Phoenix down
 10-23-2014, 02:07 AM
#1
Member

Thread Starter
Join Date: Oct 2012
Location: Arizona
Posts: 362
Likes: 0
Received 3 Likes
on
3 Posts
Car: 1998 Viper/1996 Bronco
Engine: 8.0/7.3
Transmission: T56/ZF5
Phoenix down
Okay, I admit I'm really cool having the title refer to Final Fantasy but anyways, this is a progress/rebuild thread and the Third Gen I got needed someone to bring her back to life.
So I've been wanting a 3rd gen Camaro for a few years now to become my main daily driver, and let my Bronco become a weekend cruiser (mpg isn't the greatest.)
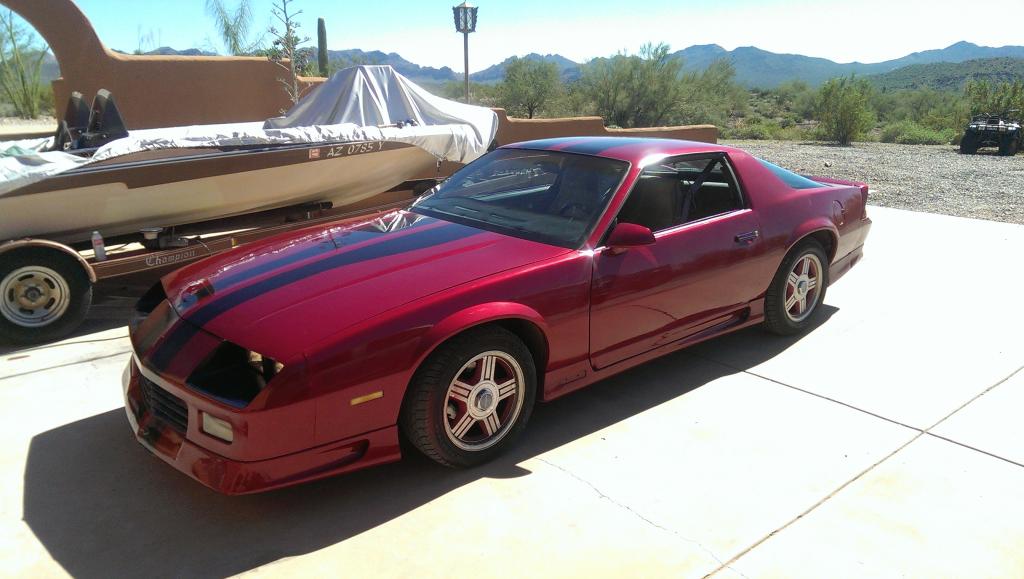
A few months ago I stumbled across this beauty:
It was only 1200(got it for 1100 ), and had a manual transmission, 305 TBI. I couldn't resist, so I purchased it the day I saw it.

Now, besides the obvious cosmetic defects, it had (and still has) some problems like:
-Looses steering wheel shaft (due to PO screwing it up)
- (No working turn signals, no air bag wiring, no steering wheel cancellation cam, destroyed lock cylinder sheath, improper bearing install)
-Two missing lower transmission bolts (which I fixed after I finally got a peak under the car after taking it to emissions)
-Shredded headliner BOARD with cut dome/third brake light wiring
-Disastrous CD player wiring mess... (don't know what to do about this yet)
-Uneven and nonworking rear hatch
-Worn hood and hatch pistons
-Ugly/uneven tires (large back, tiny front)
-Smoking on startup
-And overall neglect.
Now, I've fixed a bunch of the above. The steering wheel is all nice and tight now after I pulled it apart several times and figured what was missing and what didn't belong. I made sure to tighten the tilt wheel bolts even though the column was loose due to the bearing not being installed correctly.
Ironically, when I brought it to emissions, it passed first try. I was pleasantly surprised, and had my mind on fixing her up real nice.
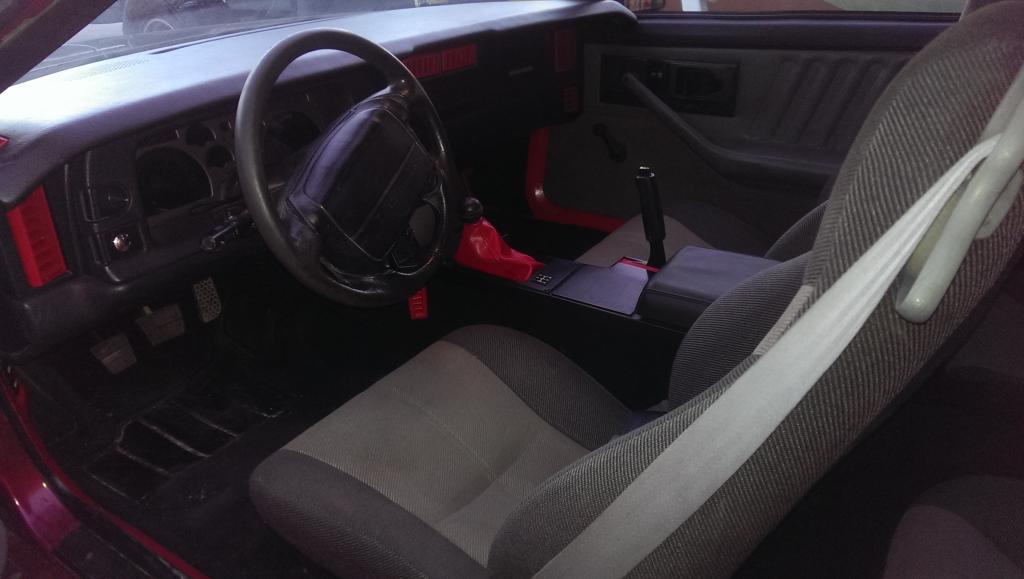
Here's a closer up of the interior and gives an idea of how it was treated:
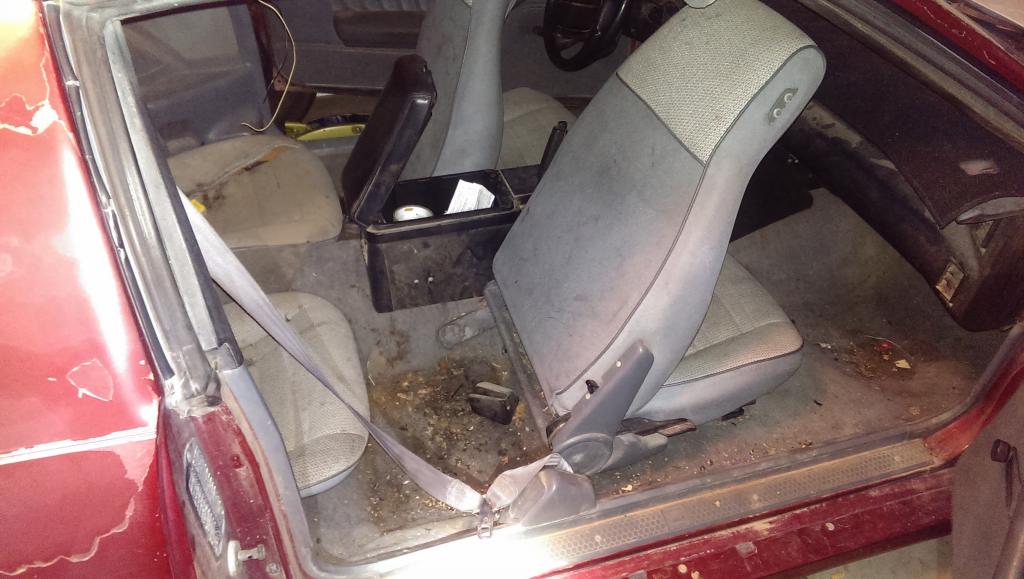
The guy I bought it from told me he was glad I wasn't going to scrap it. I could never do that! I like my projects too much! Besides, I love the look of these cars and wanted to see what I could do to bring this Camaro back to life.
Well here's the first thing I worked on:
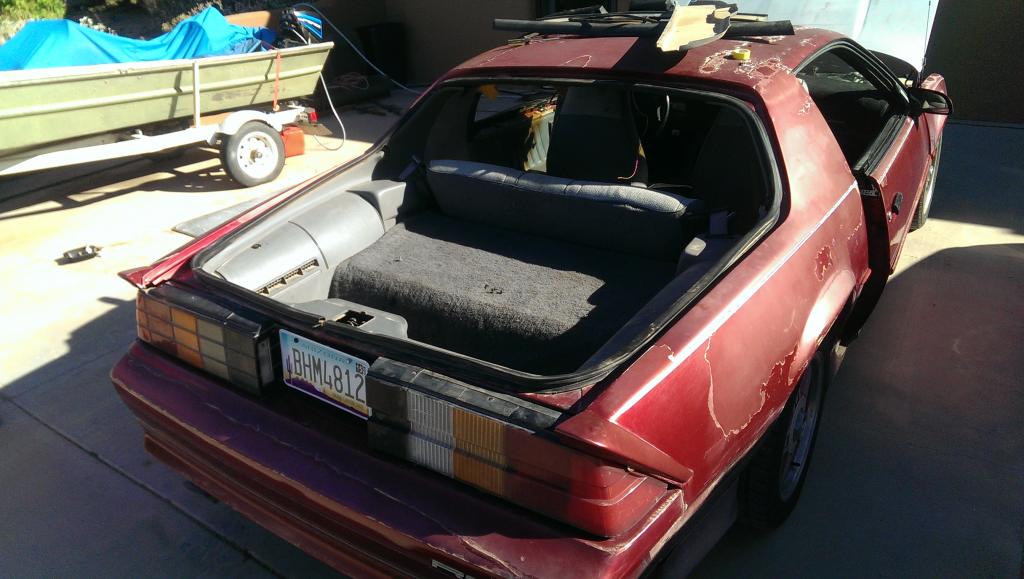
Fixing the rear hatch. I had a friend help me move the glass hatch off into my parents garage so I could realign it. The hatch was off by about 3" on both sides and wouldn't lock closed.
I managed to realign it, not quite perfectly, but pretty well. With the new hatch struts, it opens and closes how it should, and is very closely aligned on the back.
Now, I had a hand in painting part of my Bronco before, and already knew what I had planned for the paint on this car.
Here's the sanding off the old crap that was half-assed sprayed on the hood/fender:
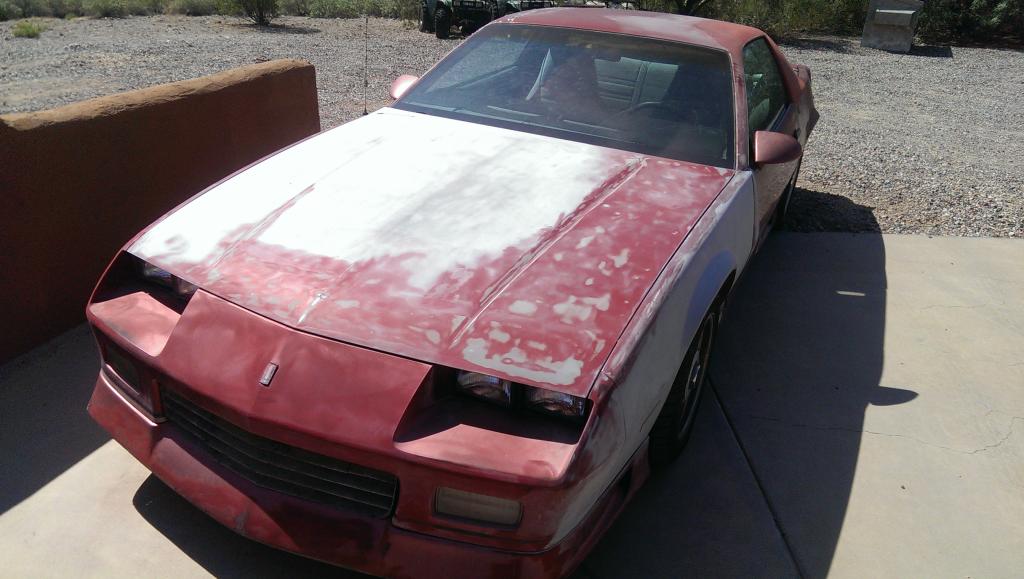
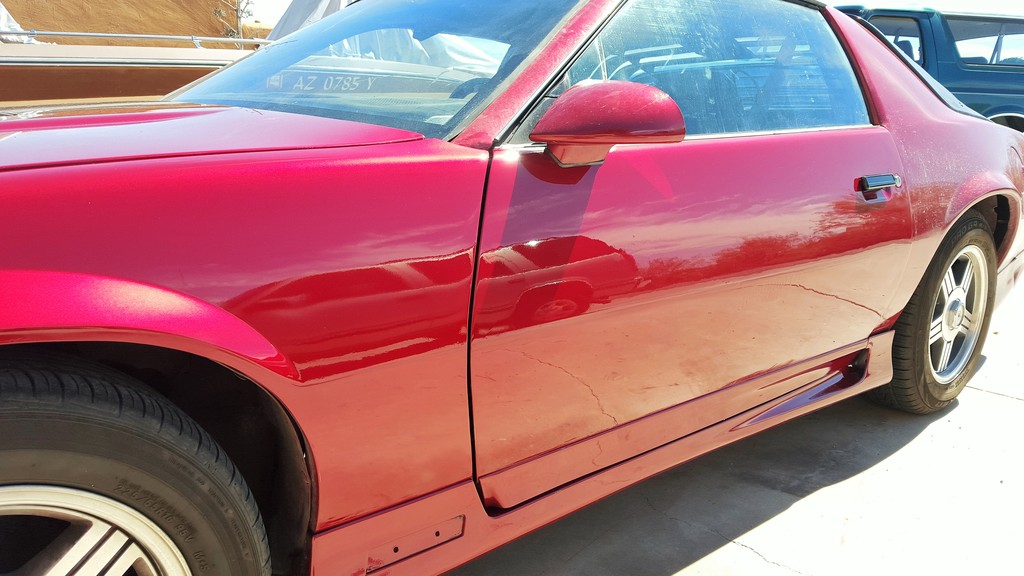
Finally got it all off and the horrible stickers that ran along the side:
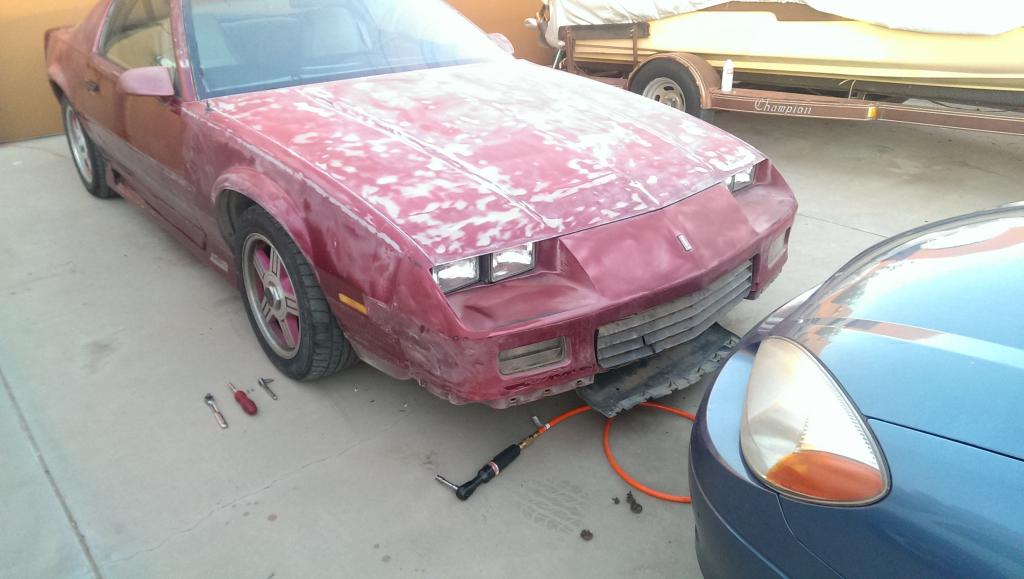
The front ground effects were in pretty terrible shape, so I tried my luck with body work on them. I didn't grab pictures of the work on them, but here is the BETTER side of when it was off:
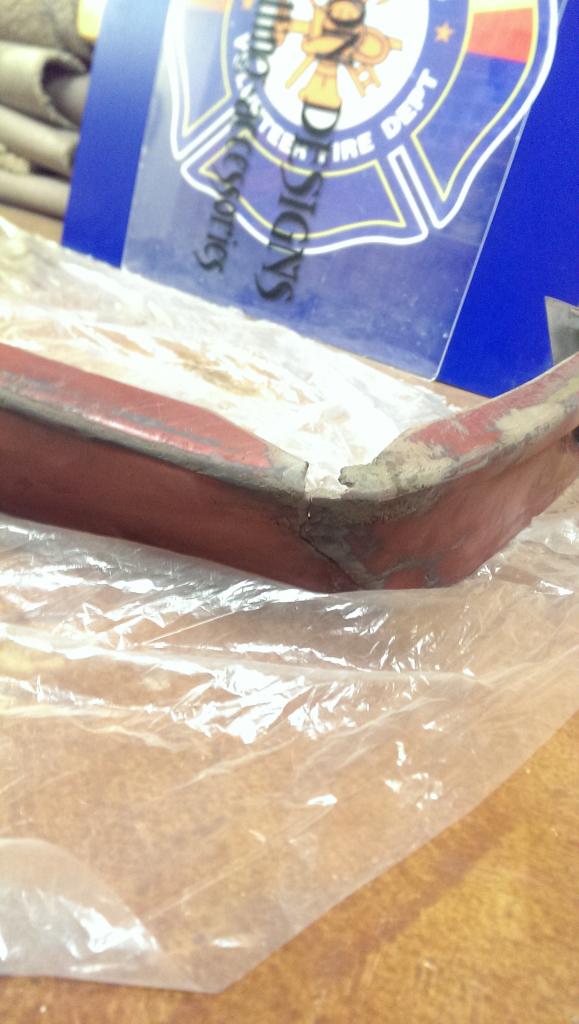
I used fiberglass on the back, and some weird epoxy typed stuff on the front to fill in the cracks and chips. Overall, it came out decently. You can still tell on the passenger side it was damaged, but it's not an attention grabber now.
Okay, most people would cringe at my plan for painting, but like I said, I painted my Bronco the same way and it came out actually very well. The reason why people would cringe is because my "booth" was my driveway. Anyways, here's the painting in action:
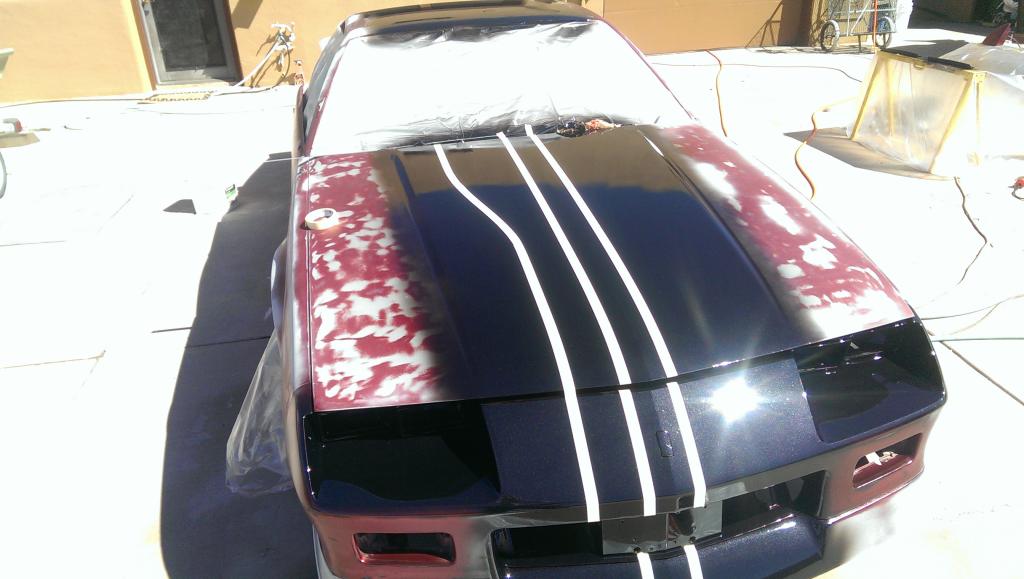
The black laid down VERY nice, but the masking off took a lot of time. I didn't realize how how it was going to be so I had to lay the next base coat and clear pretty heavy, and I got two small runs in some semi inconspicuous areas.
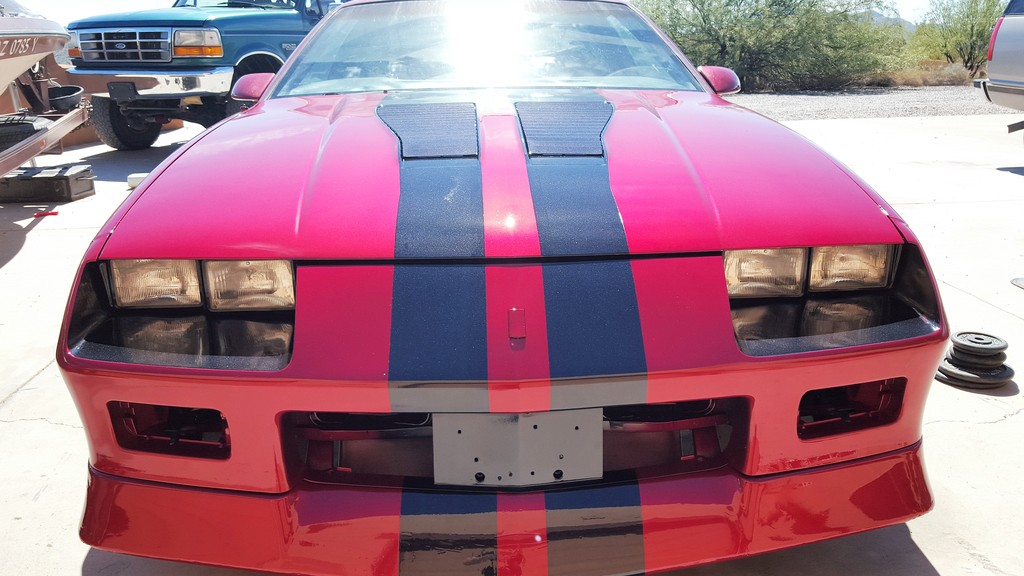
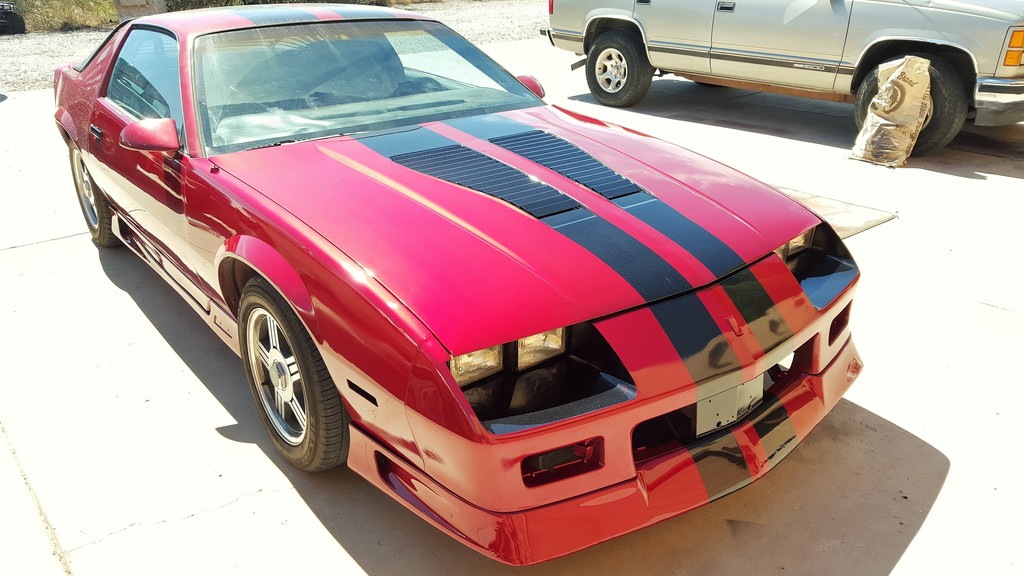
Anyways, after laying the paint and doing SOME of the wetsanding and buffing, here is how she looks now!!!

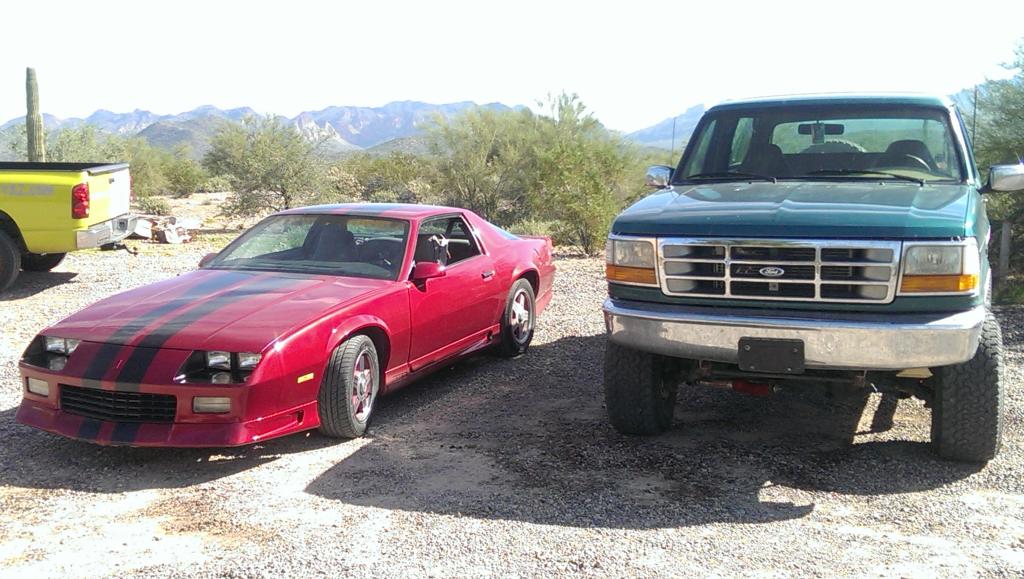
And I can't leave out my Bronco:
I still have some buffing left and wetsanding to do, but overall I'm very pleased with how it came out. Red paint is EXPENSIVE though!!!
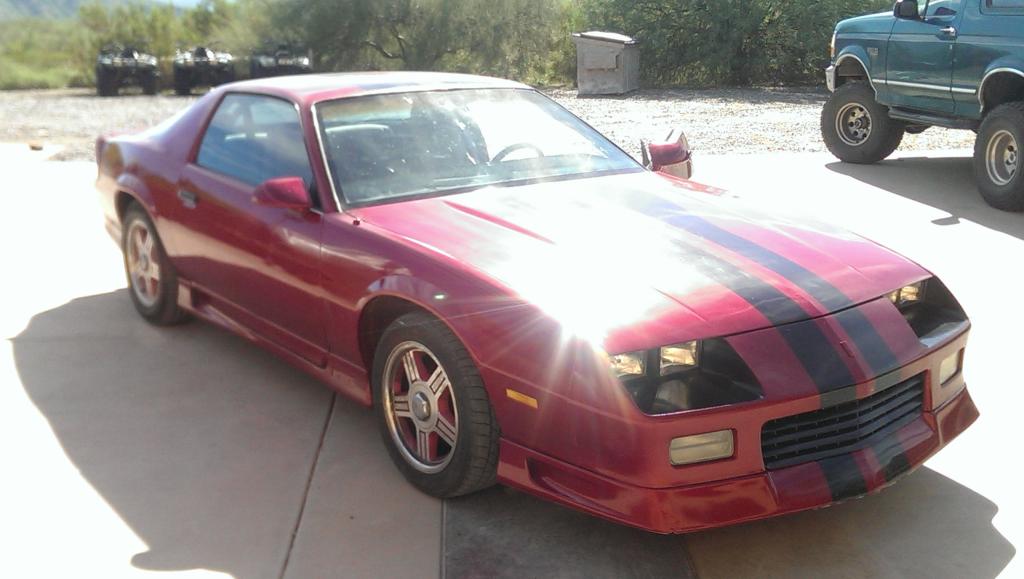
Unfortunately, compared to my truck, the Camaro is pretty low to the ground... the first day I drove it I ran the front ground effects into a curb when I parked so the bottom is scuffed now (which is slightly visible in the pictures.)
My next task will be polishing the wheels and painting the red on the wheels black!
Now, I got this car for mileage surprisingly because my Bronco (also Manual) gets about 15, and I need a little better driving roughly 50 miles everyday for school.
My first tank for the Camaro, before her makeover was 7.5mpg.... I was slightly disappointed but not surprised. What I did right after this was find and fix a bunch of vacuum leaks. There were several old brittle lines and rotted rubber lines that I replaced. I also took the TBI unit apart and cleaned it thoroughly and bought the rebuilt kit for it. Halfway through the previous tank, I did a full tune up; plugs, wires, distributor cap/rotor, pcv valve, fuel filter, and installed an open air element filter.
After the next tank, I got 15.4. Not too shabby I thought, but not good enough. I managed to find another small vacuum leak I fixed, and seafoamed the engine (for the third time.) During this time (just this last weekend), I tackled replacing the valve stem seals also.
With this tank I just checked today, I got 18.9mpg! So I'm getting up there, but I believe with the 5.0 manual TBI, I can get mid 20's highway. I believe I have some exhaust leaks I need to fix, and maybe just driving more to clean the engine out.
Anyways that's enough rambling for now! I'll post some pictures up when I get my wheels polished and painted!
So I've been wanting a 3rd gen Camaro for a few years now to become my main daily driver, and let my Bronco become a weekend cruiser (mpg isn't the greatest.)
A few months ago I stumbled across this beauty:
It was only 1200(got it for 1100
), and had a manual transmission, 305 TBI. I couldn't resist, so I purchased it the day I saw it. 
Now, besides the obvious cosmetic defects, it had (and still has) some problems like:
-Looses steering wheel shaft (due to PO screwing it up)
- (No working turn signals, no air bag wiring, no steering wheel cancellation cam, destroyed lock cylinder sheath, improper bearing install)
-Two missing lower transmission bolts (which I fixed after I finally got a peak under the car after taking it to emissions)
-Shredded headliner BOARD with cut dome/third brake light wiring
-Disastrous CD player wiring mess... (don't know what to do about this yet)
-Uneven and nonworking rear hatch
-Worn hood and hatch pistons
-Ugly/uneven tires (large back, tiny front)
-Smoking on startup
-And overall neglect.
Now, I've fixed a bunch of the above. The steering wheel is all nice and tight now after I pulled it apart several times and figured what was missing and what didn't belong. I made sure to tighten the tilt wheel bolts even though the column was loose due to the bearing not being installed correctly.
Ironically, when I brought it to emissions, it passed first try. I was pleasantly surprised, and had my mind on fixing her up real nice.
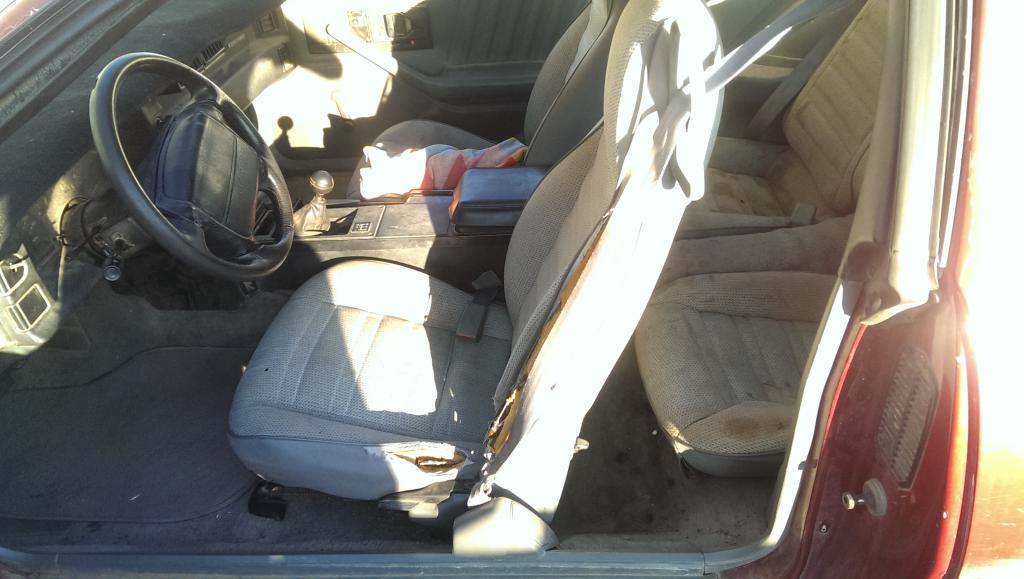
Here's a closer up of the interior and gives an idea of how it was treated:

The guy I bought it from told me he was glad I wasn't going to scrap it. I could never do that! I like my projects too much! Besides, I love the look of these cars and wanted to see what I could do to bring this Camaro back to life.
Well here's the first thing I worked on:

Fixing the rear hatch. I had a friend help me move the glass hatch off into my parents garage so I could realign it. The hatch was off by about 3" on both sides and wouldn't lock closed.
I managed to realign it, not quite perfectly, but pretty well. With the new hatch struts, it opens and closes how it should, and is very closely aligned on the back.
Now, I had a hand in painting part of my Bronco before, and already knew what I had planned for the paint on this car.
Here's the sanding off the old crap that was half-assed sprayed on the hood/fender:

Finally got it all off and the horrible stickers that ran along the side:

The front ground effects were in pretty terrible shape, so I tried my luck with body work on them. I didn't grab pictures of the work on them, but here is the BETTER side of when it was off:

I used fiberglass on the back, and some weird epoxy typed stuff on the front to fill in the cracks and chips. Overall, it came out decently. You can still tell on the passenger side it was damaged, but it's not an attention grabber now.
Okay, most people would cringe at my plan for painting, but like I said, I painted my Bronco the same way and it came out actually very well. The reason why people would cringe is because my "booth" was my driveway. Anyways, here's the painting in action:

The black laid down VERY nice, but the masking off took a lot of time. I didn't realize how how it was going to be so I had to lay the next base coat and clear pretty heavy, and I got two small runs in some semi inconspicuous areas.
Anyways, after laying the paint and doing SOME of the wetsanding and buffing, here is how she looks now!!!


And I can't leave out my Bronco:

I still have some buffing left and wetsanding to do, but overall I'm very pleased with how it came out. Red paint is EXPENSIVE though!!!
Unfortunately, compared to my truck, the Camaro is pretty low to the ground... the first day I drove it I ran the front ground effects into a curb when I parked so the bottom is scuffed now (which is slightly visible in the pictures.)
My next task will be polishing the wheels and painting the red on the wheels black!
Now, I got this car for mileage surprisingly because my Bronco (also Manual) gets about 15, and I need a little better driving roughly 50 miles everyday for school.
My first tank for the Camaro, before her makeover was 7.5mpg.... I was slightly disappointed but not surprised. What I did right after this was find and fix a bunch of vacuum leaks. There were several old brittle lines and rotted rubber lines that I replaced. I also took the TBI unit apart and cleaned it thoroughly and bought the rebuilt kit for it. Halfway through the previous tank, I did a full tune up; plugs, wires, distributor cap/rotor, pcv valve, fuel filter, and installed an open air element filter.
After the next tank, I got 15.4. Not too shabby I thought, but not good enough. I managed to find another small vacuum leak I fixed, and seafoamed the engine (for the third time.) During this time (just this last weekend), I tackled replacing the valve stem seals also.
With this tank I just checked today, I got 18.9mpg! So I'm getting up there, but I believe with the 5.0 manual TBI, I can get mid 20's highway. I believe I have some exhaust leaks I need to fix, and maybe just driving more to clean the engine out.
Anyways that's enough rambling for now! I'll post some pictures up when I get my wheels polished and painted!


 Nice work! Glad you saved it.
10-24-2014, 12:54 AM
Nice work! Glad you saved it.
10-24-2014, 12:54 AM
#4
Member
Thread Starter
Join Date: Oct 2012
Location: Arizona
Posts: 362
Likes: 0
Received 3 Likes
on
3 Posts
Car: 1998 Viper/1996 Bronco
Engine: 8.0/7.3
Transmission: T56/ZF5
Re: Phoenix down
Thanks! I don't see too many of these cars out here, but the ones I do see are almost always in horrible shape.
It was pretty funny though, when I went to emissions, there was an 89 convertible Camaro in front of me that actually looked like it was in pretty good shape. I was going to make a joke to the emissions people about mine not passing (being in the neglected shape it was) in regards to the previous camaro, but it appeared that they couldn't get the other guys hood open. He never got tested and drove off. Then when I went up, mine passed.
Anyways, I said I would do my tires next.. but I haven't polished aluminum ever, and I think I'll need to have some sanding and stuff to really get them to shine. I did have all the materials for my headliner and sail panels so I worked on those today after work!
Here is what the headliner board I picked up from the junk yard looked like after I pulled the old fabric off and put some fiberglass resin in a few spots that were damaged:
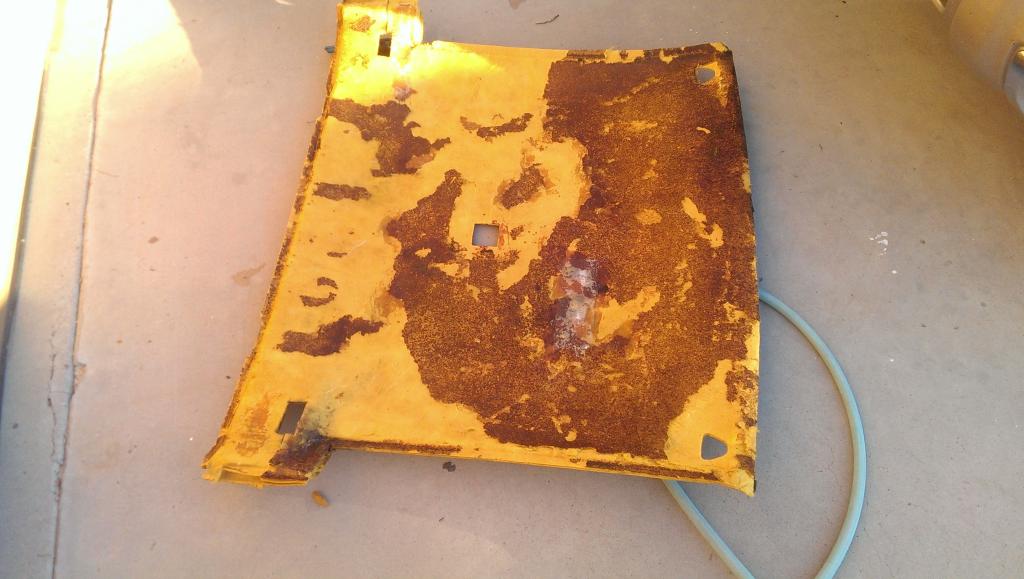
My previous board was completely destroyed, so this one was much better to work with. However... I couldn't get a completely smooth surface on this board like I was able to get with my Bronco's headliners because the board itself was peeling apart.
I decided to lay the foam backed headliner fabric on the board the way it was in the above picture and it came out prety well. At first, I saw a lot of bumps and stuff from the unevenness of the board (different layers showing and some fiberglass resin that I didn't smooth out), but when I put it in the car, it looked pretty good:
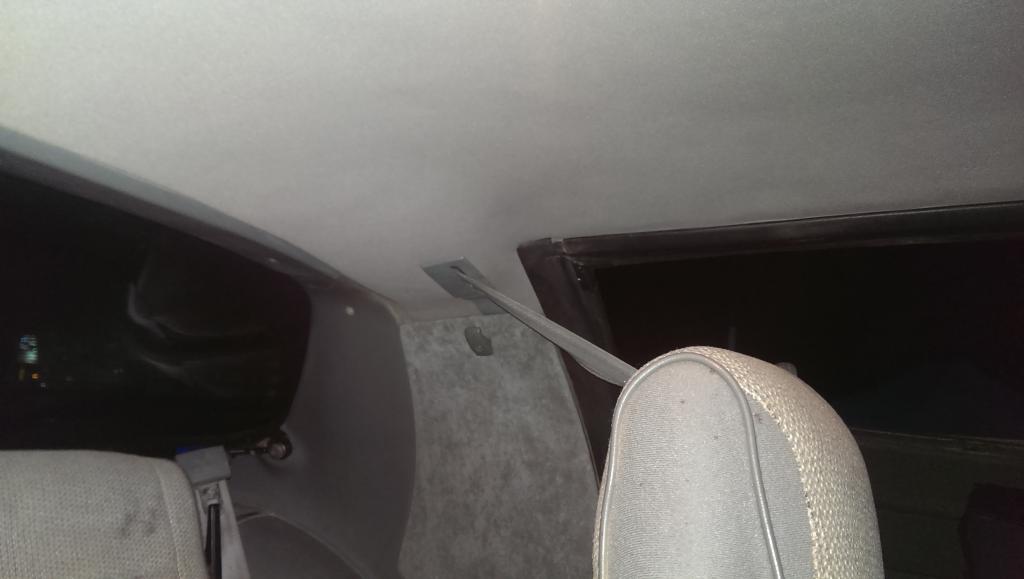
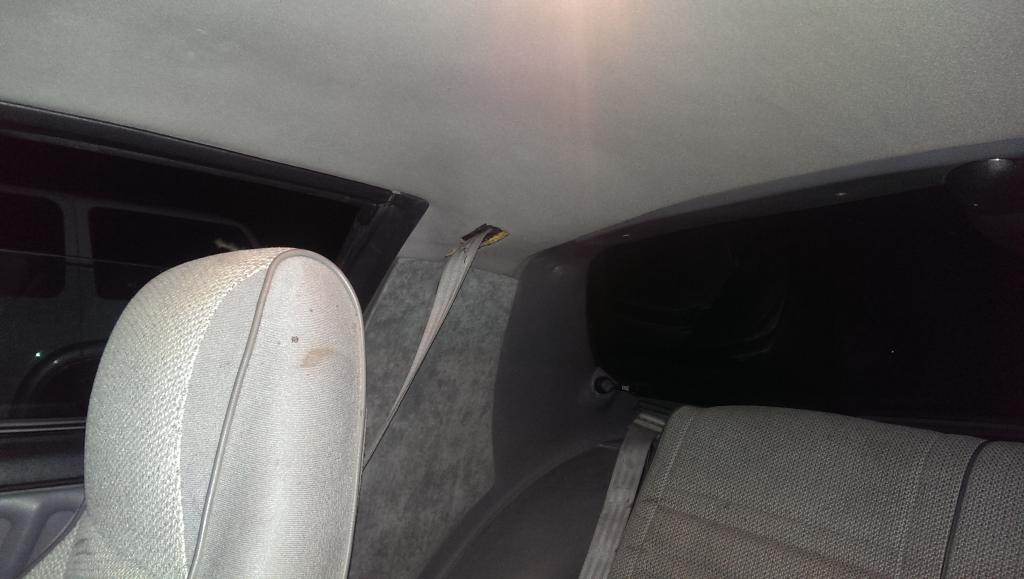
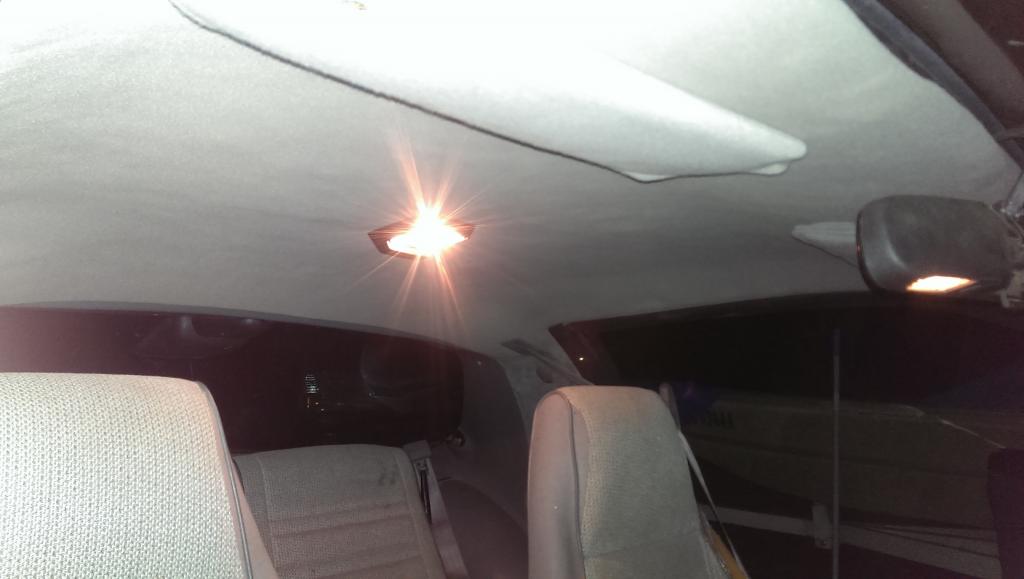
You can see the sail panels I redid also after putting the headliner up. The sail panels, to my relief, were extremely easy to reupholster. I just used my stable gun and that was it. You can also see in the last picture the lighted rear view mirror I picked up from the junk yard to replace my stock non lighted one. I installed the wiring harness for the mirror, but it had one extra wire I have not yet hooked up (it plugged into the harness near the hood latch, but the harness didn't have an extra wire in it). I believe the extra wire is for a light that is supposed to shine down on the HVAC controls, so I won't be in any real hurry to wire that in.
Anyways, I'm so glad to have a headliner/sail panels/ and new rear view mirror put in. I also got my third brake light hooked up now, but I think the bulb is dead because it wasn't lighting up with the brakes.
I really need to get my seats and carpet taken care of next.... but that's not going to be cheap. I wish I was able to reupholster seats myself..
It was pretty funny though, when I went to emissions, there was an 89 convertible Camaro in front of me that actually looked like it was in pretty good shape. I was going to make a joke to the emissions people about mine not passing (being in the neglected shape it was) in regards to the previous camaro, but it appeared that they couldn't get the other guys hood open. He never got tested and drove off. Then when I went up, mine passed.
Anyways, I said I would do my tires next.. but I haven't polished aluminum ever, and I think I'll need to have some sanding and stuff to really get them to shine. I did have all the materials for my headliner and sail panels so I worked on those today after work!
Here is what the headliner board I picked up from the junk yard looked like after I pulled the old fabric off and put some fiberglass resin in a few spots that were damaged:

My previous board was completely destroyed, so this one was much better to work with. However... I couldn't get a completely smooth surface on this board like I was able to get with my Bronco's headliners because the board itself was peeling apart.
I decided to lay the foam backed headliner fabric on the board the way it was in the above picture and it came out prety well. At first, I saw a lot of bumps and stuff from the unevenness of the board (different layers showing and some fiberglass resin that I didn't smooth out), but when I put it in the car, it looked pretty good:


You can see the sail panels I redid also after putting the headliner up. The sail panels, to my relief, were extremely easy to reupholster. I just used my stable gun and that was it. You can also see in the last picture the lighted rear view mirror I picked up from the junk yard to replace my stock non lighted one. I installed the wiring harness for the mirror, but it had one extra wire I have not yet hooked up (it plugged into the harness near the hood latch, but the harness didn't have an extra wire in it). I believe the extra wire is for a light that is supposed to shine down on the HVAC controls, so I won't be in any real hurry to wire that in.
Anyways, I'm so glad to have a headliner/sail panels/ and new rear view mirror put in. I also got my third brake light hooked up now, but I think the bulb is dead because it wasn't lighting up with the brakes.
I really need to get my seats and carpet taken care of next.... but that's not going to be cheap. I wish I was able to reupholster seats myself..
10-25-2014, 05:11 PM
#7
Trending Topics
10-25-2014, 06:50 PM
#8
Member
Thread Starter
Join Date: Oct 2012
Location: Arizona
Posts: 362
Likes: 0
Received 3 Likes
on
3 Posts
Car: 1998 Viper/1996 Bronco
Engine: 8.0/7.3
Transmission: T56/ZF5
Re: Phoenix down
Thanks guys! I saw a picture of a camaro with the stripes similar to how I painted them and I really liked the way it looked.
I think it is so much better to fix something up that to buy all nice and new because, not only do you learn things new things about the vehicle and skills associated with working on them, but you are also keeping a cool car on the road instead of the junkyard! On top of that, if you can do the work, it's also a bit cheaper! Plus you can kinda do what you want with instead of be "stuck" with the way it is if its in good shape.
For the sail panels, I did buy a different material. I was going to have them more charcoal colored, but I decided to see if I could match it a little closer. I may eventually make them a more charcoal grey when I redo my seats, because I think I want a two tone grey/black with the seats.
I have extra headliner material if I wanted to keep the sail panels the same material, but I think I'll leave them for now. The materials to re-do them is very cheap and it doesn't take much time at all for them to be redone. I could probably take them down, recover them, and put them back up in less than 30 minutes.
The headliner though.. that takes a little longer.
12-26-2014, 01:15 AM
#9
Member
Thread Starter
Join Date: Oct 2012
Location: Arizona
Posts: 362
Likes: 0
Received 3 Likes
on
3 Posts
Car: 1998 Viper/1996 Bronco
Engine: 8.0/7.3
Transmission: T56/ZF5
Re: Phoenix down
I'm going to post some more pics soon, I was able to do a semi-decent job of polishing and painting two of the 4 wheels. I got rid of the red and painted it black, so it looks much better.
However I have been having some mechanical issues, along with school finals and work picking up that have prevented my from getting much more cosmetic work done.
I just found out that my input shaft on the T5 transmission is heavily worn because the pilot bearing was completely toast. This was most likely due to the improper angle the transmission was sitting at due to only have 2 of the 4 bolts connecting it to the bellhousing when I first purchased it.
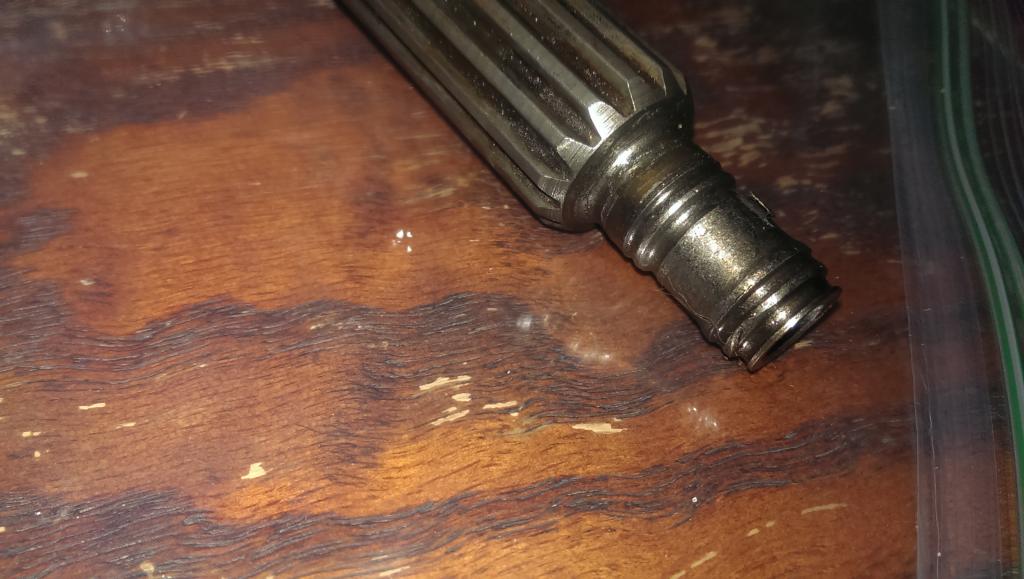
Oh well, I'm glad I have another vehicle to drive around while I get work done. I'm hoping that I can have the input shaft repaired and fairly quickly, because the bearings, gears, and mainshaft all looked great (at least to me.)
01-13-2015, 01:44 PM
#10
Member
Thread Starter
Join Date: Oct 2012
Location: Arizona
Posts: 362
Likes: 0
Received 3 Likes
on
3 Posts
Car: 1998 Viper/1996 Bronco
Engine: 8.0/7.3
Transmission: T56/ZF5
Re: Phoenix down
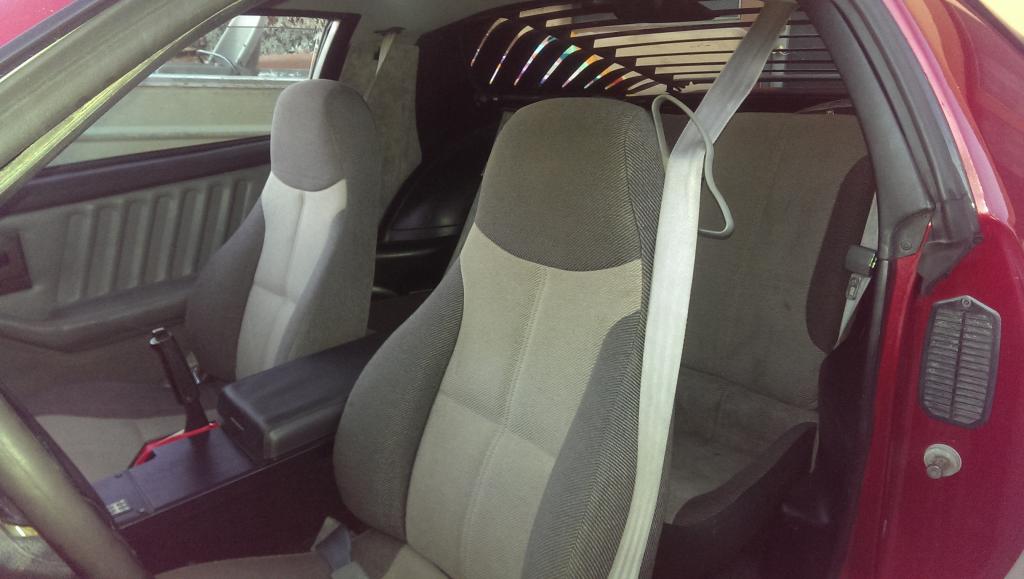
Alright I got some more work done. I got a set of seats from the junkyard and craigslist (2 passenger seats, 1 driver and the bench) for $105. I dismantled one of the passenger side seats and used it to fix the drivers side seat.
Here are my seats before:
I'm not sure what this stuff was, but it ate threw my old bench seat:

Here are the "new" seats!

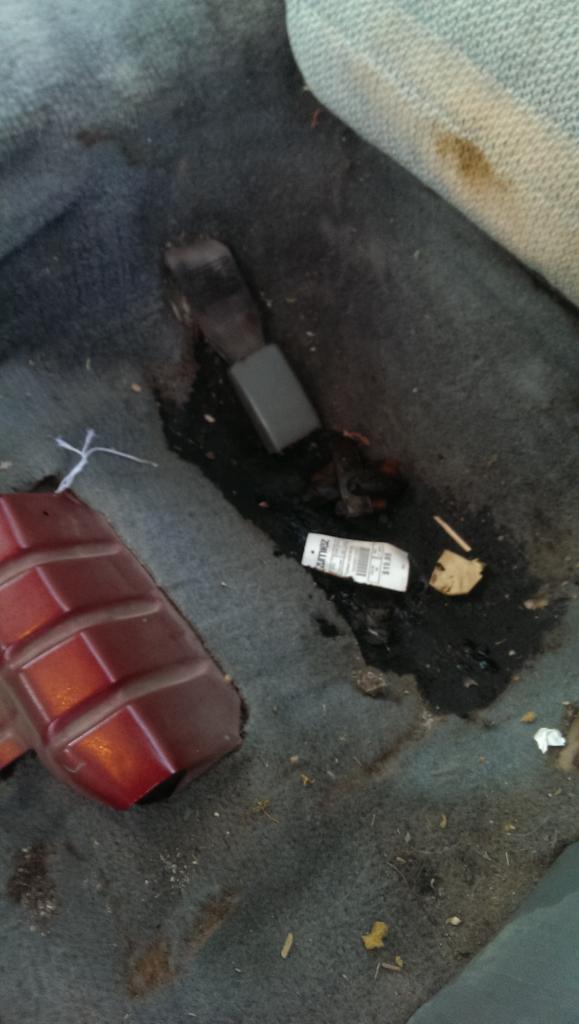
Here are some goodies I found when taking off the bench seat!
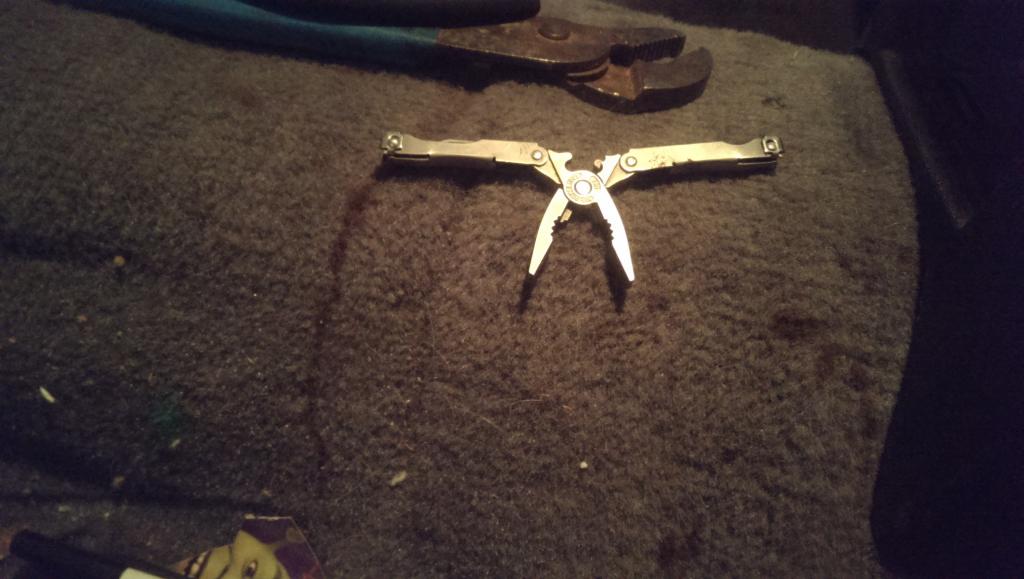
They are baby pliers and seemed to be in good shape so that's pretty cool. I also found like $1.05 in change.
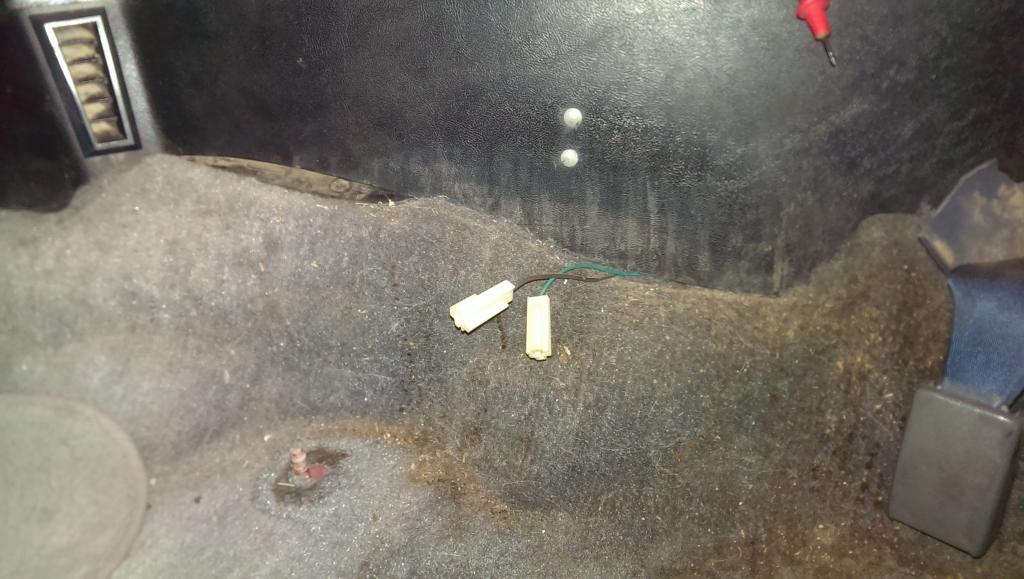
Also, does anybody know what these wire may go to? Is it maybe the stock wiring for a trunk release button or something?
Here are my seats before:

I'm not sure what this stuff was, but it ate threw my old bench seat:


Here are the "new" seats!

Here are some goodies I found when taking off the bench seat!

They are baby pliers and seemed to be in good shape so that's pretty cool. I also found like $1.05 in change.
Also, does anybody know what these wire may go to? Is it maybe the stock wiring for a trunk release button or something?
 01-13-2015, 04:28 PM
#11
01-13-2015, 07:30 PM
#12
Member
Thread Starter
Join Date: Oct 2012
Location: Arizona
Posts: 362
Likes: 0
Received 3 Likes
on
3 Posts
Car: 1998 Viper/1996 Bronco
Engine: 8.0/7.3
Transmission: T56/ZF5
Re: Phoenix down
Thank you, yeah they are pretty comfortable. To be honest, the headrest of the old third gen seats was super soft and comfortable though, these 4th gen ones don't seem as soft. However, they are still very nice and are much better than my previous seats.
I do plan on changing the color scheme of the seats in the nearish future and changing them to vinyl. I saw seat upholstery sets on hawksthirdgen that I think would be perfect. They are they same pattern, but black and red instead of black and grey.
I want to customize the interior and have it be a combination of black and red so it's different than a boring grey.
It may have to wait until summer though because the covers are like $520. I may see if local upholstery shops can make the covers for less, otherwise I'll wait and save up because these seats look good and other parts of my car need attention now.
01-14-2015, 08:30 AM
#14
Member
Thread Starter
Join Date: Oct 2012
Location: Arizona
Posts: 362
Likes: 0
Received 3 Likes
on
3 Posts
Car: 1998 Viper/1996 Bronco
Engine: 8.0/7.3
Transmission: T56/ZF5
Re: Phoenix down
Hmm would the wiring be there even if it were a manual transmission? I did find that the parking brake wire is hooked up to the lever so it's not that one.
I haven't done a real VIN lookup on my car yet, just the cheap free ones but most (not all) stated it was a manual transmission. I currently have a manual transmission installed, but it has been replaced before because it's a pre88 T5 from a V6 and I have a 91 v8.
I know on my bronco, there are a lot of wiring harness and plugs present, just nothing there because it is the base option. Maybe its something like that for this car too? I have found a few other wiring harness going to nowhere that I would like to figure out what they are.
01-14-2015, 11:59 AM
#15
Re: Phoenix down
The only other option for the left connector would be the console compartment light, but the right connector definitely looks like the e-brake connector.
Mine are black, but I have a Bird.
Guess there's no other way than tracing the wires back to where they go into a harness or component and take it from there.
If you can get your hands on a service manual (or someone with said manual) you can look up the wire colors in the schematics.
Mine are black, but I have a Bird.
Guess there's no other way than tracing the wires back to where they go into a harness or component and take it from there.
If you can get your hands on a service manual (or someone with said manual) you can look up the wire colors in the schematics.
01-14-2015, 01:01 PM
#16
Supreme Member
iTrader: (5)
Join Date: Nov 2010
Location: Mantua NJ
Posts: 5,826
Received 64 Likes
on
57 Posts
Car: 1 Owner 1986 TA with a WS6 package
Engine: 5.0 EFI
Transmission: THM700R4
Axle/Gears: 277 Posi Speedo
Re: Phoenix down
Maybe the shift indicator as said above and the console light.Turn on your lights and check with a tester and see if they get any voltage.

01-16-2015, 01:28 AM
#18
Member
Thread Starter
Join Date: Oct 2012
Location: Arizona
Posts: 362
Likes: 0
Received 3 Likes
on
3 Posts
Car: 1998 Viper/1996 Bronco
Engine: 8.0/7.3
Transmission: T56/ZF5
Re: Phoenix down
Thank you!
I haven't yet had a chance to trace those wires to see what they are. I didn't know the center console had a light, so one of them has to be for the light there. The other may be a shift indicator/gear selector light if the wiring harness is the same between manual/auto just left unplugged. I know I have another wiring harness there that also looks like a light would go to it, so I'll figure out what they are in time.
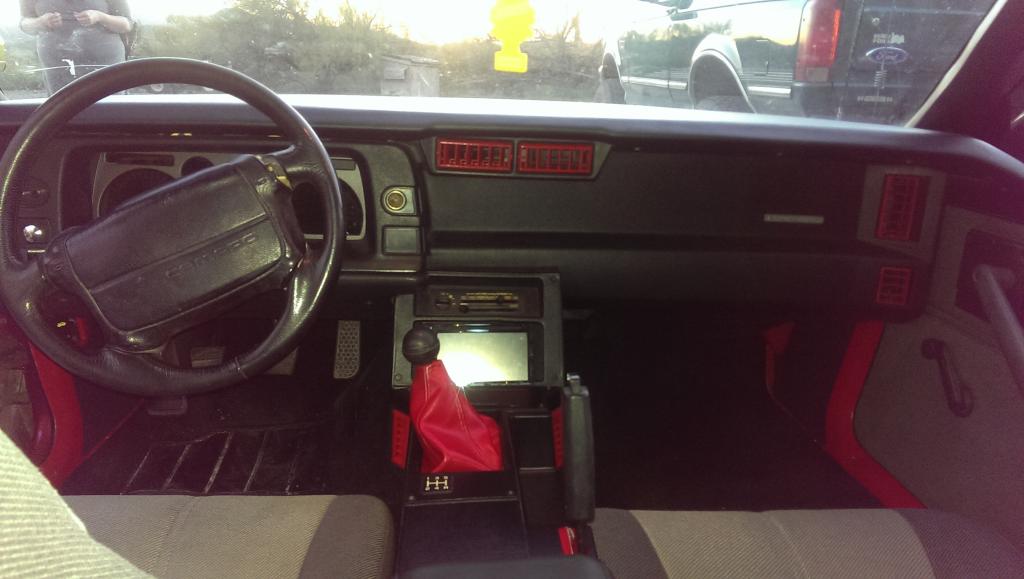
Anyways, I started doing some more interior stuff. I took off my old dash because I ordered a dash cap to cover it. I haven't yet taken a picture of the dash cap, but here is the condition my dash is in now:
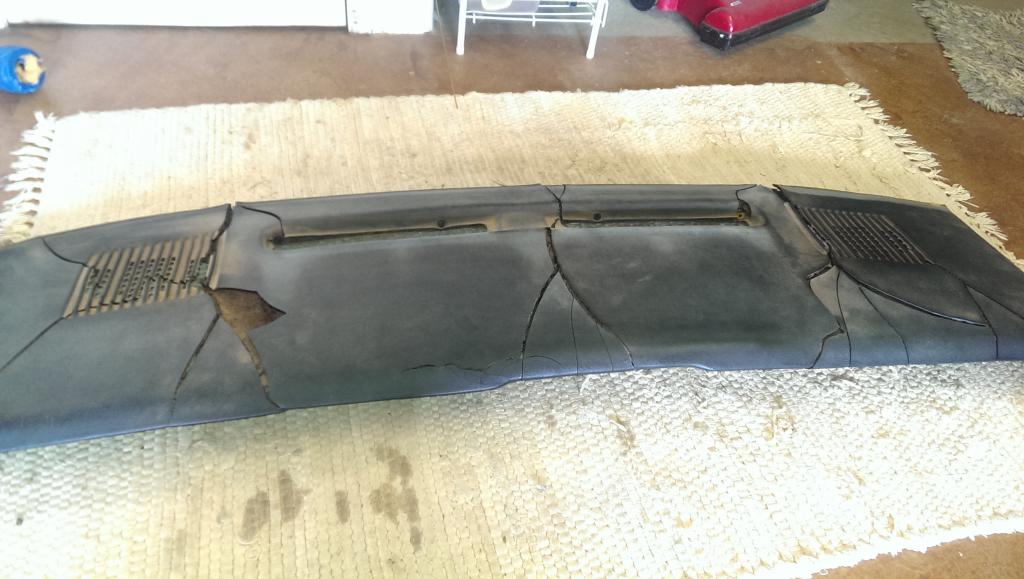
Its pretty horrible, and there was a dash carpet covering it, but the carpet looks bad and was too long, so it covered part of the vents and a little of the cluster.
I did install the dash cap, and while it looks TREMENDOUSLY better, I'm not quite happy with how it turned out. If the cap was only like 50-60 bucks, I'd be happy, but for 170 dollars, it should have been a bit better I think.
I saw this thread: https://www.thirdgen.org/forums/inte...-dash-pad.html and 84 1LE did a phenomenal job recovering his dash. I think I'm going to buy a spare dash from a junk yard and do what he did so I'll be happy in the long run. For the time being, the dash cap will do.
Tomorrow I'll go and see if I can get a used pad at a junkyard while I'm in town because I'm heading into town to get some headers ceramic coated. I purcahsed some the hooker 2055 headers, but non ceramic coated because they were just tons of money, but then did some more thinking and I want the exhaust to last a long time. I suppose it's good I didn't get the ceramic coated ones initially though because I'm not going to use the AIR system.
I bought a whole new exhaust system and new cat, but the cat didn't have air tube hookups so I cut the tubes off and welded them closed:
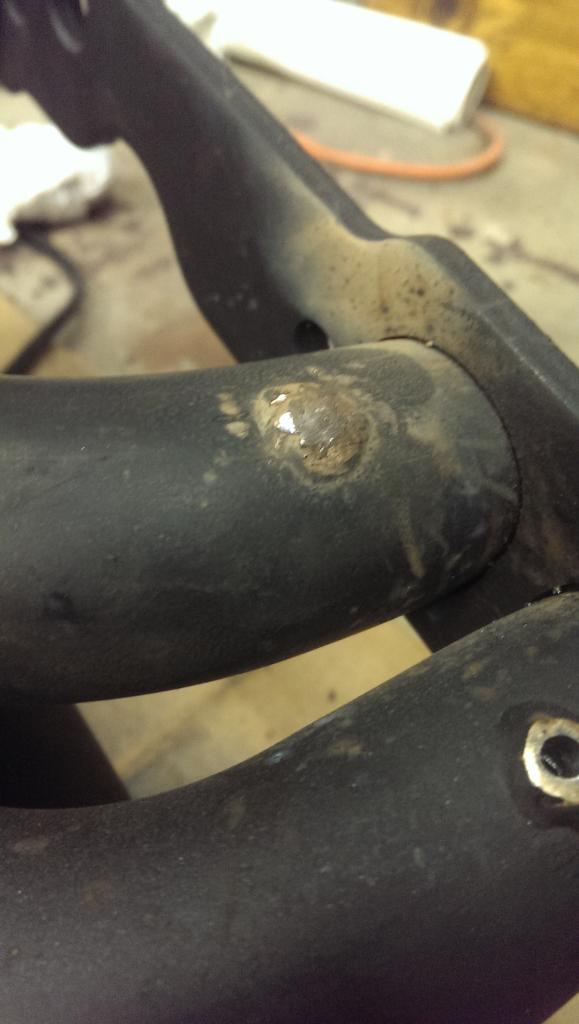
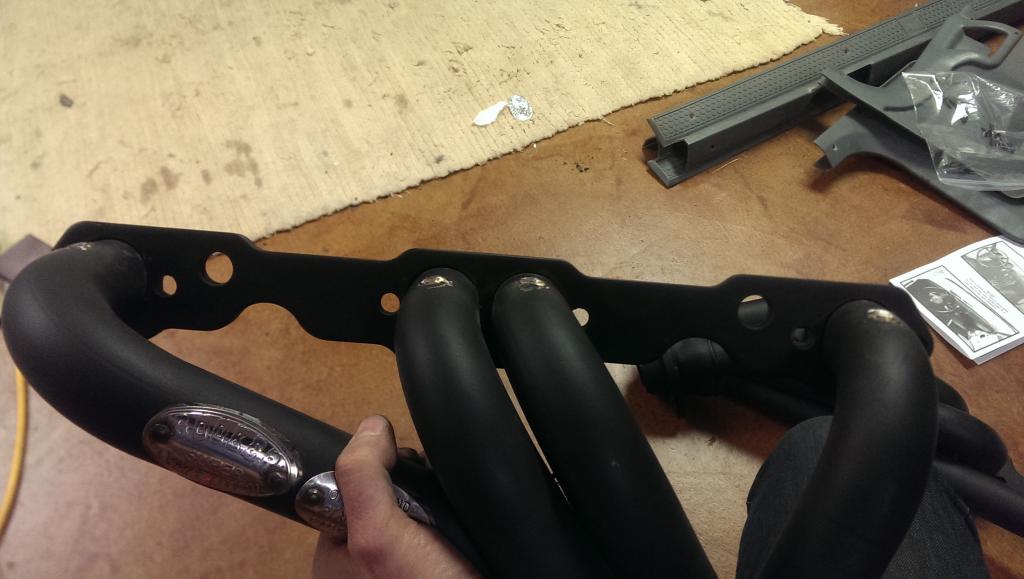
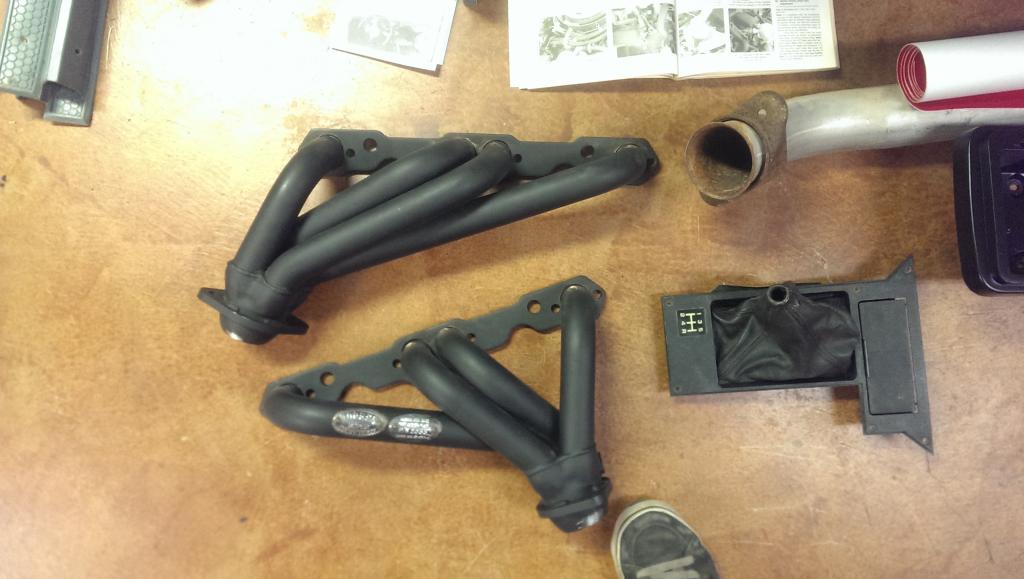
I haven't welded much, and don't have an amazing welder, so it took me a little while to get the hang of how to weld up the holes. Also, I couldn't get my dimming welding mask to work initially so I got a few surprises when I went to weld. I should have looked it up, but I didn't know it would take around a week for most places to ceramic coat either, so I guess I won't be installing the exhaust this weekend. I've got a whole bunch of interior restoration I plan on doing though this weekend so that will keep me busy.
I haven't yet had a chance to trace those wires to see what they are. I didn't know the center console had a light, so one of them has to be for the light there. The other may be a shift indicator/gear selector light if the wiring harness is the same between manual/auto just left unplugged. I know I have another wiring harness there that also looks like a light would go to it, so I'll figure out what they are in time.
Anyways, I started doing some more interior stuff. I took off my old dash because I ordered a dash cap to cover it. I haven't yet taken a picture of the dash cap, but here is the condition my dash is in now:

Its pretty horrible, and there was a dash carpet covering it, but the carpet looks bad and was too long, so it covered part of the vents and a little of the cluster.
I did install the dash cap, and while it looks TREMENDOUSLY better, I'm not quite happy with how it turned out. If the cap was only like 50-60 bucks, I'd be happy, but for 170 dollars, it should have been a bit better I think.
I saw this thread: https://www.thirdgen.org/forums/inte...-dash-pad.html and 84 1LE did a phenomenal job recovering his dash. I think I'm going to buy a spare dash from a junk yard and do what he did so I'll be happy in the long run. For the time being, the dash cap will do.
Tomorrow I'll go and see if I can get a used pad at a junkyard while I'm in town because I'm heading into town to get some headers ceramic coated. I purcahsed some the hooker 2055 headers, but non ceramic coated because they were just tons of money, but then did some more thinking and I want the exhaust to last a long time. I suppose it's good I didn't get the ceramic coated ones initially though because I'm not going to use the AIR system.
I bought a whole new exhaust system and new cat, but the cat didn't have air tube hookups so I cut the tubes off and welded them closed:


I haven't welded much, and don't have an amazing welder, so it took me a little while to get the hang of how to weld up the holes. Also, I couldn't get my dimming welding mask to work initially so I got a few surprises when I went to weld. I should have looked it up, but I didn't know it would take around a week for most places to ceramic coat either, so I guess I won't be installing the exhaust this weekend. I've got a whole bunch of interior restoration I plan on doing though this weekend so that will keep me busy.
02-06-2015, 11:34 PM
#19
Member
Thread Starter
Join Date: Oct 2012
Location: Arizona
Posts: 362
Likes: 0
Received 3 Likes
on
3 Posts
Car: 1998 Viper/1996 Bronco
Engine: 8.0/7.3
Transmission: T56/ZF5
Re: Phoenix down
I never figured out what those wires were, but all the other third gens in the junk yards I saw had them unplugged handing there too. I also found another light there. The wires don't bother me though maybe I'll tap into them later if I want to add something electrical there. Also I got the exhaust installed and I'll tell you, it was MUCH more difficult than the exhaust job on my Bronco. When I take some pictures of the new exhaust, I'll post them up.
I had to unbolt the motor mount and jack up the passenger side of the motor, take off the valve cover, and drain the coolant just to get the passenger side header in. The driver's side wasn't as bad, but still this too me the whole weekend for the entire exhaust install. However, I'm happy with the install so that's good, just don't want to do it again.
Anyways, I got a whole bunch more done on my interior and it's looking pretty good now.
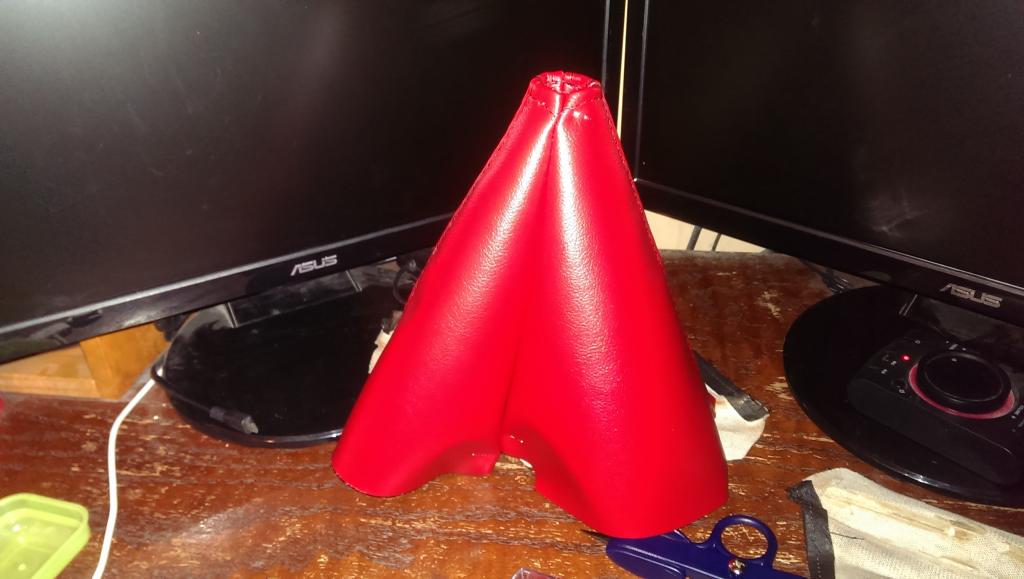
I hand sewed a new shift boot because my old leather one was too worn and dull, and I wanted to go with a black/red theme. Here is the shift boot almost done being sewed together:
The grey carpet came out for some new ACC carpet (unfortunately I didn't get the mass backed carpet because I'm on a tight budget, but this carpet is still very nice and ironically my interior is much quieter with this anyways.
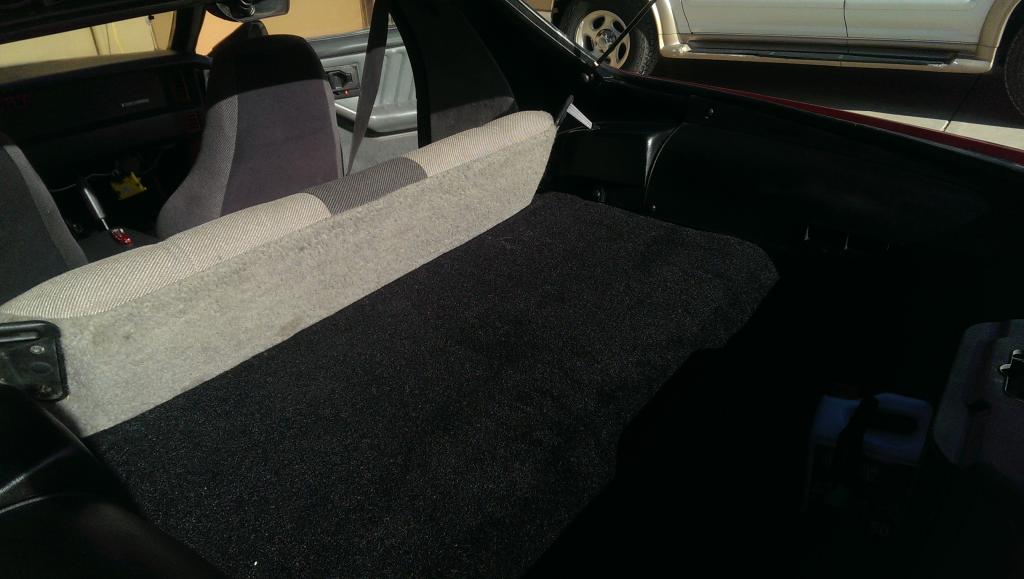
I took out every interior piece(except the dash itself) and painted them all black instead of the gray (except the kick panels/door sill panels are black and red.) I also carpeted the kick panels and center console and bought a new center console lid from Hawks because my old one was falling apart:
You can see my new carpet is getting dirty already.. I live where there are dirt roads so it gets dusty and dirty fast. I have to vacuum about every three days or it gets dirty!
Here is a more rear shot showing the back and the OEM louvers I purchased from a member in Florida!
I also installed a Kenwood navigation/bluetooth unit I bought off craigslist for an excellent price:
You can also see I painted all the vents red. I didn't know if it was going to look cool or pretty tacky, but I like the way the turned out. I couldn't get great pictures from my phone due to the daylight.
Now I have to do my door panels.. but I haven't decided what color scheme I want to go with yet... I'm going to post a new thread showing different color options I made and ask for opinions.
I had to unbolt the motor mount and jack up the passenger side of the motor, take off the valve cover, and drain the coolant just to get the passenger side header in. The driver's side wasn't as bad, but still this too me the whole weekend for the entire exhaust install. However, I'm happy with the install so that's good, just don't want to do it again.
Anyways, I got a whole bunch more done on my interior and it's looking pretty good now.
I hand sewed a new shift boot because my old leather one was too worn and dull, and I wanted to go with a black/red theme. Here is the shift boot almost done being sewed together:

The grey carpet came out for some new ACC carpet (unfortunately I didn't get the mass backed carpet because I'm on a tight budget, but this carpet is still very nice and ironically my interior is much quieter with this anyways.

I took out every interior piece(except the dash itself) and painted them all black instead of the gray (except the kick panels/door sill panels are black and red.) I also carpeted the kick panels and center console and bought a new center console lid from Hawks because my old one was falling apart:

You can see my new carpet is getting dirty already.. I live where there are dirt roads so it gets dusty and dirty fast. I have to vacuum about every three days or it gets dirty!
Here is a more rear shot showing the back and the OEM louvers I purchased from a member in Florida!

I also installed a Kenwood navigation/bluetooth unit I bought off craigslist for an excellent price:

You can also see I painted all the vents red. I didn't know if it was going to look cool or pretty tacky, but I like the way the turned out. I couldn't get great pictures from my phone due to the daylight.
Now I have to do my door panels.. but I haven't decided what color scheme I want to go with yet... I'm going to post a new thread showing different color options I made and ask for opinions.
08-21-2015, 01:13 PM
#20
Member
Thread Starter
Join Date: Oct 2012
Location: Arizona
Posts: 362
Likes: 0
Received 3 Likes
on
3 Posts
Car: 1998 Viper/1996 Bronco
Engine: 8.0/7.3
Transmission: T56/ZF5
Re: Phoenix down
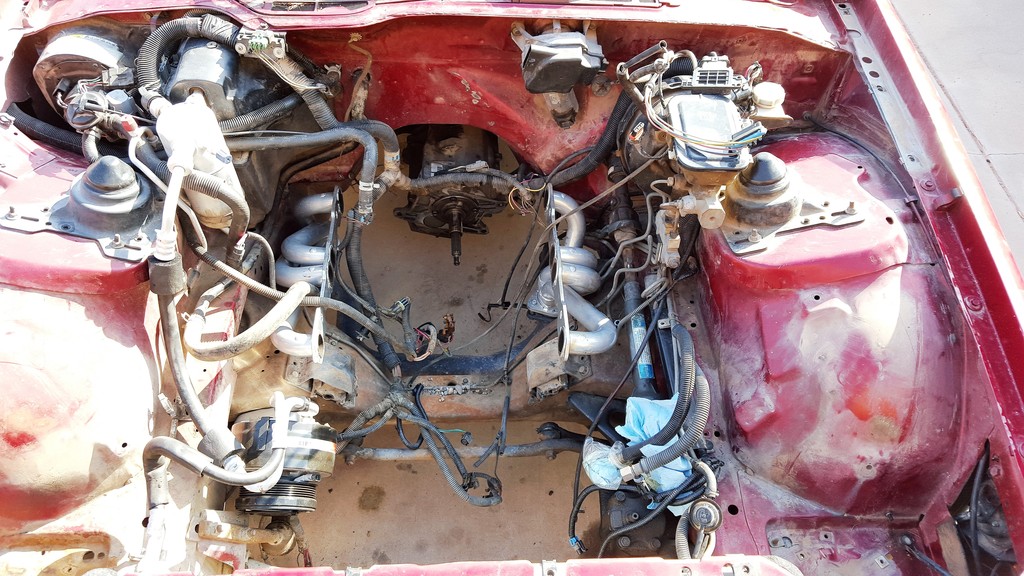
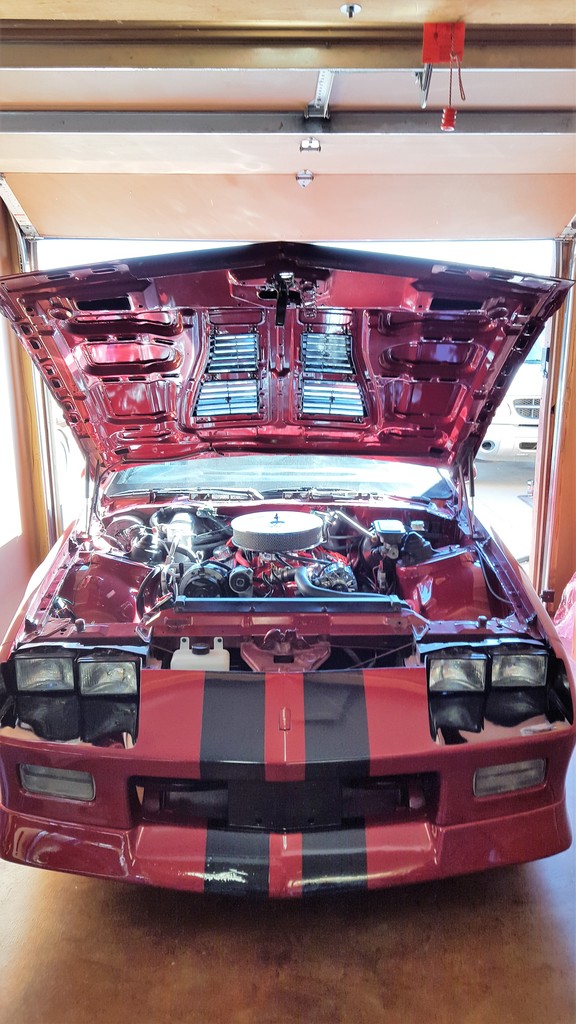
So I've come around to clean up the engine bay now that I've pulled my engine to swap cams/fix an intake manifold leak. I posted these pics in another thread but I decided for continuity of this project (for my own records and those who may be interested) that I'd post the pictures here also.
I pulled out the ugly (and cracked) coolant reservoir and also the washer fluid reservoir right before this picture:
After some very quick prep work and masking, here is what it turned out like:
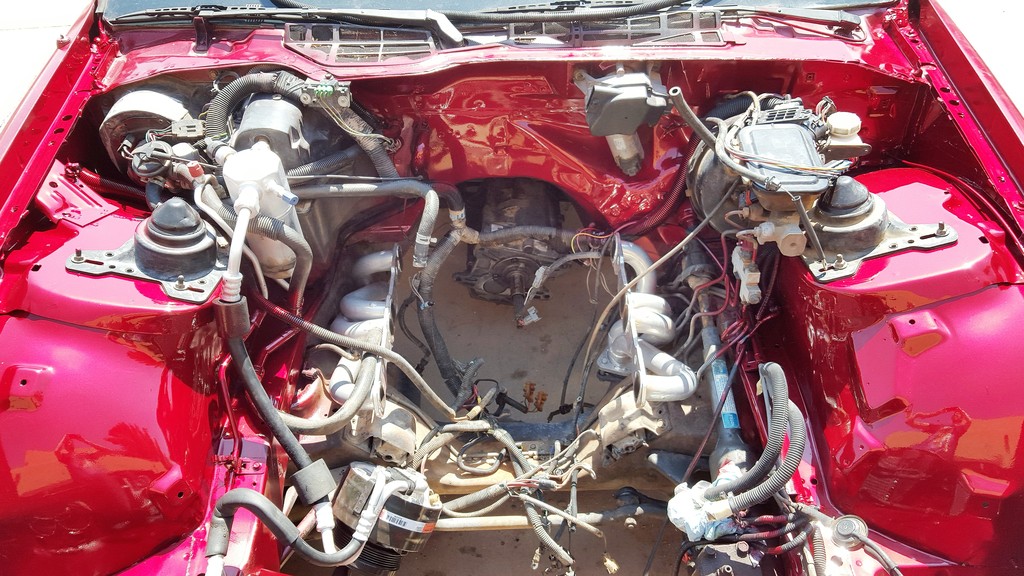
I know think I'm going to re clear my whole car because this clear coat came out way better than the clear when I first sprayed the car. I forgot to add reducer to the clear coat when I was first spraying, and I made sure to add it this time (since it's hot adding the reducer helps the clear lay out much better.)
I'll post more pictures when I get the engine back it, I'm just waiting on my intake manifold and some other parts to get powder coated!
Edit: Here are some pulleys I painted too! I figured why not paint them, they were off already and dirty looking.
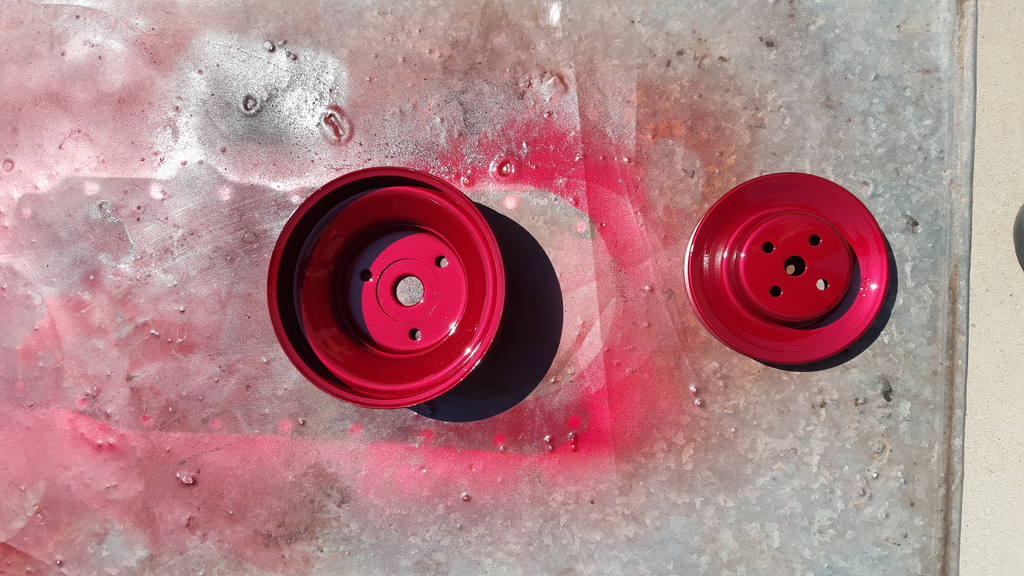
I wish I had a pulley puller for my power steering pump pulley but I'll have to live with it being stuck on the bracket. I still need to paint that bracket also.. but I think I'll just rattle can it black.
I pulled out the ugly (and cracked) coolant reservoir and also the washer fluid reservoir right before this picture:

After some very quick prep work and masking, here is what it turned out like:

I know think I'm going to re clear my whole car because this clear coat came out way better than the clear when I first sprayed the car. I forgot to add reducer to the clear coat when I was first spraying, and I made sure to add it this time (since it's hot adding the reducer helps the clear lay out much better.)
I'll post more pictures when I get the engine back it, I'm just waiting on my intake manifold and some other parts to get powder coated!
Edit: Here are some pulleys I painted too! I figured why not paint them, they were off already and dirty looking.

I wish I had a pulley puller for my power steering pump pulley but I'll have to live with it being stuck on the bracket. I still need to paint that bracket also.. but I think I'll just rattle can it black.
Last edited by Bubbajones_ya; 08-21-2015 at 01:16 PM.
08-21-2015, 01:51 PM
#22
Senior Member
iTrader: (1)

Join Date: Jun 2014
Location: Southeast VA
Posts: 538
Likes: 0
Received 0 Likes
on
0 Posts
Car: 91 Camaro RS T-Top
Engine: 5.0 Tbi
Transmission: 700r4
Axle/Gears: 3.42
Re: Phoenix down
The green and black plug/wires do look exactly like the hatch release switch wires for the motorized hatches. One will be constant power when the parking brake is up or car is in park, depending on auto or stick, parking brake in your case.
08-21-2015, 02:00 PM
#23
Member
Thread Starter
Join Date: Oct 2012
Location: Arizona
Posts: 362
Likes: 0
Received 3 Likes
on
3 Posts
Car: 1998 Viper/1996 Bronco
Engine: 8.0/7.3
Transmission: T56/ZF5
Re: Phoenix down
Okay that's what I thought. That's something I definitely want to add in the future. I bought everything to swap to power windows, so power hatch release is next! I just need to get the rear two panels that have the electrical contacts which are somewhat rare to come by here.
09-08-2015, 08:56 PM
#24
Senior Member
iTrader: (2)

Join Date: Jan 2003
Location: Northern New Jersey
Posts: 640
Received 0 Likes
on
0 Posts
Car: 1988 Trans am GTA
Engine: corvette 350 swap
Transmission: t-5 swap
Axle/Gears: 3.27:1 borg warner 9-bolt w/ PBRs
Re: Phoenix down
Great work! gotta keep saving 'em! rock on! 
Also, for your thread title referencing final fantasy, you have earned 1000 cool points (CP)!
Also, for your thread title referencing final fantasy, you have earned 1000 cool points (CP)!
Last edited by GTAman; 09-08-2015 at 09:03 PM. Reason: adding FF reference.
09-12-2015, 01:21 AM
#25
Member
Thread Starter
Join Date: Oct 2012
Location: Arizona
Posts: 362
Likes: 0
Received 3 Likes
on
3 Posts
Car: 1998 Viper/1996 Bronco
Engine: 8.0/7.3
Transmission: T56/ZF5
Re: Phoenix down
I have a few more pictures now that my engine is in and the car is running again!


oops....
The engine bay has gotten a little dirty now because I live on dirt roads and also when I was adjusting my valves, the oil got everywhere. I'll take some more pictures soon when I get some other things in order. I got better wire looms and obviously new wires which look pretty good and clean too. I'll do a good cleanup after I fix some paint I've been meaning to correct.
I ended up purchasing an IROC hood because it was 20 bucks and was in a little better condition that my previous hood was in (had minor dents). I painted it the same scheme, but the stripes are a little wider at the base, so I need to paint the stripes wider on my front bumper to match. I also messed up the driver's side stripe at the front and made it a little too wide.... so I'm going to fix that probably next weekend and then re clear the whole car and front bumper (since I'll have to adjust stripes and stuff it will be easier to clear the whole panels.)
Here is the hood with my louvers I bought (separately) just resting in place. I'm going to paint them the same black, along with my rear window louvers too.

You can see where I made that drivers side stripe bigger..... man that bothers me so much!! But it will be fixed soon. I plan on making these louvers functional, so I'm going to have to cut open this hood, and figure clearing over the bare metal will be slightly helpful.
Once all the painting and then washing (you can see my car is dirty) is done, I'll post up some more pictures!
09-12-2015, 07:10 AM
#26
Senior Member
iTrader: (1)
Join Date: Jun 2014
Location: Southeast VA
Posts: 538
Likes: 0
Received 0 Likes
on
0 Posts
Car: 91 Camaro RS T-Top
Engine: 5.0 Tbi
Transmission: 700r4
Axle/Gears: 3.42
Re: Phoenix down
Careful about making the hood functional. If you drive it a lot you might want to reconsider. If it rains you will be letting rain directly into your intake. If it's a garage kept only driven on weekends then go for it.
09-12-2015, 09:26 PM
#27
Member
Join Date: Jul 2008
Location: North Carolina
Posts: 248
Likes: 0
Received 1 Like
on
1 Post
Car: 92 RS camaro, 99 Z-24 cavalier
Engine: 5.0L TBI, 2.4L
Transmission: 700r4
Axle/Gears: 2.73
Re: Phoenix down
I love the way your paint turned out. Looks so good to have done this in a driveway.
09-13-2015, 12:11 AM
#28
Member
Thread Starter
Join Date: Oct 2012
Location: Arizona
Posts: 362
Likes: 0
Received 3 Likes
on
3 Posts
Car: 1998 Viper/1996 Bronco
Engine: 8.0/7.3
Transmission: T56/ZF5
Re: Phoenix down
Im still living with my parents while I finish up college and our garage is often too stuffed to fit a car. Out here in AZ the temps get pretty hot and I'm thinking that making the louvers functional would help decreae engine temps during the summer.
09-17-2015, 02:06 PM
#29
Member
Thread Starter
Join Date: Oct 2012
Location: Arizona
Posts: 362
Likes: 0
Received 3 Likes
on
3 Posts
Car: 1998 Viper/1996 Bronco
Engine: 8.0/7.3
Transmission: T56/ZF5
Re: Phoenix down
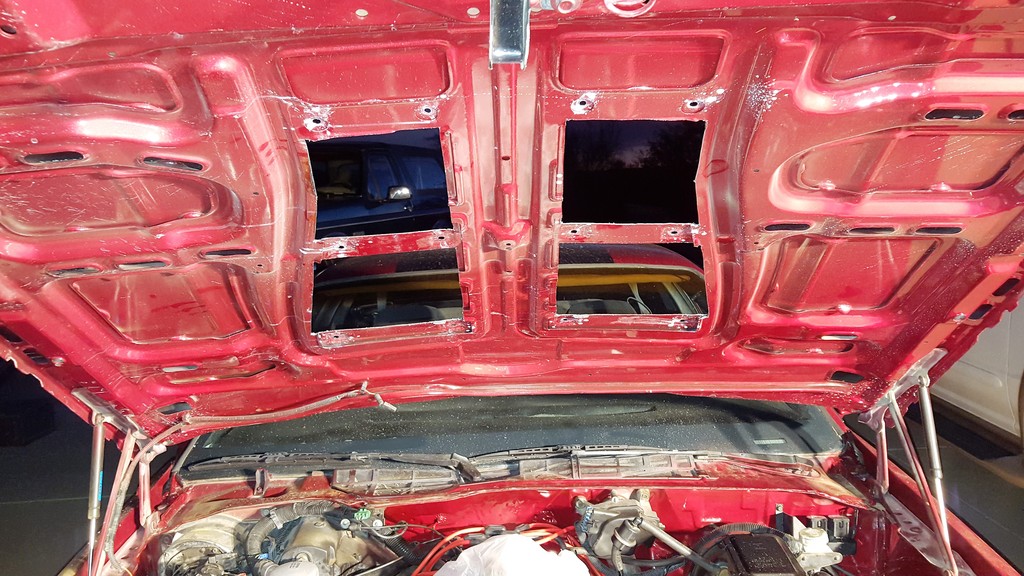
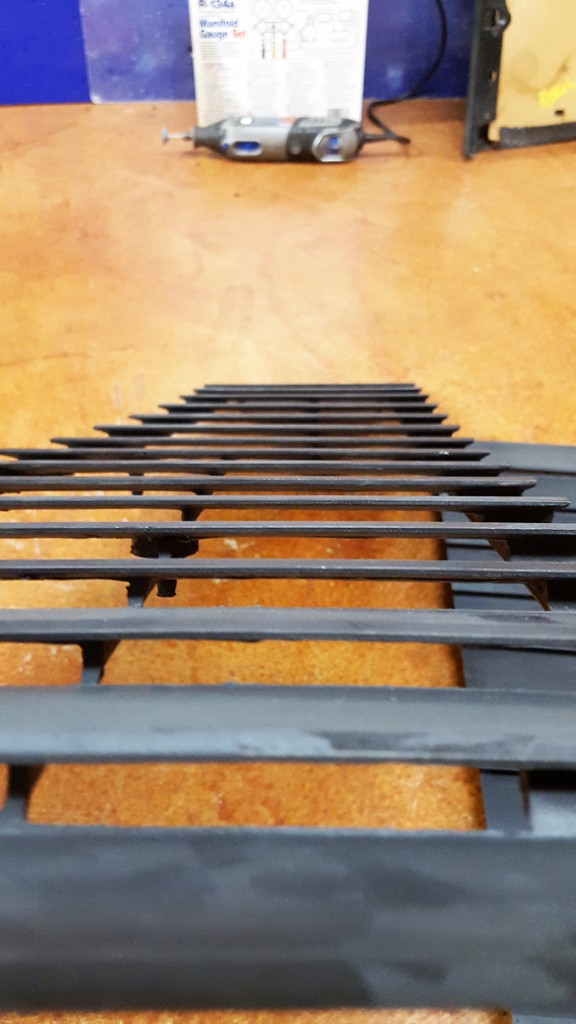
Well I've had a little time to mess with some things so I decided to make the louvers I bought functional and try and tackle fixing the paint lines at the same time.
Here is how I cut the holes in my hood:
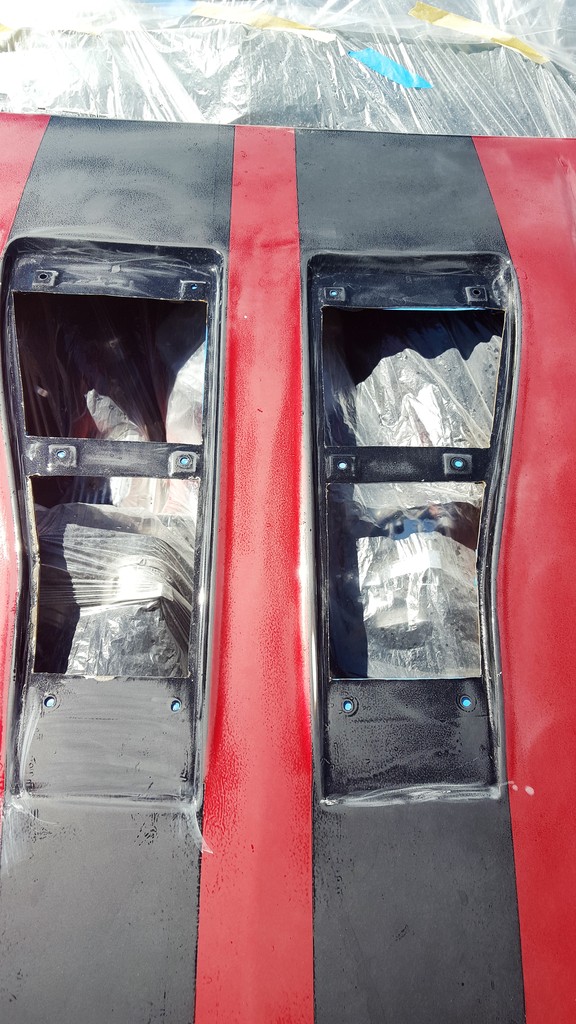
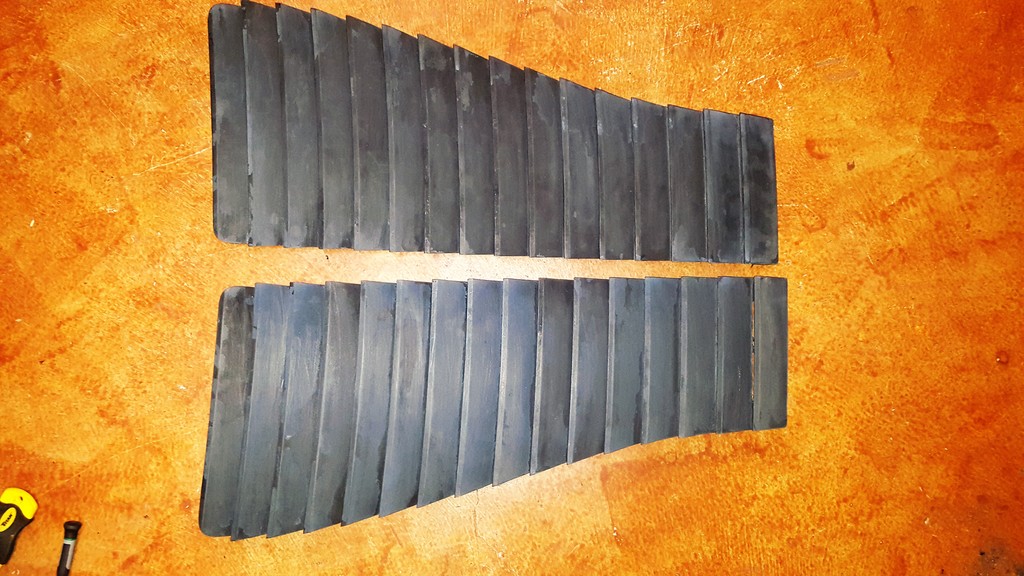
Here are what the louvers look like before I throw paint on them:
I also figured I would try to get rid of some of the orange peel on my car so I'm going to reclear part of it and see how it turns out:
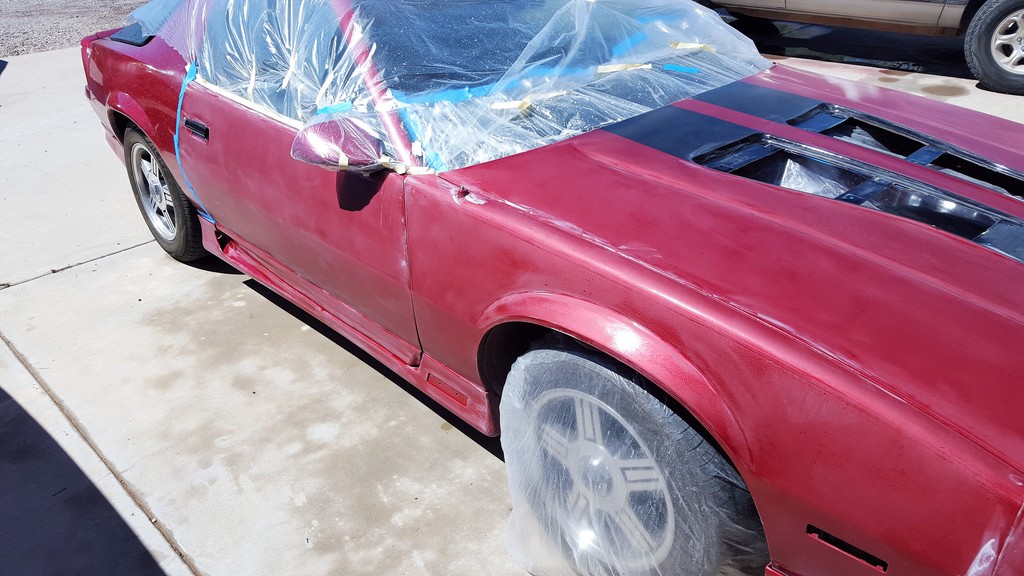

I could probably use a little more sanding in some areas.. but I don't want to have to spray any more base coat so there might be a little orange peel left. I'm going to try and see if, when fixing the drivers side stripe (it's too large at the base), I can get away spot spraying red over the black stripe instead of spraying the whole side also. I obviosuly need to spray more black on the bumper and then more red too, but I feel like the more base coat I spray, the higher the chance of orange peel in the clear will be!
Here is how I cut the holes in my hood:


Here are what the louvers look like before I throw paint on them:


I also figured I would try to get rid of some of the orange peel on my car so I'm going to reclear part of it and see how it turns out:


I could probably use a little more sanding in some areas.. but I don't want to have to spray any more base coat so there might be a little orange peel left. I'm going to try and see if, when fixing the drivers side stripe (it's too large at the base), I can get away spot spraying red over the black stripe instead of spraying the whole side also. I obviosuly need to spray more black on the bumper and then more red too, but I feel like the more base coat I spray, the higher the chance of orange peel in the clear will be!
09-18-2015, 12:35 AM
#30
Member
Thread Starter
Join Date: Oct 2012
Location: Arizona
Posts: 362
Likes: 0
Received 3 Likes
on
3 Posts
Car: 1998 Viper/1996 Bronco
Engine: 8.0/7.3
Transmission: T56/ZF5
Re: Phoenix down
Well I can't say the clear turned out exactly how I wanted.
I ran out of reducer part the way through, and I was slightly reducing the clear coat so I went a little light on some parts. Most of the clear I was spraying was a "flow coat" though, so there was already a good base of scuffed clear under it. The front bumper got two thick coats because that's where most of the repainting was done to match the stripes again.
I got some runs in the doors... so I'm going to have to fix that. Maybe I can sand and buff them out, because otherwise the doors look great! Also, there are defects here and there in the hood. Kinda like spotty clear laying down. However, with my two big spotlights, all the defects aren't really that noticeable. It looks a lot better than it did before. I'll have to see what it looks like out in the sun though.
Despite all the defects, as of now (with the spotlights on it at night), I'm pretty pleased with the paint/clear. I know that I'll go ahead and reclear the rest of the car that I didn't do today.
Who knows, now that I bought a bunch more reducer, if the current defects bother me a bunch, I may reclear parts of what I did today to get rid of them.
The hardest part of doing what I did was messing with the stripes..... I sure do love the stripes on my car, but masking off the stripes, then waiting and testing the coat for hardness, then masking off the other parts, then finally clearing gets quite tedious and nerve wrecking. Now that my stripes are all set, scuffing and reclearing what I have really wont be bad at all. A lot less masking that's for sure.
Here is what it looks like now at night, I'll get a better picture tomorrow after school.
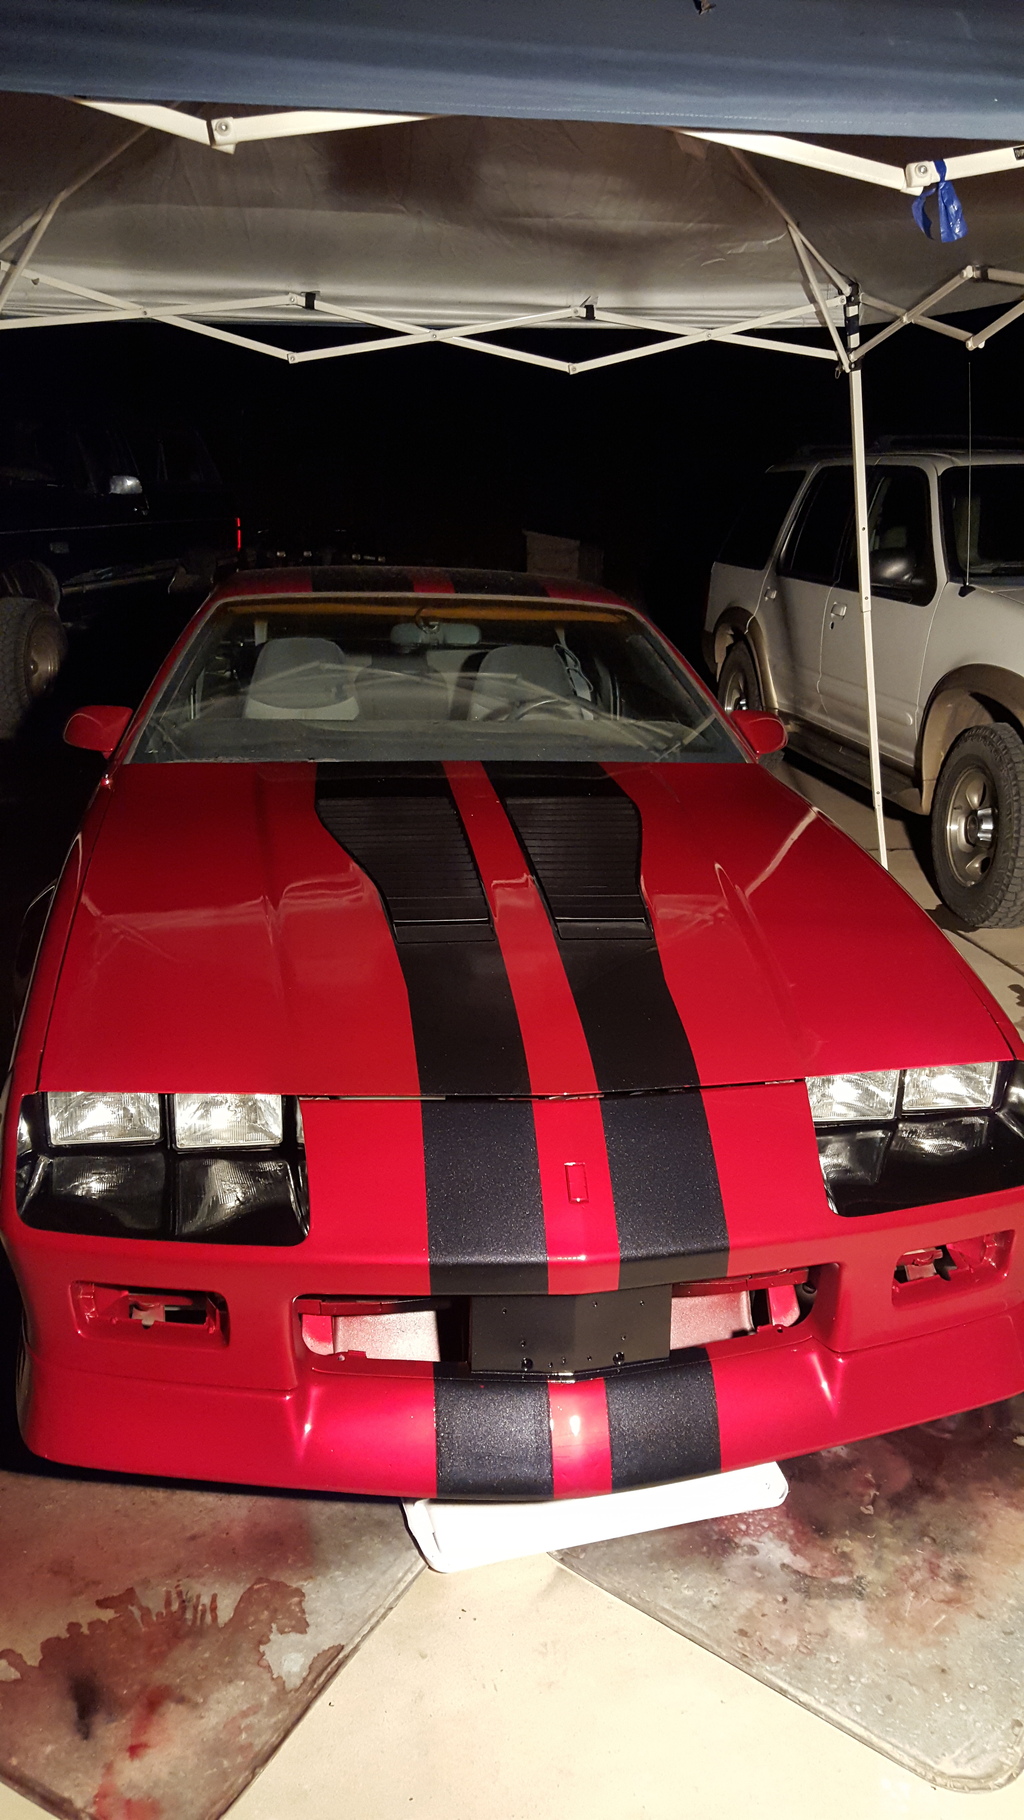
It's not the best picture, but hey the stripes are lined up! I think the louvers came out pretty nice too. I painted them with the same metallic black and cleared them. I did a very poor prep job on them but the unevenness in the paint shouldn't be noticeable on them. I just have to get some stuff to actually mount them to my car now.
09-19-2015, 09:36 PM
#31
Member
Thread Starter
Join Date: Oct 2012
Location: Arizona
Posts: 362
Likes: 0
Received 3 Likes
on
3 Posts
Car: 1998 Viper/1996 Bronco
Engine: 8.0/7.3
Transmission: T56/ZF5
Re: Phoenix down
Well overall I'm decently content with how the paint came out. The runs are quite noticeable in the doors, and there is a little bit of waviness that I thought I was going to get rid of in the doors also but oh well.
There are some clear coat flaws on the hood too, and some orange peel/unevenness on the ground effects bumper from too fast of prep. I may try and buff out small sections of the flaws in the clear on the hood, and also the runs on the doors.
It looks better than it did before though for sure, and it should last so I'm okay with that!
Here is what it looks like:
And here is the functional hood louvers installed!!
Also here is a small video of what the new cam sounds like in my engine:
http://vid1267.photobucket.com/album...psmoeyz00k.mp4
The video kept cutting out so I couldn't get the idle in long. I think the bluetooth on my stereo kept cutting off the video off on my phone to connect to the audio.
There are some clear coat flaws on the hood too, and some orange peel/unevenness on the ground effects bumper from too fast of prep. I may try and buff out small sections of the flaws in the clear on the hood, and also the runs on the doors.
It looks better than it did before though for sure, and it should last so I'm okay with that!
Here is what it looks like:


And here is the functional hood louvers installed!!

Also here is a small video of what the new cam sounds like in my engine:
http://vid1267.photobucket.com/album...psmoeyz00k.mp4
The video kept cutting out so I couldn't get the idle in long. I think the bluetooth on my stereo kept cutting off the video off on my phone to connect to the audio.
12-30-2015, 11:39 PM
#32
Member
Thread Starter
Join Date: Oct 2012
Location: Arizona
Posts: 362
Likes: 0
Received 3 Likes
on
3 Posts
Car: 1998 Viper/1996 Bronco
Engine: 8.0/7.3
Transmission: T56/ZF5
Re: Phoenix down
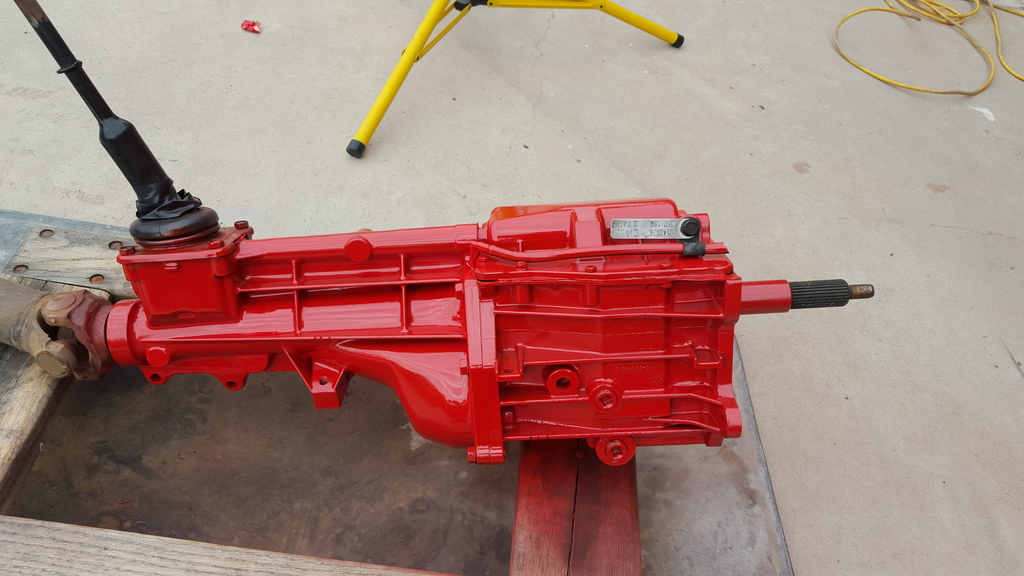
So, I finally came across a V8 T5, and it is a World Class one too! (I know, WC isn't really much at all of an upgrade from a NWC, but it IS a little better on mileage so I've heard and a newer at least.)
I haven't had a chance to test it out yet, but the fluid inside looked good and the input shaft seemed good and sturdy too (unlike when I took down my current V6 NWC T5.)
The transmission I got was completely caked in dirt, but I pressure washed it and did some very quick prep work and painted it:
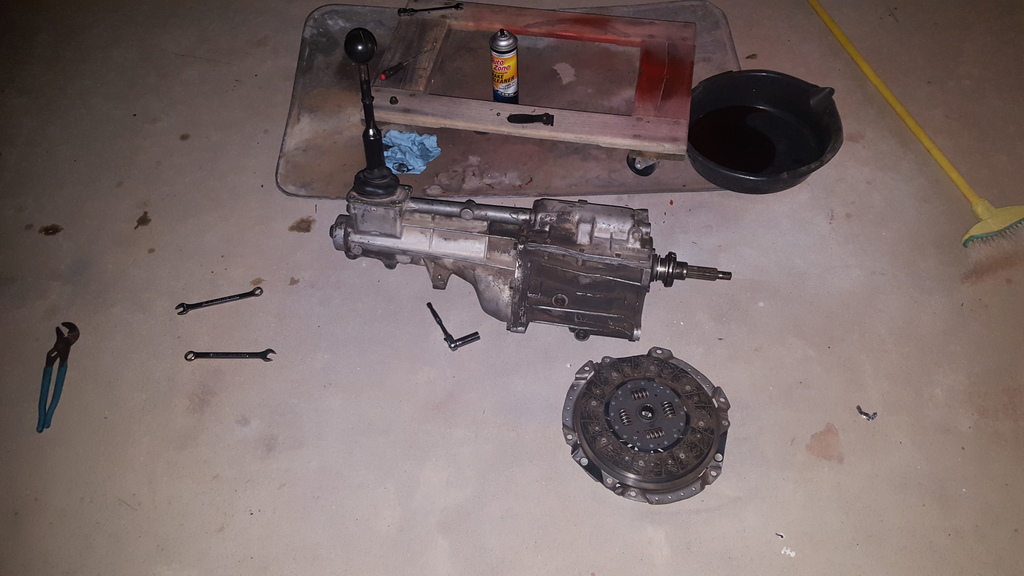
Here is the old one out:
And here is the new one almost bolted back up:
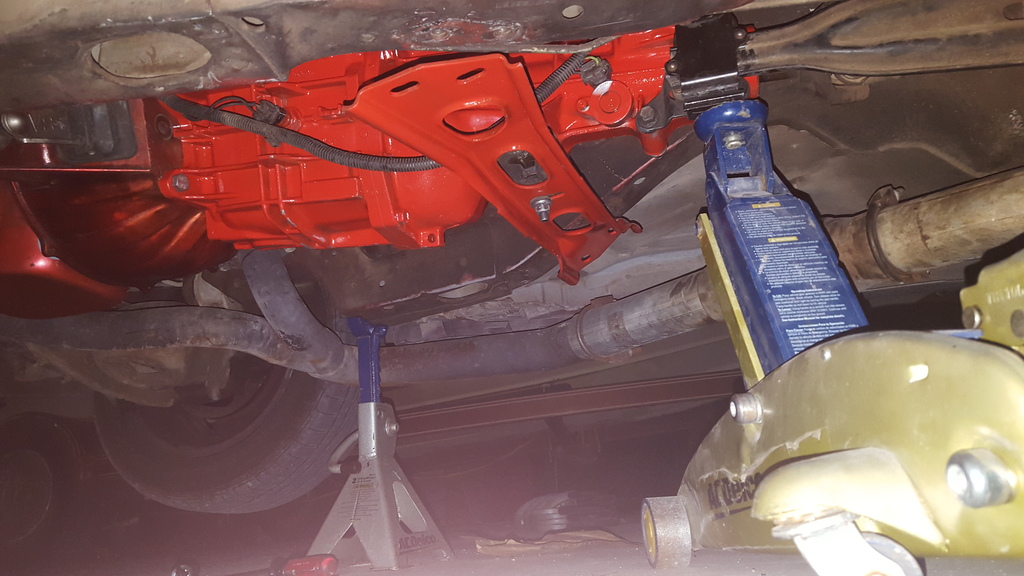
I still have to fill fluids and finish bolting some things up, but then I get to take it for a test drive and see how it runs!
I haven't had a chance to test it out yet, but the fluid inside looked good and the input shaft seemed good and sturdy too (unlike when I took down my current V6 NWC T5.)
The transmission I got was completely caked in dirt, but I pressure washed it and did some very quick prep work and painted it:

Here is the old one out:

And here is the new one almost bolted back up:

I still have to fill fluids and finish bolting some things up, but then I get to take it for a test drive and see how it runs!
01-24-2016, 09:45 PM
#33
Member
Thread Starter
Join Date: Oct 2012
Location: Arizona
Posts: 362
Likes: 0
Received 3 Likes
on
3 Posts
Car: 1998 Viper/1996 Bronco
Engine: 8.0/7.3
Transmission: T56/ZF5
Re: Phoenix down
Well after fixing my clutch disengagement issues, the car runs great. The V8 T5 is definitely way better driving with than the V6 one. My mileage has gone up slightly too, I'll have to do some more driving to see just how much it has gone up overall.
I finally got around to redoing my door panel with red and black too, as well as getting red and black seat upholstery. I couldn't get all the folds/creases out of the new vinyl seat upholstery, so I'm hoping that when summer rolls around, it will get those creases and folds out. I'll take some pictures and throw them up for what the new interior looks like.
I finally got around to redoing my door panel with red and black too, as well as getting red and black seat upholstery. I couldn't get all the folds/creases out of the new vinyl seat upholstery, so I'm hoping that when summer rolls around, it will get those creases and folds out. I'll take some pictures and throw them up for what the new interior looks like.

Thread
Thread Starter
Forum
Replies
Last Post
1992 Trans Am
History / Originality
27
05-10-2023 07:19 PM
roysatikas
Transmissions and Drivetrain
0
09-22-2015 08:15 PM