When you click on links to various merchants on this site and make a purchase, this can result in this site earning a commission. Affiliate programs and affiliations include, but are not limited to, the eBay Partner Network.
Engine SwapEverything about swapping an engine into your Third Gen.....be it V6, V8, LTX/LSX, crate engine, etc. Pictures, questions, answers, and work logs.
My dial bore gauge took a crap on me so I went to plasti gauge. I will NEVER use it again. I ended up getting +.001 bearings. Plasti said I had .0017ish on rods and .002 on mains. HEH.
Still fitting crank/rods etc.
Clean one more time.
or so I thought. Little bit more. I was very cautious as I read many threads of guys hitting water.
Couldnt find my note book..... paper towel will do! I ordered a new bore gauge and mic set. LOVE IT. These are my main clearances top left. Bottom left is crank journals. Right is bearing journals.
Playing around with rod bearings. Plasti gauge said .0017... My mituoyo dial bore gauge, 0-5-0, .0001, says a different story. Much different. With the +.001 bearings, I ended up right at .0042 or so. So bak to the std king bearings to achieve some great numbers. I'm very happy with all my clearances.
If you dont have a rod vice... BUY one. A great tool to have.
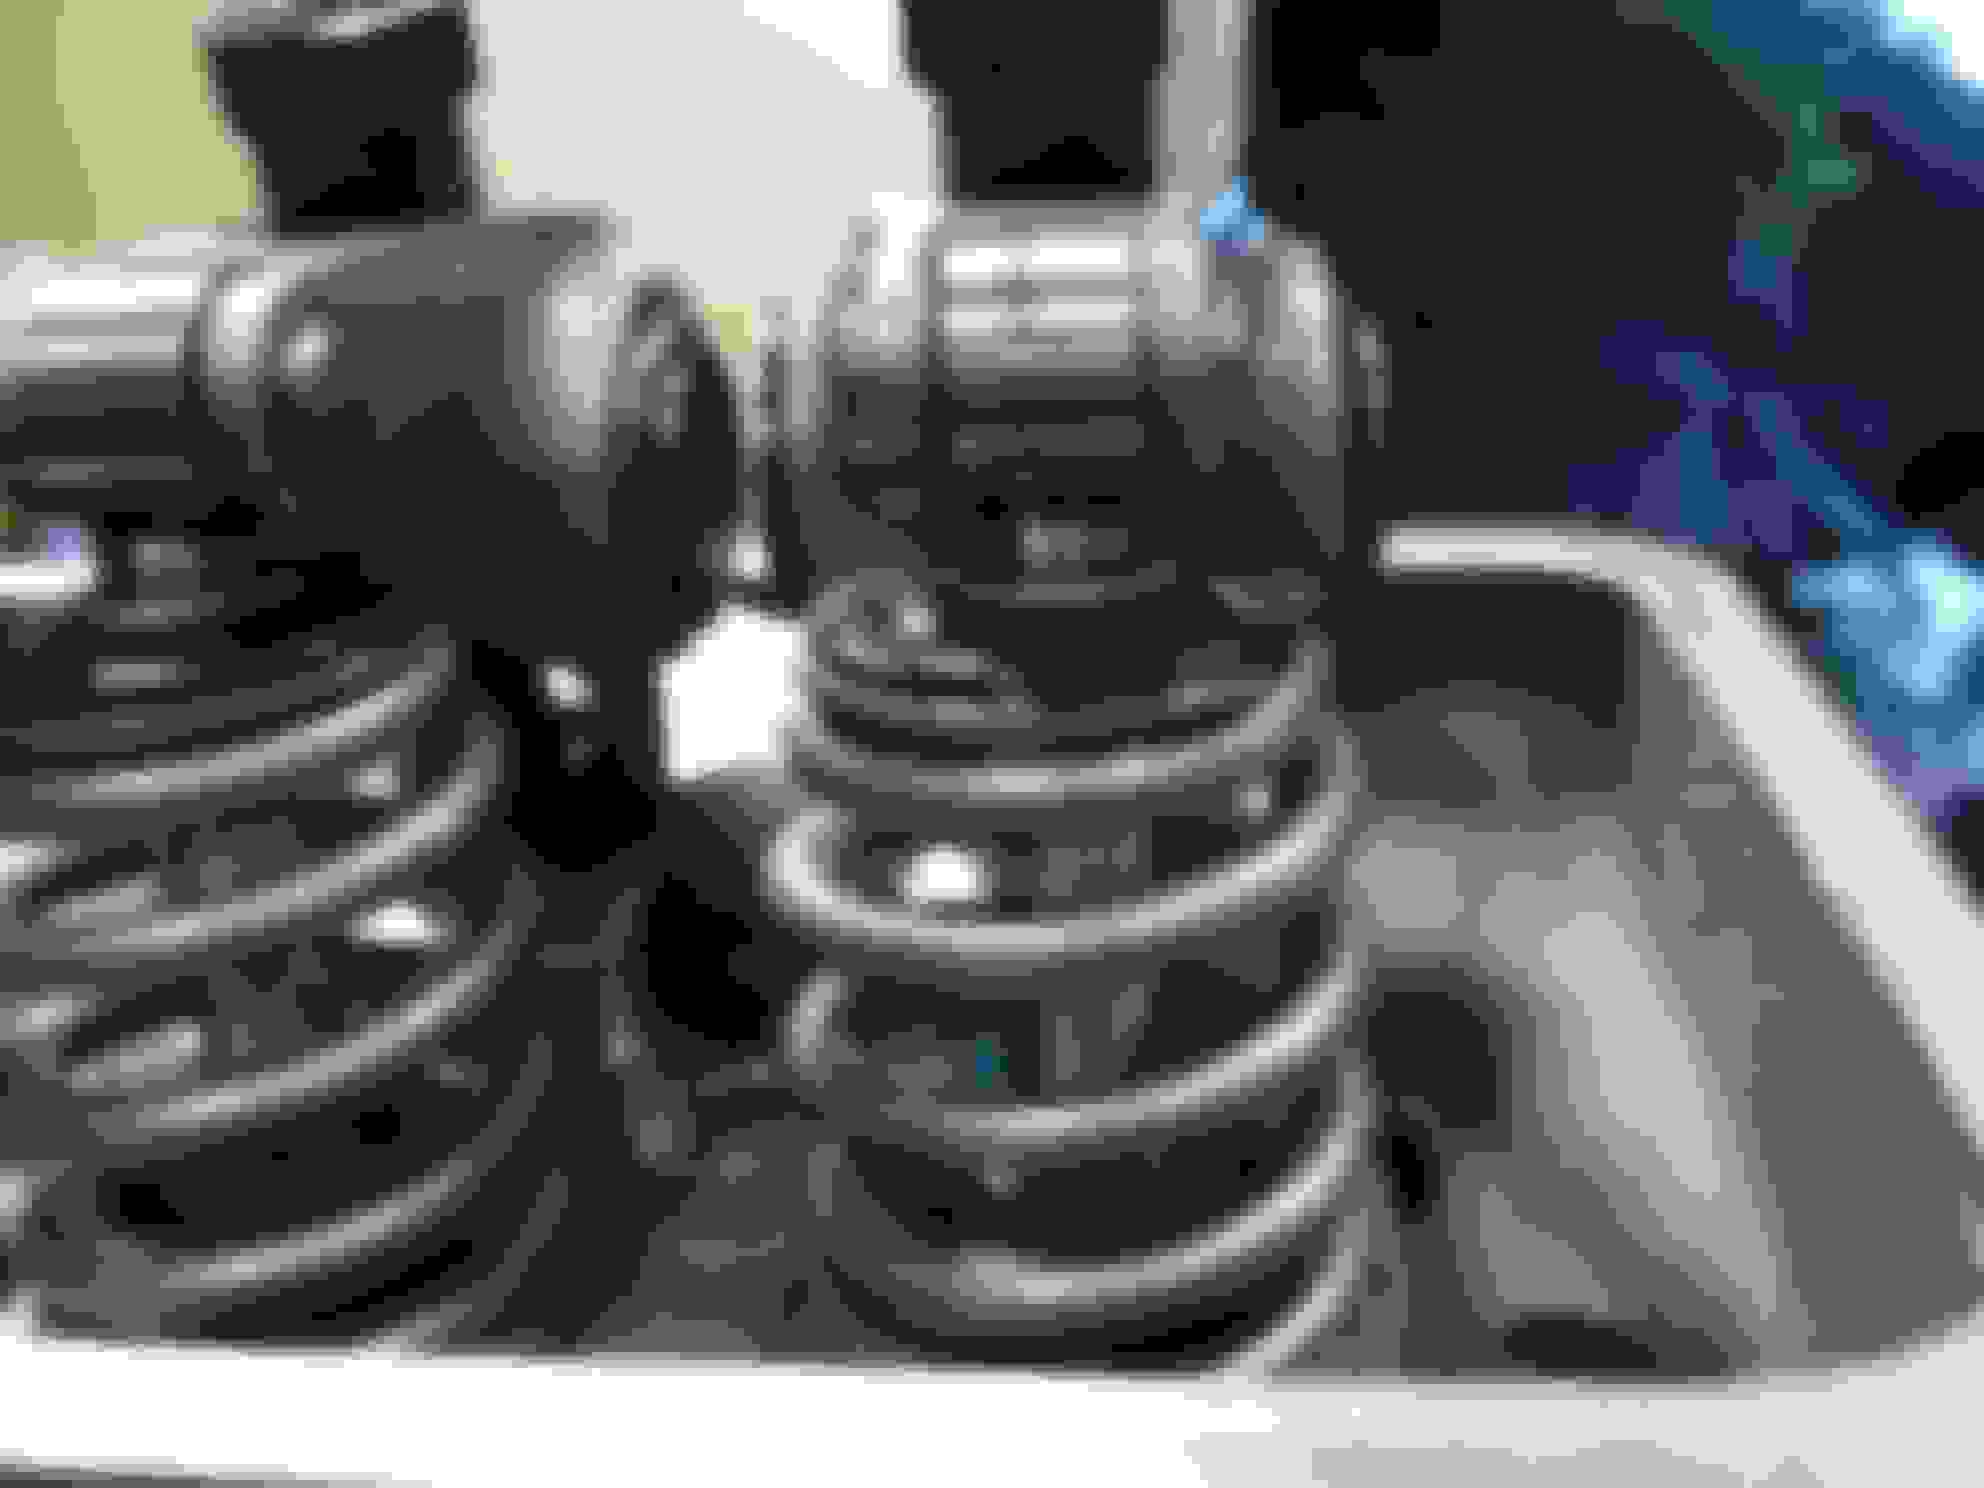
Alright, Rings are on pistons, Pistons are in holes.
I check both rod bolt stretch and use a angle gauge. Measure the bolt first, torque to 30ft#s, then 60*, measure bolt for stretch. If you can read my chicken scratch you will see I achieved .0065 stretch on all rod bolts. Spec is .006-.0064. I think I am close enough. I also did this when I checked rod bearing clearances using rod vice.
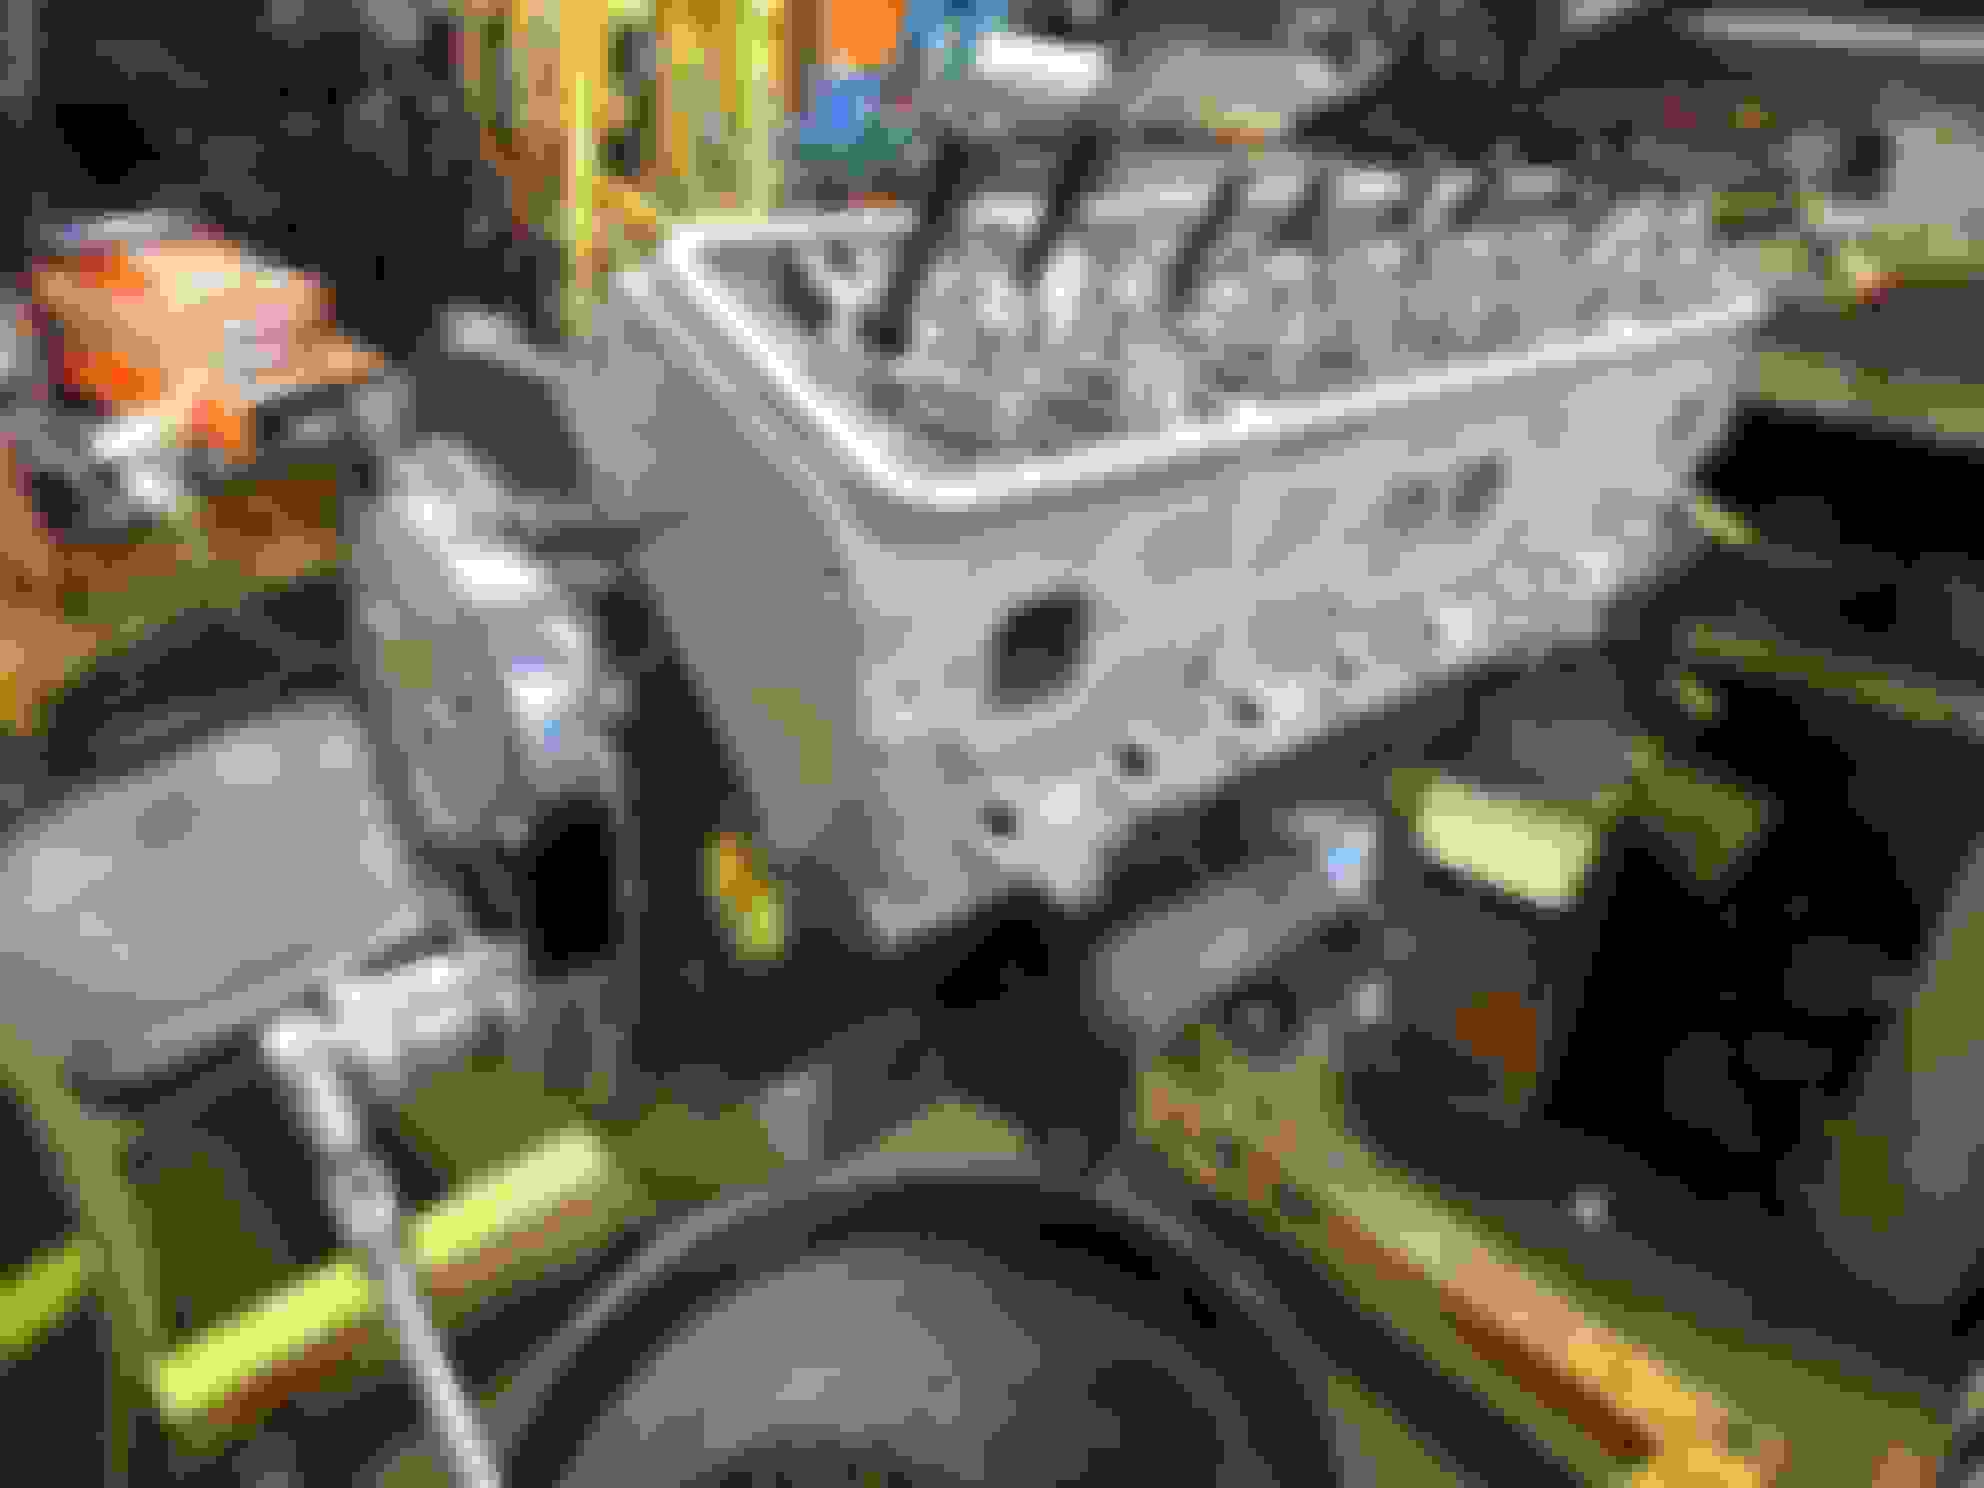
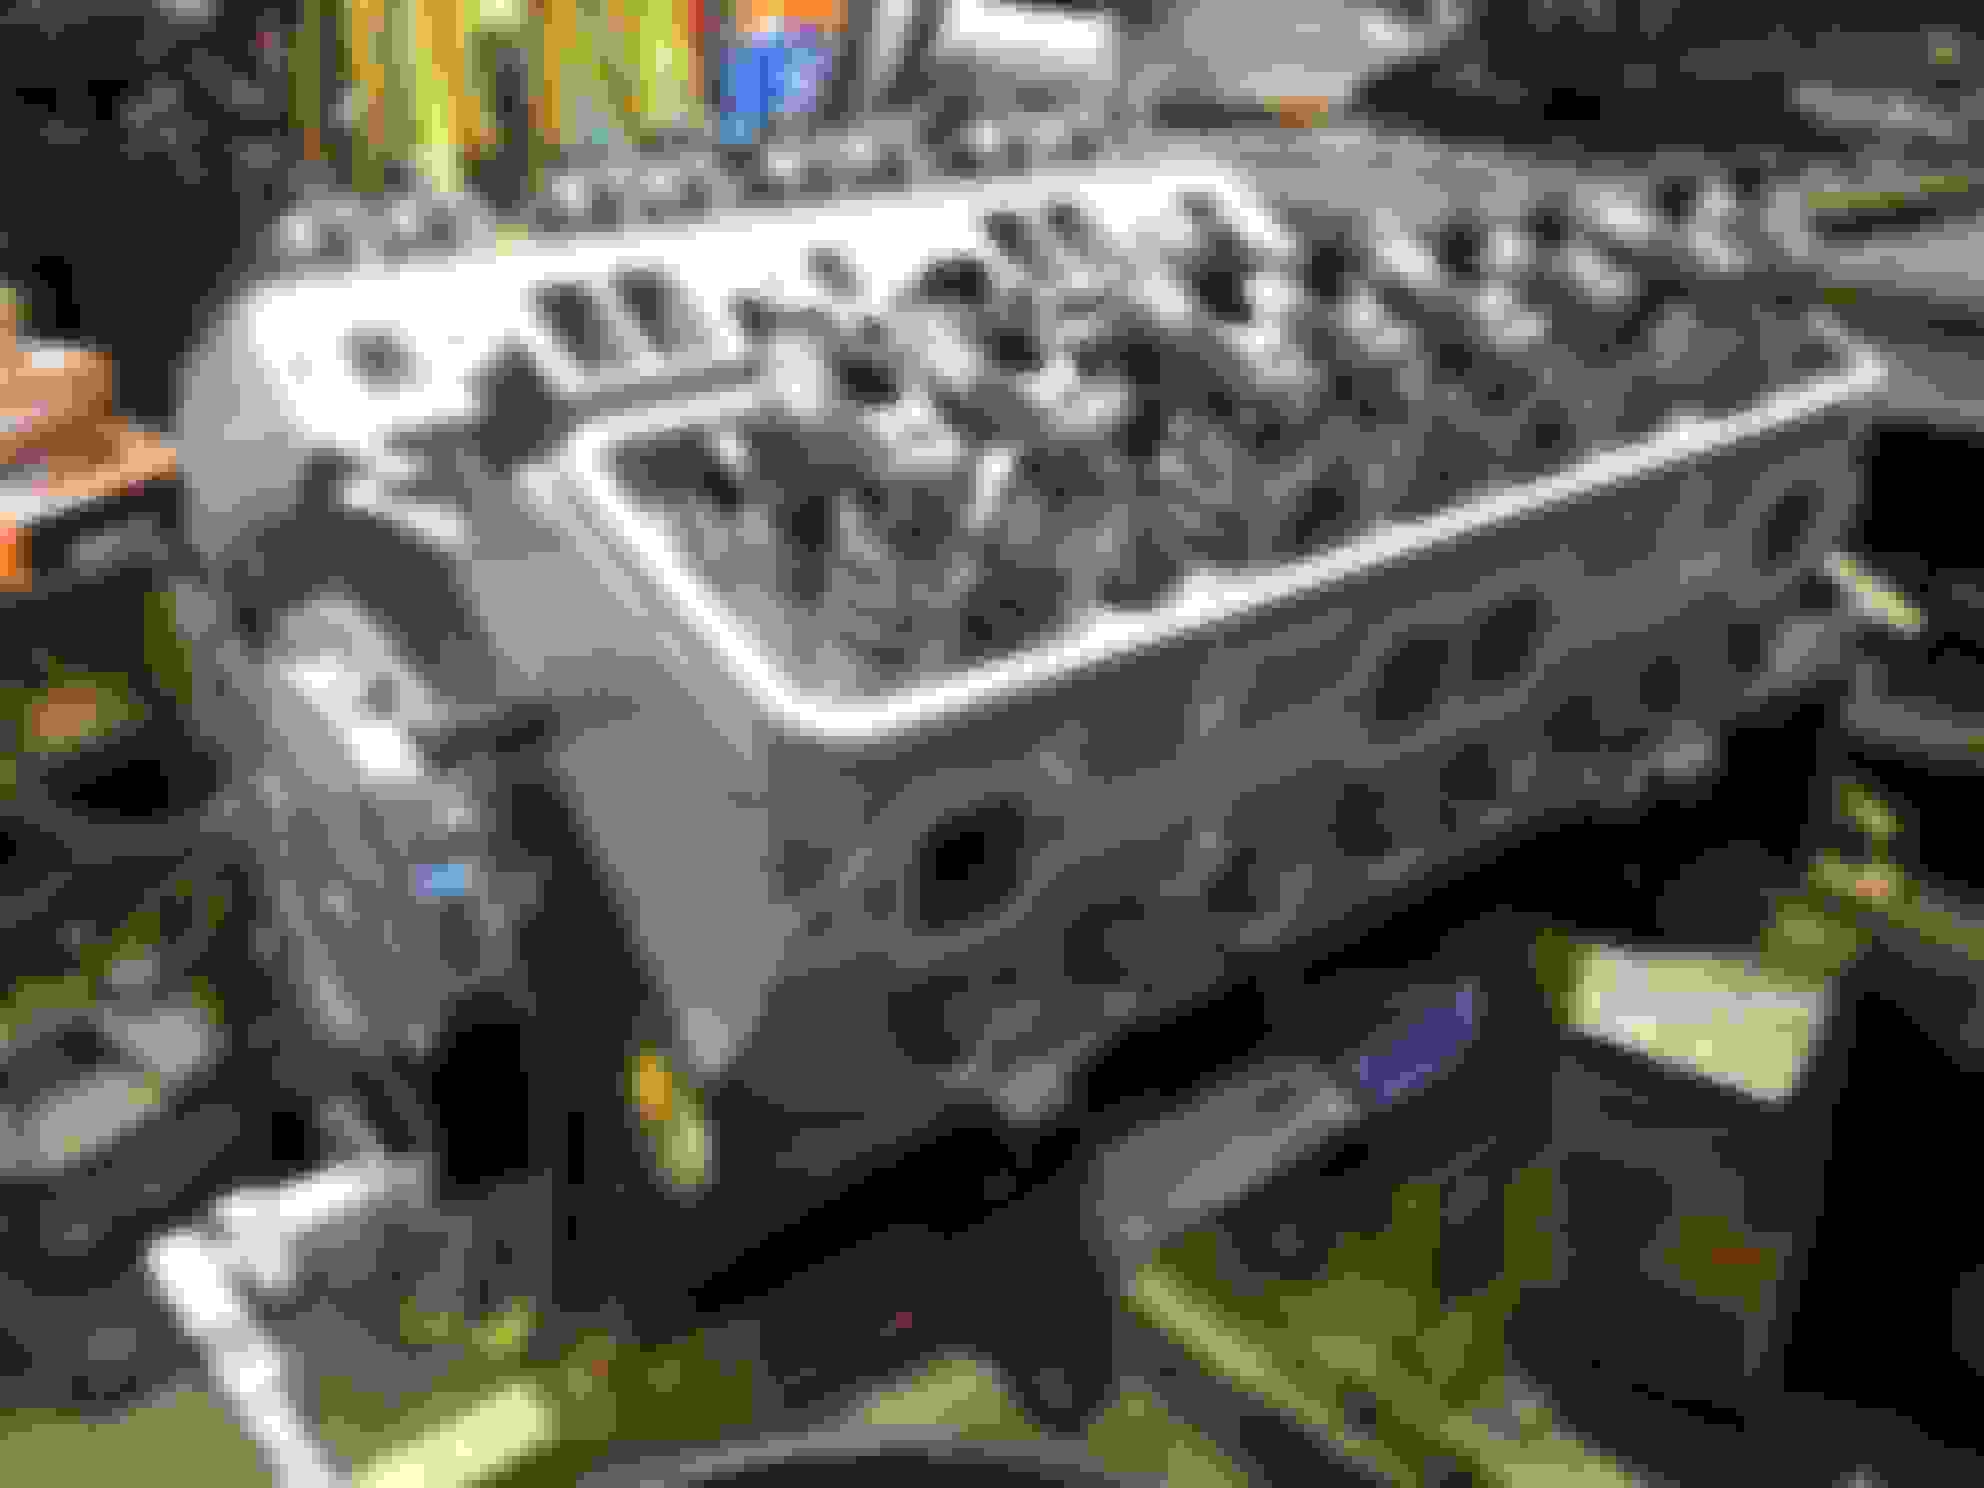
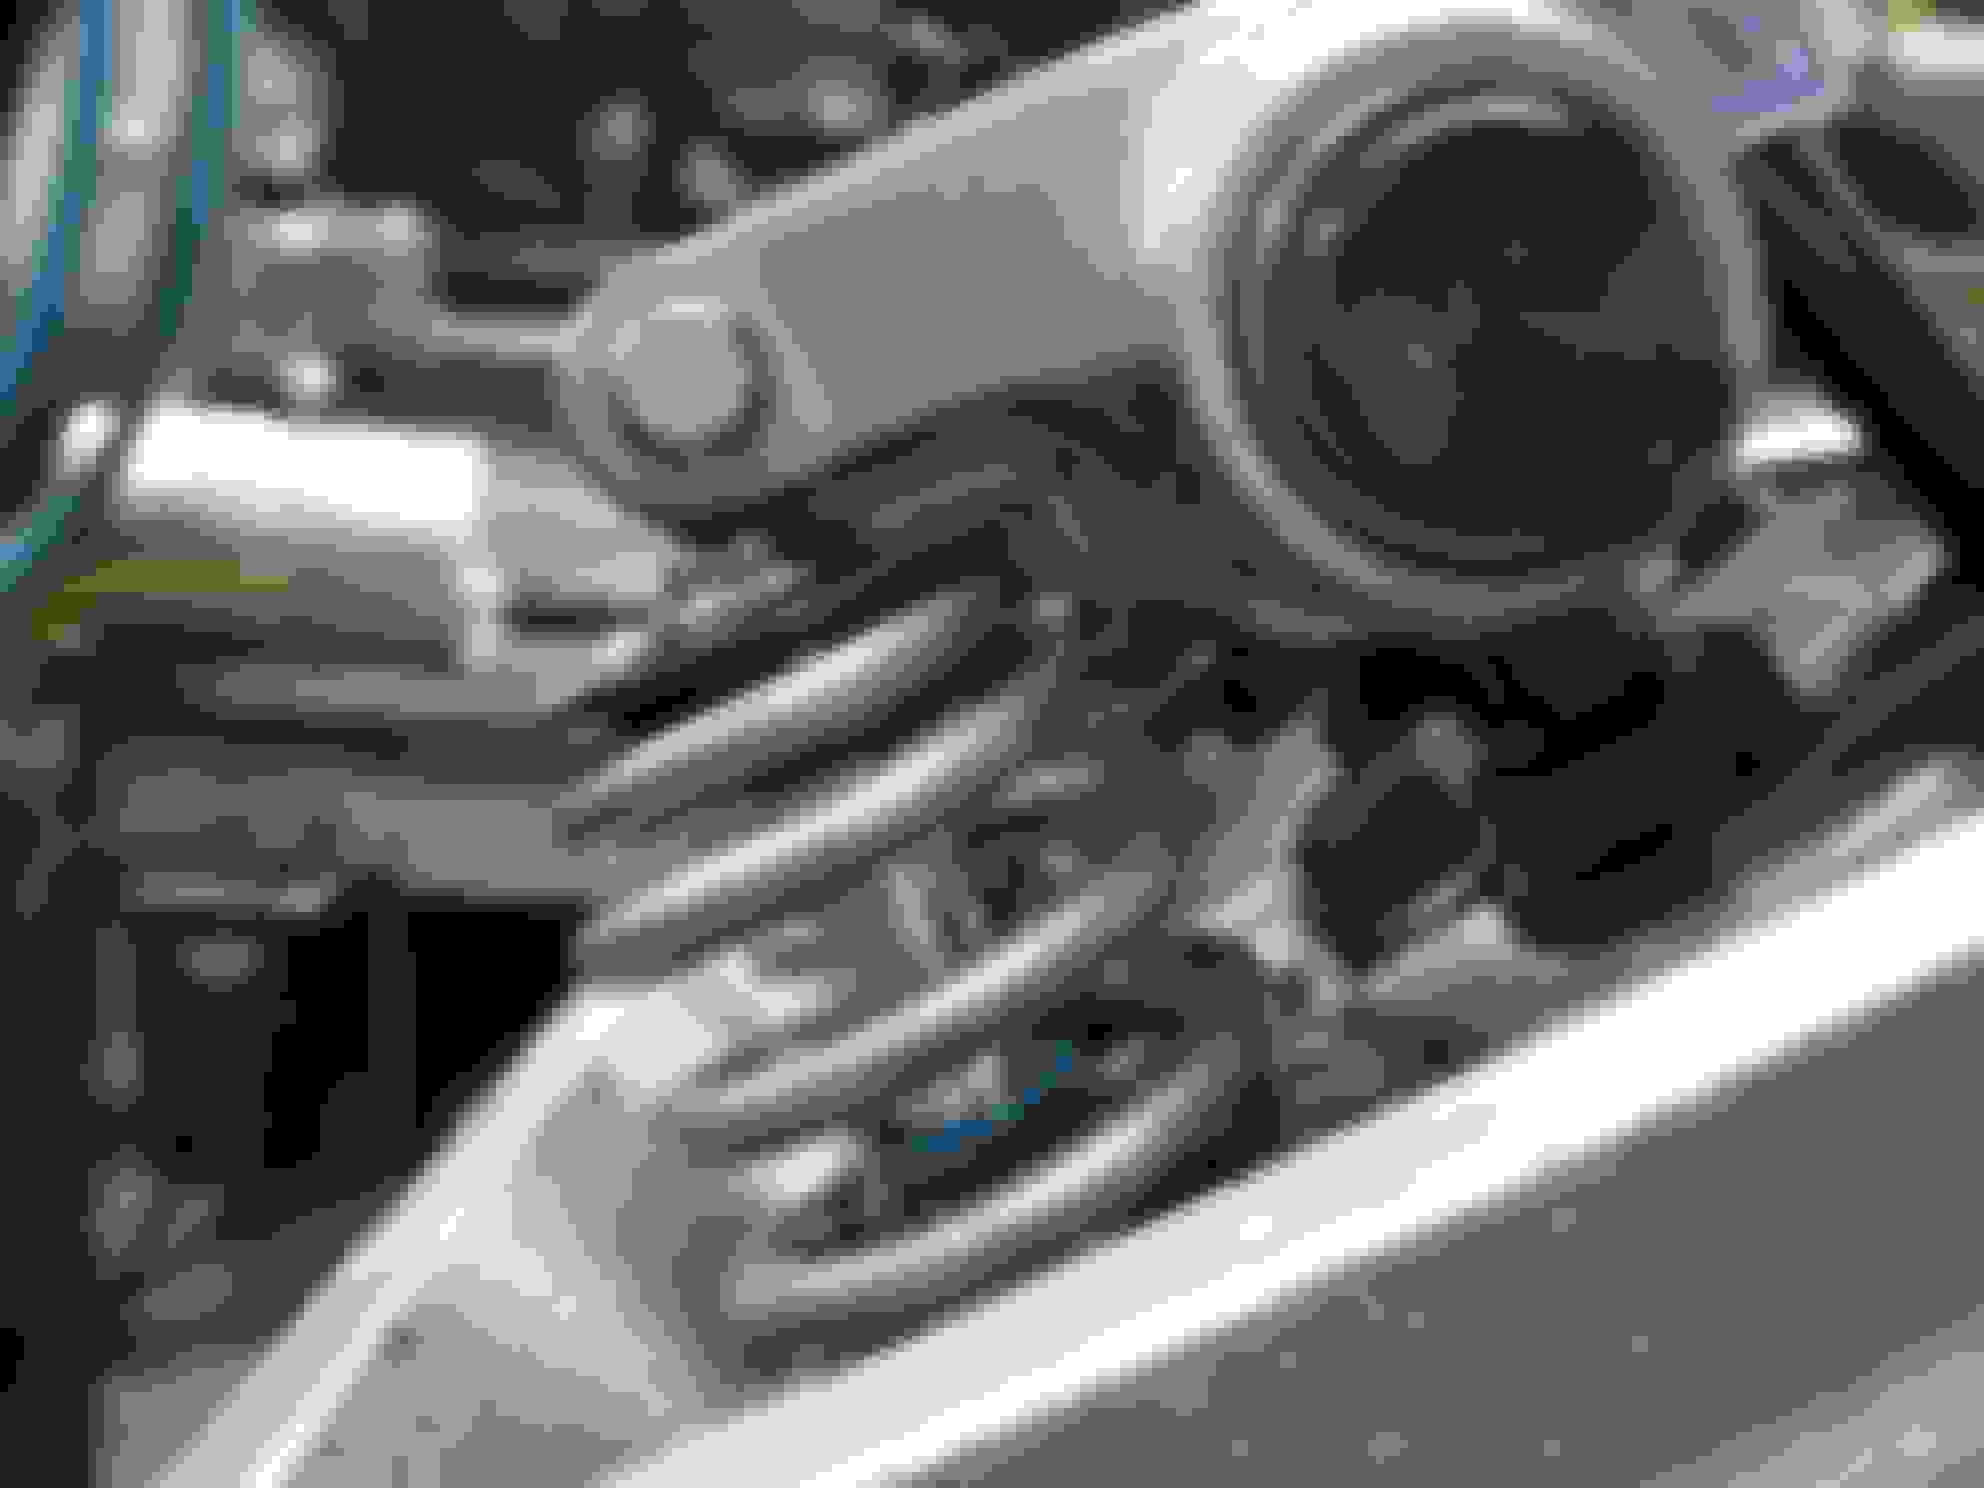
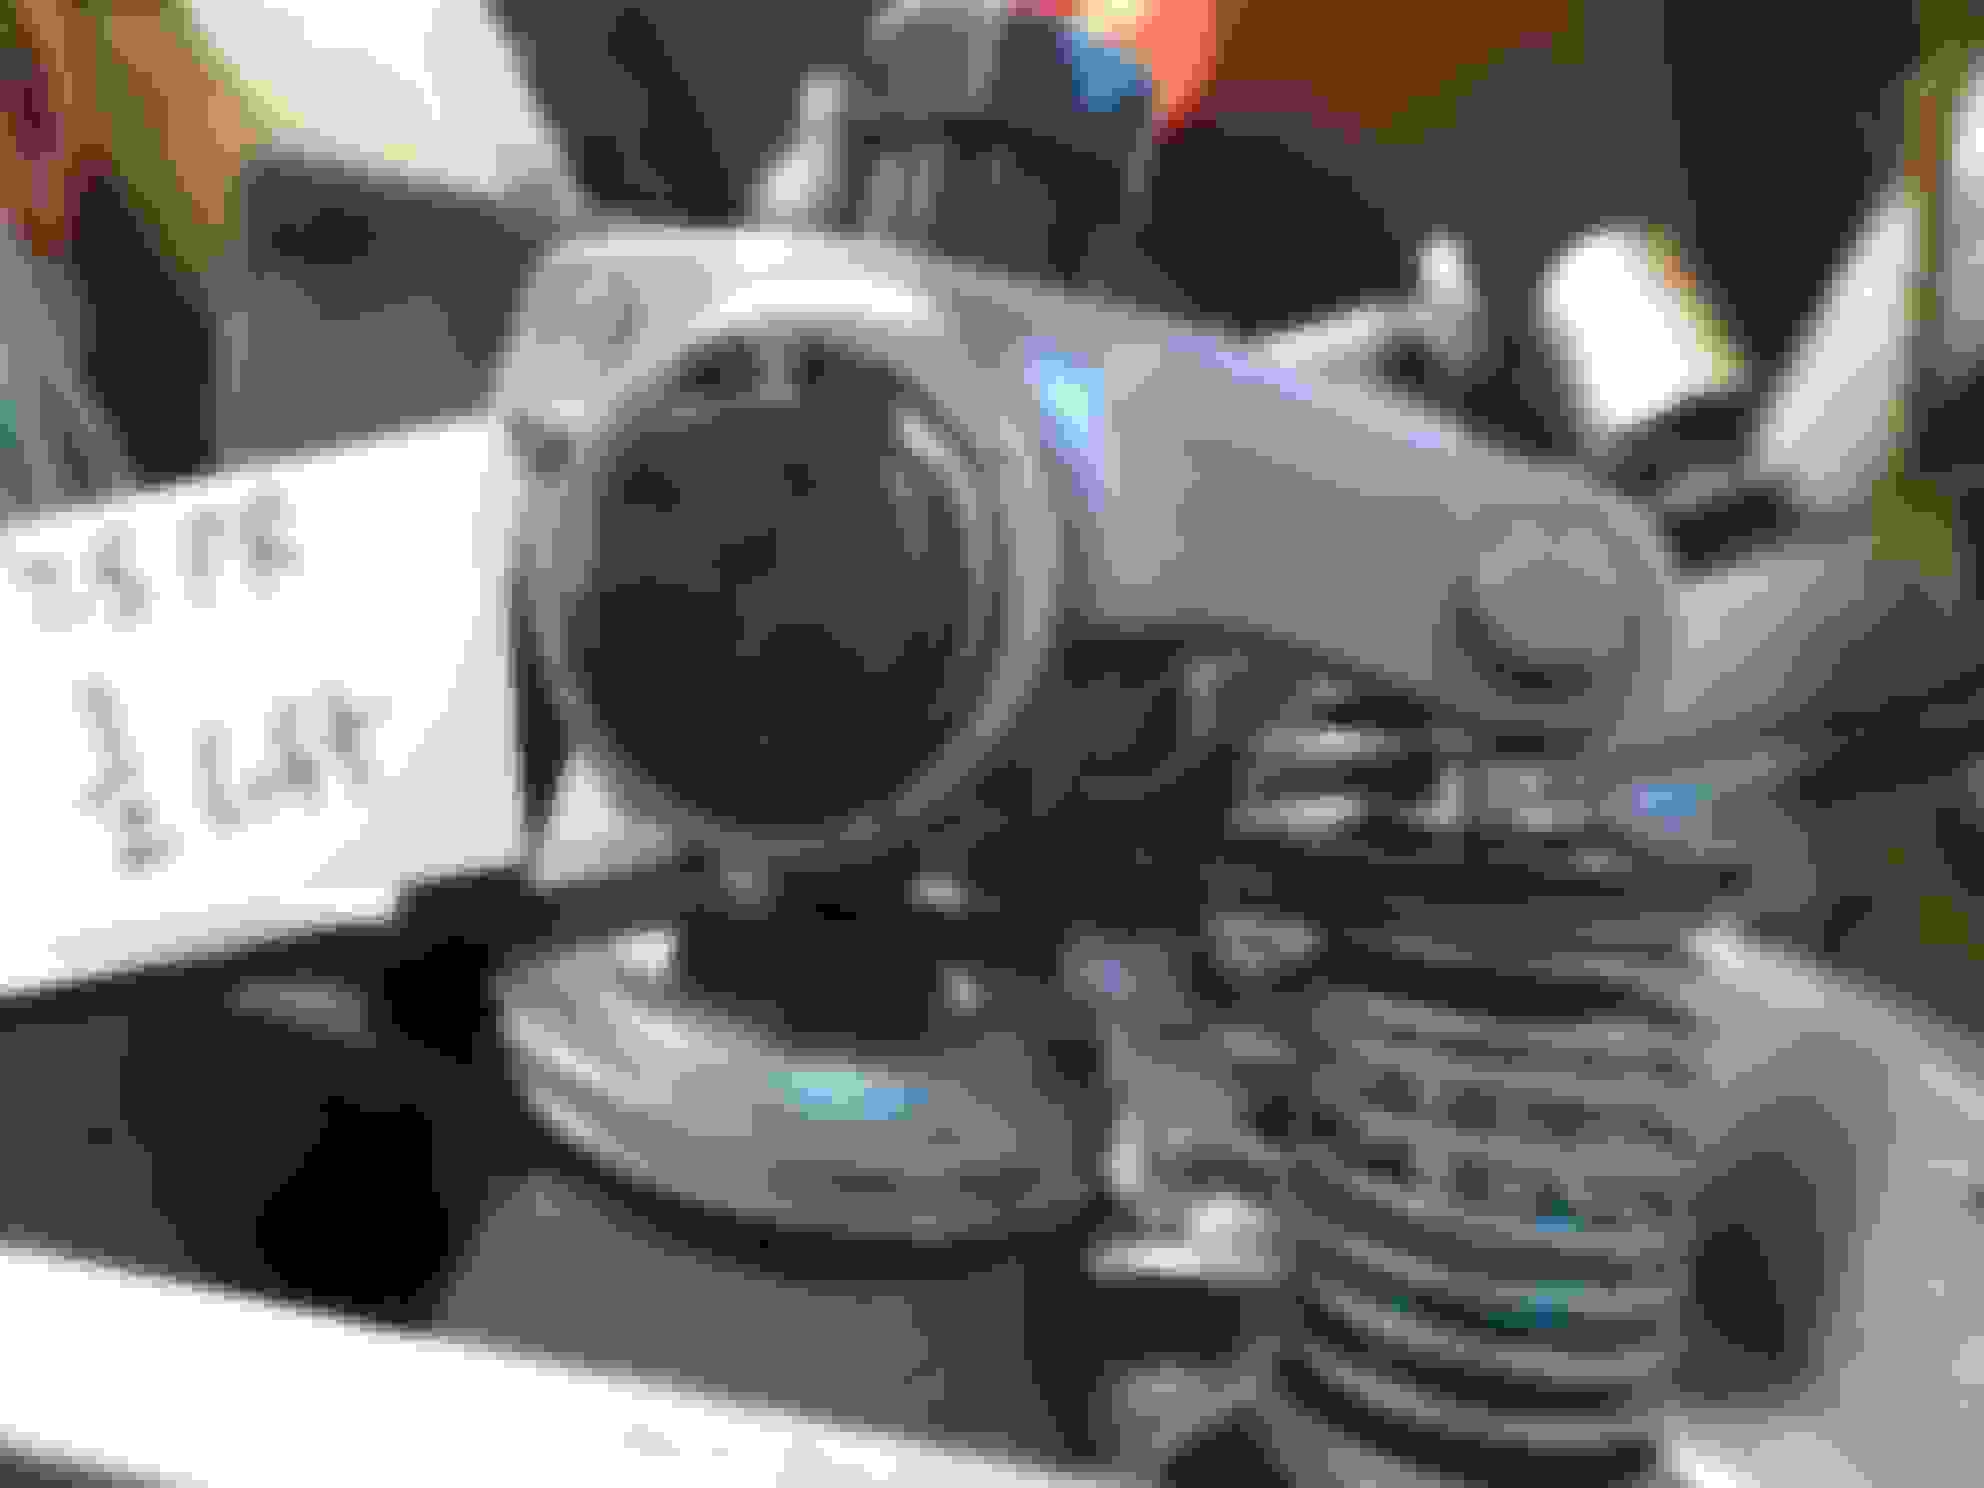
And here is my short block.
Another view
I have close to 50 hours into assembling this short block. You can not rush this. I m so glad I waited and ordered a new bore gauge. It set me back a pretty penny, but boy would I have been off if I trusted the plasti gauge. Everything is dialed in, the crank spins so nice and free. (before rods and pistons) I also installed new cam bearings. It too spins and feels VERY nice.
Next weekend is paint, new freeze plugs (which have nothing to do with your block freezing) Think about it, if your block froze enough to pop out the freeze plugs.... I think your block would crack. They are there so that the foundry's can remove the sand after they are poured and cooled. oil pump and new pick up, canton pan, timing cover, button, and much more. Then I can start with the top half assembly. I would like to get to the dyno by the end of the month.
A big thanks to
Skinny
MSgt Luttrell
and anyone else who chimed in on my other thread.
Good deal! Glad to see it getting closer to roaring to life!
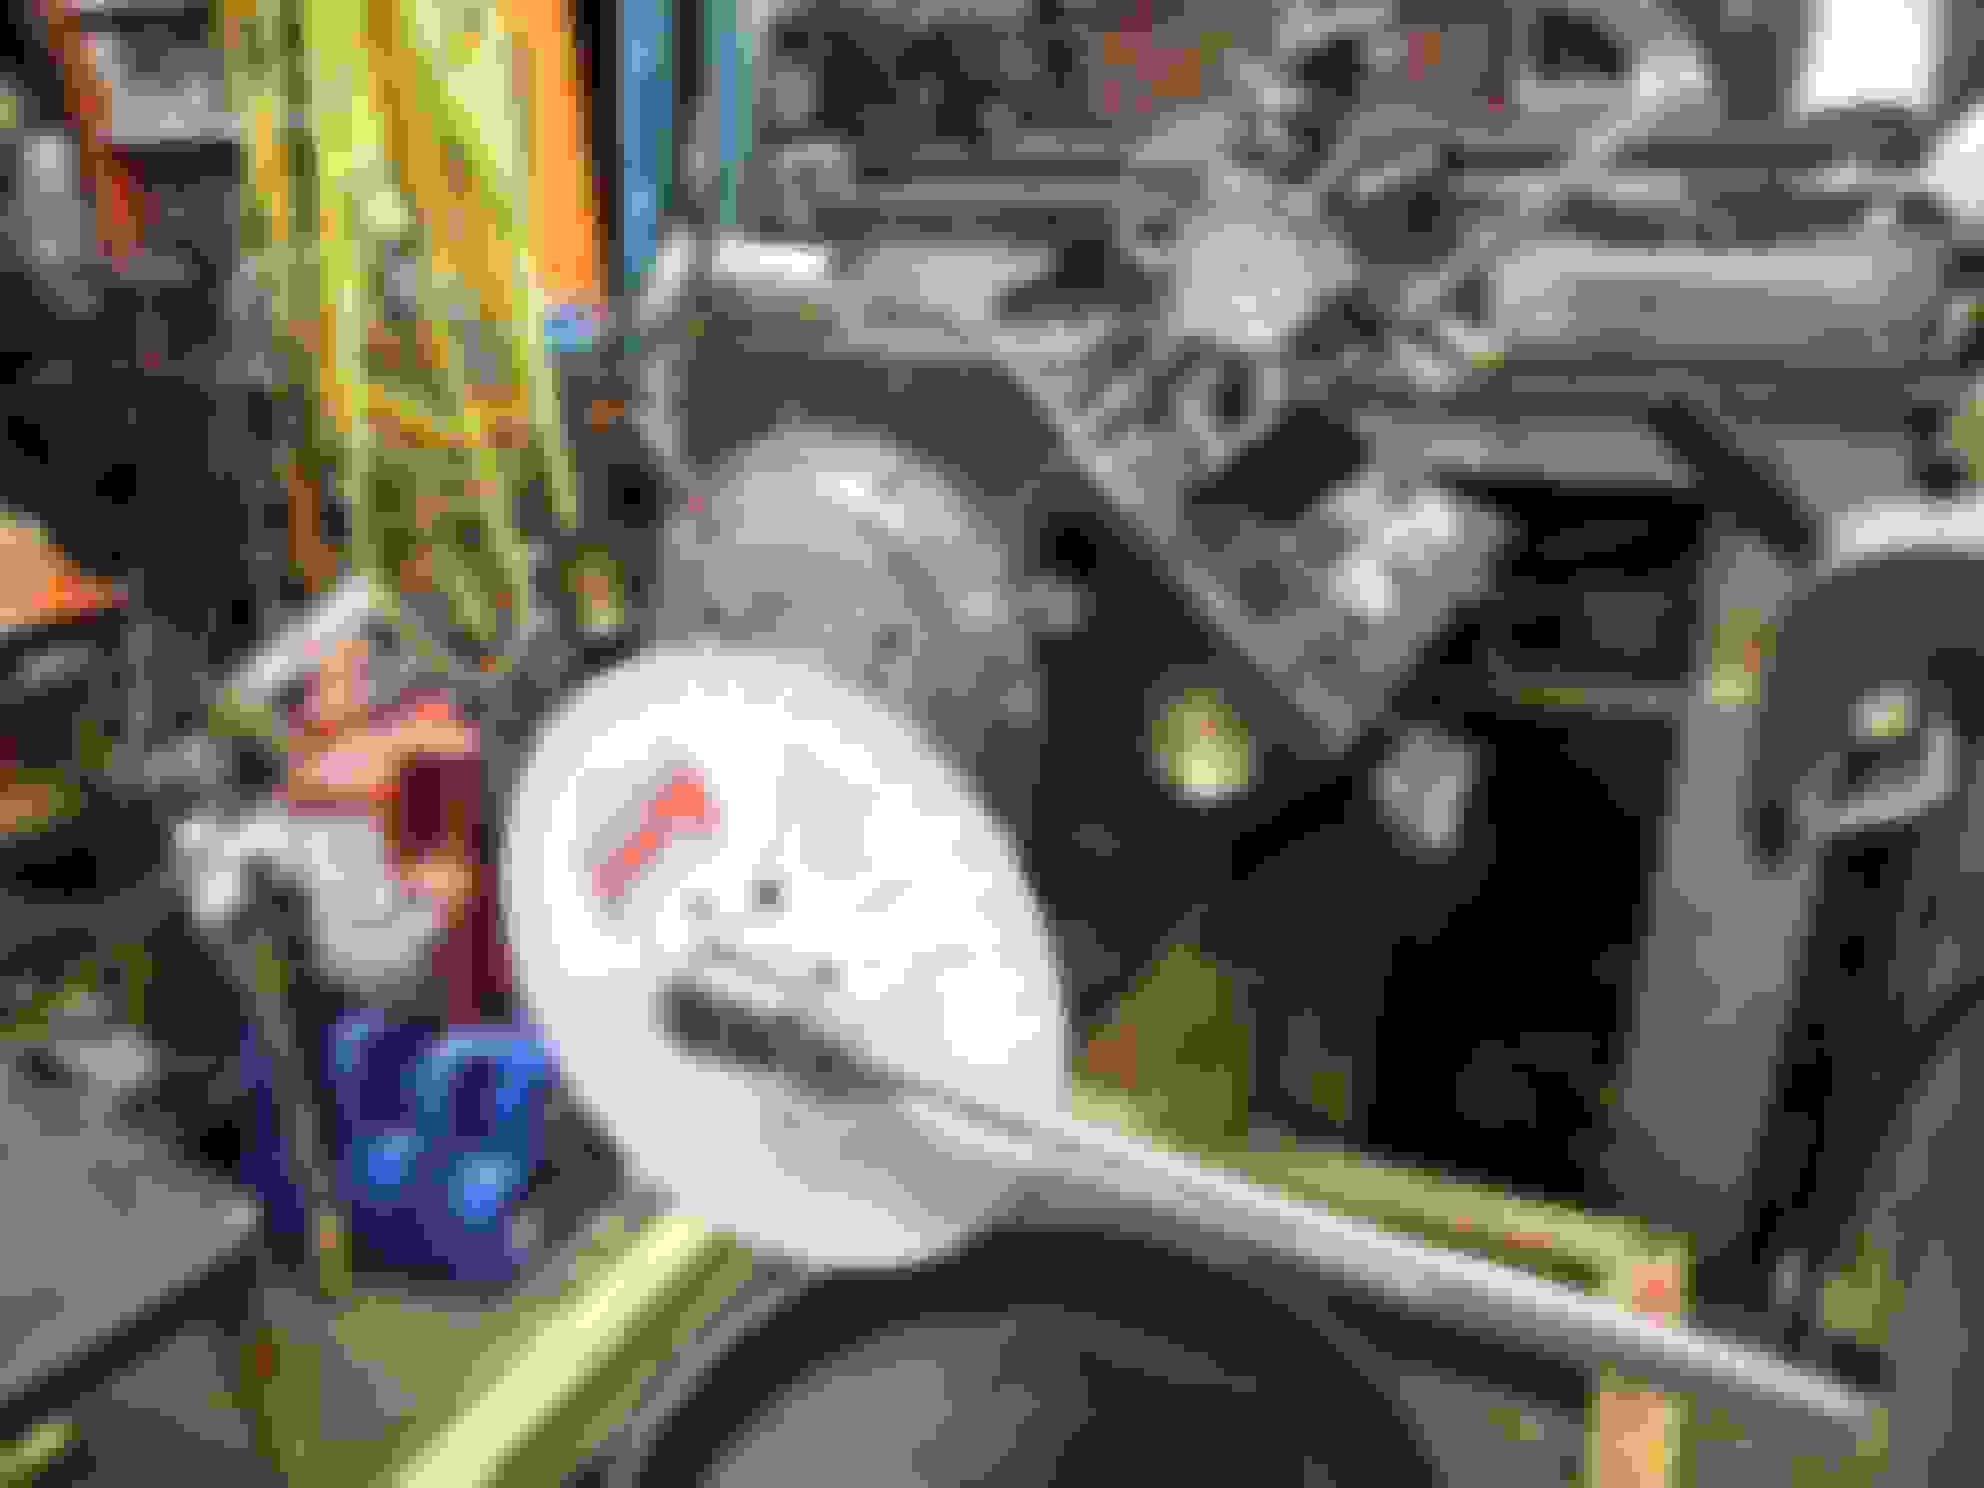
I know right??!! The next big fitment issue I think I could have, 50/50 is will the intake fit on the heads being they were decked .064. I think before I do anything else I am going to set the gaskets on, heads, and see how the intake lines up. Second biggest fitment will be rocker geometry and setting that up. I'm just glad the bottom half is together. I want to get the pan on also so it an some what be sealed up. It has rained a boat load up here in mn and every time I turned around there was crap in my cylinders. I've gone through a case of brake cleaner. Once this shop is mine, I will have a clean room. You must have a clean motor during assembly as your well aware of.
66cc heads, has .039 milled, I'm .010 in the hole. 10.8 and 8.07. I still want to cc my pistons. Some say 5 some say 6 cc's. I got a syringe that I used for cleaning my holes out when I had my wisdom teeth removed so I am going to see what they are, roughly. If they are 5cc I will be getting up there for pump gas, 10.92 and 8.16. If I have to run better octane I will I guess. But lots of ppl I talk to run 11:1 on pump gas. More pics and updates this weekend.
I would say that 8.16 DCR with an aluminium head is very workable with pump gas. The SCR is really irrelevant except when working out your cam profile. You may even find that regular grade fuel will work although for the small difference in price, I'd use premium gas as a hedge against detonation. You should be able to run a full spark curve with that CR. Lots of advance (mechanical and vacuum) for the lean fuel trim at cruise that'll get some respectable fuel economy numbers too.
Last edited by skinny z; 09-15-2016 at 10:28 AM.
Reason: irrelevant instead of relevant...
I think there's alot to be extracted from the last of the 3rd Gen ECM's. I'm choosing the 7730 used in 1992 Camaro's along with the EBL P4.
It is batch fired, but I chose a 292XFI for my build which is a grind that requires EFI. Also it is the cheapest ECU setup with tons of support here.
Right on. A coworker actually just told me today that he has 4 3rd gens and has a complete holly efi set up he wants to sell. 36 or 42# injectors. Brand new. Only thing is its 7 years old. I'm not familiar with efi at all so I'm not sure if that would be a good system to get. I will have to do some research.
Block is painted, freeze plugs are in, took oil pump apart to inspect. Went to install timing cover but my bolts arn't long enough or pretty enough. I call the local part's stores and ask if they sell any "ARP" bolts. Guy who I talk with says, "who?" ARP I say. "Never heard of them" he says.... OMG. I wanted to hang up but this humble feeling rushed over me. Other thoughts were flooding my head as well, like, you work at a parts store but never heard of arp.....??? Dont you watch any type of racing or any shows of that nature??? Then he proceeds to ask me for the year and make of the engine. Oh man... I laughed. Its a gen sbc I tell him. Silence for about what seemed forever. I tell him they are all the same from the late 60s to the 90s. Anyways, long story short, I tell him forget it, they are 1/4 20 by about 3/4. (what I need) and he says they have bolts that I can come look at. lol.
So today is a new day and I am going to run to the local hardware store, (prob get ripped off) but I am going to run Allan bolts, stainless, for both timing cover and oil pan.
I decided to spray it black again and went with VHT. I have read that black paint helps dissipate heat better than other colors.
First coat of primer. The paint seems to lay down pretty good.
Final color. Went with 3 coats of primer and 3 base coats.
All cleaned up and painted.
Starting to replace freeze plugs.
Finished freeze plugs. These were fun. Ive done many and was able to tip them over and grab with a vice grip. These wanted to go straight in so I had to drill a 3/8 in them and pry them out with a special pry bar we have for replacing tires on small tractors and such. .
Fuel plate painted and engine mounts back on as well as oil pan installed. Pretty decent pan. Few things I didnt like. One, it was FULL of metal shavings and two, the bolt holes on the pan rail are so close to the radius that the corners of the bolts rub against it slightly. I was going to run all allen bolts but the hardware store only had enough for the timing cover. I decided on stainless std 1/4, 3/4 inch long bolts. I however was very happy with Cantons 1 piece oil pan gasket.
Another angle
Another angle. Need to get a oil temp gauge. Will prob plug this hole in the mean time.
I also checked the cam with my degree wheel. Built my own piston stop and took apart a old hyd lifter and shoved a solid 5/8 steel rod, 4 inches long in it so I could get my indicator straight and parallel with it. I forgot to take pics of that but need to check the exhaust side yet so I will get some then. I wanted to get the lower end sealed up and was running out of time.
Looks a lot like my shortblock. Cloyes timing cover with the requisite Allen bolts. Canton pan, although I went with ARP hardware for that.
Don't rush. You know that you'll come across something that'll take a big bite out of the time budget and all of the rushing was for nothing. I've been putting mine together since last Christmas!
Look for a build thread near you.
Alright, Rings are on pistons, Pistons are in holes.
I check both rod bolt stretch and use a angle gauge. Measure the bolt first, torque to 30ft#s, then 60*, measure bolt for stretch. If you can read my chicken scratch you will see I achieved .0065 stretch on all rod bolts. Spec is .006-.0064. I think I am close enough. I also did this when I checked rod bearing clearances using rod vice.
And here is my short block.
Another view
I have close to 50 hours into assembling this short block. You can not rush this. I m so glad I waited and ordered a new bore gauge. It set me back a pretty penny, but boy would I have been off if I trusted the plasti gauge. Everything is dialed in, the crank spins so nice and free. (before rods and pistons) I also installed new cam bearings. It too spins and feels VERY nice.
Looks good. Rod bearing clearance could be a little bit tighter but being loose won't hurt anything.
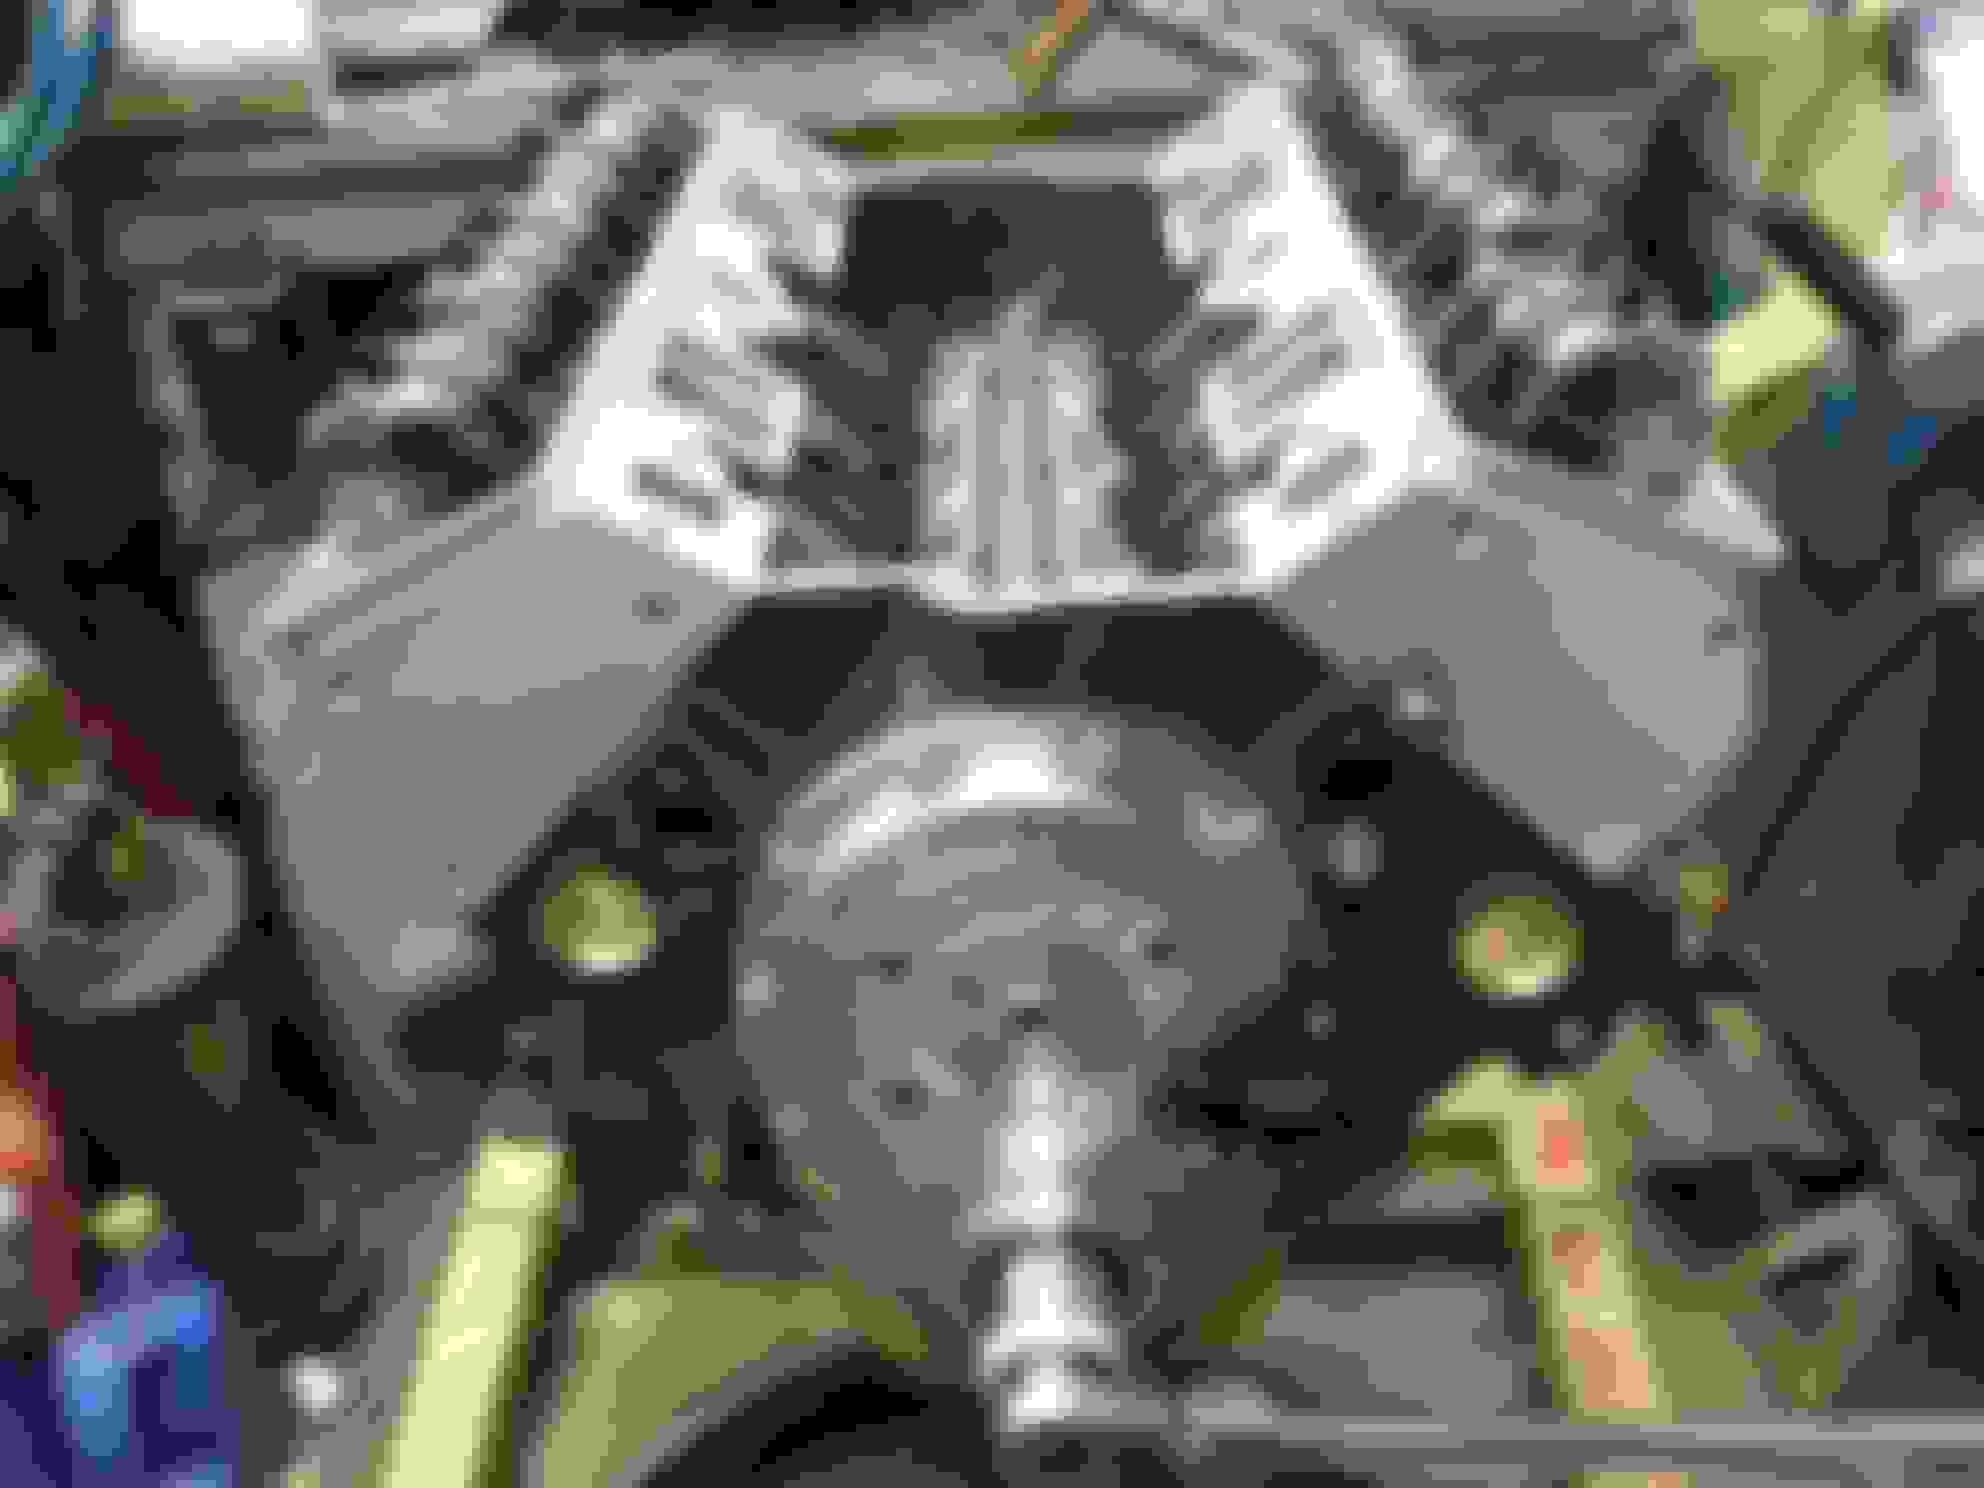
Functional too. The built in thrust button makes short work of adjusting cam end play. Chances are I'll end up using the access cover to pull some advance out my current setup as well.
curious on why you didn't have the block surfaced, and also why not a roller cam block?
Block has been surfaced, and leveled. It has also been trued up as in both deck surfaces are the same distance from mains. This is the same block from my first 383 build I did years ago. Motor has maybe 2000 miles on it. It has sat for a long time. It was crazy how far off the deck heights were. I believe the right side we took .015 and the pass we took .008 or something to achieve a .010 deck height on both banks.
I am using the same retro comp roller lifters from first build as they are like new although I am kicking the idea of getting some new howards or something. But prob run what I have.
Functional too. The built in thrust button makes short work of adjusting cam end play. Chances are I'll end up using the access cover to pull some advance out my current setup as well.
What are you setting yours at? I've read .005-.010, but I've also read that the aluminum will expand and to set it at zero cold...? What are your thoughts?
I love it! Its thick and sturdy. It does call for longer bolts. I went with 3/4 inch long. Had no problems with them being too long. Easy to adjust button too. I just need to figure where I want it. Ive read .005-.010 clearance but also read to set it to zero cold. As engine warms up the aluminum will expand and give some clearance... idk. Need to do some research. I am a bit curious as if I am going to have any water pump or damper clearance issues.
Zero cold as per the Cloyes instructions. That cover was on my last engine and went thousands of miles with no ill effects that I could determine after a tear down.
If you look careful in post 4, 3rd pic, you can see that I stamped the block, .010 up on the china wall, when I machined it years ago. Also, when I was painting it, I found a DJ stamped in the casting where the fuel pump goes. I vaguely remember doing that. I do remember we were having issues with people stealing stuff from the class so the teacher told me to stamp the block where only I would know. Man that brings back memories. I was the only person in the class to build a engine. Sadly, I was the last year they offered automotive machinist at HTC.
Also no interference issues with either a cast iron pump or an aluminum replacement.
Same is true for my ATI Super Damper.
Good to hear!! Yes, thats what cloyes says. Another good to hear!! Although its easy to set. I do like that cover.
Say, so sense my cam has a 110 lobe sep, and my intake cl is 106, and exhaust is 114, that means my intake is 4* adv and my exhaust is ret..? Right? or wrong? Wont that make it hard to do all the checks when I degree it? I checked some yesterday, but want to check the duration and a few others too.
I didn't go so far as to check individual lobes. I only checked the ICL on the number one cylinder and I used the intake centre line method for that. I wanted my cam in at 4 degrees advanced. That's in addition to the 4 degrees ground into the cam itself. So my 106 ICL on the cam card is now 102 with all of the other cam events following suit. All of the events are advanced in this case, including what happens with the exhaust. When you measure yours, you'll want to zero in of the intake centre line. If you wish to measure the ECL, it's simply the ICL plus the LSA to verify. Depending on the degree wheel you use, the math can become a little convoluted but it's still simple math.
Figured out what I was doing wrong with measuring my cam. So all that checks out. I confirmed CL#'s, Duration, Valve events, and lift. Prob over kill as My cam guy checks and verify's everything he makes with the cam doctor. Now on to what I was doing wrong..... And I should have known better I might add. I was using a solid flat lifter I made. Yup. Funny how it worked for the CL#'s but nothing else is what I kept thinking, with-out thoroughly thinking about what I was doing. The foot print from a flat lifter on a lobe is much different that a footprint on a roller as I'm sure many of you know. So with some guidance from cam guy, and I'm sure a "eye roll" I was able to figure it out.
Now onto PTV clearances. I went to napa and picked up some sealed power roller lifters that I am going to take apart and turn in to solids, so I have in future. Guy that helped me was pretty cool. I told him what I was up to and he went off and said he has a box of lifters we can look through. He comes back with this box, maybe 18"L x 10"W x 2"T. Sets it down with a clunk resembling weight. Opens it up and in front of me are 120 roller lifters for a gm roller block. I laughed. He said some guy who worked there before ordered "One" lifter for a guy with out checking quantity or price. He ordered a bakers dzn at 800 bucks. Retail value 1600 bucks. Anyways, the guy proceeds to tell me, I will give you a deal if you buy a bunch.. LOL. Long story short I bought 4, Remember they are soley for me to dissect and to turn into tools, a quart of QS 5/30 and some bits for my cordless impact for 40 bucks. Not bad. I took a pic of the box of lifters but forgot to save it.
So today after lunch with my family, I am going to check PTV, hopefully that will go well, install heads.
Then the next big thing is rocker geometry. I know on my past build I had it right on. Now these heads have been shaved .064. So I will have to figure out what all changed up top.
Then the next big thing is rocker geometry. I know on my past build I had it right on. Now these heads have been shaved .064. So I will have to figure out what all changed up top.
Remember, VGT requires that you must use the same lifter that you intend to run when you've completed your checks. Either that or you must ensure that the pushrod seat height is identical between your test lifter and your running lifter.
Do you have an adjustable pushrod?
Originally Posted by -=Z28=-
Now onto PTV clearances.
What's your preferred method of checking PTV clearance?
Yes, sure do. I used both methods. Indicator method but that doesnt tell you your radius clearances. So I used clay too. I have PLENTY of clearance. Thinking about going 1.6 on rockers now. (Have plenty retainer to seal also) I believe I have over .250 on exhaust and around .160 on intake.
Checking cam. Ended up getting a roller lifter from napa and converted it to solid so I could check valve events and PTV.
Here you can clearly see that I have plenty of clearance, both from the radius and the face of piston. I believe I had over .250 You can also see my quench. Measured right at .048. So after gasket is crushed, I will be right around .038
Here you can see the intake clearance. I had over .160 at its thinnest place.
Driver head set in place. I am really digging these 26918's. I do have a set of pac's 1218 I got for a good deal in case they dont work out or I dont like. But so far so good. I could easily go to .600 lift if I wanted. Plenty if retainer to seal clearance to boot.
Both heads installed and torqued down in 3 steps. 25-40 and a final of 65. I put arp thread sealer on threads and their torque lube under washer and bolt head per arp recommendations.
Most rockers are just set in place. I set up #1 and checked geometry.
Side to side they are darn near perfect.
Shaving .065 off the heads improved the position of where the roller sits on the valve face. this is at zero lift, if you draw a straight line from roller pin to valve face, you can see it sits just to the inside. at half lift, it is centered and full lift, just to the outside. Also when valve is at half lift, the rocker is 90* to the valve. Will work for me.
Another shot.
I did run into a small problem. A few of the poly locks, I must of missed on first build, are very sloppy. They almost have so much wobble that they feel like they can skip a thread. So I am in the market for a new set. The threads on the stud look great. On inspection of nuts, it looks like they were poorly made or the tap was going bad. No signs of wear, just really bad machining. I'm open to suggestions for brands people would recommend. Arp are pretty spendy but I DONT want these to fail. Which these few defiantly would have.
So while I shop around for poly locks, I am going to set the intake on and tear apart my carburetor and give it a once over. I have a few other things I need to check out as well.
Skinny, Do you have a oil temp in your pan? What hole did you use? The one on the filter side? 22mm right? I cant find a sender that has a 22mm thread. I may buy a plug and machine my own, tap it for 1/8 or 1/4 npt. Only thing is I dont want it sticking out too far....
While I use the mid-lift method for checking the VGT, the end result is still to get narrowest sweep across the tip of the valve. The position on the valve tip is secondary.
I was able to get my sweep to less than .030". At mid lift, the rocker axis' (the line drawn through the trunion and roller tip centre lines) are 90 degrees to the valve stem. Anything other than this and the geometry isn't right. I can't tell from your pictures.
Did you use your made up solid roller for checking?
As for the temp sensor, I used the drivers side opening on the side of the pan. It's 3/8ths NPT like the cylinder head.
Yes, I used the solid roller and my hyd rollers I am using to check. I have some super weak springs I put in the head so that It did not compress the plunger at all. Both ways gave the same results.
I am very happy with my rocker geom so far, I actually forgot to check the sweep I was so excited that everything else turned out good and noticing my locks were bad. I will check the sweep tomorrow after work. Yeah, last night I was watching some vids on rocker set up and as soon as I saw the blue ink on the valve tip, I thought, Oh crap, I completely forgot that. I believe it was the combo of the poly lock and how well everything turned out that it slipped my mind. I agree sweep pattern is crucial, but position is almost as important as you stated. If its off to one side, guides will take a tole as I'm sure you are well aware of.
In reguards to the sensor/ oil pan, To be clear, You used the hole that comes in the side of the pan next to the oil filter on the drivers side? Also, did you stick the dip stick extension/guide in the bottom of the block or did you not use that? I've noticed on several sbc builds, that many dont have it pressed in the bottom of the block. I assume its to keep the end of the stick from hitting the rotating assembly. My first go with this block I didnt have one in and never had issues.... But the dip stick kit I got came with one. Its pretty cheesy so I'm debating on using it. Also my pan is installed.... lol.
Yes, I used the solid roller and my hyd rollers I am using to check. I have some super weak springs I put in the head so that It did not compress the plunger at all. Both ways gave the same results.
The thing to consider here when measuring VGT is the seat height of the lifter. It isn't possible to get the same results with two different lifters.
I'm guessing though that you have that figured out.
Originally Posted by -=Z28=-
I am very happy with my rocker geom so far, I actually forgot to check the sweep I was so excited that everything else turned out good and noticing my locks were bad. I will check the sweep tomorrow after work. Yeah, last night I was watching some vids on rocker set up and as soon as I saw the blue ink on the valve tip, I thought, Oh crap, I completely forgot that. I believe it was the combo of the poly lock and how well everything turned out that it slipped my mind. I agree sweep pattern is crucial, but position is almost as important as you stated. If its off to one side, guides will take a tole as I'm sure you are well aware of.
I'm not sure how much you've studied this aspect of setting up a valve train but what I can tell you is what I thought I knew, only led to ruined valve guides inside of about 5000 miles.
For what it's worth, and feel free to dismiss this if you've been there and done that, is that the idea of "perfect" VGT is to obtain the smallest/narrowest sweep across the valve tip as possible. Not centred as in from intake side to exhaust side, but the smallest amount of travel in that direction as possible. That means that at mid lift...well, I posted the target earlier so I won't repeat it. Settling on the middle of the valve stem (not front of the engine to the back but from intake side to exhaust side) isn't the real deal here.
Originally Posted by -=Z28=-
In reguards to the sensor/ oil pan, To be clear, You used the hole that comes in the side of the pan next to the oil filter on the drivers side? Also, did you stick the dip stick extension/guide in the bottom of the block or did you not use that? I've noticed on several sbc builds, that many dont have it pressed in the bottom of the block. I assume its to keep the end of the stick from hitting the rotating assembly. My first go with this block I didnt have one in and never had issues.... But the dip stick kit I got came with one. Its pretty cheesy so I'm debating on using it. Also my pan is installed.... lol.
-D
The oil pan hole I use is drivers side, on the side, adjacent to the oil filter. It accepted the same sensor as I used in the cylinder head. Pretty sure it's 3/8ths NPT. I won't be home home for a week but can take pictures if it helps at all.
I used the OEM dip stick configuration. Drivers side extension out of the block between cylinders 5 and 7. 6 litres equals full.
For what it's worth, and it seems apparent from your posts that you know what you're doing, I like to spread the technical word to anyone willing to listen. Here's a link to a paper written by Jim Miller regarding valve train geometry. If you've read it already, great. If not, you may find it very enlightening. The problem with incorrect geometry is that it doesn't demonstrate itself until after the engine has run a few thousand miles. By then, the guides are smoked.
FYI: http://www.aera.org/technical-articles/rocker-geometry
Sorry to interrupt VGT, so very important, but what really bothers me are those 'beehive' springs. What if one of them breaks? You're up sh*ts creek! Read so much, people prefer dual due the fact if one spring fails, you will notice a difference in performance or sound, before total engine failure.
Interesting point however the intention of a dual spring is not to provide a measure of safety in the event one spring breaks. It's to provide the requisite pressures needed for the cam selected. That said, if the primary spring breaks to the point where it's completely useless, it's doubtful the secondary spring will have the necessary tension to keep the valve under control. Does that not make sense? Following that thinking, if a single spring fails completely, you're in much the same boat. However, breaking to the point of allowing the valve to drop completely would be a rare occurrence. A bent valve, sure. Engine failure...I guess that would depend.
Just my thoughts on the subject. For what it's worth, we have hundreds of thousands of miles on several engines with the 26918 without a single failure.
...
Just my thoughts on the subject. For what it's worth, we have hundreds of thousands of miles on several engines with the 26918 without a single failure.
Just something to consider. I forgot what cam the OP is using. I choose a 292XFI for my 383 build. The lobes abuse the valvetrain, so I posted regarding valve springs along those lines...
So anyway, great link to Valve Train Geometry. Worth reading and re-reading and re-reading.
Worth considering for sure. It may be too that the 292 is beyond the limits of the 26918. I'm running the 288 with 1.6 rockers.
As for the VGT article..I couldn't agree more. I've put together a small jig that allows me to measure without even rotating the engine. The only reason I put it through a few cycles is to check the intake to exhaust side positioning. The sweep is measured statically and can be adjusted to within a very precise amount. I'll never go back to the traditional method.
For what it's worth, and it seems apparent from your posts that you know what you're doing, I like to spread the technical word to anyone willing to listen. Here's a link to a paper written by Jim Miller regarding valve train geometry. If you've read it already, great. If not, you may find it very enlightening. The problem with incorrect geometry is that it doesn't demonstrate itself until after the engine has run a few thousand miles. By then, the guides are smoked.
FYI:
Skinny, I so appreciate the info and help as I have been out of the game for so long and MANY things have changed over the years. Most engines we repair and fix here are inline 6, diesels/ gas that are not high performance.
Having said that, I too have been reading a lot on VTG the last few days and am defiantly going to correct a few things that have learned and updated my knowledge on VTG. I have adjustable PR's so why not... I even found a set of super light springs to help set up.
The problem I am finding with all this new info, is much contradicts one another. And Most of it is speaking in regards to 7500+ rpm and shaft mount styles strictly for racing or high rpm's for a long period of time, such as with boats or endurance style racing.
[QUOTE=skinny z;6080963]The thing to consider here when measuring VGT is the seat height of the lifter. It isn't possible to get the same results with two different lifters.
I'm guessing though that you have that figured out.
When I used both style lifters, that was only for checking PTV and compressing the clay. Not for VTG.
In regards to VTG, I am going to give that a whirl. Its similar to the 90* at half lift with checking springs, but instead using the pr side to set it half lift below center of rocker line. So I am going to find center by adjusting pr. Measure pr with my caliper, Subtract half my lift from that and adjust pr. That should be my length of pr. Only thing is how do you confirm that if you arnt supposed to use checking springs, and knowing that if checked with running springs, they will compress lifter? I really dont want to take apart one of my good lifters and turn into solid...
It would be really nice to be able to run vtg through its motions to visually see its right. So, I am going to do above, and check motions with wimpy springs.
This would be interesting but it would be at the expense of your time and effort.
Try it your way. The try it the mid lift way.
With the latter method, you need a reference plane (as I've described in earlier {and multiple posts!}) because the retainers we are using don't have a convenient flat surface to measure from (assuming you have the same profile retainers as I do for your 26918 springs although mine are the tool steel version for the weight savings). You can use your running springs for this as no cycling is needed. The rocker sits loosely on the pushrod and valve and measurements are taken with lifter on the base circle. You want to triple check? Try the same method again but with the checking springs. I would really interested in seeing that although I don't expect you you to go to all of that trouble.
Another word of caution and this is in regards to measuring your pushrods with your calipers. Not all manufacturers measure their pushrods the same way so beware. Someone's 7.4" is not necessarily someone else's. I use Comp's adjustable pushrod and the length is marked on the pushrod itself. I then order Comp pushrods so there's no confusion.
As for the wimpy springs, I still use them to cycle the engine and observe the witness marks. It's very plain to see how much a difference .050" makes if nothing else. This is how I concluded that I needed Crower's backset rockers.
It would be a lot simpler if we had solid lifter cams wouldn't it?
Or shaft mounted rockers.
Most defiantly it would be. And I'm listening to ya!! Definitely not falling on def ears.
I am planning on doing the "mid lift way" and boy am I glad I dug into VTG deeper........
So, I set the rocker on the stud, Lightly put the posi lick on, turn and a half, and bring the rear of the rocker up to obtain a line through and across the rocker and 90* to the valve. (yes, my retainers are small so I need to rig something up as you showed me.... a couple times... ) And low and behold.... I cant lift it high enough. Well I can, but the threads on the rocker stud are 1/4 inch down inside the trunnion. So now I need to get new studs. Currently they are, Dart's studs, 3/8 24 stud, 7/16 14 base, the rocker nut thread length is .935, The effective stud length is 1.535, and base thread is .685. Part number, Dart Rocker Arm Studs 27002101. I need them to be at least a 1/4 inch longer if not closer to 1/2 inch longer.
Now what to do...... Go 1.6 rr and update to a 7/16 stud? Either way I need new studs. Well longer ones and that brings one image to mind. Broken studs. I have never had this happen before but T = R x P. So the taller they are, the more likely they are to break. Honestly I dont want to spend 300 more bucks on rr.... Waaa I know..
I guess my biggest concern/question, is, how tall of a stud has anyone gone with a 3/8 stud? Do I need to worry about it sense my spring pressures are not high?
What brand should I get? Looking at arp, comps, they all have several lengths to choose from.
Should I go 1.6 RR and go to 7/16 stud up top too?
A few thoughts.
First, I was beat on the head until I finally went to 7/16ths studs. That was after a broken 3/8ths stud.
Second. Using the mid lift as described by Miller, a rocker nut isn't necessary for measuring. Keep that in mind for a moment. Now during the course of your measurements, as you approach the optimum pushrod length, the contact point on the valve tip invariably approaches the exhaust side. Sometimes to the point of going off the edge. Engine assemblers tend to bail out before that happens and compromise with a shorter pushrod. This obviously leads to problems down the road not to mention decreased performance. And a measurable decrease too. Now, if that's the case with your engine, you have the option, as I did, to use a rocker arm whose trunnion mounting hole is offset towards the intake side of the head. The result is the contact patch being moved back across the head and this allows increasing pushrod length without the issue of the roller tip running off the valve. Now, you can decide on 1.6 and 7/16ths rockers along with the backset.
At the very least, using the mid lift method, which doesn't require a rocker nut, you can determine the correct VGT and go from there. At least a decision doesn't have to made right now. Also keep in mind, that the rocker arm selected will also change the VGT. The VGT and the required pushrod has to be determined once all of the components have been selected.
Round and round we go.
Talked to my machinist and he says with my spring pressures, a good quality 3/8 will be fine. And to make sure that the pivot point is not on the threads. Even if that means longer studs. This engine will be capable of high rpm's, however it will be spending most its time in the idle to 5000 range.
Today I am going to take another look at what length stud I need and get them on order and try to establish a push rod length.
Yes, the roller tip sure does encroach the exhaust side, but from what I've been reading, when proper pr length is established that even if closer to the exhaust side, it really shouldn't hurt or be a issue. As long as its not way over to the exhaust side. From how it is now, it can only get better is my understanding.
I spent some time playing around with my VTG, Starting off finding 90* @ half lift push rod length. This came out to be 7.6". Now the roller tip was way to the exhaust side. So knowing I would have to come towards the intake, I simply started shorting mt adjustable PR by .100. I continued logging sweep location as well as sweep width with my main focus at being as close to 90* at half lift but w/o being too far towards the exhaust. I came up with some pretty interesting results.
First, I established half lift. You can see I will be needing longer studs...
Then I adjusted my pr until I reached 90* to the valve. I then did some basic math to figure how many turns on the poly lock to get me down half my lift. I started with a 7.6" pr.
This is where that got me. Too close to the exhaust side. I still ran through the motions, closed, half, open to see and also record my sweep marks.
Here is half lift. Finding out that when 90* to valve, you dont achieve much sweep.
And full lift with 7.6 pr length.
Here is the sweep with a 7.6 pr.Measured to .035
I went to 7.5.
Still pretty darn near 90* to valve. This is the optimum pr length for my set up. I am in the market for 7.5 +/- . I havent found many that length but havent looked that hard.
Full lift.
Here is the sweep. Not too darn bad. Measured out to be .022.
It was hard to stay still.
I continued to shorten the pr until I reached 7.3, which is what I currently have by Trick Flow. The numbers, sweep and being 90 to valve just got worse.


 09-12-2016, 08:17 PM


 You must have a clean motor during assembly as your well aware of.