When you click on links to various merchants on this site and make a purchase, this can result in this site earning a commission. Affiliate programs and affiliations include, but are not limited to, the eBay Partner Network.
My old rad simply broke up a week before easter, while we were waiting in the Burger King drive thru and the engine went up to slighty below fan engagement temperature.
We drove to a nearby parking space and I had a look under the hood.
The temperature dropped back to normal operating temps again and there was no visible leak, so we decided to head back home before the rad possibly drained completely and stranded us there.
I decided to go with an aftermarket "Vista Pro" radiator, even though a Delco would have costed me slightly less including shipping than the Vista Pro had cost me locally.
The reason was that I needed it fast and I did not want to take any chances with it arriving damaged and having to send it back over such distances.
So what do you do when you can't simply flush your cooling system and can't get anywhere to properly do so?
Well, you don't do it like I did.
My thought was to drain the rad, replace it, fill it up with clear water, mix old and new fluids, redrain, refill, and so on... until only clear fluid remains.
Great idea, results suck!
Remove your thermostat and it may work better for you.
In the end I got the fluid down to a thin green tone, but never completely clear.
I used a small pump and a hose to get the fluid out of the old radiator using suction and gravity, which took tiiiiiiiiiiiiiime... so much time.
To get the rad out, you need to remove the rad cover and fans, then disconnect the hoses and transmission cooler lines.
The fans are each attached by one bolt above and two below them.
You then have enough play to get at those power connectors.
Have fun breaking your fingers while disconnecting those
Move the cords out of the way to improve access to the hose clamps later on.
I managed to disconnect the upper transmission line, heater hose and the upper radiator hose.
Not much fluid coming out of these and it's quickly done.
Getting the lower hose and line off was a totally different story.
Someone must have clamped that hose from beneath the car and I was certainly not going to jack that thing up with the winds going at the time.
It turned out that I wouldn't have achieved anything else that way, either.
I had a separate thread going on about that seized transmission line nut, which I finally got loose with a monkey wrench.
Getting new lines next week, by the way.
Anyway... I had to go for the water pump end of the lower hose and had quite some trouble pulling it off.
Also, try to fit ANYTHING under this car to catch fluids!
Finally did have to jack it up, but only to get the bowl back out.
By the way:
Anyone doing this should check (and fix) his radiator support before it's too late.
Not sure how I'm going to approach this.
For now it's well preserved with transmission oil and cavity wax.
So how did I manage to get the lower rad hose off?
I'll just let this picture explain that one
The next day I installed the new radiator, got some new clamps for the hoses and began my improvised flushing procedure. Hey, free refills! Kinda.
That sucks .When my radiator cracked I hat a gheto cloth fix
btw you should detail the radiator support .That surface rust is making bad contrast with the rest of the thread
Ya gotta do what ya gotta do!
Yep, that rust sucks big time. I'll need to put some more time in this year and fix that part up from all sides.
Originally Posted by DynoDave43
Isn't working on old cars fun?
I'm glad you were able to get the old rad. out of there, and that you caught it before it left you stranded somewhere.
And that's quite a monster pair of pliers you have locked onto that screwdriver handle!
As always, more good reference photos for when I have to do this job myself.
I assume it's a lot more fun than working on modern cars.
Those are cases where I open the hood, take a look, close the hood and go buy a new car or a bicycle ^^
Haha, I love my pipe wrench. And that's not even the big one I use to crack engine oil filters loose
Glad to be of service. I'm watching your thread as well. Stealing some ideas
The main thing I wanted to tend to this easter was the floor pans.
A while back I had noticed a bit of bubbling on the outside, but I needed to know whether it originated on the inside first or I would possibly begin a losing battle.
Beginning with the trunk, I removed the interior trim and carpet as far as necessary to look into the car's lowest areas.
Strange enough, the seam sealant looks very filthy throughout the car.
One day I might remove all that gunk and put some new stuff on the seams, but not now.
However, the most important part, the trunk pit, was completely dry.
I used this occasion to remove the trunk seal and check the ridges for rust.
Except for a tiny spot on the upper edge near the hatch hinges, there was none to be found.
Removed the dirt with a tooth brush, treated the spot with rust converter, gave it time to cure, added some zinc spray and put some liquid wax unter the weatherstripping, so that should at least slow the process down until there's time to get at it properly.
The rear quarter panels had been repainted two years ago, but they didn't do any body work, so I assume the ridges were rust free to begin with.
Didn't need my tools for a short while and apparently I have some neighbors who didn't like what I've been doing
Found some old German money under the carpet, by the way.
Advice for people who want to take apart their interiors:
Once I had removed the screws to a panel, I wrapped them in aluminum foil and wrote the panel's name onto the foil, so I would later on still put the right screws into the right panels
Simple method of storage if there aren't any plastic bags or fully functional brains around.
Remember what I said about my dead injectors and the clogged cat?
During that time we noticed some kind of fog or smoke in the car and didn't know where it came from, since we didn't even know about the cat.
Here's what really happened and what was a very, VERY close brush with death, thinking about it.
This is why the industry is using fireproof materials.
I wonder if aftermarket carpets are equally fireproof
In any case, it's good to have a fire extinguisher around.
Man, the carpet just MELTED into the floor in the spot without any padding material.
This was also the end of my attempt at removing the entire carpet.
There's no way I'm getting this thing out without completely destroying what's left of it.
Doesn't matter, though. I got to inspect the low spots of the pans and except for one rusty plug and a few tiny specs there was also no serious rust to be found here.
Strange, since the t-top was so leaky all those years.
Can I order a new plug somewhere? Drenched it in rust converter, but hey, replacing it would be better in this case.
Before I tucked everything back in there were some cables that finally wanted to go into an existing cable duct.
Don't know why this hasn't been done properly before.
The black connector goes into the driver side seat belt and assumingly closes a circuit to ground for the seat belt warner chime.
Oh, and I installed one of these nice sporty bucket seats!
Totally altered my point of view!
Feels kinda like in a submarine. Can't see the outside, soft red lights...
Well, on to the actually planned WORK.
At this point I was happy nothing has rusted through and on the next day I went down to the rental car shop, packed with my roughly 12 gallons (44l) of oils and my own weight in car parts.
Time to get stuff done! Yeah!
The driver side floor pan had more rust bubbles than the passenger side. Don't know why, perhaps because the ride hugs the ground more when you're driving alone.
Ignore my mounting point. I figured out how to get onto that lift so that I can reach the frame properly later on.
Someone has sprayed the car's underside with home improvement anti-corrosion primer, at least I assume that's what the red stuff is, and it never works.
Probably some tech inspection guy insisted on this.
I treated the bubbles with 80 grit sanding paper, then hit the remains with brake cleaner for degreasing purposes, then with rust converter and moved on to the passenger side and the rear seat wells.
As you can see, the sill has been badly abused over the years and is almost completely rusty.
Advice: Epoxy based rust converter takes off the little bit of original protection if you wipe overspray off, so if you want to concentrate on a certain area, better mask off the surroundings
More advice: Use a respirator! My sweater was initially black and I wouldn't want to have all that crap in my lungs.
Especially the upcoming zinc and paint vapors are an issue. The better your respirator, the longer you stay alive.
Here's something else to look out for. I can't imagine this hole being there for a purpose, as the passenger side does not have one.
It goes straight into the carpet and the ebrake cable hook also doesn't hook into the hole.
Both sides rub against the hooks, though, so this area should become part of every inspection or oil change.
Time for SPARKLES in the air!
I emptied a can of zinc spray onto my floor pans and sills after the rust converter had 6 hours to do its work, as recommended on the can.
New mounting points!
I stacked some wooden boards to get the car up an inch or two on both sides to be able to get to the frame, which ist where you jack up these cars.
Take a hint, mechanics!
After emptying the zinc can I noticed sparkles everywhere the sunlight came through.
The solvent in the spray caused the tiny particles to rise up into the air and diffuse until the particles became heavier than the air and sunk down.
Everything in the shop is glittery now. Noone has noticed yet
I used white primer and white paint to close up the floor pans.
As final step I wanted to use underbody protection, but everyone advised against using that, saying it would be subverted and you couldn't see where corrosion broke through any longer.
I'll keep my eye on the underbody in the future and correct any issue that may arise.
Now a question. What is this? It's sitting on top of my differential. Is that some kind of pressure relief valve?
I filled up about 10 ml of differential oil through the insert below, as the lip seal is damaged and will be replaced next week.
Not much loss, even though it must have been leaking over months and after every cruise there's more oil splattered over the body.
Ever think about the bump stops on your k-member? No? Me neither. Didn't know they existed until I got new ones instead of what I THOUGHT I had ordered.
The new ones could have been from Dorman... yellow cardboard packaging.
Some difference in the shape, perhaps due to normal wear....
The old ones didn't have to be replaced, but at least the two fastening nuts can be moved again now.
Well, on to a part I have dreaded all this time.
Dreaded so much, that I preferred to have professionals do it for me in the past.
However, over the last year whenever I had the time for it, the pros did not, so I decided to face my fears and become a man this week
Spark plugs! (And new cables. Delco. Not that broken up Standard stuff my mechanic put in there last time.)
R45TS for my engine, checked the gap to be 0.035" (0.89mm). Surprisingly the gap was already set correctly on all 8 plugs.
16mm socket, short extension and 3/8" wrench. Go.
No decent pics of spark plug locations, I'm afraid, but let me write this down for posterity:
- There can be no obese mechanics in F-Body V8 world.
- Each plug can be best reached from below. One or two maybe from above, but where's the sense in that when you're already beneath the car?
- Aftermarket O2 sensors have the shortest wire. Be careful not to rip it off with the cable shoe of cylinder 3.
- Older cable shoes stick to the plug and can be removed fairly easily by carefully prying with a screw driver and some pulling. Except Cyls 2, 4 and 6. Those are evil due to their alternate shape and grow longer the harder you pull on them. Lots of fun there!
- Try not to fuse your tools to the starter and other metal parts on cyls 4, 6 and 8.
Here's a pic of my old plugs. I was surprised that they're so uniformly burnt. No excessive deposits, detonations or the like.
How do you see it?
You can see that they urgently needed to be replaced.
Any longer and they'd probably have broken off during removal or damaged the threads.
Better to change them once a year. Now I know how to do it.
2 hours later I was done with them. Seriously. Two hours!
The V6 took less than half that time.
Another thing new to me was the transmission oil change.
The sealant between on the gasket had glued the pan on to the transmission housing very tight, so I had to get a screw driver between the parts in the front area left and right and hit it with a hammer.
Careful though, don't damage the sealing surface or deform the pan, so put the screw driver between the GASKET and the PAN, as the pan is easier to replace.
Make sure to keep some screws loosely in at the rear and front ends of the pan, so it doesn't suddenly come down and spill the oil everywhere.
You can then remove the front ones and get a bit out of the pan, then remove the rear screws and take down the pan with one or both hands.
No need to remove the transmission mount, by the way. Just don't have big fingers, remove the pan screws and tilt the pan far enough, always catching the oil during the process.
That leaves you with this:
Important advice:
If you decide to use sealant/adhesive on the gasket to be on the safe side, make sure you do not get it over the tiny hole between the two front passenger side holes in the pic!
This is a fluid conduit from your servo and your transmission oil pan and gasket are shaped to allow fluid back into the pan from there.
Last year I opened a thread about my transmission falling out of reverse.
The issue suddenly disappeared by itself, so I assumed there was some debris which finally dislodged itself.
There was a tiny black ball of adhesive sticking to the floor of the pan. Perhaps that was the cause.
Maybe the mechanic did not notice the tiny hole and put adhesive over it and it loosened due to internal pressures?
Black ball to the right of the magnet. Brighter ***** are from the gasket.
See that ridge on the pan's mating surface?
That's the line you can safely follow with a thin line of adhesive or sealant if you want to.
The transmission housing has neither a ridge nor groove, so be careful how much you put on there and which path you follow.
I cleaned the pan's interior with brake cleaner.
The black square is a magnet to collect metal shavings and microscopic particles.
At least there were no larger parts sticking to it.
I'm not sure whether the brake cleaner was trying to dissolve the magnet or if it was indeed very dirty, because I got a steady black stream from it.
Also, why do I have these marks in my pan? Shouldn't there be some clearance between the interior parts and the pan floor?
Something has to be chafing around in there.
I often hear about new filters not going in far enough to clear the pan's floor, so I took care to check for the old filter's o-ring and it sure did stick to the valve body, so I had to carefully pry it out with a screw driver.
After I put everything back together and filled it up with roughly 4l, I drove the transmission up to temp, stopped on level ground, went through all gears and checked the level.
Upper edge of the marked rectangle of the dipstick.
The service manual states 4.7 liters for a drain and refill, but that seems to be too much, IMO.
This concludes business for now.
I would have liked to do some more work, including replacing the fuel filter, main bearing seal and transmission lip seals, but the rental shop is closed for the rest of the week and my leave is coming to an end.
The little breather on top of the axle is the Axle housing vent.
I started using rubber transmission pan gaskets on all my vehicles, makes servicing much cleaner and quicker. Adding a drain plug will make it even more fun.
For rust treatment I started to use "Fertan", awesome product, much less toxic.
Fun it was. Sometimes
Thanks for the info. So I remembered the part about refilling the differential right and that's only a breather. Nice.
Fertan is being recommended to me locally as well, so there has to be something to it.
Will try!
Since I can't get under my car and do stuff, I decided to use the halfway decent weather to get my final headlight bezel done.
As usual, I started out with this:
That Pontiac badge had to leave, so I treated it with my girlfriend's hair dryer to soften the adhesive.
The air got quite hot and I wonder how we both keep our hair from burning up with that thing.
But first it was time to take measurements of where it sat.
To get between the heated badge and bezel, I used a custom badge remover.
It's a piece of plastic from some meat blister. Thin, but tough enough to get in there without instantly melting.
I then scrubbed the bezel with 400 grit sanding paper, then went directly to 1500 and 2500, though I didn't bother to get a perfectly smooth finish.
Most importantly the dirt and outer layer came off this way.
Ugly, huh?
That's 1mm adhesive foamtape there.
No holes, just stains.
If anyone needs to know the numbers on the badge, here you go.
I had no idea the simbols lit up if the engine is too hot or you loose oil preasure.The things I learn every day
The Firebird's dash design is pretty modern even for today.I hate the small tiny gauges in the modern cars .I mean Ive seen people who are not into muscle cars wich have no clue the car is 25 years old.
I once drove several different BMW models of the same model year. None of them had a water temp gauge, none of them had any way to check engine oil levels from below the hood.
So much for modern cars
Ours are just timeless.
I once drove several different BMW models of the same model year. None of them had a water temp gauge, none of them had any way to check engine oil levels from below the hood.
So much for modern cars
Ours are just timeless.
I totally agree. I'd even say they are ahead of time designwise.
I once drove several different BMW models of the same model year. None of them had a water temp gauge, none of them had any way to check engine oil levels from below the hood.
So much for modern cars
Ours are just timeless.
on newer models they dont even put dipsticks.You have to trust a sensor .Ask me how I know
having a Trans Am is 100% badass I know in US they have some cliches about 3rd gens but here in Europe I don't know a single person to not like the car plus muscle cars don't really have "age" .These cars are not Renault which look outdated in 10 years.You get power steering ,power brakes and rest of it is driver's skill ...its a driver's car .
...here in Europe I don't know a single person to not like the car...
Haha, I do. But that person works for the state and most certainly drives a Prius these days
The translation of her words would be "Show-Off Car" and "America's crap. Takes forever to get from a to b and the roads are always straight".
Guess she's never been to the right places
I love driving in the States. It's sooo much smoother and relaxing than it will ever be here.
You talking about Merkel? Heard they want to "tax" the cars on CO2 now.Only in Germany ,France and Romania cars are taxed on engine displacement ,the rest are taxed on value or kw/hp and in some countries are not taxed at all....yeey EU
I want to see a V8 made in Europe that gets @15l/100km.The low rev engines are reliable and don't cost alot to fix them.Try get a V8 car from Europe and maintain it with the same money .Remember that these cars are Euro 2 (some managed to get Euro 3 guess with newer modern catalytic converters).This is from a period when european cars were non euro.
Btw the Trans Am is faster than most 1.1cc turbo charged BS we see on the streets.I saw that ford Ecotec or how its called 1.2 being tortured to deliver 120hp.It gets 8 to 9 litres/100km and a pathetic torque.Same for those amusing Renault/Dacia things.None of those "new cars" can keep up with our cars so which ones are slow?BMW and Mercedes are limited to 250km/h(156mph)...our cars can get that .I saw vid with a TTA doing almost 170mph on autobahn.
Nah, that girl doesn't know anything about cars except how to get into the rear seat.
They're taxing new cars on CO2 emissions, yep. Then there's discussions about tolling us additionally. They should just simply go for the weight of the vehicle and be done with it.
Weight is what damages our streets, not engine displacement, hp, ego size or whatever
Aaaaand ours are Euro 1. Some got Euro 2/D3, but our government changed the conditions to get to that level.
For a while we were able to reach it with some retrofit cold idle manipulator, but hey, why give up on senseless taxes when it's so easy to get them out of our pockets?
I can't get up to 250 km/h, not with my auto trans and my non-performance axle
But I can keep up with many of them for a while, that's true.
120/130 mph at ~3k rpm, that's all I'm getting out of my drivetrain.
Mine is Euro 2 .Most Trans Ams on mobile.de are Euro 2 and seen few v6 which are Euro 3.I have no idea how they figure out what Euro the car is since for lets say 300g CO2/km a car from 2016 is euro 6 and one from 2000 is Euro 3....it sounds some BS to me to take money from people.
Then you're in luck!
In Germany Thirdgens get Euro1 due to the cat's presence.
They could achieve Euro2 with the addition of a cold idle controller.
We were never able to attain Euro 3 or 4, though I see some listed as such, so they are either faked, illegally categorized or the owner simply didn't know/bother to find out what the right info was.
I sadly know too well about this BS, as V6s and TBI V8s can still be upgraded, TPIs cannot.
Why not TPIs you might ask.
Some guys went through the troubles of building these cold idle controllers and going through all the costly checks and inspections to make them legally valid for tax reductions.
But, as most of us have their cars registered only for the season and therefore only pay half the taxes, most of the owners said "I'm not paying a years worth of taxes to get that thing, because it costs more than I actually pay per year!"
Obviously not long term thinkers.
This resulted in insufficient commitments, therefore skipping some checks and validations, so there's one type of approval TPI models didn't get and our Government has at some point removed tax reductions for models without that specific approval.
Here's something about my former V6:
Euro 1 taxes per year: 480€.
Idle controller: 480€.
Euro 2 taxes after adding the controller: 240€.
Now for my V8 it's 756€ per year and the controller used to be available for ~800€ and would have reduced my taxes to 378€, but because nobody bothered at the right time, I'll never get down to that level, except if I register it for 6 months of the year.
Euro 3 or 4 don't split taxes in half any further, sadly.
Ok, first of all I got my differential sealed up again. No more leaks for now.
Then I had someone install new transmission lines for me.
Yes, those are double flared brake lines, but should do the trick for the next two and a half decades.
They come in 1,50m length as straight pipes and fit with a little creativity on the bending tool.
is there any way to get the windshield washer tank and radiator antifreeze tank white again.I see most people on these boards have the problem with the plastic getting a yellowish color.
Mine has that too. Thumb-grade body seam sealer. It's just the manner in which, and the material with which, the factory chose to seal that area. Probably too awkward of a shape/area to seal otherwise.
You wouldn't happen to know what's beneath that hole, would you?
I worked a long wire through the hole and it seemed to hit the wheel well at some point, so it looks like it goes to the exterior.
Others say it goes into the blower motor housing, but I can't believe that.
I do not know for sure. I just looked at that area on my car, and my best guess is that it goes into the cowl, as that plate is forming the top of it. I cannot see that area from inside the fender-well. Thought maybe I could with it all apart.
By the way...do you some sort of electric powered zebra helping you with your underhood repairs?
Yeah, that's my girlfriend's blow dryer and it's quite maintenance free.
Just needs some hay every now and then
It seems to generate more heat than my heat gun these days, strangely.
Edit:
There is no suction or pressure coming from that hole when I set the blower to full speed, as compared to the actual blower inlet between the wipers.
A thin piece of paper did not get blown away or sucked into the hole.
Another edit:
After mulling this over, I decided to reseal that hole.
Why? By resealing and smoothing the hole, I'm channeling so it can continue to flow over the front edge of the "plenum", as my service manual" calls it.
I don't want to create a new attack surface for rain and wiper fluid, as there's nothing more than primer beneath those blobs of caulk.
When I have some spare time in the future I'll be removing the other blobs and resealing the mating surfaces in a cleaner manner than the factory was able to do.
Final edit for this post:
Interesting how this forum automatically removes the word beginning with M and ending with ULLET.
No puns on here
It seems to generate more heat than my heat gun these days, strangely.
I don't know but for some reason that seems universal.i think its related to vacum cleaners and other bs EU regulations which force some tools (dunno how to call them) to "consume less energy" so now we have toys that do what they supposed to do only on paper.
And how can you reduce energy consumption in a blow dryer?
Put a friggin jet engine in it!
At least that's how it feels at times, minus the afterburner
 03-14-2015, 07:34 PM


")


 Very nice! I love those details.
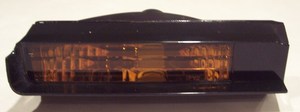

 I totally agree. I'd even say they are ahead of time designwise.


 Miss his thread / posts.