C-Prepared Autox Build
 05-20-2014, 12:52 PM
#1
Member

Thread Starter
iTrader: (3)
Join Date: Nov 2002
Location: Wichita, KS
Posts: 491
Likes: 0
Received 1 Like
on
1 Post
Car: 88 Trans Am GTA
Engine: 5.1L Gen III
Transmission: T56
Axle/Gears: 3.70
C-Prepared Autox Build
Over the next few weeks I'm going to be re-posting my build thread from here:
http://www.frrax.com/rrforum/index.p...pic=16394&st=0
(you must login to see it)
I'll probably do 2-3 at a time. Let me know what you think. I meant to start this a long time ago, but now that car is finally race-ready seems like time to share.
http://www.frrax.com/rrforum/index.p...pic=16394&st=0
(you must login to see it)
I'll probably do 2-3 at a time. Let me know what you think. I meant to start this a long time ago, but now that car is finally race-ready seems like time to share.
 05-20-2014, 12:53 PM
#2
Member
Thread Starter
iTrader: (3)
Join Date: Nov 2002
Location: Wichita, KS
Posts: 491
Likes: 0
Received 1 Like
on
1 Post
Car: 88 Trans Am GTA
Engine: 5.1L Gen III
Transmission: T56
Axle/Gears: 3.70
Re: C-Prepared Autox Build
From 4/11/13:
This is a very much long overdue post. I posted a few teaser pics while ago, and since then things have only gotten more out of hand. A coworker of mine has dubbed the car “Snowball” because the project has just gotten bigger and bigger in scope. I’ve got a few questions to ask and I figure I’m far enough along to share what I’ve done. Hopefully my fab skills and judgment haven’t been too terrible. Feel free to poke holes or tell me what I’ve done wrong.
I’m probably going to try to break this down into a couple posts over the next few days, one for the ls1 swap/motor/transmission mounts, at least one for the backhalf/fenderwell sectioning, and another for the front end weight loss measures that I’m working on while I put the car back together
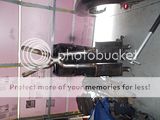
Here's when I weighed it in february:
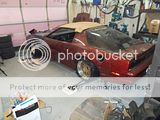
And an older photo w/o fenders
Big items left are:
Make lower fender supports, mount the hood and headlights
Integrate the wiring, install the battery, and put a few small things on the motor
Cut front springs to correct the front ride height, extend/slot strut mounts, install/mod? ARB’s
Run brake lines and bleed hydraulics
Lighten doors, make removable “pro stock” style lexan side windows
New seat mounts and harness bar
After that there’s still a lot to do but that will at least get the car race worthy. Other stuff like the accusump, spoiler, and putting the full interior back in can wait a little bit. I plan to race the car this summer and do some further mods. Then paint it this winter over shutdown (Aircaft companies give us a week off between x-mas and new years) and move onto other cars.
Goals for the build is to make a car that will it at least PAX in the top 5 or so locally and still be somewhat streetable. I want to be able to drive it to work a couple times a week as well as make it 2 or so hours to my home town. I plan to re-install the interior at some point and want to stick with on overdrive transmission. I don’t think this thing will be nationally competitive in the near future, but I would like to at least be mid pack eventually. Goals for weight are to get down to 5.1L CP weight with a good weight distribution for a motor I hope to build later. That means 2800lbs or 2750, depending on what they do with the 16”+ wheel size weight breaks.
For a stripped down car, I don’t think meeting minimum weight will be a problem, however the weight distribution will make it harder. I think 52% may be attainable with somewhat stock interior and possibly even with front/rear glass. I’m still undecided on whether to install lexan or not. It is going to take a very dedicated focus on weight, particularly the location and not just the total. This means the furthest fwd items are getting the most scrutiny, with items behind the rear axle pretty much not getting any at this time.
This is a very much long overdue post. I posted a few teaser pics while ago, and since then things have only gotten more out of hand. A coworker of mine has dubbed the car “Snowball” because the project has just gotten bigger and bigger in scope. I’ve got a few questions to ask and I figure I’m far enough along to share what I’ve done. Hopefully my fab skills and judgment haven’t been too terrible. Feel free to poke holes or tell me what I’ve done wrong.
I’m probably going to try to break this down into a couple posts over the next few days, one for the ls1 swap/motor/transmission mounts, at least one for the backhalf/fenderwell sectioning, and another for the front end weight loss measures that I’m working on while I put the car back together
Here's when I weighed it in february:

And an older photo w/o fenders

Big items left are:
Make lower fender supports, mount the hood and headlights
Integrate the wiring, install the battery, and put a few small things on the motor
Cut front springs to correct the front ride height, extend/slot strut mounts, install/mod? ARB’s
Run brake lines and bleed hydraulics
Lighten doors, make removable “pro stock” style lexan side windows
New seat mounts and harness bar
After that there’s still a lot to do but that will at least get the car race worthy. Other stuff like the accusump, spoiler, and putting the full interior back in can wait a little bit. I plan to race the car this summer and do some further mods. Then paint it this winter over shutdown (Aircaft companies give us a week off between x-mas and new years) and move onto other cars.
Goals for the build is to make a car that will it at least PAX in the top 5 or so locally and still be somewhat streetable. I want to be able to drive it to work a couple times a week as well as make it 2 or so hours to my home town. I plan to re-install the interior at some point and want to stick with on overdrive transmission. I don’t think this thing will be nationally competitive in the near future, but I would like to at least be mid pack eventually. Goals for weight are to get down to 5.1L CP weight with a good weight distribution for a motor I hope to build later. That means 2800lbs or 2750, depending on what they do with the 16”+ wheel size weight breaks.
For a stripped down car, I don’t think meeting minimum weight will be a problem, however the weight distribution will make it harder. I think 52% may be attainable with somewhat stock interior and possibly even with front/rear glass. I’m still undecided on whether to install lexan or not. It is going to take a very dedicated focus on weight, particularly the location and not just the total. This means the furthest fwd items are getting the most scrutiny, with items behind the rear axle pretty much not getting any at this time.
05-20-2014, 12:54 PM
#3
Member
Thread Starter
iTrader: (3)
Join Date: Nov 2002
Location: Wichita, KS
Posts: 491
Likes: 0
Received 1 Like
on
1 Post
Car: 88 Trans Am GTA
Engine: 5.1L Gen III
Transmission: T56
Axle/Gears: 3.70
Re: C-Prepared Autox Build
From 4/19/13:
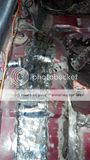
Tub/Fender Sectioning
In order to keep overall car width down I decided to go inboard in the back of the car. This should help keep from nailing cones with the back of the car, and to me it seemed like a better idea to hack up the fenderwells than the quarter panels.
Basically what I’ve done is cut the inner fender well out of the car and moved it inboard to the frame rail eliminating the u-shaped pinch weld in this area. Mine was rusted badly. I’ve tried to avoid any sort of butt weld by always overlapping sheetmetal with new metal and used skip welds. My welding skills are lacking when it comes to MIG’ing sheetmetal. It always seems to be running a fine line between burning through and having a cold turd of a weld. Best results seemed to be when I did short sections (~� inch) on a setting that was slightly hotter than needed. If I had one regret with this project, it has been the quality of the welds here.
I actually started this write-up first, but somehow lost it, and now it’s been awhile since I did it, so hopefully the photos jog my memory.
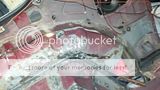
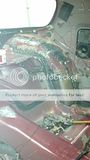
I removed the outer panels around the rear springs pockets. The thin inner panel was retained, cut, flattened out, and new angles were welded across.
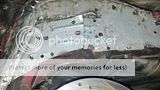
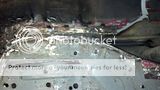
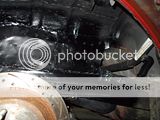
This would keep the replacement sheetmetal from just collapsing in a light crash. Probably not necessary to put them in and they may get ground down if I need more tire clearance. With 18” wheels they should be pretty well out of the way. A doubler with some plug welds covers up the inside to hopefully tie the fenderwell to frame/trunk junction a little better. The lower fender well was the most “massaged” and had some rust. It just made more sense to just bend a replacement piece of sheetmetal.
Tub/Fender Sectioning
In order to keep overall car width down I decided to go inboard in the back of the car. This should help keep from nailing cones with the back of the car, and to me it seemed like a better idea to hack up the fenderwells than the quarter panels.
Basically what I’ve done is cut the inner fender well out of the car and moved it inboard to the frame rail eliminating the u-shaped pinch weld in this area. Mine was rusted badly. I’ve tried to avoid any sort of butt weld by always overlapping sheetmetal with new metal and used skip welds. My welding skills are lacking when it comes to MIG’ing sheetmetal. It always seems to be running a fine line between burning through and having a cold turd of a weld. Best results seemed to be when I did short sections (~� inch) on a setting that was slightly hotter than needed. If I had one regret with this project, it has been the quality of the welds here.
I actually started this write-up first, but somehow lost it, and now it’s been awhile since I did it, so hopefully the photos jog my memory.


I removed the outer panels around the rear springs pockets. The thin inner panel was retained, cut, flattened out, and new angles were welded across.


This would keep the replacement sheetmetal from just collapsing in a light crash. Probably not necessary to put them in and they may get ground down if I need more tire clearance. With 18” wheels they should be pretty well out of the way. A doubler with some plug welds covers up the inside to hopefully tie the fenderwell to frame/trunk junction a little better. The lower fender well was the most “massaged” and had some rust. It just made more sense to just bend a replacement piece of sheetmetal.
05-20-2014, 12:55 PM
#4
Member
Thread Starter
iTrader: (3)
Join Date: Nov 2002
Location: Wichita, KS
Posts: 491
Likes: 0
Received 1 Like
on
1 Post
Car: 88 Trans Am GTA
Engine: 5.1L Gen III
Transmission: T56
Axle/Gears: 3.70
Re: C-Prepared Autox Build
From 4/19/13:
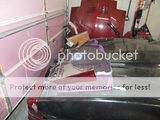
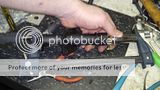
I’ve decided for better or worse to just do dumps before the axle. Cutting out the rear seat pans makes for good muffler ground clearance Those seats will even more useless with the front seats moved back. 3” in/out magnaflows should fit easily and will be overkill for almost any motor that gets built.
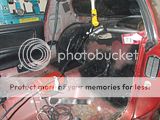
You can somewhat see the tortured jegster decoupled T/A, we’ll see how it works. I spent more time screwing with this than was healthy. Clearance is bad to the tunnel, and I’ve moved the rear wheelbase
forward 7/8” so that didn’t help anything either. Hindsight being 20/20 I could’ve easily tied a tube going from the subframe connectors, across the back of the new seat supports I have yet to fab and tied into the fourth gen mounts of Jason’s T/A. Probably would’ve saved a lot of time.
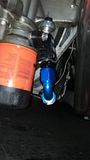
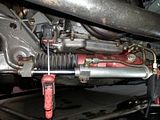
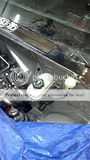
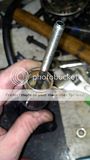
Here’s the 30-5436 Koni’s mounted inverted with 2.5x7x350lb springs on a all-star coilover kit. I cut a 3/4 to 1” long insert that’s stepped to fit inside the stock shock mount that I bored out. Then I welded it front and rear to stabilize it since it’s in single shear.
Clearance to the stock sway bar sucks, I want to mount it to the chassis to reduce sprung mass, any ideas? I’m thinking I may build a splined sway bar hanging off the rear frame rails like the new mustangs do, but to clear the panhard bar may require switching to a watts. I’m hoping a 19mm clears better than the 24mm bar I test fit.
New rear wheels are 18x11.5 CCW’s with 7.75” backspacing. Front’s are the same width and 7.25” backspacing. The shocks somehow worked out to be about an half an inch longer stackup than I thought, but tire to fenderwell clearance should be just about right with a 27” tire. The frame rails, tunnel, and shocks all bottom out at the same time, so it would’ve took a lot more effort go much lower. I was little perturbed after all this to find the new thing limiting wheel/tire width is now the panhard mount and the LCA’s. Right now I’ve got 7/8” OD 5/8” threaded rods. Eventually I want to run 18x12’s with probably 335/30R18’s up front and 345/35R18’s in back. I think what I have now would barely clear 335’s but not the 345’s. Eventually I’m going to look into doing a few things to fix the clearance.

Enough for today.
I’ve decided for better or worse to just do dumps before the axle. Cutting out the rear seat pans makes for good muffler ground clearance Those seats will even more useless with the front seats moved back. 3” in/out magnaflows should fit easily and will be overkill for almost any motor that gets built.


You can somewhat see the tortured jegster decoupled T/A, we’ll see how it works. I spent more time screwing with this than was healthy. Clearance is bad to the tunnel, and I’ve moved the rear wheelbase
forward 7/8” so that didn’t help anything either. Hindsight being 20/20 I could’ve easily tied a tube going from the subframe connectors, across the back of the new seat supports I have yet to fab and tied into the fourth gen mounts of Jason’s T/A. Probably would’ve saved a lot of time.
Here’s the 30-5436 Koni’s mounted inverted with 2.5x7x350lb springs on a all-star coilover kit. I cut a 3/4 to 1” long insert that’s stepped to fit inside the stock shock mount that I bored out. Then I welded it front and rear to stabilize it since it’s in single shear.

Clearance to the stock sway bar sucks, I want to mount it to the chassis to reduce sprung mass, any ideas? I’m thinking I may build a splined sway bar hanging off the rear frame rails like the new mustangs do, but to clear the panhard bar may require switching to a watts. I’m hoping a 19mm clears better than the 24mm bar I test fit.
New rear wheels are 18x11.5 CCW’s with 7.75” backspacing. Front’s are the same width and 7.25” backspacing. The shocks somehow worked out to be about an half an inch longer stackup than I thought, but tire to fenderwell clearance should be just about right with a 27” tire. The frame rails, tunnel, and shocks all bottom out at the same time, so it would’ve took a lot more effort go much lower. I was little perturbed after all this to find the new thing limiting wheel/tire width is now the panhard mount and the LCA’s. Right now I’ve got 7/8” OD 5/8” threaded rods. Eventually I want to run 18x12’s with probably 335/30R18’s up front and 345/35R18’s in back. I think what I have now would barely clear 335’s but not the 345’s. Eventually I’m going to look into doing a few things to fix the clearance.


Enough for today.
 05-21-2014, 08:26 AM
#7
Member
Thread Starter
iTrader: (3)
Join Date: Nov 2002
Location: Wichita, KS
Posts: 491
Likes: 0
Received 1 Like
on
1 Post
Car: 88 Trans Am GTA
Engine: 5.1L Gen III
Transmission: T56
Axle/Gears: 3.70
Re: C-Prepared Autox Build
Ruggles sold them for a while and I think there's a few other people making them now. It's a 4 to 1 ratio lever. Back to back measurement have been w/in 1% which should be close enough for what I'm doing.
Trending Topics
05-21-2014, 12:52 PM
#9
Member
Thread Starter
iTrader: (3)
Join Date: Nov 2002
Location: Wichita, KS
Posts: 491
Likes: 0
Received 1 Like
on
1 Post
Car: 88 Trans Am GTA
Engine: 5.1L Gen III
Transmission: T56
Axle/Gears: 3.70
Re: C-Prepared Autox Build
Here's a set of those scales for sale:
http://www.roadraceautox.com/showthr...ghlight=scales
I'm not sure who's making them now, but I'd get a set with the bearings of some sort on the two front scales. Side loading the scales from scrub will result in erroneously high readings.
Here's a photo of the hinge:
The hinge is just .050 aluminum with 3x #8 countersunk screws/washers on the top of the hood. The hinge pin is from the headlights with a nylon bushing. The 2 aerocatches aren't enough for over 70mph. I have some camloc's coming from aircraft spruce that I'll use for the highway. At event's I'll probably just use the aerocatches. Probably re-post the hood stuff in a week or so, it's from last fall.
http://www.roadraceautox.com/showthr...ghlight=scales
I'm not sure who's making them now, but I'd get a set with the bearings of some sort on the two front scales. Side loading the scales from scrub will result in erroneously high readings.
Here's a photo of the hinge:

The hinge is just .050 aluminum with 3x #8 countersunk screws/washers on the top of the hood. The hinge pin is from the headlights with a nylon bushing. The 2 aerocatches aren't enough for over 70mph. I have some camloc's coming from aircraft spruce that I'll use for the highway. At event's I'll probably just use the aerocatches. Probably re-post the hood stuff in a week or so, it's from last fall.
05-21-2014, 03:26 PM
#10
Member
Join Date: Nov 2002
Location: Maryville, TN
Posts: 211
Likes: 0
Received 1 Like
on
1 Post
Car: 1987 IROC Z/28
Engine: 5.0L TPI. Custom Tune
Transmission: 5 Speed/ Pro5.0 short /hurst stick
Axle/Gears: 1LE 10 bolt Rear/T2R 3.45 PBR/disc
Re: C-Prepared Autox Build
My autocross CP car weights 2995 with a full tank of gas (and that's allowed because I have a 5.0L). I am curious what you weight at this point or what you expect it will weigh. I am going to be pulling about 200 pounds out of the car over the next few months and I am curious what your experience has been in weight reduction on a CP platform.
05-21-2014, 03:55 PM
#12
Member
Join Date: Nov 2002
Location: Maryville, TN
Posts: 211
Likes: 0
Received 1 Like
on
1 Post
Car: 1987 IROC Z/28
Engine: 5.0L TPI. Custom Tune
Transmission: 5 Speed/ Pro5.0 short /hurst stick
Axle/Gears: 1LE 10 bolt Rear/T2R 3.45 PBR/disc
Re: C-Prepared Autox Build
2995 WITHOUT driver. In my class they weigh the car by itself, fully fueled and ready to go.
I don't know. I am expecting to look at the following:
Front and Rear Crash bars
Pull more out of the doors by gutting another 3 inches all the way around
Side mirrors
rear hatch, (but I need to find a good alternative there)
I don't know what else, maybe around the front end headlights and so on...
05-21-2014, 03:59 PM
#14
Member
Join Date: Nov 2002
Location: Maryville, TN
Posts: 211
Likes: 0
Received 1 Like
on
1 Post
Car: 1987 IROC Z/28
Engine: 5.0L TPI. Custom Tune
Transmission: 5 Speed/ Pro5.0 short /hurst stick
Axle/Gears: 1LE 10 bolt Rear/T2R 3.45 PBR/disc
Re: C-Prepared Autox Build
It doesn't police the operator and yes -- little people get an advantage, that's the SCCA for you...
Sometimes 2 people run the same car, my son and i do that I weigh 100 pounds more than he does.. it's just the way it is.
Sometimes 2 people run the same car, my son and i do that I weigh 100 pounds more than he does.. it's just the way it is.
05-21-2014, 04:27 PM
#15
Member
Thread Starter
iTrader: (3)
Join Date: Nov 2002
Location: Wichita, KS
Posts: 491
Likes: 0
Received 1 Like
on
1 Post
Car: 88 Trans Am GTA
Engine: 5.1L Gen III
Transmission: T56
Axle/Gears: 3.70
Re: C-Prepared Autox Build

I'm at 2825 at my first timed event with full gas, glass windshield, and heavy T56/LS7 clutch. I still have the rear crash bar and side impact bars in place, but I may leave it as ballast. I need to add some weight back to the doors for removable lexan panels, some insulation around the tunnel/mufflers, and finally I'm going to remake or reinstall the front radiator diffuser if needed to cool the motor.
My wife also wants the interior pieces in and some carpet (will have to be oxcite). We'll see about that.
My plan is to do all my development at the 5.1L weight rather than starting over after I get a new motor. I was hoping to start the build this summer, but money is tight.
05-21-2014, 08:43 PM
#16
Re: C-Prepared Autox Build
that's the most backwards thing i've ever heard of, lol.
anyway, those scales are nifty. so do you multiply the value seen on the scale by 4 to get actual weights? seems those racks would be easy to duplicate...i may have to play with this some
anyway, those scales are nifty. so do you multiply the value seen on the scale by 4 to get actual weights? seems those racks would be easy to duplicate...i may have to play with this some
05-22-2014, 12:37 PM
#17
Member
Thread Starter
iTrader: (3)
Join Date: Nov 2002
Location: Wichita, KS
Posts: 491
Likes: 0
Received 1 Like
on
1 Post
Car: 88 Trans Am GTA
Engine: 5.1L Gen III
Transmission: T56
Axle/Gears: 3.70
Re: C-Prepared Autox Build
From 4/21/13:
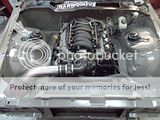
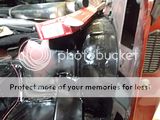
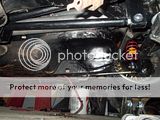
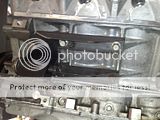
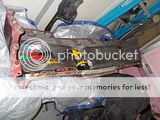
The ls1 motor is a fairly high mile unit. Compression looked good, not gunked up under the valve covers, but the oil was pretty dirty. We’ll see how she runs. Found a valley cover and intake locally from a CTS-V. I found some 243 heads inexpensively as well, so I went ahead and swapped those out. Heads were lapped and new patriot gold springs put in before installing. Cam is a TR224/224 on 112 if I’m remembering right. I still need pushrods, stockers only have about 1/2 a turn of preload. Should be okay to get the car started though. I have an improved racing baffle installed and an accusump that will be going in, but I want to save that project for after the car is drivable. Probably put in a catch can in later as well.
Transmission is an MN12 from a wrecked GTO, no real idea on the mileage on this, but fluid was clean and it came with a nearly new Ram aluminum flywheel and ZR1 clutch. Maybe when I build the 5.1L I’ll probably pick up a fidanza flywheel (6lbs lighter) and a different clutch since the ZR1 pressure plate is heavy, or I’ll just go with a 3-disk racing clutch. Second gear with the MN12 doesn’t look good with a 25.5” tire for a top speed of 64mph with a 6500rpm redline. I could see running 7000rpm redline at a later date with ported heads/bigger cam. Along with a 27” tire 2nd gear should be good for 73 or 74mph with my 3.70 gears.
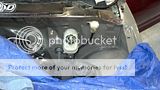
CP rules allow alternate motors to be installed +/- �” from stock on the bellhousing plane. Rather than take a chance with hawk’s mounts I made some solid mounts with a cheap SBC mount set and some angle iron. The engine is setback 3/8”, I didn’t want to push my luck with protests too much. I took measurements from an LT1 block to the aft most mounting hole and positioned the engine side mount off of that. If I did this again I think I’d get rid of the bolted on k-member mount and weld something directly to the k-member. Then I would use poly SBC mounts on the engine side that aren’t cantilevered out. I could probably save weight this way even with heavier poly mounts.
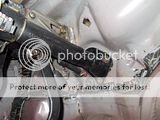
For the transmission mount, I raised the back of the transmission to keep as much exhaust clearance as possible. The Hawks LT headers hang down long and would’ve gotten beat up with the ride height I want to run (probably around 25-25.5” fender height). I also slightly shifted the transmission to the passenger side to give more room on the driver side. Hopefully this doesn’t cause u-joint issues. The collectors still hang down about an inch. I think they’ll be alright that close to the front wheels. The collectors are really close to the frame rails as well. I’m sure it’s for fitment with the wide 700r4/4L60E pan, but sucks for those of us with a manual.

The 3” y-pipe was built from a pype’s kit with a few extra bends. It dumps right before the rear axle with the mufflers where the back seat pan’s used to be. Thanks to the shorter 5” 30-series shocks I can actually run a tube out under the axle and not worry about clearance at full droop if the fumes and noise get to me too much. It’s going to be overkill for any motor I ever put in the car, so it’s heavier than needed. At least the weight is low and centrally located. I’m planning on wrapping the headers and exhaust from just in front of the firewall back to the cross. Floorboards are still going to get hot.
The ls1 motor is a fairly high mile unit. Compression looked good, not gunked up under the valve covers, but the oil was pretty dirty. We’ll see how she runs. Found a valley cover and intake locally from a CTS-V. I found some 243 heads inexpensively as well, so I went ahead and swapped those out. Heads were lapped and new patriot gold springs put in before installing. Cam is a TR224/224 on 112 if I’m remembering right. I still need pushrods, stockers only have about 1/2 a turn of preload. Should be okay to get the car started though. I have an improved racing baffle installed and an accusump that will be going in, but I want to save that project for after the car is drivable. Probably put in a catch can in later as well.
Transmission is an MN12 from a wrecked GTO, no real idea on the mileage on this, but fluid was clean and it came with a nearly new Ram aluminum flywheel and ZR1 clutch. Maybe when I build the 5.1L I’ll probably pick up a fidanza flywheel (6lbs lighter) and a different clutch since the ZR1 pressure plate is heavy, or I’ll just go with a 3-disk racing clutch. Second gear with the MN12 doesn’t look good with a 25.5” tire for a top speed of 64mph with a 6500rpm redline. I could see running 7000rpm redline at a later date with ported heads/bigger cam. Along with a 27” tire 2nd gear should be good for 73 or 74mph with my 3.70 gears.
CP rules allow alternate motors to be installed +/- �” from stock on the bellhousing plane. Rather than take a chance with hawk’s mounts I made some solid mounts with a cheap SBC mount set and some angle iron. The engine is setback 3/8”, I didn’t want to push my luck with protests too much. I took measurements from an LT1 block to the aft most mounting hole and positioned the engine side mount off of that. If I did this again I think I’d get rid of the bolted on k-member mount and weld something directly to the k-member. Then I would use poly SBC mounts on the engine side that aren’t cantilevered out. I could probably save weight this way even with heavier poly mounts.

For the transmission mount, I raised the back of the transmission to keep as much exhaust clearance as possible. The Hawks LT headers hang down long and would’ve gotten beat up with the ride height I want to run (probably around 25-25.5” fender height). I also slightly shifted the transmission to the passenger side to give more room on the driver side. Hopefully this doesn’t cause u-joint issues. The collectors still hang down about an inch. I think they’ll be alright that close to the front wheels. The collectors are really close to the frame rails as well. I’m sure it’s for fitment with the wide 700r4/4L60E pan, but sucks for those of us with a manual.


The 3” y-pipe was built from a pype’s kit with a few extra bends. It dumps right before the rear axle with the mufflers where the back seat pan’s used to be. Thanks to the shorter 5” 30-series shocks I can actually run a tube out under the axle and not worry about clearance at full droop if the fumes and noise get to me too much. It’s going to be overkill for any motor I ever put in the car, so it’s heavier than needed. At least the weight is low and centrally located. I’m planning on wrapping the headers and exhaust from just in front of the firewall back to the cross. Floorboards are still going to get hot.
05-22-2014, 12:38 PM
#18
Member
Thread Starter
iTrader: (3)
Join Date: Nov 2002
Location: Wichita, KS
Posts: 491
Likes: 0
Received 1 Like
on
1 Post
Car: 88 Trans Am GTA
Engine: 5.1L Gen III
Transmission: T56
Axle/Gears: 3.70
Re: C-Prepared Autox Build
From 4/21/13:
The tubes and mufflers are all 408 SS with 308L (I think ) filler. Hopefully this gives the welds a little more corrosion resistance. I’m not concerned with the 408 tubing, if it can last 200k miles in an OEM setting, the rest of my car will probably rust away before it does. I never thought to back-purge the welds until recently, hopefully they’ll still last. Mufflers are 18” long magnaflows. I’m hoping the extra length makes them quieter.
Driveshaft is a PST off the shelf 40” long, 3” aluminum shaft I found for $230. Seemed like a great deal until I had to replace the rear U-joint, install my yoke, and get the whole thing balanced. It’s shorter to make up for the slight engine setback, the 7/8” relocated axle, and the possibly longer ls1 input shaft/bellhousing. The 3” OD didn’t like the jegster torque arm mount and it’s been clearance quite a bit. If it’s not strong enough I don’t think a 3.5” will fit at this ride height.
I finagled the factory fuel line to work with the new arrangement. The fuel filter now sits just about of the driver side muffler with the lines shortened to fit. The line is flared to 37� at about the tranny mid plate and an AN6 union connects it to a pre fabbed Teflon line. All in all a pretty simple and cheap way to plumb it. With a semi returnless system I am a little concerned with heat in the lines since the only flow up to the engine is what is actually used by the engine. Right now the fuel line is 2-3" from the exhaust for most of the run.
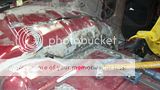
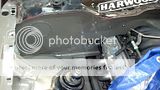
In the engine bay I filled a lot of holes with welds and patch panels. As it works out I decided after this to run the front light wiring underneath the LH fender and to get rid of the heater core, so I still had a few panels to make.

The tubes and mufflers are all 408 SS with 308L (I think ) filler. Hopefully this gives the welds a little more corrosion resistance. I’m not concerned with the 408 tubing, if it can last 200k miles in an OEM setting, the rest of my car will probably rust away before it does. I never thought to back-purge the welds until recently, hopefully they’ll still last. Mufflers are 18” long magnaflows. I’m hoping the extra length makes them quieter.

Driveshaft is a PST off the shelf 40” long, 3” aluminum shaft I found for $230. Seemed like a great deal until I had to replace the rear U-joint, install my yoke, and get the whole thing balanced. It’s shorter to make up for the slight engine setback, the 7/8” relocated axle, and the possibly longer ls1 input shaft/bellhousing. The 3” OD didn’t like the jegster torque arm mount and it’s been clearance quite a bit. If it’s not strong enough I don’t think a 3.5” will fit at this ride height.
I finagled the factory fuel line to work with the new arrangement. The fuel filter now sits just about of the driver side muffler with the lines shortened to fit. The line is flared to 37� at about the tranny mid plate and an AN6 union connects it to a pre fabbed Teflon line. All in all a pretty simple and cheap way to plumb it. With a semi returnless system I am a little concerned with heat in the lines since the only flow up to the engine is what is actually used by the engine. Right now the fuel line is 2-3" from the exhaust for most of the run.
In the engine bay I filled a lot of holes with welds and patch panels. As it works out I decided after this to run the front light wiring underneath the LH fender and to get rid of the heater core, so I still had a few panels to make.


 05-22-2014, 12:40 PM
#19
Member
Thread Starter
iTrader: (3)
Join Date: Nov 2002
Location: Wichita, KS
Posts: 491
Likes: 0
Received 1 Like
on
1 Post
Car: 88 Trans Am GTA
Engine: 5.1L Gen III
Transmission: T56
Axle/Gears: 3.70
Re: C-Prepared Autox Build
From 5/13/13 responding to questions on the wiring:
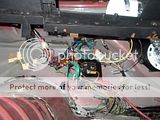
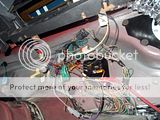
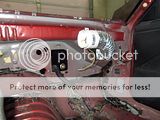
The looped wires are for the fuel relay and the fans that I still need to run. Also still need to run the alternator excite wires back to the shut off switch. All the wires are ran through the C101 and C100 connectors. I got rid of the others. I've got a little more cleaning up to do, but I hope this will suffice. The fuse blocks are bussmann 6 place ones that advanced auto carries. One for ignition and one always on should handle everything on the car. I've got another 4 place block back by the battery for the fuel pump and laptop.
Cutting out the emmissions is not that difficult to go through the stock harness, just go one plug at a time and take your time. I went through a season of dexter between the body and the motor harness. There's nothing "painless" about a painless harness.
In terms of gauges, VSS, oil pressure, and tach are just splice in the wire from the ECU and go. Voltmeter just needs to reference 12V. '98 car's may need the alternator ran to this for the resistance? 99+ car's you have to add a coolant temp or run a '98 three pin sensor. The Fuel gauge is tricky, I haven't looked into this as much as I should, but there are work arounds on TGO. I would add a low pressure warning light since the factory gauge isn't as quick as we'd like.
In terms of running the motor, its only 3-4 ignition switched fuses, LT1swap.com I think knocks this down to only one or two. Then 1 or 2 always on fuses. It's a lot of work, but I don't think painless or anything else would save me any time and just put a dent in my wallet.
Eh, what can I say, I'm an engineer. I do spreadsheets for everything including wiring:
https://docs.google.com/spreadsheet/ccc?key...amp;usp=sharing
05-26-2014, 10:18 PM
#20
Member
05-27-2014, 09:22 AM
#21
Supreme Member
iTrader: (1)
Join Date: Jul 1999
Posts: 3,257
Likes: 0
Received 5 Likes
on
3 Posts
Car: Turbo Buick
Engine: 3.8 V6
Re: C-Prepared Autox Build
Roostmeyer,
Love your build. Our cars are remarkably similar except you seem to have it turned up a couple of notches over where I am at now.
I am surprised you were able to get the 335s to fit under the fender up front. How much would you say you had to pull the fender outward to do this? I imagine we have arrived at about the same amount of backspacing due to the strut. Does the firebird fender give you more outboard room? For me to fit the 335 up there I'd have to pull the fender out about an inch. As it stands, my 315s are perfectly tucked and are at stock thirdgen scrub radius.
As far as the bumper, did you do anything to tie the front frame rails together after removing it? I've been considering doing this but am hesitant that the bumper is actually providing some structural rigidity there and was thinking about building a light brace that would tie the rails together in lieu of the bumper.
Thanks for the mounting tips for the circle track konis. Just got them in. What do you have your rebound set at if you don't mind me asking?
Finally, you might want to consider adding some bracing for the steering box. As you've seen from my posts on frrax, I've really found this to be a flimsy area of the car with the wide tires. I ended up fabbing up yet another brace that actually mounts to the top of the box cover, weighs 2 lbs, and has eliminated 95% of the flex. I can send you a pic if you like.
The other thing that I might suggest is keeping an eye on those CCWs. I ended up cracking one of mine. Never curbed it, never hit anything. Just noticed hair line cracks on damn near half of the spokes one day.
05-27-2014, 12:47 PM
#22
Member
Thread Starter
iTrader: (3)
Join Date: Nov 2002
Location: Wichita, KS
Posts: 491
Likes: 0
Received 1 Like
on
1 Post
Car: 88 Trans Am GTA
Engine: 5.1L Gen III
Transmission: T56
Axle/Gears: 3.70
Re: C-Prepared Autox Build
From 5/22/13:
I finally finished up my adapter. After a quick coat of paint i don't think it looks to bad, but before it reminded me of something a cub scout would carve.
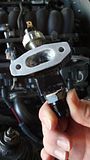

Now I just need make one more line, clamp all the hoses down, fill the accusump, and prime the engine.
I finally finished up my adapter. After a quick coat of paint i don't think it looks to bad, but before it reminded me of something a cub scout would carve.


Now I just need make one more line, clamp all the hoses down, fill the accusump, and prime the engine.
Last edited by Roostmeyer; 05-27-2014 at 01:08 PM.
05-27-2014, 12:49 PM
#23
Member
Thread Starter
iTrader: (3)
Join Date: Nov 2002
Location: Wichita, KS
Posts: 491
Likes: 0
Received 1 Like
on
1 Post
Car: 88 Trans Am GTA
Engine: 5.1L Gen III
Transmission: T56
Axle/Gears: 3.70
Re: C-Prepared Autox Build
From 5/24/13:
If i was running an oil cooler I'd probably go ahead and run a remote filter. For autocross, I feel its just extra weight up front where I don't want it.
It would be easy enough to setup a CNC part, but everything would have to be outsourced so there wouldn't be any profit margin.
I drilled holes where I wanted to end features and then used a bandsaw to connect thedots tangencies. Then did some basic rounding/chamfers on a benchtop grinder with some ATF to keep from clogging things up. Since I used 2024-T351 material I painted it for corrosion resistance. The main port was tapped with a 1/2" NPT tap from Harbor Freight. I hate the small NPT taps, but the big stuff is a whole new level of suckage. It takes a lot of force and a lot of time, probably close to an hour on that one port. I had it on hand after blocking off the water pump ports.
I prelubed the engine with the accumsump and tried turning the motor over one last time. It wouldn't build any additional pressure, but it also didn't drop. I'm guessing the oil wouldn't run through the pump to fill up the pickup. Even with fresh oil on the backside of the pump it didn't spin fast enough to fill the pickup. Then I closed the valve and took a break. After coming back and getting all the spark plugs on and fuel pump wired I tried it real quick w/o opening the accusump and the motor fired right up and held 30psi for the 4-5 seconds that it ran. I didn't have the IAT or MAF plugged in so it was running pig rich and wouldn't refire. Hopefully I'll have a chance to try it again with alternator in and everything hooked up.
If i was running an oil cooler I'd probably go ahead and run a remote filter. For autocross, I feel its just extra weight up front where I don't want it.
It would be easy enough to setup a CNC part, but everything would have to be outsourced so there wouldn't be any profit margin.
I drilled holes where I wanted to end features and then used a bandsaw to connect the
I prelubed the engine with the accumsump and tried turning the motor over one last time. It wouldn't build any additional pressure, but it also didn't drop. I'm guessing the oil wouldn't run through the pump to fill up the pickup. Even with fresh oil on the backside of the pump it didn't spin fast enough to fill the pickup. Then I closed the valve and took a break. After coming back and getting all the spark plugs on and fuel pump wired I tried it real quick w/o opening the accusump and the motor fired right up and held 30psi for the 4-5 seconds that it ran. I didn't have the IAT or MAF plugged in so it was running pig rich and wouldn't refire. Hopefully I'll have a chance to try it again with alternator in and everything hooked up.
05-27-2014, 12:50 PM
#24
Member
Thread Starter
iTrader: (3)
Join Date: Nov 2002
Location: Wichita, KS
Posts: 491
Likes: 0
Received 1 Like
on
1 Post
Car: 88 Trans Am GTA
Engine: 5.1L Gen III
Transmission: T56
Axle/Gears: 3.70
Re: C-Prepared Autox Build
From 6/24/13:
The house is painted, shed is built, I just need to wrap up some things here and there so I can get back to this build. It'll be just in time for 100+ degree, 50%+ relative humidity summer heat.
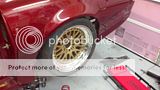
A friend of mine needed to rent a roller to get 225 rivals and 15x9 wheels under his STR miata. So I took a break and did my fenders to split the rental fee. Before rolling we loosened the fender bolts on top and pulled the fenders out as far as we could in the middle then I started to do a fairly aggressive roll.
Here's photos with the 18x11.5 CCW/315/30R18's on the car with a 1/2" spacer. 335/30R18's and 18x12's should clear just fine . Still need another 1/2 degree or so of camber on the driver side too. I only have ~1/8" clearance to the strut, so I may end up having to run a small spacer at some point.
Crappy cell phone pics, but you get the idea...
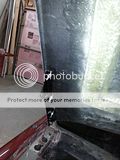
It's actually looking like 345/35R18's will be a tighter fit in the back than the 335's in the front. Bump travel sucks on this strut car. Photo's are with the tire bottomed out. The strut is bottoming out at the about the same time that the tire hits the strut support pinch weld and the bottom strut mount/stud plate. I can raise the strut mount if needed, and I'm going fold over the pinch weld even more, but after that I'm pretty much at the limits travel. I wish I had about another 1/2-3/4" of travel.
I'm sure I've pushed the fenders out and up from what they were stock, but I'm only measuring 24" to the bottom of the tire, so maybe 23.5" at full bump with some tire squish at the ground. 1.5" of travel puts me at 25" fender to ground ride height. I'll probably run 25.5" static ride height. I don't think my springs are quite that stiff yet to get by with only 1.5" of bump travel, but I'm not sure.
The house is painted, shed is built, I just need to wrap up some things here and there so I can get back to this build. It'll be just in time for 100+ degree, 50%+ relative humidity summer heat.
A friend of mine needed to rent a roller to get 225 rivals and 15x9 wheels under his STR miata. So I took a break and did my fenders to split the rental fee. Before rolling we loosened the fender bolts on top and pulled the fenders out as far as we could in the middle then I started to do a fairly aggressive roll.
Here's photos with the 18x11.5 CCW/315/30R18's on the car with a 1/2" spacer. 335/30R18's and 18x12's should clear just fine
. Still need another 1/2 degree or so of camber on the driver side too. I only have ~1/8" clearance to the strut, so I may end up having to run a small spacer at some point.

Crappy cell phone pics, but you get the idea...
It's actually looking like 345/35R18's will be a tighter fit in the back than the 335's in the front. Bump travel sucks on this strut car. Photo's are with the tire bottomed out. The strut is bottoming out at the about the same time that the tire hits the strut support pinch weld and the bottom strut mount/stud plate. I can raise the strut mount if needed, and I'm going fold over the pinch weld even more, but after that I'm pretty much at the limits travel. I wish I had about another 1/2-3/4" of travel.
I'm sure I've pushed the fenders out and up from what they were stock, but I'm only measuring 24" to the bottom of the tire, so maybe 23.5" at full bump with some tire squish at the ground. 1.5" of travel puts me at 25" fender to ground ride height. I'll probably run 25.5" static ride height. I don't think my springs are quite that stiff yet to get by with only 1.5" of bump travel, but I'm not sure.
05-27-2014, 01:06 PM
#25
Member
Thread Starter
iTrader: (3)
Join Date: Nov 2002
Location: Wichita, KS
Posts: 491
Likes: 0
Received 1 Like
on
1 Post
Car: 88 Trans Am GTA
Engine: 5.1L Gen III
Transmission: T56
Axle/Gears: 3.70
Re: C-Prepared Autox Build
Roostmeyer,
Love your build. Our cars are remarkably similar except you seem to have it turned up a couple of notches over where I am at now.
I am surprised you were able to get the 335s to fit under the fender up front. How much would you say you had to pull the fender outward to do this? I imagine we have arrived at about the same amount of backspacing due to the strut. Does the firebird fender give you more outboard room? For me to fit the 335 up there I'd have to pull the fender out about an inch. As it stands, my 315s are perfectly tucked and are at stock thirdgen scrub radius.
As far as the bumper, did you do anything to tie the front frame rails together after removing it? I've been considering doing this but am hesitant that the bumper is actually providing some structural rigidity there and was thinking about building a light brace that would tie the rails together in lieu of the bumper.
Thanks for the mounting tips for the circle track konis. Just got them in. What do you have your rebound set at if you don't mind me asking?
Finally, you might want to consider adding some bracing for the steering box. As you've seen from my posts on frrax, I've really found this to be a flimsy area of the car with the wide tires. I ended up fabbing up yet another brace that actually mounts to the top of the box cover, weighs 2 lbs, and has eliminated 95% of the flex. I can send you a pic if you like.
I added the steering brace to my to do list. I'd really like to fit in a racing rack and pinion, but it's going to require relocating the alternator, motor mount, and #1, possibly #3 primary. In short, not worth it at the moment. It should be good for a 25-30lb weight drop, more precise steering, and twice the steering ratio.

I know CCW did a redesign on the centers at some point to prevent that. As far as I know I have the newer design, but I don't have any way of verifying that as I bought the centers from somebody who bought them from somebody.
05-27-2014, 03:05 PM
#26
Supreme Member
iTrader: (1)
Join Date: Jul 1999
Posts: 3,257
Likes: 0
Received 5 Likes
on
3 Posts
Car: Turbo Buick
Engine: 3.8 V6
Re: C-Prepared Autox Build
Right now my front wheels have 7.25" backspacing (my brakes are ~1/2" wider track). 18" wheels help a lot. I've got between an 1/8" and 3/16" of clearance to the strut, so far no rubbing. There's about 1/2� of camber in the strut to spindle interface, I've got mine moved all the way towards positive camber and then a little slotting to give more clearance. I did spin while doing some course setup/practice and the LCA rubbed/machined a good chunk off the inner lip of the wheel so steering stops are on the to-do list.
 . I moved the wheel out .25" and it fixed the issue. Ended up with the same exact track width/scrub radius as stock and still nicely tucked so it all worked out. I did bend the steering stops on the A arms a little to give me more breathing room though.
I didn't do anything with the front bumper area. I actually cut off the frame horns (7lb of weight loss if I remember correctly) but that's not legal in CP so I had to weld them back on.
Based on that assumption I was thinking that a H/C 4.8 LS would be a perfect and cost effective swap. I've seen some builds where they are getting close to 500 HP out of them.
I added the steering brace to my to do list. I'd really like to fit in a racing rack and pinion, but it's going to require relocating the alternator, motor mount, and #1, possibly #3 primary. In short, not worth it at the moment. It should be good for a 25-30lb weight drop, more precise steering, and twice the steering ratio.
In my searching the closest thing that looks like it might work is the center take off rack you see unisteer (and others) using for their chevelle and second gen F body kits. Pretty sure they've cut the housing, rotated it, and installed the rear steer cavalier piston in a front steer dodge intrepid rack. They are the same rack just mirror images for front steer or rear steer.
The intrepid rack is the one that might work but you would have to fab a bracket that sort of worked like a U to bolt to the front of the rack where the holes for the tie rods are and came around the back of the rack to mount our tie rods. The width is something like 34.5" inches, and the input looks like it would sit right about where our stock steering box is. The width might be the deal breaker in that it might barely squeeze between the stock sway bar width once positioned.
This rack has enough throw and I believe has the same steering ratio as our steering box. If I could, I would have "rented" one from the auto parts store to see if it would work but I am in Europe and a dodge intrepid steering rack is a little hard to come by

Just some food for thought, would love to hear if you investigate this option. Look at that second gen Unisteer kit if you want to see how they did it.
05-27-2014, 03:42 PM
#27
Member
Thread Starter
iTrader: (3)
Join Date: Nov 2002
Location: Wichita, KS
Posts: 491
Likes: 0
Received 1 Like
on
1 Post
Car: 88 Trans Am GTA
Engine: 5.1L Gen III
Transmission: T56
Axle/Gears: 3.70
Re: C-Prepared Autox Build
Speaking of CP legality, I seem to remember reading something in the rules about the engine block having to be made from the same material as was available from the factory. Am I high?
Based on that assumption I was thinking that a H/C 4.8 LS would be a perfect and cost effective swap. I've seen some builds where they are getting close to 500 HP out of them.
Based on that assumption I was thinking that a H/C 4.8 LS would be a perfect and cost effective swap. I've seen some builds where they are getting close to 500 HP out of them.
I hear you on the rack and pinion. I researched this heavily myself. AFAIK there isn't really a good end take off option that I could find that checked all the boxes as far as fit, throw, length, etc.
In my searching the closest thing that looks like it might work is the center take off rack you see unisteer (and others) using for their chevelle and second gen F body kits. Pretty sure they've cut the housing, rotated it, and installed the rear steer cavalier piston in a front steer dodge intrepid rack. They are the same rack just mirror images for front steer or rear steer.
The intrepid rack is the one that might work but you would have to fab a bracket that sort of worked like a U to bolt to the front of the rack where the holes for the tie rods are and came around the back of the rack to mount our tie rods. The width is something like 34.5" inches, and the input looks like it would sit right about where our stock steering box is. The width might be the deal breaker in that it might barely squeeze between the stock sway bar width once positioned.
This rack has enough throw and I believe has the same steering ratio as our steering box. If I could, I would have "rented" one from the auto parts store to see if it would work but I am in Europe and a dodge intrepid steering rack is a little hard to come by
Just some food for thought, would love to hear if you investigate this option. Look at that second gen Unisteer kit if you want to see how they did it.
My thought was to use a racing rack for the speed and tune-ability. Also bump steer can be adjusted at the rack just as easily as at the spindle this way.
Last edited by Roostmeyer; 05-27-2014 at 03:45 PM. Reason: grammar
05-27-2014, 04:18 PM
#28
Supreme Member
iTrader: (1)
Join Date: Jul 1999
Posts: 3,257
Likes: 0
Received 5 Likes
on
3 Posts
Car: Turbo Buick
Engine: 3.8 V6
Re: C-Prepared Autox Build
I got the rack pictured above for $120 on ebay and picked it up locally. I remember them being a little short on throw, but with bigger tires we can't use the full factory throw anyway. If I get time this week I'll measure the throw and compare it the usable travel out of the factory box. It's 18.25 center to center, so it may cause some bump steer issues. It actually uses the same splines as the factory box, so my jeep sheering shaft should bolt right up. 17.25" racks are fairly common as well, and should be a easier to zero out bumpsteer, but then you lose an inch of travel compared to a 18.25" rack.
My thought was to use a racing rack for the speed and tune-ability. Also bump steer can be adjusted at the rack just as easily as at the spindle this way.
My thought was to use a racing rack for the speed and tune-ability. Also bump steer can be adjusted at the rack just as easily as at the spindle this way.
I guess my issue with the e.t.o. type racks is that the input shaft routing seems like it would be extremely problematic. I'm not familiar with the rack you have pictured. I've seen picts of an appleton rack that looks similar. Do you have a link or reference with more info?
With regard to your drivetrain, I saw that you are running an MN12. I take it this weighs about as much as a t56? Have you considered a 4 speed or a built T5? IIRC that's something like a 50 lb delta right there (granted, low and in the center).
BTW I don't know if you missed it but I was also wondering what you have your rebound set at with the 5" konis if you don't mind sharing.
05-28-2014, 09:00 AM
#29
Member
Thread Starter
iTrader: (3)
Join Date: Nov 2002
Location: Wichita, KS
Posts: 491
Likes: 0
Received 1 Like
on
1 Post
Car: 88 Trans Am GTA
Engine: 5.1L Gen III
Transmission: T56
Axle/Gears: 3.70
Re: C-Prepared Autox Build
As far as I know the appleton and BRT racks interchange the majority of their parts. BRT recently got bought out, but I can't remember who owns them now. I had wanted a dual pull sweet rack, but this just kind of fell in my lap. From what I can tell the BRT/Appleton racks are dimensionally the same as sweet. And yeah, the steering shaft will be difficult. They also have remote servo racks. That would give you more flexibility, but it's also twice the u-joints.
The MN12 is just a T56 with different gearing, so yeah a heavy lump. At some point if the car becomes a total trailer queen I may go the 4-speed route, 50lb's is pretty hard to beat for weight, and a bell housing mounted starter would be cool... Unfortunately I don't think a T5 (even built) would be reliable at the power level I'd like. And a TKO doesn't weight that much less than a T56.
As for the 30 series shocks, I've got them set at the 2nd click firm, so 3/4 stiff. I've got 350lb springs in back at the moment so your results may vary.
06-01-2014, 03:32 AM
#31
Supreme Member
iTrader: (1)
Join Date: Jul 1999
Posts: 3,257
Likes: 0
Received 5 Likes
on
3 Posts
Car: Turbo Buick
Engine: 3.8 V6
Re: C-Prepared Autox Build
I posted about it here:
http://www.frrax.com/rrforum/index.php?showtopic=16578
I added a tie in to the ball joint since those pictures were taken but you get the idea.
Roostmeyer, thanks for the reply about the shocks. I'm running 300 lb springs on a D44 (w/24mm bar) so it might work out to similar rebound. Just so happens I set them on 3/4 when I installed them. I'm amazed at how much better the ride is with these things than with the stock Koni yellows. Part of that might be that one of mine was blown. They are really way too long for anything lowered. The 5 inch 30 series shocks are the perrrrfect length. Springs don't fall out anymore at full droop either.
By the way, which sway bar did you end up running at the autoX with those 350lb springs?
I look forward to more updates/results from your build!
Last edited by Pablo; 06-01-2014 at 03:35 AM.
06-01-2014, 04:59 PM
#32
Member

Join Date: Oct 2011
Location: Black Hills
Posts: 226
Likes: 0
Received 0 Likes
on
0 Posts
Car: 88 rs
Engine: ls1
Transmission: t56
Axle/Gears: moser 4:10
Re: C-Prepared Autox Build
I'm not a member of frrax.com and they're taking any new members from what I can see.
06-02-2014, 12:34 PM
#34
Member
Thread Starter
iTrader: (3)
Join Date: Nov 2002
Location: Wichita, KS
Posts: 491
Likes: 0
Received 1 Like
on
1 Post
Car: 88 Trans Am GTA
Engine: 5.1L Gen III
Transmission: T56
Axle/Gears: 3.70
Re: C-Prepared Autox Build
From 7/5/13:
I weighed the car tonight, 2760lbs. 54% front weight w/o hood, radiator diffuser, lights, etc. I’m running out of ways to cut weight, but I still need to gut the passenger door and cut out the side impact beams. With the 16" wheel OD penalty gone I think I need to just go ahead and bite the bullet on the lexan. The other big items left are a racing rack and pinion and lighter flywheel/clutch. The ZR1 pressure plate is a heavy pig.
To get a better handle on what different mods will do I’ve created a weight/balance spreadsheet. I’m more concerned with getting weight off the front of the car than just meeting minimum weight.
https://docs.google.com/spreadsheet/ccc?key...amp;usp=sharing
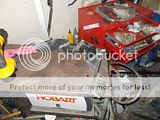
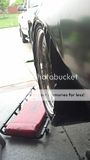
And the best $5 I ever spent on ebay:

I need to order 2-3 more so I can keep one in my truck on parts runs, swap meets etc. and have one when I misplace the other. Best portable way to check weights.
I weighed the car tonight, 2760lbs. 54% front weight w/o hood, radiator diffuser, lights, etc. I’m running out of ways to cut weight, but I still need to gut the passenger door and cut out the side impact beams. With the 16" wheel OD penalty gone I think I need to just go ahead and bite the bullet on the lexan. The other big items left are a racing rack and pinion and lighter flywheel/clutch. The ZR1 pressure plate is a heavy pig.
To get a better handle on what different mods will do I’ve created a weight/balance spreadsheet. I’m more concerned with getting weight off the front of the car than just meeting minimum weight.
https://docs.google.com/spreadsheet/ccc?key...amp;usp=sharing
And the best $5 I ever spent on ebay:

I need to order 2-3 more so I can keep one in my truck on parts runs, swap meets etc. and have one when I misplace the other. Best portable way to check weights.
Last edited by Roostmeyer; 06-02-2014 at 12:38 PM.
06-02-2014, 12:38 PM
#35
Member
Thread Starter
iTrader: (3)
Join Date: Nov 2002
Location: Wichita, KS
Posts: 491
Likes: 0
Received 1 Like
on
1 Post
Car: 88 Trans Am GTA
Engine: 5.1L Gen III
Transmission: T56
Axle/Gears: 3.70
Re: C-Prepared Autox Build
From 7/6/13:
So here’s a breakdown on what I’ve done to get to 2760:
From stock there are some easy big items, the front bumper weighs 27 lbs, ~35” in front of the front wheel axle center-line. Removing this takes about 36 lbs off the front wheels. The front hood is ~68lbs with hinges. The doors are pigs, and lots of comfort/convenience items we can get rid of because racecar.
The upper bumper bracket and support weigh over 10lbs together on a firebird, I’ve got cut this down to 2lb. I had planned on welding up a 1” chromoly bumper support to keep the nose from caving in at speed, but I think I’m just going to fiberglass over a foam core to strengthen the nose with minimal weight.. The lower part would be left as is to hopefully be able to soak up cone hits.
Two headlight assemblies with motors weight just under 20 lbs. Sloppy engineering by GM, adapter brackets attached to adapter brackets, what a mess. Mine won’t look as pretty when they’re manually put up, but should weigh around 6 lbs total including the hinges. Of course they won’t have as much adjust-ability so hopefully I can get the gaps to look good... I’ll try to update this when I get a get a better photo.
The numbers from 2/17/13 had me at 55% front weight and 2744 overall, but no seats, fluids, and the motor was missing a few small things. I think I may have some side loading on the front scales from scrub. I've mounted some ball bearings to help them move when loaded since. I really liked the harwood 3" cowl hood, but it weighed 25lbs. I was able to find a local buyer and pretty much just eat the truck freight on it. I've had hard time finding hood weights on TGO, but it sounds like a flat lift off VFN should weigh about 15lb.
I have some lower fender supports I need to remake in aluminum. I plan to replace some of the lower radiator diffuser and factory undertray pieces with corrugated plastic.
The brake booster weighs 9.1lbs. The brakes have always had an initial surge which was made braking zones nearly impossible to nail. In RCV, Milican talks about a filter or checkvalve that can be altered to help this, but I’m sure I’ll want a bigger cam in the future that’ll provide even less vacuum anyway, might as well just get rid of it. The LS1 MC weighs considerably less than the thirdgen one too. I could’ve made an adapter plate but decided to just drill two extra 3/8” hole through the firewall.
Pedals are swung back some and I modded the factory column to move it back as well. I’m going to wait until I have the seat mounted to extend/curve the pads of the pedals down. The clutch pushrod is some threaded aluminum rod connected to a cheap 3/8” rod end and a howe MC pushrod. AP sells the correct piece, but this was close and I had it on hand to use it for the brakes. Here’s my trick for getting the nasty spiral snap ring back in place after reassembly with the new pushrod. It’s not any fun.
The brake pushrod is the same thing with a chunk of 3/8 UNC allthread with an acorn nut on the end under the Howe MC boot. I’m not concerned with the swing on the clutch. The brakes will probably be about right with the increased travel due to being manual. The factory stuff probably over centers during heavy (race) braking anyway.
Aftermarket pedals would save a couple pounds of weight, and a racing column would save close to 6lbs or so. I may do that someday if I get rid of the factory dash, but for now I don’t want to spend anymore time or money on it. I moved back the steering column some as well. I cut the lower support at the rolled spot weld and moved it 2.5-3”. This should help with driver set back. The upper support I modified to bolt there and still allow it slide off and collapse in a wreck.
A factory AC delete panel/fan is still 5.5 lbs and wiring is different enough from the AC box that I decided to just ditch it and do something different. I have it scratched down somewhere, but I seem to remember the ducts weighing around 3-4lbs, the heater box and flappers were like 8 and the heater core was probably 5lb’s with the lines and coolant. I didn’t think the heater core was worth it by itself, but with all the ducting it adds up, so out it goes. On the water pump I’ve pulled out the hose bungs, tapped the holes, put my gauge coolant temp sensor in one and a plug in the other.
Here’s the new vent fan, detmar 4”, rated for 250 'ish CFM. It weighs under a pound. I tested it across my truck battery terminals and I think it’ll move as much air on high through the center duct as the factory blower did. I’m going to ditch the two outer vents (that’s what windows are for) as well as the foot outlets. Plan is to stuff a 1.5” few tubes that run to the windshield out of the back of the center vent. Close the center vent and the air does a u-turn to push fresh air to the windshield. Probably just going to use a high-off-low switch for control with a resistor on the low circuit. We’ll see how well the dryer duct stands up. For now the price is right and SCAT tubing gets a little expensive and heavy in 4”.
A future weight savings idea is to put in a sheetmetal dash and a dedicated display. A DL1 and Dash2 run close to 2G's, so not going to be swinging that anytime soon. I can't find my measurements but I think I could save ~18lbs with that.
I decided to cut anything non-essential out of the harness. No more radio, power windows/locks/mirrors, defrost for the hatch, hatch release, courtesy lights, key/light ding, dome light… pretty much factory gauges, stuff for the engine harness, and exterior lights only. Lots of little boxes, relays, and connectors can come out. I'd estimate 10lbs of wiring I've cut out.
One of the things I’ve been considering is run whatever ballast I need behind the rear axle, probably bolt it to the bottom of the frame rail just behind the panhard. I suppose I need to do a moment of inertia calculation and see what 50-100 lbs of ballast does a few more feet from the CG.
So here’s a breakdown on what I’ve done to get to 2760:
From stock there are some easy big items, the front bumper weighs 27 lbs, ~35” in front of the front wheel axle center-line. Removing this takes about 36 lbs off the front wheels. The front hood is ~68lbs with hinges. The doors are pigs, and lots of comfort/convenience items we can get rid of because racecar.
The upper bumper bracket and support weigh over 10lbs together on a firebird, I’ve got cut this down to 2lb. I had planned on welding up a 1” chromoly bumper support to keep the nose from caving in at speed, but I think I’m just going to fiberglass over a foam core to strengthen the nose with minimal weight.. The lower part would be left as is to hopefully be able to soak up cone hits.

Two headlight assemblies with motors weight just under 20 lbs. Sloppy engineering by GM, adapter brackets attached to adapter brackets, what a mess. Mine won’t look as pretty when they’re manually put up, but should weigh around 6 lbs total including the hinges. Of course they won’t have as much adjust-ability so hopefully I can get the gaps to look good... I’ll try to update this when I get a get a better photo.
The numbers from 2/17/13 had me at 55% front weight and 2744 overall, but no seats, fluids, and the motor was missing a few small things. I think I may have some side loading on the front scales from scrub. I've mounted some ball bearings to help them move when loaded since. I really liked the harwood 3" cowl hood, but it weighed 25lbs. I was able to find a local buyer and pretty much just eat the truck freight on it. I've had hard time finding hood weights on TGO, but it sounds like a flat lift off VFN should weigh about 15lb.

I have some lower fender supports I need to remake in aluminum. I plan to replace some of the lower radiator diffuser and factory undertray pieces with corrugated plastic.
The brake booster weighs 9.1lbs. The brakes have always had an initial surge which was made braking zones nearly impossible to nail. In RCV, Milican talks about a filter or checkvalve that can be altered to help this, but I’m sure I’ll want a bigger cam in the future that’ll provide even less vacuum anyway, might as well just get rid of it. The LS1 MC weighs considerably less than the thirdgen one too. I could’ve made an adapter plate but decided to just drill two extra 3/8” hole through the firewall.

Pedals are swung back some and I modded the factory column to move it back as well. I’m going to wait until I have the seat mounted to extend/curve the pads of the pedals down. The clutch pushrod is some threaded aluminum rod connected to a cheap 3/8” rod end and a howe MC pushrod. AP sells the correct piece, but this was close and I had it on hand to use it for the brakes. Here’s my trick for getting the nasty spiral snap ring back in place after reassembly with the new pushrod. It’s not any fun.


The brake pushrod is the same thing with a chunk of 3/8 UNC allthread with an acorn nut on the end under the Howe MC boot. I’m not concerned with the swing on the clutch. The brakes will probably be about right with the increased travel due to being manual. The factory stuff probably over centers during heavy (race) braking anyway.
Aftermarket pedals would save a couple pounds of weight, and a racing column would save close to 6lbs or so. I may do that someday if I get rid of the factory dash, but for now I don’t want to spend anymore time or money on it. I moved back the steering column some as well. I cut the lower support at the rolled spot weld and moved it 2.5-3”. This should help with driver set back. The upper support I modified to bolt there and still allow it slide off and collapse in a wreck.

A factory AC delete panel/fan is still 5.5 lbs and wiring is different enough from the AC box that I decided to just ditch it and do something different. I have it scratched down somewhere, but I seem to remember the ducts weighing around 3-4lbs, the heater box and flappers were like 8 and the heater core was probably 5lb’s with the lines and coolant. I didn’t think the heater core was worth it by itself, but with all the ducting it adds up, so out it goes. On the water pump I’ve pulled out the hose bungs, tapped the holes, put my gauge coolant temp sensor in one and a plug in the other.

Here’s the new vent fan, detmar 4”, rated for 250 'ish CFM. It weighs under a pound. I tested it across my truck battery terminals and I think it’ll move as much air on high through the center duct as the factory blower did. I’m going to ditch the two outer vents (that’s what windows are for) as well as the foot outlets. Plan is to stuff a 1.5” few tubes that run to the windshield out of the back of the center vent. Close the center vent and the air does a u-turn to push fresh air to the windshield. Probably just going to use a high-off-low switch for control with a resistor on the low circuit. We’ll see how well the dryer duct stands up. For now the price is right and SCAT tubing gets a little expensive and heavy in 4”.
A future weight savings idea is to put in a sheetmetal dash and a dedicated display. A DL1 and Dash2 run close to 2G's, so not going to be swinging that anytime soon. I can't find my measurements but I think I could save ~18lbs with that.
I decided to cut anything non-essential out of the harness. No more radio, power windows/locks/mirrors, defrost for the hatch, hatch release, courtesy lights, key/light ding, dome light… pretty much factory gauges, stuff for the engine harness, and exterior lights only. Lots of little boxes, relays, and connectors can come out. I'd estimate 10lbs of wiring I've cut out.
One of the things I’ve been considering is run whatever ballast I need behind the rear axle, probably bolt it to the bottom of the frame rail just behind the panhard. I suppose I need to do a moment of inertia calculation and see what 50-100 lbs of ballast does a few more feet from the CG.
06-02-2014, 12:48 PM
#36
Member
Thread Starter
iTrader: (3)
Join Date: Nov 2002
Location: Wichita, KS
Posts: 491
Likes: 0
Received 1 Like
on
1 Post
Car: 88 Trans Am GTA
Engine: 5.1L Gen III
Transmission: T56
Axle/Gears: 3.70
Re: C-Prepared Autox Build
From 8/16/13:
After chasing my own tail on and off for the last 2 weeks I seriously thought my slave cylinder was screwed up... Last weekend I built an attachment for my jack to lift the tranny, and dropped it down. While it was out I measured the slave and built some shims to move it out 3/16".
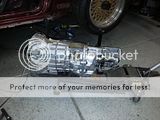
Before with a soft pedal I would get a few random bubbles through the bleeder, but other than that it was just solid brake fluid. I bought a parts store MC, went through 2 or 3 cups of brake fluid bleeding it and still had nothing. After 4 pumps with a $17 tool from harbor freight and I had a soft but at least usable clutch pedal. I'm going to go ahead and put the OEM MC back in since there was nothing wrong it.
I now know a remote bleeder is no replacement for a mity-vac :brick:
06-07-2014, 11:00 AM
#37
Member
Thread Starter
iTrader: (3)
Join Date: Nov 2002
Location: Wichita, KS
Posts: 491
Likes: 0
Received 1 Like
on
1 Post
Car: 88 Trans Am GTA
Engine: 5.1L Gen III
Transmission: T56
Axle/Gears: 3.70
Re: C-Prepared Autox Build
From 11/7/13:
It’s been way too long without an update. It’s been a busy few months. Went on vacation, saw some family and didn’t have too many weekends at home. That and I decided to take a graduate level class that’s been soaking up way too much time. I’ve been thinking about working on a masters for a long time and with the company footing the tuition bill I thought why not.
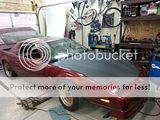
Finally got the hood installed well enough for me to move on. The fitment is still not quite where I’d like it at the very front, but I’m not sure how of that is VFN’s fault and how much of it is mine. The fenders have been pulled out to make more room for tire and all the factory sheet metal is gone to support the bumper cover. Overall I’m still pretty pleased with the fit.
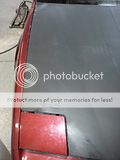

Gaps still need some adjustments. I’m pretty happy with the aerolatches.
(In hindsight, the hood needs a few camloks I'm planning on adding those this weekend)
What is VFN’s fault is the weight… Their website lists the pin on hood at 12lbs. This weighed 18 out of the box. I figured it would be a few pounds more than listed, but 50% off is crap. If you look in earlier photos you may seen a 3” cowl hood made by harwood. A local guy bought it from me and I was just out of shipping. At 25lbs I thought I could save 10lbs by switching to the flat VFN hood. I don’t think I would’ve bothered for 7lbs of weight savings. Oh well water under the bridge now. Going to have to just find the weight savings somewhere else.
The front bumper cover was much too low for whatever reason so I put in these turnbuckles to help move it up. They’re 3/8” ones and tractor supply has them in �” so I’ll probably downsize them at some point. Also you can see the quick mounts I made for the turn signals. I need to add a second bracket at some point. You can also see my “repairs” to the frame horns that I cut off. The frame are sacred in CP, so back on they went. It was either 3.5lbs total or 3.5lbs for each side that was saved by cutting them off. Either way a significant amount of weight in front of the axle if you’re in AIX or something.
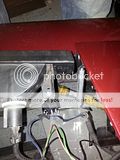
The hinges should be make it much easier to open the hood by myself, but I’m not sure if I’ll trust them on a windy day. It's held in place with ss counter sunk washers and #8 hardware.
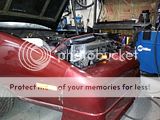
Here’s the cut down headlight buckets with 4x6 non sealed beam lights in them. Total weight is about 1.5lbs each, so over 15lb savings from stock. I still need to come up with a latch of some sort to lock them up, but they will be entirely manually operated.
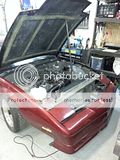
You can see the 1” tall weather stripping I put on the cowl. It’s doesn’t quite seal the entire way but should help keep high pressure air from the windshield out. I went ahead and plastidipped the air filter tube, much happier with how it looks. Also put in a new overflow bottle that’s clean. So far I need to clean up some wiring on the motor and run wires under the passenger side fender for the fans, but I’m pretty happy with how clean the install looks.
Next up is to finish up the wiring. Then I want to finish up metal work (harness bar, seat brackets, rust repair) before installing lexan and starting body work.
It’s been way too long without an update. It’s been a busy few months. Went on vacation, saw some family and didn’t have too many weekends at home. That and I decided to take a graduate level class that’s been soaking up way too much time. I’ve been thinking about working on a masters for a long time and with the company footing the tuition bill I thought why not.

Finally got the hood installed well enough for me to move on. The fitment is still not quite where I’d like it at the very front, but I’m not sure how of that is VFN’s fault and how much of it is mine. The fenders have been pulled out to make more room for tire and all the factory sheet metal is gone to support the bumper cover. Overall I’m still pretty pleased with the fit.


Gaps still need some adjustments. I’m pretty happy with the aerolatches.
(In hindsight, the hood needs a few camloks I'm planning on adding those this weekend)
What is VFN’s fault is the weight… Their website lists the pin on hood at 12lbs. This weighed 18 out of the box. I figured it would be a few pounds more than listed, but 50% off is crap. If you look in earlier photos you may seen a 3” cowl hood made by harwood. A local guy bought it from me and I was just out of shipping. At 25lbs I thought I could save 10lbs by switching to the flat VFN hood. I don’t think I would’ve bothered for 7lbs of weight savings. Oh well water under the bridge now. Going to have to just find the weight savings somewhere else.

The front bumper cover was much too low for whatever reason so I put in these turnbuckles to help move it up. They’re 3/8” ones and tractor supply has them in �” so I’ll probably downsize them at some point. Also you can see the quick mounts I made for the turn signals. I need to add a second bracket at some point. You can also see my “repairs” to the frame horns that I cut off. The frame are sacred in CP, so back on they went. It was either 3.5lbs total or 3.5lbs for each side that was saved by cutting them off. Either way a significant amount of weight in front of the axle if you’re in AIX or something.

The hinges should be make it much easier to open the hood by myself, but I’m not sure if I’ll trust them on a windy day. It's held in place with ss counter sunk washers and #8 hardware.

Here’s the cut down headlight buckets with 4x6 non sealed beam lights in them. Total weight is about 1.5lbs each, so over 15lb savings from stock. I still need to come up with a latch of some sort to lock them up, but they will be entirely manually operated.

You can see the 1” tall weather stripping I put on the cowl. It’s doesn’t quite seal the entire way but should help keep high pressure air from the windshield out. I went ahead and plastidipped the air filter tube, much happier with how it looks. Also put in a new overflow bottle that’s clean. So far I need to clean up some wiring on the motor and run wires under the passenger side fender for the fans, but I’m pretty happy with how clean the install looks.
Next up is to finish up the wiring. Then I want to finish up metal work (harness bar, seat brackets, rust repair) before installing lexan and starting body work.
06-07-2014, 11:02 AM
#38
Member
Thread Starter
iTrader: (3)
Join Date: Nov 2002
Location: Wichita, KS
Posts: 491
Likes: 0
Received 1 Like
on
1 Post
Car: 88 Trans Am GTA
Engine: 5.1L Gen III
Transmission: T56
Axle/Gears: 3.70
Re: C-Prepared Autox Build
From 2/1/14:
Last fall after 5 years of talking about it, I took a grad class... big mistake. I'm not used to giving up that much free time and it really cut into my wrenching time.
Anyway, it's February now and first event is on 3/32, 7 weeks to go...
I did make some progress over the last month or so, I gutted the doors and rear hatch. Keeping the side impact bars in for now. They may yet go, but without a cage I hate to have zero side impact protection. I've built the seat mounts and nearly completed the harness bar.
Here's the passenger side seat mount:
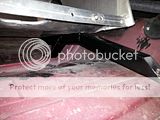
It's 1.25"x.0625 square tubing cut, bent, and welded on 3 sides. The rear mount is 1/8" angle with an 1/8" gusset. It's non-adjustable and somewhat taller for my vertically challenged wife. Seat is a 20 degree layback ultrashield.
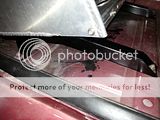
The driver side seat rails are 2" 1/8" thick angle trimmed down a bit. The inboard seat rail is welded in and notched to fit around the tunnel hat section, outboard side is bolted. I have a somewhat loose fitting 18" ultrashield seat with a 10 degree layback. Plan is to add some extra closed and open cell foam for extra cushioning.
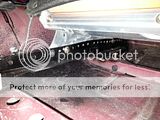
The backside of the seat mount was cantilevered back a ways so I wanted to support it. I picked up one of the 3/8" torque arm tunnel mounts.

The side plates have 3 3/4" spaced holes on the bottom, the body side seat rails are 1" spaced. Between the alternating hole patterns I should have 1/4" adjustability. The back end of the outboard seat rail picks up one a 3/8" subframe connector bolt.
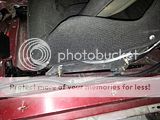
I bought a small index table for my mill/lathe so I fired it up and made a few 3/8" spacers for the steering wheel. I need to remember which direction does what for the feeds. The second one turned out better.
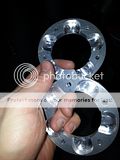
 06-12-2014, 12:52 PM
#39
Member
Thread Starter
iTrader: (3)
Join Date: Nov 2002
Location: Wichita, KS
Posts: 491
Likes: 0
Received 1 Like
on
1 Post
Car: 88 Trans Am GTA
Engine: 5.1L Gen III
Transmission: T56
Axle/Gears: 3.70
Re: C-Prepared Autox Build
From 2/1/14:
And what may be my next project...
The JFZ (Sierra) front brake kit that's currently in the car:
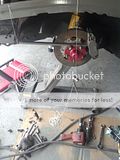
The kit came with 4 pot 2" piston calipers. Running the math this thing is going to have wayyyyy too much front brake bias. The car currently has the '89+ style PBR rears which are only 1.563 bore. I'm working towards a better rear weight bias which isn't helping things either.
https://docs.google.com/spreadsheet/ccc?key...amp;usp=sharing
My options are to somehow find significantly larger rear calipers, or to put in smaller fronts calipers and maybe redrill the brake pedal to get better leverage.
The front calipers are very heavy, a Dynapro caliper will bolt right in and save 3lbs just in the caliper, plus more for the smaller pad. It looks like the narrow dynapros are available in 1.625" cylinders. 1.5" is really what I would need up front, but there are very few options for calipers in that size. That brings me to LS1 rear calipers. The 45mm calipers should get me where I need to go with 1.625" 4 pot front calipers. Does anyone know if the LS1 style PBR's would bolt on in place of the older PBR style? Maybe I could make a caliper spacer out of an old pad to make up the difference in disc width. Otherwise I'd have to change the rotors and fabricate backing plates as well to fit my 9-bolt. Flynbye has 12" backing plates, but I'm not sure what caliper they use. Getting the e-brakes to work at some point may be difficult as well.
06-12-2014, 12:53 PM
#40
Member
Thread Starter
iTrader: (3)
Join Date: Nov 2002
Location: Wichita, KS
Posts: 491
Likes: 0
Received 1 Like
on
1 Post
Car: 88 Trans Am GTA
Engine: 5.1L Gen III
Transmission: T56
Axle/Gears: 3.70
Re: C-Prepared Autox Build
From 3/20/14:
I’m long overdue for an update. About a month ago I put in doublers for the sub straps, welded in a battery frame/mount, and took care of some rust repair I wanted to get done prior to installing the lexan hatch. At this point I hopefully won’t be doing any major welding/grinding cutting on the car anymore. Both sides of the rear wheel wells had really bad spots on the forward arch right around the top of the ground effects. Luckily they should be mostly hidden once the ground effects are on. The patches didn’t turn out perfect but hopefully will be okay with just a little filler.
I really should’ve begged/borrowed a sand blaster for the pitted rust. Navel jelly does a good job on surface rust, but the rust in the pitting was impossible to remove. After ~10 applications of naval jelly I think I got 95% of it out, With my luck I’ll get a bubble come up right after painting the car. I was too rushed to take photos in process, so POR15’ed/primed finished shots is all I have.
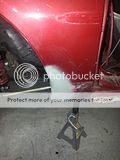
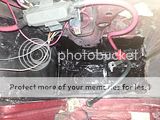
With the doublers in I installed the Passenger side harness and seat support to the harness bar. On the passenger side I was able to attach to the factory seat belt mounts, although they could probably be a little further back for the main belt. I may just move the seat forward an inch to help it out. On the driverside/inboard side I picked up one of the jegs TA tunnel saddle bolts with a 1/16” wall �” OD spacer so the belts can swivel. On the outboard side I cut through the floor and ran a 1/8” plate to the subframe connectors.
I suppose I should go over the harness bar. I’m still on the fence on a roll bar. If I did one it would be a basic roll bar with x-door bars tied to the front and rear shock towers and I’d probably cut out the 45lb sub frame connectors that are on the car now. This would be much stiffer as well as well as a good base to switch to double a-arms up front at some point if I wanted. There are the concerns with hitting a roll bar in a wreck without a helmet on, but more so, I’m not comfortable climbing over door bars all the time. Also I have no intentions of ever selling the car, but anything I’ve seen for sale with a rollbar/cage/non street legal seems to be reselling for pennies on the dollar in terms of what it would cost to build.
Here’s an in progress shot, I need to work on my TIG skills more...
The rear mounts tie into �” bolts that go through the stock upper shock mount hold. These hold on adapter brackets for the eye-eye shocks in the back. The harness bar comes up at about a 30� angle from horizontal and would’ve just bent over in a wreck. Aluminum rods running down from the stock shoulder belt mount should help support the vertical component of the crash loads. I ended up closer to running out of misalignment in the support rods than I had thought. The trussing/triangulation should be overkill.
I know that in a rollover a harness bar alone will is much worse than the factory 3 points. I wanted proper racing seats and I don’t really see a 3 point belt allowing your body to slide over in a roll over in a proper racing seat anyway. I’ve also moved the driver seat too far aft to use the factory seat belt attachment points anymore, otherwise I’d run both. Harnesses aren’t street legal and are kind of a PITA, but I’m not sure what else I could do here.
Then there’s the seats. I didn’t feel two $800 or so of FIA bucket seats were appropriate for the car, although I could probably have afforded out of date used ones, finding ones I fit would be difficult. That left aluminum racing seats (used of course). Which really should have a backbrace. A harness bar provides this seat back support.
I'll come back tonight/tomorrow and add a few more photos, seems like I can do better.
I’m long overdue for an update. About a month ago I put in doublers for the sub straps, welded in a battery frame/mount, and took care of some rust repair I wanted to get done prior to installing the lexan hatch. At this point I hopefully won’t be doing any major welding/grinding cutting on the car anymore. Both sides of the rear wheel wells had really bad spots on the forward arch right around the top of the ground effects. Luckily they should be mostly hidden once the ground effects are on. The patches didn’t turn out perfect but hopefully will be okay with just a little filler.
I really should’ve begged/borrowed a sand blaster for the pitted rust. Navel jelly does a good job on surface rust, but the rust in the pitting was impossible to remove. After ~10 applications of naval jelly I think I got 95% of it out, With my luck I’ll get a bubble come up right after painting the car. I was too rushed to take photos in process, so POR15’ed/primed finished shots is all I have.


With the doublers in I installed the Passenger side harness and seat support to the harness bar. On the passenger side I was able to attach to the factory seat belt mounts, although they could probably be a little further back for the main belt. I may just move the seat forward an inch to help it out. On the driverside/inboard side I picked up one of the jegs TA tunnel saddle bolts with a 1/16” wall �” OD spacer so the belts can swivel. On the outboard side I cut through the floor and ran a 1/8” plate to the subframe connectors.
I suppose I should go over the harness bar. I’m still on the fence on a roll bar. If I did one it would be a basic roll bar with x-door bars tied to the front and rear shock towers and I’d probably cut out the 45lb sub frame connectors that are on the car now. This would be much stiffer as well as well as a good base to switch to double a-arms up front at some point if I wanted. There are the concerns with hitting a roll bar in a wreck without a helmet on, but more so, I’m not comfortable climbing over door bars all the time. Also I have no intentions of ever selling the car, but anything I’ve seen for sale with a rollbar/cage/non street legal seems to be reselling for pennies on the dollar in terms of what it would cost to build.
Here’s an in progress shot, I need to work on my TIG skills more...

The rear mounts tie into �” bolts that go through the stock upper shock mount hold. These hold on adapter brackets for the eye-eye shocks in the back. The harness bar comes up at about a 30� angle from horizontal and would’ve just bent over in a wreck. Aluminum rods running down from the stock shoulder belt mount should help support the vertical component of the crash loads. I ended up closer to running out of misalignment in the support rods than I had thought. The trussing/triangulation should be overkill.

I know that in a rollover a harness bar alone will is much worse than the factory 3 points. I wanted proper racing seats and I don’t really see a 3 point belt allowing your body to slide over in a roll over in a proper racing seat anyway. I’ve also moved the driver seat too far aft to use the factory seat belt attachment points anymore, otherwise I’d run both. Harnesses aren’t street legal and are kind of a PITA, but I’m not sure what else I could do here.
Then there’s the seats. I didn’t feel two $800 or so of FIA bucket seats were appropriate for the car, although I could probably have afforded out of date used ones, finding ones I fit would be difficult. That left aluminum racing seats (used of course). Which really should have a backbrace. A harness bar provides this seat back support.
I'll come back tonight/tomorrow and add a few more photos, seems like I can do better.
06-16-2014, 10:37 PM
#41

Re: C-Prepared Autox Build
Roostmeyer, a great build with lots of good ideas for correcting some of the factory shortcomings. I am also building an AX/open track car. Some of your pics and ideas look very familiar like the sectioned rear wheel tubs and rear tubular control arms. My build is posted on the Fabrication forum under "home brew road racer"
I am also working to get the frt/rear weight bias closer to 505/50. My 83Z weighed in at 3209 without the driver and had a true 60/40 split with 1900lb on the front and 1309 on the rear. Tvc did a ls track day car and moved the engine back about 3 inches. He posted a final bias of 53/47 I think and was right at 3000lbs with a fully gutted interior but had a full cage and no door bars.
I am finishing the rear interior sheet metal now and hope to get started on the front suspension by late summer. I will be addressing the many short comings of the strut front end that you have mentioned. I am looking to put in a double A-arm suspension, rack and pinion, coil overs and move the spindle center line a few inches forward. This will have the affect of moving all of the unsprung weight of the car back 4 inches relative to the front axle CL.
Since you are an engineer with great spread sheet skills maybe you could work out some before an after numbers for weight bias. You could assume that the suspension pieces I move forward will weigh the same as the stock pieces that are coming off.
Here are a few pics of what I have done. some of the similarities are spooky.
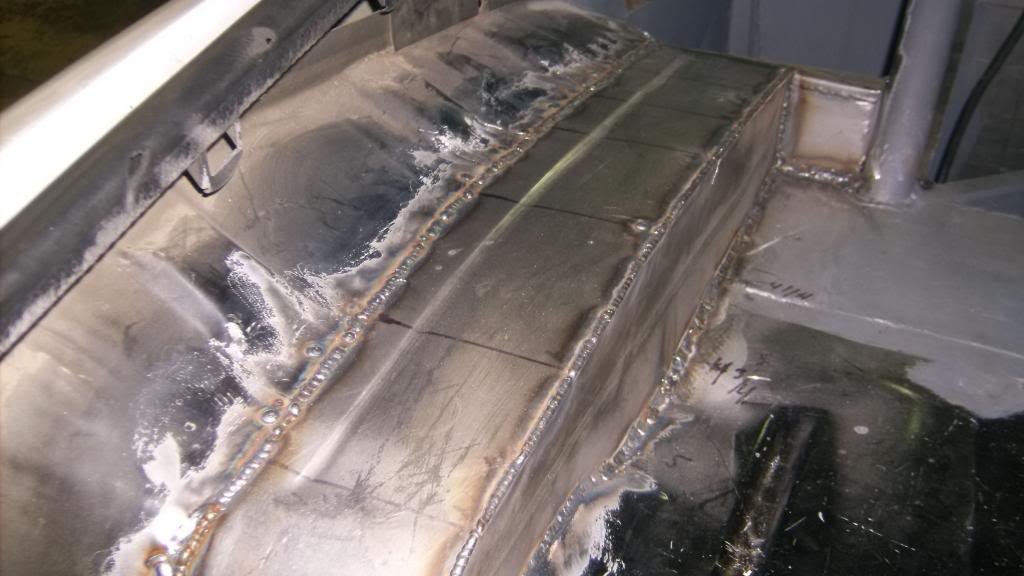
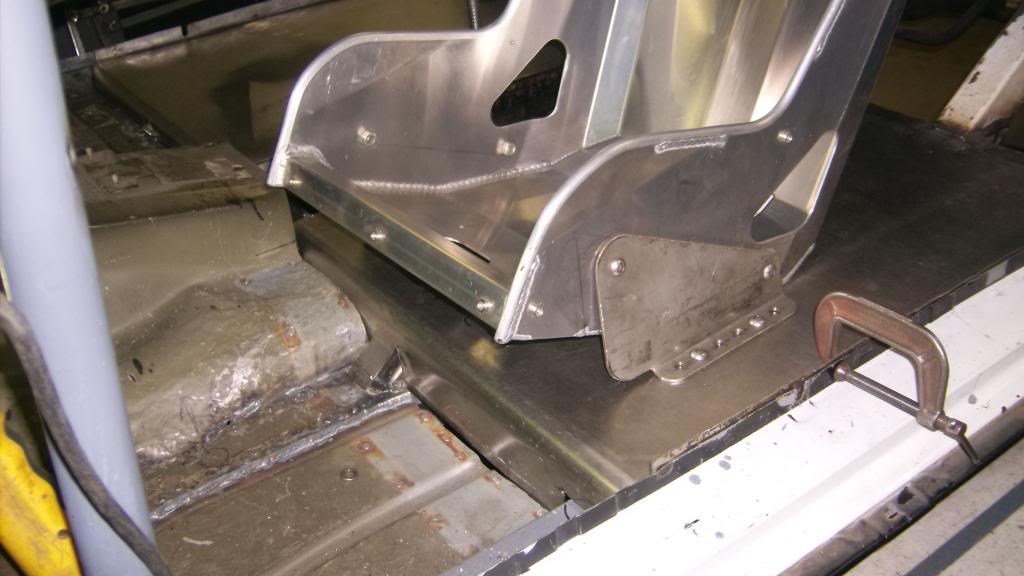
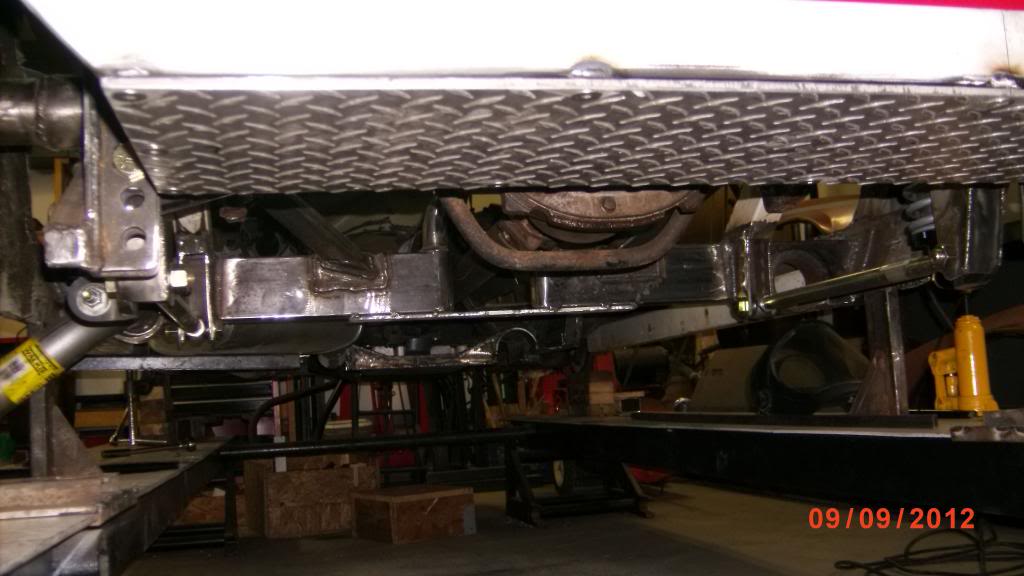
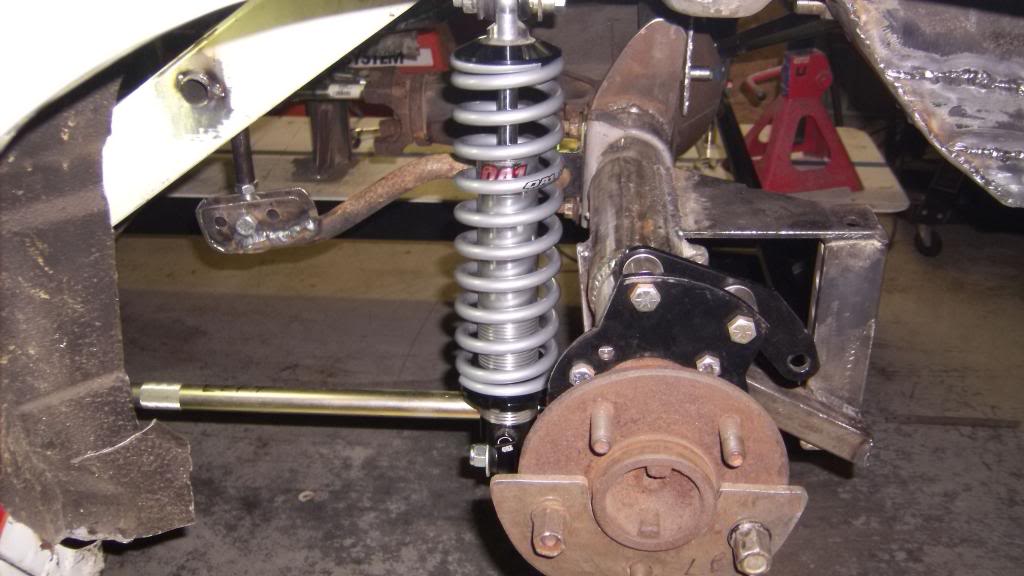
I will be following the rest of your build and will probably go back review your pics a few times to see if I can pick up any more ideas.
I am also working to get the frt/rear weight bias closer to 505/50. My 83Z weighed in at 3209 without the driver and had a true 60/40 split with 1900lb on the front and 1309 on the rear. Tvc did a ls track day car and moved the engine back about 3 inches. He posted a final bias of 53/47 I think and was right at 3000lbs with a fully gutted interior but had a full cage and no door bars.
I am finishing the rear interior sheet metal now and hope to get started on the front suspension by late summer. I will be addressing the many short comings of the strut front end that you have mentioned. I am looking to put in a double A-arm suspension, rack and pinion, coil overs and move the spindle center line a few inches forward. This will have the affect of moving all of the unsprung weight of the car back 4 inches relative to the front axle CL.
Since you are an engineer with great spread sheet skills maybe you could work out some before an after numbers for weight bias. You could assume that the suspension pieces I move forward will weigh the same as the stock pieces that are coming off.
Here are a few pics of what I have done. some of the similarities are spooky.


I will be following the rest of your build and will probably go back review your pics a few times to see if I can pick up any more ideas.
06-16-2014, 10:49 PM
#42
Member
Thread Starter
iTrader: (3)
Join Date: Nov 2002
Location: Wichita, KS
Posts: 491
Likes: 0
Received 1 Like
on
1 Post
Car: 88 Trans Am GTA
Engine: 5.1L Gen III
Transmission: T56
Axle/Gears: 3.70
Re: C-Prepared Autox Build
I would love to move the front wheelbase forward, but prepared rules allow you +/-1" on the wheelbase. I've seen your build, I'll go ahead and subscribe so I can check out the latest and greatest.
The math actually works out to be very easy if you cheat a little and round down our wheelbase to 100" from 101". Making that assumption, moving the front and rear wheelbase forward 1" gives you a 1% move in CG. If you move the front wheel base forward 4" you should bump it 2%. If you move the rear forward an inch (easy to do) along with the 4" in front you can bump it 2.5% to the rear.
The math actually works out to be very easy if you cheat a little and round down our wheelbase to 100" from 101". Making that assumption, moving the front and rear wheelbase forward 1" gives you a 1% move in CG. If you move the front wheel base forward 4" you should bump it 2%. If you move the rear forward an inch (easy to do) along with the 4" in front you can bump it 2.5% to the rear.
06-17-2014, 12:31 PM
#43
Member
Thread Starter
iTrader: (3)
Join Date: Nov 2002
Location: Wichita, KS
Posts: 491
Likes: 0
Received 1 Like
on
1 Post
Car: 88 Trans Am GTA
Engine: 5.1L Gen III
Transmission: T56
Axle/Gears: 3.70
Re: C-Prepared Autox Build
From 4/3/14:
Next step was to finish up the wiring. I’ve got the fan wired up, went with this one: http://www.summitracing.com/int/parts/flx-398/overview/
I was originally going to make some mounts and a shroud for it, but I got lazy and used the zip tie things. Has anyone ever had these perforate a radiator? My initial impression with the fan is that it moves a lot of air… on the outside of the fan. I think I may end up having to space it out and using a shroud later on. I’m also planning on building a new front diffuser for it, but that should be able to wait until it gets warmer out.
I wired a separate coolant sensor for the gauge, a low oil pressure light , the shift light, and an overheat dummy light. All of them reuse lights in the stock gauges. I’m experimenting with some LED lights from ebay. They seem slightly brighter, but not quite the LOOK AT ME bright I was going for. I also soldered in pots for the fuel gauge bridge resistors per this thread on TGO:
https://www.thirdgen.org/forums/ltx-lsx/...gauge-40-a.html
Here’s the finished product in the driverside footwell:
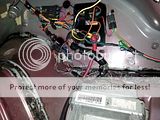
Then I started on the lexan hatch. The frame is �” square 6061 aluminum tube that’s hand formed. The back and center backstays are 1/16” thick, the two sides are 1/32 thick. They’re riveted onto tabs welded to the frame surround.
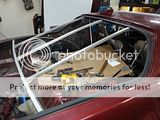
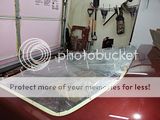
The top screws have spacers made from 1/2" OD, 1/4" ID aluminum tubing. There was enough difference in angle on the sides that this wasn’t going to work so I welded tabs around to the surround that the glass slides into. These are some older photos, I had 8” fastener spacing on the backstays, but after thinking about it I doubled the number of screws to 4” spacing. For road racing I’d certainly strap the lexan as well as use larger backstays, but these should never see much above 100mph.
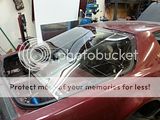
I went back and also made another set of spacers an 1/8" longer to help the oil canning around the top.
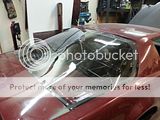
For trunk access the rear decklid pivots on the forward edge on a simple bracket that’s welded to the deck lid. There's a flanged bushing and a shoulder bolt for it to rotate on. The decklid has been gutted underneath, but still weighs 12lbs if I’m remembering correctly. I plan on picking up a non-electric pull down latch and rewelding the old bracket to the decklid in the center so the stock lock will still work.
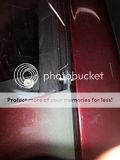
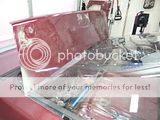
Here’s the new wilwood calipers up front.
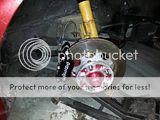
And here's a poor choice for $$/lb, APR side mirrors. They weigh in at under 1/2 a pound for the pair, but for some reason I swore the stock mirrors were close to 5lbs each. When I finally got around to taking them off and weighing them they came in at under 5lbs for both. I suppose it was easy weight, but I'm not sure if the looks will grow on me or not. The rear bolt on the mirror picks up the stock hole and I formed a piece of .063 aluminum to cover the center factory wiring hole.
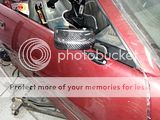
Next step was to finish up the wiring. I’ve got the fan wired up, went with this one: http://www.summitracing.com/int/parts/flx-398/overview/
I was originally going to make some mounts and a shroud for it, but I got lazy and used the zip tie things. Has anyone ever had these perforate a radiator? My initial impression with the fan is that it moves a lot of air… on the outside of the fan. I think I may end up having to space it out and using a shroud later on. I’m also planning on building a new front diffuser for it, but that should be able to wait until it gets warmer out.

I wired a separate coolant sensor for the gauge, a low oil pressure light , the shift light, and an overheat dummy light. All of them reuse lights in the stock gauges. I’m experimenting with some LED lights from ebay. They seem slightly brighter, but not quite the LOOK AT ME bright I was going for. I also soldered in pots for the fuel gauge bridge resistors per this thread on TGO:
https://www.thirdgen.org/forums/ltx-lsx/...gauge-40-a.html
Here’s the finished product in the driverside footwell:

Then I started on the lexan hatch. The frame is �” square 6061 aluminum tube that’s hand formed. The back and center backstays are 1/16” thick, the two sides are 1/32 thick. They’re riveted onto tabs welded to the frame surround.


The top screws have spacers made from 1/2" OD, 1/4" ID aluminum tubing. There was enough difference in angle on the sides that this wasn’t going to work so I welded tabs around to the surround that the glass slides into. These are some older photos, I had 8” fastener spacing on the backstays, but after thinking about it I doubled the number of screws to 4” spacing. For road racing I’d certainly strap the lexan as well as use larger backstays, but these should never see much above 100mph.

I went back and also made another set of spacers an 1/8" longer to help the oil canning around the top.

For trunk access the rear decklid pivots on the forward edge on a simple bracket that’s welded to the deck lid. There's a flanged bushing and a shoulder bolt for it to rotate on. The decklid has been gutted underneath, but still weighs 12lbs if I’m remembering correctly. I plan on picking up a non-electric pull down latch and rewelding the old bracket to the decklid in the center so the stock lock will still work.


Here’s the new wilwood calipers up front.

And here's a poor choice for $$/lb, APR side mirrors. They weigh in at under 1/2 a pound for the pair, but for some reason I swore the stock mirrors were close to 5lbs each. When I finally got around to taking them off and weighing them they came in at under 5lbs for both. I suppose it was easy weight, but I'm not sure if the looks will grow on me or not. The rear bolt on the mirror picks up the stock hole and I formed a piece of .063 aluminum to cover the center factory wiring hole.
 06-17-2014, 12:32 PM
#44
Member
Thread Starter
iTrader: (3)
Join Date: Nov 2002
Location: Wichita, KS
Posts: 491
Likes: 0
Received 1 Like
on
1 Post
Car: 88 Trans Am GTA
Engine: 5.1L Gen III
Transmission: T56
Axle/Gears: 3.70
Re: C-Prepared Autox Build
From 4/24/14:
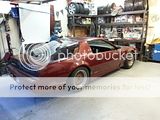
Filled her up and got her on the scales, I'll be grabbing some 100lb dumb bells and weight from the basement for corner weighting tonight. I've lost 25lbs, but still want to cut another 15. The back is coming up a 1/2" to try to clear a dip in my driveway... headers are not liking it.
Left Right totals
852 688 1540
544 732 1276
1396 1420 0.563
0.49 0.50 2816
Goal: 2775
https://docs.google.com/spreadsheet/ccc?key...drive_web#gid=7
So I'm at 2816lbs, but I still have some more weight loss opportunities. I need to put lexan in for the windshield, and I think I have a way to run coil overs that should save a significant amount of weight. Also, the passenger side seat can come out for major events. With those I should be in good shape with zero ballast. Some of the other ideas will have to wait. I'm pleased to get down to my target weight, just wish I had a way of getting a better weight distribution legally. I think a double a-arm front end could save a lot of weight in cutting out the wheel wells, but I now have a hard 6 (out of 9 ) month deadline to finish the car up and paint it so that's not happening.
On the brief drive, I think I've got a blown engine sensor fuse. After reading the thread on it I decided to buy torque and an ELM327 BT adapter, it's already paid for itself. The MAF isn't reporting anything, and the O2's aren't warming enough to go into closed loop. Between the two the car is running around 11-12:1 AFR, pig rich. For some reason my tach and speedometer aren't working either, so I've got a little work to do this weekend.

Filled her up and got her on the scales, I'll be grabbing some 100lb dumb bells and weight from the basement for corner weighting tonight. I've lost 25lbs, but still want to cut another 15. The back is coming up a 1/2" to try to clear a dip in my driveway... headers are not liking it.
Left Right totals
852 688 1540
544 732 1276
1396 1420 0.563
0.49 0.50 2816
Goal: 2775
https://docs.google.com/spreadsheet/ccc?key...drive_web#gid=7
So I'm at 2816lbs, but I still have some more weight loss opportunities. I need to put lexan in for the windshield, and I think I have a way to run coil overs that should save a significant amount of weight. Also, the passenger side seat can come out for major events. With those I should be in good shape with zero ballast. Some of the other ideas will have to wait. I'm pleased to get down to my target weight, just wish I had a way of getting a better weight distribution legally. I think a double a-arm front end could save a lot of weight in cutting out the wheel wells, but I now have a hard 6 (out of 9
) month deadline to finish the car up and paint it so that's not happening.On the brief drive, I think I've got a blown engine sensor fuse. After reading the thread on it I decided to buy torque and an ELM327 BT adapter, it's already paid for itself. The MAF isn't reporting anything, and the O2's aren't warming enough to go into closed loop. Between the two the car is running around 11-12:1 AFR, pig rich. For some reason my tach and speedometer aren't working either, so I've got a little work to do this weekend.
06-18-2014, 08:42 PM
#45
Member
Re: C-Prepared Autox Build
At the really big events passengers aren't even allowed so getting rid of the passengers seat for em is a great idea. Of course a smart passenger can make you faster at the little ones so back in it goes.
06-23-2014, 02:57 PM
#46
Member
Thread Starter
iTrader: (3)
Join Date: Nov 2002
Location: Wichita, KS
Posts: 491
Likes: 0
Received 1 Like
on
1 Post
Car: 88 Trans Am GTA
Engine: 5.1L Gen III
Transmission: T56
Axle/Gears: 3.70
Re: C-Prepared Autox Build
yeah, I'd like to be able to leave it in just for convenience, but in the grand scheme of things it's pretty easy to pull.
From 4/26/14 on future weight savings ideas:
I'm hoping to start on the 5.1L LS build sometime next year, but I figure it's easier to add ballast than cut a bunch of extra weight. I'll probably just be running local events in the near future anyway and seems like it should save development time in the long run. My plans for the 5.1L aren't all that extravagant, but I'd like to put in a light weight clutch, ATI aluminum dampener, AI ported heads, and make the shortblock safe to 8000 or more rpm. Nothing is cheap!
Plan for the coil-overs is to hang the sleeve off the top of the strut and run a short bee-hived spring sitting above the tire:
GC165.64.96 6.5 550
GC140.64.83 5.5 475
I currently own some 6.5" 550 springs and on mockup it looks like they may work with some spacers on the strut, but ideally I need a shorter spring.
The 475's are used in E30 rear spring pockets, less weight, but worse spring motion ratio, so I think they would be okay:
http://www.ground-control-store.com/.../II=902/CA=241
I'll need to trim out the strut hole to make room for springs. I'm leaning towards adding quite a few extra fasteners for the strut to lock it down stationary. When I was checking bump travel I noticed the strut oil canning when the weight of the car was placed on the strut mount. Then I'd use strut type circle track lower a-arms like this to adjust camber/caster down below:
http://pitstopusa.com/i-5081252-ppm-...-monoball.html
I'm thinking ~13lbs would be saved on the spring, and 10+lbs on the control arms. Using the arms to push out the front wheel axle center line an inch or so should be good for a .5% move of CG (~13lbs moved from the front to the rear).
06-23-2014, 02:58 PM
#47
Member
Thread Starter
iTrader: (3)
Join Date: Nov 2002
Location: Wichita, KS
Posts: 491
Likes: 0
Received 1 Like
on
1 Post
Car: 88 Trans Am GTA
Engine: 5.1L Gen III
Transmission: T56
Axle/Gears: 3.70
Re: C-Prepared Autox Build
From 5/5/14
Time for a tire trailer:
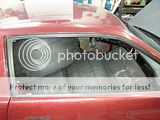
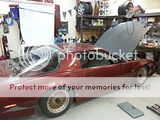
I think I've got the lead on a free tire trailer from a local autocrosser. Local f-body yard has a hitch that I'm going to check out. I suppose it's ballast in a good location... as long as I can still meet weight.
Anyway I went out Saturday and got some testing in and have some baseline pressures to start with on 5/17 at a local PCA event.
I had intended to go to our 3rd SCCA event yesterday, but ended up getting an offer I couldn't refuse. I jumped on a XLS+ at 6:45AM, flew to Talladega, enjoyed the race from the pits for a while and was back home in time for dinner.
06-23-2014, 03:00 PM
#48
Member
Thread Starter
iTrader: (3)
Join Date: Nov 2002
Location: Wichita, KS
Posts: 491
Likes: 0
Received 1 Like
on
1 Post
Car: 88 Trans Am GTA
Engine: 5.1L Gen III
Transmission: T56
Axle/Gears: 3.70
Re: C-Prepared Autox Build
From 5/19/14:
First timed event!
Around here the best value for the money is the Porsche club events. $20 gets you 5 runs in the morning, 5 in the afternoon.
Listen for the nice loud thump under braking in the finish. I think a NB miata shock mount is too soft for the decoupled torque arm and it bottomed out on the safety loop. There was a inch drop off in the concrete just after the finish so it got a nice impulse load. I was running 35/28 for pressures and still a bit too much oversteer.
I’m still driving it like the Mazda 3, a small bump on the brakes to rotate the car and then back on the accelerator to stabilize, then add throttle as necessary. I’m sure there’s got to be a faster way to drive it than point and shoot, but it seemed to be pretty effective. Moved to 36/26psi and finally got rid of the steady state oversteer.
I’d like to see 2-5lb front to rear pressures. Current setup is ~1340lb/in up front, 350’s in back, 36/19 bars, +1/2” LBJ’s, lowered panhard bar, 25.63” front, 25.75” rear fender height. I’m thinking either I’ll buy some new 300 or 325 rear springs or shorten the front bar by an inch or so and convert it to adjustable endlinks.
On my last run I noticed a bit of a chirp coming from the front accessories. Popped the hood and didn’t noticed anything out of place. I figured it was just an idler pulley, something that should last another thousand miles. Made it 34 of the 40 mile drive home before I heard a thump and saw the serpentine belt in my rear view mirror. I had noticed some small cracks in the pulley, but nothing that looked too serious. Anyway, I couldn’t find a pulley, or even a pump with a pulley at any local part store, so AAA came to my rescue. I would’ve probably just nursed the car home, but my temp sensor for the gauge AND the overheat dummy light sensor are both in the water pump. I would’ve had no clue what the temp was at the head.
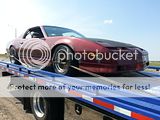
So I have a bad pump, no pulley, and the pulley took out the reservoir on its departure. Looks like I can get a reman for $77 with rez, then I think I’d feel better with an aluminum pulley (~$90), considering they’re not that much more than just the pulley. I could probably JB weld the reservoir, but I really don’t like that idea.
I’m a little tempted by this:
http://www.ebay.com/itm/POWER-STEERING-PUMP-GM-TYPE-2-w-POLISHED-BILLET-ALUMINUM-PULLEY-/130905919495?pt=Vintage_Car_Truck_Parts_Accessories&hash=item1e7a99d007&vxp=mtr
My guess is the pulley offset is for a serpentine TPI or truck, but it’s also rotated 90� so I’d have to mod the stock bracket or build a new bracket anyway. Or maybe it’s time to go to a racing pump (maybe used nascar?) with some more adjustability. I have some thinking to do here, and 3 weeks to get the car back together. I never outdrove the pump, and the assist felt good to me, so I think the stock setup is still fine… if it will hold up.
Also, for some reason the car is throwing a fault and refusing to go into closed loop and running pig rich. The car needs a tune. Only reasonable person to do it is in Topeka, but I'm still tempted to just but the stuff and do it myself. It looks like the DIY crowd is reallllly close to getting a work-able LS1 solution, but the $260 cable isn't that much cheaper than the Jet cable/software on amazon.
Last edited by Roostmeyer; 06-23-2014 at 03:14 PM.
06-26-2014, 01:20 PM
#49
Member
Thread Starter
iTrader: (3)
Join Date: Nov 2002
Location: Wichita, KS
Posts: 491
Likes: 0
Received 1 Like
on
1 Post
Car: 88 Trans Am GTA
Engine: 5.1L Gen III
Transmission: T56
Axle/Gears: 3.70
Re: C-Prepared Autox Build
From 6/17/14:
Time for another update.
I got one of my long term items knocked out. The car was very loose at the first event, I ended up at 10 PSI more front than rear tire pressures to balance the car. I also had to run spacers to keep the tires from rubbing on the panhard mounts. Long term I want to run 335/345 rear tires so I would have to move those brackets sooner or later. The panhard was not nearly level either.
Looking at Kevin’s spreadsheet, a 100lb spring change in the rear was good for .5% change in balance, moving the panhard an inch was good for 1.5%. I figured I might as well take out two birds with one stone and redo the panhard mounts. While I was there I might as well cut the old brackets off the rear end and convert to a sprung sway bar. I need to reweigh the brackets, but I think I took about 15lbs of unsprung weight off the rearend. The sway bar is a stock NA miata sway bar, 19 mm. It should be very close in width and arm length to the 19mm I had on it before. I can actually use the stock sway bars here, but I’d have to cut the ends and weld on something to convert them to bolt on endlinks. I still need to take the sway bar back out and weld/drill/bolt on something to make it adjustable.
This was an exercise in poor time management. I had the axle side down earlier in the week, and chassis side done last weekend, but still had to get it bolted back in and change out the 3rd link bushing on the decoupled TA. I had planned on just running the stock sway bar setup but figured I had enough time… then ended up buying a new to me more baby friendly truck and putting tires on the DD taking 5+ hours of wrenching time away. I did all the sway bar fab work on Saturday afternoon/evening and ended up not getting into bed until 12:30 Saturday night. There was no time to re-corner weight the car or even zero out the sway bars.
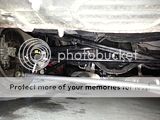
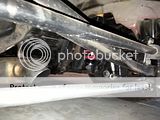
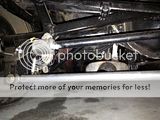
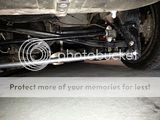
So I woke up at 6, and couldn’t go back to sleep. I didn’t have time to pack the car the night before so I figured I needed the extra time to get ready anyway. We had heavy storms the night before, so I was working on 4 hours of sleep . I get loaded up and pull the car out of the garage and notice a trail of power steering fluid. In my haste to wrap the car up I tightened one fitting, but left the other end on the PS pressure hose finger tight. Cinch it back down, pour in some fluid and then I hauled butt to the event.
First run, get all the way through the course and get red flagged right at the end. Not so bad, I got some heat in the tires, and knew I needed to drop rear tires pressures. On the rerun I get out there and immediately throw the serpentine belt because of the power steering fluid everywhere. Get it put back on in grid and on my next run I put down a decent time for taking it easy… only to cone it away right at the end. Next run coming out of the turn around I oversteered into a bunch of cones, I had tried to backing off the throttle to get the car to wiggle back, but the car just wasn’t responding the way I expected. I did go ahead and try to zero out the rear sway bar in grid to see if that would help, but never really felt a difference. Next run got behind on a big offset and the car spun right at the end. Then I coned my last run away really early on and figured I’d push things a little harder. Even not caring about another cone or two the car just never responded the way I expected.
This is my taking it easy 2nd run:
All day I fought inconsistencies in the car and never really felt comfortable. The times reflected that: Not a good day when you’re fastest run has a cone on it.
cp 56 Ryan Ostmeyer 1988 Pontiac Trans Am maroon 45.809+dnf 54.320+1 55.202+5 65.299 53.439+3 56.320
So a combination of untreated slicks, a locked up front Koni (I hope from using an impact to tighten), sleep deprivation, whacked out corner weights, and mushy brakes made for some not so great times (I know excuses, excuses). Had my second run been clean I would’ve been 5th out of 39 in Pax, not great, but not bad for early development and there was plenty of time to find on that course. I still ended up at 36/28 for tire pressures to balance the car even with dropping the panhard over an inch. I think the rear springs may be binding due to their barrel shape. I’m going to swap those out for some normal 325lb/in springs, formula V the tires, rebleed the brakes, and corner weight the car. Next event I’m chairing, so I’m hoping to get some testing done during setup.
It does look to be working alright in the pictures, maybe a hair more camber is needed. I'm maxed out at 2.8�.
https://nerdycyclistphotography.shut...pictures/16940
Time for another update.
I got one of my long term items knocked out. The car was very loose at the first event, I ended up at 10 PSI more front than rear tire pressures to balance the car. I also had to run spacers to keep the tires from rubbing on the panhard mounts. Long term I want to run 335/345 rear tires so I would have to move those brackets sooner or later. The panhard was not nearly level either.
Looking at Kevin’s spreadsheet, a 100lb spring change in the rear was good for .5% change in balance, moving the panhard an inch was good for 1.5%. I figured I might as well take out two birds with one stone and redo the panhard mounts. While I was there I might as well cut the old brackets off the rear end and convert to a sprung sway bar. I need to reweigh the brackets, but I think I took about 15lbs of unsprung weight off the rearend. The sway bar is a stock NA miata sway bar, 19 mm. It should be very close in width and arm length to the 19mm I had on it before. I can actually use the stock sway bars here, but I’d have to cut the ends and weld on something to convert them to bolt on endlinks. I still need to take the sway bar back out and weld/drill/bolt on something to make it adjustable.
This was an exercise in poor time management. I had the axle side down earlier in the week, and chassis side done last weekend, but still had to get it bolted back in and change out the 3rd link bushing on the decoupled TA. I had planned on just running the stock sway bar setup but figured I had enough time… then ended up buying a new to me more baby friendly truck and putting tires on the DD taking 5+ hours of wrenching time away. I did all the sway bar fab work on Saturday afternoon/evening and ended up not getting into bed until 12:30 Saturday night. There was no time to re-corner weight the car or even zero out the sway bars.


So I woke up at 6, and couldn’t go back to sleep. I didn’t have time to pack the car the night before so I figured I needed the extra time to get ready anyway. We had heavy storms the night before, so I was working on 4 hours of sleep . I get loaded up and pull the car out of the garage and notice a trail of power steering fluid. In my haste to wrap the car up I tightened one fitting, but left the other end on the PS pressure hose finger tight. Cinch it back down, pour in some fluid and then I hauled butt to the event.
First run, get all the way through the course and get red flagged right at the end. Not so bad, I got some heat in the tires, and knew I needed to drop rear tires pressures. On the rerun I get out there and immediately throw the serpentine belt because of the power steering fluid everywhere. Get it put back on in grid and on my next run I put down a decent time for taking it easy… only to cone it away right at the end. Next run coming out of the turn around I oversteered into a bunch of cones, I had tried to backing off the throttle to get the car to wiggle back, but the car just wasn’t responding the way I expected. I did go ahead and try to zero out the rear sway bar in grid to see if that would help, but never really felt a difference. Next run got behind on a big offset and the car spun right at the end. Then I coned my last run away really early on and figured I’d push things a little harder. Even not caring about another cone or two the car just never responded the way I expected.
This is my taking it easy 2nd run:
All day I fought inconsistencies in the car and never really felt comfortable. The times reflected that: Not a good day when you’re fastest run has a cone on it.
cp 56 Ryan Ostmeyer 1988 Pontiac Trans Am maroon 45.809+dnf 54.320+1 55.202+5 65.299 53.439+3 56.320
So a combination of untreated slicks, a locked up front Koni (I hope from using an impact to tighten), sleep deprivation, whacked out corner weights, and mushy brakes made for some not so great times (I know excuses, excuses). Had my second run been clean I would’ve been 5th out of 39 in Pax, not great, but not bad for early development and there was plenty of time to find on that course. I still ended up at 36/28 for tire pressures to balance the car even with dropping the panhard over an inch. I think the rear springs may be binding due to their barrel shape. I’m going to swap those out for some normal 325lb/in springs, formula V the tires, rebleed the brakes, and corner weight the car. Next event I’m chairing, so I’m hoping to get some testing done during setup.
It does look to be working alright in the pictures, maybe a hair more camber is needed. I'm maxed out at 2.8�.
https://nerdycyclistphotography.shut...pictures/16940
Last edited by Roostmeyer; 06-26-2014 at 01:23 PM.
09-24-2014, 12:26 PM
#50
Member
Thread Starter
iTrader: (3)
Join Date: Nov 2002
Location: Wichita, KS
Posts: 491
Likes: 0
Received 1 Like
on
1 Post
Car: 88 Trans Am GTA
Engine: 5.1L Gen III
Transmission: T56
Axle/Gears: 3.70
Re: C-Prepared Autox Build
From 7/8/14:
I unstuck the adjuster on the front koni with an impact, corner weighted the car, dropped in some normal 325lb/in springs to see if the old bee-hive 350’s were binding, and took it to another autocross. By the end the car felt much more consistent. Not necessarily good, but at least I could drive around the issues.
Once again I ended up with 35psi front, 26 rear pressures. I did move up the koni’s from 1 turn to 1.33 turn (from 1.75 total). The car felt much more stable and would finally take a set in the corner. Before it seemed like the car would wallow and hop mid corner. I’m thinking I’ll drop to 250lb/in rear springs to try get the tire pressures a little closer together for steady state handling.
At those pressures the car seems fairly balanced in steady state, but consistently looses the rear end as I go into the power. I think I want to try 1.5 turns and full hard in the front koni’s at the next event to help with corner exit and try to find how much front rebound is too much. I’m also thinking about going back to 2/4 clicks on the rear koni’s from 3/4. The car was realllly nervous on corner entry prior to dropping the rear pressures. I hate to make this many changes at once, but the rear rebound adjusters are a huge PITA to adjust on car and will be easy to do with the spring swap.
Looking at this video (and past videos) the rear consistently goes away as I unwind the wheel and lay into the power. Seems like just as soon as I get the wheel straight I’m counter steering. Does anybody have any ideas as to why the car is doing this? Maybe the diff? Car doesn’t seem to push like I’d expect from a over-locked diff. I suppose the crappy tune could have some contribution as well if there’s some flat spots in the power band.
As for my driving, let me know what you think. I need to stop hitting cones first and foremost. I would’ve had FTD if I hadn’t coned away my two fastest runs. This course had a lot of thread the needle type elements, should I be adding a little distance to the course to give the car more room to maneuver? I’m used to driving underpowered, small cars. I also think I was really hesitant to get in the throttle, especially near the turn around as well at the offsets toward the finish. Part of that is the brakes are not confidence inspiring and I find myself lifting before braking zones. I need to brace the brake master cylinder.