LO3 To L30 Vortec Swap: Completed(Mostly)
 04-05-2014, 11:09 AM
#151
Senior Member

Thread Starter
Join Date: Oct 2006
Location: California
Posts: 827
Likes: 0
Received 1 Like
on
1 Post
Car: 1989 Chevy Camaro RS
Engine: L30 TBI 5.0L Vortec
Transmission: 700R4
Axle/Gears: Stock
Re: LO3 To L30 Swap (In progress)
Little update.
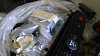
RFMaster is at the Junk yard right now and noticed a 92 Chevy 1500 5.7 newely added to the lineup. Pulled the TBI whole below. Will have them cleaned and flowed. Now just need the new 18 PSI spring.
RFMaster is at the Junk yard right now and noticed a 92 Chevy 1500 5.7 newely added to the lineup. Pulled the TBI whole below. Will have them cleaned and flowed. Now just need the new 18 PSI spring.
 04-07-2014, 10:06 AM
#152
Supreme Member
Join Date: Jan 2007
Location: OC CA
Posts: 1,873
Likes: 0
Received 0 Likes
on
0 Posts
Car: 75 Beast
Engine: 383 +EBL Flash
Transmission: 700R4
Axle/Gears: 4.11 with 33"
Re: LO3 To L30 Swap (In progress)
Follow up on the above post...
JY TB turned out to have a pair of GM5235206*RPD injectors still having Orange/Black paint markings. These are common truck injectors rated 61lb-hr at 13PSI give or take. Before long they will be shipped to Witchhunter for cleaning and testing. Also, I'll have to modify FPR to have adjustable set screw. This will take a bit of work on the bench.
Trip to LBC swap did not yield 5/8" hose fittings so I'll have these sourced from one of the industrial supply house places in the area.
EoU
//RF
04-07-2014, 11:48 PM
#153
Senior Member
Thread Starter
Join Date: Oct 2006
Location: California
Posts: 827
Likes: 0
Received 1 Like
on
1 Post
Car: 1989 Chevy Camaro RS
Engine: L30 TBI 5.0L Vortec
Transmission: 700R4
Axle/Gears: Stock
Re: LO3 To L30 Swap (In progress)
Follow up on the above post...
JY TB turned out to have a pair of GM5235206*RPD injectors still having Orange/Black paint markings. These are common truck injectors rated 61lb-hr at 13PSI give or take. Before long they will be shipped to Witchhunter for cleaning and testing. Also, I'll have to modify FPR to have adjustable set screw. This will take a bit of work on the bench.
Trip to LBC swap did not yield 5/8" hose fittings so I'll have these sourced from one of the industrial supply house places in the area.
EoU
//RF
JY TB turned out to have a pair of GM5235206*RPD injectors still having Orange/Black paint markings. These are common truck injectors rated 61lb-hr at 13PSI give or take. Before long they will be shipped to Witchhunter for cleaning and testing. Also, I'll have to modify FPR to have adjustable set screw. This will take a bit of work on the bench.
Trip to LBC swap did not yield 5/8" hose fittings so I'll have these sourced from one of the industrial supply house places in the area.
EoU
//RF
04-10-2014, 03:00 AM
#154
Senior Member
Thread Starter
Join Date: Oct 2006
Location: California
Posts: 827
Likes: 0
Received 1 Like
on
1 Post
Car: 1989 Chevy Camaro RS
Engine: L30 TBI 5.0L Vortec
Transmission: 700R4
Axle/Gears: Stock
Little update. So far so good for the Friday swap.
Side note: It has been hot in so cal! Picked up a set of AC gauges and vacuum pump. Converted AC to 134. Now blows 40�F at the vents.
Side note: It has been hot in so cal! Picked up a set of AC gauges and vacuum pump. Converted AC to 134. Now blows 40�F at the vents.
04-11-2014, 05:24 AM
#155
Senior Member
Thread Starter
Join Date: Oct 2006
Location: California
Posts: 827
Likes: 0
Received 1 Like
on
1 Post
Car: 1989 Chevy Camaro RS
Engine: L30 TBI 5.0L Vortec
Transmission: 700R4
Axle/Gears: Stock
Small update. RF had something come up and rescheduled for Sunday. Going to start tearing down the car today on my own. My first time ever doing a swap so we will see how far I can get.
Will use Chilton's manual as reference guide.
Will use Chilton's manual as reference guide.
04-12-2014, 12:50 AM
#156
Senior Member
Thread Starter
Join Date: Oct 2006
Location: California
Posts: 827
Likes: 0
Received 1 Like
on
1 Post
Car: 1989 Chevy Camaro RS
Engine: L30 TBI 5.0L Vortec
Transmission: 700R4
Axle/Gears: Stock
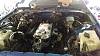
Update: RF was unable to attend today, but my excitement couldn't be contained. I began the swap by pulling some of the stuff I felt comfortable with. Ended up breaking the alternator bracket in the process(cheap aluminum) which RF is going to attempt to source from the local JY tomorrow morning. If not, I can get a new one from summit for < 60.
Started at 2 and stopped at 6. Ended up getting the dizzy, water pump, rad, compress, TB and some other stuff off of it which should make mine and RFs job easier come Sunday. Pics below.
Started at 2 and stopped at 6. Ended up getting the dizzy, water pump, rad, compress, TB and some other stuff off of it which should make mine and RFs job easier come Sunday. Pics below.


 04-12-2014, 01:31 AM
#157
Member
iTrader: (6)
Join Date: Aug 2012
Location: TN
Posts: 466
Likes: 0
Received 0 Likes
on
0 Posts
Car: 1990 Camaro RS
Engine: L31
Transmission: 700R4
Re: LO3 To L30 Swap (In progress)
Aw that sucks on the broke bracket. How did you do it so I don't make the same mistake? You'll be done before you know it. 
04-12-2014, 07:52 AM
#159
Senior Member
Thread Starter
Join Date: Oct 2006
Location: California
Posts: 827
Likes: 0
Received 1 Like
on
1 Post
Car: 1989 Chevy Camaro RS
Engine: L30 TBI 5.0L Vortec
Transmission: 700R4
Axle/Gears: Stock
Re: LO3 To L30 Swap (In progress)
Problem was that I assumed it was the same as the Compressor bracket with was about a total of 3 bolts securing it to the motor. The alt bracket has about 5-6 with 2-3 of them being hidden. When I had the same three out as the compressor bracket, I tapped the top of it with the hammer and it went flying. Terrible.
Yeah RF did some research on the cars that have it which isn't many. Also sucked that there is no way to remove the PS pump without a pulley puller.
04-12-2014, 01:56 PM
#160
Senior Member
Thread Starter
Join Date: Oct 2006
Location: California
Posts: 827
Likes: 0
Received 1 Like
on
1 Post
Car: 1989 Chevy Camaro RS
Engine: L30 TBI 5.0L Vortec
Transmission: 700R4
Axle/Gears: Stock
Re: LO3 To L30 Swap (In progress)
Update:
Let me being by saying RF's assistance through this process has been an invaluable!
Now onto the update, RF made an emergency trip to the local JY this morning and found a 89 Camaro with the drivetrain intact. Bracket pulled and we are back in business!
Let me being by saying RF's assistance through this process has been an invaluable!
Now onto the update, RF made an emergency trip to the local JY this morning and found a 89 Camaro with the drivetrain intact. Bracket pulled and we are back in business!
04-12-2014, 02:48 PM
#161
Supreme Member
Join Date: Jan 2007
Location: OC CA
Posts: 1,873
Likes: 0
Received 0 Likes
on
0 Posts
Car: 75 Beast
Engine: 383 +EBL Flash
Transmission: 700R4
Axle/Gears: 4.11 with 33"
Re: LO3 To L30 Swap (In progress)
Couple of comments from the shop floor.
For what ever insane reason GM designed alternator - PS bracket in such a way that it can not be removed from the engine without removing PS pulley first! I had to buy cheap puller-installer set from HFT #40749 (which did the job for $20) to get to the three bolts that keep PS pump attached to the bracket. To add additional insult GM used large head T-45 torx bolts which look like allen bolts. So it took two trips to JY to get this bracket off since my JY set does not have Torx drivers. Lucky for me Azn has a store 1/2 mile from JY.
Yea, I wish that GM assembly drawings that I saw online would have mentioned Torx. Now, this bracket is soaking in engine de-greaser. Managed to get all bolts, studs and nuts which should make installation easier............
//RF
04-13-2014, 09:23 PM
#162
Senior Member
Thread Starter
Join Date: Oct 2006
Location: California
Posts: 827
Likes: 0
Received 1 Like
on
1 Post
Car: 1989 Chevy Camaro RS
Engine: L30 TBI 5.0L Vortec
Transmission: 700R4
Axle/Gears: Stock
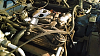
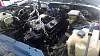
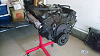
Update. RF and myself got some more work done to the Camaro.
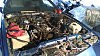
Pulled the Motor out which was a pain! The trans did not want to separate from the block at all. Took several minute of adjusting height and twisting then it released.
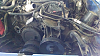
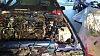
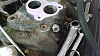
Began fitting the new motor with the heater fitting and new sensors. Noticed the old intake manifold has a provision for for the brake booster vacuum hose, but the new doesn't. Will figure this out later. Also noticed the CTS boss on the GMPP intake is larger than the LO3, thus requiring a new yet to be determined sensor.
Plan on continuing tomorrow
EDIT: May be able to correct the CTS boss issue with a 1/2 to 3/8 NPT brass bushing from home depot. will source tomorrow.
Notice the port on the runner.
Pulled the Motor out which was a pain! The trans did not want to separate from the block at all. Took several minute of adjusting height and twisting then it released.
Began fitting the new motor with the heater fitting and new sensors. Noticed the old intake manifold has a provision for for the brake booster vacuum hose, but the new doesn't. Will figure this out later. Also noticed the CTS boss on the GMPP intake is larger than the LO3, thus requiring a new yet to be determined sensor.
Plan on continuing tomorrow
EDIT: May be able to correct the CTS boss issue with a 1/2 to 3/8 NPT brass bushing from home depot. will source tomorrow.

Notice the port on the runner.


Last edited by RS-Chevy-SS; 04-13-2014 at 10:48 PM.
04-15-2014, 01:03 AM
#164
Senior Member
Thread Starter
Join Date: Oct 2006
Location: California
Posts: 827
Likes: 0
Received 1 Like
on
1 Post
Car: 1989 Chevy Camaro RS
Engine: L30 TBI 5.0L Vortec
Transmission: 700R4
Axle/Gears: Stock
Re: LO3 To L30 Swap (In progress)
Hey man! Didn't think anyone was paying attention to the swap!
Well heres the update. RF couldn't make it out today, so I flew solo. Tomorrow my dad will assist.
Started off the day continuing to source new fittings for the CTS and bypass port. Got the fittings but didn't mount them yet. Also had to source an 8MM square drive bit(which I've never seen) to remove a drain plug placed in the port for the radiator fan switch. Harbor freight 30 minutes away had the set.
Now to the interesting part. I spent the rest of the day outfitting the motor with some sensors, starter, water pump, motor mount brackets, etc.
The motor is ready to drop in so I began to replace the motor mounts which are a major PITA! I began at around 6PM and finished ONE SIDE at 9PM. These things are the worst design I have ever seen. Space, if you are planning to change your mounts(mine were stockers and cracked) save the time of BS'n with extensions and swivel joints and just drop the lower control arms. Makes it so much easier.
By the time I found that out, it was already about 8, so I did the driver side and left the passenger for tomorrow.
Tomorrows Kill list
1) Complete reassembly of drivers side suspension
2) Disassemble passenger side and replace motor mount
3) Final check for items that can be installed prior to dropping engine
4) Mount engine.
If I get those done ill be good. Short day tomorrow(wife's B-day)
04-15-2014, 01:18 AM
#165
Member
iTrader: (6)
Join Date: Aug 2012
Location: TN
Posts: 466
Likes: 0
Received 0 Likes
on
0 Posts
Car: 1990 Camaro RS
Engine: L31
Transmission: 700R4
Re: LO3 To L30 Swap (In progress)
Good to hear, I have been checking out your progress each day. There is a lot of information that will come in handy for me.
04-15-2014, 01:25 AM
#166
Supreme Member
Join Date: Jan 2007
Location: OC CA
Posts: 1,873
Likes: 0
Received 0 Likes
on
0 Posts
Car: 75 Beast
Engine: 383 +EBL Flash
Transmission: 700R4
Axle/Gears: 4.11 with 33"
Re: LO3 To L30 Swap (In progress)
Sorry - Monday was bad for me. Multiple meetings in 818 and 310, one was in completely 'tight' facility ( I had to turn my phone in )!!!
1) Motor Mount should be held by 3x 3/8"-16 bolts - take a picture of what you got.
2) Do not forget to torque flex plate bolts to spec!! This is rather critical!!!
3) You need to block main oil gulley next to dizzy hole. I brought bunch of NPT style plugs in a plastic bag. Cover dizzy hole with rag to prevent any possibility of 'OS' moment!
4) Sorry tomorrow looks ugly again - Burbank area. Next opportunity Saturday morning.
//RF
04-15-2014, 09:20 AM
#167
Supreme Member
iTrader: (11)
Join Date: Aug 2013
Location: MICHIGAN
Posts: 4,636
Received 751 Likes
on
577 Posts
Car: 1988 Trans Am
Engine: L03
Transmission: 700R4
Axle/Gears: 10 Bolt 2.73 Open
Re: LO3 To L30 Swap (In progress)
I read this thread every time there is a new post. Learning lots of good things.
04-15-2014, 11:09 PM
#168
Senior Member
Thread Starter
Join Date: Oct 2006
Location: California
Posts: 827
Likes: 0
Received 1 Like
on
1 Post
Car: 1989 Chevy Camaro RS
Engine: L30 TBI 5.0L Vortec
Transmission: 700R4
Axle/Gears: Stock
Update time:
Been solo the past few days. Definitely a learning curve. I'm way deeper into the car than I ever thought I would be.
Ok so we spent the first few hours trying to get the driver side buttoned back up from the mount install. Spring wouldn't go in due to the auto zone rental compressor being wrong.
Ended up having to go to O'Reilly and pick up the internal compressor and a piece of pipe per a thread on here which made the job much easier. Then proceeded to the passenger and completed the mount install there.
Let me just reiterate, MOTOR MOUNT ARE A PITA! The time it takes to change the
two, if you have proper tools is easily 3-4 hours. Started at 10 and finished at 7 mostly from having to source the proper tools which caused several trips.
Next moved onto the motor for final prep. Installed the CTS, motor brackets, coolant bypass, oil port plug on the block, oil filter adapter and some other fittings. Still need to do the thermostat (need new bolts) and clean the manifold.
Engine drop scheduled for tomorrow.


 04-16-2014, 12:29 AM
#169
Member
iTrader: (6)
Join Date: Aug 2012
Location: TN
Posts: 466
Likes: 0
Received 0 Likes
on
0 Posts
Car: 1990 Camaro RS
Engine: L31
Transmission: 700R4
Re: LO3 To L30 Swap (In progress)
If you're not in a hurry, you should clean up and paint your engine bay. You may never get another opportunity to do it and it will give your install a much more finished look. Keep up the progress, you are doing a great job.
04-16-2014, 02:07 AM
#170
Supreme Member
Join Date: Jan 2007
Location: OC CA
Posts: 1,873
Likes: 0
Received 0 Likes
on
0 Posts
Car: 75 Beast
Engine: 383 +EBL Flash
Transmission: 700R4
Axle/Gears: 4.11 with 33"
Re: LO3 To L30 Swap (In progress)
RS
The thermostat housing bolts that I've left are 3/8"-16 x 1-1/4" - might be just a touch too long. Try and see if they are not too long. There are some lock washers and flat washers in the bag.
The rear heater hose port is a bit cruddy and rusty. I was trying to source one from swap meet, but I did not see any. It is ether 5/8 or 3/4" barb to 1/2 MNPT
Temperature gauge sensor IRC is crewed into driver side head. Just double check that OE sensor is 3/8NPT. Vortec heads are drilled and tapped for 3/8 MNPT. Early Gen 1 heads are drilled for 1/2 NPT sensors. Got to hit the hay.
//RF
04-16-2014, 04:52 PM
#171
Senior Member
Thread Starter
Join Date: Oct 2006
Location: California
Posts: 827
Likes: 0
Received 1 Like
on
1 Post
Car: 1989 Chevy Camaro RS
Engine: L30 TBI 5.0L Vortec
Transmission: 700R4
Axle/Gears: Stock
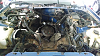
Mid day update! Motor is nearly in. Picking up new bell bolts then mounting accessories.
 04-16-2014, 08:45 PM
#172
Senior Member
Thread Starter
Join Date: Oct 2006
Location: California
Posts: 827
Likes: 0
Received 1 Like
on
1 Post
Car: 1989 Chevy Camaro RS
Engine: L30 TBI 5.0L Vortec
Transmission: 700R4
Axle/Gears: Stock
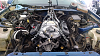
End of day update
Motor is in the car! Mounted the motor and torqued the mounts, flywheel bolts, , torque converter bolts, bell housing holts. Pretty much all that's left if accessories, fuel lines, TB etc.
Stay tuned
Rebuild project?
Motor is in the car! Mounted the motor and torqued the mounts, flywheel bolts, , torque converter bolts, bell housing holts. Pretty much all that's left if accessories, fuel lines, TB etc.
Stay tuned


Rebuild project?
 04-17-2014, 02:24 AM
#174
Senior Member
Thread Starter
Join Date: Oct 2006
Location: California
Posts: 827
Likes: 0
Received 1 Like
on
1 Post
Car: 1989 Chevy Camaro RS
Engine: L30 TBI 5.0L Vortec
Transmission: 700R4
Axle/Gears: Stock
Thanks! Plan to work on that tomorrow. Really want to get her fired up already! Lot of little things still need to be done starter, exhaust, sort the wiring harness, fuel delivery, etc. Little projects that add up
 04-18-2014, 02:09 AM
#176
Senior Member
Thread Starter
Join Date: Oct 2006
Location: California
Posts: 827
Likes: 0
Received 1 Like
on
1 Post
Car: 1989 Chevy Camaro RS
Engine: L30 TBI 5.0L Vortec
Transmission: 700R4
Axle/Gears: Stock
Lol.
Update:
Got a decent amount of work done today. Fully installed the new hooker headers and hooker y pipe today so the exhaust is done.
Side note: the passenger side header gave me hell. The heater pipe was in the way and needs to be relocated. Will source new hose tomorrow. Took about an hour to get the pass side in. 50 minutes on the first attempt, took a break, came back and it just slid right in! Fitment is other wise good and I now have 3" all the way back from the collectors IIRC.
Installed the starter and related wiring. Began sorting out the harness. There's a sole connector on the driver side of the tranny which I have no idea where it goes.
Mounted the TB and throttle bracket. Seems to be missing a boss for the back bolt so will run with one until I figure a solution out.
Tomorrow's kill list:
1) Re-route heater hoses.
2) Sort harness
3) Mount serp system
3) Install distributor(have no idea how to get TDC yet)
4) Fire!


 04-18-2014, 11:37 AM
#178
Supreme Member
Join Date: Jan 2007
Location: OC CA
Posts: 1,873
Likes: 0
Received 0 Likes
on
0 Posts
Car: 75 Beast
Engine: 383 +EBL Flash
Transmission: 700R4
Axle/Gears: 4.11 with 33"
Re: LO3 To L30 Swap (In progress)
RS
On the throttle bracket - I mentioned this before.
You will need to source one because the intake bolts are oriented vertically (90deg) rather than the conventional angle (72deg) - a vortec unique bracket is required..
http://www.jegs.com/i/JEGS+Performan...57332/10002/-1
or
http://www.summitracing.com/parts/EDL-8032/
Planning to be there Saturday AM - good Friday to you.
//RF
04-18-2014, 10:39 PM
#179
Senior Member
Thread Starter
Join Date: Oct 2006
Location: California
Posts: 827
Likes: 0
Received 1 Like
on
1 Post
Car: 1989 Chevy Camaro RS
Engine: L30 TBI 5.0L Vortec
Transmission: 700R4
Axle/Gears: Stock
Re: LO3 To L30 Swap (In progress)
Great suggestions RF, we may be able to get by with just bending the back tab of the bracket. I will let you take a look when you are here tomorrow.
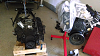
Nightly update:
Ended up completely re-doing the heater hose routing. I'm pretty satisfied with how it came out.
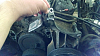
Noticed some fitment issues with the alternator and fuel lines. Looks like the intake manifold is raised with raises the fuel lines and requires them to be moves. I bent them out of the way for now. Also couldn't get the back alternator bracket in due to this. Also had trouble accessing the vacuum port on the runner directly behind the TB due to the lines.
Installed the compressor and related accessory brackets.Had trouble with the power steering pump pulley, couldn't get it in all the way with the puller. Will let RF try tomorrow. Mounted all accessory drive, connected fuel lines.
Was going to attempt to get TDC for dizzy install, however the plugs are now impossible to get to. Will possibly just bump the starter tomorrow.
Other than that, the car is ready to fire as far as I can tell.
Kill list for tomorrow:
1) Fully seat PS pump pulley
2) Install dizzy/prime motor
3) Fire
4) Re route brake booster line and ac vacuum lines.
Nightly update:
Ended up completely re-doing the heater hose routing. I'm pretty satisfied with how it came out.
Noticed some fitment issues with the alternator and fuel lines. Looks like the intake manifold is raised with raises the fuel lines and requires them to be moves. I bent them out of the way for now. Also couldn't get the back alternator bracket in due to this. Also had trouble accessing the vacuum port on the runner directly behind the TB due to the lines.
Installed the compressor and related accessory brackets.Had trouble with the power steering pump pulley, couldn't get it in all the way with the puller. Will let RF try tomorrow. Mounted all accessory drive, connected fuel lines.
Was going to attempt to get TDC for dizzy install, however the plugs are now impossible to get to. Will possibly just bump the starter tomorrow.
Other than that, the car is ready to fire as far as I can tell.
Kill list for tomorrow:
1) Fully seat PS pump pulley
2) Install dizzy/prime motor
3) Fire
4) Re route brake booster line and ac vacuum lines.


 04-18-2014, 11:45 PM
#181
Supreme Member
Join Date: Jan 2007
Location: OC CA
Posts: 1,873
Likes: 0
Received 0 Likes
on
0 Posts
Car: 75 Beast
Engine: 383 +EBL Flash
Transmission: 700R4
Axle/Gears: 4.11 with 33"
Re: LO3 To L30 Swap (In progress)
RS
We'll use flexplate wrench to turn engine over. I am bit concerned about spark plug access.
The back alternator bracket was attached to exhaust manifold bolt. In OE setup exhaust manifold adds some spacing away from the head. We'll need to cut a 3/8" ID spacer to allow back alternator bracket to reach to a right position. Some DIY is required.
Accelerator - TV bracket must provide correct geometry - it is too long to explain here - I'll fill you in tomorrow.
Overall - great progress! I am a bit concern about PS pulley installation. We'll have to resort to heating pulley in the oven at 300 F for about 1 hour before attempting to install it.
Busy day for me today again.
//RF
04-19-2014, 03:48 PM
#182
Senior Member
Thread Starter
Join Date: Oct 2006
Location: California
Posts: 827
Likes: 0
Received 1 Like
on
1 Post
Car: 1989 Chevy Camaro RS
Engine: L30 TBI 5.0L Vortec
Transmission: 700R4
Axle/Gears: Stock
Re: LO3 To L30 Swap (In progress)
Its alive! Timing is off and still need to route vacuum lines/brake booster. Need new fuel lines. RF will be here shortly to elaborate.
Last edited by RS-Chevy-SS; 04-25-2014 at 04:18 AM.
04-19-2014, 11:04 PM
#184
Senior Member
Thread Starter
Join Date: Oct 2006
Location: California
Posts: 827
Likes: 0
Received 1 Like
on
1 Post
Car: 1989 Chevy Camaro RS
Engine: L30 TBI 5.0L Vortec
Transmission: 700R4
Axle/Gears: Stock
Yes sir. I am right now. Car is still running the stock injectors and FPR. seems to idle a lot better when cold but when warm starts to idle funny.
Side note: there is a two post connector coming from the transmission that I have no idea where it goes. Any ideas?
Fast if you're there, how do you time this motor with the tab on the plastic cover?
Side note: there is a two post connector coming from the transmission that I have no idea where it goes. Any ideas?
Fast if you're there, how do you time this motor with the tab on the plastic cover?
04-19-2014, 11:51 PM
#187
Member
iTrader: (6)
Join Date: Aug 2012
Location: TN
Posts: 466
Likes: 0
Received 0 Likes
on
0 Posts
Car: 1990 Camaro RS
Engine: L31
Transmission: 700R4
Re: LO3 To L30 Swap (In progress)
Just doing a google search, it looks like vortec motors get set with a OBD 2 scan tool. Without a timing tab, you will have to do it by ear.
04-19-2014, 11:59 PM
#188
Senior Member
Thread Starter
Join Date: Oct 2006
Location: California
Posts: 827
Likes: 0
Received 1 Like
on
1 Post
Car: 1989 Chevy Camaro RS
Engine: L30 TBI 5.0L Vortec
Transmission: 700R4
Axle/Gears: Stock
Re: LO3 To L30 Swap (In progress)
On vortec motors the timing is set by the comp IF it is installed in a vehicle that it originally came in with that type of dizzy.
04-20-2014, 12:35 AM
#189
Supreme Member
Join Date: Jan 2007
Location: OC CA
Posts: 1,873
Likes: 0
Received 0 Likes
on
0 Posts
Car: 75 Beast
Engine: 383 +EBL Flash
Transmission: 700R4
Axle/Gears: 4.11 with 33"
Re: LO3 To L30 Swap (In progress)
1) I'll have to fab new fuel lines to get around fitment and routing issues. RS- please measure overall length of each fuel line with a piece of cord running along each one (they are different). I also need plenty of close in photos at the back at TB to determine hose end types for additional clearance.
2) On this L30 motor we've installed 12562818 timing cover which does NOT have crank sensor hole drilled. There is a timing tab located right around 1 o'clock position as indicated by red arrow below.

Balancer outer rim has timing line across it. The question what is the corresponding timing when this line aligns against the tab - this question is for Fast355 or any one else that has first hand experience with setting timing on L30/L31 engines. Balancer was supplied with crate engine. Unfortunately, I was in the rush and basically set timing by ear. Timing with semi warm engine was around 9deg - I have dial back timing light. Ideally, I would allow engine to fully warm up and set timing with EST plug open as it should be done per FSM.
3) Need to cut 3/8" id spacer to support alternator back brace. RS - please measure thickness of the exhaust manifold flange thickens on your original LO3 #cyl 1
So there are plenty of loose ends to tidy up and it would take a bit of time. But for now above actions need immediate attention. Overall great we've have accomplished what we set out to do - fine details will require time and effort to close.
//RF
Last edited by RFmaster; 04-20-2014 at 12:37 AM. Reason: typo
04-20-2014, 02:40 AM
#190

Re: LO3 To L30 Swap (In progress)
JMO, get a piston stop and set up your own timing mark if a tab is there. Get something like one of those gold sharpies, use the stop to determine TDC, put some clear over it and call it a day. No need to get crazy with it.
It's really easy, all you do is throw the stop in a cylinder, gently turn the engine until it hits then mark at your marking. After you do that, rotate it around until it hits again. When it does that, mark it again at the same point on the balancer. You're going to take the center of the 2 marks and that's TDC.
ED:"best vacuum" has always gotten me VERY close on base timing. I'm not going to say it's a good way to set timing, but it's not necessarily a bad one either. It definitely is an aspect of listening to "what the engine wants"
04-20-2014, 08:45 AM
#191
Supreme Member
iTrader: (2)

Join Date: Jan 2005
Location: Hurst, Texas
Posts: 9,970
Received 379 Likes
on
323 Posts
Car: 1983 G20 Chevy
Engine: 305 TPI
Transmission: 4L60
Axle/Gears: 14 bolt with 3.07 gears
Re: LO3 To L30 Swap (In progress)
Balancer outer rim has timing line across it. The question what is the corresponding timing when this line aligns against the tab - this question is for Fast355 or any one else that has first hand experience with setting timing on L30/L31 engines. Balancer was supplied with crate engine. Unfortunately, I was in the rush and basically set timing by ear. Timing with semi warm engine was around 9deg - I have dial back timing light. Ideally, I would allow engine to fully warm up and set timing with EST plug open as it should be done per FSM.
//RF
//RF
If you have a dial back timing light, try setting the timing at 8�BTDC with the timing wire disconnected. I have the timing tables for a L99 265 Caprice that uses the 305 bore and the LT1 version of the L30 heads and the same cam and it runs 30-32� of timing at high rpm, more initial timing amd alot quicker advance rate. If you want I will post them up for your tuning effort. They area ddecent place to start imo.
04-20-2014, 09:19 AM
#192
Supreme Member
Join Date: Jan 2007
Location: OC CA
Posts: 1,873
Likes: 0
Received 0 Likes
on
0 Posts
Car: 75 Beast
Engine: 383 +EBL Flash
Transmission: 700R4
Axle/Gears: 4.11 with 33"
Re: LO3 To L30 Swap (In progress)
If you are running the L30 cover and balance that will be TDC.
If you have a dial back timing light, try setting the timing at 8�BTDC with the timing wire disconnected. I have the timing tables for a L99 265 Caprice that uses the 305 bore and the LT1 version of the L30 heads and the same cam and it runs 30-32� of timing at high rpm, more initial timing amd alot quicker advance rate. If you want I will post them up for your tuning effort. They area ddecent place to start imo.
If you have a dial back timing light, try setting the timing at 8�BTDC with the timing wire disconnected. I have the timing tables for a L99 265 Caprice that uses the 305 bore and the LT1 version of the L30 heads and the same cam and it runs 30-32� of timing at high rpm, more initial timing amd alot quicker advance rate. If you want I will post them up for your tuning effort. They area ddecent place to start imo.
Happy Easter Fast355 - that's what I thought, but I wanted to confirm this. Yes, we are using OE timing cover and balancer as supplied by GM (L30 crate). I only wish that GM supplied some documentation with crate engine. I'll send PM for the bin.
//RF
04-20-2014, 05:10 PM
#193
Senior Member
Thread Starter
Join Date: Oct 2006
Location: California
Posts: 827
Likes: 0
Received 1 Like
on
1 Post
Car: 1989 Chevy Camaro RS
Engine: L30 TBI 5.0L Vortec
Transmission: 700R4
Axle/Gears: Stock
Re: LO3 To L30 Swap (In progress)
Side note: Ordered the edlebrock 8032 throttle bracket to correct that issue.
04-20-2014, 08:55 PM
#194
Supreme Member
Join Date: Jan 2007
Location: OC CA
Posts: 1,873
Likes: 0
Received 0 Likes
on
0 Posts
Car: 75 Beast
Engine: 383 +EBL Flash
Transmission: 700R4
Axle/Gears: 4.11 with 33"
Re: LO3 To L30 Swap (In progress)
I think it is a bit retarded - I mean timing is late! I better be careful with the way I say that. That's what happens when you rush things or press for time! Need to advance timing another 8 deg or so (dizzy needs to be turned CCW). For a stock LO3 calibration I expect 18deg +/-2 at idle. The right way to set timing is open EST plug and set it to base timing which correspond to the one set in the EPROM - stock LO3=0deg. Also need to reset IAC - did not do that when we got everything fired up!
Get some coolant so that we can warm up engine to normal operating temperature and get all this minor stuff squared away. Meanwhile, other activities require attention during this week.
//RF
Get some coolant so that we can warm up engine to normal operating temperature and get all this minor stuff squared away. Meanwhile, other activities require attention during this week.
//RF
04-20-2014, 11:16 PM
#195
Member
iTrader: (6)
Join Date: Aug 2012
Location: TN
Posts: 466
Likes: 0
Received 0 Likes
on
0 Posts
Car: 1990 Camaro RS
Engine: L31
Transmission: 700R4
Re: LO3 To L30 Swap (In progress)
The dial back light will get you where you want it, you could also get a timing tape that is calibrated to your balancer diameter. You got that motor in pretty quickly, good job sticking with it. You will have it wrapped up in no time.
04-20-2014, 11:55 PM
#196
Senior Member
Thread Starter
Join Date: Oct 2006
Location: California
Posts: 827
Likes: 0
Received 1 Like
on
1 Post
Car: 1989 Chevy Camaro RS
Engine: L30 TBI 5.0L Vortec
Transmission: 700R4
Axle/Gears: Stock
RF- Got the leaky fuel line corrected today. Undid the top line, checked the O ring, and reinstalled it. It didn't leak any more after that.
Took it for a small drive ( < 0.5 mile), man it sounds good! Didn't get above about 1800 rpm though
Video of the short drive. Hard to hear but a small rumble can be heard
Last edited by RS-Chevy-SS; 04-21-2014 at 12:01 AM.
04-21-2014, 12:01 AM
#197
Supreme Member
Join Date: Jan 2007
Location: OC CA
Posts: 1,873
Likes: 0
Received 0 Likes
on
0 Posts
Car: 75 Beast
Engine: 383 +EBL Flash
Transmission: 700R4
Axle/Gears: 4.11 with 33"
Re: LO3 To L30 Swap (In progress)
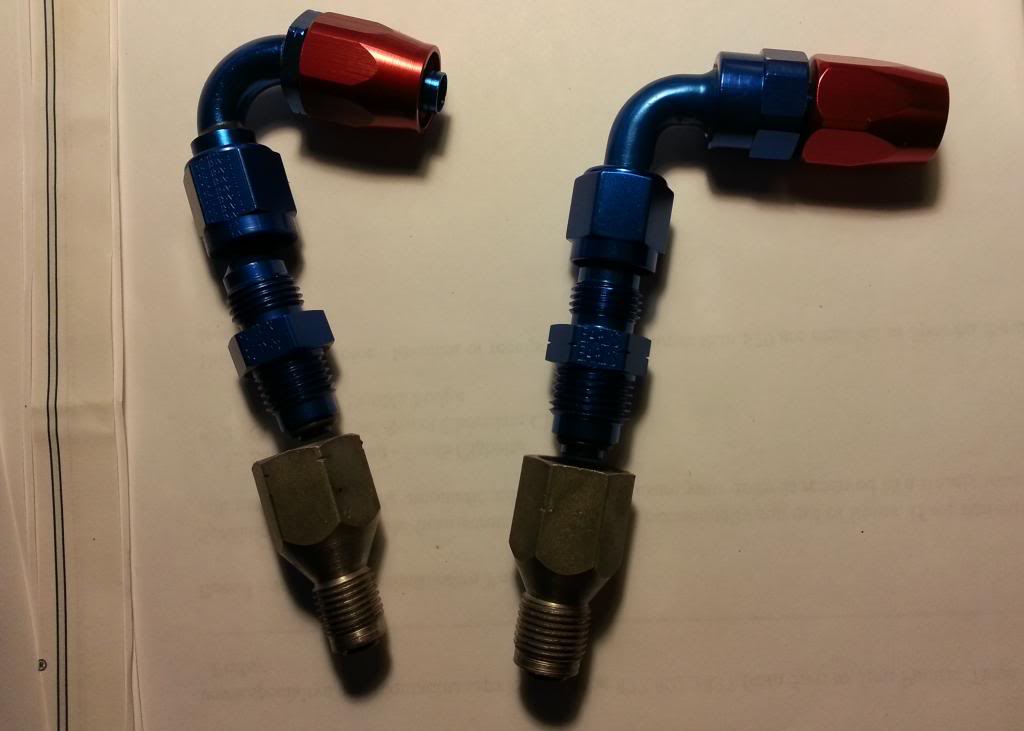
Next stage - correcting fuel lines
I like running braided -6AN lines - easy to make, but expensive and bulky. Going from stock metric fuel lines fittings to -6 AN requires adapters. Luckily these a readily available. Alternatively, bending 3/8 and 5/16 soft steel fuel lines, beading ends and making transitions - is a time consuming affair. Can be done, but we'll end-up with rubber hoses to make up transitions from metric fitting to main line.
At TB inlet Fuel return (left)
EAR991954
Fitting, Adapter, AN Flare to Metric, -6 AN to 14mm x 1.5, Aluminum, O-ring
EAR812006
Fitting, Hose End, Swivel-Seal, 120 Degree, -6 AN Hose to Female -6 AN
Fuel supply (right)
EAR991955
Fitting, Adapter, AN Flare to Metric, -6 AN to 16mm x 1.5, Aluminum, O-ring
EAR809106
Fitting, Hose End, Swivel-Seal, 90 Degree, -6 AN Hose to Female -6 AN
On my engine test stand - fuel supply (yes, it is SAE 30R9 rated hose)
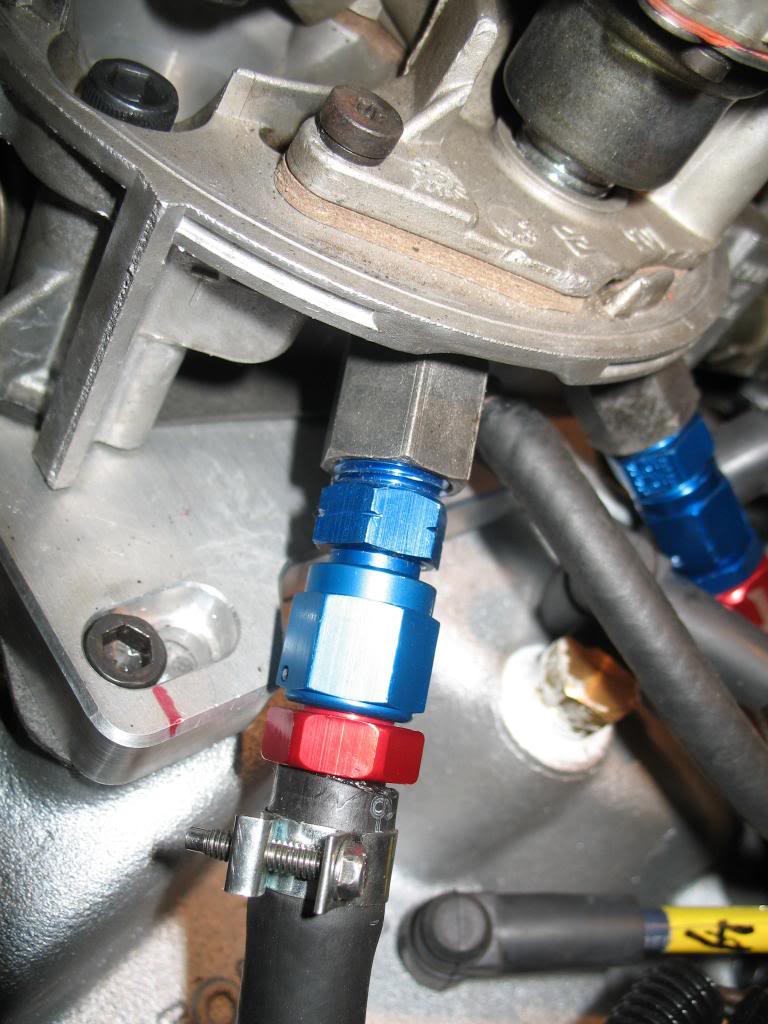
Fuel return port
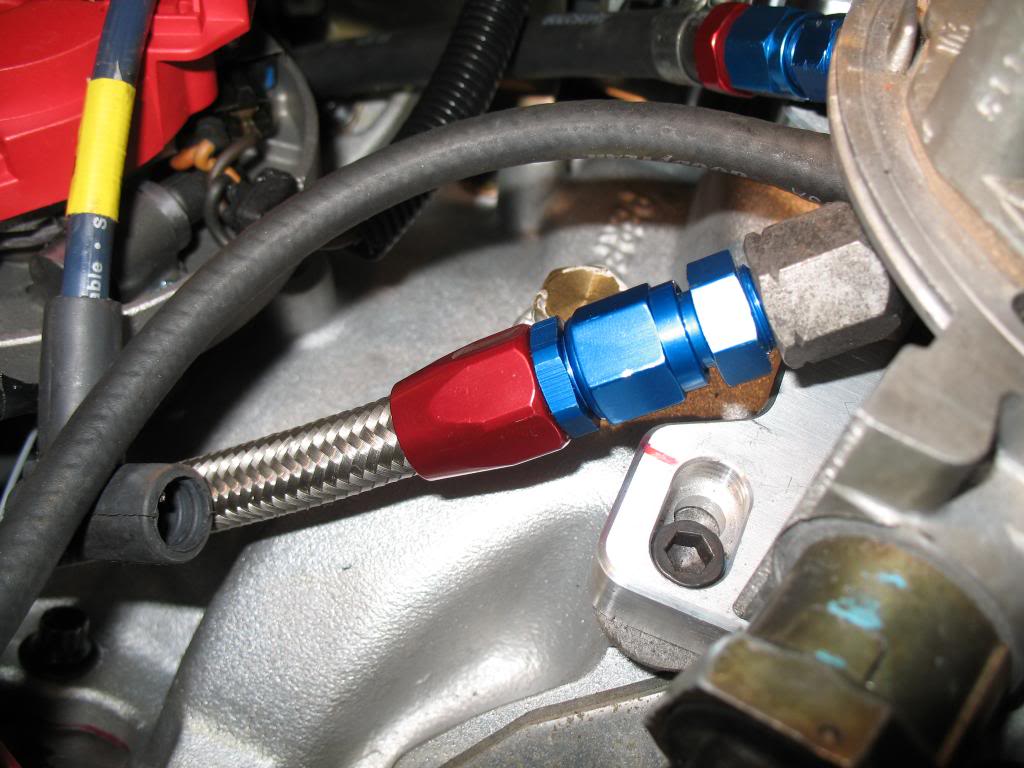
Same EAR991955 / EAR991954 adapters will be used to transition to the main lines (driver side fender).
//RF
I like running braided -6AN lines - easy to make, but expensive and bulky. Going from stock metric fuel lines fittings to -6 AN requires adapters. Luckily these a readily available. Alternatively, bending 3/8 and 5/16 soft steel fuel lines, beading ends and making transitions - is a time consuming affair. Can be done, but we'll end-up with rubber hoses to make up transitions from metric fitting to main line.
At TB inlet Fuel return (left)
EAR991954
Fitting, Adapter, AN Flare to Metric, -6 AN to 14mm x 1.5, Aluminum, O-ring
EAR812006
Fitting, Hose End, Swivel-Seal, 120 Degree, -6 AN Hose to Female -6 AN
Fuel supply (right)
EAR991955
Fitting, Adapter, AN Flare to Metric, -6 AN to 16mm x 1.5, Aluminum, O-ring
EAR809106
Fitting, Hose End, Swivel-Seal, 90 Degree, -6 AN Hose to Female -6 AN

On my engine test stand - fuel supply (yes, it is SAE 30R9 rated hose)

Fuel return port

Same EAR991955 / EAR991954 adapters will be used to transition to the main lines (driver side fender).
//RF
04-21-2014, 12:04 AM
#198
Senior Member
Thread Starter
Join Date: Oct 2006
Location: California
Posts: 827
Likes: 0
Received 1 Like
on
1 Post
Car: 1989 Chevy Camaro RS
Engine: L30 TBI 5.0L Vortec
Transmission: 700R4
Axle/Gears: Stock
Next stage - correcting fuel lines
I like running braided -6AN lines - easy to make, but expensive and bulky. Going from stock metric fuel lines fittings to -6 AN requires adapters. Luckily these a readily available. Alternatively, bending 3/8 and 5/16 soft steel fuel lines, beading ends and making transitions - is a time consuming affair. Can be done, but we'll end-up with rubber hoses to make up transitions from metric fitting to main line.
At TB inlet Fuel return (left)
EAR991954
Fitting, Adapter, AN Flare to Metric, -6 AN to 14mm x 1.5, Aluminum, O-ring
EAR812006
Fitting, Hose End, Swivel-Seal, 120 Degree, -6 AN Hose to Female -6 AN
Fuel supply (right)
EAR991955
Fitting, Adapter, AN Flare to Metric, -6 AN to 16mm x 1.5, Aluminum, O-ring
EAR809106
Fitting, Hose End, Swivel-Seal, 90 Degree, -6 AN Hose to Female -6 AN
On my engine test stand - fuel supply (yes, it is SAE 30R9 rated hose)
Fuel return port
Same EAR991955 / EAR991954 adapters will be used to transition to the main lines (driver side fender).
//RF
04-21-2014, 12:14 AM
#199
Supreme Member
Join Date: Jan 2007
Location: OC CA
Posts: 1,873
Likes: 0
Received 0 Likes
on
0 Posts
Car: 75 Beast
Engine: 383 +EBL Flash
Transmission: 700R4
Axle/Gears: 4.11 with 33"
Re: LO3 To L30 Swap (In progress)
Need some high resolution photographs with a tape measure set from the back of TB to the dizzy. Fuel lines should clear vacuum port - or at least be a lot easier to route since fuel lines are flexible and fittings can swivel.
//RF