How to Take The Clear Coat Off of Your Rims and Polish Them
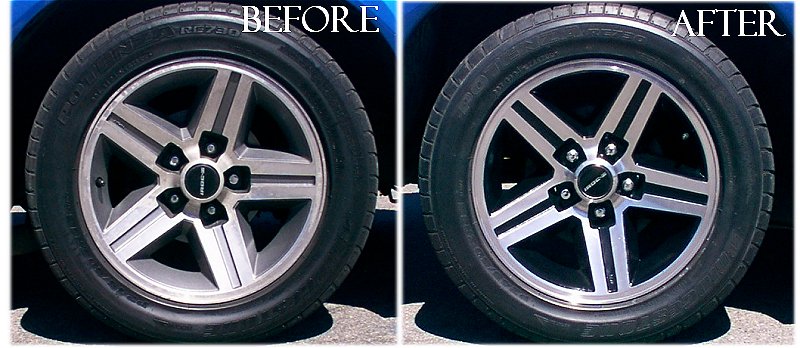
Are you tired of looking at those old, dull, dirty, clear coat chipped IROC-Z rims? Do you want to give them a new, fresh look? Well why don’t you take the clear coat off, polish them, and have them look like new!
P.S. I am not responsible for anyone messing up their rims, this is an informative article to help you.
Materials Needed:
- A jack of course
- A can of Tal-strip II, A.K.A. Aircraft surface remover. You can find this at your local auto parts store. Also stick with the container, forget the spray, its weak. If you can’t find any get a strong stripper for metals.
- A hard plastic scraper. If you do this outdoors you can use your hose as long at it can spray hard.
- Thick safety gloves and goggles.
- A 1" inch cheapo natural bristle paint brush.
- A roll of 2" inch Painters masking tape.
- The Sunday paper. You’re going to need a lot of news paper.
- A Fine razor, preferably an exacto knife.
- Four cans of black spray paint . Get whatever brand or color you want, I used 4 black 89 cent cans of the cheap stuff.
- Very fine steel wool.
- A few sheets of 400 grit wet/dry sand paper.
- Mothers or Magic blue aluminum polish, what ever you prefer.
*Optional: A bottle of Meguiars deep crystal system step 1 works great to get rid of deposits.
**Important! Please do not attempt to do this when you do not have the time, this is a time consuming process so set a date when you will have nothing to do when you begin this. It is also best to do this outdoors in the shade since you will be playing with a very hazardous stripper (paint stripping chemical 🙂 ).
Ok, now what you have everything you need let the fun begin!
Step one:
Now that you have everything on hand and you are ready to go, go ahead and choose a rim to begin with. I suggest that you pick the worst looking rim you have for 2 reasons, 1. it will probably take the longest to do, and 2. you can really get a before and after feeling. If you have chrome lug nuts put them near you as you will be polishing those suckers in a bit.
Once you have the rim off, roll it over to a nice shady spot, put a rag or something of the sort under the tire to catch all of the Tal-Strip that falls through the gaps. Go ahead now and READ the instructions on the back of the can if you haven’t done so already! Put on your safety gear and take the cap off of the can slowly, be careful of the can spiting because its under pressure and you don’t want to get this stuff on your skin, trust me. Also take the center cap off of the rim.
Dip the 1" inch brush right into the can and begin spreading a generous amount on the rim, stroke the brush in ONE DIRECTION ONLY. Be very careful not to get any on the tire, if you do get a drop on it, very quickly wipe it off with a towel, it shouldn’t hurt the tire if you take it off fast. Once you have the rim completely covered go ahead and let it sit for about 10 minutes, it should start bubbling and blistering the second you put it on, this shows you its working. While you are waiting, you can kill time by polishing your lug nuts to compliment your new rim :).
Step 2:
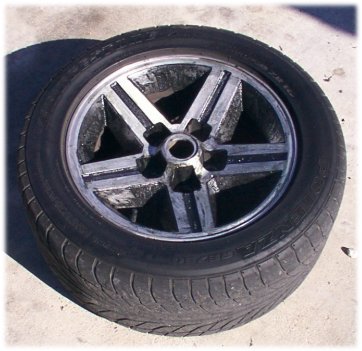
After 10 minutes roll around, put one side of the wheel on a block of wood or something to give it an angle, it’s easier to hose off this way. Put the hose setting on power spray and hose the crap out of it. You should see big black chunks of stuff coming off, what it is? Why your clear coat of course :D. The gray painted spots will look very nasty, but that’s the way it will look. For really stubborn clear coat spots you might have to re-coat it, since this is your worst rim it may take 2-3 re-coats before you get it all off and take most of the gray paint off also. If you want to scrape it go ahead but hose it afterward. The rim is going to look really nasty and crappy, and you are going to say to yourself, "Why the hell am I doing this?" You will realize in the end you will have badass looking rims 🙂
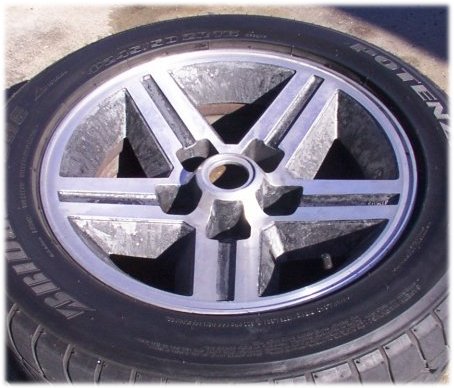
Once you are done and are satisfied with the results, dry the rim off pretty well, use the 400 grit sand paper to take most of the left over paint off. Then use the steel wool on the aluminum parts *note: when using the steel wool go with the machine lines on the rims, if you go against them, it will leave scratches.* Once you are done re-hose it to take off all of the dust and steel wool flakes off of the rim. Now it is time to tape the rim up!
Step 3:
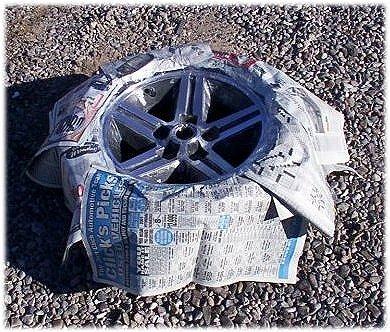
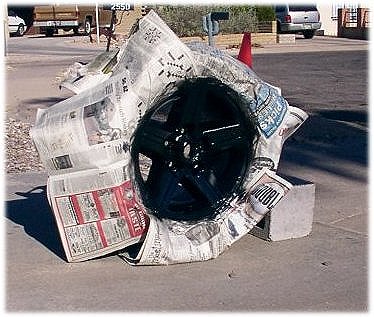
This is probably the most time consuming part, makes sure to cover everything aluminum including the veins of the rim "center stripes" and lug nut holes for now, don’t forget the air valve. Once you do that tape newspaper around the tire to protect it from the spray paint, when everything is done, get the exacto knife and cut out the center stripes & holes where the lug nuts go. Then look over everything to make sure you taped up all of the aluminum. It is now time to spray paint.
Step 4:
Shake the can up for a minute or so and then test spray it on the log or anything, Then spray even left to right coats on the gaps, up and down coats on the center stripes, and just shoot straight into the lug nut holes. After you are finished, allow 5-10 minutes between each coat, give the rim 4 good coats in a shady spot, then let it dry for about 30 minutes in a sunny spot. This is enough time to let it dry really well.
Step 5:
Once the spray paint is fully dry to the touch, go ahead and slowly start peeling off the tape, the rims looks a hell of a lot better now doesn’t it :). Go ahead and grab the Meguairs deep crystal step 1 if you decide to use it, apply a little bit to a towel when necessary and start rubbing the outside part of the rim and work your way to the center, then use a clean side and take the stuff off. The deep crystal stuff will remove a lot of deposits and make the rim very clean. your towel should be black now. *note: be very careful not to get any of the polish OR the deep crystal stuff on the freshly painted parts. It will leave spots on the paint. Now go ahead and use the mothers or magic blue, use very little at a time since you don’t want to get any on the fresh paint. The rim should look very nice and polished.
You now have a freshly painted and polished rim, looks good doesn’t it. There is nothing left to do now but put the rim back on the car and finish the other 3!
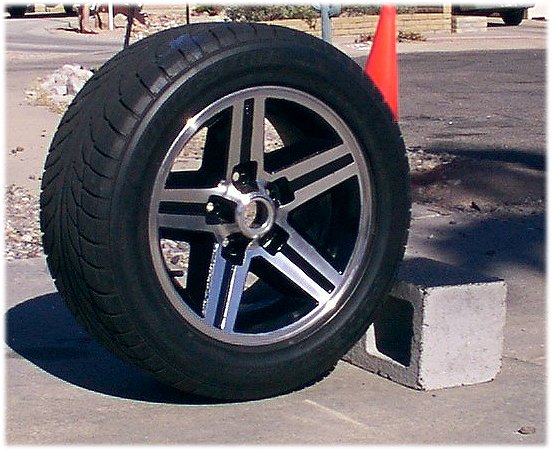
Soon you will have some great looking rims that will get nothing but compliments. Good luck and I hope my tech article has helped you out. If you have any comments or questions, please feel free to e-mail me at: tpi5siz@hotmail.com, I will get back to you as soon as I can.