My LS1/T56 swap thread
 10-19-2013, 12:43 PM
#1
Senior Member
Thread Starter

My LS1/T56 swap thread
Well. Got my motor for $1500 out of a 02 T/A, came with the computer and the harness. The yard decided to cut the harness about 5" from the computer for easier removal. It's a bit of a hassle, however I can make it work. I haven't had time to look at the rest of the harness, but maybe next weekend I can. If the rest of the harness is that far hacked I'll have to go with a PSI conversion harness, but I really want to do this myself for my own education.
Also picked up the 4th gen tank with sender/pump in it.
My car is an 87 T/A with the non computer controlled carb, so I'm going full stand alone on my harness.
There is a LOT of info here on this site and other places on the web for wiring info. However, What I plan to do is take that info a bit further and show people exactly how I am going about the project.
I'll include part numbers if I can and costs as we go along. The project will take me a few months as I am doing this as I can afford it. I'll get everything set up and organized, wiring figured out, fuel lines worked out etc and then throw it in the car.
The first little bit of my thread will be almost all wiring.
So, as I said I'm doing a stand alone system. My gauges will be 100% speedhut gauges. This does a few things to my benefit. The first is I will have my own harness for the gauges. The only inputs I need from the ECM are the VSS and tach wires. I'll make a connector behind my gauge panel so I can connect/disconnect if I ever need to. My other 4 sensors will get their info from their own gauge senders.
I'll throw up my "how to" in this thread once I get the cash for the gauges.
So far I have printed the 2002 Fbody pinout for the computer. Using info from here and an amazing post I found on a BMW forum I have written down on my pin out of wires that I can combine together, wires that will be deleted, wires that I have to add (Rev lock out since the car was an auto) etc. I'll take pictures of my print out with my chicken scratch notes so anyone here can see what I'm planning and my little personal hints. The pinout diagrams leave some info out, which I have tracked down and put in my notes. I think this will clear up some issues for those considering the swap.
All I'll need out of my engine side of my car harness is a 12v switched and the starter wire. It's pretty simple once you sit down, read, make notes and think things through.
I'm going to head to a pick and pull yard for a good power distribution/fuse/relay box. Any suggestions on what vehicles to get one from? The yard with my motor wanted $100 for the F-body one and I felt that was steep.
I'll need space for 4 relays (fuel, ign, 2 fans) and 7 fuses. I'm doing a set up similar to what is in post # 130 of this thread https://www.thirdgen.org/forums/ltx-...3rd-gen-3.html
It's seriously that easy guys, it just seems intimidating. Of course if anyone sees flaws, let me know and I'll fix it. I'll put up the info as I go along about the little stuff with pictures.
All I know about wiring is from what I have picked up working on motorcycles, adding accessories to vehicles and a self contained 12V system in my race trailer for lights, stereo and acc power. I am ocd when it comes to clean wiring and I actually like to solder. Anyone can do this if I can.
Unfortunately, winter is coming and the truck needs new tires (gets nasty where I live) and so is Christmas, so there won't be a whole lot of big progress until the new year. Would be nice to get my gauges next month if I find a deal on tires that leaves me with enough cash.
 10-19-2013, 07:11 PM
#2
Senior Member

iTrader: (1)
Join Date: Aug 2006
Location: Bethlehem, CT
Posts: 632
Likes: 0
Received 4 Likes
on
4 Posts
Car: 1983 Firebird SE
Engine: C5 LS1
Transmission: 6 speed
Axle/Gears: 3.42
Re: My LS1/T56 swap thread
https://www.thirdgen.org/forums/ltx-...rt-finish.html
This is the bible on LSX into 3rd Gen harnesses. Check it out.
This is the bible on LSX into 3rd Gen harnesses. Check it out.
10-29-2013, 11:53 AM
#3
Senior Member
Thread Starter
Re: My LS1/T56 swap thread
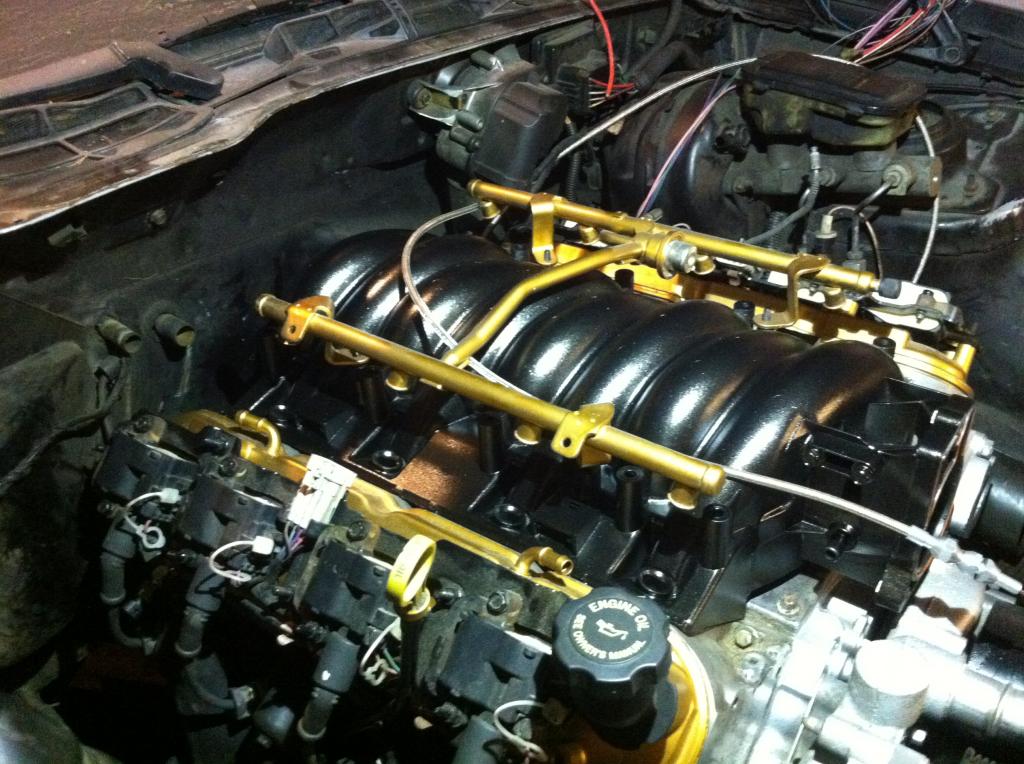
Well, managed to get some time this weekend to do some work on the motor. Here it is, all 140,000km and obviously a few winters on it:

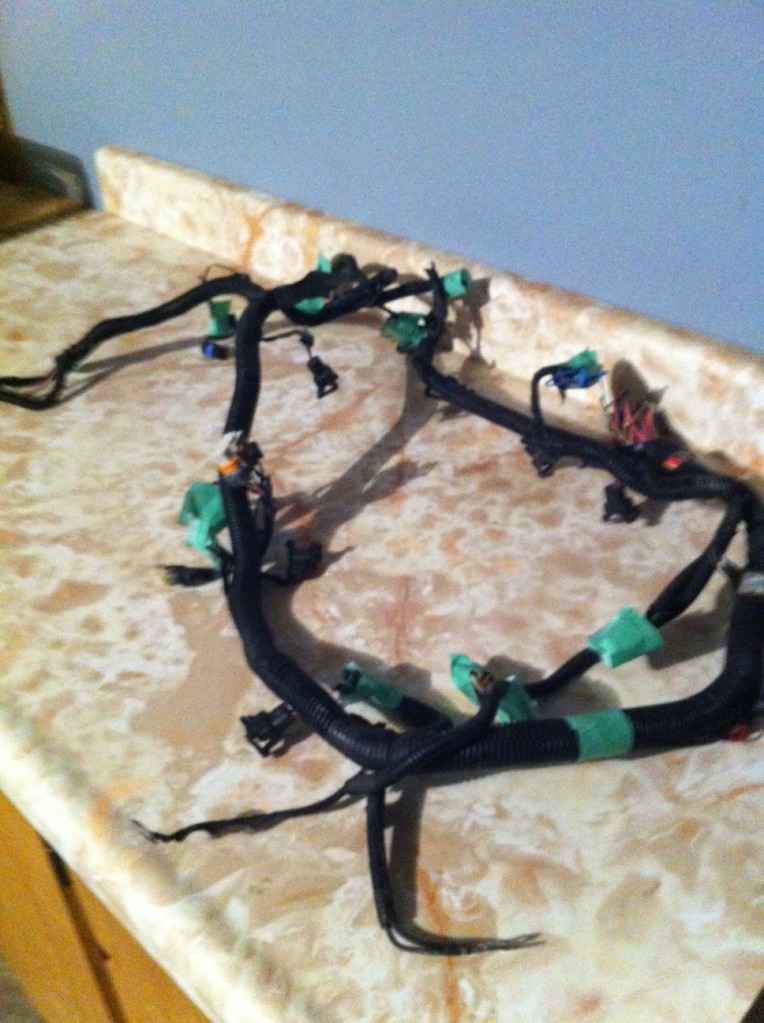
And here is how my harness and ECM were seperated:

So, first order of business was to label all the connections first. Hint* Your injector connectors are already numbered so you don't have to label those.
And then remove the harness to get something like this:
Then, seperate your connectors off of the ECM, pull off the coloured and grey caps.

Then, get your pin-out sheets out, and start to pull pins. I marked it with a black sharpie for the pins I had removed as I went along and did it. Be methodical. I did this while having a phone conversation, since I had already marked down what to remove, what stays, and what gets added.

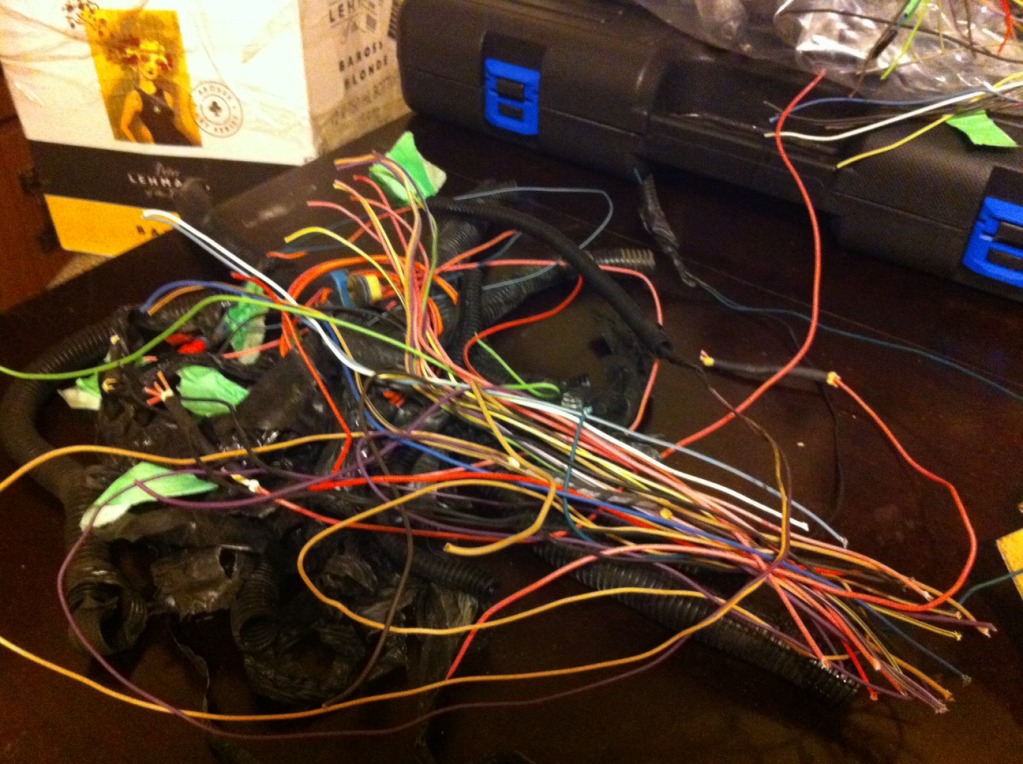
These are all the wires that I removed. Yours won't be as short as these ones, unless your ECM was hacked out like mine was.

Now rip all the tape and loom off the harness:

And, starting at the connectors on the R hand side of the harness (less complicated side) I began pulling wires out from the mess. I cut the commons (12V pinks and Black grounds) at the junctions. This is the pile of wiring that was removed, and two connectors that I won't be using (Air solenoid and the charcoal cannister).
Now, bundle up your connectors individually, tape them so they stay wound up and label the bundle:

I then proceded to go through my pin out sheets, pin by pin to verify that I had all the right pins, had no extras and was missing none. I also checked that each pin matched up to the wire from the specific destination on each connector. Marked each with a piece of tape for easy tracking. This ensured me that I missed nothing, and that I know where everything is going.
I was left with (from memory here) 2 orange constant battery wires that get a fuse and go straight to battery. I will also solder the DLC battery wire to these.
I have a (green I think) DLC communication line that will run to the port.
4 Black ECM grounds, outputs for speedo, tach, the fuel pump (+) lead and the grounds for the Fans. Those are the only ones that so far don't have a "mate" in the harness.
I'm missing a crank position connector, my IAT sensor and need a bunch of wire to assemble the harness. My Bank 2 O2 sensor is missing as well. All of these I plan to get from a $50 all you can carry day at a local yard. Plan to source a starter and maybe some bucket seats to make sure I get my $50 worth.
I'm aiming for a later S-10 and a FWD GM car to get as much wiring as I can, as well as the O2 sensors and pigtails. (Thanks for the advice Pocket!)
IAT sensor is pretty generic, so I'll just grab one from the right era of GM vehicle.
RockAuto is a great website to use to show you what parts from different cars are the same part number.
I know this is fairly simply detailed, but I hope that this can some day be used as another guide.

And here is how my harness and ECM were seperated:

So, first order of business was to label all the connections first. Hint* Your injector connectors are already numbered so you don't have to label those.
And then remove the harness to get something like this:

Then, seperate your connectors off of the ECM, pull off the coloured and grey caps.

Then, get your pin-out sheets out, and start to pull pins. I marked it with a black sharpie for the pins I had removed as I went along and did it. Be methodical. I did this while having a phone conversation, since I had already marked down what to remove, what stays, and what gets added.

These are all the wires that I removed. Yours won't be as short as these ones, unless your ECM was hacked out like mine was.

Now rip all the tape and loom off the harness:

And, starting at the connectors on the R hand side of the harness (less complicated side) I began pulling wires out from the mess. I cut the commons (12V pinks and Black grounds) at the junctions. This is the pile of wiring that was removed, and two connectors that I won't be using (Air solenoid and the charcoal cannister).

Now, bundle up your connectors individually, tape them so they stay wound up and label the bundle:

I then proceded to go through my pin out sheets, pin by pin to verify that I had all the right pins, had no extras and was missing none. I also checked that each pin matched up to the wire from the specific destination on each connector. Marked each with a piece of tape for easy tracking. This ensured me that I missed nothing, and that I know where everything is going.
I was left with (from memory here) 2 orange constant battery wires that get a fuse and go straight to battery. I will also solder the DLC battery wire to these.
I have a (green I think) DLC communication line that will run to the port.
4 Black ECM grounds, outputs for speedo, tach, the fuel pump (+) lead and the grounds for the Fans. Those are the only ones that so far don't have a "mate" in the harness.
I'm missing a crank position connector, my IAT sensor and need a bunch of wire to assemble the harness. My Bank 2 O2 sensor is missing as well. All of these I plan to get from a $50 all you can carry day at a local yard. Plan to source a starter and maybe some bucket seats to make sure I get my $50 worth.
I'm aiming for a later S-10 and a FWD GM car to get as much wiring as I can, as well as the O2 sensors and pigtails. (Thanks for the advice Pocket!)
IAT sensor is pretty generic, so I'll just grab one from the right era of GM vehicle.
RockAuto is a great website to use to show you what parts from different cars are the same part number.
I know this is fairly simply detailed, but I hope that this can some day be used as another guide.
Last edited by WTR388; 10-29-2013 at 11:57 AM.
03-25-2014, 02:58 PM
#4
Senior Member
Thread Starter
Re: My LS1/T56 swap thread
Figure I'll update this!
Purchased an LS1 Bellhousing and a Lt style T56 last week. I'll have roughly $2200 in the transmission aside from clutch set up. Considering I can't find an LS1 style around, and to get one from the states is redonkulous at the moment it's the best I could do.
I spent $100 at the pick and pull and got:
Full engine harness from a 2001 1500 truck.
various fuse/relay boxes from GM cars to play with.
Leather buckets from a Saturn SC2 (seriously, nice seats) as well as the rear seats to use to cover my stock rears up (nearly perfect fit with some minor mods).
I found a MINT set of buckles and belts from an 84 camaro. And some interior trim (don't need but might someday)
Astro steering shaft.
Bunch of smaller parts and pieces.
My engine harness is done. Layed out on the motor, lengthened with the truck harness wire, all I have to wire are the T56 connectors, my MAF and IAT and the fuse panel but that's all getting done once the pieces start to come together.
I'm waiting on a big cheque from work which is due in the next few weeks and then I can order my ~$3000 shopping list from hawks, jegs and rockland.
Looks like the swap should be done sometime early June!
There might also be a strip, body work and re-paint of the car if I have the engergy.
Motocross season is approaching so all my weekends, multiple week nights and spare money are all tied up in to that. I am selling a couple things to do the body.
I'll have some wheels and a carb 305 with a T-5 for sale as well.
The updates are slow and few because of how brutally cold it has been here... Winter is STILL happening here and we're supposed to be out on the track in the next few weeks here... Gonna be a mud/ice fest!
05-10-2014, 04:22 PM
#5
Senior Member
Thread Starter
Re: My LS1/T56 swap thread
No interest yet it seems, but still plugging away at this thing.
Motor is almost done being painted.
Sold my FZ6 this morning so I spent the rest of the morning spending $950 (Canadian) at Hawks, and then another $740 for a nice custom set of gauges from hawks... Those are the single "splurge" item for the build... I want the interior to be very stock feeling but hinting that something just isn't normal in there.
Still have another $1500 in online parts to order (T56 conversion kit, LS7 clutch, fuel hose and fittings from Jegs). Everything else I'll be picking up from the local Napa or scrap yard.
Bit of a time crunch now as the military possibly has me moving, I just switched trades from Medic to one of the aircraft mechanic trades where I'm going to pick up some really good fab skills.
Once I have most of my parts I'm going to actually start the swap!
A little bit nervous that the thing is just going to end up dead in the water.
Still have to wire out my J-body fuse box as I can't get the leads out of the lumina fuse box in order to switch them around, despite the fact the box itself is perfect for the swap.
06-06-2014, 09:32 AM
#6
Senior Member
Thread Starter
Re: My LS1/T56 swap thread
More progress.
My first orders have been showing up, have all my stuff from hawks. I got the new 5 speed shifter plate and the 6 speed gear selector thing... How do you take the old one off without ruining anything? Looks like it's glued in.
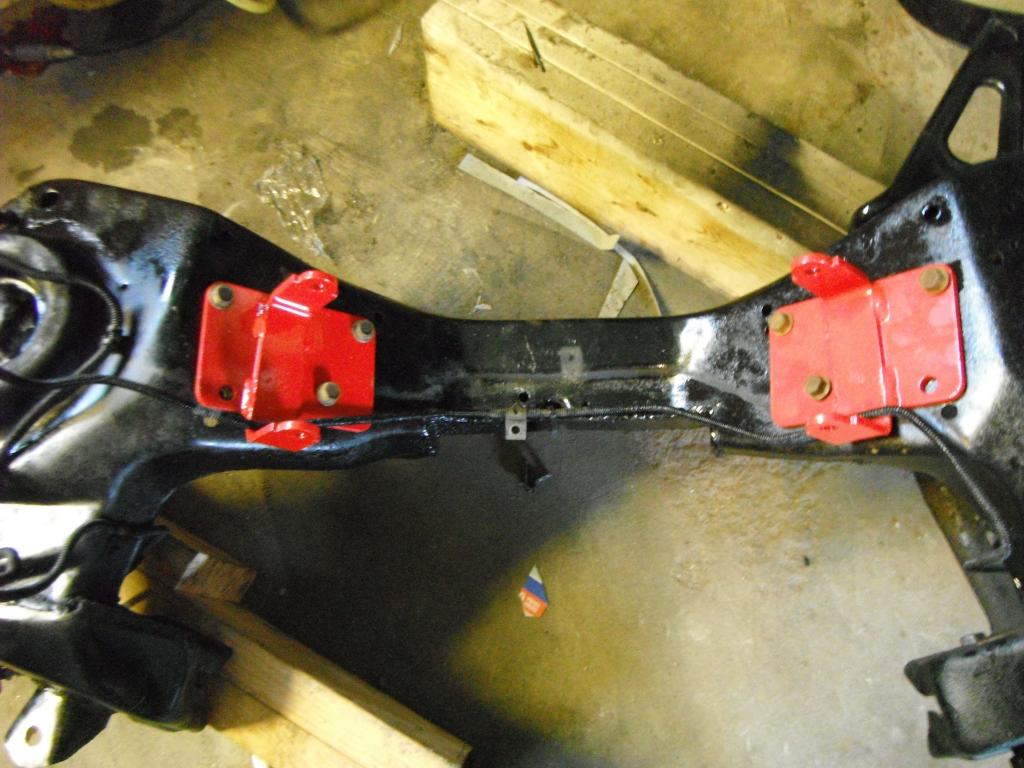
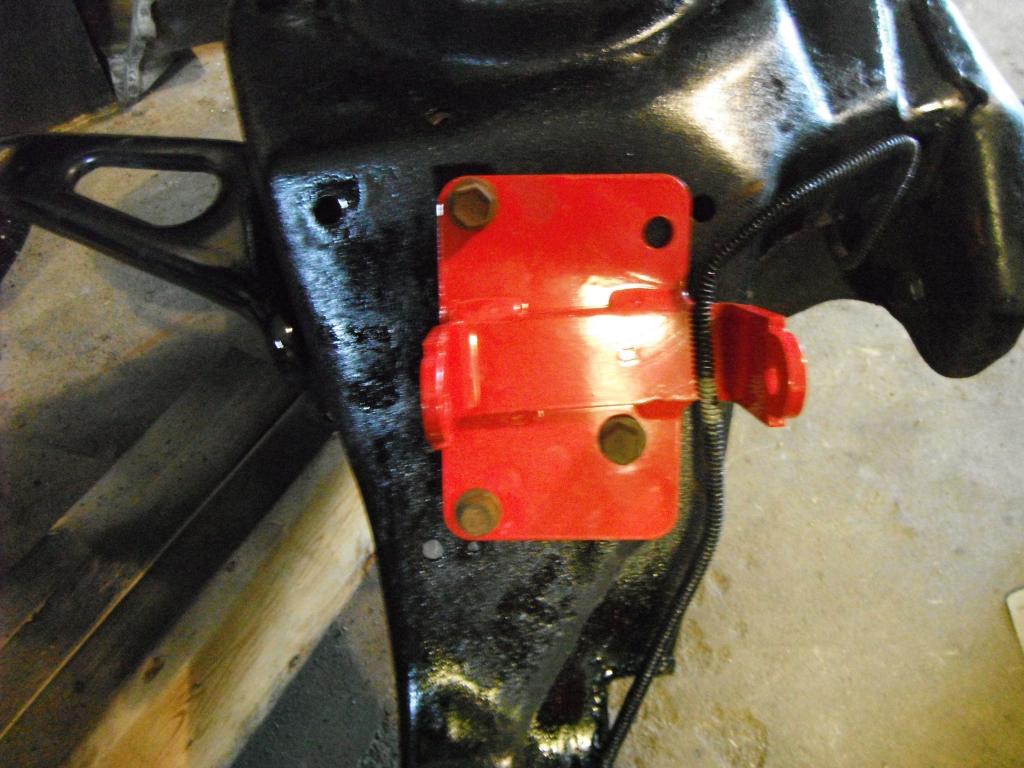
My BMR braces are here.
I decided to just get an empty relay box and 2 fuse panels to do that from scratch.
My speed hut gauges arrived and they are pretty sweet.
I started to do body work, to fix some rust on the lower A-pillars... And now the car has almost everything off of it, bumpers and almost everthing else is ready for primer... Now, if I could just get time off to do the work! I race motocross and I'm doing pretty good in the standings so I don't even have weekends, and 3 nights a week I'm either working on the MX bike, doing my weekly mountain bike ride or headed out fridays for my race weekend.
I started the body work because RS gear was delayed on the LT1/LS1 kits, but they got them in earlier than I expected, so that is also now on the way to my door... Which means the body work is now what's holding me up.
Keep trying to book time off work, but we're so short on guys right now in a fast paced environment that it's hard...
If everything goes right, I should be on the road early July with a fresh re-paint and an LS1.
Sorry for lack of pics, the only thing interesting/cool so far are the gauges.
My first orders have been showing up, have all my stuff from hawks. I got the new 5 speed shifter plate and the 6 speed gear selector thing... How do you take the old one off without ruining anything? Looks like it's glued in.
My BMR braces are here.
I decided to just get an empty relay box and 2 fuse panels to do that from scratch.
My speed hut gauges arrived and they are pretty sweet.
I started to do body work, to fix some rust on the lower A-pillars... And now the car has almost everything off of it, bumpers and almost everthing else is ready for primer... Now, if I could just get time off to do the work! I race motocross and I'm doing pretty good in the standings so I don't even have weekends, and 3 nights a week I'm either working on the MX bike, doing my weekly mountain bike ride or headed out fridays for my race weekend.
I started the body work because RS gear was delayed on the LT1/LS1 kits, but they got them in earlier than I expected, so that is also now on the way to my door... Which means the body work is now what's holding me up.
Keep trying to book time off work, but we're so short on guys right now in a fast paced environment that it's hard...
If everything goes right, I should be on the road early July with a fresh re-paint and an LS1.
Sorry for lack of pics, the only thing interesting/cool so far are the gauges.

Trending Topics
06-11-2014, 09:25 AM
#8
Senior Member
Thread Starter
Re: My LS1/T56 swap thread
Well, I had a pretty good crash making a pass in to a rough downhill corner in my last mx race and broke my collar bone. I'm in a sling for 2-6 weeks depending if I get surgery or not so I'm delayed again... But I'll at least take the time to get everything ordered so I can get it done as soon as I can work again.
Need my clutch, intake tubing and front accesories and thats it!
Need my clutch, intake tubing and front accesories and thats it!
06-11-2014, 10:32 AM
#9
Senior Member
Re: My LS1/T56 swap thread
wishing the best for your recovery and it looks like things are coming along  . We'll be watching.
. We'll be watching.
07-30-2014, 01:16 PM
#10
Senior Member
Thread Starter
Re: My LS1/T56 swap thread
Sold my 5 speed for $500. Therefore had to pull the motor and transmission out. Did it through the bottom. Took me a day and an hour this morning. It would have only taken me a few hours but I couldn't get my center link out. So, I had to unbolt the drag arm mount from the passenger side and take the k member brace off the drivers side to clear the pitman arm and was able to snake everything out.
I sheared off the front bolt in the drivers side transmission mount, however it appears there is another already threaded hole in front of that, I'm assuming for mounting an automatic. So, instead of messing around with the broken stud, I'll use the standard rear hole and make a slot in my hawks cross member so I can use the unused front hole.
Today's goals are to pull this transmission off the motor and load it in the truck, clean up the garage floor (oops) and then start digging in to the engine bay wiring... So far it looks like I only have to worry about the starter wire (thick purple) and I'll reroute the 3 constants for the body harness to some unused slots in my fuse block for my ls1 harness.
And then work out my gauge wires, which will be once I pull the dash apart since I'm going with 100% custom gauges.
I was going to mount the computer under the dash, but now I'm thinking in the passenger side fender, which leaves me more room under the passenger side dash to mount my fuses/relays. I want them there so they are easy and clean to get to and more weather proofing.
My LT1 transmission is now an LS1 transmission thanks to the local trans shop (who are an awesome group of guys), my ls7 clutch kit is waiting in the box, my pilot bearing and slave cyl are waiting to be picked up. So, tomorrow I'm ordering a remote bleeder and etc. and once I have that stuff the engine should be ready to go in!
Couple questions: can I put the remote bleeder on the slave with the transmission attached to the engine?
And, I do not have a vac line for my hvac control coming through the firewall... Where should that have come out?
It's not a huge deal for now, but eventually I'll want that working.
08-01-2014, 12:19 AM
#11
Senior Member
Thread Starter
Re: My LS1/T56 swap thread
I really need to upload some pictures. Once I have all the prep done I think I'll try to make basically a "how to" video as I go through all the steps showing the smaller details and edit it all up later down the road... Not sure how good of a job a rookie can do but I can try.
Did some smaller but needed things today.
Started off looking for some clamshell to block bolts, I couldn't find better than 8.8 metric grade bolts, so I hopefully can find some tomorrow in the city.
the 305 and k-member are now separated, the K-member got a pressure wash, and did some garage organizing which tends to be needed while working in a smaller space just planning out where to put things for the next needed steps.
I'm dealing with a sheared off bolt in the frame for the transmission mount. It sheared itself off right at the head, so I'm planning on slotting the stud with my dremel, then using my flat impact bit and lots of heat (no impact gun, just some steady pressure with the breaker bar). Hopefully that will work.
While under there, I found my floor is in a bit worse shape than I thought, not that I thought it was perfect but I do in fact have a small hole... So maybe next spring I'll be replacing the entire floor pan. Hopefully having the subframe braces in there won't be a problem once that happens.
Someone with this car obviously didn't know proper jacking points as the passenger fender had some obvious damage from it and the mounting location for the drivers side subframe brace is deformed a little bit. But it should still be weldable.
Hopefully get that bolt out tomorrow so I'm not obsessing about it tomorrow over the long weekend (holiday weekend for us Canucks). The gf hates it when there is something wrong with the car, as it never leaves my mind. Spend some $ on rock auto and summit tomorrow for my starter and fuel stuff.
Any idea if I can install a remote bleeder with the transmission connected to the motor? I have everything needed now to slap them together and would like to do that fairly soon.
08-01-2014, 08:05 AM
#12
Supreme Member
iTrader: (24)
Join Date: Jun 2005
Location: NC
Posts: 7,883
Likes: 0
Received 58 Likes
on
42 Posts
Car: 92 Firebird
Engine: Supercharged 6.0
Transmission: T56
Axle/Gears: 8.8 3.73
Re: My LS1/T56 swap thread
A speed bleeder line cannot be installed from outside the trans. If the trans isnt in the car, its not a bad job. Good time to inspect the clutch and pilot bushing/bearing
08-01-2014, 10:55 AM
#13
Senior Member
Thread Starter
Re: My LS1/T56 swap thread
This will be my first time installing a clutch in a car. I can do one in my mx bike from start to finish in about 10-15 minutes but this is totally different.
I'll wait until I get my bleeder line before I connect the trans to the motor.
While trying to get out that broken bolt this morning I noticed at some point they used some form of epoxy to seal a hole in the side of the subframe in the mount area. So, judging by the floor (which has been patched twice) and the condition of the frame there, it seems like water sat there for a while at one point. Luckily it's tiny and localized, and once I get the brake/fuel lines out of my way I'll take a piece of 1/8" and weld in a proper patch. The frame rail on the passenger side is mint.
I'm assuming this epoxy was done by the owner before the guy I bought it off of. Someone did look after it, the entire bottom of the car has been done in rocker guard and is pretty solid.
I think I'm going to try and track down some left handed drill bits and drill out this bolt and if I have to I'll tap some new threads. I heated that sucker up this morning so hot I could feel the heat coming off of it from almost a foot away but just couldn't get it to budge.
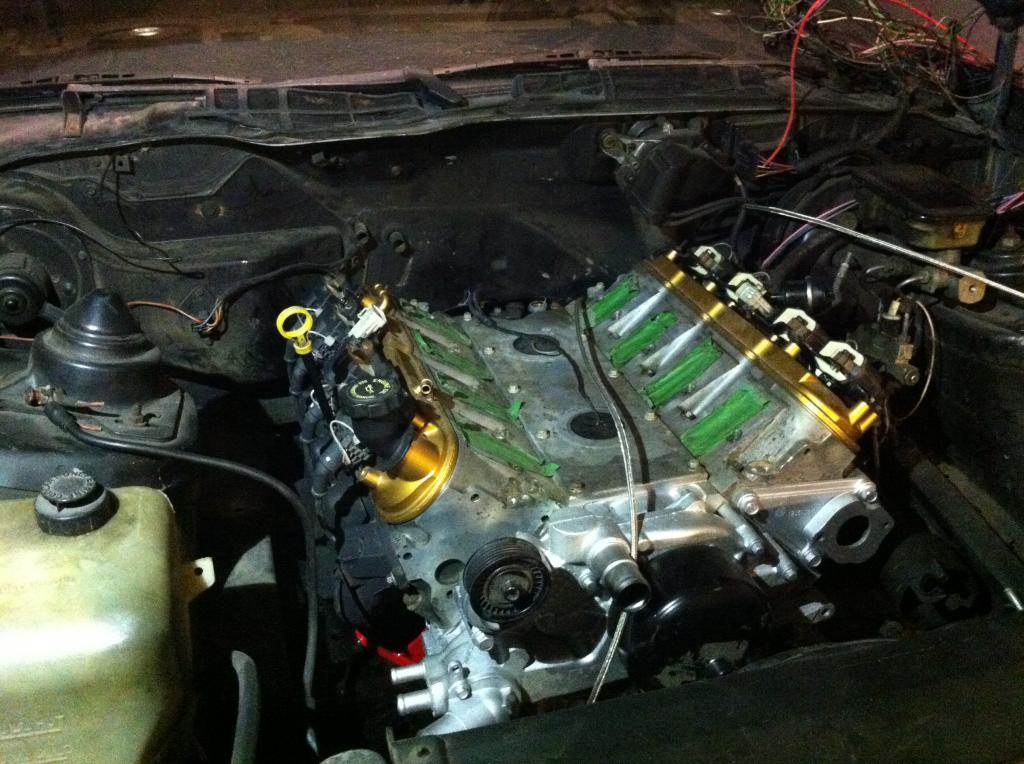
Anyways, time for some pictures!
Last pic of the engine in the car

No engine!

Anyone want an old 305?

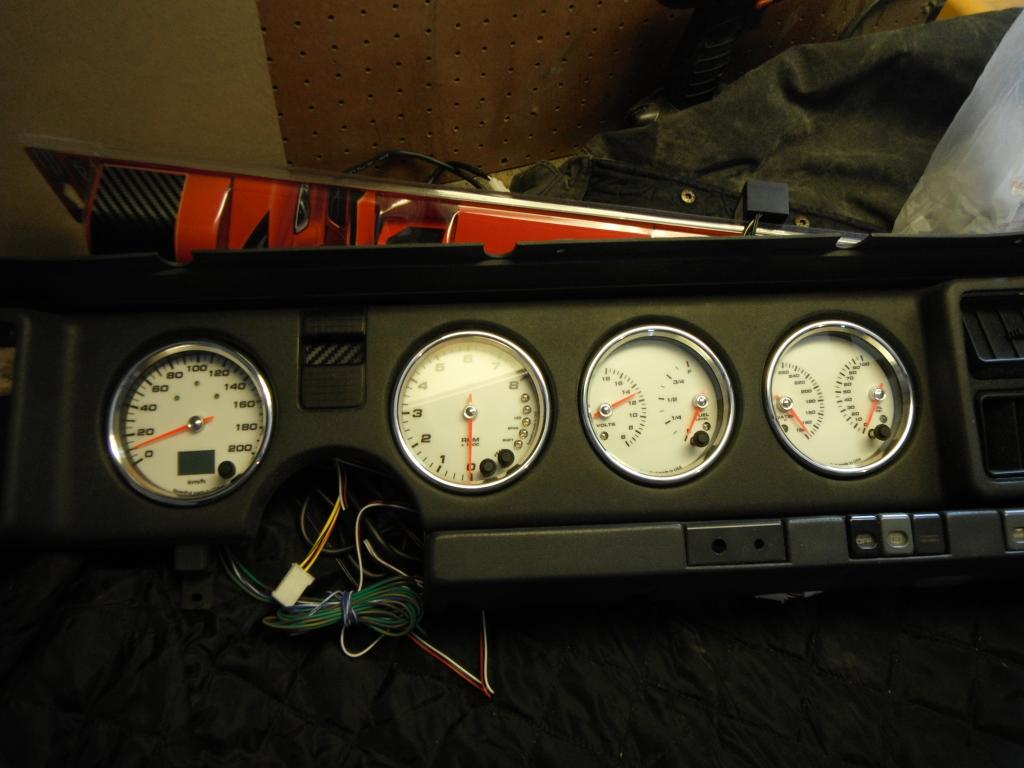
And, I had 15 minutes this morning after messing around with that bolt and took the dash apart. I got these gauges weeks ago and it's been killing me to see how they will fit.
I think what I'll do is take a sheet of metal and epoxy it to the back of the gauge overlay and just make my holes for the gauges... But I'm not exactly sure how to cut out a perfect circle that it requires while keeping it all in line.
Couldn't ask for a better fit! These gauges are frikkin sweet!
 08-01-2014, 06:12 PM
#14
Supreme Member
iTrader: (24)
Join Date: Jun 2005
Location: NC
Posts: 7,883
Likes: 0
Received 58 Likes
on
42 Posts
Car: 92 Firebird
Engine: Supercharged 6.0
Transmission: T56
Axle/Gears: 8.8 3.73
Re: My LS1/T56 swap thread
If heat didnt budget it, then a left handed bit wont either. Drill it out and tap fresh threads
Post a pic of the slave cyl you bought. There are two types, one is raw cast alum and has AP cast into the base. GM along with many aftermarket companies rebrand this as their own. It is a solid unit
The second type is painted black and uses an external retainer clip to hole the clutch line in. This one is known to fail within weeks of install. Return it if its painted black
Autozone carries both under the same name, but at the best price Ive seen ($90ish). Grab the alum one and you're golden
A clutch is simple job if you follow the standard procedure. Torque the flywheel in the proper sequence/passes. You want a bronze bushing in the crank, not a bearing. Reason is, if a bushing fails, the $3 part is destroyed. If a bearing fails, the $20 bearing and your $200 input shaft are scrap. Bring a magnet and order a bushing for a 69 camaro 350/4spd. If the magnet sticks, try a different one. The ID will be square on one side and rounded on the other. Rounded side sticks out to guide in a slightly mis aligned clutch assembly
When torquing the PP bolts, slide the line up tool in-out after each bolt. It should be smooth. If it hangs/catches, you need to break all the bolts loose and start over
When mating the trans to engine, do NOT rest the trans just inside the clutch disk. You risk misaligning the disk and having to start over. Using a couple threaded rods in the BH to keep the trans lined up helps. If the trans stops about 1/2" from being fully seated to the BH, the input is stuck on the pilot bushing. Do NOT torque the bolts to pull the trans the rest of the way up. Instead, finger tighten all 8 bolts and grab the tailhousing. Wiggle, jiggle, swear, get rough with it and eventually it'll give up and slide in. Sometimes rotating the engine over 180* helps. Using the bolts to pull the trans up uses the input shaft as a plow to dig trench your new bushing
08-01-2014, 06:14 PM
#15
Supreme Member
iTrader: (24)
Join Date: Jun 2005
Location: NC
Posts: 7,883
Likes: 0
Received 58 Likes
on
42 Posts
Car: 92 Firebird
Engine: Supercharged 6.0
Transmission: T56
Axle/Gears: 8.8 3.73
Re: My LS1/T56 swap thread
I do like the fit of the gauges
Wish all aftermarket speedos didnt go so high. If Im doing 100+, the last thing Ill be looking at is the speedo. 99% of all your driving will be 70 and under, why not stop at 100 or 120 like stock? Makes reading the low speeds like 35 easier
Wish all aftermarket speedos didnt go so high. If Im doing 100+, the last thing Ill be looking at is the speedo. 99% of all your driving will be 70 and under, why not stop at 100 or 120 like stock? Makes reading the low speeds like 35 easier
08-02-2014, 08:10 AM
#16
Member
iTrader: (4)
Join Date: Jun 2001
Location: new phila, oh
Posts: 278
Likes: 0
Received 0 Likes
on
0 Posts
Car: 1990 RS
Engine: LS1
Transmission: T56
Axle/Gears: 3.73 9 bolt
Re: My LS1/T56 swap thread
I do like the fit of the gauges
Wish all aftermarket speedos didnt go so high. If Im doing 100+, the last thing Ill be looking at is the speedo. 99% of all your driving will be 70 and under, why not stop at 100 or 120 like stock? Makes reading the low speeds like 35 easier
Wish all aftermarket speedos didnt go so high. If Im doing 100+, the last thing Ill be looking at is the speedo. 99% of all your driving will be 70 and under, why not stop at 100 or 120 like stock? Makes reading the low speeds like 35 easier
08-04-2014, 08:34 PM
#17
Senior Member
Thread Starter
Re: My LS1/T56 swap thread
Thanks a lot Pocket. I'll see if GM will take back the bearing so I can put in a bushing.
My speedo is in KM/hr. With my plans (eventual H/C/I etc) I'll likely be trapping near 120mph judging by other cars with similar mods, which puts me near 200km/hr.
It was a long weekend for us up here but due to GF time I spent very little time on the car.
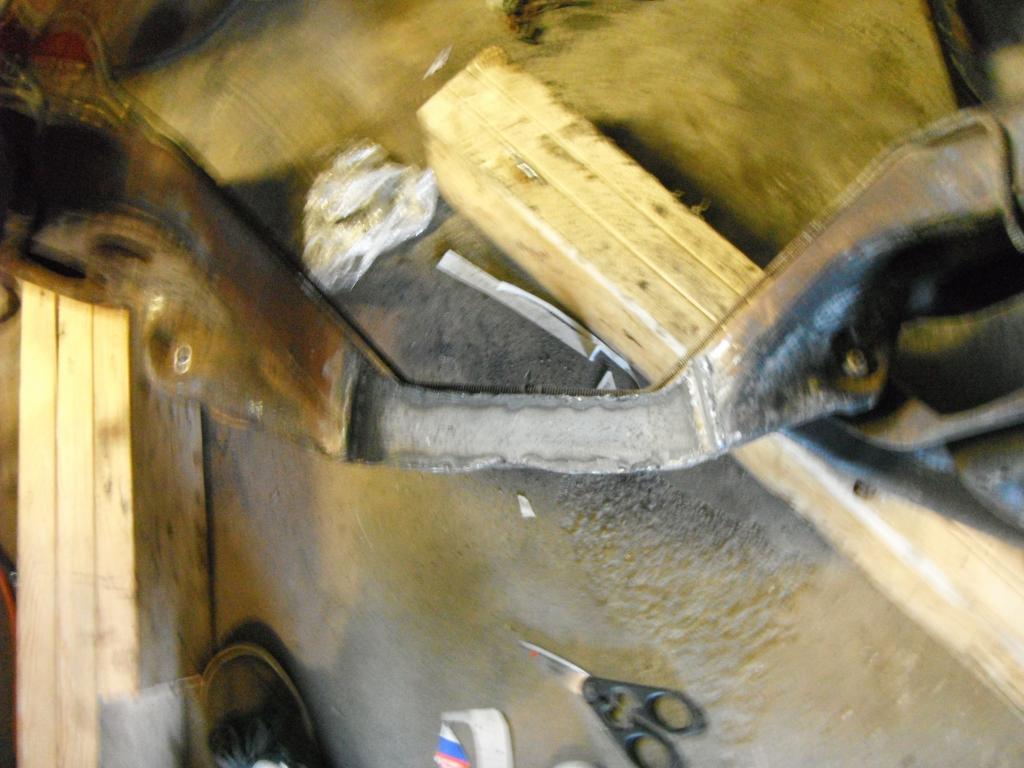
I broke off a new drill bit trying to drill out that bolt... And then I decided to dig around some as I looked at the rust in the area... Well, a little poking and prodding brought out this issue:
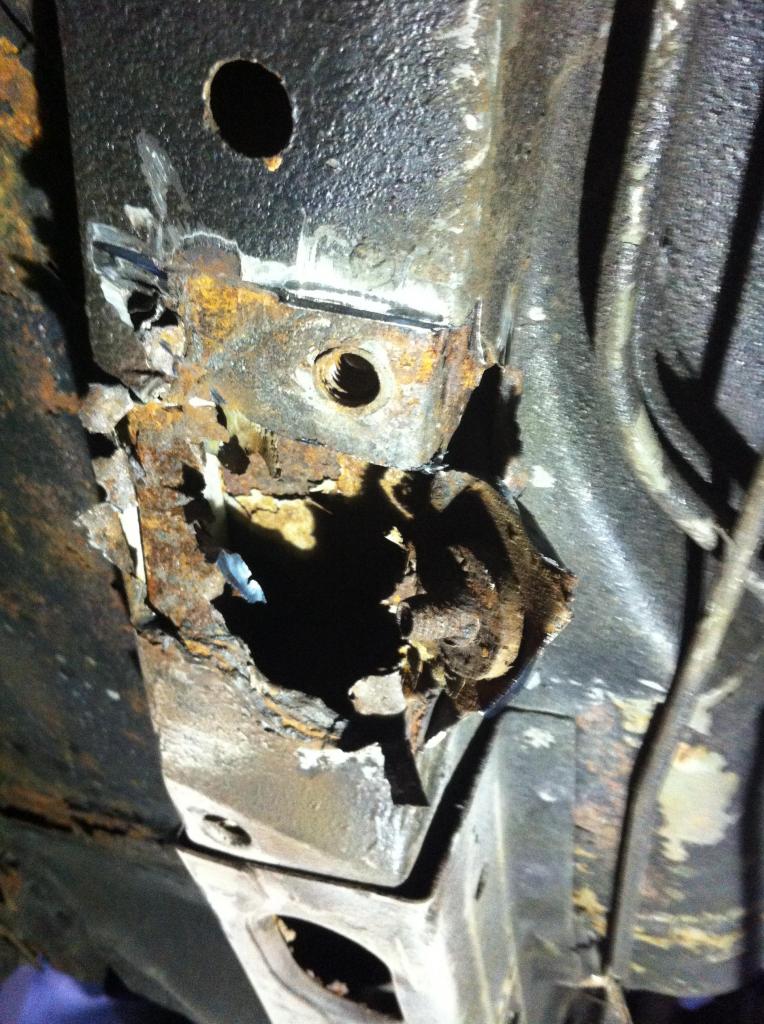
This is my planned action to fix it:
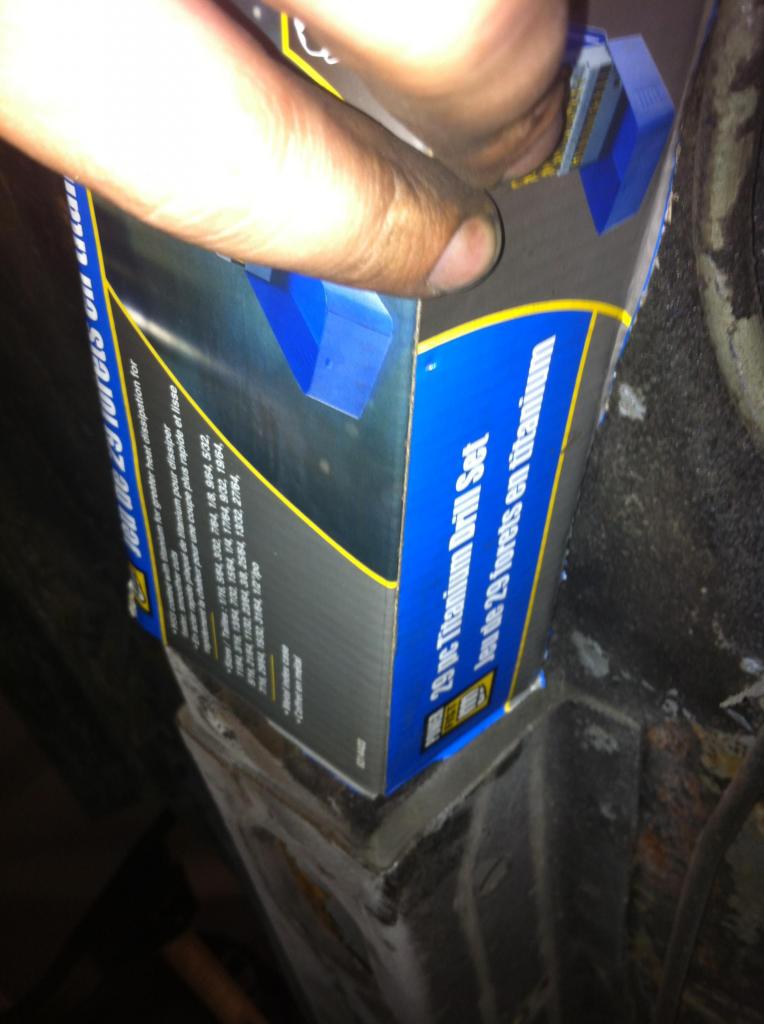
Well, it will be 1/8 steel bent up by the local steel shop. This wraps around all 3 sides and overlaps good solid metal. I'll also weld nuts to the inside of it in the location that the Hawks mount will require. Depending on how tight that 1/8 of overlaping steel makes the tunnel, I MIGHT have to cut my mount in order for it to fit in the tunnel. Not a big deal really.
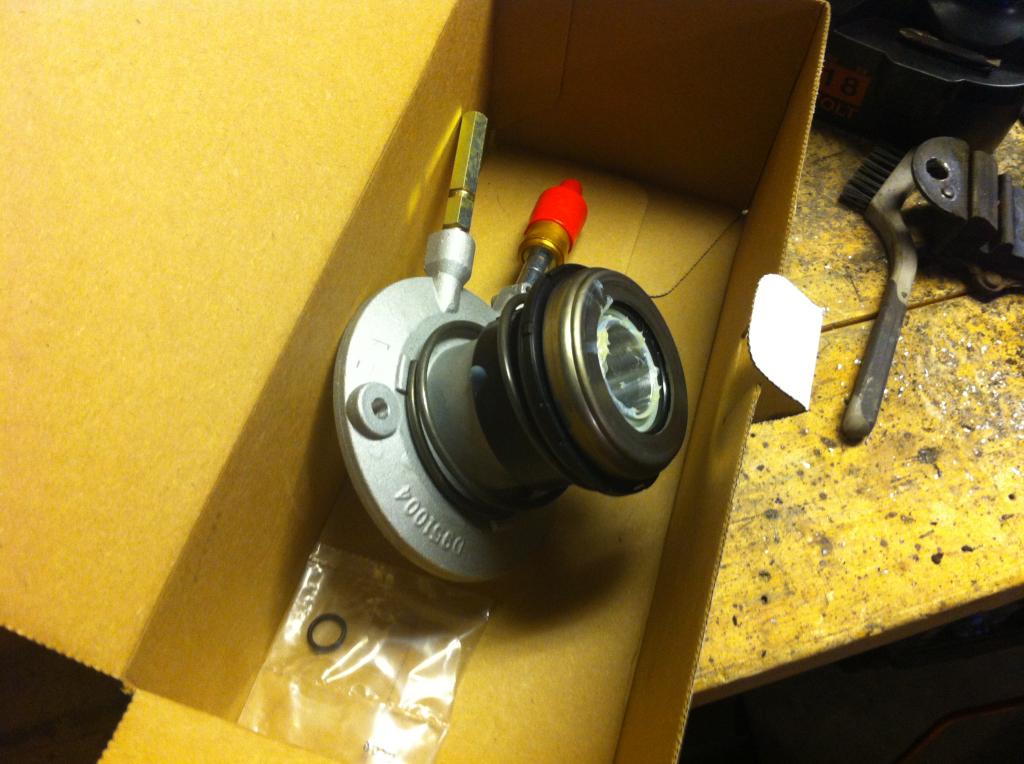
Here is my Slave, it looks like the one you're talking about Pocket.
I got a fuel pump when I got my 4th gen tank... The guy said they don't guarantee them, he usually throws them out so I was just seeing if it would work. I held the wires to the battery terminals to give it a test. The hot wire got pretty warm pretty quickly, I think I noted some smoke too... This is the noise it gave me: (It's a video so you may have to click on it)

I'm going to assume I should be looking to replace it? What is the cheapest in tank pump that is easy to mount up?
So yep, that's where I stand at the moment... Any day now I'll be turning the corner and the car will be back over the engine.
I have to go to Fastenal tomorrow to get my engine mounting bolts, what grade are you guys using for that stuff? They have the metric 8.8 stuff in store, but I was thinking it should be stronger?
My speedo is in KM/hr. With my plans (eventual H/C/I etc) I'll likely be trapping near 120mph judging by other cars with similar mods, which puts me near 200km/hr.
It was a long weekend for us up here but due to GF time I spent very little time on the car.
I broke off a new drill bit trying to drill out that bolt... And then I decided to dig around some as I looked at the rust in the area... Well, a little poking and prodding brought out this issue:

This is my planned action to fix it:

Well, it will be 1/8 steel bent up by the local steel shop. This wraps around all 3 sides and overlaps good solid metal. I'll also weld nuts to the inside of it in the location that the Hawks mount will require. Depending on how tight that 1/8 of overlaping steel makes the tunnel, I MIGHT have to cut my mount in order for it to fit in the tunnel. Not a big deal really.
Here is my Slave, it looks like the one you're talking about Pocket.

I got a fuel pump when I got my 4th gen tank... The guy said they don't guarantee them, he usually throws them out so I was just seeing if it would work. I held the wires to the battery terminals to give it a test. The hot wire got pretty warm pretty quickly, I think I noted some smoke too... This is the noise it gave me: (It's a video so you may have to click on it)
I'm going to assume I should be looking to replace it? What is the cheapest in tank pump that is easy to mount up?
So yep, that's where I stand at the moment... Any day now I'll be turning the corner and the car will be back over the engine.
I have to go to Fastenal tomorrow to get my engine mounting bolts, what grade are you guys using for that stuff? They have the metric 8.8 stuff in store, but I was thinking it should be stronger?
08-05-2014, 10:15 PM
#18
Senior Member
Thread Starter
Re: My LS1/T56 swap thread
A little bit more progress today.
Ordered my remote bleeder last night, it could be here friday, which means friday the engine and transmission could possibly be connected.
I tried to get my piece bent up to fix the frame rail today but the place closes at 4. I get off work at 3 and it's a struggle to get down there in time so I'll have to try tomorrow... IF I get that done and IF I get my bleeder hose in time the engine could very possibly be in the car sometime Sunday.
What grade of bolts should I be using for the transmission to bellhousing and the bellhousing to motor mounts? Is the metric 8.8 (grade 5) good enough? If not, I'll let fastenal know to add them to my order as well.
Tonight after I did all my running around, I did some painting of engine parts and started to tackle the engine bay wiring.
After routing through all of the twists, tangles, weird splices etc from the previous owners I have seperated these 5 wires. The pink used to go to my distributor. This is my "hot in run" wire to my relay to turn on the PCM.
Purple is my starter wire.
The white one will go to the tach signal wire from the PCM (R10 rings a bell but I haven't looked at my sheet or any wiring for quite some time now)
The two red wires will go to a constant hot source. Not exactly 100% sure what they are hot for, but they are the only two that traced directly down to the (+) common that was on the starter. I'll run those to the constant hot connection at my new fuse panel.
The wires you see off to the left are for sensors and a relay or two. I'll have to track down what does what so I can integrate them with my sending units on the LS1.

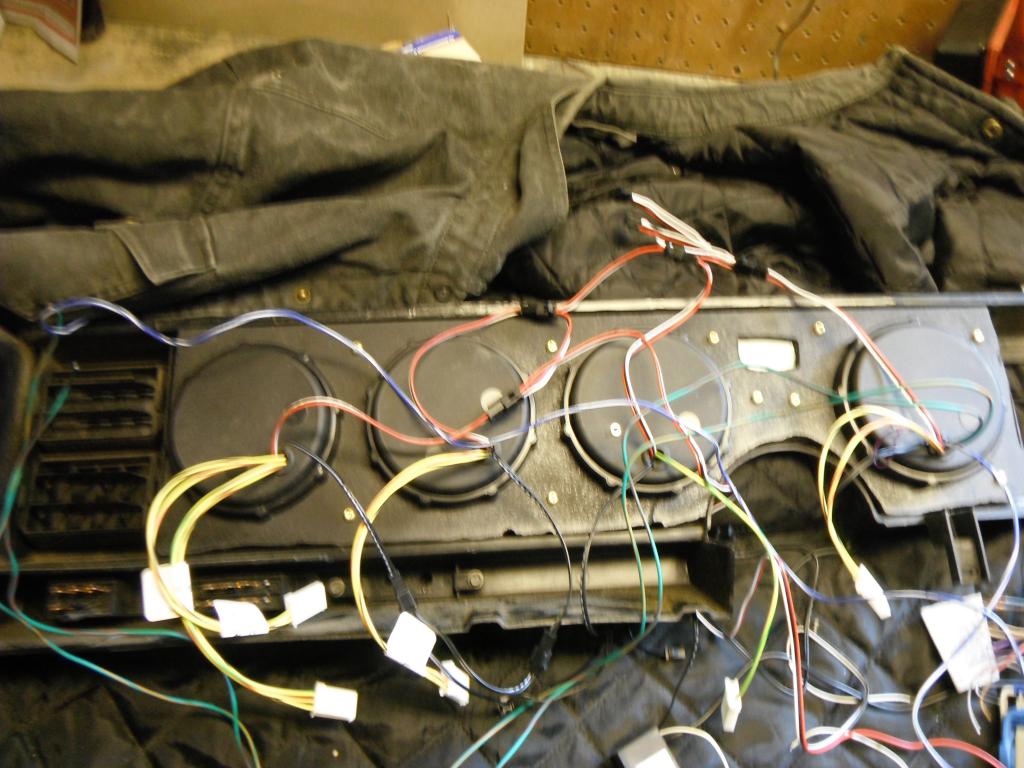
I then pulled the actual gauges out of the dash. I was really hoping for some simple connectors to locations directly related to what they do. I instead find this:
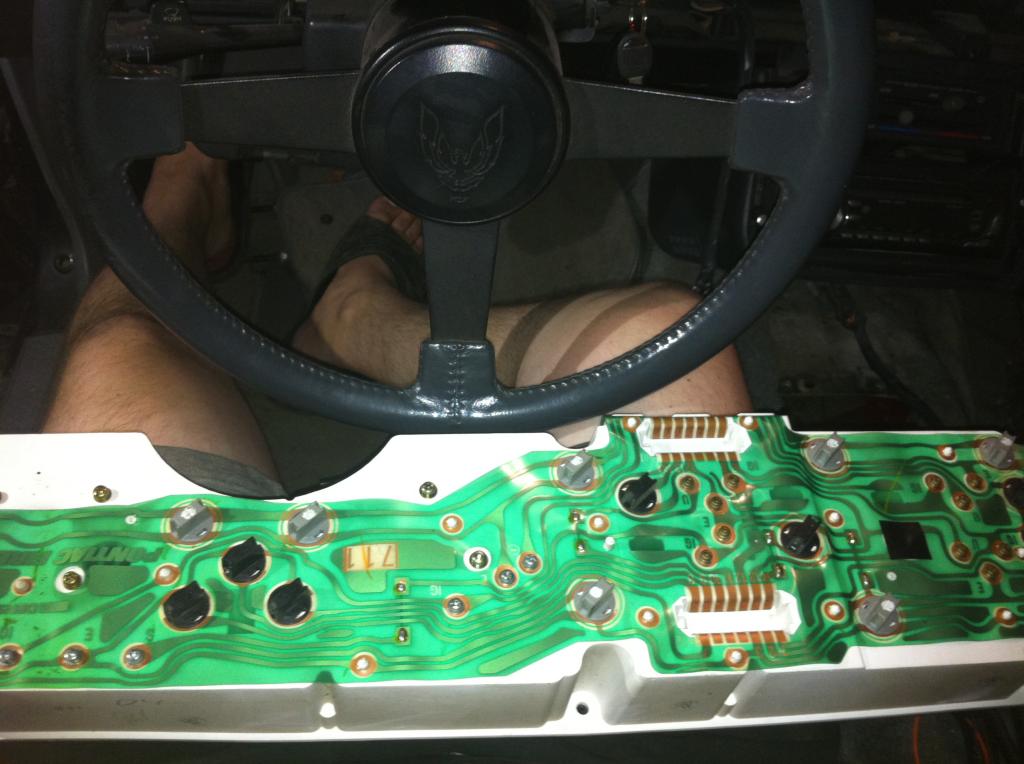
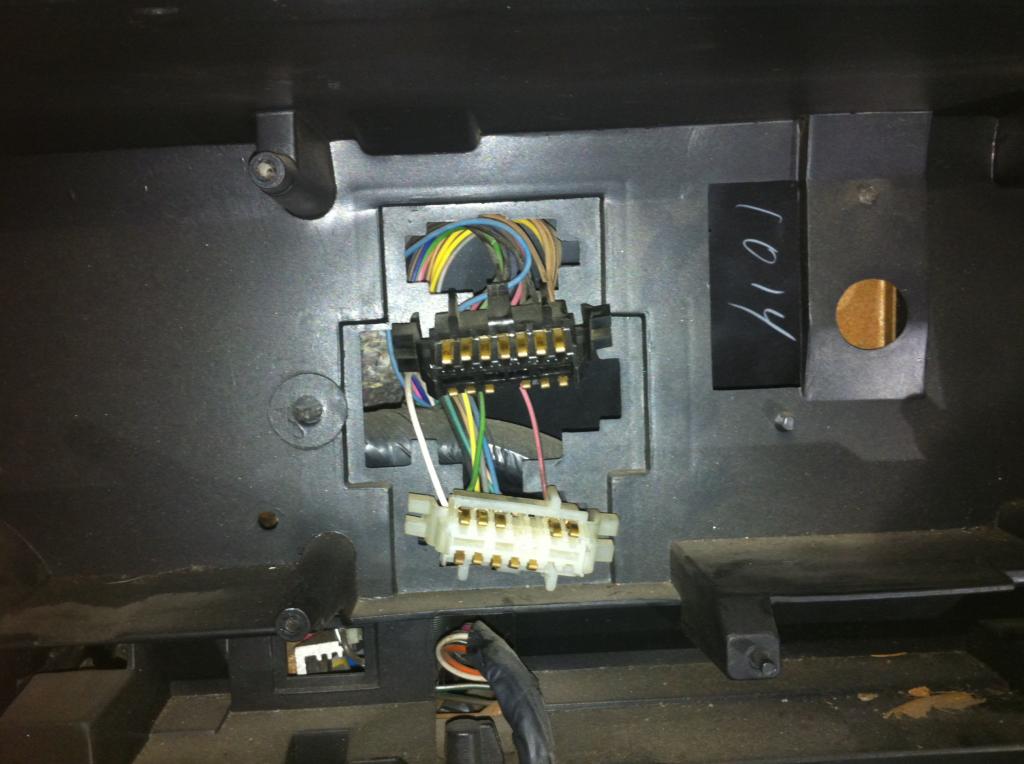
Why did nobody tell me about this lol.
Luckily all of these circuits are numbered where the connectors would insert, and all the same pins are numbered at the connectors.
So, I guess what I'll have to do is figure out what circuits I need for my new gauges, and do some tracing.
I will need a resistor on the signal wires for my speedo and tach, but I'll simply take the 12v source for those from one of the switched pcm + wires and put the resistors in down at my PCM connections.
Ordered my remote bleeder last night, it could be here friday, which means friday the engine and transmission could possibly be connected.
I tried to get my piece bent up to fix the frame rail today but the place closes at 4. I get off work at 3 and it's a struggle to get down there in time so I'll have to try tomorrow... IF I get that done and IF I get my bleeder hose in time the engine could very possibly be in the car sometime Sunday.
What grade of bolts should I be using for the transmission to bellhousing and the bellhousing to motor mounts? Is the metric 8.8 (grade 5) good enough? If not, I'll let fastenal know to add them to my order as well.
Tonight after I did all my running around, I did some painting of engine parts and started to tackle the engine bay wiring.
After routing through all of the twists, tangles, weird splices etc from the previous owners I have seperated these 5 wires. The pink used to go to my distributor. This is my "hot in run" wire to my relay to turn on the PCM.
Purple is my starter wire.
The white one will go to the tach signal wire from the PCM (R10 rings a bell but I haven't looked at my sheet or any wiring for quite some time now)
The two red wires will go to a constant hot source. Not exactly 100% sure what they are hot for, but they are the only two that traced directly down to the (+) common that was on the starter. I'll run those to the constant hot connection at my new fuse panel.
The wires you see off to the left are for sensors and a relay or two. I'll have to track down what does what so I can integrate them with my sending units on the LS1.

I then pulled the actual gauges out of the dash. I was really hoping for some simple connectors to locations directly related to what they do. I instead find this:


Why did nobody tell me about this lol.
Luckily all of these circuits are numbered where the connectors would insert, and all the same pins are numbered at the connectors.
So, I guess what I'll have to do is figure out what circuits I need for my new gauges, and do some tracing.
I will need a resistor on the signal wires for my speedo and tach, but I'll simply take the 12v source for those from one of the switched pcm + wires and put the resistors in down at my PCM connections.
08-05-2014, 10:44 PM
#19
Senior Member
Thread Starter
Re: My LS1/T56 swap thread
And another need for some input. I'm shopping for parts I need for my gauge panel, and considering what lights to set up for my idiot lights.
I want one for the e-brake for sure (can I also wire my sensor from the brake master to this light?) and the check engine light... Anything else you guys think I may need?
The speedhut speedo has my high beam and turn signal lights in there. I'm going to place my idiot lights where my turn signals used to be in the dash.
08-16-2014, 11:25 PM
#20
Senior Member
Thread Starter
Re: My LS1/T56 swap thread
Despite not posting updates, I have been busy! I was on afternoon shifts this week so it makes my only time to work on the car before work which just feels all backwards to me!
Anyways, got some stuff done the last few days. I've been working on getting that frame patch welded up, bent up and all that... It goes in tomorrow.
I have my gauge panel pretty much ready to go, aside from wiring it up.
So, what I did was took some 1/4" hardboard and epoxied it in to enough places on the back side of my gauge panel. This is to space my second panel that the gauges mount in at the right distance and also give me something to screw the second panel in to.
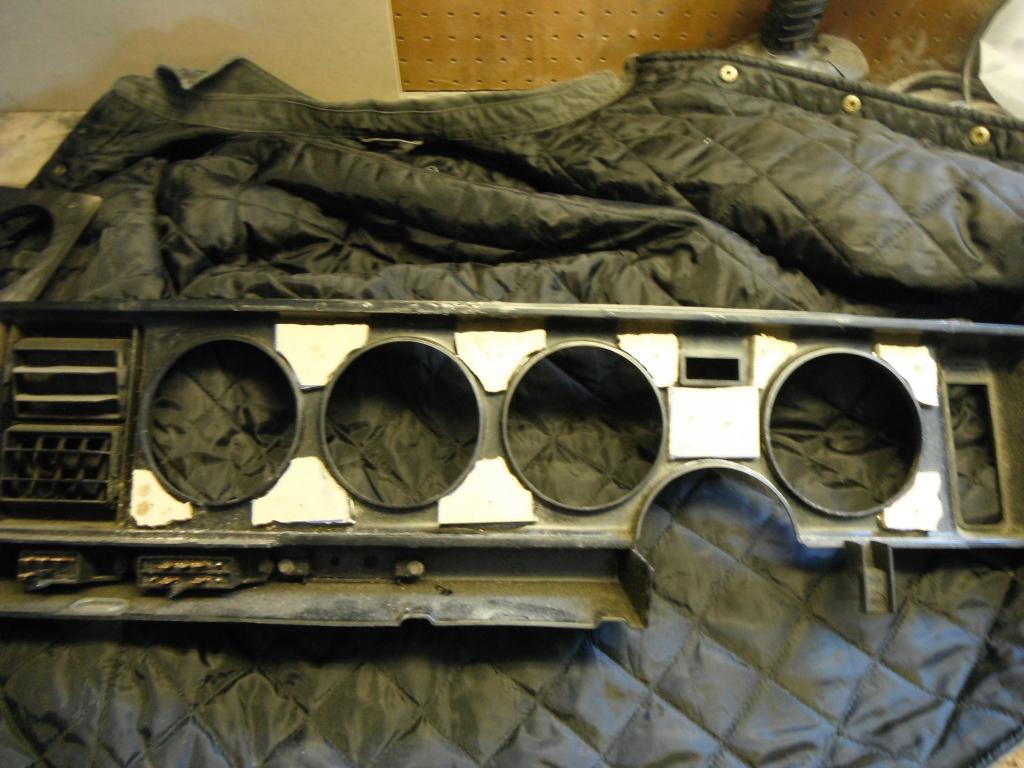
Took another piece of the hardboard, cut it to fit in behind the front panel, and then cut out my mounting holes to fit the gauges in... Cuts aren't the nicest, I don't have a jigsaw, so I just did what I could with my dremel.
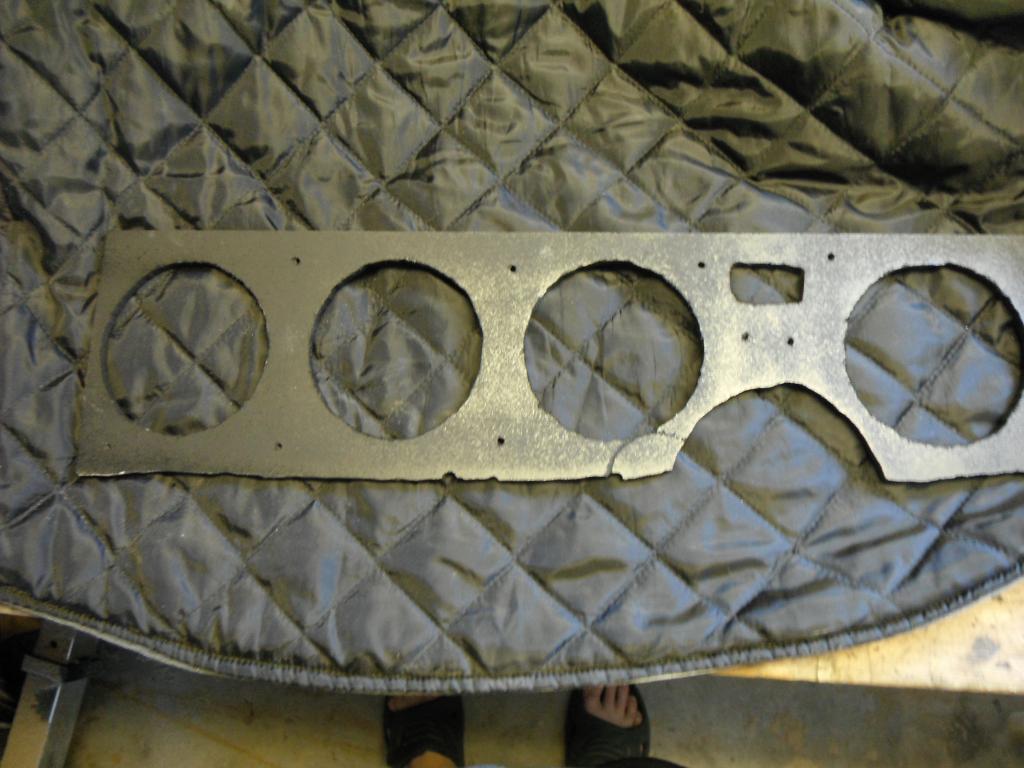
In the middle where the high beam and turn indicators used to go, I epoxied in a piece of steel and covered it with some carbon wrap stuff. I'll put my MIL light and brake indicator in there.
Today, I got in to the fun stuff!
Started off with selling the ole 305 for $100. Guy picked it up, we put it on the trailer and that was that!
Then got in to the k-member notch. Welds are slowly getting better!
Painted up the k-member and then stuck on my mount plates.
Then the motor went on... This took some work to get it to fit, I'm not sure what the room mates thought when I was in the garage cussing at the motor after I defeated it in to letting me get those big bolts through lol.
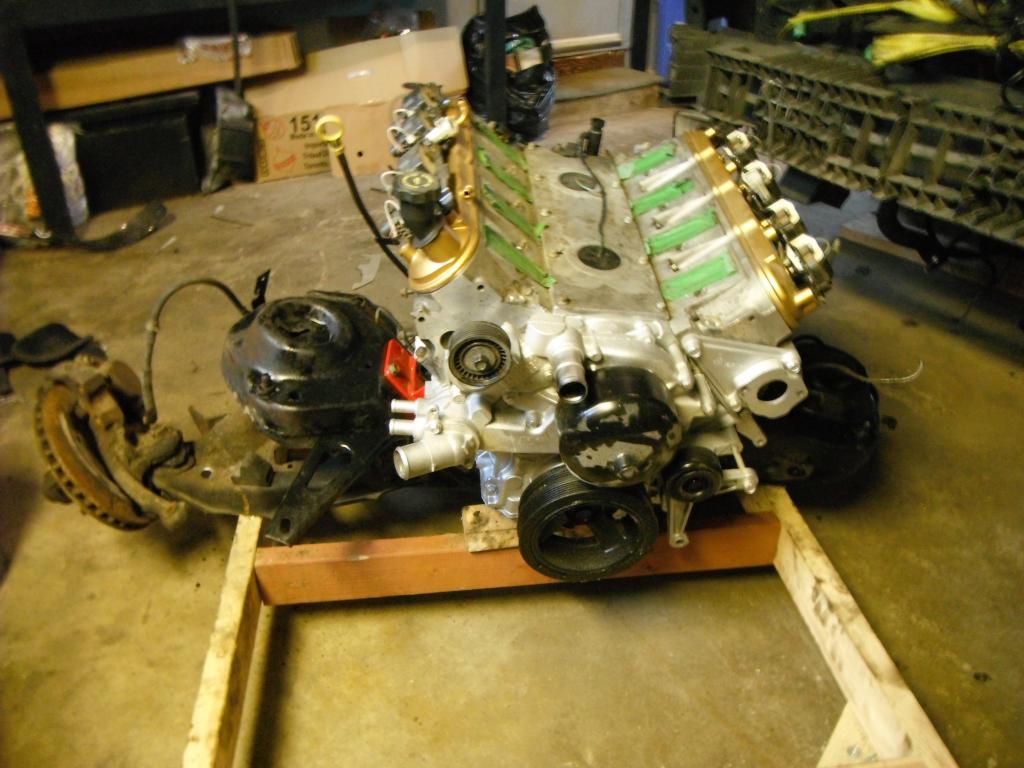
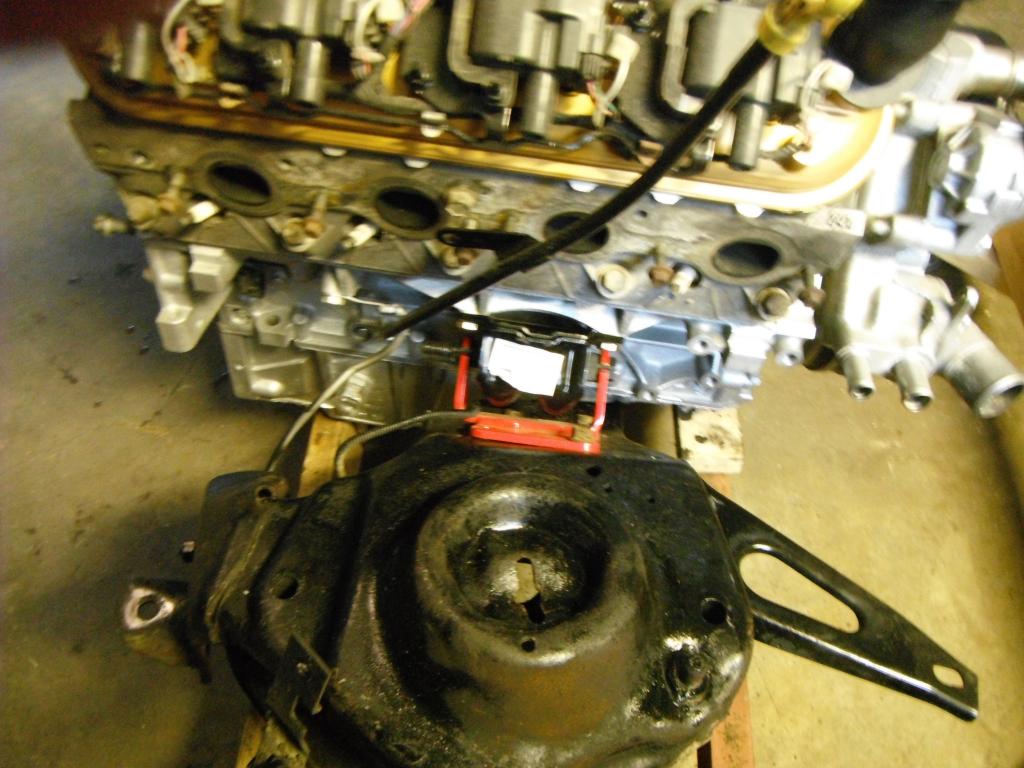
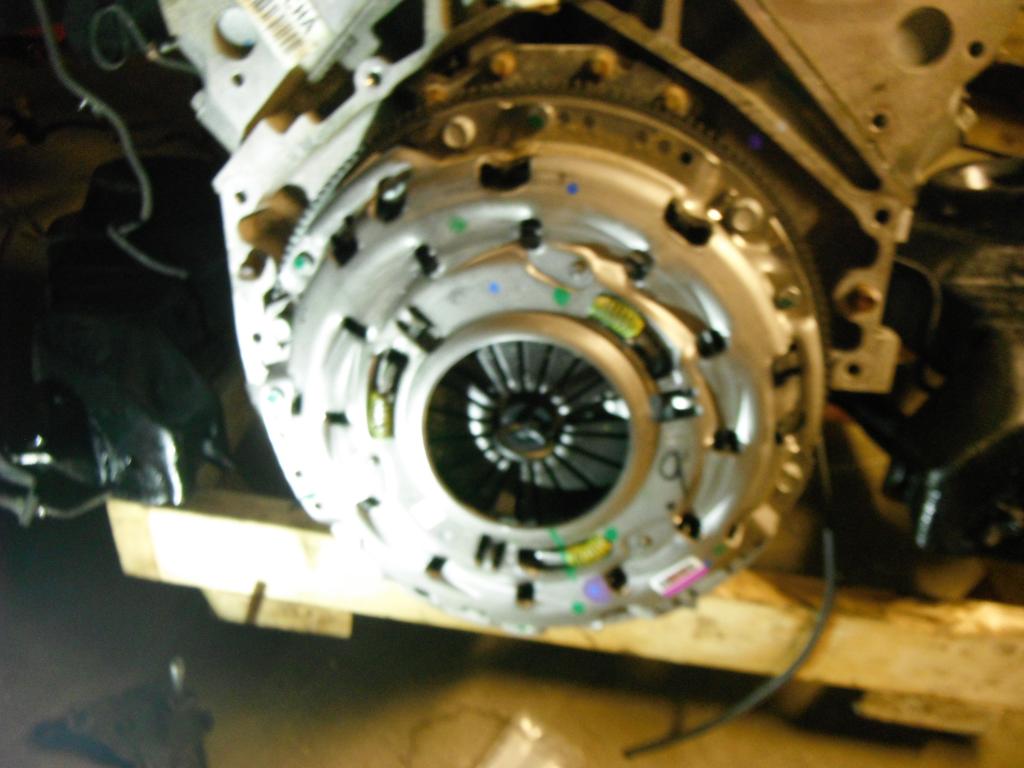
And then it was on to the clutch! First time ever for me doing this, pretty straight forward job really. This LS7 clutch sure is heavy.
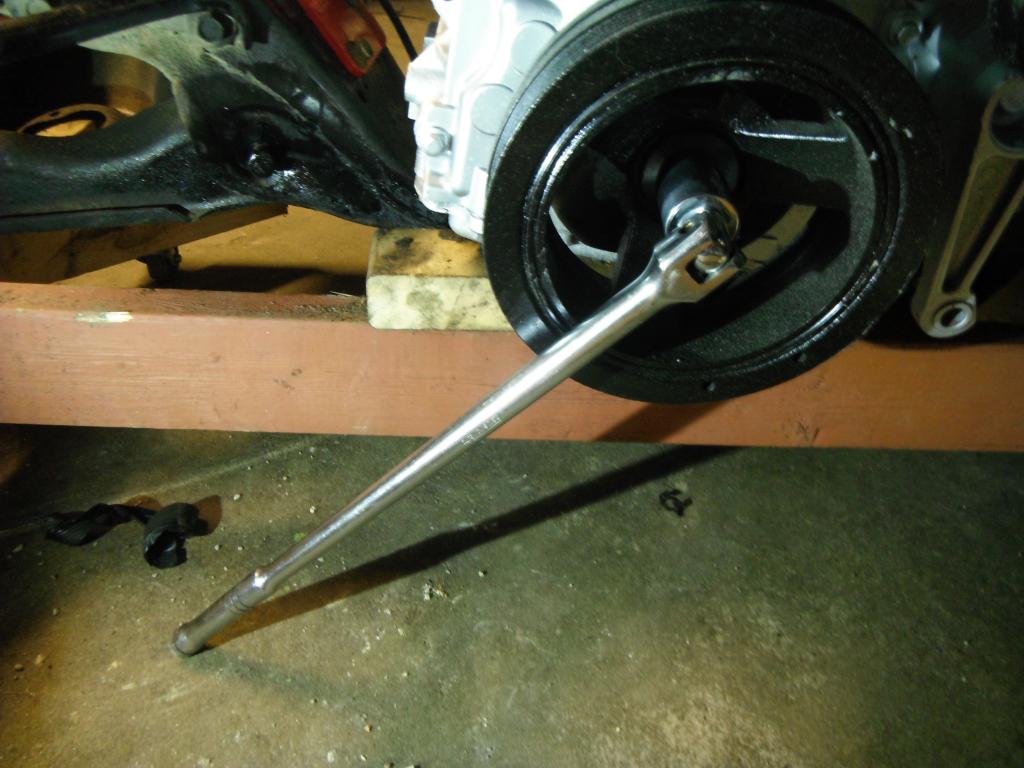
This is how I stopped the motor from rotating as I tightened everything up.
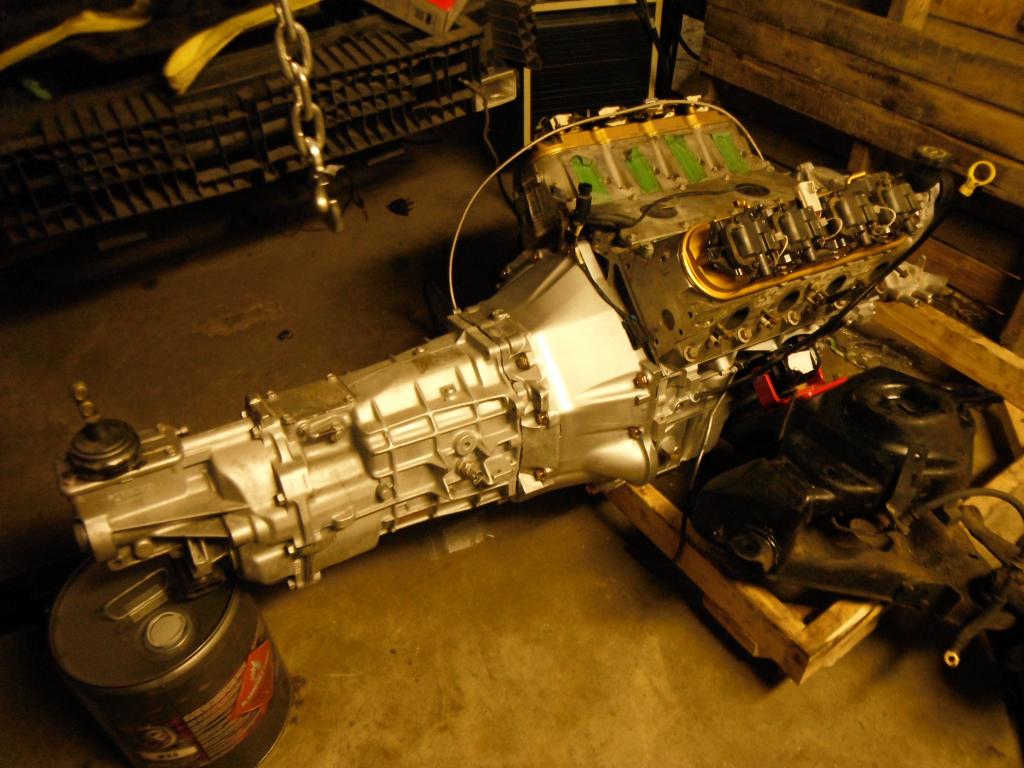
So, I got the transmission on. I used a tie down around the front of the transmission and a tie down around the rear of it and used the engine hoist to pick it up. This allowed me to adjust the angle of the transmission with using the buckles on the straps. Got the input shaft in to the bushing, messed around with the heights and angles and then the sound of the splines lining up and in it went. Used the bolts to pull it the rest of the way home, however there was no binding it was little more than finger tight to get it flush with the bell housing. All in all happy! I expected this to take me 3 hours, but I got it done in 2 and that includes messing around with installing my remote bleeder from speedway. They include extra fittings for some reason and it had me a bit confused until I took a look at their web site for pictures.
Tomorrow I go get some bolts that match the threads for the sway bar mounting locations on the frame and a length of chain to go between the two as I believe this will be the best method for me to attach the hoist to the car... It was a little sketchy how I did it last time.
I believe I will also get some new spark plugs and do that now while it's easy, and mount the manifolds back on.
Weld in the frame patch and get this motor in the car! Hopefully my bolt holes in my patch line up close enough with my hawks cross member that I don't have to waste too much time messing around... But I know I will.
Sorry for the blurry pics... Guess I have to mess with the settings on the camera a bit.
Anyways, got some stuff done the last few days. I've been working on getting that frame patch welded up, bent up and all that... It goes in tomorrow.
I have my gauge panel pretty much ready to go, aside from wiring it up.
So, what I did was took some 1/4" hardboard and epoxied it in to enough places on the back side of my gauge panel. This is to space my second panel that the gauges mount in at the right distance and also give me something to screw the second panel in to.

Took another piece of the hardboard, cut it to fit in behind the front panel, and then cut out my mounting holes to fit the gauges in... Cuts aren't the nicest, I don't have a jigsaw, so I just did what I could with my dremel.


In the middle where the high beam and turn indicators used to go, I epoxied in a piece of steel and covered it with some carbon wrap stuff. I'll put my MIL light and brake indicator in there.

Today, I got in to the fun stuff!
Started off with selling the ole 305 for $100. Guy picked it up, we put it on the trailer and that was that!
Then got in to the k-member notch. Welds are slowly getting better!

Painted up the k-member and then stuck on my mount plates.


Then the motor went on... This took some work to get it to fit, I'm not sure what the room mates thought when I was in the garage cussing at the motor after I defeated it in to letting me get those big bolts through lol.


And then it was on to the clutch! First time ever for me doing this, pretty straight forward job really. This LS7 clutch sure is heavy.

This is how I stopped the motor from rotating as I tightened everything up.

So, I got the transmission on. I used a tie down around the front of the transmission and a tie down around the rear of it and used the engine hoist to pick it up. This allowed me to adjust the angle of the transmission with using the buckles on the straps. Got the input shaft in to the bushing, messed around with the heights and angles and then the sound of the splines lining up and in it went. Used the bolts to pull it the rest of the way home, however there was no binding it was little more than finger tight to get it flush with the bell housing. All in all happy! I expected this to take me 3 hours, but I got it done in 2 and that includes messing around with installing my remote bleeder from speedway. They include extra fittings for some reason and it had me a bit confused until I took a look at their web site for pictures.

Tomorrow I go get some bolts that match the threads for the sway bar mounting locations on the frame and a length of chain to go between the two as I believe this will be the best method for me to attach the hoist to the car... It was a little sketchy how I did it last time.
I believe I will also get some new spark plugs and do that now while it's easy, and mount the manifolds back on.
Weld in the frame patch and get this motor in the car! Hopefully my bolt holes in my patch line up close enough with my hawks cross member that I don't have to waste too much time messing around... But I know I will.
Sorry for the blurry pics... Guess I have to mess with the settings on the camera a bit.
08-17-2014, 07:23 AM
#21
Senior Member

Join Date: Feb 2009
Location: USA
Posts: 885
Likes: 0
Received 0 Likes
on
0 Posts
Car: 1989 SS
Engine: LT1+1500$ hooker exhaust
Transmission: T56
Axle/Gears: 3.42 bogger
Re: My LS1/T56 swap thread
I do like the fit of the gauges
Wish all aftermarket speedos didnt go so high. If Im doing 100+, the last thing Ill be looking at is the speedo. 99% of all your driving will be 70 and under, why not stop at 100 or 120 like stock? Makes reading the low speeds like 35 easier
Wish all aftermarket speedos didnt go so high. If Im doing 100+, the last thing Ill be looking at is the speedo. 99% of all your driving will be 70 and under, why not stop at 100 or 120 like stock? Makes reading the low speeds like 35 easier
08-17-2014, 08:03 AM
#22
Senior Member
Thread Starter
Re: My LS1/T56 swap thread
It's in Km/Hr... I find it stupid with some of these speedometers out there too. But 200 is only 120Mphr. And considering the goal is eventually to be in mid to high 11s, that's pretty close to the trap speed.
08-17-2014, 09:15 AM
#23
Senior Member
Join Date: Feb 2009
Location: USA
Posts: 885
Likes: 0
Received 0 Likes
on
0 Posts
Car: 1989 SS
Engine: LT1+1500$ hooker exhaust
Transmission: T56
Axle/Gears: 3.42 bogger
Re: My LS1/T56 swap thread
I was jk, i could care less tbh what your speedo says.. do what you want and be happy and safe.
08-17-2014, 10:51 AM
#24
Supreme Member
iTrader: (24)
Join Date: Jun 2005
Location: NC
Posts: 7,883
Likes: 0
Received 58 Likes
on
42 Posts
Car: 92 Firebird
Engine: Supercharged 6.0
Transmission: T56
Axle/Gears: 8.8 3.73
Re: My LS1/T56 swap thread
That's the good slave, rock on
Metric bolts don't grade the same as standard. 8.8 is slightly above std grade 5. 10.9 are standard automotive grade, slightly under grade 8. 12.9 are suspension grade, hard to locate in a fastener store
Anything m10 will be fine with 8.8. Anything smaller, try to get 10.9 to be safe on holding torque
08-17-2014, 12:07 PM
#25
Member

Join Date: Aug 2007
Location: Long Island, NY
Posts: 201
Likes: 0
Received 2 Likes
on
2 Posts
Car: 1992 z28
Engine: LS1
Transmission: T-56
Re: My LS1/T56 swap thread
Nice progress man! Its all starting to come together. Its a good feeling when you get the engine and tranny on that kmember. Also putting the engine and transmission together is another good feeling. Cant wait to see you get these in the car. At this rate your going to catch up to me and my build.
08-17-2014, 01:38 PM
#26
Senior Member
Join Date: Feb 2009
Location: USA
Posts: 885
Likes: 0
Received 0 Likes
on
0 Posts
Car: 1989 SS
Engine: LT1+1500$ hooker exhaust
Transmission: T56
Axle/Gears: 3.42 bogger
08-17-2014, 10:11 PM
#27
Senior Member
Thread Starter
Re: My LS1/T56 swap thread
Things didn't go exactly as planned today.
Welding that frame up wasn't so awesome as it was 1/8 plate to basically sheet metal. Really had to build the weld up on the sheet metal bit by bit before I could place the heat on the plate steel. When I get access to the backside when I do the floor I'll be sure to beef up the inside properly.
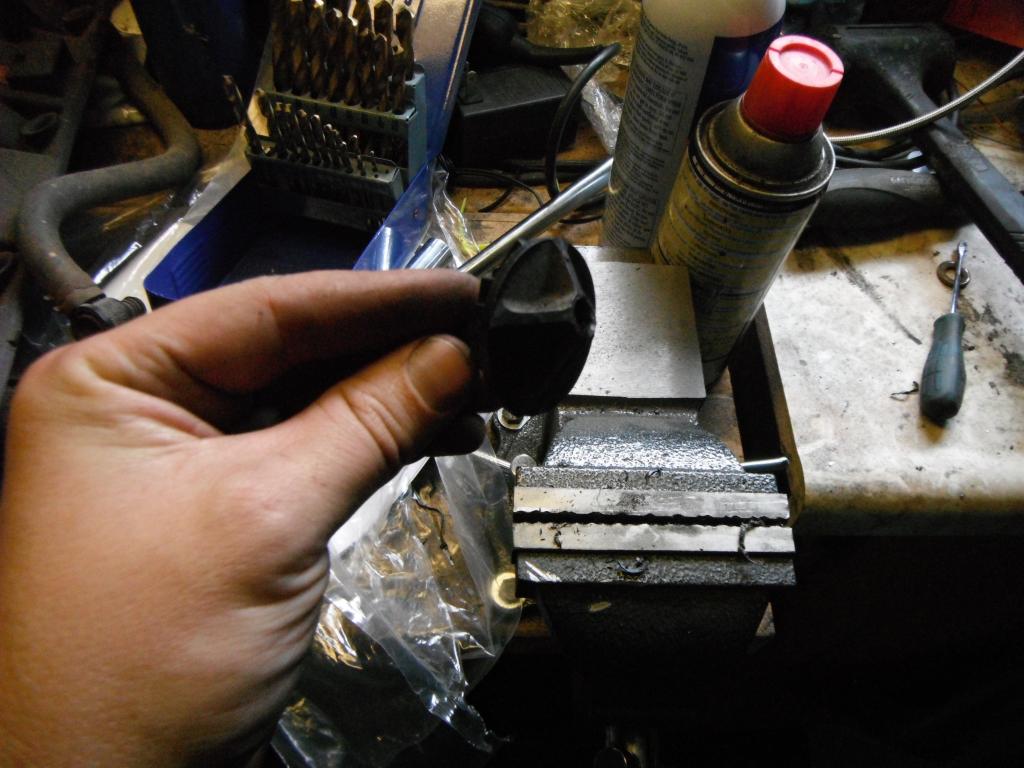
I was getting things prepped for the motor today, figured it would be easier now to get the throttle cable out of the firewall and got the new Lokar cable situated.
So, they come with these ends:
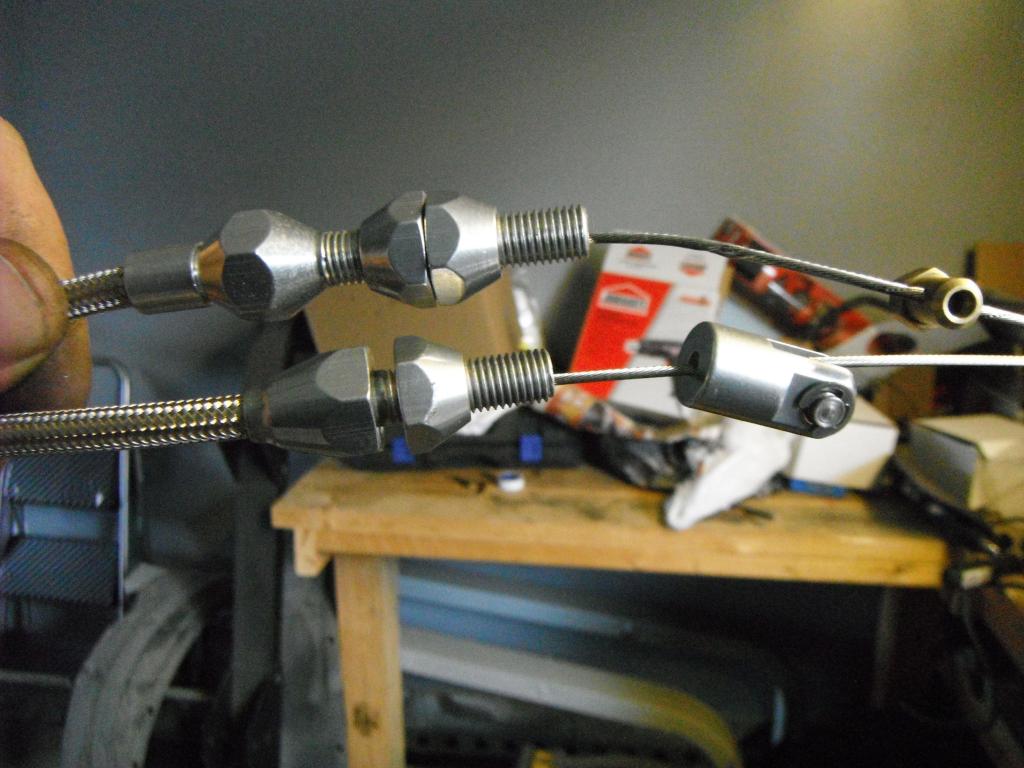
I simply removed the brass piece, and the aluminum nut off the lower end seen in the pic.
I then took the old cable off the pedal and removed the plastic grommet out of the fire wall. Then cut the old cable out.
I then drilled it out carefully just enough to be able to screw in the end I removed the nut from.
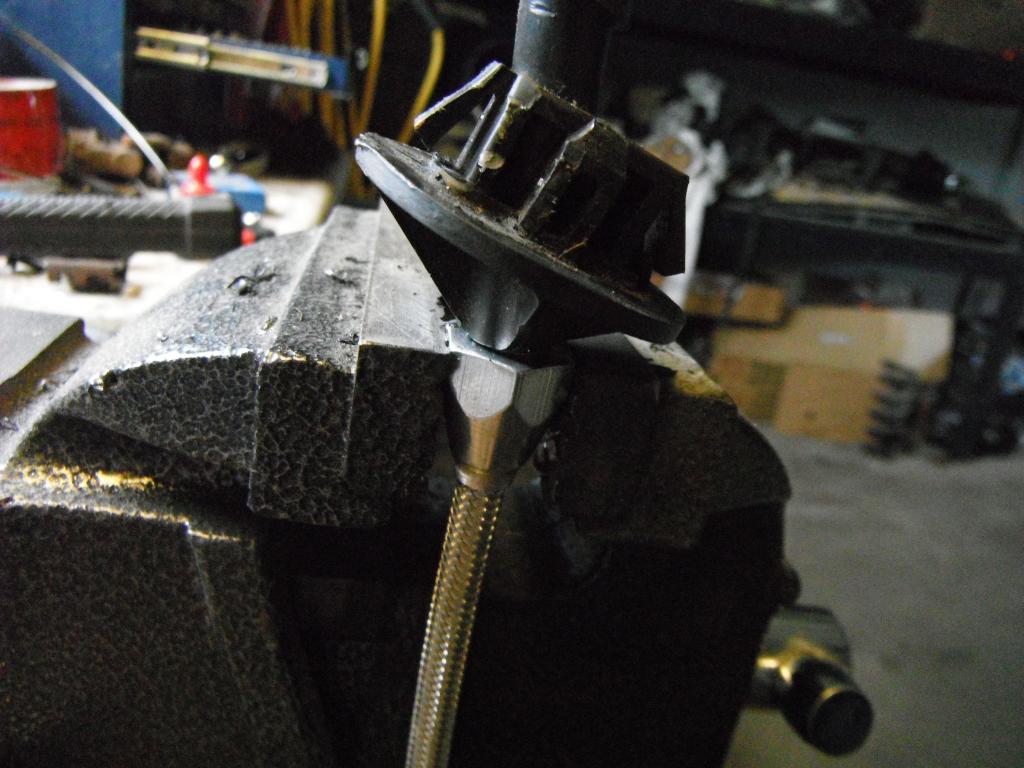
Simply installed the cable in the same direction it came in the package, not forgetting to use the black plastic cup that snaps in to the 3rd gen pedal. cable end fits nice and snug!

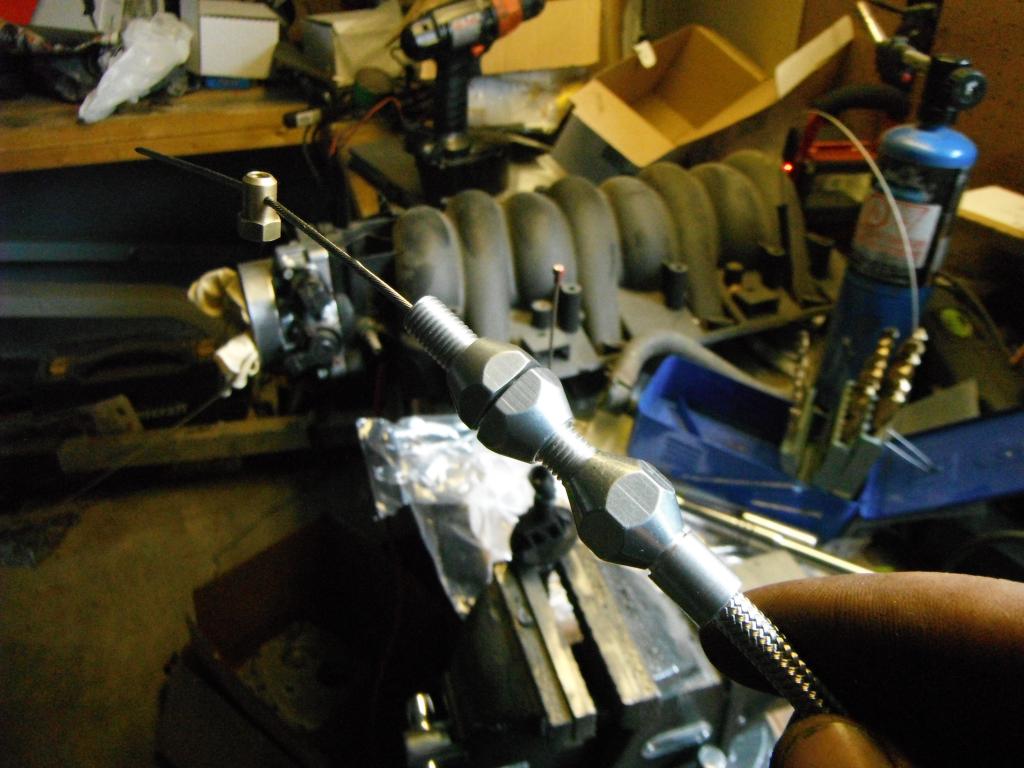
This end obviously goes to the bracket by the throttle body and will allow simple fine adjustment of cable slack.
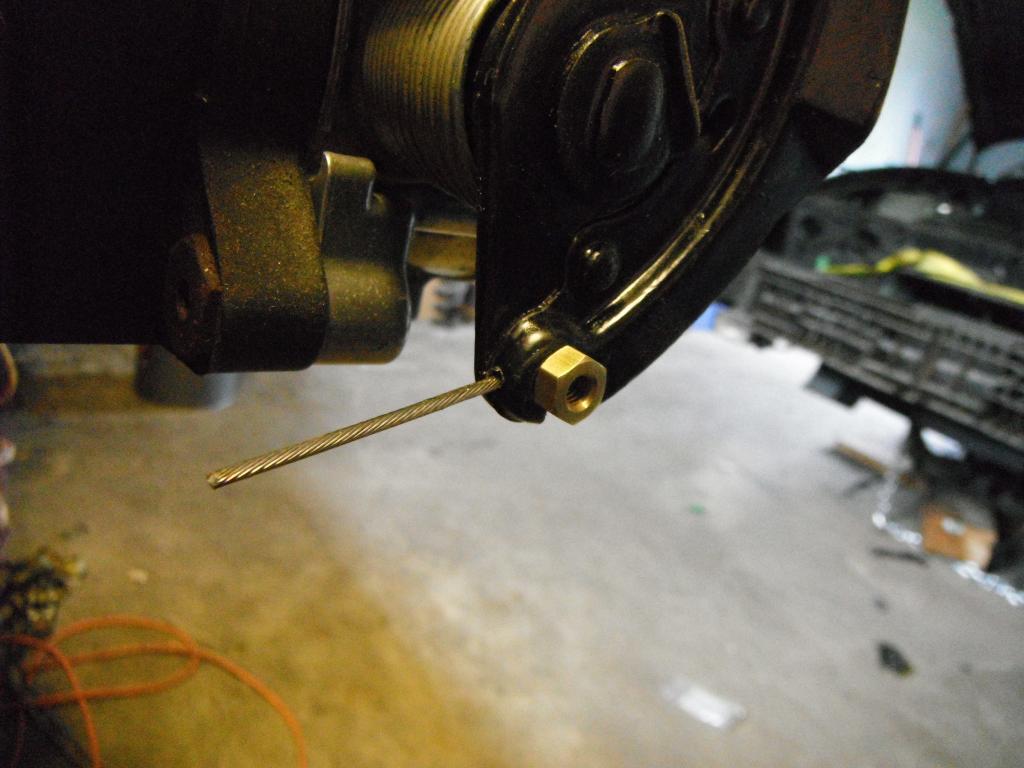
Then, to get the brass piece to fit on the throttle body arm properly, I had to drill a hole for the cable to fit through as it can't bend down at enough of an angle after it goes through the fitting. I only made the hole as big as I needed. Works good and nothing is going to come apart on me. The other side of the fitting not seen does also rest in the slot like stock.
So, thinking I had everything ready to go, I started to put the manifolds on. Passenger side was just how it should be. The drivers side however, this is what I got:
Which results in:
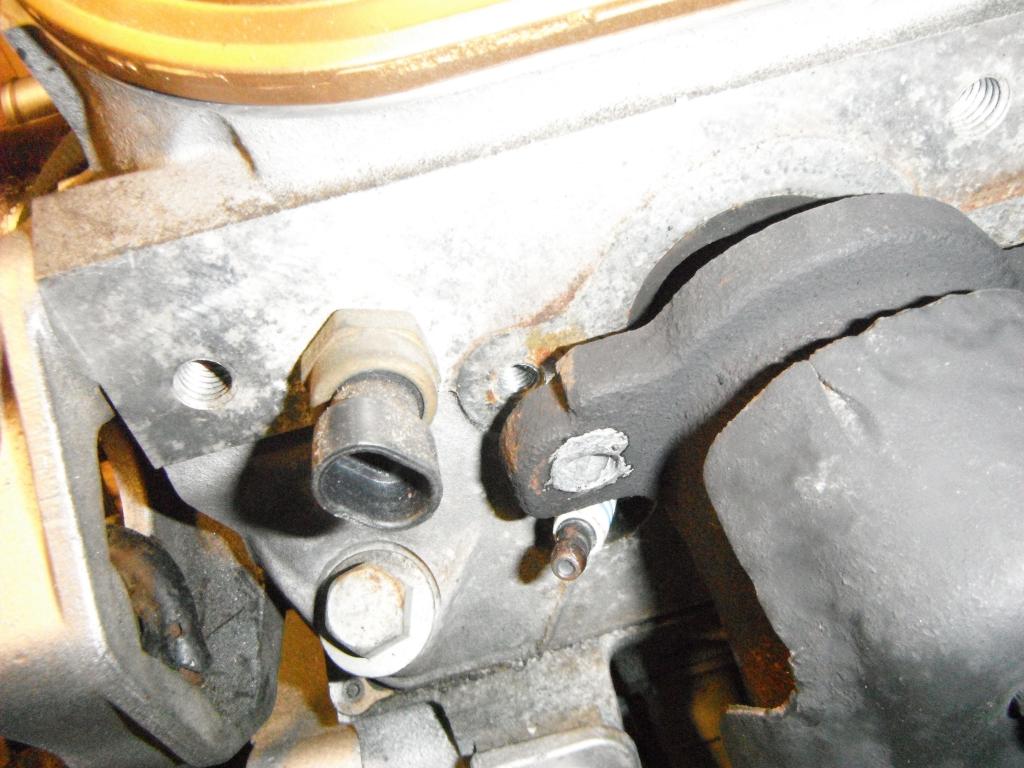
I didn't know this was something people have had to deal with until I searched for it... Apparently it happens.
At first I thought maybe the engine was crooked in the k-member. But, I did a few comparison measurements from side to side using a few different constant frame locations (k-member to car mounting holes) to the tail shaft, and every frame of reference I used showed me I was square.
So, I guess the plan is to use a spark plug (put in new ones today) and fill the o2 bung hole and weld in a new bung as close to the manifold as possible once I get to that part of the build... However, I'm going to see if my new o2 sensor shows up tomorrow and see if it is any shorter to maybe fit in.
So that's where I got today... I wanted that motor in the car but welding that frame up took some time, but I didn't want to rush that. However, my Hawks cross member lines up nearly perfectly with my new mounting holes.
Maybe tomorrow after work I'll put the manifolds back on and get the motor in there finally.
The exhaust set up right now will basically be a "make it work" deal as I'm ordering those hedman swap mid length manifolds in the winter, and after that I will do a proper exhaust with a cutout.
I know I'm showing lots of little details here, and it's boring to you experienced guys, but since I'm figuring out these small things for the first time I'm passing on how I did things for other first timers... Some stuff I have learned from others on this site, but it's always fragmented here and there.
Welding that frame up wasn't so awesome as it was 1/8 plate to basically sheet metal. Really had to build the weld up on the sheet metal bit by bit before I could place the heat on the plate steel. When I get access to the backside when I do the floor I'll be sure to beef up the inside properly.
I was getting things prepped for the motor today, figured it would be easier now to get the throttle cable out of the firewall and got the new Lokar cable situated.
So, they come with these ends:

I simply removed the brass piece, and the aluminum nut off the lower end seen in the pic.
I then took the old cable off the pedal and removed the plastic grommet out of the fire wall. Then cut the old cable out.

I then drilled it out carefully just enough to be able to screw in the end I removed the nut from.

Simply installed the cable in the same direction it came in the package, not forgetting to use the black plastic cup that snaps in to the 3rd gen pedal. cable end fits nice and snug!

This end obviously goes to the bracket by the throttle body and will allow simple fine adjustment of cable slack.

Then, to get the brass piece to fit on the throttle body arm properly, I had to drill a hole for the cable to fit through as it can't bend down at enough of an angle after it goes through the fitting. I only made the hole as big as I needed. Works good and nothing is going to come apart on me. The other side of the fitting not seen does also rest in the slot like stock.

So, thinking I had everything ready to go, I started to put the manifolds on. Passenger side was just how it should be. The drivers side however, this is what I got:

Which results in:

I didn't know this was something people have had to deal with until I searched for it... Apparently it happens.
At first I thought maybe the engine was crooked in the k-member. But, I did a few comparison measurements from side to side using a few different constant frame locations (k-member to car mounting holes) to the tail shaft, and every frame of reference I used showed me I was square.
So, I guess the plan is to use a spark plug (put in new ones today) and fill the o2 bung hole and weld in a new bung as close to the manifold as possible once I get to that part of the build... However, I'm going to see if my new o2 sensor shows up tomorrow and see if it is any shorter to maybe fit in.
So that's where I got today... I wanted that motor in the car but welding that frame up took some time, but I didn't want to rush that. However, my Hawks cross member lines up nearly perfectly with my new mounting holes.
Maybe tomorrow after work I'll put the manifolds back on and get the motor in there finally.
The exhaust set up right now will basically be a "make it work" deal as I'm ordering those hedman swap mid length manifolds in the winter, and after that I will do a proper exhaust with a cutout.
I know I'm showing lots of little details here, and it's boring to you experienced guys, but since I'm figuring out these small things for the first time I'm passing on how I did things for other first timers... Some stuff I have learned from others on this site, but it's always fragmented here and there.
08-18-2014, 10:40 AM
#28
Supreme Member
iTrader: (24)
Join Date: Jun 2005
Location: NC
Posts: 7,883
Likes: 0
Received 58 Likes
on
42 Posts
Car: 92 Firebird
Engine: Supercharged 6.0
Transmission: T56
Axle/Gears: 8.8 3.73
Re: My LS1/T56 swap thread
Use a plug or broken off O2 sensor to fill the hole
Cheap and easy to find O2 bungs are spark plug anti foulers from any parts store. Use a pair for a large plug, then cut the end off so the sensor probe can pass through
Cheap and easy to find O2 bungs are spark plug anti foulers from any parts store. Use a pair for a large plug, then cut the end off so the sensor probe can pass through
08-21-2014, 10:31 PM
#29
Senior Member
Thread Starter
Re: My LS1/T56 swap thread
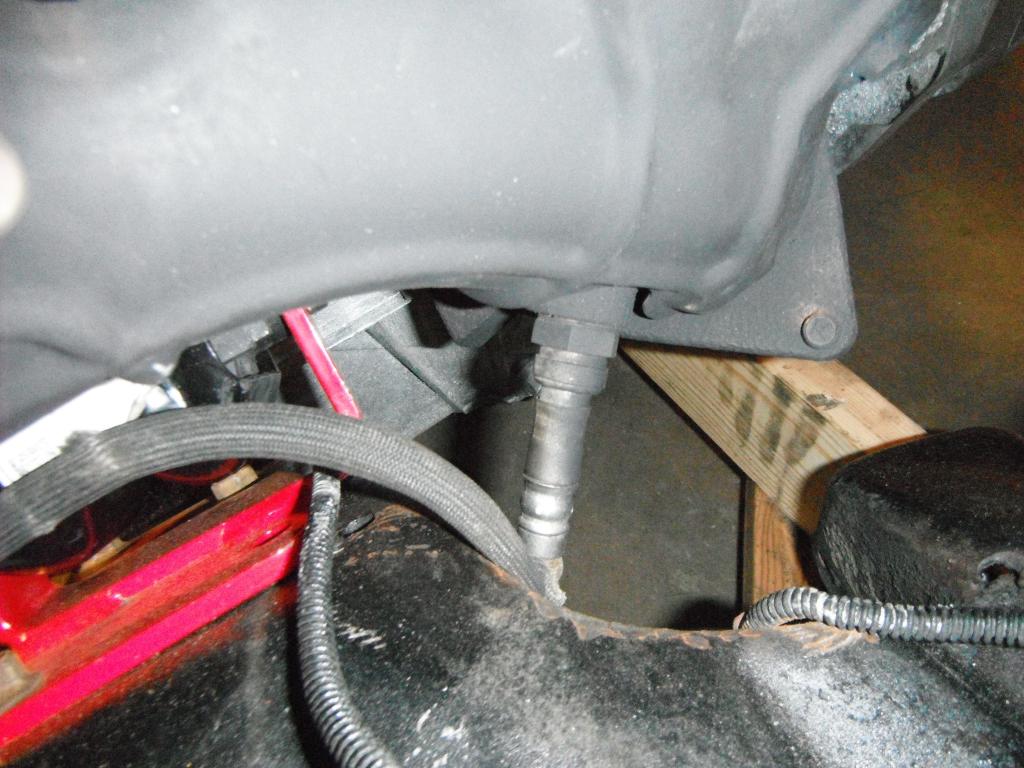
So last night, this happened:
I came home from work and went in to the garage not sure what was the next thing to tackle... The hoist was at the nose of the car, engine and transmission were sitting next to it and about 30 minutes later, in it was! My first guesstimate measurement for the hole in the tunnel for the trans was off by 1/2" so I had to fix that up.
The haws cross member needed very little adjustment to get it all lined up but that could also be due to my left frame rail being rebuilt.
Tonight I got in to the garage, cleaned up a thing or two and got in to the spray paint:
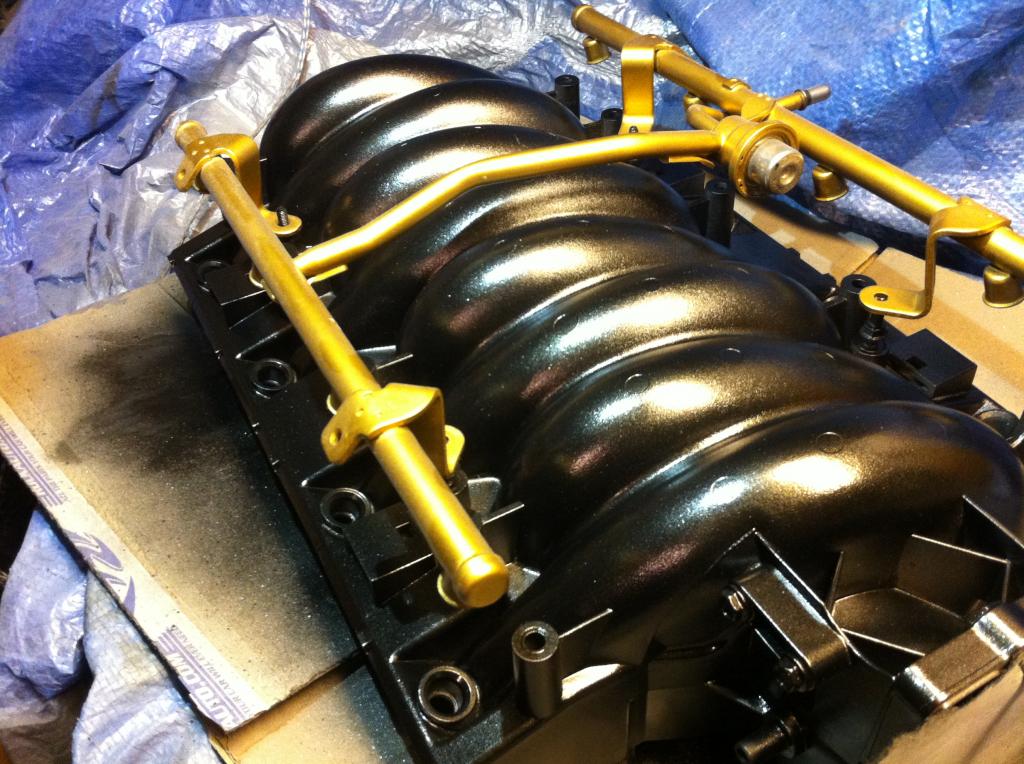
It really is really metallic, it will shine in the sun light!
Of course, gotta do a mock up shot:
Also got my H2O and oil pres senders in the block, my speedut gauges came with the senders but not the proper adapters to the ls1 block, and used the autometer adapters since it was cheaper to get them to me from Summit than off the Speedhut website, but that may be different for you stateside guys.
Had a nice little surprise that I didn't expect. The power break vac hose was on my intake when I got it, and so was the little plastic fitting that inserts in to the brake booster. I figured I was going to have to find some way of splicing the 3rd and 4th gen hoses together, but this clipped in perfect, and the 4th gen hose is shaped perfect, so that was a nice little surprise.
Tomorrow I'm throwing the front suspension back together, Saturday is wiring day with the objective being to have ALL of the wiring done (aside from reverse lock out solenoid because I don't have a connector that fits it in my pile of left overs).
Sunday is fuel tank replacement, fuel line pluming and making some manifold flanges so I can mount my O2 sensors and fire this thing up!!
However, if I don't get my fuel pressure line fitting for my fuel rail tomorrow, I might just take the weekend off and go watch our big national mx event, that I was hoping to ride but with this collar bone break I haven't ridden and I'm not in race shape at all.

I came home from work and went in to the garage not sure what was the next thing to tackle... The hoist was at the nose of the car, engine and transmission were sitting next to it and about 30 minutes later, in it was! My first guesstimate measurement for the hole in the tunnel for the trans was off by 1/2" so I had to fix that up.
The haws cross member needed very little adjustment to get it all lined up but that could also be due to my left frame rail being rebuilt.
Tonight I got in to the garage, cleaned up a thing or two and got in to the spray paint:

It really is really metallic, it will shine in the sun light!
Of course, gotta do a mock up shot:

Also got my H2O and oil pres senders in the block, my speedut gauges came with the senders but not the proper adapters to the ls1 block, and used the autometer adapters since it was cheaper to get them to me from Summit than off the Speedhut website, but that may be different for you stateside guys.
Had a nice little surprise that I didn't expect. The power break vac hose was on my intake when I got it, and so was the little plastic fitting that inserts in to the brake booster. I figured I was going to have to find some way of splicing the 3rd and 4th gen hoses together, but this clipped in perfect, and the 4th gen hose is shaped perfect, so that was a nice little surprise.
Tomorrow I'm throwing the front suspension back together, Saturday is wiring day with the objective being to have ALL of the wiring done (aside from reverse lock out solenoid because I don't have a connector that fits it in my pile of left overs).
Sunday is fuel tank replacement, fuel line pluming and making some manifold flanges so I can mount my O2 sensors and fire this thing up!!
However, if I don't get my fuel pressure line fitting for my fuel rail tomorrow, I might just take the weekend off and go watch our big national mx event, that I was hoping to ride but with this collar bone break I haven't ridden and I'm not in race shape at all.
08-21-2014, 10:52 PM
#30
Member
iTrader: (5)

Join Date: Feb 2005
Location: Bolivar, TN
Posts: 224
Likes: 0
Received 0 Likes
on
0 Posts
Car: 89 GTA
Engine: 350
Transmission: 700R4
Axle/Gears: 3.27
Re: My LS1/T56 swap thread
Looks good keep the info coming. Will be starting my swap soon. Good luck keep up the good work.
08-22-2014, 04:56 PM
#31
Senior Member
Thread Starter
Re: My LS1/T56 swap thread
No fuel fitting today in the mail, so I'm gonna take tomorrow off and go watch some racing.
Is 8 ga wire heavy enough for my main power from the battery to my fuse/relay block? I bought a roll of it, and haven't found anything thicker in the stores around here.
I'm going to run my alternator charge wire down the harness to my fuse block where everything else connects, just to keep as few wires running by their lonesome around the engine bay. Trying to keep this install somewhat clean.
08-22-2014, 06:58 PM
#32
Re: My LS1/T56 swap thread
I went with 4ga myself, I think 8 will be cutting it close but it also depends on how long the wire will be. Here is a chart to help ya decide. If you choose to go thicker and the lengths work out for ya you could always buy a battery cables in the auto store and change the ends.
http://www.crutchfield.com/S-45tJR3t...uge_chart.html
http://www.crutchfield.com/S-45tJR3t...uge_chart.html
09-01-2014, 01:38 AM
#33
Senior Member
Thread Starter
Re: My LS1/T56 swap thread
Been working all weekend on this thing.
Engine wiring is DONE.
I ran 4ga from the batt to my fuse/relay panel on the firewall.
It seriously took me a day and a half to wire up my fuse/relay panel, route all the wiring on the engine and pack it all up in to loom etc. Wires to the starter are hooked up.
I still have to hook up my two body positive wires and my pink ign wire but no big deal.
Is 12 Ga wire thick enough to run from the firewall back to the fuel pump?
Front suspension is put together (spring compressor FTW), and the rear end is jacked in the air with everything removed except the darn fuel tank... I'm going to just get a pipe cutter and cut the neck off and it should come out... I'm not using the tank, but I want the filler neck from it anyways, and I will need a pipe cutter for doing the exhaust anyways... unfortunately with the long weekend I won't be able to get one tomorrow.
Started to play with braided fuel line, managed to get a fitting on, but I sure need practice at it! Hopefully have the fuel line at the tank end done tomorrow.
I'll also try to finish up the wiring (routing through the firewall for the ECU and finishing up my gauge install)... I really have no idea when this thing will see spark! In some ways it feels just around the corner, but it feels so far away at the same time.
09-01-2014, 05:47 PM
#34
Re: My LS1/T56 swap thread
Good decision on the 4ga wire , now you wont have to worry about it. !0ga or 12ga will be fine for the hotwire cant remember what one I used even tho it was just a few weeks ago lol but either will do and both are way more then the factor ga.
09-02-2014, 11:11 PM
#35
Senior Member
Thread Starter
Re: My LS1/T56 swap thread
Sorry, no pics tonight... But there is video!
This is literally the first fire up of the motor... I finished up my fuel lines (or so I thought) and then realized I only need like 4 more wire connections to start the car... so I just rigged them up for now. Went to check and no interior lights... So check the battery again, ground cable wasn't making good contact. Got that fixed, turn the key to run and no fuel pump... checked wires, couldn't figure it out. Messed with relays, then saw a random ground wire I hadn't hooked up, fuel relay.
Anyways, got some fuel in there, pressurized the lines, and I have a leak at my fuel filter, where I have an AN to whatever thread adapter for the LS1 fuel filter... I tightened it right up and it still leaks... How tight do these need to be to not leak? I'm at the point where it's going to strip. Can I use teflon or something? None of the AN lines I made leak, so it's a bit of a let down that something else is leaking.
Still went ahead and fired it up. First kick over, my old gauge pod was on the roof and it fell in to the car, gave me a little scare.
I basically just fired the car up to hear it was going to run and shut it down due to the fuel leak, and my O2 sensors aren't in yet since I need to make some down pipes.
Here's the video, gotta click to watch... Exciting for me but not much to see.
09-06-2014, 12:05 PM
#36
Senior Member
Thread Starter
Re: My LS1/T56 swap thread
Well, got myself some Permatex liquid thread sealant stuff, fuel drip issue solved.
Been working on my manifold flanges, got them cut out with a grinder best I could, welded together and now forming the first little bit of exhaust out of the manifolds so I can mount my O2 sensors up. The passenger side shoots the first bit of pipe in the the k-member so it's a tricky side.
Exhaust plan for now is basically 2 cherry bombs on each side of the transmission mount humps, and dumped before the rear axle, possibly angled to the side before the rear tires. This is just TEMPORARY and will be addressed once I get my headers next spring.
Wired in my gauges! These are my favourite part of the swap so far, visually. Still have some connections to hook up at the computer but that's all simple and easy.
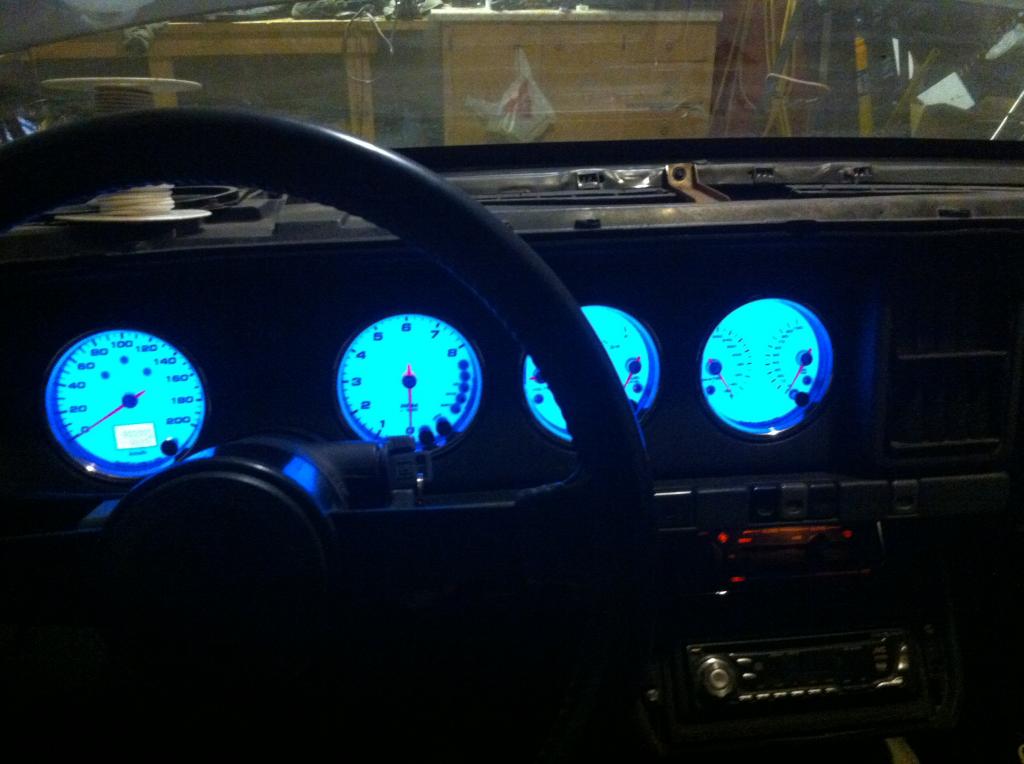
Unfortunately, I made my harness like 2" too short to tuck the computer up where I wanted it to be under the dash... So I have some other thinking to do, but that is at the bottom of the list.
I'm replacing my panhard rod bolts. They are rusted enough that some of the shaft at the base of the threads is missing, so I'll just replace them. Unfortunately, they are a tapered bolt so I have to get them from the dealer.
I'm trying to find 6mm brake line locally so I can fix my line and get the brakes bled, but it looks like I have to order from somewhere.
So that's where I am! Still need to figure out my steam line routing, but it looks like I'll be making a splice in the upper rad hose and making a piece similar to the JTR piece.
It might be ready for a trip around the block some time next weekend!
I couldn't figure out why my turn signals wouldn't flash but the 4 ways would on my gauge cluster, or why I had no lights in the front of the car... Started to think I messed up and then realized I hadn't plugged the front light harness at the firewall. I will need an electric flasher for my turn signals since the LED lights in the gauge don't draw enough. I already have a digital flasher in my 4 ways.
I'm also not wiring in my reverse lockout solenoid. Its not that hard to push it through the gate, and nobody else drives this car but me... And if my 100lb sister ever thinks she can take it out for a spin when I'm at home visiting, she won't be able to get it out of the drive lol.
Last edited by WTR388; 09-06-2014 at 12:20 PM.
09-06-2014, 03:50 PM
#37
Senior Member
iTrader: (1)
Join Date: Aug 2006
Location: Bethlehem, CT
Posts: 632
Likes: 0
Received 4 Likes
on
4 Posts
Car: 1983 Firebird SE
Engine: C5 LS1
Transmission: 6 speed
Axle/Gears: 3.42
Re: My LS1/T56 swap thread
Computer is now at the end of the passenger footwell. Works out to be not nearly as funky as it sounds.
09-17-2014, 09:01 PM
#38
Senior Member
Thread Starter
Re: My LS1/T56 swap thread
Made some temporary manifold flanges to weld some pipe to so my O2 sensors could be mounted up.
Rear suspension all tucked back in. Front suspension bolted together. Had to make a new brake line using 1/4" line (there is NO 6mm at any of the stores in the two towns here, and even then, finding a fitting to go in to the rear flex line almost didn't happen), bled brake, that was all on the weekend. Monday night I installed my BMR subframe connectors, I can already tell a difference in how much the body flexes when I'm lifting it by the nose and putting it on stands. Looking forward to seeing how it feels.
Got the clutch bled (so I thought) and then started it up again, and let it actually run for more than a couple seconds... I love the motor already.
However, I couldn't get it in to gear, so I gave up for the night figuring the T5 master wouldn't work... 20 Minutes later I went back to the garage because I refused to think it wouldn't work, bled it a couple more times (I used basically every technique I could think), it felt a bit better, so I fired it up again and in to gear it went! Finally it moved under it's own power.
4th gear is dead, it just grinds and won't pop in, which I was afraid of because it wouldn't go in to gear with the motor off too... I was positive it went in to gear and everything turned just fine before I had the LS1 shaft installed in it.
So, I'll be looking at a rebuild. I really want to send it to Tick for their rebuild, but being in Canada that complicates the whole deal.
I'm going on a course from early oct to end of Nov, and I'm at a stage now where the car runs and moves, so for now, aside from putting a few things together in the interior and some more wire clean up, I'm done for now... until next spring because when I get back in late Nov the roads are salted and the car stays inside.
Winter plans are to replace drivers floor and tidy things up. Year One 17" snowflakes, C5 brakes, prokit springs, upgraded shocks (KYB likely), ball joints, tie rods, panhard rod (my panhard rod bolts are so rusted it makes me a bit nervous and GM no longer has bolts so I'll get an aftermarket rod with new bolts), and maybe some nicer lower control arms.
I enjoyed making my harness, but it just isn't as clean as I wanted it to be, but it all works, so I'll probably be selling it if someone wants a harness. I'll be getting Pocket to build me one, they are slick!
Next few days I'll get back in to sanding the car, and hopefully paint it again next week.
I wish it could be summer year round, but next May as the last bit of salt is washed off the road, I can finally take this baby out!! And maybe my bank account can stop hemmorhaging lol.
10-28-2014, 07:14 PM
#39
Senior Member
Thread Starter
Re: My LS1/T56 swap thread
Well, before I left, I manage to paint the car, make up a simple exhaust just to get me sounding legal and drove it for about 20km. Only issue I had was one tiny drip from my steam vent tube because I didn't tighten the clamp enough.
Runs at around 190-210 F which I thought at first was high, turns out to be normal. Happy!
Gauges in and working! (speedo is in but can't get a nice picture with all 4)
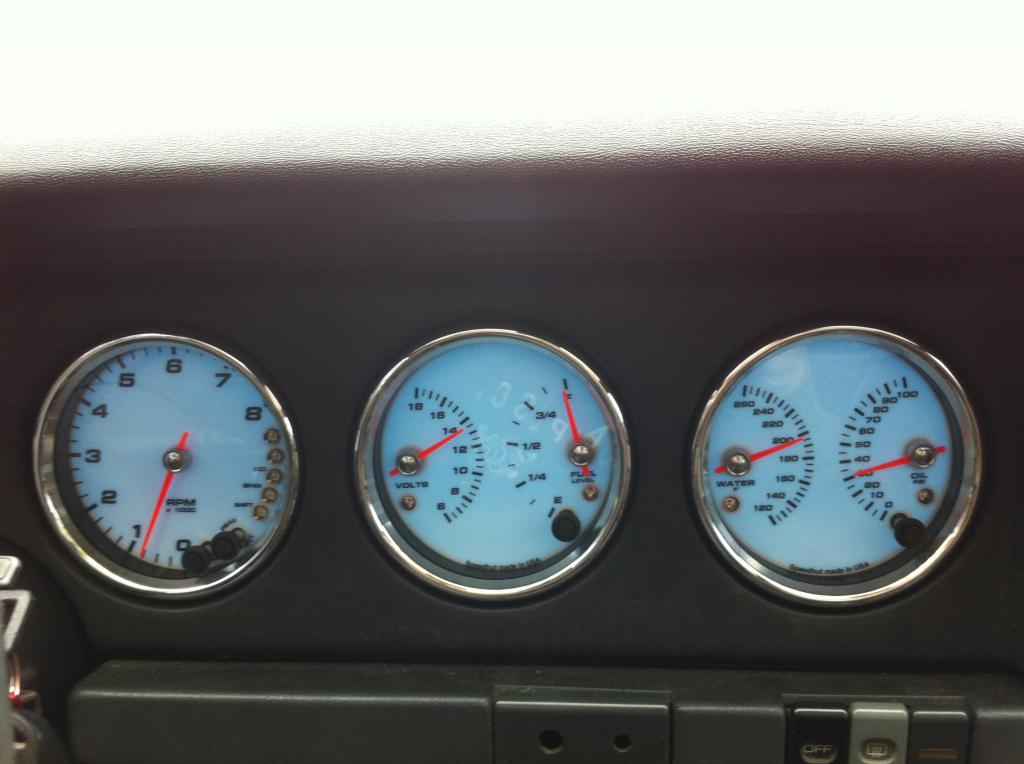
Here it is on the road after it's first trip to work and back. I painted the car in my garage with a Devilbiss Finishline4 gun, single stage limco:
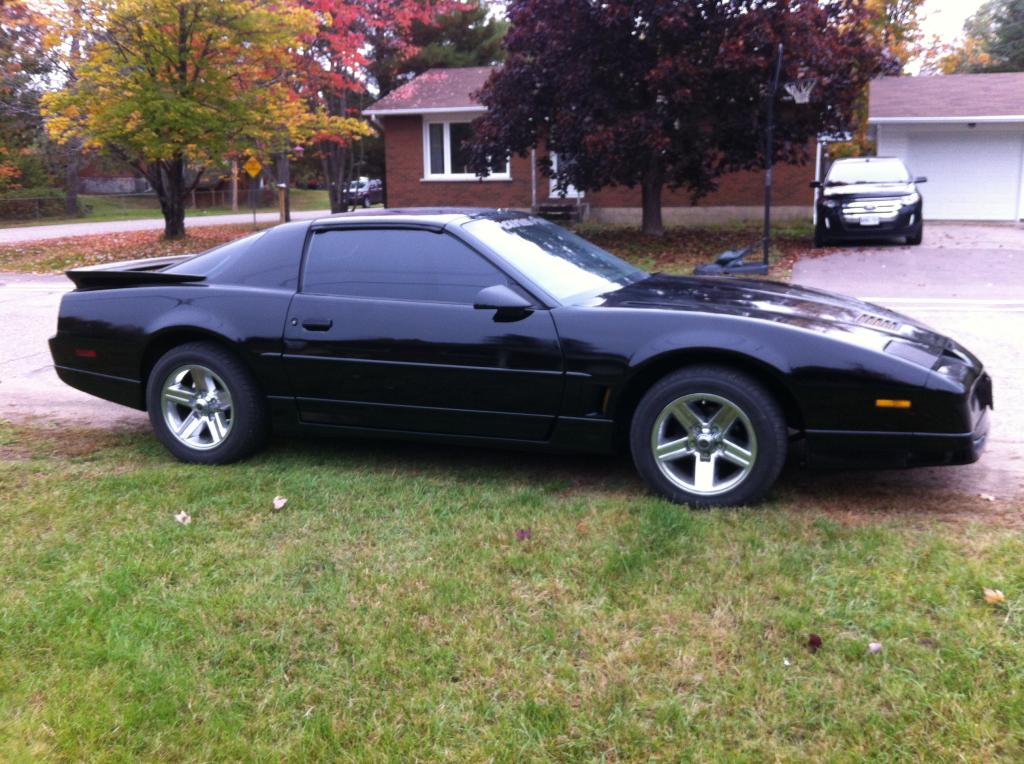
Car sits too high in the front now, so I'll be fixing that. Putting on some headers (either mid length of long tube) and hopefully enjoying this thing some.
I do need to pull the trans out, syncro rings on 4th are messed up, so I'll be bringing it to one of our TGO members next spring to get a rebuild.
11-30-2014, 11:38 AM
#40
COTM Editor
iTrader: (22)
Join Date: Mar 2001
Posts: 9,892
Likes: 0
Received 1,855 Likes
on
1,270 Posts
Car: '89 Firebird
Engine: 7.0L
Transmission: T56
Re: My LS1/T56 swap thread
Nice looking car.
 03-09-2015, 11:22 PM
#41
Senior Member
Thread Starter
Re: My LS1/T56 swap thread
Well, this showed up just over a week ago:
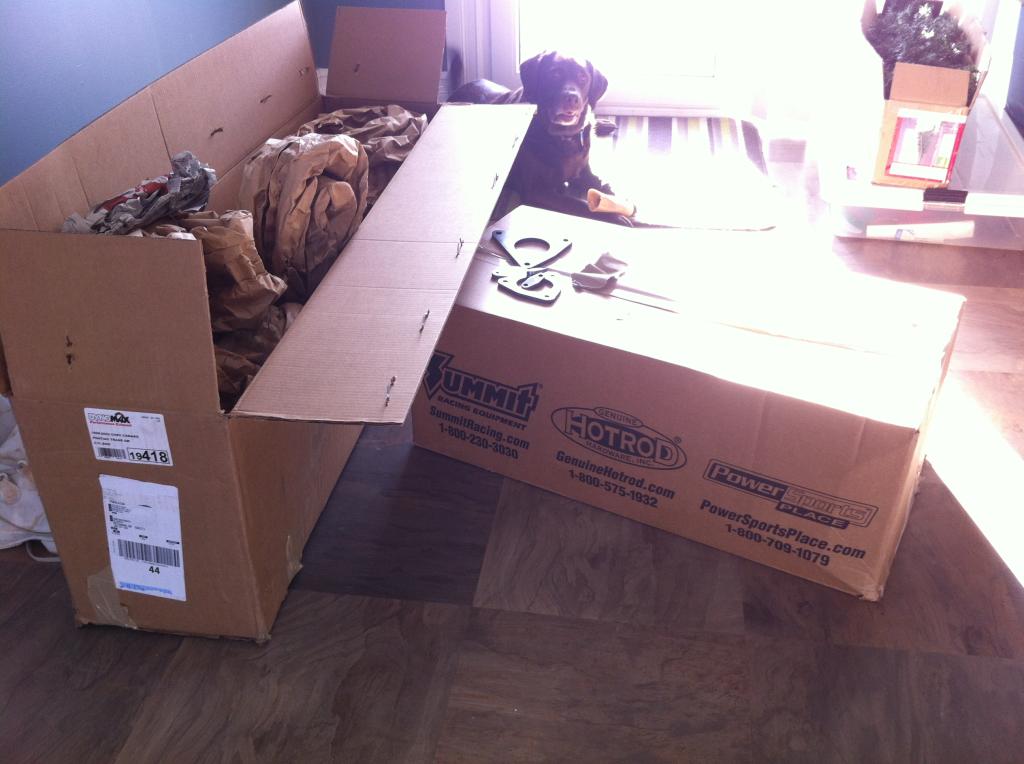
Here is what was in there:
Dynomax 2.5 to 3" merge pipe
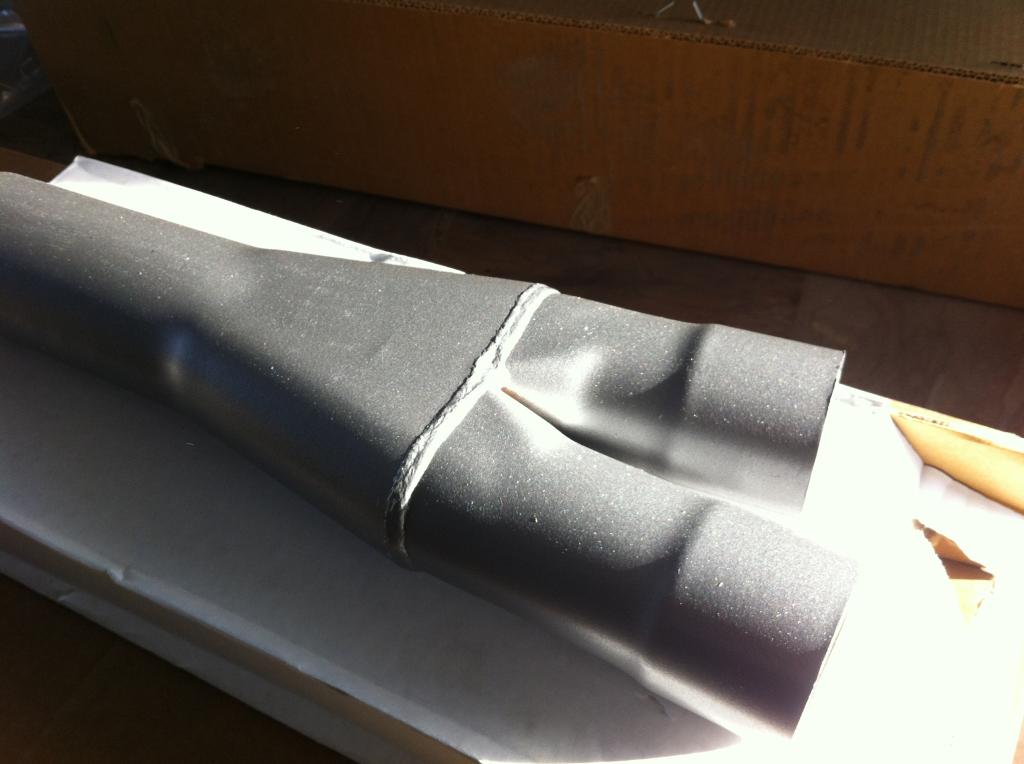
No more fuel leaks! This is the proper o-ring style fitting for the engine side of the fuel filter.
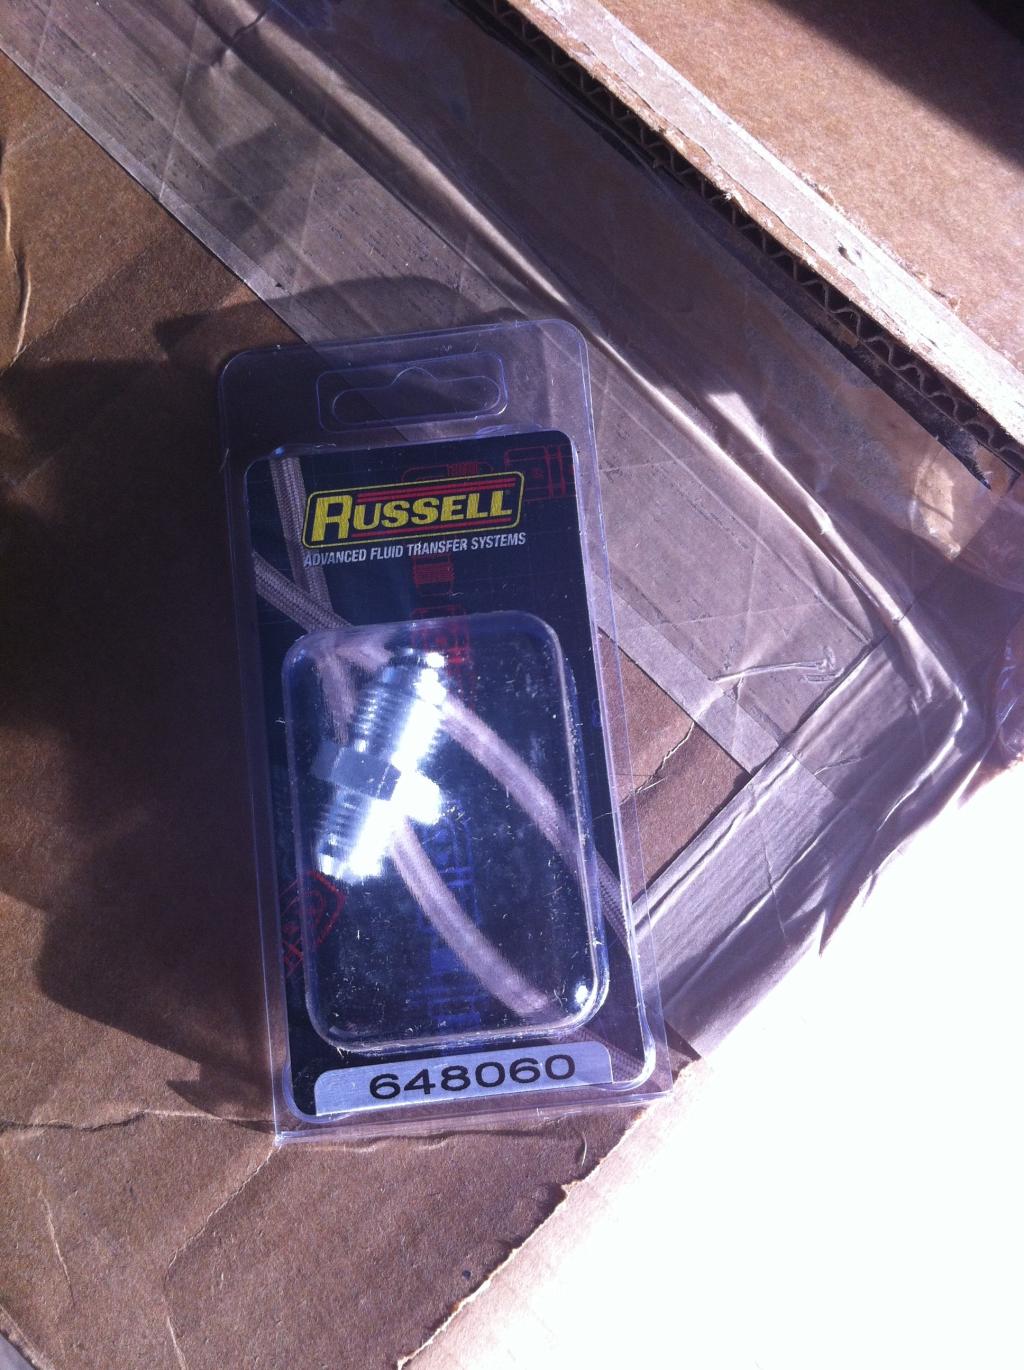
There was also a few 2.5" mandrel bend sections, exhaust hangers, flanges etc in the box.
I ordered these for $45 off a guy on ebay. Brand new, nice and thick LS1 manifold flanges with the block off plates, which I don't need (so if anyone needs some, I got em for the price of shipping and they are yours)
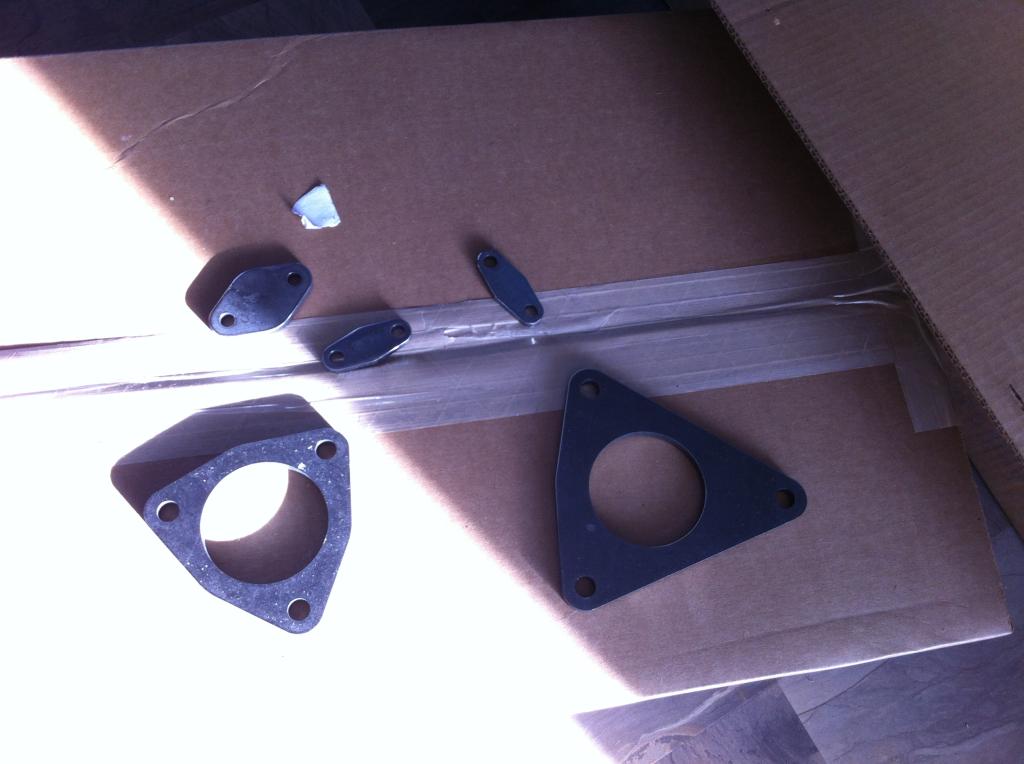
And then this big ole box showed up:
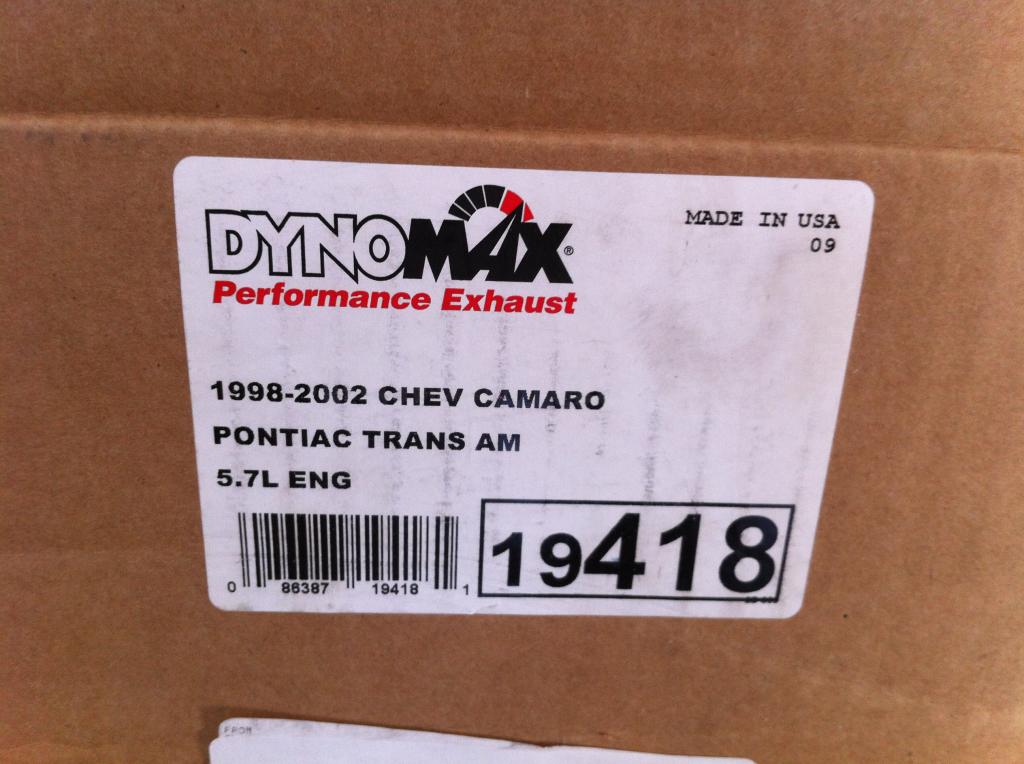
This is the 4th gen dynomax welded system.
And then the great Pocket sent me this awesome little fuse block. Wires are labelled, and it's neat and tidy. Fits next to the battery on the frame rail, and enough wire that I ran the wiring through the passenger fender then back to the fire wall to hide as much of it as I can.
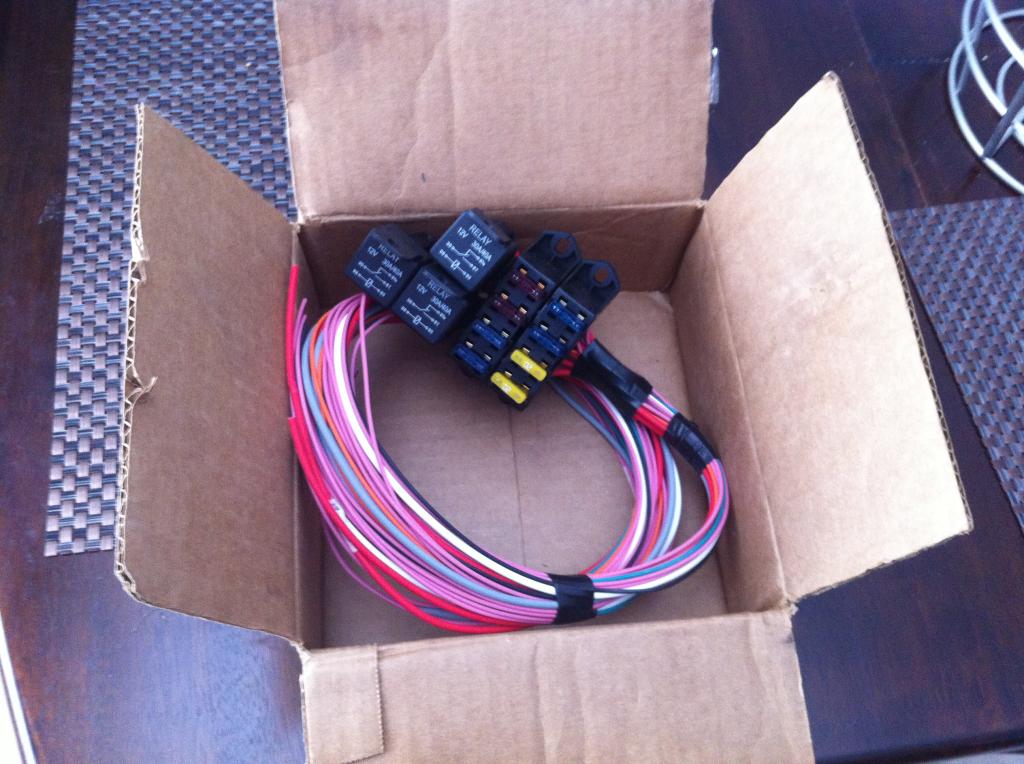
So here is my horribly welded y-pipe (haven't welded much recently and I'm still using flux wire)
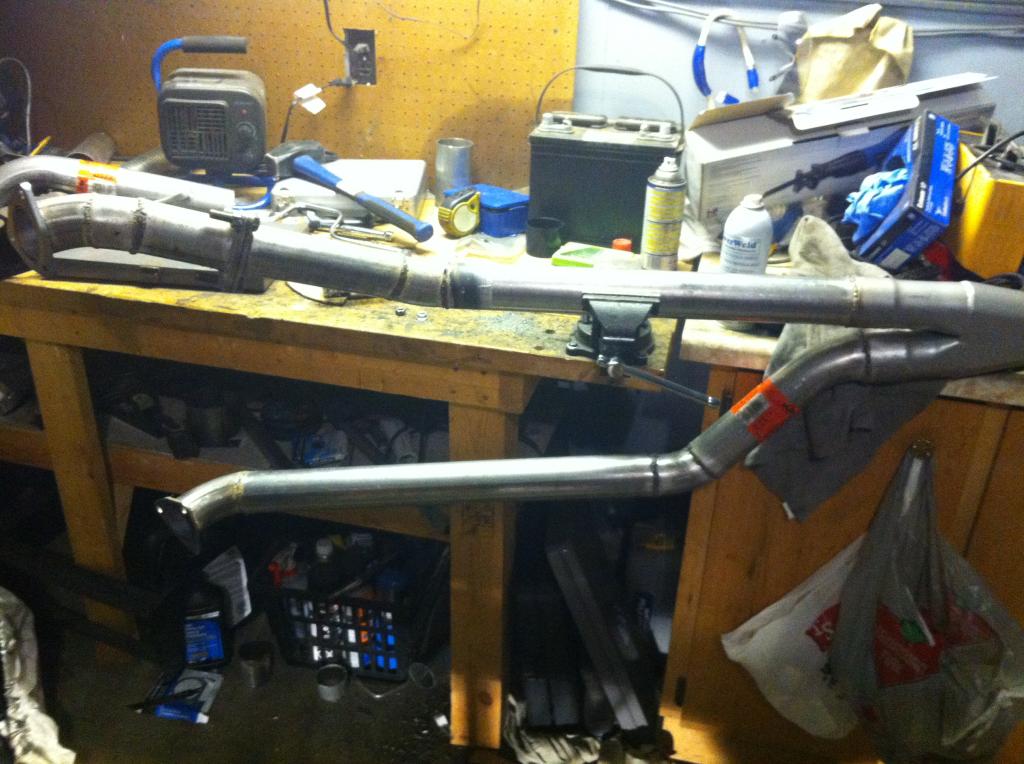
It's tucked up nicely along the frame rails, nothing is hanging overly low, it's pretty much dead even with the bottom of the trans. I'll get some pictures of my routing and once the car is on it's feet again I'll get some clearance pictures. I used the LS1 flanges I got, cut up and welded some pipe to put the O2 sensors in and then mounted another set of flanges, about even with the rear of the bellhousing, this is so I can remove the y-pipe easily to pull the trans out. And this is the sound out of that dynomax! Love the sound... It's gonna be even better when the longtubes and the Heads and Cam get put in at some point.
https://www.youtube.com/watch?v=sU77...ature=youtu.be
<iframe width="854" height="510" src="https://www.youtube.com/embed/sU77oH9uzsU" frameborder="0" allowfullscreen></iframe>
So this is the mess my engine bay was in, it was like this so I could test run and drive the car before I had to go away for a few months.
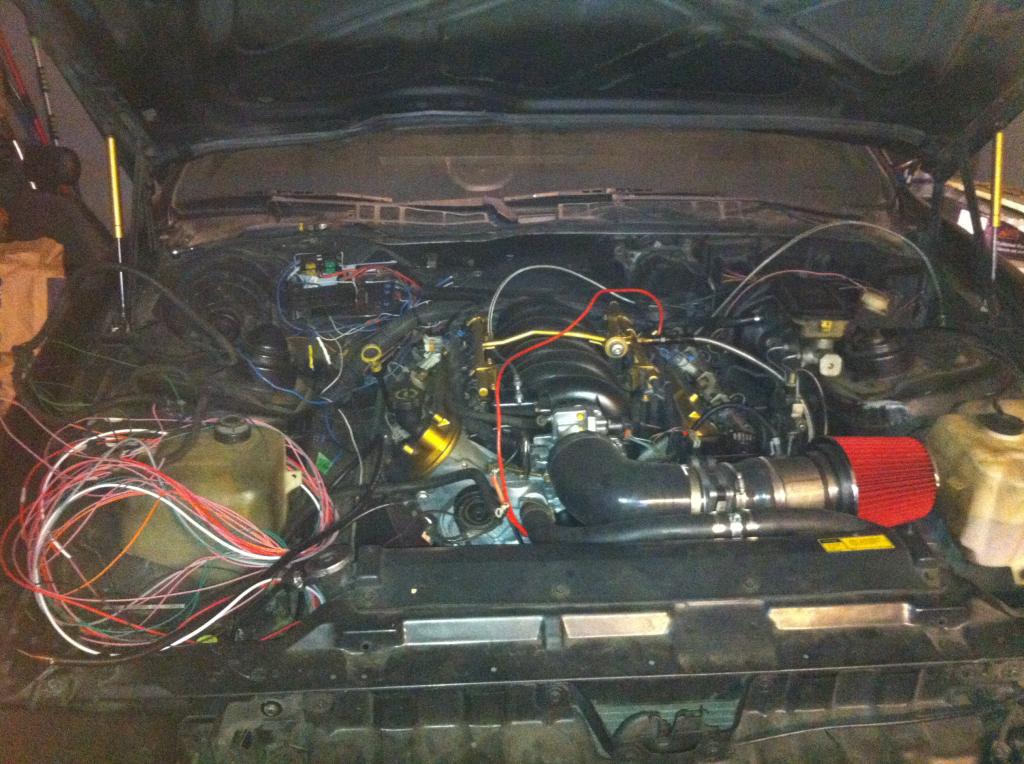
So I pulled that all apart, and rebuilt my harness using the new fuse block, you can't see it in this picture but it is further down one of the bundles to the left.
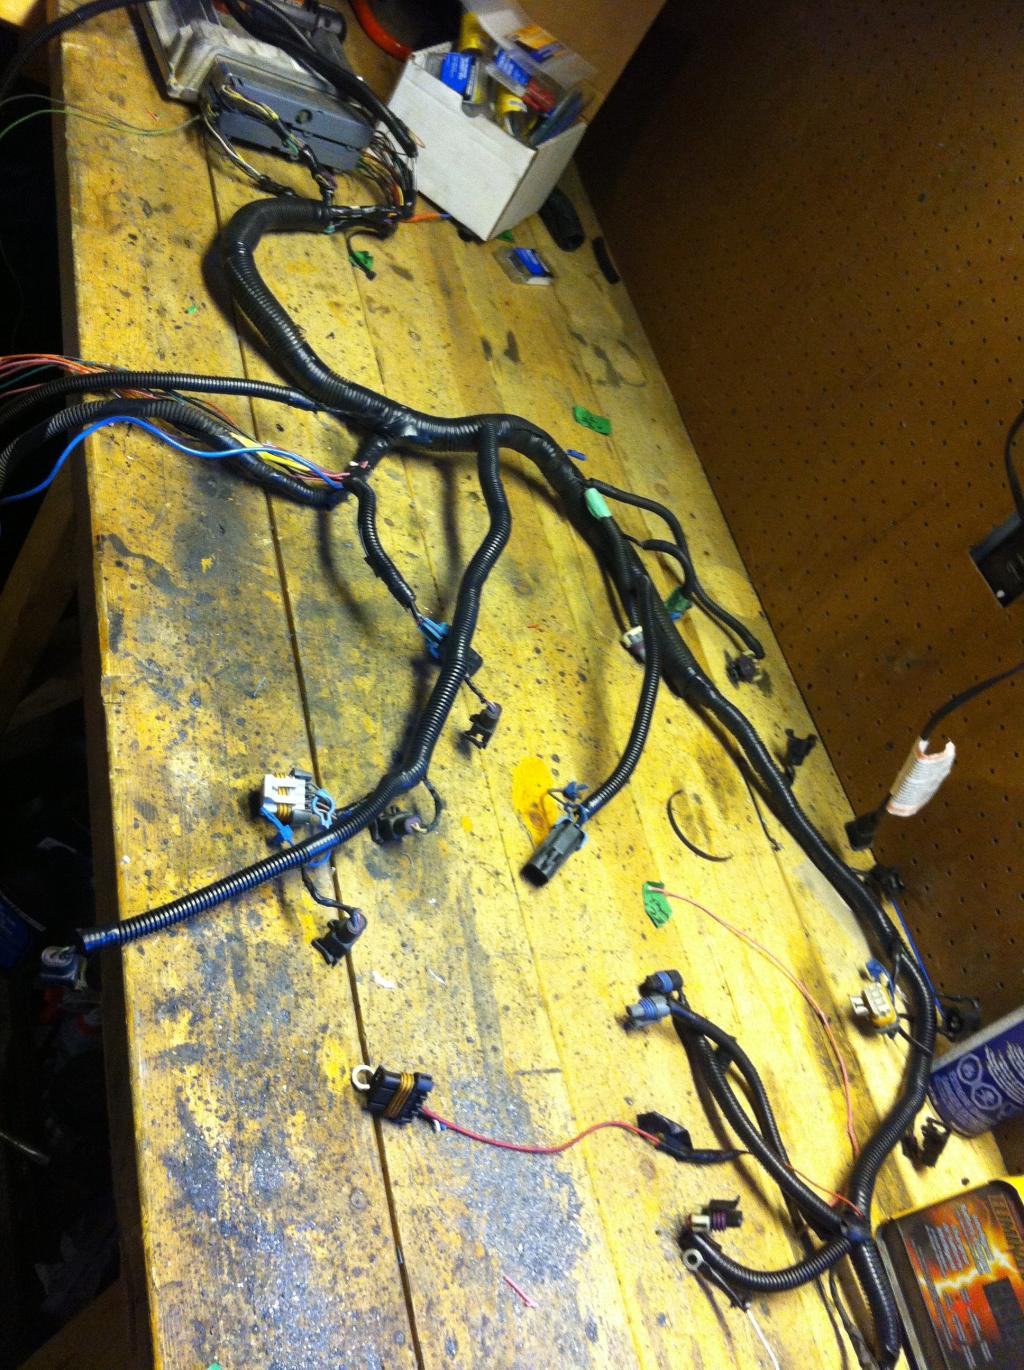
So that is back in the car and the wiring is basically finished, looks much better. I also managed to get that computer up in behind the dash, which I couldn't before, and I had stashed it under the carpet which looked horrible so I'm pretty happy with it!
Now I'm finishing everything up before I move again next week, I just put in a really nice used headliner that came with the dome light with the two pilot lights, and put LED lights in there, put the interior back together.
I also had an upholstery shop re-cover my rear seat foams with the covers I found from a Saturn! (a 2001 sc1 or something like that), and used the front seats from that same car. The seats cost me $225 including labour cost from the upholstery shop... Cant complain about that! I even have adjustable lumbar. The GF found the buckets for me at the yard while I was there looking for harness parts last winter, and while in that car I had a funny feeling the rear seat covers just might work.
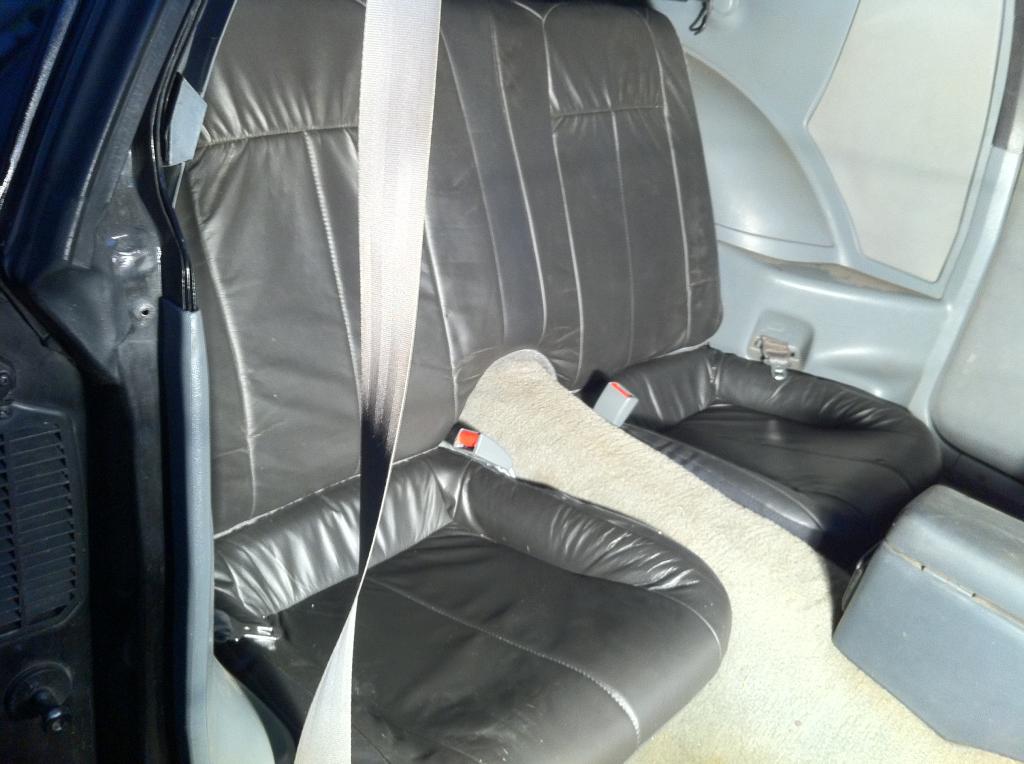


Last edited by WTR388; 03-09-2015 at 11:46 PM.
03-15-2015, 10:18 AM
#42
Senior Member
iTrader: (3)
Join Date: Jan 2012
Location: Clark NJ
Posts: 877
Likes: 0
Received 2 Likes
on
2 Posts
Car: 1988 Pontiac Transam GTA Notchback
Engine: 2003 Chevy 5.3 Vortec (325 cu)
Transmission: 4L60E
Axle/Gears: 3.27
Re: My LS1/T56 swap thread
When my 02 sensor hit the crossmember because of the manifold, my solution was to shorten the hole for the o2 sensor. I cut it to about 4 threads (originally there was about 7-8 threads), and now its not a problem.
03-15-2015, 06:26 PM
#43
Senior Member
Thread Starter
Re: My LS1/T56 swap thread
Long past the solution for that one, with where I mounted it I can fairly easily change it out if I ever need to. Is there enough room to unscrew and remove the sensor with the hole cut down? (just for the next guy that has this issue).
We had 4 days above freezing last week, on Thursday I measured out the 4km I need to calibrate the speedhut speedo and figured I would do it Friday... Came outside to 6" of snow when I went to work so it's still sitting in the garage... I move next week so it will be a few weeks before it sees the road yet.
We had 4 days above freezing last week, on Thursday I measured out the 4km I need to calibrate the speedhut speedo and figured I would do it Friday... Came outside to 6" of snow when I went to work so it's still sitting in the garage... I move next week so it will be a few weeks before it sees the road yet.
03-23-2015, 07:45 PM
#44
Senior Member
Thread Starter
Re: My LS1/T56 swap thread
Managed to get things wrapped up! Finally took it for a spin to calibrate my speedometer... I love this motor. For sure a huge upgrade from that worn out 305 I had, 6th gear doing 80km/hr (50ish for you guys) and I was at or below 1000rpm and it was still smooth. Spins the tires nicely!
Here is my y-pipe set up... Welds aren't pretty but they work.
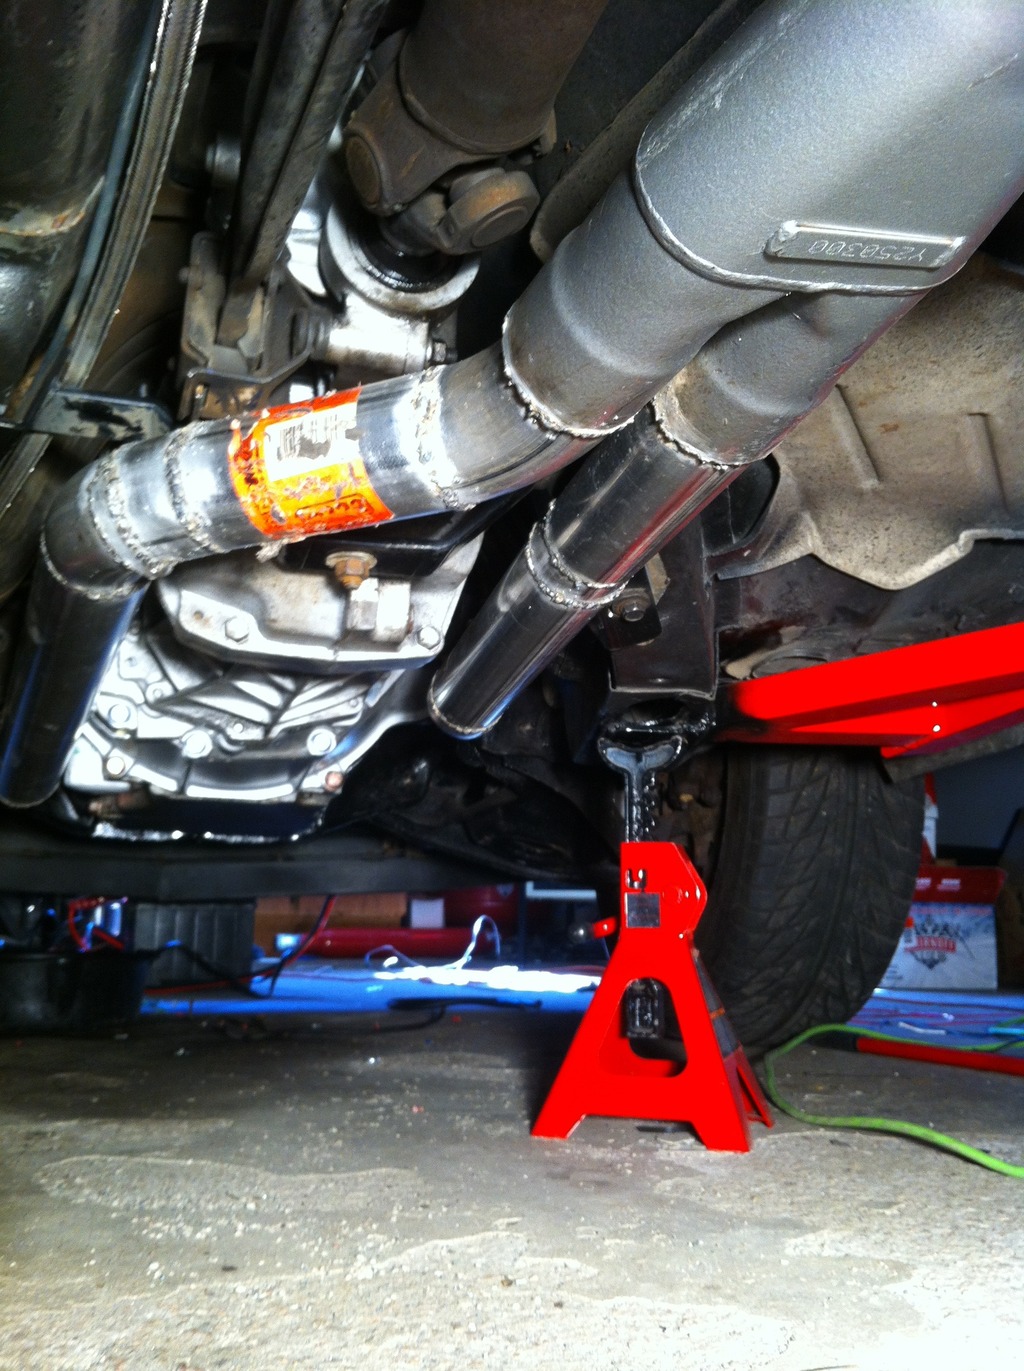
Ground clearance of my Y pipe and the dynomax cat back:
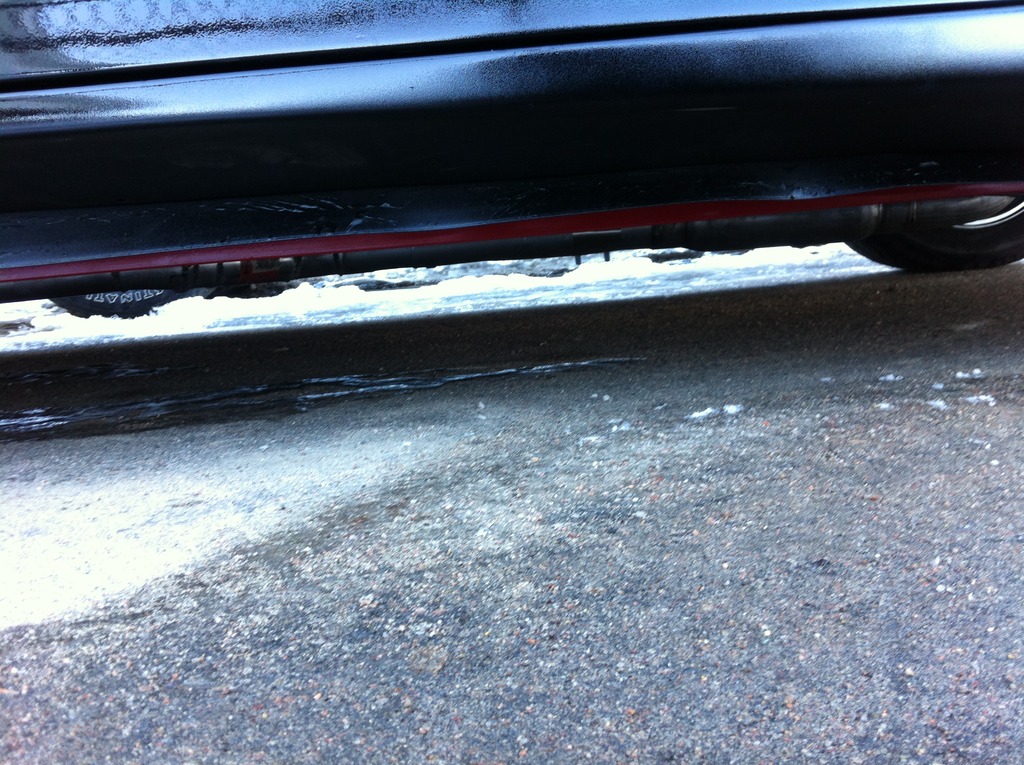
I took my time fitting this to get as much ground clearance as possible,
And the engine bay in it's "finished" state. Huge thanks to Pocket for my tiny fuse/relay block, it sits beside the battery on the front frame rail.
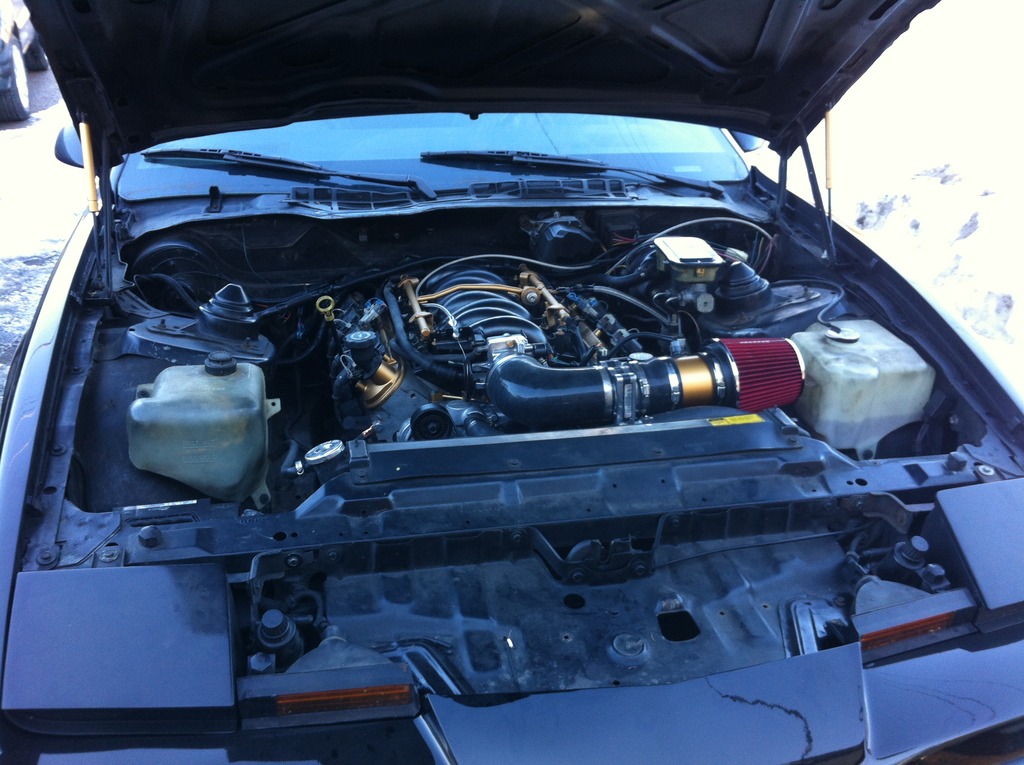
I think I'm going to find some new reservoir and washer bottles after this next paint job... Taking it to a shop this time, I discovered my dust in the paint problem is actually caused by cheap bulb filters I use at the gun, they are blowing their guts out.
So just waiting for the salt/dirt to get off the roads and for the pot holes to be filled in so I can drive this thing around! Trans still needs that rebuild but I'm considering doing that myself.
04-11-2015, 08:43 PM
#46
Junior Member

Join Date: Dec 2014
Location: Augusta, KS
Posts: 53
Likes: 0
Received 0 Likes
on
0 Posts
Car: 1987 camaro
Engine: 305
Transmission: 700R4 4 speed automatic
Re: My LS1/T56 swap thread
Well, managed to get some time this weekend to do some work on the motor. Here it is, all 140,000km and obviously a few winters on it:
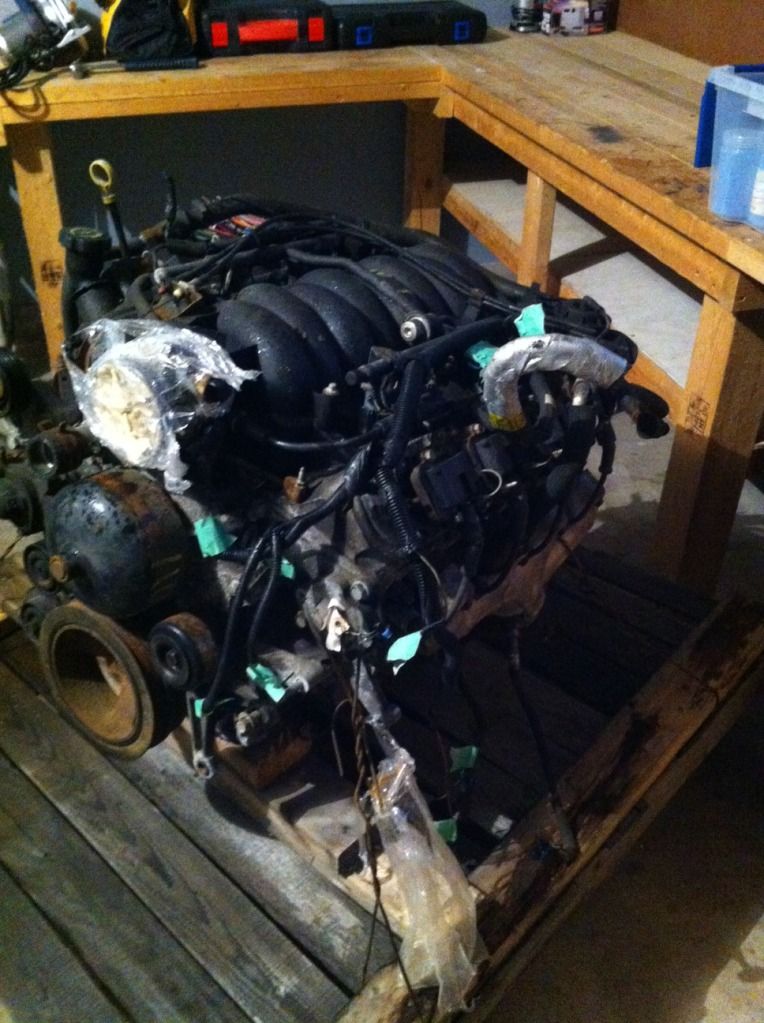
And here is how my harness and ECM were seperated:
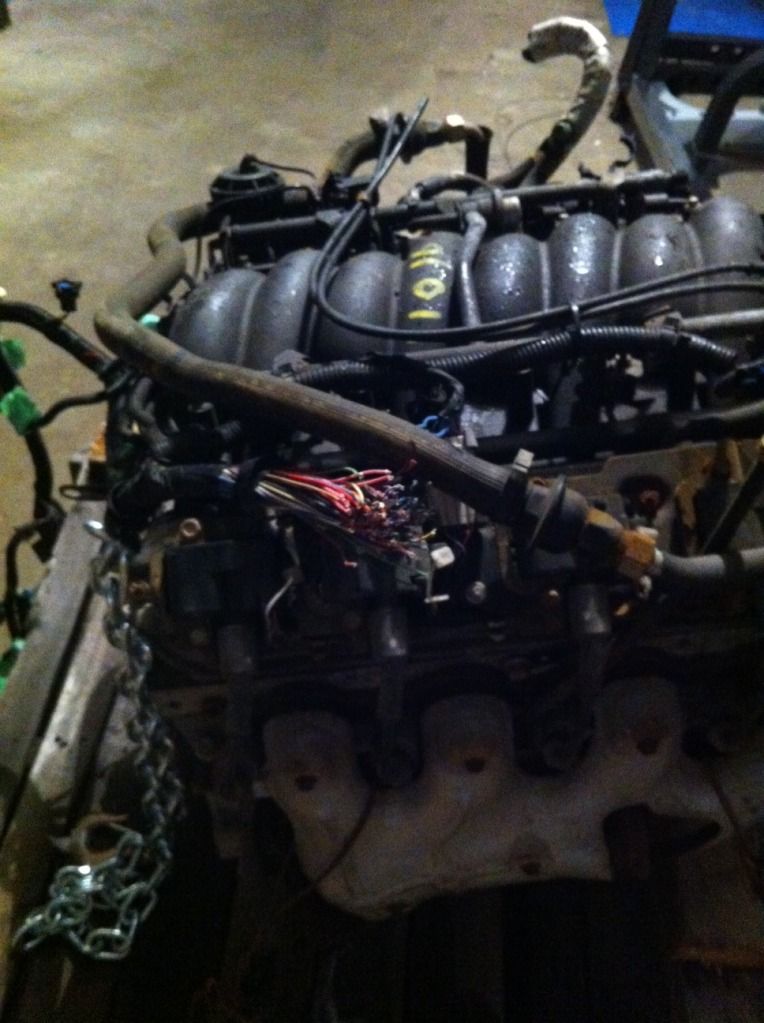
So, first order of business was to label all the connections first. Hint* Your injector connectors are already numbered so you don't have to label those.
And then remove the harness to get something like this:

Then, seperate your connectors off of the ECM, pull off the coloured and grey caps.

Then, get your pin-out sheets out, and start to pull pins. I marked it with a black sharpie for the pins I had removed as I went along and did it. Be methodical. I did this while having a phone conversation, since I had already marked down what to remove, what stays, and what gets added.
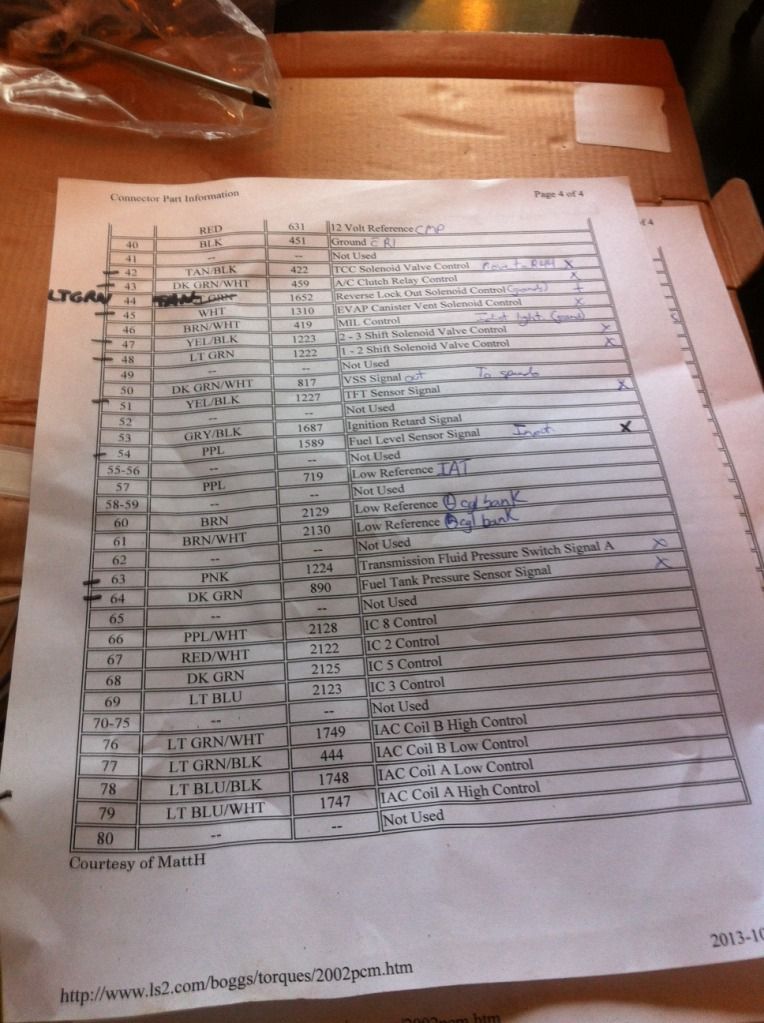
These are all the wires that I removed. Yours won't be as short as these ones, unless your ECM was hacked out like mine was.
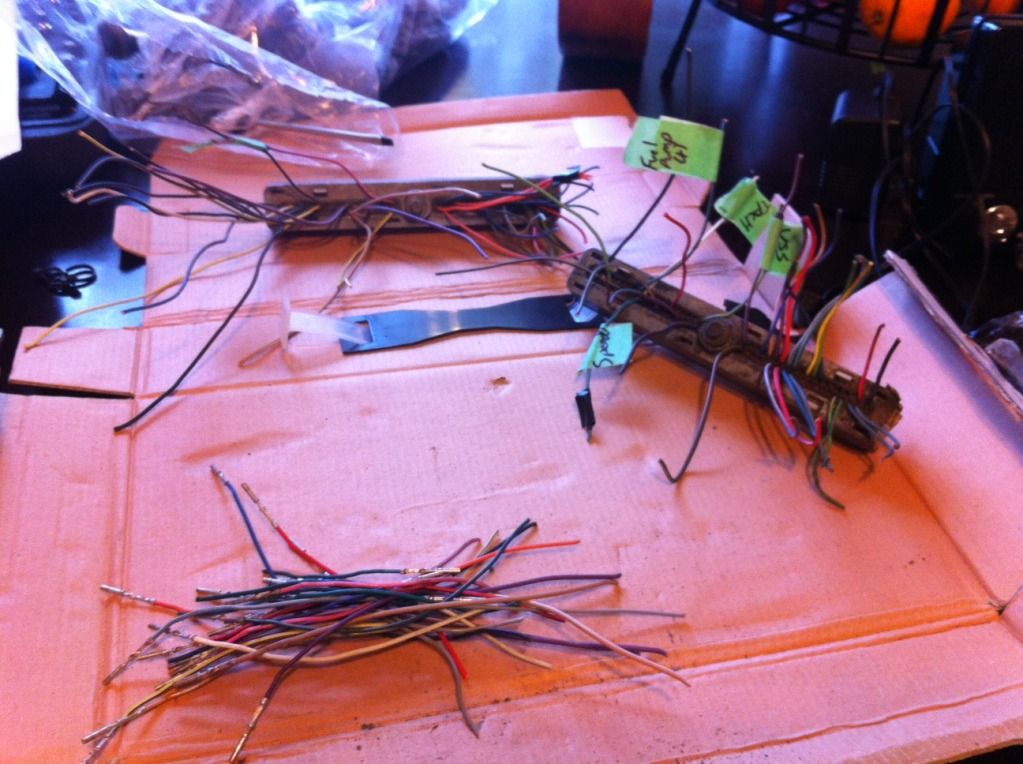
Now rip all the tape and loom off the harness:
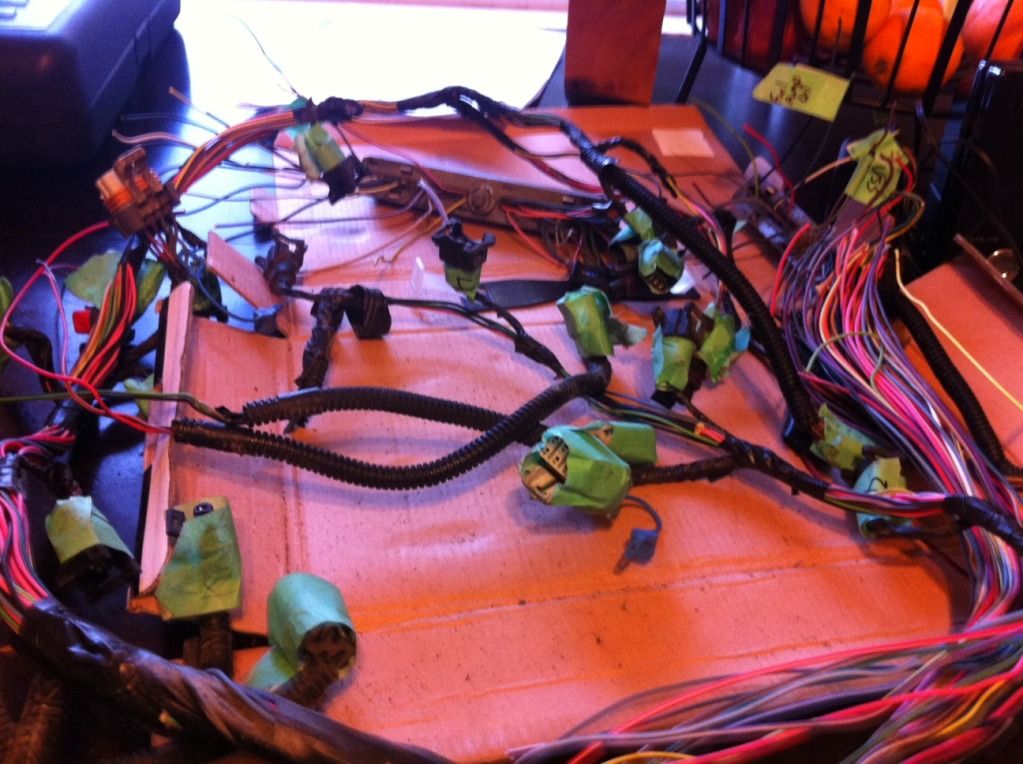
And, starting at the connectors on the R hand side of the harness (less complicated side) I began pulling wires out from the mess. I cut the commons (12V pinks and Black grounds) at the junctions. This is the pile of wiring that was removed, and two connectors that I won't be using (Air solenoid and the charcoal cannister).

Now, bundle up your connectors individually, tape them so they stay wound up and label the bundle:
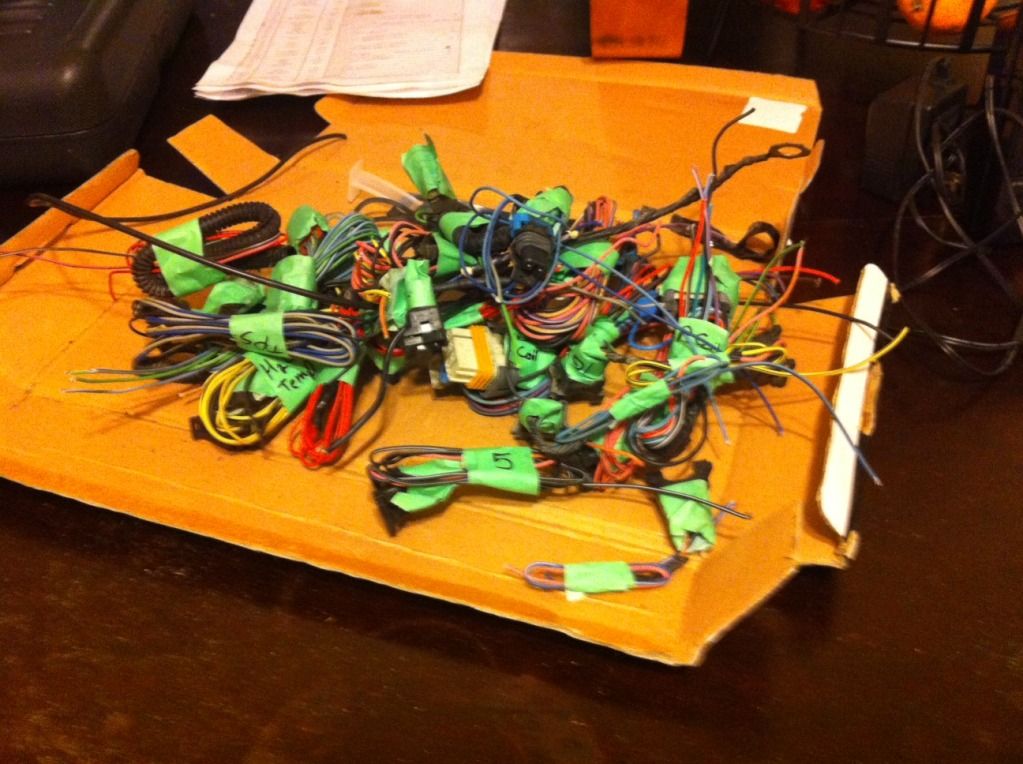
I then proceded to go through my pin out sheets, pin by pin to verify that I had all the right pins, had no extras and was missing none. I also checked that each pin matched up to the wire from the specific destination on each connector. Marked each with a piece of tape for easy tracking. This ensured me that I missed nothing, and that I know where everything is going.
I was left with (from memory here) 2 orange constant battery wires that get a fuse and go straight to battery. I will also solder the DLC battery wire to these.
I have a (green I think) DLC communication line that will run to the port.
4 Black ECM grounds, outputs for speedo, tach, the fuel pump (+) lead and the grounds for the Fans. Those are the only ones that so far don't have a "mate" in the harness.
I'm missing a crank position connector, my IAT sensor and need a bunch of wire to assemble the harness. My Bank 2 O2 sensor is missing as well. All of these I plan to get from a $50 all you can carry day at a local yard. Plan to source a starter and maybe some bucket seats to make sure I get my $50 worth.
I'm aiming for a later S-10 and a FWD GM car to get as much wiring as I can, as well as the O2 sensors and pigtails. (Thanks for the advice Pocket!)
IAT sensor is pretty generic, so I'll just grab one from the right era of GM vehicle.
RockAuto is a great website to use to show you what parts from different cars are the same part number.
I know this is fairly simply detailed, but I hope that this can some day be used as another guide.
And here is how my harness and ECM were seperated:
So, first order of business was to label all the connections first. Hint* Your injector connectors are already numbered so you don't have to label those.
And then remove the harness to get something like this:
Then, seperate your connectors off of the ECM, pull off the coloured and grey caps.
Then, get your pin-out sheets out, and start to pull pins. I marked it with a black sharpie for the pins I had removed as I went along and did it. Be methodical. I did this while having a phone conversation, since I had already marked down what to remove, what stays, and what gets added.
These are all the wires that I removed. Yours won't be as short as these ones, unless your ECM was hacked out like mine was.
Now rip all the tape and loom off the harness:
And, starting at the connectors on the R hand side of the harness (less complicated side) I began pulling wires out from the mess. I cut the commons (12V pinks and Black grounds) at the junctions. This is the pile of wiring that was removed, and two connectors that I won't be using (Air solenoid and the charcoal cannister).
Now, bundle up your connectors individually, tape them so they stay wound up and label the bundle:
I then proceded to go through my pin out sheets, pin by pin to verify that I had all the right pins, had no extras and was missing none. I also checked that each pin matched up to the wire from the specific destination on each connector. Marked each with a piece of tape for easy tracking. This ensured me that I missed nothing, and that I know where everything is going.
I was left with (from memory here) 2 orange constant battery wires that get a fuse and go straight to battery. I will also solder the DLC battery wire to these.
I have a (green I think) DLC communication line that will run to the port.
4 Black ECM grounds, outputs for speedo, tach, the fuel pump (+) lead and the grounds for the Fans. Those are the only ones that so far don't have a "mate" in the harness.
I'm missing a crank position connector, my IAT sensor and need a bunch of wire to assemble the harness. My Bank 2 O2 sensor is missing as well. All of these I plan to get from a $50 all you can carry day at a local yard. Plan to source a starter and maybe some bucket seats to make sure I get my $50 worth.
I'm aiming for a later S-10 and a FWD GM car to get as much wiring as I can, as well as the O2 sensors and pigtails. (Thanks for the advice Pocket!)
IAT sensor is pretty generic, so I'll just grab one from the right era of GM vehicle.
RockAuto is a great website to use to show you what parts from different cars are the same part number.
I know this is fairly simply detailed, but I hope that this can some day be used as another guide.
04-11-2015, 08:57 PM
#47
Senior Member
Thread Starter
Re: My LS1/T56 swap thread
It's not that bad honestly... It took me longer than I wanted because the harness was cut and I had to solder every single wire and I didn't have a great soldering set up.
With a nice soldering gun, flux and solder, soldering is fairly fast... I used a cheapo and I'm upgrading.
I rebuilt it a second time to use a fuse/relay box from Pocket and it didn't take that long. The harness actually makes sense, and you'll be more able to trouble shoot if things go wrong down the road.
04-11-2015, 10:37 PM
#48
Senior Member
iTrader: (3)
Join Date: Jan 2012
Location: Clark NJ
Posts: 877
Likes: 0
Received 2 Likes
on
2 Posts
Car: 1988 Pontiac Transam GTA Notchback
Engine: 2003 Chevy 5.3 Vortec (325 cu)
Transmission: 4L60E
Axle/Gears: 3.27
Re: My LS1/T56 swap thread
Long past the solution for that one, with where I mounted it I can fairly easily change it out if I ever need to. Is there enough room to unscrew and remove the sensor with the hole cut down? (just for the next guy that has this issue).
We had 4 days above freezing last week, on Thursday I measured out the 4km I need to calibrate the speedhut speedo and figured I would do it Friday... Came outside to 6" of snow when I went to work so it's still sitting in the garage... I move next week so it will be a few weeks before it sees the road yet.
We had 4 days above freezing last week, on Thursday I measured out the 4km I need to calibrate the speedhut speedo and figured I would do it Friday... Came outside to 6" of snow when I went to work so it's still sitting in the garage... I move next week so it will be a few weeks before it sees the road yet.
simple answer is no, - I mean it works in a pinch, which is where I was, but If I could do it again, the piece that I cut off, I should have welded to the pipe a little further down and just plugged the hole in the manifold.
04-16-2015, 02:16 PM
#49
Junior Member

Join Date: Nov 2009
Location: Northern Wyoming
Posts: 27
Received 0 Likes
on
0 Posts
Car: 1987 Camaro
Engine: 383
Transmission: T-56
Axle/Gears: Working on that
Re: My LS1/T56 swap thread
What brand gauges are those? I like them and my try and find something similar for my Camaro project.
04-16-2015, 04:38 PM
#50
Senior Member
Thread Starter
Re: My LS1/T56 swap thread
I used speed hut gauges. Awesome company, a pleasure to deal with, great products! They build to order which is awesome. They care about the product.