My DIY paint project write up.
 01-02-2011, 10:44 AM
#1
Supreme Member

Thread Starter
iTrader: (3)

Join Date: Sep 2005
Location: MD
Posts: 1,685
Likes: 0
Received 3 Likes
on
3 Posts
Car: '88 IROC-Z medium orange metallic
Engine: L98
Transmission: 700R4
Axle/Gears: 3.27
My DIY paint project write up.
I just got finished painting my TA and wanted to post the process and pics for anyone that searches in the future. I searched a bunch before I started the project and couldn't find anything in one thread so I will compile the info that I gathered here. There are thousands of different ways to do these things and I'm sure a pro would pick my procedures apart, but it came out pretty well for me.
First, I'm not a body guy. I'm a machinist/engine builder by trade. I just happen to have a nice garage and can't stand paying someone to do work that I feel I can do myself. So I decided to tackle my own body work. This car was my first project car when I was 19 and I did a LOT of learning on it over the past 8 years so you can imagine how bad the body was.
The first step is to make a relationship with your local body supply shop. They will prove to be an invaluable resource during your project. Some things may cost more than if you were to buy online, but their advice will be worth it.
DISASSEMBLY and STRIPPING:
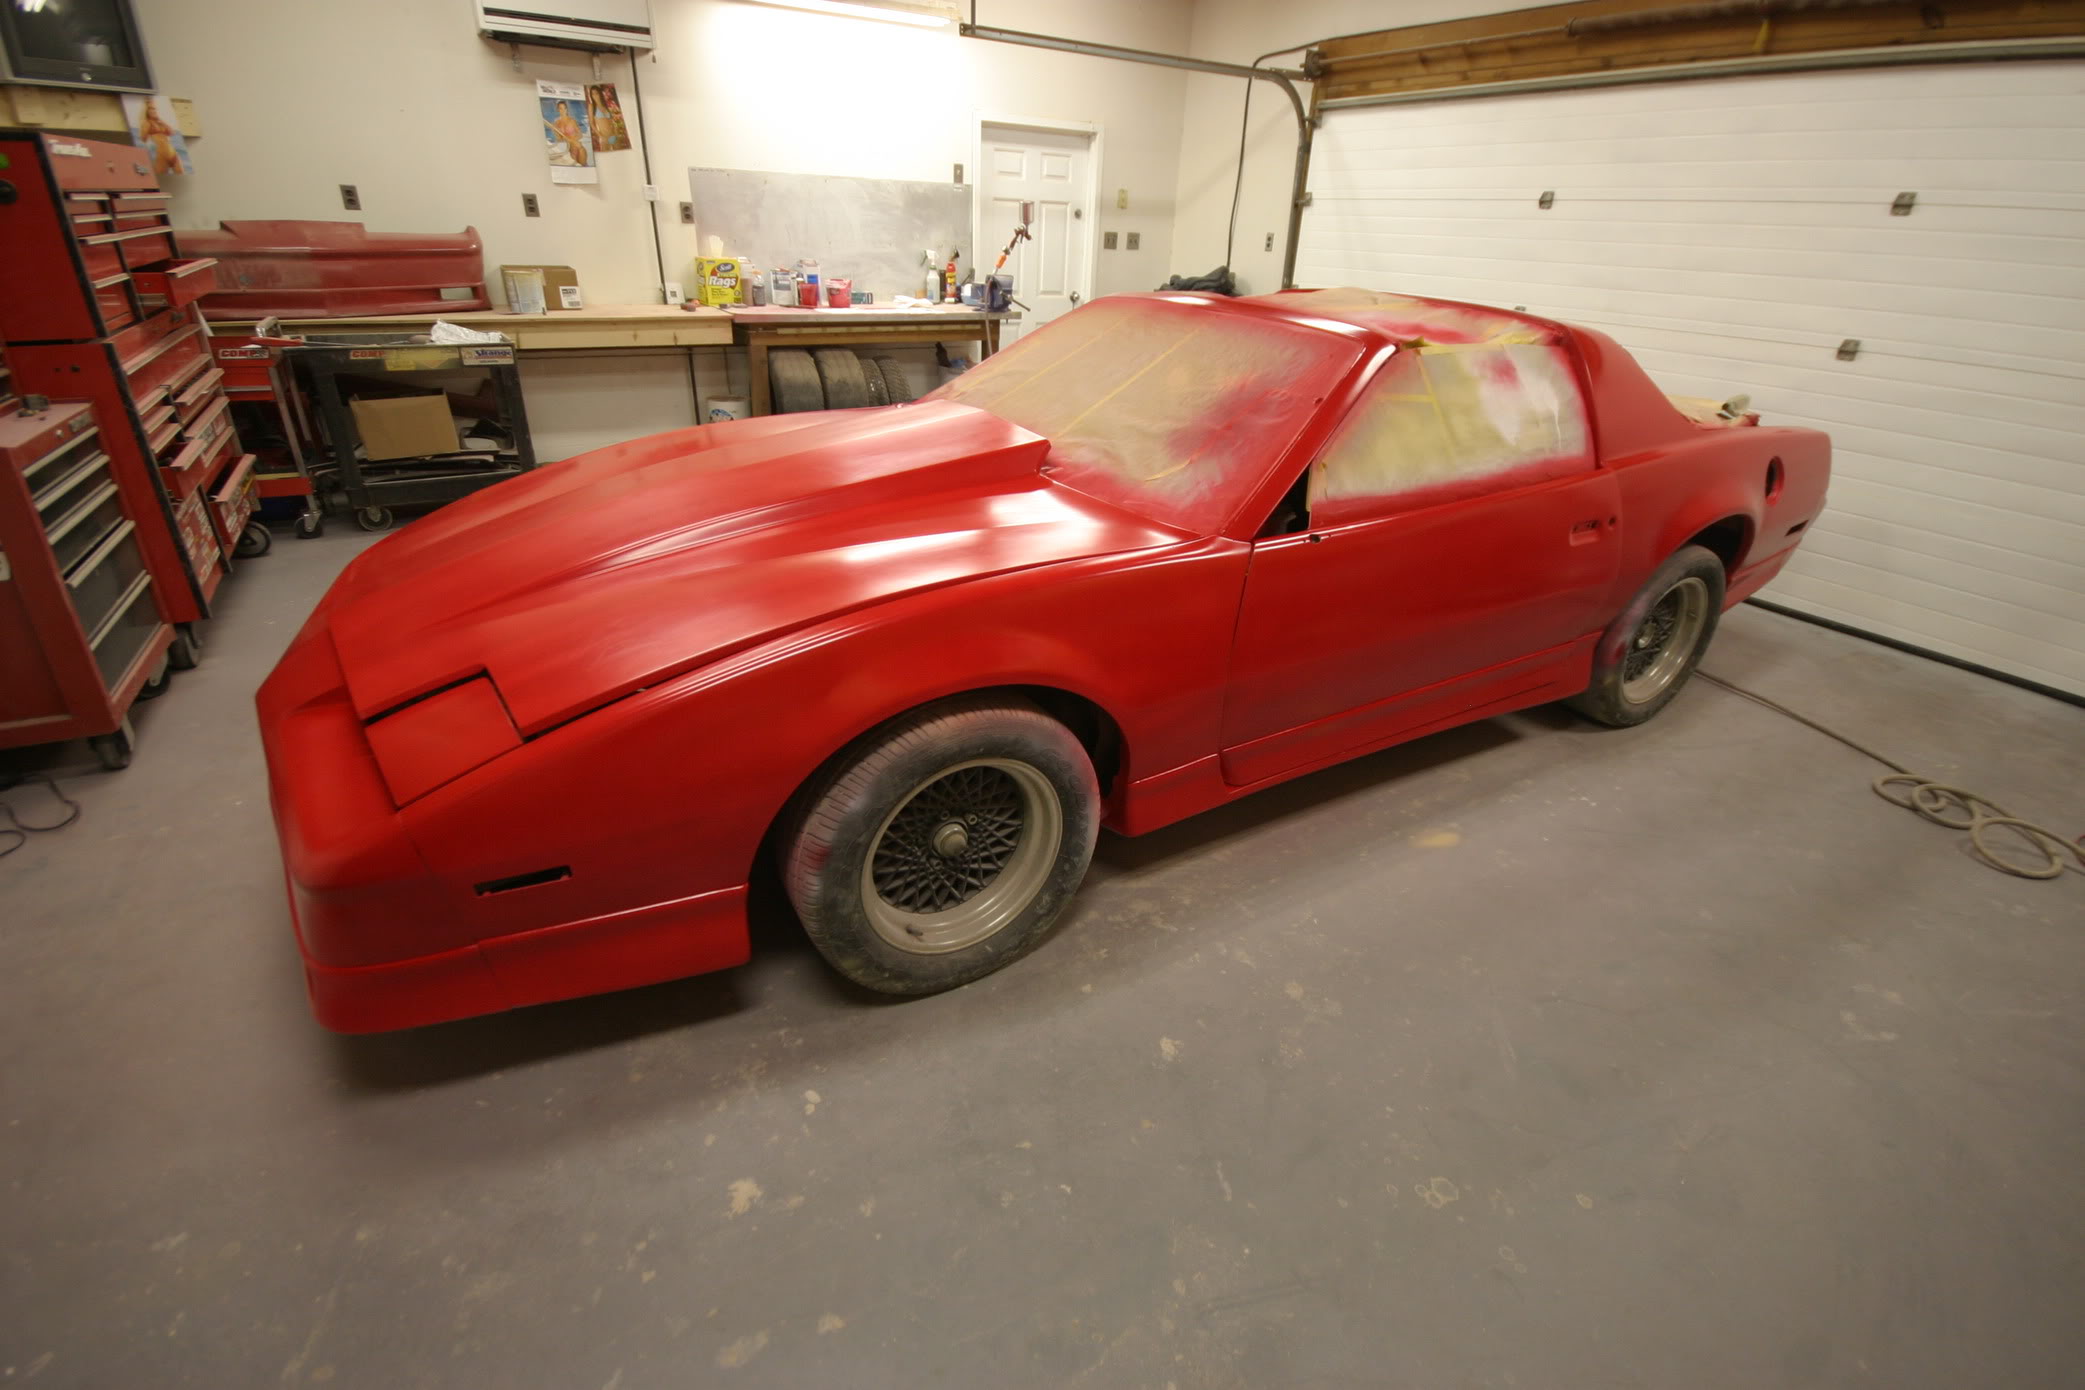
There was not rust, but there were plenty of misaligned panels and improperly installed ground effects. Years ago, I sanded and primed this thing and took it to Maaco for paint. So we've got a few layers of junk over top of the original paint and I decided that the best plan was to take it all down to bare metal. The hood is new fiberglass and the fenders were replaced with a pair that had good factory paint so I did not strip them. I removed the door handles, locks, bumper covers, ground effects, weather stripping, hatch and side trim. Most of these can be left on but it's up to you. I wanted to be sure that there was no rust hiding behind the GFX. The hatch and weather stripping came off so I could paint the jambs.
I used Tal Strip which is a chemical stripper to get the paint off. Be careful not to get this on plastic parts or body seams! Whatever this stuff touches MUST come off. If it gets applied to any body filler, it must be ground out otherwise it will seep out later and destroy your fresh paint. I used a stripper on the plastic parts that is made for use on flexible pieces. I then went over all the steel with 80 grit on a DA for the steel parts and 120g on the DA on the plastic parts.
Here is a pic before some disassembly and DA sanding;

And a photo of some filler I found in the quarter;
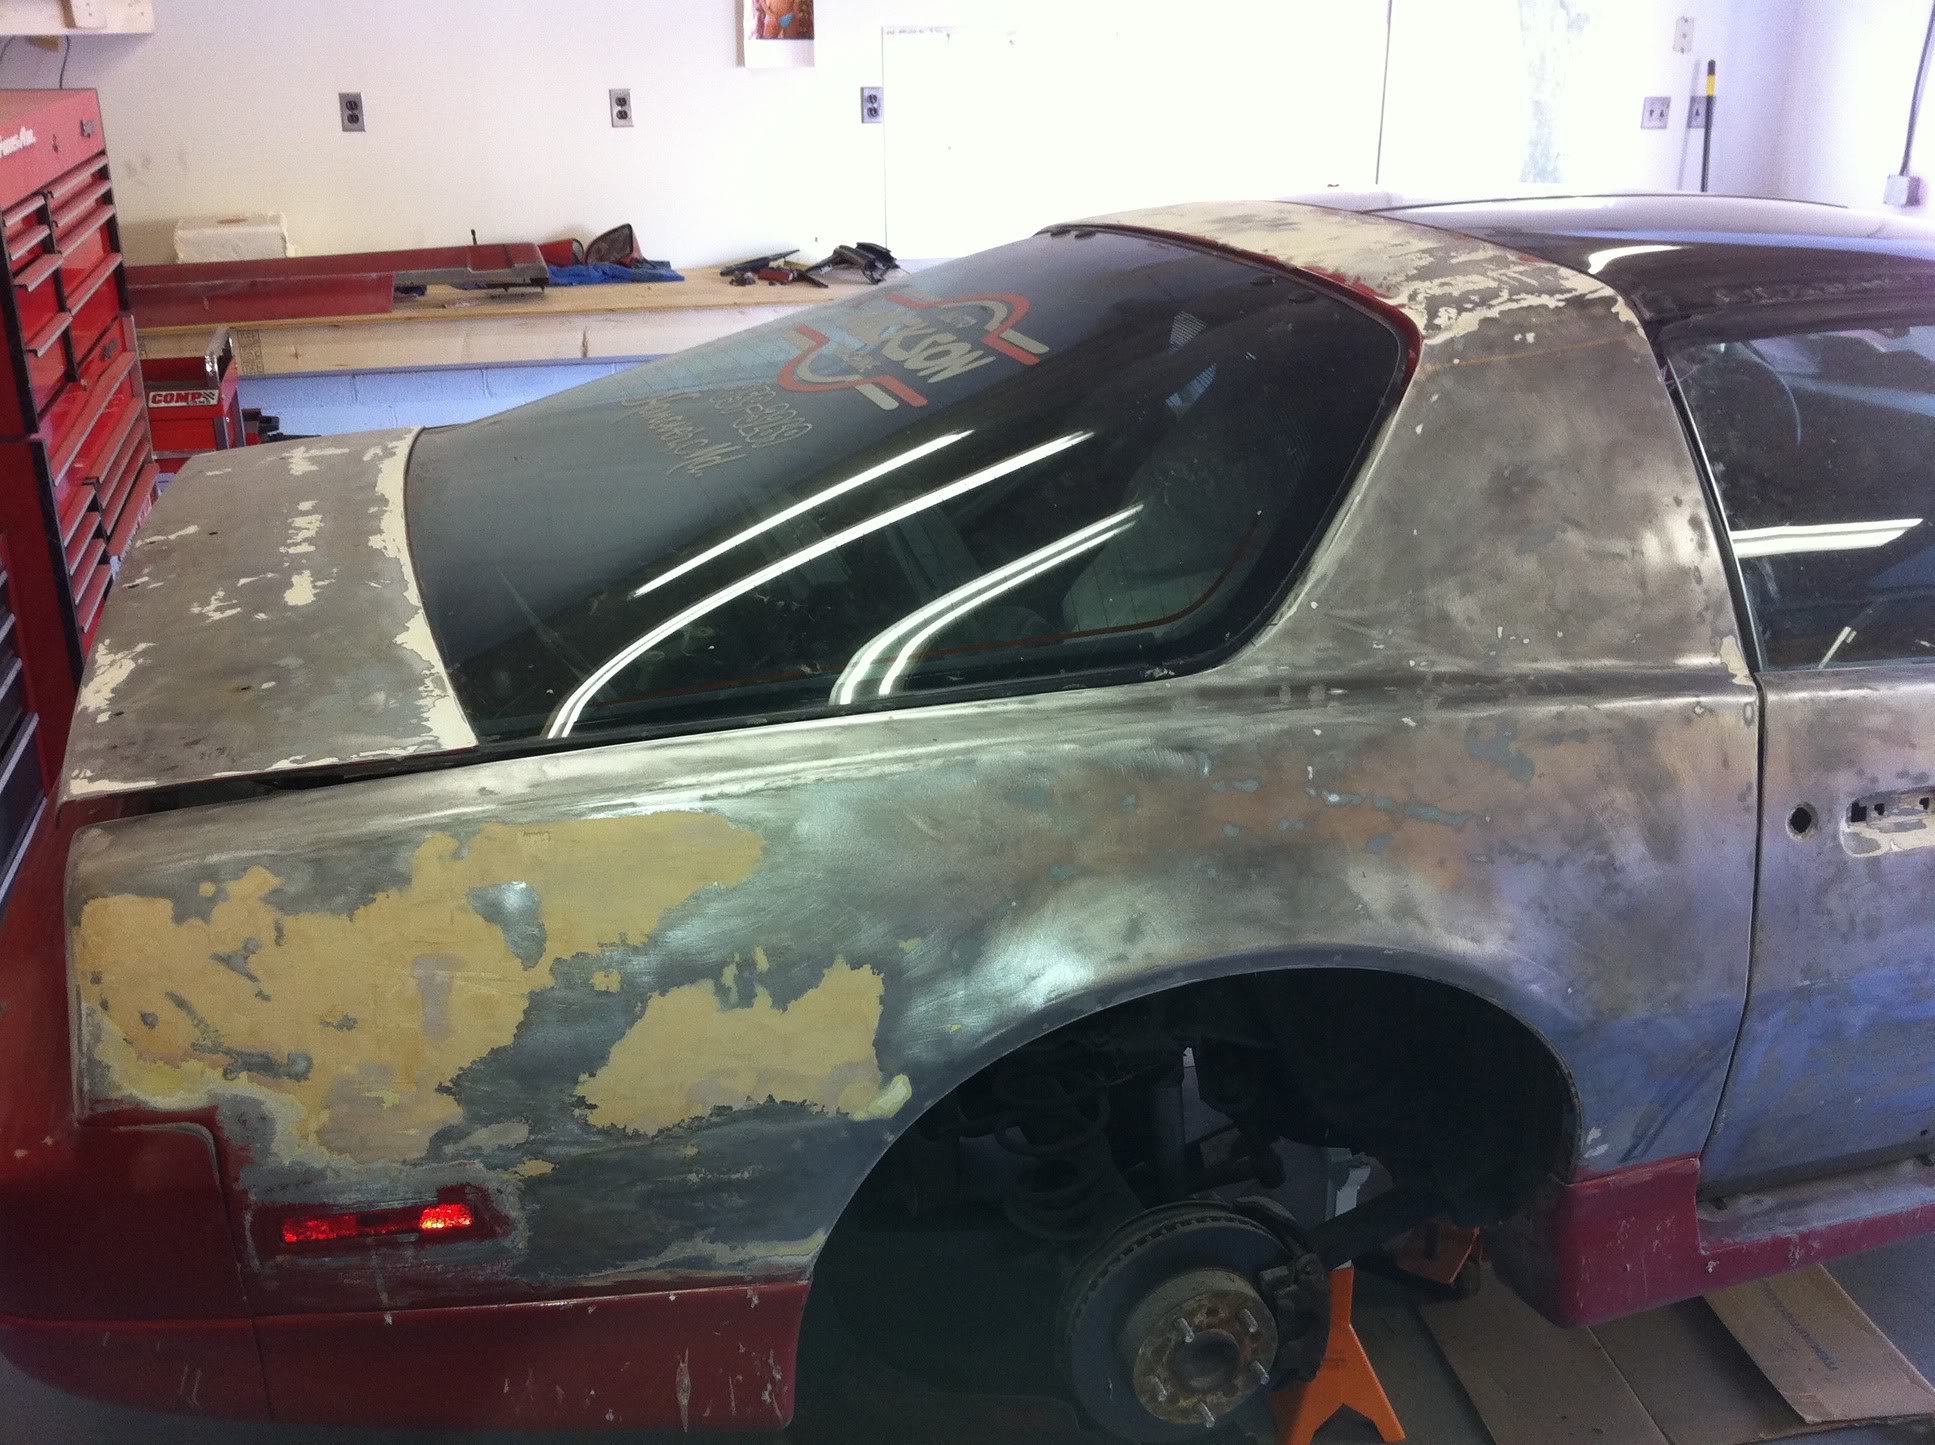
And here it is all stripped;

BODY WORK;
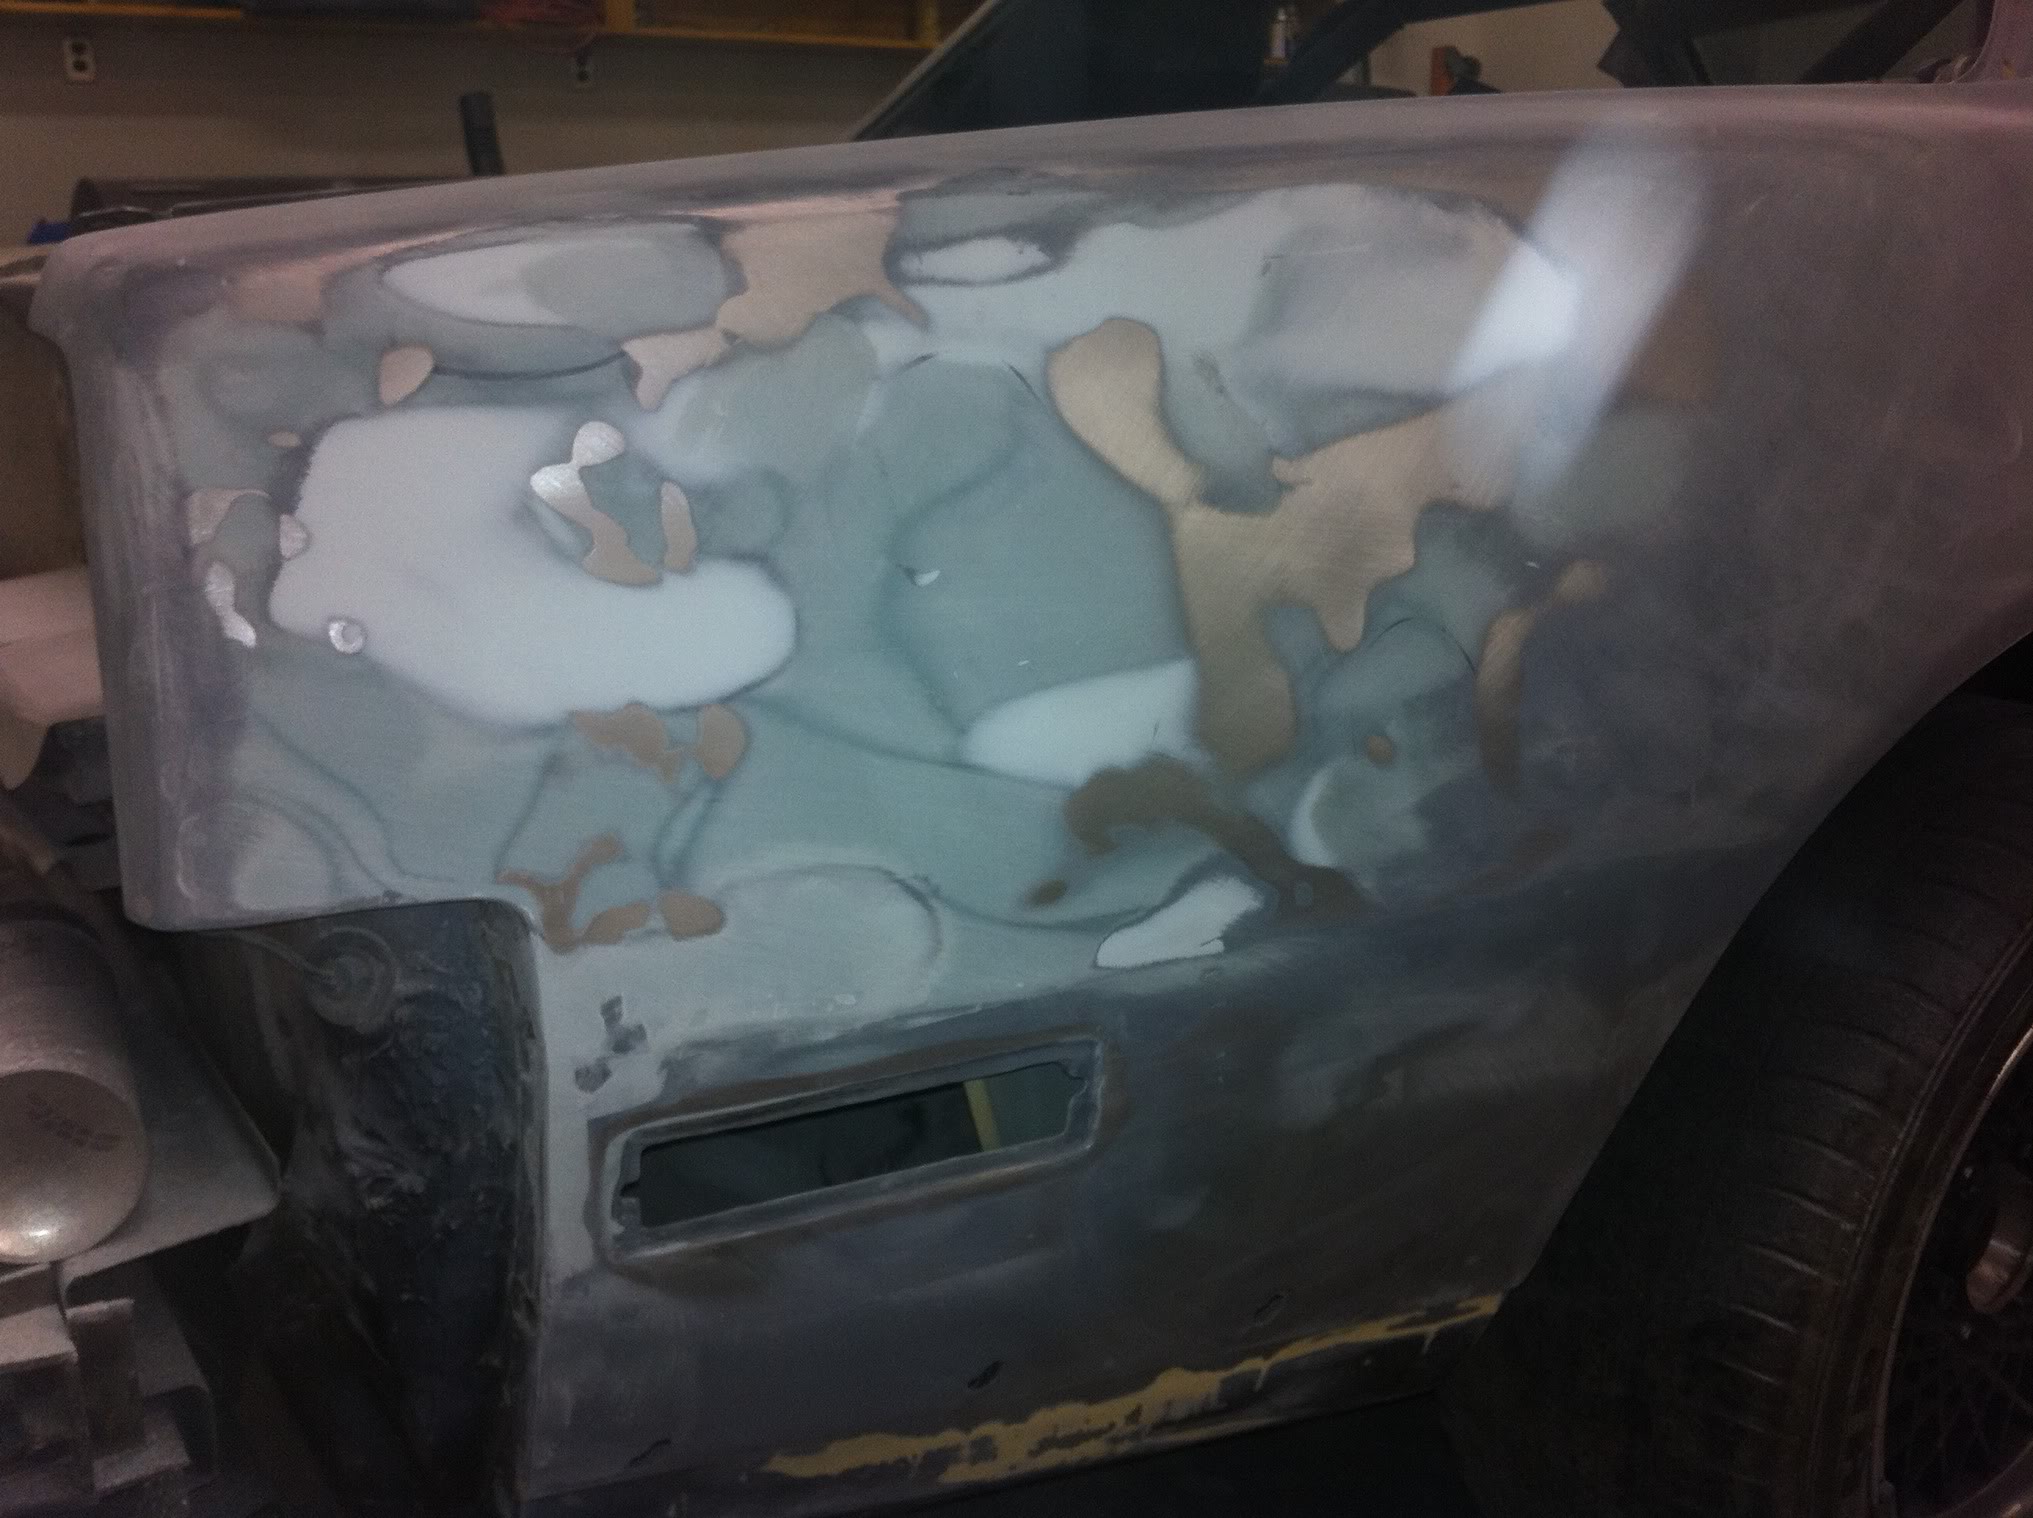
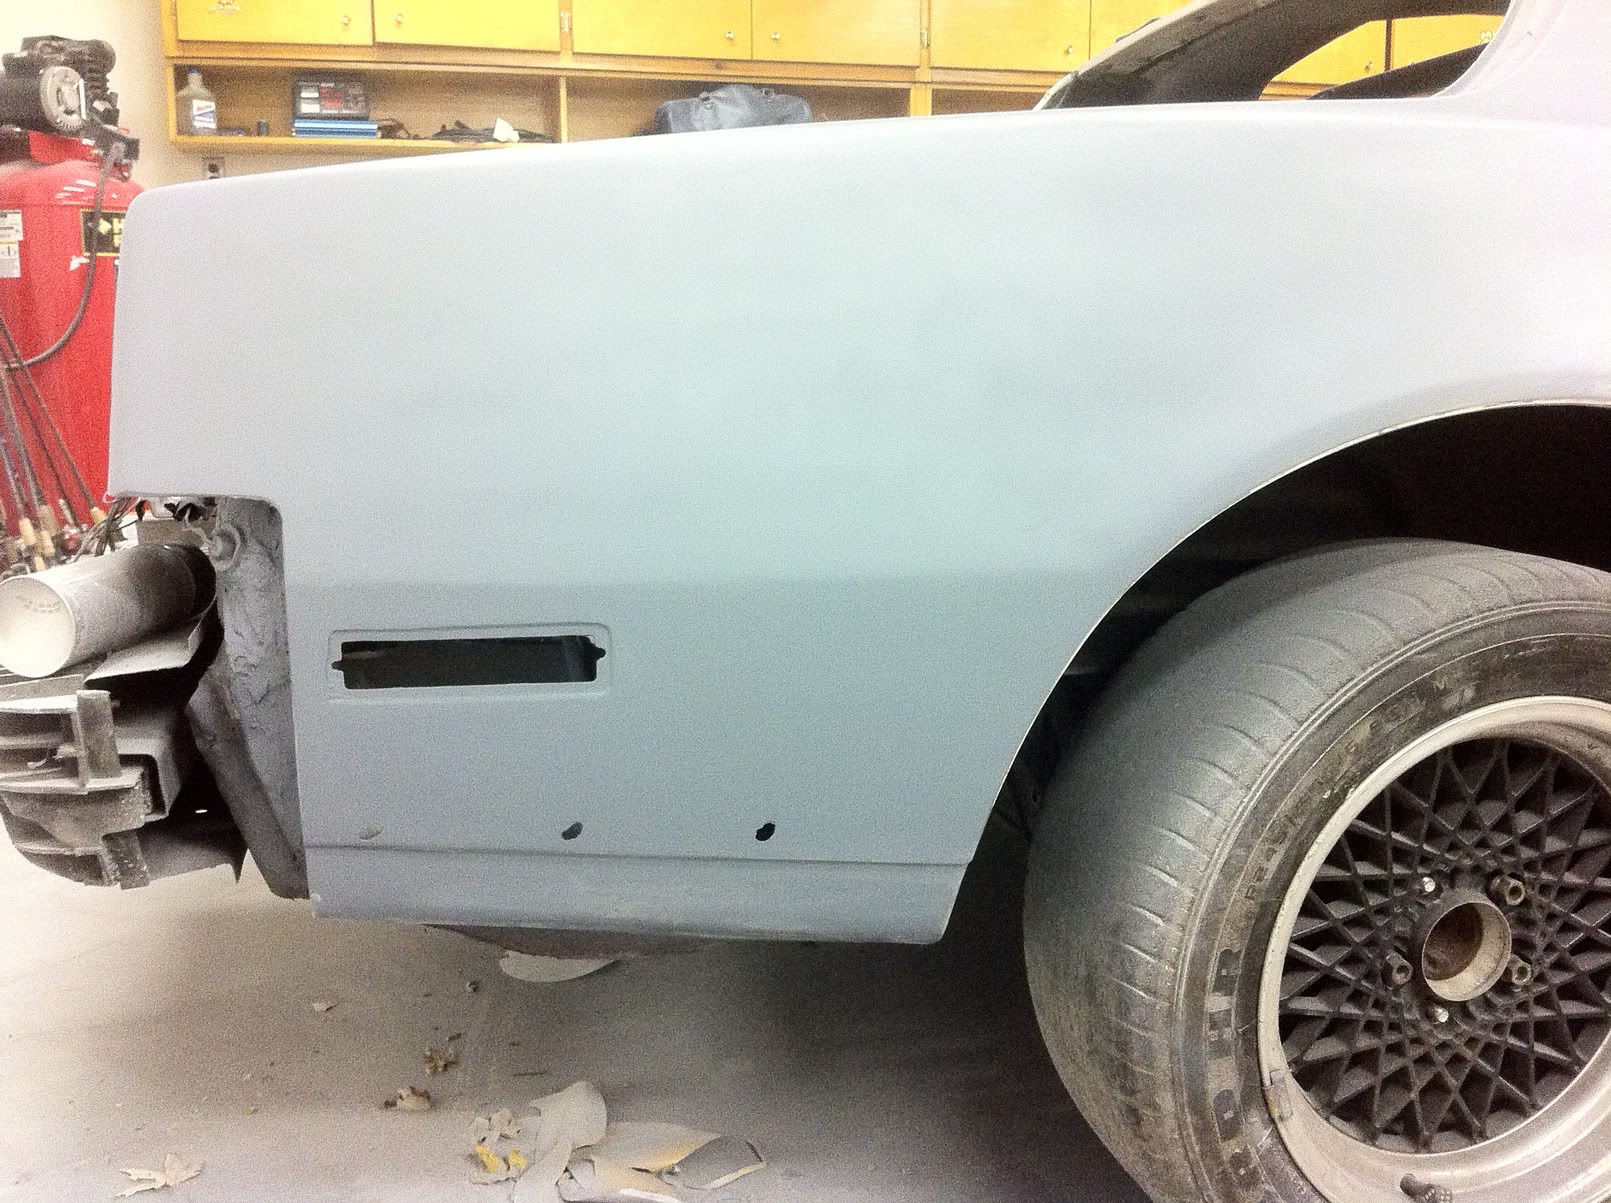
The car wasn't in bad shape overall but I did have to replace all of the filler that I took out. There were a few spots in the doors and that big area of the rear 1/4. I got a gallon of filler from my local auto body shop. Similar to Bondo, just a different brand. Mix it up and apply it to a cleaned surface. I like to apply it to bare metal so if you've got any primer on the panel it's a good idea to knock it off before you add the filler. Let it set for 15-20 minutes. Then, starting with 80g on a DA or a block, knock it down to get it close. I used 100g to do the final shaping and finished it off with 180.
I forgot to take progress pics, but here is a photo of the finished 1/4 and some filler in the doors. Note that the door damage is right on the body line. You must be very careful here to get the shape perfect or else it will look wavy when you paint.
First, I'm not a body guy. I'm a machinist/engine builder by trade. I just happen to have a nice garage and can't stand paying someone to do work that I feel I can do myself. So I decided to tackle my own body work. This car was my first project car when I was 19 and I did a LOT of learning on it over the past 8 years so you can imagine how bad the body was.
The first step is to make a relationship with your local body supply shop. They will prove to be an invaluable resource during your project. Some things may cost more than if you were to buy online, but their advice will be worth it.
DISASSEMBLY and STRIPPING:
There was not rust, but there were plenty of misaligned panels and improperly installed ground effects. Years ago, I sanded and primed this thing and took it to Maaco for paint. So we've got a few layers of junk over top of the original paint and I decided that the best plan was to take it all down to bare metal. The hood is new fiberglass and the fenders were replaced with a pair that had good factory paint so I did not strip them. I removed the door handles, locks, bumper covers, ground effects, weather stripping, hatch and side trim. Most of these can be left on but it's up to you. I wanted to be sure that there was no rust hiding behind the GFX. The hatch and weather stripping came off so I could paint the jambs.
I used Tal Strip which is a chemical stripper to get the paint off. Be careful not to get this on plastic parts or body seams! Whatever this stuff touches MUST come off. If it gets applied to any body filler, it must be ground out otherwise it will seep out later and destroy your fresh paint. I used a stripper on the plastic parts that is made for use on flexible pieces. I then went over all the steel with 80 grit on a DA for the steel parts and 120g on the DA on the plastic parts.
Here is a pic before some disassembly and DA sanding;
And a photo of some filler I found in the quarter;
And here it is all stripped;
BODY WORK;
The car wasn't in bad shape overall but I did have to replace all of the filler that I took out. There were a few spots in the doors and that big area of the rear 1/4. I got a gallon of filler from my local auto body shop. Similar to Bondo, just a different brand. Mix it up and apply it to a cleaned surface. I like to apply it to bare metal so if you've got any primer on the panel it's a good idea to knock it off before you add the filler. Let it set for 15-20 minutes. Then, starting with 80g on a DA or a block, knock it down to get it close. I used 100g to do the final shaping and finished it off with 180.
I forgot to take progress pics, but here is a photo of the finished 1/4 and some filler in the doors. Note that the door damage is right on the body line. You must be very careful here to get the shape perfect or else it will look wavy when you paint.
 01-02-2011, 10:44 AM
#2
Supreme Member
Thread Starter
iTrader: (3)
Join Date: Sep 2005
Location: MD
Posts: 1,685
Likes: 0
Received 3 Likes
on
3 Posts
Car: '88 IROC-Z medium orange metallic
Engine: L98
Transmission: 700R4
Axle/Gears: 3.27
Re: My DIY paint project write up.
ETCHING PRIMER;
Any bare metal needs to be sprayed with an etching primer to promote proper adhesion. Once again, I got a product from my local body supply shop. Since I was working only working on one panel at a time, I used an aerosol product to avoid the hassle of mixing up catalyzed primers and having to set up and clean my spray equipment. This isn't meant to be sanded so you're just looking for even coverage here. Be sure to spray all bare metal spots.
DEALING WITH RUST;
Thankfully I didn't have much in the way of rust. I did have a few spots around the T-Tops where there was a bit of rust. All of my spots would be concealed by the weather stripping so I just prepped the area and applied some POR-15. If you've got more severe damage, you will need to grind it all out and repair the area or replace the panel.
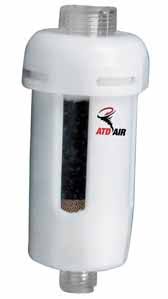
SPRAY EQUIPMENT;
You're going to need a decent compressor, a couple spray guns, water seperator, and I like to use a second regulator and air dryer right at the gun. I use a 3.5 HP 60g compressor from Home Depot. I use a cheap-o gun from Harbor Freight for primer and a nicer on from Mac which is made by Sata for base and clear. For the base and clear, buy the best gun you can afford. You can do a nice job with a cheap gun but nicer ones are much easier to dial in, use and maintain.


Any bare metal needs to be sprayed with an etching primer to promote proper adhesion. Once again, I got a product from my local body supply shop. Since I was working only working on one panel at a time, I used an aerosol product to avoid the hassle of mixing up catalyzed primers and having to set up and clean my spray equipment. This isn't meant to be sanded so you're just looking for even coverage here. Be sure to spray all bare metal spots.
DEALING WITH RUST;
Thankfully I didn't have much in the way of rust. I did have a few spots around the T-Tops where there was a bit of rust. All of my spots would be concealed by the weather stripping so I just prepped the area and applied some POR-15. If you've got more severe damage, you will need to grind it all out and repair the area or replace the panel.
SPRAY EQUIPMENT;
You're going to need a decent compressor, a couple spray guns, water seperator, and I like to use a second regulator and air dryer right at the gun. I use a 3.5 HP 60g compressor from Home Depot. I use a cheap-o gun from Harbor Freight for primer and a nicer on from Mac which is made by Sata for base and clear. For the base and clear, buy the best gun you can afford. You can do a nice job with a cheap gun but nicer ones are much easier to dial in, use and maintain.
01-02-2011, 10:45 AM
#3
Supreme Member
Thread Starter
iTrader: (3)
Join Date: Sep 2005
Location: MD
Posts: 1,685
Likes: 0
Received 3 Likes
on
3 Posts
Car: '88 IROC-Z medium orange metallic
Engine: L98
Transmission: 700R4
Axle/Gears: 3.27
Re: My DIY paint project write up.
MASKING;
Be sure to mask off any places that you don't want to paint. I like to use masking paper instead of newspaper. It's got a wax coating on one side so nothing seeps through and also it wont blow out like newspaper will. I bought a 500' roll for $9 from my auto body supply shop. Also use a high quality tape. Cheap tapes will not adhere, will bleed and many leave a residue behind.
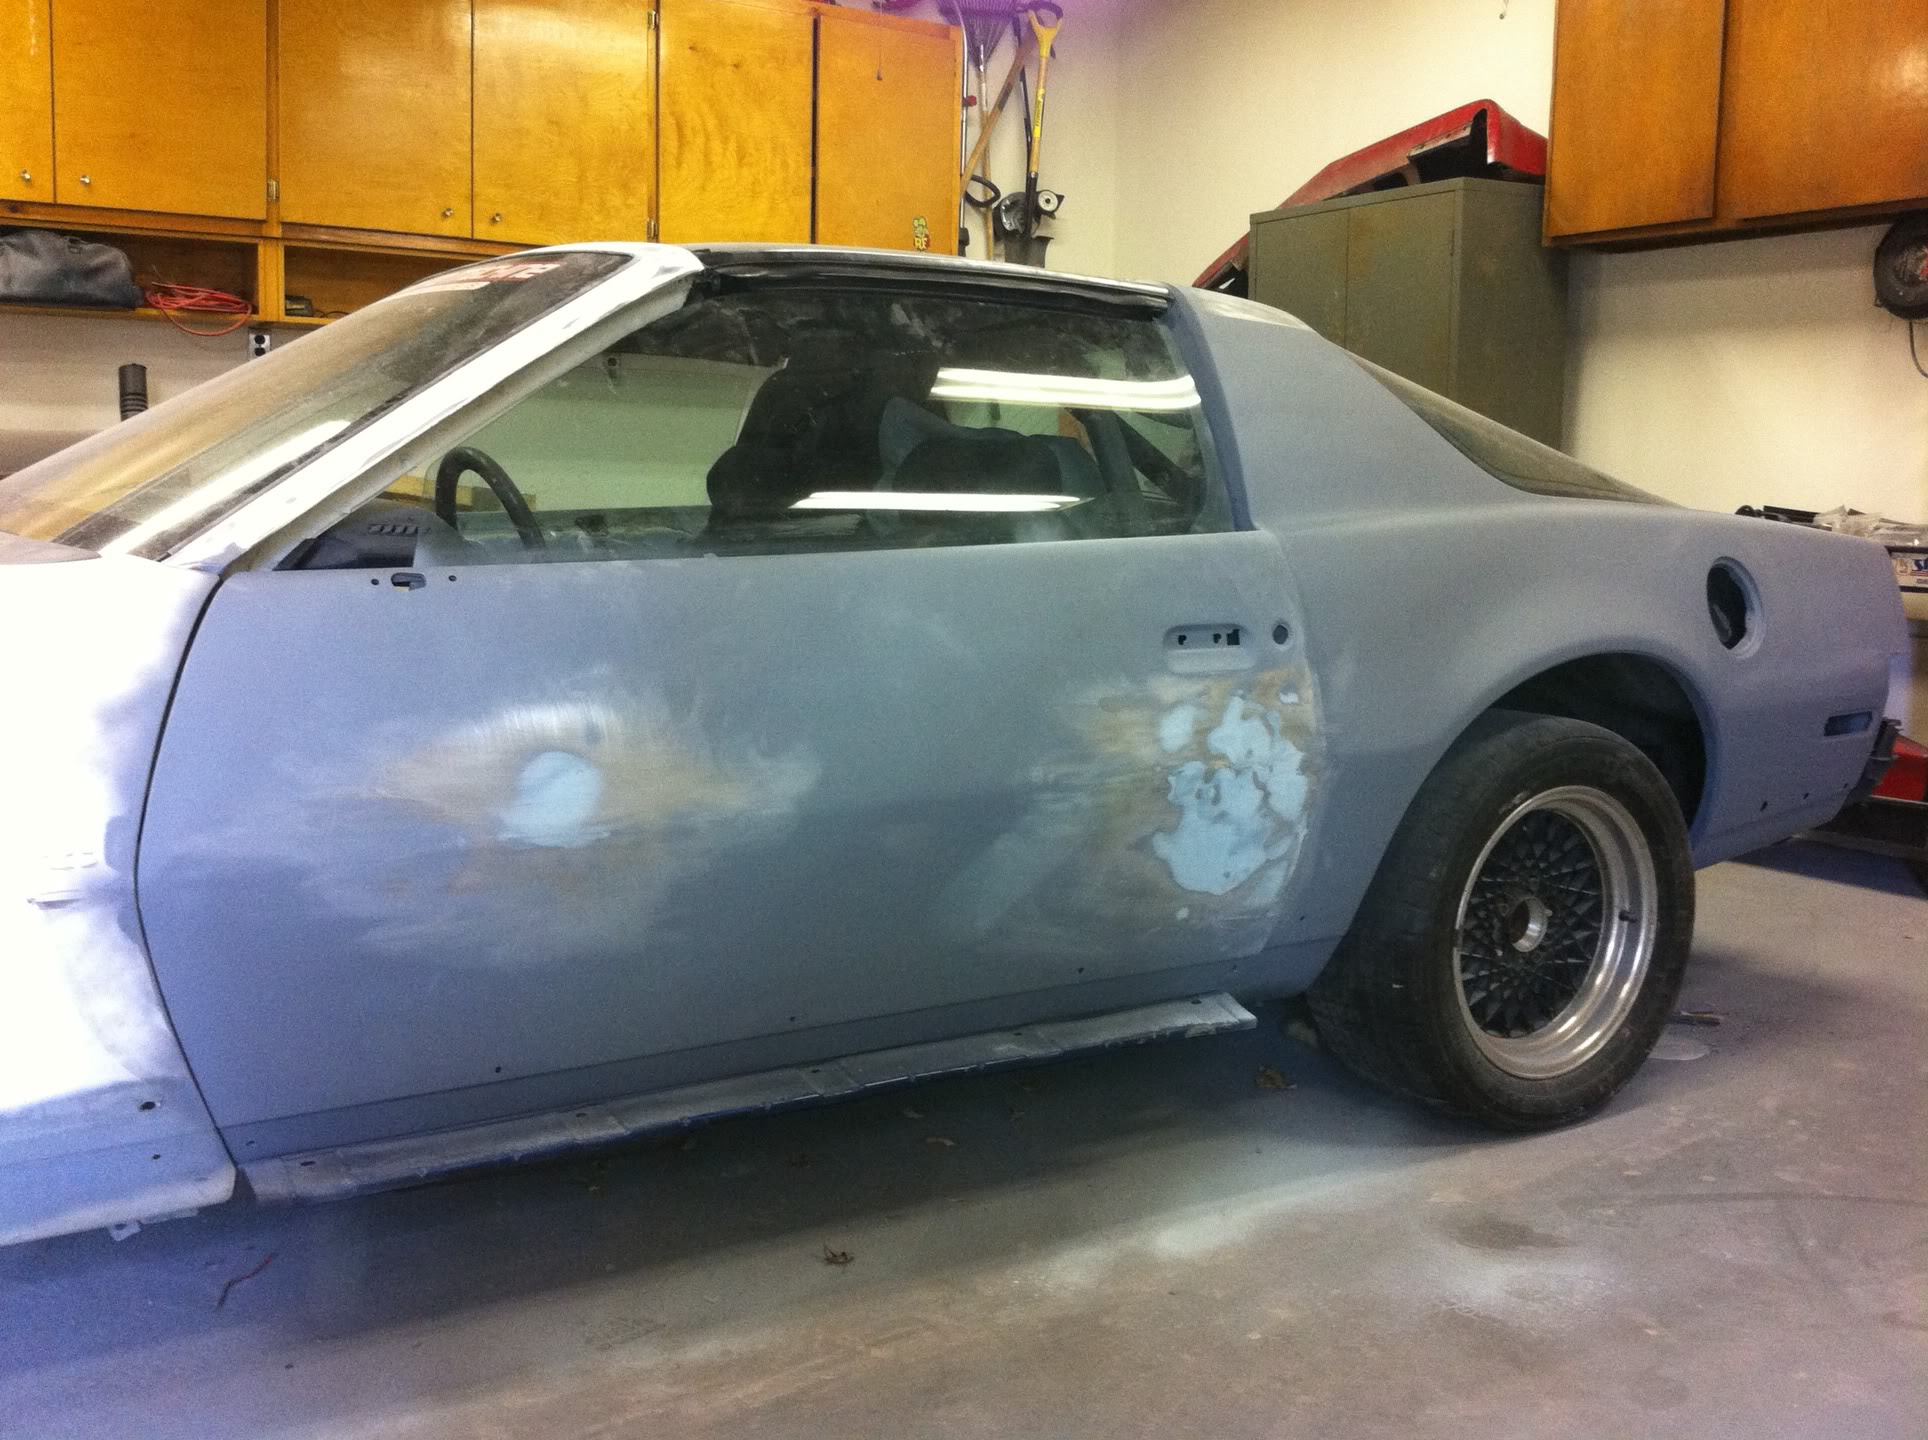
PRIMING;
Once all of your body work is done and your panels are aligned, it's time to spray a couple coats of a high build primer. Before you spray ANYTHING on the body you will want to use a wax and grease remover to get rid of oils, fingerprints and contaminants that will cause adhesion problems. Don't use mineral spirits, laquer thinner or alcohol, etc. Wax and grease remover is made specifically for this. OTher solvents will evaporate too quickly before they've broken down and removed the oils. I used an off-brand from my supply store. When you go in, ask for Prepsol.
I used Ulitimate 2K which is a urethane based product. Use a mixing cup to measure your primer and catalyst precisely then add it to your spray gun. For primer, I used a cheapo Harbor Freight gravity feed gun with a 1.7mm tip. I like to lay it on pretty heavy with 50% overlap. When done right it should be relatively smooth and have a "plastic" look to it. Allow it to flash for 15-20 minutes between coats.


BLOCKING;
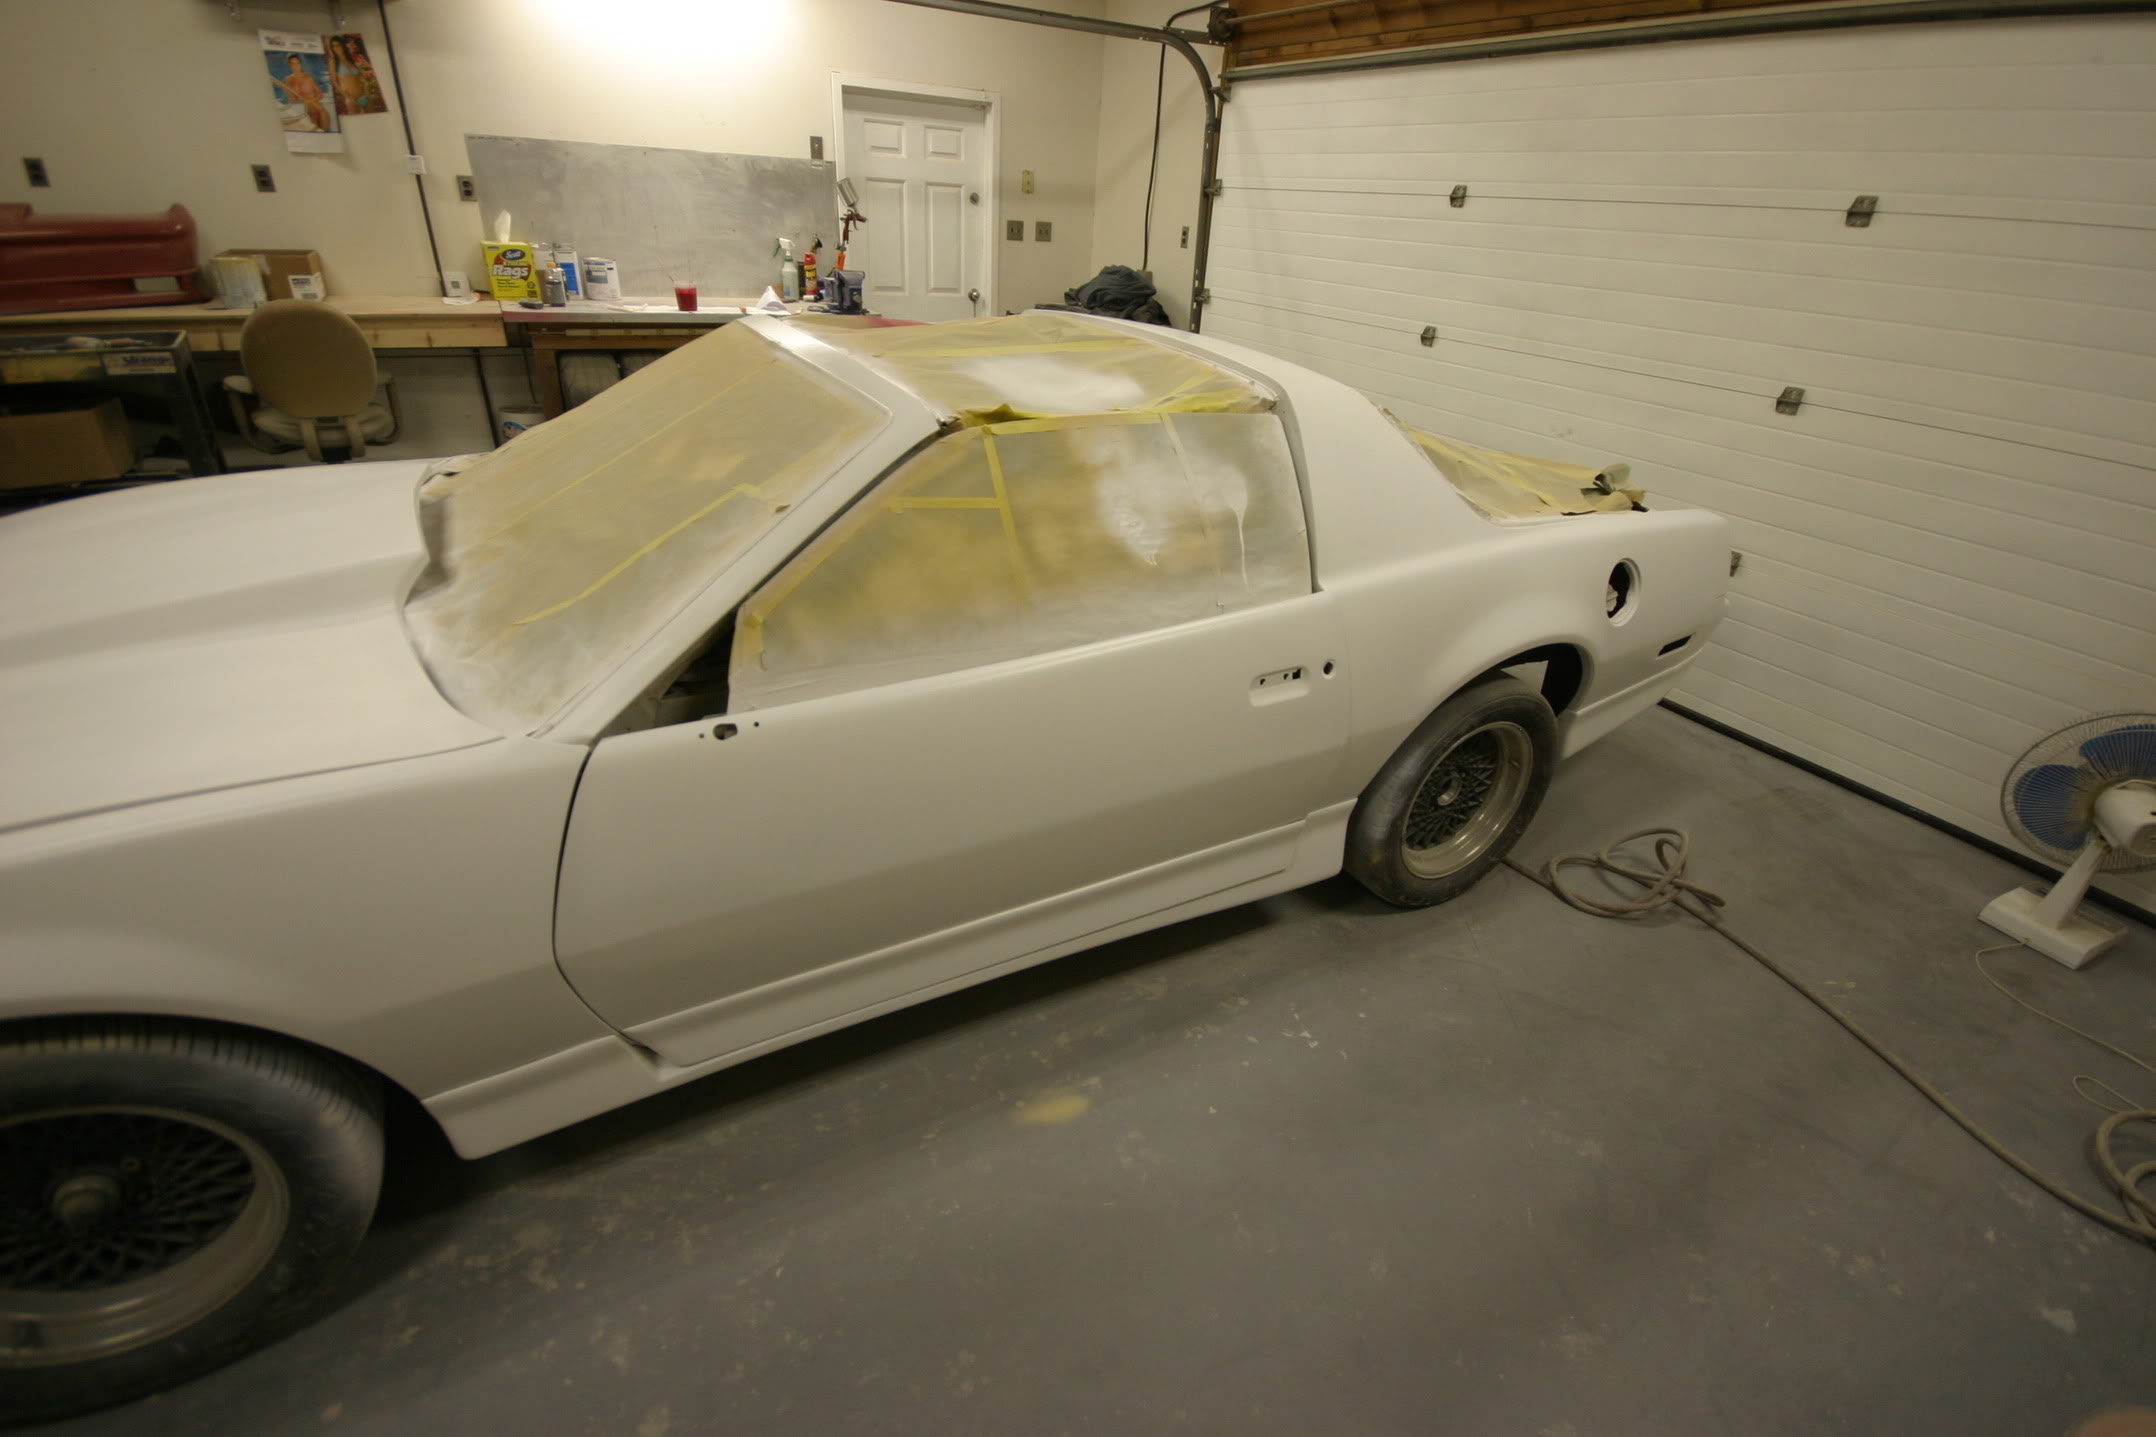
Now that you've got your primer layed down you need to block it out to find the high and low spots. Use a cheap, black spray paint and just "dust" it on the whole car. This is called a guide coat and will reveal the low spots.
Not my pic, but this is what it should look like;
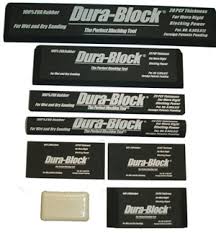
With the guide coat on it's time to block the car out. I used a set of Dura Block foam sanding blocks. From here on out we're going to where latex gloves whenever touching the car. You don't want to introduce any contaminants or oil to the surface. Use the largest block for any given area. This will help avoid creating lost spots. Use the round block for sanding contours. NEVER sand by hand, especially with your fingertips. This will create grooves. Go over the entire car with 180g on the blocks. I like to move in 45* strokes. Sand away from body lines. If you go towards them with your strokes you'll have a tendency to round them off. You are not trying to remove a lot of material here. All you want to do is reveal the low spots. Do NOT sand until they're gone. That defeats the purpose. If you find a low spot, move on. We will come back and fill them all in after the car is blocked.

Be sure to mask off any places that you don't want to paint. I like to use masking paper instead of newspaper. It's got a wax coating on one side so nothing seeps through and also it wont blow out like newspaper will. I bought a 500' roll for $9 from my auto body supply shop. Also use a high quality tape. Cheap tapes will not adhere, will bleed and many leave a residue behind.
PRIMING;
Once all of your body work is done and your panels are aligned, it's time to spray a couple coats of a high build primer. Before you spray ANYTHING on the body you will want to use a wax and grease remover to get rid of oils, fingerprints and contaminants that will cause adhesion problems. Don't use mineral spirits, laquer thinner or alcohol, etc. Wax and grease remover is made specifically for this. OTher solvents will evaporate too quickly before they've broken down and removed the oils. I used an off-brand from my supply store. When you go in, ask for Prepsol.
I used Ulitimate 2K which is a urethane based product. Use a mixing cup to measure your primer and catalyst precisely then add it to your spray gun. For primer, I used a cheapo Harbor Freight gravity feed gun with a 1.7mm tip. I like to lay it on pretty heavy with 50% overlap. When done right it should be relatively smooth and have a "plastic" look to it. Allow it to flash for 15-20 minutes between coats.
BLOCKING;
Now that you've got your primer layed down you need to block it out to find the high and low spots. Use a cheap, black spray paint and just "dust" it on the whole car. This is called a guide coat and will reveal the low spots.
Not my pic, but this is what it should look like;
With the guide coat on it's time to block the car out. I used a set of Dura Block foam sanding blocks. From here on out we're going to where latex gloves whenever touching the car. You don't want to introduce any contaminants or oil to the surface. Use the largest block for any given area. This will help avoid creating lost spots. Use the round block for sanding contours. NEVER sand by hand, especially with your fingertips. This will create grooves. Go over the entire car with 180g on the blocks. I like to move in 45* strokes. Sand away from body lines. If you go towards them with your strokes you'll have a tendency to round them off. You are not trying to remove a lot of material here. All you want to do is reveal the low spots. Do NOT sand until they're gone. That defeats the purpose. If you find a low spot, move on. We will come back and fill them all in after the car is blocked.
01-02-2011, 10:47 AM
#4
Supreme Member
Thread Starter
iTrader: (3)
Join Date: Sep 2005
Location: MD
Posts: 1,685
Likes: 0
Received 3 Likes
on
3 Posts
Car: '88 IROC-Z medium orange metallic
Engine: L98
Transmission: 700R4
Axle/Gears: 3.27
Re: My DIY paint project write up.
FILLING OUR LOW SPOTS;
Once the car is blocked out you'll likely have several low and high spots. A low spot is a place where there is still some guide coat left behind. These spots need to be filled. I used a glazing putty by Evercoat. You could use your regular filler but the glazing putty goes on and sands much easier. It is ONLY for very thin applications. If you've got a dent or a deeper low spot you'll need to break out the filler again. Shape your putty and/or filler just like you did before and finish it off with 180g.
A high spot is where you've gone through the primer. If you have broken through to bare metal you'll need to apply more etching primer to this spot.
Now you've hopefully got it all level again. Clean the car of all sanding dust, degrease the whole thing and apply another coat of primer or two depending on how thick you're laying it down. Apply another guide coat and block the whole thing again. Hopefully there are no defects but if you find more high or low spots you need to fix them again. Continue this process until you can block the whole car and not find any defects.
CLEAN CLEAN CLEAN CLEAN!! ;
Now you've got the body work done and it's time to paint. The body is straight, even and all of the panely are lined up. Remove all of the masking from the car and push is outside. You'll want to wash it down with clean water to remove all of the dust and crud from sanding. Use an air gun to blow out all of the nooks and crannies. Allow it to dry, preferably overnight.
Chances are that if you're reading this you don't have a spray booth. You will need to clean out the garage really, really good now. You will want to get every speck of dust out. Use a blow gun to dislodge dust/dirt from the walls, ceiling, fans, tool boxes, benches etc and sweep it all up. If you've got clutter that can collect dust, cover it with a tarp or move it out of the garage. Things like lawnmowers, bikes, furniture will be ok to live outside for a day or two while we paint the car. Anything that can collect dust would be better off elsewhere. I used a leaf blower and went through the garage blowing all of the dirt and dust out. Take your time here. The more dirt is left behind the higher the chances are of your paint being contaminated.
Once the garage and the car are cleaned, pull the car back in and re-mask it. Now you're going to go over the whole car with the wax and grease remover. Anywhere you are going to paint needs to be cleaned.
FINAL INSPECTION;
You've got the car blocked to 180g, cleaned and masked. Go over the entire car with a fine-toothed comb looking for imperfections. Anything left behind will show up in your final product. Use a bright light and inspect every inch. If you find a problem, fix it now. Re-clean the area and continue.
SEALER;
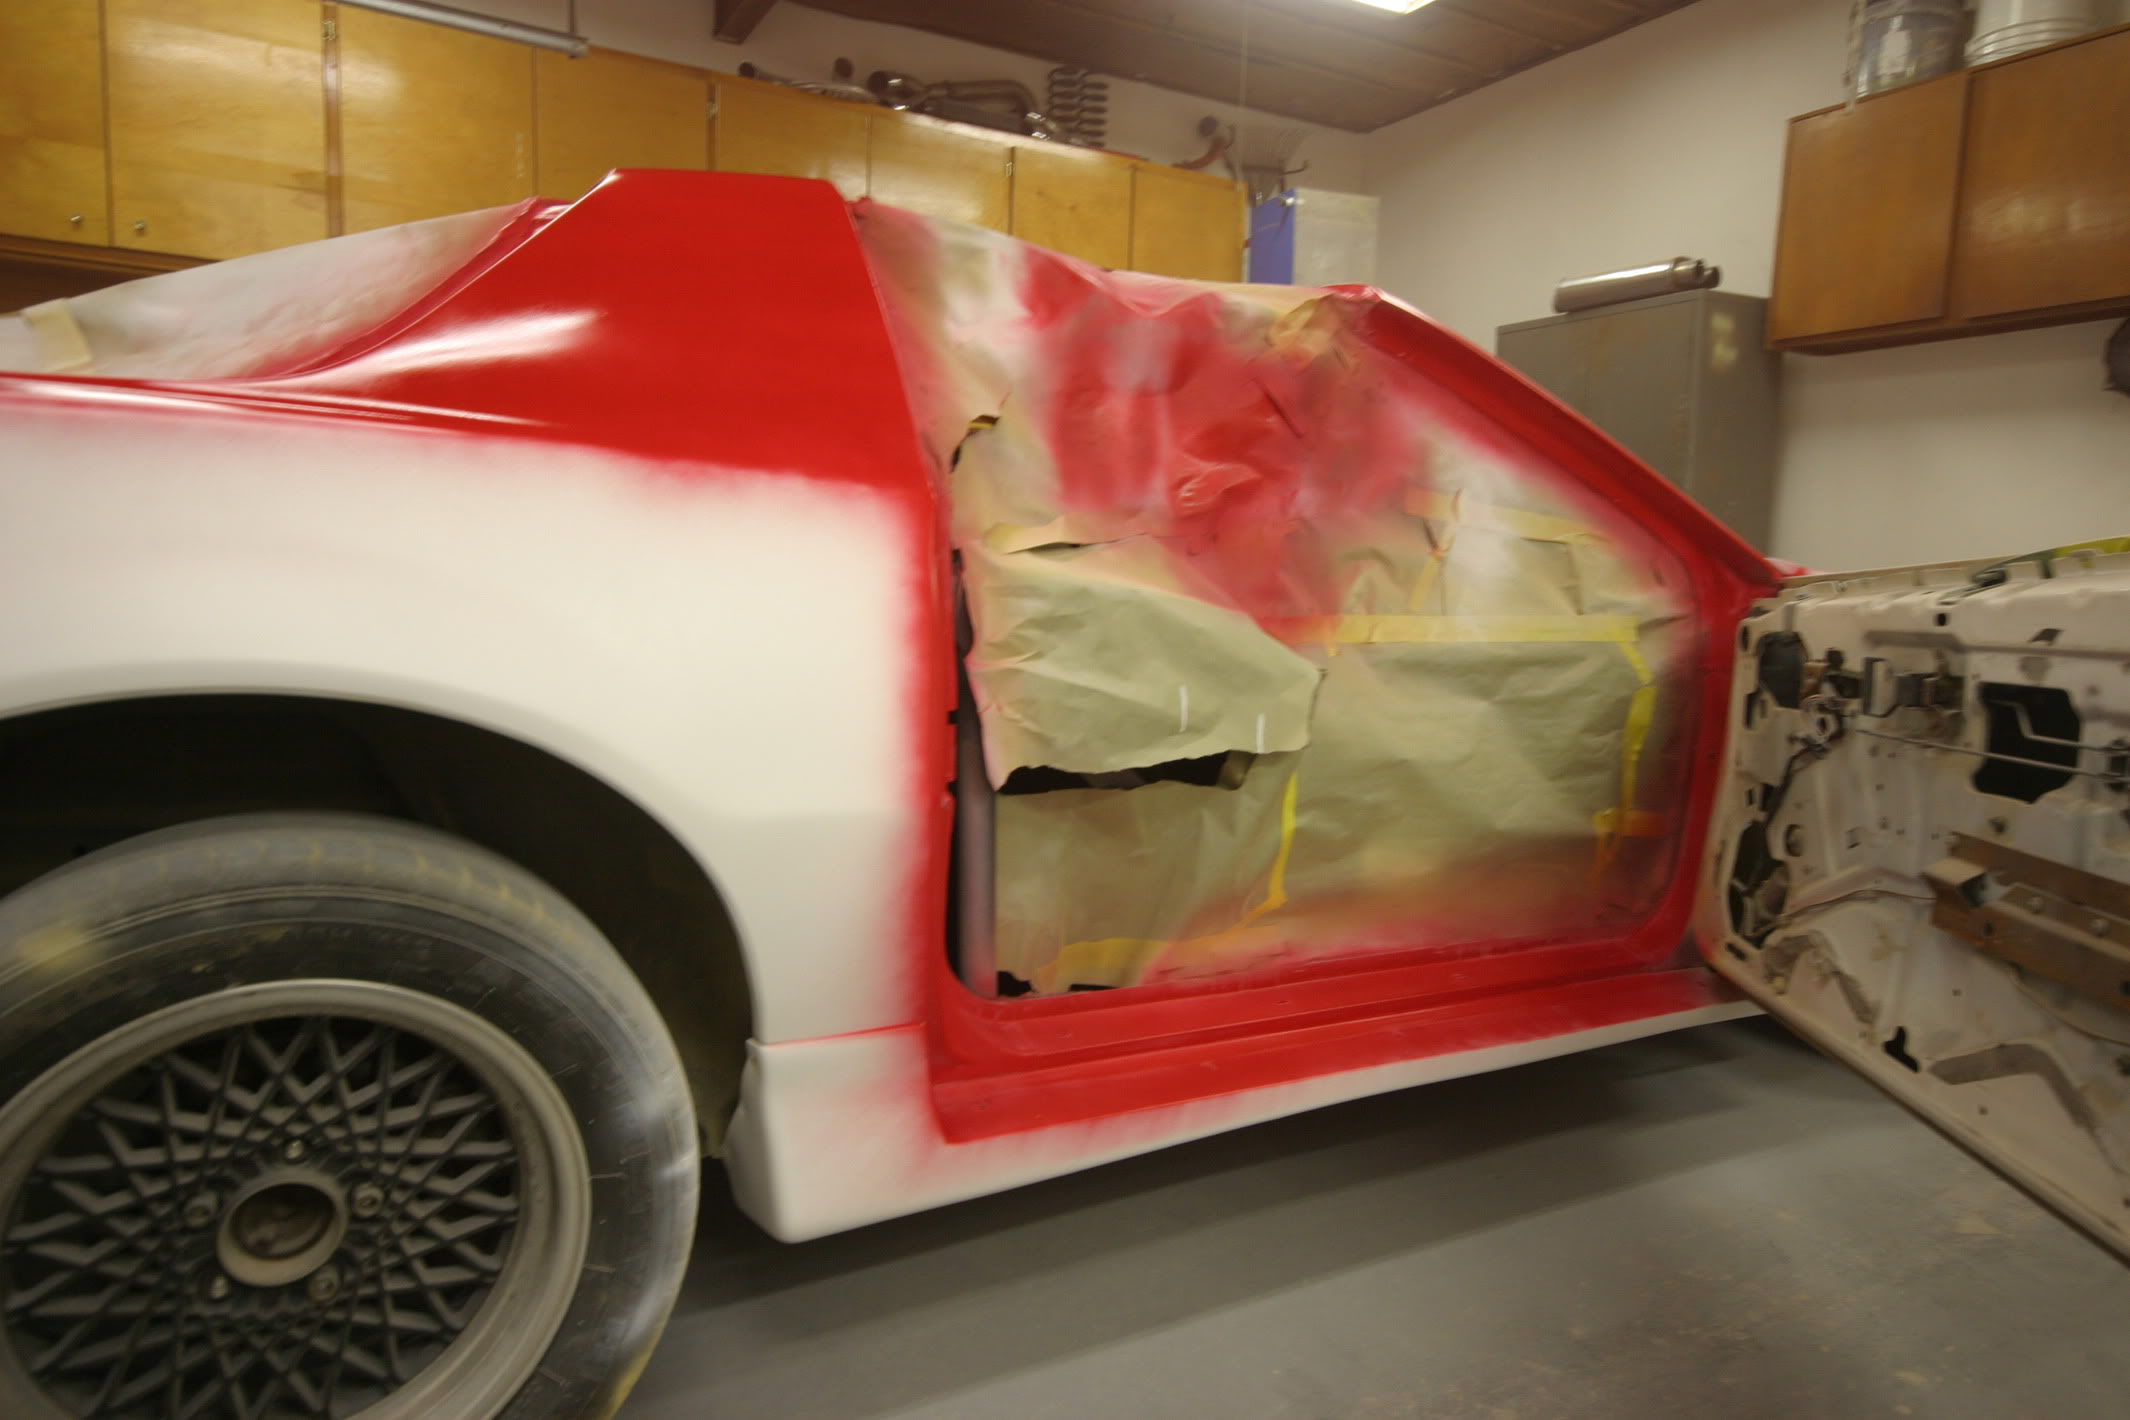
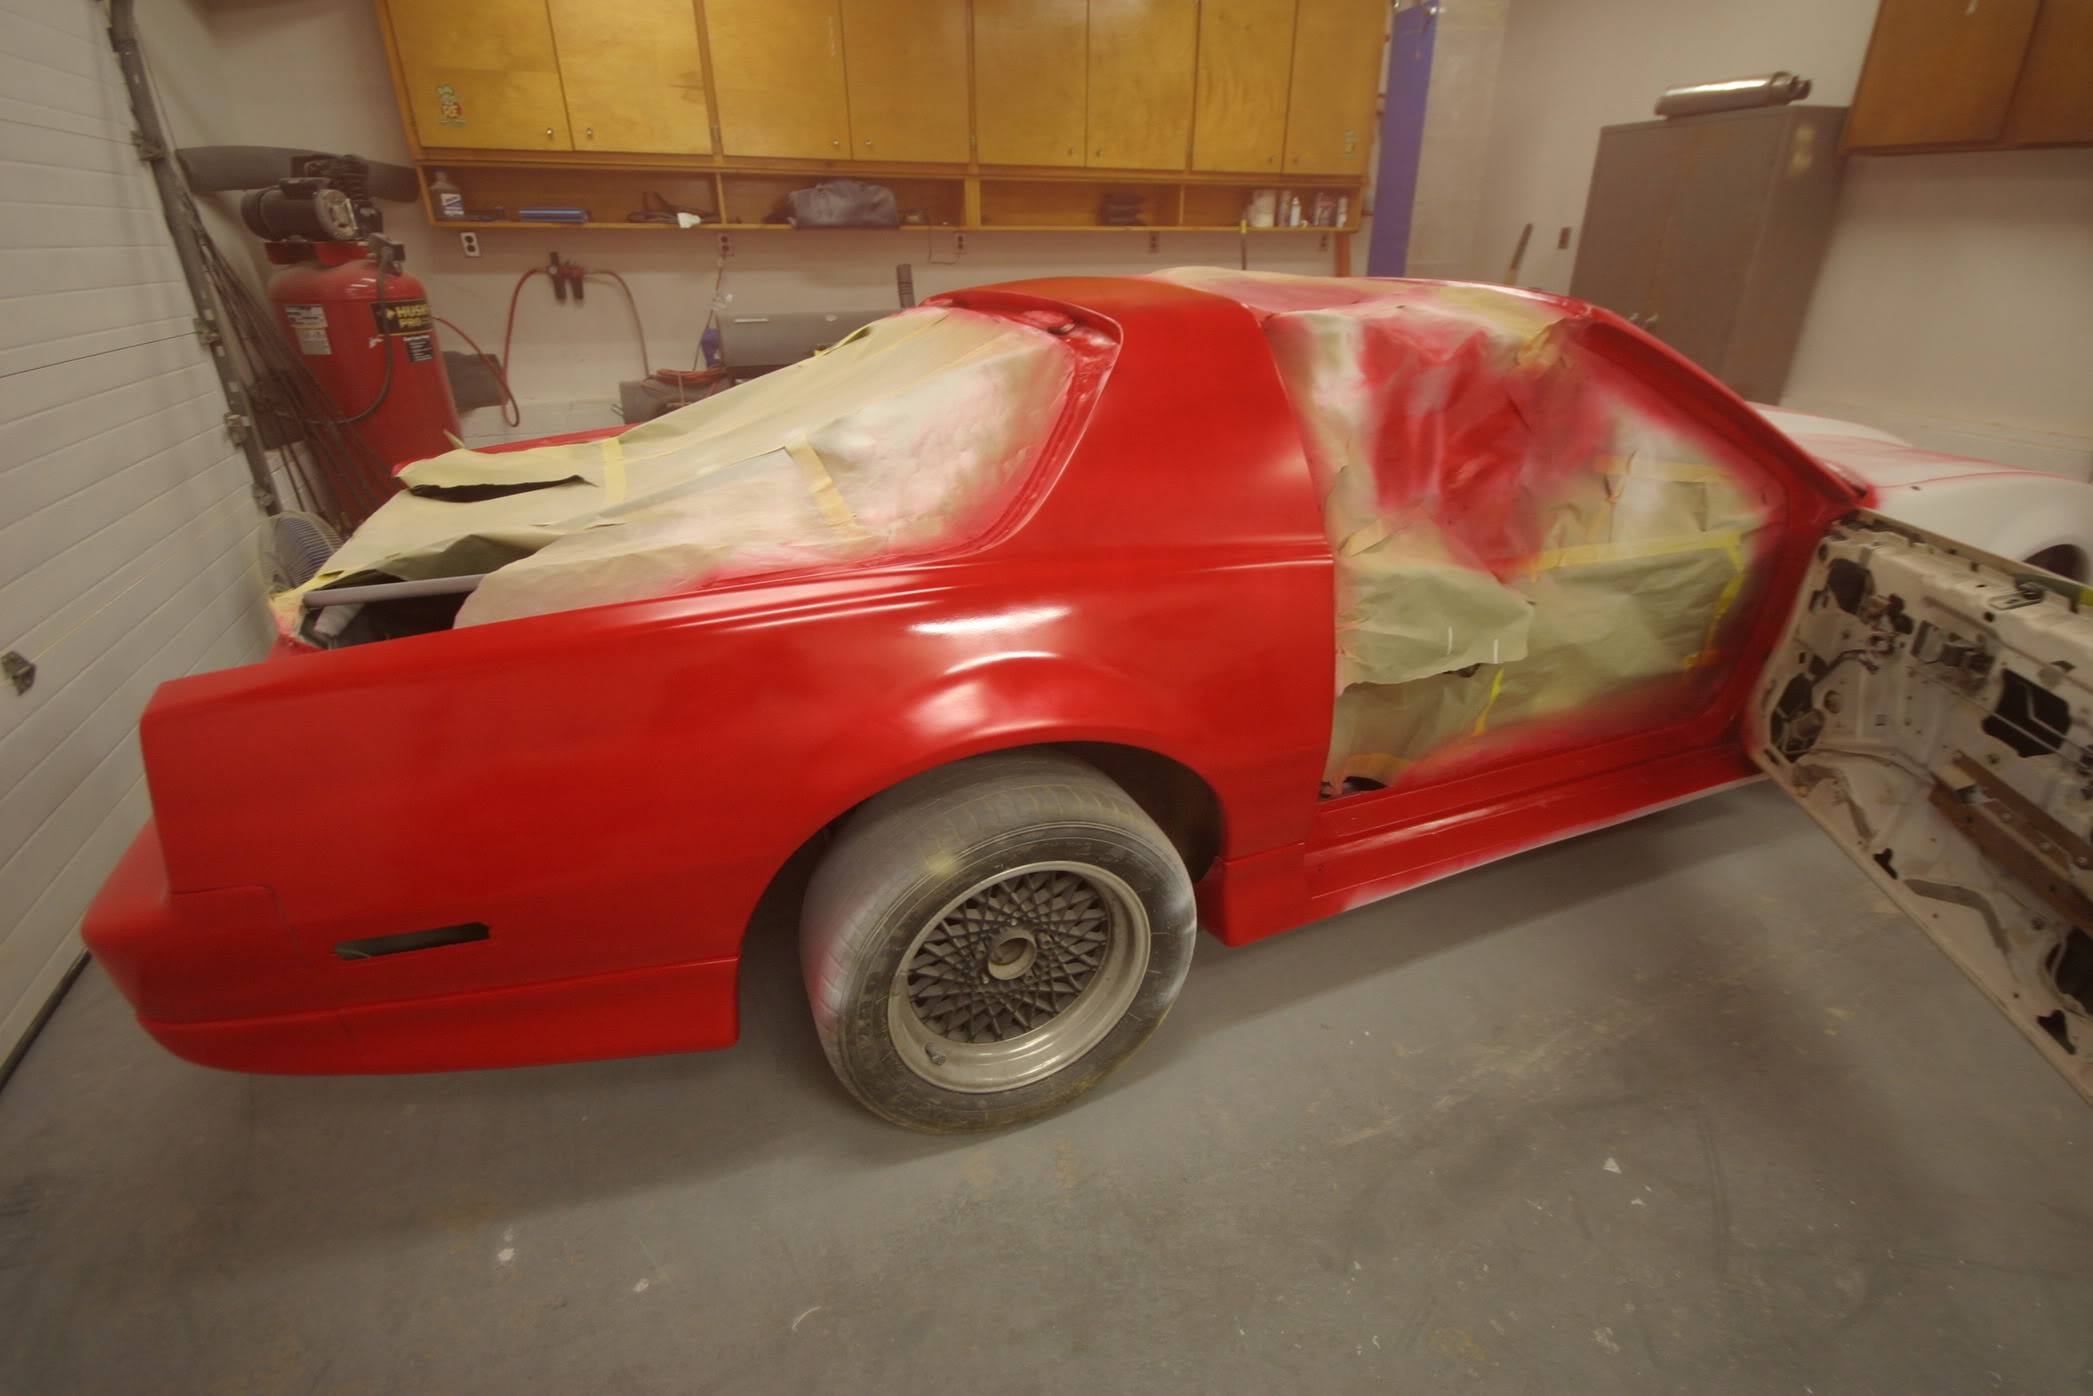
Touchy subject. Many people view this as an optional step. Using a sealer will give you a nice, uniform substrate to apply your base coat to. Base coats are transluscent so any dark spots in your primer will show up in your paint job and make it look blotchy. You can buy sealer in white, gray or black. Using the appropriate colored sealer will make your color "pop". My car is going to be red so I used a white sealer.
Mix up your sealer according to the ratios on the info sheets. I used PPG which mixed 3:1:1. It uses a hardener and reduce. It goes on much lighter than the primer so be careful here not to run it. I used my Mac gun for this with 40 psi and a 1.4mm tip. Adjust your fluid control and fan pattern using a test panel to practice on. I used the windshield of the car since it was masked. Find settings that work for you. Some people like to go slow, others are fast.
Once it's mixed and everything is ready to go, use a tack cloth to go over the whole car and remove and dust and particles.
I ran the heck out of the first coat of sealer. Be sure to avoid this by spraying the first coat on a little bit thinner. If you get runs, you'll have to let the sealer harden before you can sand them out. I let it set for 36 hours then sanded them out with 400. Then cleaned the car with wax and grease remover, tacked it off again and sprayed a second coat. This one went well. Let it flash off (flash time will be on the product info sheet) and appy a third coat. Different brands will call for a different number of coats. Mine called for 2-3 full coats.
Once the car is blocked out you'll likely have several low and high spots. A low spot is a place where there is still some guide coat left behind. These spots need to be filled. I used a glazing putty by Evercoat. You could use your regular filler but the glazing putty goes on and sands much easier. It is ONLY for very thin applications. If you've got a dent or a deeper low spot you'll need to break out the filler again. Shape your putty and/or filler just like you did before and finish it off with 180g.
A high spot is where you've gone through the primer. If you have broken through to bare metal you'll need to apply more etching primer to this spot.
Now you've hopefully got it all level again. Clean the car of all sanding dust, degrease the whole thing and apply another coat of primer or two depending on how thick you're laying it down. Apply another guide coat and block the whole thing again. Hopefully there are no defects but if you find more high or low spots you need to fix them again. Continue this process until you can block the whole car and not find any defects.
CLEAN CLEAN CLEAN CLEAN!! ;
Now you've got the body work done and it's time to paint. The body is straight, even and all of the panely are lined up. Remove all of the masking from the car and push is outside. You'll want to wash it down with clean water to remove all of the dust and crud from sanding. Use an air gun to blow out all of the nooks and crannies. Allow it to dry, preferably overnight.
Chances are that if you're reading this you don't have a spray booth. You will need to clean out the garage really, really good now. You will want to get every speck of dust out. Use a blow gun to dislodge dust/dirt from the walls, ceiling, fans, tool boxes, benches etc and sweep it all up. If you've got clutter that can collect dust, cover it with a tarp or move it out of the garage. Things like lawnmowers, bikes, furniture will be ok to live outside for a day or two while we paint the car. Anything that can collect dust would be better off elsewhere. I used a leaf blower and went through the garage blowing all of the dirt and dust out. Take your time here. The more dirt is left behind the higher the chances are of your paint being contaminated.
Once the garage and the car are cleaned, pull the car back in and re-mask it. Now you're going to go over the whole car with the wax and grease remover. Anywhere you are going to paint needs to be cleaned.
FINAL INSPECTION;
You've got the car blocked to 180g, cleaned and masked. Go over the entire car with a fine-toothed comb looking for imperfections. Anything left behind will show up in your final product. Use a bright light and inspect every inch. If you find a problem, fix it now. Re-clean the area and continue.
SEALER;
Touchy subject. Many people view this as an optional step. Using a sealer will give you a nice, uniform substrate to apply your base coat to. Base coats are transluscent so any dark spots in your primer will show up in your paint job and make it look blotchy. You can buy sealer in white, gray or black. Using the appropriate colored sealer will make your color "pop". My car is going to be red so I used a white sealer.
Mix up your sealer according to the ratios on the info sheets. I used PPG which mixed 3:1:1. It uses a hardener and reduce. It goes on much lighter than the primer so be careful here not to run it. I used my Mac gun for this with 40 psi and a 1.4mm tip. Adjust your fluid control and fan pattern using a test panel to practice on. I used the windshield of the car since it was masked. Find settings that work for you. Some people like to go slow, others are fast.
Once it's mixed and everything is ready to go, use a tack cloth to go over the whole car and remove and dust and particles.
I ran the heck out of the first coat of sealer. Be sure to avoid this by spraying the first coat on a little bit thinner. If you get runs, you'll have to let the sealer harden before you can sand them out. I let it set for 36 hours then sanded them out with 400. Then cleaned the car with wax and grease remover, tacked it off again and sprayed a second coat. This one went well. Let it flash off (flash time will be on the product info sheet) and appy a third coat. Different brands will call for a different number of coats. Mine called for 2-3 full coats.
01-02-2011, 10:48 AM
#5
Supreme Member
Thread Starter
iTrader: (3)
Join Date: Sep 2005
Location: MD
Posts: 1,685
Likes: 0
Received 3 Likes
on
3 Posts
Car: '88 IROC-Z medium orange metallic
Engine: L98
Transmission: 700R4
Axle/Gears: 3.27
Re: My DIY paint project write up.
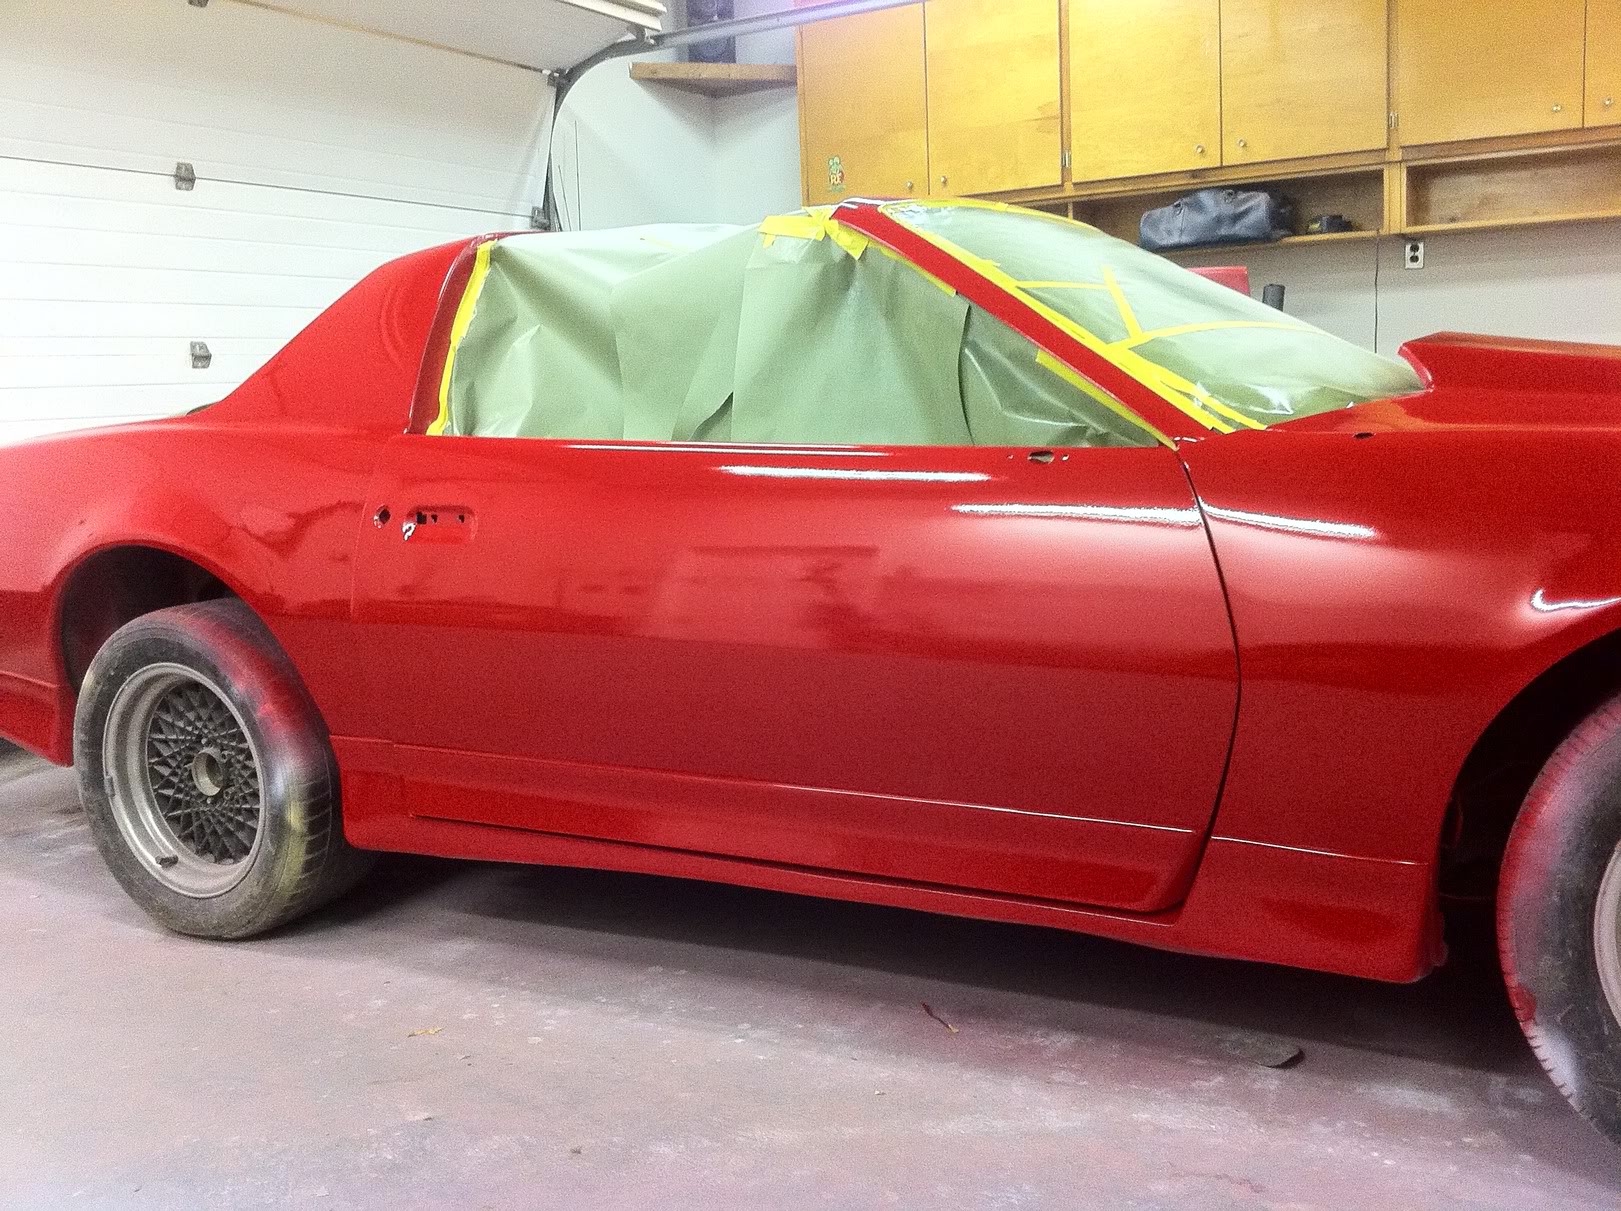
BASE COAT;
Read your product info sheet for the sealer. It will list a maximum time between the last coat of sealer and the first coat of base. If you exceed this time you will need to sand the car again or the base wont adhere. It's usually 24 hours. If you're doing it the same day just be sure to let if flash of adequately.
Inspect your sealer coat for contaminants. Now is the time to nib out any dust or dirt that fell into the sealer. Without a booth, you will inevitably find some sort of crud. When you do, use a piece of 600g and lightly sand it out.
Go over the car again with wax and grease remover.
Give your gun a good cleaning. It must be spotless. I use the same setup for base as I did for the sealer in terms of fan pattern, PSI, etc.
Mix up your paint. Once again look at the info sheet for ratios. Most are 1:1. Use the appropriate reducer for your paint. Be sure to strain it as you place it in the gun cup.
Tack the car off again.
Spray. I overlapped the first coat of base by about 75% for good coverage. Be sure not to apply it too heavy or it will run. Apply enough so it looks wet, but no more. I keep the gun 6-8" off the surfcace and adjust my speed to control the amount of paint being applied. This is all about feel. Test if out on a test panel to get the feel. Start with the jambs and hard to reach spots. Let them flash off then close the doors and do the rest of the car. The order is up to you but I started from the top down.
Apply 3-4 coats, be sure you've got good, even coverage and let each coat flash off adequately. Your product sheets will have this info.
Go over the car again looking for contaminants just like you did with the sealer. If you have to sand them out, you will need to re-apply base coat to that area. Don't just spray the spot, but continue to the edge of a panel or body line.

CLEAR COAT;
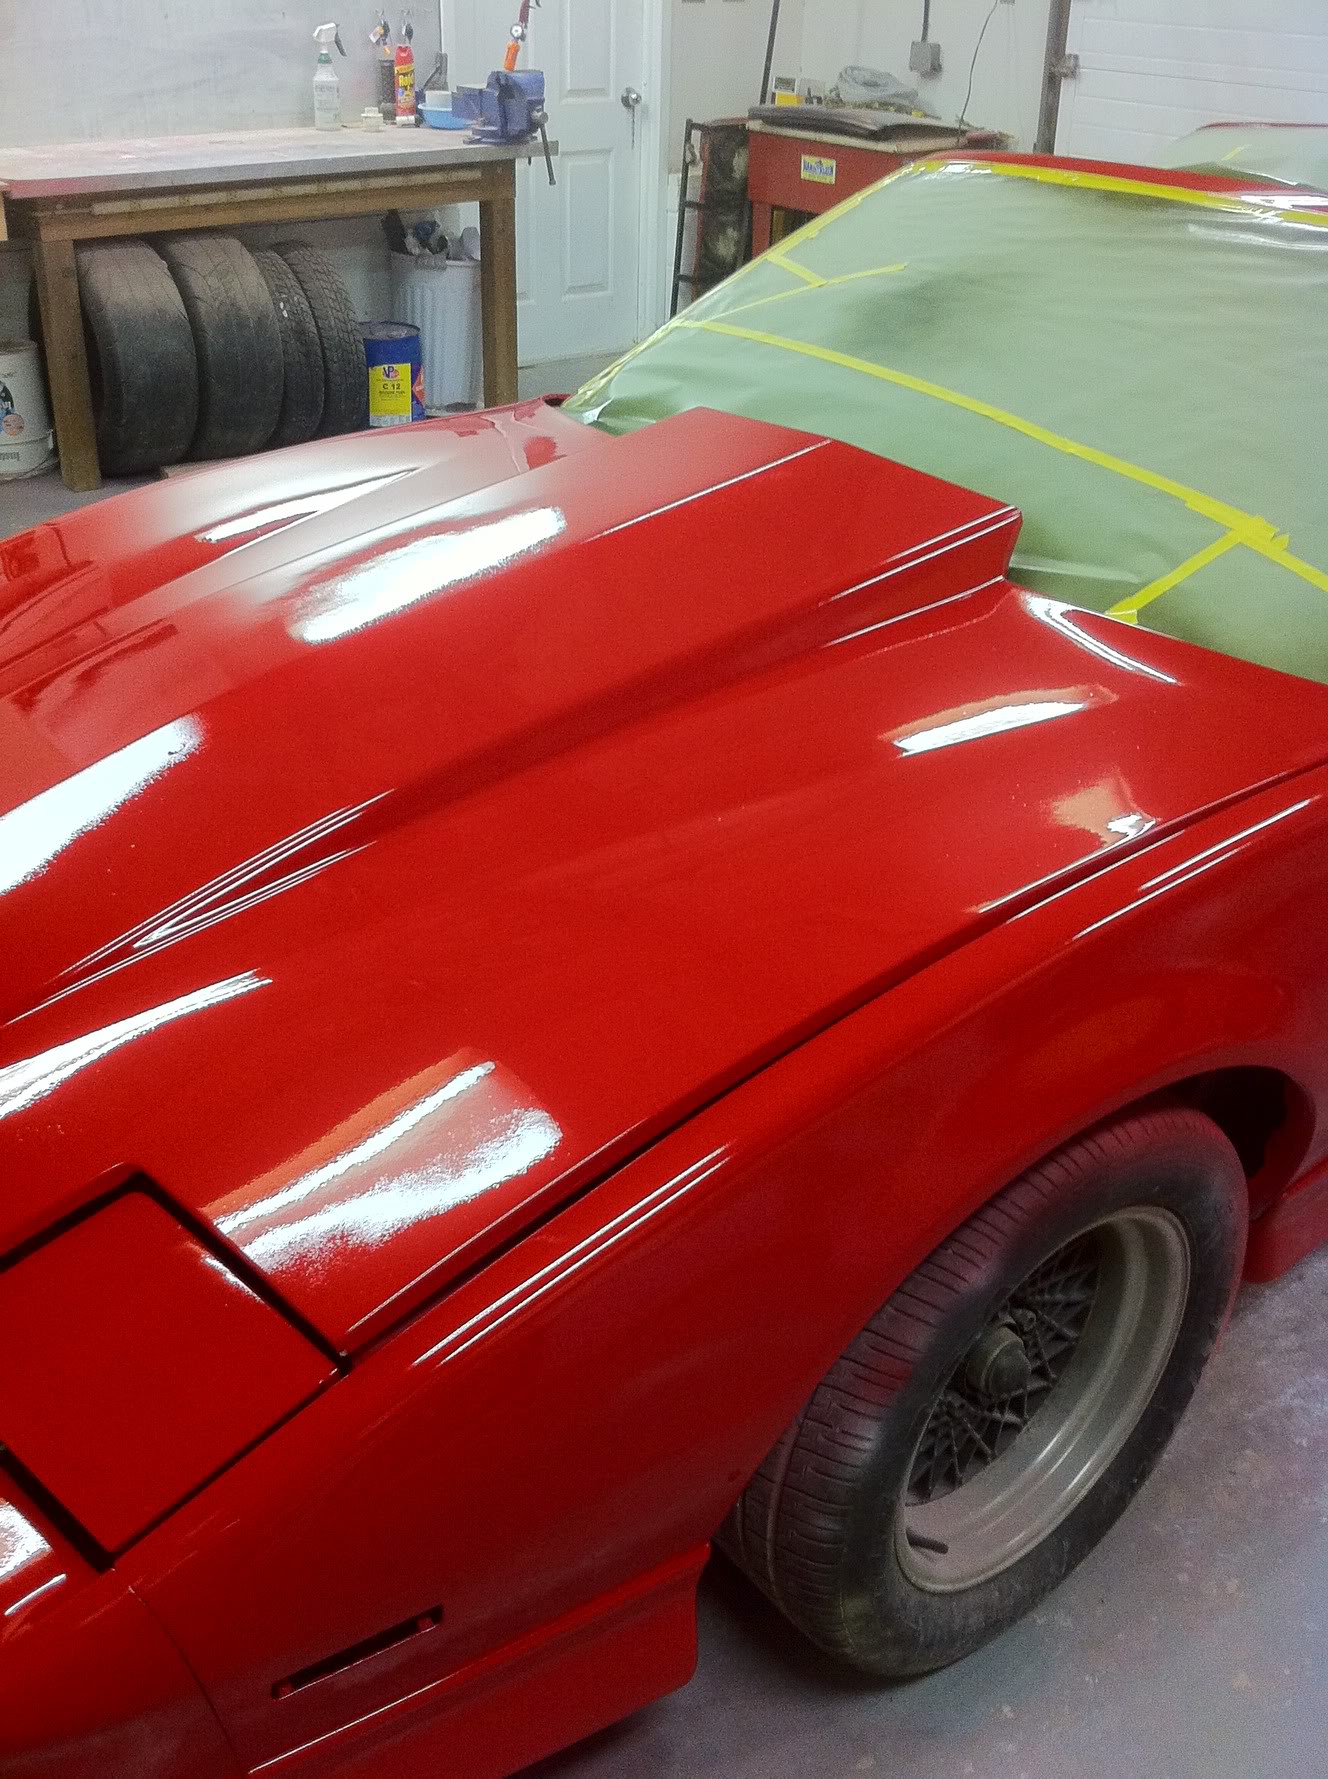
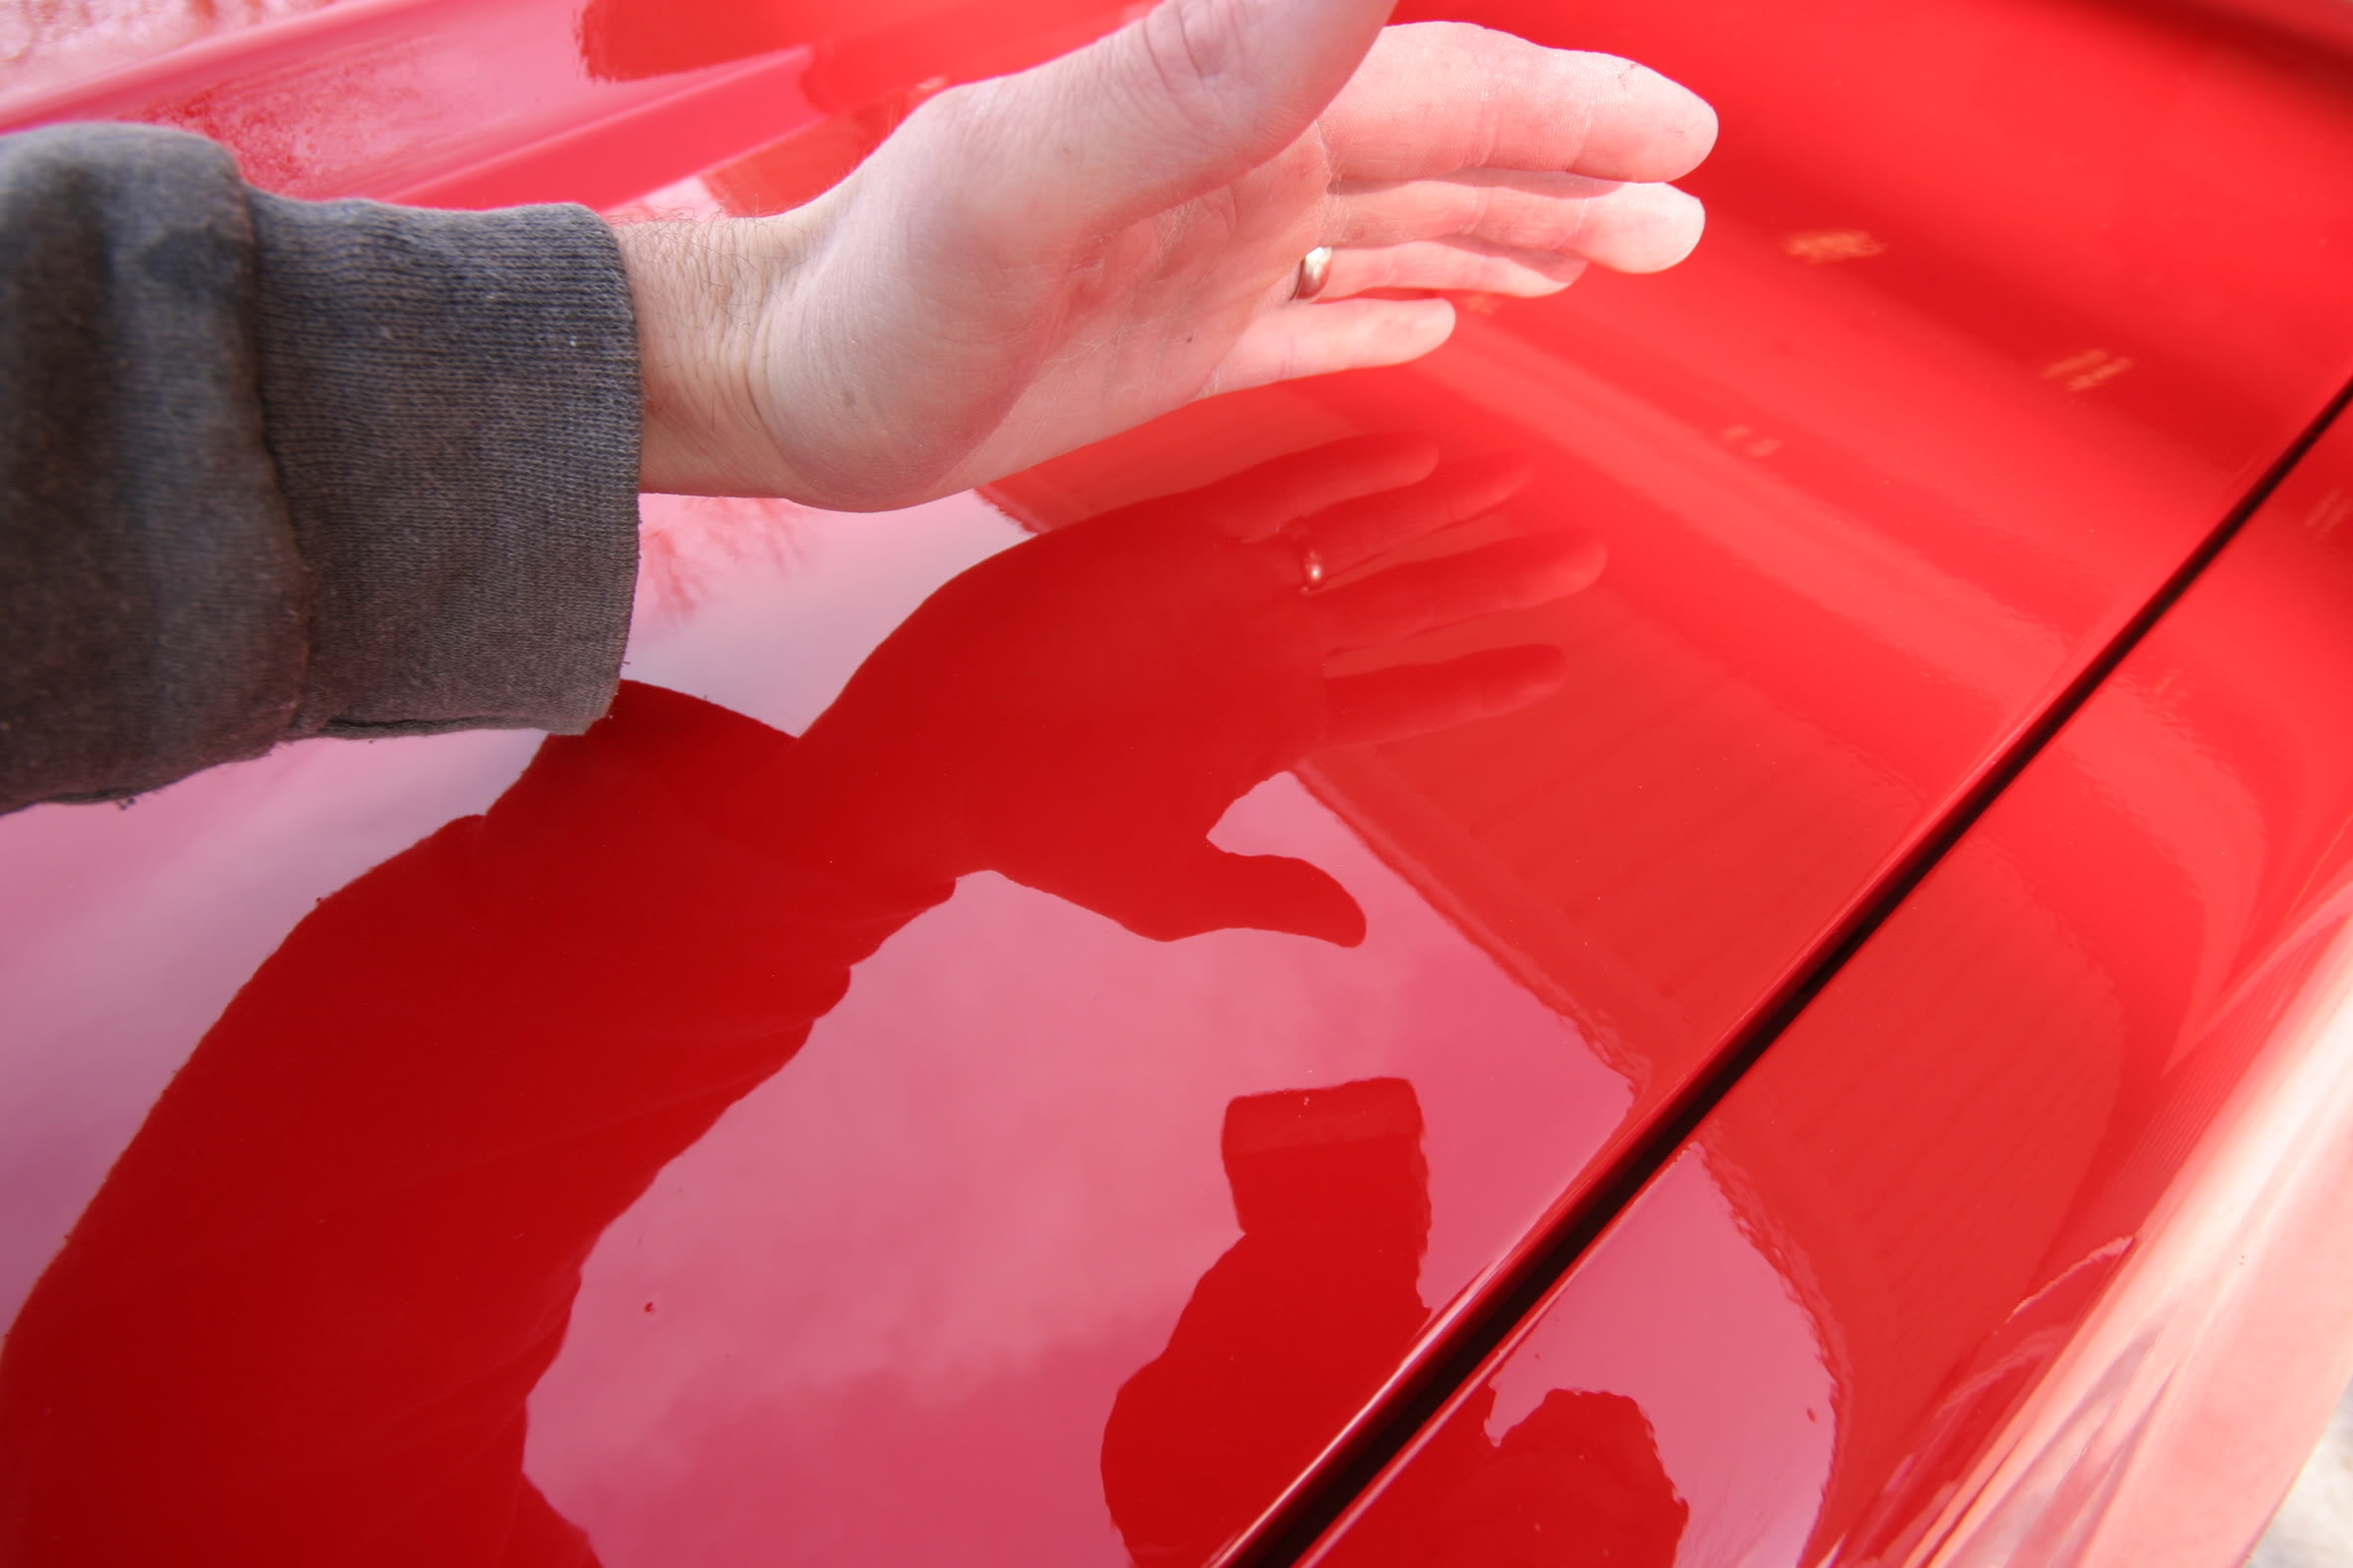
Lots of people are scared about clear but I found this to be my favorite part. It's when the car starts to look GOOD! Mix up your clear, and strain it into your gun cup. The settings are a bit different here. I opened up the fan pattern all the way and the fluid control was about 80% of wide open. You want the clear to go on heavy. On the edge of running. Once again, use a test panel and adjust your speed until you get it nice and heavy but no runs. I did 3 coats of clear because I intended to wetsand and apply more clear. If you aren't doing this, apply 4 coats.
Read your product info sheet for the sealer. It will list a maximum time between the last coat of sealer and the first coat of base. If you exceed this time you will need to sand the car again or the base wont adhere. It's usually 24 hours. If you're doing it the same day just be sure to let if flash of adequately.
Inspect your sealer coat for contaminants. Now is the time to nib out any dust or dirt that fell into the sealer. Without a booth, you will inevitably find some sort of crud. When you do, use a piece of 600g and lightly sand it out.
Go over the car again with wax and grease remover.
Give your gun a good cleaning. It must be spotless. I use the same setup for base as I did for the sealer in terms of fan pattern, PSI, etc.
Mix up your paint. Once again look at the info sheet for ratios. Most are 1:1. Use the appropriate reducer for your paint. Be sure to strain it as you place it in the gun cup.
Tack the car off again.
Spray. I overlapped the first coat of base by about 75% for good coverage. Be sure not to apply it too heavy or it will run. Apply enough so it looks wet, but no more. I keep the gun 6-8" off the surfcace and adjust my speed to control the amount of paint being applied. This is all about feel. Test if out on a test panel to get the feel. Start with the jambs and hard to reach spots. Let them flash off then close the doors and do the rest of the car. The order is up to you but I started from the top down.
Apply 3-4 coats, be sure you've got good, even coverage and let each coat flash off adequately. Your product sheets will have this info.
Go over the car again looking for contaminants just like you did with the sealer. If you have to sand them out, you will need to re-apply base coat to that area. Don't just spray the spot, but continue to the edge of a panel or body line.
CLEAR COAT;
Lots of people are scared about clear but I found this to be my favorite part. It's when the car starts to look GOOD! Mix up your clear, and strain it into your gun cup. The settings are a bit different here. I opened up the fan pattern all the way and the fluid control was about 80% of wide open. You want the clear to go on heavy. On the edge of running. Once again, use a test panel and adjust your speed until you get it nice and heavy but no runs. I did 3 coats of clear because I intended to wetsand and apply more clear. If you aren't doing this, apply 4 coats.
01-02-2011, 10:52 AM
#6
Supreme Member
Thread Starter
iTrader: (3)
Join Date: Sep 2005
Location: MD
Posts: 1,685
Likes: 0
Received 3 Likes
on
3 Posts
Car: '88 IROC-Z medium orange metallic
Engine: L98
Transmission: 700R4
Axle/Gears: 3.27
Re: My DIY paint project write up.
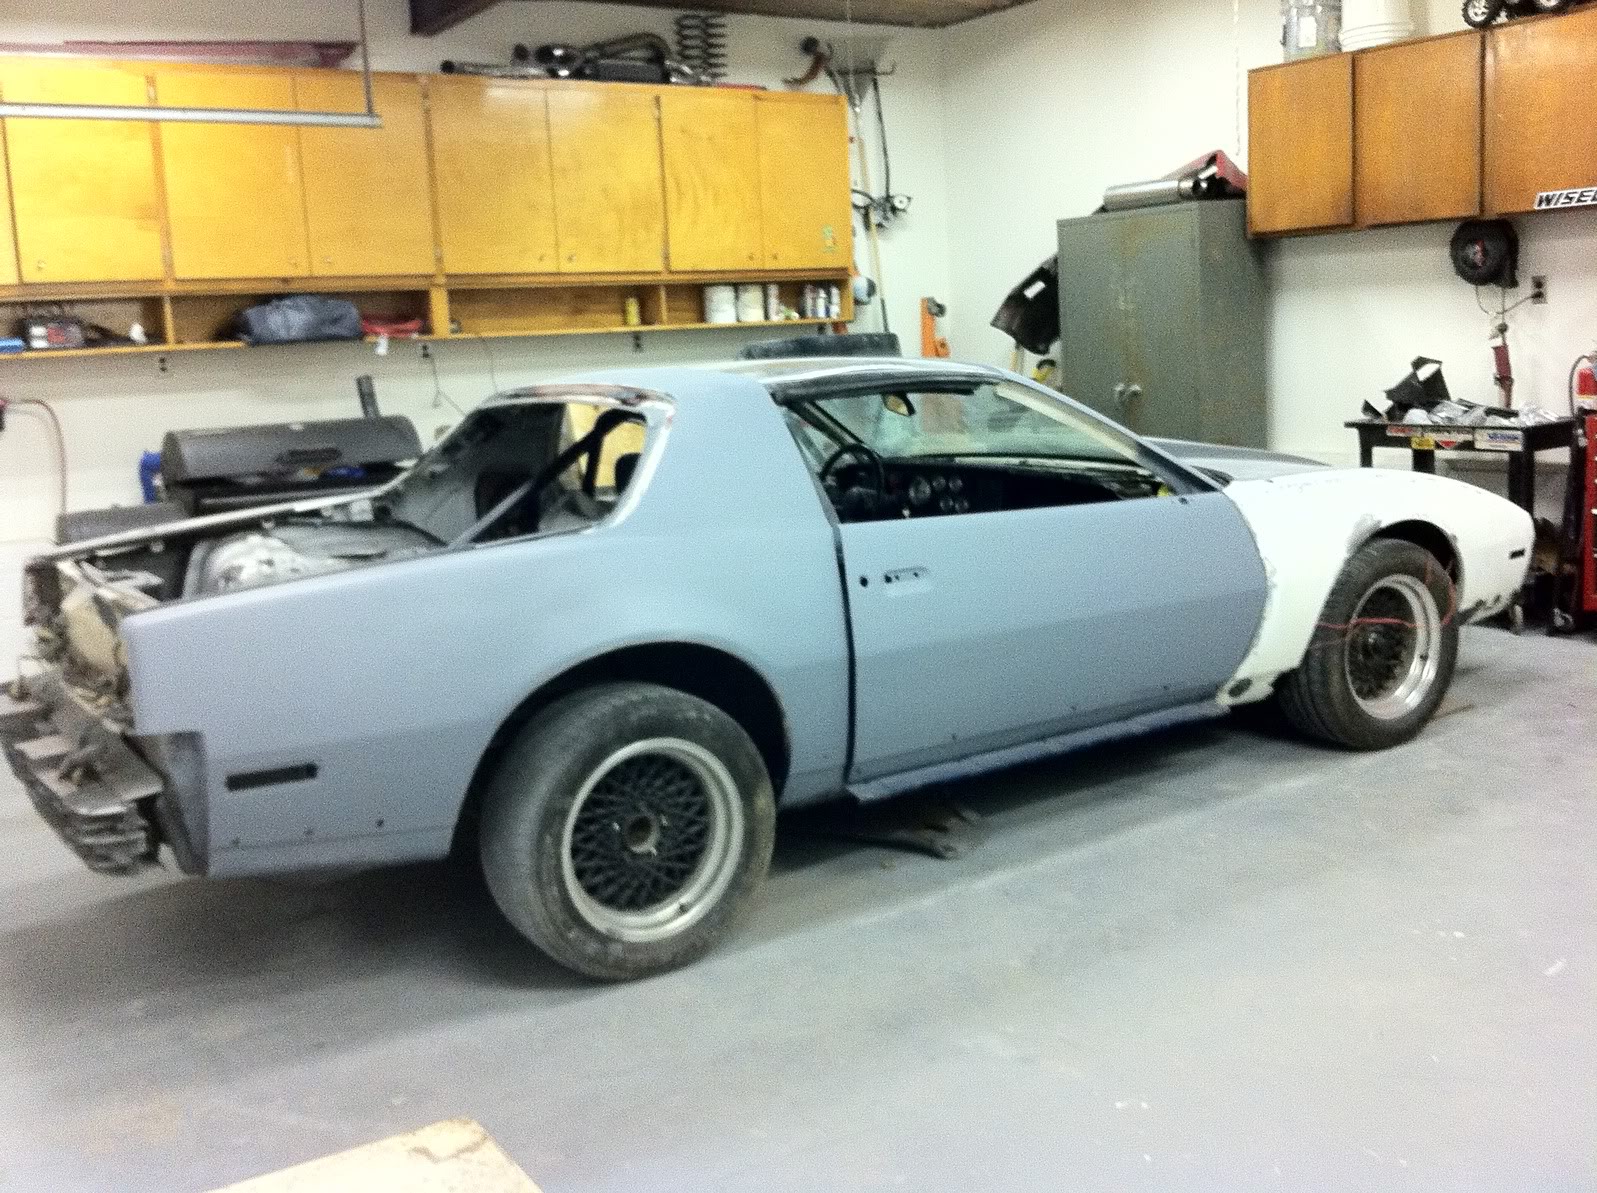
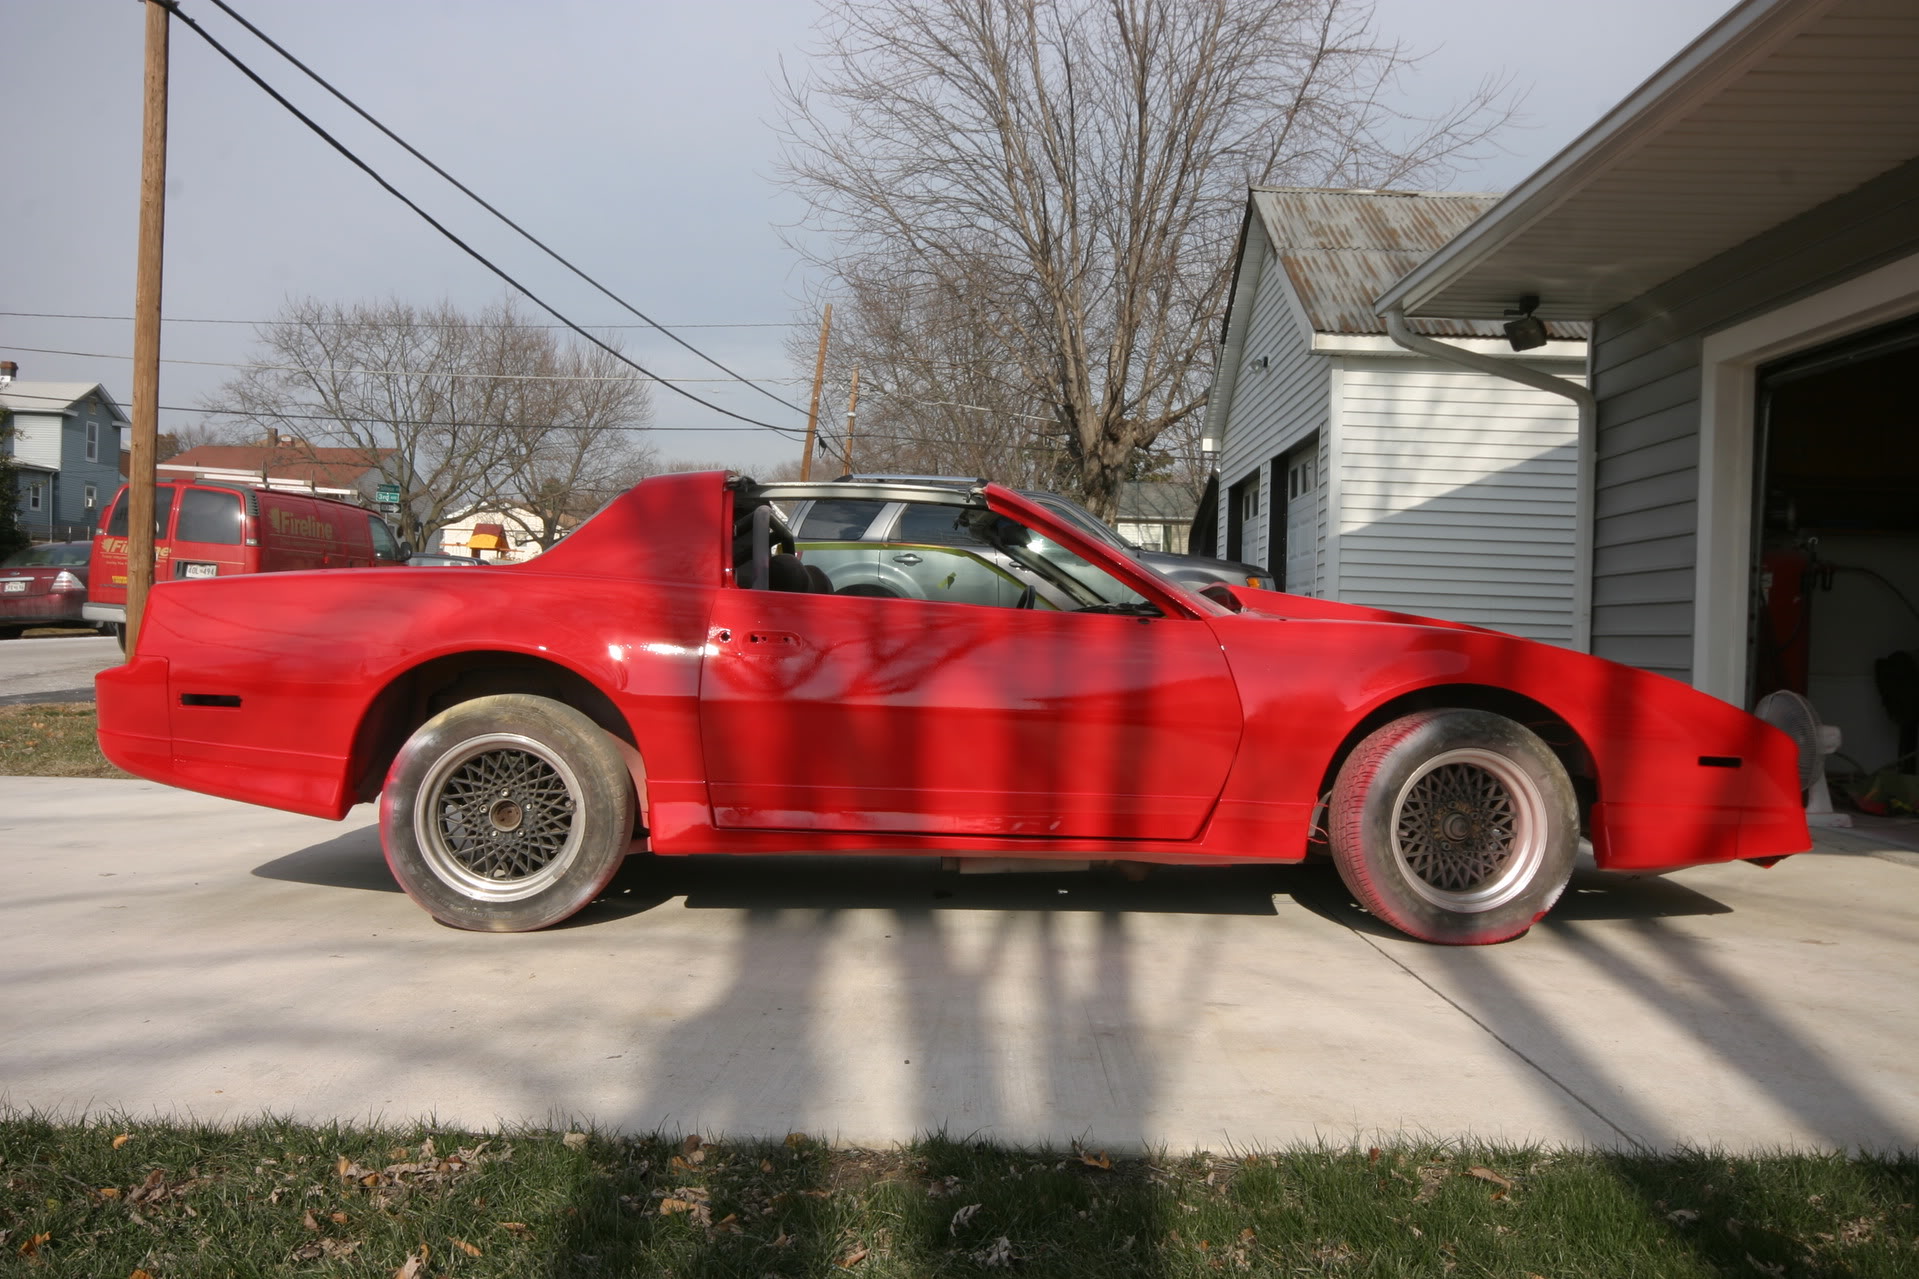
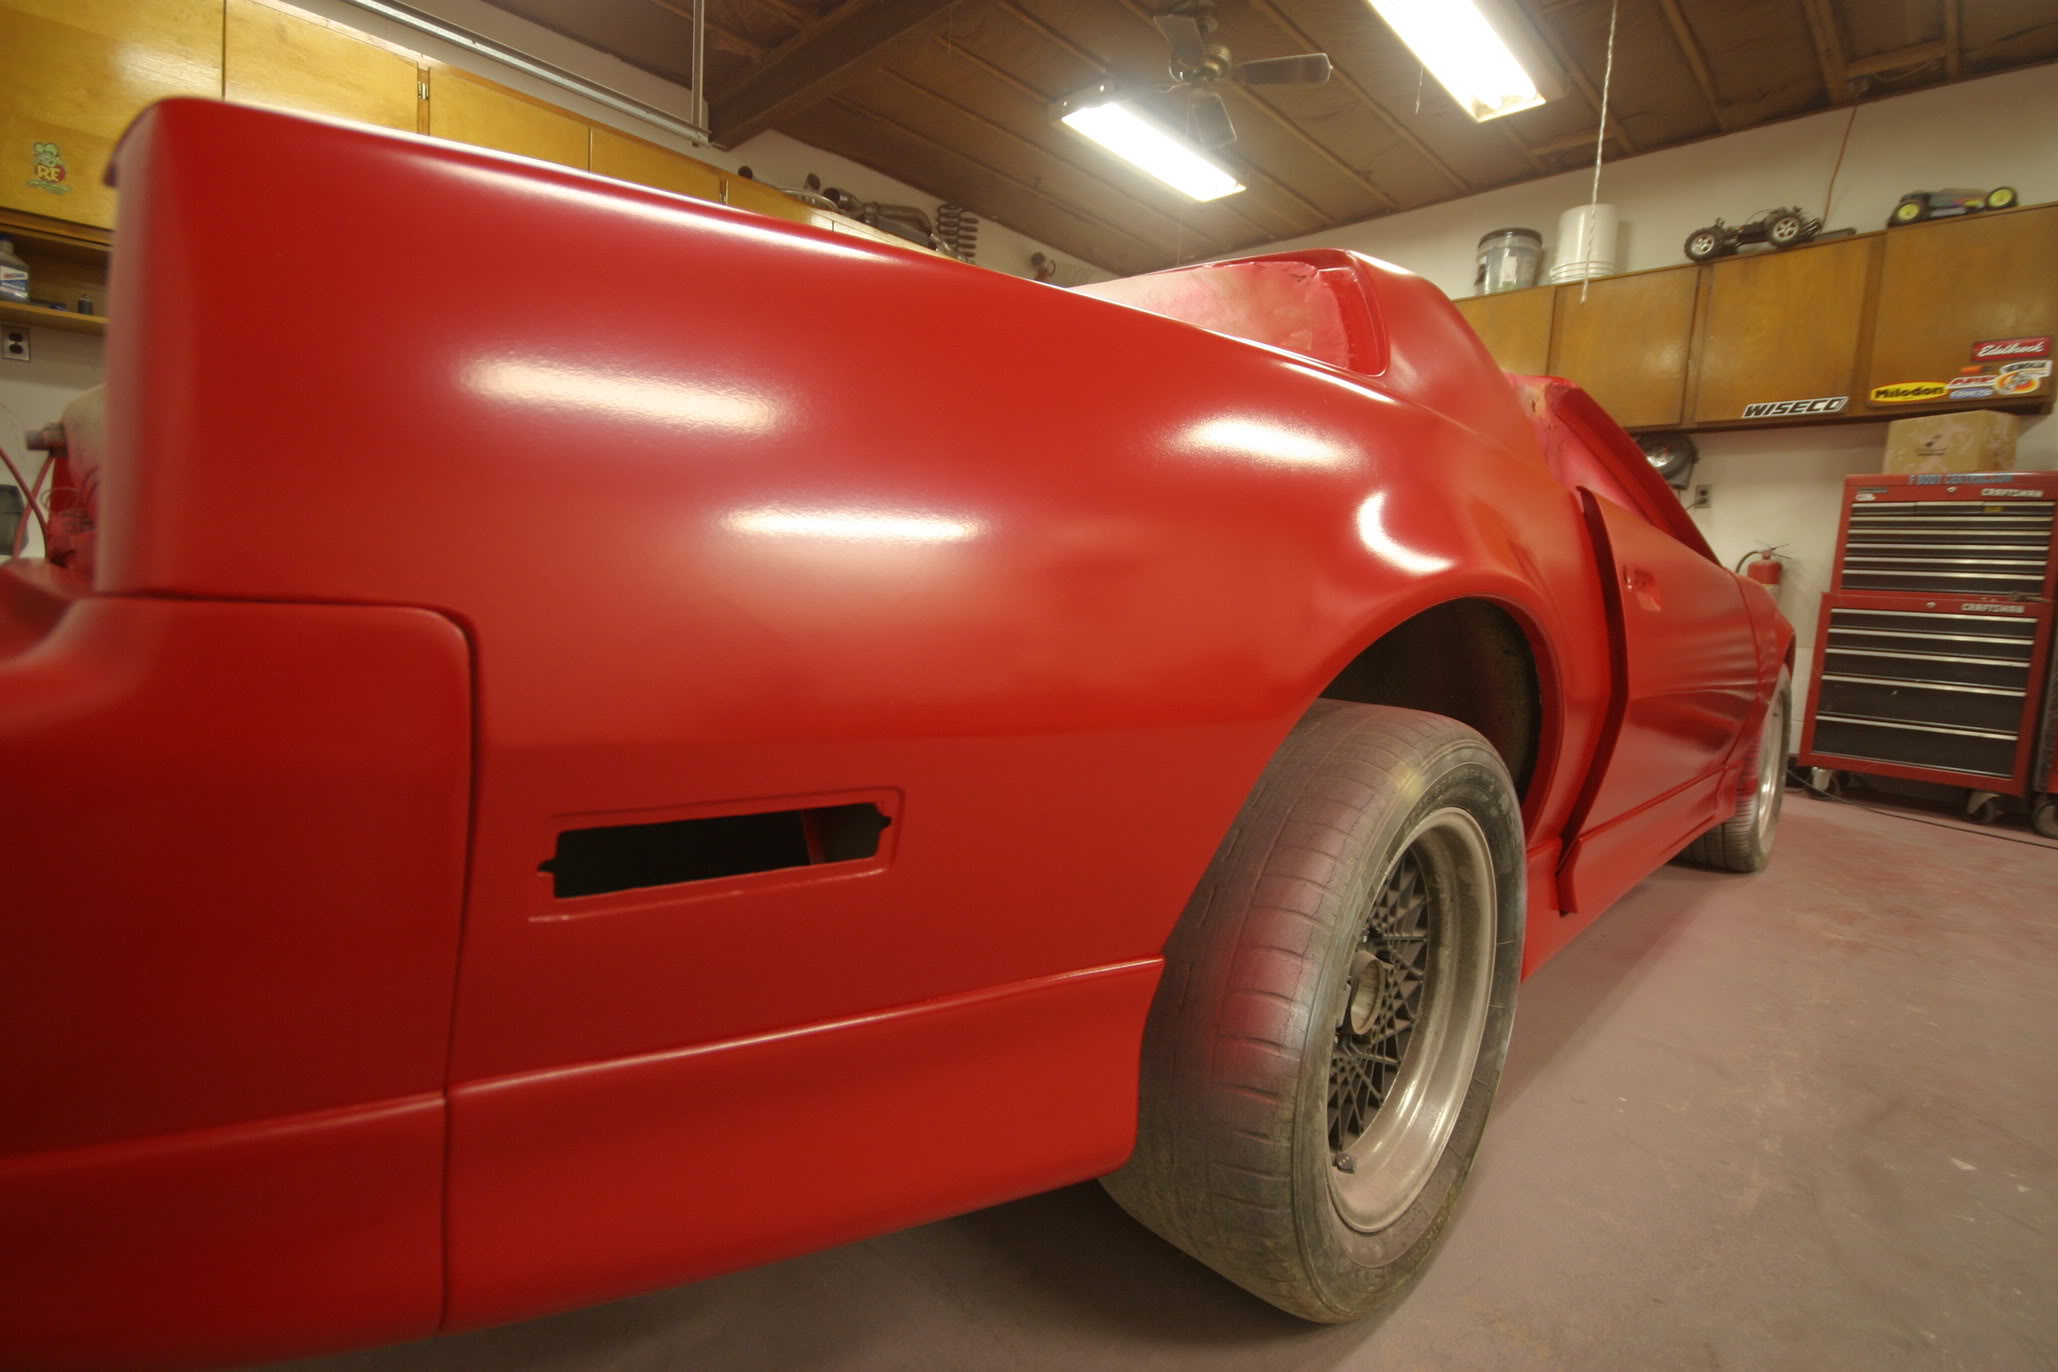
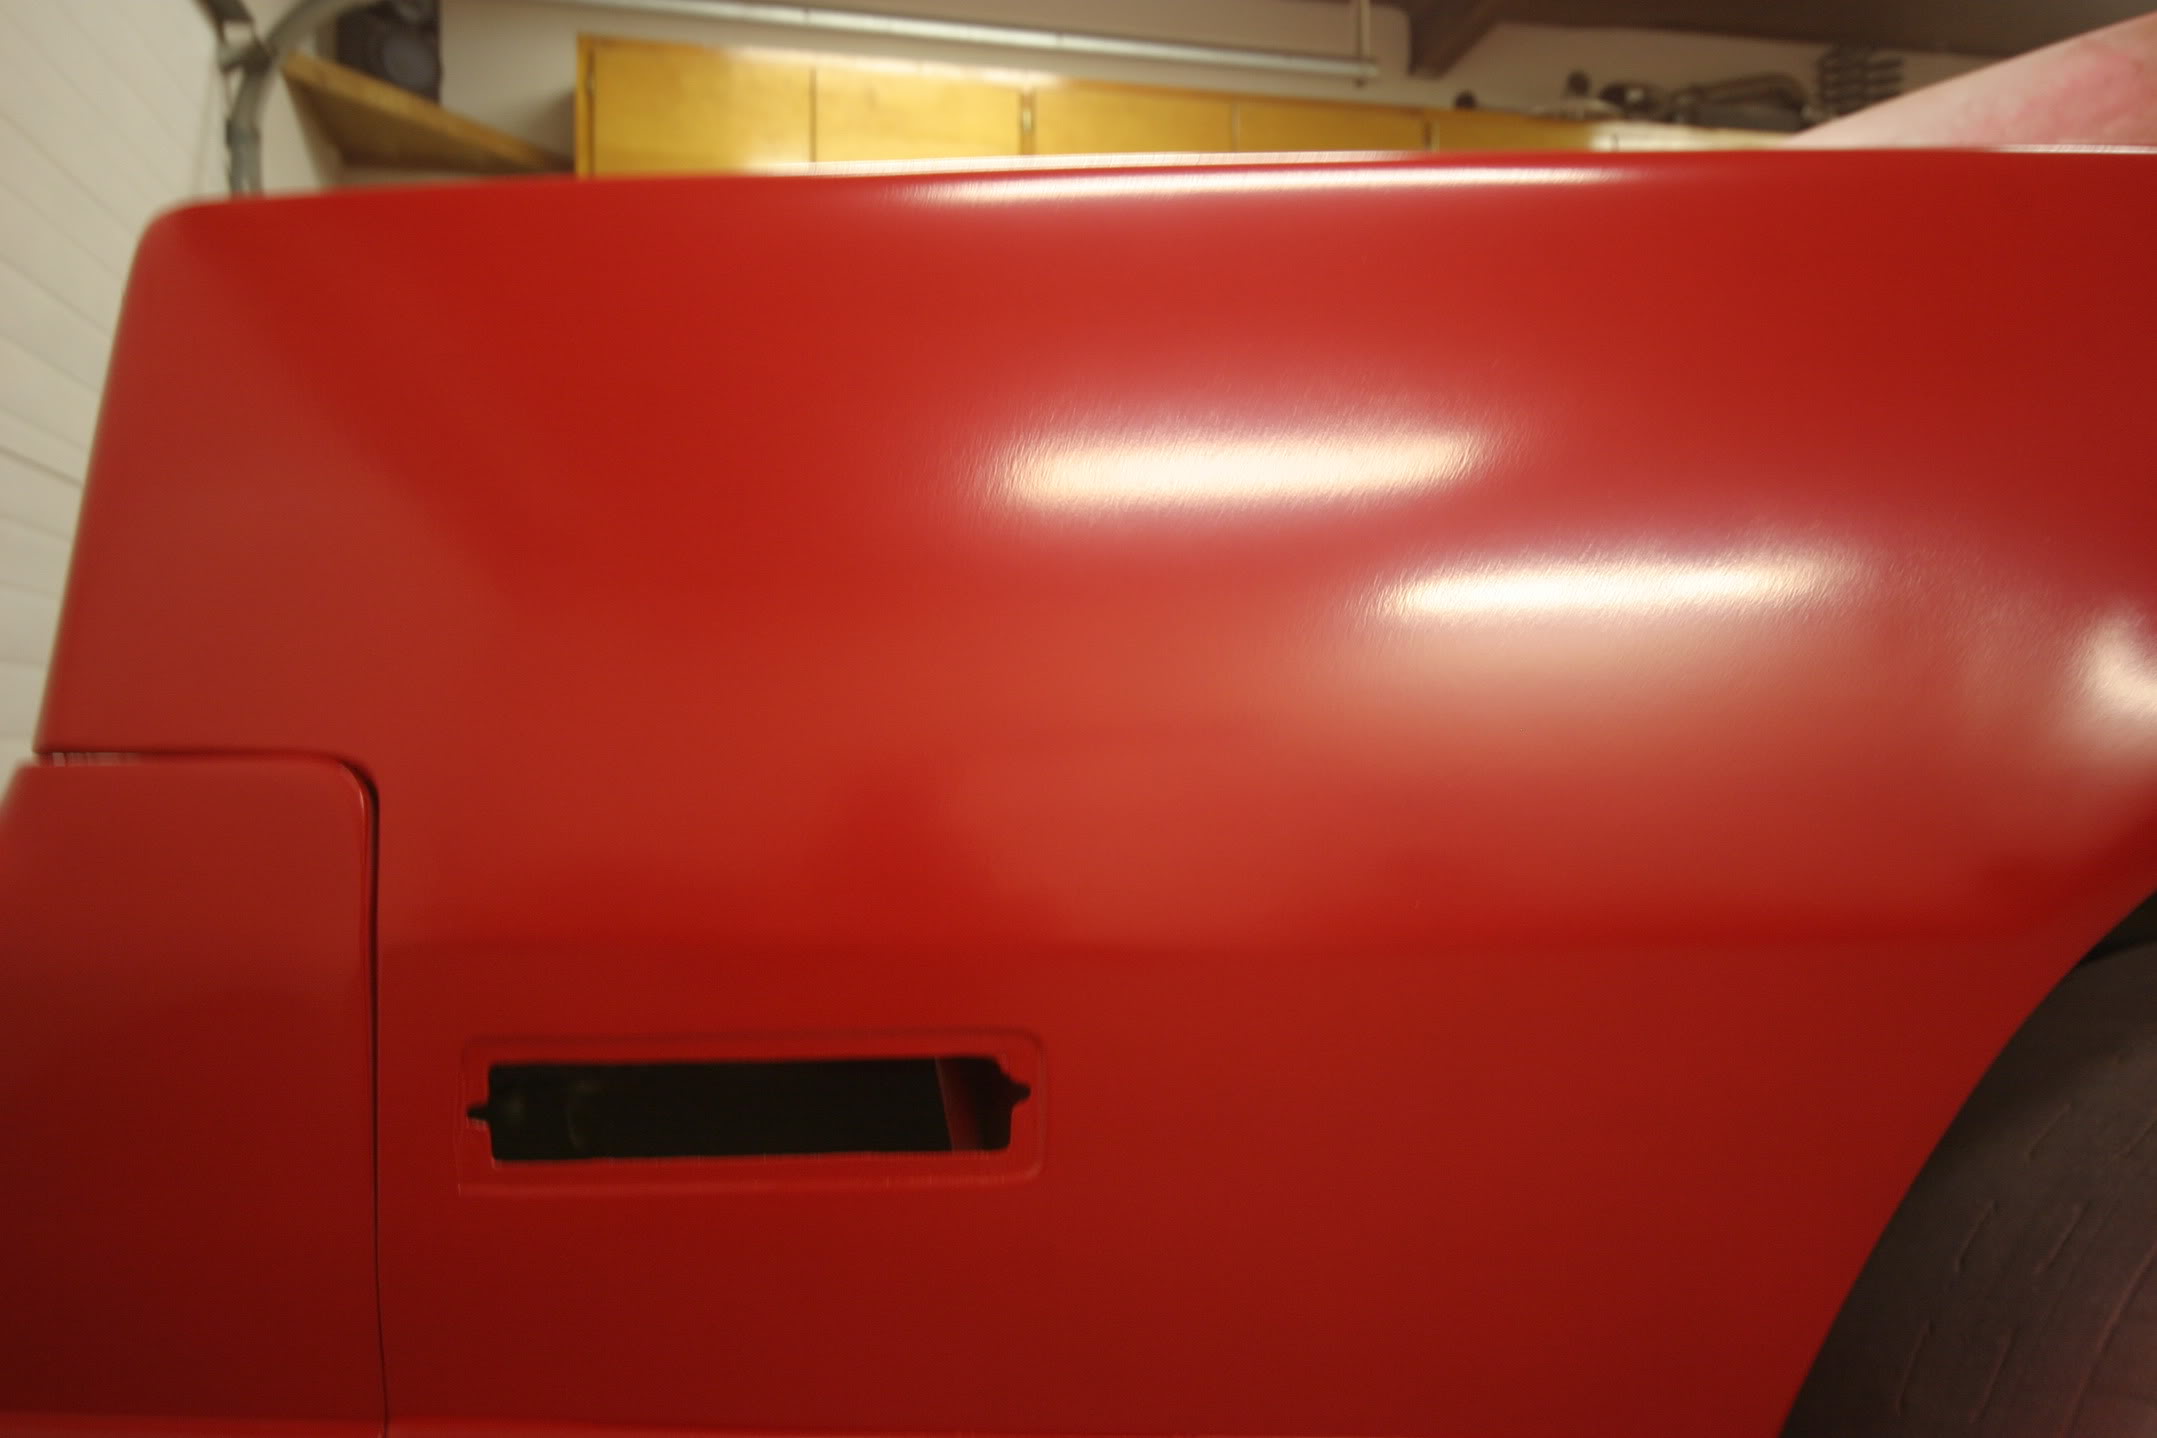
Total cost of all materials was around $2000. That includes the primer, sealer, base, clear, hardeners, reducers, respirator, sandpaper, blocks, tape and paper. You could do it cheaper because I used the top of the line base coat from PPG that was $745/gallon but it went on much nicer than the cheaper paints and had much better coverage.
I still have to wet sand, apply more clear then color sand and buff it. When it's all done I'll be in the neighborhood of 200-250 hours.
I still have to wet sand, apply more clear then color sand and buff it. When it's all done I'll be in the neighborhood of 200-250 hours.

Trending Topics
01-02-2011, 02:20 PM
#8
Supreme Member
iTrader: (18)
Join Date: Dec 2007
Location: Minnesota
Posts: 1,924
Likes: 0
Received 12 Likes
on
9 Posts
Car: 84 camaro, 88 trans am, 98 camaro
Engine: Modded , stock, LSX modded
Transmission: 700r4, 700r4, t-56
Axle/Gears: 327, 308, 373
Re: My DIY paint project write up.
Looks great. One question how come you didn't bag your wheels?
01-02-2011, 04:59 PM
#9
Supreme Member
Thread Starter
iTrader: (3)
Join Date: Sep 2005
Location: MD
Posts: 1,685
Likes: 0
Received 3 Likes
on
3 Posts
Car: '88 IROC-Z medium orange metallic
Engine: L98
Transmission: 700R4
Axle/Gears: 3.27
Re: My DIY paint project write up.
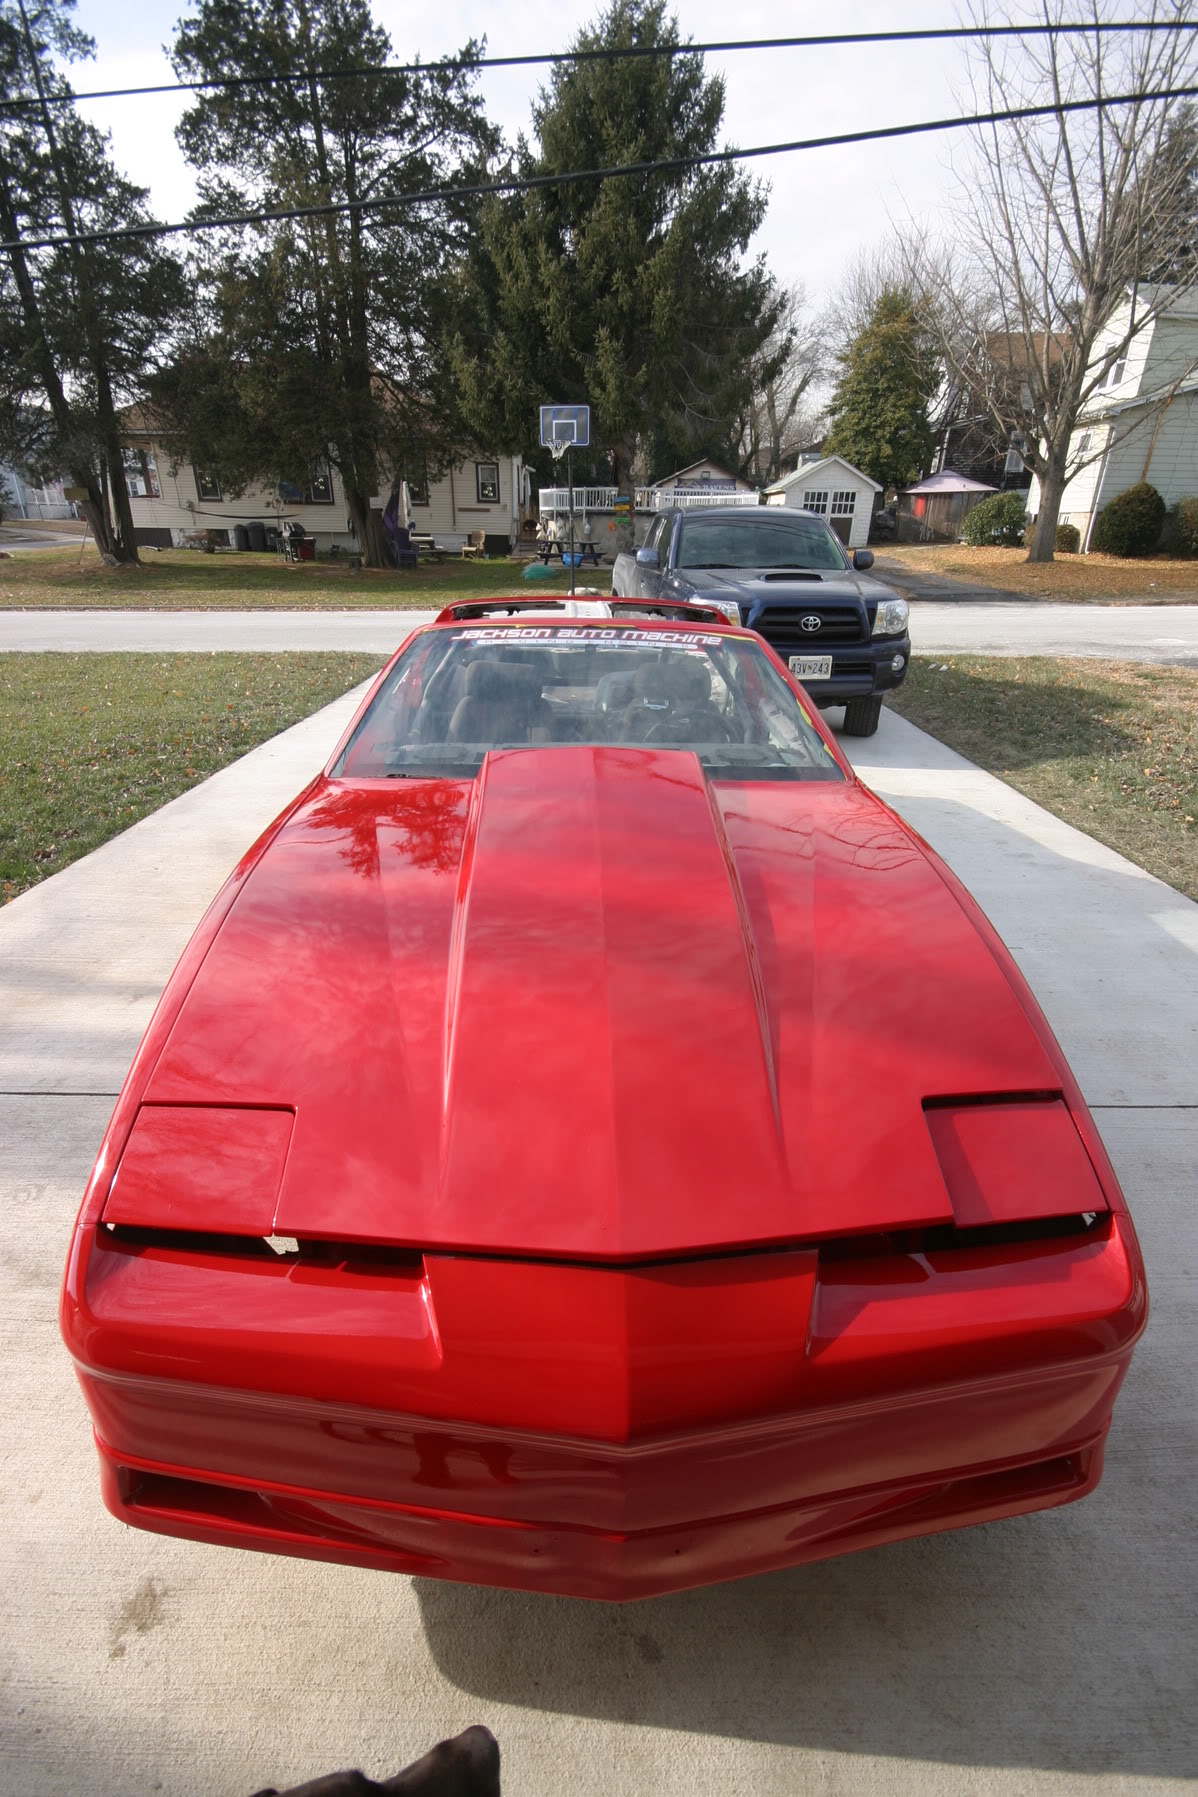
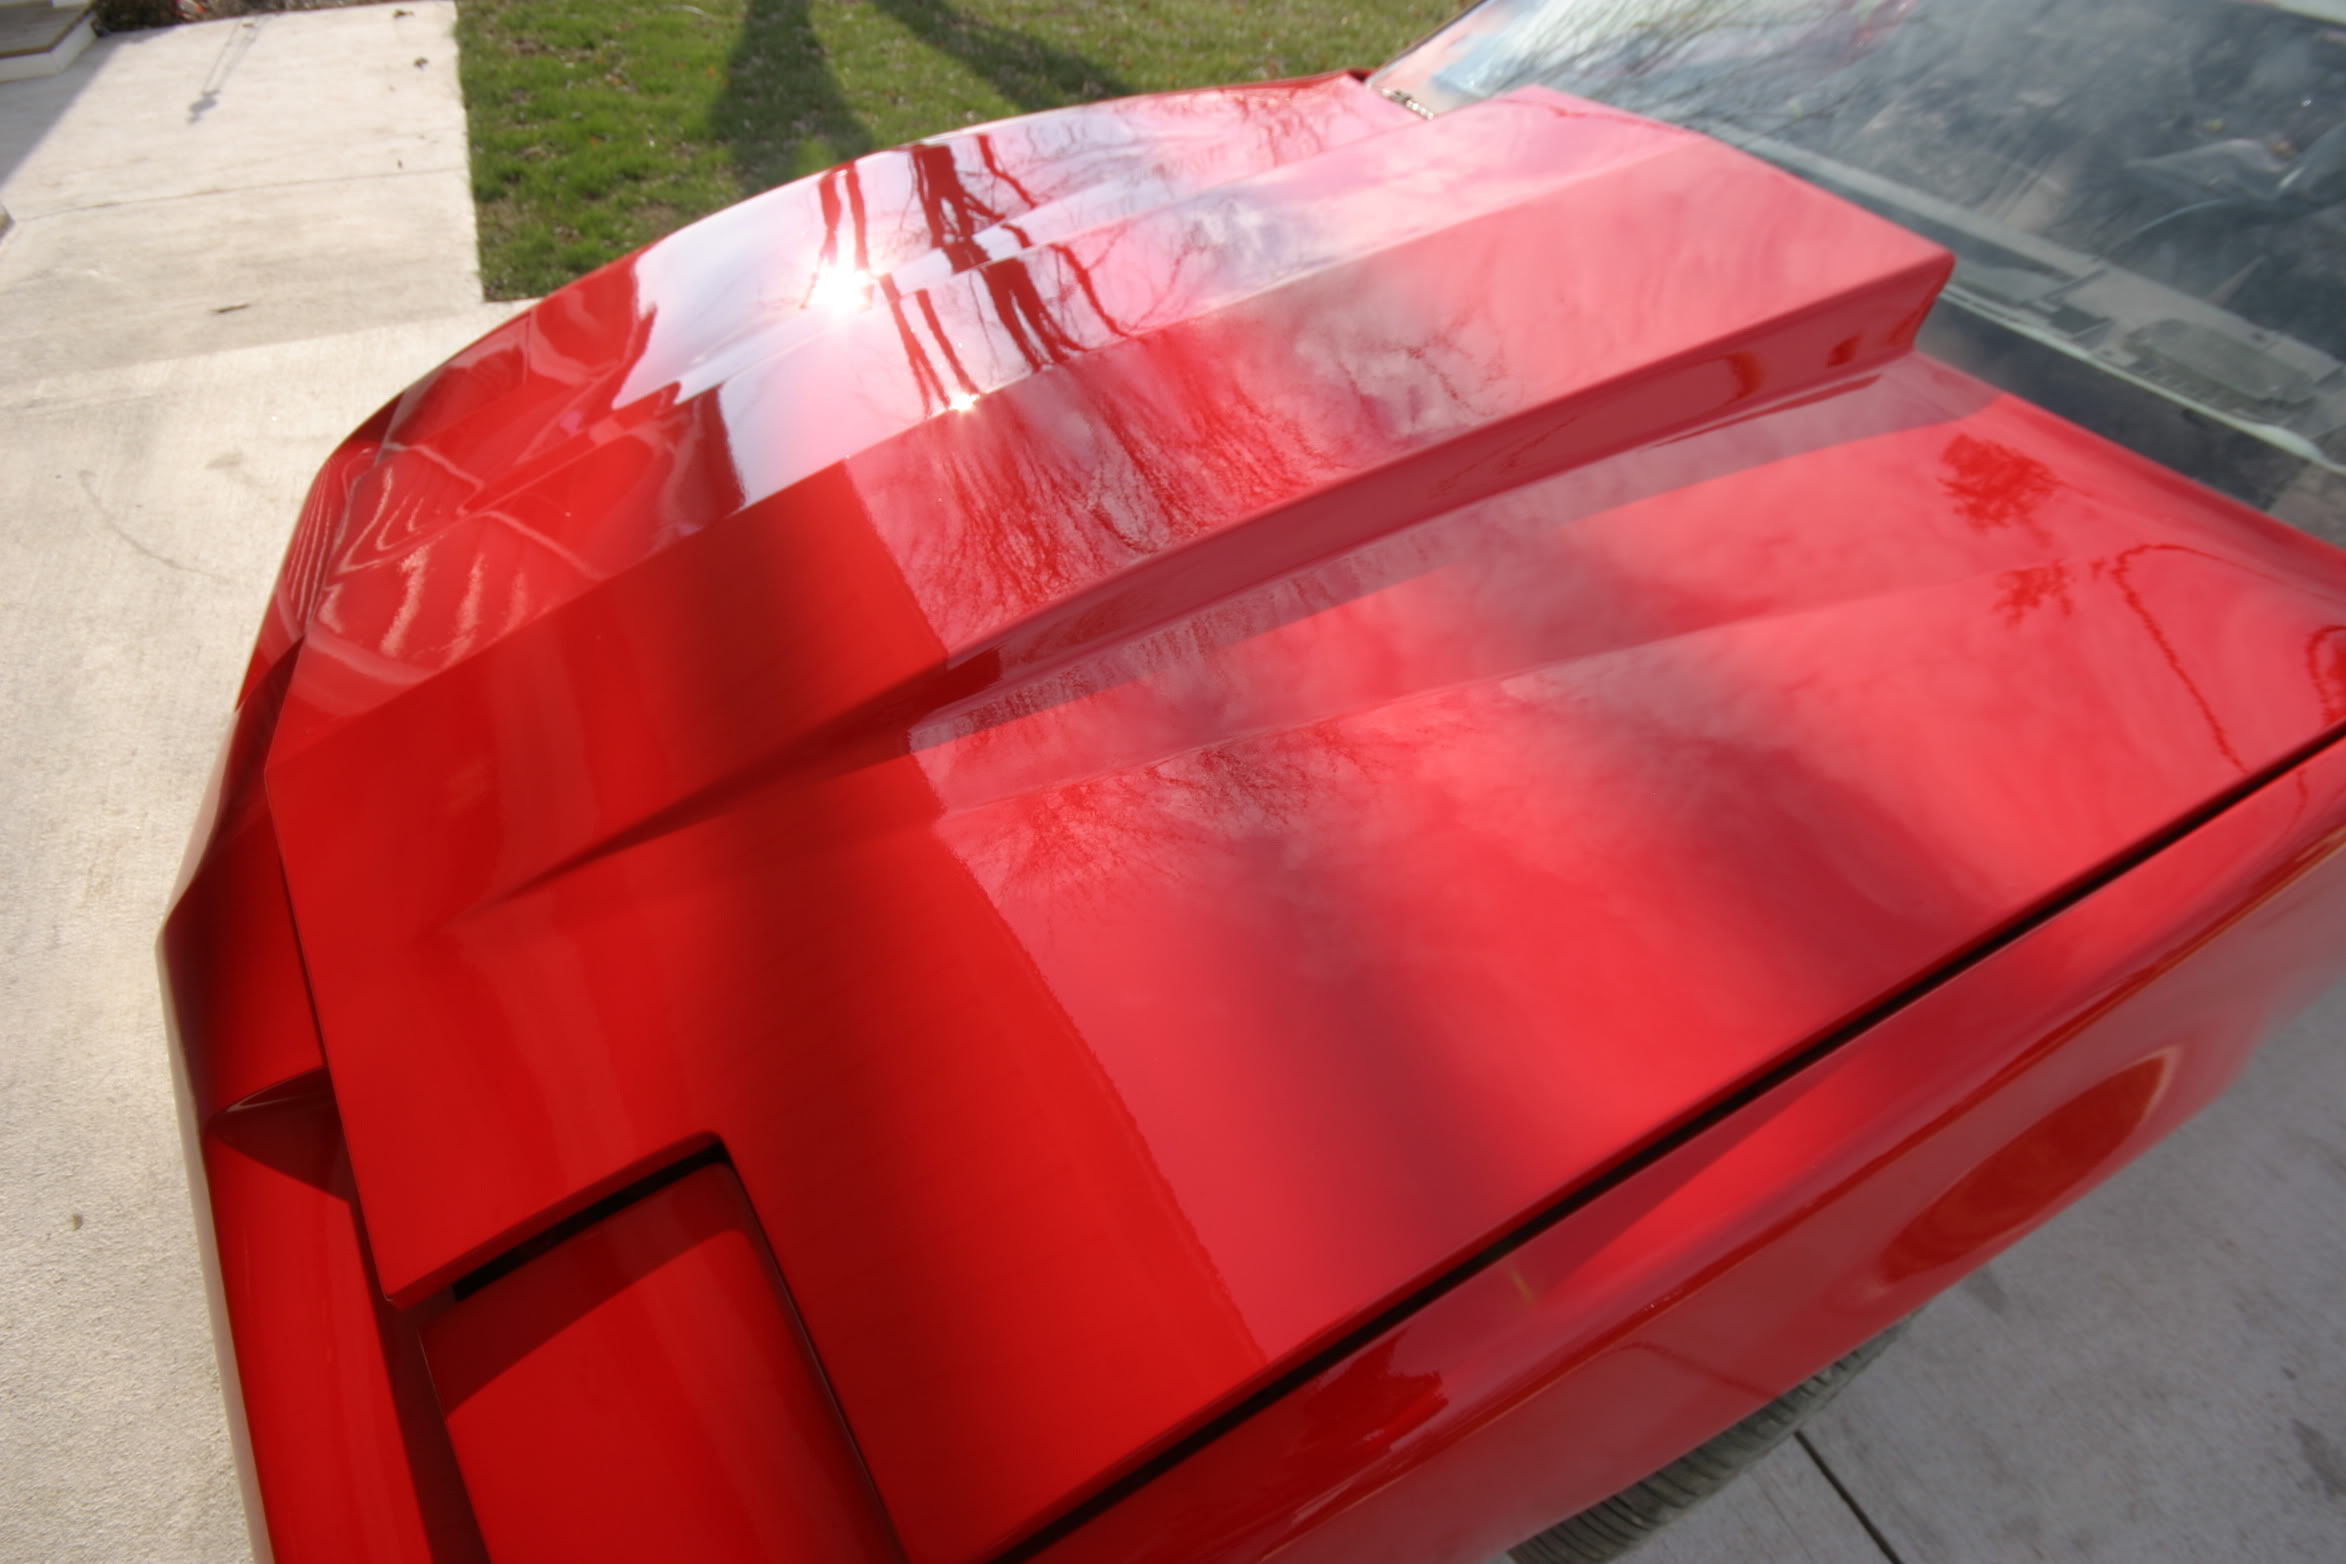
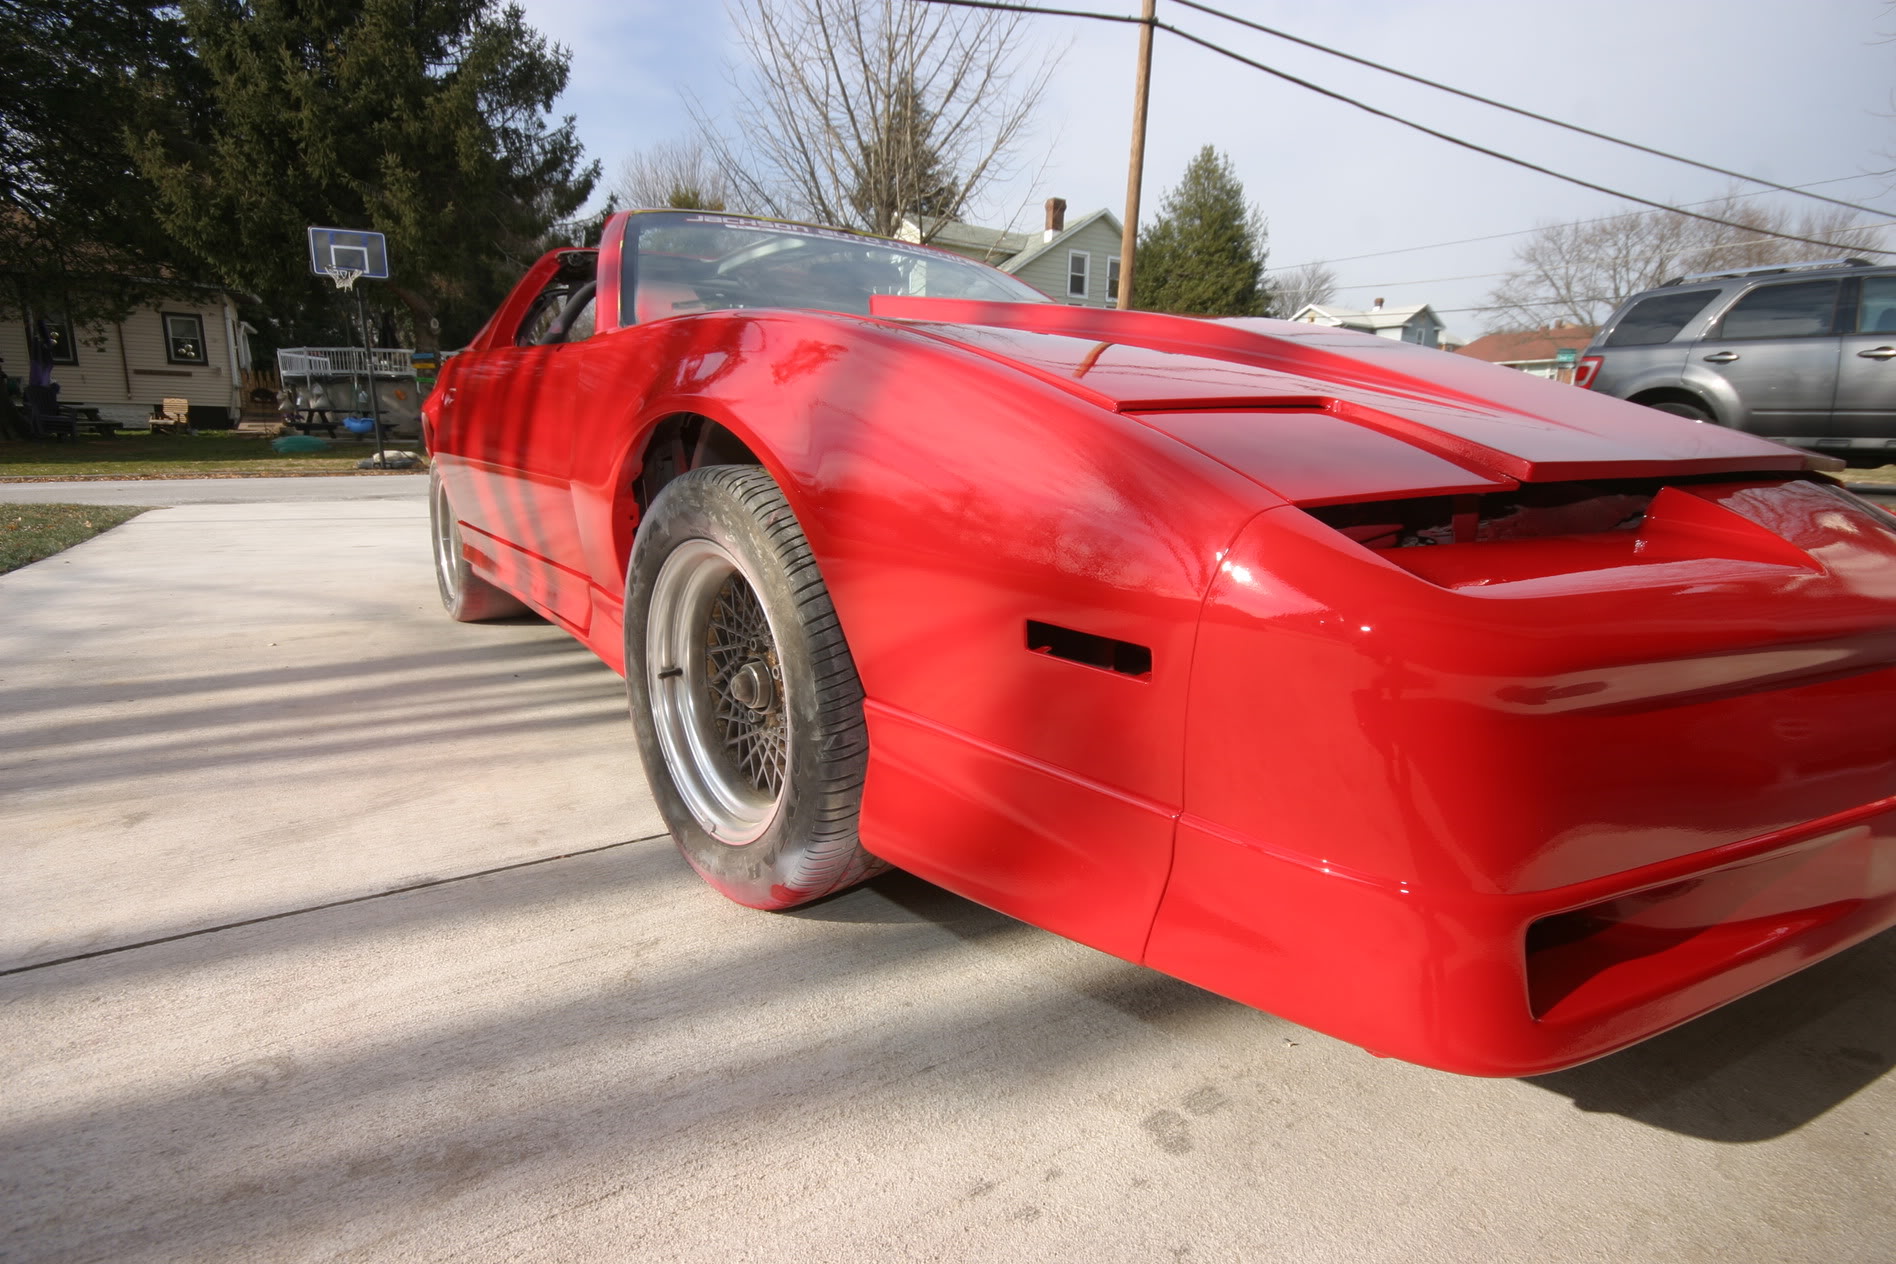
Thanks. Yes, thats without wetsanding. I did wet sand with 600 today and put on two more coats of clear. I'll post some photos of that in the next day or so. This is my first paint job and venture into body work.
 01-03-2011, 05:00 AM
#13
Senior Member
iTrader: (1)

Join Date: Mar 2009
Location: Stoughton, MA
Posts: 817
Likes: 0
Received 0 Likes
on
0 Posts
Car: 1985 camaro Z28
Engine: 305 5.0 V8 carburated
Transmission: 700r4
Re: My DIY paint project write up.
Awesome work! Makes me want to try to paint my car someday. This should be a sticky for sure!
01-03-2011, 06:36 AM
#14
Re: My DIY paint project write up.
Good to see a TRUE step by step guide, and the car looks absolutely great for not even being wetsanded/buffed yet. Wow.
Really looking forward to the de facto final product.
How about some shots down the body to see how straight she is?
Really looking forward to the de facto final product.
How about some shots down the body to see how straight she is?
 03-16-2011, 09:45 AM
#16
Senior Member
iTrader: (2)
Join Date: Jun 2008
Location: Traverse City, MI
Posts: 728
Likes: 0
Received 0 Likes
on
0 Posts
Car: 91' Firebird
Engine: 3.1 LH0 V6
Transmission: Auto 700R4
Axle/Gears: 3.23 limited slip
Re: My DIY paint project write up.
This is by FAR the best car painting writeup I've found! Took a little searching to find it though... +1 to whoever said it should be a sticky!
Last edited by K-slice; 03-16-2011 at 05:05 PM.
03-16-2011, 04:30 PM
#18
Supreme Member
iTrader: (3)
Join Date: Jan 2009
Location: Mesquite, Texas
Posts: 4,009
Likes: 0
Received 5 Likes
on
5 Posts
Car: 89 rs, 86 Trans Am
Engine: RS-V6... Trans Am-LG4
Transmission: RS-T5... Trans Am 700r4
Re: My DIY paint project write up.
it is good. I'm about to get into this myself, and I'm trying to decide if I should remove the front and rear bumpers.
I have to change a fender, so at some point I'm going to have to remove at least one side of the front bumper anyway
I have to change a fender, so at some point I'm going to have to remove at least one side of the front bumper anyway
03-16-2011, 05:06 PM
#19
Senior Member
iTrader: (2)
Join Date: Jun 2008
Location: Traverse City, MI
Posts: 728
Likes: 0
Received 0 Likes
on
0 Posts
Car: 91' Firebird
Engine: 3.1 LH0 V6
Transmission: Auto 700R4
Axle/Gears: 3.23 limited slip
Re: My DIY paint project write up.
Me too! I've been putting off pain for 2 summers now and hopefully I'll have the finances and time to do it.
03-16-2011, 06:05 PM
#20
Member
Join Date: Jul 2008
Location: McGregor TX
Posts: 439
Likes: 0
Received 0 Likes
on
0 Posts
Car: 91 RS T-top
Engine: 305 tbi
Transmission: T5
Axle/Gears: 3:42 fourth gen disk brake
Re: My DIY paint project write up.
She came out beautiful. Very nice job. Why didn't you remove the ground efx etc? I would think over time the will chip where the butt up against the body.
03-16-2011, 08:00 PM
#22
Member
iTrader: (1)

Join Date: Jan 2005
Location: Otsego Mn
Posts: 109
Likes: 0
Received 0 Likes
on
0 Posts
Car: 86 IROC
Engine: MAS Crate 350
Transmission: 97 T-56
Axle/Gears: 97 rear 3.43's posi
Re: My DIY paint project write up.
YEP! Plus 1 more for to sticky this one!!!!! DOOOOOO IIIIIITTTT!!!!!!!

 03-16-2011, 10:36 PM
#25
Junior Member
iTrader: (1)

Join Date: Mar 2002
Location: New Jersey
Posts: 11
Likes: 0
Received 0 Likes
on
0 Posts
Car: 1989 Pontiac Firebird Formula 350
Engine: L98
Transmission: A4
Re: My DIY paint project write up.
Prob the best How-to paint thread on the board. I will definitely be referencing this when my time comes.
03-31-2011, 07:14 PM
#26
Junior Member

Join Date: Mar 2011
Location: Indiana
Posts: 11
Likes: 0
Received 0 Likes
on
0 Posts
Car: 88 camaro, 87 iroc
Engine: 305 tbi, 305 tpi
Transmission: manual\auto
Re: My DIY paint project write up.
thanks for the info, i learned alot. getting ready to start my 87 iroc. is will be very helpfull.
04-02-2011, 10:09 PM
#28
Supreme Member
iTrader: (3)
Join Date: Jan 2009
Location: Mesquite, Texas
Posts: 4,009
Likes: 0
Received 5 Likes
on
5 Posts
Car: 89 rs, 86 Trans Am
Engine: RS-V6... Trans Am-LG4
Transmission: RS-T5... Trans Am 700r4
Re: My DIY paint project write up.
every paint pro I've ever talked to says flex agent is a waste of time and money.
04-03-2011, 06:18 PM
#29
Senior Member
iTrader: (4)

Join Date: Mar 2010
Location: St. Louis
Posts: 595
Likes: 0
Received 1 Like
on
1 Post
Car: 91 Z28
Engine: 350 TPI
Transmission: 700R4
Axle/Gears: Stock
Re: My DIY paint project write up.
It is a complete waste of time and money. Use quality paint by a known manufacturer, don't bother with the flex agent, and you'll be fine.
04-03-2011, 08:43 PM
#30
Re: My DIY paint project write up.
yea after doing some reasearch ive come to the same conclusion... flex additive does nothing.
Not sure why my bumper paint is coming off in sheets then, it was coming off after 3 months. Im going to have to assume poor prep by my paint guy. Im gona go with single stage urethane primer and single stage hot rod back on my hood and bumper now... i hope that sticks.
Not sure why my bumper paint is coming off in sheets then, it was coming off after 3 months. Im going to have to assume poor prep by my paint guy. Im gona go with single stage urethane primer and single stage hot rod back on my hood and bumper now... i hope that sticks.
04-04-2011, 08:03 AM
#31
Supreme Member

Re: My DIY paint project write up.
 04-05-2011, 06:48 PM
#34
Junior Member
Join Date: Mar 2011
Location: Indiana
Posts: 11
Likes: 0
Received 0 Likes
on
0 Posts
Car: 88 camaro, 87 iroc
Engine: 305 tbi, 305 tpi
Transmission: manual\auto
Re: My DIY paint project write up.
I have a question, if you have a low spot and you have to use filler, do you have to sand it all the way down to the metal for the filler to stick? Thanks for the advice, just want to do it right the first time.
04-05-2011, 06:53 PM
#35
Supreme Member
iTrader: (3)
Join Date: Jan 2009
Location: Mesquite, Texas
Posts: 4,009
Likes: 0
Received 5 Likes
on
5 Posts
Car: 89 rs, 86 Trans Am
Engine: RS-V6... Trans Am-LG4
Transmission: RS-T5... Trans Am 700r4
Re: My DIY paint project write up.
If you don’t have bare metal, I would use a polyester filler.
04-06-2011, 01:24 AM
#38
Junior Member

Join Date: Nov 2010
Location: Oshkosh, WI.
Posts: 69
Likes: 0
Received 0 Likes
on
0 Posts
Car: 1989 Firebird Formula
Engine: 305 TBI (For now?!?!)
Transmission: Auto-Stock
Axle/Gears: stock
Re: My DIY paint project write up.
 This is by far the best write up ever. All i need is a garage to do this in and I'm sure I could tackle this myself
  04-07-2011, 02:42 PM
#39
Junior Member
Join Date: Mar 2011
Location: Indiana
Posts: 11
Likes: 0
Received 0 Likes
on
0 Posts
Car: 88 camaro, 87 iroc
Engine: 305 tbi, 305 tpi
Transmission: manual\auto
Re: My DIY paint project write up.
make your own booth with pvc pipe (just dont glue it) and plastic, and few fans.
04-07-2011, 08:36 PM
#40
Re: My DIY paint project write up.
can i ask how you prepped the bumper? I just stripped mine and it took 2 days. Mine was a replacement bumper and its polyurethane. after a few months after paint it chipped off, after i stripped the bumper i noticed that the parts where the chipped paint came off the poly became dark yellow/orange, hard and seemed to be "recessed" compared the the rest of the bumper surface. I thought about putty but I didnt think you could put putty on a poly bumper. I started to sand the bumper with 240 grit, then going 320, then 400. Ill shoot some urethane primer and then sand it with 600 before the hot rod black urethane paint. Just Wanted to know if you guys use putty on bumpers since you didnt really cover the bumper prep in this thread.
11-07-2012, 12:19 PM
#41
Supreme Member
Thread Starter
iTrader: (3)
Join Date: Sep 2005
Location: MD
Posts: 1,685
Likes: 0
Received 3 Likes
on
3 Posts
Car: '88 IROC-Z medium orange metallic
Engine: L98
Transmission: 700R4
Axle/Gears: 3.27
Re: My DIY paint project write up.
can i ask how you prepped the bumper? I just stripped mine and it took 2 days. Mine was a replacement bumper and its polyurethane. after a few months after paint it chipped off, after i stripped the bumper i noticed that the parts where the chipped paint came off the poly became dark yellow/orange, hard and seemed to be "recessed" compared the the rest of the bumper surface. I thought about putty but I didnt think you could put putty on a poly bumper. I started to sand the bumper with 240 grit, then going 320, then 400. Ill shoot some urethane primer and then sand it with 600 before the hot rod black urethane paint. Just Wanted to know if you guys use putty on bumpers since you didnt really cover the bumper prep in this thread.
I did use flex additive in every coat on every panel. The paint supply shop that I got all of my supplies from said that I should use it on the plastic pieces. For ease of mixing/spraying they advised me to just use it on every coat instead of spraying the plastic pieces seperately. They said it wouldn't hurt if applied to the steel panels too. I used the PPG flex additive. I did not use any special bonding agents or adhesion promoters. Just made sure everything was good and clean. Used lots of wax and grease remover and lots of tack rags.
 11-07-2012, 05:58 PM
#43
Junior Member
Join Date: Feb 2008
Location: Idaho Falls, Id
Posts: 85
Likes: 0
Received 2 Likes
on
2 Posts
Car: lots of Firebirds!
Engine: LS1s, 455
Transmission: t56s all around! lol
Re: My DIY paint project write up.
Looks good. Thanks for taking the time to write this. Subscribing so I can read it all when I have the time
 02-16-2014, 12:51 PM
#46
Supreme Member
Thread Starter
iTrader: (3)
Join Date: Sep 2005
Location: MD
Posts: 1,685
Likes: 0
Received 3 Likes
on
3 Posts
Car: '88 IROC-Z medium orange metallic
Engine: L98
Transmission: 700R4
Axle/Gears: 3.27
Re: My DIY paint project write up.
It's been about two years now and my DIY paint job is holding up well. Good adhesion, no bubbling, peeling or lifting to speak of. I was a bit concerned about the bumper covers but so far so good.
02-21-2014, 02:22 PM
#47
Member

Join Date: Jul 2009
Location: Oklahoma
Posts: 238
Likes: 0
Received 0 Likes
on
0 Posts
Car: genesis, equus, f250, camaro, other
Engine: 5.7
Transmission: t5
Re: My DIY paint project write up.
Looks good! Did you wetsand and buff? Shame you didn't remove the ground effects, but looks good regardless
06-01-2015, 02:43 PM
#48
Junior Member

Join Date: Feb 2015
Posts: 22
Likes: 0
Received 0 Likes
on
0 Posts
Re: My DIY paint project write up.
Great info and exactly what I needed to know prior to painting.
Only difference is I plan to paint the bumpers, side skirts and spoiler off the car.
Only difference is I plan to paint the bumpers, side skirts and spoiler off the car.

Thread
Thread Starter
Forum
Replies
Last Post
ambainb
Camaros for Sale
11
04-25-2016 09:21 PM
ElPaleterro85
Body
2
08-13-2015 03:49 PM

