How to Replace the Hydraulic Clutch Assembly
Materials
- new hydraulic clutch setup (GM part number 12527718)
- jack and jackstands or ramps
- 7/16" deep socket
- 10mm wrench or socket
- 7mm wrench or socket
- flat screwdriver
Removal
- Jack up front of car.
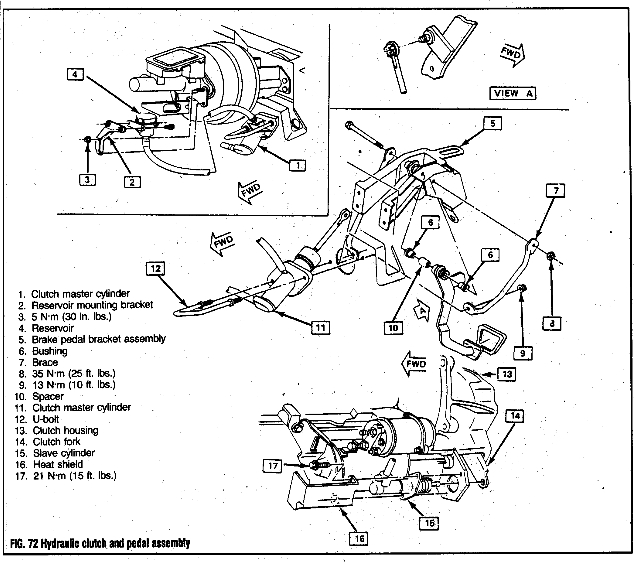
- Go under car, unbolt 2 bolts holding slave cylinder to bellhousing (10mm). Unbolt bolt holding hydraulic line to frame (7mm).
- Now pop the hood. Unbolt the 2 bolts holding the white fluid resevoir (10mm).
- Go inside the car, unbolt the kick-panel to gain access to clutch assembly (not sure what size bolts).
- Unbolt two nuts holding clutch master cylinder to firewall (7/16").
- Using a screwdriver, pry the push-rod off of the clutch pedal. You might have to depress the clutch to get at it.Careful not to hit yourself in the forehead like I did, ouch..
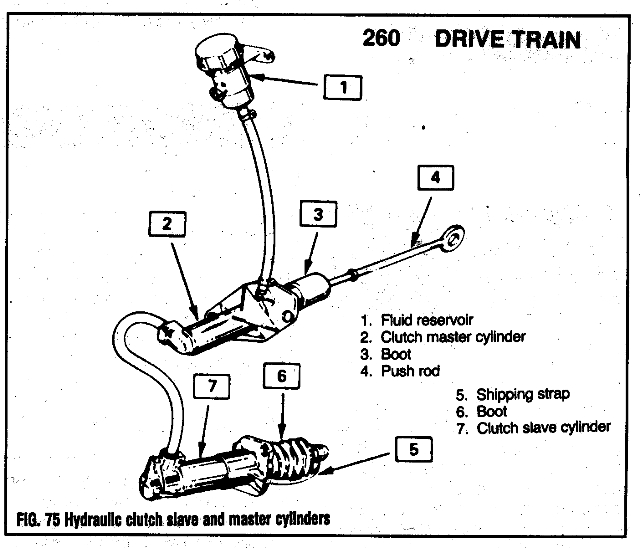
- Now that the clutch master cylinder is free you’re ready to remove the entire assembly from the car. You might want to break the pushrod off the master cylinder. It’s easy and only spills a few drops of fluid. Also take the fluid resevoir off (cut the hose if you want).
- You may also want to unbolt the ESC Module or any other things that are in your way near the fluid resevoir. This makes it easier to see when you’re installing the new master cylinder. The AIR hose and brake booster hose are also a very good idea to remove for when you’re trying to snake the new system in underneath the steering shaft and brake booster.
Installation
- Lower slave cylinder down. Make sure it goes under the steering shaft, not over.
- This is the hard part. You need to get the master cylinder into the hole in the firewall. What I did was gently bend the brake lines back a little bit so that I could get more space. Be careful not to bend the pushrod on the master cylinder at too much of an angle or it could snap off. One other problem I had was that after I had the master cylinder in place the tube that leads to the slave cylinder was twisted the wrong way. Just twist the line until it’s in the right place. When it’s in correctly it will be pretty obvioius because everything will line up just right.
- Bolt the slave cylinder onto the bellhousing (10mm). Remember, the nuts are integrated into the shield (you’re not missing any!). Bolt the 7mm screw back into the frame to secure the hydraulic line.
- Bolt the master cylinder to the firewall. This part requires 2 people. One person must go under the dash and coax the bolts through while the other person pushes them in from the engine bay. This is because there’s a metal bracket that gets in the way.
- Attach the new pushrod to the clutch pedal by simply snapping it on.
- Reconnect the AIR hoses and the brake booster hose.
- Bolt the resevoir down (10mm).
- Bolt kick panel down.
- Lower car, close hood.
- Try out the clutch pedal.