Third Gen Interior Door Panel Restoration
By Alan Austin ( alanaustin@mindspring.com )
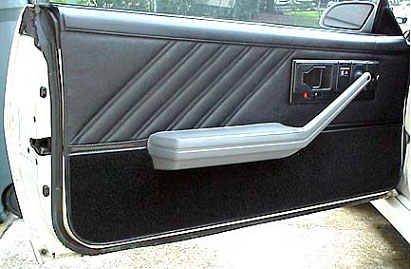
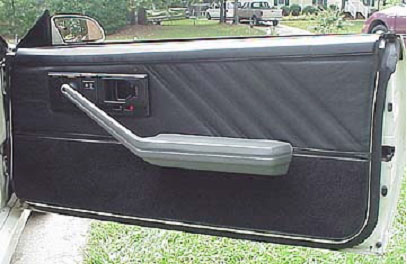
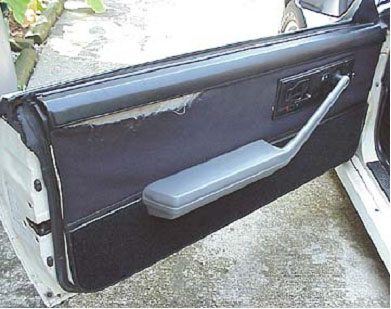
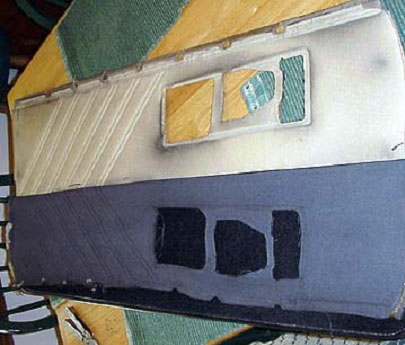
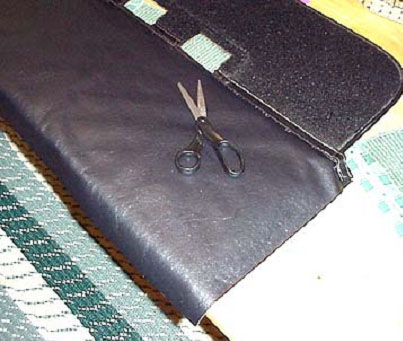
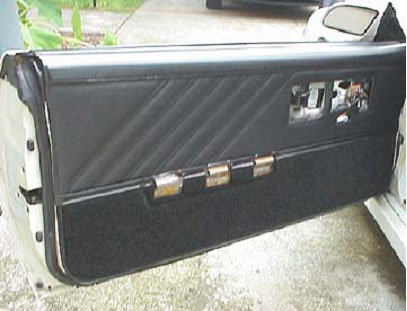
Tired of the door panels on your 3rdgen looking like crap? For a measly $13.00 and a good 6 hours of your time, you can restore them to their original glory, or at least very close to it. This is how mine looked before I decided to redo them:
What follows is a step-by-step procedure on refinishing your door panels. It isn’t perfect but it worked for me, and I’m pleased with the results.
The main thing to remember if you decide to tackle this job is to take your time and be patient. If you find yourself getting frustrated, walk away from it, take a break and come back to it when you’re ready to try again. That is much easier than breaking something or taking several steps backwards.
Good luck with this and I hope you’ll find this helpful.
Time required: approx. 3 hours/panel
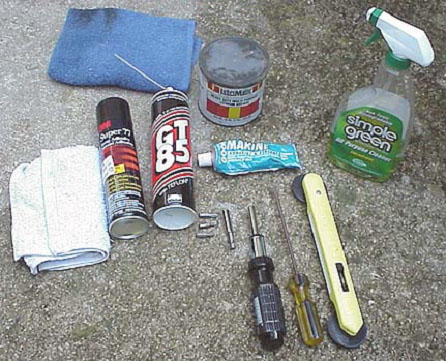
Tools:
- Thin blade screw driver
- Needle-nose pliers or similar (I used a "Leatherman")
- 10mm socket w/ratchet
- Torx driver w/extension
- T-30 torx tip
- T-10 torx tip
- 5/32 allen socket
- X-acto knife
- Screen window "roller" tool
Materials:
- clean rags
- 3M Brand "Super 77" spray adhesive
- Goop Brand Marine adhesive
- GT85 Teflon spray lubricant
- Replacement fabric of your choice
- Simple Green cleanser
Roll your window down all the way
Remove the arm rest
Remove two 5/16 allen-head screws underneath (extension driver works great for this)
Remove the T-30 Torx screw at the top of the handle
Set the arm rest aside
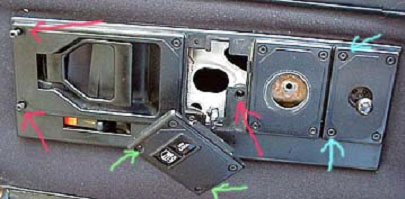
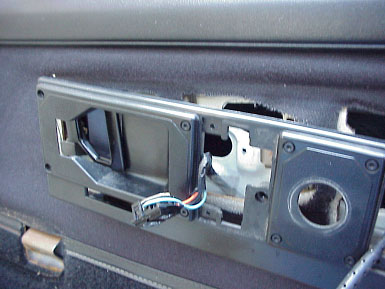
Remove door handle/lock panel (see picture below):
Remove power lock panel’s two T-15 screws (green arrows)-NOTE: there are ONLY two screws-the other "screws" are fake (molded plastic) then remove the switch assembly from its panel
Remove main panels T-15 screws (red arrows)
Remove side-view mirror panel T-15 screws(blue arrows)
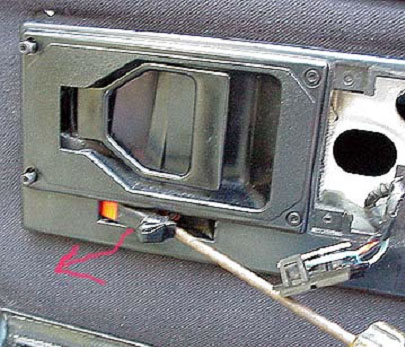
Remove manual lock:
Gently pry a thin screw driver under the manual lock, pull it out and towards you so that it disengages from the lock bar. Do not force it as it comes of easily. Slide it out the rest of the way.
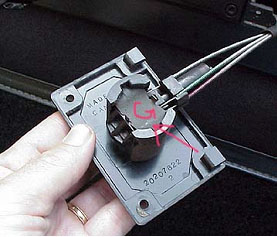
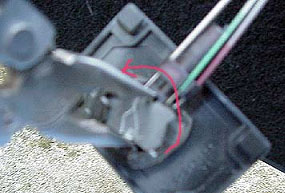
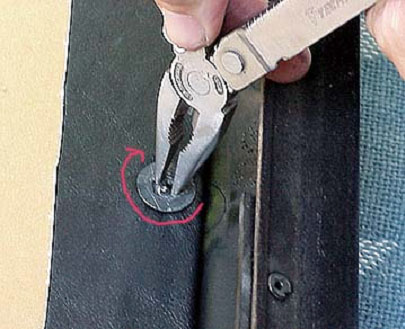
Remove side-view mirror control:
Grasp the metal plate that holds the pivot assembly onto the panel with a pair of pliers. Carefully rotate the plate 90 degrees to disengage the plate. This will allow you to remove the assembly from the plate.
Remove main panel:
Gently pull the power lock switch and side-view mirror assemblies and wires through the panels. Guide the main panel out-the door handle WILL fit through the hole, just don’t force it. Be careful of the door lock bar as well-slide it to the "locked" position to give you more room. Set the panel aside.
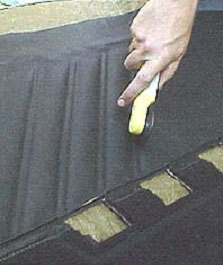
Starting at the BOTTOM of the trim panel and working your way upwards, carefully pry the panel out to disengage the nylon barbed "stays" from the door. There is a special tool to do this but it’s not necessary if you’re gentle with it. Try to grasp each individual barbed stay to pull them out. If they end up sticking to the door instead of the panel, simply remove them after you get the panel completely off and re-insert them into the panel. If you break them, replacements are available at your local auto parts store.
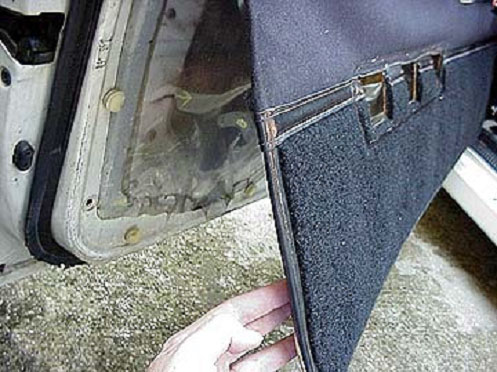
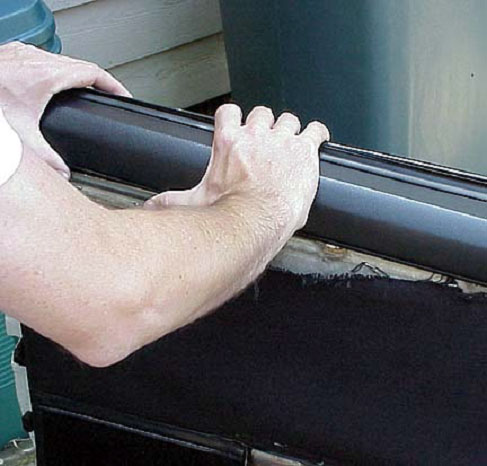
Remove top of trim panel:
This is one of the trickiest parts of the entire job, and you have to be very patient so that you don’t break the plastic trim at the top of the panel.
Starting at the end of the door (opposite the door hinges), squeeze the plastic panel, push out and upwards firmly to disengage the lock tab that holds the top of the panel to the door frame but not so forcefully that you crack the plastic. There are a total of three lock "tabs" on this plastic piece: one at each end and one in the middle. After you disengage the first one it’s a good idea to have an assistant hold that end up for you while you work on the other two, so that the panel doesn’t re-lock itself. Be patient and you will be able to remove it without breaking anything.
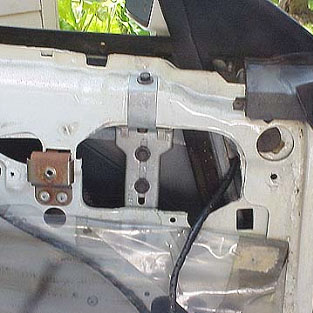
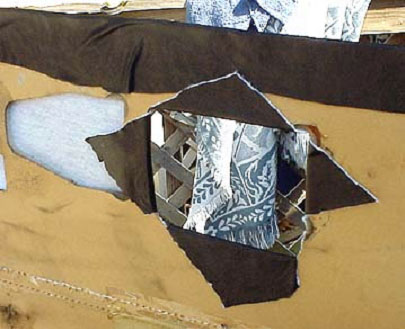
This is what the door looks like sans trim panel. Now is a good time to check the waterproof plastic liner for damage, grease and lubricate all moving parts, adjust glass height (if necessary), etc.
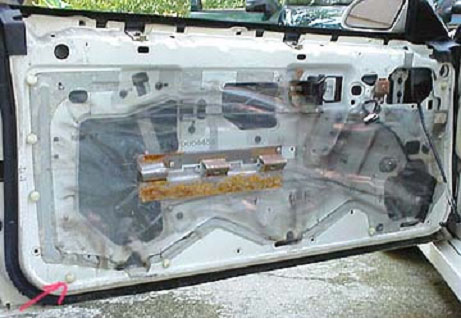
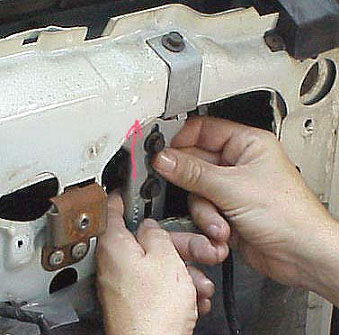
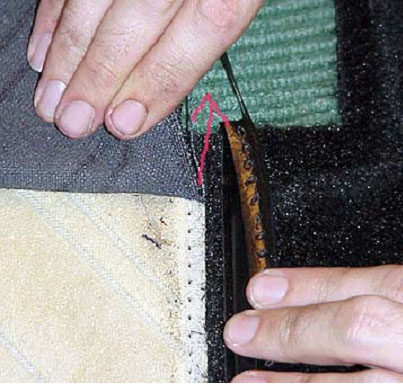
My car had excessive wind noise at highway speed, so I raised the glass SLIGHTLY to improve the seal at the top. This is done by adjusting the "stops" at the top of the door. They are easy to get to and easy to adjust. You have to peel back the plastic water barrier to get to them.
Adjust the door glass upwards, if you feel it’s necessary, by loosening the two 10mm bolts on the stop adjuster; there is also a single 10mm bolt on a 2nd adjuster on the other end of the door. Move both upwards only a small amount and test to make sure you have adequate compression on the door seal. Make sure that you don’t adversely affect the angle of the window-the top of the glass should be parallel with the door seal at the top.
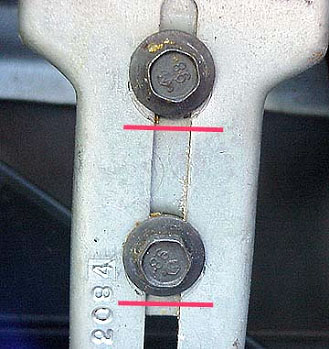
Note the red lines which show the original position of the 10mm bolts. This is all I needed to adjust mine to eliminate wind noise.
Now is also a good time to lubricate all moving assemblies/locks/etc. inside the door. Be sure to reattach the water barrier to prevent water intrusion. Use a waterproof adhesive if necessary.
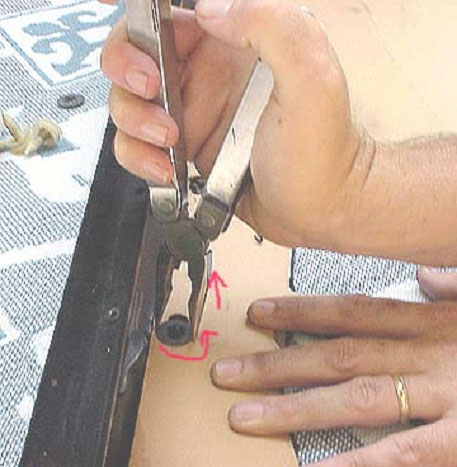
Now that you have the panel off the door, the next step is to remove the plastic trim plate from the top of the trim panel. It is attached via metal speed nuts that are screwed onto plastic nibs molded to the inside of the plastic trim plates. The easiest way I found to remove these was to grasp them firmly on their outside edge with a pair of pliers and twist them off, being careful not to break off the plastic nibs. Push down on the cardboard backing so you have better access to the speed nuts. Save the speed nuts because you’ll need them to reattach the panel.
Lay the panel on a flat surface and carefully remove the old fabric; (the bottom half of my trim panels were covered with carpet, and in very good condition, so I left it alone). Gently separate the fabric from the sponge/foam backing. If you’re lucky, the backing is in good shape like mine was, including the diagonal indentations.
Use a thread cutter or X-acto knife to remove the threads running the length of the middle of the panel (work on the back of the panel). ONLY remove the line of threads that attach the top half of the fabric that you’re replacing.
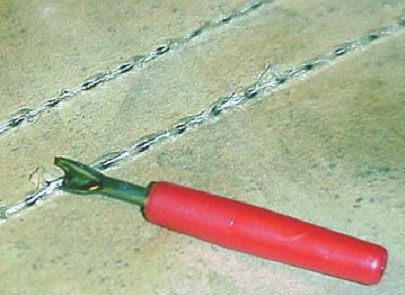
Once you’ve cut the threads, gently separate and remove the old fabric from the backing,
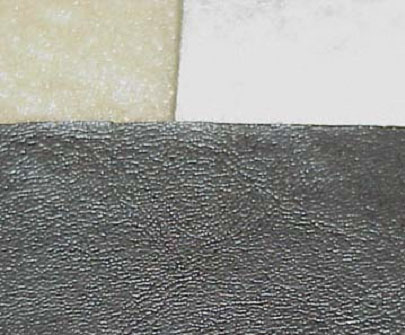
This is a close-up shot of the new material. It is a thin but durable vinyl with cotton backing and leather-like grain. $6/yard. One yard was plenty to do both panels (albeit only the top halves).
Lay you new material straight and even on the trim panel, tuck it under the middle seam trim piece and then cut off the excess, leaving 1-2" extra on the edges to fold over.
Applying the adhesive: Working in a well ventilated area, spray the 3M adhesive generously on the back of the new fabric in an even coat and also on the trim panel foam backing (BE CAREFUL NOT TO GET OVERSPRAY ON THE FRONT SIDE!). Allow it to set for approximately 10-15 seconds then carefully lay the material onto the backing. It sets up very quickly, so it’s better to have an assistant help you set the fabric in place! Smooth out the fabric evenly over the entire surface but make sure your hands are clean and not sticky with glue or grease from previous steps. Use a roller to FIRMLY press the new fabric into the indentations. You have to work quickly and keep going back over it several times to make sure you have good bonding! Smooth out all wrinkles as much as possible.
Hopefully it will look like this after you’ve pressed and rolled the new fabric into place. I glued and folded the extra fabric around the edges to give it a neater look. You also won’t have to worry about the fabric stretching and pulling out over time if you leave yourself a little extra.
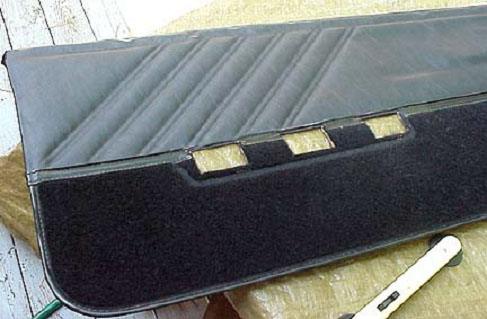
Cut out access holes with an X-acto knife in an "X" shape and glue/fold excess tightly over back of holes. Trim off some of the excess so that it won’t interfere with reinstalling the trim plates.
Reattach the top plastic molding to the trim panel by screwing on the speed nuts. I found the easiest way to do this was by pushing down in the center and twisting it Clockwise at the same time. Again, be careful not to break the plastic nibs!
Install the panel back on the door in the reverse order: be sure to put the top of the panel on first. Remember the nylon barb "stays"!
Reattach the door handle/lock hardware and side-view mirror control panels after giving them a thorough cleaning with Simple Green. It will make a big difference if you take the time to clean all the little nooks and crannies of the trim panel and the switches.
Reattach the arm rest last.
And here is the finished product. Since restoring mine, adjusting the glass, lubricating everything and tightening things down, wind/road noise has been dramatically reduced and the door sounds much "tighter" when closing it. Not exactly like new but very close. Certainly not as many rattles and clunks.
Good Luck!