When you click on links to various merchants on this site and make a purchase, this can result in this site earning a commission. Affiliate programs and affiliations include, but are not limited to, the eBay Partner Network.
This is on an '87 with the newer style alternator but the older style flanges straight across (the serpentine ones have the bolt hole flanges about 100* apart).
What are my options for upgrade? I mostly need better charging at idle and better RPM tolerance.
Details, I have custom brackets that mount the early style alternator flange layout, and am currently running an my second stock '87 alternator (I've killed 2 in just over a year). I have a roughly 6.75" crank pulley and the stock '87 alternator pulley does not turn the alternator fast enough to keep the battery voltage up at idle. I have an overdrive (smaller) March pulley from an LT1 car that allows it to charge OK at idle but it seems it doesn't like higher rpms like that (both times I killed the alternator was right after I bounced off the 7000rpm rev limit doing a burnout).
My thoughts on a possible solution:
Try a CS144- if it fits it should make enough power at idle and tolerate the rpm. I had an LT1 car that i regularly shifted at 6500rpm and never had a problem with the alternator, and even with an underdrive pulley on the crank I didn't need the small pulley on the alternator to keep things charged. I'm running 4th gen fans, electric water pump, big fuel pump.... It should plug right into the harness. I can't find anyone that has one in stock locally but I ordered the PN for an '97 LT1 4th gen (right flange/bracket config, might need clocking), but I don't know if the spacing is OK and things are already tight in that area (I need to push the body of the stock alternator into the lower rad hose to get the belt on)
Try a CS130/130b (I don't know which is which, one is internal fan and one external, one seems to have reliability problems, don't know which)- smaller body than the CS144, and I'll need to get/make an adapter to plug it in
Try a fresh SI(whatever) the stock alternator- the 2 I killed were both used, one that was on the '87 TA when I bought it and one that was on my '87 formula 350 (I believe about 5 years old). Maybe a fresh one will charge OK with a stock pulley and live at the higher rpms? I have my doubts since I killed a Delco and what appeared to be a decent rebuild.
Try the modern replacement for the CS130/144? Supposedly better alternators but need the new plug (same one as the 130 needs). I have no idea what to look for and part stores kinda suck WRT to looking at parts and figuring things out
Something else? There's a tread here that mentions some toyota alternators, no idea which ones. I also have a few of the bigger ford Taurus alternators sitting around (I believe something like >130A in a fairly compact package with an internal fan).
Last edited by 83 Crossfire TA; May 16, 2018 at 05:40 AM.
I can tell you that I finally got a 4th gen f-body CS144 style in and there is no way it fits in the same brackets as the earlier alternators. The mounting holes are probably a little over 1/2" further apart. The case is also bigger around, deeper (If you want to mount it at the same pulley height in front of a surface like a cylinder head it probably won't clear, the BAT stud will hit (I may be able to use it by re-clocking so the stud sticks out past the edge of the head) and significantly heavier.
I've also figured out that the original '87 alternator is actually a CS130- the early, till about '85 is a 10SI/12SI (same physical size, different amp ratings), and the later one is a CS130. Fourth gens use a CS144, and the CS130d is a internal fan replacement for the CS130 which uses a different plug. I know that there are newer versions of the CS130/144 (called something else) which all use the CS130d style plug.
Oh, I also found that as a general rule of thumb, the Delco alternators are rated to <18,000rpm (at the alternator shaft) and I was spinning in excess of 22,000rpm, probably the reason that I killed 2 quickly.
Last edited by 83 Crossfire TA; Apr 7, 2018 at 07:01 AM.
Actually the cut off from the SI to CS alternator is 86/87.
I can't verify it at the moment, but I'm pretty sure the 86 and 87 alternator brackets are different. 87 is one year only because of the change. If you're using the 87 bracket, you might want to try the 85-86 bracket, since the SI is physically bigger than the CS. Or just slow your alternator down a bit.
The CS-144 alternator is a beast! Find a way to fit it in there, and your problem will be solved. The 140 amp version alone puts out 85 or 90 amps at idle.
But buy a NEW one, not rebuilt, not remanufactured. The rebuilders are no longer replacing everything (like they should), they are only replacing the defective component(s) ONLY and cleaning the case and throwing it in a box.
Some info from Jegs:
Powermaster GM CS144 Style Alternators have a straight across ear mounting configuration that is 7.2" center-to-center between the mounting ears. This is only 5/8" wider than the earlier 10SI, 12SI, and CS-130 series so, if you do not have a fixed mounting bracket, it will make a great high output upgrade for those alternators. Made in the U.S.A. http://www.jegs.com/p/Powermaster/Po...34945/10002/-1
Actually the cut off from the SI to CS alternator is 86/87.
I can't verify it at the moment, but I'm pretty sure the 86 and 87 alternator brackets are different. 87 is one year only because of the change. If you're using the 87 bracket, you might want to try the 85-86 bracket, since the SI is physically bigger than the CS. Or just slow your alternator down a bit.
Huh, that's interesting, I was under the impression that the only 86 to 87 change was the alternator pulley went from v-belt to multi-rib. Searching them on Autozone's site shows the '86 to be 4 rib, 5 rib, and one that isn't clear but looks like a v-belt all listed for an '86 LB9 (the pics could always be wrong but the 4 and 5 rib ones are clearly labeled as such in their product description). They look like the 10SI like my '83 had but are rated at 108A, which I don't have a clue what it is since the 12SI was only made up to 90something A.
In the end that doesn't help or hurt me much since I'm not using factory brackets. I needed to move the alternator down to keep the front of the cylinder heads clear so I am down but lower than the factory bracket and upside down (the pivot is on the top, the adjustment is on the bottom).
Originally Posted by NoEmissions84TA
The CS-144 alternator is a beast! Find a way to fit it in there, and your problem will be solved. The 140 amp version alone puts out 85 or 90 amps at idle.
That is kind of what I already knew but after helicoiling the messed up bolt hole in the front of the cylinder head that I was using as a pivot bolt (outside bottom, so the front of the head is still basically clear), I REALLY didn't want to hear.
After measuring a stock and underdrive LT1 crank pulley I suspect a stock LT1 CS140 with the stock pulley would be my "easy" solution. I know that with both pulleys my LT1 car charged fine, and my current crank pulley is right in between their size. I also shifted that car hundreds of times at 6500rpm and never had any problems with it. Honestly It's the only GM alternator that I've ever had that I never had to replace. (My 10SI in my '83 it seemed like I replaced every year, it got to the point where I knew what tools I needed and could do it in the dark in about 10 minutes)
But buy a NEW one, not rebuilt, not remanufactured. The rebuilders are no longer replacing everything (like they should), they are only replacing the defective component(s) ONLY and cleaning the case and throwing it in a box.
Some info from Jegs:
Powermaster GM CS144 Style Alternators have a straight across ear mounting configuration that is 7.2" center-to-center between the mounting ears. This is only 5/8" wider than the earlier 10SI, 12SI, and CS-130 series so, if you do not have a fixed mounting bracket, it will make a great high output upgrade for those alternators.
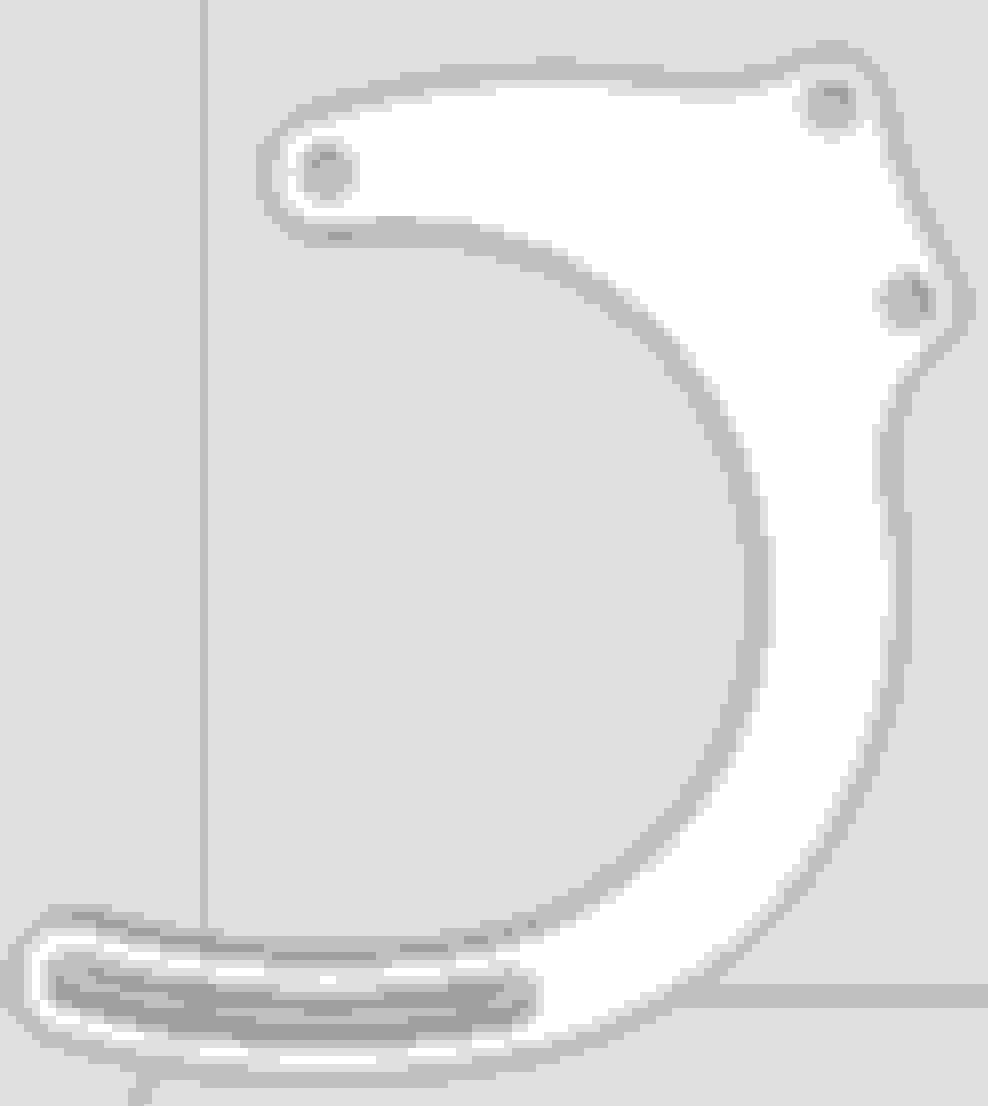
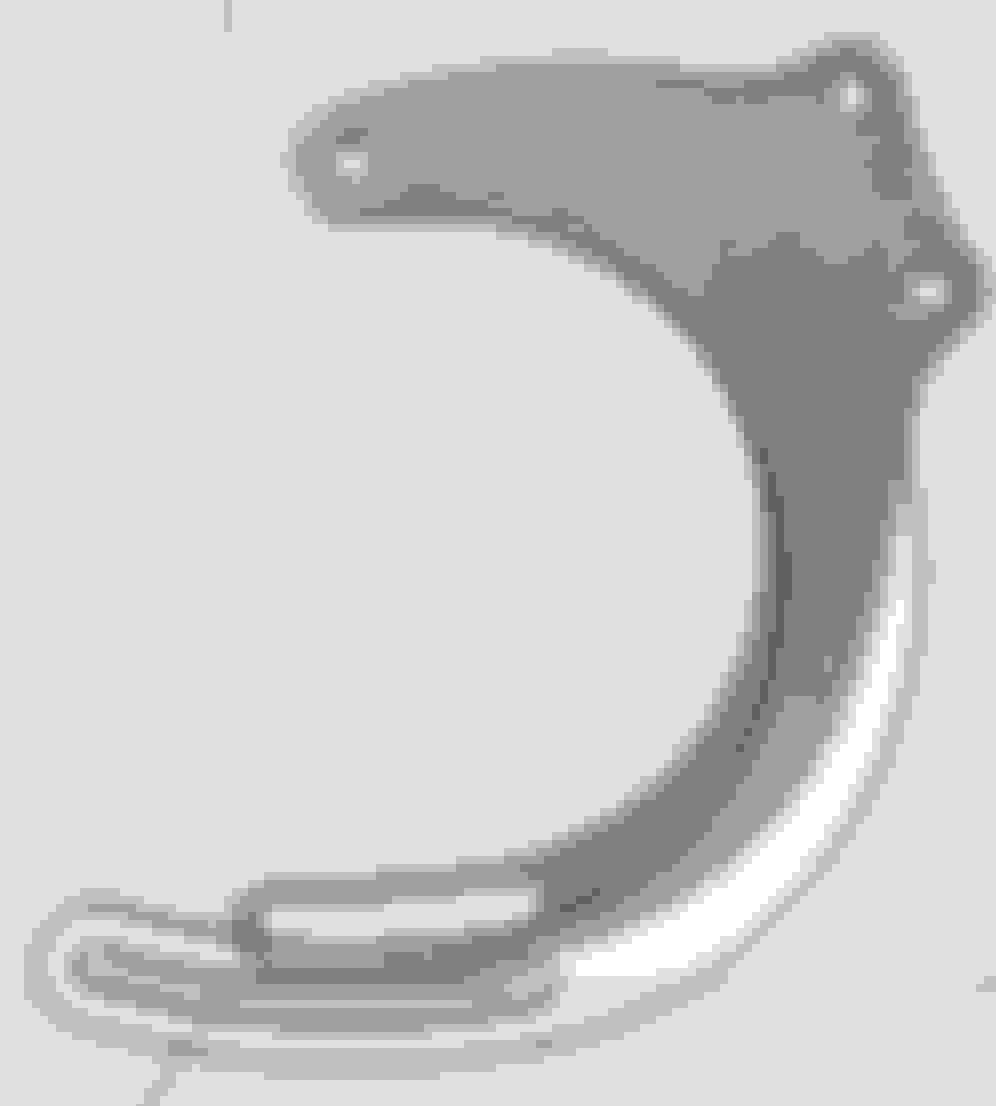
Yea, that's where things get not so easy. I do have a pretty much fixed mounting bracket that has an adjustment slot but it's the same bracket that the pivot blot goes through, so the whole thing is too small. These are the best pictures I could find, basically 3 years old but the same bracket:
I'm guessing that I will not only need to make a new bracket wider to accomodate the larger diameter, but longer to get the alternator out past the lower radiator hose. With the alternator just hanging off the pivot bolt it looks like it will have to be all the way out to the frame rail (probably about 1" away) by the time you make something that will hold it in that position and adjust for the belt), and it looks like any of them will need to be re-clocked to make the BAT terminal not hit the engine. I'm actually really suprised how much more a little extra diameter on the alternator housing makes WRT to how far out it needs to be mounted in that location.
a cs 130 in good order should easily keep up with the load of the 4th gen fans,electric water pump,fuel pump ,ETC.-all that not much more amps than a stock late model thirdgen would take with the AC blowing.About 15-18a for the 4th gen fans,~7-10 for the WP,perhaps 5 for the FP,~20 maximum for the rest of the car.Beware of small case alternators that are rated high amps as those often don't put out well at idle because of fewer turns of stator winding.A ford "3G"alternator could be looked into-I have one swiped from a '93 tempo and it is similar size and mounting to a cs130.Ford alty can use a chevy pulley.Alternators can fail from overrev in a couple ways:rotor lugs "flare out"and rub the stator,or brushes can "float"up off the slip rings,arc,and blow the regulator.
a cs 130 in good order should easily keep up with the load of the 4th gen fans,electric water pump,fuel pump ,ETC.-all that not much more amps than a stock late model thirdgen would take with the AC blowing.About 15-18a for the 4th gen fans,~7-10 for the WP,perhaps 5 for the FP,~20 maximum for the rest of the car.Beware of small case alternators that are rated high amps as those often don't put out well at idle because of fewer turns of stator winding.A ford "3G"alternator could be looked into-I have one swiped from a '93 tempo and it is similar size and mounting to a cs130.Ford alty can use a chevy pulley.Alternators can fail from overrev in a couple ways:rotor lugs "flare out"and rub the stator,or brushes can "float"up off the slip rings,arc,and blow the regulator.
I've had 2 cs130's that wouldn't keep up at idle with the stock pulley, that were OK with a smaller pulley but then blew up doing burnouts or at the drag strip. I typically cycle the 4th gen fans 2 at a time, the 55 gal/hr water pump, I have 2 in-tank Stealth340 pumps (but I'm only using one right now) plus the normal stuff. I've been tempted to grab another 130 (I can get one for free as a warranty replacement) but the thing is that I need a completely different bracket for that then the CS144. That leaves me not knowing what to do.
I'd love more info about using a ford 3G (wiring them into the GM harness and the built in regulator) since I have a couple of nice ones in the basement and they seem to have good output, smallish, light, durable (I abused them building welders out of them and have never seen one fail. I killed one on one of my parent's Taurus, but that was just a bearing going out)
The ford 3G is a very good unit-it even looks coolI ran one 302,000 in a '93 f150 until the brushes wore out-bearings still good.The '93 tempo sample I have has it's specs on the back between "Motorcraft" and the output stud-printed out in little dimples on a grainy surface they are not easy to read,but could make out "95A"-that should be plenty of capacity.I am going to sniff around the f150 bullnose forums to see what the wire hookup is as the 3G is a fairly common retrofit into those(I've got an '85 f150 SB in my fleet,351 HO,c6,9"
I looked and found a 130A 3G in my basement. These things are supposed to be able to put out something close to 90A at idle and are fairly compact, it could almost fit in my existing bracket. The thing is that I can't seem to figure out much about wiring them. I know the big stud is the battery terminal and the small plug that I don't have anything in is the field coil. Past that I have no idea. When I used to use them to build little TIG welders I would bypass it like you see in on the back of this one and then control output by applying power through a headlight dimmer switch to control output. I can't see to find much googling (a lot of 1 and 2G swap info)
fount this on the ford truck forums:
A:-yellow/white wire,goes to battery along with the black/orange wire from output stud.
S:small white /black connects to small blk/wht from stator(single connection between reg.plug and output stud.
I:green/red-connects to switched ignition through a idiot light or resistor.
couldn't quite tell if the 130a in the pics is the large case or small case 3G-looks like the small.The 95a unit I have has a basic diameter of ~5.25" and between centers of front mounting bolts~6 7/8:about 1/8"more than 10/12 Si dimensions.-should fit a chevy bracket with just a little work
In the end that doesn't help or hurt me much since I'm not using factory brackets. I needed to move the alternator down to keep the front of the cylinder heads clear so I am down but lower than the factory bracket and upside down (the pivot is on the top, the adjustment is on the bottom).
That is kind of what I already knew but after helicoiling the messed up bolt hole in the front of the cylinder head that I was using as a pivot bolt (outside bottom, so the front of the head is still basically clear), I REALLY didn't want to hear.
Yea, that's where things get not so easy. I do have a pretty much fixed mounting bracket that has an adjustment slot but it's the same bracket that the pivot blot goes through, so the whole thing is too small. These are the best pictures I could find, basically 3 years old but the same bracket:
I'm guessing that I will not only need to make a new bracket wider to accomodate the larger diameter, but longer to get the alternator out past the lower radiator hose. With the alternator just hanging off the pivot bolt it looks like it will have to be all the way out to the frame rail (probably about 1" away) by the time you make something that will hold it in that position and adjust for the belt), and it looks like any of them will need to be re-clocked to make the BAT terminal not hit the engine. I'm actually really suprised how much more a little extra diameter on the alternator housing makes WRT to how far out it needs to be mounted in that location.
Is it worth all that?
1) Replace your long alternator pivot bolt with a stud. Buy a 7" or 8" grade 8 bolt at HD or Lowes, cut the head off and thread for a nut. Then you are not further stressing the threads in the head.
2) Alan Grove (and others) make these support brackets for that same hole, and/or if you had heads without that accessory bolt hole. Might be an option, but I don't know if it will work with your water pump.
3) Another option is what I did. If your head has the accessory bolt hole approx. 3-4" lower than the one you are using now, you can use that as the pivot. The alternator gets flipped back right-ide up again, but now will be that 3-4" lower. But you have to make your own upper slotted adjustment arm/bracket. I have some fuzzy pictures of mine I can post later.
Funny you mentioned the Ford alternator. Back in the day, my friend Doug had a fox body Mustang and we both ordered high-output alternators. He received a GM alternator for his Ford, and I get a Ford alternator for my Trans Am. Mine looks like the one in your picture. I can't remember where I got it from, I will check tonight. The bolt hole is larger and they supplied a bushing to make up for the difference and an external circuit breaker. It is the alternator I made the brackets for that I described above.
Last edited by NoEmissions84TA; May 27, 2018 at 09:21 PM.
Now you can help me. Whose power steering pump brackets are you using? I want my pump to mount like yours. Any clearance issues with the steering box? I'm removing the A/C. Mine mounted above the PS.
Except for your electric water pump, you have the setup I want to use.
You can also search online/yellow pages for a place that rebuilds starters/alternators that could custom rebuild your existing alternator for higher output? I have a shop that isn't too far from my house that I know has rebuilt a few alternators to custom specifications for some of my friends. There aren't many of them, but they're out there.
1) Replace your long alternator pivot bolt with a stud. Buy a 7" or 8" grade 8 bolt at HD or Lowes, cut the head off and thread for a nut. Then you are nut further stressing the threads in the head.
I helicoiled the bolt hole. There were no threads left in that hole. Admittedly not a great bracket design for aluminum heads without an insert but should be fine with the helicoil.
2) Alan Grove (and others) make these support brackets for that same hole, and/or if you had heads without that accessory bolt hole. Might be an option, but I don't know if it will work with your water pump.
Is this just to fix my stripped thread or is there more to it than that?
3) Another option is what I did. If your head has the accessory bolt hole approx. 3-4" lower than the one you are using now, you can use that as the pivot. The alternator gets flipped back right-ide up again, but now will be that 3-4" lower. But you have to make your own upper slotted adjustment arm/bracket. I have some fuzzy pictures of mine I can post later.
I'd love a picture to see where it ends up, but I suspect that will put it back where it was stock and that won't work because I have coolant passages plumbed straight out the front of the head here (just a zoom in of the above shot), it doesn't really look it here but it is behind the alternator bracket here:
These are converted LT1 heads, not small block heads, so they're different than SBC heads
Funny you mentioned the Ford alternator. Back in the day, my friend Doug had a fox body Mustang and we both ordered high-output alternators. He received a GM alternator for his Ford, and I get a Ford alternator for my Trans Am. Mine looks like the one in your picture. I can't remember where I got it from, I will check tonight. The bolt hole is larger and they supplied a bushing to make up for the difference and an external circuit breaker. It is the alternator I made the brackets for that I described above.
It looks like it would be very helpful to know how you wired it up...
Now you can help me. Whose power steering pump brackets are you using? I want my pump to mount like yours. Any clearance issues with the steering box? I'm removing the A/C. Mine mounted above the PS.
Except for your electric water pump, you have the setup I want to use.
Oh wow... Like I said those pics were 3 years old and I removed that pump and went with a type II soon after. I believe that it started as an Alan Grove or similar low mount alternator bracket like this:
The AG ones list that they only work with the older non-metric power steering pumps, but this one definitely works with the stock '87 metric pump (what I was using it with).
There was some problem with it fitting correctly in a 3rd gen (I don't remember if it was something with the engine or the engine compartment/steering box), I don't remember if I cut a whole new bracket or just cut that one and welded/changed it. I just remember that I ended up throwing it on my scanner so I could make an exact pattern for what I wanted, cut it out and then powder coated it black when it was right. I know that it cleared everything beautifully and was much easier to deal with than the stock mount.
I believe that I threw the bracket, spacers and even most if not all of the hardware in a box when I took it off. If you want it I can go digging for it and you can have it for a few $.
You can also search online/yellow pages for a place that rebuilds starters/alternators that could custom rebuild your existing alternator for higher output? I have a shop that isn't too far from my house that I know has rebuilt a few alternators to custom specifications for some of my friends. There aren't many of them, but they're out there.
My understanding is that the smaller cs130 housings just can't be made to have significantly better output at low RPM's and when you build them up they become even less durable then stock (again, I've killed 2).
I believe that I threw the bracket, spacers and even most if not all of the hardware in a box when I took it off. If you want it I can go digging for it and you can have it for a few $.
Relocated alternator. Crappy digital camera - sorry.
In the 1st pic, the rear aluminum bracket I made was for a head that did not have the 3-4" lower accessory hole. Heads that have these holes do not need this. 2nd pic - that bent rod is for extra support. 4th pic is the lower bracket I made.
It looks like you can't do this because of the coolant lines in your heads. (We need to talk about those.)
But that alternator is a Ford unit. I bought it from Performance Distributors. It's their Mr AMP unit and the bolt spacing measures 6 7/8". https://performancedistributors.com/...mp-alternator/
Is this just to fix my stripped thread or is there more to it than that?
The bracket is either for additional support OR to provide that accessory hole for heads that don't already have it.
It looks like it would be very helpful to know how you wired it up...
The alternator came with a new matching plug for the side connector (pic 5). Just swap the plug to the original wiring.
I picked up the old alternator to measure the size difference and noticed bits and pieces falling out of the inside. I guess 7000rpm shift points turn these things into maracas :
So here is the closest in I can get the CS144 hanging off the same pivot bolt as the CS130 was on:
The battery stud on the back also hits the cylinder head so I'll need to re-clock it. There are also no threads in the mounting ear (it looks like it might have had them at some point), but it also looks like it would be easy to drop a 3/8" helicoil in there.
I guess I'll need a different bracket to tension it
Relocated alternator. Crappy digital camera - sorry.
In the 1st pic, the rear aluminum bracket I made was for a head that did not have the 3-4" lower accessory hole. Heads that have these holes do not need this. 2nd pic - that bent rod is for extra support. 4th pic is the lower bracket I made.
It looks like you can't do this because of the coolant lines in your heads. (We need to talk about those.)
But that alternator is a Ford unit. I bought it from Performance Distributors. It's their Mr AMP unit and the bolt spacing measures 6 7/8". https://performancedistributors.com/...mp-alternator/
Is this just to fix my stripped thread or is there more to it than that?
The bracket is either for additional support OR to provide that accessory hole for heads that don't already have it.
It looks like it would be very helpful to know how you wired it up...
The alternator came with a new matching plug for the side connector (pic 5). Just swap the plug to the original wiring.
How do you tension that?
It looks like going with the CS144 or the GM one will mean making a new bracket for me, the CS144 will plug right in after some re-clocking where the ford will reqire both re-clocking and a new wiring harness...
There are also no threads in the mounting ear (it looks like it might have had them at some point), but it also looks like it would be easy to drop a 3/8" helicoil in there.
A through bolt works better and holds better. Use stainless for pretty.
So here is the closest in I can get the CS144 hanging off the same pivot bolt as the CS130 was on:
What if you fabricated a bracket that bolts to the head but gives you a new pivot location about 1 to 1.5" higher? Long through bolt with a nut on the back side.
OR, do you have the threaded accessory hole that is about 3" lower on your head? If so, then you flip the alternator back right-side-up and do the same as I did. You will then use one of those curved arm brackets with the slot for the top alt hole to adjust the belt tension.
How do you tension that?
Just answered. Just like the factory setup - pull hard and tighten the bolt.
The bracket you are using now - can you cut and weld it to fit the larger case CS-144 alternator? Just saw 3/4 of the way through, spread open to fit, weld.
The wiring for the plug on the side of the alt is just a pigtail swap. Very simple.
After getting rid of the air pump, I couldn't stand the alternator being mounted way up in the air either. My heads had the extra lower accessory bolt hole, so I took advantage of it.
Last edited by NoEmissions84TA; Apr 9, 2018 at 07:36 PM.
There are also no threads in the mounting ear (it looks like it might have had them at some point), but it also looks like it would be easy to drop a 3/8" helicoil in there.
A through bolt works better and holds better. Use stainless for pretty.
I can't imagine trying to get a wrench on the nut while holding the belt tension in that area under the alternator. For the bracket that I made for my Type II power steering pump, I cut it out of thicker aluminum and cut a shouldered slot in it that had a square nut that fit in it and road on the shoulder... something like that might work but that would mean that the pivot side and the adjustment side of the bracket would have to be at different heights... probably more complicated than I want.
So here is the closest in I can get the CS144 hanging off the same pivot bolt as the CS130 was on:
What if you fabricated a bracket that bolts to the head but gives you a new pivot location about 1 to 1.5" higher? Long through bolt with a nut on the back side.
The CS144 is deeper than the CS130, and the stud will already hit the head without re-clocking. There just isn't room for a bracket to offset the pivot behind it.
OR, do you have the threaded accessory hole that is about 3" lower on your head? If so, then you flip the alternator back right-side-up and do the same as I did. You will then use one of those curved arm brackets with the slot for the top alt hole to adjust the belt tension.
How do you tension that?
Just answered. Just like the factory setup - pull hard and tighten the bolt.
I meant that I couldn't tell what was slotted to move in your pics of the bracket.
The bracket you are using now - can you cut and weld it to fit the larger case CS-144 alternator? Just saw 3/4 of the way through, spread open to fit, weld.
...
I would take a pie cut out of here (just enough to spread open to fit the larger case) and weld back together.
Pie cutting and welding will mess up the arc used for adjustment. I thought about cutting through and adding about a .6" spacer to keep the arc pretty close, but I need a longer slot to make up for the bigger alternator body (the small stock one already was within about 1/4-1/2" from the end of the adjustment range tightened down) so that won't work either.
Originally Posted by NoEmissions84TA
That'll work too. I assume you have someone that can cut that pattern? Lucky you.
I can cut the pattern
Really I will likely cut it out by hand, the only part that would be difficult to make look nice would be the adjustment slot, and then I_might_ fixture it up on a rotary table and cut it with my Bridgeport, but the rest would just be less work to cut out with a grinder/jigsaw/bandsaw and cleaning up with a sander. I'll just print a top parallel projection of the model and stick it to the steel and use it as a pattern.
If it was more complicated I'd likely try printing it with my 3D printer to test fit the part, but I'm pretty sure that this is going to fit fine so I'm not too worried about it.
Printed to scale, glued to a piece of steel using Super 77
Rough cut out using an angle grinder and a small HF bandsaw. I'll sand the edges smooth before painting/mounting it. Maybe I'll take the time to powerdercoat it.
This looks like it will work OK. I drilled the 3 holes but left figuring out how I'm cutting the slot for tomorrow.
but the rest would just be less work to cut out with a grinder/jigsaw/bandsaw and cleaning up with a sander.
Oh damn, you did it already. But it looks great. I make brackets the same way, but I use a 1/8" drill bit to make a series of holes along where I want to cut, then connect the dots with a jigsaw. Crude, but it works.
I really wanted to show you what I ran across today. It looks like your current bracket is this (or a copy): CV 32200. But CV also has CV 22224 and CV22225.
See them here, pages 31-33: https://issuu.com/cvproducts/docs/cv...g_volume_16/33
It might give you some ideas, but I think you already have it covered.
I woke up early and cut the slot on the bridgeport mill... need to clean it up but I think this is going to work. I'm a little worried about how thick this bracket is, but it's the same as the one that was on there.
Last edited by 83 Crossfire TA; May 16, 2018 at 01:35 AM.
I cleaned up the slot with a file and test fit it on the alternator, this position should put it all the way up against the frame rail, all the way in just barely clears the alternator's fan (but on the car you can't go that far because this waterpump's outlet is a little higher than normal).
I still need to re-clock the alternator but I should be close to a running car with about an hour more work.
I haven't had more than a few minutes a day to work on this thing, I've been busy. So I'm too lazy to powder coat this. Instead I broke all the edges with a file, threw it in my blast cabinet and then sprayed it with some etching primer and some semi-gloss black.
Since my shop dog died last fall I've had this guy hanging around. He just sits outside my basement door or my garage door and watches me... Shop bunny? Is that a thing?
So this should have been done yesterday or the day before, but when I went to modify the alternator to work I noticed it making a funny sound so I opened the case and found that the brush holder assembly in the fresh rebuild was cracked in half.
Oh well, back to autozone, 2 more days till they can order another one in.
From there: I re-clocked the case, as it was assembled the plug would have been in an OK location but the BAT terminal would have been wedged up against the cylinder head.
Then I tapped the ear for a helicoil.
Nice, shiny stainless threads... no one else will ever see them in there but they make me happy. I locktighted them in just for good measure.
I was going to machine a nice aluminum spacer for the pivot bolt but noticed that the stock spacer/bracket might work if it was straight. I threw it in my 40 ton press and flattened it- it's really close.
After making the bolt hole slot longer, a little sanding, and a nice spray bomb with some rustoleum, cut down a bolt so it doesn't go down into the case too far and I had this, it looks almost factory. I had the right washer head bolt that would make it look exactly right but that space is REALLY tight on the car and decided to go with something with a thinner head and no washer
Everything bolted into place.
This thing has miles of adjustment compared to the bought bracket for the smaller alternator. It fits well, clears everything and is nice and sturdy. There was absolutely no way to squeeze the old belt (360K6, 36" 6 rib) in there, even completely crushing the lower radiator hose. I went looking through my pile of old stuff and found a 370K5 (1" longer but only 5 ribs) that I could just barely wedge on there. It should be good enough to get me to the parts store later today for a proper belt- I'd rather bring the car and try a few lengths to see what fits best. I suspect that I'm going to end up with something around a 390K6. While I was in there I cleaned up the wiring harness some...
As far as any of the documentation out there that says that this is a drop in. No way, nothing about it just bolts in. The case is larger, the mounting ears are about 5/8" further apart, all the bolt holes are different sizes, heck even the battery stud is MUCH larger, so you need to ream out or install new ring terminals on the BAT connection.
I should finish it try to start it and get a proper belt for it this afternoon
Last edited by 83 Crossfire TA; Apr 14, 2018 at 08:26 AM.
Nice! Looks clean, and KISS simplicity that should be very dependable.
Thanks, it's that semi race car semi street car thing that I'm going for... as simple and dependable as I can get for racing while still giving me what I need for a street car. Eventually as I work on more and more parts of the car everything gets cleaned up and goes in that direction.
I've seen this with rabbits before. This rabbit, he's got evil in his heart. Watch your back.
Huh... I put this all together at about 7am this morning in the driveway and he was sitting about 10' away in the lawn watching me... At the time I was thinking it was kind of nice having my little buddy around, now you have me second guessing, could he be the terrible Rabbit of Caerbannog? Death awaits you all, with nasty pointy teeth:
For anyone interested how I did this (and I've actually done this 2x exactly the same way), here are 2 angles of the same burnout. The funny thing is that it doesn't sound like it's turning all that fast (partly because some of the sound is drowned out by some dirt bikes and it started in first), but then you notice that I'm bouncing off the limiter and the limiter is set at 7000rpm (yes, I wing my wienie 305 up to 7000rpm, as per the dyno runs it really wants to be shifted around 7300-7400rpm but I'm not that crazy, um, er brave...):
Maybe I can help a little. I installed a CS144 alt. to replace the CS130 alt. in my truck. The engine was a roller-cammed 350 out of a '90 Cadillac which I assume was the same as an Impala under the hood. There is an extra bracket to mount the CS144 onto the engine accessory bracket. I had to use F-body WP and Crank pulleys to line everything up. It's worked great the last five years.
I've got the part number for the add-on bracket somewhere. Last time I looked, I'm pretty sure it's discontinued/obsolete. At one time it was rumored to be a B4C Camaro part, but since most B4Cs don't have it, it looks like that was more than likely a modification performed by the receiving user. The bracket apparently is common on the early-mid 90s boats, Caprice, Cadillac, Oldsmobubble, B-bodies.
Well, I got everything buttoned up and drove over to autozone to try to find a better belt. I grabbed the next 3 sizes longer than 37" that they had in stock in a 6 rib belt, they all worked but I settled on a 380K6, it got the alternator about 1/4" off of the lower radiator hose and left me with the most clearance to everything else. Done.
Then in the middle of that one of the return blockoff caps on the radiator burst.
I went and got some more and swapped it while I was there. Now I'm done. I had the laptop with me and datalogged it. 99% of the time the battery voltage reads 13.6-13.8V. It actually goes up a little if you turn the fans on, headlights and everything else I could think of to add load to it.
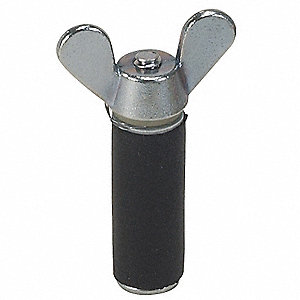
I hate these things. While I was test fitting belts this one started spewing all over the engine bay. At least I was in the autozone parking lot at the time so I could just grab another. Anyone have a better solution then these dorman caps? I don't think I've ever even gotten a year out of one of them.
Last edited by 83 Crossfire TA; Apr 14, 2018 at 07:16 PM.
Nice, shiny stainless threads... no one else will ever see them in there but they make me happy. I locktighted them in just for good measure.
Those threads are never going to give you a problem again.
After making the bolt hole slot longer, a little sanding, and a nice spray bomb with some rustoleum, cut down a bolt so it doesn't go down into the case too far and I had this, it looks almost factory. I had the right washer head bolt that would make it look exactly right but that space is REALLY tight on the car and decided to go with something with a thinner head and no washer
Everything bolted into place.
This thing has miles of adjustment compared to the bought bracket for the smaller alternator. It fits well, clears everything and is nice and sturdy.
As far as any of the documentation out there that says that this is a drop in. No way, nothing about it just bolts in. The case is larger, the mounting ears are about 5/8" further apart, all the bolt holes are different sizes, heck even the battery stud is MUCH larger, so you need to ream out or install new ring terminals on the BAT connection.
I LOVE IT! And the best part .............. BUILT - Not Bought. Great work!
I LOVE IT! And the best part .............. BUILT - Not Bought. Great work!
Thank you.
LOL, but I guess you haven't guessed the theme with what I'm doing here (and for that matter usually doing):
This car has a stock LB9 (305 TPI) bottom end with 120something thousand miles on it, and pretty much everything else on/in it has, well a very personal touch to it. The heads, heavily ported aluminum LT1 (ported by me) with the coolant passages and a bunch of the stock bolt holes welded shut, new ones cut, and everything machined to work on the SBC, all machining and welding done by me. Intake, a heavily worked '70's era Victor Jr, that I finished to match the LT1 heads, added injector bungs, reshaped the top pad... fabbed aluminum elbow to mount an LS style throttle body. Cam, well I got together with Tim Cole at Comp Cams and discussed crazy ideas and ended up with a billet roller cam using short travel hydraulic roller lifters, some essentially solid roller lobe profiles a 4/7 firing order swap, with fairly short duration and almost .600" lift.
The whole combination is optimized for a turbo which it will get eventually, it has 8.5:1 compression, but with all the breathing it revs to over 7000rpm like it was nothing, still has a very tame bottom end making it no big deal to putter through town in. With the cutout closed it even sounds very close to stock at idle, quieter/tamer than most people that have just have a muffler or cat back on a stock car.
The rear suspension is all custom, everything adjustable, tubular, made by yours truly. Front... well if I ever get around to finishing them I'm working on my own front drop spindles, which will get an oddball brake swap that I don't know of anyone else doing- C4 non-HD brakes which will give me bigger (12"), better stopping brakes which will fit under stock 15" wheels and be lighter than the stock factory 10.5" front brakes.
Wait till you see what i do with a set of stock firebird wheels ;-) seriously.
Originally Posted by NoEmissions84TA
So nice not having the alternator sticking way up in the air like with the factory bracket setup.
This gets into the above:
the LT1 cylinder heads have coolant passages coming out of their front faces preventing me from mounting too much to them
I wanted to leave as much room as possible at port height and above on the passenger side for the turbo setup
I don't know if they will withstand 250+ degrees of the cooling system, though.
That's really a pretty good idea... My only concerns would be to find one just the right size (they're fairly fussy WRT to fit) and that that nipple is designed for clamping pressure down around the outside rather than expansion from the inside... huh...
Might you use one of the expansion plugs (only tighten enough to seal so as not to risk splitting the plastic barb) AND use the Dorman cap with a hose clamp on the outside as before?


 I ran one 302,000 in a '93 f150 until the brushes wore out-bearings still good.The '93 tempo sample I have has it's specs on the back between "Motorcraft" and the output stud-printed out in little dimples on a grainy surface they are not easy to read,but could make out "95A"-that should be plenty of capacity.I am going to sniff around the f150 bullnose forums to see what the wire hookup is as the 3G is a fairly common retrofit into those(I've got an '85 f150 SB in my fleet,351 HO,c6,9"


 :
: