BlackTopKing's "Concrete Angel" Build


 04-15-2013, 04:40 PM
#154
Supreme Member
Thread Starter
iTrader: (1)
Join Date: Oct 2008
Location: Charleston SC
Posts: 1,107
Likes: 0
Received 0 Likes
on
0 Posts
Car: 1987 Trans Am GTA
Engine: 350 TPI
Transmission: T56
Axle/Gears: Posi 3:42
Re: BlackTopKing's "Concrete Angle" Build
I dk, I think cause I messed them.up, so hopefully its not the case, here now after...weird thing, it shows them on my end..
Sorry guys but hopefully its all good for now on
Sorry guys but hopefully its all good for now on
04-15-2013, 07:18 PM
#156
Senior Member
Join Date: May 2009
Location: Conway SC
Posts: 744
Likes: 0
Received 0 Likes
on
0 Posts
Car: 1988 Camaro
Engine: 385
Transmission: 700r4
Axle/Gears: 9 bolt
Re: BlackTopKing's "Concrete Angle" Build
Yep pics help alot. LOL After putting in my bars I've got some ideas for strength for your targa top idea. I'll try to explain in a email or the next time we meet. BTW I did win a auction Saturday so I didn't come home completely empty handed.
04-15-2013, 08:28 PM
#157
Supreme Member
Thread Starter
iTrader: (1)
Join Date: Oct 2008
Location: Charleston SC
Posts: 1,107
Likes: 0
Received 0 Likes
on
0 Posts
Car: 1987 Trans Am GTA
Engine: 350 TPI
Transmission: T56
Axle/Gears: Posi 3:42
Re: BlackTopKing's "Concrete Angle" Build
Awe, man...what a tease...what did you win?
And Yeah, Def would love to hear any ideas and feedback. Ive taken alot of time to make sure that everything is a little on the over build side.
Fiberglass cores where i can, Fiberglass boards where i can and even metal internals like the spoiler (alumnium, for weight reasons)
So by time i get the the cars structor, i wanna do the same.
Suspention mods are next (after the body is in a full mock up state / primer-ish). Rims and Tires + Rear Swap + rear and front suspention upgarde + brakes + subframe connectors (maybe aftermarket is i can get a good price, if not...fabricated) + cage (which will allow me to then complete body, any fender tweeking and targa)
I like your 8pt, because i like how low the fwd arms (pt 7 and 8) are and not in the way of getting in and out, image crawing over the fwd arms and under lambo doors...ummm yeah, not happening.
I also want (more for looks) want to add the rear "X" brace effect in the hatch area (if i keep the gelass hatch).
I have been steady collecting tons of parts,metal and materials so hopefully itll all work out.
I have even considered (sorry to say) foaming the pilars, alot of the drif guys are blocking off openings and filling with 2pt foam (not great stuff) they are claiming to have a stiffer set up from it (as noticable as a strut tower bar)
The only true scray part is....how to do the interior after the Cage!...lol...PITA
Last edited by BlackTopKing; 04-15-2013 at 08:39 PM. Reason: Add thoughts
04-15-2013, 08:49 PM
#158
Supreme Member
Thread Starter
iTrader: (1)
Join Date: Oct 2008
Location: Charleston SC
Posts: 1,107
Likes: 0
Received 0 Likes
on
0 Posts
Car: 1987 Trans Am GTA
Engine: 350 TPI
Transmission: T56
Axle/Gears: Posi 3:42
Re: BlackTopKing's "Concrete Angle" Build
Ok so....now on to the good stuff (as i am being told to go to work).
I mocked up rear spoiler tonight ( in its raw state) and even i think its too big...but it looks so good from front and rear angles, the profile is where im like...hummmmm....lol...this is a rarity for me to think ive gone to far (always go to far) but I am not gonna jump on gun just yet to cut down....I am gonna give it a couple days of viewing...lol...think that ill have to move it off the edge of hatch, it wont seem so "over the edge".
Trimed up side skirts....now on to the second coating of foam (did small amounts due to rain...humidity will mess its curing up and not be solid)
I dont know if i mentioned...
Picked up a 2nd hood, that ill be doing in CarbonFiber (ProAm style) this way i can change the look up a little bit when i want. It was one of the scores i found in Andrews....along with Lenax T-Tops....
they are pretty screwed up, like 3 different paint jobs on them, so no saving...but perfict for the Targa Prototype....Jimmy got me really thinking on "how to do a clear Targa" verse a solid targa....
I think the first will be a soild and maybe a second in Lenax (new clean clear piece)
sigh*** anyway, back to airbrushing this Busa, so i can get some parts on order.
Seriously need to get the coulumn switch, battery relocation kit (my cables are roted) and msd coil to start
04-15-2013, 09:22 PM
#161
Re: BlackTopKing's "Concrete Angle" Build
its not fll time but its my neighbors shop we do custom upholstery and anything interior wise, weve worked on the chopped and shortened inperial with the newer v10 i think it was, also marks steilows 68 silver camaro we did. we do boats motorcycle seats charis for autorama etc. mostly racecars, show cars, exotics that kinda stuff. we also do prototype work for acura and chrysler as well.
i specifially do shope cleaning(well we all do) we all run errands if needed, i do some fabrication, patterning skyving, cutting acetate etc.
i specifially do shope cleaning(well we all do) we all run errands if needed, i do some fabrication, patterning skyving, cutting acetate etc.


 04-16-2013, 01:04 PM
#163
Supreme Member
Thread Starter
iTrader: (1)
Join Date: Oct 2008
Location: Charleston SC
Posts: 1,107
Likes: 0
Received 0 Likes
on
0 Posts
Car: 1987 Trans Am GTA
Engine: 350 TPI
Transmission: T56
Axle/Gears: Posi 3:42
Re: BlackTopKing's "Concrete Angle" Build
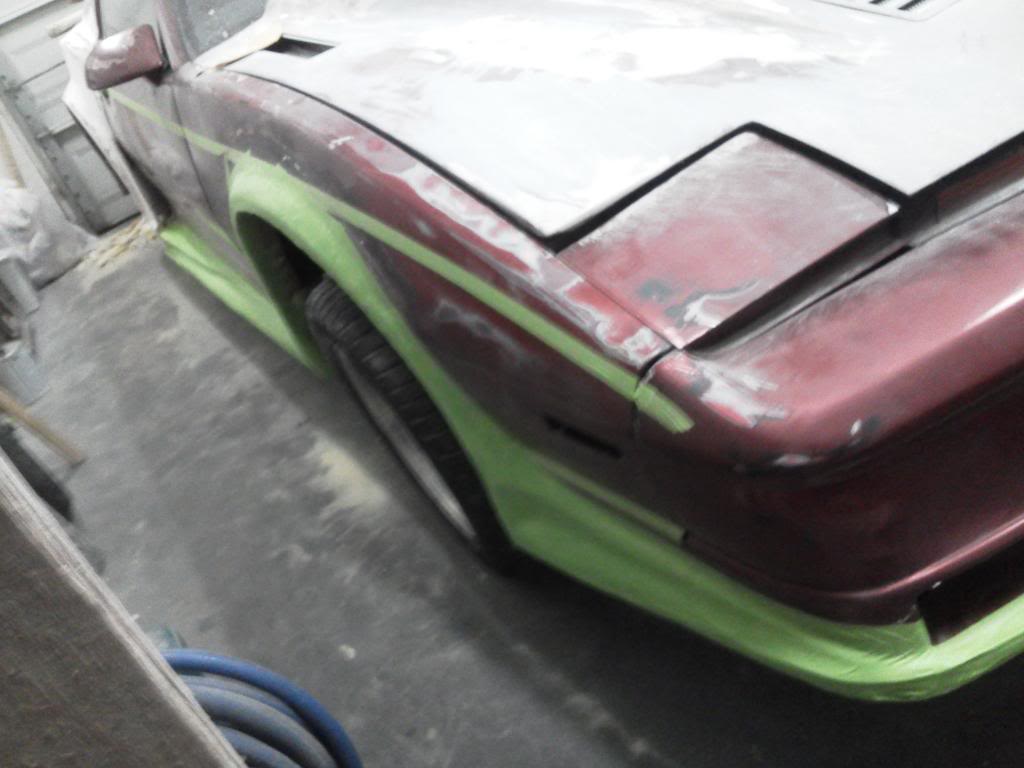
Ok, so I got a few camera phone pics up.
I dont havebpic of frame, it must be on actual camera, post later. But in short, the cardboard is now lile a cast over the frame n zip screw together for now.
just really have to measure and nope where you have all your connections and it screws, so you are not driving into them later
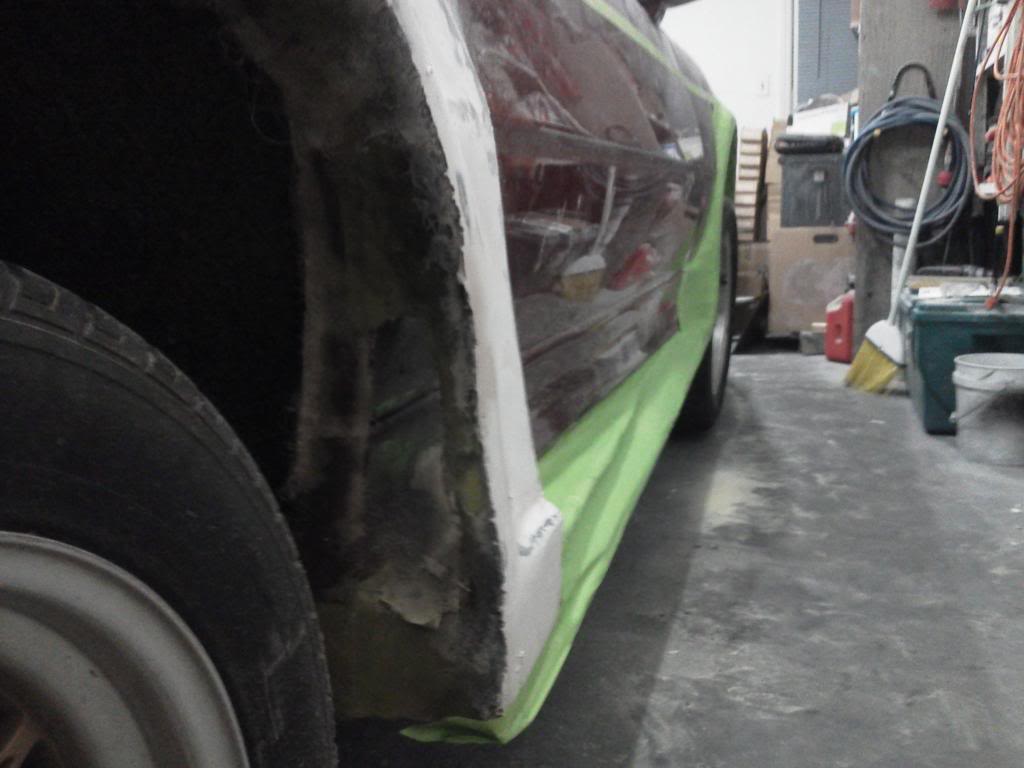
I also have a picture of the beginning stages of rear half are the side skirts.
basically made it a tray to pour the foam on, acarve e and shape.
then pop off to make a fiberglass part.
remember my side schedule be made into three sections not one, exhaust side center and forward... mainly because of the fun till hope
and then of course because I could not wait, I convince my lovely assistant to all the spoiler in about where it will be positioned on the car, hence the " do I really have to" look
Lol
I dont havebpic of frame, it must be on actual camera, post later. But in short, the cardboard is now lile a cast over the frame n zip screw together for now.
just really have to measure and nope where you have all your connections and it screws, so you are not driving into them later
I also have a picture of the beginning stages of rear half are the side skirts.
basically made it a tray to pour the foam on, acarve e and shape.
then pop off to make a fiberglass part.
remember my side schedule be made into three sections not one, exhaust side center and forward... mainly because of the fun till hope
and then of course because I could not wait, I convince my lovely assistant to all the spoiler in about where it will be positioned on the car, hence the " do I really have to" look
Lol
04-16-2013, 05:23 PM
#164
Junior Member


Join Date: Mar 2009
Location: Charleston, SC
Posts: 59
Likes: 0
Received 0 Likes
on
0 Posts
Car: 1989 IROC Z28
Engine: Empty
Transmission: T-56
Re: BlackTopKing's "Concrete Angle" Build
Quick question: Is the spoiler the same width as the car? It looks like it may have been off center in one of the pics, so I am not sure.
As far as too big, I think it looks good up... when it is down, that may be a different story.
Just a thought: What if you made the spoiler slide forward and down bringing the back end of spoiler even with trunk lid, then slide back and up? A lot more work, but I think that may look a 100% better in the down position .
.
I am so ready for you to tackle the targa! Dying from anticipation, lol. I think your idea of metal frame with lexan/plexi windows would work great and perhaps if still not rigid enough add 2 pins in the center. And if it doesnt work, I will know what not to do . Couldnt resist.
As far as too big, I think it looks good up... when it is down, that may be a different story.
Just a thought: What if you made the spoiler slide forward and down bringing the back end of spoiler even with trunk lid, then slide back and up? A lot more work, but I think that may look a 100% better in the down position
.I am so ready for you to tackle the targa! Dying from anticipation, lol. I think your idea of metal frame with lexan/plexi windows would work great and perhaps if still not rigid enough add 2 pins in the center. And if it doesnt work, I will know what not to do
. Couldnt resist.
04-16-2013, 09:31 PM
#165
Supreme Member
Thread Starter
iTrader: (1)
Join Date: Oct 2008
Location: Charleston SC
Posts: 1,107
Likes: 0
Received 0 Likes
on
0 Posts
Car: 1987 Trans Am GTA
Engine: 350 TPI
Transmission: T56
Axle/Gears: Posi 3:42
Re: BlackTopKing's "Concrete Angle" Build
Quick question: Is the spoiler the same width as the car? It looks like it may have been off center in one of the pics, so I am not sure.
As far as too big, I think it looks good up... when it is down, that may be a different story.
Just a thought: What if you made the spoiler slide forward and down bringing the back end of spoiler even with trunk lid, then slide back and up? A lot more work, but I think that may look a 100% better in the down position.
I am so ready for you to tackle the targa! Dying from anticipation, lol. I think your idea of metal frame with lexan/plexi windows would work great and perhaps if still not rigid enough add 2 pins in the center. And if it doesnt work, I will know what not to do. Couldnt resist.
As far as too big, I think it looks good up... when it is down, that may be a different story.
Just a thought: What if you made the spoiler slide forward and down bringing the back end of spoiler even with trunk lid, then slide back and up? A lot more work, but I think that may look a 100% better in the down position
.I am so ready for you to tackle the targa! Dying from anticipation, lol. I think your idea of metal frame with lexan/plexi windows would work great and perhaps if still not rigid enough add 2 pins in the center. And if it doesnt work, I will know what not to do
. Couldnt resist.Over all its 63" (22.5" e wing n 18" window)
h s+ould get it a .25 from outter upper quarter edge.
As for idea, its a good one and have to admit I been playing with some ideas.
The issue I have is I wasnt gonna do a custom hatch, just yet and with the duh factor of deck vers taillights n its 4" of no, no, no area (2"clearance) I either come up with a creative way to move it or will be moding alot more to get this to work then planed.
See in the first design, ive fig that arms from the spoiler will extebd into a channel threw deck. were attached to an actuator at its furthest point and a stationary piviot point. Like a hing. Actuator push towards taillights allowing spoiler to pivoit forward towards glass. But with the 4" no, no, no spot...i now need a huge curve in the arms + the low degree of spoiler would need to raise as going fowards to clear deck incline....wtf....
Talk about complicating a simple function.
So I will be thinking.
I started fiberglassing it today as itll take a couple short days to do. (sanded foam edges down today too)
Another extreme idea was, to fab machine looking alumnium arms to come out of the center section of Tailights, like TimeAttack cars.....yes offered by an import owner...i think they hsvve yo be really cool looking to do it though...lol
But your idea is good too, just I would have to cut spoiler into 3 sections like camaro spoilers withbthe center raising in a tradition function for actuating spoiler.
My fwd motion was only because of the voted fighter jet theme...thus, airbreaks...(no im not going to wind tunel...but still look cool)
Either way, I got a week to glass n think....hummm
Too big? Still dint know, im tryn to keep vision in full.. So it could be the unfunish effects of spoiler, rear bumper or quarters too....
I do like it tho, very MSE style with lil IMSA.
Targa....ummm yeah, talk about an ADD temption to just jump to that...lol...i also agree, alumnium frame...lol
Ill still do a soild first n fig this latching thing...then yeah, lenax one!
If sucessfull...then well have to add a 3rdGen CarnCrafts night n make ya one!
04-17-2013, 12:27 AM
#167
Senior Member
Join Date: Mar 2012
Location: Ballwin, MO
Posts: 553
Likes: 0
Received 0 Likes
on
0 Posts
Car: 1987 Trans Am
Engine: 355 tpi
Transmission: 5 speed
Re: BlackTopKing's "Concrete Angle" Build
I like your concept draft, But I was wondering if the two hinges in the center would be enough, Maybe having two more closer to the ends of the spoiler would make it more stable. Just thinking because it is a 3 piece spoiler it may have to much deflection and brake off the ends. But I'm sure you have thought about this.
And your spoiler is not to big, it is bigger then mine but I think it looks good. When it's laid back it looks like its for a drag car and when up more like an IMSA car.
And your spoiler is not to big, it is bigger then mine but I think it looks good. When it's laid back it looks like its for a drag car and when up more like an IMSA car.
04-17-2013, 07:54 AM
#168
Supreme Member
Thread Starter
iTrader: (1)
Join Date: Oct 2008
Location: Charleston SC
Posts: 1,107
Likes: 0
Received 0 Likes
on
0 Posts
Car: 1987 Trans Am GTA
Engine: 350 TPI
Transmission: T56
Axle/Gears: Posi 3:42
Re: BlackTopKing's "Concrete Angle" Build
I like your concept draft, But I was wondering if the two hinges in the center would be enough, Maybe having two more closer to the ends of the spoiler would make it more stable. Just thinking because it is a 3 piece spoiler it may have to much deflection and brake off the ends. But I'm sure you have thought about this.
And your spoiler is not to big, it is bigger then mine but I think it looks good. When it's laid back it looks like its for a drag car and when up more like an IMSA car.
And your spoiler is not to big, it is bigger then mine but I think it looks good. When it's laid back it looks like its for a drag car and when up more like an IMSA car.
I thought about it last night.
I decided not to let this beat me,
he who wants to do something, finds a way.
he who does not, find an excuse.
so we need to find a way to make this work.
I am thinking I might jump a little too fat to fiberglassing stage, because now I'm second guessing the aluminum frame.
Argo steel would have been a little heavier, it would have been a little easier to fabricate arms and hinges for.
I was just got a fiberglass it bolted on, as it is, until I addressed the hatch issue, but....
I think you're right I think its perfect size.
now the bottom of that for there is a2X.25 aluminum flat stock....
I could just cut that out
Bolt steel flat to.it
Or
well that everything else up in steal, bolting the arms to the alumnium stock....
Damn, hate simple mistakes
04-17-2013, 07:56 AM
#169
Supreme Member
Thread Starter
iTrader: (1)
Join Date: Oct 2008
Location: Charleston SC
Posts: 1,107
Likes: 0
Received 0 Likes
on
0 Posts
Car: 1987 Trans Am GTA
Engine: 350 TPI
Transmission: T56
Axle/Gears: Posi 3:42
Re: BlackTopKing's "Concrete Angle" Build
Or, just start over n make a new one...
Lol
Only a prototype anyway
Lol
Only a prototype anyway
04-17-2013, 07:09 PM
#170
Senior Member
Join Date: Mar 2012
Location: Ballwin, MO
Posts: 553
Likes: 0
Received 0 Likes
on
0 Posts
Car: 1987 Trans Am
Engine: 355 tpi
Transmission: 5 speed
Re: BlackTopKing's "Concrete Angle" Build
How much of the frame like in your concept draft do you have made?
I think you're on the right track just looks like you could add a hinge on the ends like the hinges you have in the center, Maybe in the area where the black tape is.
How are you going to mount the plexigass or lexan on the spoiler ?
And are you planning to run a seal of some kind at the bottom of the spoiler so it does not rub against the hatch?
Sorry for all the questions
04-17-2013, 09:12 PM
#171
Supreme Member
Thread Starter
iTrader: (1)
Join Date: Oct 2008
Location: Charleston SC
Posts: 1,107
Likes: 0
Received 0 Likes
on
0 Posts
Car: 1987 Trans Am GTA
Engine: 350 TPI
Transmission: T56
Axle/Gears: Posi 3:42
Re: BlackTopKing's "Concrete Angle" Build
How much of the frame like in your concept draft do you have made?
I think you're on the right track just looks like you could add a hinge on the ends like the hinges you have in the center, Maybe in the area where the black tape is.
How are you going to mount the plexigass or lexan on the spoiler ?
And are you planning to run a seal of some kind at the bottom of the spoiler so it does not rub against the hatch?
Sorry for all the questions
I think you're on the right track just looks like you could add a hinge on the ends like the hinges you have in the center, Maybe in the area where the black tape is.
How are you going to mount the plexigass or lexan on the spoiler ?
And are you planning to run a seal of some kind at the bottom of the spoiler so it does not rub against the hatch?
Sorry for all the questions
Na, I like the questions.
This is all i think of all day anyway (its an illness)
" run a seal of some kind at the bottom of the spoiler so it does not rub against the hatch?"
Actually, didnt think of this....good thought, i did think of sometype of seal/garment for were the actuators comes out of the deck...
As for frame,
2" flat stock at bottom of spoiler, 1/5" angle that runs up the center(like a track framing the sides of plexi) and a 1/2" rod that travels from the flat stock up the sides of the outter spoiler (about were the hatch and quater meet)
The frame: for me, was mainly to give me a stronge support area at the bottom of the spoiler (inital area to connect to the arms for the actuators) and to keep it from flexing when moving.
My hope is to over build the spoiler so to be stronge because with out the plexi its really has a weak area in the center.
To connect plexi i was gonna riviet it to the alumnium angle giving it a lil of a fabricated look and allowing me to change it out....but if i had to make solid ill be using an epoxy...ill get name...it drys in like 10mins and is nasty stronge (use on mason projects, but can get clear)
Anybetter ideals?
04-17-2013, 09:15 PM
#172
Junior Member
Join Date: Mar 2009
Location: Charleston, SC
Posts: 59
Likes: 0
Received 0 Likes
on
0 Posts
Car: 1989 IROC Z28
Engine: Empty
Transmission: T-56
Re: BlackTopKing's "Concrete Angle" Build
As for idea, its a good one and have to admit I been playing with some ideas.
The issue I have is I wasnt gonna do a custom hatch, just yet and with the duh factor of deck vers taillights n its 4" of no, no, no area (2"clearance) I either come up with a creative way to move it or will be moding alot more to get this to work then planed.
See in the first design, ive fig that arms from the spoiler will extebd into a channel threw deck. were attached to an actuator at its furthest point and a stationary piviot point. Like a hing. Actuator push towards taillights allowing spoiler to pivoit forward towards glass. But with the 4" no, no, no spot...i now need a huge curve in the arms + the low degree of spoiler would need to raise as going fowards to clear deck incline....wtf....
Talk about complicating a simple function.
So I will be thinking.
I started fiberglassing it today as itll take a couple short days to do. (sanded foam edges down today too)
Another extreme idea was, to fab machine looking alumnium arms to come out of the center section of Tailights, like TimeAttack cars.....yes offered by an import owner...i think they hsvve yo be really cool looking to do it though...lol
But your idea is good too, just I would have to cut spoiler into 3 sections like camaro spoilers withbthe center raising in a tradition function for actuating spoiler.
How about the spoiler is down, the actuator is attached near the front of the spoiler, and obviously in the closed position. The back bottom of the spoiler is attached to a rod that pivots on the spoiler and is attached to the back end of the deck and also able to pivot. When actuator opens, pushing spoiler back it also pushes against the rod making it pivot upwards giving it an angle vs. laying flat as it would be on the deck when closed.
If this makes no sense (not sure if it does to me when reading, lol) I will explain better Saturday, just remind me.
04-17-2013, 09:44 PM
#173
Supreme Member
Thread Starter
iTrader: (1)
Join Date: Oct 2008
Location: Charleston SC
Posts: 1,107
Likes: 0
Received 0 Likes
on
0 Posts
Car: 1987 Trans Am GTA
Engine: 350 TPI
Transmission: T56
Axle/Gears: Posi 3:42
Re: BlackTopKing's "Concrete Angle" Build
So I am sitting here watching TV when I come up with a crazy idea... I will attempt to explain on here, but I work better with props, so bare with me.
How about the spoiler is down, the actuator is attached near the front of the spoiler, and obviously in the closed position. The back bottom of the spoiler is attached to a rod that pivots on the spoiler and is attached to the back end of the deck and also able to pivot. When actuator opens, pushing spoiler back it also pushes against the rod making it pivot upwards giving it an angle vs. laying flat as it would be on the deck when closed.
If this makes no sense (not sure if it does to me when reading, lol) I will explain better Saturday, just remind me.
Huh...
almost like a multi function... the first set of actuators puch the spoiler in an upward position. In conjuntion to a second set of actuators that push the spoiler foward...
I actually like the idea, but think that the this multi function whould be a challenge to synce...would need somekind of delay, for one to engage as the second engages...
but the first thing this sparks is an extremely creative hinge...almost like a curved and slotted hinge. something that would guide the spoiler. actuator maybe with an eyelet bolt.
something thatll allow this movement...
almost making me think of mini...lambo hinges...lol
well def talk on Sat
04-17-2013, 11:48 PM
#174
Senior Member
Join Date: Mar 2012
Location: Ballwin, MO
Posts: 553
Likes: 0
Received 0 Likes
on
0 Posts
Car: 1987 Trans Am
Engine: 355 tpi
Transmission: 5 speed
Re: BlackTopKing's "Concrete Angle" Build
Na, I like the questions.
This is all i think of all day anyway (its an illness)
" run a seal of some kind at the bottom of the spoiler so it does not rub against the hatch?"
Actually, didnt think of this....good thought, i did think of sometype of seal/garment for were the actuators comes out of the deck...
As for frame,
2" flat stock at bottom of spoiler, 1/5" angle that runs up the center(like a track framing the sides of plexi) and a 1/2" rod that travels from the flat stock up the sides of the outter spoiler (about were the hatch and quater meet)
The frame: for me, was mainly to give me a stronge support area at the bottom of the spoiler (inital area to connect to the arms for the actuators) and to keep it from flexing when moving.
My hope is to over build the spoiler so to be stronge because with out the plexi its really has a weak area in the center.
To connect plexi i was gonna riviet it to the alumnium angle giving it a lil of a fabricated look and allowing me to change it out....but if i had to make solid ill be using an epoxy...ill get name...it drys in like 10mins and is nasty stronge (use on mason projects, but can get clear)
Anybetter ideals?
About your plexi , I wouldn't rivet it on if you would like to be able to change it out, I'm unsure how thick of plexi you are using. But if it is thick enough I would chamfer the holes and use a flat head phillips machine screw and run it flush with the plexiglass. This is what I'll be doing on my pop up deletes
For the seal I was thinking something like whats used on side windows, this to help water and junk from getting under it, Not sure how low you're thinking of setting the spoiler or if you are planning to run it a bit off the hatch lid.
04-18-2013, 09:17 PM
#176
Supreme Member
Thread Starter
iTrader: (1)
Join Date: Oct 2008
Location: Charleston SC
Posts: 1,107
Likes: 0
Received 0 Likes
on
0 Posts
Car: 1987 Trans Am GTA
Engine: 350 TPI
Transmission: T56
Axle/Gears: Posi 3:42
Re: BlackTopKing's "Concrete Angle" Build
First I hope this is not an illness, as I don't just think about my own project but I end up thinking of others as well, But if it is I think its a good one to have.
About your plexi , I wouldn't rivet it on if you would like to be able to change it out, I'm unsure how thick of plexi you are using. But if it is thick enough I would chamfer the holes and use a flat head phillips machine screw and run it flush with the plexiglass. This is what I'll be doing on my pop up deletes
For the seal I was thinking something like whats used on side windows, this to help water and junk from getting under it, Not sure how low you're thinking of setting the spoiler or if you are planning to run it a bit off the hatch lid.
04-21-2013, 10:03 PM
#177
Member
Join Date: Jun 2009
Location: Toledo ohio
Posts: 317
Likes: 0
Received 0 Likes
on
0 Posts
Car: 87 Black Irocz28
Engine: 350 TPI
Transmission: 700r4 shift kit
Axle/Gears: 3:73 richmend axles and eaton gears
Re: BlackTopKing's "Concrete Angle" Build
Hay blacktop are you still interested in that contempo body kit in Florida ???
04-22-2013, 06:43 AM
#179
Supreme Member
Thread Starter
iTrader: (1)
Join Date: Oct 2008
Location: Charleston SC
Posts: 1,107
Likes: 0
Received 0 Likes
on
0 Posts
Car: 1987 Trans Am GTA
Engine: 350 TPI
Transmission: T56
Axle/Gears: Posi 3:42
Re: BlackTopKing's "Concrete Angle" Build
well the good news is, by Thursday I will be caught up add a whole bike I had a schedule.... which means Trans Am time!!!!
so hopefully by the weekend we have this spoiler in fiberglass n at a bolt om stage
so hopefully by the weekend we have this spoiler in fiberglass n at a bolt om stage
05-05-2013, 08:36 PM
#180
Supreme Member
Thread Starter
iTrader: (1)
Join Date: Oct 2008
Location: Charleston SC
Posts: 1,107
Likes: 0
Received 0 Likes
on
0 Posts
Car: 1987 Trans Am GTA
Engine: 350 TPI
Transmission: T56
Axle/Gears: Posi 3:42
Re: BlackTopKing's "Concrete Angle" Build
GUESS WHAT!!!
Finally, first time since Sept, I dont have a Tanks, a Bike a helmet or a car in sight...im done, phew...thank you bike week!!!
LOL
Trans Am Time now BABY.
Got SideSkirts, Foamed and Carved and fiberglass ready.
Got Front Fenders, Foamed Carved and Fiberglass ready.
Got Front Bumper,Modified-Foamed Carved and yep...fiberglass ready.
Spoiler is just about done, sanding wise...now time to make move....
So tomorrow, Ill post up what i got done today, but it would seem as if, i wasnt playing around.
i should have a soild two weeks of TA Time...i really like to get this body work done enough to spray some primer on to see it all as a single color and tweek as needed from there
05-11-2013, 12:30 PM
#181
Supreme Member
Thread Starter
iTrader: (1)
Join Date: Oct 2008
Location: Charleston SC
Posts: 1,107
Likes: 0
Received 0 Likes
on
0 Posts
Car: 1987 Trans Am GTA
Engine: 350 TPI
Transmission: T56
Axle/Gears: Posi 3:42
Re: BlackTopKing's "Concrete Angle" Build
Front Nose mock up
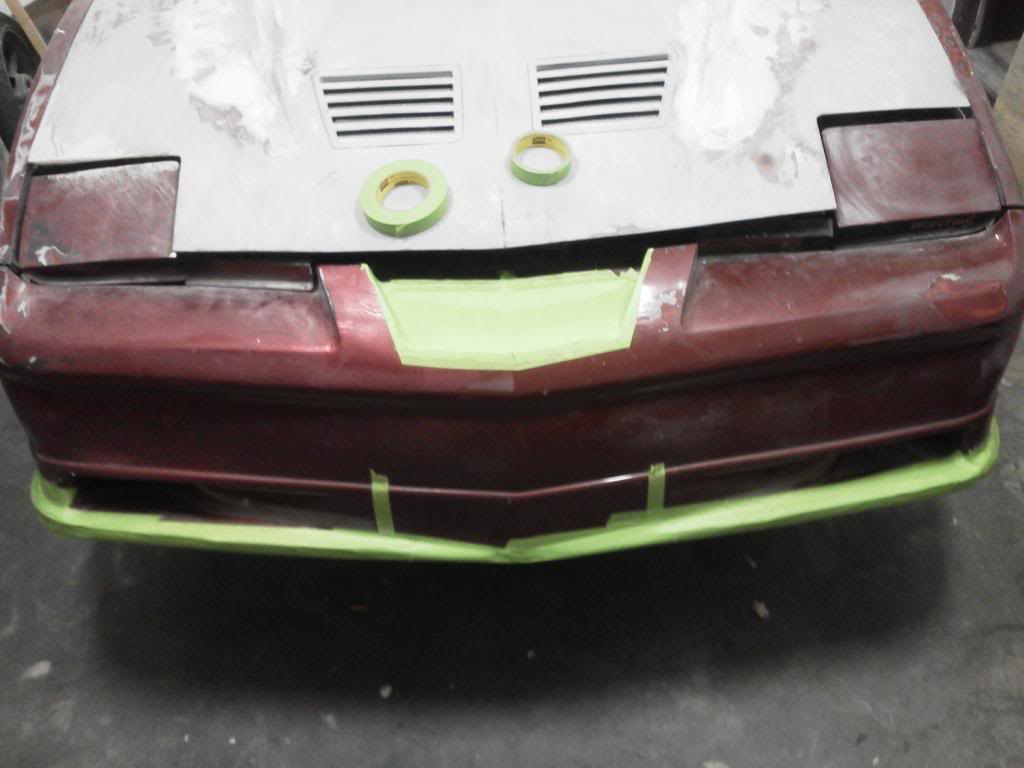

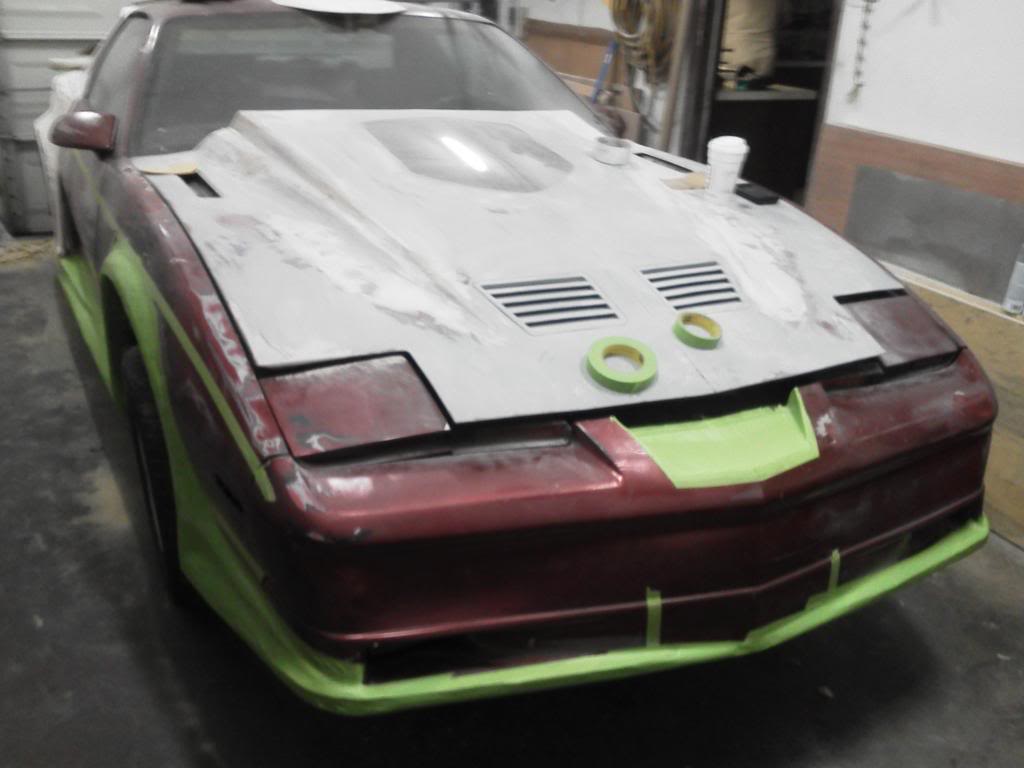
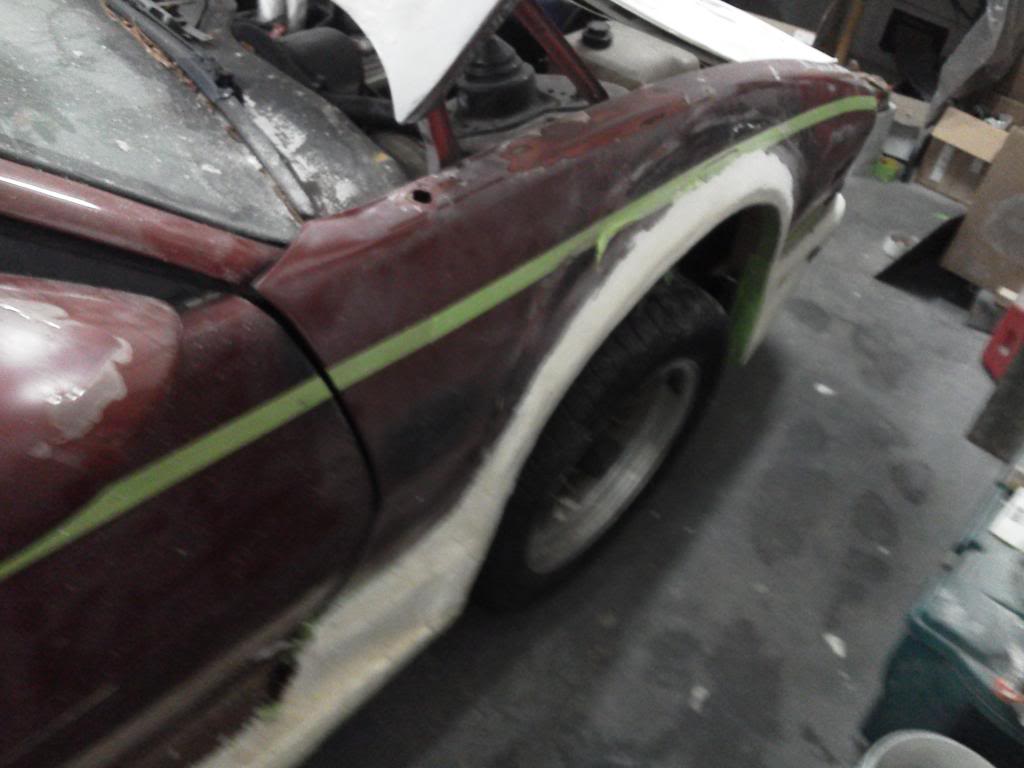
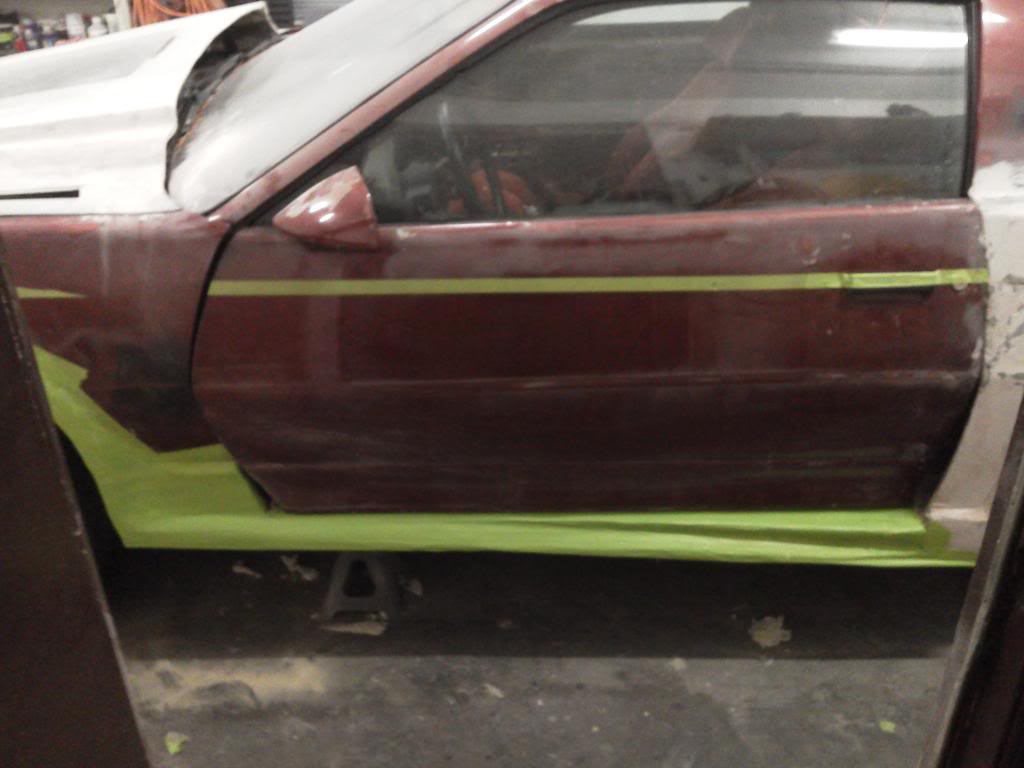
SideSkirt:
Foam, carve/shape and then green tape to mock up...nice way to get an overall view
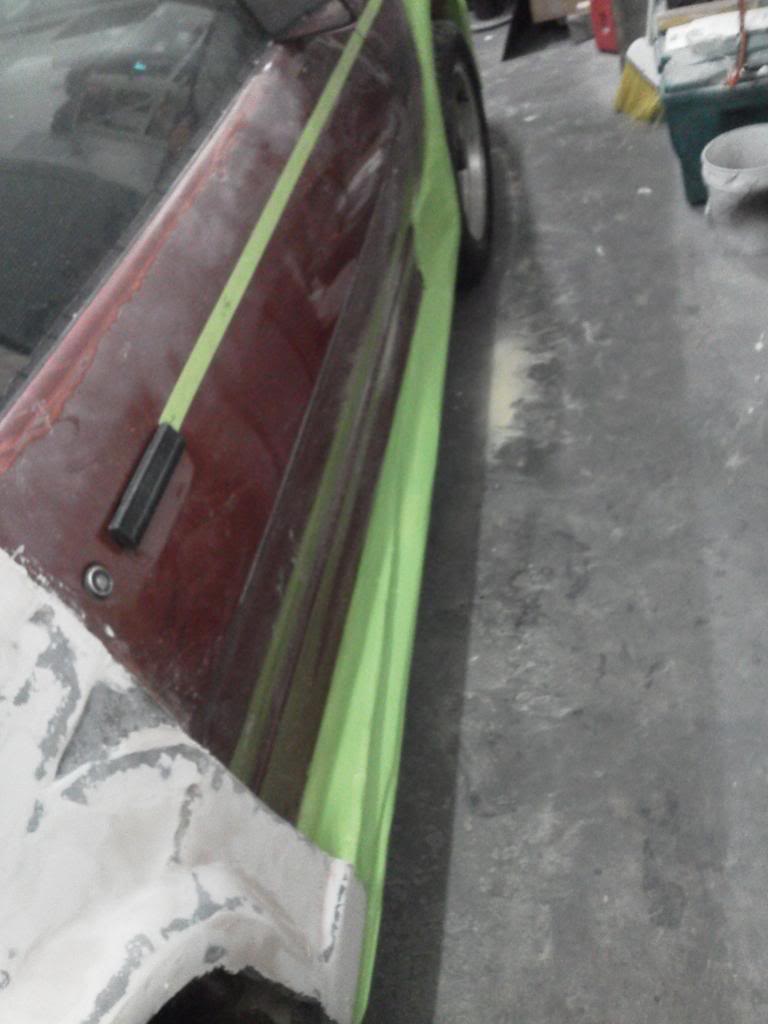
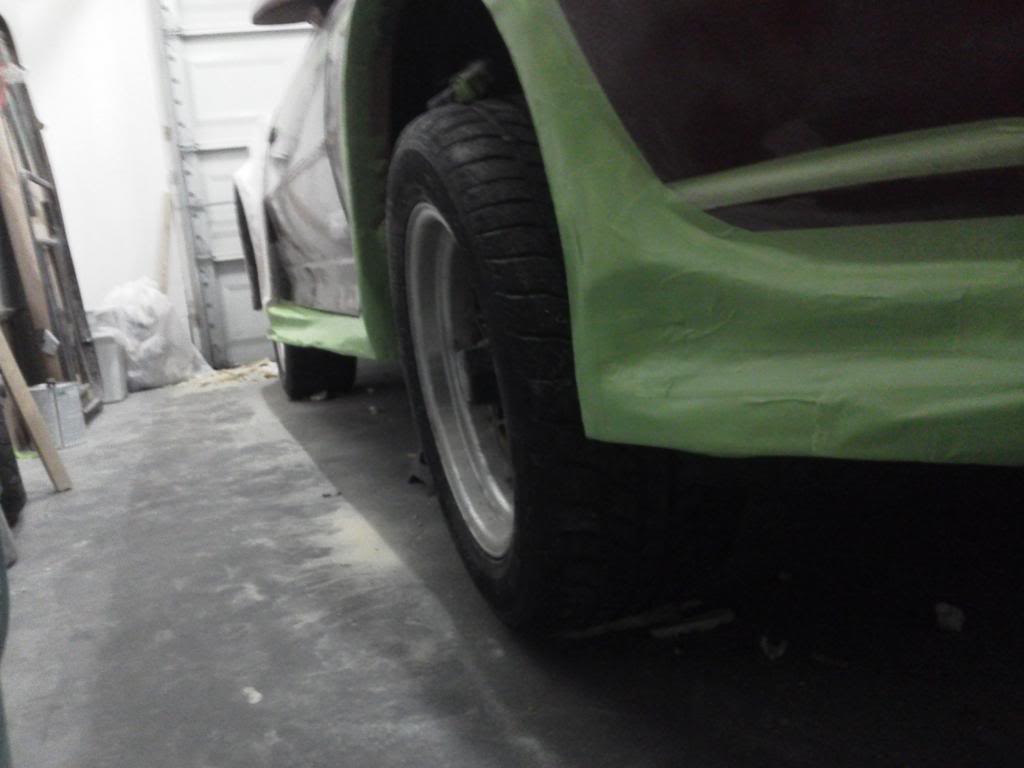
Compairing to the orignal drawing. after fiberglassing the Front nose,fenders and sideskirts (finishing spoiler), i will have the spillers,front lip and rear valance left to do (in carbonfiber)
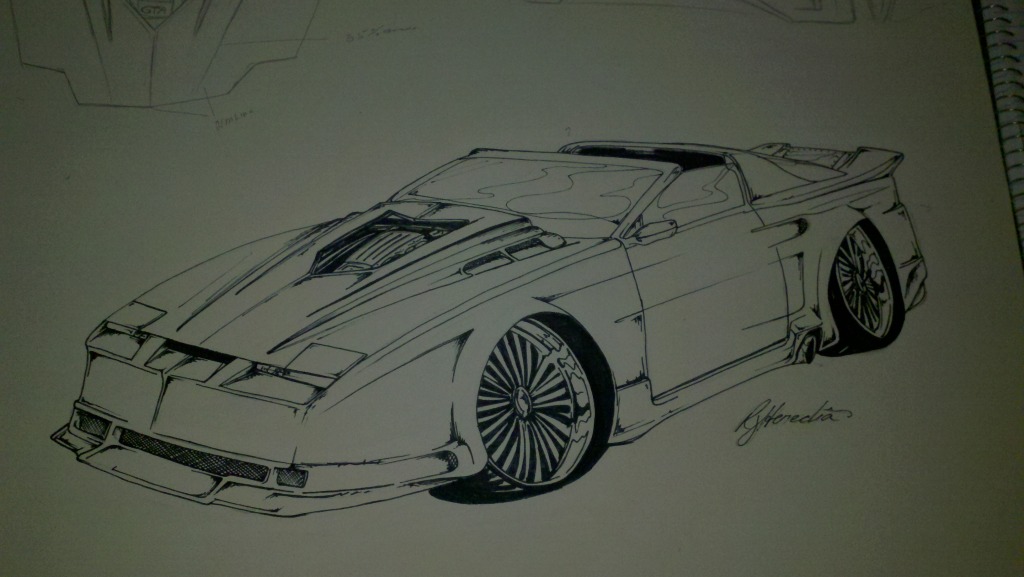
I think its starting to take shape and pretty close (did change a few things and may still ad a few as well, but we will see)
my personal goal is to have body and running by July for Fbody week in Myrtle
05-12-2013, 08:16 AM
#183
Supreme Member
Thread Starter
iTrader: (1)
Join Date: Oct 2008
Location: Charleston SC
Posts: 1,107
Likes: 0
Received 0 Likes
on
0 Posts
Car: 1987 Trans Am GTA
Engine: 350 TPI
Transmission: T56
Axle/Gears: Posi 3:42
Re: BlackTopKing's "Concrete Angle" Build
Thanks man,
Been glassin all night, sideskirts by far the most funky position....even with car jacked up.
This afternoon im hoping to have layer #3 (have 2 now)on the nose,fenders n sideskirts. Then ill grind out any hi spots n pull outside, while I clean...ill def take pics then.
Then just pull pieces off car to do back sides, maybe this week I can start the front lip, splitters n valance (made off car)
05-12-2013, 08:19 AM
#184
Supreme Member
Thread Starter
iTrader: (1)
Join Date: Oct 2008
Location: Charleston SC
Posts: 1,107
Likes: 0
Received 0 Likes
on
0 Posts
Car: 1987 Trans Am GTA
Engine: 350 TPI
Transmission: T56
Axle/Gears: Posi 3:42
Re: BlackTopKing's "Concrete Angle" Build
Still got to fig the gas door
Stock n maybe try to extend
Challenger gas door
Or maybe tge dodge trucks(aftermarket)
Ill do dodge, but no ford. Lol
I like challenger cause it says fuel n that seem, fighterjet-ish
Any other ideals
Stock n maybe try to extend
Challenger gas door
Or maybe tge dodge trucks(aftermarket)
Ill do dodge, but no ford. Lol
I like challenger cause it says fuel n that seem, fighterjet-ish
Any other ideals
05-12-2013, 09:46 PM
#186
Supreme Member
Thread Starter
iTrader: (1)
Join Date: Oct 2008
Location: Charleston SC
Posts: 1,107
Likes: 0
Received 0 Likes
on
0 Posts
Car: 1987 Trans Am GTA
Engine: 350 TPI
Transmission: T56
Axle/Gears: Posi 3:42
Re: BlackTopKing's "Concrete Angle" Build
I know the newer ones do, not sure of the older, ill have to look
05-12-2013, 10:10 PM
#187
Senior Member
Join Date: Mar 2012
Location: Ballwin, MO
Posts: 553
Likes: 0
Received 0 Likes
on
0 Posts
Car: 1987 Trans Am
Engine: 355 tpi
Transmission: 5 speed
 05-12-2013, 10:53 PM
#188
Supreme Member
Thread Starter
iTrader: (1)
Join Date: Oct 2008
Location: Charleston SC
Posts: 1,107
Likes: 0
Received 0 Likes
on
0 Posts
Car: 1987 Trans Am GTA
Engine: 350 TPI
Transmission: T56
Axle/Gears: Posi 3:42
Re: BlackTopKing's "Concrete Angle" Build
Yeah, even like that!
Think itll look cleaner n more fitting as well, instead of the stock door.
Something that small could n would really make a big impact, overall
Think itll look cleaner n more fitting as well, instead of the stock door.
Something that small could n would really make a big impact, overall
05-13-2013, 11:10 AM
#189
Senior Member
Join Date: Mar 2012
Location: Ballwin, MO
Posts: 553
Likes: 0
Received 0 Likes
on
0 Posts
Car: 1987 Trans Am
Engine: 355 tpi
Transmission: 5 speed
Re: BlackTopKing's "Concrete Angle" Build
I would think if you did a more flush fit , you know with the hole for the cap cut just a bit bigger and in the shape of the cap would really look good. Well never mind I think I may want to do this on my car.
05-13-2013, 11:34 AM
#190
Supreme Member
Thread Starter
iTrader: (1)
Join Date: Oct 2008
Location: Charleston SC
Posts: 1,107
Likes: 0
Received 0 Likes
on
0 Posts
Car: 1987 Trans Am GTA
Engine: 350 TPI
Transmission: T56
Axle/Gears: Posi 3:42
Re: BlackTopKing's "Concrete Angle" Build
ima try to find pic, the new styles are counter sunk so cap is close to fluse, but lip is inwards.
05-13-2013, 11:36 AM
#191
Supreme Member
Thread Starter
iTrader: (1)
Join Date: Oct 2008
Location: Charleston SC
Posts: 1,107
Likes: 0
Received 0 Likes
on
0 Posts
Car: 1987 Trans Am GTA
Engine: 350 TPI
Transmission: T56
Axle/Gears: Posi 3:42
Re: BlackTopKing's "Concrete Angle" Build
Good news....fiberglass is done
05-15-2013, 09:35 PM
#192
Supreme Member
Thread Starter
iTrader: (1)
Join Date: Oct 2008
Location: Charleston SC
Posts: 1,107
Likes: 0
Received 0 Likes
on
0 Posts
Car: 1987 Trans Am GTA
Engine: 350 TPI
Transmission: T56
Axle/Gears: Posi 3:42
Re: BlackTopKing's "Concrete Angle" Build
Glass sanded down pretty smooth, wont need much filler atvall, so tomorrow will be my big day. Fill n knock down coat....
I am so dieing to see this thibg as a soild color (so I can really see it, I might use some left over red...lol...just I can say ye or na before I go any further.
Rrrr....killing me, a week solid n this will be in a primer, def....lol
And way, I am thinking of the center intake of nose...carbon overlay, shave the front turns.
And doo body line on door for sure.
Question is, should I do an intake vent on fenders, up hi for airintake...kinda too ricy but kinda why not at same time...
What you guys think?
05-15-2013, 11:46 PM
#193
Senior Member
Join Date: Mar 2012
Location: Ballwin, MO
Posts: 553
Likes: 0
Received 0 Likes
on
0 Posts
Car: 1987 Trans Am
Engine: 355 tpi
Transmission: 5 speed
Re: BlackTopKing's "Concrete Angle" Build
Glass sanded down pretty smooth, wont need much filler atvall, so tomorrow will be my big day. Fill n knock down coat....
I am so dieing to see this thibg as a soild color (so I can really see it, I might use some left over red...lol...just I can say ye or na before I go any further.
Rrrr....killing me, a week solid n this will be in a primer, def....lol
And way, I am thinking of the center intake of nose...carbon overlay, shave the front turns.
And doo body line on door for sure.
Question is, should I do an intake vent on fenders, up hi for airintake...kinda too ricy but kinda why not at same time...
What you guys think?
I am so dieing to see this thibg as a soild color (so I can really see it, I might use some left over red...lol...just I can say ye or na before I go any further.
Rrrr....killing me, a week solid n this will be in a primer, def....lol
And way, I am thinking of the center intake of nose...carbon overlay, shave the front turns.
And doo body line on door for sure.
Question is, should I do an intake vent on fenders, up hi for airintake...kinda too ricy but kinda why not at same time...
What you guys think?
Are you just using regular filler or are you going to do the milkshake ( filler with epoxy resin ) ? On my fiberglass I use the milkshake it allows the filler to spread a bit smoother and work with a little longer than filler alone.
I even thinned the milkshake out even more with acetone and sprayed it with my primer gun but that was on the plug for my fiberglass hood, it sanded great and ended up really hard after it dried, just took a few days two dry before I could sand it.
05-16-2013, 06:48 AM
#194
Supreme Member
Thread Starter
iTrader: (1)
Join Date: Oct 2008
Location: Charleston SC
Posts: 1,107
Likes: 0
Received 0 Likes
on
0 Posts
Car: 1987 Trans Am GTA
Engine: 350 TPI
Transmission: T56
Axle/Gears: Posi 3:42
Re: BlackTopKing's "Concrete Angle" Build
I think that might be a bit much with the vents, The hood already has vents showing even though they are not functional, I kind of figured that the center intake on the nose would be for a ram air type of thing. And yes a carbon fiber inlay would look great there.
Are you just using regular filler or are you going to do the milkshake ( filler with epoxy resin ) ? On my fiberglass I use the milkshake it allows the filler to spread a bit smoother and work with a little longer than filler alone.
I even thinned the milkshake out even more with acetone and sprayed it with my primer gun but that was on the plug for my fiberglass hood, it sanded great and ended up really hard after it dried, just took a few days two dry before I could sand it.
True, simple n clean...not tryn to over complicate.
could always add later as wrell.
Never tried yourr milkshake, ill do polymr woth bondo to fill out nice and wheen filling edges or areas of consern, I will apply witg resin, but not a full spread. Ill have to try it.
 05-18-2013, 08:23 PM
#196
Supreme Member
Thread Starter
iTrader: (1)
Join Date: Oct 2008
Location: Charleston SC
Posts: 1,107
Likes: 0
Received 0 Likes
on
0 Posts
Car: 1987 Trans Am GTA
Engine: 350 TPI
Transmission: T56
Axle/Gears: Posi 3:42
Re: BlackTopKing's "Concrete Angle" Build
Well I got 5hrs of play outta the 10hrs i hoped for.
Got the fiberglass sanded down on the front clip and filler applied, sanded it out a bit and now have a few spots to tweek out on the sideskirts.
hopefully i can get the car back on the ground and out of the guarge tomorrow so that i can get some pics.
I am so tempted to just spray it red..smoothed out or not...rrrrrr...
i just wanna see this thing already, need a pic me up this week anyway and some TA Motovation.
Plus i think itll be a way to proof the car..i keep going in circles on the doors, weather or not to create that upper panle to make the center look sunken...and so on..ect.ect.
on a neg note, the stupid car...is now not wanting to start...battery,battery cable or draw issue...odd, but the voltage shows 12.7 at battery, but car shows 11 ish and cranks like there is 0.
gotta love 3rdgens
05-19-2013, 10:31 AM
#197
Senior Member
Join Date: Mar 2012
Location: Ballwin, MO
Posts: 553
Likes: 0
Received 0 Likes
on
0 Posts
Car: 1987 Trans Am
Engine: 355 tpi
Transmission: 5 speed
Re: BlackTopKing's "Concrete Angle" Build
And I thought you only proofed shine not cars
05-19-2013, 10:41 AM
#198
Senior Member
Join Date: Mar 2012
Location: Ballwin, MO
Posts: 553
Likes: 0
Received 0 Likes
on
0 Posts
Car: 1987 Trans Am
Engine: 355 tpi
Transmission: 5 speed
Re: BlackTopKing's "Concrete Angle" Build
I just came across an add for an auto form kit for convertable car and it top would be great to make a targa top out of when I saw this I remembered your drawing and how you wanted your car, its in the parts for sale exterior here in TGO. it may give you some good idea how to do yours
05-19-2013, 06:50 PM
#199
Supreme Member
Thread Starter
iTrader: (1)
Join Date: Oct 2008
Location: Charleston SC
Posts: 1,107
Likes: 0
Received 0 Likes
on
0 Posts
Car: 1987 Trans Am GTA
Engine: 350 TPI
Transmission: T56
Axle/Gears: Posi 3:42
Re: BlackTopKing's "Concrete Angle" Build
After looking over your pics again of your car and your drawing of your concept I think that upper panel to make the center look sunken would look right on your car, I wouldn't make it more that a quarter of an inch build out.
And I thought you only proofed shine not cars
And I thought you only proofed shine not cars
If I do a full line, whole door, ill have to shave handles, im thinking unless I do a 3rd streach n featger out before handles.
Also agree, .25" would actually create a strong impression, dont take much.
Only tricky part is....lambo doors need adjusting over time...so ill ded have to install new struts so that the lines arnt off in a year from now.
Back to ebay
05-19-2013, 06:57 PM
#200
Supreme Member
Thread Starter
iTrader: (1)
Join Date: Oct 2008
Location: Charleston SC
Posts: 1,107
Likes: 0
Received 0 Likes
on
0 Posts
Car: 1987 Trans Am GTA
Engine: 350 TPI
Transmission: T56
Axle/Gears: Posi 3:42
Re: BlackTopKing's "Concrete Angle" Build
I just came across an add for an auto form kit for convertable car and it top would be great to make a targa top out of when I saw this I remembered your drawing and how you wanted your car, its in the parts for sale exterior here in TGO. it may give you some good idea how to do yours
Im looking right now.
Side not I was actually thinking about thid today n although i was gonna do cage during the interior stage n cage before targa, I really rather do targa while im hete, exterior, now.
N was looking at the roof section thinking, what if I boxed n "x" framed the hatch side of the roof (to suport) area.
Meaning, I dint want to cut n watch car tweek, so to brace it n keep roof in line.
1/2" squar stock maybe?, something that could be hiden with a custom liner...?
Last edited by BlackTopKing; 05-19-2013 at 06:58 PM. Reason: Add thought