What ever happened to QwkTrip's car anyway?
 01-21-2018, 02:57 PM
#951
COTM Editor

Thread Starter
iTrader: (22)
Join Date: Mar 2001
Posts: 9,893
Likes: 0
Received 1,855 Likes
on
1,270 Posts
Car: '89 Firebird
Engine: 7.0L
Transmission: T56
Re: What ever happened to QwkTrip's car anyway?
Decided that I'm going to clean the layer of carbon off the piston and do this all over again.
 01-23-2018, 12:33 AM
#952
COTM Editor
Thread Starter
iTrader: (22)
Join Date: Mar 2001
Posts: 9,893
Likes: 0
Received 1,855 Likes
on
1,270 Posts
Car: '89 Firebird
Engine: 7.0L
Transmission: T56
Re: What ever happened to QwkTrip's car anyway?
Okay, so it looks like what I did earlier was a bunch of hooey. I should not have been rocking the piston to extremes. The preponderance of information I've found is that the measurement should be taken with piston level, or directly above the pin.
I have remeasured (carefully over and over again) and the right bank (even cylinders) is further out of the deck than the left bank (odd cylinders). Good news is the range is tight within each bank.
cyl 1.... .0030
cyl 3.... .0035
cyl 5.... .0030
cyl 7.... .0030
cyl 2.... .0055
cyl 4.... .0065
cyl 6.... .0060
cyl 8.... .0060
Using a piston bridge, I put a dial indicator at 12 and 6 o'clock positions on the piston, rocked the piston by hand until level (both readings roughly the same) and then took readings. If numbers were slightly different then I averaged the values. After that I would double check that piston really was a TDC.
I also took another set of measurements with dial indicator at center point of piston. Pretty much gave the same numbers except for one piston where it seems center is 0.001 lower than the outer portion of the piston.
Last edited by QwkTrip; 03-02-2018 at 12:34 PM.
01-23-2018, 08:22 PM
#953
Supreme Member
Re: What ever happened to QwkTrip's car anyway?
So the general internet wisdom is to ignore piston rock? Perhaps that takes into account the quench value itself seeing that if the piston remained perfectly true to the bore at all times, one could conceivably go for zero quench. Or a couple of thou anyway.
Are you confident with the .045" gasket?
And I've never seen the word "hooey" and "preponderance" in the same paragraph before...
Are you confident with the .045" gasket?
And I've never seen the word "hooey" and "preponderance" in the same paragraph before...
01-23-2018, 11:25 PM
#954
COTM Editor
Thread Starter
iTrader: (22)
Join Date: Mar 2001
Posts: 9,893
Likes: 0
Received 1,855 Likes
on
1,270 Posts
Car: '89 Firebird
Engine: 7.0L
Transmission: T56
02-04-2018, 12:59 AM
#955
COTM Editor
Thread Starter
iTrader: (22)
Join Date: Mar 2001
Posts: 9,893
Likes: 0
Received 1,855 Likes
on
1,270 Posts
Car: '89 Firebird
Engine: 7.0L
Transmission: T56
Re: What ever happened to QwkTrip's car anyway?
The LS7 build begins..... 
First thing I did was remove the stock cylinder heads and sold them. I've got better plans coming up for that.

I need to switch out some parts to convert from dry sump to wet sump. First thing to go is the LS7 front cover, which will later be replaced by an LS3 front cover.

Inside the engine I was surprised to find out that my "stock" low mile engine has a Katech oil pump...... um..... Okay. Unfortunately that fine piece of equipment is being removed because it won't work with a wet sump pan.

Oil pan and windage tray also get removed since those won't work with a wet sump system either.

The LS7 crank sprocket is compatible with only the dry sump pump so it is necessary to swap out for a LS3 style crank sprocket. The correct tool to remove the crank sprocket is Kent Moore J-41558 but it is pretty expensive so I rigged up a 2 jaw puller with zip ties to keep the jaws from spreading. I also cut the old crank bolt short (only the shank remains) and drilled a pilot hole in the end for the puller to have something to center on. It was not an easy job though. Seriously, it was a b**** to remove. That sprocket was stuck on REALLY tight.

I used the old sprocket as a spacer over the crank snout and drove the new sprocket in place using another homemade tool. The tool is just a piece of M16 all-thread screwed into the end of the crank. Two nuts are jammed together on the right side so I can hold the all-thread to keep it from rotating. And on the left side are a couple fenders washers for a slip surface, and a single nut I can turn to push the sprocket onto the crankshaft. Easy pleasey.

New camshaft installed with a Cloyes Hex-A-Just cam sprocket. The cam pin fits in an eccentric bushing and the bushing can be rotated to advance or retard the cam up to 6 degrees. The crank sprocket (installed earlier) can also be indexed on the crank for more adjustment, but I installed it straight up anticipating the cam is cut pretty close to specification.

Comp Cams LSG lobes with 240/254 on a 114 split.

This is my stopping point today -- Prepping to degree the cam. I am taking no chances with this cam install and decided to get a large 16-inch degree wheel for increased accuracy.

First thing I did was remove the stock cylinder heads and sold them. I've got better plans coming up for that.
I need to switch out some parts to convert from dry sump to wet sump. First thing to go is the LS7 front cover, which will later be replaced by an LS3 front cover.
Inside the engine I was surprised to find out that my "stock" low mile engine has a Katech oil pump...... um..... Okay. Unfortunately that fine piece of equipment is being removed because it won't work with a wet sump pan.
Oil pan and windage tray also get removed since those won't work with a wet sump system either.
The LS7 crank sprocket is compatible with only the dry sump pump so it is necessary to swap out for a LS3 style crank sprocket. The correct tool to remove the crank sprocket is Kent Moore J-41558 but it is pretty expensive so I rigged up a 2 jaw puller with zip ties to keep the jaws from spreading. I also cut the old crank bolt short (only the shank remains) and drilled a pilot hole in the end for the puller to have something to center on. It was not an easy job though. Seriously, it was a b**** to remove. That sprocket was stuck on REALLY tight.
I used the old sprocket as a spacer over the crank snout and drove the new sprocket in place using another homemade tool. The tool is just a piece of M16 all-thread screwed into the end of the crank.
Two nuts are jammed together on the right side so I can hold the all-thread to keep it from rotating. And on the left side are a couple fenders washers for a slip surface, and a single nut I can turn to push the sprocket onto the crankshaft. Easy pleasey.New camshaft installed with a Cloyes Hex-A-Just cam sprocket. The cam pin fits in an eccentric bushing and the bushing can be rotated to advance or retard the cam up to 6 degrees. The crank sprocket (installed earlier) can also be indexed on the crank for more adjustment, but I installed it straight up anticipating the cam is cut pretty close to specification.
Comp Cams LSG lobes with 240/254 on a 114 split.
This is my stopping point today -- Prepping to degree the cam. I am taking no chances with this cam install and decided to get a large 16-inch degree wheel for increased accuracy.
Last edited by QwkTrip; 07-18-2023 at 07:23 PM.
02-05-2018, 08:51 AM
#956
Supreme Member
iTrader: (11)

Join Date: Sep 1999
Location: NJ
Posts: 4,345
Received 298 Likes
on
234 Posts
Car: 92 Firebird
Engine: 4.8 LR4
Transmission: T56
Axle/Gears: 3.45 9 Bolt
Re: What ever happened to QwkTrip's car anyway?
That's a lot of duration, lol. Interested to see the end result, I really want an LS7 or an LS9 in my second gen.
What are you going to do with the oil pump, sprocket, cover and pan?
What are you going to do with the oil pump, sprocket, cover and pan?
 02-05-2018, 08:02 PM
#958
COTM Editor
Thread Starter
iTrader: (22)
Join Date: Mar 2001
Posts: 9,893
Likes: 0
Received 1,855 Likes
on
1,270 Posts
Car: '89 Firebird
Engine: 7.0L
Transmission: T56
Re: What ever happened to QwkTrip's car anyway?
The advertised lift on the cam card assumes typical LS rocker ratio of 1.7, whereas the LS7 has a 1.8 rocker ratio. The Yella Terra rockers that Mamo uses actually run a tick on the high side closer to 1.85 ratio, so lift at valve is nearly 0.660 inch.
Haven't made up my mind yet. Finding that Katech oil pump was an $800 present that I wasn't expecting.
Haven't made up my mind yet. Finding that Katech oil pump was an $800 present that I wasn't expecting.
02-16-2018, 01:37 AM
#959
COTM Editor
Thread Starter
iTrader: (22)
Join Date: Mar 2001
Posts: 9,893
Likes: 0
Received 1,855 Likes
on
1,270 Posts
Car: '89 Firebird
Engine: 7.0L
Transmission: T56
Re: What ever happened to QwkTrip's car anyway?
After installing the Cloyes timing set it dawned on me that the camshaft sprocket was for my old engine with LS2 style 1x speed sensor but LS7 has a 4x speed sensor. The Holley HP EFI can handle whatever combination I do, but the software is easier if it is one of the standard LS combos (not mix-matched parts). Just for kicks and grins, I installed the original LS7 cam sprocket (4x style) and wouldn't you know the camshaft degree'd real nice! Yay.... I got lucky again. 
And boy was it easy to degree the cam this time. Skinny, you'll be happy to know I switched methods to finding intake centerline and then confirming cam was ground correctly by checking all valve events at 0.05" lobe lift. I don't know why I struggled so much last time. This time I had better tools and a little practice, I suppose.

I am using a Melling high pressure, standard flow oil pump. The video below shows how to install both a stock oil pump and the Melling oil pump (different procedures). I especially like how they say disassembling the pump voids warranty, immediately followed by Step #1 - disassemble pump. I bought six individual 0.002 inch feeler gauges from Grainger, part number 3R018.
Update: the Melling 10295 standard-volume high-pressure wasn't enough pump for the engine with the Johnson lifters with axle oiling. Had to upsize to a high volume Melling 10296.
Post #1701, https://www.thirdgen.org/forums/ltx-...ml#post6459947


Part of the wet sump conversion is eliminating the LS7 front cover and replacing it with an LS3 front cover. I used an alignment tool from SacCity Corvette to install the front cover. The tool helps to position the oil seal concentric to the crank snout (and damper when it is installed) so to avoid premature wear and oil leak. The tool is just a plastic sleeve that slides over the crank snout and fits snuggly inside the cover seal. There also is a version that is a little more accurate with a larger diameter cylinder that aligns to the cover itself (no seal installed).

And boy was it easy to degree the cam this time. Skinny, you'll be happy to know I switched methods to finding intake centerline and then confirming cam was ground correctly by checking all valve events at 0.05" lobe lift. I don't know why I struggled so much last time. This time I had better tools and a little practice, I suppose.
I am using a Melling high pressure, standard flow oil pump. The video below shows how to install both a stock oil pump and the Melling oil pump (different procedures). I especially like how they say disassembling the pump voids warranty, immediately followed by Step #1 - disassemble pump.
I bought six individual 0.002 inch feeler gauges from Grainger, part number 3R018.Update: the Melling 10295 standard-volume high-pressure wasn't enough pump for the engine with the Johnson lifters with axle oiling. Had to upsize to a high volume Melling 10296.
Post #1701, https://www.thirdgen.org/forums/ltx-...ml#post6459947
Part of the wet sump conversion is eliminating the LS7 front cover and replacing it with an LS3 front cover. I used an alignment tool from SacCity Corvette to install the front cover. The tool helps to position the oil seal concentric to the crank snout (and damper when it is installed) so to avoid premature wear and oil leak. The tool is just a plastic sleeve that slides over the crank snout and fits snuggly inside the cover seal. There also is a version that is a little more accurate with a larger diameter cylinder that aligns to the cover itself (no seal installed).
Last edited by QwkTrip; 03-16-2022 at 01:20 AM.
02-16-2018, 03:39 PM
#960
COTM Editor
Thread Starter
iTrader: (22)
Join Date: Mar 2001
Posts: 9,893
Likes: 0
Received 1,855 Likes
on
1,270 Posts
Car: '89 Firebird
Engine: 7.0L
Transmission: T56
Re: What ever happened to QwkTrip's car anyway?
Changing the speed timing system from LS1 style (24x) to LS3/LS7 style (58x) also necessitates changes to the engine harness. I looked at the differences between the Holley LS1 and LS3 harness schematics and saw the following changes are necessary. At first glance it appears there is a lot of cutting and splicing involved, especially considering that the ECM is already populated with wires at the locations to where wires need to move. But fortunately, it isn't as complex as it seems because there are a few shortcuts.

Half the changes can be accomplished just by swapping wires at pins 'A' and 'C' of the cam sensor plug. And according to Holley tech, the IPU ground (A14) is a suitable ground for sensors so no need to move pin A14. So the only actual wire splice is moving B20 to A26. And it happens to be that pin 'B' of the oil pressure sensor is already connected to A26 so I am just going to splice wires in the engine bay at the connector for oil pressure sensor. That didn't turn out to be very hard at all!

Half the changes can be accomplished just by swapping wires at pins 'A' and 'C' of the cam sensor plug. And according to Holley tech, the IPU ground (A14) is a suitable ground for sensors so no need to move pin A14. So the only actual wire splice is moving B20 to A26. And it happens to be that pin 'B' of the oil pressure sensor is already connected to A26 so I am just going to splice wires in the engine bay at the connector for oil pressure sensor. That didn't turn out to be very hard at all!
Last edited by QwkTrip; 03-25-2018 at 05:50 PM.
02-16-2018, 04:43 PM
#961
COTM Editor
Thread Starter
iTrader: (22)
Join Date: Mar 2001
Posts: 9,893
Likes: 0
Received 1,855 Likes
on
1,270 Posts
Car: '89 Firebird
Engine: 7.0L
Transmission: T56
Re: What ever happened to QwkTrip's car anyway?
Instead of drilling out the threads for LS1 knock sensors, I am going to give the Gen IV style knock sensors a try with this LS7.
The LS1 harness already has an electrical connector behind the engine that has the knock sensor inputs to ECM. Only difference is the LS1 sensors ground to engine block while the Gen IV knock sensors ground to engine ECM. All I need to do is change the connectors at end of harness to Gen IV style, and run new wires for ground back to pin A18 of the engine ECM. But instead of running wire all the way back to engine ECM, I am going to tie the knock sensor grounds to the pin 'A' of the oil pressure sensor.

The LS1 harness already has an electrical connector behind the engine that has the knock sensor inputs to ECM. Only difference is the LS1 sensors ground to engine block while the Gen IV knock sensors ground to engine ECM. All I need to do is change the connectors at end of harness to Gen IV style, and run new wires for ground back to pin A18 of the engine ECM. But instead of running wire all the way back to engine ECM, I am going to tie the knock sensor grounds to the pin 'A' of the oil pressure sensor.
Last edited by QwkTrip; 03-17-2018 at 05:06 PM.
03-02-2018, 12:28 PM
#962
COTM Editor
Thread Starter
iTrader: (22)
Join Date: Mar 2001
Posts: 9,893
Likes: 0
Received 1,855 Likes
on
1,270 Posts
Car: '89 Firebird
Engine: 7.0L
Transmission: T56
Re: What ever happened to QwkTrip's car anyway?
....
Last edited by QwkTrip; 03-24-2018 at 02:18 AM.
03-24-2018, 02:55 AM
#963
COTM Editor
Thread Starter
iTrader: (22)
Join Date: Mar 2001
Posts: 9,893
Likes: 0
Received 1,855 Likes
on
1,270 Posts
Car: '89 Firebird
Engine: 7.0L
Transmission: T56
Re: What ever happened to QwkTrip's car anyway?
Progress has been very slow because this engine has turned into a saga of things that go wrong. Oil pan, sump baffle, head gaskets, head studs, crank spacer.... all been a problem. All the fussing with parts has delayed me more than 2 months.
The oddest thing of all is an issue with the Cometic head gaskets. There is an oily substance that leaches out of the gaskets every time I compress after installation. After 6 rounds of clean up and reinstalling, I had to just throw away the first set of gaskets ($160 down the drain). Cometic was of no help with this either. I touched a little brake cleaner to the gasket and after a few minutes it left a residue that looked similar. All I can figure is the porosity of the engine block allows some brake cleaner residue to remain and it contaminates the gasket. I have a new set of head gaskets and this time I'm going to clean the block with alcohol and just let it sit for many hours, maybe even overnight, before installing the gaskets. If that doesn't work then I'm done with Cometic and I'll just use a GM head gasket.
The oddest thing of all is an issue with the Cometic head gaskets. There is an oily substance that leaches out of the gaskets every time I compress after installation. After 6 rounds of clean up and reinstalling, I had to just throw away the first set of gaskets ($160 down the drain). Cometic was of no help with this either. I touched a little brake cleaner to the gasket and after a few minutes it left a residue that looked similar. All I can figure is the porosity of the engine block allows some brake cleaner residue to remain and it contaminates the gasket. I have a new set of head gaskets and this time I'm going to clean the block with alcohol and just let it sit for many hours, maybe even overnight, before installing the gaskets. If that doesn't work then I'm done with Cometic and I'll just use a GM head gasket.
03-24-2018, 03:38 AM
#964
COTM Editor
Thread Starter
iTrader: (22)
Join Date: Mar 2001
Posts: 9,893
Likes: 0
Received 1,855 Likes
on
1,270 Posts
Car: '89 Firebird
Engine: 7.0L
Transmission: T56
Re: What ever happened to QwkTrip's car anyway?
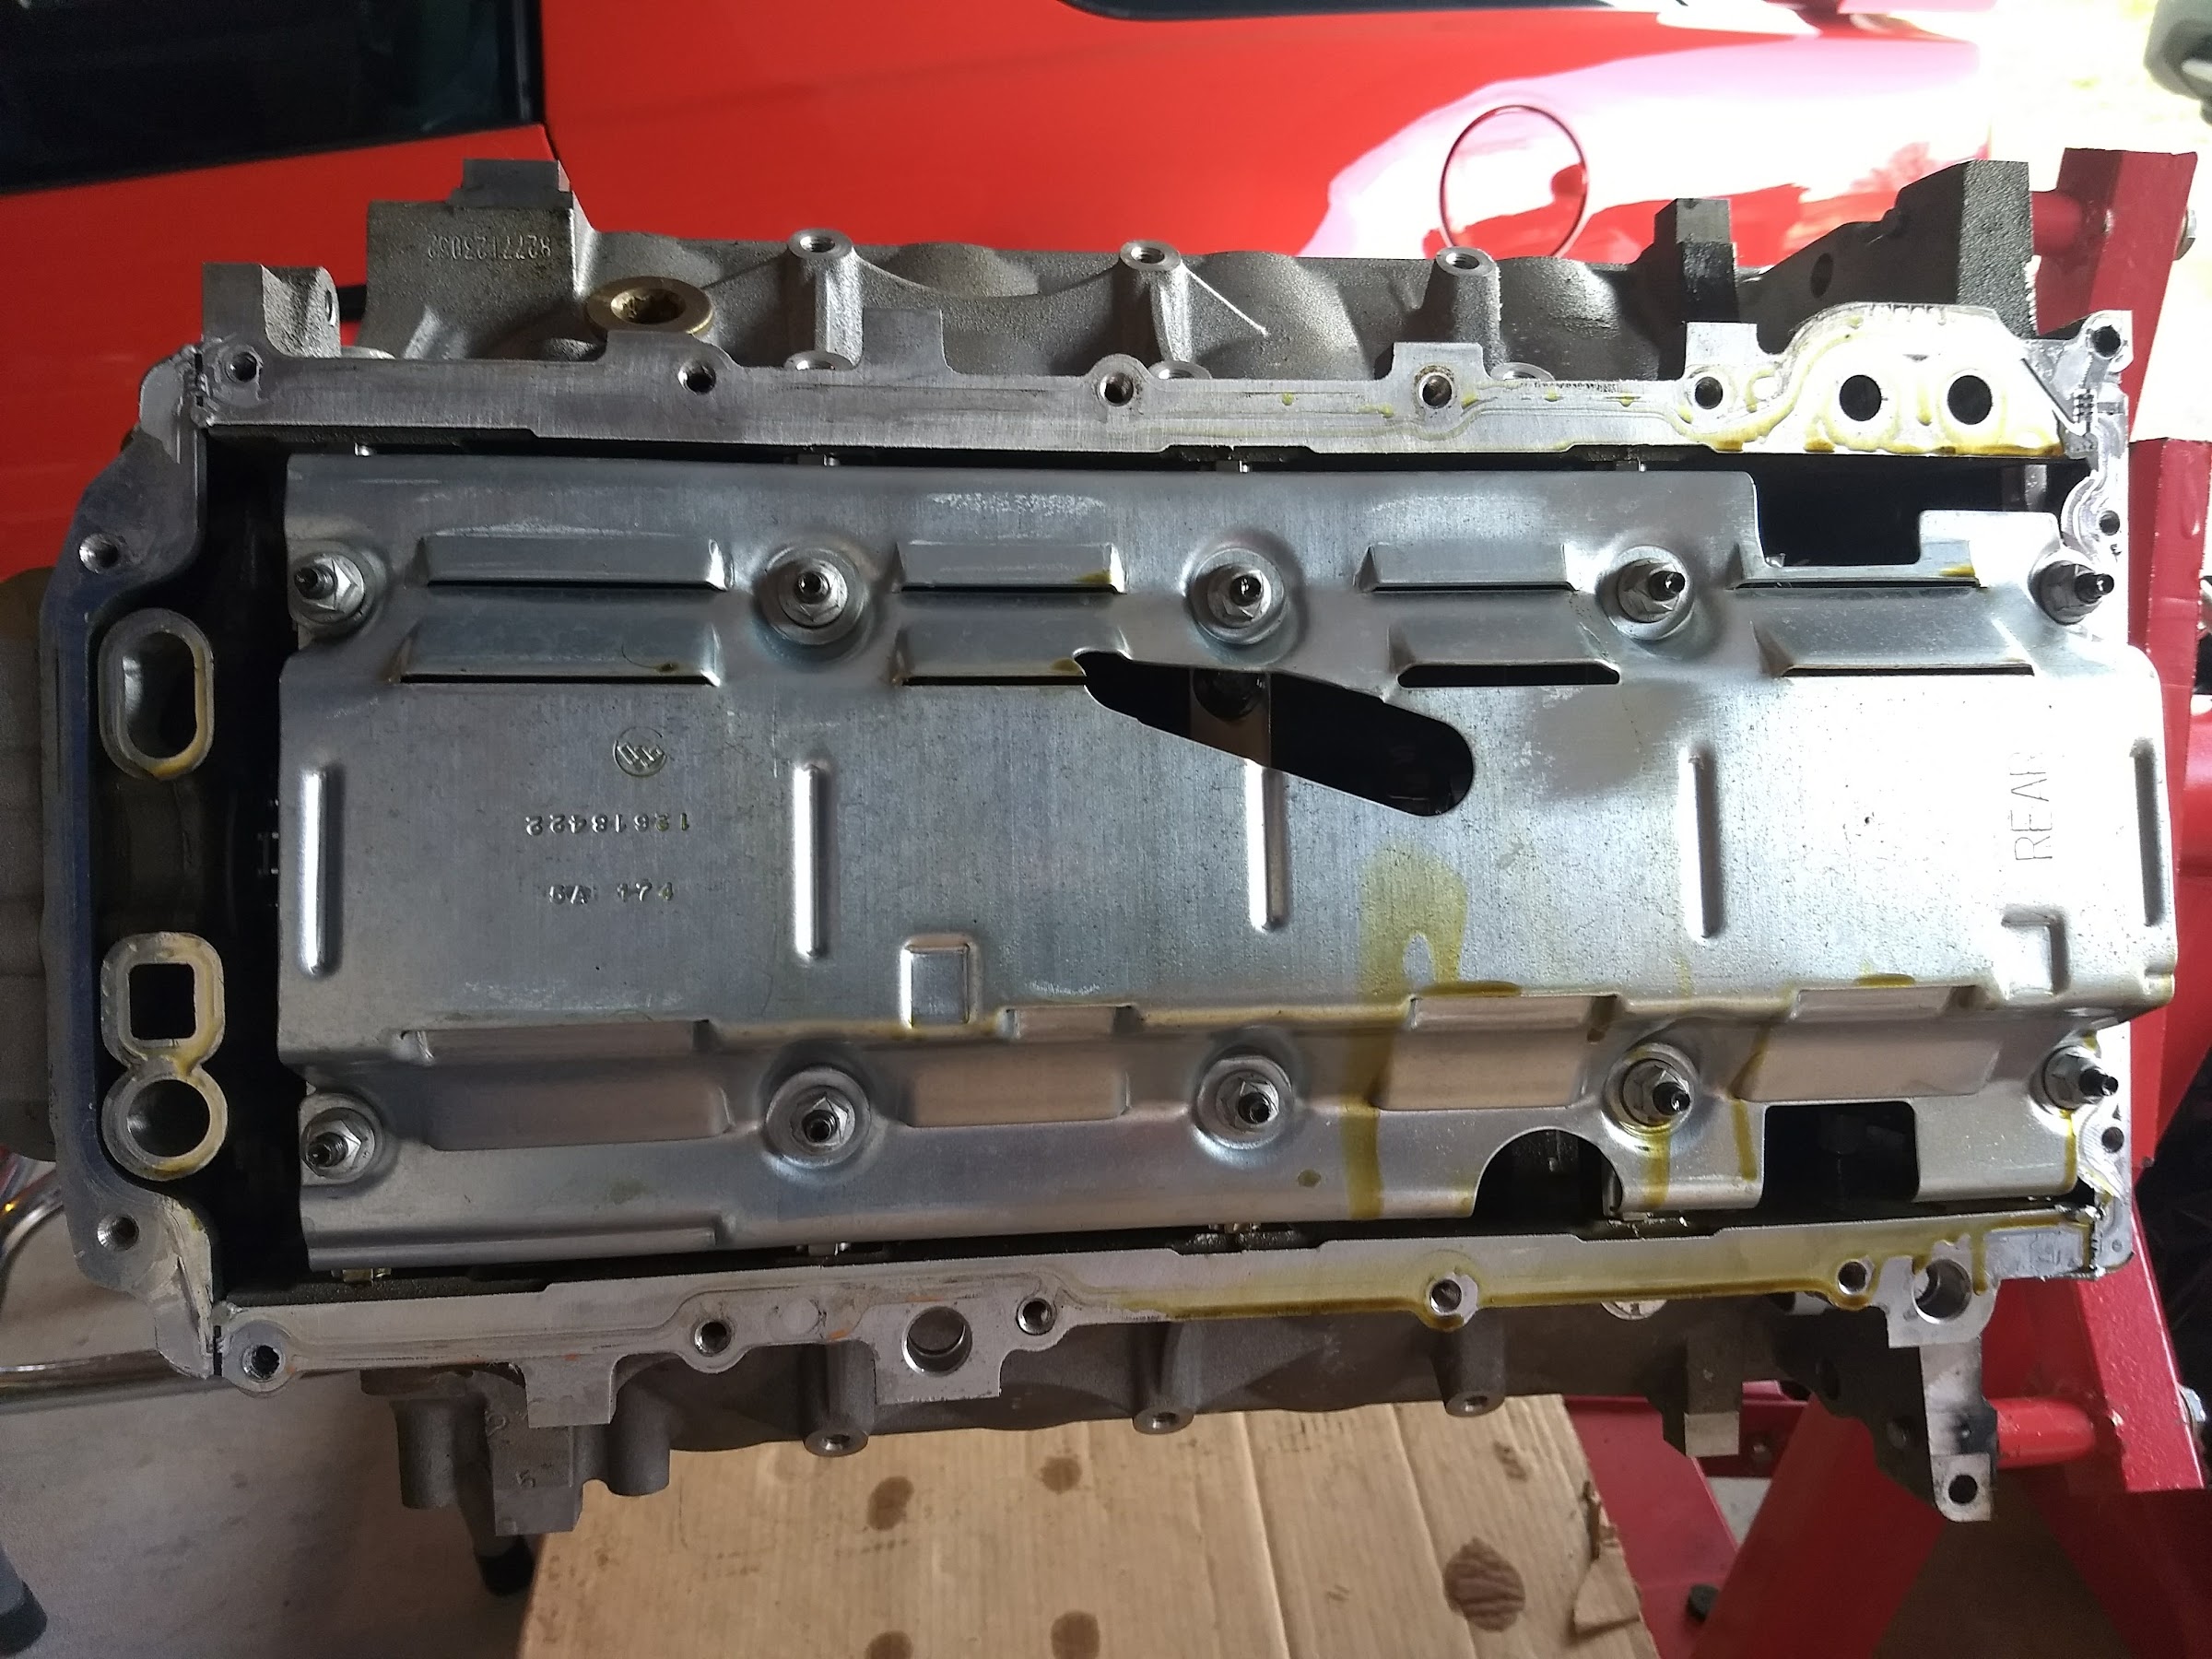
Something that has gone right is the Improved Racing crank scraper. The scraper will improve oil control and net about 10 RWHP on a high output engine.
Improved Racing has a crank scraper for stock LS7 dry sump, but not one for wet sump. I ordered the next closest thing, part number EGM-742, that is for a 4" stroke with aftermarket I-beam rods. They also sent me a plastic cutout of the LS7 scraper so I could overlay it on my scraper and know where to trim. And they sent me a graphic showing me where I will need to trim. They literally could not have made this any easier! Those guys at Improved Racing are wonderful to work with.
Scraper installed and trimmed to fit with 0.035 inch clearance. Scraper mounts to the studs where the stock windage tray used to be.

The new windage tray is a matched set with the scraper and actually mounts to the scraper instead of the studs. This windage tray is compatible with the Holley 302-1 pan, but I can't install the pan yet because it is one of the big hassles I have with defective parts.

I won't say the Holley pickup tube fits well either. It doesn't align with the oil pump inlet very well. I might have to tweak the tube bends but not until I get a properly made oil pan in my hands. I also have a tube brace from Improved Racing (part number EGM-500), but first words in the instructions is it doesn't work with Holley products. Starting to see a trend here....

LS7 does not have a dipstick in the engine so I have to drill the dipstick hole. I used a drill guide made by AFX to make sure the hole was square to the pad. It was an expensive tool but the results are good. I'm willing to rent this tool to people that don't want to buy it. I didn't want to buy it either, but I couldn't find a used one for sale or rent.

Improved Racing has a crank scraper for stock LS7 dry sump, but not one for wet sump. I ordered the next closest thing, part number EGM-742, that is for a 4" stroke with aftermarket I-beam rods. They also sent me a plastic cutout of the LS7 scraper so I could overlay it on my scraper and know where to trim. And they sent me a graphic showing me where I will need to trim. They literally could not have made this any easier! Those guys at Improved Racing are wonderful to work with.
Scraper installed and trimmed to fit with 0.035 inch clearance. Scraper mounts to the studs where the stock windage tray used to be.
The new windage tray is a matched set with the scraper and actually mounts to the scraper instead of the studs. This windage tray is compatible with the Holley 302-1 pan, but I can't install the pan yet because it is one of the big hassles I have with defective parts.
I won't say the Holley pickup tube fits well either. It doesn't align with the oil pump inlet very well. I might have to tweak the tube bends but not until I get a properly made oil pan in my hands. I also have a tube brace from Improved Racing (part number EGM-500), but first words in the instructions is it doesn't work with Holley products. Starting to see a trend here....
LS7 does not have a dipstick in the engine so I have to drill the dipstick hole. I used a drill guide made by AFX to make sure the hole was square to the pad. It was an expensive tool but the results are good. I'm willing to rent this tool to people that don't want to buy it. I didn't want to buy it either, but I couldn't find a used one for sale or rent.
Last edited by QwkTrip; 03-24-2018 at 04:01 AM.
03-25-2018, 11:26 AM
#965
Supreme Member
Re: What ever happened to QwkTrip's car anyway?
And boy was it easy to degree the cam this time. Skinny, you'll be happy to know I switched methods to finding intake centerline and then confirming cam was ground correctly by checking all valve events at 0.05" lobe lift. I don't know why I struggled so much last time. This time I had better tools and a little practice, I suppose.
Glad to hear something's working out.
I'm curious as to the issue you're having with the Holley pan. I too am contemplating an LS swap and rely on threads like yours to line up all of the needed components. I thought the Holley pan was no-brainer. (or have I missed something?)
Last edited by skinny z; 04-01-2018 at 05:48 PM. Reason: Spelling
03-25-2018, 03:04 PM
#966
COTM Editor
Thread Starter
iTrader: (22)
Join Date: Mar 2001
Posts: 9,893
Likes: 0
Received 1,855 Likes
on
1,270 Posts
Car: '89 Firebird
Engine: 7.0L
Transmission: T56
Re: What ever happened to QwkTrip's car anyway?
The "trap door" style sump baffle cannot be bolted in place because it does not mate to the mounting pedestals. There is a 4 - 6 mm gap at all four mounting pedestals. First efforts were focused on the possibility of baffle being made wrong, but now efforts are being focused on the pan itself. It is not an isolated incident but most people probably wouldn't notice using the standard Holley baffle. It doesn't become apparent until you try to use the optional trap door baffle.
Just to clarify, this is not the 302-2 oil pan (similar to LS1 F-body pan) talked about in other threads at this site. I have the 302-1 oil pan with more front clearance for stroker engines and full-length windage tray.


Just to clarify, this is not the 302-2 oil pan (similar to LS1 F-body pan) talked about in other threads at this site. I have the 302-1 oil pan with more front clearance for stroker engines and full-length windage tray.
03-25-2018, 08:31 PM
#967
Supreme Member
Re: What ever happened to QwkTrip's car anyway?
Is it safe to say then that to plug your garden variety LM7 into a third gen, the 302-2 pan will do the job? Amongst a myriad of other parts.
03-26-2018, 12:00 AM
#968
COTM Editor
Thread Starter
iTrader: (22)
Join Date: Mar 2001
Posts: 9,893
Likes: 0
Received 1,855 Likes
on
1,270 Posts
Car: '89 Firebird
Engine: 7.0L
Transmission: T56
Re: What ever happened to QwkTrip's car anyway?
The Holley 302-1 is the only cast pan that I found that has enough room for crank scraper and full length windage tray, while still giving adequate ground clearance. I plan to test fit with my stock K-member and see what happens. Rumor says it won't fit but doggonit the dimensions look promising!
Last edited by QwkTrip; 03-29-2018 at 11:10 PM.
03-26-2018, 07:06 AM
#969
Supreme Member
iTrader: (11)
Join Date: Sep 1999
Location: NJ
Posts: 4,345
Received 298 Likes
on
234 Posts
Car: 92 Firebird
Engine: 4.8 LR4
Transmission: T56
Axle/Gears: 3.45 9 Bolt
Re: What ever happened to QwkTrip's car anyway?
That oil pickup is a GM unit. A lot of the parts for the LS engines are just re-branded (sometimes not even that) or just put in Holley packaging. I have gotten quite a few of the Holley parts with GM stickers still on them. I would bet your problem is the increased thickness of the scraper AND the windage tray together.
03-26-2018, 06:38 PM
#970
COTM Editor
Thread Starter
iTrader: (22)
Join Date: Mar 2001
Posts: 9,893
Likes: 0
Received 1,855 Likes
on
1,270 Posts
Car: '89 Firebird
Engine: 7.0L
Transmission: T56
Re: What ever happened to QwkTrip's car anyway?
I think it is just a Holley part. My GM pickup tube for F-body pan is brazed neatly 360 degrees around the tube at the oil pump flange. This unit is spot welded in two locations (and not neatly at that). The spot welds is why the tube brace doesn't fit. The misalignment of pickup tube isn't a height problem. The tube bend angle is too tight.
But you just gave me the idea to grind the welds and fully braze it.
But you just gave me the idea to grind the welds and fully braze it.
Last edited by QwkTrip; 03-26-2018 at 06:51 PM.
04-12-2018, 09:43 PM
#971
COTM Editor
Thread Starter
iTrader: (22)
Join Date: Mar 2001
Posts: 9,893
Likes: 0
Received 1,855 Likes
on
1,270 Posts
Car: '89 Firebird
Engine: 7.0L
Transmission: T56
Re: What ever happened to QwkTrip's car anyway?
Had a warm day so made a bit of progress.
Getting the Mamo 265 heads bolted up to the LS7 has been a bit of a challenge. Trick Flow instructed me to use ARP head stud kit for LS1, part number 234-4317. Problem is they don't know what they're talking about. The larger M11 studs are correct, but the smaller M8 studs are too short. The heads require longer LSx style studs in those locations, which is offered only in the outrageously expensive ARP 2000 material, part number, AFG2-725-2LGB. Just sucks paying another $100 for 10 little, lousy studs.
But the real problem has been the Cometic head gaskets. Every time I remove the heads there has been an oily substance on the gasket compression surfaces. I've done this 5 or 6 times and it keeps getting worse every round, and the gasket coating has been ruined from the clean ups. Cometic is clueless why this is happening and won't help with cost of replacement. So $180 later I have a new set of gaskets... and yes, I'm kind of mad about it!

I ran a little experiment and rubbed a small area of the old gasket with brake cleaner and sure enough, 30 minutes later the oily droplets formed on the surface. The only theory I've got is that the porosity of the aluminum traps some of the brake cleaner in the metal and that ends up contaminating the gasket after assembly. So this time I let the engine and heads air out for 24 hours before assembly. Don't know if it worked and I don't really care any more. Just leaving it alone and moving on.
Final outcome is 69 cc head with 0.040" thick gasket, producing average 0.035" quench, and about 11.7 static compression ratio.


Getting the Mamo 265 heads bolted up to the LS7 has been a bit of a challenge. Trick Flow instructed me to use ARP head stud kit for LS1, part number 234-4317. Problem is they don't know what they're talking about.
The larger M11 studs are correct, but the smaller M8 studs are too short. The heads require longer LSx style studs in those locations, which is offered only in the outrageously expensive ARP 2000 material, part number, AFG2-725-2LGB. Just sucks paying another $100 for 10 little, lousy studs.But the real problem has been the Cometic head gaskets. Every time I remove the heads there has been an oily substance on the gasket compression surfaces. I've done this 5 or 6 times and it keeps getting worse every round, and the gasket coating has been ruined from the clean ups. Cometic is clueless why this is happening and won't help with cost of replacement. So $180 later I have a new set of gaskets... and yes, I'm kind of mad about it!
I ran a little experiment and rubbed a small area of the old gasket with brake cleaner and sure enough, 30 minutes later the oily droplets formed on the surface. The only theory I've got is that the porosity of the aluminum traps some of the brake cleaner in the metal and that ends up contaminating the gasket after assembly. So this time I let the engine and heads air out for 24 hours before assembly. Don't know if it worked and I don't really care any more. Just leaving it alone and moving on.
Final outcome is 69 cc head with 0.040" thick gasket, producing average 0.035" quench, and about 11.7 static compression ratio.
Last edited by QwkTrip; 04-13-2018 at 10:28 AM.
04-13-2018, 06:20 PM
#972
Supreme Member
Re: What ever happened to QwkTrip's car anyway?
My question is: What is the thinking regarding the "contamination" with respect to how it would impair the gaskets performance?
As far as head gaskets go, I've only ever installed them, torqued them down, re-torqued the next day and moved on. I've never had the occasion to remove the heads after what I would hope to be final assembly. For all I know, removing them might reveal all manner of different evils but I've never had the opportunity to observe. (And for the record, I've never had head gasket failure.)
As far as head gaskets go, I've only ever installed them, torqued them down, re-torqued the next day and moved on. I've never had the occasion to remove the heads after what I would hope to be final assembly. For all I know, removing them might reveal all manner of different evils but I've never had the opportunity to observe. (And for the record, I've never had head gasket failure.)
04-13-2018, 06:52 PM
#973
COTM Editor
Thread Starter
iTrader: (22)
Join Date: Mar 2001
Posts: 9,893
Likes: 0
Received 1,855 Likes
on
1,270 Posts
Car: '89 Firebird
Engine: 7.0L
Transmission: T56
Re: What ever happened to QwkTrip's car anyway?
The gaskets are steel sheet metal that won't seal to the engine block, so the coating is needed to form a seal. The coating is being damaged so sealing cannot be trusted any longer. Some of the coating is actually gone in some spots. And a seal has to be dry because wet things tend to expand & escape when temp and pressure rise, and that can break the sealing surface too.
I doubt this would happen with a GM head gasket because they are constructed differently. GM head gaskets are really reliable and almost never leak. Cometic head gaskets are notorious leakers but I am taking that risk so I can get a tight quench.
Cometic gaskets are reusable as long as you don't heat cycle. I pulled the heads because one of the ARP studs slipped when tightening and that had to be inspected and resolved.
04-13-2018, 07:01 PM
#974
Supreme Member
Re: What ever happened to QwkTrip's car anyway?
Fair enough.
I haven't any experience with the steel shim gaskets. My choice for my Gen 1 SBCs has always been the Clevite/Victor Reinz/Mahle graphite composite (026") gasket.
I can relate. Isn't hotrodding wonderful...
I haven't any experience with the steel shim gaskets. My choice for my Gen 1 SBCs has always been the Clevite/Victor Reinz/Mahle graphite composite (026") gasket.
I can relate. Isn't hotrodding wonderful...
04-13-2018, 07:27 PM
#975
COTM Editor
Thread Starter
iTrader: (22)
Join Date: Mar 2001
Posts: 9,893
Likes: 0
Received 1,855 Likes
on
1,270 Posts
Car: '89 Firebird
Engine: 7.0L
Transmission: T56
Re: What ever happened to QwkTrip's car anyway?
I'll be honest, this LS7 has ended up costing a stupid amount of money and I wouldn't do it again. It has cost way more than I thought it would and what I told my wife at the beginning. I'm feeling bad/guilty about it but what's done is done and I can't turn back the clock.
04-14-2018, 10:33 AM
#976
Supreme Member
Re: What ever happened to QwkTrip's car anyway?
What's been the biggest challenge to date (the Mrs. notwithstanding)?
Was it the change from dry sump to wet sump?
I've been putting together a plan for an LS swap for a while now and see how easily the costs can escalate. It kind of builds a case for a crate engine and even then it produces what seems an endless list of components required. My enthusiast friend now has two LS engines in his stable of cars. The 454 LSX I posted earlier and most recently an LS3 with a Hot Cam upgrade. Both of these have absorbed huge amounts of additional parts despite being purchased as packages. The 454 in particular as it came as an incomplete long block. Induction, oil pan, accessory drives and even relocating the coil packs all contributed to the inflated budget.
04-14-2018, 01:31 PM
#977
COTM Editor
Thread Starter
iTrader: (22)
Join Date: Mar 2001
Posts: 9,893
Likes: 0
Received 1,855 Likes
on
1,270 Posts
Car: '89 Firebird
Engine: 7.0L
Transmission: T56
Re: What ever happened to QwkTrip's car anyway?
Oh, gosh, that's a big question!
Regarding the LS7, the aftermarket top end package got really expensive. Wet sump conversion cost about $1100 because I went with all the bells and whistles (pan, scraper, tray, baffles, upgraded oil pump), but I sold the Katech oil pump for $500. I could have carried over the F-body oil pan for free from my current engine, but I felt that it was inadequate.
Regarding LS swap in general, I think for the most part people do understand the cost of major purchases like engine, trans, rear axle, & brakes because they spend so much time planning out what they want. I'd say the hidden cost is in,
Wiring got pretty expensive for me. I did a lot of wiring, probably more than most people. And re-doing power distribution and making my own custom battery cables was actually pretty spendy.
I built my fuel system from scratch. It got expensive between tools, tube stock, hose, and AN fittings. If you can just keep your stock lines it will save you quite a bit.
I think my exhaust was $2300. But I didn't have the options you have available to you now. There are more affordable choices out there now.
Sometimes there is a ripple affect of buying aftermarket parts and it pays to understand the details before buying. For example, I got a deal on a new/used BMR K-member. I didn't know that I would end up having to buy a $700 set of A-arms to make it work. The FAST 102R on my current engine is another example. I bought that new/used, too. Seemed like a decent deal until I realized I had to buy a lot more stuff to make it work. Should have just stayed with the LS3 intake.
And what will cost you more than anything is the quest for horsepower because it cascades through everything -- engine, drivetrain, cooling, fuel delivery, safety. High rpm power in particular will cost you a bundle to make it reliable.
Regarding the LS7, the aftermarket top end package got really expensive. Wet sump conversion cost about $1100 because I went with all the bells and whistles (pan, scraper, tray, baffles, upgraded oil pump), but I sold the Katech oil pump for $500. I could have carried over the F-body oil pan for free from my current engine, but I felt that it was inadequate.
Regarding LS swap in general, I think for the most part people do understand the cost of major purchases like engine, trans, rear axle, & brakes because they spend so much time planning out what they want. I'd say the hidden cost is in,
- Wiring
- Fuel system
- Exhaust
- Ripple affect of buying aftermarket parts
- Ripple affect of chasing more horsepower
Wiring got pretty expensive for me. I did a lot of wiring, probably more than most people. And re-doing power distribution and making my own custom battery cables was actually pretty spendy.
I built my fuel system from scratch. It got expensive between tools, tube stock, hose, and AN fittings. If you can just keep your stock lines it will save you quite a bit.
I think my exhaust was $2300. But I didn't have the options you have available to you now. There are more affordable choices out there now.
Sometimes there is a ripple affect of buying aftermarket parts and it pays to understand the details before buying. For example, I got a deal on a new/used BMR K-member. I didn't know that I would end up having to buy a $700 set of A-arms to make it work. The FAST 102R on my current engine is another example. I bought that new/used, too. Seemed like a decent deal until I realized I had to buy a lot more stuff to make it work. Should have just stayed with the LS3 intake.
And what will cost you more than anything is the quest for horsepower because it cascades through everything -- engine, drivetrain, cooling, fuel delivery, safety. High rpm power in particular will cost you a bundle to make it reliable.
Last edited by QwkTrip; 04-14-2018 at 04:18 PM.
04-14-2018, 03:51 PM
#978
COTM Editor
Thread Starter
iTrader: (22)
Join Date: Mar 2001
Posts: 9,893
Likes: 0
Received 1,855 Likes
on
1,270 Posts
Car: '89 Firebird
Engine: 7.0L
Transmission: T56
Re: What ever happened to QwkTrip's car anyway?
You know, a proven killer combo is an iron 6.0L with a stroker kit and AFR cathedral port heads. Way more affordable and a great street/strip engine. That would have been a smart move for me too, especially considering that I already have the short block in my car.
Last edited by QwkTrip; 04-14-2018 at 04:03 PM.
04-15-2018, 06:09 PM
#979
Supreme Member
Re: What ever happened to QwkTrip's car anyway?
In as far as discussing my LS plans, yes, I like the 4 1/8th bore if only because I have access to as new LS7 heads at a discount. And whatever cam GM put in the crate 454LSX. Those would be from the 454 I posted earlier as that engine will be moving to Texas Speed 285 heads and some ridiculous cam. Interestingly all to stay NA. As is my intention too if I can source a decent large bore shortblock. That said, an alternative I've considered and admittedly is expensive too, is a smaller C.I.D. (perhaps like the LM7 I have sitting in the driveway) with a super charger. I could easily develop that engine program in the truck that it's currently in. Then transplant it to the Camaro when it suits me. That car has some of the infrastructure already in place, like a fuel system, so that would take some of the edge off the build.
But the big picture for me though is that I'm at that point where you ask yourself do I continue working with the old technology despite having invested plenty in it? The lower cost budget also has it's appeal. Or move on?
Anyway, it's threads like this that help out with the plan in general.
You gotta be close to the end. What's left?
04-15-2018, 06:54 PM
#980
COTM Editor
Thread Starter
iTrader: (22)
Join Date: Mar 2001
Posts: 9,893
Likes: 0
Received 1,855 Likes
on
1,270 Posts
Car: '89 Firebird
Engine: 7.0L
Transmission: T56
Re: What ever happened to QwkTrip's car anyway?
Yep, decisions decisions!
I'm probably not even 50% of the way yet. I've been having problems with a lot of the parts I bought and that is being worked in the background with the suppliers. This engine will probably be sitting around for months.
I'm probably not even 50% of the way yet. I've been having problems with a lot of the parts I bought and that is being worked in the background with the suppliers. This engine will probably be sitting around for months.
04-15-2018, 07:55 PM
#981
Supreme Member
iTrader: (8)
Join Date: Oct 2001
Location: Il
Posts: 11,689
Received 745 Likes
on
505 Posts
Car: 1989-92 FORMULA350 305 92 Hawkclone
Engine: 4++,350 & 305 CIs
Transmission: 700R4 4800 vig 18th700R4 t56 ZF6 T5
Axle/Gears: 3.70 9"ford alum chunk,dana44,9bolt
Re: What ever happened to QwkTrip's car anyway?
Its going to really move when finished!!!
04-19-2018, 01:10 AM
#982
COTM Editor
Thread Starter
iTrader: (22)
Join Date: Mar 2001
Posts: 9,893
Likes: 0
Received 1,855 Likes
on
1,270 Posts
Car: '89 Firebird
Engine: 7.0L
Transmission: T56
Re: What ever happened to QwkTrip's car anyway?
Which set up would you run? I don't like what I'm seeing here but at the same time I've heard LS7 rocker geometry kind of sucks. Each washer is about 0.047 inch thick.
Just for reference, Mamo normally ships with 0 or 1 washer because that is maximum that will fit under stock valve cover with a Yella Terra gasket spacer.


Just for reference, Mamo normally ships with 0 or 1 washer because that is maximum that will fit under stock valve cover with a Yella Terra gasket spacer.
Last edited by QwkTrip; 04-21-2018 at 12:21 AM.
04-19-2018, 07:31 AM
#983
04-19-2018, 07:58 AM
#984
Supreme Member
Re: What ever happened to QwkTrip's car anyway?
As we all know, it's the width that's important here and not so much the centre contact patch that so many seem to think is the correct result. Within reason of course.
That said, we experimented with the YT rockers on the LSX I've posted about. The end result is that we switched back to the stock LS7 rocker arm as we couldn't get proper VGT. I'll have to revisit the build notes to recall exactly what the issue was.
That said, we experimented with the YT rockers on the LSX I've posted about. The end result is that we switched back to the stock LS7 rocker arm as we couldn't get proper VGT. I'll have to revisit the build notes to recall exactly what the issue was.
04-19-2018, 08:23 AM
#985
Supporter/Moderator
iTrader: (7)
Join Date: Feb 2001
Location: Cincinnati, OH
Posts: 13,207
Likes: 0
Received 375 Likes
on
288 Posts
Car: '90 RS
Engine: 377 LSX
Transmission: Magnum T56
Re: What ever happened to QwkTrip's car anyway?
Which set up would you run? I don't like what I'm seeing here but at the same time I've heard LS7 rocker geometry kind of sucks. Each washer is about 0.047 inch thick.
Just for reference, Mamo normally ships with 0 or 1 washer because that is maximum that will fit under stock valve cover with a Yella Terra gasket spacer.

Just for reference, Mamo normally ships with 0 or 1 washer because that is maximum that will fit under stock valve cover with a Yella Terra gasket spacer.
I don't like any of those. Did you call Tony? He can ship you out a whole slew of shims so you are not spending your evenings in the hardware store with a caliper. If you leave it like that you are missing out on a lot of lift. Are you using a sharpie or dry ink marker? I found I couldn't get reliable results with a sharpie. I had to use dry erase marker and everything became easier and very clear without smudging.
Granted my MMS heads are cathedral but here is the wipe I ended up with using his shims.
 04-19-2018, 09:06 AM
#986
Supreme Member
Re: What ever happened to QwkTrip's car anyway?
That looks good. Narrow AND centred.
04-19-2018, 11:56 AM
#988
Supporter/Moderator
iTrader: (7)
Join Date: Feb 2001
Location: Cincinnati, OH
Posts: 13,207
Likes: 0
Received 375 Likes
on
288 Posts
Car: '90 RS
Engine: 377 LSX
Transmission: Magnum T56
Re: What ever happened to QwkTrip's car anyway?
You want both but centered is the lesser of the two evils. If you aren't centered than the rocker scrubs the valve tip and side loads the valve against the guides, prematurely wearing them. If you are too wide you lose cam lift and leave power on the table.
04-19-2018, 01:20 PM
#989
Supreme Member
iTrader: (11)
Join Date: Sep 1999
Location: NJ
Posts: 4,345
Received 298 Likes
on
234 Posts
Car: 92 Firebird
Engine: 4.8 LR4
Transmission: T56
Axle/Gears: 3.45 9 Bolt
Re: What ever happened to QwkTrip's car anyway?
How are you able to change the pattern here? I know with a traditional rocker, you need to change your pushrod length, but how do you "adjust" a non-lash rocker? Where is he shimming?
04-19-2018, 01:35 PM
#990
Supporter/Moderator
iTrader: (7)
Join Date: Feb 2001
Location: Cincinnati, OH
Posts: 13,207
Likes: 0
Received 375 Likes
on
288 Posts
Car: '90 RS
Engine: 377 LSX
Transmission: Magnum T56
Re: What ever happened to QwkTrip's car anyway?
OK, got it. I was told if it isn't centered you were side loading. Wide pattern makes sense you're losing lift.
How are you able to change the pattern here? I know with a traditional rocker, you need to change your pushrod length, but how do you "adjust" a non-lash rocker? Where is he shimming?
How are you able to change the pattern here? I know with a traditional rocker, you need to change your pushrod length, but how do you "adjust" a non-lash rocker? Where is he shimming?
Here is a pic with good centering but poor wipe. I added another shim to get the picture I posted above.
 04-19-2018, 05:59 PM
#991
COTM Editor
Thread Starter
iTrader: (22)
Join Date: Mar 2001
Posts: 9,893
Likes: 0
Received 1,855 Likes
on
1,270 Posts
Car: '89 Firebird
Engine: 7.0L
Transmission: T56
Re: What ever happened to QwkTrip's car anyway?
Yes, he said one shim works but is not ideal. More shims and I will need tall valve covers. Practically everyone is running one shim and having good results.
Machinist blue dye.
Are you using a sharpie or dry ink marker?
04-19-2018, 06:40 PM
#992
Supporter/Moderator
iTrader: (7)
Join Date: Feb 2001
Location: Cincinnati, OH
Posts: 13,207
Likes: 0
Received 375 Likes
on
288 Posts
Car: '90 RS
Engine: 377 LSX
Transmission: Magnum T56
Re: What ever happened to QwkTrip's car anyway?
Good choice using dye. I struggled with my pattern a lot. I eventually used both shims he gave me and it ended up being perfect. Just try using all the shims and see what it looks like. I know you are space constrained on AC box interference but not having optimal valvetrain geometry on a MMS top end is far worse.
04-19-2018, 09:18 PM
#993
Supreme Member
Re: What ever happened to QwkTrip's car anyway?
I'm curious as to whether "practically everyone" settles for less than optimum. If they're anything like the Gen 1 crowd, my guess is that yes is the answer. I can't count the number of heads I've seen that have been killed by premature valve guide wear due to and only due to incorrect valve train geometry (VGT).
Personally I'd skip the witness mark method and move on to the more sophisticated empirical measurements method (as outlined by Jim Miller). That will determine, within a few thousandths, precisely what the correct geometry is. It will apply universally across most platforms (or at least those that concern the subject matter at hand).
Just my two cents...
And for what it's worth, his original paper has all but disappeared from the internet. If anyone is interested, I've saved a copy.
EDIT: And I will defend to the death (or at least until it's uncomfortable) this method of checking VGT.
Last edited by skinny z; 04-19-2018 at 09:22 PM.
04-19-2018, 10:46 PM
#994
COTM Editor
Thread Starter
iTrader: (22)
Join Date: Mar 2001
Posts: 9,893
Likes: 0
Received 1,855 Likes
on
1,270 Posts
Car: '89 Firebird
Engine: 7.0L
Transmission: T56
04-20-2018, 12:34 AM
#995
COTM Editor
Thread Starter
iTrader: (22)
Join Date: Mar 2001
Posts: 9,893
Likes: 0
Received 1,855 Likes
on
1,270 Posts
Car: '89 Firebird
Engine: 7.0L
Transmission: T56
Re: What ever happened to QwkTrip's car anyway?
That author is VERY long winded.
Boiling it all down, he seems to only focus on max area under the lift curve. And placement on valve tip is just an outcome, not a concern. I'd be surprised if people with deep knowledge about valvetrain durability would agree with that.Regardless of all that, The only **** I can turn is pedestal height. I don't think "ideal" is in the cards with these parts, so now it is a matter of finding the best compromise. That is unless I use different rockers.
Last edited by QwkTrip; 04-20-2018 at 01:40 AM.
04-20-2018, 02:08 AM
#996
COTM Editor
Thread Starter
iTrader: (22)
Join Date: Mar 2001
Posts: 9,893
Likes: 0
Received 1,855 Likes
on
1,270 Posts
Car: '89 Firebird
Engine: 7.0L
Transmission: T56
Re: What ever happened to QwkTrip's car anyway?
Gotta remember this is the Corvette crowd so most of them are buying their first set of Little Tikes tools to do the job.
Last edited by QwkTrip; 04-20-2018 at 11:48 PM.
04-20-2018, 08:35 AM
#997
Supporter/Moderator
iTrader: (7)
Join Date: Feb 2001
Location: Cincinnati, OH
Posts: 13,207
Likes: 0
Received 375 Likes
on
288 Posts
Car: '90 RS
Engine: 377 LSX
Transmission: Magnum T56
Re: What ever happened to QwkTrip's car anyway?
Let me clarify. Tony tells people to use 0 or 1 washer. Reason is so stock valve cover can be used. It is not ideal but he says it is working fine. It can be improved if customer is willing to use tall valve cover, but it is rare that anybody bothers to check like I did.
Gotta remember this is the Corvette crowd so most of them are buying their first set of Little Tikes tools to do the job.
Gotta remember this is the Corvette crowd so most of them are buying their first set of Little Tikes tools to do the job.
04-20-2018, 08:45 AM
#998
Supreme Member
Re: What ever happened to QwkTrip's car anyway?
True enough. I've thought of editing that paper down to the essentials but it's not mine to edit. Unfortunately the length probably keeps most from reading it. Which is a shame really. You can see there's some real meat in the details .
Question: When you guys are doing your witness mark method test, what are you using for springs and lifters?
04-20-2018, 10:53 AM
#999
Supporter/Moderator
iTrader: (7)
Join Date: Feb 2001
Location: Cincinnati, OH
Posts: 13,207
Likes: 0
Received 375 Likes
on
288 Posts
Car: '90 RS
Engine: 377 LSX
Transmission: Magnum T56
Re: What ever happened to QwkTrip's car anyway?
I use the head fully assembled with the springs that are going to be used. Lifter and pushrod don't matter since that is lash related and not positional relationship of roller to valve tip. I think I used an old LS1 lifter and pushrod. I verified wipe again once I received my custom length Manton pushrods, and it was still perfect.
04-20-2018, 05:49 PM
#1000
COTM Editor
Thread Starter
iTrader: (22)
Join Date: Mar 2001
Posts: 9,893
Likes: 0
Received 1,855 Likes
on
1,270 Posts
Car: '89 Firebird
Engine: 7.0L
Transmission: T56
Re: What ever happened to QwkTrip's car anyway?
I tried rolling the engine with adjustable pushrod and check springs but it was impossible to remove the pair of rockers without disturbing the witness marks and I finally gave up. Needed to be an 8 arm octopus to do that. The blue dye marks with the slightest touch/rub.
An adjustable pushrod is too flimsy to use with the real springs.