1989 Camaro - "The Project" Begins...
 11-29-2012, 11:36 AM
#151
Senior Member


Join Date: Jul 1999
Location: Baton Rouge, LA USA
Posts: 558
Likes: 0
Received 0 Likes
on
0 Posts
Re: 1989 Camaro - "The Project" Begins...
Very nice build! Like the attn to detail your taking to everything! Definitely giving me more n more ideas! lol
 03-20-2013, 12:14 AM
#153
Re: 1989 Camaro - "The Project" Begins...
I love seeing the pictures and attention to detail in your project. Your paint work under the hood gives me goosbumps because I am working on my Camaro getting it ready to paint the underhood. I didn't do any powdercoating, just sanding and rustoleum painting.
03-21-2013, 04:33 AM
#154
Supreme Member
Thread Starter
iTrader: (6)

Join Date: Oct 2006
Location: West of Toronto
Posts: 3,041
Likes: 0
Received 6 Likes
on
6 Posts
Car: 89 IROC
Engine: 305 TPI / ZZ4 cam
Transmission: Stage 2 700R4, LS1 driveshaft
Axle/Gears: Strange 3.42 w/ Auburn
Re: 1989 Camaro - "The Project" Begins...
I plan on getting back to finish rebuilding the engine in a few weeks after it warms up a bit. Still -3 here.

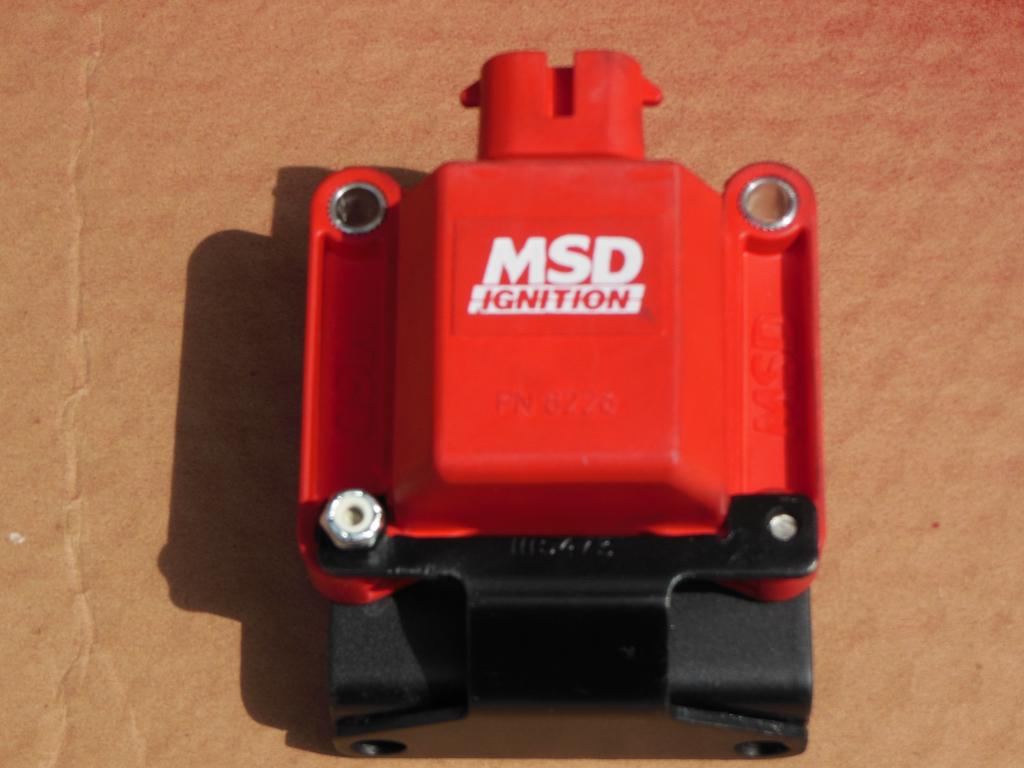
I did pick up a few items from MSD to help the stock ignition out. I figured my 15 year old Accell coil needed a break. I added a MSD Digital 6 box and MSD harness as well.
I wanted to paint the Digital 6 as nothing in my engine bay is red and I'm going for the blue/gray look. The guys a MSD sent me a new cover FREE and said after I paint it, return the box and painted cover and they would install it and reseal the box. Sounds like a plan to me.


I picked up some Clarion component speakers for the doors. I heard them in a car a few years ago and was impressed with the clear detailed sound they produced.
I plan on modifying my door buildouts next month and will post up step-by-step.

Last edited by The Project; 03-21-2013 at 04:43 AM.
04-28-2013, 04:32 PM
#155
Supreme Member
Thread Starter
iTrader: (6)
Join Date: Oct 2006
Location: West of Toronto
Posts: 3,041
Likes: 0
Received 6 Likes
on
6 Posts
Car: 89 IROC
Engine: 305 TPI / ZZ4 cam
Transmission: Stage 2 700R4, LS1 driveshaft
Axle/Gears: Strange 3.42 w/ Auburn
Re: 1989 Camaro - "The Project" Begins...
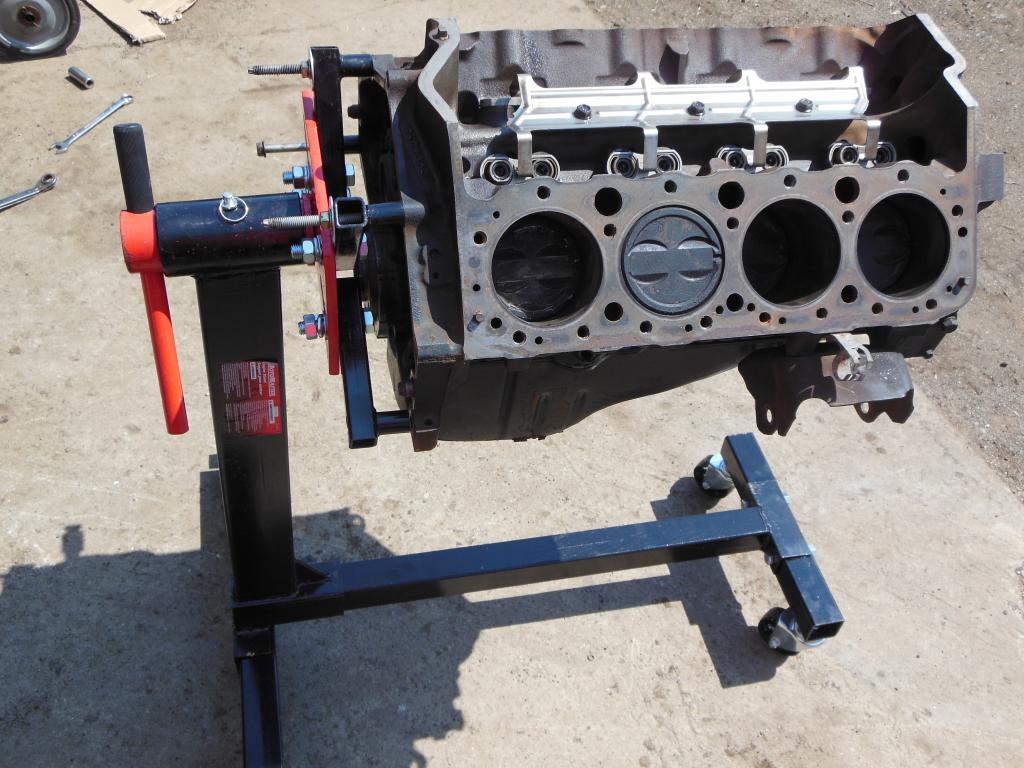
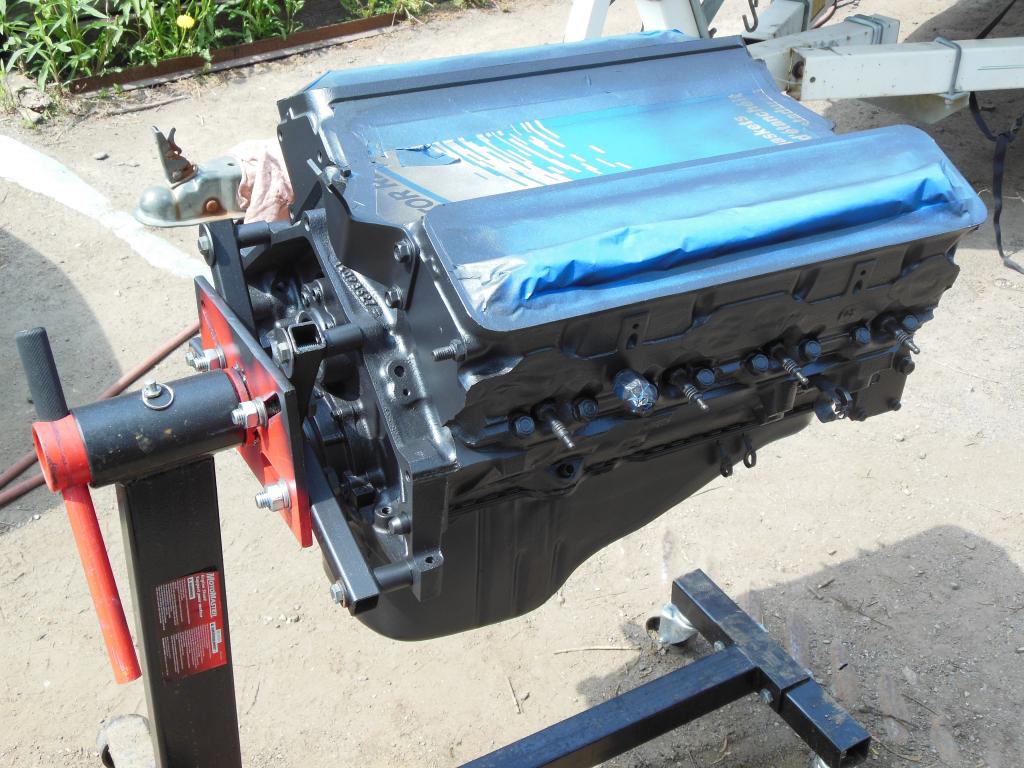
FINALLY put the engine stand together and got the engine mounted for reassembly. Will start next weekend.
More parts prep...
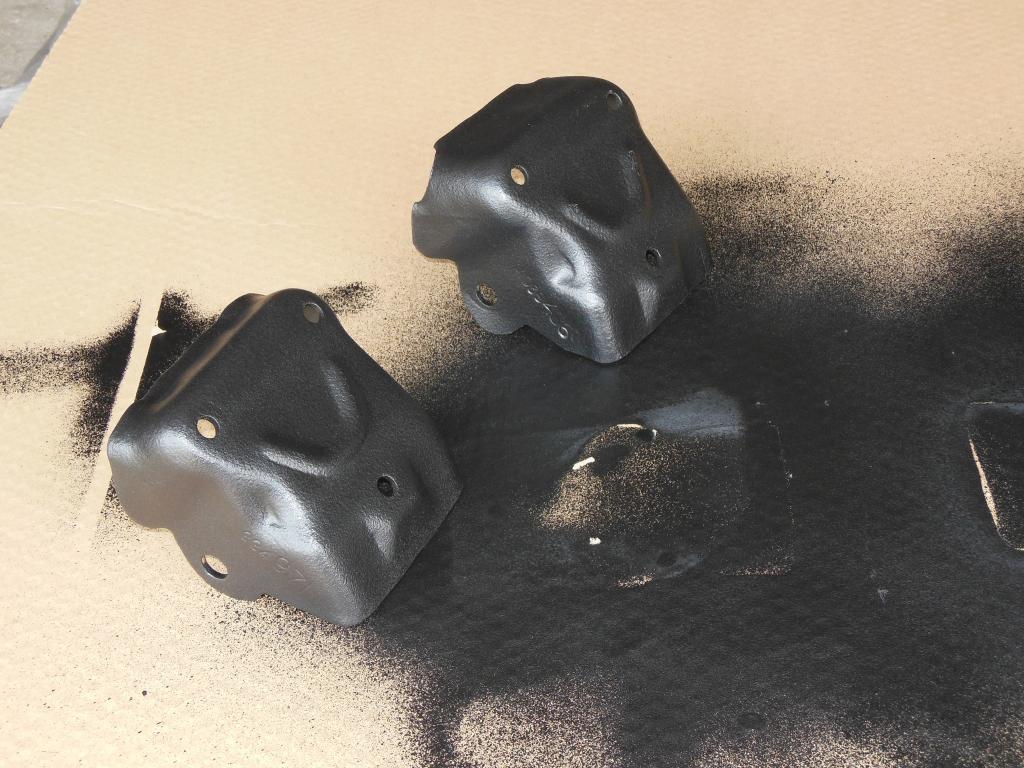
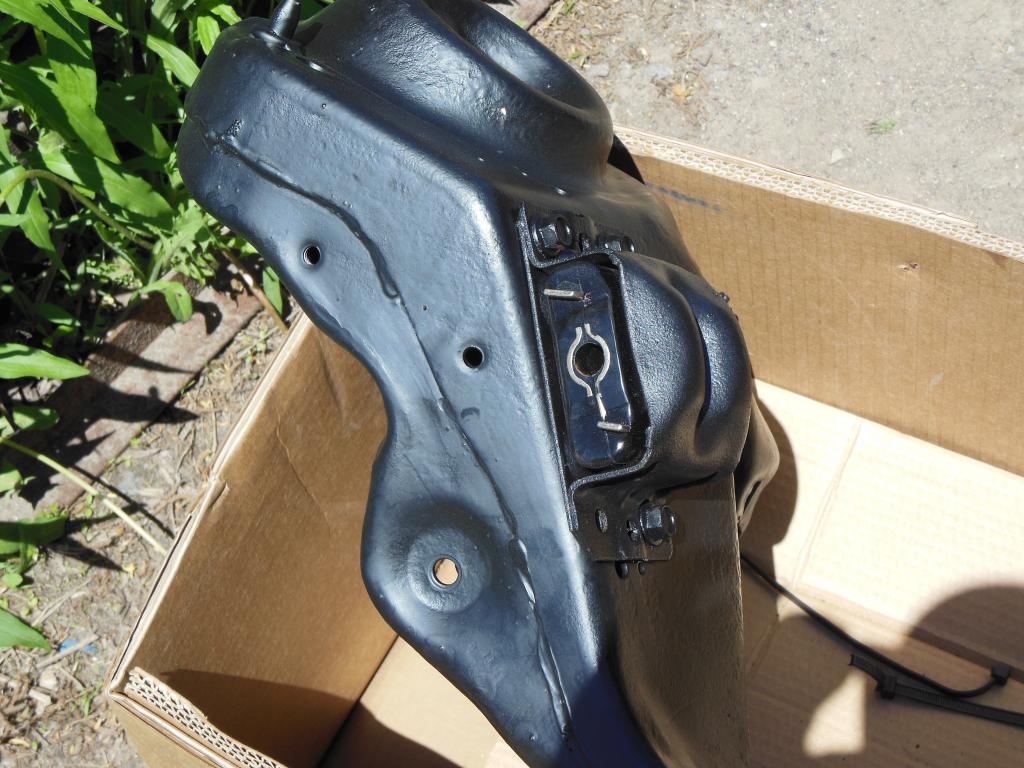
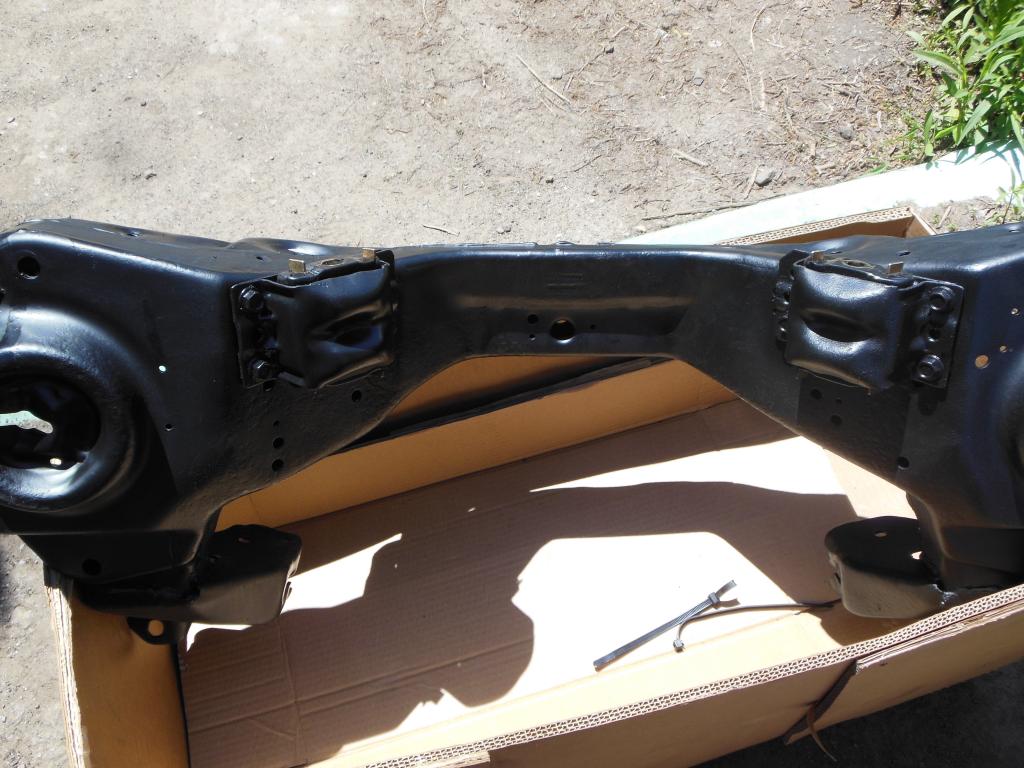
Degreased and sanded the motor brackets. Then hit em with a few coats of bedliner. I know I won't see these brackets, but since I'm coating most of the undercarriage, might as well do these as well. Also soaked the bolts and washers in some CLR for a few hours to remove the rust.
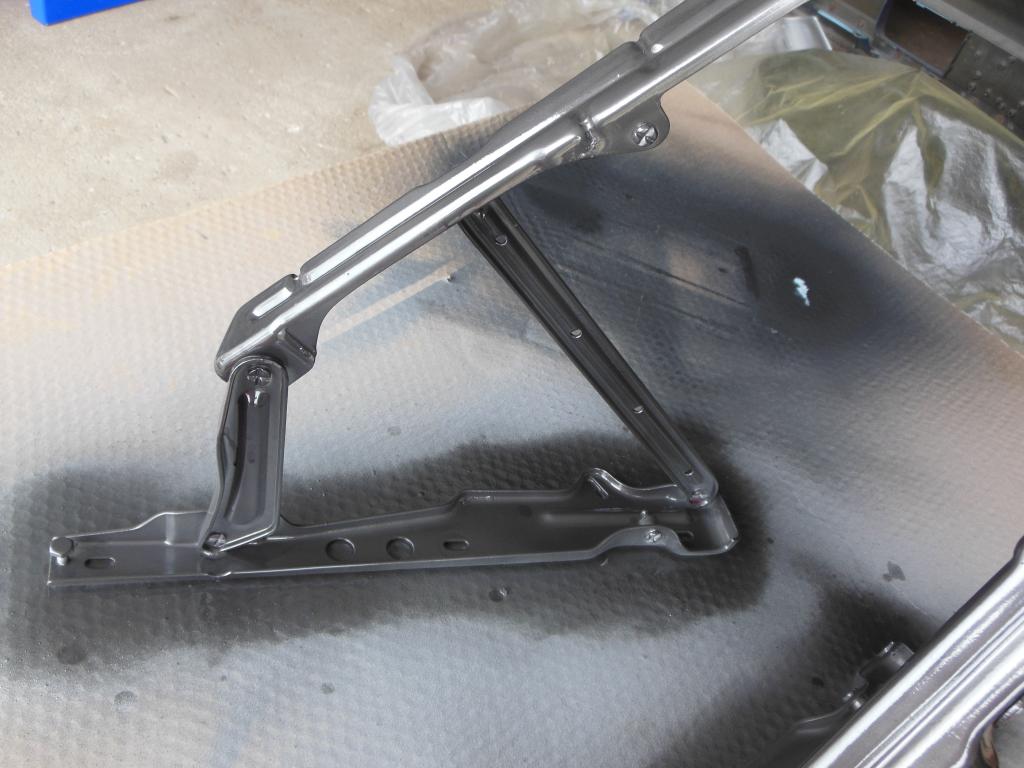
Had an idea to repaint the hood hinges with some cans of Duplicolor Metalcast I had laying around. Time to try the paint effect on the hinges.
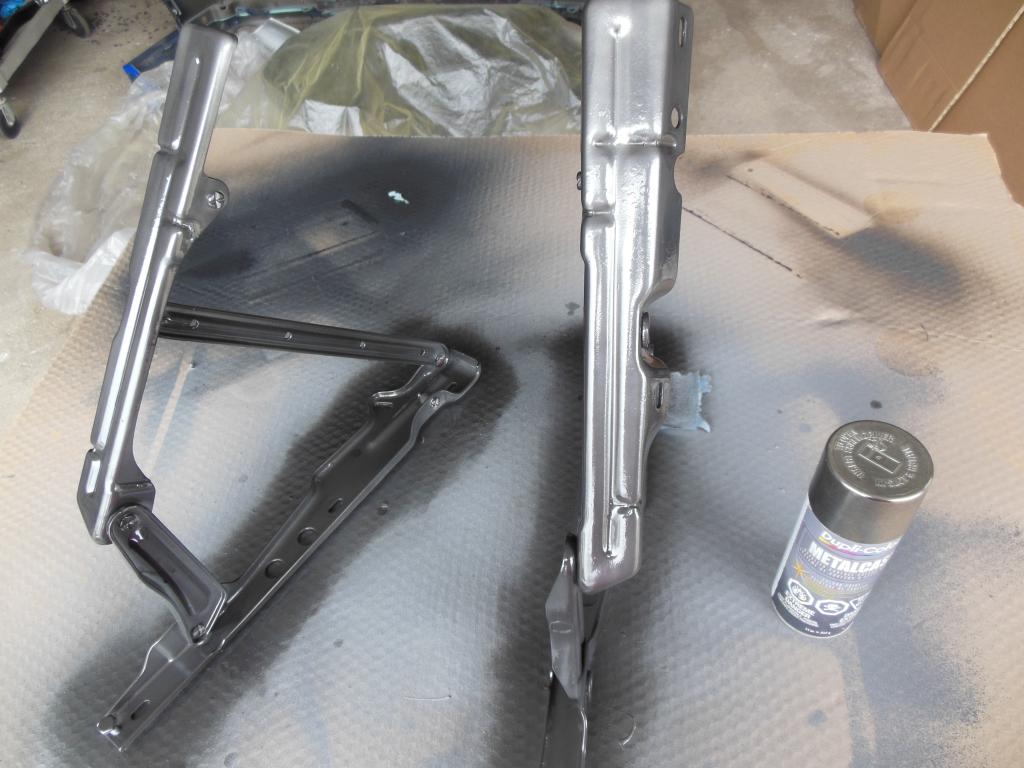
Not quite a black chrome effect...looks more like a pewter. Applied the grey base then the dark chrome top coat. Will do for now, but next year will take the hinges to the powdercoater and go with a flat black.
Before
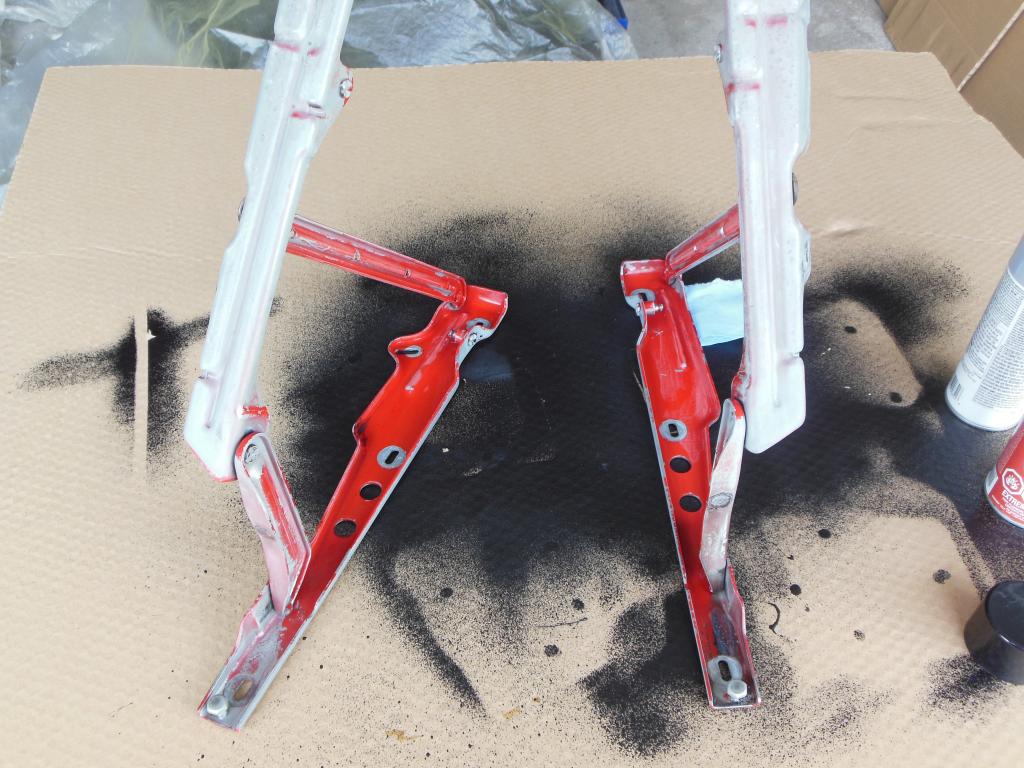
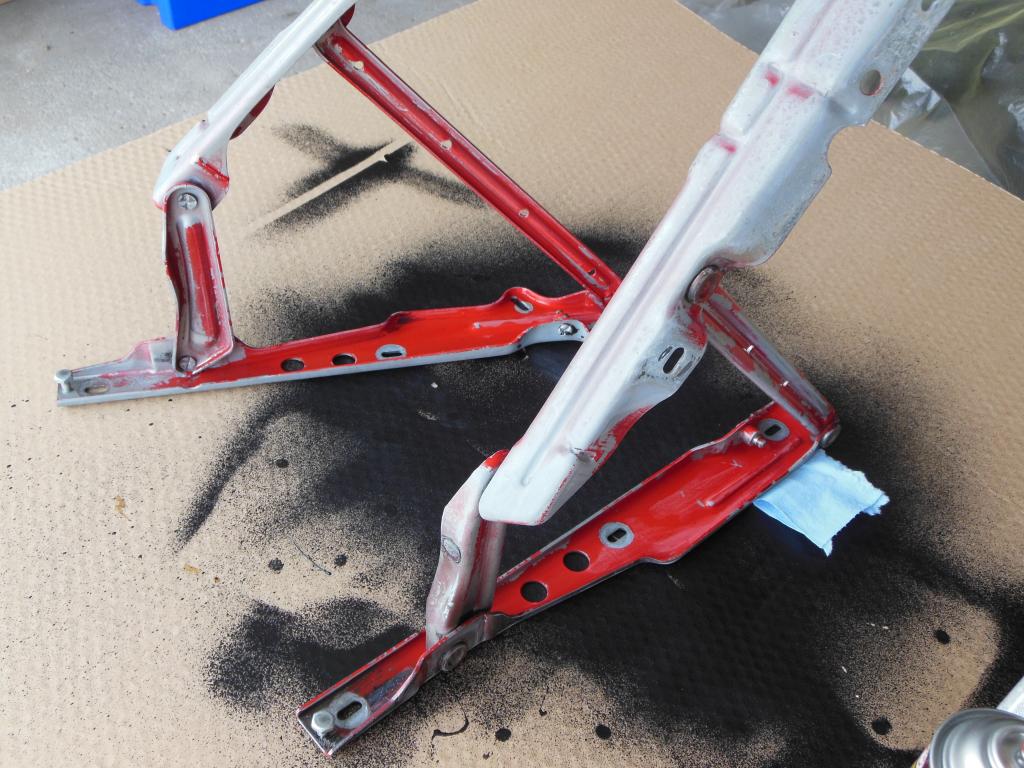
After...Smoke Anondized or Pewter??

More parts prep...
Degreased and sanded the motor brackets. Then hit em with a few coats of bedliner. I know I won't see these brackets, but since I'm coating most of the undercarriage, might as well do these as well. Also soaked the bolts and washers in some CLR for a few hours to remove the rust.

Had an idea to repaint the hood hinges with some cans of Duplicolor Metalcast I had laying around. Time to try the paint effect on the hinges.
Not quite a black chrome effect...looks more like a pewter. Applied the grey base then the dark chrome top coat. Will do for now, but next year will take the hinges to the powdercoater and go with a flat black.
Before


After...Smoke Anondized or Pewter??

 05-19-2013, 07:00 PM
#159
Supreme Member
Thread Starter
iTrader: (6)
Join Date: Oct 2006
Location: West of Toronto
Posts: 3,041
Likes: 0
Received 6 Likes
on
6 Posts
Car: 89 IROC
Engine: 305 TPI / ZZ4 cam
Transmission: Stage 2 700R4, LS1 driveshaft
Axle/Gears: Strange 3.42 w/ Auburn
Re: 1989 Camaro - "The Project" Begins...
ENGINE REBUILDING HAS BEGUN 
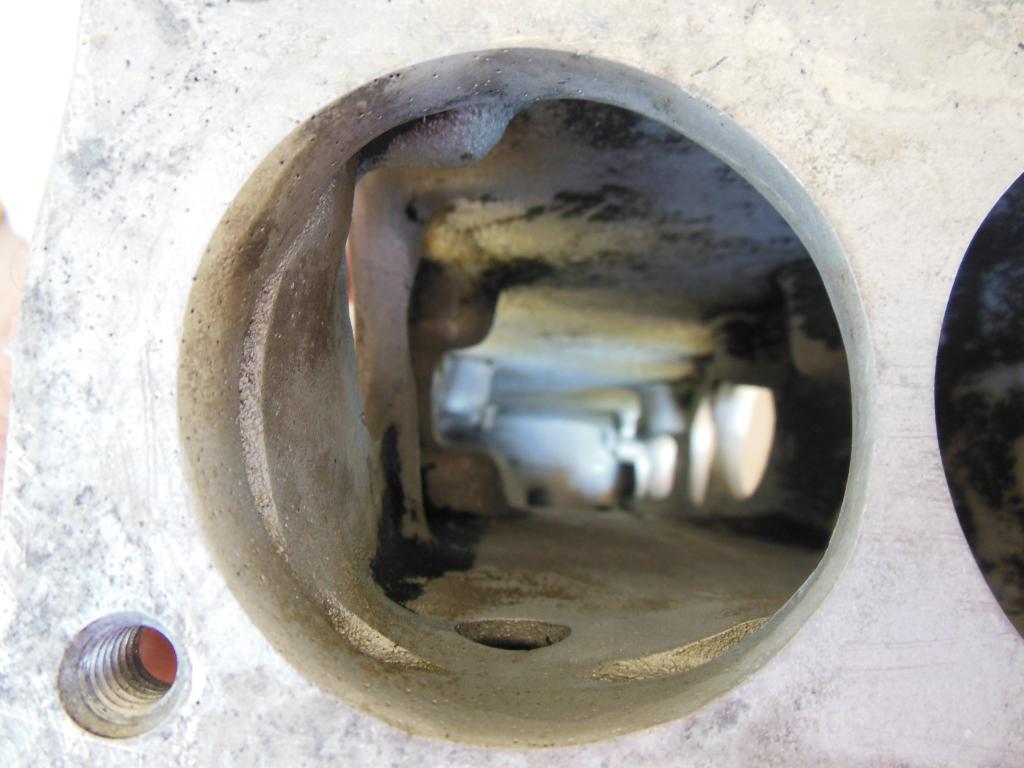
Engine Flush Time....Pulled the old engine plugs to have a look inside and decided it badly needed an engine flush. Went old school with some CLR in a spray gun and the water hose. NOW, its nice and clean with new Melling freeze plugs installed.
Also, applied some engine oil to the cyclinder walls and turned the engine over by hand a few time to lubricate.

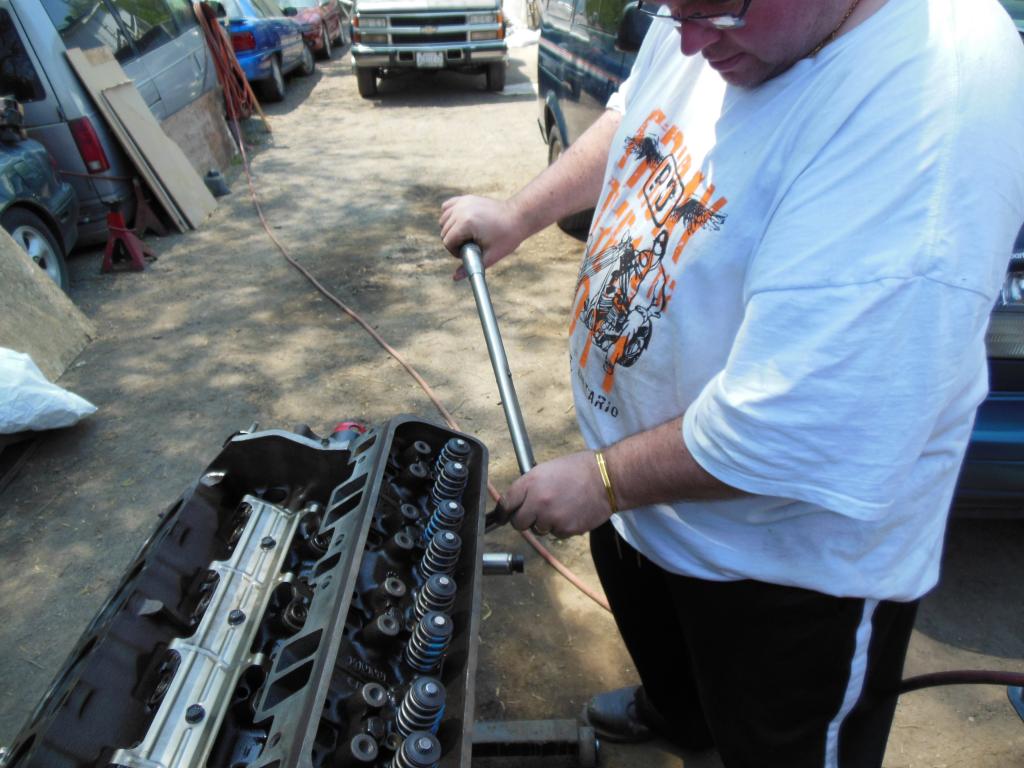
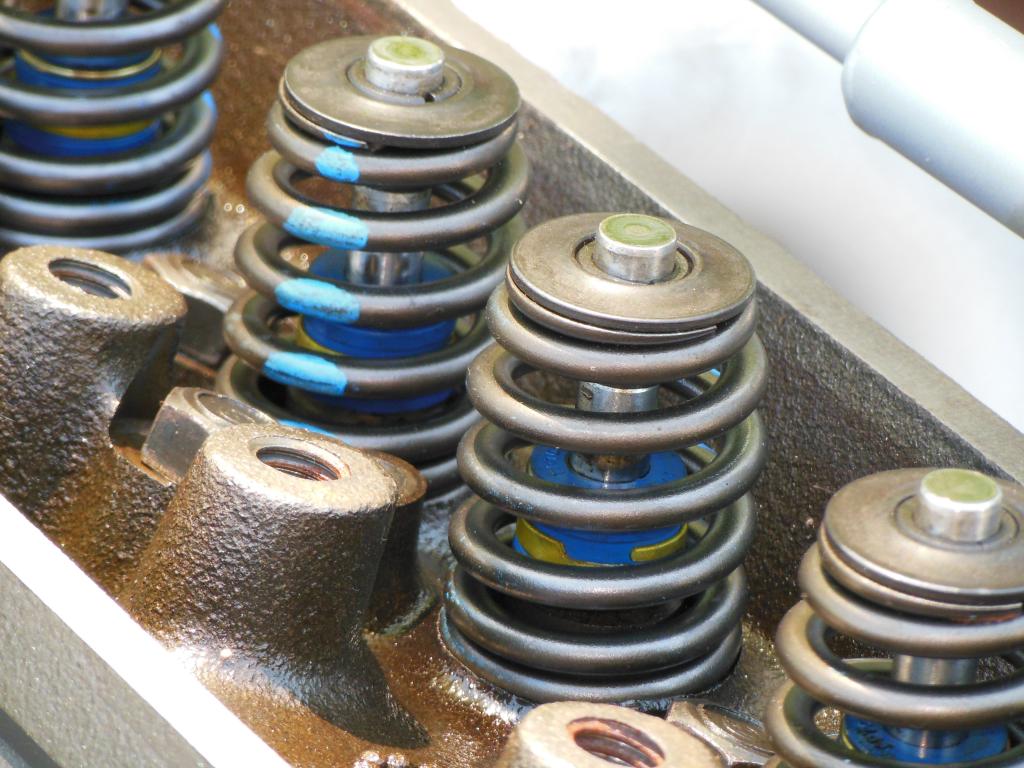
Heads Done....Finished installing the posi valve seals, added some shims and installed the Comp Cams beehive springs on the exhaust side. Also, cleaned off the old head bolt sealant and put a steel wire to the threads. Installed thin gaskets and torqued the head bolts to 65 ft/lbs. Always a good idea to double check each bolt after torquing them down. Can never be too careful.
PROOF I WORK ON MY ENGINE!!!
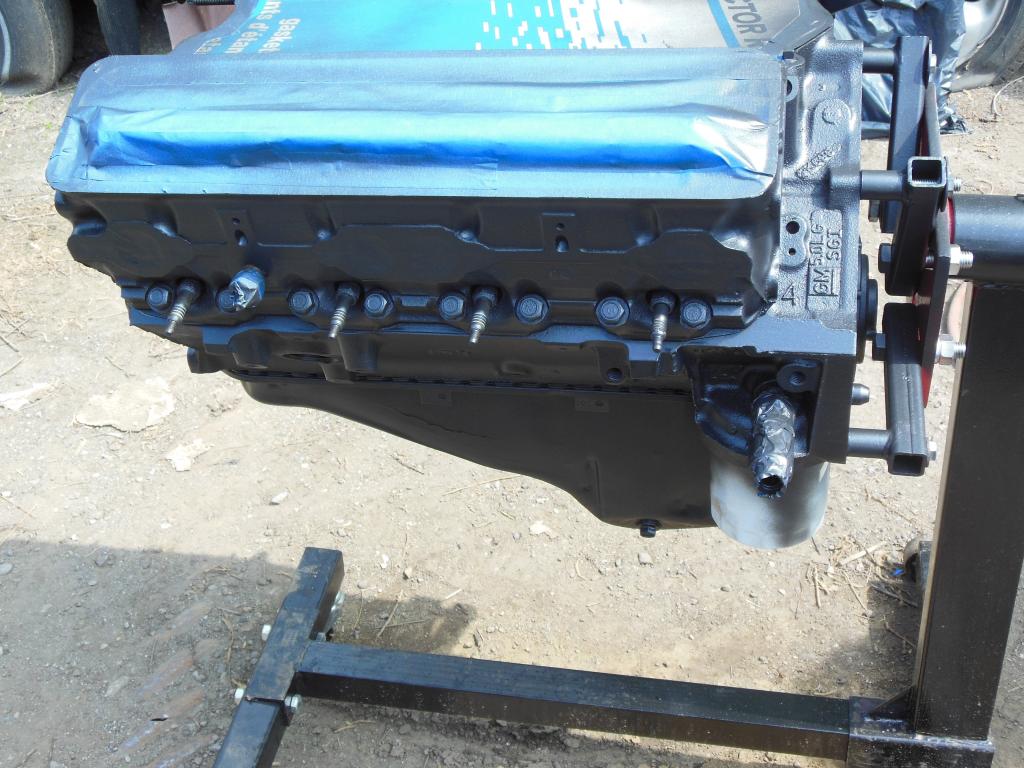
Taped up all the holes, and hit the block with some metallic engine enamel. Reinstalled the motor mounts and put a cover over the engine.
Next week...mounting the engine to the k-member....fingers crossed.
Engine Flush Time....Pulled the old engine plugs to have a look inside and decided it badly needed an engine flush. Went old school with some CLR in a spray gun and the water hose. NOW, its nice and clean with new Melling freeze plugs installed.
Also, applied some engine oil to the cyclinder walls and turned the engine over by hand a few time to lubricate.

Heads Done....Finished installing the posi valve seals, added some shims and installed the Comp Cams beehive springs on the exhaust side. Also, cleaned off the old head bolt sealant and put a steel wire to the threads. Installed thin gaskets and torqued the head bolts to 65 ft/lbs. Always a good idea to double check each bolt after torquing them down.
Can never be too careful.PROOF I WORK ON MY ENGINE!!!

Taped up all the holes, and hit the block with some metallic engine enamel. Reinstalled the motor mounts and put a cover over the engine.
Next week...mounting the engine to the k-member....fingers crossed.

 05-22-2013, 02:59 PM
#160
Junior Member
iTrader: (1)

Join Date: Sep 1999
Location: Greenville, Michigan
Posts: 62
Likes: 0
Received 0 Likes
on
0 Posts
Car: 1985 Pontiac Firebird
Engine: 2.8 v-6
Transmission: Auto
Axle/Gears: 3.42
Re: 1989 Camaro - "The Project" Begins...
Subscribed! Great build you have going!
05-27-2013, 01:27 AM
#161
Supreme Member
Thread Starter
iTrader: (6)
Join Date: Oct 2006
Location: West of Toronto
Posts: 3,041
Likes: 0
Received 6 Likes
on
6 Posts
Car: 89 IROC
Engine: 305 TPI / ZZ4 cam
Transmission: Stage 2 700R4, LS1 driveshaft
Axle/Gears: Strange 3.42 w/ Auburn
Re: 1989 Camaro - "The Project" Begins...
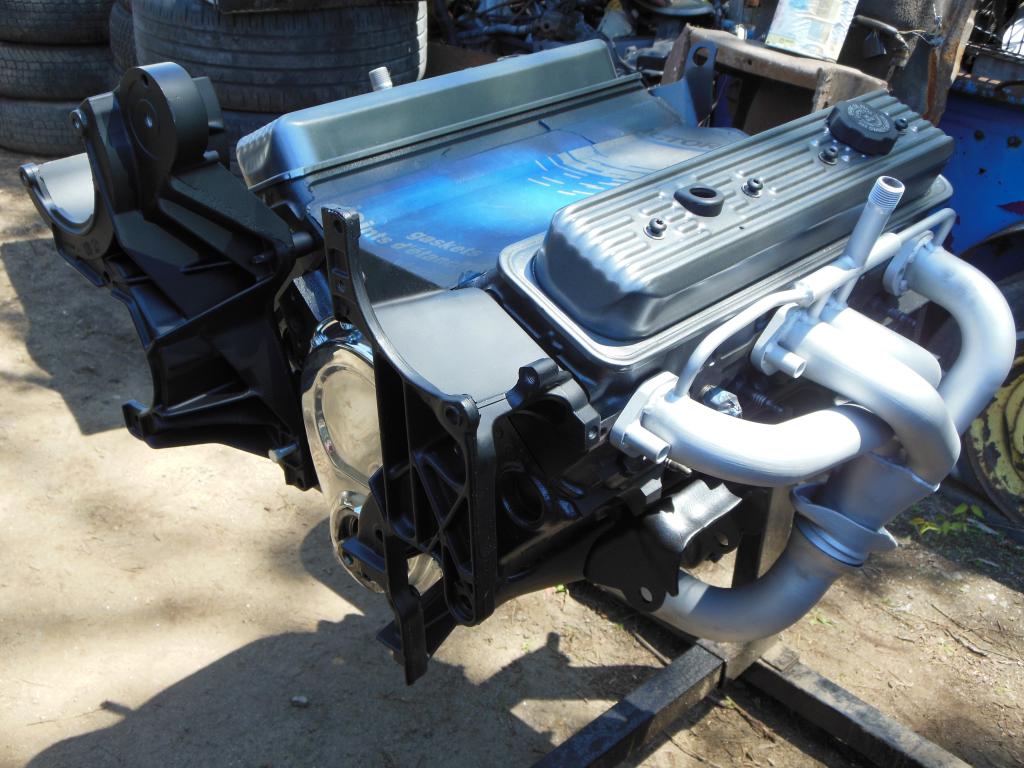
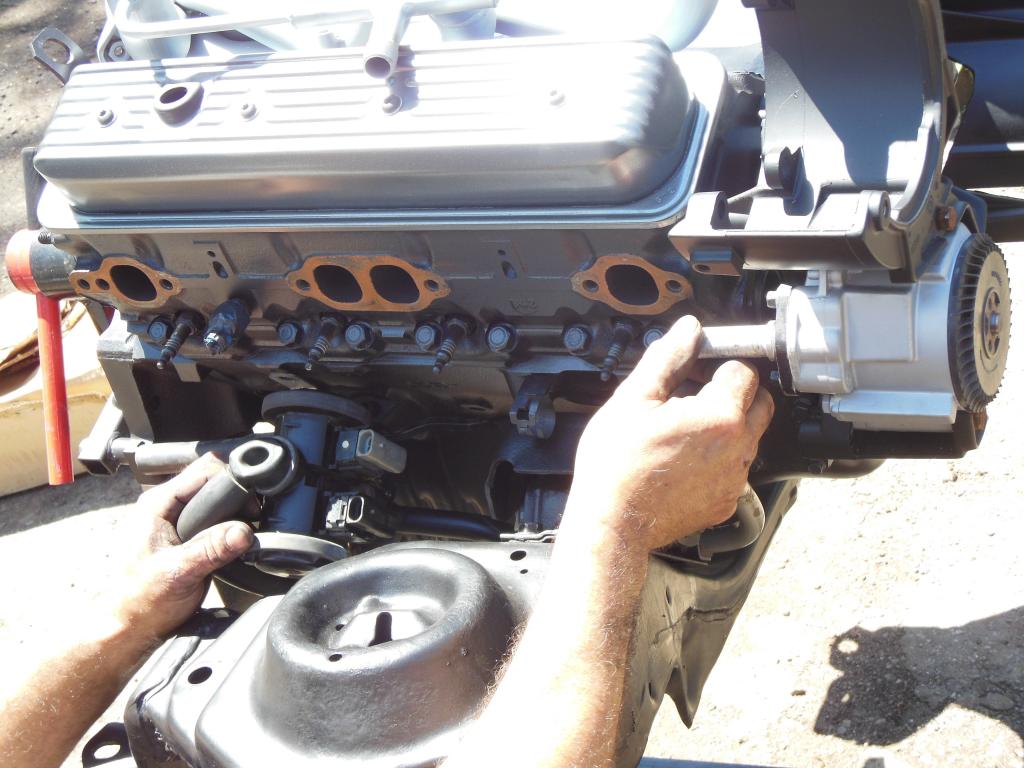
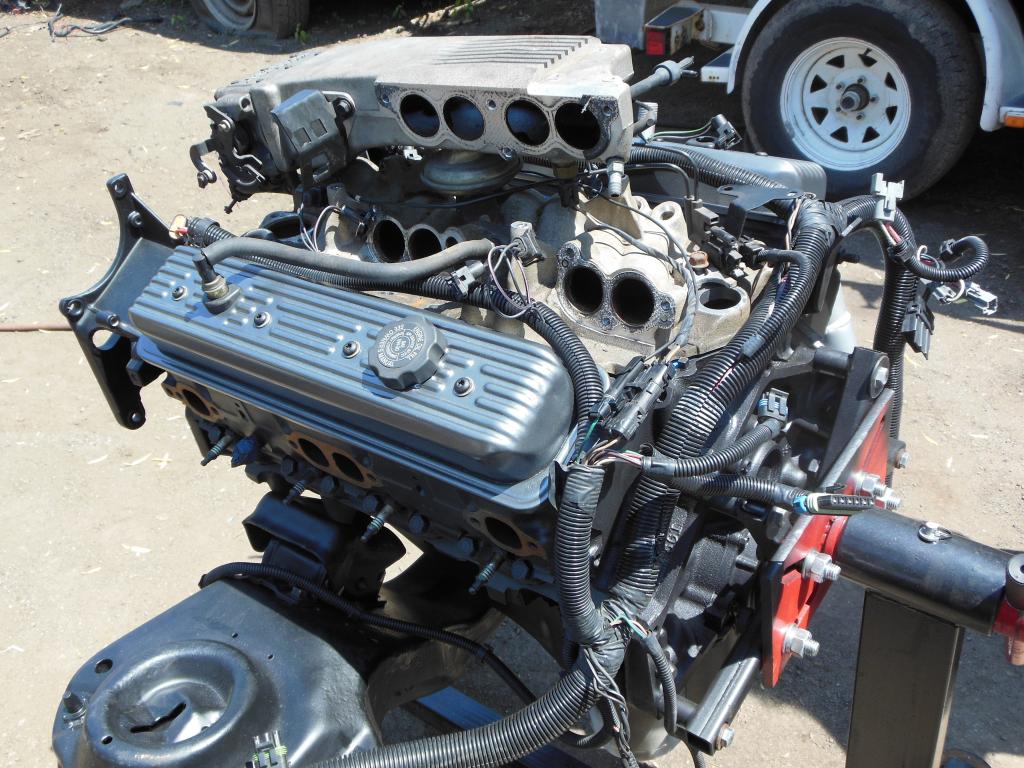
Engine and parts mock up today.
Close up of the posi valve seals and Comp Cams beehive springs.
Drilled out the spot rivets on the engine mounts, sanded down and painted the mounts , then installed the Energy Suspension bushings.
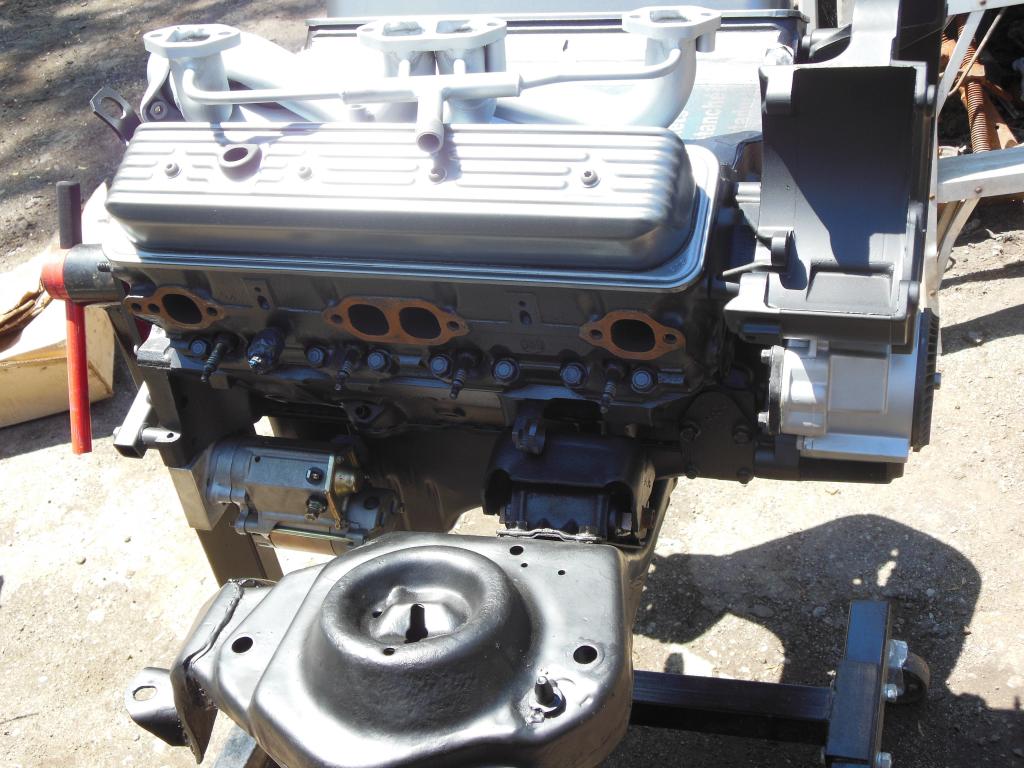
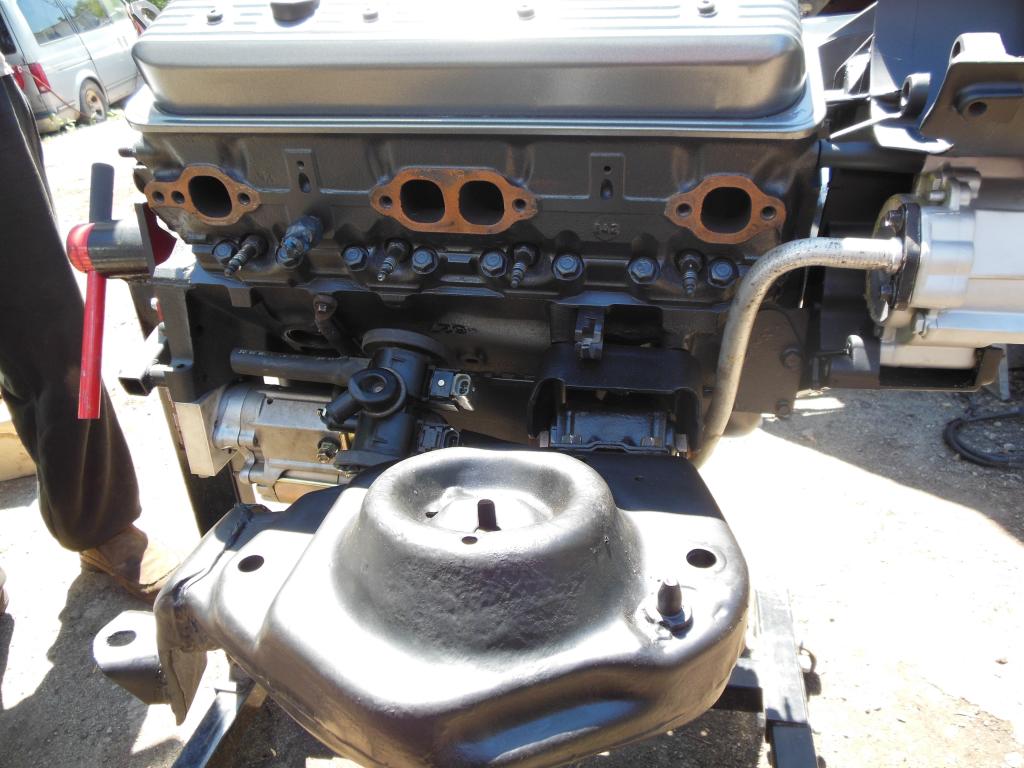
Installed the powder-coated accessory brackets and starter. Starter needed little grinding to get it just right.
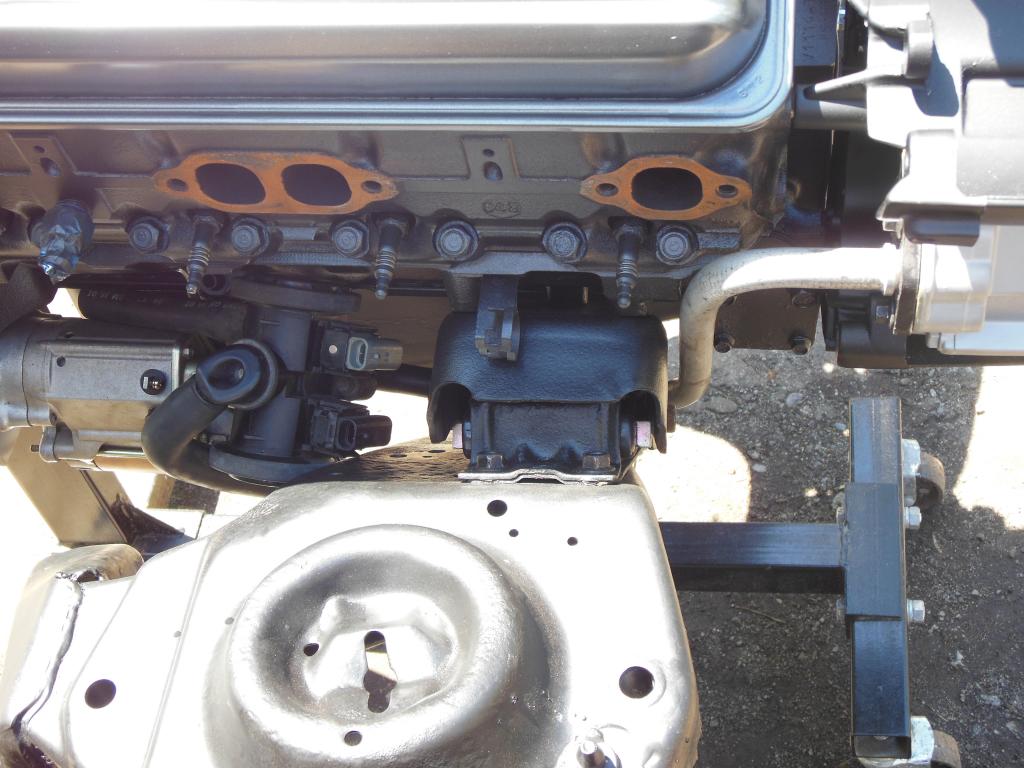
When installing the K-member, best not to fully tighten the engine mounts. You might need a hammer and pry bar to install the main bolts.
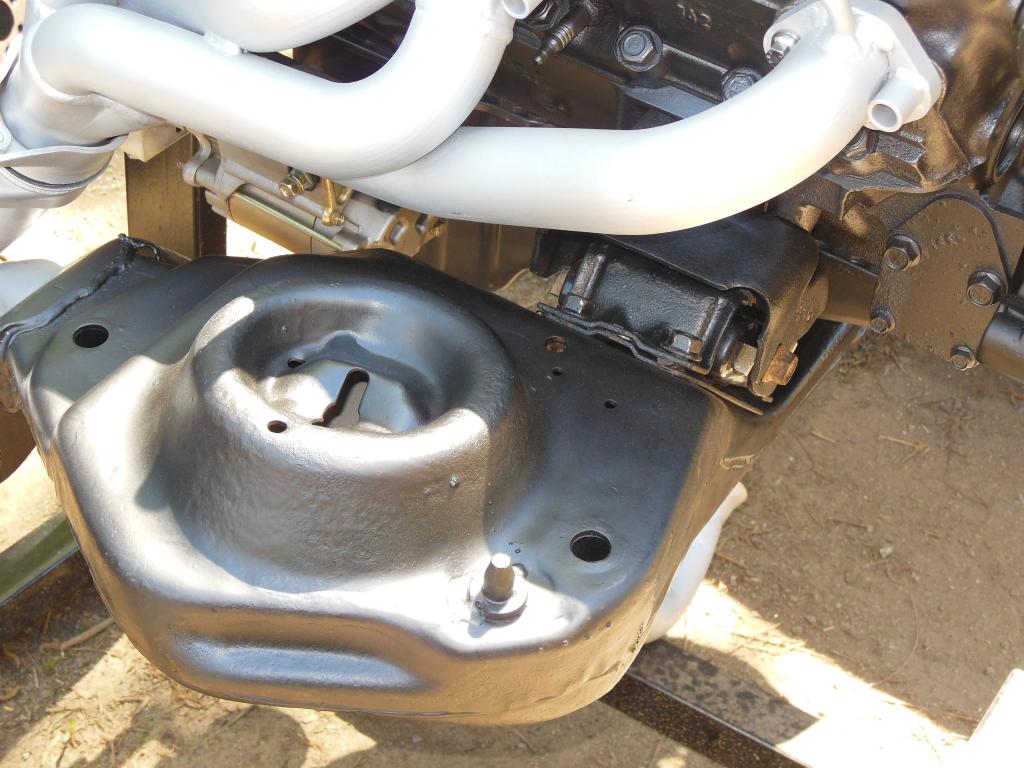
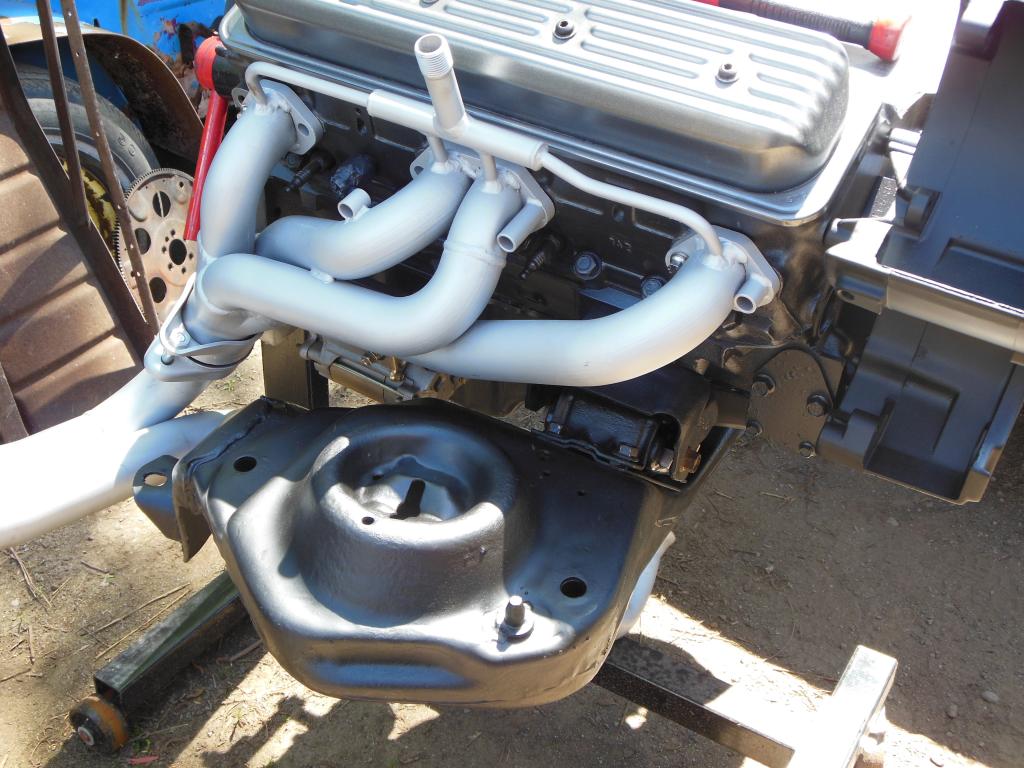
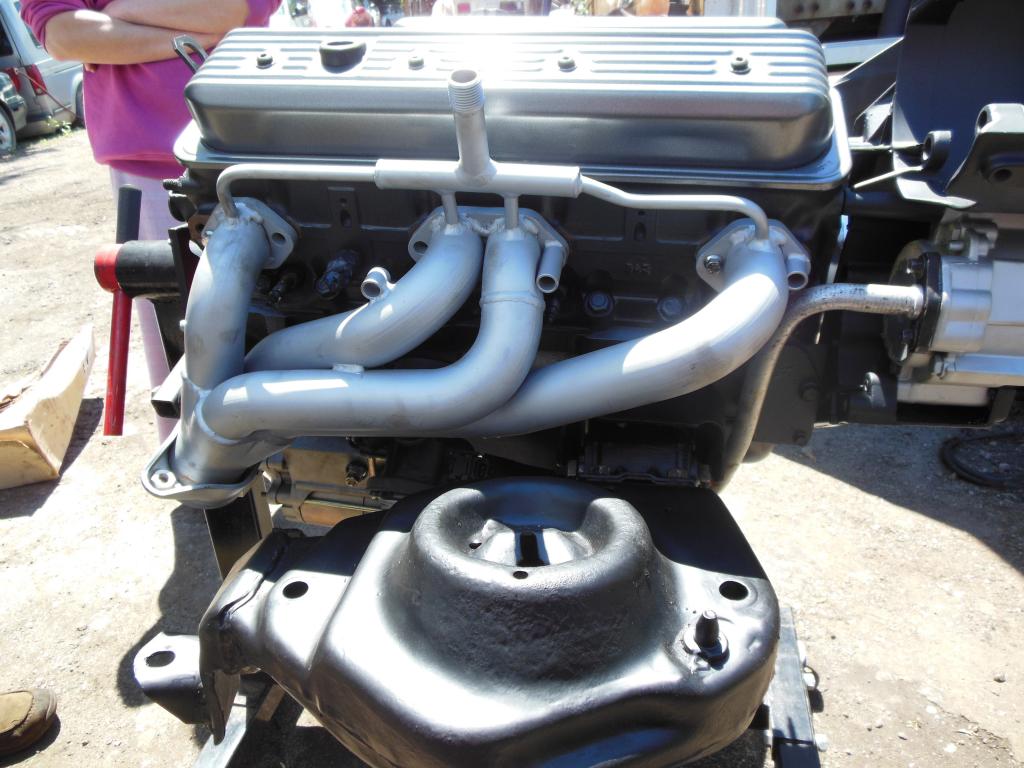
Loosely fitted the headers and pipes to see how they would fit and look at the clearance. Need to see if there is enough room to mount the AIR module between the oil pan and headers. Want to move the module from the top of the motor to the bottom and clean things up. Thinking of using some high temp braided hosing from a Cadillac so the tubes don't melt from the header heat.
Close up of the posi valve seals and Comp Cams beehive springs.

Drilled out the spot rivets on the engine mounts, sanded down and painted the mounts , then installed the Energy Suspension bushings.


Installed the powder-coated accessory brackets and starter. Starter needed little grinding to get it just right.
When installing the K-member, best not to fully tighten the engine mounts. You might need a hammer and pry bar to install the main bolts.
Loosely fitted the headers and pipes to see how they would fit and look at the clearance. Need to see if there is enough room to mount the AIR module between the oil pan and headers. Want to move the module from the top of the motor to the bottom and clean things up. Thinking of using some high temp braided hosing from a Cadillac so the tubes don't melt from the header heat.


Last edited by The Project; 05-27-2013 at 01:31 AM.
05-27-2013, 08:51 AM
#162
Supreme Member
iTrader: (1)
Join Date: Mar 2007
Location: Apopka, Florida
Posts: 1,237
Likes: 0
Received 7 Likes
on
6 Posts
Car: 1989 Pontiac Trans Am GTA
Engine: cammed LS1
Transmission: Monster SS 4L65E
Axle/Gears: 9 bolt posi w/ 3.70 gears
Re: 1989 Camaro - "The Project" Begins...
Looks like it's coming along nicely. What coating it that on the headers?
05-27-2013, 09:13 AM
#163
Supreme Member
iTrader: (1)
Join Date: Jun 2009
Location: Central Connecticut
Posts: 1,777
Likes: 0
Received 0 Likes
on
0 Posts
Car: 91 Trans Am 'vert
Engine: LB9
Transmission: T5
Axle/Gears: 3.45 9 bolt
Re: 1989 Camaro - "The Project" Begins...
That's looking awesome! Sorry if you already answered this, but what kind of intake are you going with?
05-27-2013, 03:31 PM
#164
Supreme Member
Thread Starter
iTrader: (6)
Join Date: Oct 2006
Location: West of Toronto
Posts: 3,041
Likes: 0
Received 6 Likes
on
6 Posts
Car: 89 IROC
Engine: 305 TPI / ZZ4 cam
Transmission: Stage 2 700R4, LS1 driveshaft
Axle/Gears: Strange 3.42 w/ Auburn
Re: 1989 Camaro - "The Project" Begins...
For now I'm going with the stock base with a little porting to open the runner holes. Next year I might go vortec and will get the Edelbrock vortec base with the bigger runner holes. An Edelbrock base and better heads are definitely in the future.
 06-09-2013, 09:03 PM
#166
Supreme Member
Thread Starter
iTrader: (6)
Join Date: Oct 2006
Location: West of Toronto
Posts: 3,041
Likes: 0
Received 6 Likes
on
6 Posts
Car: 89 IROC
Engine: 305 TPI / ZZ4 cam
Transmission: Stage 2 700R4, LS1 driveshaft
Axle/Gears: Strange 3.42 w/ Auburn
Re: 1989 Camaro - "The Project" Begins...
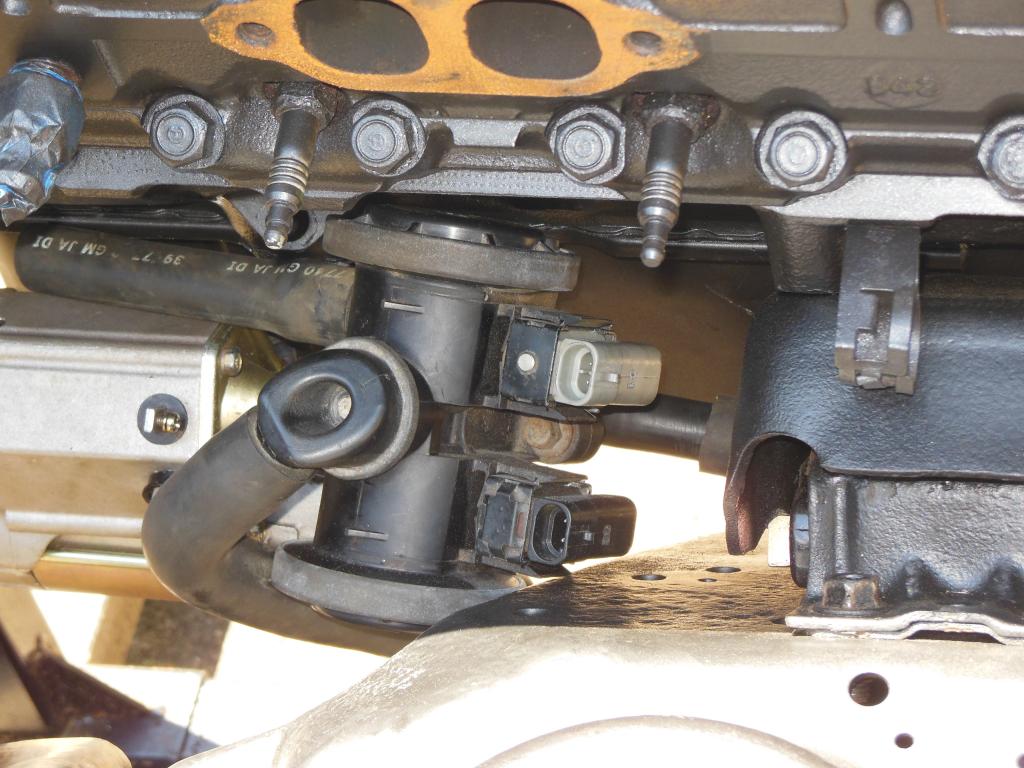
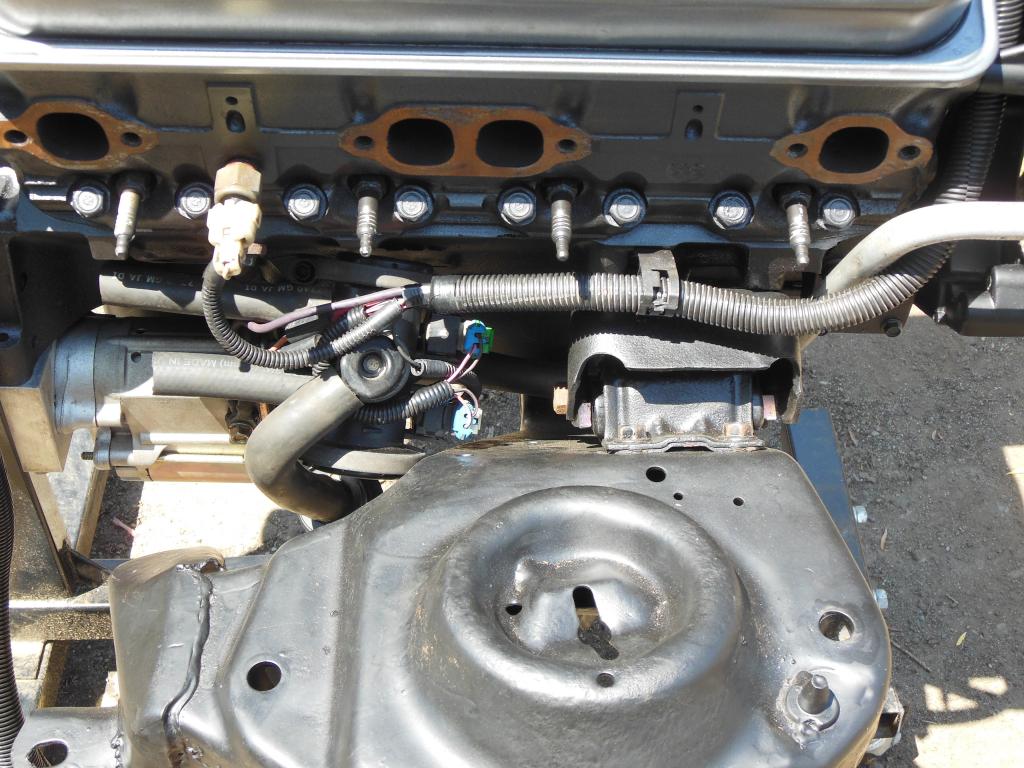
Started working on relocating the A.I.R. pump. Originally was going to move to near the battery but came up with a better idea.
All it took was cutting the back of the tubing, then adding some new tubing, make a few bends, have a coffee , bend some more, mock up to make sure the A.I.R. is tucked up close to the block, make a bracket, make a better bracket , have lunch, bend some more, fit headers for clearance.....AND VOILA...fits perfectly
I will be running the tubing from the headers and A.I.R. pump thru the back of the motor with copper fittings and tubing.
Here are the pics....Before
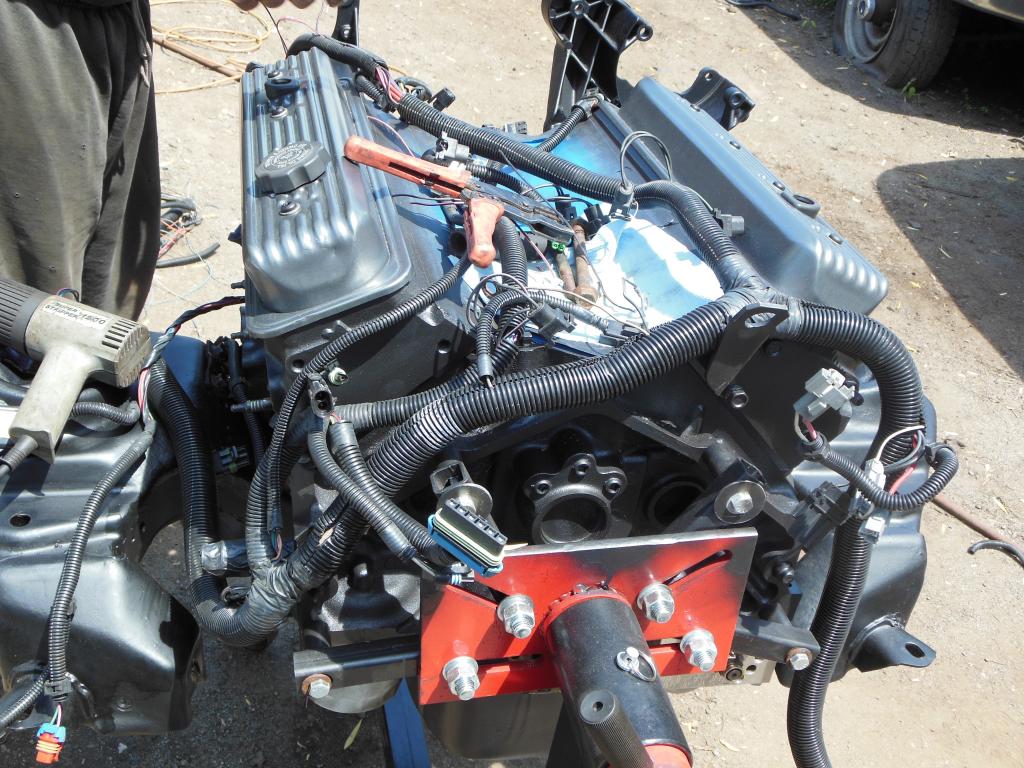
Making the tubing, fittings and brackets
DONE...just have to paint the tubing with some hi-heat silver paint.
All it took was cutting the back of the tubing, then adding some new tubing, make a few bends, have a coffee
, bend some more, mock up to make sure the A.I.R. is tucked up close to the block, make a bracket, make a better bracket , have lunch, bend some more, fit headers for clearance.....AND VOILA...fits perfectly I will be running the tubing from the headers and A.I.R. pump thru the back of the motor with copper fittings and tubing.
Here are the pics....Before

Making the tubing, fittings and brackets


DONE...just have to paint the tubing with some hi-heat silver paint.
 06-16-2013, 01:55 AM
#167
Supreme Member
Thread Starter
iTrader: (6)
Join Date: Oct 2006
Location: West of Toronto
Posts: 3,041
Likes: 0
Received 6 Likes
on
6 Posts
Car: 89 IROC
Engine: 305 TPI / ZZ4 cam
Transmission: Stage 2 700R4, LS1 driveshaft
Axle/Gears: Strange 3.42 w/ Auburn
Re: 1989 Camaro - "The Project" Begins...
Putting the engine harness in place and lengthening some of the sensors for the AIR pump, charcoal canister and a few others that will be modified in the next few weeks. Thankfully , I kept the old engine harness so extra correct wires are no problem.
Also need a visual to see how to hide and rework as much of the harness as possible. All part of trying to clean up the look a bit.
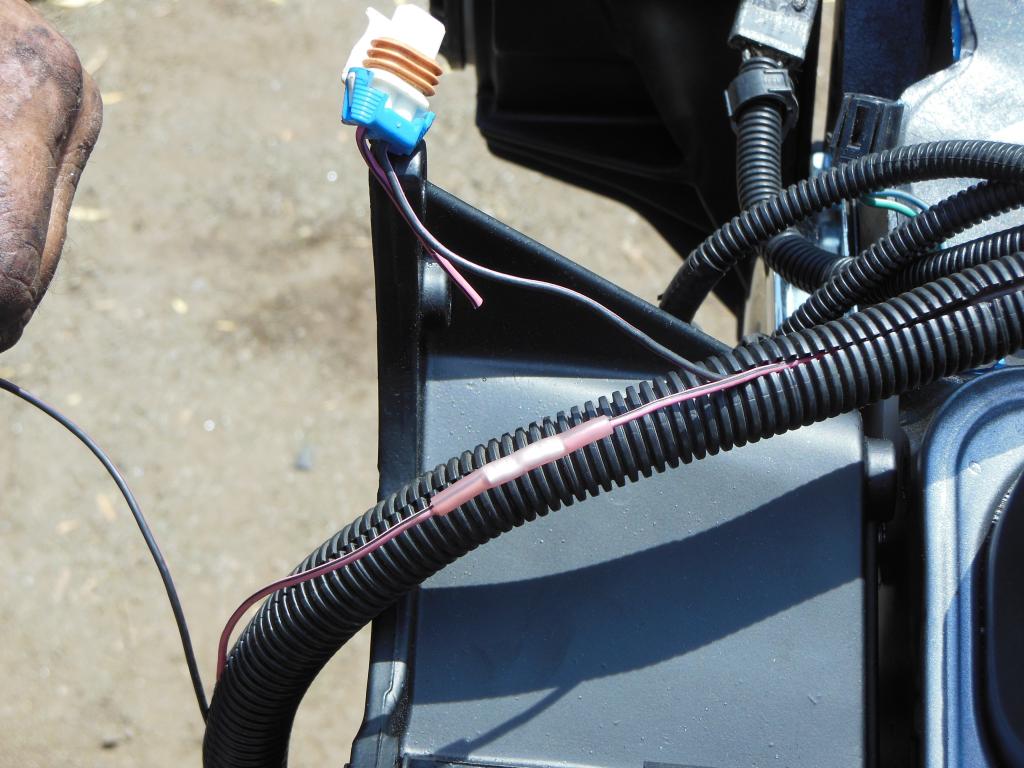
Also need a visual to see how to hide and rework as much of the harness as possible. All part of trying to clean up the look a bit.


 07-21-2013, 06:50 PM
#168
Supreme Member
Thread Starter
iTrader: (6)
Join Date: Oct 2006
Location: West of Toronto
Posts: 3,041
Likes: 0
Received 6 Likes
on
6 Posts
Car: 89 IROC
Engine: 305 TPI / ZZ4 cam
Transmission: Stage 2 700R4, LS1 driveshaft
Axle/Gears: Strange 3.42 w/ Auburn
Re: 1989 Camaro - "The Project" Begins...
Started working on the front of the engine yesterday. Would have gotten further but forgot the bracket bolts. Also decided to go with a new water pump just to make things easier.
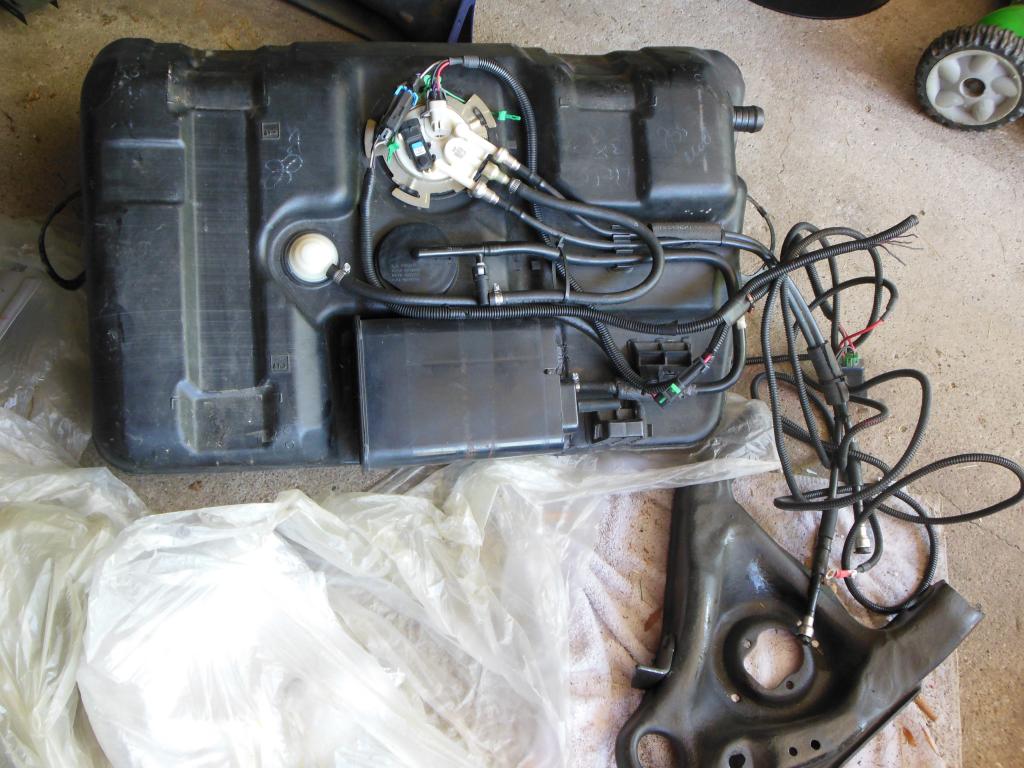
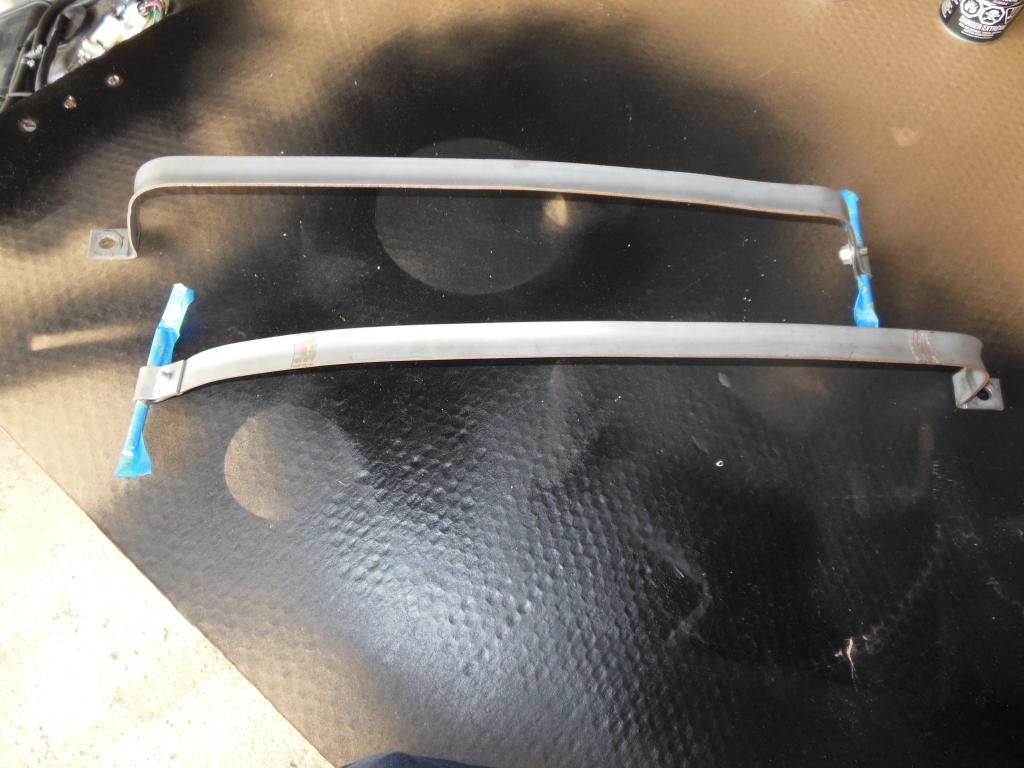
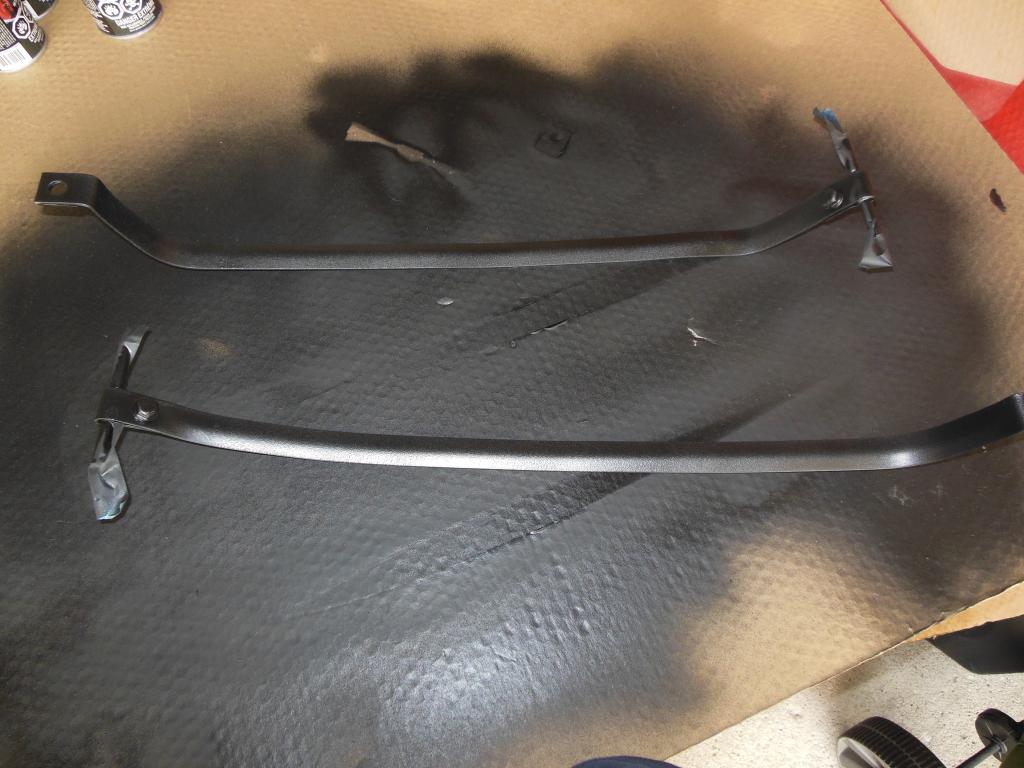
3rd gen fuel tank just wasn't cutting it so I went out and picked up a 4th gen tank and fitted with new Racetronix fuel pump and Racetronix wiring harness. Will utilize the 4th gen charcoal canister which will eliminate the factory canister and clean up the engine bay even more. Fuel neck was modified (lengthened) with some Aeroquip fuel hose to help fit the 3rd gen gas opening. Also picked up some new tank straps which I covered with bed liner to prevent rusting.
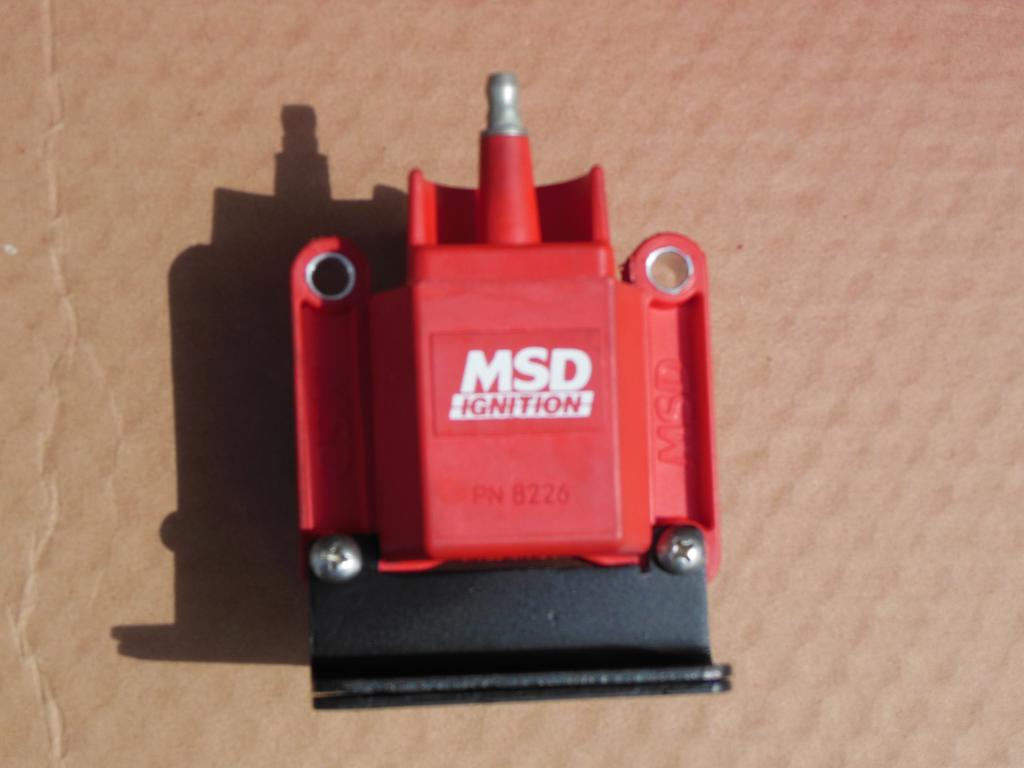
Modified the stock coil holder to accept the MSD coil and keep the original height. Just grind the spot welds, separate the holder, notch the metal bracket to accept the MSD coil, then paint the holder and reassemble.
3rd gen fuel tank just wasn't cutting it so I went out and picked up a 4th gen tank and fitted with new Racetronix fuel pump and Racetronix wiring harness. Will utilize the 4th gen charcoal canister which will eliminate the factory canister and clean up the engine bay even more. Fuel neck was modified (lengthened) with some Aeroquip fuel hose to help fit the 3rd gen gas opening. Also picked up some new tank straps which I covered with bed liner to prevent rusting.


Modified the stock coil holder to accept the MSD coil and keep the original height. Just grind the spot welds, separate the holder, notch the metal bracket to accept the MSD coil, then paint the holder and reassemble.

 08-13-2013, 09:50 PM
#169
Senior Member
iTrader: (3)
Join Date: Nov 2007
Location: Salt Lake
Posts: 844
Likes: 0
Received 2 Likes
on
2 Posts
Car: 1989 IROC & ROLL-Z
Engine: L98 Vortec FIRST TPI
Transmission: T56, Mech Speedo
Axle/Gears: G92 J65 3.27
Re: 1989 Camaro - "The Project" Begins...
Looking really good. Like the idea of hiding the AIR system, will look sharp and still be legal.
Not sure how keen you are on this, but now would be an appropriate time to add a nice access panel in the trunk deck for future fuel pump work. Sure saves time.
Some people are utterly against that idea however...
Not sure how keen you are on this, but now would be an appropriate time to add a nice access panel in the trunk deck for future fuel pump work. Sure saves time.
Some people are utterly against that idea however...
08-14-2013, 06:48 AM
#170
Junior Member
Join Date: Jan 2012
Location: Chicago IL
Posts: 62
Likes: 0
Received 0 Likes
on
0 Posts
Car: 87 iroc z
Engine: 305 tpi
Transmission: 700r4
Axle/Gears: ??drum??
Re: 1989 Camaro - "The Project" Begins...
I know I'm late but just wondering, how are you going to get the stock base plate to fit the vortec heads? I plan on doing the same swap and everything I've read says it won't fit.
08-18-2013, 08:18 PM
#171
Supreme Member
Thread Starter
iTrader: (6)
Join Date: Oct 2006
Location: West of Toronto
Posts: 3,041
Likes: 0
Received 6 Likes
on
6 Posts
Car: 89 IROC
Engine: 305 TPI / ZZ4 cam
Transmission: Stage 2 700R4, LS1 driveshaft
Axle/Gears: Strange 3.42 w/ Auburn
Re: 1989 Camaro - "The Project" Begins...
Looking really good. Like the idea of hiding the AIR system, will look sharp and still be legal.
Not sure how keen you are on this, but now would be an appropriate time to add a nice access panel in the trunk deck for future fuel pump work. Sure saves time.
Some people are utterly against that idea however...
Not sure how keen you are on this, but now would be an appropriate time to add a nice access panel in the trunk deck for future fuel pump work. Sure saves time.
Some people are utterly against that idea however...
So this was the plan�install the Comp Cams screw-in studs, CM rods and Magnum roller rockers. We put everything together and then discovered there was a LOT of space between the rods and rockers. At first I thought I had dropped a lifter but then realized that ALL the rockers had space. Checked the Com Cams website to see if I bought the wrong parts. YUP�all parts were correct. Quick call to Comp Cams helpline and discovered that since we went to screw in studs, we need to shave the stud boss down the height of the base of the stud (DOH!!). :arg:
Before the problem��they look SO GOOD

So�I had two options; A) remove and strip the head, send out to machine shop, reassemble head. B) Buy a Comp Cams stud boss cutter and do it myself. Went with "B". Called Performance Improvements and found out cutter is special order and the sales rep has NEVER sold a cutter EVER!!! Guess not a lot of people are DIY guys or don�t install screw in studs on stock iron heads.
Beginning the shave the boss down. Had to remove about 1/8� of material. Used the cordless drill on slow speed and kept measuring. Also had to extend all the stud threads as I didn�t go deep enough originally.

Install complete�they look GREAT now. Too bad I�ll never see them again�hopefully. Lots of Clevite assembly lube used and turned each cyclinder by hand to ensure rockers were tightened at top-dead-centre. Lock nuts were hand tightened then given a 3\4 turn and jam nuts tightened as well.

Went to install the valve covers and found out they didn't want to fit. Seems the baffle and centre bolt supports don't like the Comp rockers. A bit of grinding and putting the pliers to the baffle and they now fit. Just a great way to end two week ends of work.
Decided to go with a new water pump to avoid any headaches. As I was buying a new aluminum rad, it seemed like a no brainer. Water pump painted and front pulleys installed.
Starting to come together.

New Mishimoto rad�.LOTS of BLING!! Will run with 4th gen fans to keep everything COOL. :wink:


 10-27-2013, 12:57 PM
#174
Junior Member
Join Date: Nov 2010
Location: Canada
Posts: 67
Likes: 0
Received 0 Likes
on
0 Posts
Car: 1988 IROC
Engine: procharged stock 350 tpi
Transmission: stock 700-R-4
Axle/Gears: stock 3.27
Re: 1989 Camaro - "The Project" Begins...
Nice work. Nice pics. Enjoying your thread.
10-28-2013, 03:11 AM
#175
Supreme Member
Thread Starter
iTrader: (6)
Join Date: Oct 2006
Location: West of Toronto
Posts: 3,041
Likes: 0
Received 6 Likes
on
6 Posts
Car: 89 IROC
Engine: 305 TPI / ZZ4 cam
Transmission: Stage 2 700R4, LS1 driveshaft
Axle/Gears: Strange 3.42 w/ Auburn
Re: 1989 Camaro - "The Project" Begins...
Thanks, hope to see your ride at some of the CCFBG events next year 
www.ccfbg.com
Thanks....Right now the fuel rail is at Arkansas Polishing for some polish and rework.
Also have some 22lb injectors on order
Winter is coming fast (had snow 30 min north) so might have to put things away until the spring.
www.ccfbg.com
Thanks....Right now the fuel rail is at Arkansas Polishing for some polish and rework.
Also have some 22lb injectors on order
Winter is coming fast (had snow 30 min north)
so might have to put things away until the spring.
11-17-2013, 10:35 AM
#176
Supreme Member
Thread Starter
iTrader: (6)
Join Date: Oct 2006
Location: West of Toronto
Posts: 3,041
Likes: 0
Received 6 Likes
on
6 Posts
Car: 89 IROC
Engine: 305 TPI / ZZ4 cam
Transmission: Stage 2 700R4, LS1 driveshaft
Axle/Gears: Strange 3.42 w/ Auburn
Re: 1989 Camaro - "The Project" Begins...
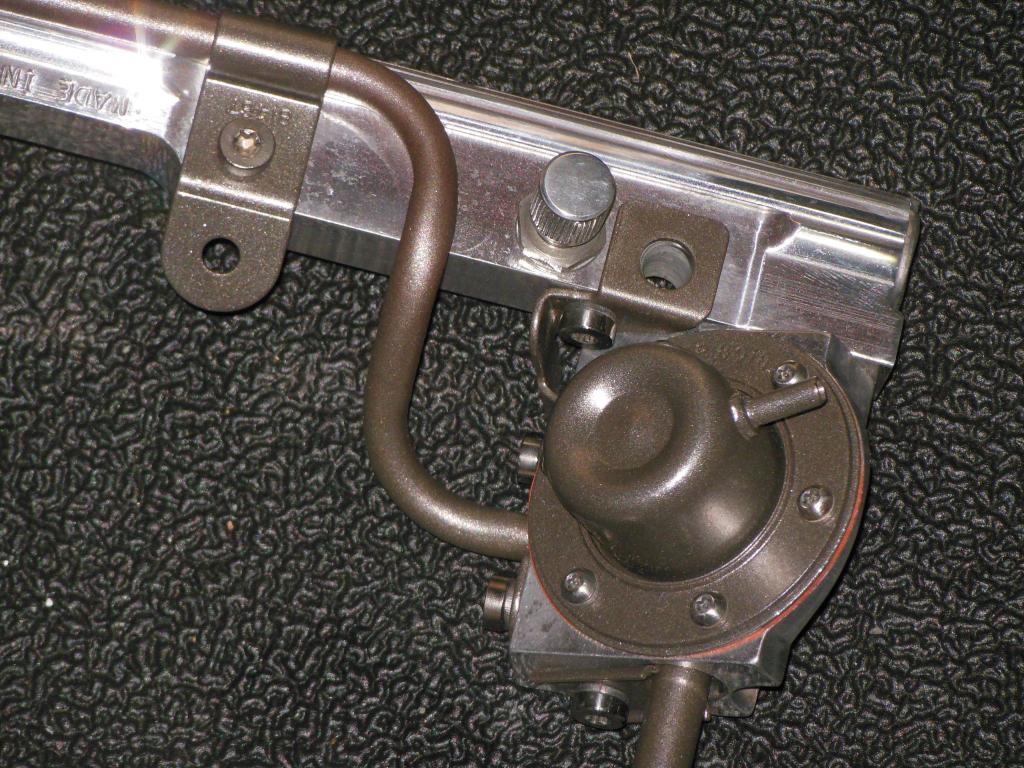
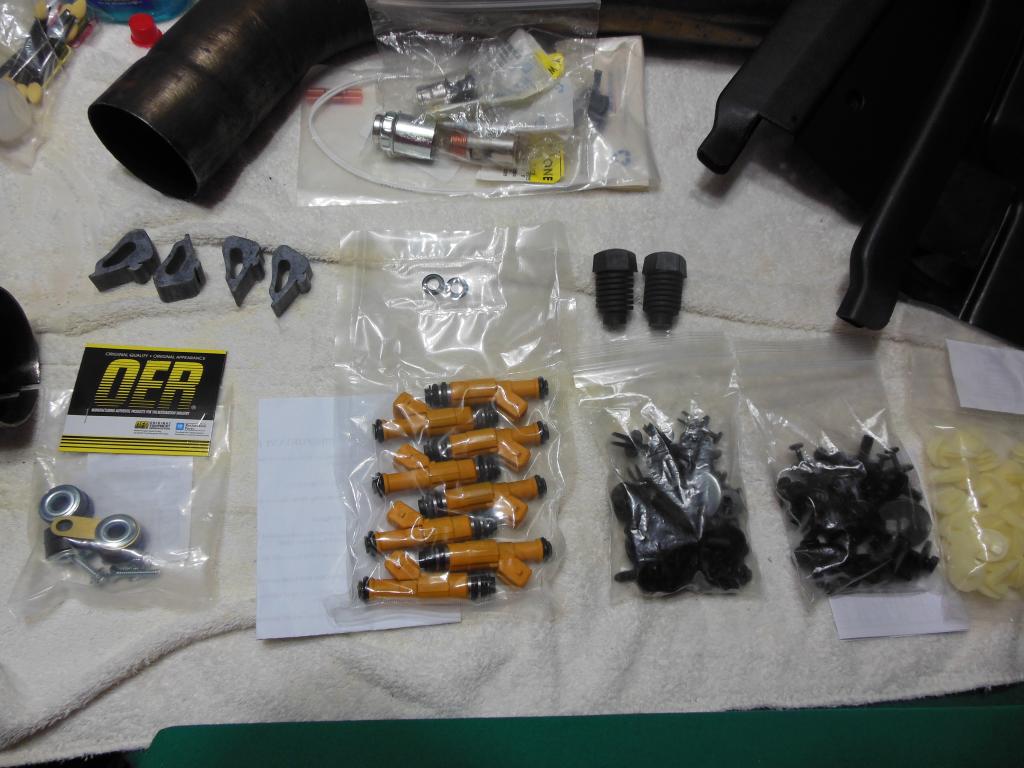
Sent my fuel rail to Arkansas Polishing to get polished and have the lines Powder coated. The powder color is very close to that of the value covers color so should like killer when installed. Two thumbs up for Arkansas Polishing, this guy does some nice work. 
Before Pics...some alum pitting
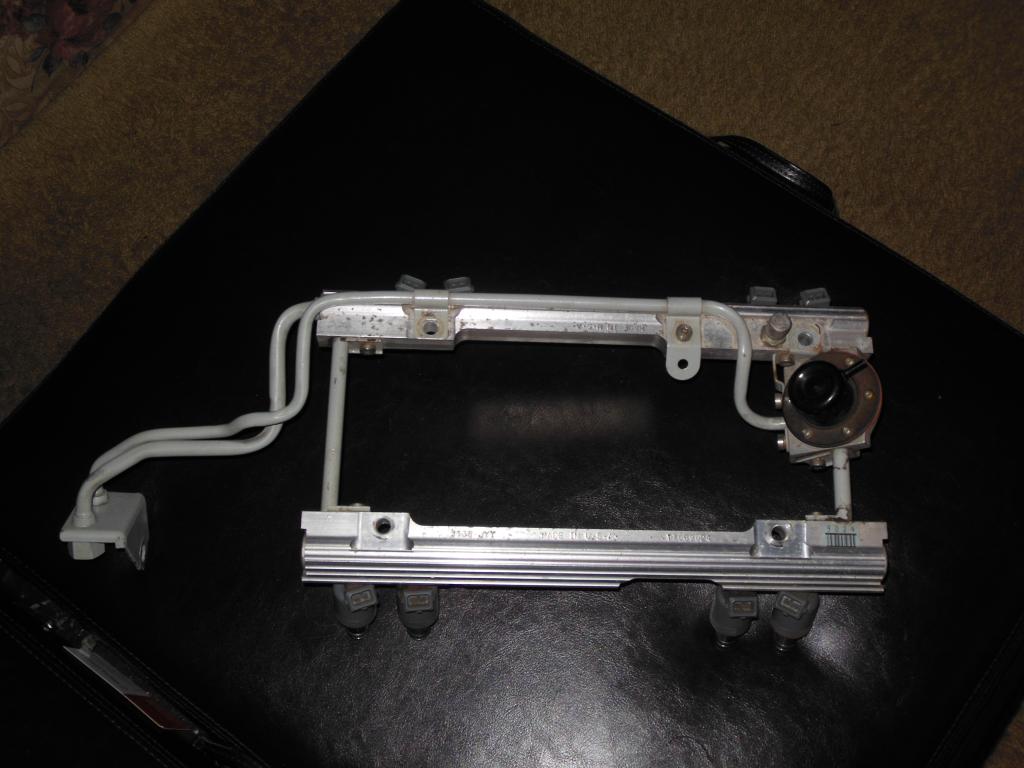
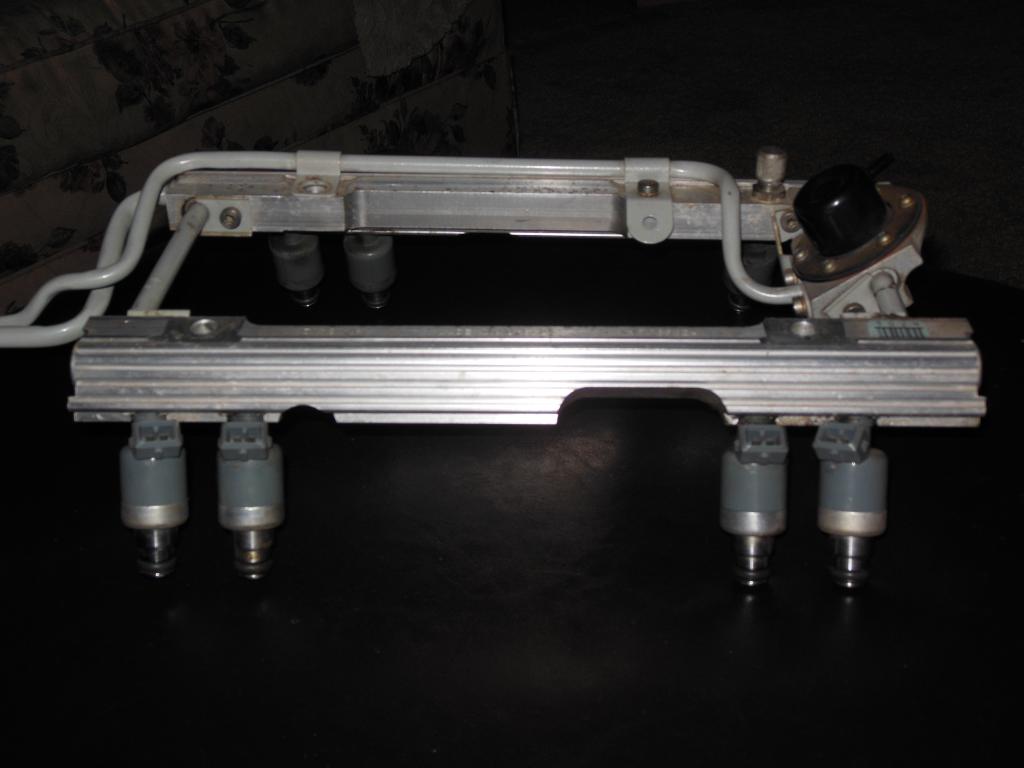
Polished and Powder Coated
New Bosch 22 lb Injectors and a few other new items waiting to be installed
Before Pics...some alum pitting


Polished and Powder Coated


New Bosch 22 lb Injectors and a few other new items waiting to be installed
 11-18-2013, 02:13 AM
#177
Junior Member
Join Date: May 2011
Location: Arizona
Posts: 86
Likes: 0
Received 1 Like
on
1 Post
Car: 1989 IROC-Z Camaro 'Vert.
Engine: 350, ZZ4 motor
Transmission: TH-700R4
Axle/Gears: 2.73 ... for now.
Re: 1989 Camaro - "The Project" Begins...
I just want to say this is an uttelry amazing build and you are putting in some great work. I am about to do work on my Camaro within a similiar scope that you have been doing... All out, pretty much. Haha. This thread has been a great resource just to see what the car looks like in a thousand pieces, etc.
Again, fantastic job and I can't wait to see it completed!
Again, fantastic job and I can't wait to see it completed!
11-18-2013, 08:24 AM
#178
Supreme Member
Re: 1989 Camaro - "The Project" Begins...
Did you replace the diaphragm in the fuel pressure regulator?
11-23-2013, 06:34 PM
#179
Supreme Member
Thread Starter
iTrader: (6)
Join Date: Oct 2006
Location: West of Toronto
Posts: 3,041
Likes: 0
Received 6 Likes
on
6 Posts
Car: 89 IROC
Engine: 305 TPI / ZZ4 cam
Transmission: Stage 2 700R4, LS1 driveshaft
Axle/Gears: Strange 3.42 w/ Auburn
Re: 1989 Camaro - "The Project" Begins...
I just want to say this is an uttelry amazing build and you are putting in some great work. I am about to do work on my Camaro within a similiar scope that you have been doing... All out, pretty much. Haha. This thread has been a great resource just to see what the car looks like in a thousand pieces, etc.
Again, fantastic job and I can't wait to see it completed!
Again, fantastic job and I can't wait to see it completed!
I didn't simply because I have a Holley AFPR being installed later on and wasn't too concerned with the stock one.
12-29-2013, 12:30 PM
#180
Member
Join Date: May 2009
Location: Paris, tn
Posts: 156
Likes: 0
Received 0 Likes
on
0 Posts
Car: 1982 Z28, 1991 RS
Engine: 350 Carbed, 305 TBI
Transmission: 700r4, t5
Axle/Gears: 3.23s posi Limited Slip, 3.08 posi
Re: 1989 Camaro - "The Project" Begins...
wow love this thread Found it today, and read the whole thing. great work! gives me hope on my 82 z.
 03-03-2014, 08:37 AM
#182
Supreme Member
Re: 1989 Camaro - "The Project" Begins...
****************
Last edited by W.E.G.; 03-10-2014 at 03:37 PM.
03-03-2014, 05:22 PM
#184
Member

Join Date: Jul 2009
Location: Oklahoma
Posts: 238
Likes: 0
Received 0 Likes
on
0 Posts
Car: genesis, equus, f250, camaro, other
Engine: 5.7
Transmission: t5
Re: 1989 Camaro - "The Project" Begins...
first time starting it up in 7 yrs. i have the exhaust manifold unbolted bc the heade was to close to the spark plug for me to get the socket off. i had to unbolt it. thats why its popping. also have the cat off as well
im trying to start mine again. i bought this car in 2006 or 2005. had the tran done at mr transmission for 2k. i kept having problems with the car keeping the power. i had replaced the ground cable going from the alt to the battery and then i started having problem. i didnt have alot of money so i let it sit. i got a cheap car and now am trying to bring it back to life. i changed out the gas tank, the sending unit along with the pump and fuel filter. i also replaced the spark plugs, wires, oil changed, oil filter and replacing the starter this sunday. the pig tails that go to the distributor coil were burned out and that was causing my car to shut off when moved. i have the grey one on order and already replaced the black one. i also have the trunk motor, under hood light, support shocks for hood, and bolts for the console inside.
got a video starting it up for the first time in 7 yrs
http://youtu.be/M69wytEFlys
06-09-2014, 11:58 AM
#186
Supreme Member
Thread Starter
iTrader: (6)
Join Date: Oct 2006
Location: West of Toronto
Posts: 3,041
Likes: 0
Received 6 Likes
on
6 Posts
Car: 89 IROC
Engine: 305 TPI / ZZ4 cam
Transmission: Stage 2 700R4, LS1 driveshaft
Axle/Gears: Strange 3.42 w/ Auburn
Re: 1989 Camaro - "The Project" Begins...
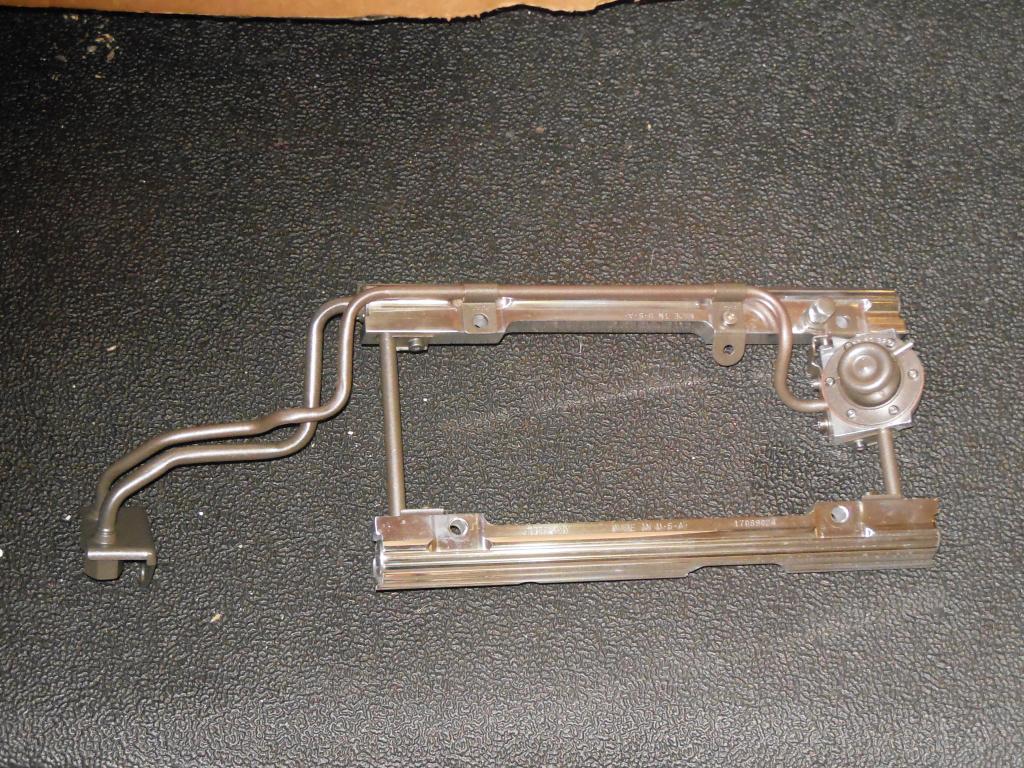
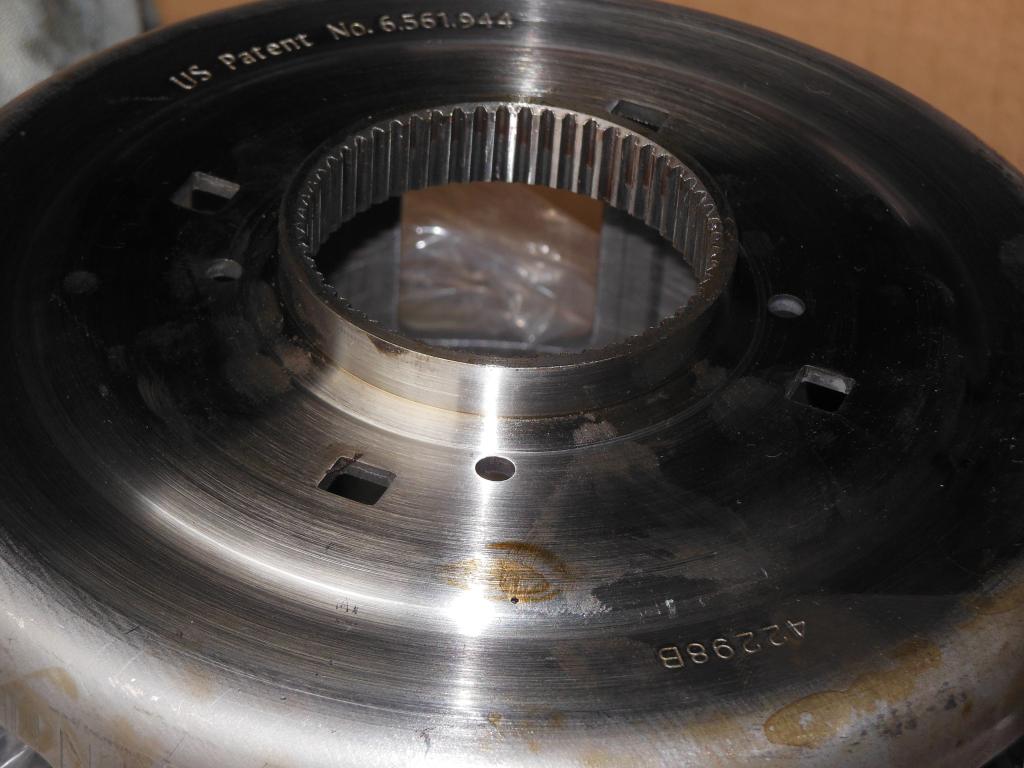
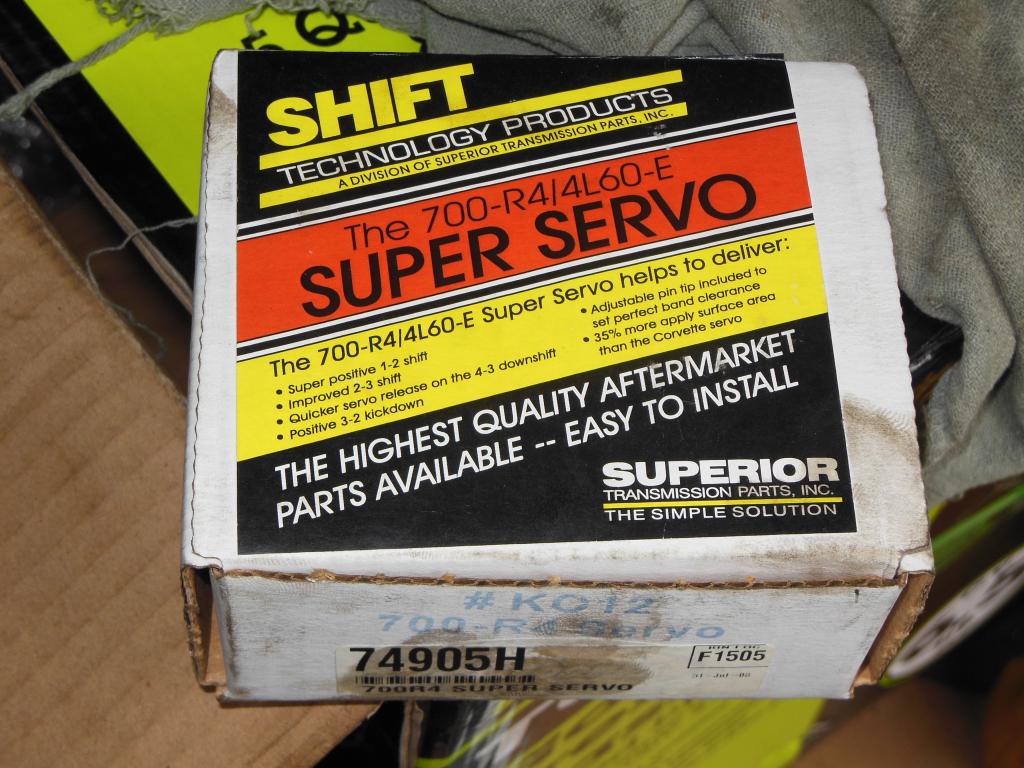
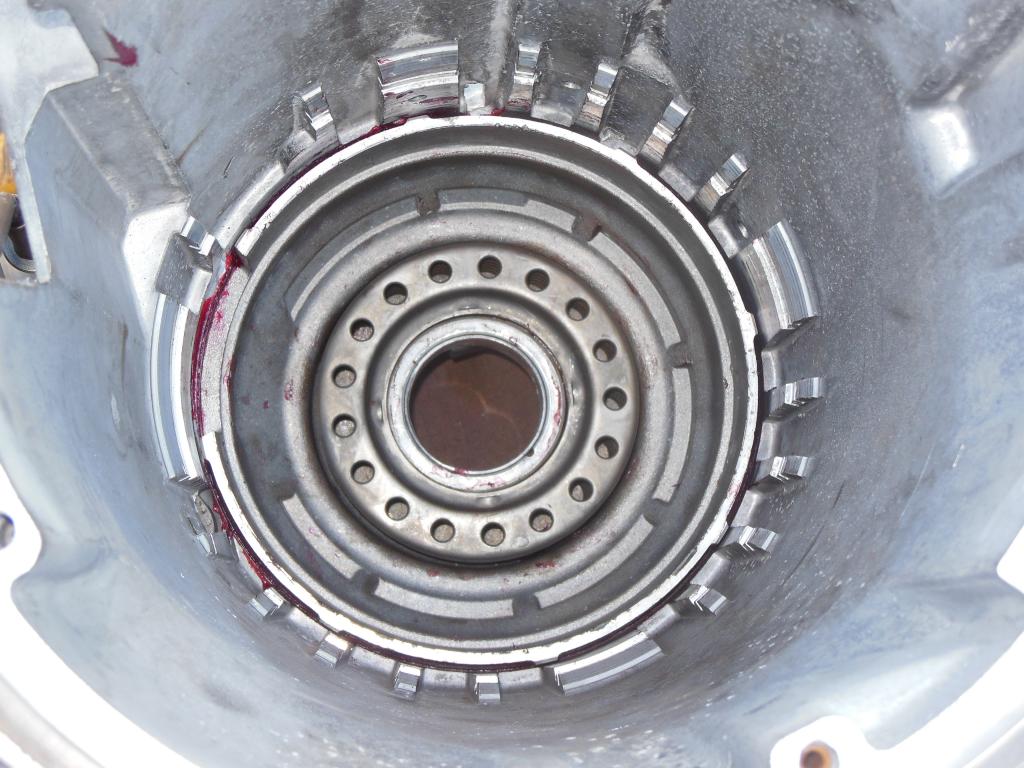
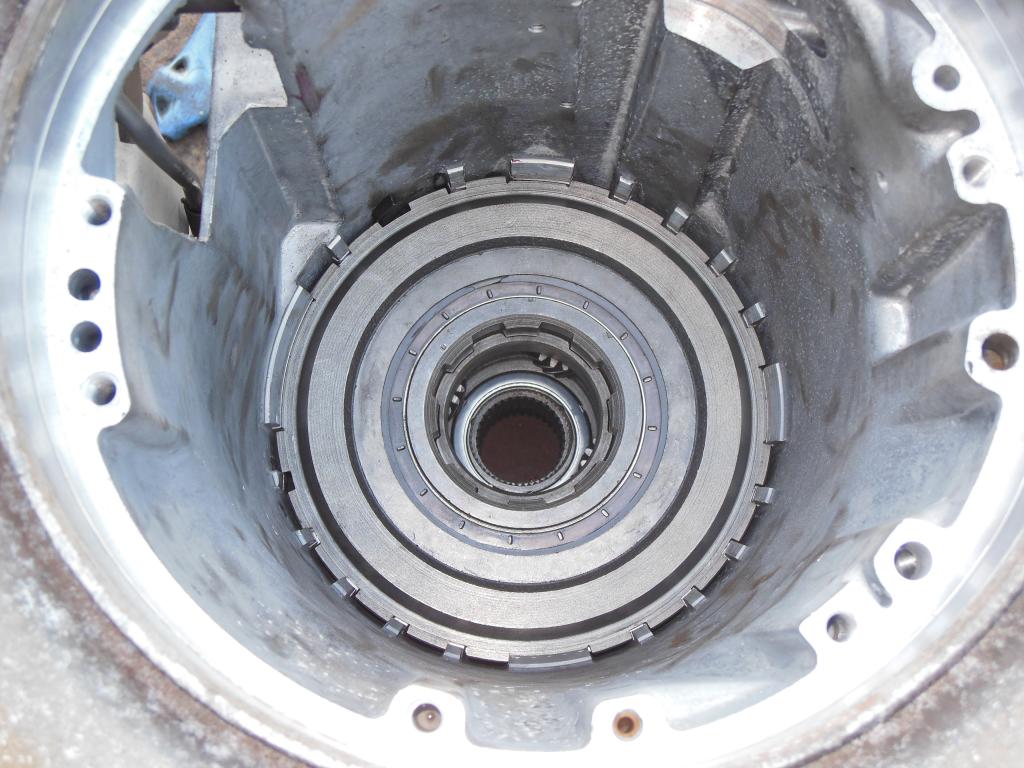
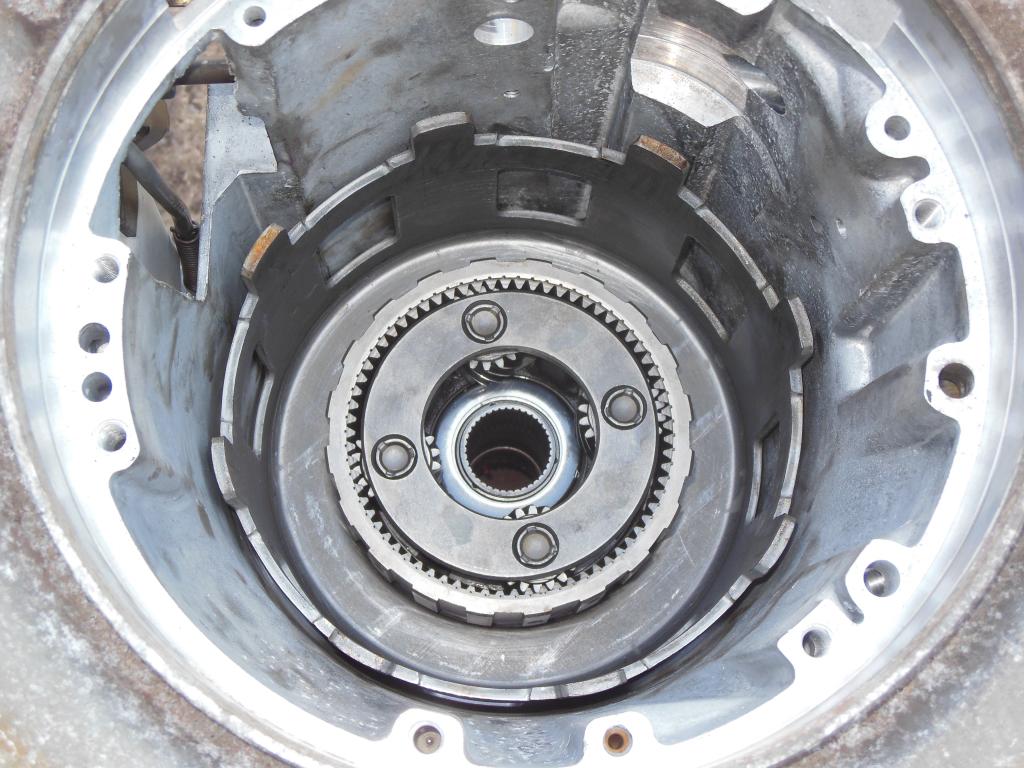
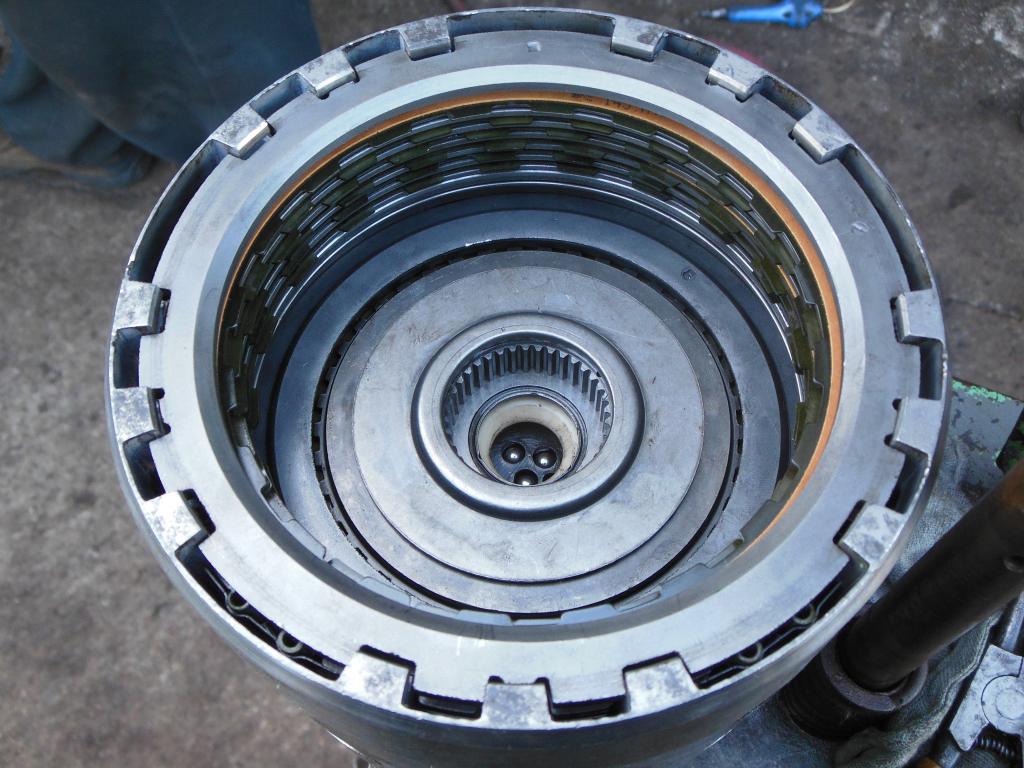
Tranny rebuild time!!!!
Pulled the trans apart on Saturday and gave it the once over. Seems to look pretty clean inside with no excessive signs of wear.
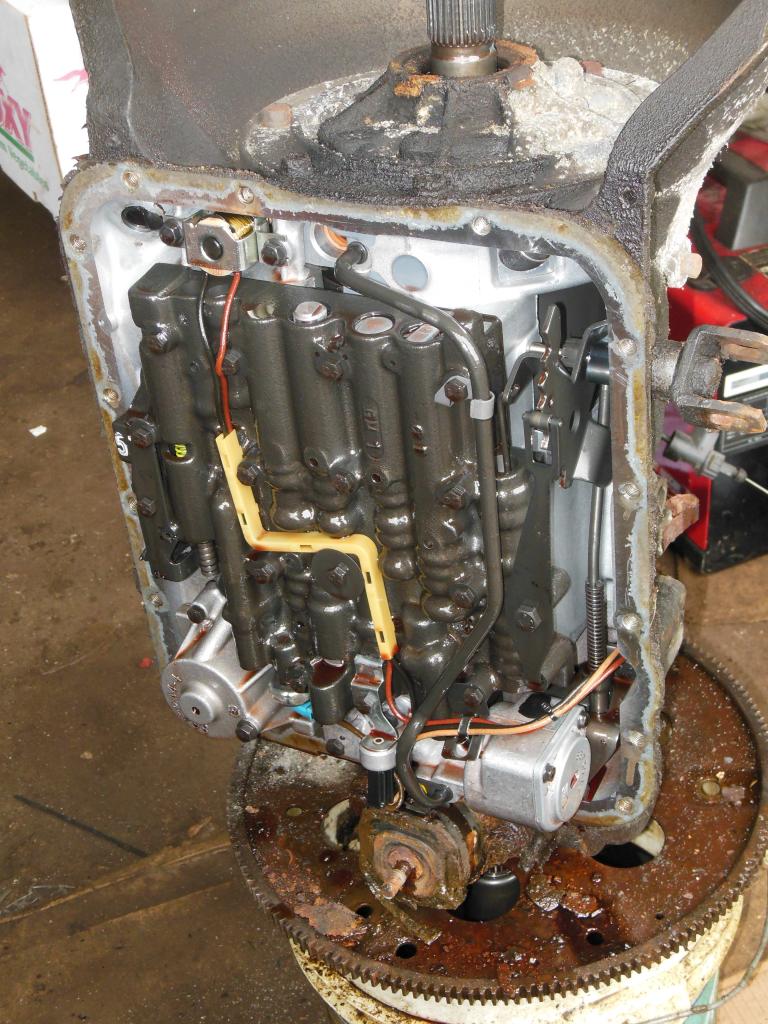
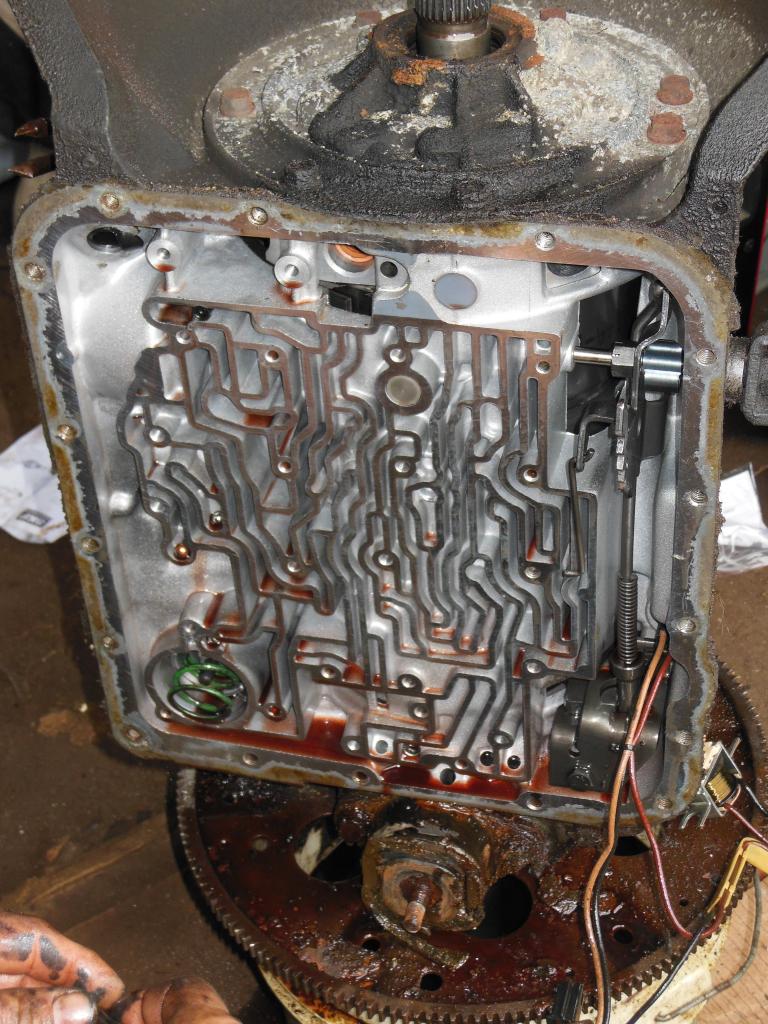
All the old parts will be put the "hot tank" for a good clean with all new internals going in next week.
Pics of the servos and "The Beast"
Pulled the trans apart on Saturday and gave it the once over. Seems to look pretty clean inside with no excessive signs of wear.


All the old parts will be put the "hot tank" for a good clean with all new internals going in next week.
Pics of the servos and "The Beast"


 06-09-2014, 12:56 PM
#187
Supreme Member
Re: 1989 Camaro - "The Project" Begins...
What's your choice of "shift kit".
This was suggested by Dana at Pro Built Automatics and it's served me well.
https://www.700r4l60e.com/store/prod...&cat=65&page=1
I had a lot of the parts already (as I see you have) so I opted for the TransGo 700-2&3 kit. I also picked up a new seperator plate.
I found one of the biggest problems the 700R4 crowd experiences is the sloppy 2-3 shift at WOT. This kit addresses that with a choice that has to be made during installation. I've given up some of the smoothness of the 2-3 shift when cruising (it's a little clunky) but at WOT, it's instantaneous.
 06-15-2014, 06:24 PM
#192
Supreme Member
Thread Starter
iTrader: (6)
Join Date: Oct 2006
Location: West of Toronto
Posts: 3,041
Likes: 0
Received 6 Likes
on
6 Posts
Car: 89 IROC
Engine: 305 TPI / ZZ4 cam
Transmission: Stage 2 700R4, LS1 driveshaft
Axle/Gears: Strange 3.42 w/ Auburn
Re: 1989 Camaro - "The Project" Begins...
Had a little setback with the trans rebuild.
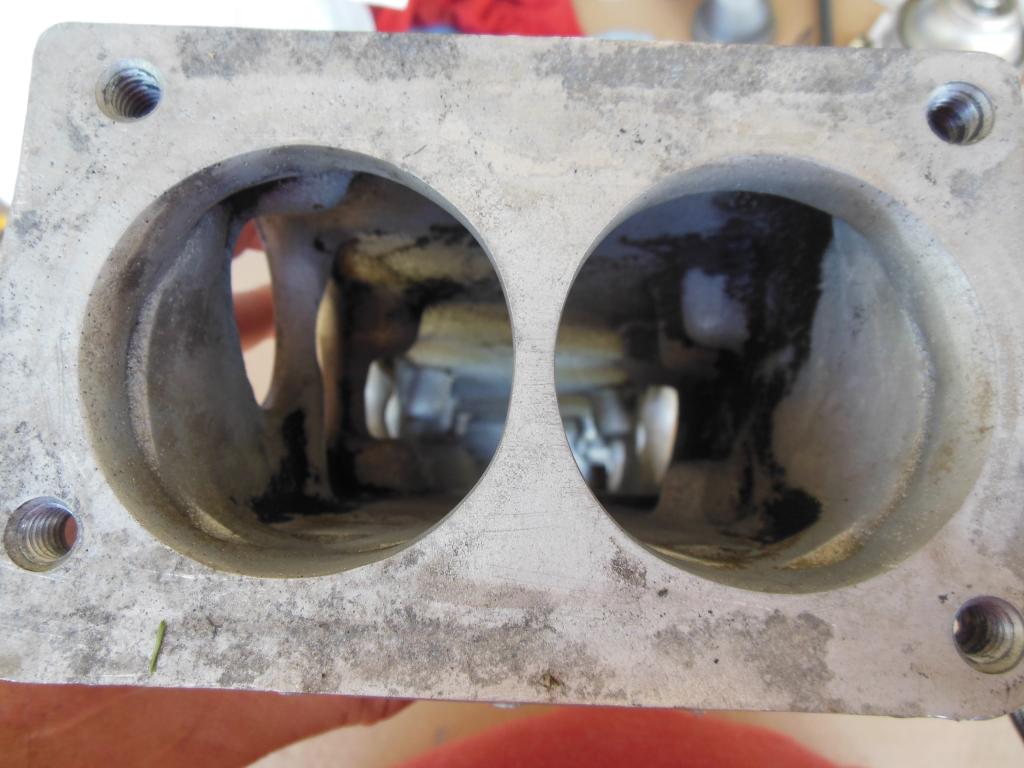
Decided to clean and paint the throttle body. Used a half can of Throttle Body Cleaner and some q-tips to get into the corners. Now its nice and clean.
Also, added a new IROC Z plate I picked up from ebay a while back. Overall, pretty happy with the results. Used VHT Chassis paint in satin black.
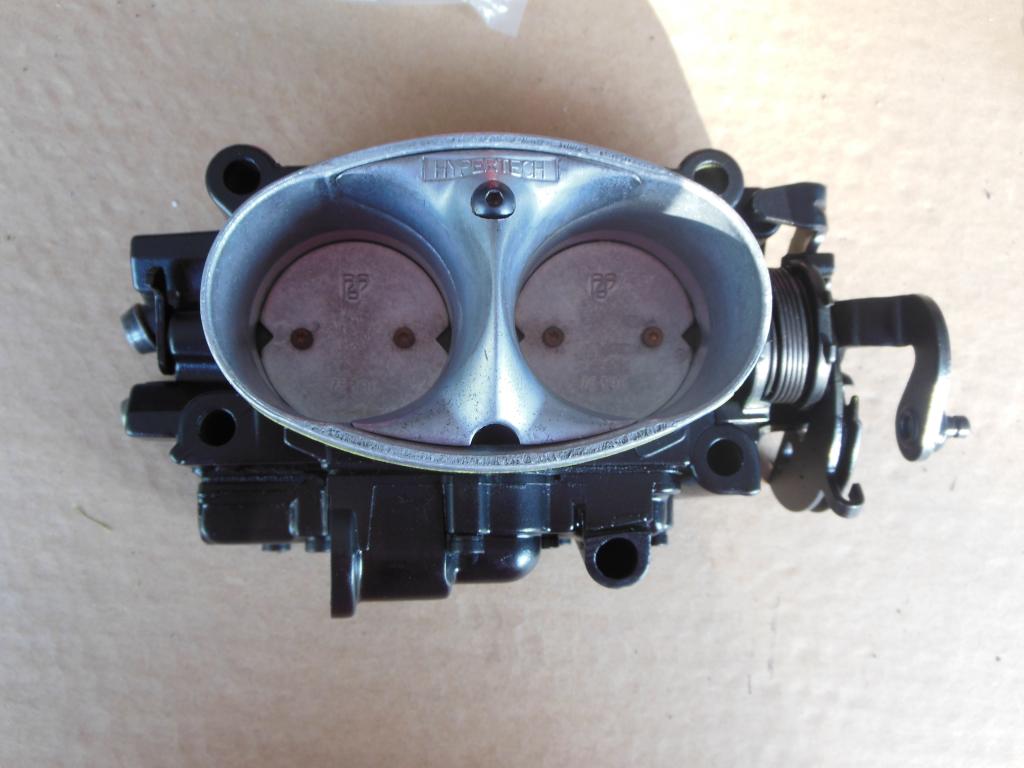
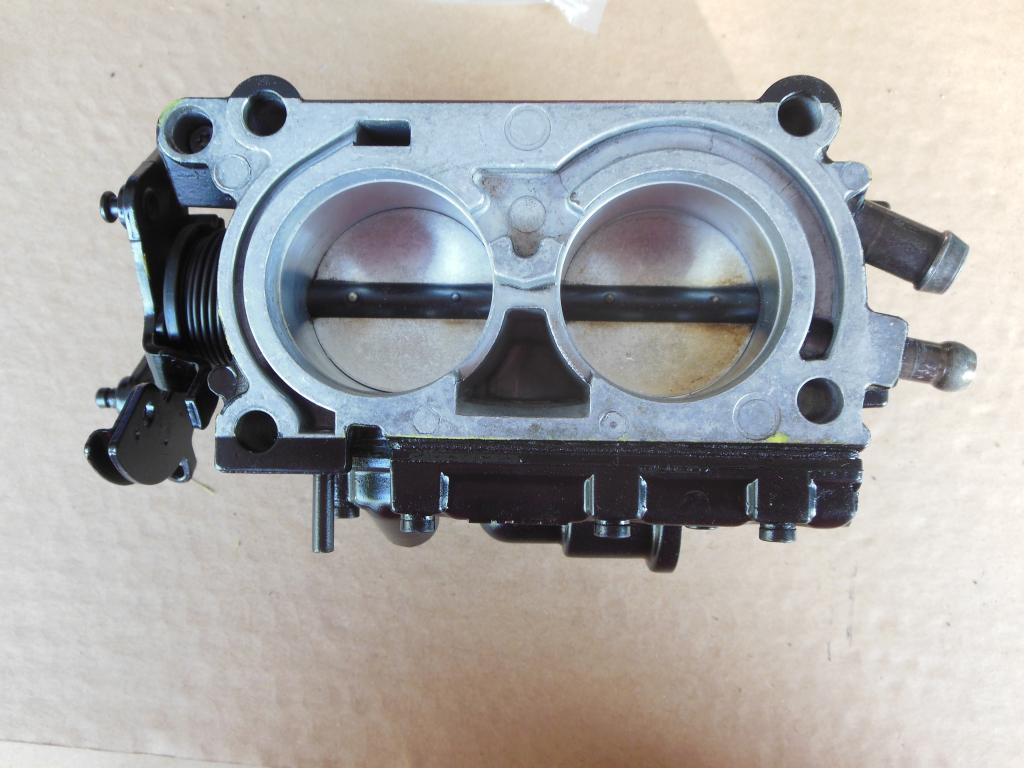
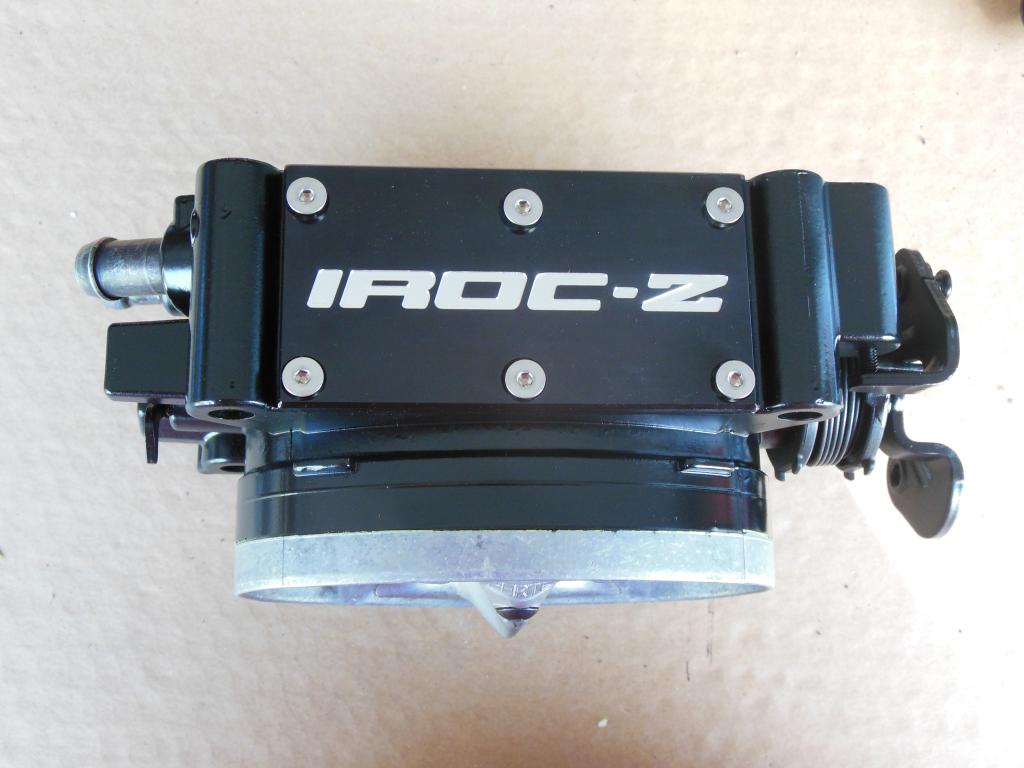
Decided to clean and paint the throttle body. Used a half can of Throttle Body Cleaner and some q-tips to get into the corners. Now its nice and clean.
Also, added a new IROC Z plate I picked up from ebay a while back. Overall, pretty happy with the results. Used VHT Chassis paint in satin black.


 06-21-2014, 09:43 PM
#193
Supreme Member
Thread Starter
iTrader: (6)
Join Date: Oct 2006
Location: West of Toronto
Posts: 3,041
Likes: 0
Received 6 Likes
on
6 Posts
Car: 89 IROC
Engine: 305 TPI / ZZ4 cam
Transmission: Stage 2 700R4, LS1 driveshaft
Axle/Gears: Strange 3.42 w/ Auburn
Re: 1989 Camaro - "The Project" Begins...
Started the trans rebuild today. Put all the parts in the hot tank first to get them nice and clean beofre allpying lots of lube to the metal. Used a TransGo rebuild kit.
BEAST installed
Clutch Plates Done...finally
DONE
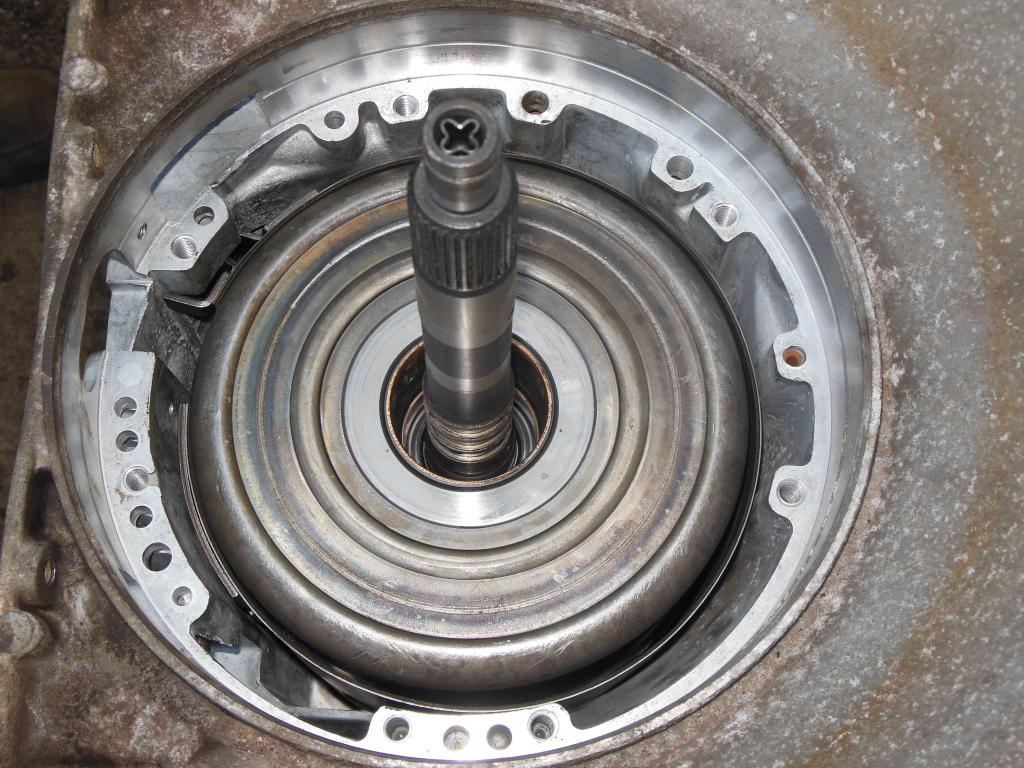
Will finish off next week with new shift kit, servos and stall. Also have a TCI alum. trans pan going on.


BEAST installed

Clutch Plates Done...finally

DONE

Will finish off next week with new shift kit, servos and stall. Also have a TCI alum. trans pan going on.
06-22-2014, 12:28 AM
#194
Supreme Member
Re: 1989 Camaro - "The Project" Begins...
What are you using for a converter?
06-22-2014, 08:47 AM
#195
Member

Join Date: Mar 2013
Location: gladstone
Posts: 325
Likes: 0
Received 0 Likes
on
0 Posts
Car: 72 nova/ 90 camaro rs,04 suburban
Engine: blown 327/ 355/306/355/5.3
Transmission: muncie 4 speed/T5/powerglide,4l80e
Axle/Gears: 342/411/456/ moser axles
Re: 1989 Camaro - "The Project" Begins...
its looking good man! truly like builds like this
06-22-2014, 09:47 AM
#196
06-22-2014, 11:21 AM
#197
Supreme Member
Re: 1989 Camaro - "The Project" Begins...
I've got a NIB TCI Breakaway converter that you may be interested in.
Smokin' deal!
http://www.tciauto.com/tc/breakawayr...e-lock-uphtml/
Smokin' deal!
http://www.tciauto.com/tc/breakawayr...e-lock-uphtml/
06-23-2014, 07:48 PM
#198
Supreme Member
Thread Starter
iTrader: (6)
Join Date: Oct 2006
Location: West of Toronto
Posts: 3,041
Likes: 0
Received 6 Likes
on
6 Posts
Car: 89 IROC
Engine: 305 TPI / ZZ4 cam
Transmission: Stage 2 700R4, LS1 driveshaft
Axle/Gears: Strange 3.42 w/ Auburn
Re: 1989 Camaro - "The Project" Begins...
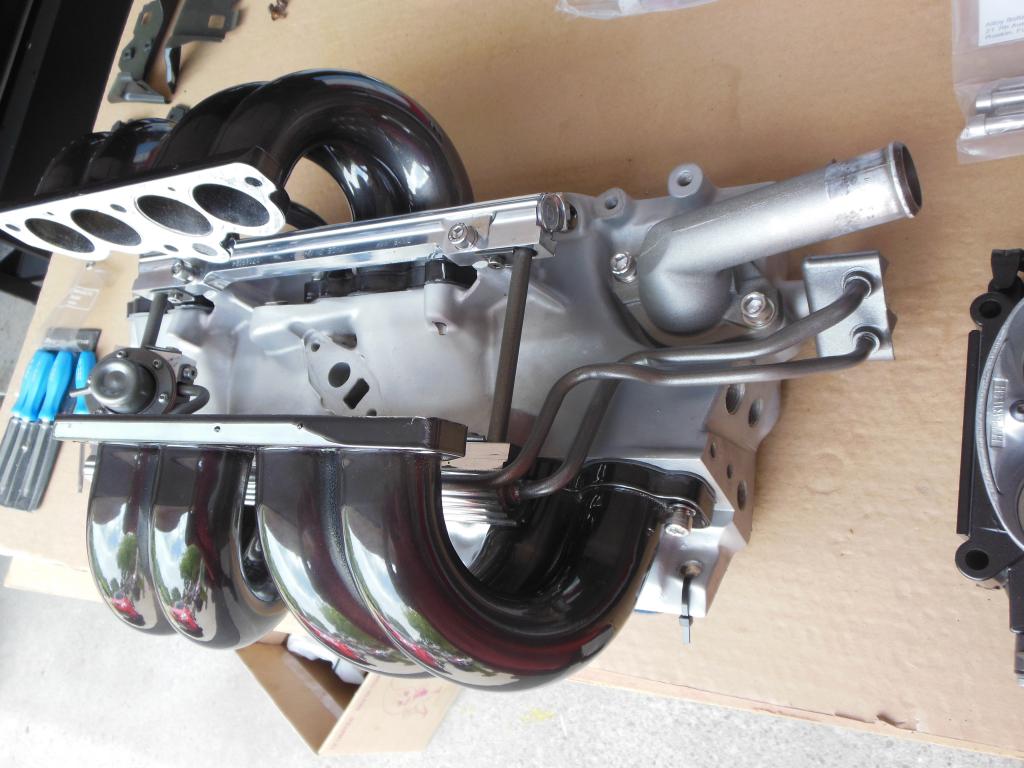
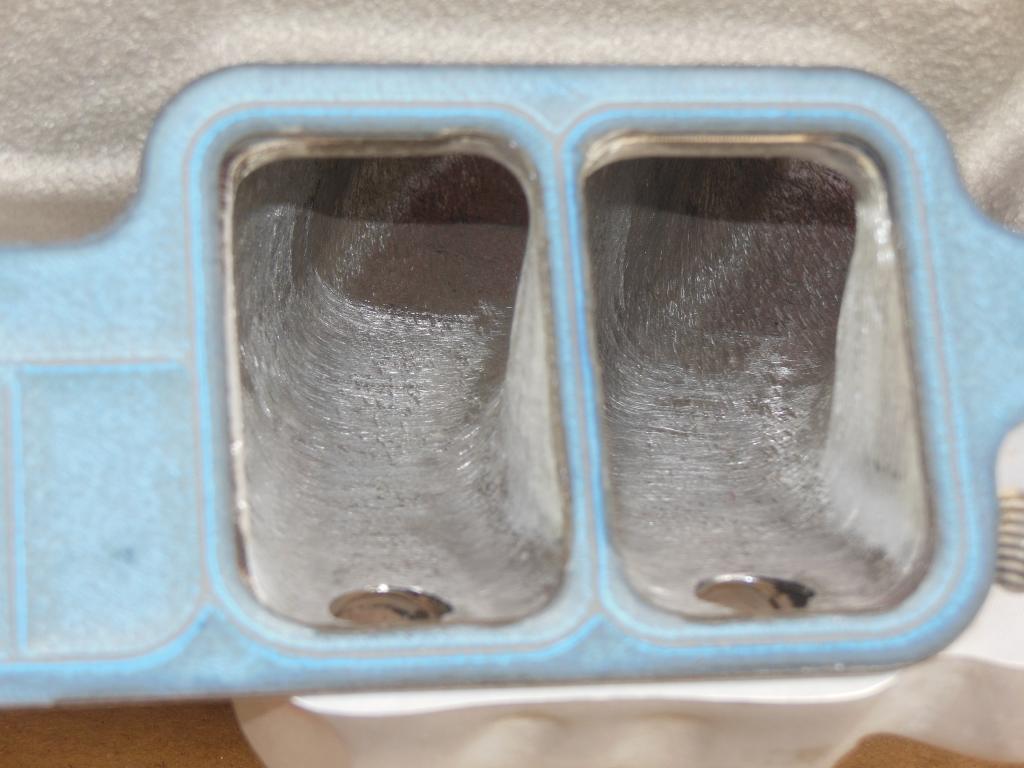
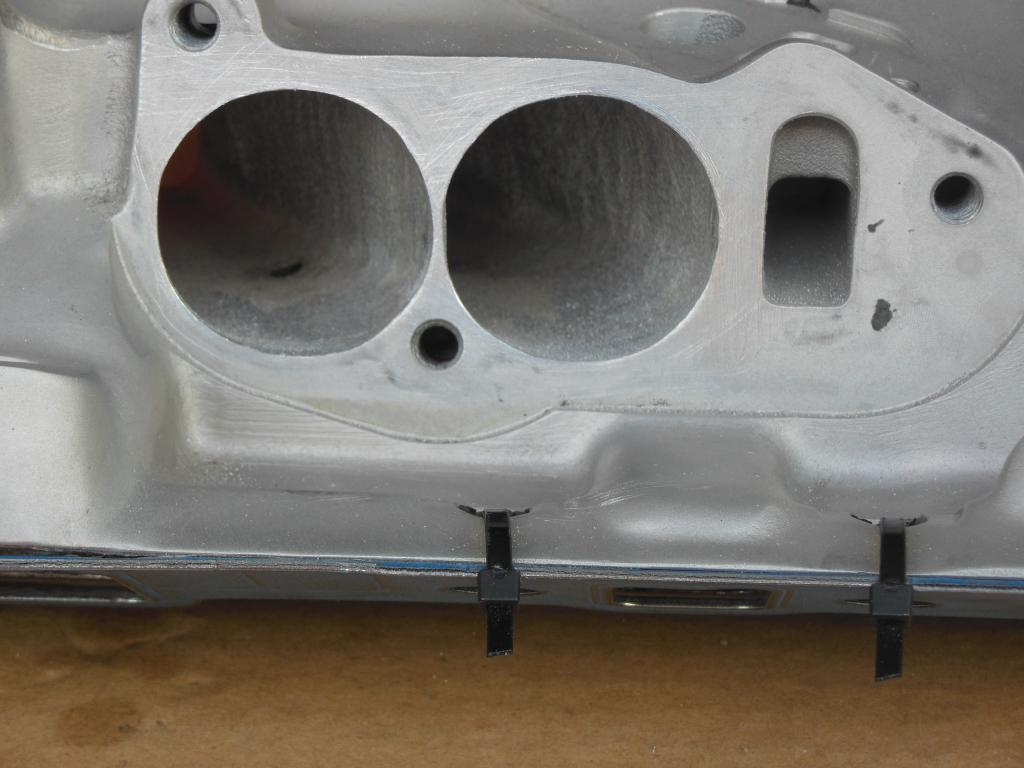
Time to port match the plenum to the TPIS runners.
Also opened the throttle body area to 58mm for later....actually got bored and just wanted to use my dremmel.
Now everything is opened up.

Restrictor area gone!!
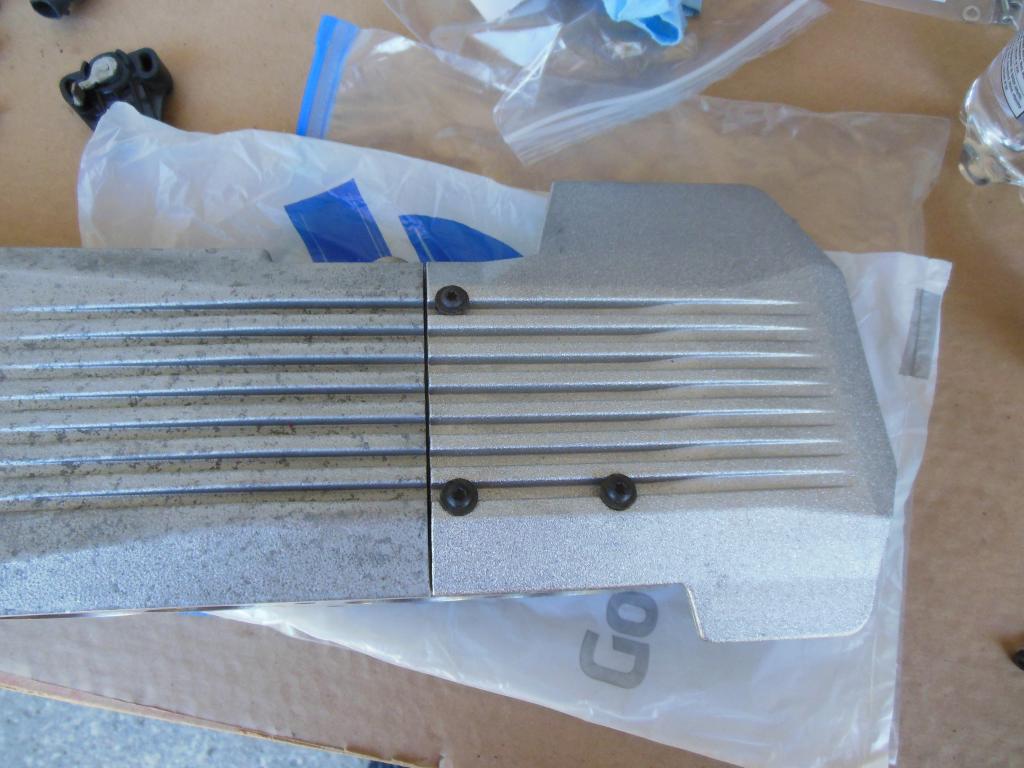
New metal dist. cover plate
Also opened the throttle body area to 58mm for later....actually got bored and just wanted to use my dremmel.
Now everything is opened up.

Restrictor area gone!!


New metal dist. cover plate

Last edited by The Project; 06-23-2014 at 07:51 PM.
06-29-2014, 03:06 PM
#199
Supreme Member
Thread Starter
iTrader: (6)
Join Date: Oct 2006
Location: West of Toronto
Posts: 3,041
Likes: 0
Received 6 Likes
on
6 Posts
Car: 89 IROC
Engine: 305 TPI / ZZ4 cam
Transmission: Stage 2 700R4, LS1 driveshaft
Axle/Gears: Strange 3.42 w/ Auburn
Re: 1989 Camaro - "The Project" Begins...
Cleaning the rest of the tranny parts.
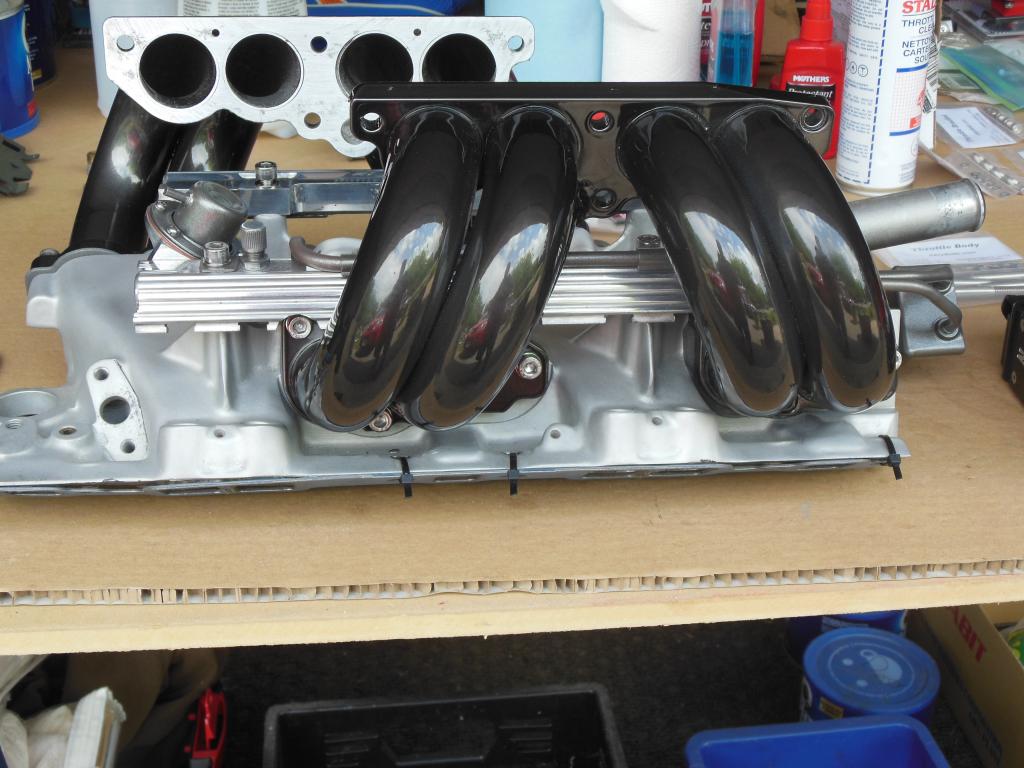
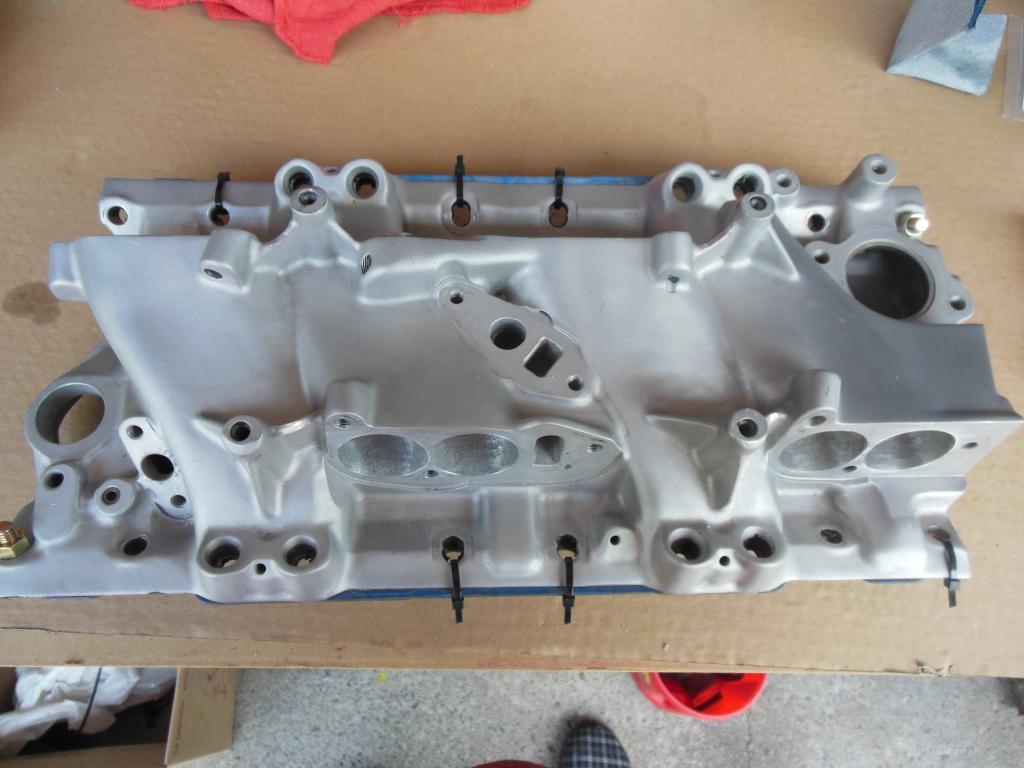
Decide to gasket match and smooth out the runners on my new Accel base. TPIS gaskets finally arrived...just in time.
New Accel manifold...VERY hard to fine.
Dremmel came in handy
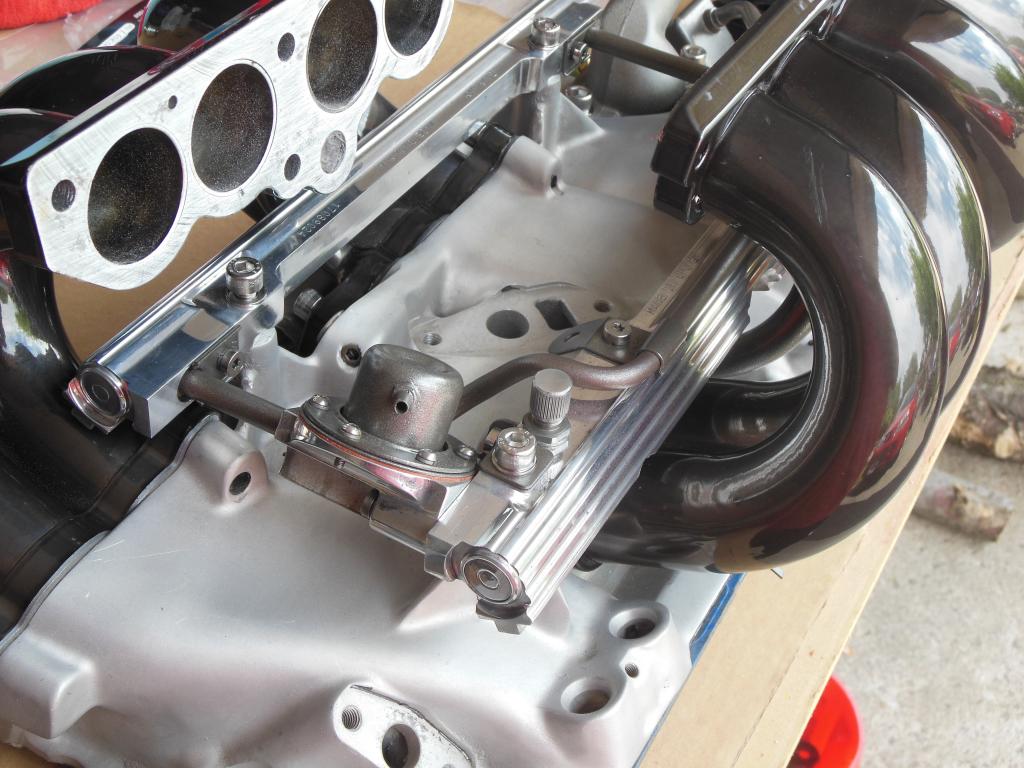
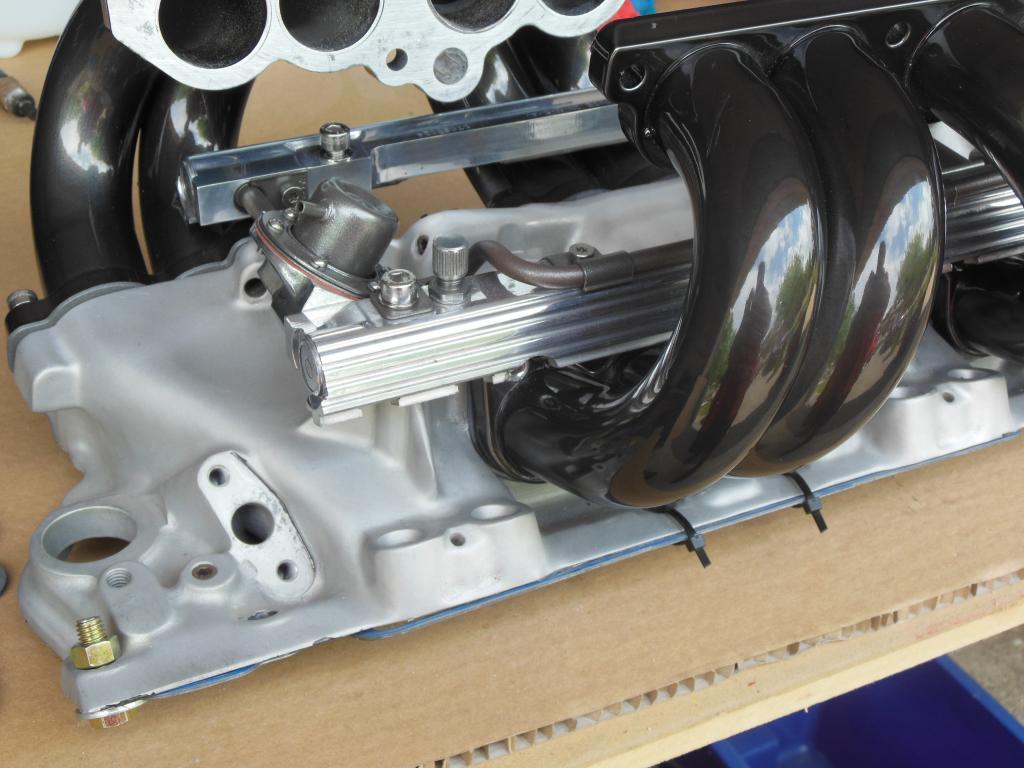
Plenum is out getting a satin finish. Little mock up to see what it will look like. Glad I went with SS allen bolts.
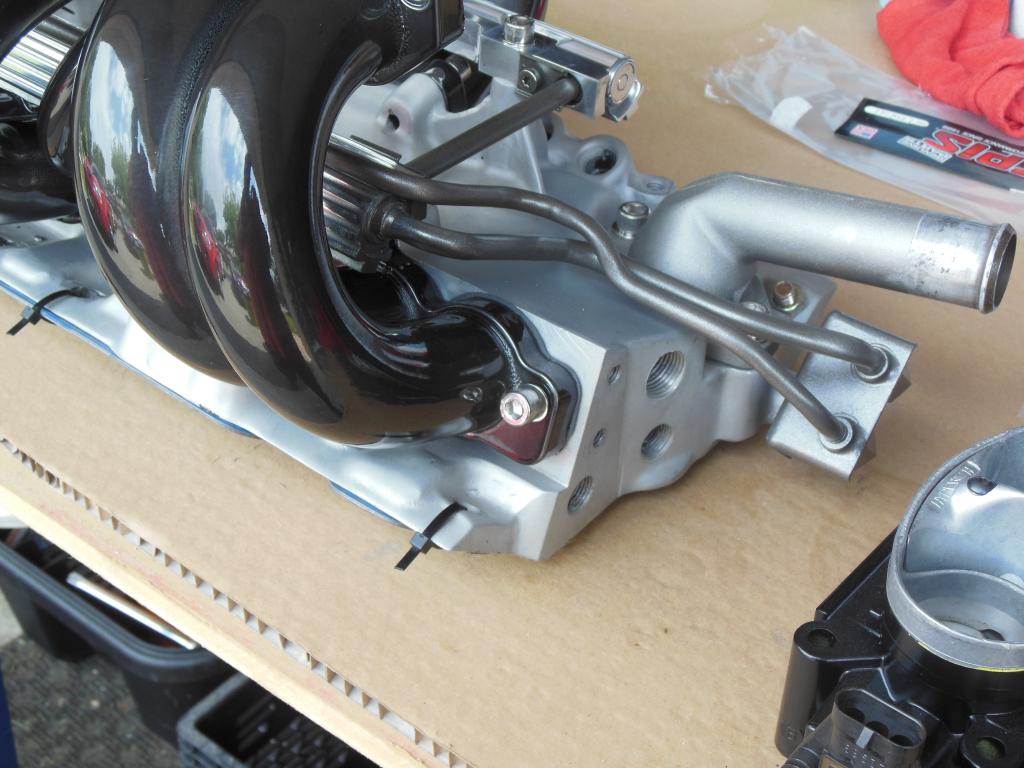
Decide to gasket match and smooth out the runners on my new Accel base. TPIS gaskets finally arrived...just in time.
New Accel manifold...VERY hard to fine.

Dremmel came in handy


Plenum is out getting a satin finish. Little mock up to see what it will look like. Glad I went with SS allen bolts.


Last edited by The Project; 06-29-2014 at 03:09 PM.
06-30-2014, 08:44 AM
#200
Supreme Member
Thread Starter
iTrader: (6)
Join Date: Oct 2006
Location: West of Toronto
Posts: 3,041
Likes: 0
Received 6 Likes
on
6 Posts
Car: 89 IROC
Engine: 305 TPI / ZZ4 cam
Transmission: Stage 2 700R4, LS1 driveshaft
Axle/Gears: Strange 3.42 w/ Auburn
Re: 1989 Camaro - "The Project" Begins...
Few more pics of the set up.