When you click on links to various merchants on this site and make a purchase, this can result in this site earning a commission. Affiliate programs and affiliations include, but are not limited to, the eBay Partner Network.
So last summer I went on the hunt for a project car. I found myself an 85 base Camaro that the PO had begun converting into an IROC. He'd already swapped in a 9 bolt rear end, replaced the V6 with a 305 that he told me had a 327 crank in it, and begun changing the interior over to black from the truly horrendous red that it came from the factory.
So i took her home and began tearing her apart. And the more work I did the more I realized that:
A- The PO is an idiot, with the mechanical skill of a highly caffeinated and particularly deranged monkey. Pretty sure that this is universal. All cars were previously owned by idiots.
B- This will not be done quickly, and it will not be cheap.
On the positive side, however, there is almost no rot on the car, and very little in the way of rust. This is a plus because I loathe body work with the fury of a thousand suns. And now that spring has finally found its way to Massachusetts, I can get rid of some of that pesky money I had laying around in my bank accounts...
Gotta love the 'custom' hood he put on this thing. This is why maniacs should never be given a plasma cutter...
One black door...
And one Red. It suffers from a serious case of ugly right now...
Wiring Nightmare
I decided the easiest way to fix his wiring insanity was to rip the entire harness out of the car and replace it with a Painless kit. Also replaced the 'custom' hood with a stock IROC one he included in the sale.
All the wiring in this shot is gone now, but I've at least gotten a few things accomplished...
I have a whole new front end sitting in boxes in my garage right now, but I can't tear the car apart because a giant tree in my back yard needs to be cut down, and they will have to be able to move the camaro out of the way of their crane to do so. So now I'm twiddling my thumbs for a few weeks until that happens.
UMI K-member and LCA's, New springs and struts. The rest of the front end is in other boxes
Anyway, I figured I've been lurking on here for a year or so, I should actually say hello and show off the car.
Badass keep us updated and in full detail it'll help people my car needs a makeover as well new paint, new rims, get the rust off, get rid of factory exhaust replace with thunder cat, wipeout the ugly grey interior, and cowl induction hood. Not much to do for me I hope all goes well with you and your sweet car
Normally, I'd agree with you 84 1LE, but some idiot let a perfectionist get a hold of a project car, so everything causes the snowball effect. Front end comes off, now the engine and tranny need to come out so the bay can be painted, the underside of the car cleaned and bedlined, etc... I know myself well enough to know that once it's on stands and ripped apart it won't be moving anytime soon. Plus I have no overhead cover at all, so between rain and working in the broiling sun once summer finds it's way here, I don't get as much time to work on it as I'd like.
I'm thinking of moving it next to my garage and putting up a tarp for some cover, that will keep me out of the sun, at least. My concern is that parking it over grass for an extended period would begin to cause rusting issues, and next to my garage is rather moist to being with
Yeah, I wouldn't wanna take it apart twice either, especially when it can be done in one shot.All the down time though would also bug me.Maybe sweet talk the tree trimmers into letting you cut to the front of the line.
Went to go do some work on the car this evening and found a couple inches of standing water in the rear seat floor pan. Looks like the T-tops are pissing through the corners of the brand new seals I put on last year. Which is weird because they didn't leak when I installed them... Oh well. They had to come back out for paint anyway. Now I've got a sexy trash bag duct taped over the roof and rear hatch. Very ghetto. I'm going to try adjusting the T-top pin receivers tomorrow, but pretty sure I need to reseal. Maybe I should put one of those fancy stainless T-top bars in at the same time.
And summer has reared it's ugly head. Say hello to broiling direct sunlight and bugs continually dive-bombing your eyes.
I went out early this morning to yank the drivetrain. As long as the car can steer and stop, the tree guys can move it. Though my plan is to have it out of the way before they get around to cutting this thing down anyway. Especially after today, I just can't work on this thing while the sun is cooking me.
So I'm going to build myself a carport/tent/thing off the side of my garage. Put a tarp down, then put another up on poles to keep the sun off, hopefully it doesn't rust the car away.
But anyway, on to the pictures:
This this is absolutely filthy. I was amazed there was any oil in the pan, I thought it was all on the block and the car!
Dirty, dirty engine bay. I'll strip the last of the stuff out once I move it, then out comes the pressure washer...
Fenders were the first thing to come off this morning. They are mangled underneath where it looks like someone jacked up the car by the pinch weld. Rockers are messed up too.
Battery tray is rusted pretty badly. Not sure what to do with that yet. Depending on how strong the metal is I might be able to repair it with some work. Otherwise it's improvising time...
Yes, that is a piece of the tree in my back yard being used as cribbing. Damn thing crushed my neighbor's garage, it might as well do something useful...
Ugly ugly transmission. There was no electrical hooked up to this at all, so I'm not sure what this clown was doing when he installed it. Though he did bother to put a B&M pan on it, because clearly that will add 10 horsepower...
All in all, a fairly productive day. Took me maybe 5 hours or so to pull the engine and trans. Not my fastest work, but considering I'm working with hand tools that are mostly leftovers from my work toolset, I'm not complaining too much. I could do more towards stripping the engine bay today, but it's hot and my ghostly Irish *** has had all the sun I can stand for today.
You mean the door hinges? He probably left that bolt wherever he put his common sense, so it will never be found. The more I tear this thing apart the more hackery I find. Part of me is afraid to keep going, but the perfectionist demands that this thing be as good as I can make it.
So it's been a bit since I've had time to sit here and update the thread with the little bits and pieces I've had time to get to on the car. I haven't had as much time as I'd like, but I've been getting a decent amount of rebuild work done on components, if not on the car itself. On the car itself I ripped a few more things out of the engine bay and started dropping the front clip, but there's still a few more things to go before I have it out.
On the other hand, one of the things I yanked out was this unsightly piece of junk.
I think it was leaking from every seal it had, and any identification on the thing is long gone, but it turns out that it's a quick ratio box, about 2.5 turns from lock to lock. Since that was what I wanted in the car anyway, I dropped $25 at Rock auto and bought a rebuild kit for it. Gates PN 350430, if anyone needs it. I spent a day at work pretty much doing my own thing whenever my boss wasn't looking and now it's sitting in my rebuild shop waiting for paint.
In other news, I took the motor and tranny to my shop, because that's where all my good tools and of course all the shop's equipment is. I started trying to get some info on them, and in the process of getting the casting numbers, found out that the PO is an even bigger moron than I realized.
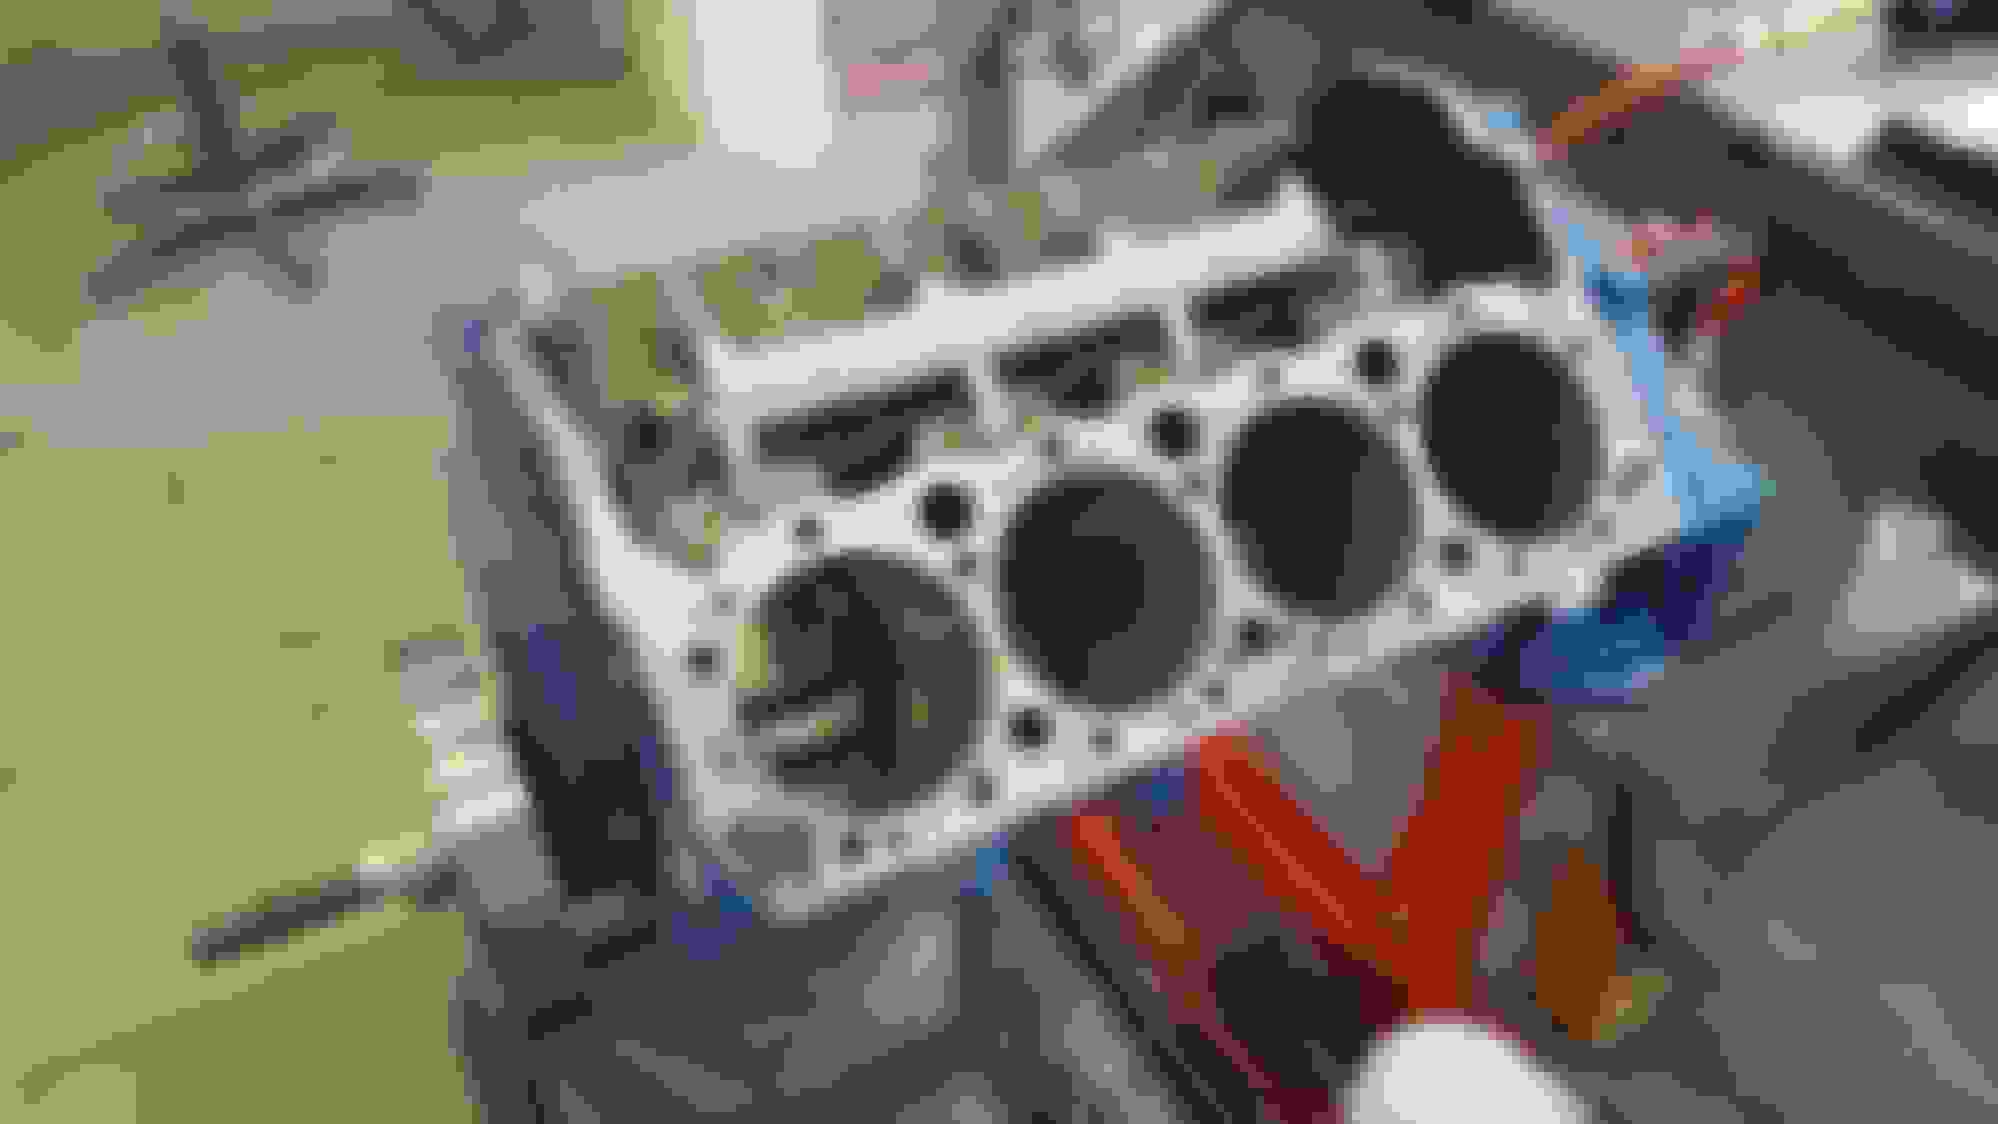
It's crusty and gross in that shot, but if you squint, you can see that it says 5.7L. He told me that it was a 305. Of course you can't see any of this when it's in the car, really. Especially when there's a monster distributor on it, too. He also told me that he built it himself, which after tearing it down to a bare block today, I'm really glad I did, since about half the bearings had some serious scoring on them. Good thing I'm not reusing that crank.
It looks crappy and rusty here because I'd just finished taking the pressure washer to it. I think I got about 5 lbs of the block out of the water jacket drains. Kept having to poke them with a screwdriver to get all the gunk out. I left the freeze plugs in and put the water pump back on to fill the jackets with vinegar. Hopefully it cleans them up somewhat. Otherwise I'll be out $3 for a gallon of vinegar. Oh well.
While they are soaking, I took a wire wheel to the outside of the block, trying to knock off anything loose that the pressure washer didn't get. Once that was done, I went over the whole block with Rustoleum Rust Reformer. It does the rust conversion and inhibition thing while I continue getting the rest of it ready for paint. Kinda hard to see, but here it is after it flashed off.
Rust Reformer says to let it sit for four hours before you try to paint it, so I moved on to other things. The PO told me that he'd put an upgraded cam into the motor when he built it, so I went looking for part numbers.
It's kind of hard to read with all the rag fibers stuck in the engraving. (My shop buys the worst, cheapest rags I've ever used) but it says 31402000. When you punch that into Google, you find out that it's a Trick Flow TrackMax cam. I copied the specs form Summit:
Duration at 050 inch Lift: 214 int./220 exh.
Valve Lift with Factory Rocker Arm Ratio: 0.452 int./0.465 exh.
Lobe Separation (degrees): 110
Camshaft Manufacturers Description: Good idle, strong low-end power, 2,400-5,900 rpm powerband. Small tube headers and free-flowing induction recommended. Compression: 9:1 minimum.
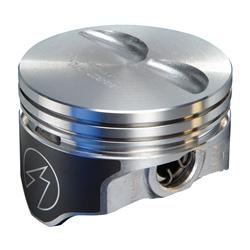
Also found that when he rebuilt the motor he replaced all 8 pistons with Sealed Power castings.
Good news is that the block is a 1991 14093638 casting. 4 bolt mains and roller cam. 1 piece rear main (once I buy a new housing to replace the 2 piece seal adapter that the PO put in there to install his 327 crank)
I just had a nice chat with Jegs, Summit, and Amazon, and I have an Eagle 383 stroker crank coming with all new bearings, rings, freeze plugs, timing set, balancer, oil pump and pickup, new seal housing, lower end gaskets, and ARP bolts to hold it all together.
So it's been a bit, but there is progress on both the car and the engine front, though not as much as I'd like on either, truth be told. I had an ingenious tarp setup thing going on to protect me from the sun, keep the car in the shade because using chemicals/paint on hot metal or touching it just sucks. Anyone who has left a ratchet on the cowl of their car in direct July sun knows exactly what that's like.
Unfortunately, nature refused to cooperate with my makeshift tent and pretty much ripped the grommets right out of the tarps every night when the wind blew. So now we're back to working in the sun. Joy.
But I've started cleaning up the nose of the car. I'm trying to work in sections because that makes it easier to handle than trying to do it all in one go. Right now I'm trying to tackle everything from the radiator support to the cowl.
The wheel wells were pretty bad, covered in a combination of that glorious factory tarry undercoating and 30 years of dirt. The seam sealer had all cracked, and was holding water, so I kept finding rust spots under the sealant.
I scraped it all out and then wire wheeled the undercoating and a good chunk of the paint off. I'm not terribly worried about stellar looks in the wheel wells, as they will be bed-lined with the rest of the bottom of the chassis. A coat of primer and then some fresh seam sealant.
I was trying to be a bit more conservative with it than GM was when they built the car, especially given it's price (though it looks, handles, and smells EXACTLY like high-urea RTV...) but I don't know that I was actually that successful in that regard.
I still have the corners of the engine bay to do, but I did scrape down the cowl and scuff it up for repainting.
After smearing some new sealant along the lip of the cowl I gave it a shot of primer to keep the worst of the rust off and turned my attention to the battery tray. The battery tray is probably the single worst spot I've found so far on this car, and the only thing I would call truly rotten, as opposed to just a bit rusty.
I wire wheeled it down, figuring that it would just come apart on me and I'd end up putting in a patch, but the metal is actually still surprisingly sturdy. There are a few areas that are pretty much gone, but the bulk of the tray is still intact. It looks like crap, of course, but then it's had acid leaked all over it for three decades.
I smeared some Rust Dissolver on it (which seems to be diluted phosphoric acid, pretty much) and it did the lovely turning the oxide into phosphate trick that it does. I let it sit for an hour or two to make sure it worked all the way in. (Instructions say about 30 min) and then since they said heavy deposits may require a second application I did it again. Then I rinsed it down, let it dry and gave it some primer. It isn't pretty, but it will have a battery on top of it anyway. I could cut it out and put in a patch, or spend hours with body filler to smooth it back out, but frankly I'd rather spend the time on areas that you'll actually see.
So that's more or less caught up on the body side of things, now we'll move back to the shop where the engine is.
There's been some painting going on
And just to make people lose their minds, I painted it Ford Blue. Because I hate orange and blue works better with the color scheme I have planned for the car. I used Eastwood Ceramic engine paint, and it came out pretty good. I'll do some touchups once everything is built, since I've already chipped it here and there installing freeze plugs and such, but overall it seems to be very durable and of course shiny. I painted the steering gear with it as well because the smallest amount you can buy is a quart, so I might as well use it. And I'm sure it's more durable than spray paint.
Once that was done I put the freeze plugs and such back in, put in the bearings and the crank and then remembered that I had to clearance the block for the longer stroke. Because I'm a genius like that and forget basic stuff while I'm busy worrying about the more complex crap.
So I bolted up a piston and did the clearancing with my die grinder and a carbide burr. I ground out about 0.050 everywhere it hit, so there should be no expansion issues, and it doesn't look like I cut into the water jackets, so hopefully everything is good.
I cleaned the crap out of everything again to get all the metal out, then put the crank and cam back in. Timing cover on, rear main on, fuel pump block plate on and lifters all in.
Shiny new 400 balancer and we're ready for pistons. Of course then physics reared it's ugly head again. When I was clearancing the block I figured I'd get my deck height and such at the same time. Unfortunately I'd forgotten another fairly basic fact. The crank I took out wasn't a 350 crank, it was a 327 crank. The pistons the PO put in there were designed to work with that. So now instead of stroking this by about 1/4" I was stroking it by almost 1/2". Yeah. My pistons came up about 1/4" above the deck. No bueno.
So summit has sent me a nice balanced set of pistons that should work properly, without coming up out of the cylinder or smacking the bob weights on the crank. Speed-Pro H860CP's if anyone is interested.
The math says they should be 0.025 down the cylinder at TDC, which is more than I'd like, but we can't have everything in life. My quench distance is screwed up unless I get a super thin headgasket set, but we'll jump off that bridge when we get there.
Just a quick update for now, I found myself a lovely crack in the front subframe behind the steering box.
Drilled it out, ground out a channel over the cracks...
Welded it up and ground it down. First use of my new welder, so it wasn't the prettiest thing I've ever stuck together, but at least it's back in one piece now.
Last thing for this post is that I finished stripping the engine bay and hit it up with a quick spray of epoxy paint to seal it up. This is after the first coat, I put on another to get complete coverage and fix the little spots of red peeking through here and there.
Yes I know the radiator support isn't fully painted. That's because it wasn't fully stripped yet, but working outside I was running into rust problems, so I wanted to get as much painted as I could before the problems got serious.
Yeah, it does look like a crack. I stared at it a good long while before I was confident it was a seam and not just an extraordinarily straight crack. Paint and primer should be here tomorrow so I can shoot the bay this weekend and start putting things back together. Engine build is getting more complicated due to a lack of thorough research on my part, but the whole lower end is together just waiting on my backordered head gaskets and rockers.
So it's been quite a while since I've posted an update on here. I've been busy with my son being born, but I have managed to sneak an hour or two in the garage here and there.
It seems I didn't take any pictures of it, since I'm pretty bad at remembering to do that, but I primed and painted the engine bay. Both were done using Eastwood products, the primer was urethane gray, and the black is single stage urethane Boulevard Black. It's hard to tell on here, but it didn't come out nice and glassy smooth, it's more like a wrinkle finish or a hammertone. Pretty much orange peel everywhere. I'm not entirely sure why, I used the same gun to paint the engine and oil pans, and they came out nice and smooth. I'm assuming it's the difference between painting outside and inside. Maybe the paint needs to be thinned a bit more.
I'm not unhappy with it, it's just kind of textured. But I got good coverage and adhesion, so we're going to roll with it. As you can see, I've also started installing parts again. There's a UMI K-member and A-arms, the giant coil is the Painless engine harness, and of course the steering box that I rebuilt.
I also bedlined both of the wheel wells and put in new KYB AGX struts and AC Delco mounts, plus some refinishing of the bracketry in the wheel wells.
I spent most of the day today making some progress on the engine. Last time I posted a pic of it it was still a short block. Rotating assemble with an oil pan, pretty much. I finally got my head gaskets and have been able to continue building it up. I ordered Cometic MLS head gaskets because they were recommended by Brodix, who makes the heads for Summit, but based on my own experience I wouldn't recommend them. You have to drill holes in the gaskets for appropriate coolant flow, and they didn't properly fit the head dowels on the decks without modification. for $75 a piece they could at least make them correct out of the box.
The heads are Summit 162111's with Comp Cams 1.5 roller rockers, and of course the fancy valve covers. MSD 8362 HEI distributor, and Summit Stage 3 226010 intake manifold. Summit 8.5mm wires and Moroso wire organizers.
I also tore the starter apart and cleaned it up and repainted it.
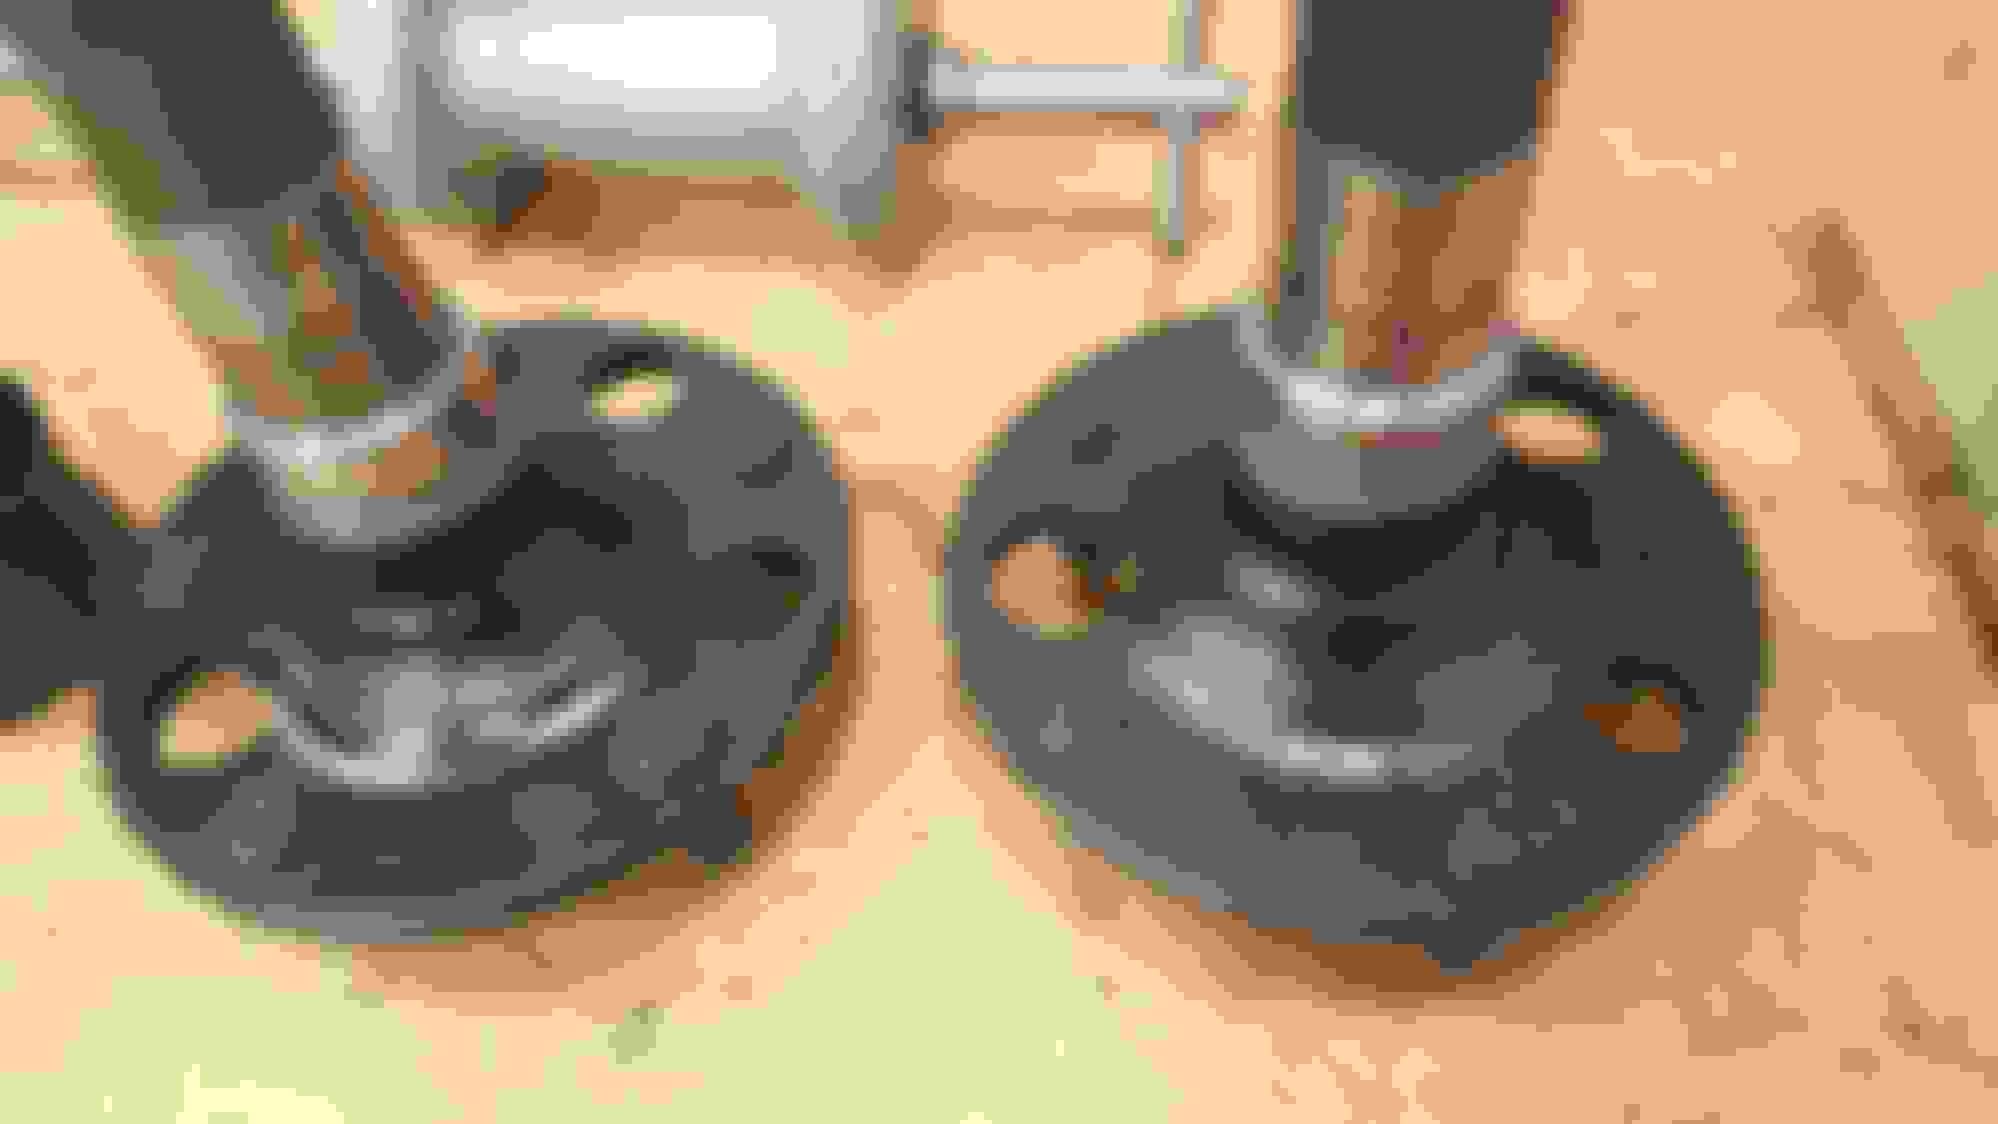
So I have a sizable update for today. I've gotten a good little chunk of things done since I put the last post up. Foremost among them, I got my new coil springs installed, which was probably in the top five worst things I've ever had to do. I know there's tons of threads on here with people suggesting ways to change them and moaning about how bad they suck, but holy hell that was awful.
Or rather I should say the first side was awful. The second side took like an hour, including having to go get another spring compressor after the threads on the forcing screw stripped on the first one. Cheap $35 Advance Auto piece of crap. Of course after I bought the new one the guy told me they were lifetime warranted. Jerk. I ended up only using half of it and compressing the spring against the bottom spring seat with a block of wood and a metal plate underneath to keep from damaging my powder coat as much as possible. Personally I think installing new springs without scratching something is pretty much a fantasy.
Before anyone says anything, Yes I'm aware that the tie rod goes under the knuckle, not over it. It isn't attached, it's just resting there to keep it out of my way while I was working on the other side.
In other news, I got the clamshells for the motor mounts cleaned up and repainted, and new poly bushings from Energy Suspension installed. Also the front steering linkage is all in now too, just have to bolt up the outer tie rod ends. Once I get a sway bar I can put that and the steering brace in and the front end will be pretty much done underneath.
I also got the replacement pedals and brake booster mounted. I am doing a manual conversion once the money for a t56 magically appears from the cash fairy. That's probably going to have to wait for next year, though. Also in this shot, I pulled off the doors and T tops and pulled the weatherstripping, the channels that hold the weatherstripping, and the T bar itself. I stripped it all down and shot it with the same Eastwood gray urethane primer and then topcoated it with black tractor and implement paint from my local hardware store. Which disgustingly enough looks better than the expensive urethane paint I bought from Eastwood to do the engine bay. $10 a quart gave some pretty good results...
At least until an unexpected rain shower came along and rained on my tacky paint. Now I get to sand it all down and try again because weathermen suck. Related to that, the T-Top Seal Channels and the T-bar itself had a foam-like sort of adhesive on the back of the channels and underneath the T-bar in the center. I've not seen anything like it in parts stores around me, so I'm curious: what have other people used to replace this when changing these parts out?
I've also just gotten coils of brake line and all the fittings I should need to replace all the lines on the car. I'm using the Nickel-Copper brake line from S.U.R. & R through Summit, and just reconditioned the existing master, proportioning valve, and booster. Stock calipers will go back on as well, once I give them a refinish job. I'd like to throw something better on, but building the engine sucked up most of my discretionary cash, so now we're making do and starting a list of things to upgrade later. I got a Powerstop pad and rotor package for the front, drilled and slotted rotors with ceramic/Carbon Fiber pads. Not that they will do a whole lot with giant clunky single piston calipers, but I figure it has to be some improvement over stock.
Other than that, there's been lots of stripping and painting of brackets and such, minor things being bolted up to the engine, and getting that ready to go back in now that I can actually roll the car back to the driveway to do that. Still a long road ahead, but hopefully I'll actually get to drive it next year.
-Donny
Last edited by RavingMadly; 08-07-2016 at 08:02 PM.
Reason: Wasn't done writing...
Now that I'm done playing army out in the woods, I've finally gotten the chance to put a few hours into the car again. Unfortunately, it's been an uphill battle ever since I got back. The car is fighting me at every turn, and I'm having to accept compromises and less than perfect work so that I can get it buttoned up before winter. I'm not happy about it, but I'm less happy about it sitting out in the yard getting snowed on all winter. Yes it's only September, but I'd like to have it back in the garage protected by the middle of November.
First major thing I got done after coming back was to get the weatherstrips for the T-tops put back in, even though I wasn't thrilled with the paint I laid down before I left. Most of it won't be seen, but that's no excuse for shoddy work. I've more or less come to the conclusion that I'm never going to get an acceptable paint job, so I'm going to give that up and I'll spend the money to have it professionally done at some point.
Laid down a bunch of 3M Window Weld adhesive to seal the T-bar back down. Last thing I want is water getting in and ruining the interior. The green and white stuff is 3M double sided foam tape to replace the adhesive patch that GM had in there. Not sure if it's going to work, but it's the best idea that I was able to find on the board. And yes, I know how bad the paint looks. The water marks never sanded out.
This whole approach I got from a thread here on the board: https://www.thirdgen.org/forums/body...herstrips.html I found the 1/4 inch bead to be a bit excessive for using in the tracks, it makes the rubber strip extremely difficult to seat. I probably would have gone with a slightly smaller size bead in hindsight. Also, the bed that I layed down for the ends of the T-bar is WAY too wide and I had to scrape a lot of it back out. The plus side is you can just ball the stuff up and reuse it for the next section. I ended up using about a roll and a half of this stuff to do the whole T-top weatherstrips. https://www.amazon.com/gp/product/B0...?ie=UTF8&psc=1
Unfortunately when I was done, I still had window gaps:
I ended up loosening the two adjuster screws on the top of the door and pulling the glass in so that it presses up against the seal nice and tight. I need to get all the wiring done so that I can check the window operation, but it turns out that Painless screwed me in that regard, so right now all I care is that it keeps water out.
I started doing the wiring, but the only things I got wired in were the fuel pump and the in tank sender. I was trying to do all the under the carpet wiring first so that I could reinstall a good chunk of the interior that's taking up my garage. Unfortunately, a big chunk of that is the wiring for the power windows and locks. the power window wiring (in the stock harness) ran down the driver's side channel just inside the door, crossed under the seat, and then came up into the center console area for connection to the switches.
My new plan is that that wiring is going to run across the dash to the center of the car and then down past the shifter and to the switches that way. It allows it to run over the carpet, and while I may have to extend the wires a bit, I'm already doing an insane amount of cutting and soldering, so what's another set of splices?
Painless tells you that their kit is complete, but it isn't. They include wires in their harness for battery power to the window motor and door lock actuator, but none of the wiring for the switches. So now I have to invent that or cannibalize it out of the old harness and somehow graft it into the new one.
And resist the temptation to just light the car on fire while doing it...
Well I managed not to set the car on fire, despite being sorely tempted to. I continued working on the wiring, or trying to, but for some reason that escapes me, GM used solid aluminum wire in portions of the harness, which of course you can't solder copper wire to. I'm going to have to bite the bullet and use butt connectors or just give up on the GM connectors and replace them with weatherpaks, but given what people seem to want for those, I'll probably swallow my hatred of butt connectors, as long as they're the good, heat-shrink ones.
In other exciting news, I got the motor back into the car.
I actually had it much further assembled than this, and then realized that I'd bought a Clockwise rotation water pump for a serpentine setup. So the accessory brackets had to come back off, and when the replacement pump gets here in a few days it will be going on, and I'll have a perfectly good aluminum pump to hold down paper with or something.
On the plus side, the engine dropped pretty much right in. Let me tell you though, there is no fear like that of installing a freshly painted engine into a freshly painted bay. I wrapped my lifting chain with rags and masking tape to protect the valve covers, but there was really no way to protect the motor mounts. I scraped up the K-member side a little, but all things considered, it was better than I was afraid of.
Now that there is some weight on the front end, the sway bar has stopped scraping my struts, too. Headers have been blasted, painted with VHT Flame-Proof, and I should be getting my insulation wrap for them tomorrow so I can install them.
I also ran all new brake lines, at least as far as the rubber hose to the rear axle. Everything from there will be replaced when I do the rear suspension. I used all copper-nickel tubing from S.U.R. & R, along with their fittings.
Only issue I ran into is trying to bubble flare SAE line, rather than metric. I broke the arbor on my bubble flaring tool twice before I gave up and just did the first part of a double flare on the back side of the clamp. No leaks so far, so I'm calling it a win.
Old line on the left, new, ghetto bubble flare on the right
Different angle. New line on the left, old on the right.
Flip your Double Flare clamp over so that it's flat and you can make bubble flares with it.
The line to the rear needs to be re-done, because it's 3/16" instead of 1/4", due to GM being crafty with their fitting sizes. The fitting on the front of the line is 14x1.50, so I foolishly assumed that the rear end of the line would be the same, but it isn't. It's 12x1.00. Only fitting I had for it was 3/16", so to keep from having the system open to the elements (and wasting brake fluid), I jammed a smaller line in there for now. The proper fitting is coming from summit, and I'll replace the line again when it comes in.
Now that the engine is back in place I can start making some more serious progress on the wiring. It's hard to wire the engine bay when you have no real hard notion of where a wire needs to go. Again, the Painless harness is not as complete a kit as they claim, so there will be plenty of additions to their harness before I'm done, I'm sure...
I had planned to do an update on this thread some time ago, but I keep forgetting to take pictures, and by the time I remember to do it, it's gotten too dark outside and I have to clean up and call it a night. So yesterday I finally remembered to snap a few pics of what I've been doing in the hour or so a night I get before darkness forces me inside.
I finally got all the accessory pulleys in, installed correctly, and put the belt back on. Pardon the old crusty A/C compressor. It's functioning as an idler pulley for now until I re-do the whole A/C system. the PO left it open to the elements, so now EVERYTHING needs to be replaced. Well, the pieces that were still in the car do. It's missing the condenser and at least one of the hard lines.
Summit originally sent me some weird idler pulley instead of a water pump pulley, so that took a few extra days. Plus side is they replaced the AC Delco pulley I bought with a Chevrolet Performance pulley... which is completely identical. Like they came off the same production line, probably, but the CP pulley costs $20 more. The part number is even the same. So yeah, watch out for those shifty bastards at CP.
In other news, I got my fuel pressure regulator reinstalled. I was going to replace it, like everything else, but then did some research and it seems that they don't make this regulator anymore, at least not under this part number. Summit suggested an alternative that looks identical and the specs seem to match up, but it was $120. My budget can only take so much unnecessary replacement for it's own sake, so I decided to clean it up and run it. If it causes me problems then there's a rebuild kit for 4309 FPR's for like $30.
Fittings going into it are steel -6 AN to 3/8" NPT, and then I crimped on some female fittings onto regular fuel line with our hydraulic crimper at work. I sleeved the whole thing in black braided expandable wire loom. Same stuff I'm sleeving the wiring in, but black instead of blue. All the electrical will be blue, all the plumbing will be black. I just need to get a clamp to hold the lines down near the strut tower to prevent chafing.
Driver's side valley harness, running the wires for the alternator and coolant temp sensor. I got the modulator cable run up from the transmission, but it isn't going to work with the return bracket in that position. The throttle arm is too far away, and the modulator cable actually prevents the carb from getting to full throttle. Probably going to need a new bracket and possibly a new modulator cable. You can also see that I had to switch to a universal upper radiator hose. Due to the Summit/Northern radiator that the PO installed (badly) not fitting quite right, and the valve covers being much taller than the stock ones, the preformed hose that I took off, and the new one that I bought don't fit properly anymore.
Unfortunately, I'm more or less working on emergency measures at this point so that I can get the car back into the garage before winter. Yes, all of this plumbing is kind of ugly and not the way I would choose to do it if I had unlimited funds and time, but it will be functional enough to get the thing into storage. I can always make it pretty later. Plumbing is easy to re-run time and time again.
Passenger side of the engine bay. You can see my pretty new battery cables there all sleeved up. The engine is completely wired at this point. I need to sleeve two more wires back to the bulkhead connector, but I'm waiting until later today when I yank the distributor to prime the motor, as they run behind it.
Headers have been wrapped with DEI wrap, sprayed, and installed, though there's alignment issues on both sides with them. The driver's side has one bolt that doesn't line up correctly, not quite sure why yet, and on the passenger's side the flange of the header is actually touching the frame, which is not going to fly. The entire passenger side area at the rear of the engine sucks, though in terms of space. The replacement dipstick I had to get messes with the space I need for the spark plug boots. The boots are WAY too close to the headers for my liking, so they will probably get some insulating boots to go over them. Then on top of that I need to somehow get the cooler lines for the transmission through that area as well as reinstall the HVAC box and heater core so I can run the coolant lines to it. And of course squeeze in the transmission dipstick through some form of black magic.
Lastly, I had to make some changes in the battery area. After all the crap I kept hearing about Optimas, I decided to go a different route. I got an XS Power D1200 and threw it in the battery tray. It's actually smaller in every dimension than a stock group 75 battery, and has better specs. I loathe side terminal batteries with every fiber of my being, so switching to top post was a given. Plus this battery is lighter, is AGM, so I don't need to worry about acid leaks, and it fits handily into the tray, though I did turn it 90* for better cable routing.
Unfortunately, this particular battery doesn't have the lip at the base that the stock battery hold down used, so I had to improvise a bit. $7 at Autozone and the battery is J-hooked to the tray. I'm going to trim the studs down a bit, as they don't really need to stick up 4" above the battery.
I didn't take any pictures of it, but the transmission has been reinstalled (that SUCKED working alone with one floor jack and my truck's emergency spare tire jack, BTW). However, the torque arm isn't mounted yet because I didn't pay attention and bought the wrong bushing from Energy suspension. They craftily make two, since GM apparently though it would be a brilliant idea to reverse the torque arm at some point, and the one I bought is, of course, wrong. New one is on the way, should be here in a day or two if I know Summit.
Everything is slowing down, as I'm having to problem-solve and troubleshoot almost constantly. Changing valve covers and motor mounts has seemingly changed the way the engine fills the bay enormously. The wiper motor now hits my driver side valve cover and has to be modified or changed out to not do that. The HVAC box now rests on the passenger side header, and of course that header is now touching the frame as I mentioned earlier.
Part of me wants to loosen up the motor mount/ K-member bolts and see if the whole thing can be nudged off to the driver's side a hair, but I don't think there's that kind of slop in the holes to allow for it. And of course, solving one problem may only make the others worse. Time will tell...
I didn't take any pictures of it, but the transmission has been reinstalled (that SUCKED working alone with one floor jack and my truck's emergency spare tire jack, BTW). However, the torque arm isn't mounted yet because I didn't pay attention and bought the wrong bushing from Energy suspension. They craftily make two, since GM apparently though it would be a brilliant idea to reverse the torque arm at some point, and the one I bought is, of course, wrong. New one is on the way, should be here in a day or two if I know Summit.
I did the same, fortunately the new "extra" bushing I had fit my friends car.
So the new bushing from Energy Suspension came in and it was still wrong. This time the slot for the torque arm was right, but it was almost like they didn't finish cutting the bushing to fit the mount. There was one section that wasn't cut out to allow the clamshell to close over it. Rather than argue with people who clearly have no idea what this mount actually looks like or how it works, I pulled out my Xacto knife and just hacked it down to fit. In other news, cutting poly bushings with an Xacto knife is time consuming and difficult.
So the torque arm is mounted now, drive shaft is back in, and my cooler lines are run.
I wanted to do hard lines all the way from the transmission to the radiator, but then decided it would both be easier and better to put a rubber section in where it makes the corner around the unibody to start heading forward and up. This will allow more flex into the system when the car is moving, so rather than pulling on every clamp and the radiator, the rubber can just move a bit. Plus if I need to drop the transmission again, I won't have to fight the steel lines.
I also replaced the throttle return bracket with one that allows the modulator cable to be hooked up. It's adjustable, so it will need some fine tuning, and I loathe the fact that it's chrome, but I have a bead blaster at work, so I can fix that whenever I'm willing to yank it back out.
And of course the most important part of the update, I got the engine started!
It's ridiculously louder than I remember. Not sure how much of that is the changes I made, and how much could be an exhaust leak. Once I get the idle timing set so that it will run smoother and better, I need to snoop around and make sure everything sealed up on the hack-job of an exhaust the PO installed on this thing. It works, but it's hideous. Held together with bad welds and band clamps. Once this thing is driveable one of the first stops is an exhaust shop to get it re-done properly.
Once I get the timing set and the carb tuned a bit I'll put up a video so those who wish can hear it. Hopefully in the next week or two I'll have the time for it.
Video after the first round of rough carb tweaking. Still needs total timing set and then the carb adjusted. Also sounds like I have an exhaust leak on the passenger side, but the mic on my phone is evidently crap, so who knows for sure. The funny part is that my son was fast asleep in the back seat through the entire tuning process.
Seems it's been a while since I've posted anything. Well, winter will do that. Then six weeks of military duty in the spring, plus I have a kid about to turn one Plus work. Plus college. I'm doing well if I have time to sleep. Anyway, finally found some free time to advance the cause, and spent the day getting absolutely filthy. I pulled the rear axle out of the car last week, as it has a serious case of ugly and needs to be cleaned, painted, resealed, etc. All those parts are on their way from combinations of AZ, Rockauto, and even a few things from summit.
Going to get new springs, an upgrade to KYB AGX adjustable shocks, a UMI LCA and Panhard bar kit, fresh U-joints, axle seals, fluid, and diff cover gasket. Also all new ST suspension sway bar, E-brake cables, pads, rotors, calipers, brake hoses and lines, and my patented bead blasting and painting of every trivial bracket and strap.
I also dropped the fuel tank, as the whole purpose of why I was getting filthy today was cleaning the whole underbody. Power washed it, then sprayed it with superclean, rinsed it, then hit it with Gunk gel, scrubbed, and rinsed again. It still isn't perfect, but it's a hell of a lot better than it was. Due to my general sogginess and filthy hands I didn't take any pictures, I'll get one tomorrow before I start herculining the undercarriage, as that was the point of all this.
As soon as I pulled the unnecessary heat shield off the bottom of the fuel tank, however, there were issues. Show of hands, who's surprised? Yeah, no one. The padding that keeps the tank nice and tight in the straps and from scraping around was completely gone. So since it was coming down anyway, I did some forum searching and found out that you can make new padding from a yoga mat. Whatever. I'll try anything once. The straps are in with the bracketry that is going to my shop to be cleaned and blasted, once they're painted up and cured I'll glue down some yoga mat and see how it goes.
In other news, this should come as no surprise, but if you choose to do this undercarriage lining thing, be prepared to get utterly filthy. Not like "don't wear clothes you like" filthy. More along the lines of "Hope no one you love sees you so they don't become utterly repulsed by the dirtiness that is you" filthy. Doing this on my back in the driveway I went through three sets of clothes with a shower between each set.
Anyway, I'll try and get some pics tomorrow before and after the painting. The rear end will be going to my shop for blasting, paint, and new seals/bearings before it goes back in, hopefully sometime next week. In the meantime, I have an LS1/T56 driveline coming from Ebay, so all that engine work I did last summer is out the window. Anyone know someone who wants a freshly built 383 with a couple hours idling on it?
In the meantime, I have an LS1/T56 driveline coming from Ebay, so all that engine work I did last summer is out the window. Anyone know someone who wants a freshly built 383 with a couple hours idling on it?
YEP, you are a perfectionist.
Change the entire plan midstream.
I get it, I'm a perfectionist too. But I force myself to accept only 98%.
Don't even start on the rear end, you know you will be changing that also.
As promised, I went out and took some pictures today of the work I've been doing. Briefly, since it took about 4 hours to get the underside of the car bedlined. The undersides of third gens are not nearly flat enough. I think I got to use the roller for like 10 minutes of the four hours I was working. I also forgot the cardinal rule of painting above yourself: wear long sleeves. Actually safety glasses would be the cardinal rule. Bedliner in your eye not only hurts, but makes you look like you're wearing eyeliner after you can finally see again.
Anyway, here's a before pic. This is post scraping, scrubbing, etc.
I pretty much covered how I got to this point in the last post, so I won't rehash the same stuff again. There are some spots I couldn't get to without pulling the transmission back out, so they will wait until I start the LS1/T56 conversion. Here is the underside and wheel wells after being covered.
I've used the entire gallon of Herculiner at this point, so to do any touchups or get the foot or so of the transmission tunnel I haven't gotten yet I'll have to grab some more. Last thing I did today was fabricate up the new brake lines for the rear calipers. They're cut, bent, and flared, just need the axle cleaned up and redone. It's more or less holding everything up at this point. I also need to re-run the hard line to the rear axle from the master cylinder. Last year I substituted 3/16" for 1/4" line due to a fitting mistake. I have the appropriate fittings now, so once the axle is back in place I'll be tackling that, too.
I've used the entire gallon of Herculiner at this point, so to do any touchups or get the foot or so of the transmission tunnel I haven't gotten yet I'll have to grab some more.
You can get a spray can of truck bed liner. Harbor Freight even carries it, I believe. I bought a bunch of spray cans at NAPA.
So this is pretty much my last chance to work for a bit. Supposed to rain the rest of the week here, plus my son's birthday is this week, so the chance to work for three days straight may not come again for a bit.
At this point I thought that the axle not being done was the biggest detriment to getting the rear wheels back on the ground. Turns out I was wrong. In the interest of making work for myself while the sun shines, I decided to clean up the fuel tank. That rapidly degenerated into let's sand down and paint the fuel tank.
Years of video games have taught me that there is only one color suitable for painting something that can explode.
Anyway, in the process of painting and cleaning, I removed the pump and sending unit. I was simply going to replace them when I was done, but then I noticed that the O-ring was cracked and dry-rotten all to hell. So new lock ring and O-ring kit it is. But then I got to thinking that while I have this all apart, the car needs a new pump to support the LS1.
The last thing I want to do is pull everything back apart again to change the pump in a few months when the new motor goes in. More chances to scuff up my pretty fuel tank. So I ordered up a Walbro 255, since that seems to be the widest consensus on what works for an LS1 without breaking the bank. Added an install kit to get the plug, strainer, etc, and we're good to go. Prime will have it here in a few days. Gives the paint time to fully cure.
So while the paint was baking in the sun, I started cleaning up the sending unit. I was just going to do pump surgery, so no reason to replace the whole thing. I clipped off the charcoal canister line and welded it shut.
I cleaned up all the lines and was about to give them a shot of paint when for some reason an hour into this process I decided to ohm out the fuel sender and make sure it worked. Because AFTER all the work and masking are done is the time to check that, naturally.
Turns out the sending unit itself is broken internally, so I wasted a bunch of time and effort. Then I wasted more trying to solder it back together. I got it technically working, but the resistance is off. I knew it would be, but hoped it would still be close. Not close enough, so I'm in the process of sourcing a new sending unit. Looks like the only way to get it is to order the whole unit, however. If someone knows differently, please let me know. I'd much rather change the rheostat than the whole unit.
So after that, I cut some strips from the yoga mat to make tank padding. Stuff cuts beautifully with an X-acto. 2 1/4" X 21" for the top pads, and 2" X 25" for the bottoms. I haven't test fit the bottom yet, that's just going with double the strap width and measuring it's length. I'll post any corrections I have to make. I got some double sided Gorilla tape to hold it all in place until the bolts are tight, but figured I'd let the paint keep curing until I'm actually ready to put it in.
About the only other thing I think I did was sand down and paint up the straps for the tank and spend about three hours cleaning and organizing my garage. Good times...
Not much in the way of major progress to show tonight. The rear end is in my painter's blast booth, but their fresh air system still needs inspection before it can be used, so no blasting until that happens. I did, however grab a giant box of crap I pulled off the underside of the car and run it through my blast cabinet and get in ready for reassembly.
Axle Shaft retainers and caliper brackets freshly painted
heat shields that may or may not be useful when the new exhaust gets run
Fuel tank shield
There's a lot more, miscellaneous brackets and such from the rear end, but most of it was wrapped up and packed in the box by the time I started taking pictures.
Unfortunately in the process of stripping down the axle, I discovered that the sealing area is pretty well grooved up. I was hoping I could clean it and re-polish it, but it's just too rough. The axles might seal, but then they might not and I get to do this all over again.
Blasted, primed, and painted
Not much of the polished area left after removing the rust. even if I could polish it back up, the diameter would probably be too small to seal up.
Slightly more left on this side, but the groove is just as bad.
So rather than live through the fun of disassembling my rear axle twice, I spent a good chunk of my afternoon and evening trying to chase down speedi-sleeves. That was less than fun. Timken doesn't list one of the appropriate size in their catalogue. SKF does. 99165 is the only sleeve I was able to find in the correct range to fit these axles. I ordered a pair and will let you guys know if and how they work out.
So since my fuel sender isn't here yet, and I have no axle to install, I puttered around doing some quick bracket bolt ups and such. Put the new E-brake cables in, and adjusted the LCA's and got the car end bolted up, though not torqued. I also boxed the upper panhard bracket brace that ties the rear subframe together. It's reasonably ugly, I have to take my grinder to it, smooth it out and give it some paint, but otherwise I'm waiting on parts to continue...
Fuel filter bracket made pretty and bolted back up
heat shields back in place with VHT paint
E-brake cables with a pretty T bracket now
and UMI adjustable LCA's waiting for an axle to bolt to. Disassembled these and covered the threads in anti-sieze before putting them in.
So since my axle housing is still sitting in the blast booth waiting for the contractor to come test the fresh air system, I've had to meddle with other things to keep myself occupied in the couple hours I get to work on the car each night after the monster goes to bed. I decided to go back to meddling with the interior again. I got sick of looking at that cheesy steering wheel the PO had installed. I bought a nice Grant wheel last fall and never got around to putting it in, since I was focused on getting the car able to drive back into the garage before winter.
So I pulled the horn cover and found this. This is the kind of crap that really pisses me off. I get that not everyone is a professional mechanic. But there is a right way and a wrong way to do things. If you aren't capable of doing it right, bribe someone who is with food and/or alcohol to do it for you.
Duct Tape is not a component of ANY electrical work. EVER.
Also, my speedi-sleeves came in, turns out I can still use a micrometer correctly, and they fit nice and snug on the axles. Expensive buggers at over $26 a piece, but definitely cheaper than new axle shafts. Again, they are SKF P/N 99165 for anyone who needs it. And that is for the 9 bolt shafts.
Clean off the crap from the installer I used and it's ready for assembly
Replaced the universal joints in the driveshaft. They weren't really that bad, but since I have it out and not much else to do I figured I might as well just change them. Not like they're pricey. That was my first experience with GM's pinned U joints, though. That plastic crap in there smells awful when you light it on fire.
Painted up and pretty
Finally, look what showed up on Thursday:
Might be hard to tell under the shrink wrap, but that, my friends, is an LS1 with a T56 on the back. Shipping company dinged the alternator pulley and I didn't catch it until after I'd signed, so looks like I need to scrounge up a pulley. It has 65k on it, so obviously it's not shiny and new. It's got dirt and scratches and things are tweaked and bent here and there. Came out of a 2001 camaro SS. There's already a catch can in the vent lines, though it's currently only plumbed to vent one bank of the engine. The other bank is plumbed straight to the intake.
I already ran casting numbers and such, and I didn't manage to grab one of the few that were built with LS6 blocks, so it's still an LS1 casting, though it does have the LS6 intake manifold. 241 heads. It could be better, certainly, but it could also be much, much worse. The hardest part for me is going to be putting it in the car as it is, without stripping it apart to clean and paint it.
Ordinarily I wouldn't, but this thing has pretty much eaten up my budget for the year until and unless I can sell the 383 that is in the car now. Hopefully that will be coming out next week and I can get it up on various places to try and move it, because there's still parts needed for the install that I don't have. New motor mount bushings, transmission crossmember, throttle cable, radiator hoses, etc.
Related to that, the T-Top Seal Channels and the T-bar itself had a foam-like sort of adhesive on the back of the channels and underneath the T-bar in the center. I've not seen anything like it in parts stores around me, so I'm curious: what have other people used to replace this when changing these parts out?
Did you ever figure out the foam-like adhesive? I've been studying replacements for a while. Need it on hardtop car between body and side window seal channels. Planning to use 4700 Series 3M Vinyl Foam Tape.
Purchased 30 yards from ULine even though need less than 20 feet. I have 4718, but 4726 might work better. I can make the 4718 work because there of a dip in the window seal channel that will allow me to cutting to 3/4 inch wide and set down into dip. I'd be happy to mail you a short piece of 4718 if you want to test thickness and density.
I just ended up using 3M double sided foam tape. Post 26 shows how I laid it out. I didn't really do any further chasing of the material after I installed the T bar, as my leaks are due to the glass at this point, not the T bar
It has been a fairly eventful week since my last update. I got the new engine and transmission moved to my house and unpacked, and was immediately reminded of why I hate buying anything off of Flea-Bay.
Yep, that is a torn clamshell. Whatever hit this thing and led to the drivetrain ending up in my garage I'm guessing slammed it on the right front quarter. The clamshell is junk, the A/C mounting bracket is cracked, and the rear alternator bracket is also snapped off. In addition to that the power steering pulley is broken in half, and the plug for my MAF is just gone. I have a MAF and three bare wires.
All this hidden under the shrink wrap despite saying that any damage would be listed in the item description. **** I hate E-Bay. At least the motor turns over. Though it turns suspiciously easy. Or I'm just too used to high-compression diesels from work.
I pulled a valve cover and looked inside, and it's clearly a junkyard motor.
If you look close you can see the giant barnacles of rust growing on the top of the pushrods. So those will have out come out and be cleaned up before it ever gets started. At least it isn't full of sludge.
I pulled the harness off and started separating everything out. A lot of it will be going away as I don't need or want it. Hopefully there is a plug I can scavenge for the MAF, otherwise I'll have to get one. Mouser sells them cheaply enough. So the wiring harness is all in nice neat coils in a box now, waiting to be re-run and put back together neatly. I've been more or less living in Pocket's wiring threads, I just wish photobucket wasn't such a giant pile of scum. I can get a lot by reading, but the photos missing sucks.
I removed the 383 and the 700R4 as well as the factory fuel lines and the 3/16" brake line I made for the rear last summer.
I ran new brake and fuel lines to the front of the car, and installed the clutch master. Surprisingly a 3rd gen master and 4th gen line went right together with no modifications at all. I was expecting to have to drill out the master a bit, but I didn't have to.
After 2 day shipping new clamshells and installing them on the LS1, I picked it up and dropped it in the car. Of course it wasn't even remotely that easy, as either UMI didn't bother to include directions with their K-member package, or they wandered off from my giant pile of saved instruction sheets. I have their older style LSx mounts, with just the 4 slotted holes. They aren't marked in any way left or right, up or down, so I had them upside down on the wrong sides last night.
I switched them over this morning, but there still seem to be a few fitment issues with them.
I could have sworn that when I did my research last year, before I ordered the new front end, that UMI's K-member and mounts left room to mount the A/C in the stock location. As you can see, there is no way in hell an A/C compressor is going to fit in there, so I'm not entirely sure what went wrong. Maybe I have the wrong style compressor, maybe my research was bad, but for now at least I had to take it off. Also the plastic fan ducting on the back of the alternator is sitting on the adapter bracket. Overall I'm pretty unhappy with the whole situation, where a purpose-built and engineered product doesn't fit correctly. I understand that there's a certain degree of variance in LS accessories, but if there's certain requirements for the setup to work it should be stated. Edit: Apparently I just can't research worth a damn. Guess I'm the *******.
Desperately trying to free up floor space in my garage, I decided to put the t-56 in, even though I don't have the crossmember yet. I figured I'd at least get the hole in the floor cut and have everything in the right position so I could start running wiring tomorrow.
Simultaneously the hardest and easiest transmission install I've ever done. The bell housing technically can't be removed from the engine while it's in the car. I took it off with the transmission to do the drop in as I can't really do the putting it in from the bottom trick with my equipment.
Putting it back on required everything short of pulling the engine hoist back out. And there's still one bolt behind the left cylinder head that simply can't be installed with the motor in the car. It's almost like this car wasn't designed for this engine...
Anyway, I got that back up then slowly cobbled together a way to lift the transmission, as it weighs a good amount more than me and I have crap for leverage lying on my back under the car. The board you see there was ratchet strapped to the transmission so it couldn't rotate, then I lifted the front until the input shaft rested on the bellhousing, then slid the jack under it and picked it up the rest of the way level. Once I had it to that point it literally slid right in. I didn't even have to clock it to line up the splines or anything. It's now sitting on a nice ghetto piece of PVC pipe to hold it in place until I have a crossmember to bolt it up with.
Tomorrow I'll be running wiring and other bits and bobs all day, working towards getting this thing able to start before my warranty runs out from the junk *******. Though I've probably already voided it stripping the harness apart. I just trust nothing that place said anymore. Olmstead automotive, FYI. Buyer Beware.
Last edited by RavingMadly; 08-01-2017 at 06:38 PM.
At least the block didnt crack at the motor mount & those plastic pulleys should be replaced with a steel piece.No love for those tubular x-members though.
Maybe file a claim with ebay, "item not as described".Get a partial refund.
I could have sworn that when I did my research last year, before I ordered the new front end, that UMI's K-member and mounts left room to mount the A/C in the stock location. As you can see, there is no way in hell an A/C compressor is going to fit in there, so I'm not entirely sure what went wrong. Maybe I have the wrong style compressor, maybe my research was bad, but for now at least I had to take it off. Also the plastic fan ducting on the back of the alternator is sitting on the adapter bracket. Overall I'm pretty unhappy with the whole situation, where a purpose-built and engineered product doesn't fit correctly. I understand that there's a certain degree of variance in LS accessories, but if there's certain requirements for the setup to work it should be stated.
It a bummer however it is indeed clearly stated on their website, not to mention numerous threads here on the boards.
You should be able to get the maf plug at any local parts store. I'm not sure if it's the same one used on the truck harness but if it is there should many of those at the nearest wrecking yard if it isn't in stock at store
After several weeks, I'm finally getting around to posting an update on this. I've been working on it pretty consistently, had a whole free weekend, and when I inevitably have to pick up my soldering iron again it's going to be too soon.
Obviously, as has already been stated, the LS1 and T56 are in place in the car.
I got the T-56 crossmember from hawks after I decided not to go with the Hooker Blackheart exhaust, due mainly to cost. It bolted up reasonably easily, all things considered, though there was still a fair amount of prying and cursing before everything lined up. I just reused the Energy Suspension Poly mount that I had used to install the 700R4, since GM doesn't really have a wide variance in transmission mounts.
The PCM is also completely wired in, at least to the engine and transmission. The interior leads to the tach, OBD2, CEL and such haven't been attached to anything yet, they're just sort of draped through the top dash wire run.
I couldn't find a decent description or image of where people mounted their PCM's so I took a clear shot of where I put mine. For those who don't recognize it by sight, it's attached to the firewall and the right side behind where the passenger HVAC ducting will be once I repair my dash and put it all back in. It keeps it securely mounted and out of sight, the downside is that any time it has to come out, the whole dash will have to come back out too.
Now that the crossmember is installed, the hole for the shifter had to be cut. I put the 4th gen inner boot down to cover the hole until I get the console back in with the pretty boot to cover it.
The transmission harness coming up through the floor is using a 4th gen grommet that came on the harness. I don't know what it goes through on a 4th gen, but it fits the grommet hole for a third gen shifter cable perfectly.
The biggest reason I chose not to go with the Blackheart exhaust, as I said above was due to price. Instead of dropping a thousand bucks on headers, plus having to triple the price of my transmission crossmember and change out the motor mount brackets I already paid for, I decided to go with the Speed Engineering headers.
These things are gorgeous. And they fit perfectly, as you can hopefully see from the shots above. I had to pull the starter to put the passenger side in from the bottom, but that was it. They don't touch anything, they don't rub anything, all the plugs have good clearance, and even the oxygen sensors are pointed the right way to not touch anything. The only issues I had with them was just that you can't get a torque wrench on the rear bolts on both sides, and the #3 bolt from the front would need an extension to use a torque wrench. If you put them on and then put the motor in from the bottom, I'd expect zero issues at all. They shipped with both the MLS gaskets and bolts that I ordered as well as the graphite gaskets that Speed Engineering includes with the purchase. The bolts aren't ARP or anything, but they work and there are the correct number and thread.
The last few items I have shots of are the passthrough for the PCM harness in the passenger fender and the modification of the firewall throttle cable passthrough that I did to install the Lokar throttle cable.
For the PCM harness, I separated the square connector that the original PCM harness passed through, removed the wiring and resin, and placed the new harness inside the connector. I have to replace the resin with something still, to ensure that it seals up, but even though there are more wires than the original harness, they are all of a smaller gauge, so they still fit.
For the throttle cable, I sawed off the stock tubing from the original connector and cut the cable itself to remove it. I then drilled out the plastic connector to allow me to screw in the Lokar firewall end of their cable. I put a smear of RTV on it to make sure that water doesn't slip through. I slid the pedal connector on, then fed the cable back through to the throttle body. With a 5 quart oil jug on the pedal to floor it, I opened the throttle body all the way and discovered that the cable didn't need to be cut, so I put the connector on and tightened it down.
Aside from that, there's been a ton of wiring going on that I haven't gone into detail on because it's been covered over and over again in other threads, and honestly repeating solder joints and heat shrink 300 times just doesn't make for fascinating reading.
I would definitely try to re-do that.Wont be fun dropping the dash.I modified my original plastic bracket for the ECM.Maybe start with that.Mine is the vertical mounting type, but ive noticed some f-bodies use a horizontal style also.Loks like that one might work better for you.Great work though.
Originally Posted by RavingMadly
I couldn't find a decent description or image of where people mounted their PCM's so I took a clear shot of where I put mine. For those who don't recognize it by sight, it's attached to the firewall and the right side behind where the passenger HVAC ducting will be once I repair my dash and put it all back in. It keeps it securely mounted and out of sight, the downside is that any time it has to come out, the whole dash will have to come back out too.
 05-23-2016, 09:58 AM


 my car needs a makeover as well new paint, new rims, get the rust off, get rid of factory exhaust replace with thunder cat, wipeout the ugly grey interior, and cowl induction hood. Not much to do for me I hope all goes well with you and your sweet car