My 91 Z28 build. 17 years in the making... Finally going to do this right
 02-12-2017, 08:13 PM
#1
Supreme Member

Thread Starter
iTrader: (2)
Join Date: Feb 2005
Location: West Warwick RI, postal code: 02893
Posts: 4,337
Received 55 Likes
on
41 Posts
Car: Building LS3, T56 Z28
Engine: LS3
Transmission: T-56
Axle/Gears: Moser/ 4.11
My 91 Z28 build. 17 years in the making... Finally going to do this right
I bought this car when I was 16. I attempted to build it up during my early years in college and frankly, I did a horrible job. I was teaching myself everything about cars as I was building the car. Not very well I guess. I could go on for a long time telling tales of why I did this or that. Mostly all bad ideas.
I got married, bought a house, got a new job and finally have the resources and time to do this right, so lets get to it.
Here is a pic of the car back when it was 100% stock, in 2000.

Fast forward to 2005, a forged 383, T56, Moser 12 bolt, paint, shaved locks, shaved antenna, shaved gas door, ZR1s, C5 brakes, 6 point, etc.....

Needless to say the car looked OK, but was put together horribly. 100% my fault.
New build and time to to a better job.
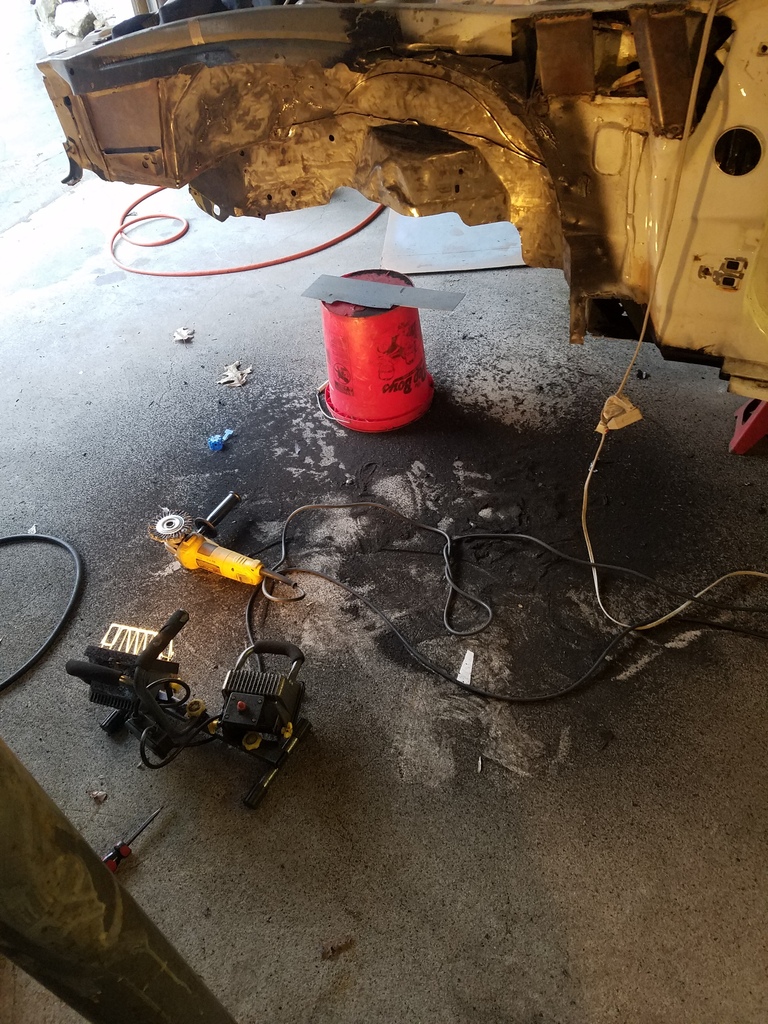
I started by ripping the car apart.
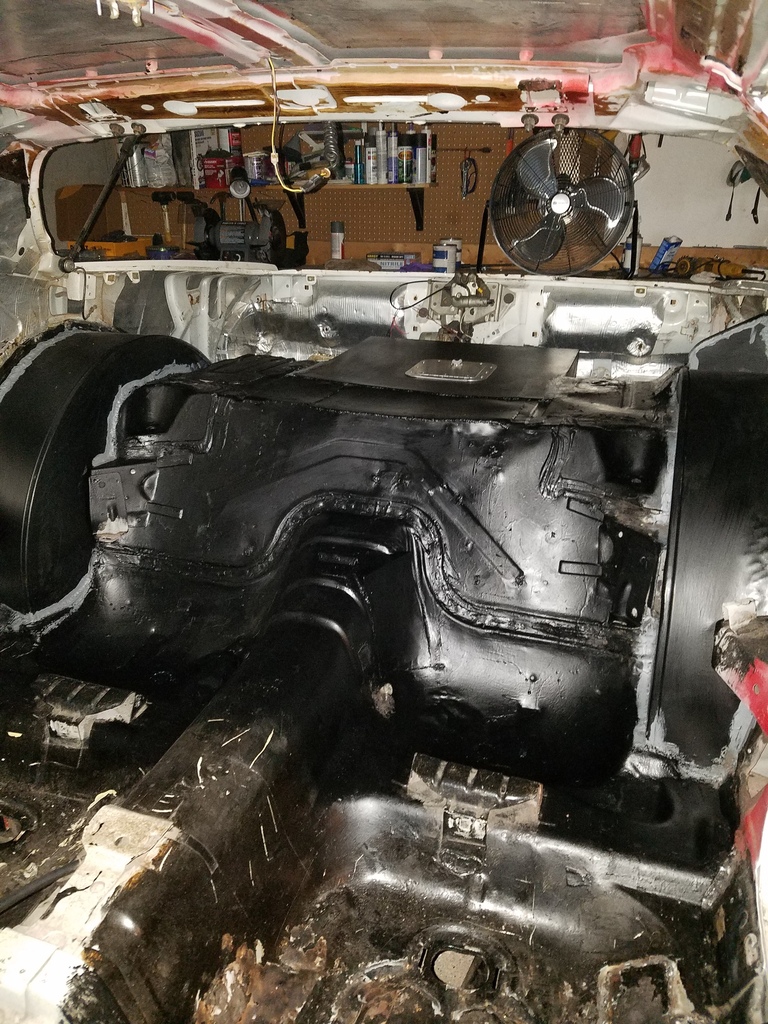
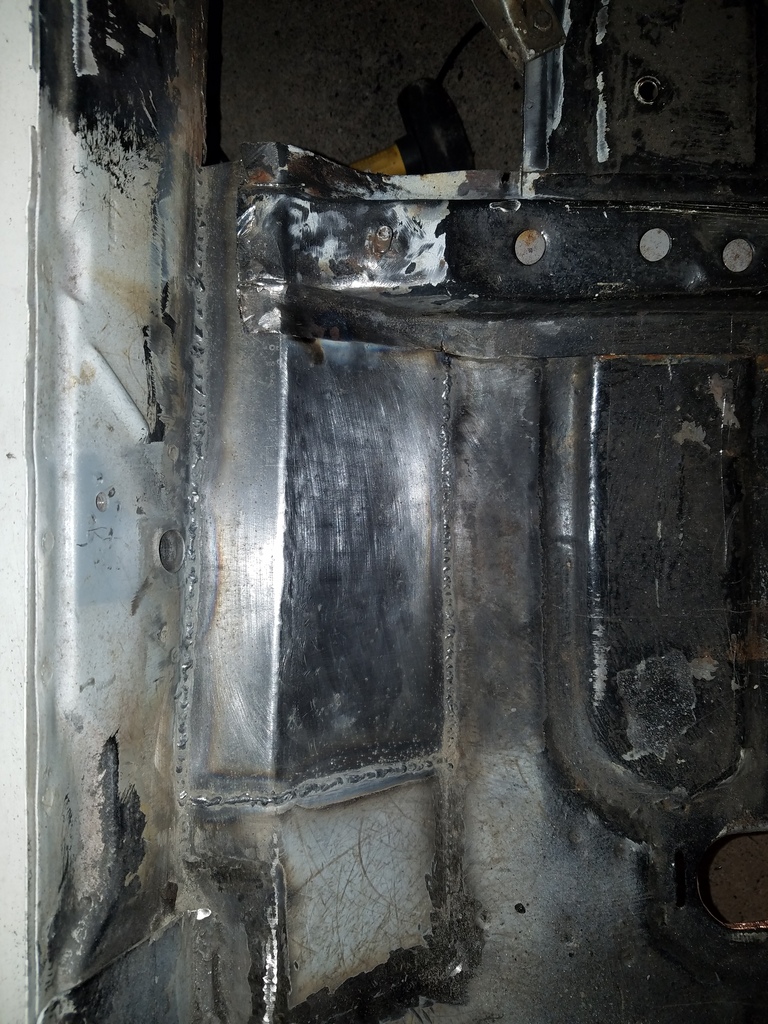
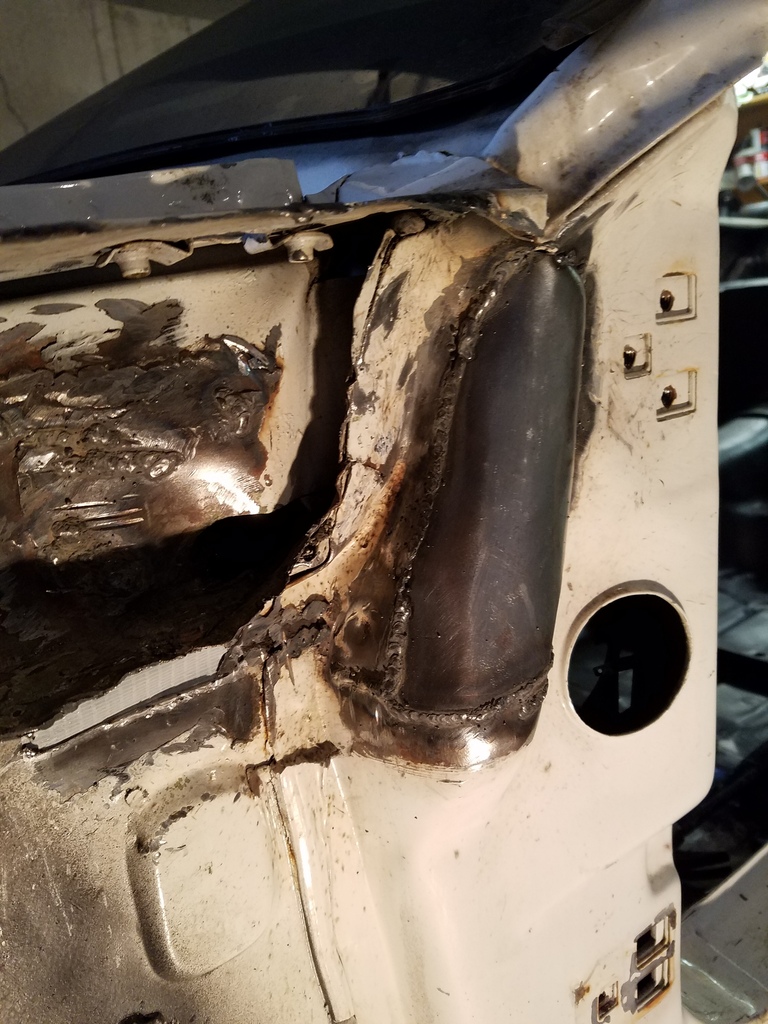
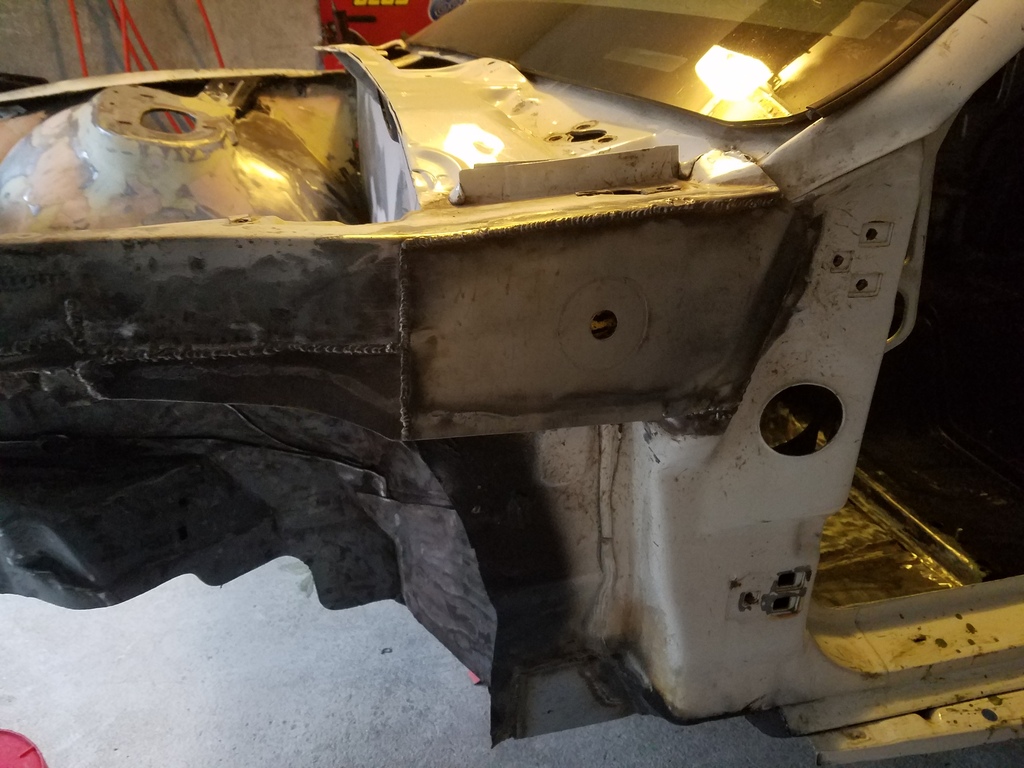
The first thing I wanted to address was a smoother looking engine bay. I realized I wanted to do this because I liked to go to car shows after the fist build.
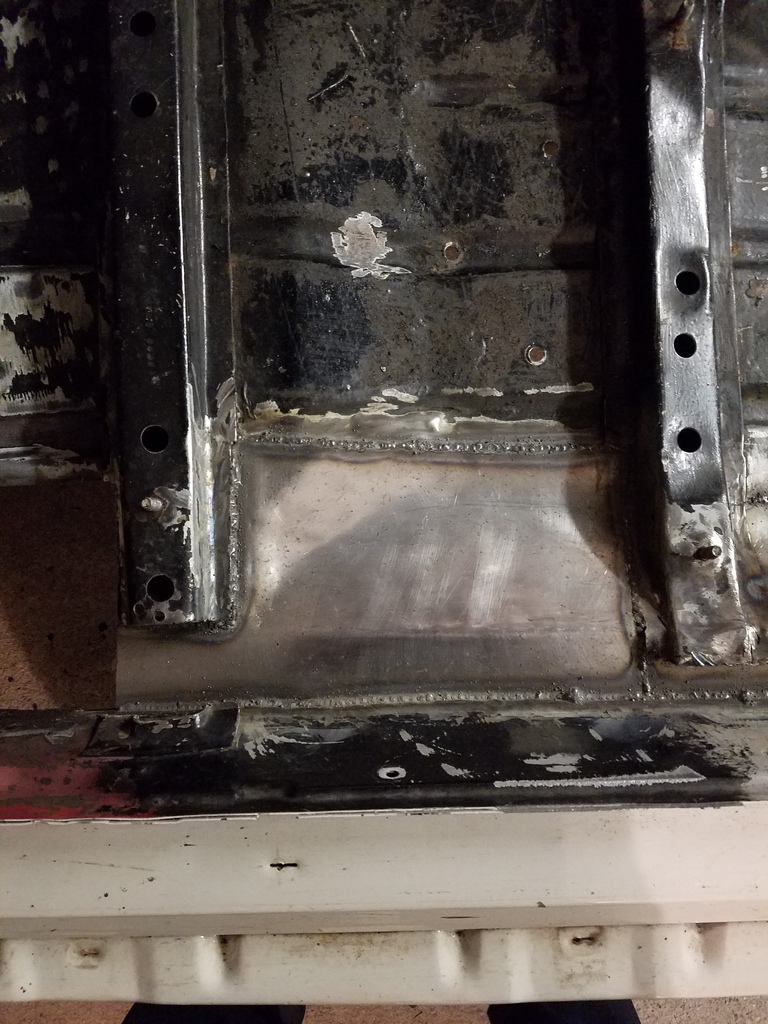
Here you can see my first pass after cutting up the mounting points and welding the strut towers.

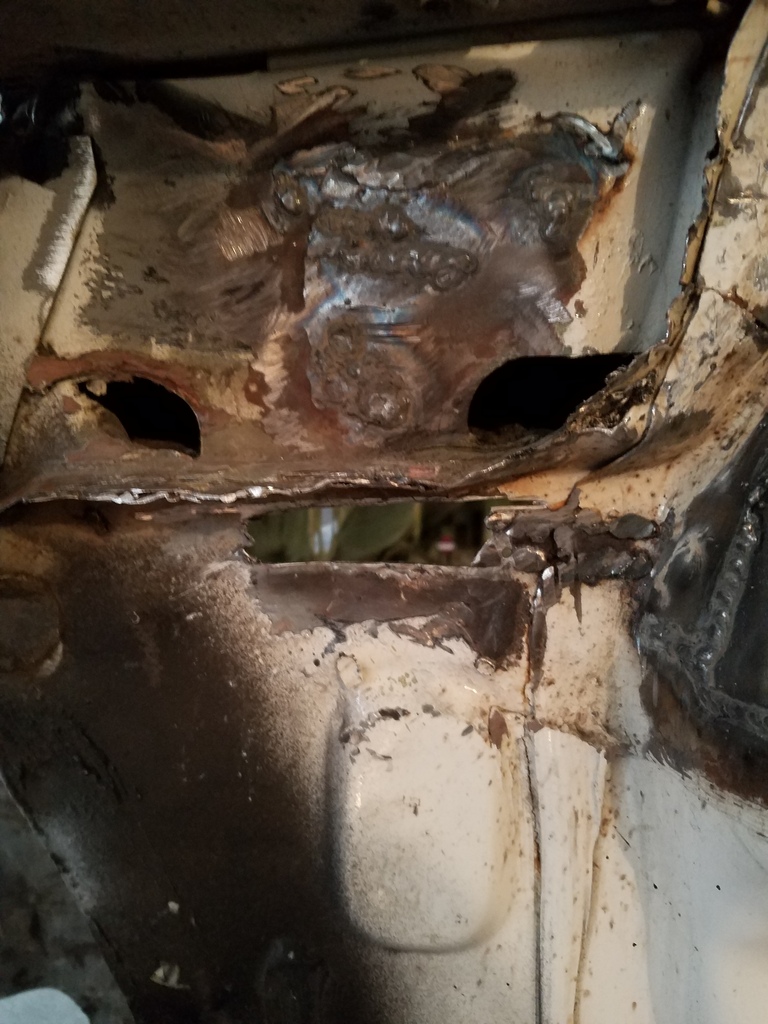
Battery tray and side wall.
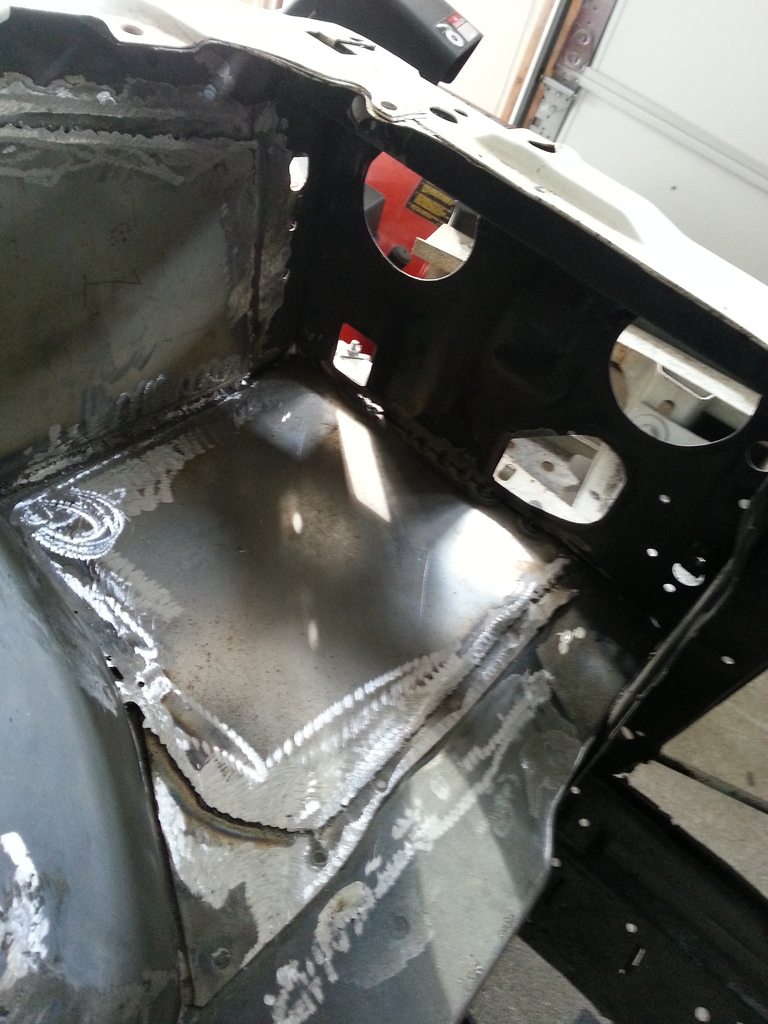
Firewall and towers after some filler.
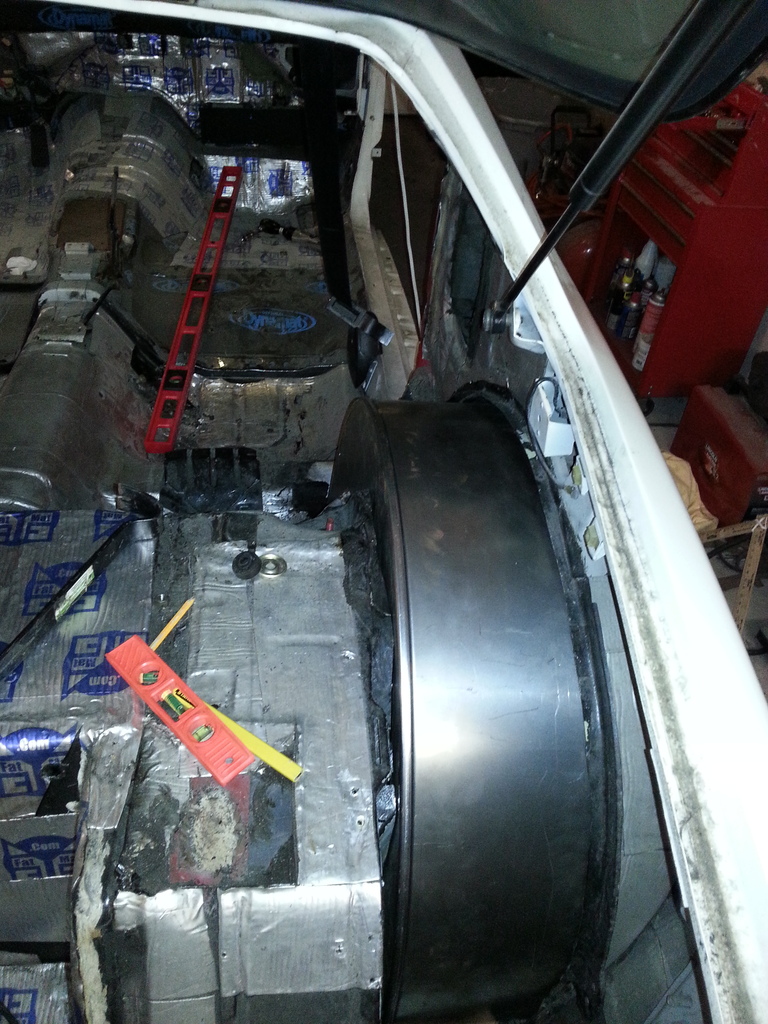
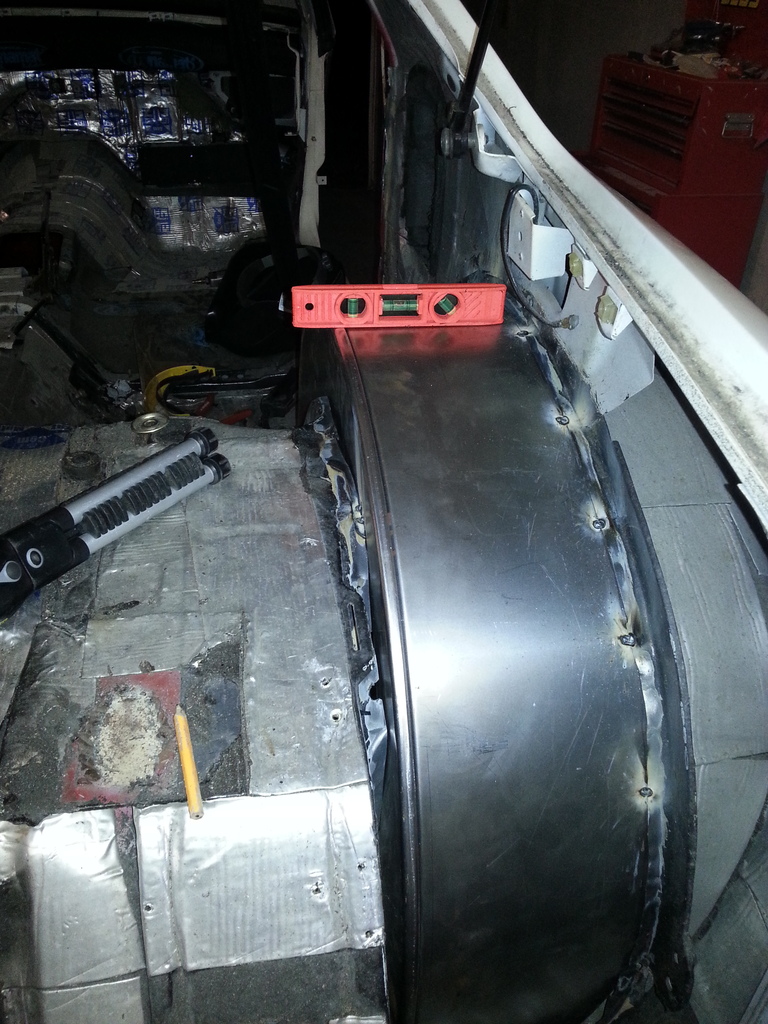
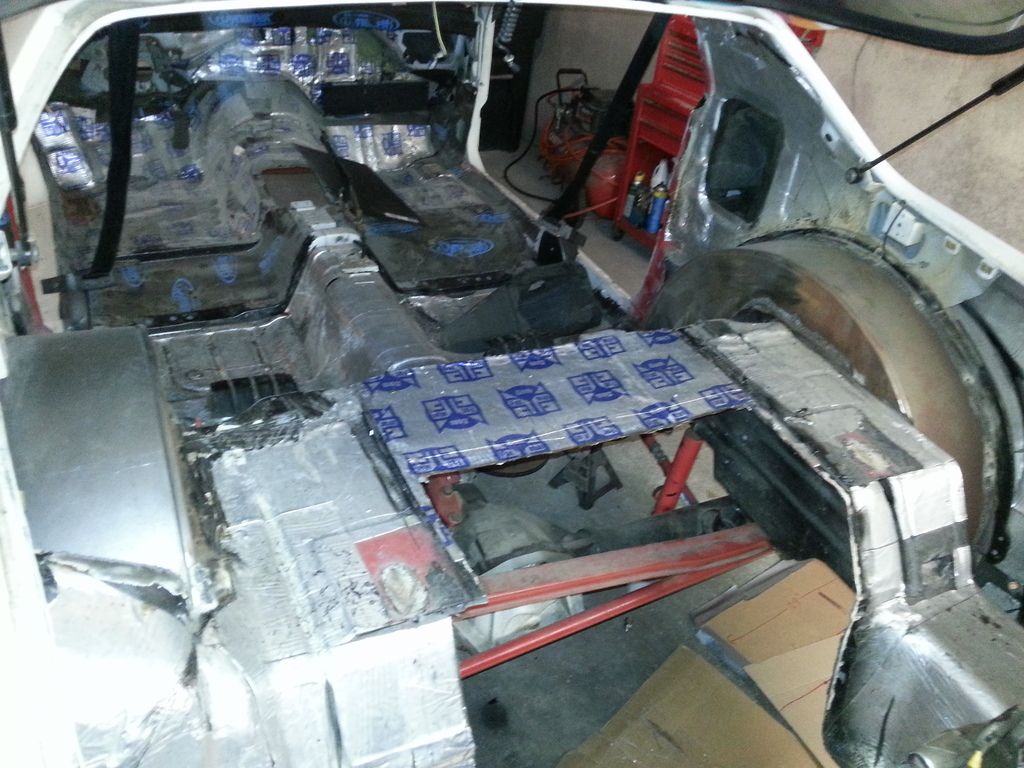
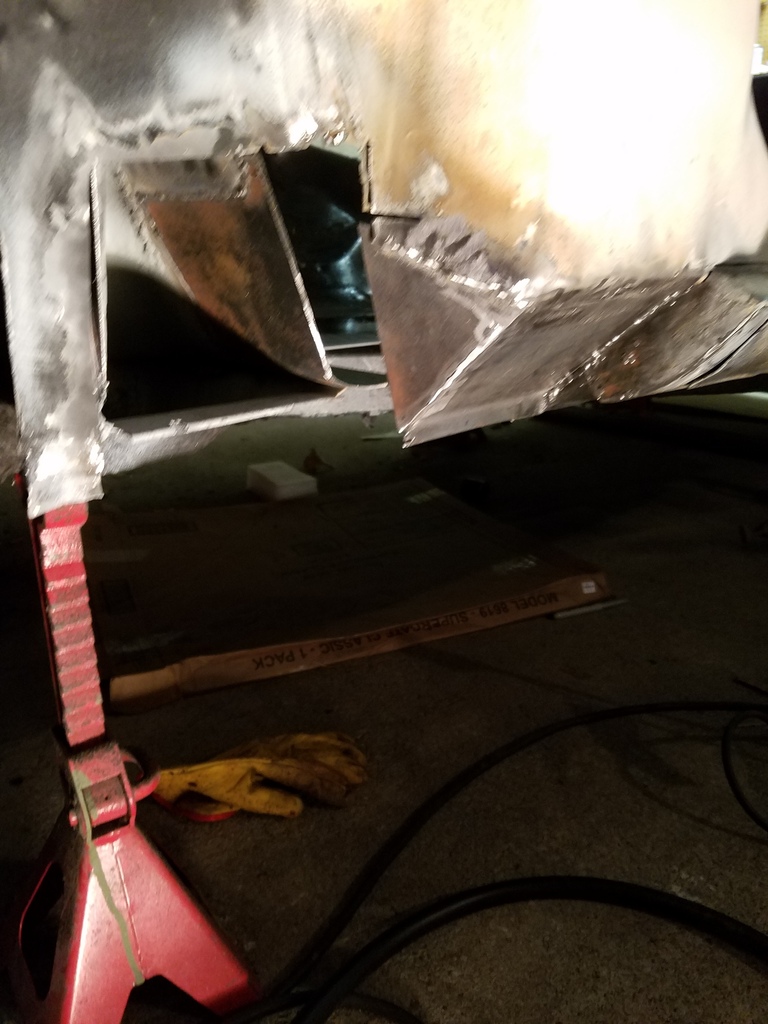
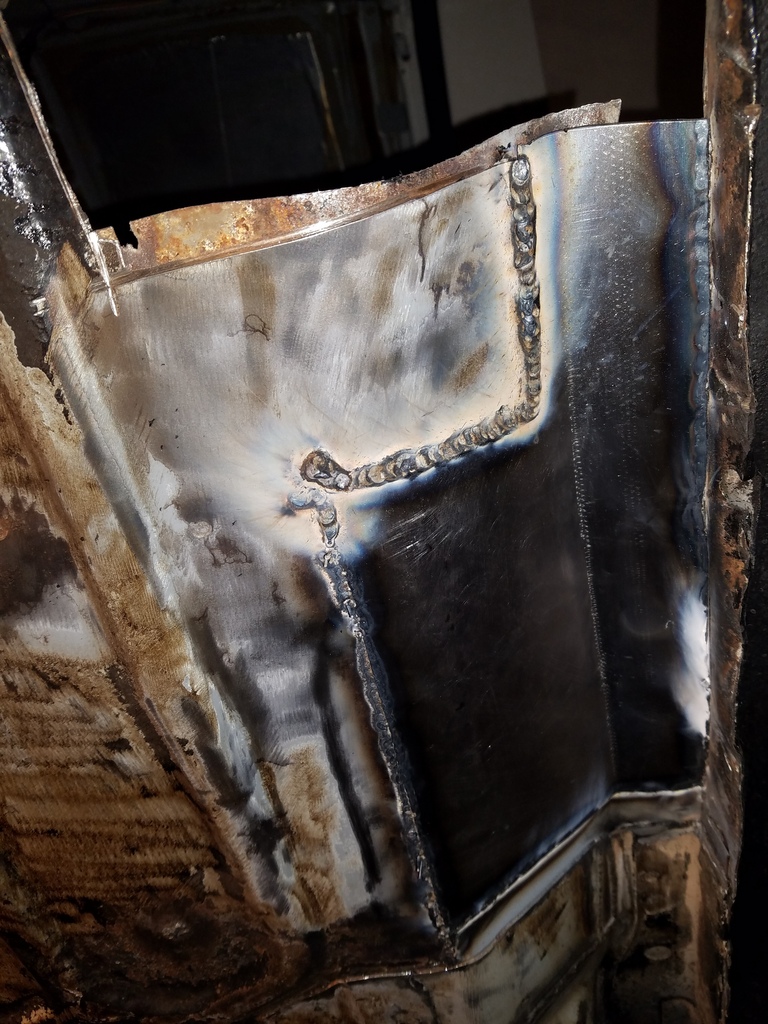
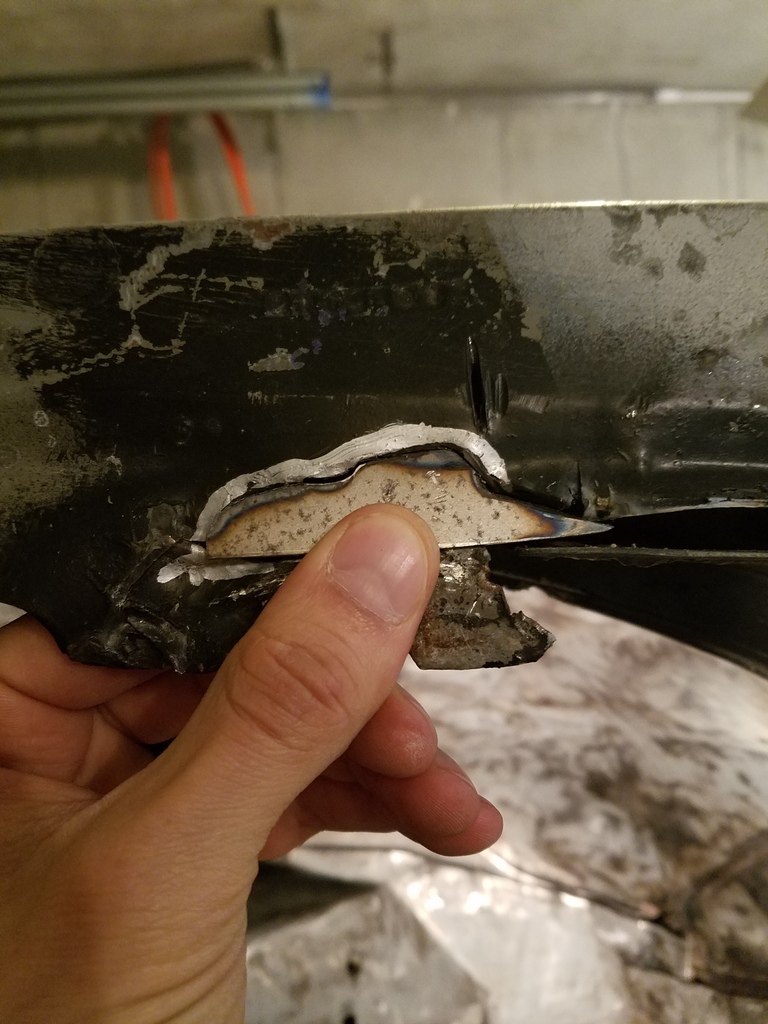
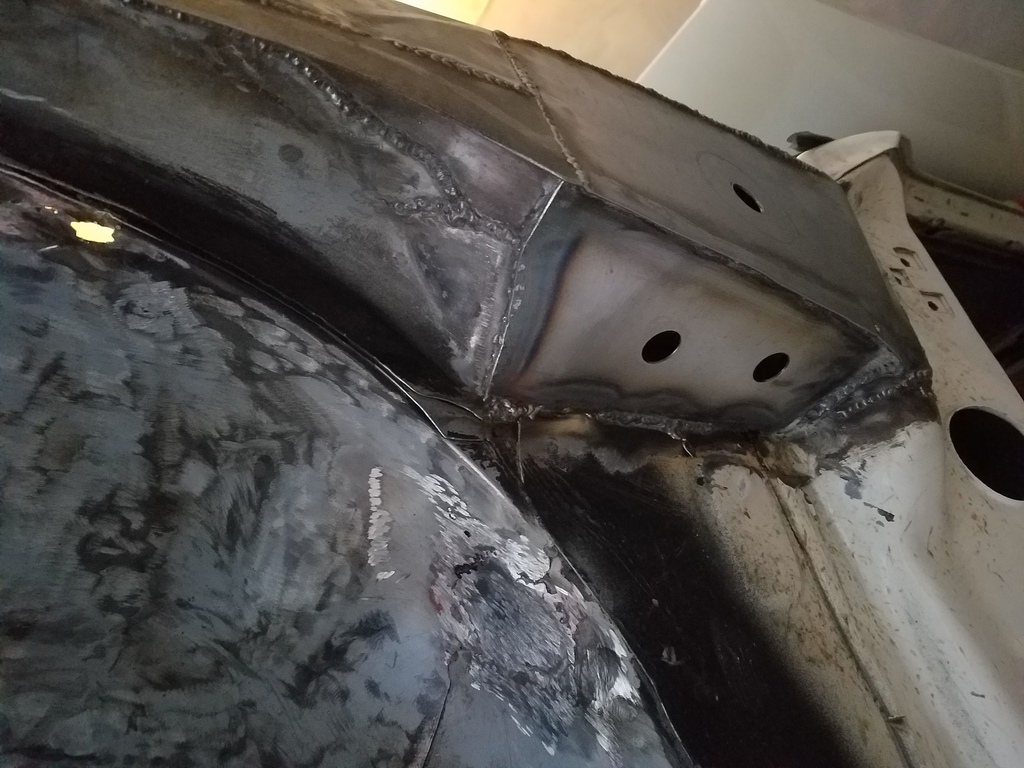
I am not very happy with the work I did so far so I think I am going to grind off the filler and start over on the towers and some of the side panels. Before I do that I decided to get to work on some minitubs. These are the 4th gen wolfe kit.
Here is the first cuts I did.
Test fitting.
Tack welded.
Final welded from the inside of the car.
Passenger side first cut.
First cut

I am doing this to try and fit C7 ZO6 rims with air ride bag over shocks. This is why I am not removing more material for a deeper tub.
I got married, bought a house, got a new job and finally have the resources and time to do this right, so lets get to it.
Here is a pic of the car back when it was 100% stock, in 2000.
Fast forward to 2005, a forged 383, T56, Moser 12 bolt, paint, shaved locks, shaved antenna, shaved gas door, ZR1s, C5 brakes, 6 point, etc.....
Needless to say the car looked OK, but was put together horribly. 100% my fault.
New build and time to to a better job.
I started by ripping the car apart.
The first thing I wanted to address was a smoother looking engine bay. I realized I wanted to do this because I liked to go to car shows after the fist build.
Here you can see my first pass after cutting up the mounting points and welding the strut towers.
Battery tray and side wall.
Firewall and towers after some filler.
I am not very happy with the work I did so far so I think I am going to grind off the filler and start over on the towers and some of the side panels. Before I do that I decided to get to work on some minitubs. These are the 4th gen wolfe kit.
Here is the first cuts I did.
Test fitting.
Tack welded.
Final welded from the inside of the car.
Passenger side first cut.
First cut
I am doing this to try and fit C7 ZO6 rims with air ride bag over shocks. This is why I am not removing more material for a deeper tub.
Last edited by dennisbernal91z; 08-12-2022 at 07:58 AM.

The following users liked this post:
M G Brewer (12-18-2021)
02-12-2017, 08:35 PM
#2
Supreme Member
Thread Starter
iTrader: (2)
Join Date: Feb 2005
Location: West Warwick RI, postal code: 02893
Posts: 4,337
Received 55 Likes
on
41 Posts
Car: Building LS3, T56 Z28
Engine: LS3
Transmission: T-56
Axle/Gears: Moser/ 4.11
Re: My 91 Z28 build. 17 years in the making... Finally going to do this right
I shaved the gas cap off so I could no longer use a stock tank, something I decided to do back when I was 17. If I could do it again, I may not have bothered, but here we are.
Here is a pic of how the cell was setup back when I was a kid.

Then it evolved into a bigger change to the trunk to make it "safer".

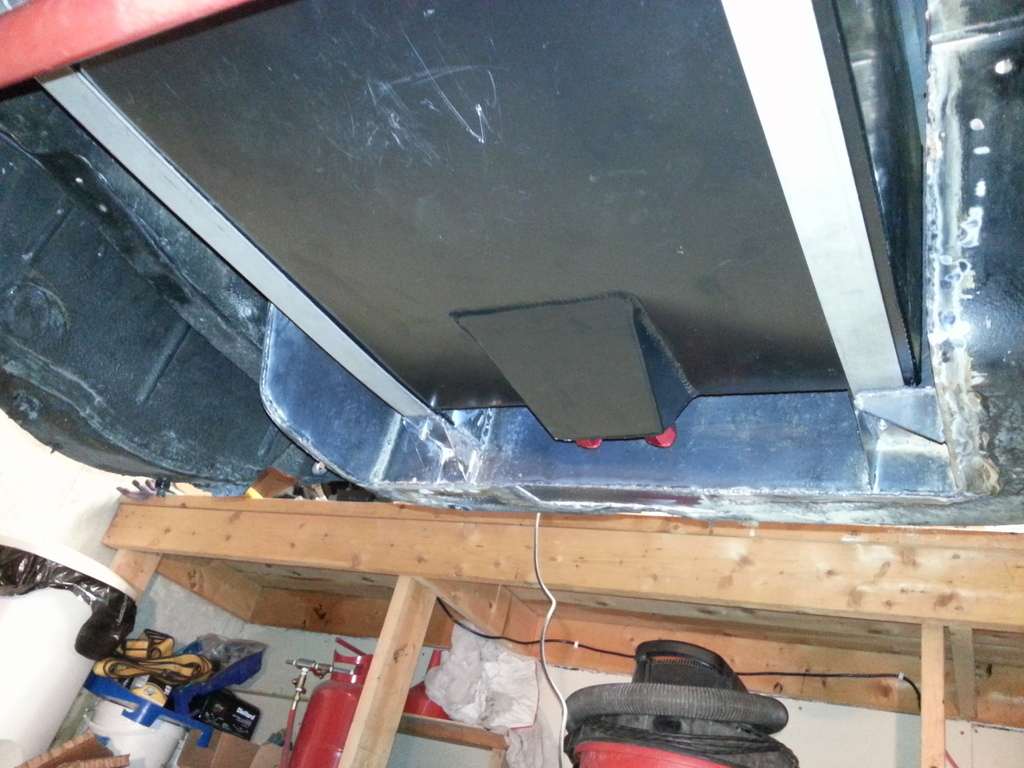
Now I decided that this was not safe at all and I wanted to mount a new cell outside the car. Time to cut out all the bad ideas.
Here is the new idea to change the shape of the trunk to hold the cell.
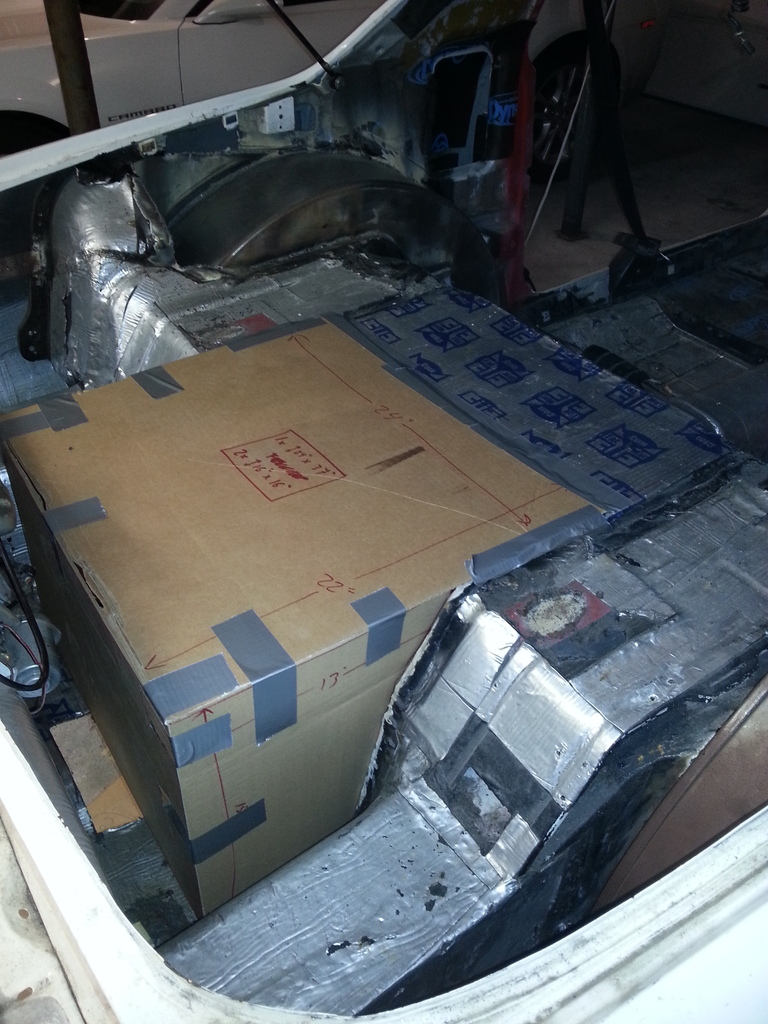
Major fab done.
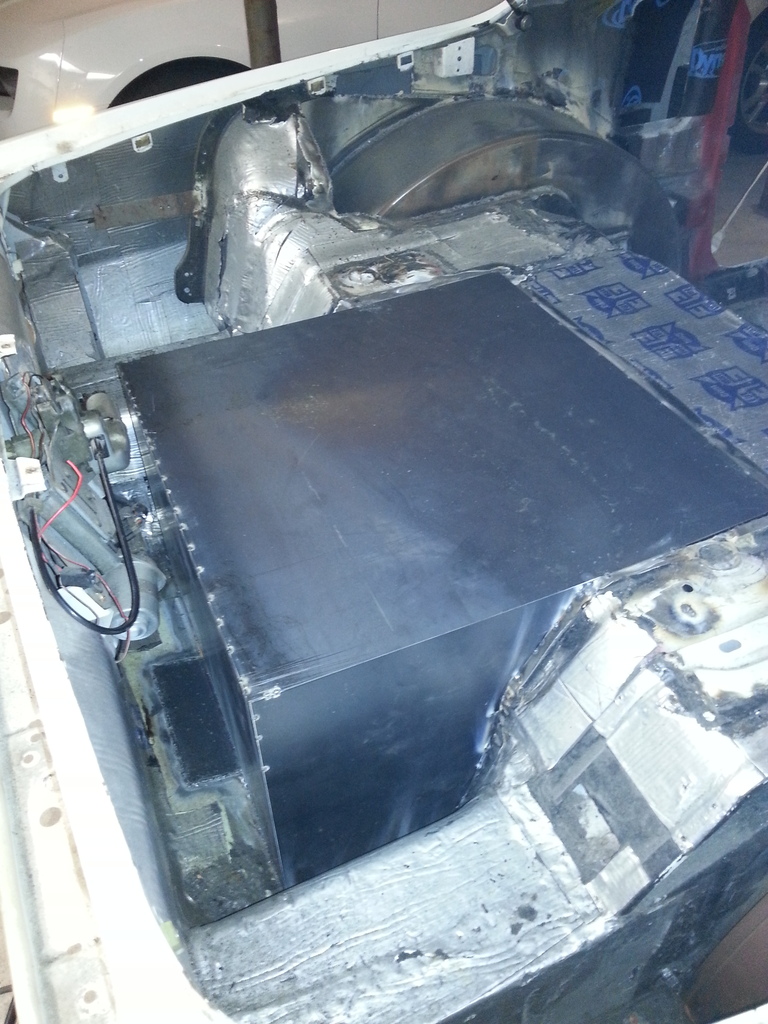
To hold the cell I thought I would use the mounting feet. (bad idea #1).
Second idea. Straps to help hold the weight. (bad idea #2).
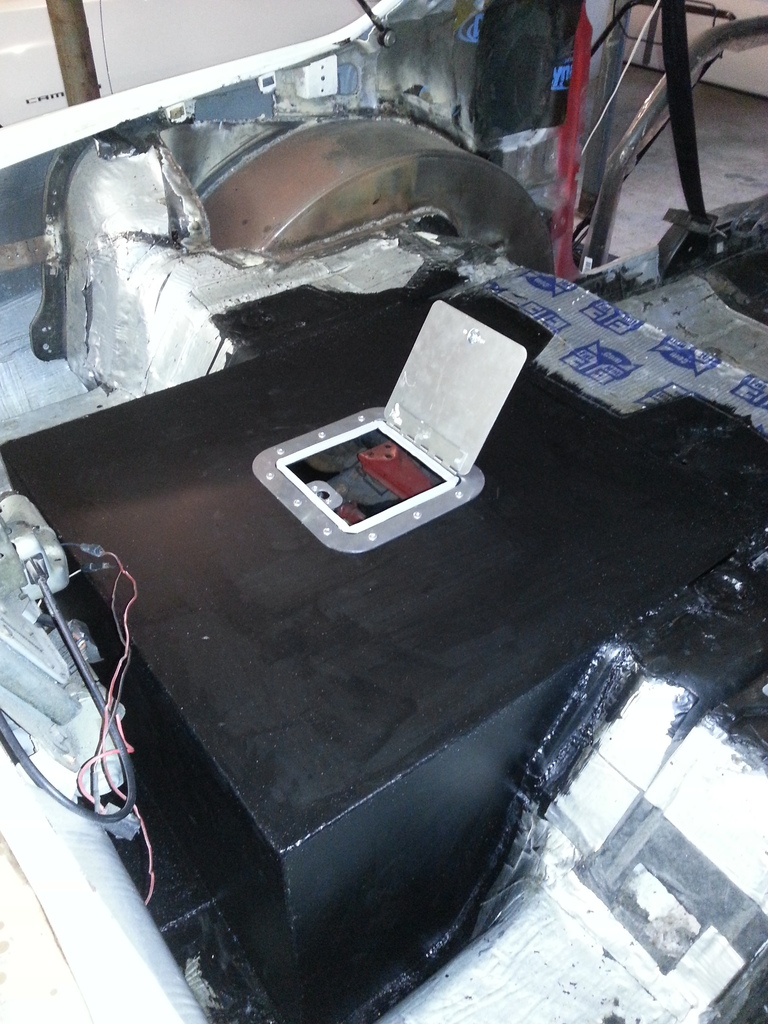
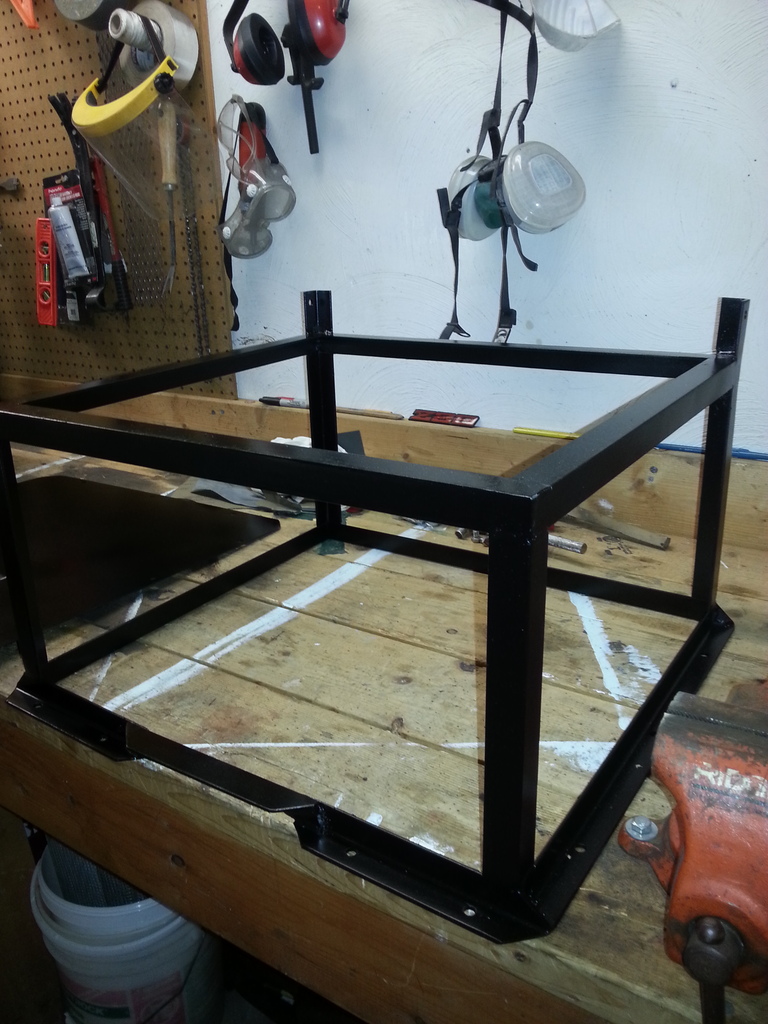
From some advice I found on TGO, I decided to make a frame to hold the cell that I can bolt to the body directly.
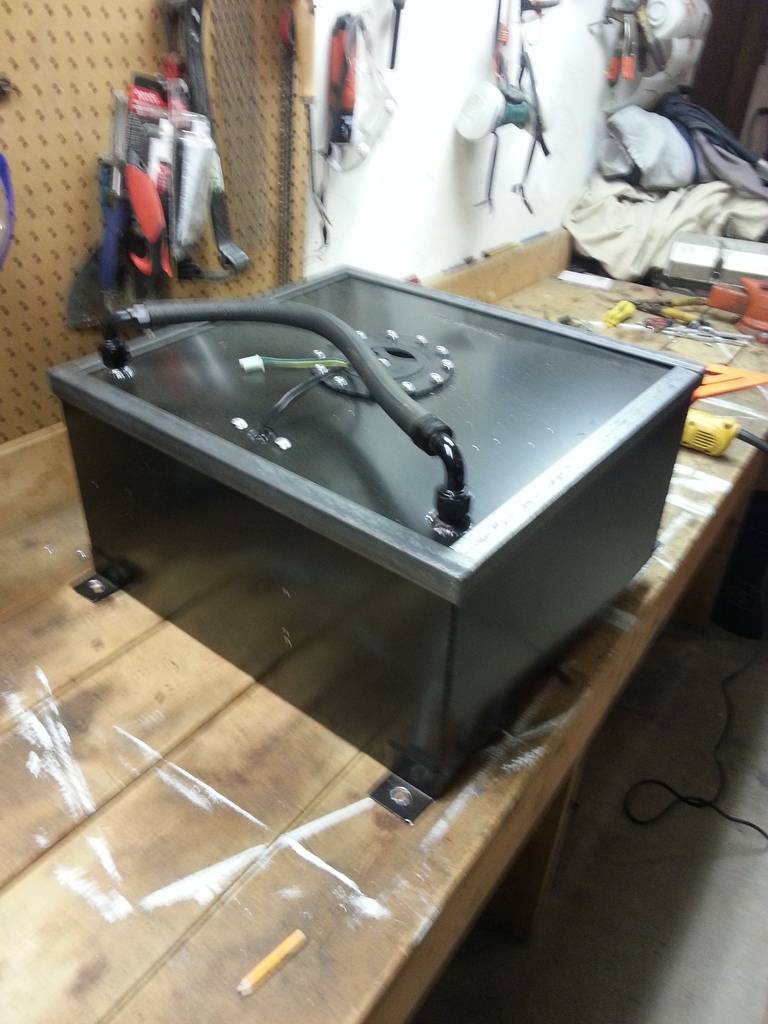
To install the cell into the frame it will have a removable floor.
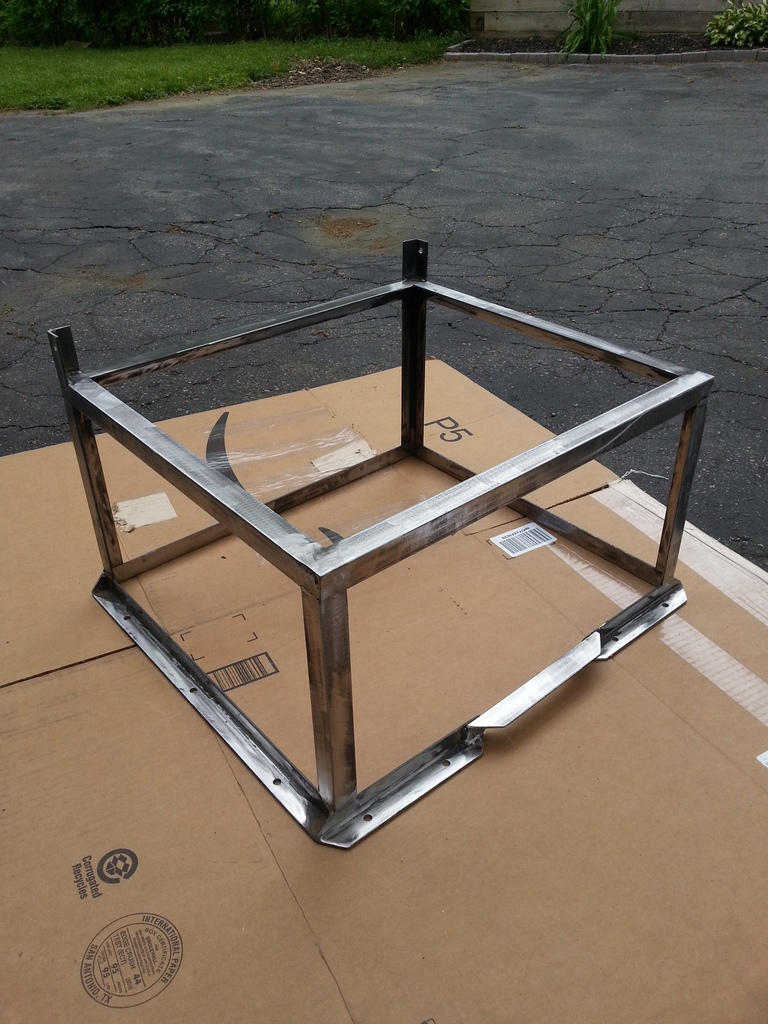
Here is the frame getting ready for paint. All edges being ground down.
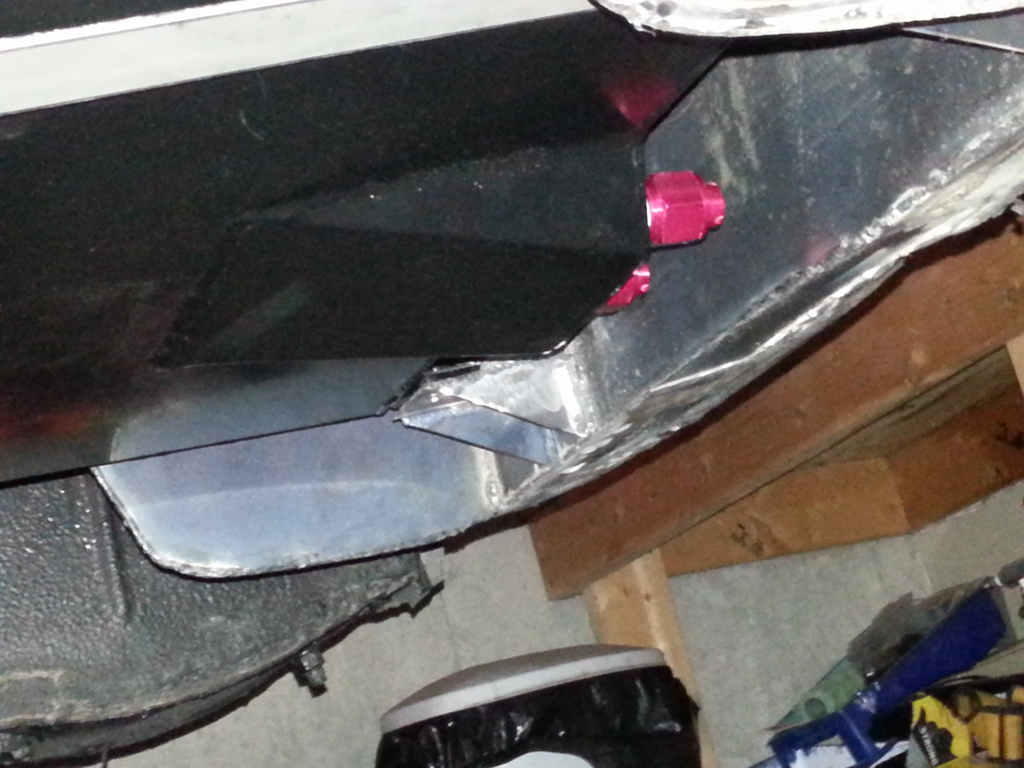
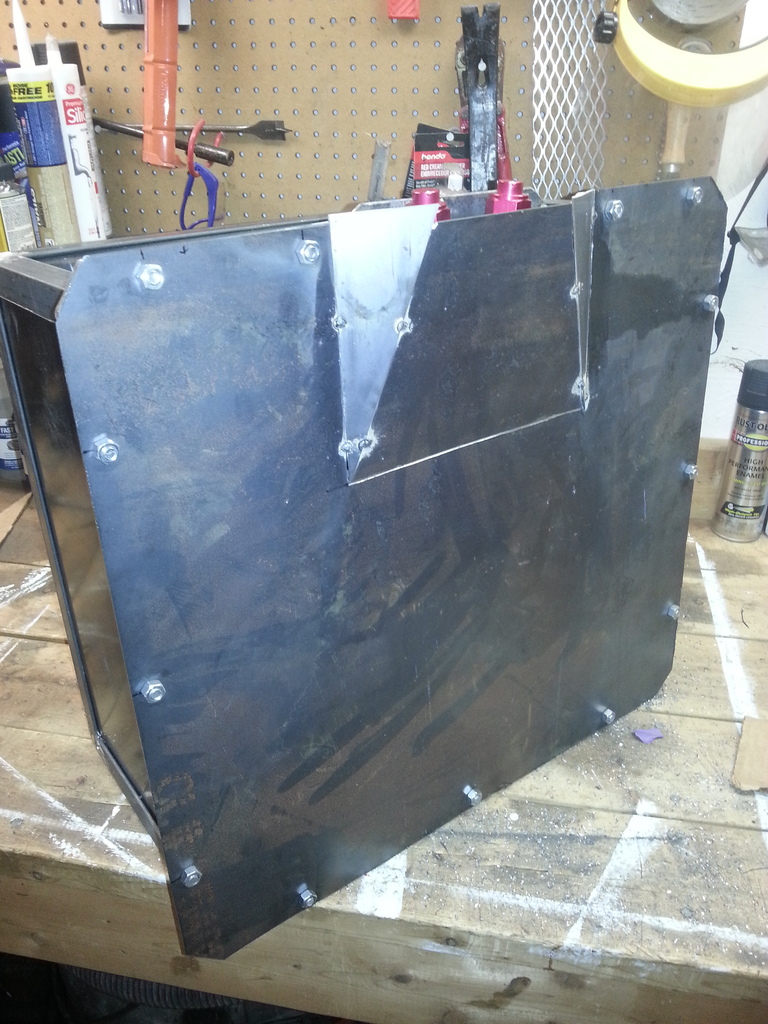
Here is the trap door to be able to access the cell.
Here is a pic of how the cell was setup back when I was a kid.
Then it evolved into a bigger change to the trunk to make it "safer".
Now I decided that this was not safe at all and I wanted to mount a new cell outside the car. Time to cut out all the bad ideas.
Here is the new idea to change the shape of the trunk to hold the cell.
Major fab done.
To hold the cell I thought I would use the mounting feet. (bad idea #1).
Second idea. Straps to help hold the weight. (bad idea #2).
From some advice I found on TGO, I decided to make a frame to hold the cell that I can bolt to the body directly.
To install the cell into the frame it will have a removable floor.
Here is the frame getting ready for paint. All edges being ground down.
Here is the trap door to be able to access the cell.
Last edited by dennisbernal91z; 02-13-2017 at 01:45 PM.
02-12-2017, 08:53 PM
#3
Supreme Member
Thread Starter
iTrader: (2)
Join Date: Feb 2005
Location: West Warwick RI, postal code: 02893
Posts: 4,337
Received 55 Likes
on
41 Posts
Car: Building LS3, T56 Z28
Engine: LS3
Transmission: T-56
Axle/Gears: Moser/ 4.11
Re: My 91 Z28 build. 17 years in the making... Finally going to do this right
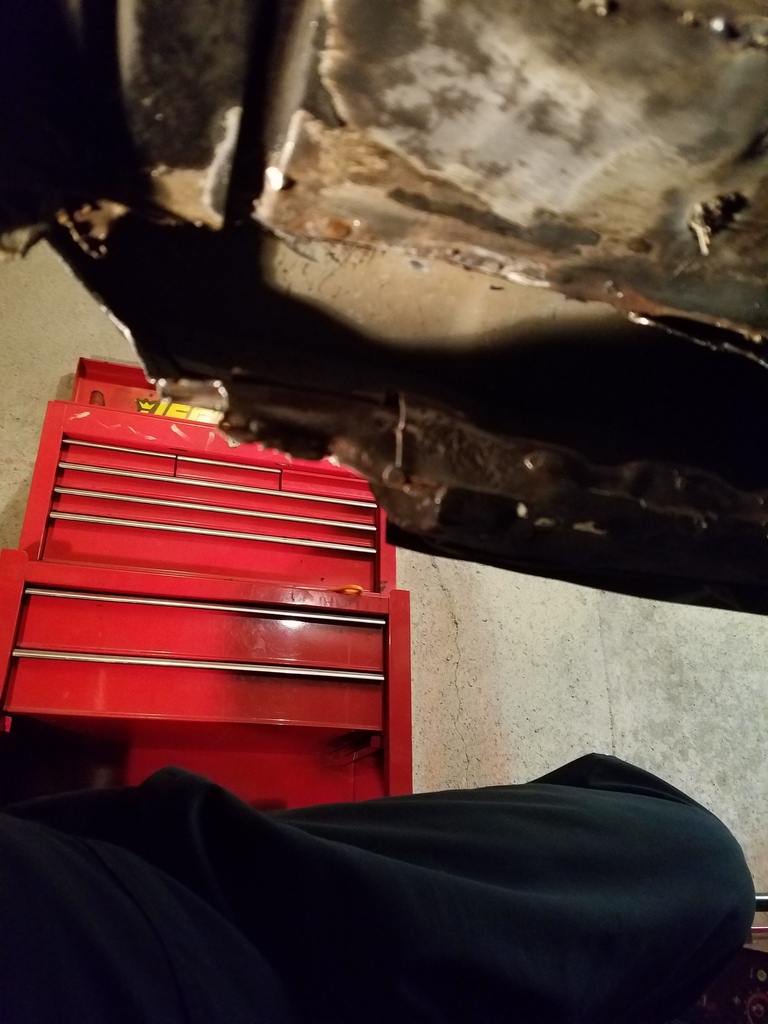
Gonna sort of jump around now since this is all I have pics of in an attempt to get the build thread up to date asap.
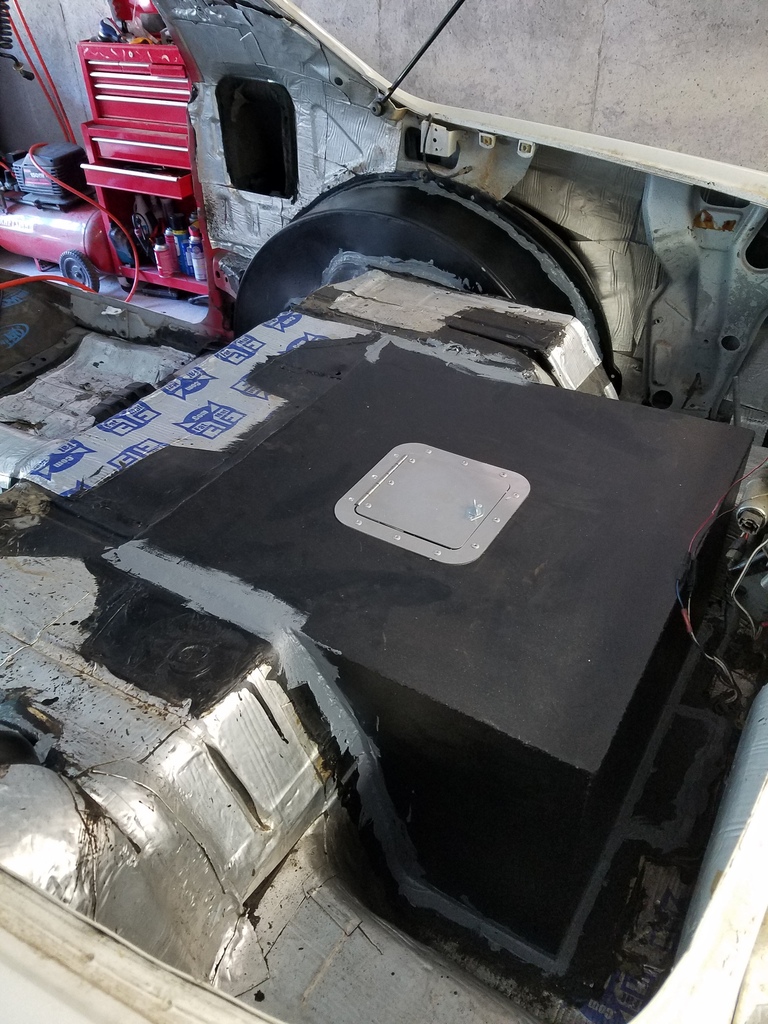
Here is the finished fuel cell frame.
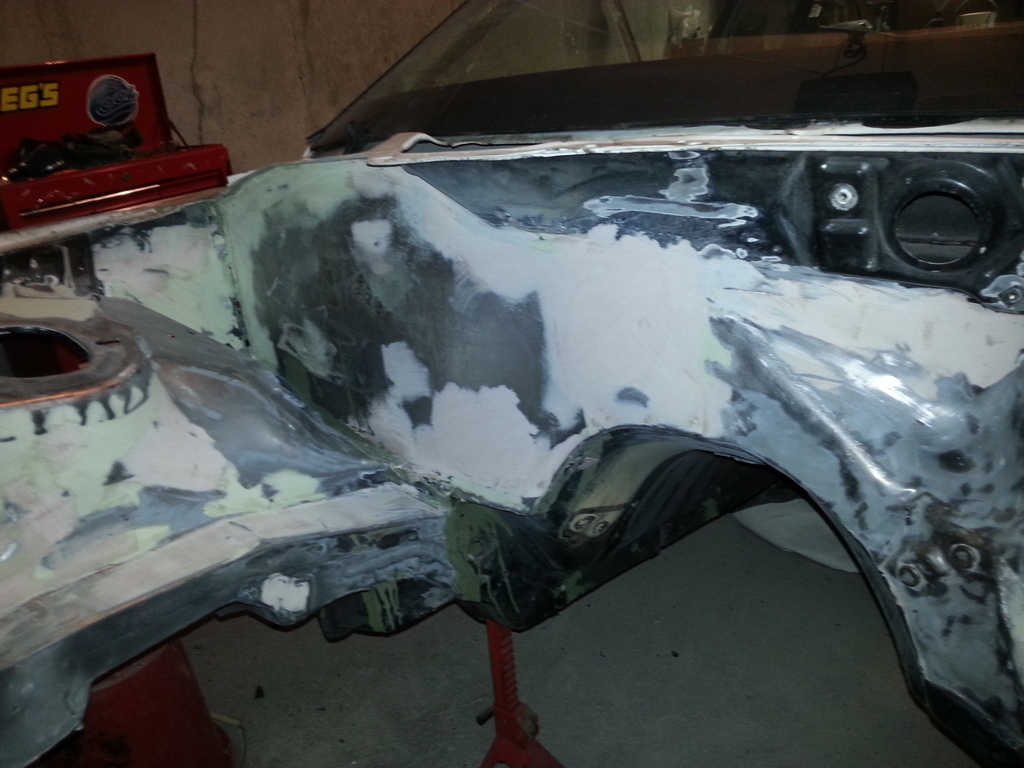
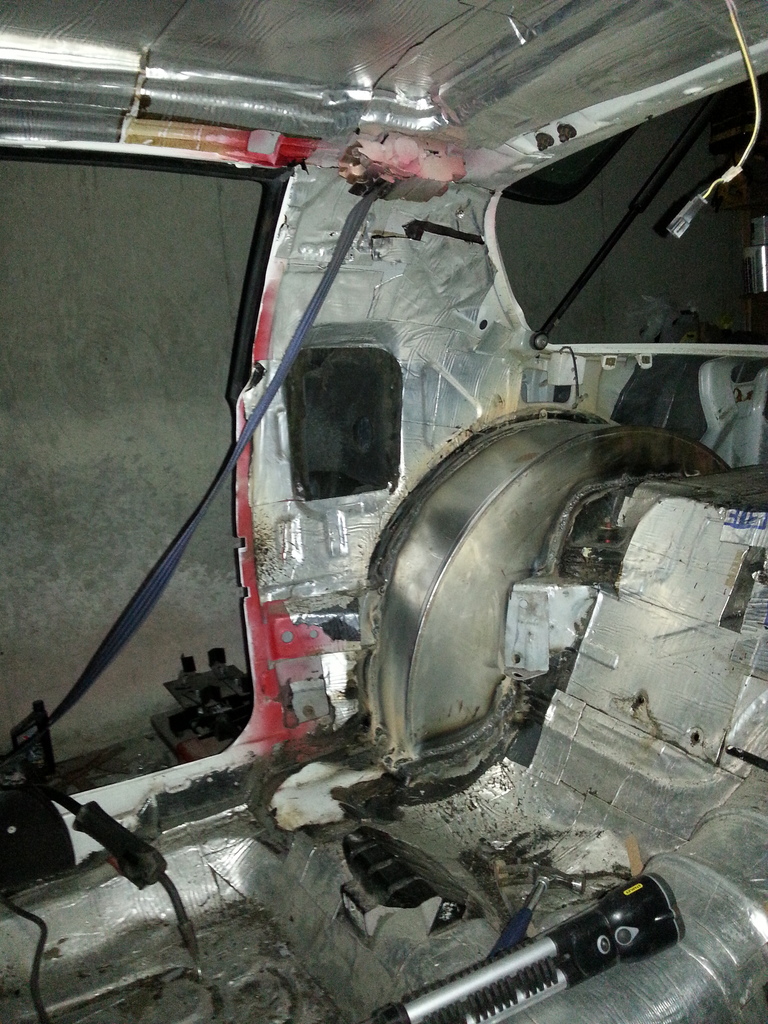
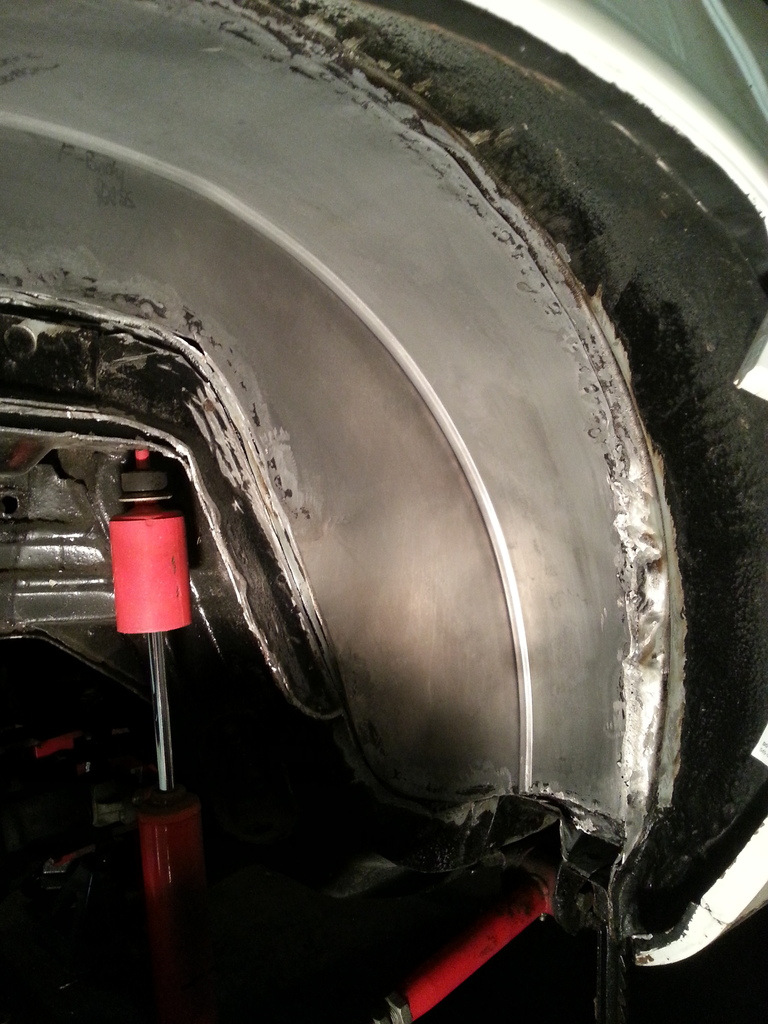
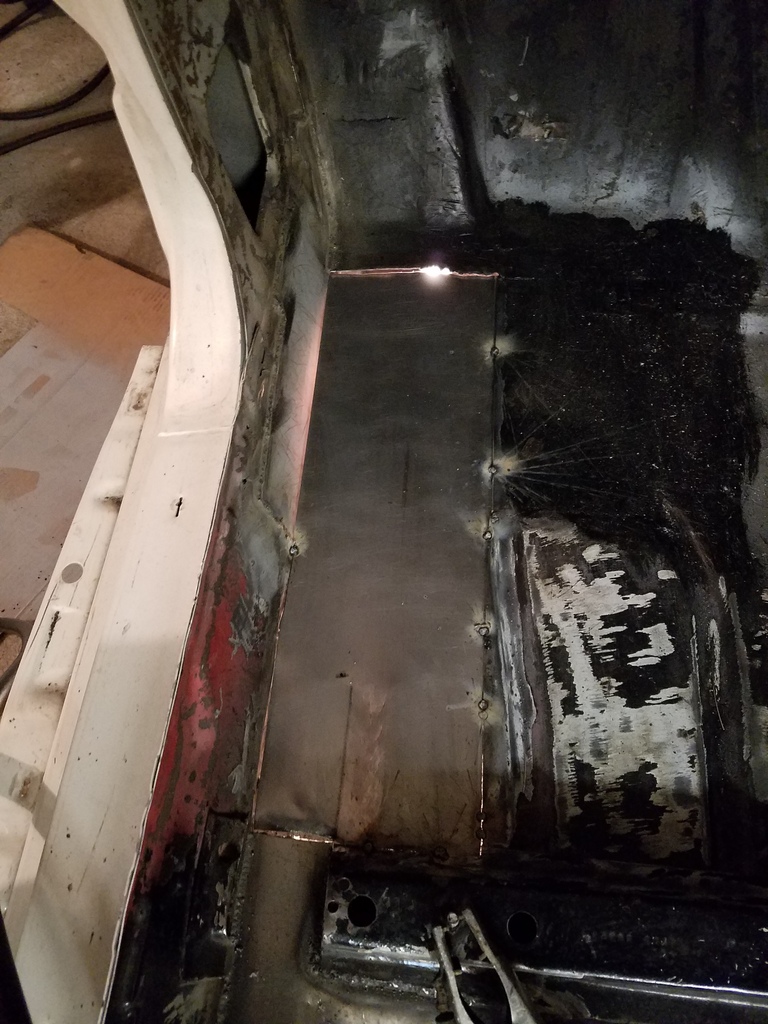
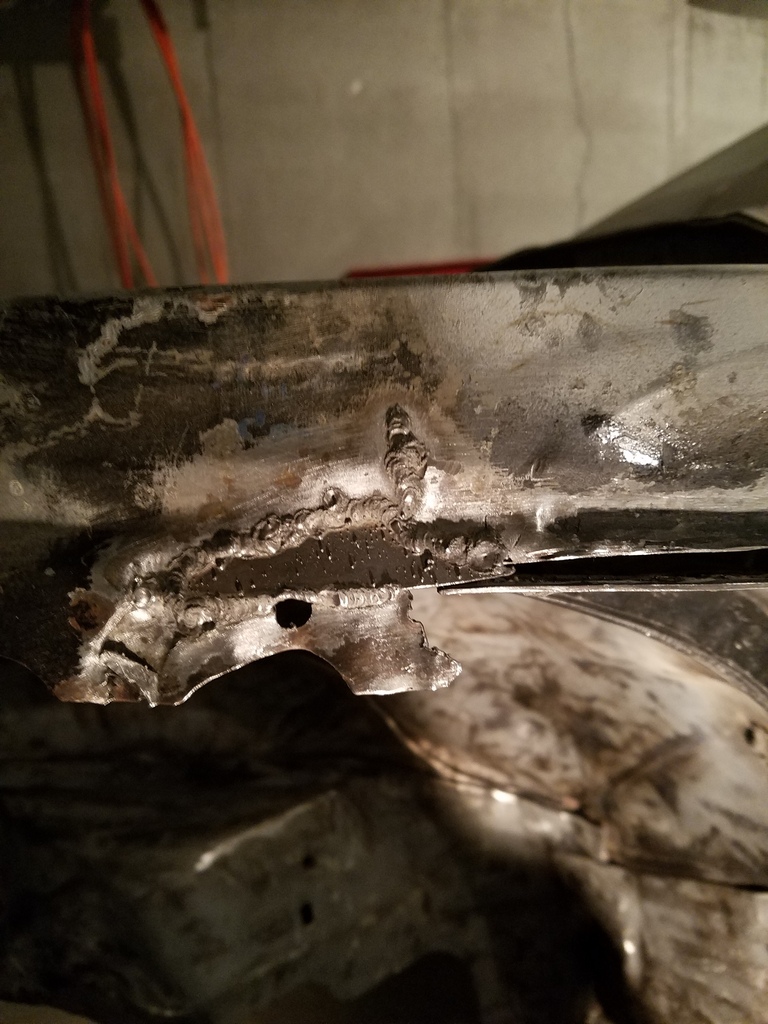
Here is the passenger side tub being "massaged" to fit right. I am no fabricator. The frame will be added back around the spring pocket after I get the air ride bag shocks.
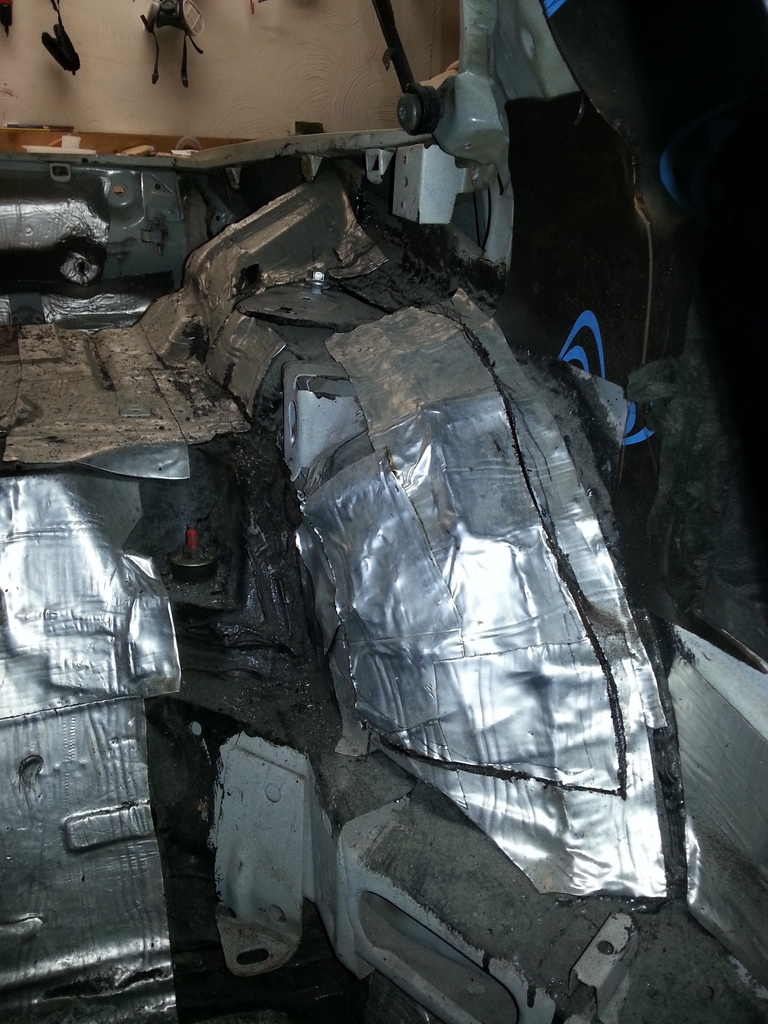
Tubs and cell with seam sealer from Eastwood. Great product.
Coating the inside of the floor with rust inhibiting paint. I am going to start from tail lights and work my way to the engine bay.
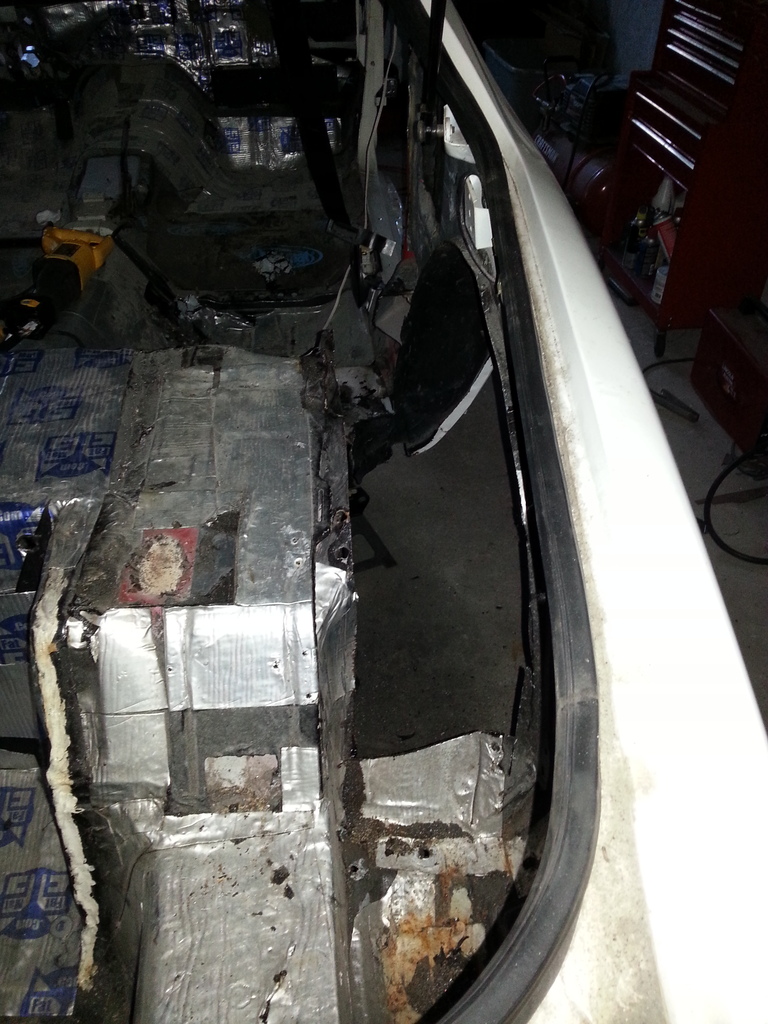
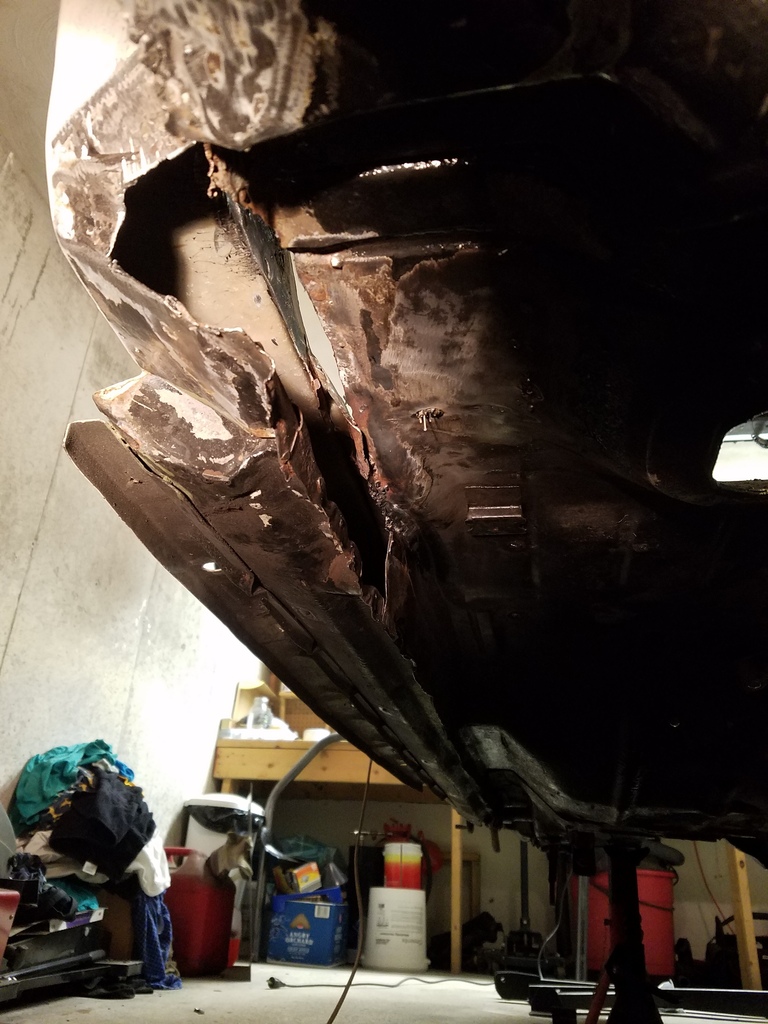
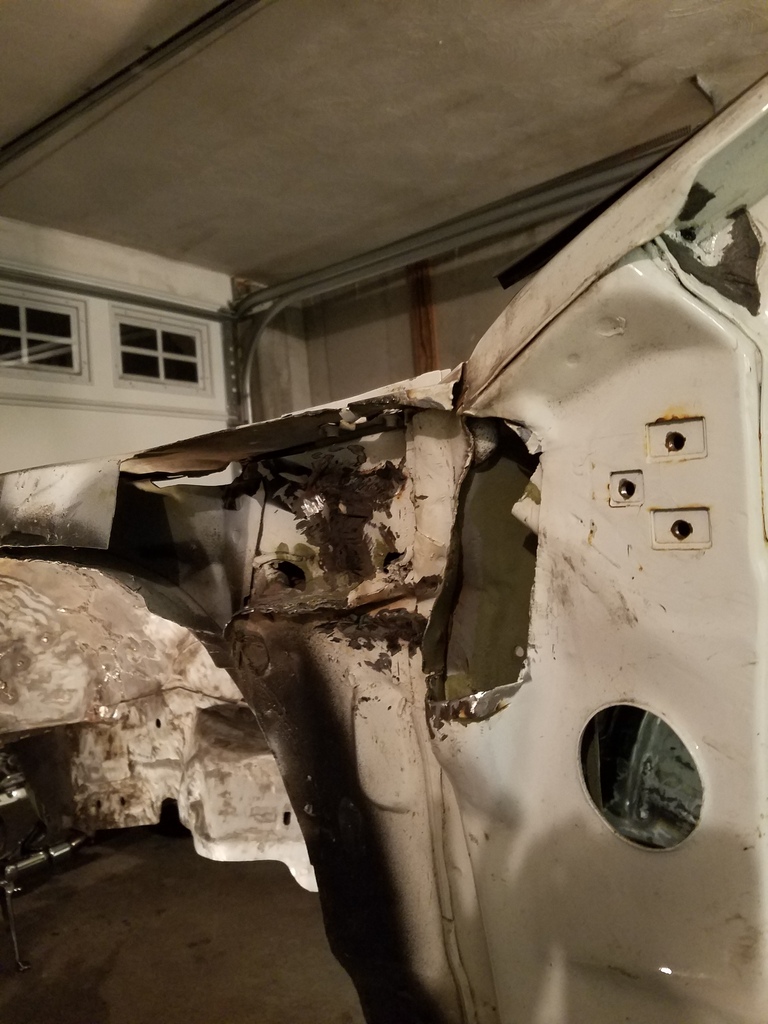
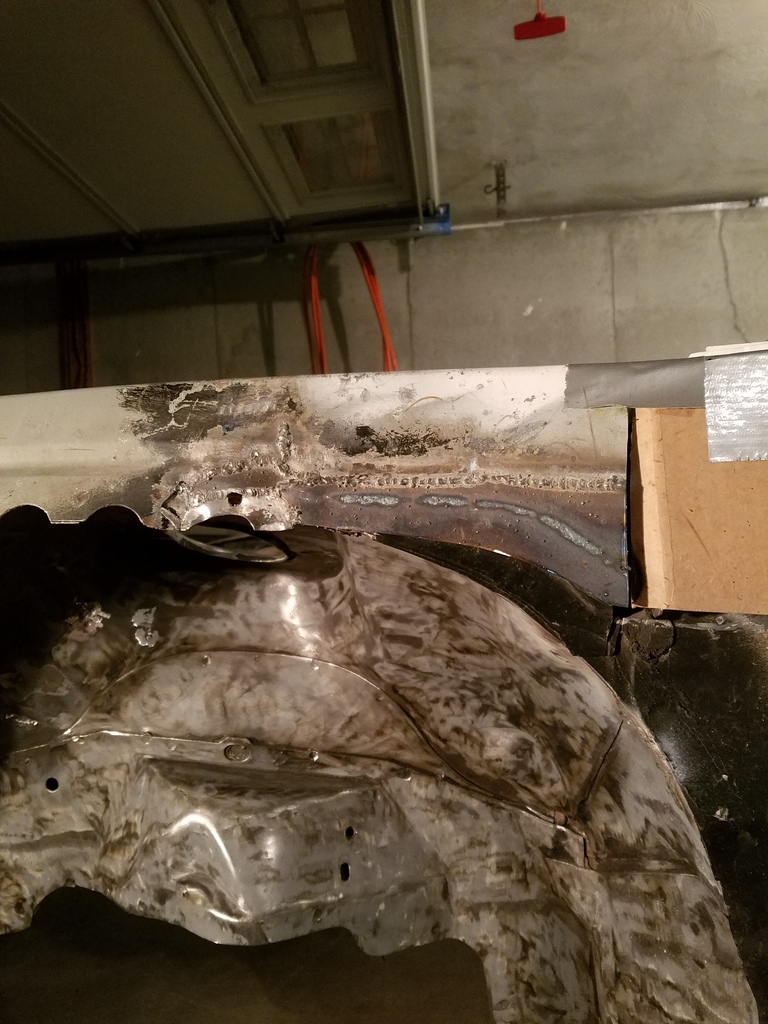
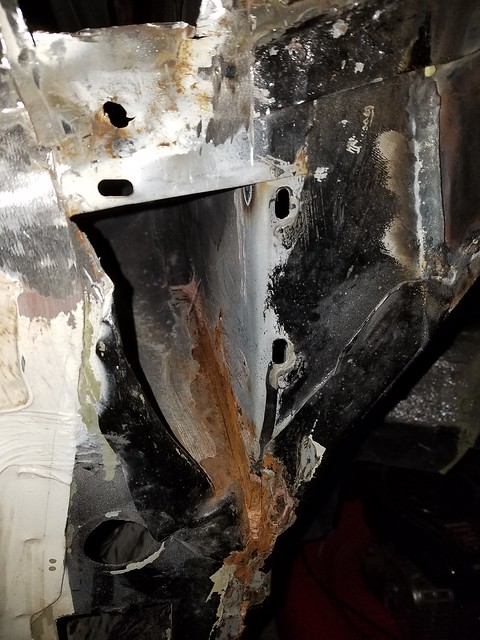
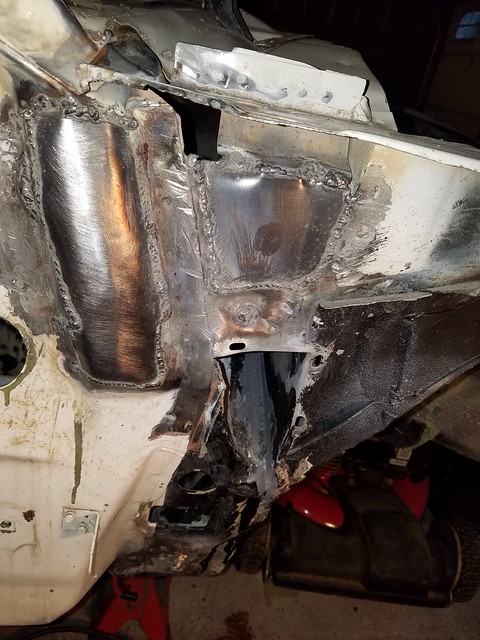
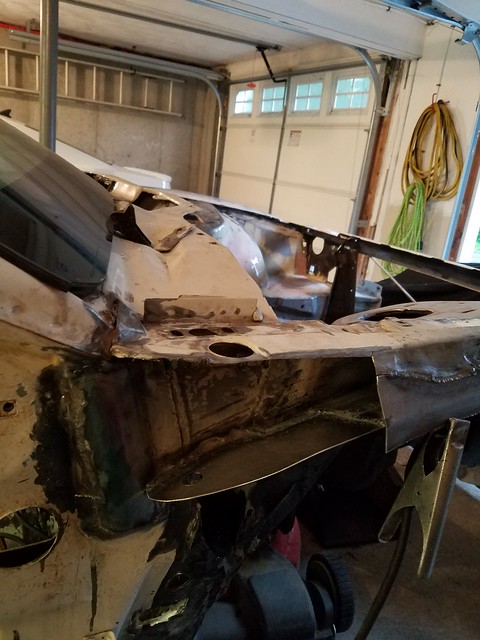
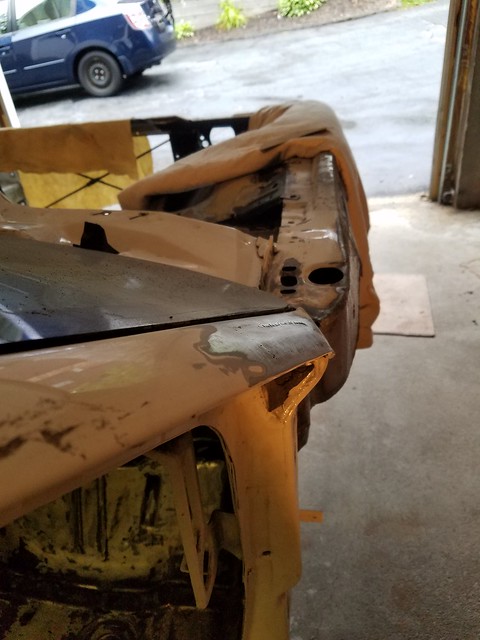
Back when I was a kid I did some HORRIBLE patch work. I decided to cut it all out and start over. Here is what it looks like with all the junk work cut out.

A bit further back.
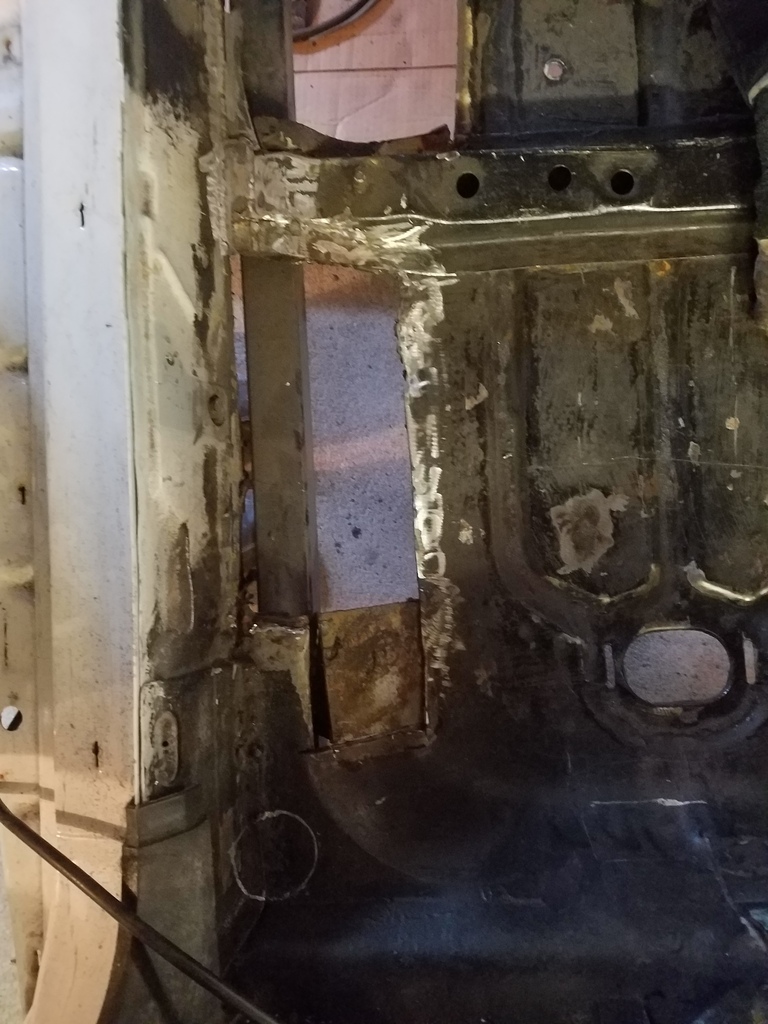
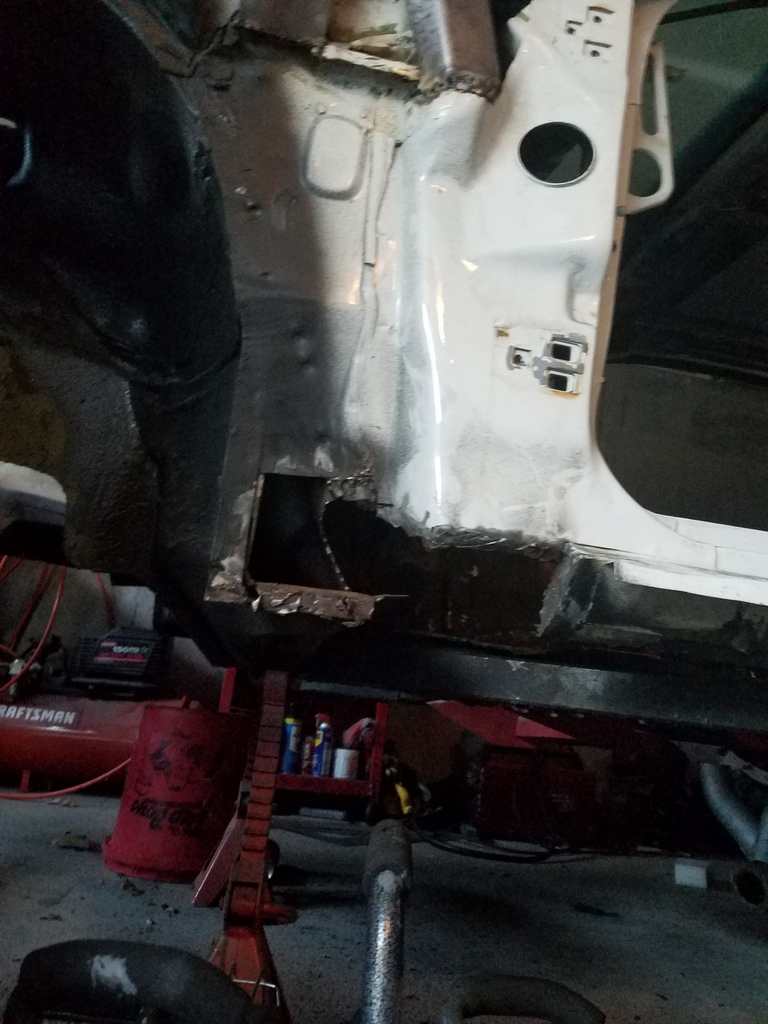
Driver side from the outside.
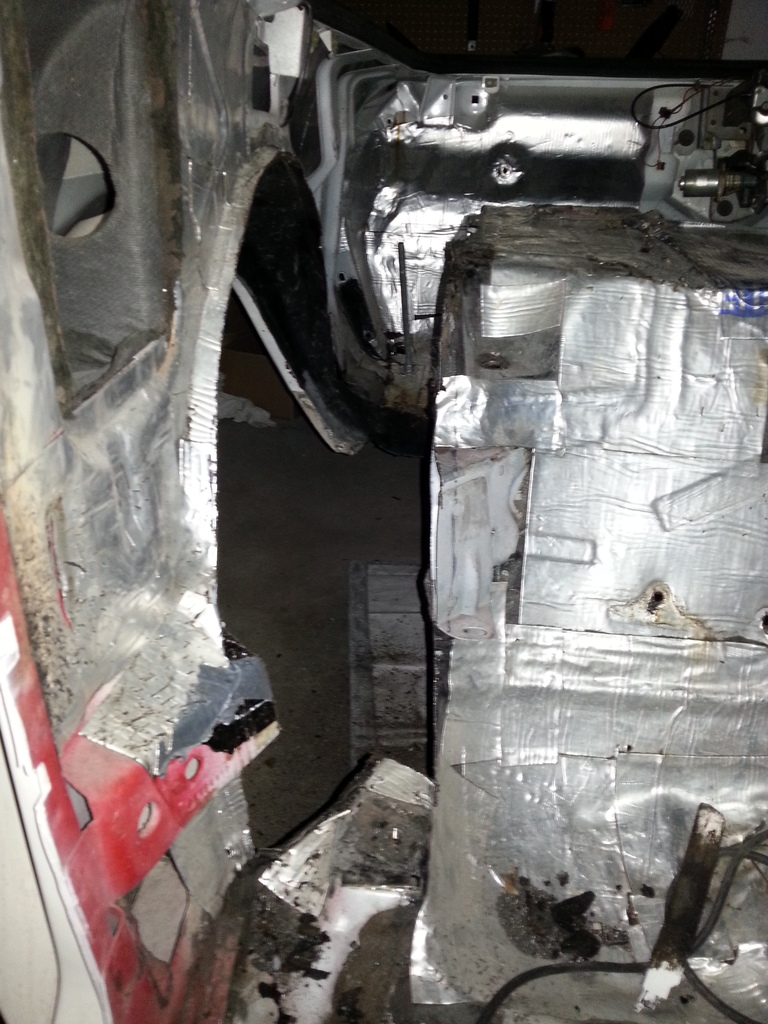
Starting to rebuild with small pieces to form the missing panels.
Driver side shot from the outside.
Some shots of the passenger side mess.

Here is the finished fuel cell frame.
Here is the passenger side tub being "massaged" to fit right. I am no fabricator. The frame will be added back around the spring pocket after I get the air ride bag shocks.
Tubs and cell with seam sealer from Eastwood. Great product.
Coating the inside of the floor with rust inhibiting paint. I am going to start from tail lights and work my way to the engine bay.
Back when I was a kid I did some HORRIBLE patch work. I decided to cut it all out and start over. Here is what it looks like with all the junk work cut out.
A bit further back.
Driver side from the outside.
Starting to rebuild with small pieces to form the missing panels.
Driver side shot from the outside.
Some shots of the passenger side mess.
Last edited by dennisbernal91z; 02-13-2017 at 01:45 PM.
02-12-2017, 09:04 PM
#4
Supreme Member
Thread Starter
iTrader: (2)
Join Date: Feb 2005
Location: West Warwick RI, postal code: 02893
Posts: 4,337
Received 55 Likes
on
41 Posts
Car: Building LS3, T56 Z28
Engine: LS3
Transmission: T-56
Axle/Gears: Moser/ 4.11
Re: My 91 Z28 build. 17 years in the making... Finally going to do this right
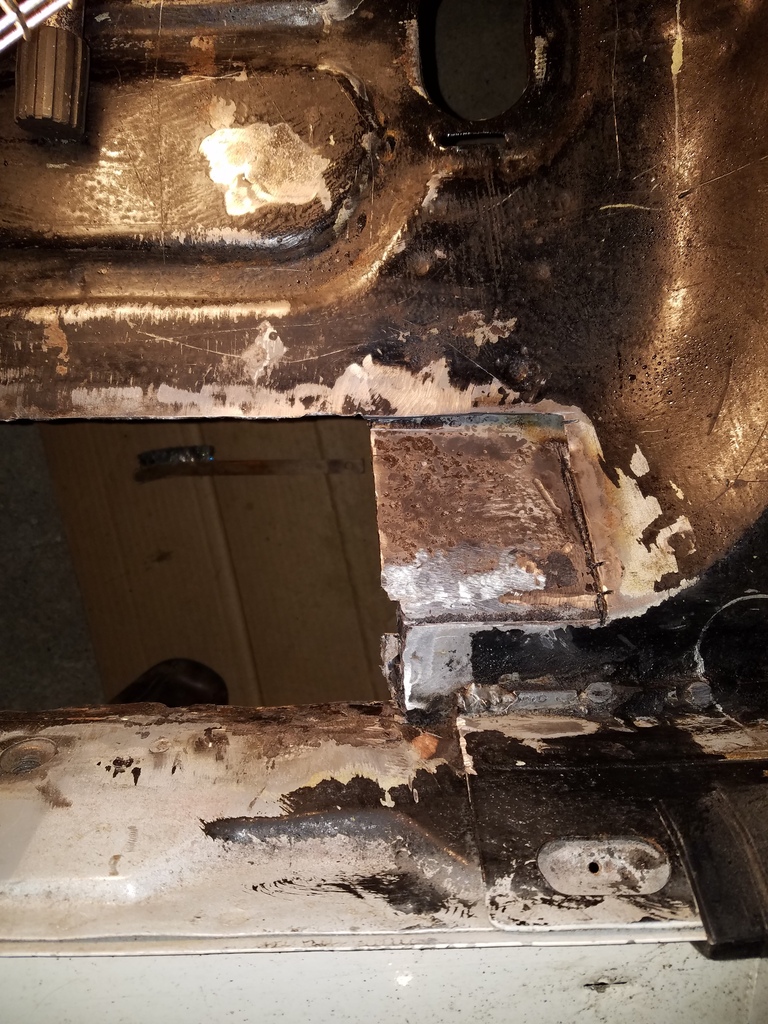
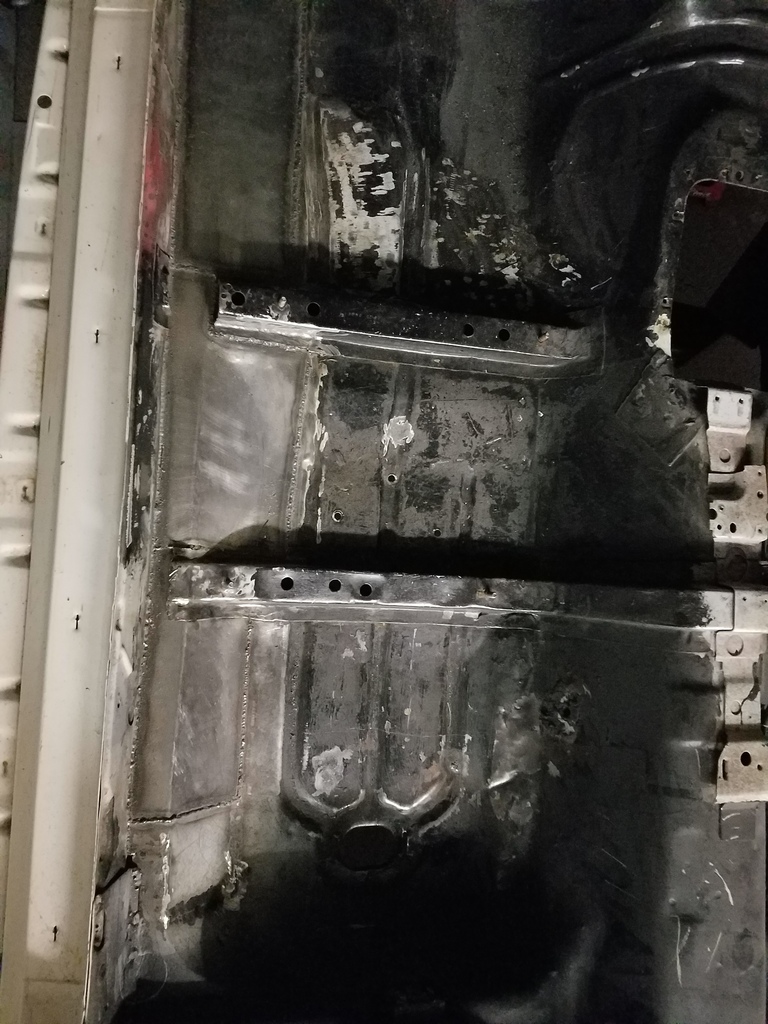
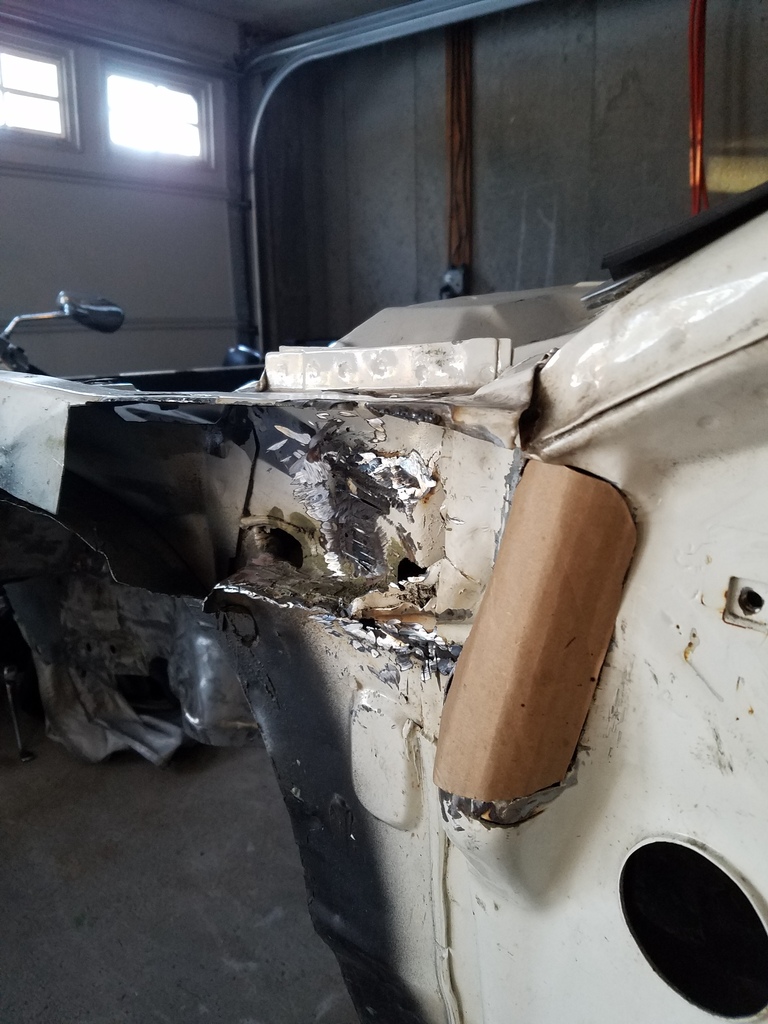
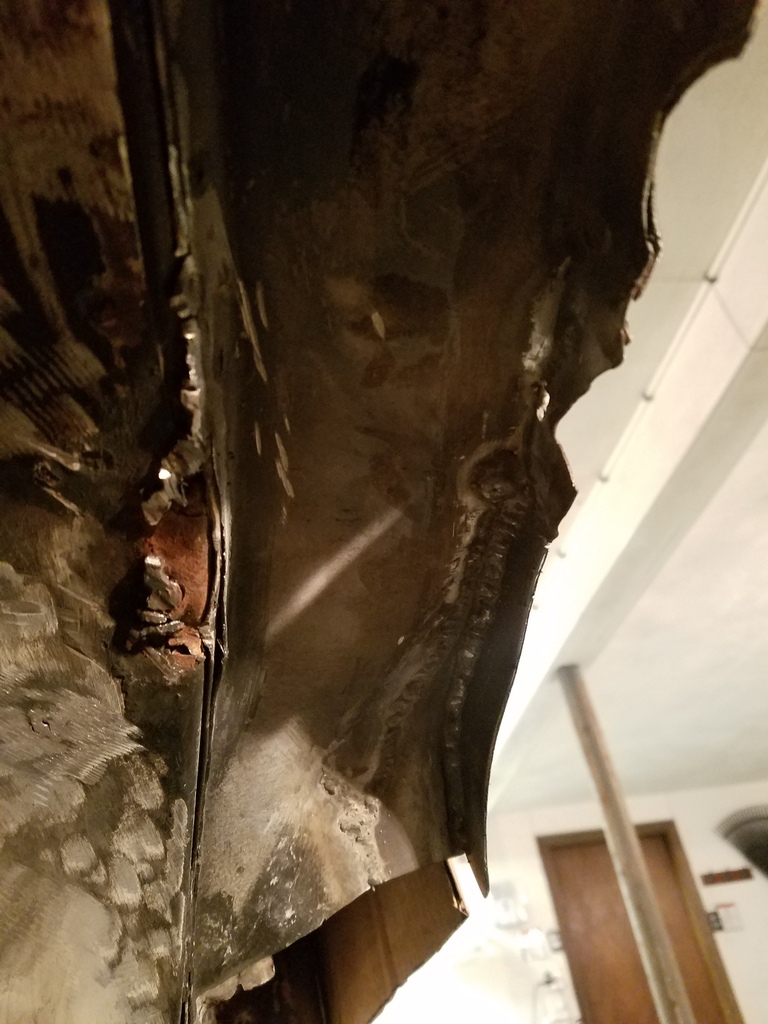
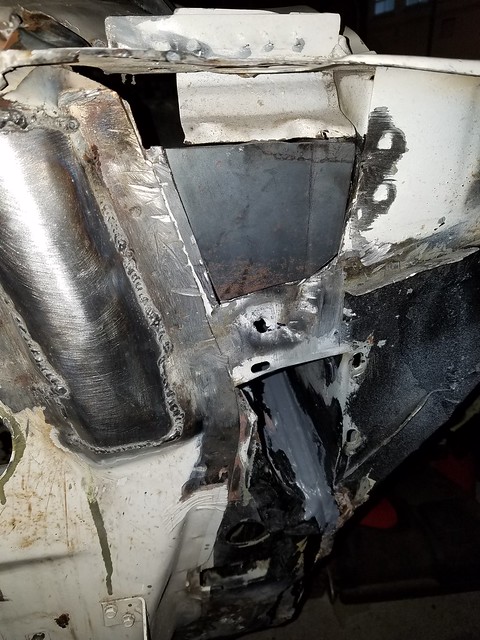
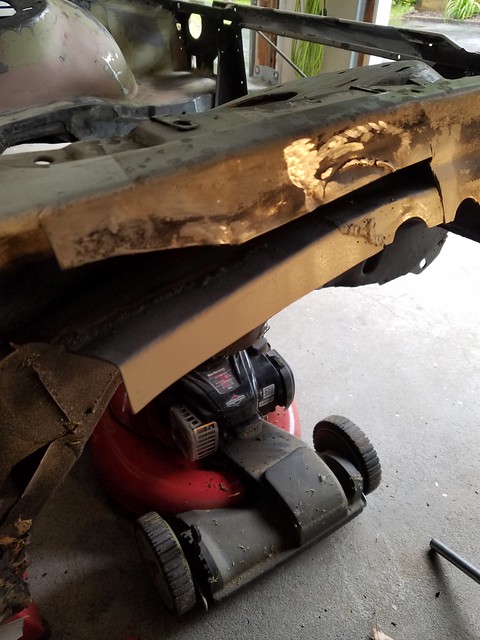
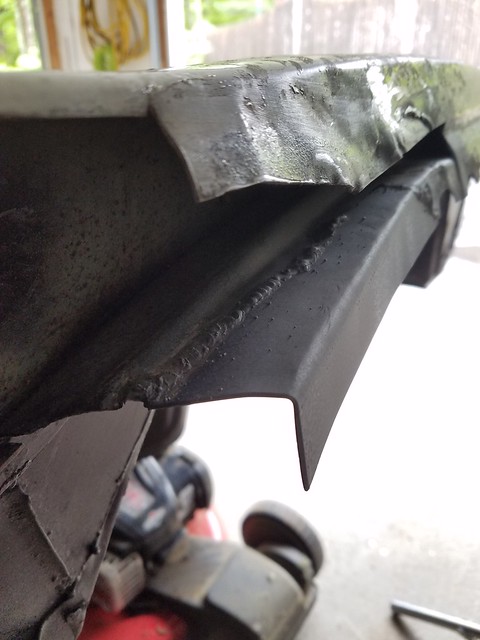
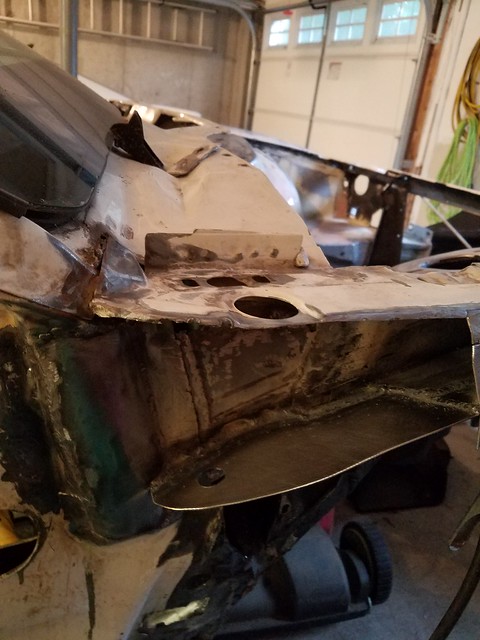
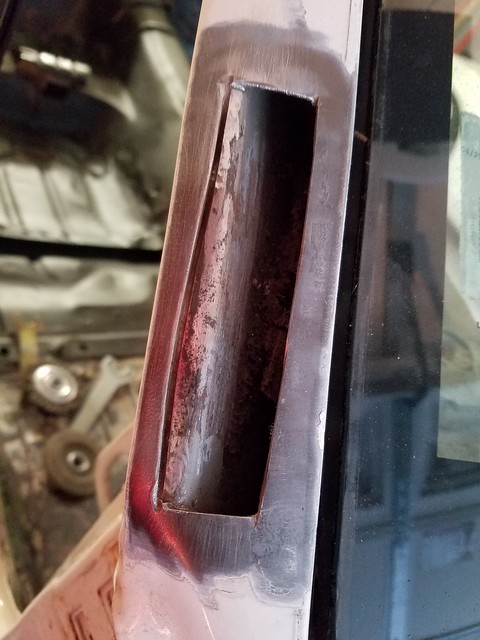
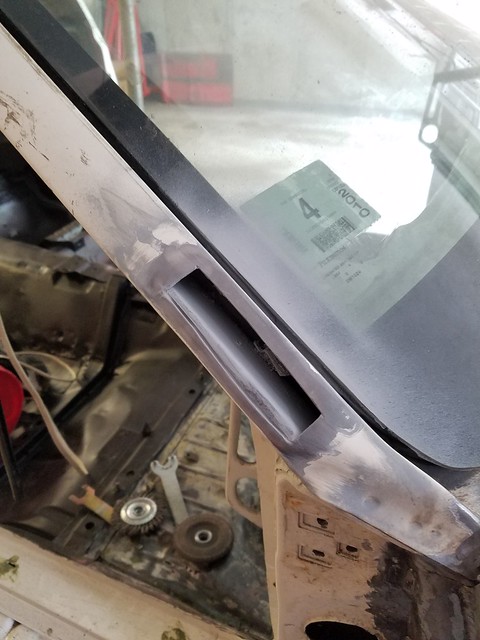
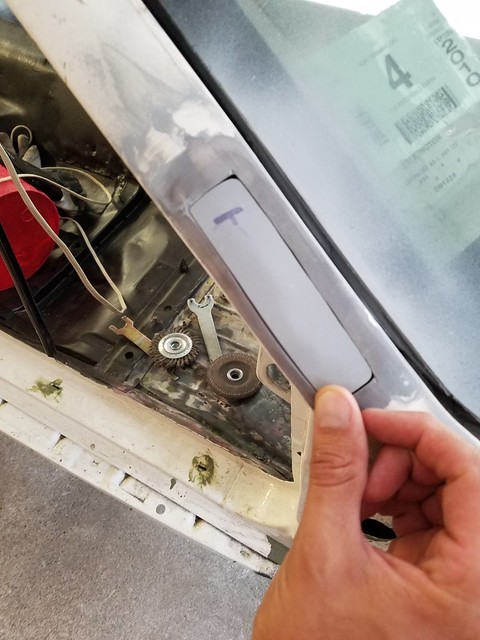
Here is the driver side all junk cut out and ready to be rebuilt.
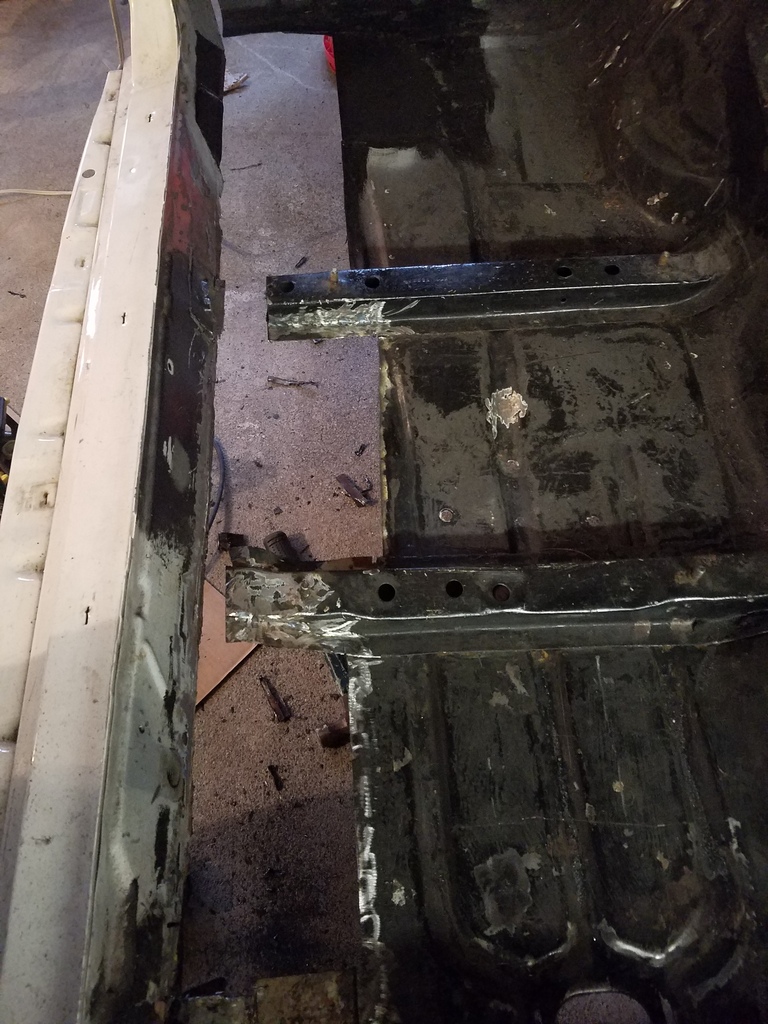
Tangent. The aftermath of wire wheeling all the undercoating off the driver side wheel tub.
Fixing the thinker suspension mount metal under the floor.

After spraying with zinc phosphate to convert any rust.
First patch test fit and ready to go in.
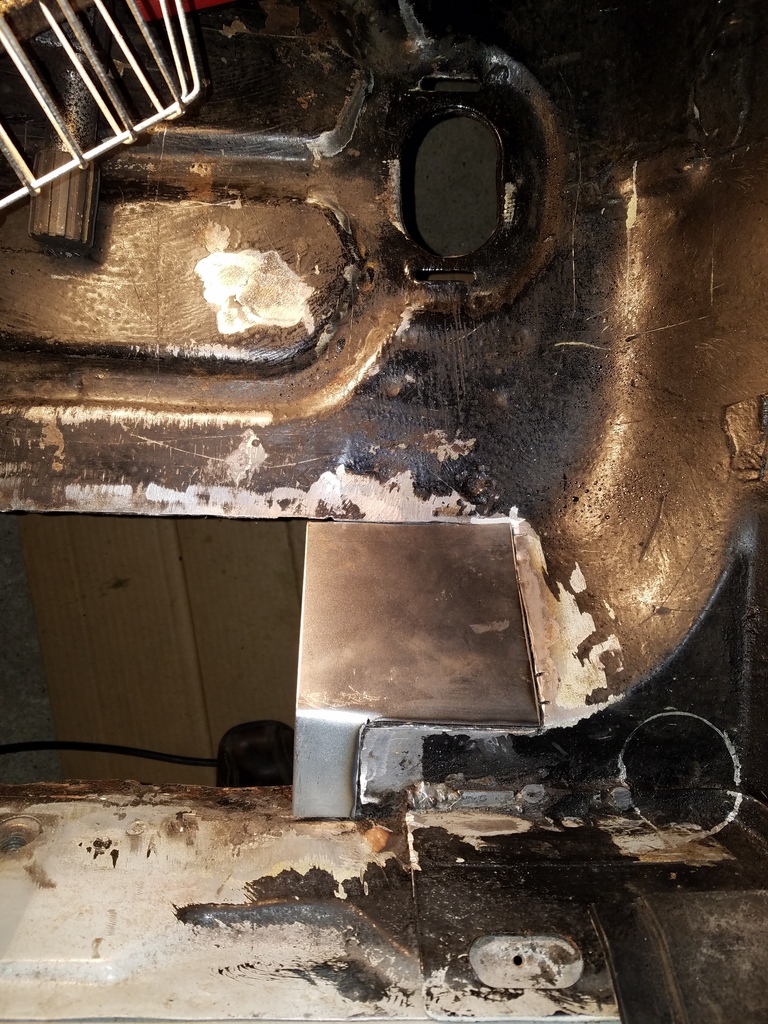
Painted everything with weld thru primer for the placed that I can't get to later.
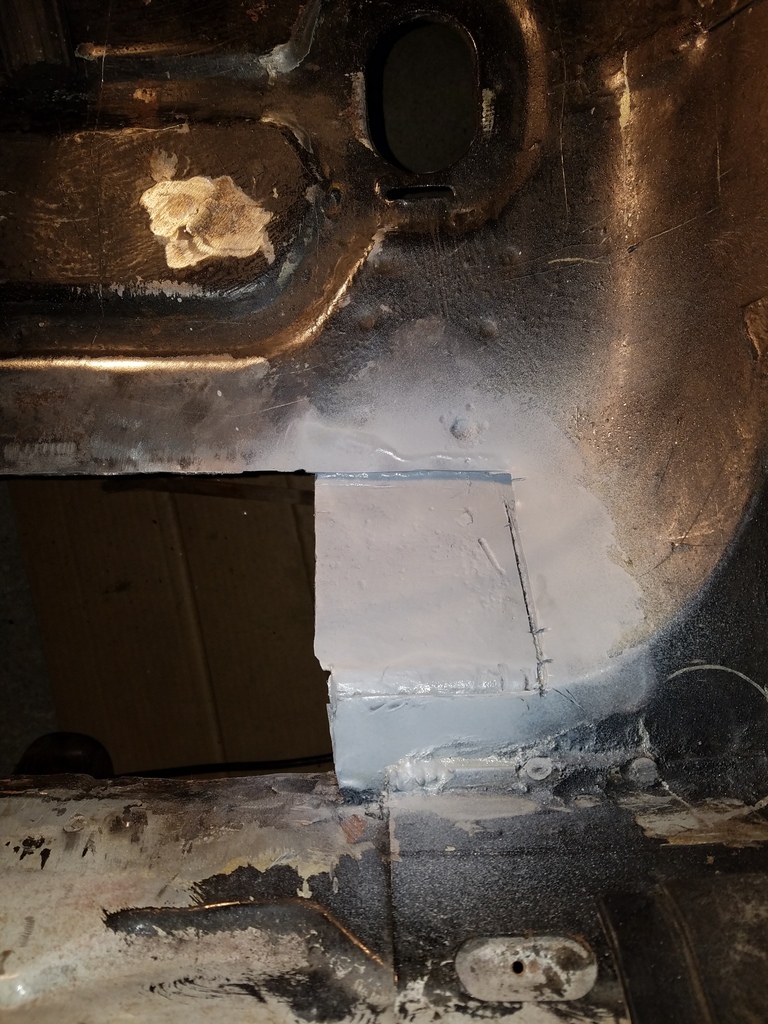
Patch welded in.
Wire wheeled.
After grinding.
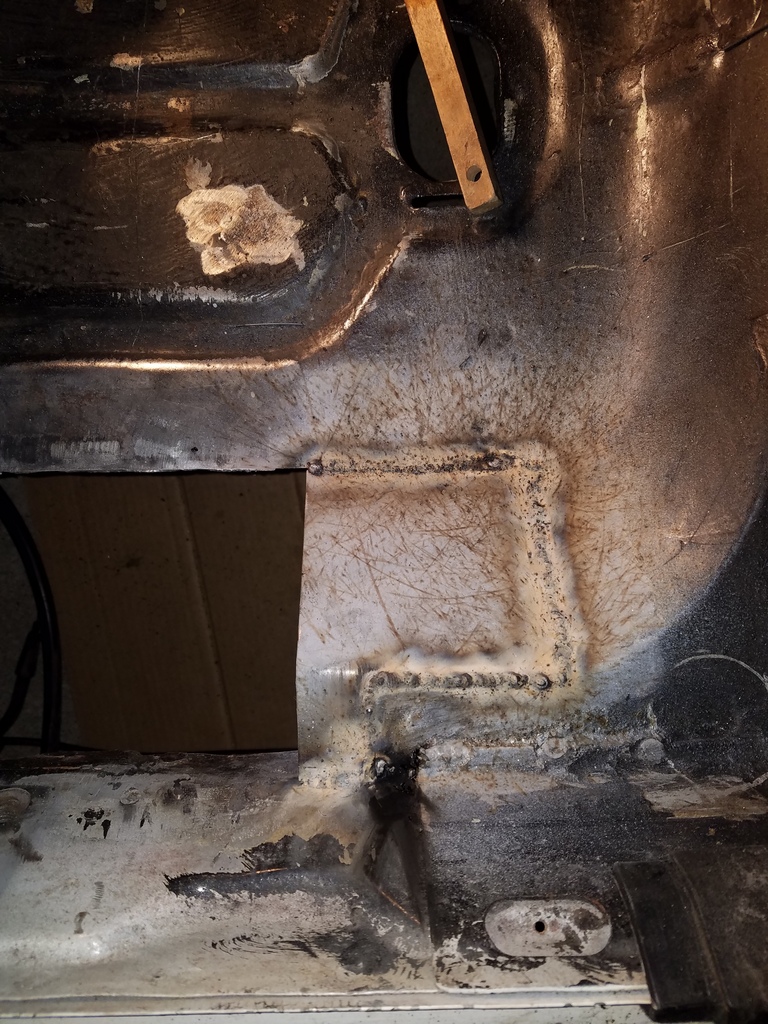
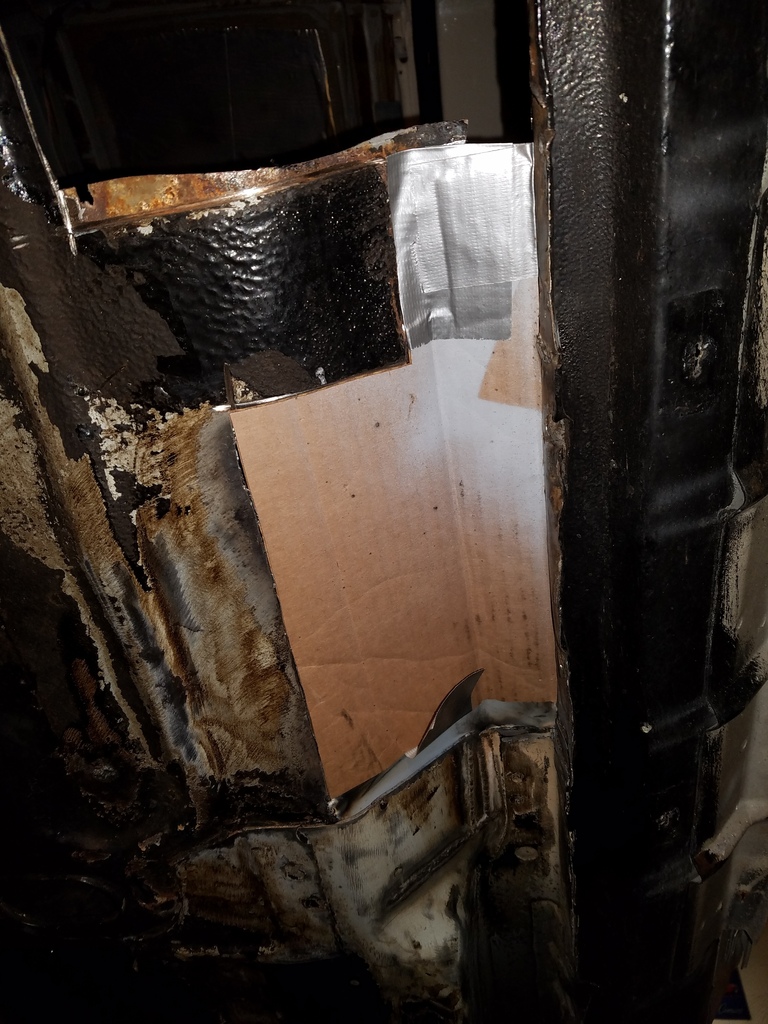
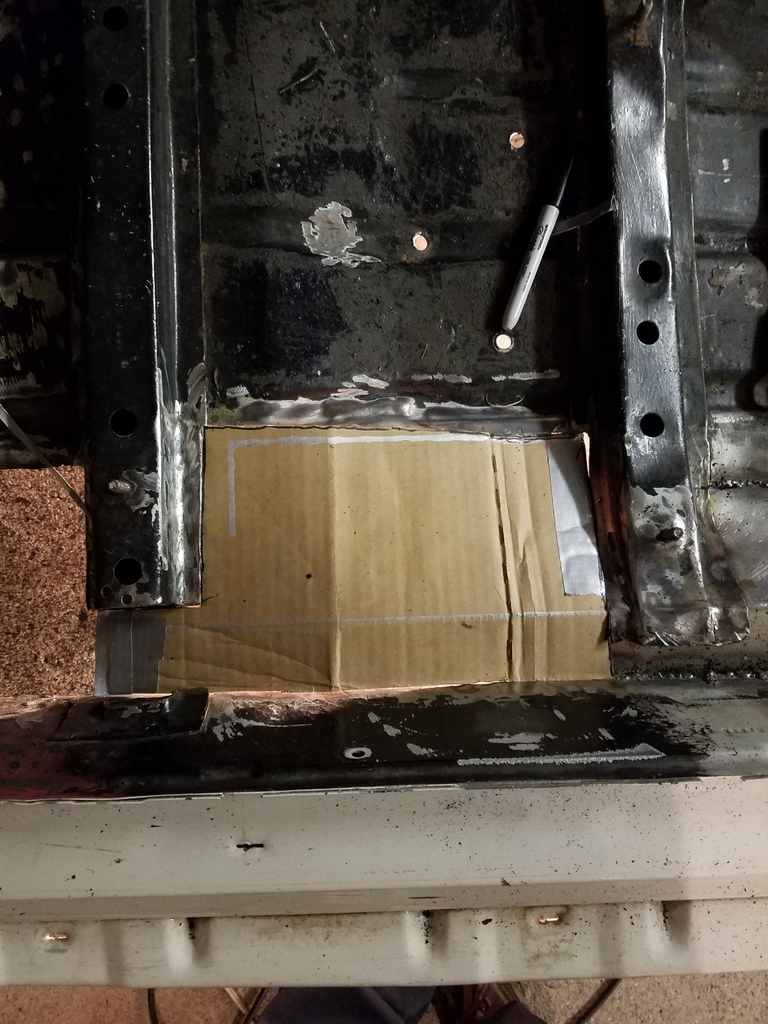
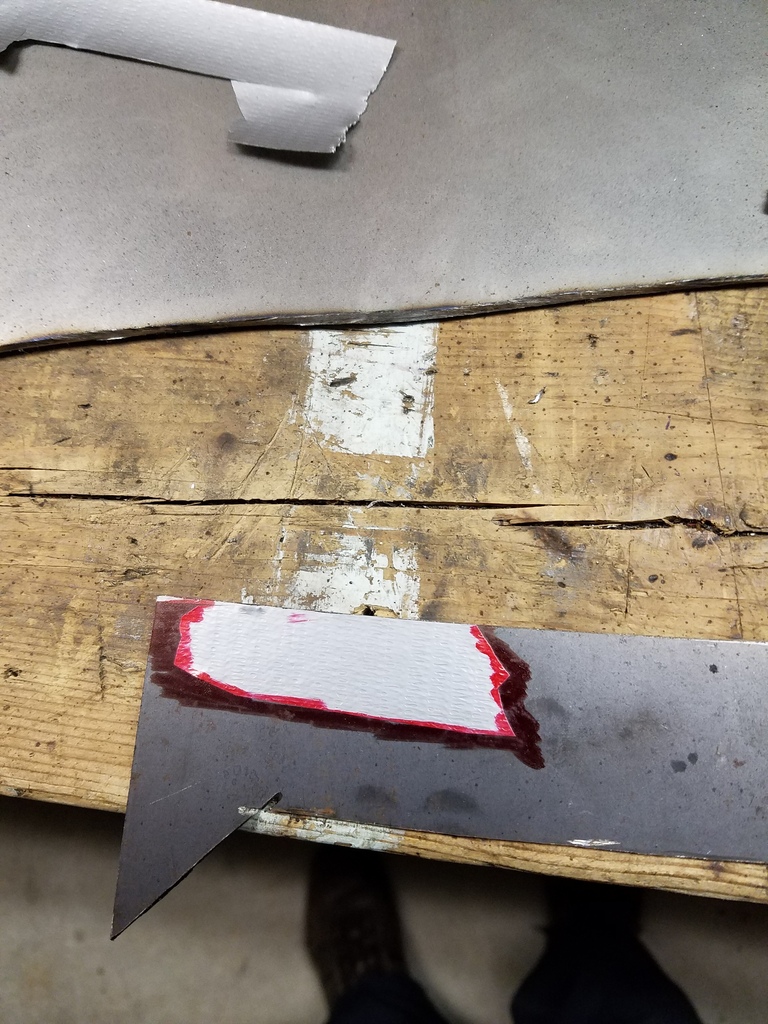
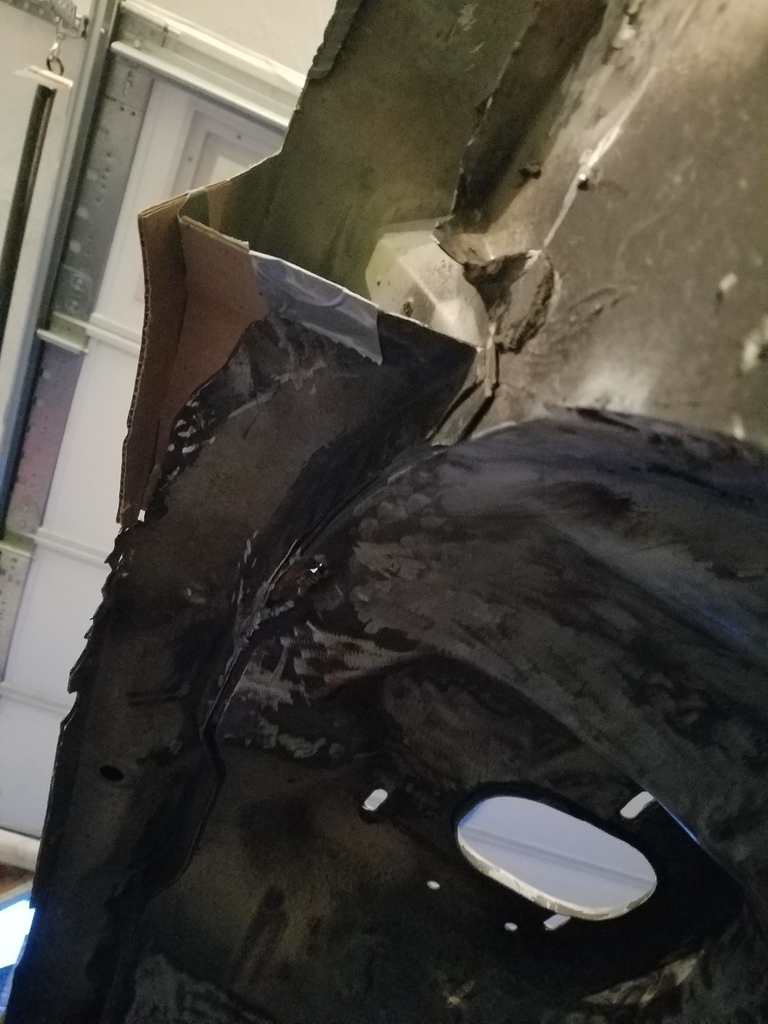
Next piece getting mocked up with cardboard.
Tangent. The aftermath of wire wheeling all the undercoating off the driver side wheel tub.
Fixing the thinker suspension mount metal under the floor.
After spraying with zinc phosphate to convert any rust.
First patch test fit and ready to go in.
Painted everything with weld thru primer for the placed that I can't get to later.
Patch welded in.
Wire wheeled.
After grinding.
Next piece getting mocked up with cardboard.
02-12-2017, 09:13 PM
#5
Supreme Member
Thread Starter
iTrader: (2)
Join Date: Feb 2005
Location: West Warwick RI, postal code: 02893
Posts: 4,337
Received 55 Likes
on
41 Posts
Car: Building LS3, T56 Z28
Engine: LS3
Transmission: T-56
Axle/Gears: Moser/ 4.11
Re: My 91 Z28 build. 17 years in the making... Finally going to do this right
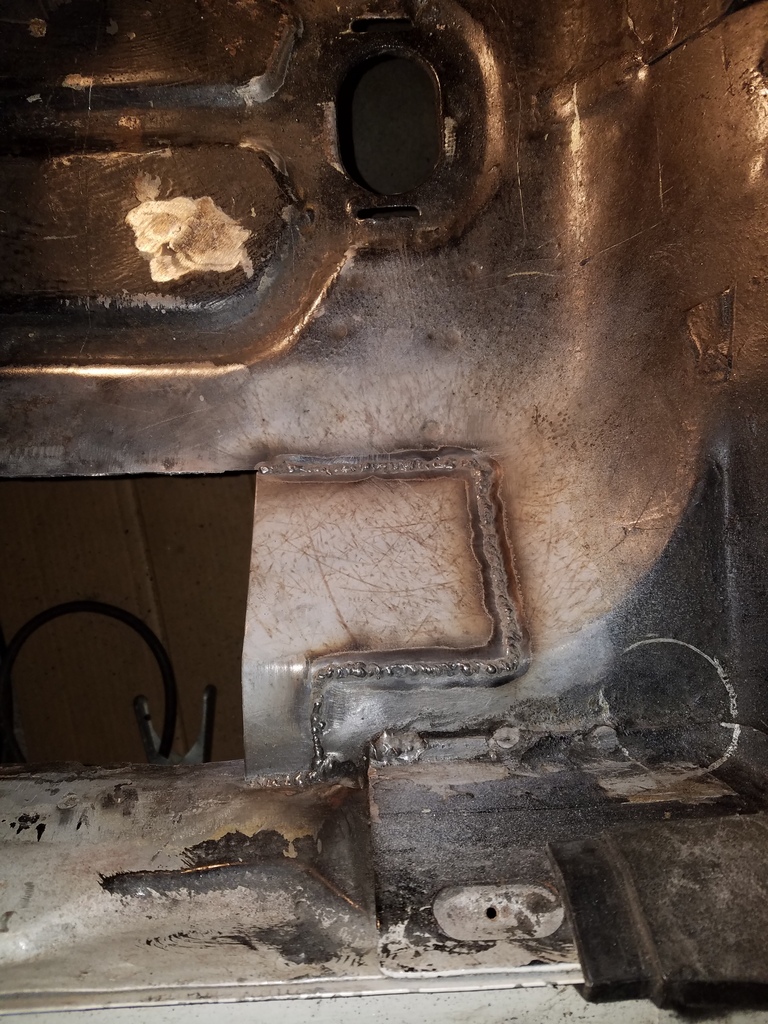
Mock up from below.
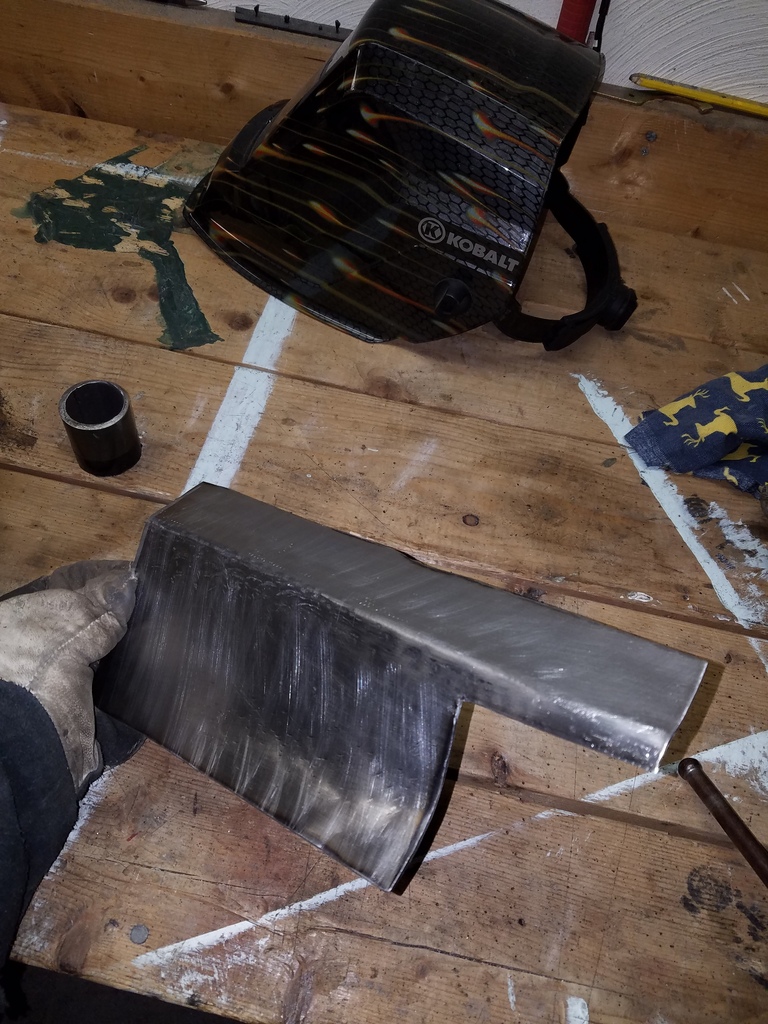
Panel formed and ready to go in.
Trial fit #20. Really trying to adjust to make it fit as good as possible.
Shot from below.
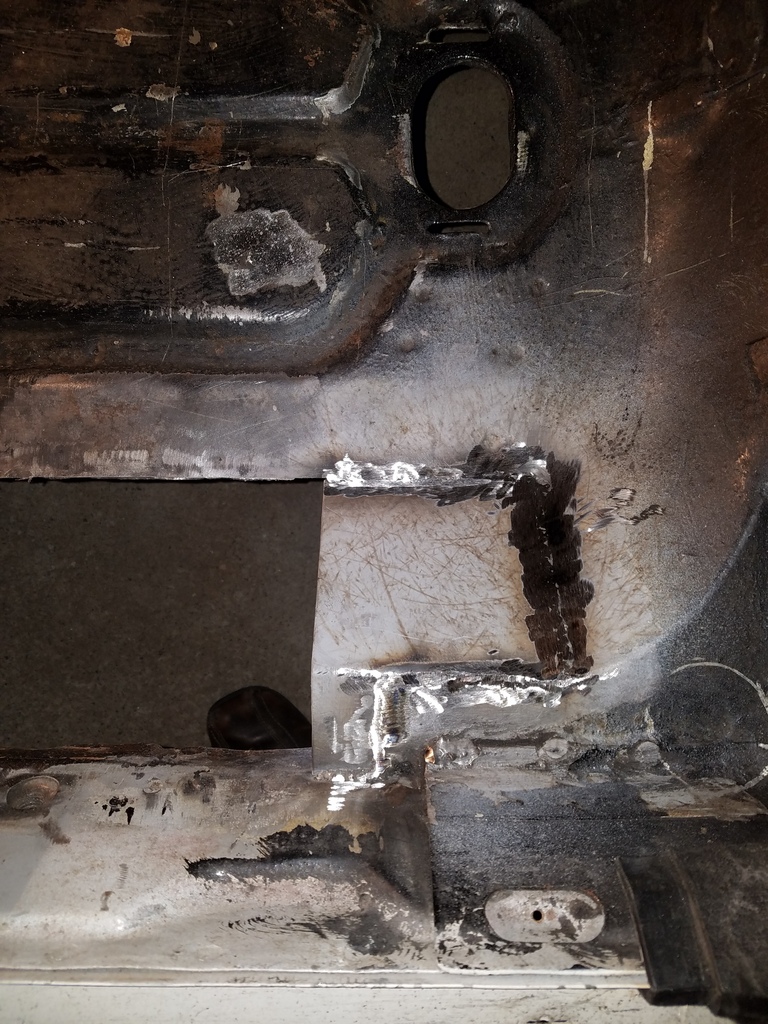
Welded in.
From below.
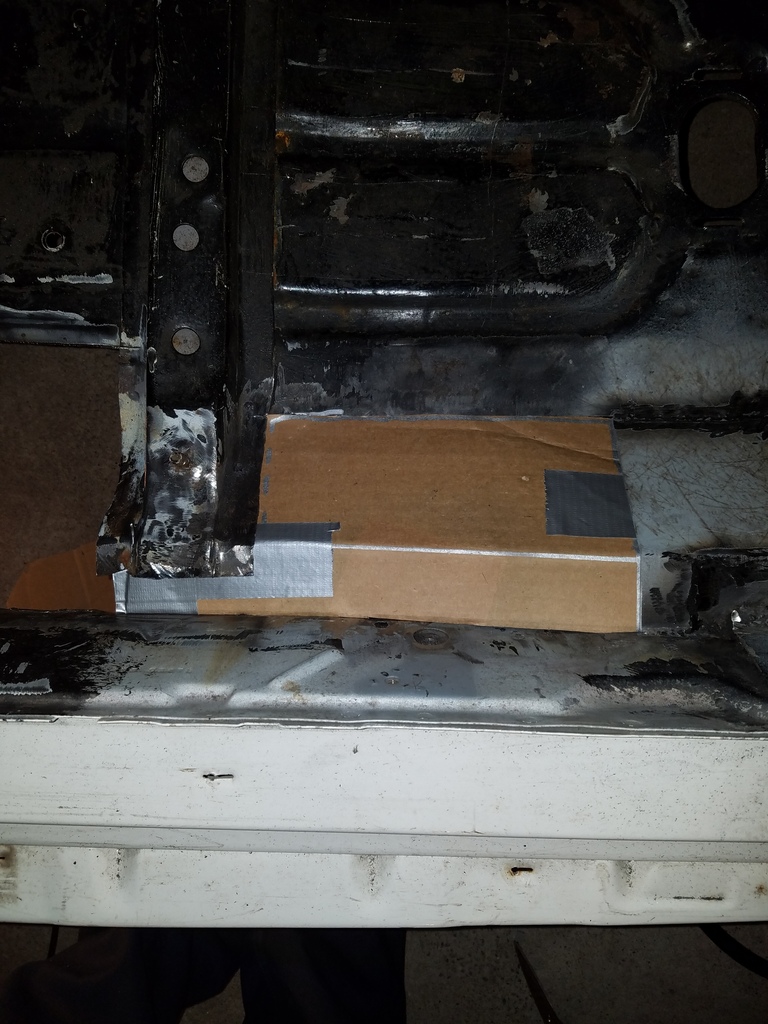
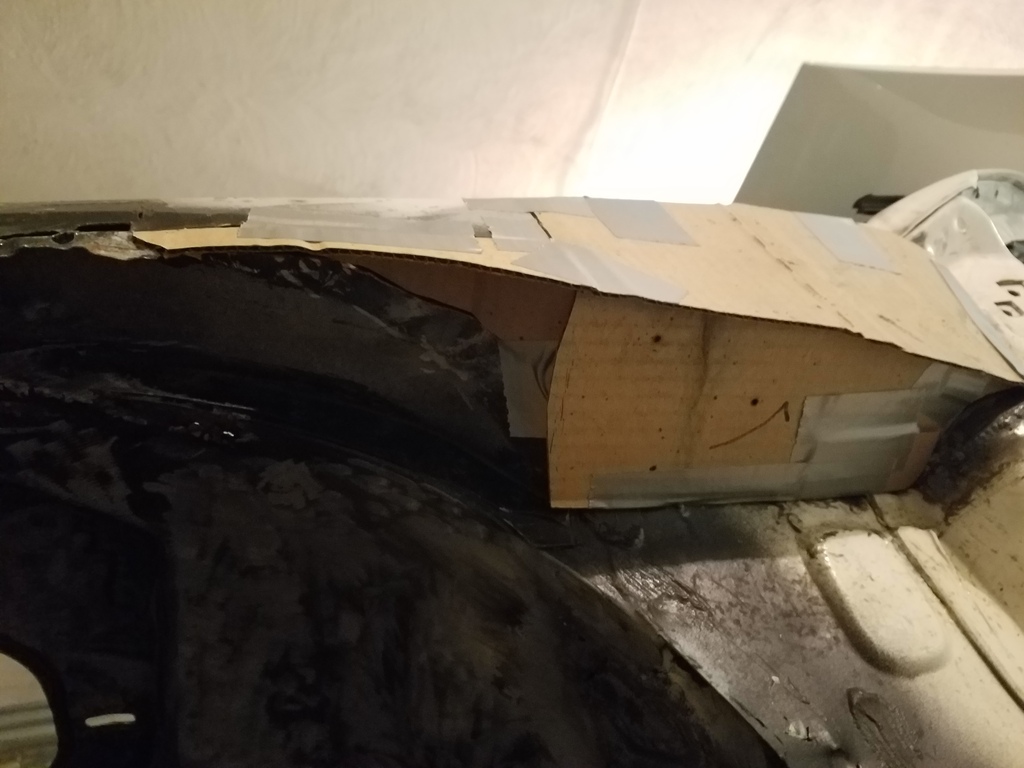
Next panel in cardboard.
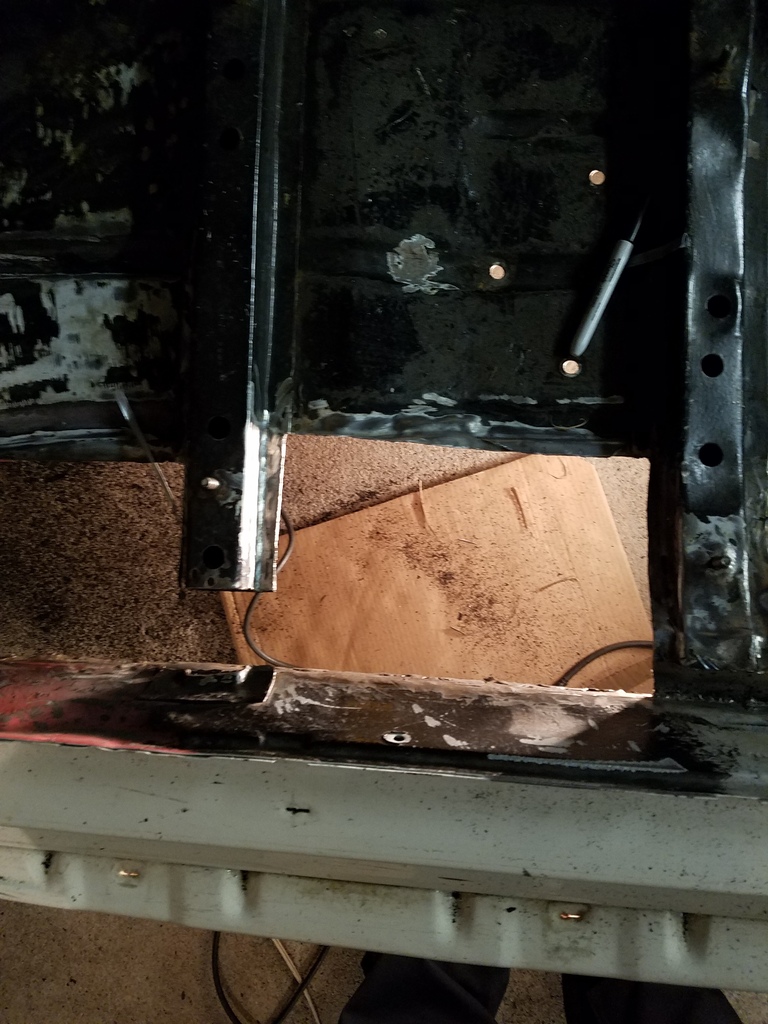
Area prepped and ready for welding.
Trial fitting just about done.

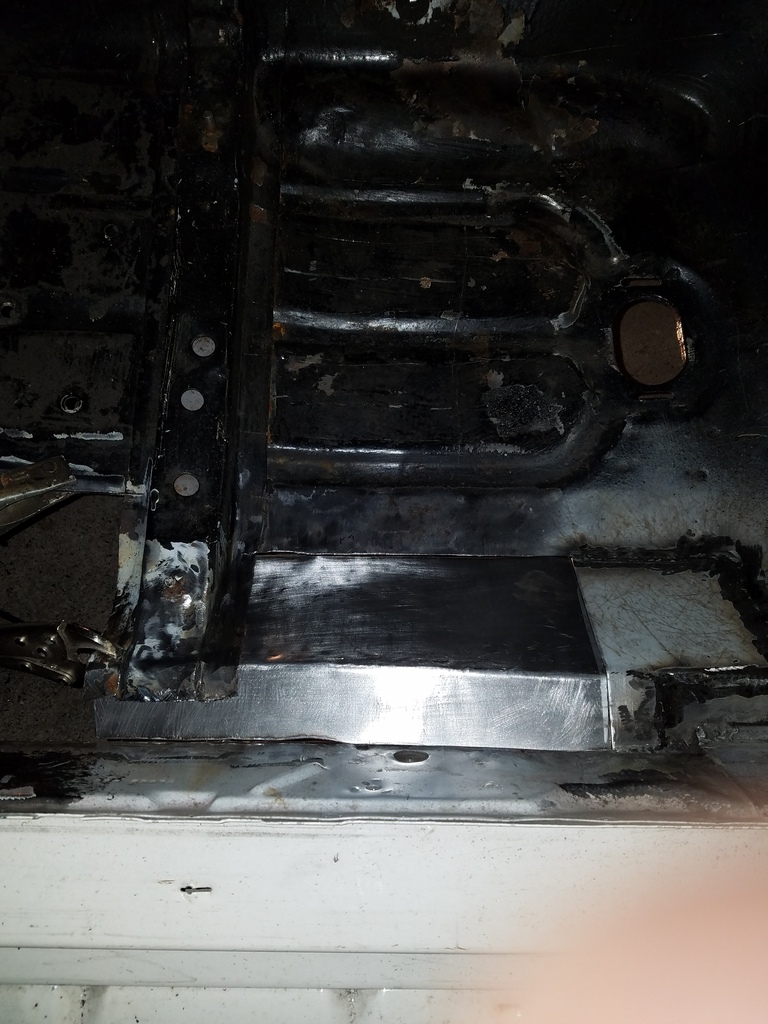
Welded in.
Panel formed and ready to go in.
Trial fit #20. Really trying to adjust to make it fit as good as possible.
Shot from below.
Welded in.
From below.
Next panel in cardboard.
Area prepped and ready for welding.
Trial fitting just about done.
Welded in.
02-12-2017, 09:16 PM
#6
Supreme Member
Thread Starter
iTrader: (2)
Join Date: Feb 2005
Location: West Warwick RI, postal code: 02893
Posts: 4,337
Received 55 Likes
on
41 Posts
Car: Building LS3, T56 Z28
Engine: LS3
Transmission: T-56
Axle/Gears: Moser/ 4.11
Re: My 91 Z28 build. 17 years in the making... Finally going to do this right
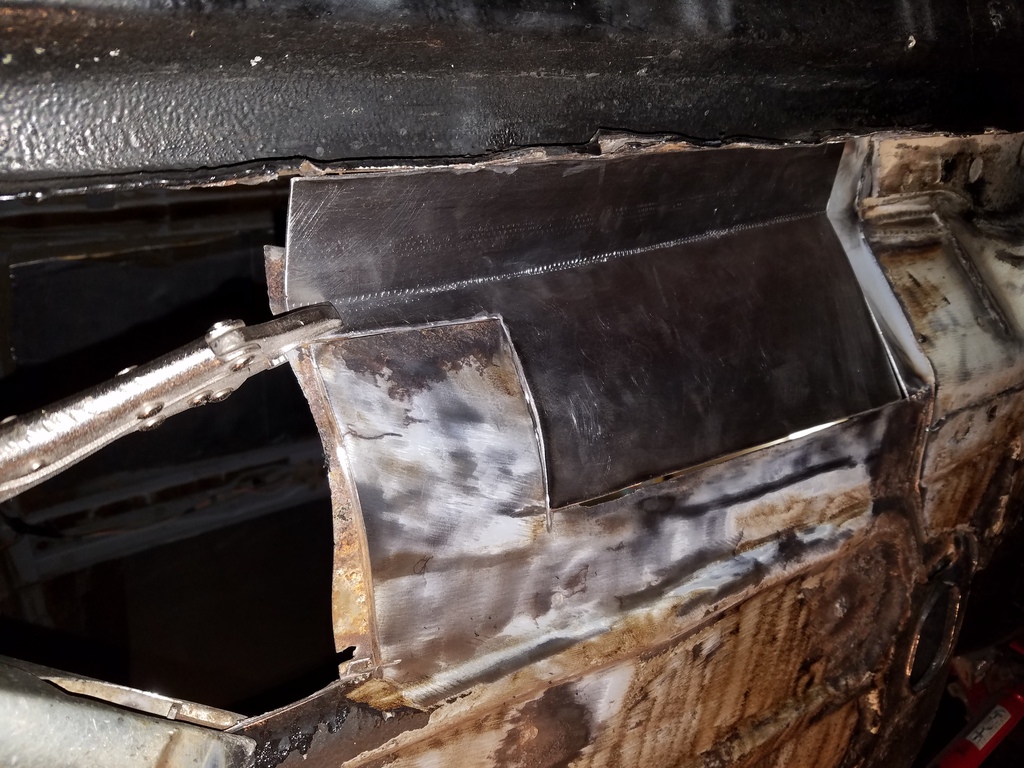
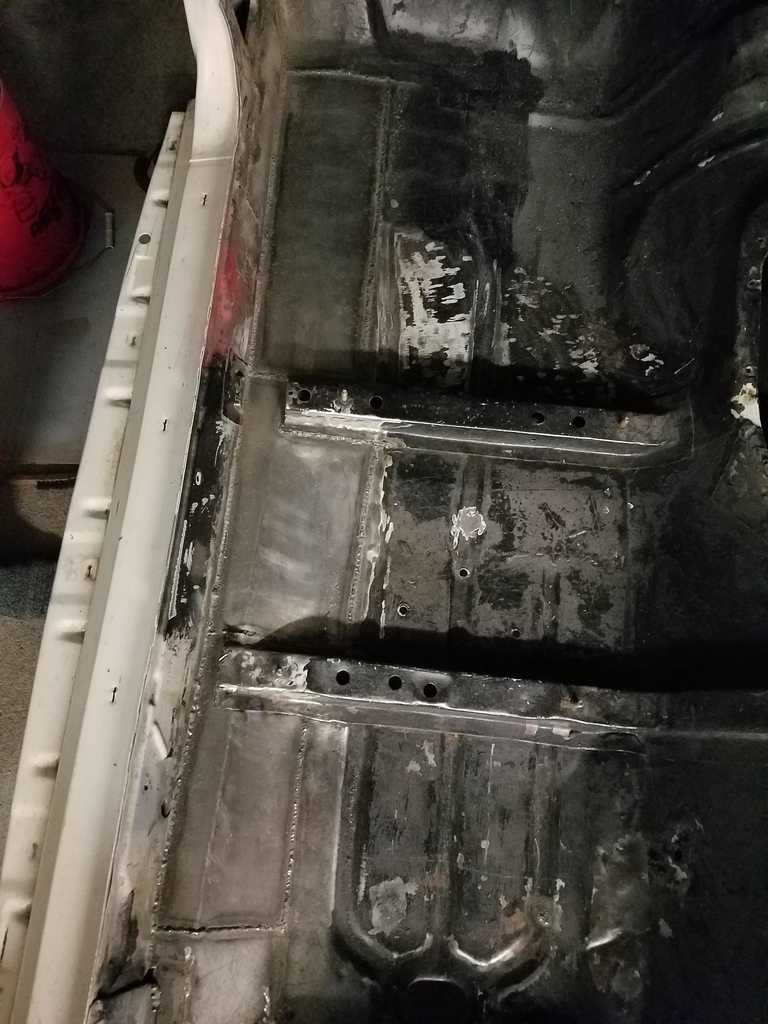
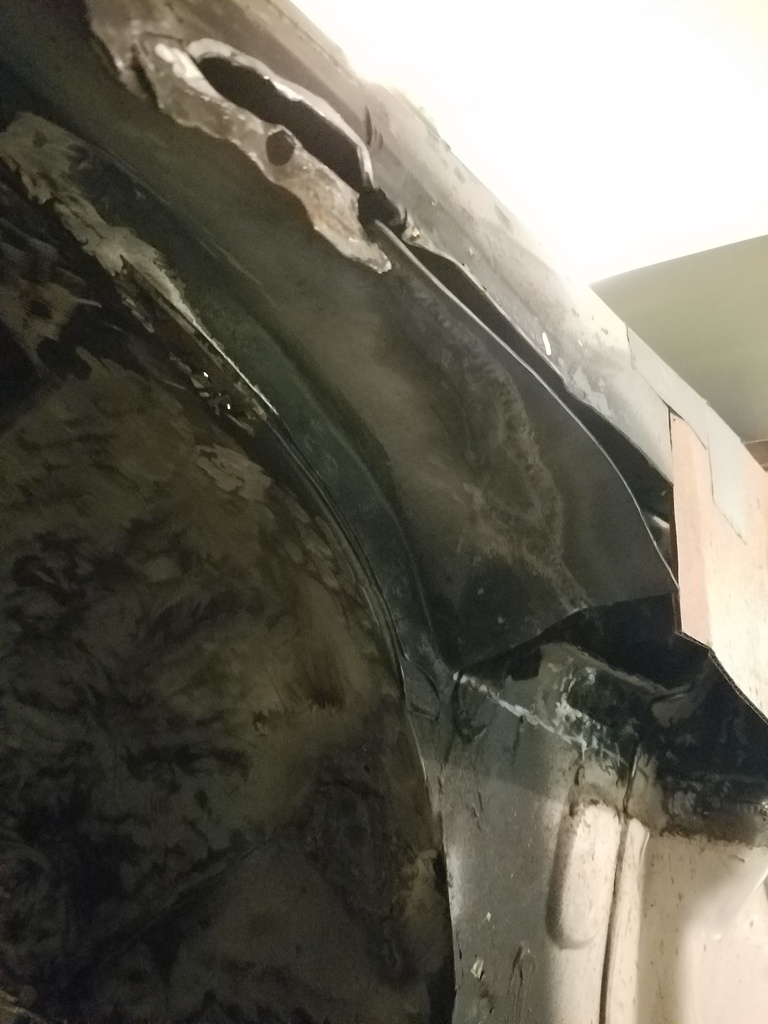
Here is the last piece for the driver side going in.
Full shot of the whole driver side.
Thats all for now. Hope to have updates wrapping up the floor metal work over the next week.
Dealing with a few blizzards these days.
Full shot of the whole driver side.
Thats all for now. Hope to have updates wrapping up the floor metal work over the next week.
Dealing with a few blizzards these days.
02-13-2017, 11:44 AM
#7
COTM Editor
iTrader: (11)
Join Date: Mar 2006
Location: WINDSOR, CO
Posts: 4,098
Likes: 0
Received 12 Likes
on
12 Posts
Car: 91 Z28, 87 SC, 90 IROC, 92 RS
Engine: LS1, 305 TPI, L98, NADA
Transmission: T56, 700r4's, and NADA
Axle/Gears: 3.89, 3.42, 3.23, NADA
Re: My 91 Z28 build. 17 years in the making... Finally going to do this right
Glad you haven't given up on the old girl, and are taking the time to fix your learning curve. I have always liked your car, so I'm excited to see what you come up with.
Trending Topics
02-13-2017, 01:24 PM
#8
Supreme Member
iTrader: (2)
Join Date: Mar 2014
Location: South Ms
Posts: 4,419
Received 721 Likes
on
490 Posts
Car: 89 Firebird
Engine: 355 TBI
Transmission: 700R4
Axle/Gears: 10 Bolt.Posi-3.73s
Re: My 91 Z28 build. 17 years in the making... Finally going to do this right
Nice! I used to have one that looked just like it I sold it in 2001 and recently found it parked behind a house. I think I may try to buy it back.
02-13-2017, 01:55 PM
#9
Supreme Member
Thread Starter
iTrader: (2)
Join Date: Feb 2005
Location: West Warwick RI, postal code: 02893
Posts: 4,337
Received 55 Likes
on
41 Posts
Car: Building LS3, T56 Z28
Engine: LS3
Transmission: T-56
Axle/Gears: Moser/ 4.11
Re: My 91 Z28 build. 17 years in the making... Finally going to do this right
BADNBLK: Thanks! That means a lot coming from someone who has such a beautiful car.
This build will be the final build of this car so I imagine it will take a LOT longer than before. But I am exited to have a well built car for once.
dmccain: Go buy that car back!
This is the first car I ever owned. Drove it all thru my high school years. I am only on my 3rd car ever, my 13 Camaro. Had a Grand Prix GXP for a bit before this. Either way we can tell I like to hold on to my cars. I want to keep this for the rest of my life. Been 17 years already!
Now that I am up to date with my updates, I will try to post updates here every couple of days. It will help keep me motivated.
Thanks again for checking it out!
02-14-2017, 09:16 AM
#10
Member
Join Date: Nov 2001
Location: Midvale, UT
Posts: 482
Likes: 0
Received 2 Likes
on
2 Posts
Car: 1991 RS
Engine: L03
Transmission: T5
Axle/Gears: 4.11
Re: My 91 Z28 build. 17 years in the making... Finally going to do this right
I like your setup with the fuel cell, at some point in life I want to move my tank in a similar manner, I think this would really free up space to run true 3" exhaust over the axle. (well this and me going to a watts link)
02-14-2017, 11:03 AM
#11
Supreme Member
Thread Starter
iTrader: (2)
Join Date: Feb 2005
Location: West Warwick RI, postal code: 02893
Posts: 4,337
Received 55 Likes
on
41 Posts
Car: Building LS3, T56 Z28
Engine: LS3
Transmission: T-56
Axle/Gears: Moser/ 4.11
Re: My 91 Z28 build. 17 years in the making... Finally going to do this right
Yeah, the Watts links look really promising. Just a lot of cost to absorb if you are not going to autocross. (I think).
Thanks for checking out the build.
Thanks for checking out the build.
02-14-2017, 11:27 AM
#12
Supreme Member
Thread Starter
iTrader: (2)
Join Date: Feb 2005
Location: West Warwick RI, postal code: 02893
Posts: 4,337
Received 55 Likes
on
41 Posts
Car: Building LS3, T56 Z28
Engine: LS3
Transmission: T-56
Axle/Gears: Moser/ 4.11
Re: My 91 Z28 build. 17 years in the making... Finally going to do this right
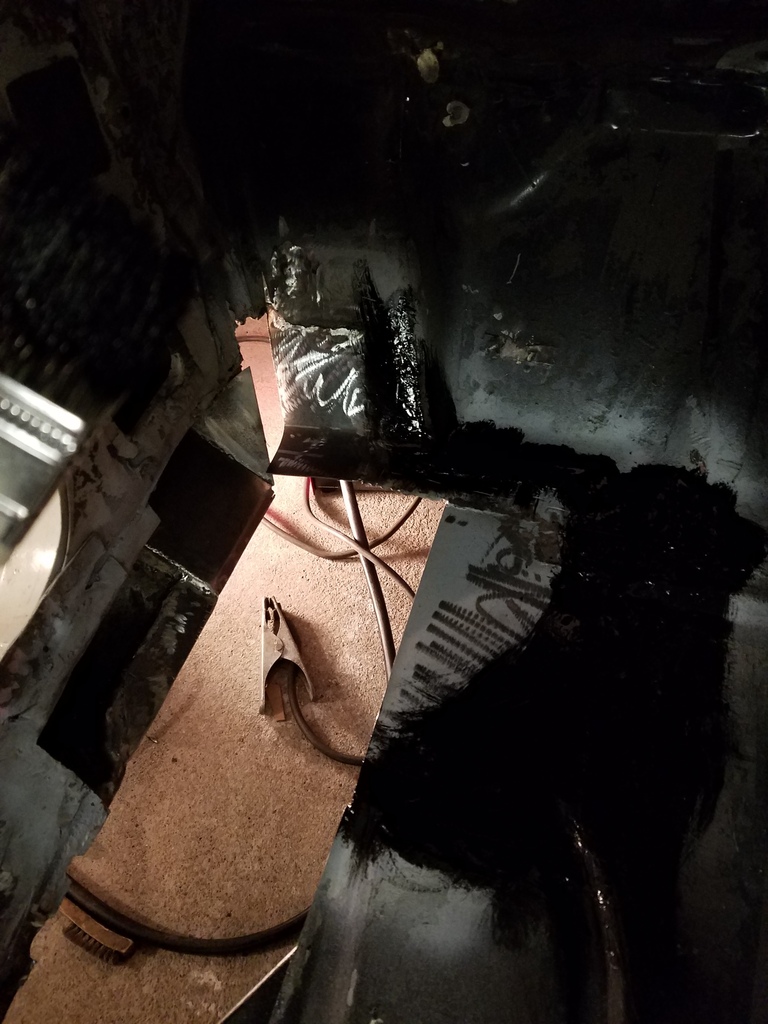
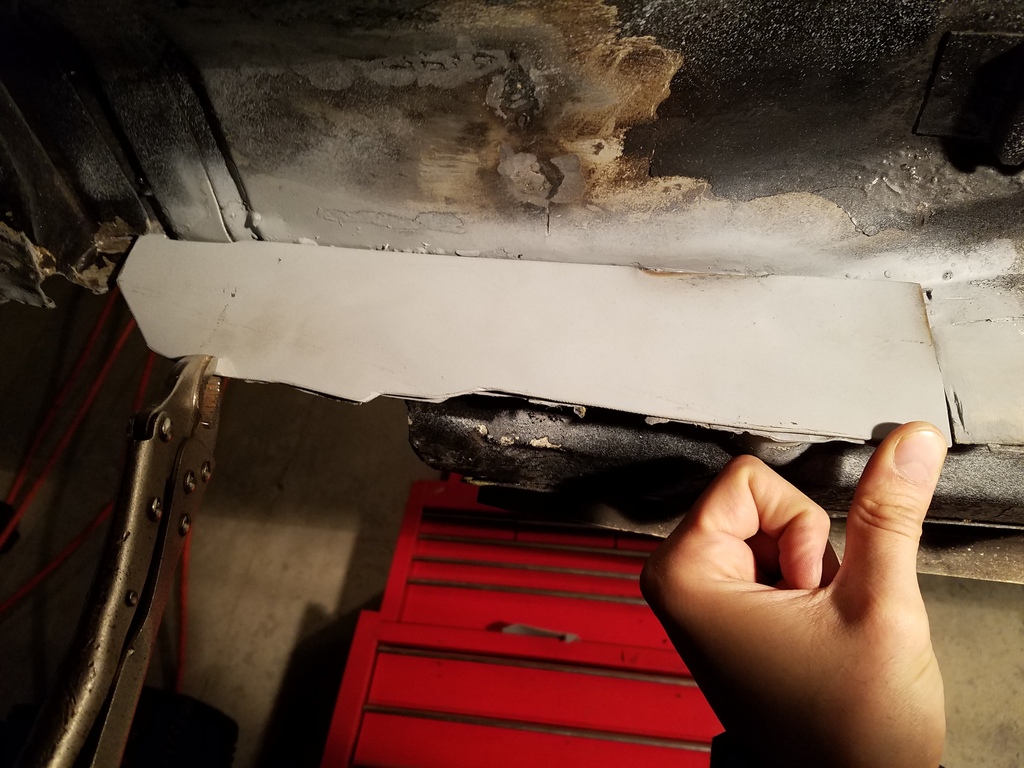
Now with the DS patches all in, I decided to spend the night doing some detail work. Welding in a small patch to cap off the seat mount and grind all my old welds.
Open seat mount that needs to be closed off.
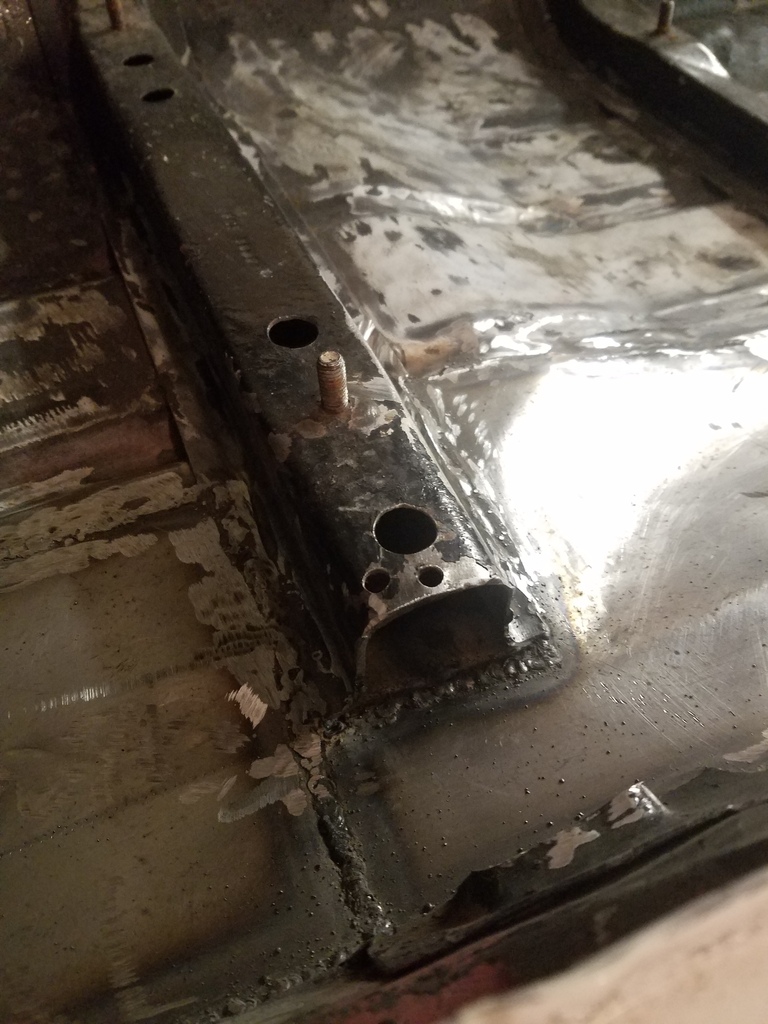
I was going to make it span back to the rocker, but figured why make things harder on myself for minimal, if any gains.
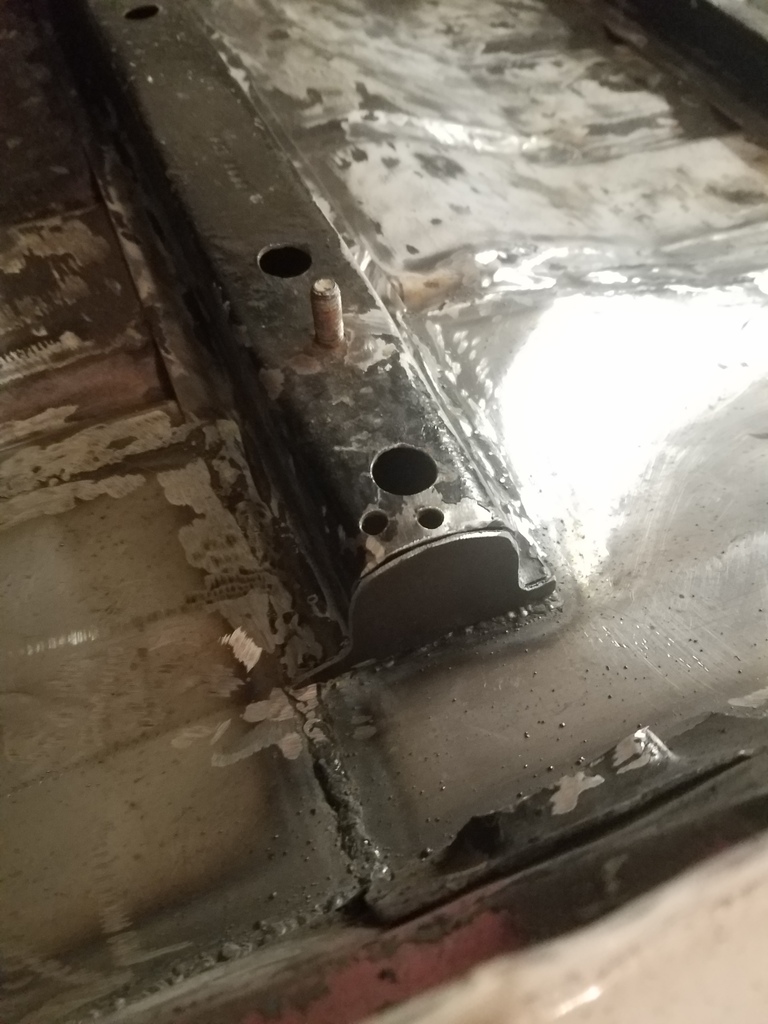
Horrible picture, but here is can see it all cleaned up and ground down. Path installed as well.
Time to move onto the PS.
Open seat mount that needs to be closed off.
I was going to make it span back to the rocker, but figured why make things harder on myself for minimal, if any gains.
Horrible picture, but here is can see it all cleaned up and ground down. Path installed as well.
Time to move onto the PS.
02-16-2017, 02:34 PM
#13
Supreme Member
Thread Starter
iTrader: (2)
Join Date: Feb 2005
Location: West Warwick RI, postal code: 02893
Posts: 4,337
Received 55 Likes
on
41 Posts
Car: Building LS3, T56 Z28
Engine: LS3
Transmission: T-56
Axle/Gears: Moser/ 4.11
Re: My 91 Z28 build. 17 years in the making... Finally going to do this right
Did a bit of work on the passenger side last night.
Here you can see the size of the hole left from cutting out my horrid patch job from before. I think sprayed some weld thru primer after wire wheeling the entire area as much as possible.
Patch being sized up to close the hole. Just about there.
Welded in.
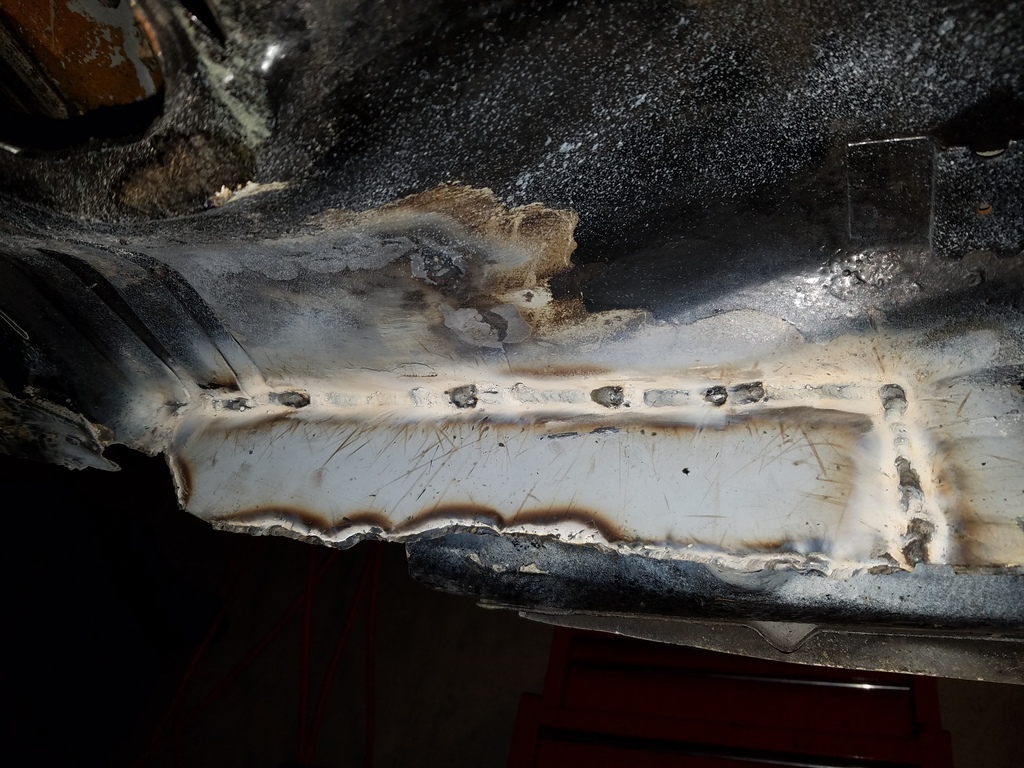
Cleaned up a bit with a wire brush. Not ground down yet.
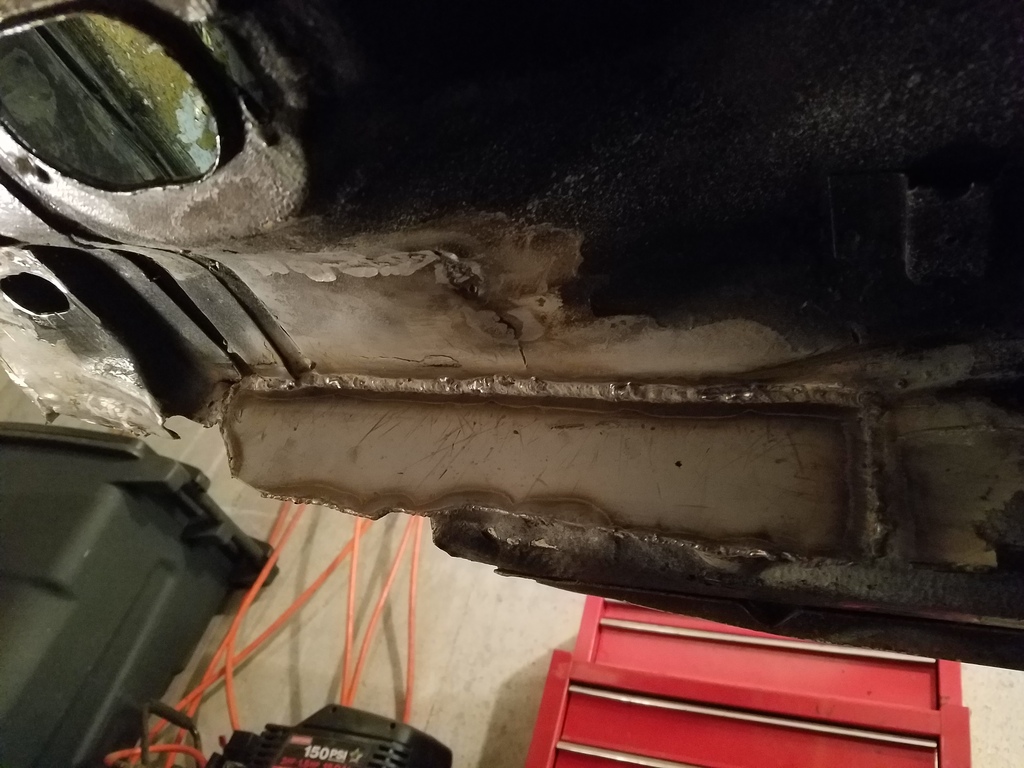
Hole on the inside of the car floor, PS.

Patch test fitting.
Welded in, wire wheeled, and ground down. No more seeing the ground!
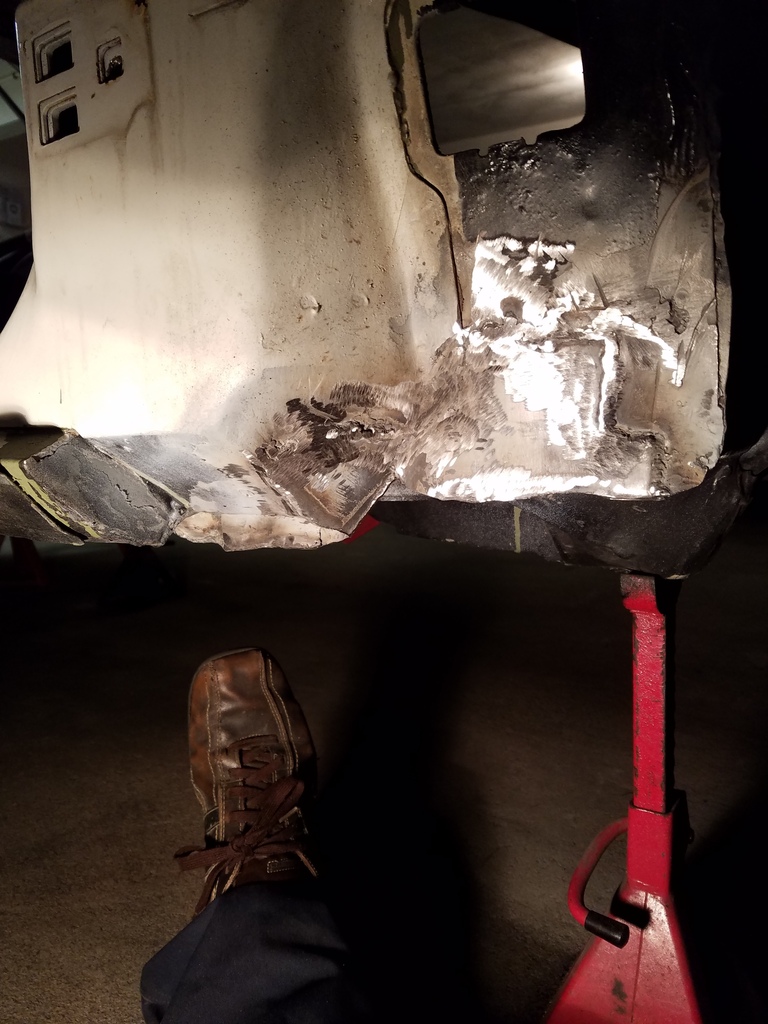
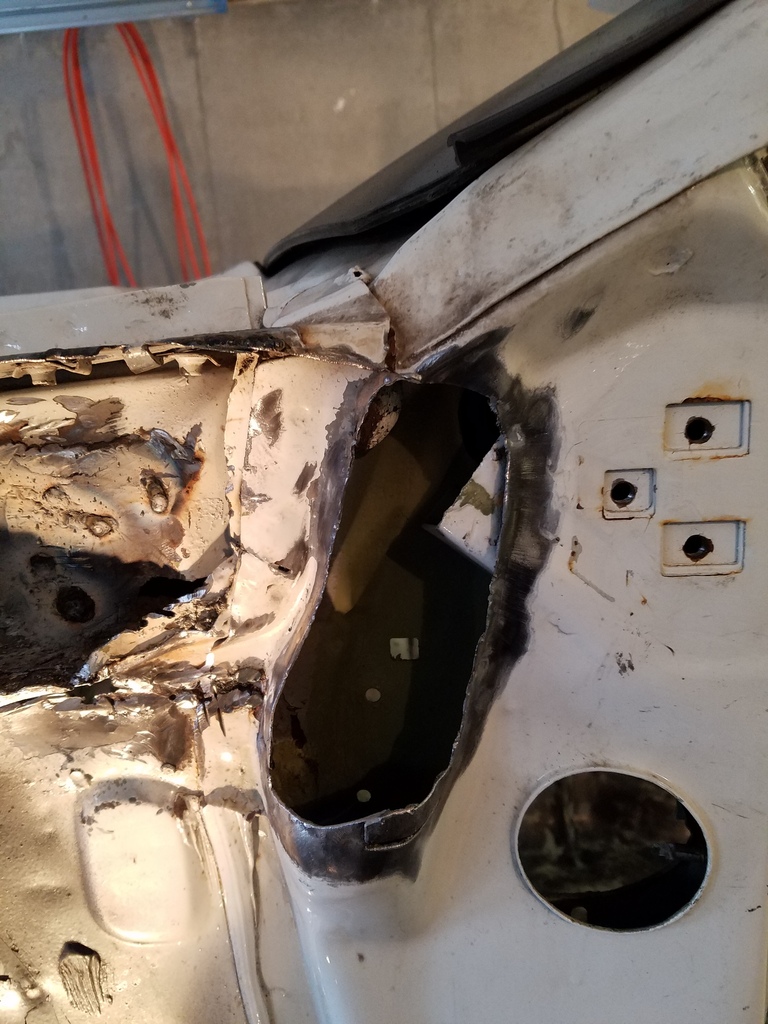
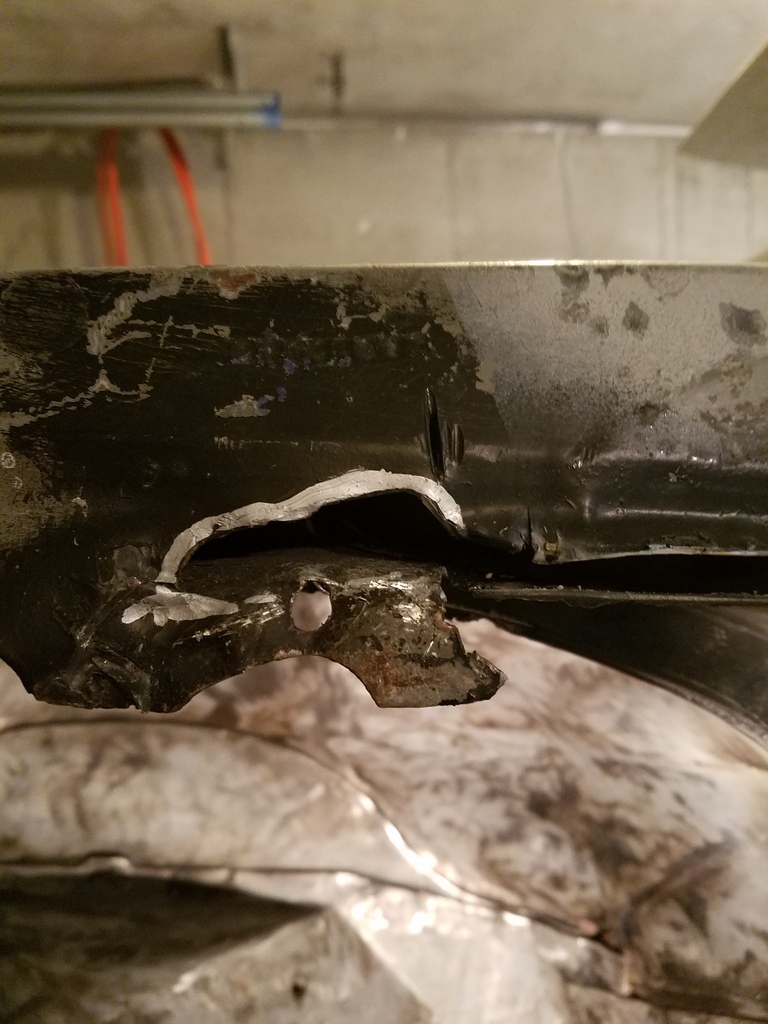
Last hole on the PS. Didn't get around to closing it up, but almost.
Goes into that void where the wheel well, PS floor and frame all come together. The outer wall was gone.
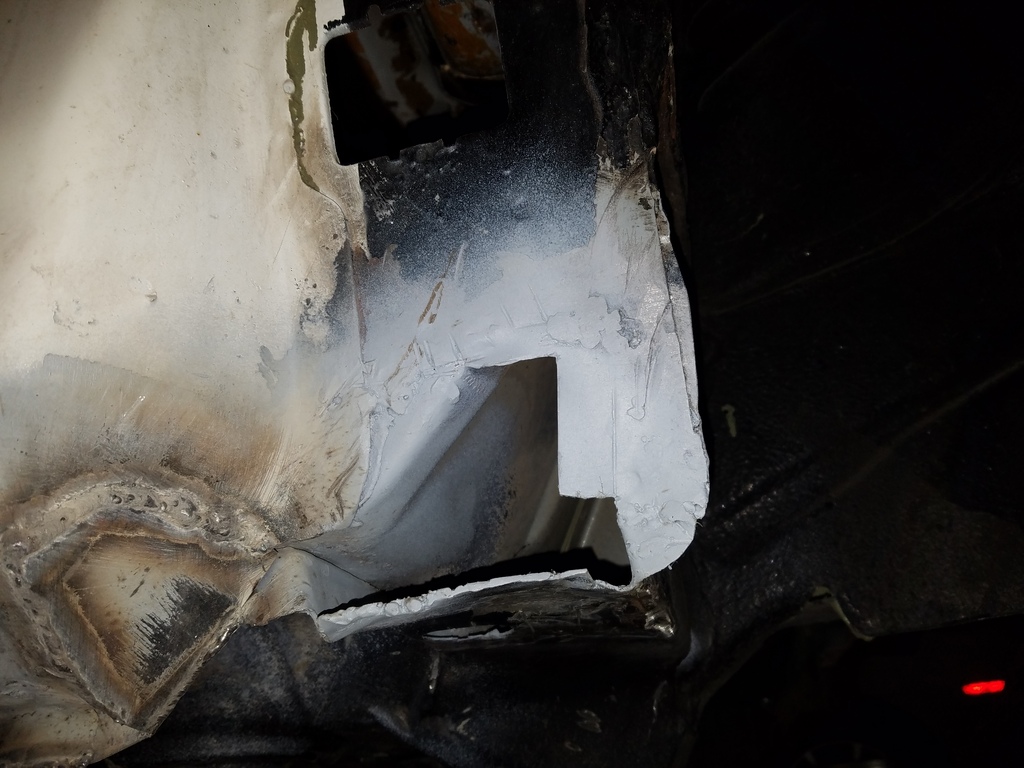
Strangest patch I have ever made. Curved in a few different ways and a small tab on it. Should weld in easy.
Here you can see the size of the hole left from cutting out my horrid patch job from before. I think sprayed some weld thru primer after wire wheeling the entire area as much as possible.
Patch being sized up to close the hole. Just about there.
Welded in.
Cleaned up a bit with a wire brush. Not ground down yet.
Hole on the inside of the car floor, PS.
Patch test fitting.
Welded in, wire wheeled, and ground down. No more seeing the ground!
Last hole on the PS. Didn't get around to closing it up, but almost.
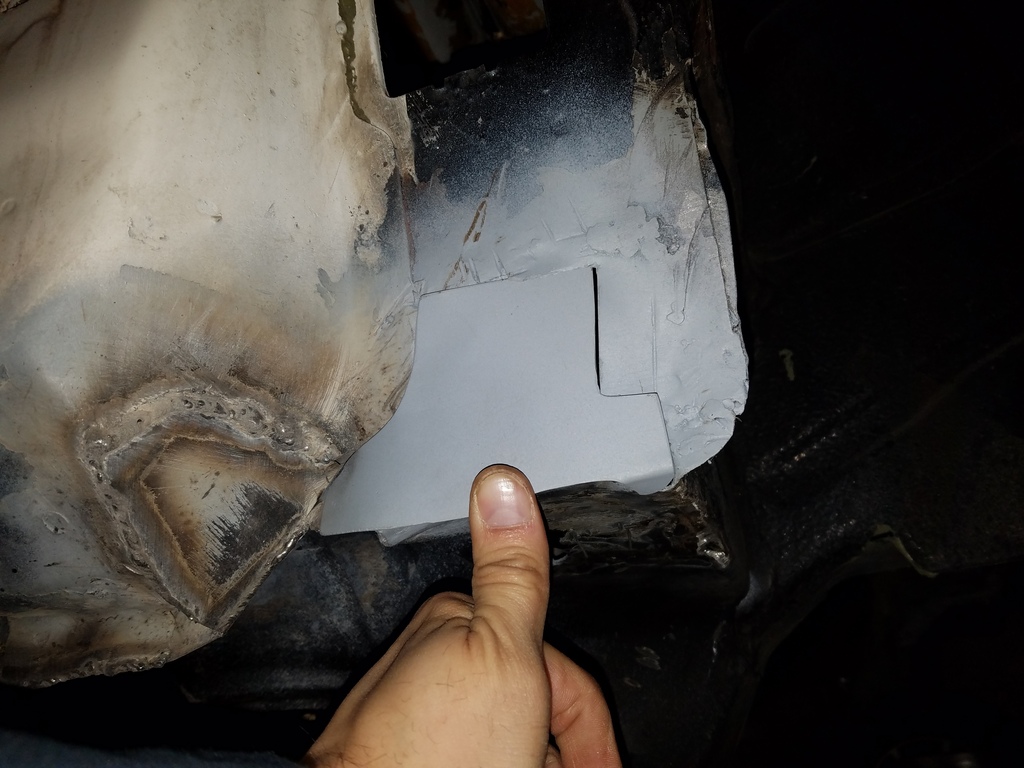
Goes into that void where the wheel well, PS floor and frame all come together. The outer wall was gone.
Strangest patch I have ever made. Curved in a few different ways and a small tab on it. Should weld in easy.
02-21-2017, 12:39 PM
#14
Supreme Member
Thread Starter
iTrader: (2)
Join Date: Feb 2005
Location: West Warwick RI, postal code: 02893
Posts: 4,337
Received 55 Likes
on
41 Posts
Car: Building LS3, T56 Z28
Engine: LS3
Transmission: T-56
Axle/Gears: Moser/ 4.11
Re: My 91 Z28 build. 17 years in the making... Finally going to do this right
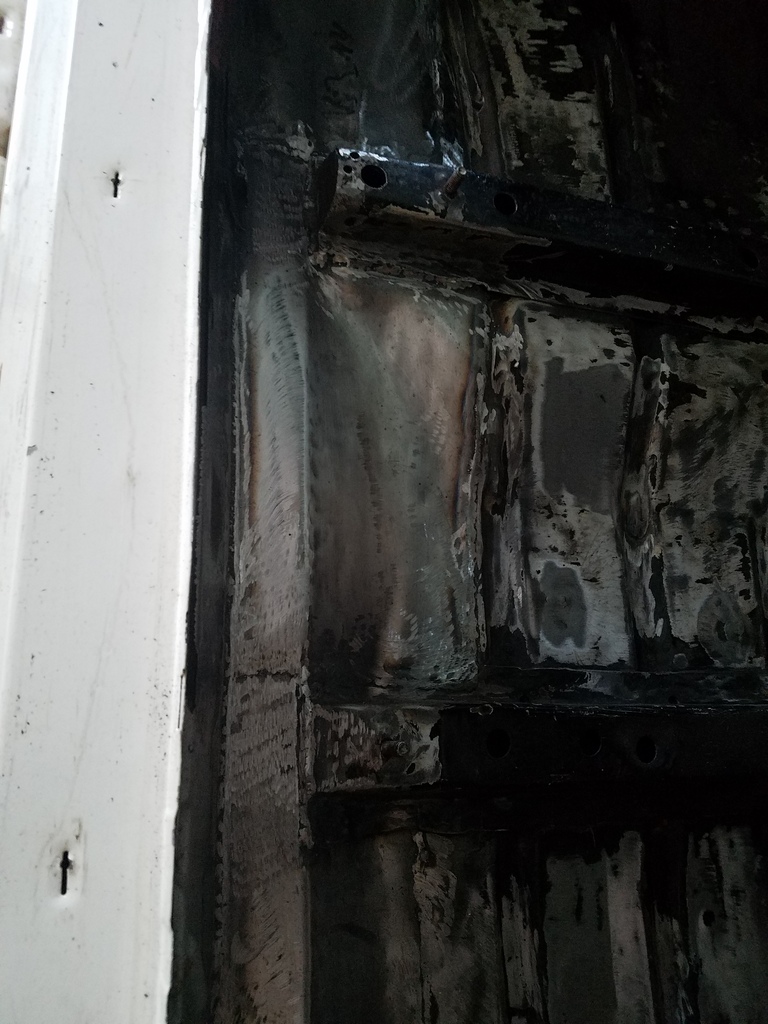
Tons of work over the weekend, but just a minor update on here.
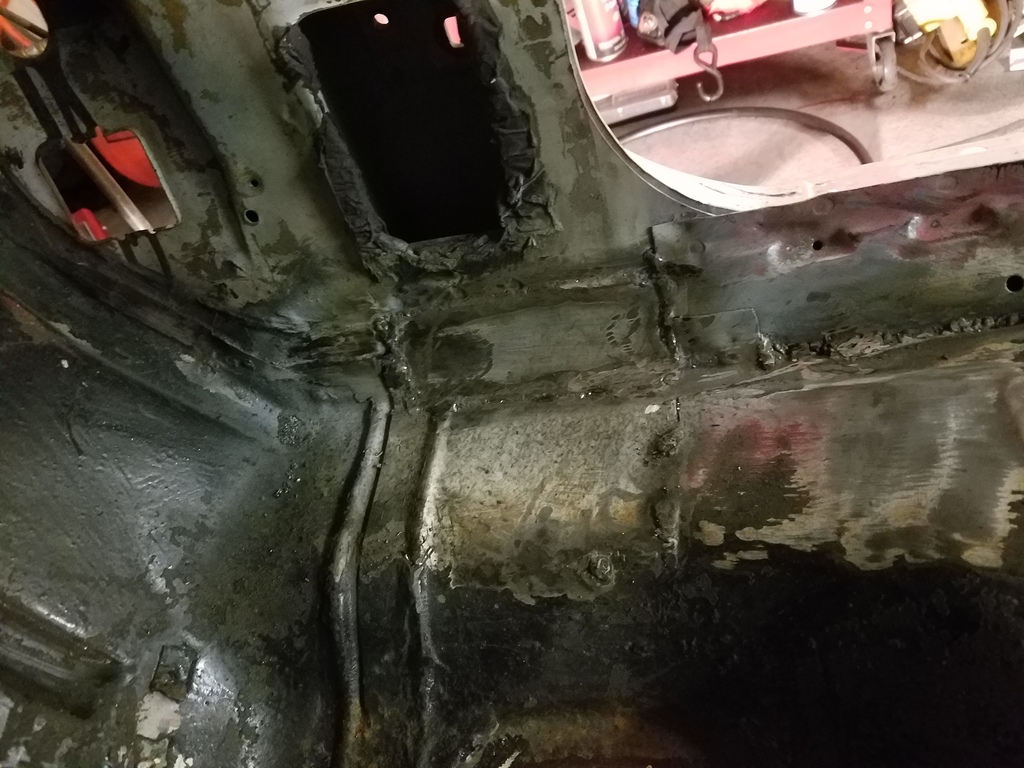
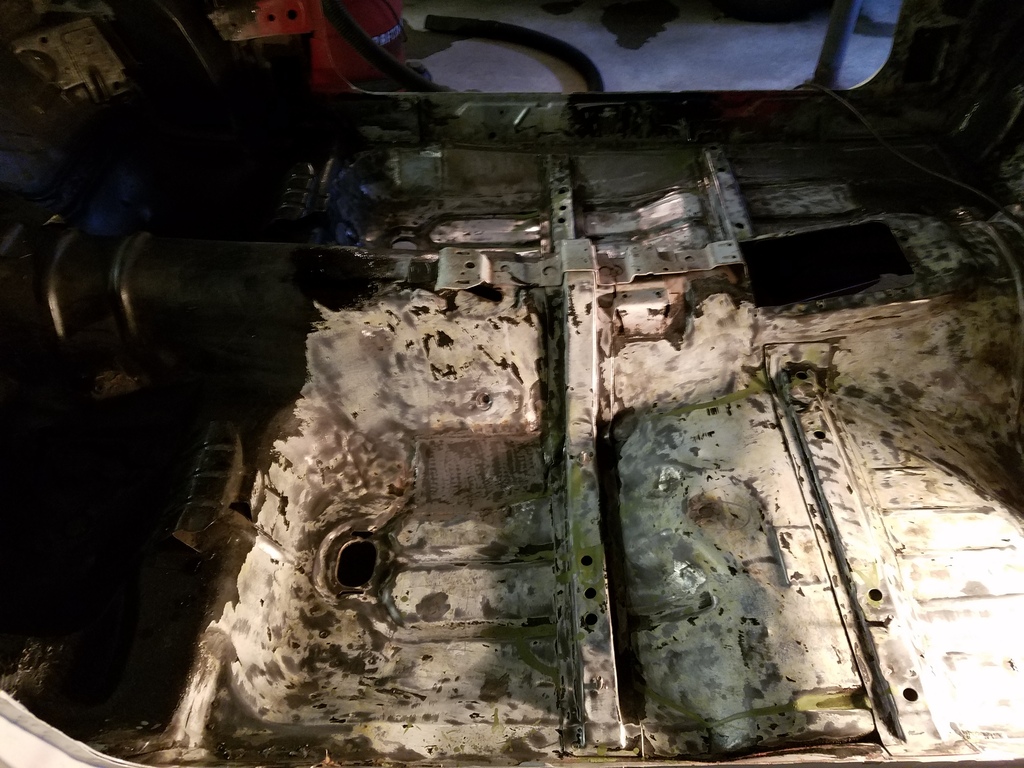
I decided that since I was done with the patches on the floor, the next logical step is to see if the floor boards had any other issues lingering underneath the old POR-15.
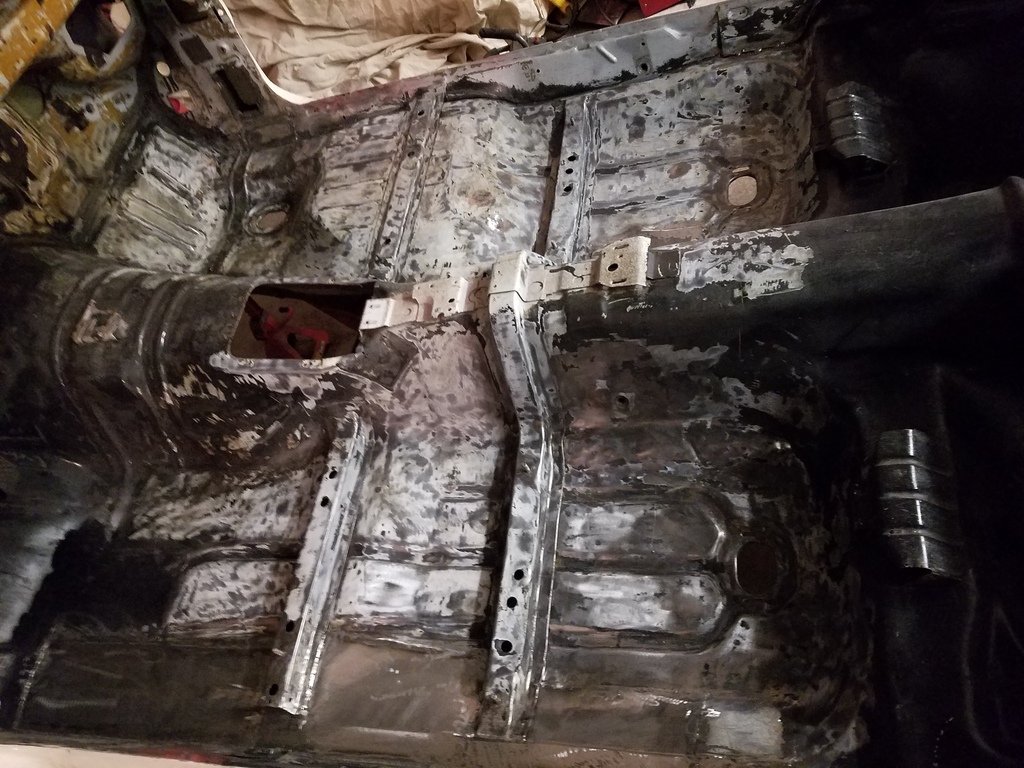
Time to wire wheel the entire floor. This also will revealed small pinholes that I can weld shut as well as gave the floor a bit of texture so the new Eastwood coating would have something better to bite into.
First is a pic of the strange corner that needed closing.
Next you can see a couple shots of the floor after about 2 hours of wire wheeling.... I want to do this under the car as well, that will truley be a nightmare job. But worth it knowing that I have had eyes on every single nook and cranny.

Other side
Hope to do touch up welding tonight, then start wiping down the interior floor and painting the floor. Also injecting paint into the running boards to seal them up from the inside with internal frame paint from Eastwood.
I am sure I will find some problem areas when stripping the floor from under the car, but I don't want to leave metal bare for too long.
I think touch ups on the inside are an inevitability.
I decided that since I was done with the patches on the floor, the next logical step is to see if the floor boards had any other issues lingering underneath the old POR-15.
Time to wire wheel the entire floor. This also will revealed small pinholes that I can weld shut as well as gave the floor a bit of texture so the new Eastwood coating would have something better to bite into.
First is a pic of the strange corner that needed closing.
Next you can see a couple shots of the floor after about 2 hours of wire wheeling.... I want to do this under the car as well, that will truley be a nightmare job. But worth it knowing that I have had eyes on every single nook and cranny.
Other side
Hope to do touch up welding tonight, then start wiping down the interior floor and painting the floor. Also injecting paint into the running boards to seal them up from the inside with internal frame paint from Eastwood.
I am sure I will find some problem areas when stripping the floor from under the car, but I don't want to leave metal bare for too long.
I think touch ups on the inside are an inevitability.
02-22-2017, 11:02 AM
#15
Member
Join Date: Nov 2001
Location: Midvale, UT
Posts: 482
Likes: 0
Received 2 Likes
on
2 Posts
Car: 1991 RS
Engine: L03
Transmission: T5
Axle/Gears: 4.11
Re: My 91 Z28 build. 17 years in the making... Finally going to do this right
since effectively the watts link just keeps the rear centered, it can be effective in any type of racing from Drag, to Auto x to road course. Looks like it is coming along great, keep up the good work!
02-25-2017, 01:01 PM
#16
Re: My 91 Z28 build. 17 years in the making... Finally going to do this right
The fuelcell looks great.
I saw the pictures where you had the the rusty metal cut out of the floor boards along the door and I instantly thought you were going to make some Hellaciously awesome subframe connectors like DSE has done. Will you be adding and subframe connectors on the perimeter? Only make your own inner set if you can get the metal cheap and have lots of time to spend on them. It took me the better part of two whole days to do my set what with all the measuring the length, cut, measure the angle, cut, grind weld. Repeat a dozen times per side.
I saw the pictures where you had the the rusty metal cut out of the floor boards along the door and I instantly thought you were going to make some Hellaciously awesome subframe connectors like DSE has done. Will you be adding and subframe connectors on the perimeter? Only make your own inner set if you can get the metal cheap and have lots of time to spend on them. It took me the better part of two whole days to do my set what with all the measuring the length, cut, measure the angle, cut, grind weld. Repeat a dozen times per side.
02-25-2017, 04:42 PM
#17
Supreme Member
Thread Starter
iTrader: (2)
Join Date: Feb 2005
Location: West Warwick RI, postal code: 02893
Posts: 4,337
Received 55 Likes
on
41 Posts
Car: Building LS3, T56 Z28
Engine: LS3
Transmission: T-56
Axle/Gears: Moser/ 4.11
Re: My 91 Z28 build. 17 years in the making... Finally going to do this right
Hey Tibo.
For SFC I will be using BMR outers combined with a 4 point bar. If i knew about DSE units back in the day, i would have planned the build around them...
For SFC I will be using BMR outers combined with a 4 point bar. If i knew about DSE units back in the day, i would have planned the build around them...
03-02-2017, 08:29 AM
#18
Supreme Member
Thread Starter
iTrader: (2)
Join Date: Feb 2005
Location: West Warwick RI, postal code: 02893
Posts: 4,337
Received 55 Likes
on
41 Posts
Car: Building LS3, T56 Z28
Engine: LS3
Transmission: T-56
Axle/Gears: Moser/ 4.11
Re: My 91 Z28 build. 17 years in the making... Finally going to do this right
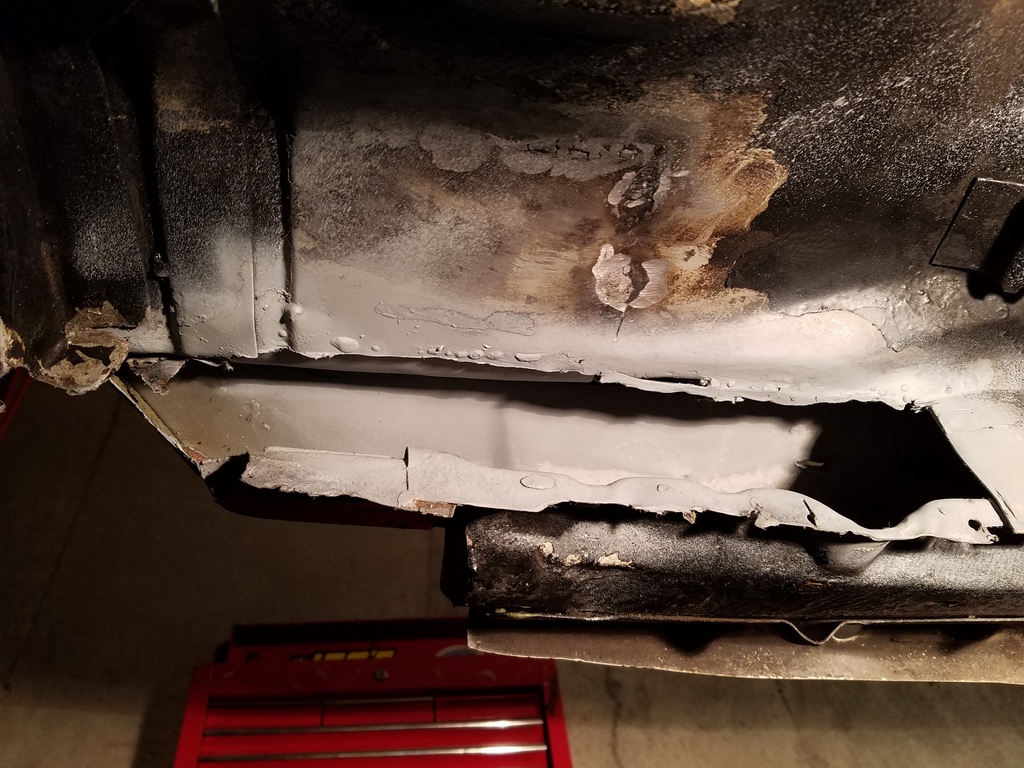
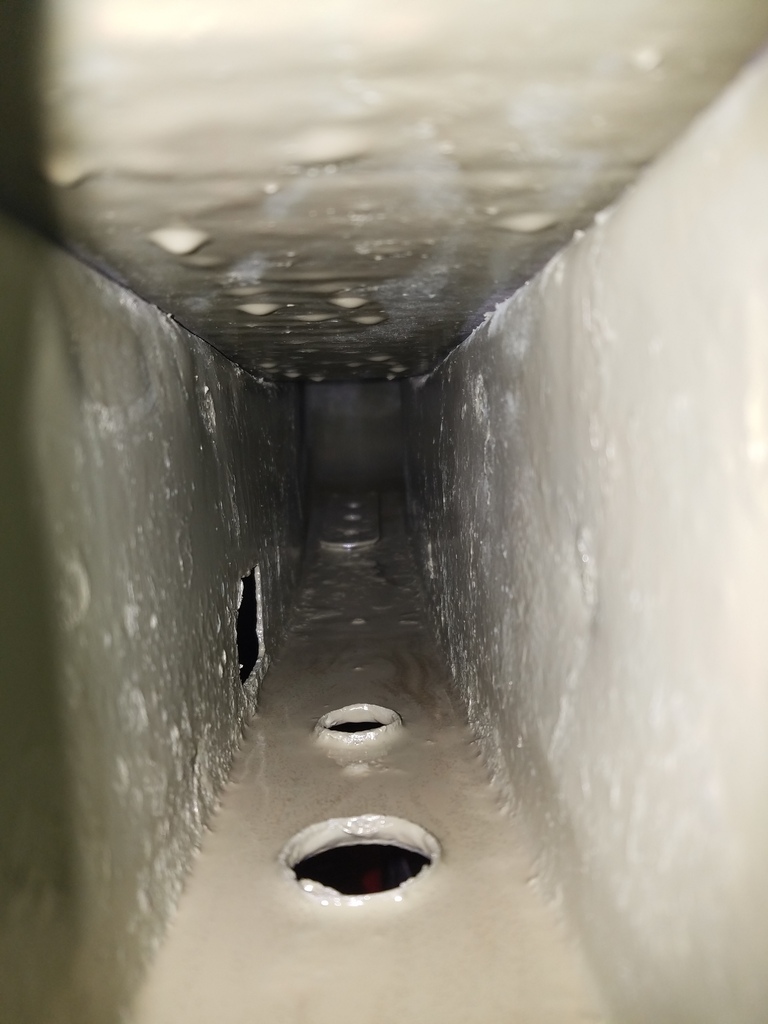
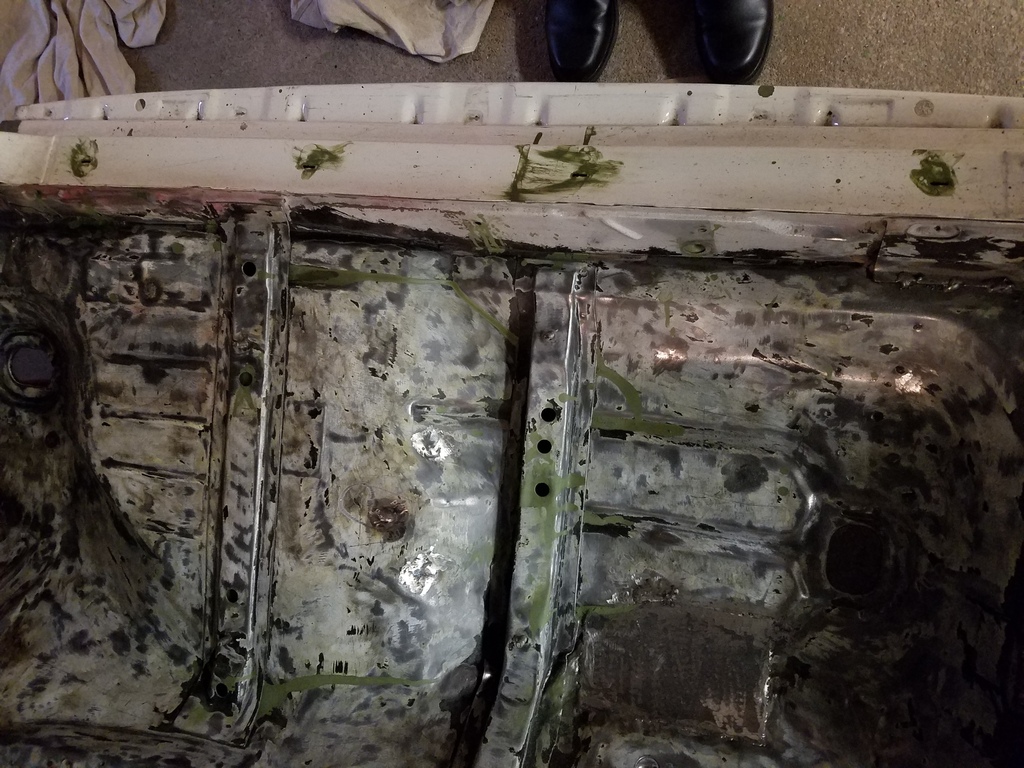
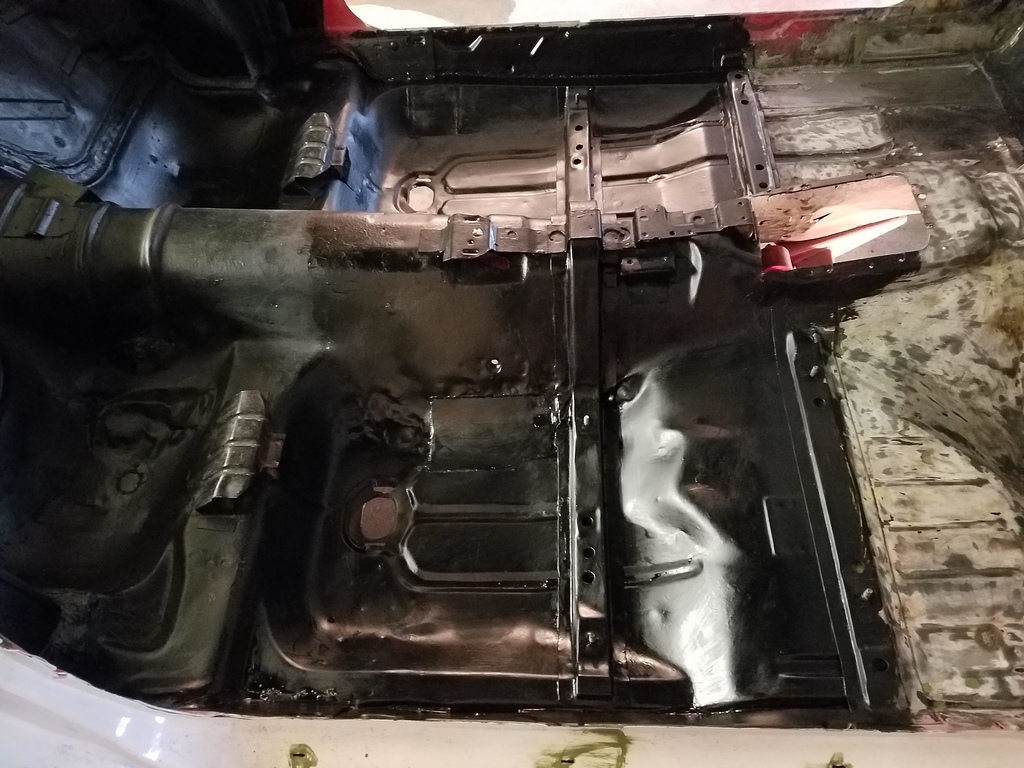
OK, so now that the major metal patch work has been complete on the rockers and the floor, I wanted to get things sealed up quick.
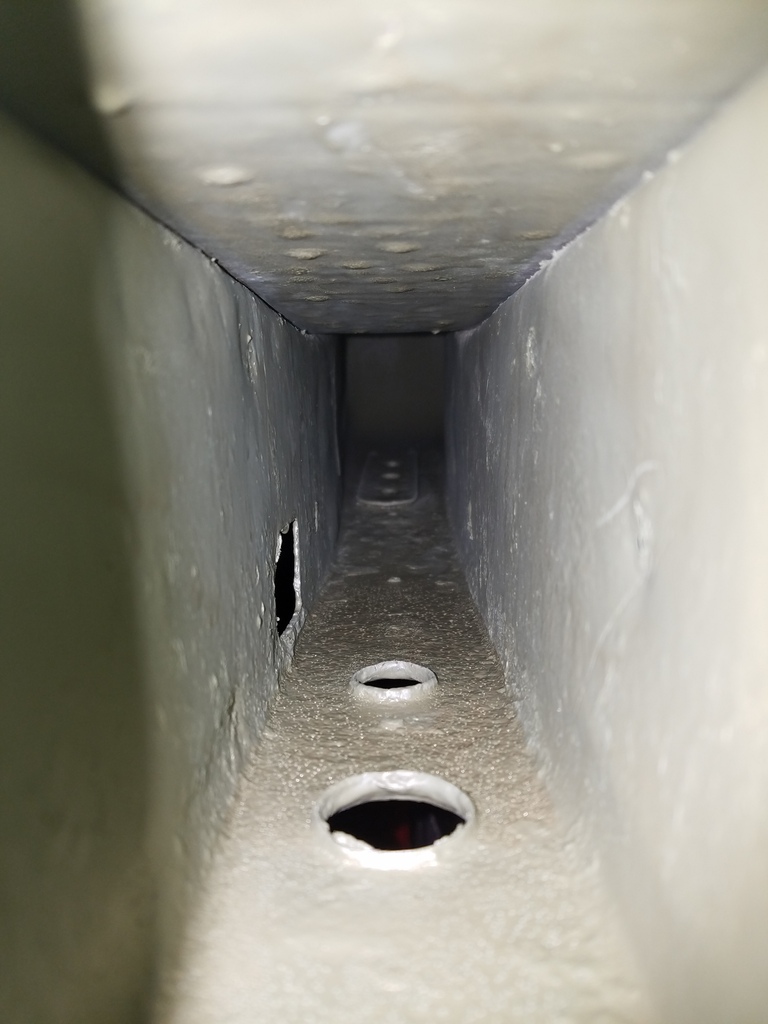
Before I started to use the internal frame coating that I got from Eastwood, I wanted to clean out the rear frame as much as possible. I took the first two pics after I have taped a wire brush to a ruler and went to town and vacuumed out what I could.
DS
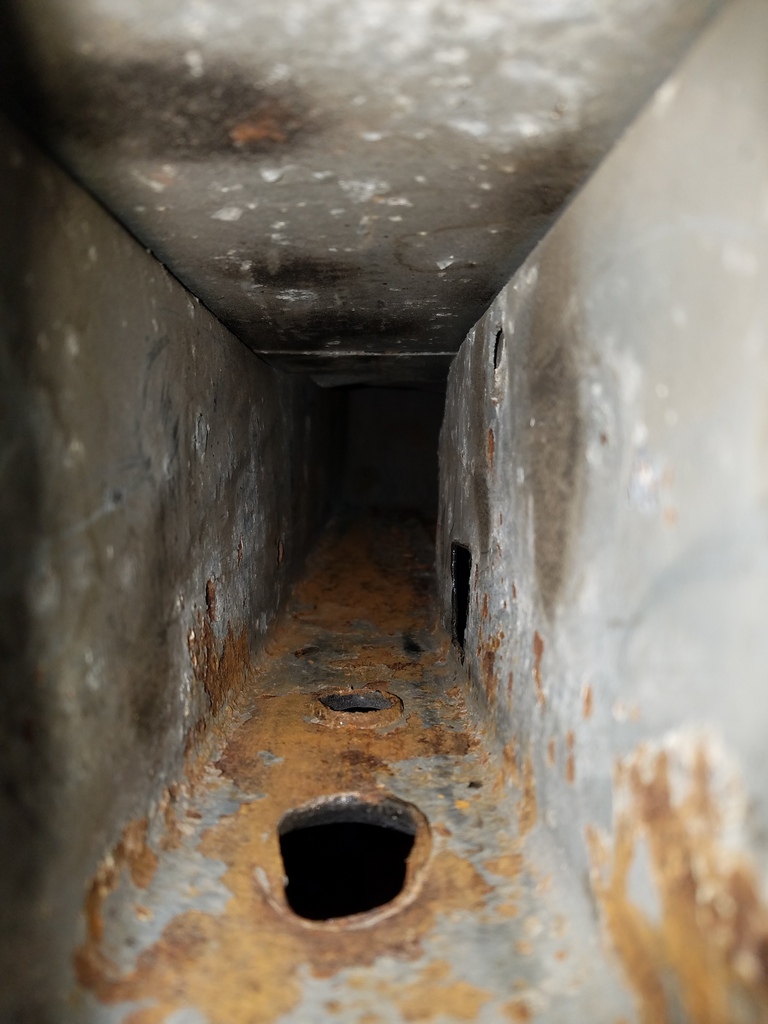
PS
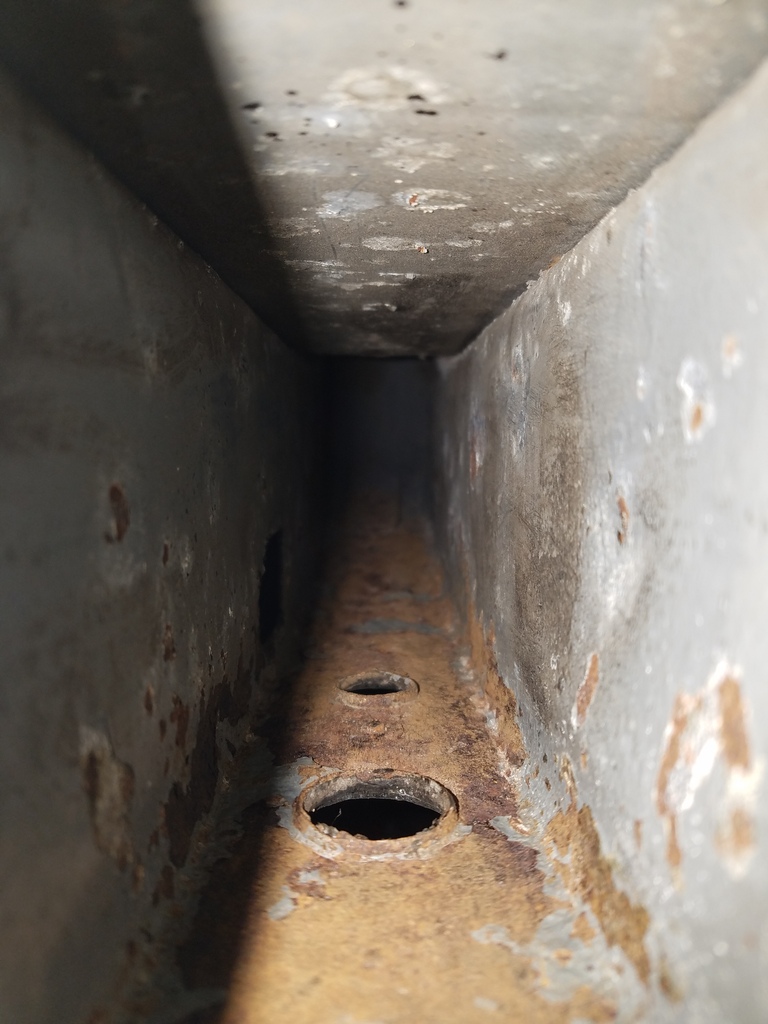
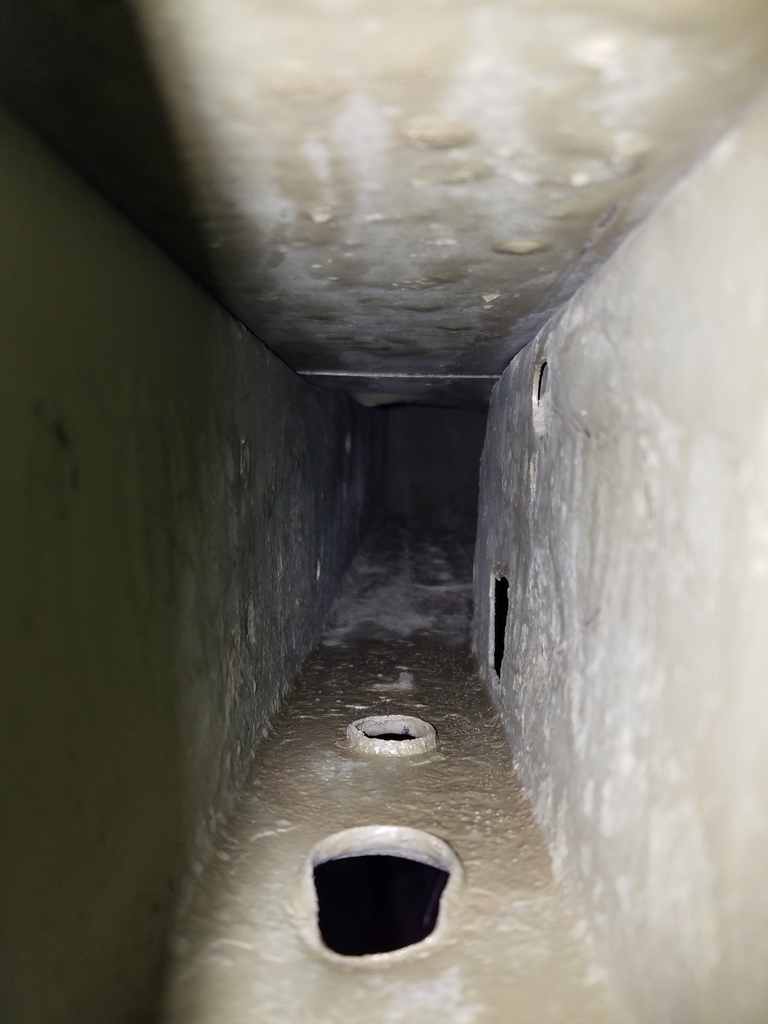
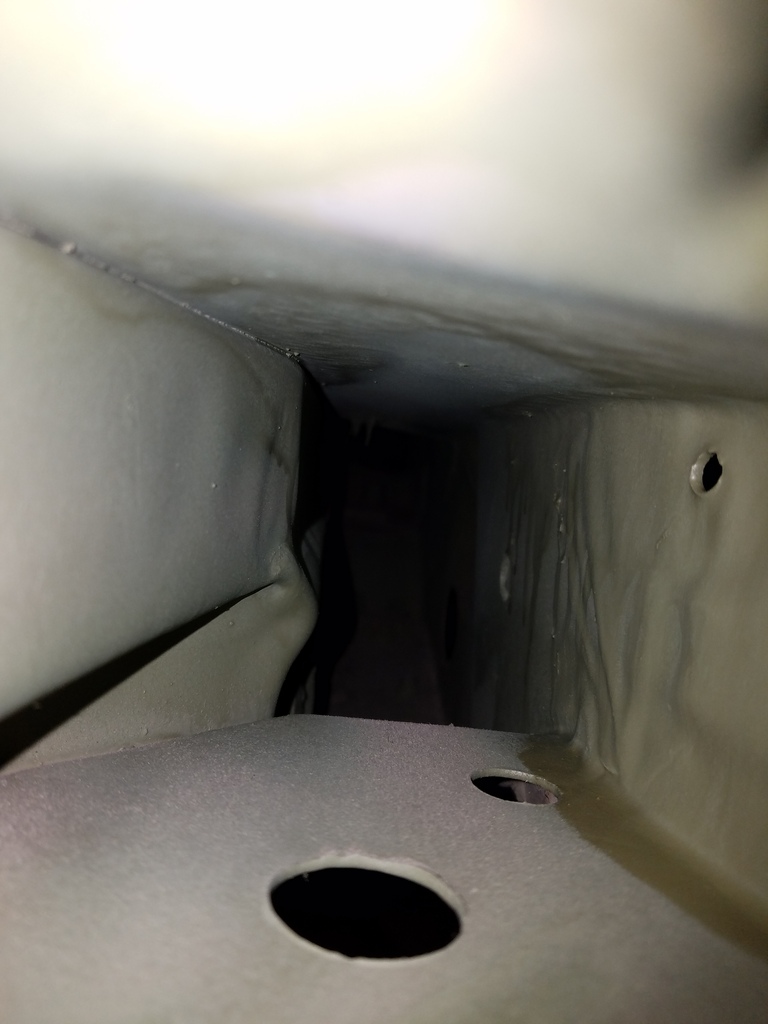
I then made a custom tool that is a cable with a few small chain links on the end. Guys who restore old trucks and jeeps use this method to get rust out of frames.
After using the tool, more rust became loose. To do a good cleaning I taped a fuel line to my shop vac. This made it so I was able to clean out the frame very well.
DS
PS

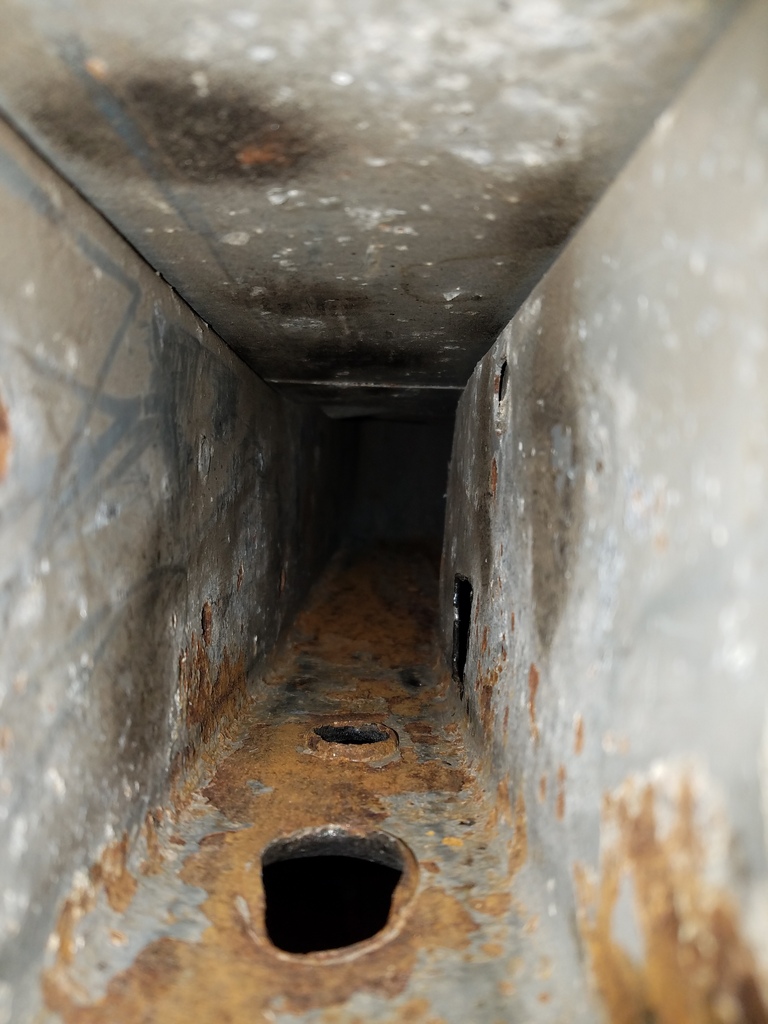
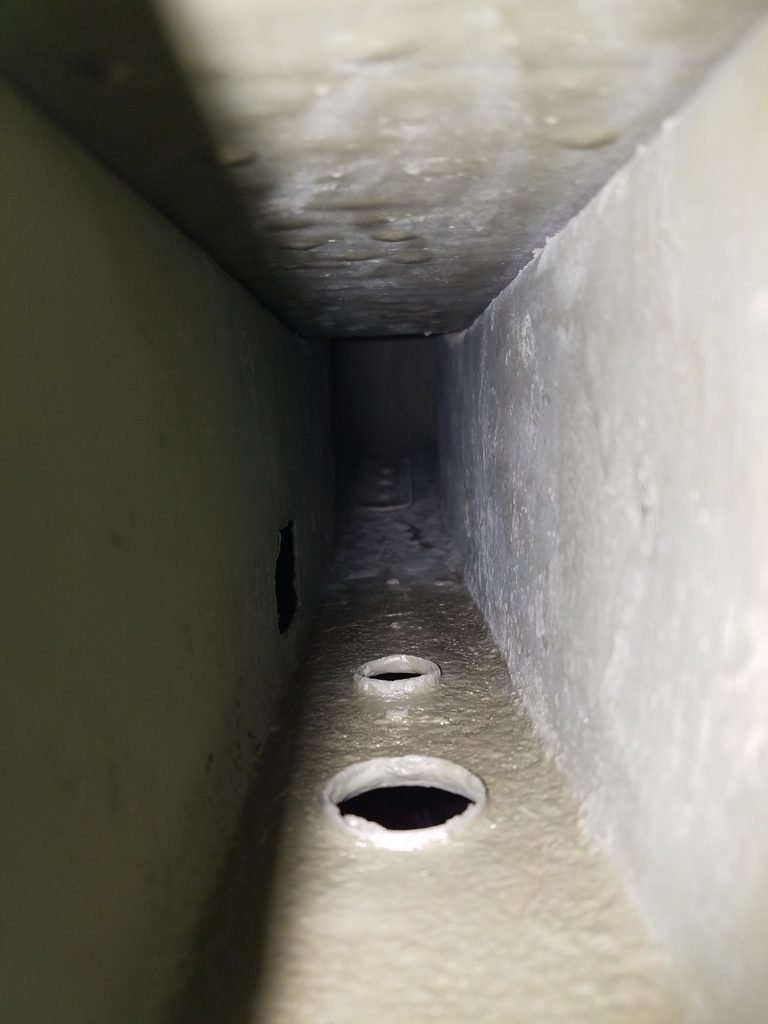
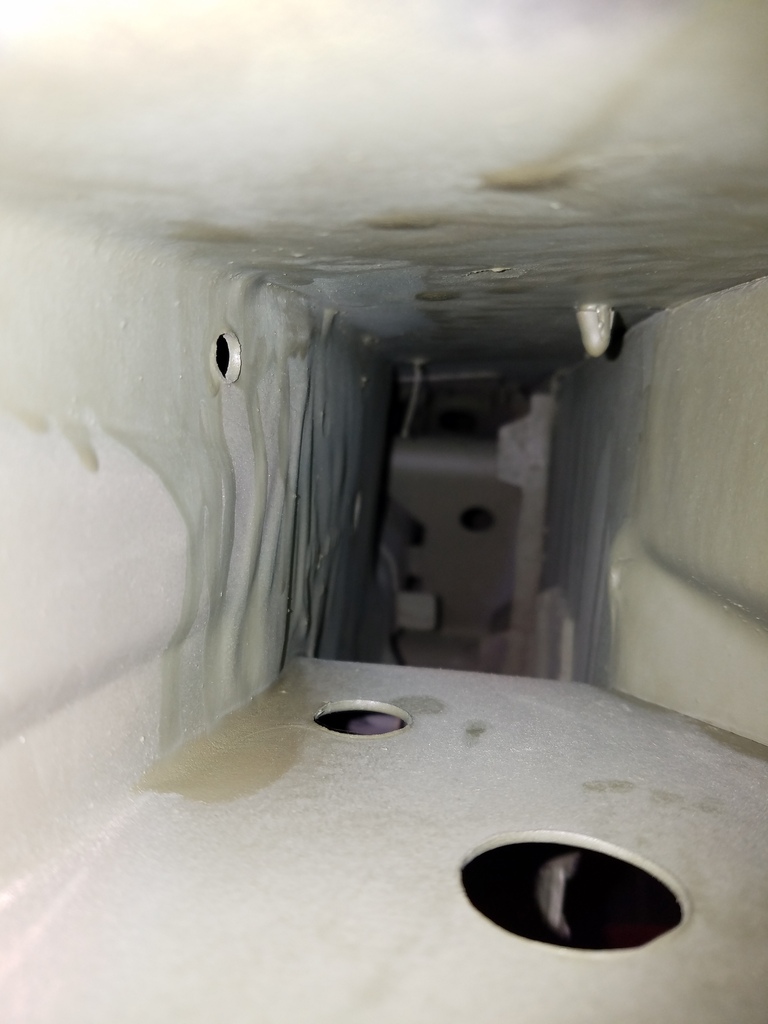
Right after shooting the coating in. Make sure to put cardboard down under the area being coated. This stuff dries supper hard and creeps into cracks (both good things).
DS
PS
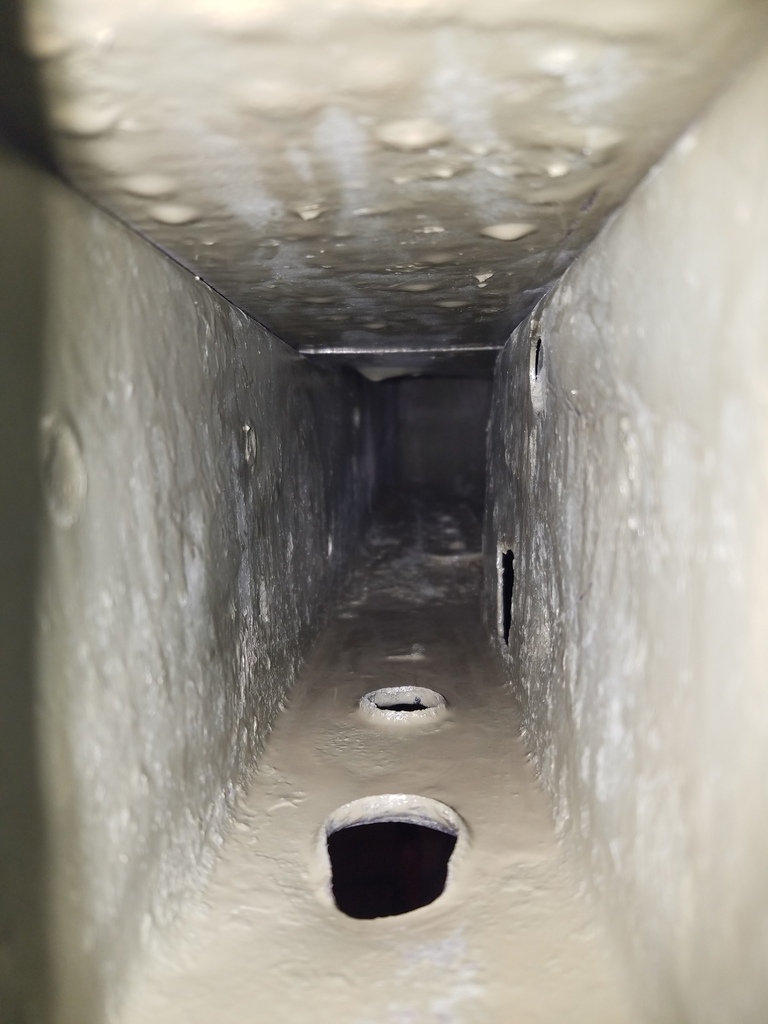
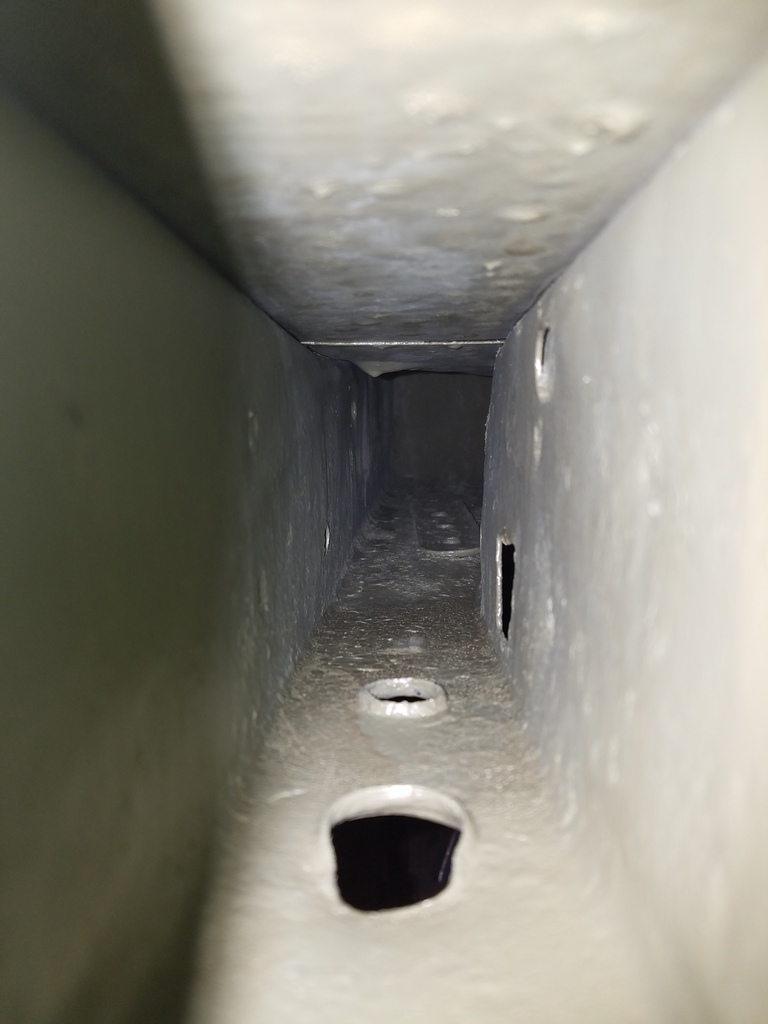
12 hours later once completely dry. Still on the fence about needing a second coat.
DS
PS
I used the same spray in the front frame. Back then I was still being stupid and didn't vacuum well and I didn't know about the custom wire tool. So rust flakes and scale are entrapped in the front frame rails. Oh well. This car will be garage kept from now on and not driven in the rain unless I get caught in it after a show. I think it will be OK.
Oh I also sprayed this stuff in the seat mounting rails. I figured why not.
Next update will be in a week. Family visiting.
I hope to start working on the fender horns that I hacked up as a kid back when I mounted the "sweet" lambo door hinges I thought were cool for some reason. Also small final touches on the interior floor.
Before I started to use the internal frame coating that I got from Eastwood, I wanted to clean out the rear frame as much as possible. I took the first two pics after I have taped a wire brush to a ruler and went to town and vacuumed out what I could.
DS
PS
I then made a custom tool that is a cable with a few small chain links on the end. Guys who restore old trucks and jeeps use this method to get rust out of frames.
After using the tool, more rust became loose. To do a good cleaning I taped a fuel line to my shop vac. This made it so I was able to clean out the frame very well.
DS
PS
Right after shooting the coating in. Make sure to put cardboard down under the area being coated. This stuff dries supper hard and creeps into cracks (both good things).
DS
PS
12 hours later once completely dry. Still on the fence about needing a second coat.
DS
PS
I used the same spray in the front frame. Back then I was still being stupid and didn't vacuum well and I didn't know about the custom wire tool. So rust flakes and scale are entrapped in the front frame rails. Oh well. This car will be garage kept from now on and not driven in the rain unless I get caught in it after a show. I think it will be OK.
Oh I also sprayed this stuff in the seat mounting rails. I figured why not.
Next update will be in a week. Family visiting.
I hope to start working on the fender horns that I hacked up as a kid back when I mounted the "sweet" lambo door hinges I thought were cool for some reason. Also small final touches on the interior floor.
03-02-2017, 01:05 PM
#19
Supreme Member
iTrader: (11)
Join Date: Aug 2013
Location: MICHIGAN
Posts: 4,637
Received 751 Likes
on
577 Posts
Car: 1988 Trans Am
Engine: L03
Transmission: 700R4
Axle/Gears: 10 Bolt 2.73 Open
Re: My 91 Z28 build. 17 years in the making... Finally going to do this right
Wow...thanks for posting this. I loved the idea of the Eastwood internal frame coating, but had my doubts about how well that applicator worked. Kevin Tetz did a demo of it, spraying it into a clear tube. The coverage was good, but the to be was small diameter, and an equal distance form the nozzle all around. I wasn't sure about the coverage in a rectangular frame rail. But this proves that it really does do a nice job.
If you have the product, I'd do a second coat. Now's the time.
I'll be saving these photos for reference.
If you have the product, I'd do a second coat. Now's the time.
I'll be saving these photos for reference.
03-02-2017, 03:26 PM
#20
Supreme Member
Thread Starter
iTrader: (2)
Join Date: Feb 2005
Location: West Warwick RI, postal code: 02893
Posts: 4,337
Received 55 Likes
on
41 Posts
Car: Building LS3, T56 Z28
Engine: LS3
Transmission: T-56
Axle/Gears: Moser/ 4.11
Re: My 91 Z28 build. 17 years in the making... Finally going to do this right
No problem. Happy to help.
After more thinking, i will do a second coat.
I bought 3 cans, used 1.5 doing what i described above.
After more thinking, i will do a second coat.
I bought 3 cans, used 1.5 doing what i described above.
03-13-2017, 12:09 PM
#21
Supreme Member
Thread Starter
iTrader: (2)
Join Date: Feb 2005
Location: West Warwick RI, postal code: 02893
Posts: 4,337
Received 55 Likes
on
41 Posts
Car: Building LS3, T56 Z28
Engine: LS3
Transmission: T-56
Axle/Gears: Moser/ 4.11
Re: My 91 Z28 build. 17 years in the making... Finally going to do this right
Second coat complete on the rear frame rails. Hard to tell where you already coated, so I kinda just spray like crazy in there and hope for the best. Looks like full coverage to me.
Driver side:
Passenger side:
Decided to take a quick shot down the front frame rails as well to show how they are coated. This is after a quick second coat.
Driver side (I think):
Passenger side. That drip is actually bondo I think from filling holes in the engine bay, but I am not really sure.
I also sprayed down every bolt hole to try an ensure that I got full coverage. Just pinched the sprayer to try and contain the blast. All that paint will be getting sanded off before paint anyways, so no need to worry about spills now.
Decided that the next step should be to get some of this bare metal painted so it doesn't start to build up surface rust. Wiped down with PRE (pre-painting prep spray from Eastwood).
Coated with Rust Encapsulation paint from Eastwood. Applied with a brush.
Next step will be to finish cleaning the dash, weld, grind, wire wheel, etc... till it is all good metal, then repeat what I just did. Hope to do this all this week.
03-13-2017, 03:43 PM
#22
03-14-2017, 09:30 AM
#23
Supreme Member
Thread Starter
iTrader: (2)
Join Date: Feb 2005
Location: West Warwick RI, postal code: 02893
Posts: 4,337
Received 55 Likes
on
41 Posts
Car: Building LS3, T56 Z28
Engine: LS3
Transmission: T-56
Axle/Gears: Moser/ 4.11
Re: My 91 Z28 build. 17 years in the making... Finally going to do this right
Thanks! Slow and steady wins the race...
04-03-2017, 09:28 AM
#26
Supreme Member
Thread Starter
iTrader: (2)
Join Date: Feb 2005
Location: West Warwick RI, postal code: 02893
Posts: 4,337
Received 55 Likes
on
41 Posts
Car: Building LS3, T56 Z28
Engine: LS3
Transmission: T-56
Axle/Gears: Moser/ 4.11
Re: My 91 Z28 build. 17 years in the making... Finally going to do this right
Finally got around to removing the Dynamat glue residue from the dash area. Man that sucked. Not sure what I am going to use once I repaint the entire cabin, but hopefully I can find something that is not sticky, but rather is held on by some mechanical means. As you can see I still have some cleanup to do on the firewall area. What a mess...
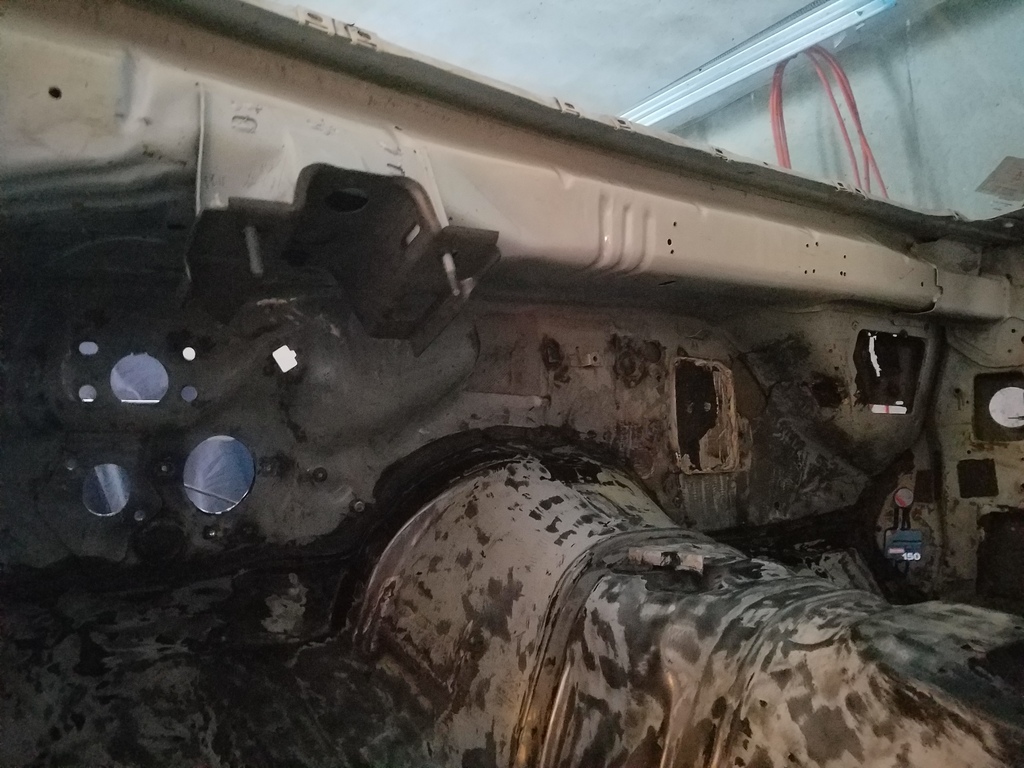
Onto the next issue.
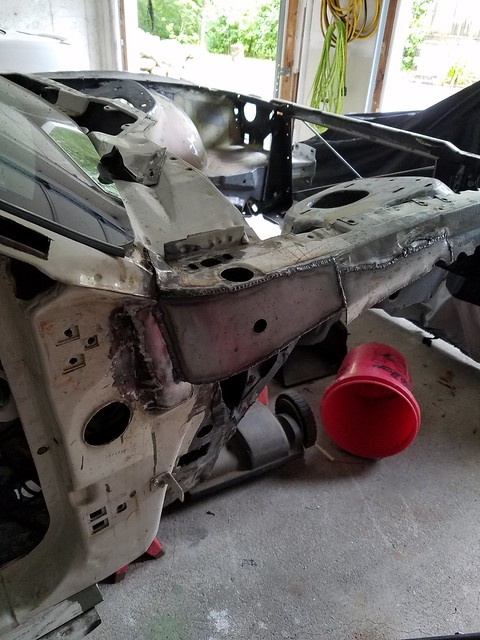
The complete mess my fender horns were.
Passenger side.
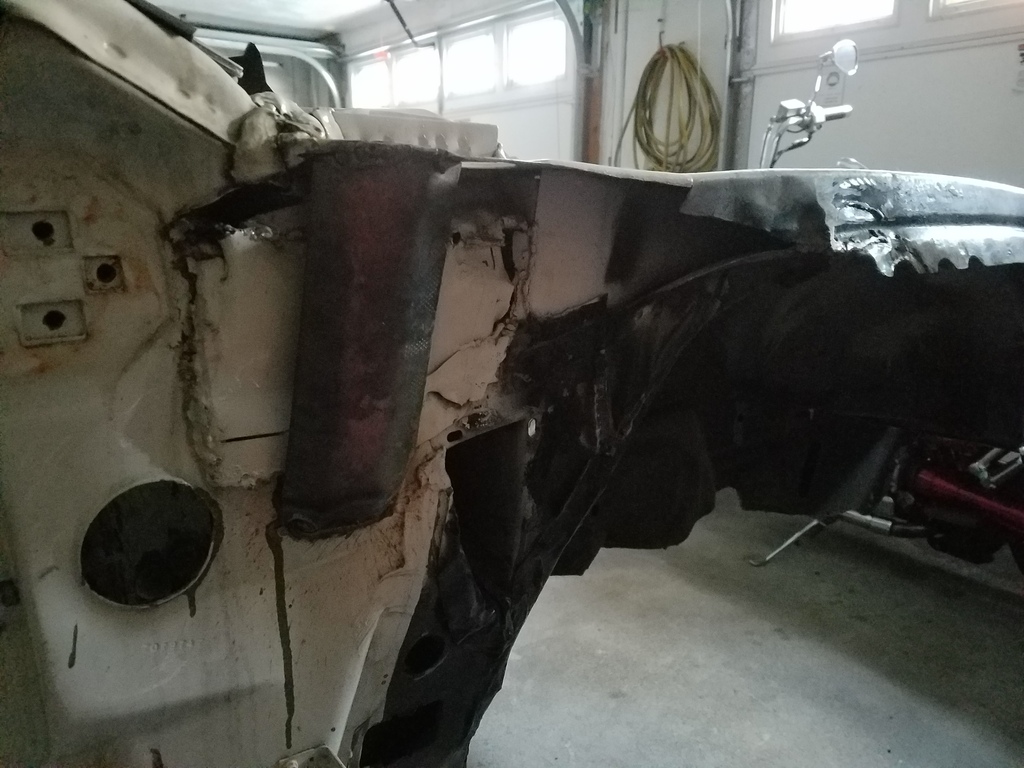
I decided to start the rebuild of the driver side first. Already cut off some crap metal I had added a while back. Staring to asses how to tackle this issue. By the way this was all done because I had added universal fit lambo door hinges back in the day that I later got rid of... Stupid idea.
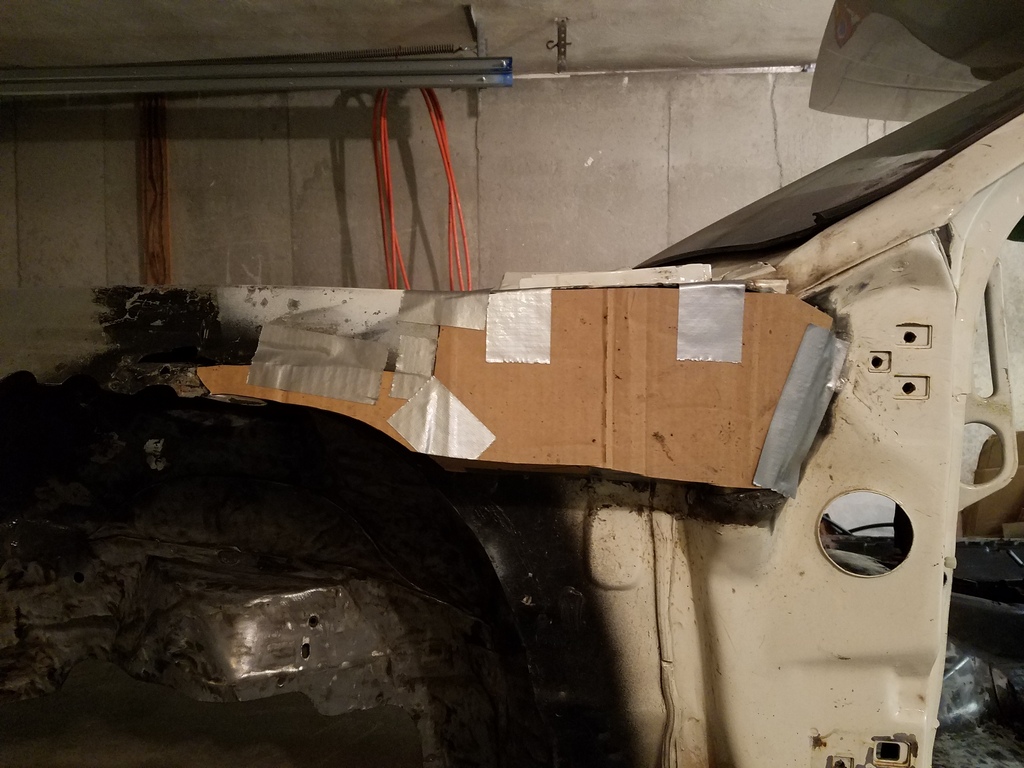
Test fitting first piece to be made. All about getting the cardboard just right.
Area cleaned up and ready for metal.
Cardboard pattern transferred to metal.

Welded in.
Next issue was a small rust hole just below this area that went into the foot well area.
Rust cut out.
This time I made the template out of duct tape. Here I am transferring it to metal.
Onto the next issue.
The complete mess my fender horns were.
Passenger side.
I decided to start the rebuild of the driver side first. Already cut off some crap metal I had added a while back. Staring to asses how to tackle this issue. By the way this was all done because I had added universal fit lambo door hinges back in the day that I later got rid of... Stupid idea.
Test fitting first piece to be made. All about getting the cardboard just right.
Area cleaned up and ready for metal.
Cardboard pattern transferred to metal.
Welded in.
Next issue was a small rust hole just below this area that went into the foot well area.
Rust cut out.
This time I made the template out of duct tape. Here I am transferring it to metal.
04-03-2017, 09:40 AM
#27
Supreme Member
Thread Starter
iTrader: (2)
Join Date: Feb 2005
Location: West Warwick RI, postal code: 02893
Posts: 4,337
Received 55 Likes
on
41 Posts
Car: Building LS3, T56 Z28
Engine: LS3
Transmission: T-56
Axle/Gears: Moser/ 4.11
Re: My 91 Z28 build. 17 years in the making... Finally going to do this right
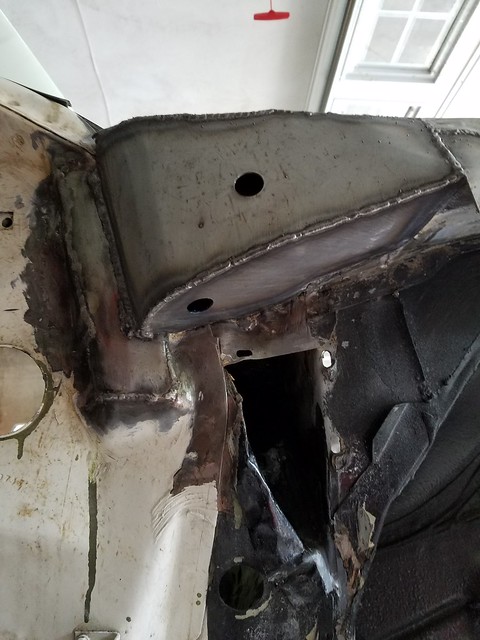
Now that the rust hole was patched I could move onto making the rest of the fender horn from cardboard.
Including small slivers under the horn that were super fun.
Boxing off the lower area.
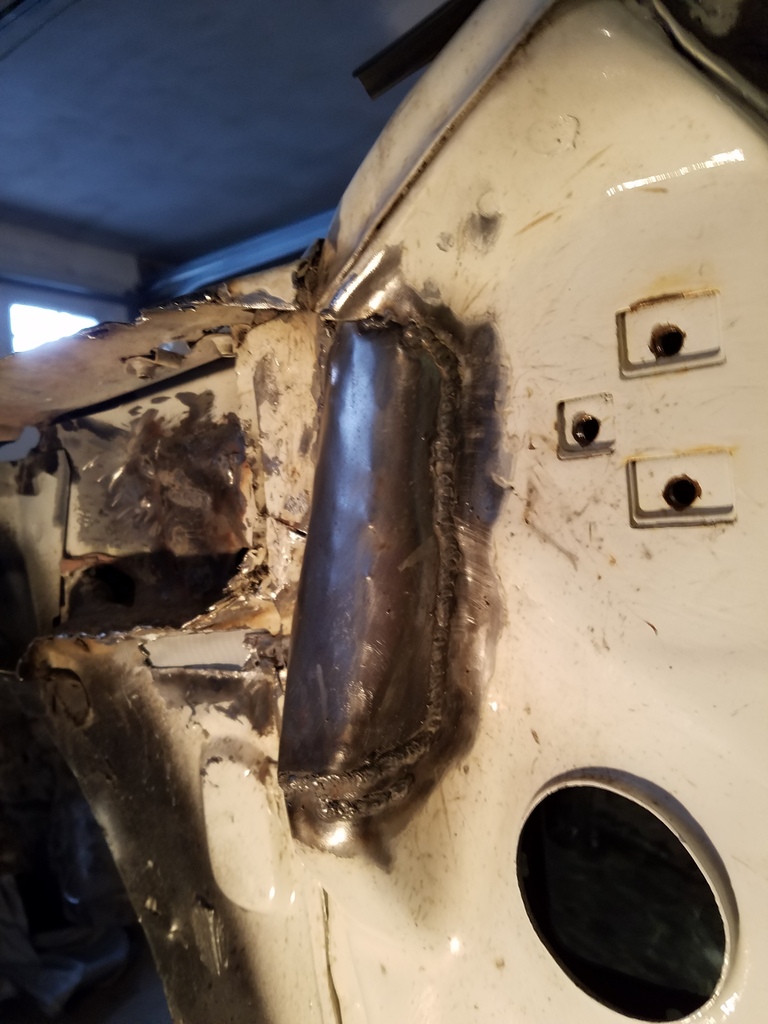
Always start with the most annoying parts... That sliver welded in.
Oddly shaped hole at the leading edge.
Small patch piece.
Welded in.
Next piece welded in. This was a big step as the rest is much more straight forward.
A shot of the reconstructed area from below.
Next should be the other cardboard pieces shown before, then onto the passenger side.
Including small slivers under the horn that were super fun.
Boxing off the lower area.
Always start with the most annoying parts... That sliver welded in.
Oddly shaped hole at the leading edge.
Small patch piece.
Welded in.
Next piece welded in. This was a big step as the rest is much more straight forward.
A shot of the reconstructed area from below.
Next should be the other cardboard pieces shown before, then onto the passenger side.
04-28-2017, 12:14 PM
#28
Supreme Member
Thread Starter
iTrader: (2)
Join Date: Feb 2005
Location: West Warwick RI, postal code: 02893
Posts: 4,337
Received 55 Likes
on
41 Posts
Car: Building LS3, T56 Z28
Engine: LS3
Transmission: T-56
Axle/Gears: Moser/ 4.11
Re: My 91 Z28 build. 17 years in the making... Finally going to do this right
Got the final 2 panels attached.
Drilled a hole in the middle to be able to paint inside later.

Shot from below.
Drilled a hole in the middle to be able to paint inside later.
Shot from below.
04-29-2017, 07:18 PM
#30
Supreme Member
Thread Starter
iTrader: (2)
Join Date: Feb 2005
Location: West Warwick RI, postal code: 02893
Posts: 4,337
Received 55 Likes
on
41 Posts
Car: Building LS3, T56 Z28
Engine: LS3
Transmission: T-56
Axle/Gears: Moser/ 4.11
Re: My 91 Z28 build. 17 years in the making... Finally going to do this right
Yeah, the passenger side has the same issues to be resolved . Then the 4 point and the SFC.
then welding should be complete...
then welding should be complete...
04-29-2017, 08:22 PM
#31
COTM Editor
iTrader: (22)
Join Date: Mar 2001
Posts: 9,899
Likes: 0
Received 1,855 Likes
on
1,270 Posts
Car: '89 Firebird
Engine: 7.0L
Transmission: T56
Re: My 91 Z28 build. 17 years in the making... Finally going to do this right
I always like the threads of long-time owners. Pretty impressive all the things you're able to do. This is going to be a really nice car when you're done. 
04-29-2017, 08:56 PM
#32
Supreme Member
iTrader: (7)
Join Date: Nov 2006
Location: Alamogordo, NM
Posts: 3,740
Likes: 0
Received 9 Likes
on
9 Posts
Car: 88 Formula 350
Engine: 5.7
Transmission: T-56
Axle/Gears: 9" 3.89
Re: My 91 Z28 build. 17 years in the making... Finally going to do this right
Subscribed... I am going to be redoing my first car as well. Luckily I didn't do any real cutting or anything, but there is a good bit of wiring I need to redo and paint/body work. Keep it up! It's looking good!
04-29-2017, 10:22 PM
#33
Re: My 91 Z28 build. 17 years in the making... Finally going to do this right
this is why I never drove mine on a wet street or in the rain...would hate to even think about fixing weather age...I was shocked at all the dust under the no see them places when I started pulling mine apart....keep up the good work..
04-30-2017, 06:21 AM
#34
Supreme Member
Thread Starter
iTrader: (2)
Join Date: Feb 2005
Location: West Warwick RI, postal code: 02893
Posts: 4,337
Received 55 Likes
on
41 Posts
Car: Building LS3, T56 Z28
Engine: LS3
Transmission: T-56
Axle/Gears: Moser/ 4.11
Re: My 91 Z28 build. 17 years in the making... Finally going to do this right
Thanks for taking a look everyone.
70% Off what I am fixing is from me doing stupid things to the car as a teen. (Lambo door hinges) Only the floor board repair and a couple small areas were rust fixes. The rest was botched crap.
anyways, hope to keep this thread updated
On the planning side of things, I decided to make a big shift. I will be selling my motor, clutch and trans... going to go with something reliable, f.i., and powerful. New GM Connect & Cruise LSA with manual trans.
Not cheap to say the least, but in the end, I think this it is the setup I will enjoy 20 years from now. I am looking at it in terms of a long investment. (I know there are cheaper ways to make the same power)
I just decided I want everything new on this build once its done, and I don't want to re invent the wheel. Chevy makes powerfull turn key setups, just need to save up. A lot.
06-05-2017, 06:19 AM
#35
Junior Member
iTrader: (4)
Join Date: Jun 2013
Location: dutchess county ny
Posts: 75
Likes: 0
Received 11 Likes
on
11 Posts
Car: '87 z28
Engine: 383
Transmission: t56
Axle/Gears: 10 bolt 4:10
Re: My 91 Z28 build. 17 years in the making... Finally going to do this right
good luck looks good doing the same with my 87
06-12-2017, 07:28 AM
#37
Supreme Member
Thread Starter
iTrader: (2)
Join Date: Feb 2005
Location: West Warwick RI, postal code: 02893
Posts: 4,337
Received 55 Likes
on
41 Posts
Car: Building LS3, T56 Z28
Engine: LS3
Transmission: T-56
Axle/Gears: Moser/ 4.11
Re: My 91 Z28 build. 17 years in the making... Finally going to do this right
Hey Tibo, I hadn't thought of going rack and pinion. You are right about the money. I just want what is best for the car at this point. If it adds another couple grand I don't care, I will just save for longer.
I have never seen an easy to install setup. Plenty of manual racks, but I want PS.
If you have seen straight forward kits, please send a link. I will try to post some progress pics. Its been a while. I have taken a few picks but since the weather has been great I have been riding my motorcycle a lot and swimming!
06-12-2017, 08:52 AM
#38
Supreme Member
Thread Starter
iTrader: (2)
Join Date: Feb 2005
Location: West Warwick RI, postal code: 02893
Posts: 4,337
Received 55 Likes
on
41 Posts
Car: Building LS3, T56 Z28
Engine: LS3
Transmission: T-56
Axle/Gears: Moser/ 4.11
Re: My 91 Z28 build. 17 years in the making... Finally going to do this right
Here is a mess of update pictures.
Found some rust in the cowl drainage area on the passenger side, under the OEM seam sealer. This was after I scrapped it all up and wire brushed what I could.
After using zinc phosphate rust conversion, pre painting prep to clean and rust encapsulating paint. 3 coats. Not pretty but confident that it is sealed.

The piece of metal just above this area was also toast, see image before last. New seam sealer applied as well as patch panel being test fit into area that was destroyed (by me back in the day, ugh...) On the left you can see the fender "bump" rebuilt as well.
Patch welded in, top was hard since the edge went in and out a couple times. Grinding to follow.
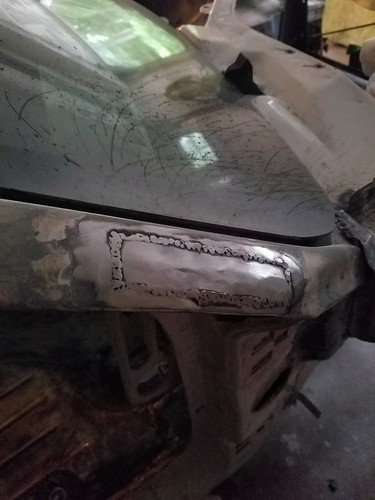
First piece of fender horn rebuild. The hardest piece for sure due to the bend and strange welding angles needed.
Larger lower piece tacked in. Drain hole also drilled.
Only two more pieces to go then this side should be complete and ready for paint. Light at the end of the body rebuild tunnel... I think...
Found some rust in the cowl drainage area on the passenger side, under the OEM seam sealer. This was after I scrapped it all up and wire brushed what I could.
After using zinc phosphate rust conversion, pre painting prep to clean and rust encapsulating paint. 3 coats. Not pretty but confident that it is sealed.
The piece of metal just above this area was also toast, see image before last. New seam sealer applied as well as patch panel being test fit into area that was destroyed (by me back in the day, ugh...) On the left you can see the fender "bump" rebuilt as well.
Patch welded in, top was hard since the edge went in and out a couple times. Grinding to follow.
First piece of fender horn rebuild. The hardest piece for sure due to the bend and strange welding angles needed.
Larger lower piece tacked in. Drain hole also drilled.
Only two more pieces to go then this side should be complete and ready for paint. Light at the end of the body rebuild tunnel... I think...
Last edited by dennisbernal91z; 07-26-2017 at 07:49 AM.
07-20-2017, 07:39 AM
#39
Supreme Member
Thread Starter
iTrader: (2)
Join Date: Feb 2005
Location: West Warwick RI, postal code: 02893
Posts: 4,337
Received 55 Likes
on
41 Posts
Car: Building LS3, T56 Z28
Engine: LS3
Transmission: T-56
Axle/Gears: Moser/ 4.11
Re: My 91 Z28 build. 17 years in the making... Finally going to do this right
Test complete. Using Flickr.
Last edited by dennisbernal91z; 07-26-2017 at 07:50 AM.
07-20-2017, 08:11 AM
#40
Supreme Member
Thread Starter
iTrader: (2)
Join Date: Feb 2005
Location: West Warwick RI, postal code: 02893
Posts: 4,337
Received 55 Likes
on
41 Posts
Car: Building LS3, T56 Z28
Engine: LS3
Transmission: T-56
Axle/Gears: Moser/ 4.11
Re: My 91 Z28 build. 17 years in the making... Finally going to do this right
Turns out Amazon Prime Photos and Photobucket don't allow third party hosting of images. Not sure what I am going to do...
I will try using Imgur, Photobucket is dead to me. Amazon Prime photos is only good for backing up images, not for posting on blogs like this.
I will try using Imgur, Photobucket is dead to me. Amazon Prime photos is only good for backing up images, not for posting on blogs like this.
Last edited by dennisbernal91z; 07-20-2017 at 12:18 PM.
The following users liked this post:
87CIZ (12-21-2021)
07-21-2017, 09:31 AM
#43
Supreme Member
Thread Starter
iTrader: (2)
Join Date: Feb 2005
Location: West Warwick RI, postal code: 02893
Posts: 4,337
Received 55 Likes
on
41 Posts
Car: Building LS3, T56 Z28
Engine: LS3
Transmission: T-56
Axle/Gears: Moser/ 4.11
Re: My 91 Z28 build. 17 years in the making... Finally going to do this right
I have been trying to use Imgur, but it is strange.... I will check out Flickr now.
07-21-2017, 04:51 PM
#44
Supreme Member
iTrader: (11)
Join Date: Aug 2013
Location: MICHIGAN
Posts: 4,637
Received 751 Likes
on
577 Posts
Car: 1988 Trans Am
Engine: L03
Transmission: 700R4
Axle/Gears: 10 Bolt 2.73 Open
Re: My 91 Z28 build. 17 years in the making... Finally going to do this right
I find it pretty friendly to use. And MUCH faster than the Bucket. With 1/20th the ads.
I did a little tutorial on it. I'm far from all knowing on how to use their tools, but this is what I came up with.
http://wichargerguy.proboards.com/th...-photos-flickr
I did a little tutorial on it. I'm far from all knowing on how to use their tools, but this is what I came up with.
http://wichargerguy.proboards.com/th...-photos-flickr
07-26-2017, 07:28 AM
#45
Supreme Member
Thread Starter
iTrader: (2)
Join Date: Feb 2005
Location: West Warwick RI, postal code: 02893
Posts: 4,337
Received 55 Likes
on
41 Posts
Car: Building LS3, T56 Z28
Engine: LS3
Transmission: T-56
Axle/Gears: Moser/ 4.11
Re: My 91 Z28 build. 17 years in the making... Finally going to do this right
OK so I uploaded a ton of pics to Flickr.
I will try to go back up thru the build and correct posts, but that is a TON of work, so maybe a little at a time.
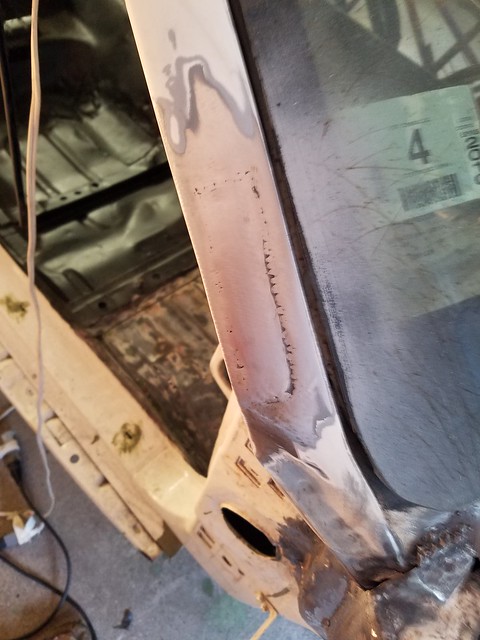
I had paper thin metal under some paint bubbles on my passenger side A pillar so I cut the area out and cleaned out all the rust.
Here I sanded and welder primed the entire area.
Test piece fit in place. Also primed with weld thru primer.
Welding complete on the A-pillar patch. All spot welds done over the course of a couple weeks. Just did a dot every time I walked by! Time to start grinding and sanding to form the steel.
I will try to go back up thru the build and correct posts, but that is a TON of work, so maybe a little at a time.
I had paper thin metal under some paint bubbles on my passenger side A pillar so I cut the area out and cleaned out all the rust.
Here I sanded and welder primed the entire area.
Test piece fit in place. Also primed with weld thru primer.
Welding complete on the A-pillar patch. All spot welds done over the course of a couple weeks. Just did a dot every time I walked by! Time to start grinding and sanding to form the steel.
Last edited by dennisbernal91z; 07-26-2017 at 07:34 AM.
07-26-2017, 07:53 AM
#46
Supreme Member
Thread Starter
iTrader: (2)
Join Date: Feb 2005
Location: West Warwick RI, postal code: 02893
Posts: 4,337
Received 55 Likes
on
41 Posts
Car: Building LS3, T56 Z28
Engine: LS3
Transmission: T-56
Axle/Gears: Moser/ 4.11
Re: My 91 Z28 build. 17 years in the making... Finally going to do this right
Finished the passenger side fender horn rebuild. I forgot to extend the last panel down to form the lip the front section has. I did this on the driver side. Oh well. I could weld a lip on, but I don't think this is worth it.
Shot of the underside of the finished area. Grinding and paint to follow.
Shot of the underside of the finished area. Grinding and paint to follow.
08-01-2017, 09:34 AM
#47
Supreme Member
Thread Starter
iTrader: (2)
Join Date: Feb 2005
Location: West Warwick RI, postal code: 02893
Posts: 4,337
Received 55 Likes
on
41 Posts
Car: Building LS3, T56 Z28
Engine: LS3
Transmission: T-56
Axle/Gears: Moser/ 4.11
Re: My 91 Z28 build. 17 years in the making... Finally going to do this right
Further update to the A-pillar repair. Did some more grinding to shape the metal.
Next up is to close some holes I made on the cowl lip. Once I have done that I will be stripping the PS wheel well and getting to work on the other nooks and crannies of the engine bay to get the cowl forward ready for epoxy primer. Any suggestions?

Next up is to close some holes I made on the cowl lip. Once I have done that I will be stripping the PS wheel well and getting to work on the other nooks and crannies of the engine bay to get the cowl forward ready for epoxy primer. Any suggestions?
08-05-2017, 04:17 PM
#48
Re: My 91 Z28 build. 17 years in the making... Finally going to do this right
A note on Epoxy primers that most don't know or think is BS... Do not apply body filler directly over epoxy. The filler needs to go on primer surfacer. The filler will only bond with the epoxy primer by adhesion so you have to scuff the heck out of it with like 80 grit. Only think of Epoxy primer as heavy duty sealer.
08-06-2017, 10:49 AM
#49
Supreme Member
Thread Starter
iTrader: (2)
Join Date: Feb 2005
Location: West Warwick RI, postal code: 02893
Posts: 4,337
Received 55 Likes
on
41 Posts
Car: Building LS3, T56 Z28
Engine: LS3
Transmission: T-56
Axle/Gears: Moser/ 4.11
Re: My 91 Z28 build. 17 years in the making... Finally going to do this right
Great advice Tibo. Can I do my bondo work on bare steel and then use epoxy and then surfacer?
or is best course of action, steel, epoxy, surfacer, bondo, primer (surfacer again?), paint?
or is best course of action, steel, epoxy, surfacer, bondo, primer (surfacer again?), paint?
08-06-2017, 11:44 AM
#50
Re: My 91 Z28 build. 17 years in the making... Finally going to do this right
Best way is what you said. Metal, epoxy, 2K, filler, 2K. You can spray Epoxy over the filler BUT you may notice that the filler wants to almost absorb the thin epoxy primer and will require two coats vs usually one with a good 2K. Some of the better fillers are direct to metal like the Evercoat Rage series which I cannot say enough good things about Evercoat Rage Ultra! It sands so wonderfully. The Bondo brand and even Evercoat Lite Weight filler sand like concrete compared to the Rage ultra. With the Rage Ultra I really only had pinholes if I really stirred the filler when mixing it or when I wiped the area multiple times with the spatula. You can also sand the rage really thin, to the point of being translucent and it will still adhere.