When you click on links to various merchants on this site and make a purchase, this can result in this site earning a commission. Affiliate programs and affiliations include, but are not limited to, the eBay Partner Network.
Antony! I know they don't serve much purpose, but I always liked the look of the overhead console. My first T/A, a 1985, had one in it. I think I might actually have one sitting around here somewhere. I might have to look at putting it in my car one day.
So what are you planning on doing to your car next?
Yeah, they're kinda fun toys, not much more.
Gives us guys an opportunity to bash some buttons overhead like David Hasselhoff used to do
Aside from some general engine maintenance I plan to get subframe connectors, perhaps also a wonder bar, to add some extra stiffness.
Especially the SFCs are of interest to get rid of some body twisting.
Then there's also still the rims which need to be restored, polished and sealed with a clear coating.
Aaaaand I need to get onto a lifting platform and do some work to the underside.
I found a sort of bedliner-equivalent today, which may just do the job, but that stuff's expensive.
Got a couple of ideas, though
A crash test and it's even a 1990's model... at least the title says so.
Well, 30 mph against a solid wall and even the windshield stays intact.
A little readjusting up front and all's fine again
Just found this piece of trivia on the net: 1990 Pontiac Firebird | Frontal Crash Test by NHTSA | CrashNet1 - YouTube
A crash test and it's even a 1990's model... at least the title says so.
Well, 30 mph against a solid wall and even the windshield stays intact.
A little readjusting up front and all's fine again
83's were alot squishier for some reason.I have no idea what they improved over the years.Im sure subframe connectors would help ,especially in small overlap crashes.
Anyway these cars are pretty safe if (note that IF ) they are not rusted.They have long hoods and lots of metal to absorb the forces of a crash.
Last edited by FirebirdUSX; 03-26-2014 at 05:01 PM.
One main difference in these two videos is that the 1990 Firebird seems to be a V6, looking at the underbody part of the video, therefore having more space between engine and front end to absorb the force.
The 83 video could be a V8 and that fan shroud means the fan is connected directly to the crank shaft. That way the impact force is channeled to the rear much earlier, thereby twisting the frame more.
You can see how the k-member twists and breaks the transmission. In the 90 video the k-member moves backwards quite uniformly and not as far.
Yup, subframe connectors should close the gap between the rails and stiffen the car sufficiently to keep the rear end from coming up behind you in such a case... I hope
Hopefully neither of us has to find out. Ever.
Yup, subframe connectors should close the gap between the rails and stiffen the car sufficiently to keep the rear end from coming up behind you in such a case... I hope
Hopefully neither of us has to find out. Ever.
Few years ago a guy here reinforced the passenger area with a roll cage .It was special because he made it through the body not inside the car ,he put those pipes through the A pillers around the roof and so on .I cant find the damn thread ...I searched it with google but I probably missing a key words or something.Anyway probably his car was more crash resistent than most cars today on the road I liked it because after he put back the interior you had no idea how many reinforcements he had around his cabin.
Nice build thread, I normally don't read the build threads unless they are referenced within a tech article, glad I did, event learned sometjing.
I have never heard of the vacuum line distributor vapor evacuation. I don't know where to fin them, but they do make screw on fittings to go onto the tire valves if you didn't want to use clamps. Kinda like the fix-a-flat connectors.
My only question is in regards to your headlamp replacement; and that would be of what lamp brand/wattage did you go with and how do you feel it performs for you and in comparison to the other vehicles on the roads
Wow, you wouldn't want a tree to jump in front of your car like that. That's dangerous!
Reinforcing makes sense, especially when it's hidden. Would like to see that in some more detail.
I know what fittings you mean. They would look great, professional. Hadn't thought of that.
My headlights are Hella lamps, I believe. Over here in Germany we need them to be E-certified and only the Hella ones have that.
The trouble is that they are out of production, so finding new ones is becoming kind of hard these days... and expensive.
Got some good used ones for mine off someone from a local forum.
I can't compare them to sealed beams because I never had those, but these things are definitely an improvement over the smaller 91 lamps, especially with the Osram Nightbreaker H4 halogen bulbs I am using now.
Perhaps the xenon mods some of you guys have are even better, but I guess it's not going to get much better for us guys over here, considering our regulatory limitations.
Oh and compared to other road vehicles my lights perform quite well.
Except when xenon cars come around... those are brighter than the sun at times
I can see properly in the dark with the Night Breakers, just as I can with rentals or the first German car I had.
I've been running EC spec'd bulbs in every car that I could get them into; my preference is Cibie but in the 4x6 for a Camaro they are out of my price range so I'm running Bosch. I have no complaints about them. I would have thought that being in the EU gave you better access. I actually prefer to run Flosser or Narva bulbs in mine
Hmm, I read about Cibi� once, but had trouble finding any of those.
No idea whether they're still in production, but they did have the same dimensions as the ones from Hella.
I just saw these: http://www.ebay.com/itm/200mm-H6054-...-/330397528585
They're even E-approved... or at least they have the logo on the glass.
Should suffice for our requirements, so apparently there are still alternatives on the market.
Haven't seen Flosser/Narva bulbs in the shops here.
Usually, we only get Phillips, Bosch, Osram or brandless/noname bulbs.
I hope that NEVER happens to me. Imagine what would have happened if that had been a Honda or so. Dead.
There's nothing better than excessive material up front in such situations.
Originally Posted by Mad Myche
Nice build thread, I normally don't read the build threads unless they are referenced within a tech article, glad I did, event learned sometjing.
I have never heard of the vacuum line distributor vapor evacuation.
And thanks, btw
Yeah, the vapor evac was brought to my attention by a buddy of mine and I immediately had to go modding
Simple and logical fix, known to some for years, yet still not widely known, sadly. But it helps and there's absolutely no downside to it.
Now, this was crap!
I wanted to take care of a relatively small rust spot and see what my rattle can skills are worth...
...well next to nothing, I suppose.
This is what I found yesterday.
Well, at least it wasn't as bad as expected under the trim.
Dirty, yes, but no rusted holes. The right side shows how dirty it has been.
As usual, the rust hadn't stopped within the visible area, so I had to sand around the spots a bit to make sure there's nothing remaining that could undermine my work one day.
The masking tape was there to prevent me from accidentally scratching any surface around the work area.
I followed up the sanding with a nice coat of zinc, then 4 layers of primer, 4 layers of paint and 4 layers of clear coating, giving each layer the prescribed time to settle before adding the next one.
Looking gooooooood... (the shiny part is where the action is)
And then... by the looks of it, I could have used stickers instead of going through all the hassle.
Perhaps I can sand the edges down a bit with my 2500 grit paper when it's fully cured.
Is this because rattle cans are made for larger parts rather than small touch ups?
I know some tricks to get the edges smooth, rolling up the corners of the masking tape for example, but the paint just floods the area when it comes out of the can, so that's of absolutely no help in these cases.
I just hope this holds up until I can get the car to a paint shop one day, which may be next year or so.
A friend of mine came over to have me help him removing some decals off the car he's about to sell.
I always wanted to experiment with the heat gun in my cellar, so I quickly learned how to pull this off, literally
Afterwards I decided to get rid of these tiny "GTA Trans Am" decals on my rockers and the trunk lid using said heat gun.
Except for my appearance package, there's no GTA in there, so why have these strange aftermarket decals on there?
Here's the remains of one sticker after I pulled the heated red tape off.
No GTA had such stickers, as far as I know, so why did someone put them there?
Using my trusty Meguiar's quick detailer and rubber, that's it for the adhesive as well.
In the correct angle and lighting, and if you know exactly where to look, you can still see remnants of the stickers shape, because the adhesive has somehow minimally influenced the paint over the years, but the stickers finally gone
The guy had achieved respectable results on his hatch lid, so I bought this stuff and went outside for a first try.
This is how my driver's side door sill used to look like after sitting around for a couple of years.
Pay special attention on the scuffs along the edge here.
The compound is applied like regular polish. After the first session the scuffs are close to gone.
With some more intense labor, it even took care of the old rust traces quite well. I thought I'd never get those out!
The remaining traces are in deep grooves, and I don't believe any kind of polish will help with those. I may have overdone it in this spot, though.
Compare this to the initial old pic of the sill. Amazing stuff, and that's only after five minutes of work.
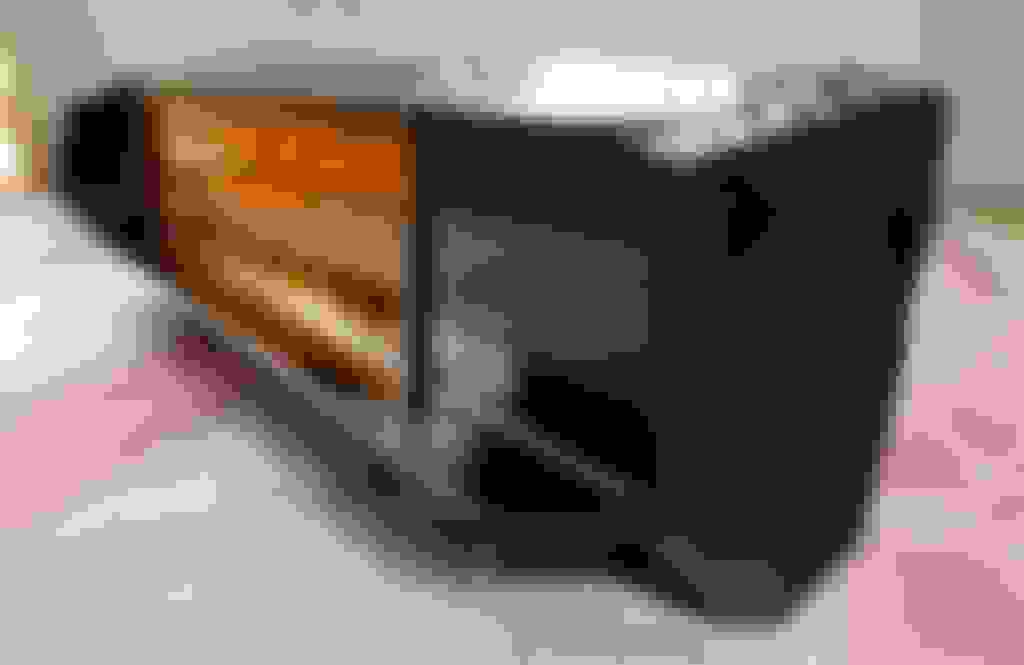
As we swapped out my coolant sensors the other day, we realized the water pump's weep hole was... well... weeping. Only a bit, but there you go.
So in my endless wisdom, I decided to order a new pump, just to be prepared for when the day comes.
I received an Airtex pump from one of the local dealers here and shortly thereafter I began hearing voices... uhm, noises... from the front of the engine.
Yep, that's my bearing going down the drain, shortly before going on vacation with the car.
Luckily one of the shops got it all fixed up on very short notice.
Just imagine going down the highway, in the middle of nowhere, and then having that bearing seize, kill your accessory belt, damage the hood and whatever's near the belt.
Better to prevent that from ever happening.
Let's see how this new pump holds up. The old one took slightly more than 24 years to die
A nice topside view, which we don't get to see very often.
We traveled up to the Baltic Sea, which is approximately 400 miles and ten million bugs away from home
No issues, no SES light, no unusual rattling, squeaking or grinding. Good times
Haha, yeah, as long as they don't ALL turn into FIREbirds
Thanks for your feedback, guys.
The details are exactly what has not been treated properly over all those years, and I like to take care of them
They make a difference, believe me.
A few weeks ago we discovered that the t-tops were leaking again.
Until this weekend, it has been quite cold outside, so there was no chance of properly sealing it up again and we wondered: Why? Where is the seal damaged? It worked so fine for so long!
Well, it wasn't due to the radical ups and downs in temperature, as we first suspected.
The paint-guy needed to pry the weatherstrip from the rear part of the roof to paint the top (he painted the rear sides of the car and quielty decided for himself he needed to also do the top).
That's where he pulled the RTV sealant apart.
This time we used silicone instead of RTV and it's waterproof again.
At least I got the chance to fix my headliner this time.
A very simple, yet effective fix. Stick glue and cardboard.
The headliner was broken in the top right corner and began sagging.
A couple of days back I decided to do something about my turn signals' shabbyness.
I thought "hey, it's a sunny day... give them a quick sanding... prime and coat them in the sun..."
Great idea
Sanding took way longer than estimated, weather conditions changed from sun to non-stop-rain for the following two days and then there's my missing experience with this type of work.
Remember my last paint job on the rocker panel...?
This one went a lot better than expected, though!
I just had to go into the cellar to spray around, which meant three flights down, three flights up, between every layer
As you know, the black paint on the turn signal housings fades over the years, gets damaged by weather conditions, insects and rubble and reduces the optical value of every well-maintained front end.
There's also often some disturbing overspray from the factory, like on my driver's side one.
I decided to first work on my passenger's side housing, since it's cracked and glued anyway and I'd rather replace that one if this goes bad.
Time to get out the 80 grit and remove the old paint.
Since the front half of the housing is what you get to see, I opted to work on that part only.
The rear part got some scuffing with 80 grit to offer the new paint at least SOME grip.
I guess next time I'll be roughing up the front half, too, and not going all the way down to the clear plastic. Should do the work with much less effort.
I went from 80 to 120, 300, 400, 600, then 1500 and 2500 grit, by the way, at least on the lense itself, to get a smooth, reflective surface.
I decided to sand the embossed lettering off, because I did not want any dirt possibly lodged in there to be under my clear coat in the end.
The hardest part was sanding the fine edges of the lense. You just can't get into the corners properly.
Time to mask the lense and get the plastic primer on there, then the black paint and clear coat.
Here's the mistake I made: Even though the plastic primer is transparent, it is very visible beneath the clear coat from certain angles.
Next time, I'll try spraying on the clear coat onto the lens directly.
I also added the clear coat layer after layer a bit to quickly, but luckily the buildup managed to run off enough to give me a smooth surface, so I didn't have to go sanding again.
Not quite dry in the next pic, still some white buildup in certain places.
Here's the comparison with the other housing.
And here's the result.
I could give it a rub with my 600 grit and follow up with 1500 and 2500, followed by Meguiar's PlastX to give it a mirrorlike finish, but I'm totally fine with how it looks right now.
There's a little texture on there which matches the rest of the car, so that's that.
I'll wait for better weather to work on the next housing.
After that I'll be doing the same to my headlight shrouds.
My friend Luis helped me out with this one and found a decent mirror for me to replace my old cracked housing.
Many thanks again for that! The housing was already close to perfect when it got here and now it looks as if nothing bad had ever happened to the car
Our customs office decided to keep it around for 4 weeks and then I had to wait for the right weather to get my car down to the shop and have them match colors for the paint job.
The mirror came in green paint, so I gutted it, had that old paint removed and let the guys put the right color on.
Today was assembly day.
I used the opportunity to test the components of the replacement mirror and decide on which were better: old or new.
The replacement motor (you can still see the green paint on the sleeve) made some suspicious sounds when operating in one of the four directions, so I opted to reuse my old one.
The two holes are responsible for rotating the two threaded rods that attach to the rear of the mirror plate and the diagonal fittings in the center are for the "cross"-component which fixes the mirror plate in place while allowing swivel operations at the same time.
Here's the backside of the mirror plate. Removal requires to tilt the plate as far as possible and then using a flathead screwdriver to pry the cross-component off the motor housing.
The threaded rods can be either pulled away from the motor or be driven out electrically via the switches in the car.
The replacement mirror was scratched up pretty bad, so I reused my old one, including the plate.
Now for the tricky part I ran into.
Usually the nuts can be removed from the threads on the mirror's base.
In my case someone had used thread sealant to fix the nuts in place, which means that the threads came out instead of the nuts coming off them.
I tried to get the nuts off by screwing two of them together and then turning one of them against the other, depending on which direction I wanted to go.
Well, one on the "new" threaded rods had a bad end and I didn't manage to get the other nut off the second one, so I went on to removing the rods from my old mirror housing.
This is how it turned out.
Since that old mirror housing is cracked and deformed and nobody else will ever be using it on a car again, that's ok.
I tried everything and still my patient died. That's life.
Btw: The silicone I recently injected as a sealant... when pealing it off, it also removes some of the paint on such thin edges, so beware if you're planning to use it.
I eventually got the rods into the mirror's base by using two nuts again and screwing them against each other.
The perfect method to get them in there.
Finally, no cracks left, no gaps, no silicone and no deformation!
Remembering that we're going to a couple of car shows this month, I suddenly got this nagging feeling of having to do something. Right now.
First thing:
Check engine oil level. Get oil from cellar. Notice still sealed bottle of steering pump fluid on the shelf.
-> So I ordered a syringe with a capacity of 100ml (~3.4 fl.oz) with a hose attached to it, which allowed me to pull two full loads from he reservoir and put two new ones in.
With time it will mix up with the old stuff and I'll repeat. This saves me from the messy process of bleeding air from the system as when draining it.
Second thing:
My second front turn signal still hasn't been refurbished and how bad does that look?!
This time I went straight to 400 grit and basically wasted most of the sheet.
I should have started with a lower value and worked my way up, like last time.
After sanding the upper side, I managed to take a pic of how filthy the housing was.
Only now did I notice how deformed the housing actually is. For a perfect job, you'd need to use some filler.
Note the black overspray on the left edge of the lense and the lettering in the bottom part. This stuff needs to go and that was, once again, the hard part.
Using the 400 grit, the letters were actually gone faster than the last time.
This may be due to the finer grain placement on the sanding paper, which allows for covering the tighter areas better.
Pics like these, with everything scratched up so badly, have kept me from doing stuff like this in the past, because I didn't believe it possible to get a shiny finish ever again.
But this is how it can go if you do it properly. A final polishing is required, though.
Again, the task of masking begins.
Some advice here: Use quality masking tape and especially some finer stuff for the outer edges! Otherwise you'll have adhesive all over the place, even in the paint layers.
After adding 5 black layers, I removed the masking tape and abstained from using the adhesion promoter on the lense this time.
Following removal of tape adhesive remains, 5 layers of clear paint were added.
Ideas for future projects: Sanding the paint layer with very fine grit may allow for a smoother appearance in the end. Sanding the final clear layer may cause a mirror finish.
Finally ready to go.
When time allows, I'll give the light covers a try. I assume the Pontiac-logo is just stuck on with the usual bit of double-sided adhesive, right?
Looks great Antony! Yes, the Pontiac emblem is attached with double-sided tape. When I removed the adhesive from my bezel it left an indentation in the plastic. You could still kind of see where it said "Pontiac". That sucks because I am leaving that emblem off of my car.
Nice job on your mirror by the way
Have fun at your car shows. Post up some pictures of them if you don't mind.
Was that black paint shiny on the turn signal ?Thought it was the same as the black healight plastic cover.
btw that has to be the best aligned hood on this site lol
Thanks! It took me some time, as you know
I don't know if they were matte from the beginning, but they were ugly and I like the concept of them being shiny together with the headlight covers.
Looks great Antony! Yes, the Pontiac emblem is attached with double-sided tape. When I removed the adhesive from my bezel it left an indentation in the plastic. You could still kind of see where it said "Pontiac". That sucks because I am leaving that emblem off of my car.
Nice job on your mirror by the way
Have fun at your car shows. Post up some pictures of them if you don't mind.
Thanks, Dave!
I hope it will stick to the clear coat my covers will receive.
That will probably be your only chance to remove that indentation, I guess: Some filler, sanding and a coat of paint.
Since my emblem will come on there again, that's not going to be so wild here, thankfully
The mirror is great! You guys did a fine job finding it, so thanks again!
I'll keep my camera ready and see that I at least get a couple of shots of the ThirdGen-corner, if there is one this year.
Good to see people over-seas giving these cars the time and money they deserve. Keep at it and you should have a killer ride thats virtually nowhere else to be found over there.
I was thinking about restoring the emblem.
Gonna try some silver enamel paint and my brush for that and I'll either stick with the glossy finish or look for some satin clear for it.
Guess it'll be glossy to match the rest.
There are some ThirdGens over here which receive even more attention than mine, but they sadly aren't on these boards.
A local friend of mine, which may even read this, has just restored his V6's engine to a factory finish or even better and is going to have the body restored soon, so I'm not alone and that's great!
I intend to stay with this car for quite some while and try my best to keep it in a presentable state


 03-14-2014, 08:20 AM

 Antony! I know they don't serve much purpose, but I always liked the look of the overhead console. My first T/A, a 1985, had one in it. I think I might actually have one sitting around here somewhere. I might have to look at putting it in my car one day.


")