When you click on links to various merchants on this site and make a purchase, this can result in this site earning a commission. Affiliate programs and affiliations include, but are not limited to, the eBay Partner Network.
Organized Drag Racing and AutocrossDrag racing and autocross discussions and questions. Techniques, tips, suggestions, and "what will I run?" questions.
I apologize in advance for the long intro! But I think knowing some of my background and goals will help you to help me make some decisions on the project down the road. I have a thread going over on lateral-g.net as well but will do my best to keep both updated.
My name is Matt and I live in Massachusetts. I own a 1987 Camaro Z28 IROC-Z that I am hoping to transform until a reliable, fast track car that is also comfortable enough to drive long distances. (Aka� Pro touring). All while on a budget. Seems like a tall task but I�m up for the challenge.
Some background on myself: I am a mechanical engineer and have loved cars from a young age. My first �project car� was a 1975 Corvette that my Dad surprised me with when I was 18. It was sitting under a tarp in someone�s front yard and he knocked on their door one day and made a deal. That was when my passion really took off. Neither of us really knew too much about working on cars, but slowly and surely we took on bigger and bigger projects until we had a nice driver.
I was starting to get interested in road racing and autocrossing however, and started to realize that making a 1975 Corvette into a reliable track car was possible, but definitely beyond my budget. I just couldn�t afford to upgrade the suspension, brakes, cooling, wheels/tires, etc to get it where I wanted. So, I made the tough decision to sell the car that my Dad and I had spent a lot of time on and bought something a little more suited to track duty right out of the box, a 1997 Corvette:
I owned that car for 4 years, and loved it. What a value those cars are� you can drive it on 400 mile road trips with the A/C on and then lap it all day at the track and drive home.
My passion for cars has not faded over the years and has actually grown. I love being around cars� whether it be detailing them, going to a car show or reading about them� they�re in my head and not going away! Because of this, I have set a goal for myself of someday owning my own garage to help people pursue their own goals of driving their dream car. Life is too short and I want to do something I love, or at least take a shot at it.
That being said, I needed a car that I could use to grow my "brand" and use as my �advertising� of what I can do. Even though the Corvette was a great car, it just didn�t stand out enough if I wanted to use it for advertising. At any given track day or autocross event, I would be 1 of 5+ Corvettes. I needed something more unique. I also want to learn. I consider myself pretty competent with a wrench, but I have yet to do any hardcore engine or chassis work. The Corvette didn�t need any of this, so I wanted something that needed a bit of attention so I could make it my own and grow my skillset.
After a lot of research, I settled on a third generation (1982 - �92) Camaro as a replacement for the Corvette. You may think I�m crazy, selling a perfectly good C5 Vette to pick up a third gen, but hear me out. There are plenty of these cars around, and they are not old enough where they need a complete restoration (which is most likely the case if I were to get something from the �60s or �70s) so I could focus primarily on performance upgrades. This seems to be a great time to pick up one of these cars as well, since they seem to be gaining in popularity and the aftermarket support is starting to pick up for them. The were also quite capable right out of the box, and are already setup with a 3-link rear suspension and fuel injection.
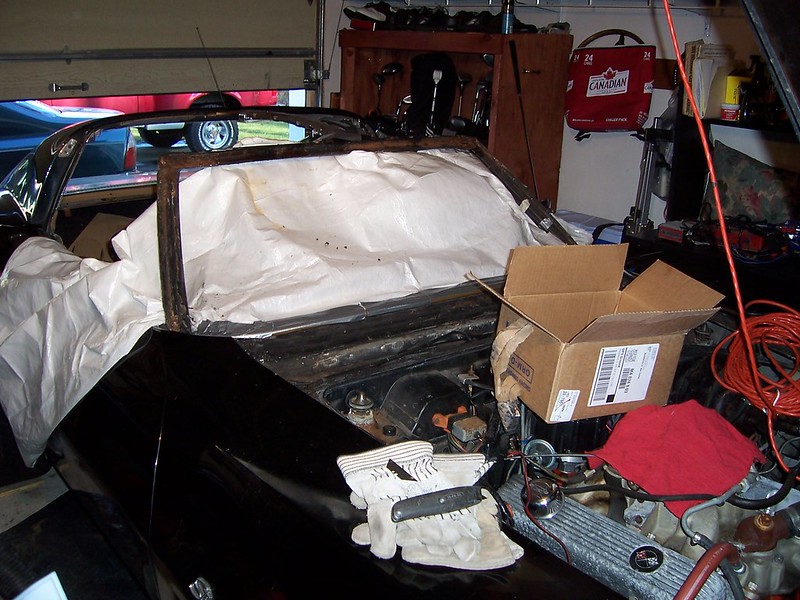
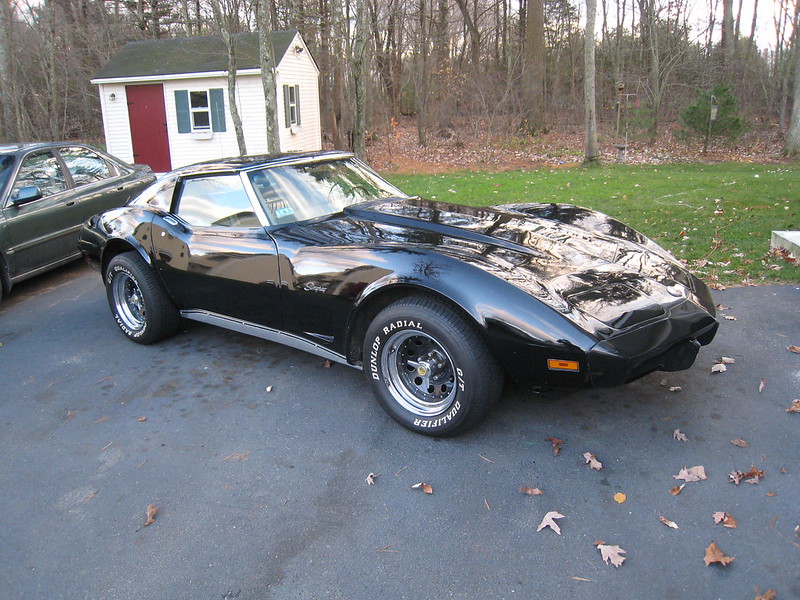
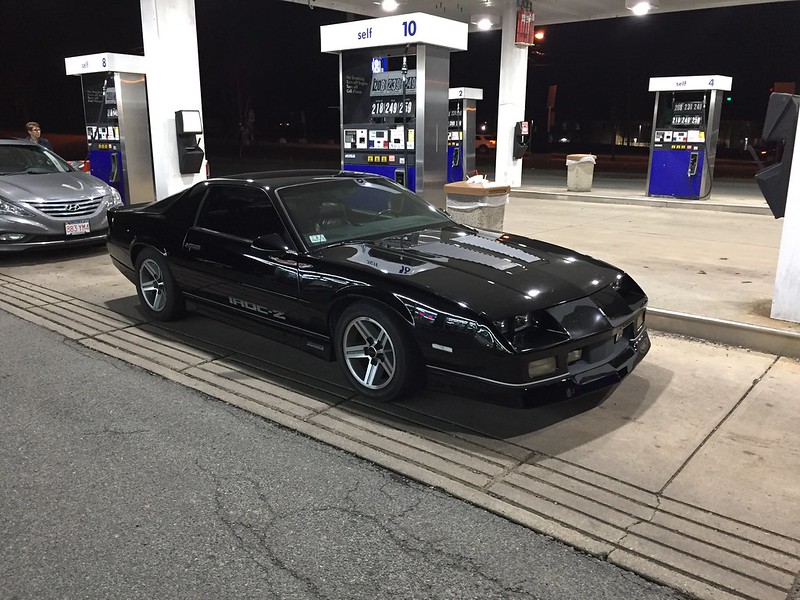
After doing a lot of searching, I wound up finding my car on Craigslist. It was one of the more expensive ones available in my area, but I have always heard to start with the best car you can afford and you will save money in the long run. It had a good body, and lots of performance parts already installed which was a plus. Seeing the car in person, I was a little scared as it seemed to be a bit hacked together and abused. The parts were there however, and I decided to purchase it with the idea that tidying up the loose ends would be a good learning experience and would be something I could do without spending a ton of money. Here is a picture from the night I drove it home:
As I got the car home, I thoroughly went over it and overall it was pretty clean. It already had weld-in subframe connectors and quite a few suspension bits. A ZZ4 crate engine had been swapped in along with a T56. The car was still rough however, as if someone rushed to get it together and didn�t take their time� lots of things like loose wires hanging on the engine, oil leaks and disconnected hoses jumped out at me.
This was in May, and I had signed up to run the Optima event at NJMP in August that year and wouldn�t let myself miss it. Unfortunately, I had a really busy summer which left not much time to work on the car so I had to be selective with what work I could do before the big event. I chose to focus on safety, which meant really going through the brakes and checking all of the suspension bolts. I changed all of the fluids and added a fresh set of tires on the stock 16� wheels. I really wanted to upgrade the brakes and wheels, but there just wasn�t enough time.
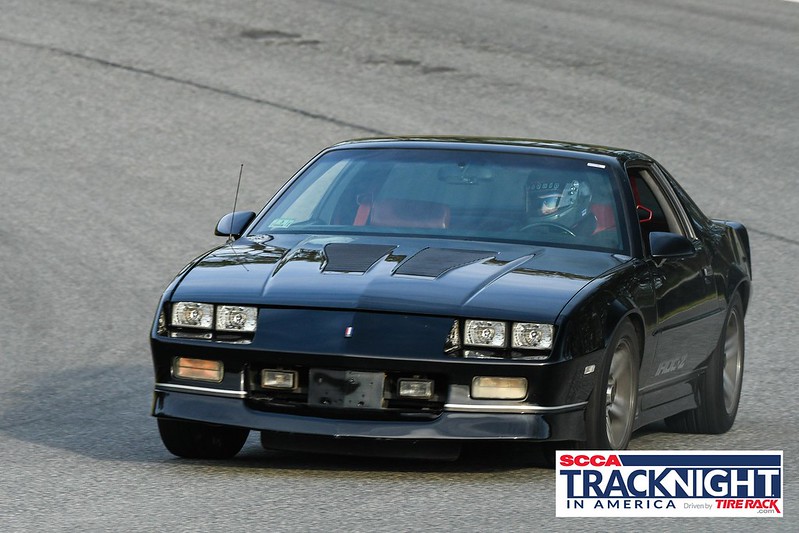
I am lucky to have 2 race tracks close to me that sponsor SCCA Track Nights in America, so I attended one at Palmer Motorsports park the week before I had to leave for the Optima event in NJMP. Fortunately the car did great, I ran three 20 min sessions and other than being black flagged for not having my gas cap on tight enough the car ran great and I was super happy!
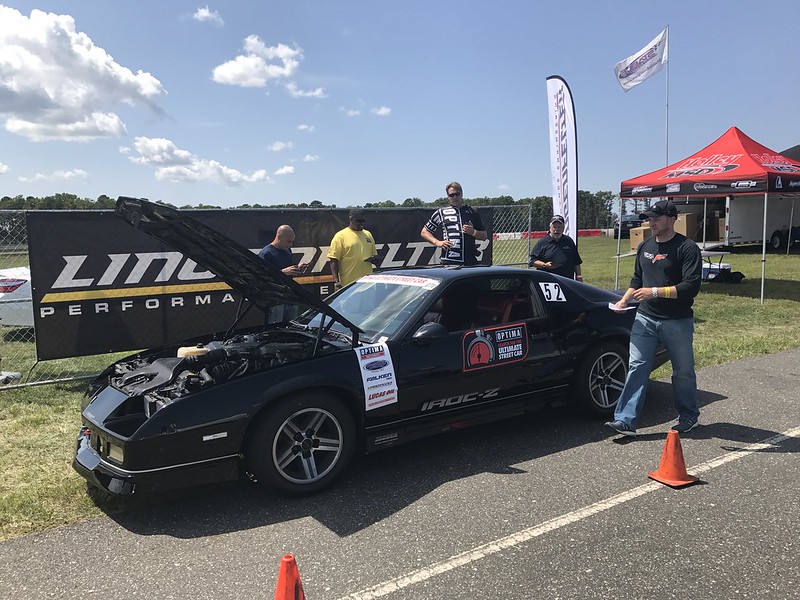
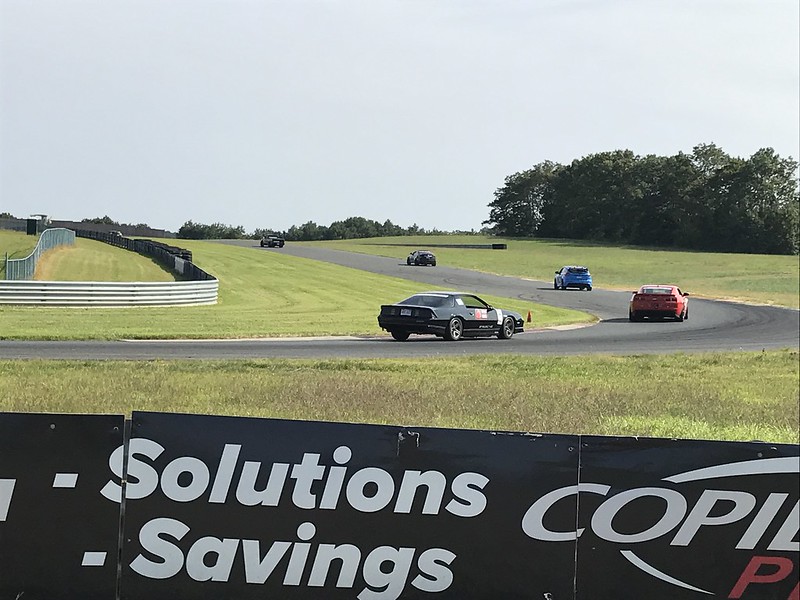
A week later my Dad and I loaded up the truck and headed down to NJ. I was so fired up for this trip� I follow the Optima series very closely and thought it was so cool to not only be there, but to run with some of the guys and cars I had read about and seen on YouTube. I was so fired up to be going! My only goal for the weekend was to finish with the car in one piece. Luckily, I was able to accomplish that and had a blast. We had awesome weather the whole weekend and the car took whatever I could throw at it. It was definitely not the fastest out there, but that�s mostly because of the driver (and maybe the 245 series tires?)
Now comes time for the winter upgrades. I�ve been going back and forth about whether to pull the engine out of the car (which is running fine by the way), and I think I have decided to go for it. If I really want to organize the wiring and get it cleaned up to the point where I am proud to pop the hood, I think this is the only way to go. I also bought this car to learn, so no time like the present to dive in and pull my first motor.
I�m working with a limited budget and am also making a list of possible upgrades over the winter. I know I NEED a new radiator, as the car was overheating after 15mins at NJMP over the summer. There are lots of things I would LIKE to do, so I will have to prioritize and see what I can afford. I�m sure I�ll be asking for lots of advice in this area before I put out any big bucks.
If you�ve made it this far, thanks for reading. I hope by following this thread you can learn just as much as I intend to.
Hey Matt! Good to hear from you on the forum here. I was the guy at NJMP in August with the red 87 iroc. You later took me for a ride in your car on session 5 of the track. I had a blast and that car did quite well! Glad you made it out and glad you have plans to work on the car yourself going forward. It is tough to budget huge $ items for any car project, so doing the work ourselves always helps out.
I would follow you initial instincts and go with a full 4 corner big brake upgrade. I run the 4th gen corvette (C4HD) set, but there are other more affordable options, especially if you can pull some from a wrecked junk car. C4 car, Lt1 or LS1 4th gen fbodys also have better than stock 3rd gen brakes. think about doing braided flex lines too for a more responsive pedal feel. also an adjustable proportioning valve
better struts and shocks will be great too, as will bushiings on all suspension components. this january i will be upgrading my struts and shocks to Koni Yellows. they are expensive. I will be removing my current Tokico Illumina 5 setting on-car adjustable struts/shocks which only have about 35,000 miles on them. i''d be willing to sell you them for a fair price. a new set of springs will be an improvement from the stock 30 year old ones. adjustable lower rear control arms with relocation brackets for the rear axle are helpful.
also the cooling system yes. your overflow tank was boiling hot!
lots more can be done. time and $budget are usually what limits my projects , but that's just life
Last edited by IROCZman15; 12-14-2017 at 10:12 PM.
I'm debating waiting on upgrading the brakes until I can afford something that I will never have to upgrade again. I want my brakes to be one of the strongest parts of the car as I don't want to have to worry about them on the road course, where I try to use them as hard as I can. I feel like the effort put into piecing together a C4HD or LS1 brake upgrade might not be worth the time/money if I will just out drive them somewhere down the road. Might as well go right to Wilwoods right off the bat and end up saving money in the long run. I gave my stock ones hell at NJMP though and they seems to do OK... I have them optimized as best I can right now with high temp fluid, Hawk race pads and braided stainless lines so maybe the same upgrades on the C4HDs might be enough.
Thanks for the offer on the struts, but i already have Koni Yellows and Eiback drop springs. Those are OK for now, and I'm definitely looking on upgrading the bushings this year and rebuilding the steering system as it's pretty sloppy right now.
I'm debating waiting on upgrading the brakes until I can afford something that I will never have to upgrade again. I want my brakes to be one of the strongest parts of the car as I don't want to have to worry about them on the road course, where I try to use them as hard as I can.
Matt,
I was there too, I have the Jamaica Yellow 92 Firebird with the LS swap. Good to see you post here. Will follow intently.
I have the LS1 setup on my car, mostly because I still wanted to use the GTA crosslace wheels on the car for daily driving. I was definitely over braking the 275/40 tires, high treadwear number though, with the LS1 brakes with some EBC Yellowstuff pads on all 4 corners. Even if you got the LS1s and needed to upgrade later, you should easily be able to sell everything, plus you have to do the same spindle and hub mods for any aftermarket brake package you want to put on, so changing to a different setup is just unbolting the calipers and brackets and putting the new stuff on and bleeding everything. That's my 2 cents anyway.
Looking forward to more updates
Thanks for the advice Scooter. I remember your car for sure, it looked sharp in that yellow color! I'll keep my eyes open for a used set of LS1s, might not be a bad idea especially if the mods I have to do will carry over to the next upgrade.
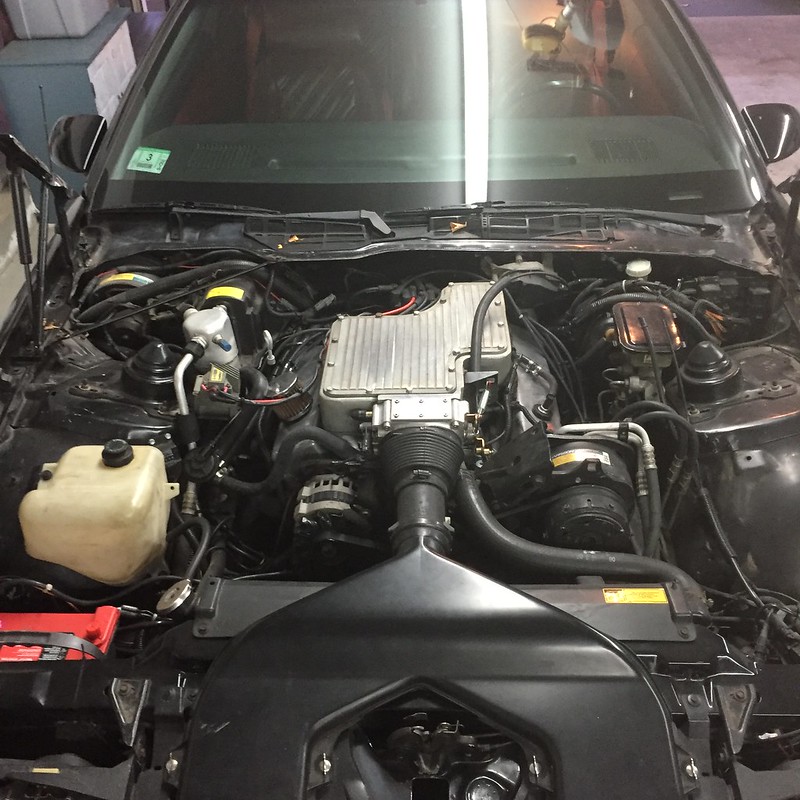
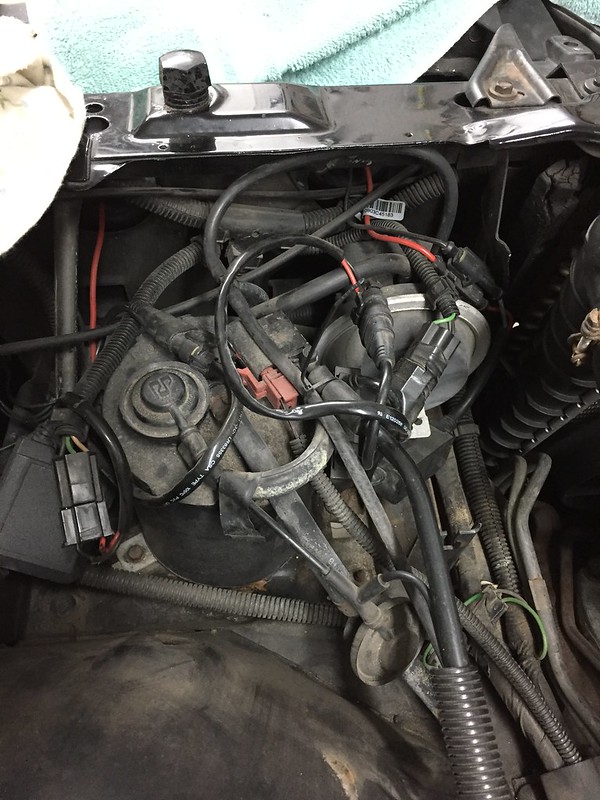
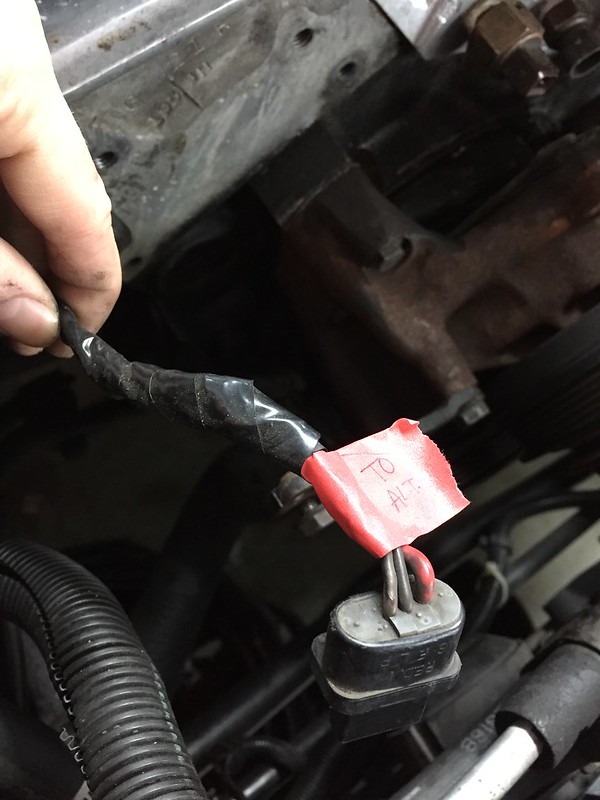
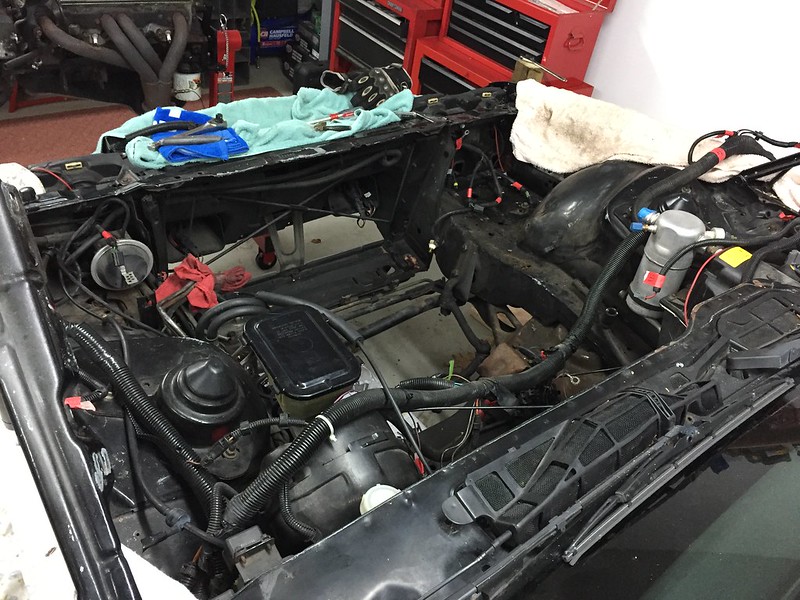
Here is my starting point on the engine bay, Looks fairly tidy from a distance but once you start digging in there are lots of issues. For instance, the charcoal canister is there, but not connected to anything. There are also a ton of wires just taped together or a thinner gauge wire crimped to a thicker gauge wire.
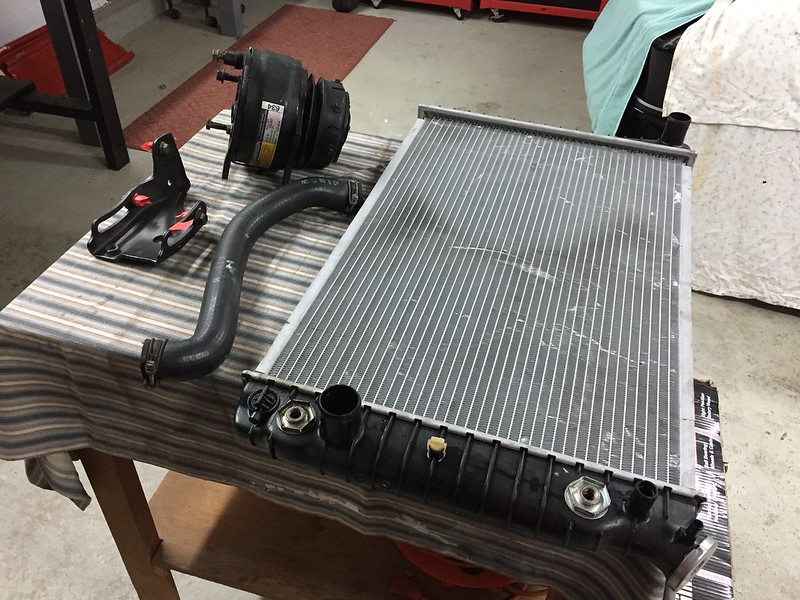
Made some good progress the past couple of days disassembling the engine bay. I've got the radiator and A/C condenser out, removed the alternator and the A/C compressor and have started tackling the wiring harness little by little and making sure I'm taking pictures and tagging everything.
Some progress pics:
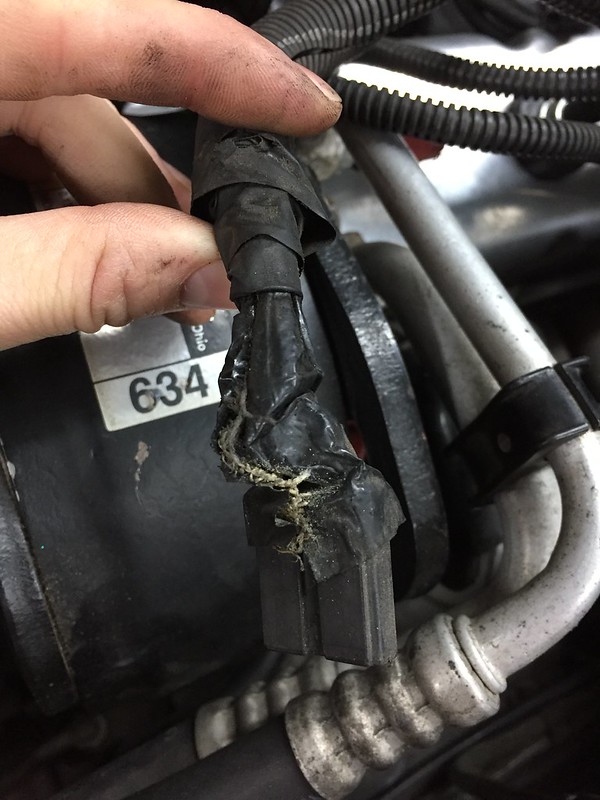
Here's a good example of the wiring issues I'm finding. This is the plug to the backside of the A/C compressor that's in pretty rough shape:
That's why I'm digging into this though so we'll get it all cleaned up!
Welcome to the addiction. The link in my signature is for the car we flog 30+ days a year on track at Pro-Touring events around the country. Looking at the pictures, here are my suggestions:
1. Finish addressing the engine bay wiring issues to make sure you aren't going to have any wiring fires or issues under the hood.
2. Look at safety equipment. Mount a fire extinguisher. Look at cages, racing seats, and harnesses. Do the cage, seats, and harnesses when you can afford them. Get the fire extinguisher now if you don't already have one.
3. Check over the car for any mechanical issues and get those fixed. Bushings, bolts, motor and trans mounts, wheel bearings, and fluids.
4. Improve the brakes. LS1 brakes are a good upgrade and the mods to mount those will work with most aftermarket kits later.
4. Suspension. Shocks, springs, adjustable LCA's, panhard, and torque arm
5. Better rubber and wheels
6. More power
Thanks for the tips. I'm a big fan of the GTA you work on and I'll definitely have a lot of questions for you as I go along!
A few responses to your suggestions: 1. Finish addressing the engine bay wiring issues to make sure you aren't going to have any wiring fires or issues under the hood.
--> I'm on it!
2. Look at safety equipment. Mount a fire extinguisher. Look at cages, racing seats, and harnesses. Do the cage, seats, and harnesses when you can afford them. Get the fire extinguisher now if you don't already have one.
--> All of these items are on my list to buy this winter. I have a race shop pretty close to me (HMS Motorsports) where I can try different seat to see what fits me. I'll contact you when it comes to the cage... I bolt-in may be all I can afford I know those aren't the greatest
3. Check over the car for any mechanical issues and get those fixed. Bushings, bolts, motor and trans mounts, wheel bearings, and fluids.
--> Did a pretty good once-over before the Optima event last fall. Did new wheels bearings, checked all the bolts on the suspension and did fresh oil, brake fluid, etc. I'll get new trans and motor mounts before those go back in.
4. Improve the brakes. LS1 brakes are a good upgrade and the mods to mount those will work with most aftermarket kits later.
--> Definitely will look into this.
4. Suspension. Shocks, springs, adjustable LCA's, panhard, and torque arm
--> Most suspension links were upgraded by the previous owner along with the springs and shocks. The only remaining stock item are front LCA's. Those are pricey but might be worth the upgrade.
5. Better rubber and wheels
--> Saving up for 18x10.5s!
6. More power
--> I agree that this should be last. The 350 in there should be plenty for now.
If you are keeping the stock wheels and it really is a budget then stick with ls1 front brakes. If you have a little extra money the C4 HD rotors with Wilwood 4 piston FSL is a great setup, I've had it for a few years. Another inexpensive option is to buy just the brackets for a newer Camaro fixed caliper and buy a rebuilt caliper from a parts store. Remember that we don't have abs so lots of these huge rotor setup some people sell are nothing more than eye candy.
Making some good progress on the car. I think I am pretty much done with disconnecting all of the wiring, removed the wiper motor, power steering hoses and the driveshaft. Couple things came up along the way:
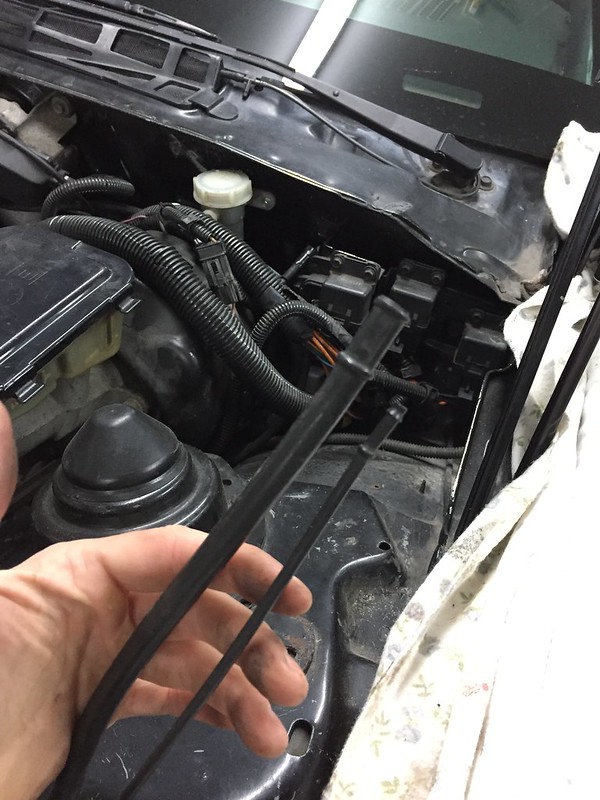
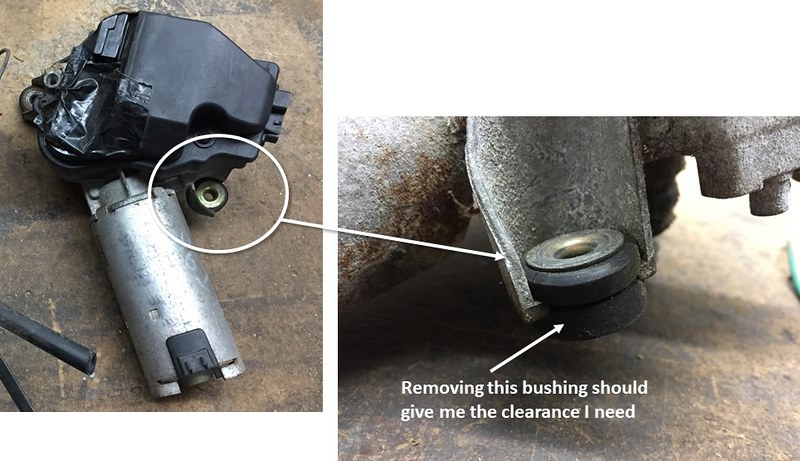
My wiper motor was modified by the previous owner to fit the Super Ram intake. They had to cut out the small pump for the washer spray which leaves me with no windshield washers... something that I'd like to have on longer road trips. I have a used wiper motor/washer pump to replace it though and I think I can make it fit by modifying the bushing a bit:
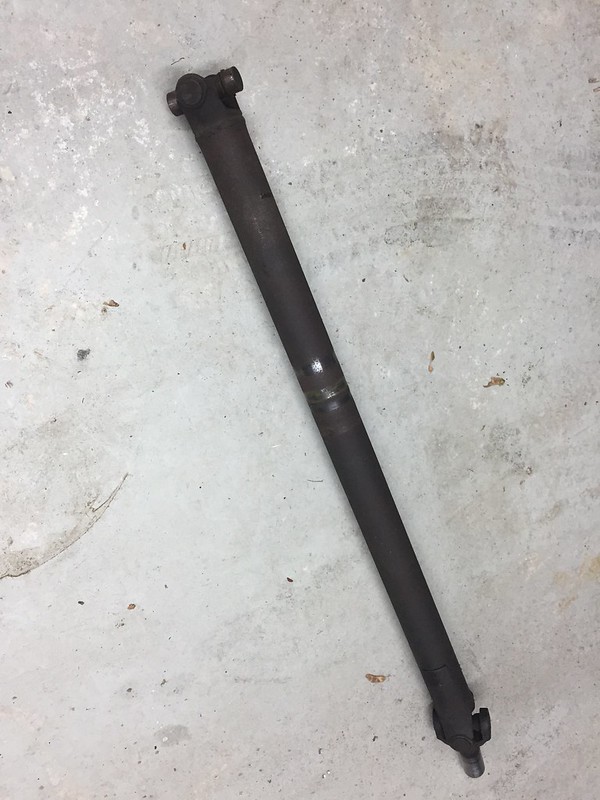
My driveshaft was showing a bit of wear in some areas so I'll have to check out if it's been rubbing somewhere. I've also been having a vibration at high RPM so I am going to send it out to check the balance and maybe get new U-joints while it's there. I'd love to upgrade to an aluminum one, but not sure it's in the budget at the moment.
Hey garage_engineer, just went thru the whole thread. Looks like a great start.
You mentioned you need better cooling. My circle track radiator might fit the bill. It has two Derale fans mounted to it. I could also give you the custom top clamp I fabbed up a few years ago. Nothing pretty, but it works.
The rad does have a -16 outlet so you will need a different thermostat housing or an adapter.
I also have plans to sell my C5 Z06 calipers. I plan to go with something a like a 6th camaro caliper down the road.
I feel like it will fit the car's style better. Let me know if you are interested.
Hey Dennis,
Thanks for the offer. I sent you a PM so we can chat on the side.
Happy new year to everyone! I'm continuing on with the disassembly process despite the 10deg temps here in Mass. My little garage heater is working overtime to keep my work space bearable.
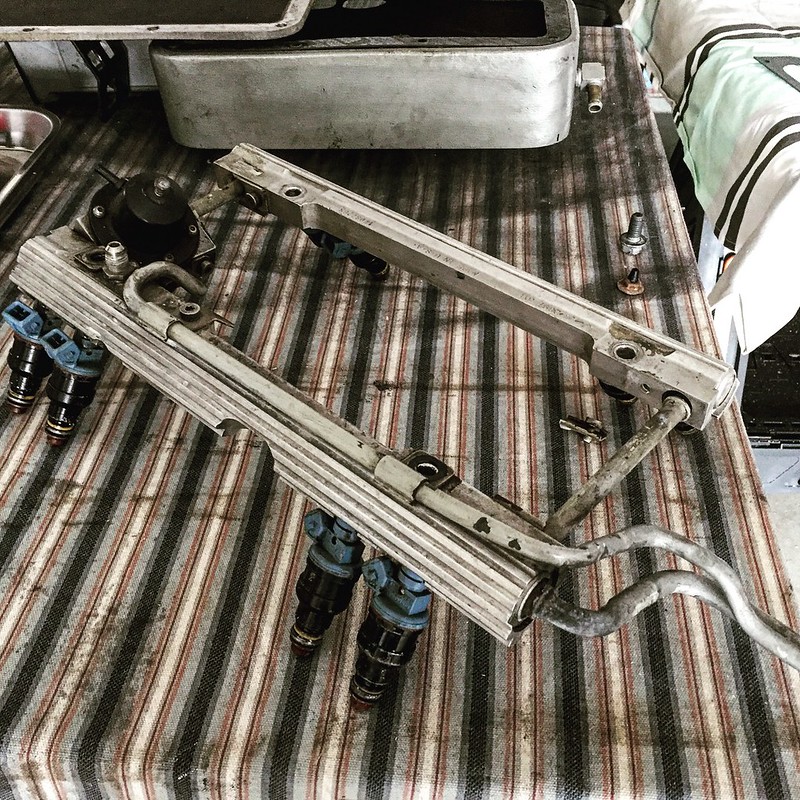
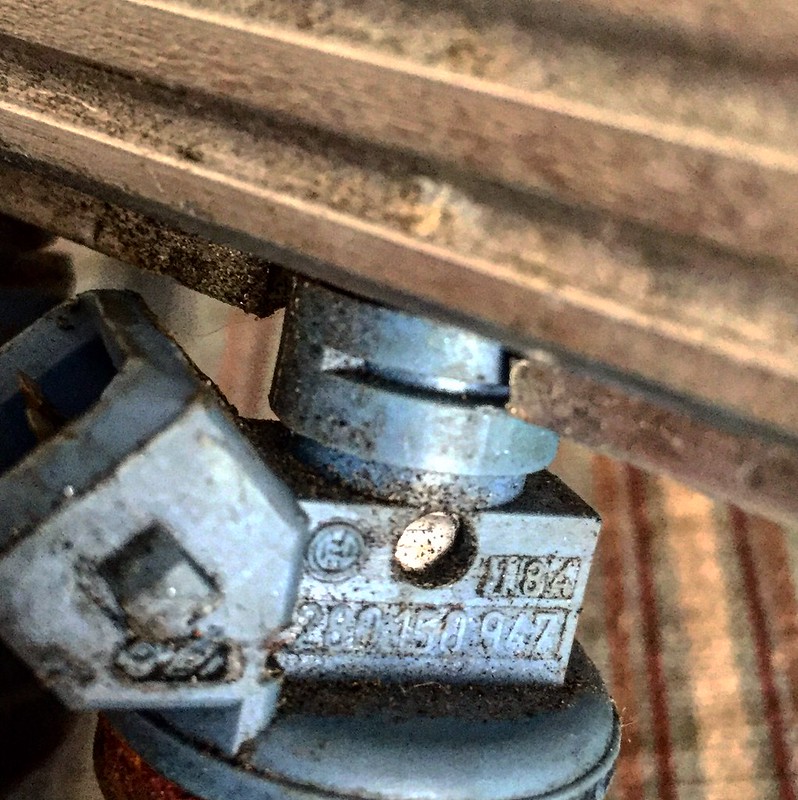
I have the fuel rails and injectors off the car. I'm thinking these are Ford "blue" injectors from the 5.0L Cobra... can anyone help me to confirm that? If so, they are 24lb injectors and I think these might not be sufficient for my 350 if they are flowing correctly. I got the following from onallcylinders.com:
injector size in lbs./hr. = (Max. HP x "Brake Specific Fuel Consumption") / (number of injectors x duty cycle)
So...
Max HP = 350 (estimated)
BSFC = 0.5 (estimation for a modified, naturally aspirated engine)
# of injectors = 8
Duty Cycle = 0.80 (the amount of time injector is open versus the total time between firing events; .80 is safe for an OE injector)
(350 x 0.5) / (8 x 0.8) = 27.34 lbs./hr<-- Looks like I need bigger injectors... any thoughts?
I'd like to send them out to get rebuilt and flow tested as well... any suggestions on who could do this?
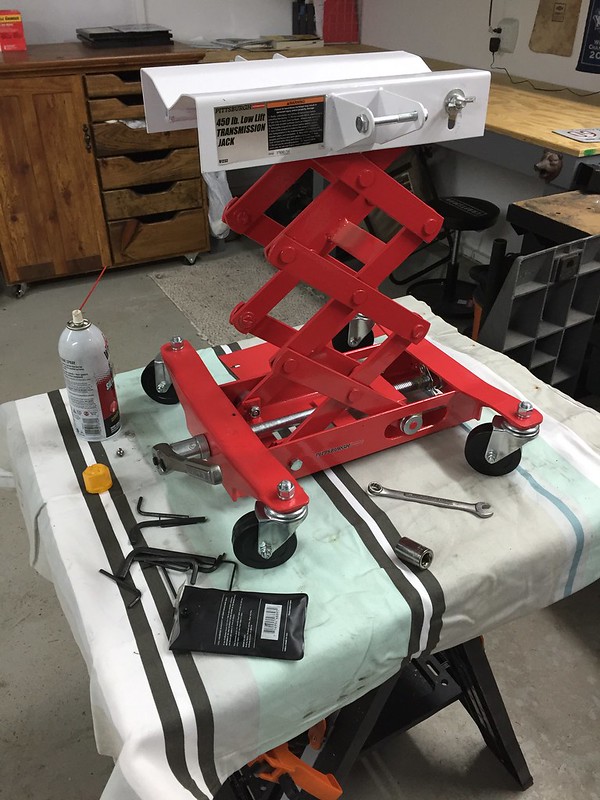
I also managed to remove the transmission crossmember and started working on getting the transmission out from under the car. I tried supporting it with my floor jack and a piece of wood, but definitely did not feel comfortable doing it that way. That T56 is heavy! I ended up heading over to Harbor Freight and grabbing a small scissor lift to use. I don't mind buying tools like this if it makes my life easier and I'm going to use it again in the future.
Right on. I have bought a ton of rarely used "special" tools from HF. They work out great.
As for the injectors, what is the cost estimate of a rebuild vs buying new? Really worth rebuilding?
What kinds of garage heater are you using? My garage is under my house (part of my basement) but my heater is powered by propane so I have to crack a door, with temps so low, it is not worth my using the propane. Curious to see what your setup is like.
one of the thirdgen.org sponsors is SouthBay Fuel injectors. While I have not personally needed to use them, i know MANY people on the board here have used them. Sales and rebuilds and flow tests etc.
I have done the floorjack method twice recently for removing the transmission (700R4 though). For installs, I borrow my neighbors transmission jack. it certainly helps because there are adjusters for fore-aft and left-right to help line everything up.
Right on. I have bought a ton of rarely used "special" tools from HF. They work out great.
As for the injectors, what is the cost estimate of a rebuild vs buying new? Really worth rebuilding?
What kinds of garage heater are you using? My garage is under my house (part of my basement) but my heater is powered by propane so I have to crack a door, with temps so low, it is not worth my using the propane. Curious to see what your setup is like.
Why don't you give us a call. We'll be more than happy to help you. We can talk about what you might need as far as injectors go and answer whatever questions you may have.
516-442-4707
Right on. I have bought a ton of rarely used "special" tools from HF. They work out great.
As for the injectors, what is the cost estimate of a rebuild vs buying new? Really worth rebuilding?
What kinds of garage heater are you using? My garage is under my house (part of my basement) but my heater is powered by propane so I have to crack a door, with temps so low, it is not worth my using the propane. Curious to see what your setup is like.
I just have a 220V electric heater hung from the ceiling. It can make the garage comfortable when it's 30-40 deg outside but is struggling lately when temps are in the single digits. Might need to look into something else, I hate losing nights/weekends working on the car because I can't feel my fingers!
one of the thirdgen.org sponsors is SouthBay Fuel injectors. While I have not personally needed to use them, i know MANY people on the board here have used them. Sales and rebuilds and flow tests etc.
Why don't you give us a call. We'll be more than happy to help you. We can talk about what you might need as far as injectors go and answer whatever questions you may have.
516-442-4707
Thanks for the tips guys! I'll be giving you a call shortly to discuss my options.
Slow progress in the garage due to the cold weather and a big snow storm last week, but some progress is better than none!
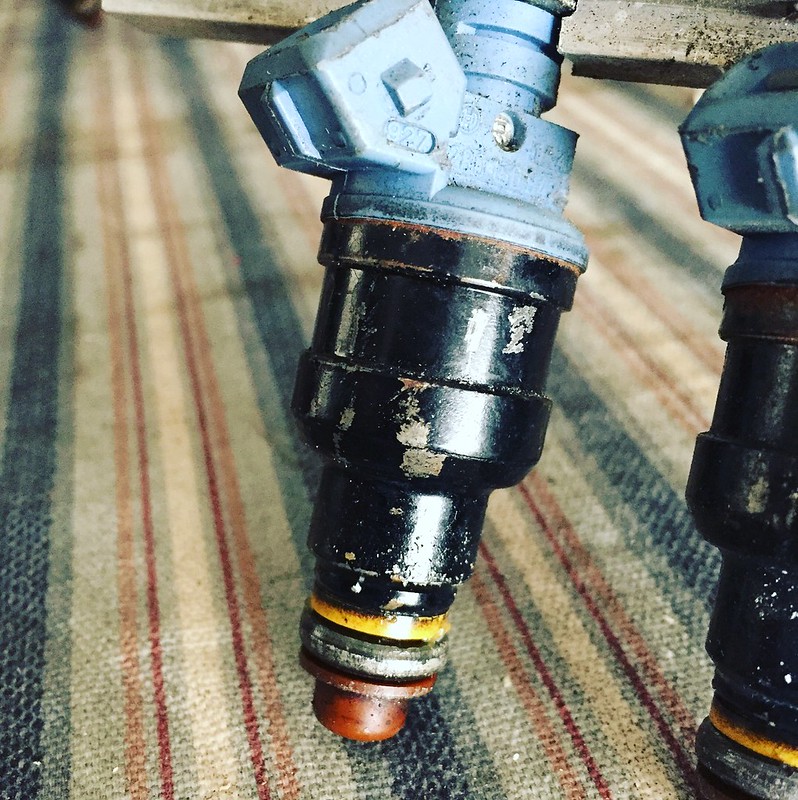
I got my fuel injectors disconnected from the fuel rail and will be sending them out this week. Some of them look pretty nasty so I'll see what the fuel injector shop says on whether it's worth restoring them or just getting new ones:
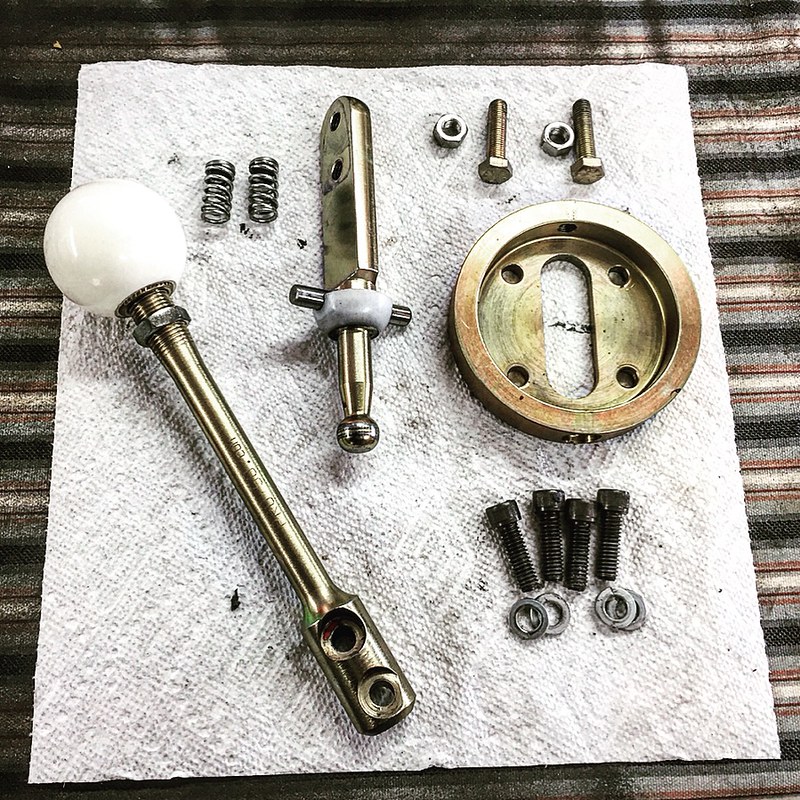
I took my shifter out of the car and cleaned it and tagged the bolts before putting it on the storage shelf. Looks like a Pro 5.0 (at least the shifter handle is) and I think I may change it out for something with a stiffer feel. I had an MGW in my Corvette and loved the super short, stiff shifts so I may look into one of those for this car.
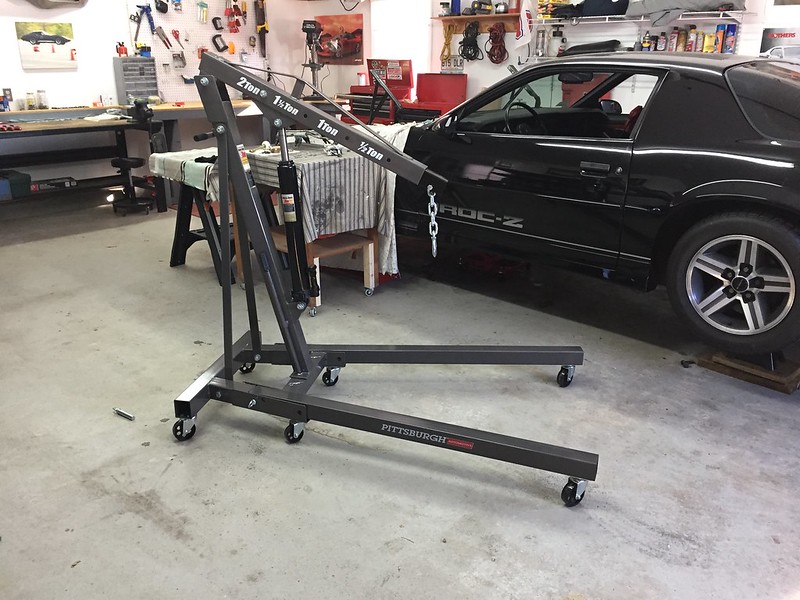
I also assembled my engine hoist I got from Harbor Freight. It comes in 2 boxes and initially one of the boxes was wrong, but they swapped it out without a fuss and now she's ready for action
I need some help on something here... my car has trouble starting when it sits for a day or 2. It cranks over fine, but takes quite a while to catch. Once it starts it runs fine, and it'll start right up if I ask it to again on that same day. I think what may be happening is my fuel pressure regulator is slowly bleeding off fuel pressure when the car is off... so when I hit the key the next day, it needs to build up that pressure again before it starts. Does this sounds correct? If so, is there a way I can test my fuel pressure regulator?
Looking like some warmer weather coming this week (we might get above freezing!) so hopefully I'll be able to make some good progress!
I would get a pressure gauge mounted to that port in the image. I used to have one on my motor back when I had my 305 TPI. You can then just check at a glance what pressure the system is at. Not bad to have for any other upgrades or changes later on.
Sounds like your theory is fairly sound. The system does pressurize itself before turning the car over, so I am not sure why it bleeding out would hurt anything. Also where would it be bleeding to? Back into the tank? Do you smell gas?
How strong is your battery? How clean is your fuel filter?
That does look like a Pro 5.0 shifter, and they are normally super stiff, so if your's doesn't you may need new springs, or the detent in your transmission may need tightening up. I HATED the Pro 5.0 my friend put in his car.
I would get a pressure gauge mounted to that port in the image. I used to have one on my motor back when I had my 305 TPI. You can then just check at a glance what pressure the system is at. Not bad to have for any other upgrades or changes later on.
Sounds like your theory is fairly sound. The system does pressurize itself before turning the car over, so I am not sure why it bleeding out would hurt anything. Also where would it be bleeding to? Back into the tank? Do you smell gas?
How strong is your battery? How clean is your fuel filter?
I will certainly look into a fuel pressure gauge... sounds like something I will get some good use out of.
I am assuming the gas is just draining back through the lines and to the tank. My car does have a strong smell of gas which drives me nuts. I believe it's coming from the fuel vapor canister however, since the lines are not connected to anything and just venting into the engine compartment.
Battery is a brand new Optima red top and the fuel filter is new as well.
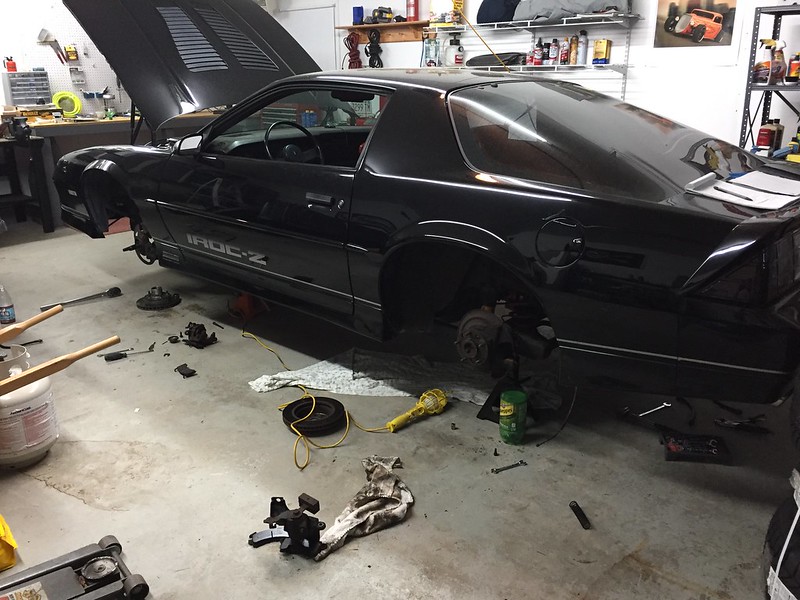
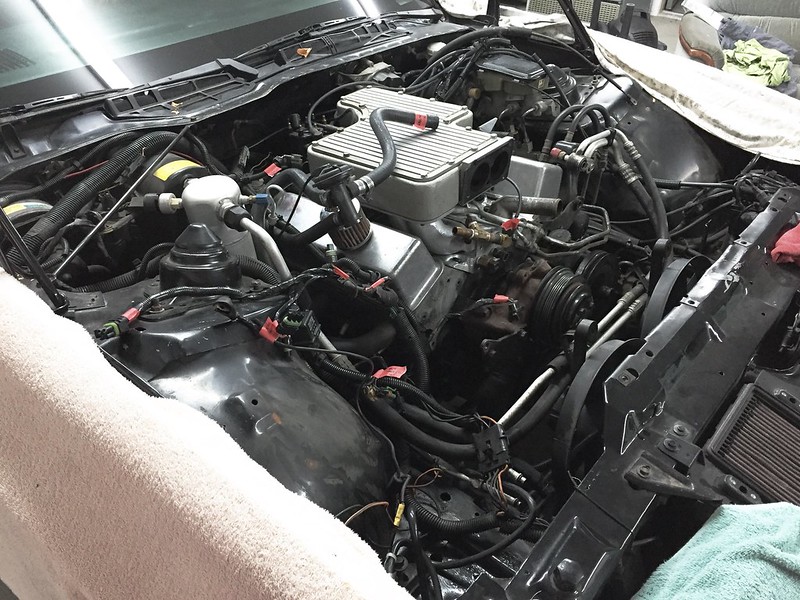
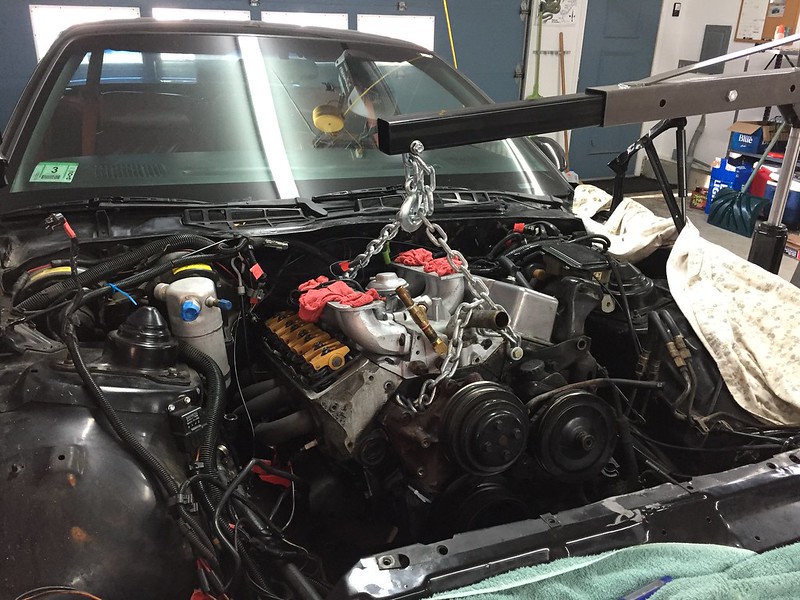
We finally got a break in the weather up here in Boston this weekend and I took full advantage and got a lot done in the garage. I'd been working hard to get the engine and transmission ready to remove from the car and I was finally able to get them out this weekend. I'm lucky to have my Dad living nearby and he came over for the day to lend a hand.
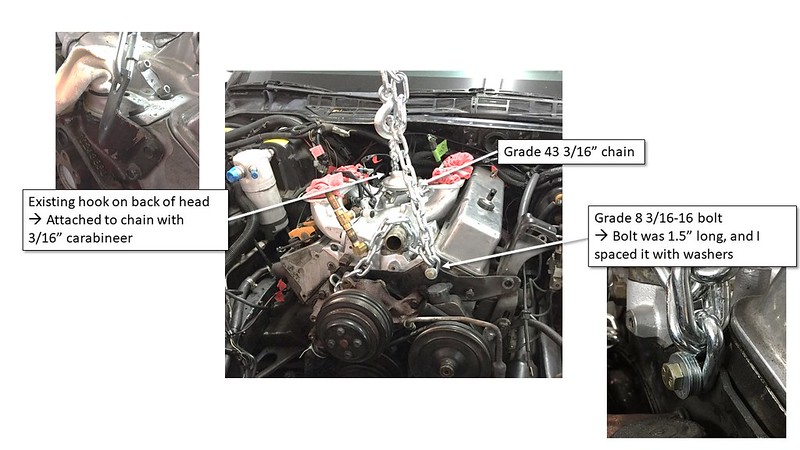
I had never pulled an engine, so this was a new process for me. I spent a lot of time researching how to position the crane, how to attach the crane to the engine and so on. I had bought a load leveler but wasn't able to get it hooked up to the thread holes in the back of the engine. Here is the setup I ended up using:
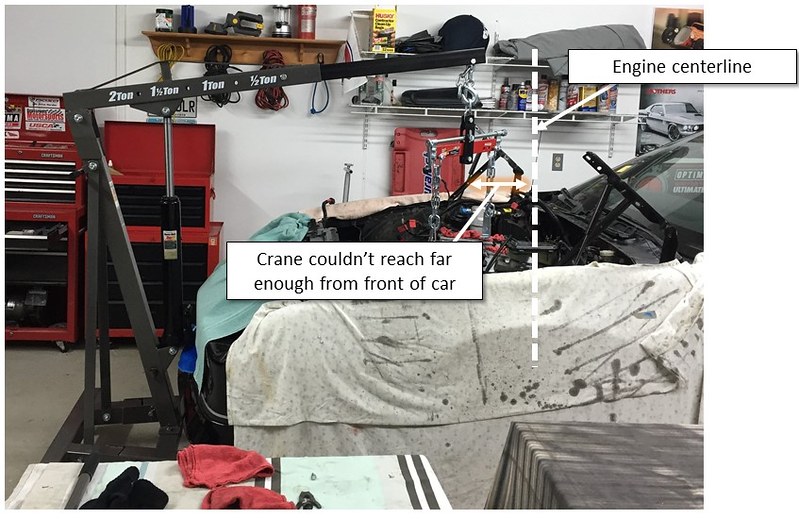
My crane was a bit short to reach the center of the engine from the front. Looking back, I could have maybe made this work, but I ended up going from the side instead.
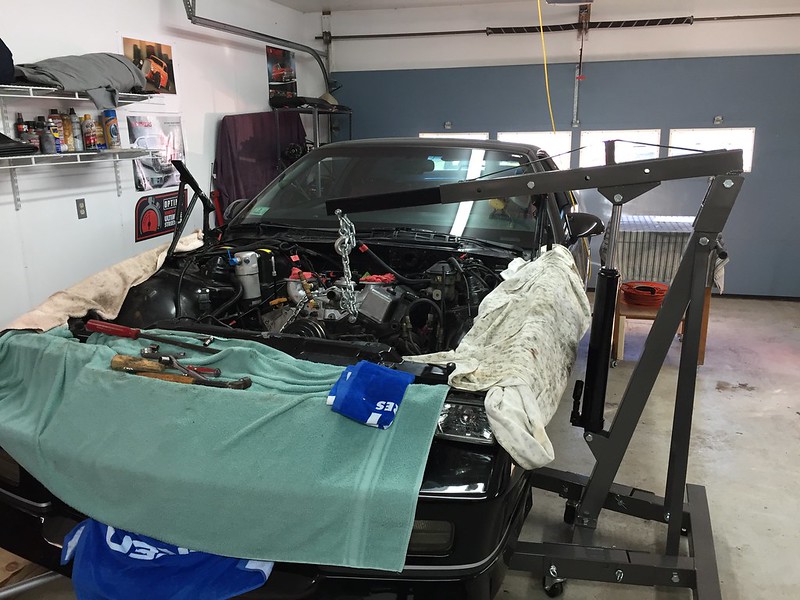
Final setup:
Before we pulled the engine, I wanted to pull the transmission from under the car. I attached my scissor lift and was able to get to 7 of the 8 bolts holding the transmission to the bellhousing. For the 8th one at the top, I loosened the engine mounts and lowered my scissor lift, essentially angling the transmission down so I could get at it. Once that was done, I disconnected the clutch fork and out she came!
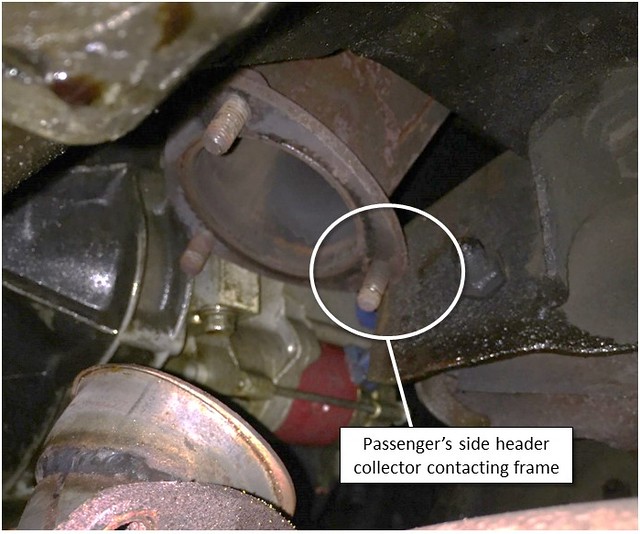
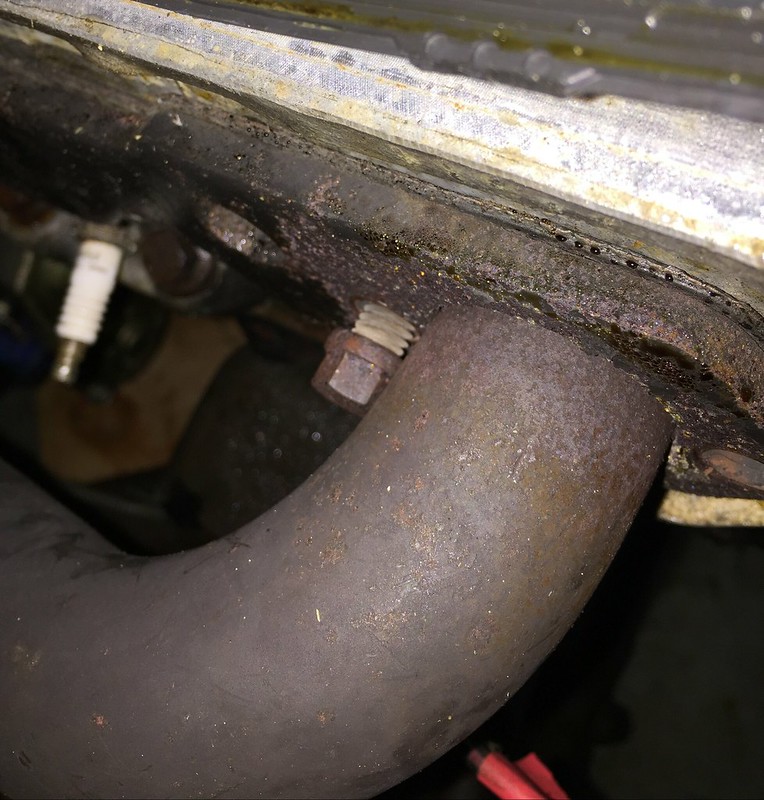
Next we started on the engine. I had left quite a few pieces on the engine thinking I could remove it with them still attached, like the headers and the bellhousing. Our biggest issue was that we couldn't get our hook on the crane perfectly centered, so the driver's side of the engine was rising much faster than the passenger's side. This caused the passenger's side header to keep getting caught on the frame:
So, off it must come. I was TERRIFIED to remove the headers in the car because of the horror stories I've heard about breaking of bolts in the head and the difficulty of getting to some of the bolt heads. Luckily though all of them moved freely. I had to get creative with a couple of them and ran out to grab some stubby wrenches but eventually we got it out.
I got lucky here:
After getting passed that snag, we just took our time and slowly inched the engine up and forward until it was clear of anything holding it back. I was nervous as it was hanging 5ft in the air over my fender but it all worked out OK. Here are some more pictures:
Slowly creeping upwards:
I was terrified at this moment:
My Dad and I:
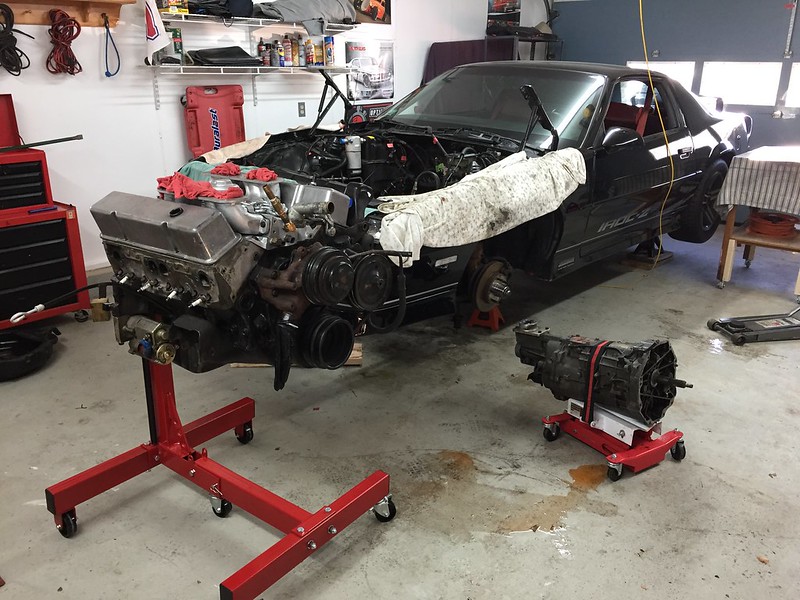
Safely out of the car:
We finised the day with the engine on it's stand and the transmission on a table ready to be gone through. I was super happy to get this done so smoothly, I now feel like a real car guy since I can say I've pulled an engine! Now the fun can start!
Congratulations. Great having someone to help you pull the engine. Engine pulls (in these cars) by yourself are sooo tedious. When you are ready to put it back in you can do it with the engine and tranny attached, just use caution to not let it start swaying or lower too much too fast. I did it alone with my 383/T56 into my freshly painted custom engine bay and didn't get a scratch. Go to Walmart and buy a bunch of cheap towels too so you don't have to worry as much about scratches if it does bump something.
Continuing on with disassembling my engine bay. When I started this project, I wasn't sure how far I wanted to go with removing things from the engine bay but after giving it some thought I've decided to take it all out and paint the engine bay. Do a job once and do it right, right?
Not a lot of great pictures to show on this update as I am disconnecting the wiring harness and taking my time to label everything. My plan is to lay it all out on the garage floor and fix any connections that need repair and replace all of the loom.
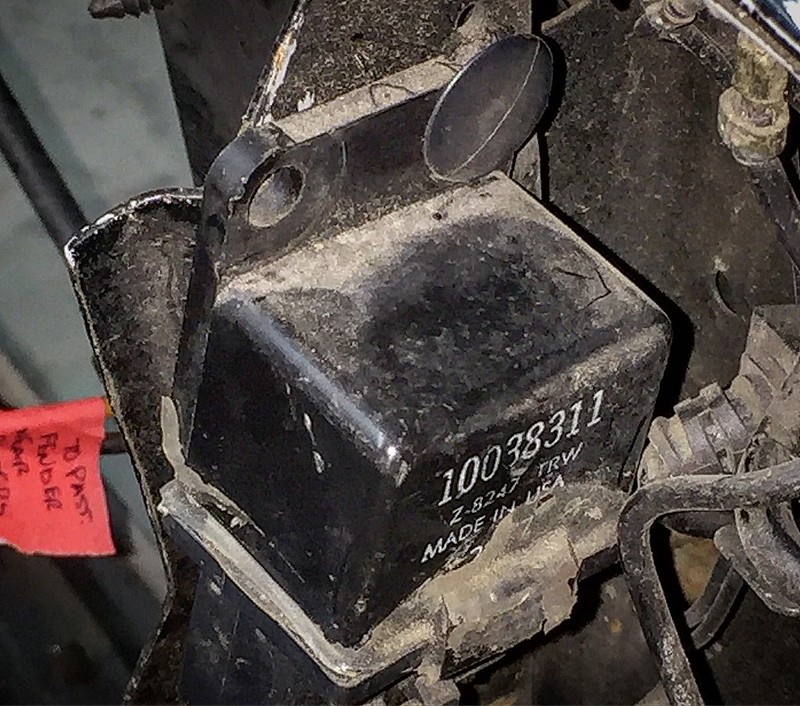
I'm finding a lot of relays attached the fenders and core support with these plastic clips... doesn't seem too stable!
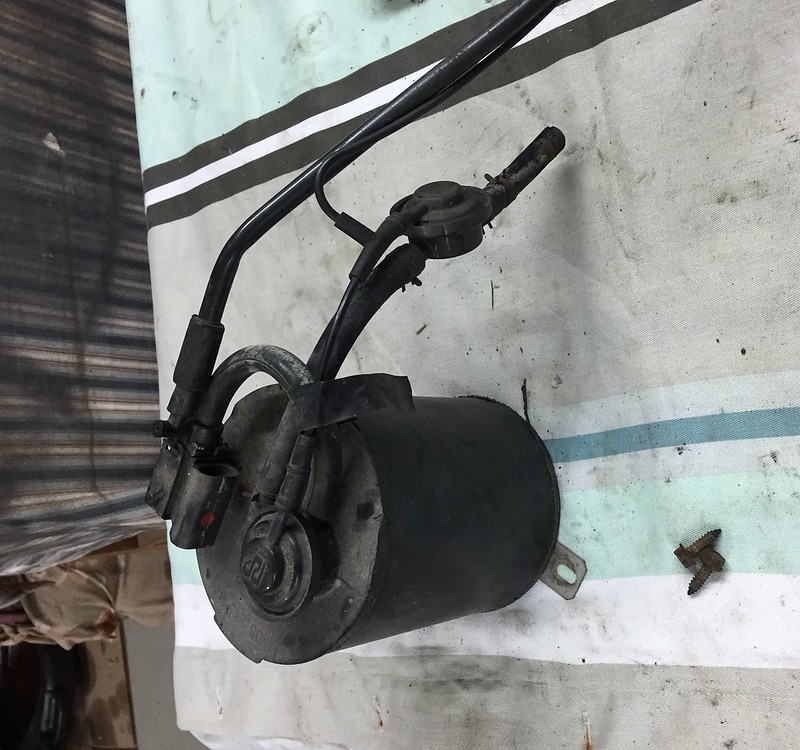
Also took out the fuel vapor canister. About half the hoses were disconnected which would explain the fuel smell I was getting when driving the car. Debating on putting this back in or not... I'll have to do a bit of research on what it takes to get it working properly or how hard it is to delete.
Good idea on taking it all out. That is the basic direction I am taking on my build. I want my eyes on every inch of metal to ensure there is no rust, then strip it all and paint it all. Gonna take a while, but slow and steady wins the race.
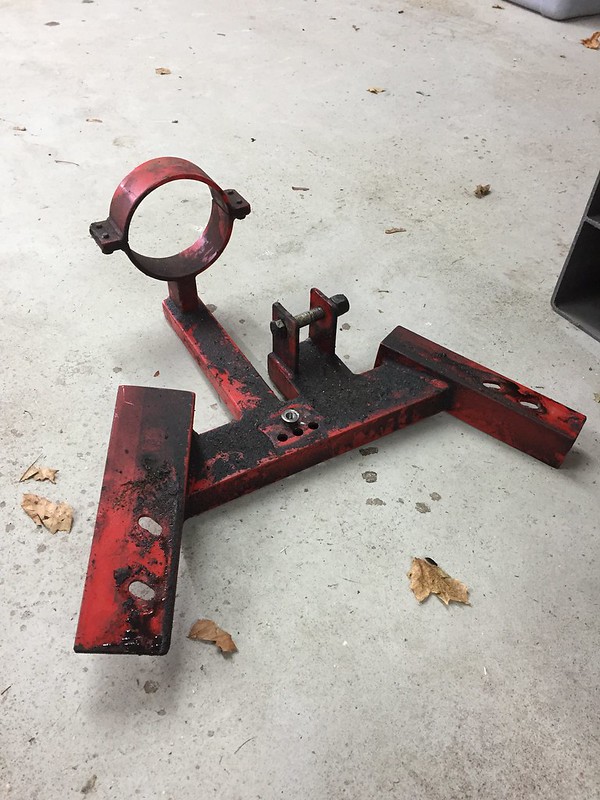
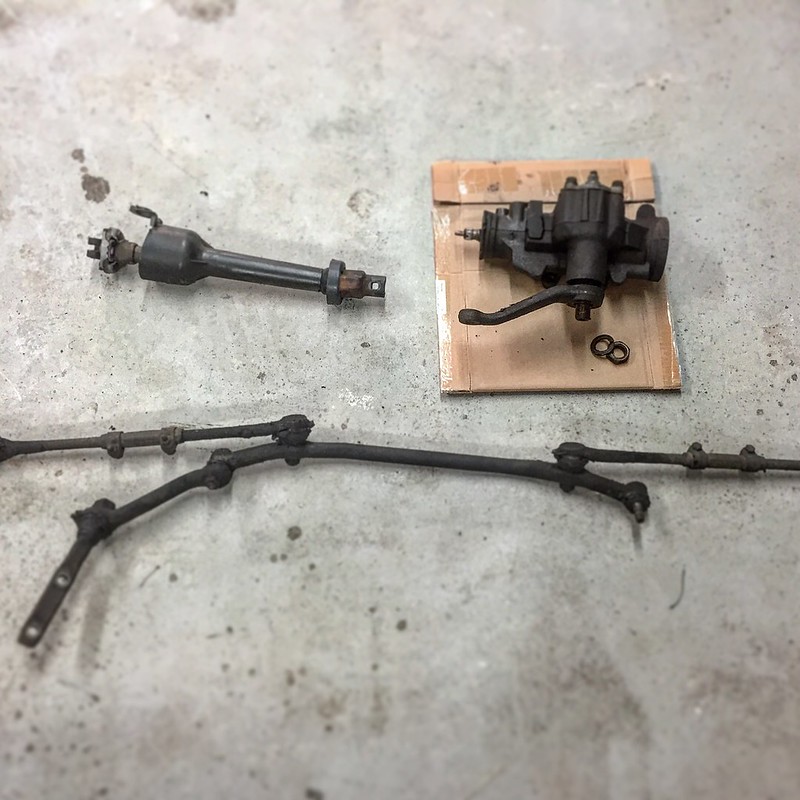
I was able to make a ton of progress this weekend on the car. I was able to get the entire steering system out of the engine bay and then dropped the K-member. Here are a few pics:
Steering components out of the car:
I'm still working on getting the Pitman off of the steering box. My puller wasn't working even when I hit it with the impact gun so I'll have to check out some alternate methods. I will be sending the box out to be rebuilt as it has quite a bit of slop in it.
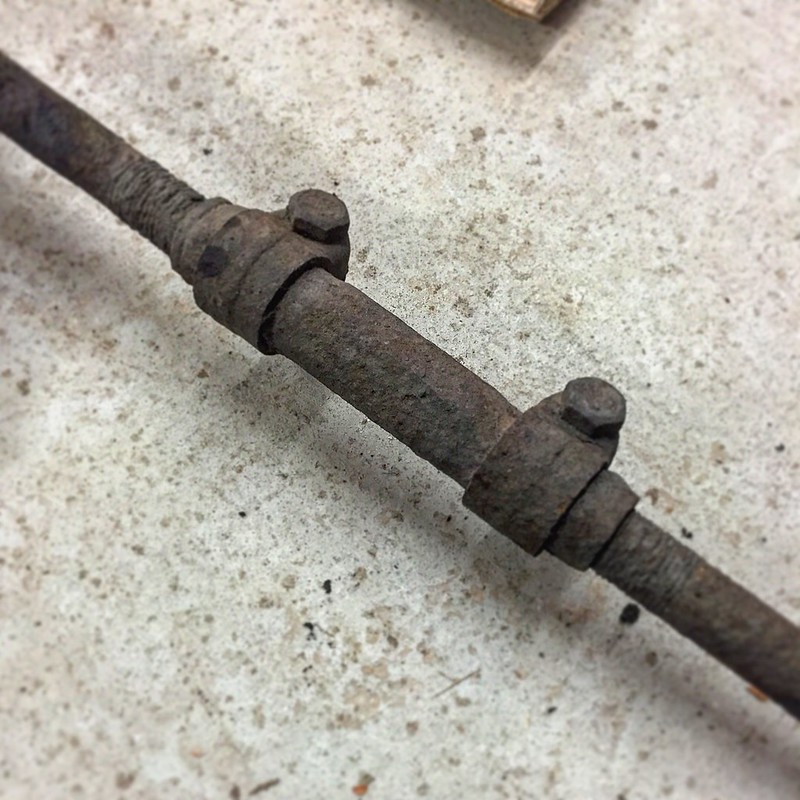
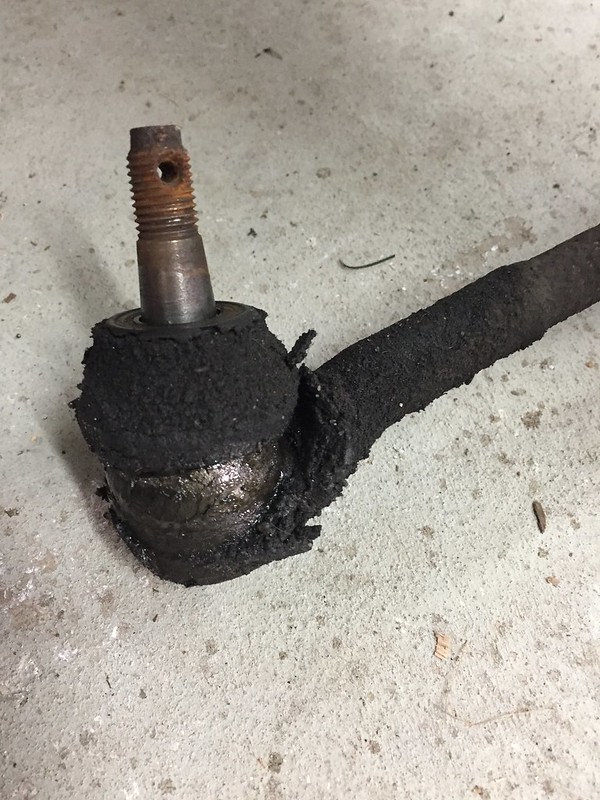
The rest of the steering linkage is definitely going to get replaced... it was looking pretty nasty. I don't think that tie rod has been adjusted in the last 30 years!
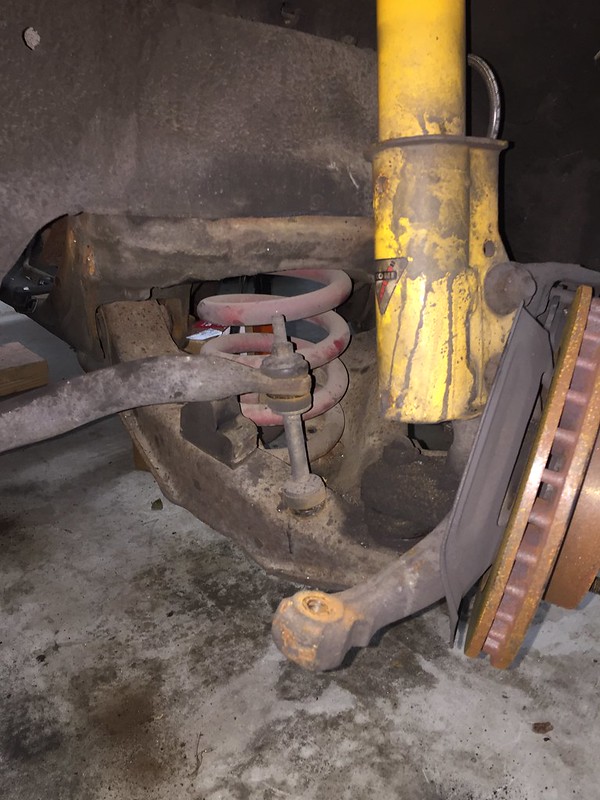
I then moved on to the K-member. First I popped the lower ball joints... I was able to get them loose with a few good whacks with the hammer. Again, found a ton of crud and dirt built up on the lower control arms. I think the front end might lose 20lbs in dirt alone!
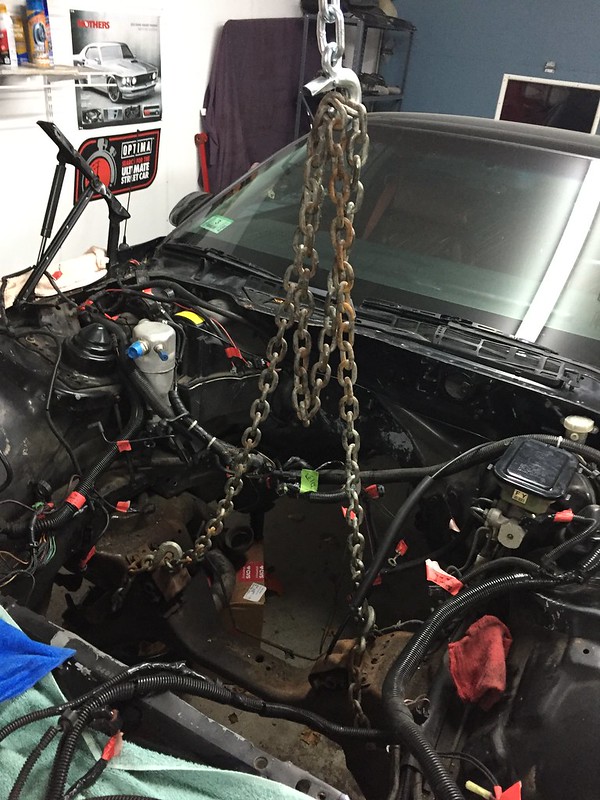
Next, I put 2 jack stands under the K-member and took out the 6 bolts holding it up. In order to get it out from under the car though, I ended up using a chain to hook it up to my engine crane and lifted it just a bit to get it off of the jack stands so I could remove them.
Then, I lowered it down to the floor, removed the chains and dragged it out the side of the car.
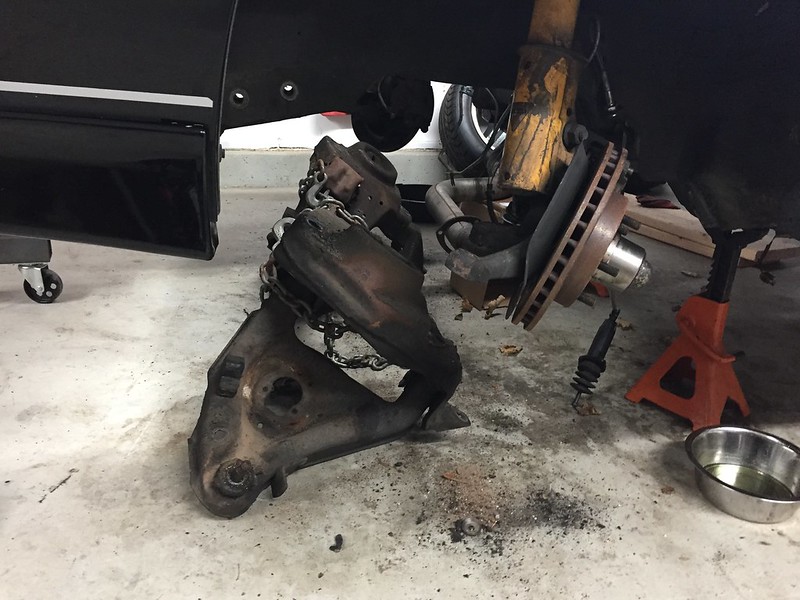
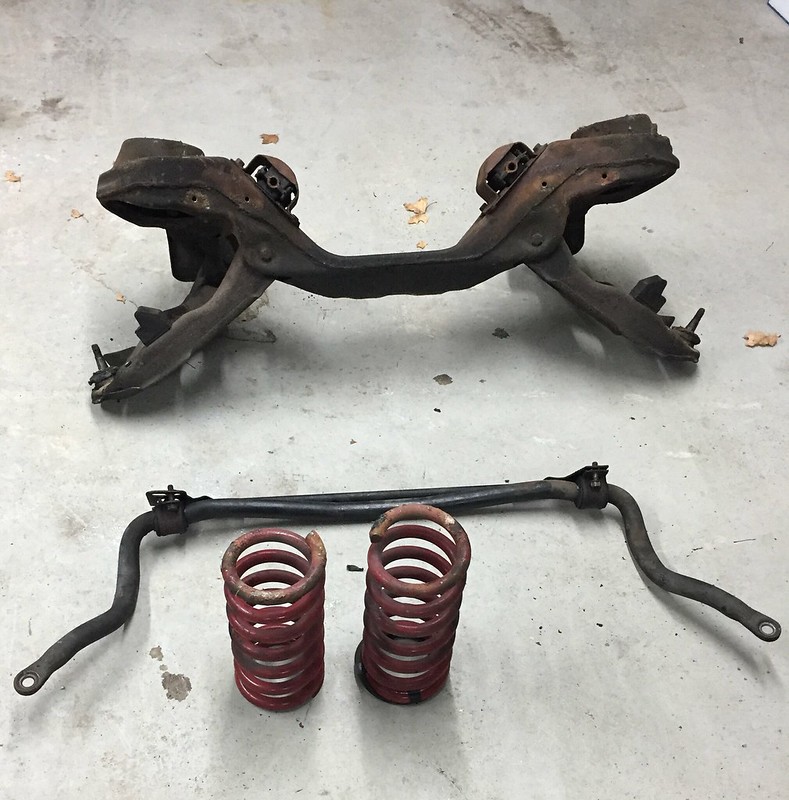
Here it is outside the car with the springs and the sway bar:
I'm torn on how to proceed with the K-member. I'm on a budget, so my original plan was to clean it up and paint it. I was going to add some new bushings and ball joints to the control arms and re-use those as well. However, those tubular K-members and control arms sure are sweet! I'll have to do a bit of research here.
Next up is getting the brake booster out and keep labeling and removing the wiring harness. Little by little!
My two cents:
The OEM cross member is fine to reuse. With an engine swap the advantage of an aftermarket tubular version is worth it otherwise the factory piece is good to go.
When replacing the bushings on the factory control arms, go with the Del-A-Lum replacements.
Add extended ball joints to your list.
For the road racing/Auto X crowd the Koni Yellows seem to be the overall best choice.
These bits of advice came to me via some of the more experienced members on the forum and whose opinion I respect a great deal. Something I thought I'd pass along.
A few threads you may find interesting:
I'm torn on how to proceed with the K-member. I'm on a budget, so my original plan was to clean it up and paint it. I was going to add some new bushings and ball joints to the control arms and re-use those as well. However, those tubular K-members and control arms sure are sweet! I'll have to do a bit of research here.
The tubular units are nice but not necessary unless you are doing an engine swap. The Del A Lum bushing set for the front arms with the stock K member, Koni struts, and Ground Control weight jacks is where most of us start. There are better struts out there but they start about about triple the cost of the front Koni's and go up from there. If you're on a budget, stick with the Koni's for now. Brakes and tires will get you better gains than expensive struts.
If you do decide to go tubular, I highly recommend the UMI road race K member. It can work with any engine from SBC to LS with just a change of motor mounts so it has growth options some of the others don't have.
My two cents:
The OEM cross member is fine to reuse. With an engine swap the advantage of an aftermarket tubular version is worth it otherwise the factory piece is good to go.
When replacing the bushings on the factory control arms, go with the Del-A-Lum replacements.
Add extended ball joints to your list.
For the road racing/Auto X crowd the Koni Yellows seem to be the overall best choice.
These bits of advice came to me via some of the more experienced members on the forum and whose opinion I respect a great deal. Something I thought I'd pass along.
A few threads you may find interesting:
Thanks for the great threads, I'll definitely read through those as I'm making my decision. You're cross member looks great all painted up.
Originally Posted by Beater79TA
The tubular units are nice but not necessary unless you are doing an engine swap. The Del A Lum bushing set for the front arms with the stock K member, Koni struts, and Ground Control weight jacks is where most of us start. There are better struts out there but they start about about triple the cost of the front Koni's and go up from there. If you're on a budget, stick with the Koni's for now. Brakes and tires will get you better gains than expensive struts.
If you do decide to go tubular, I highly recommend the UMI road race K member. It can work with any engine from SBC to LS with just a change of motor mounts so it has growth options some of the others don't have.
Thanks for chiming in Tom, I really appreciate your advice! I'm already halfway to the "starter" setup, with springs and Konis already on the car. My only worry is I will spend the money to upgrade the bushings, ball joints, etc which is money that could go towards the K-member. Part of me keeps saying to upgrade it once and d it right the first time. Decisions, decisions!
Part of me keeps saying to upgrade it once and d it right the first time. Decisions, decisions!
Something to be aware of with respect to a tubular k-member is it's durability. Taking in consideration the internet being what it is, there are documented tales of the aftermarket pieces not being able to withstand the rigors of racing or even more, the punishment that a street driven car dishes out.
From a personal perspective and to echo the views expressed by a few others here, it's not something I would change.
Also took out the fuel vapor canister. About half the hoses were disconnected which would explain the fuel smell I was getting when driving the car. Debating on putting this back in or not... I'll have to do a bit of research on what it takes to get it working properly or how hard it is to delete.
With respect to the charcoal canister and keep vs delete: I think it depends on a few things. 1. How aggressive the smog police are in your region? Here, one cannot legally remove ANY smog related equipment on any car from I think it is 1974 on. Steep fines. 2. Even if your region is really relaxed on this today doesn't mean it always will be - regulations tend not to diminish over time, rather the opposite. 3. Even if missing emission equipment is never an issue for you it could be to a future owner affecting sellability/price. 4. It is my understanding that if this equipment is in good condition it should not cost you notably in the performance department.
You are smart to do the research as you mentioned on what is impacted if you delete this, I believe there are some dependencies. I do realize it is one more thing to have to refurbish and clean for the project... however it will never be easier to do now. Good luck with whatever way you pursue.
i remember last year when I removed my stock front control arms and how much crud was on them and in the spring pocket! I replaced min with the UMI ones. as for the K member, i decided to keep the stock one. it is beefy but strong. as mentioned above, aftermarket ones may save you some weight, but there are cases where they have failed or been bent in an instance where the stock one would have held up just fine.
get some MOOG tie rods, and steering components. for the easy adjust-ability factor, i did go with UMi aluminum tie rod links. I kept my charcoal canister also, but next year it will be coming out when the newengine goes on in.
keep up the good work. progress looks great. I got to find some time to get back to mine this upcoming week or so. currently no transmission, no driveshaft, no rear end, no fuel tank, no rear suspension, no exhaust . etc etc. I have the Koni yellow struts in a box, but am still waiting for the rear shocks to be shipped out since they were on backorder.
We finally got a break in the weather up here in Boston this weekend and I took full advantage and got a lot done in the garage. I'd been working hard to get the engine and transmission ready to remove from the car and I was finally able to get them out this weekend. I'm lucky to have my Dad living nearby and he came over for the day to lend a hand.
I had never pulled an engine, so this was a new process for me. I spent a lot of time researching how to position the crane, how to attach the crane to the engine and so on. I had bought a load leveler but wasn't able to get it hooked up to the thread holes in the back of the engine. Here is the setup I ended up using:
My crane was a bit short to reach the center of the engine from the front. Looking back, I could have maybe made this work, but I ended up going from the side instead.
I had exactly the same issue when I returned my "lifetime guaranteed" engine crane after 20+ years of faithful service. It was so used up that the frame was actually bent and was what I considered to be unsafe. The replacement was an apparent copy of the original but also about 3/4 the size. As such, it was short like yours.
My remedy was to add another length to the arm via a piece of 1 1/2" x 2 1/2" x 3/16" tube at 60". It provided the right amount of length to the boom and never appeared to "over-extend" the capacity of the lift. I was however very cautious.
Great thread and looking forward to following! I too invested in the HF Trans jack and have used it many times installing and removing the T56. Makes like much easier!
The full build and racing is on the Facebook page. We run full UMI on the entire car. So the front end is the road race tubular K member, tubular arms, UMI weight jacks, and some very limited production UMI / AFCO double adjustable road race struts. The adjustment range on these is about double the Koni's. We're also a LS swapped car. We started with a BMR K member a friend made us a deal on which required the BMR arms. When the arms failed we tried to switch out just the arms but couldn't so it turned into switching out the K member and the arms. The road race K member is much sturdier than the BMR unit we had originally.
If you're looking for reasons to keep or throw out the factory K member, remember the DSE thirdgen still has the factory K member. Most of the members on FRRAX.com still use the factory K member as well. It works and can work with engine swaps. But if you want to open up more room around the bottom of the engine to reach things and shave a few more pounds, the road race K member is a nice unit.
The rear suspension is all UMI as well. Adjustable lower control arms, torque arm, UMI/AFCO rear coilovers, and the Watts link.
For some of these items, we helped with product testing so we ran the Watts Link and weight jacks for 3 months and 5 events prior to them being released into the catalog. We've had the front struts for a year testing them. These still aren't in the catalog but are available if you call and ask for them.
Wow! I hope that wasn't disastrous for anyone concerned.
Failed in what way?
Originally Posted by Beater79TA
If you're looking for reasons to keep or throw out the factory K member, remember the DSE thirdgen still has the factory K member. Most of the members on FRRAX.com still use the factory K member as well.
 12-13-2017, 08:49 PM