1987 Camaro "Pro-Touring" Budget Build
 02-01-2018, 08:31 PM
#51
Supreme Member

Re: 1987 Camaro "Pro-Touring" Budget Build
Wow! I hope that wasn't disastrous for anyone concerned.
Failed in what way?
Interesting point and something I'd forgotten.
Failed in what way?
Interesting point and something I'd forgotten.
 02-02-2018, 06:06 AM
#52
Senior Member

Re: 1987 Camaro "Pro-Touring" Budget Build
Failed in that the poly bushings flowed out of the arms allowing them to move approximately 1/8 inch front to rear while the car was in motion. That was when we found out their bushings were unique to their arms and the fix was to just replace everything.
02-06-2018, 09:30 PM
#53
Re: 1987 Camaro "Pro-Touring" Budget Build
With respect to the charcoal canister and keep vs delete: I think it depends on a few things. 1. How aggressive the smog police are in your region? Here, one cannot legally remove ANY smog related equipment on any car from I think it is 1974 on. Steep fines. 2. Even if your region is really relaxed on this today doesn't mean it always will be - regulations tend not to diminish over time, rather the opposite. 3. Even if missing emission equipment is never an issue for you it could be to a future owner affecting sellability/price. 4. It is my understanding that if this equipment is in good condition it should not cost you notably in the performance department.
nice progress !
i remember last year when I removed my stock front control arms and how much crud was on them and in the spring pocket! I replaced min with the UMI ones. as for the K member, i decided to keep the stock one. it is beefy but strong. as mentioned above, aftermarket ones may save you some weight, but there are cases where they have failed or been bent in an instance where the stock one would have held up just fine.
get some MOOG tie rods, and steering components. for the easy adjust-ability factor, i did go with UMi aluminum tie rod links. I kept my charcoal canister also, but next year it will be coming out when the newengine goes on in.
The full build and racing is on the Facebook page. We run full UMI on the entire car. So the front end is the road race tubular K member, tubular arms, UMI weight jacks, and some very limited production UMI / AFCO double adjustable road race struts. The adjustment range on these is about double the Koni's. We're also a LS swapped car. We started with a BMR K member a friend made us a deal on which required the BMR arms. When the arms failed we tried to switch out just the arms but couldn't so it turned into switching out the K member and the arms. The road race K member is much sturdier than the BMR unit we had originally.
If you're looking for reasons to keep or throw out the factory K member, remember the DSE thirdgen still has the factory K member. Most of the members on FRRAX.com still use the factory K member as well. It works and can work with engine swaps. But if you want to open up more room around the bottom of the engine to reach things and shave a few more pounds, the road race K member is a nice unit.
If you're looking for reasons to keep or throw out the factory K member, remember the DSE thirdgen still has the factory K member. Most of the members on FRRAX.com still use the factory K member as well. It works and can work with engine swaps. But if you want to open up more room around the bottom of the engine to reach things and shave a few more pounds, the road race K member is a nice unit.
Also - awesome write up on the car on lateral-g!
02-06-2018, 09:31 PM
#54
Re: 1987 Camaro "Pro-Touring" Budget Build
I don't have a very exciting update this time around as I'm still working through removing everything from the engine bay, but here goes:
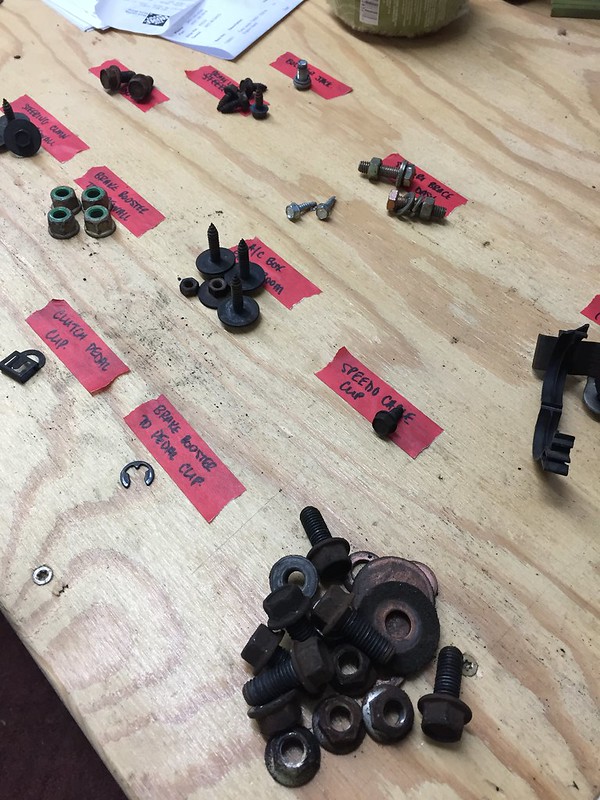
One of the biggest pains in the rear was getting the brake booster off the firewall. The 4 nuts holding the booster to the firewall are way up high underneath the dash and a royal pain to get to! For some reason, I'm always hesitant to take extra pieces off in order to get to a hard-to-reach fastener... I'll sit there and struggle with wrenches, ratchets, extensions and u-joints and in the end it usually ends up being faster just to bite the bullet and take off the couple other parts in the way. Anyone else do this too?
I ended up dropping the steering column in this case to get at 2 of the nuts and out she came. My master cylinder had some nasty residue on the bottom from some old fluid. I had flushed in some fresh DOT4 before my last track event but mustn't have done a good job cleaning it out. I want a firmer pedal, so I will doing some research to see which master cylinder will make sense to increase my pedal firmness.
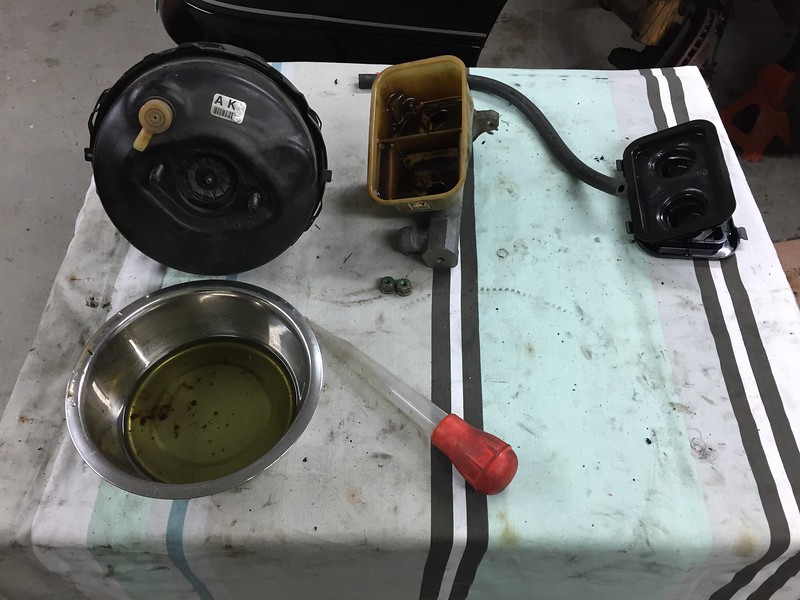
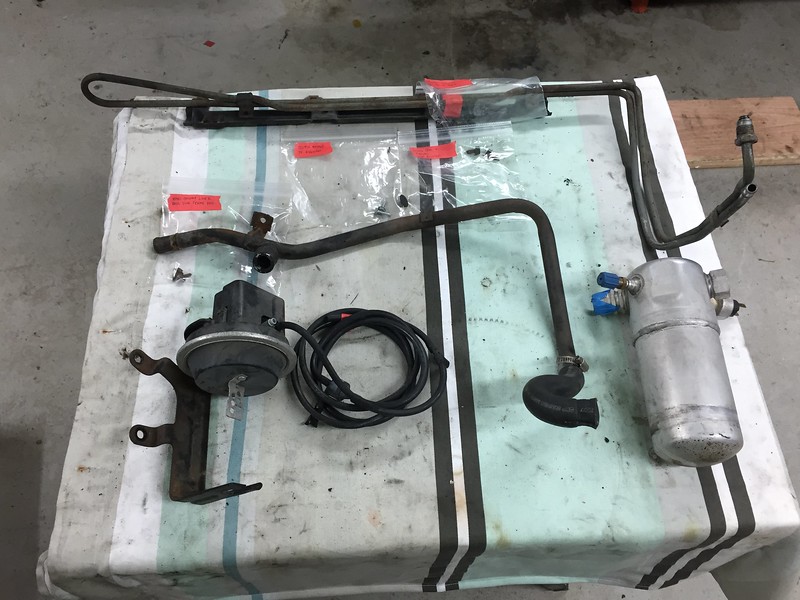
Here are some other random parts I've been taking off and labeling: AC dryer, power steering "cooler", cruise control module and a few other hoses and lines. Slowly but surely getting there.
That's where I stand for right now. I'm shooting to have the engine bay cleaned out by this weekend so I can get started with the cleanup and prep for paint. Lots of work ahead of me too with cleaning up the wiring harness, painting the engine and lots of other odds and ends. I'm trying to keep the momentum up doing just a little bit every couple of days and chipping away at it little bit little. Gotta enjoy the journey!
One of the biggest pains in the rear was getting the brake booster off the firewall. The 4 nuts holding the booster to the firewall are way up high underneath the dash and a royal pain to get to! For some reason, I'm always hesitant to take extra pieces off in order to get to a hard-to-reach fastener... I'll sit there and struggle with wrenches, ratchets, extensions and u-joints and in the end it usually ends up being faster just to bite the bullet and take off the couple other parts in the way. Anyone else do this too?
I ended up dropping the steering column in this case to get at 2 of the nuts and out she came. My master cylinder had some nasty residue on the bottom from some old fluid. I had flushed in some fresh DOT4 before my last track event but mustn't have done a good job cleaning it out. I want a firmer pedal, so I will doing some research to see which master cylinder will make sense to increase my pedal firmness.
Here are some other random parts I've been taking off and labeling: AC dryer, power steering "cooler", cruise control module and a few other hoses and lines. Slowly but surely getting there.
That's where I stand for right now. I'm shooting to have the engine bay cleaned out by this weekend so I can get started with the cleanup and prep for paint. Lots of work ahead of me too with cleaning up the wiring harness, painting the engine and lots of other odds and ends. I'm trying to keep the momentum up doing just a little bit every couple of days and chipping away at it little bit little. Gotta enjoy the journey!
02-06-2018, 09:59 PM
#55
Senior Member
Re: 1987 Camaro "Pro-Touring" Budget Build

 02-07-2018, 07:07 AM
#56
Supreme Member
iTrader: (2)
Join Date: Feb 2005
Location: West Warwick RI, postal code: 02893
Posts: 4,337
Received 55 Likes
on
41 Posts
Car: Building LS3, T56 Z28
Engine: LS3
Transmission: T-56
Axle/Gears: Moser/ 4.11
Re: 1987 Camaro "Pro-Touring" Budget Build
Interesting bracket. Never seen anything like that. Would love to see what you come up with if you "clean it up" a bit.
Any downside to simply making a bracket that clamps to the master and solidly mounting it to the strut tower? Is zero flex OK?
Any downside to simply making a bracket that clamps to the master and solidly mounting it to the strut tower? Is zero flex OK?
02-07-2018, 07:12 AM
#57
Senior Member
Re: 1987 Camaro "Pro-Touring" Budget Build
Sam Strano sells one for 4th gens. That's where I took some of the ideas from even though that one won't mount to a thirdgen. Using the bolt allows you to preload the master so it can't move. Any type of bracket that keeps the master from moving would likely accomplish the same task, though. But you need to stabilize all axis of movement when you brace it. Coming in from the front with pressure did that.
02-08-2018, 08:16 PM
#58
Re: 1987 Camaro "Pro-Touring" Budget Build
Definitely something to think about... I'll have to add this to my list of things to research. I haven't checked my firewall flex, but I'm sure mine will get bad at some point even if it isn't doing it now.
02-08-2018, 08:20 PM
#59
Senior Member
Re: 1987 Camaro "Pro-Touring" Budget Build
02-11-2018, 08:29 PM
#60
Re: 1987 Camaro "Pro-Touring" Budget Build
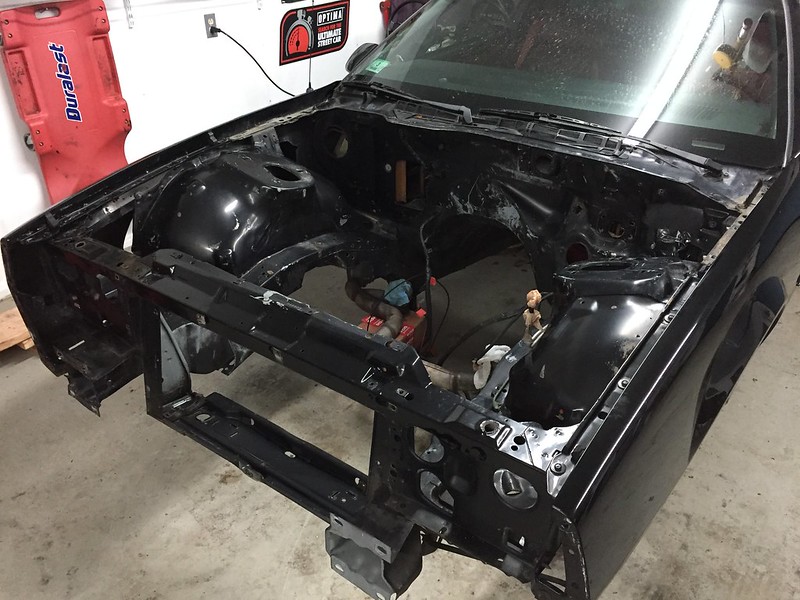
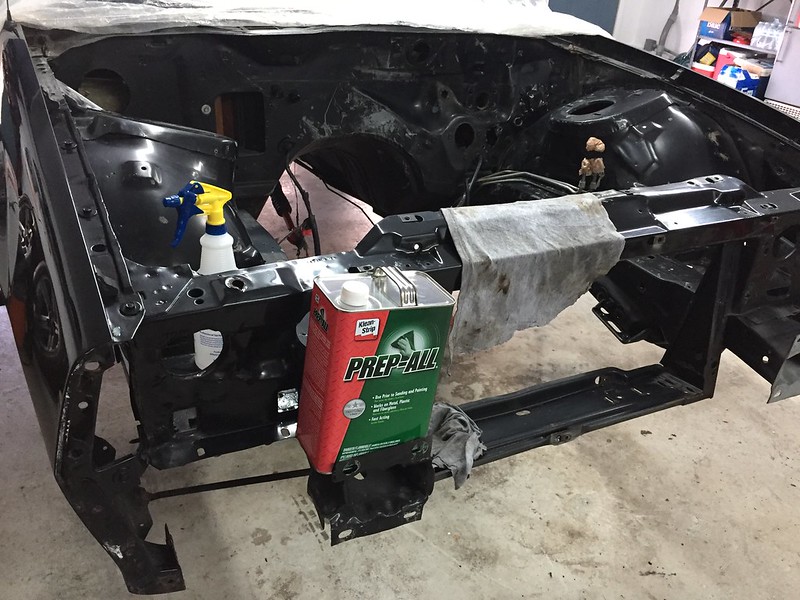
Ok another big update from this weekend. I finally have the engine bay completely stripped down and am ready to start the paint prep process. Here are some pics of the last big parts coming off:
Removed the from bumper covers, impact bar and a few other clips and pieces so I can get at the core support to paint it:
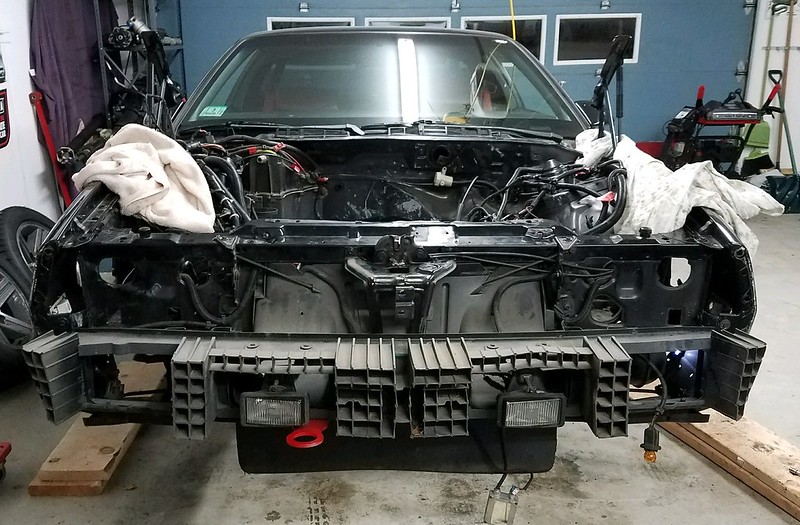
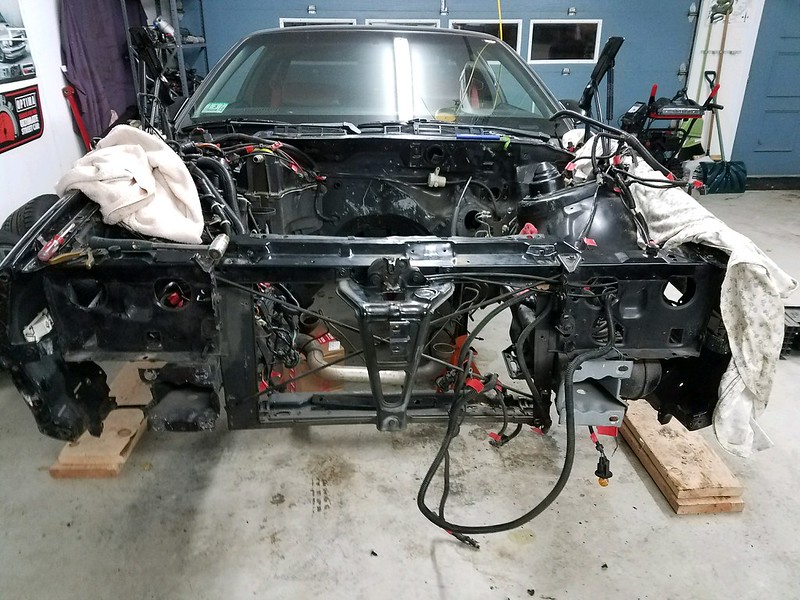
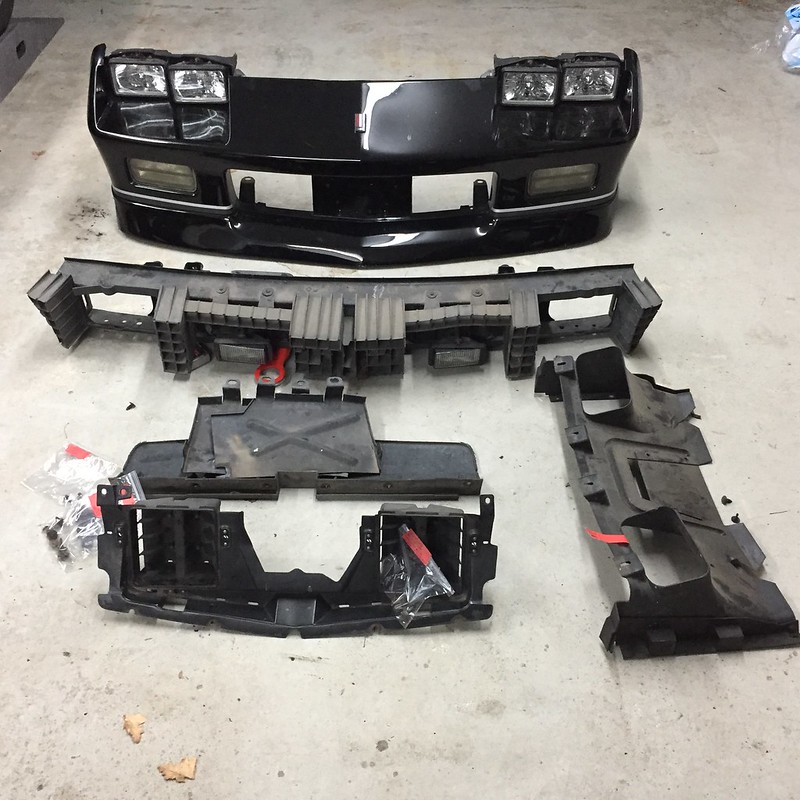
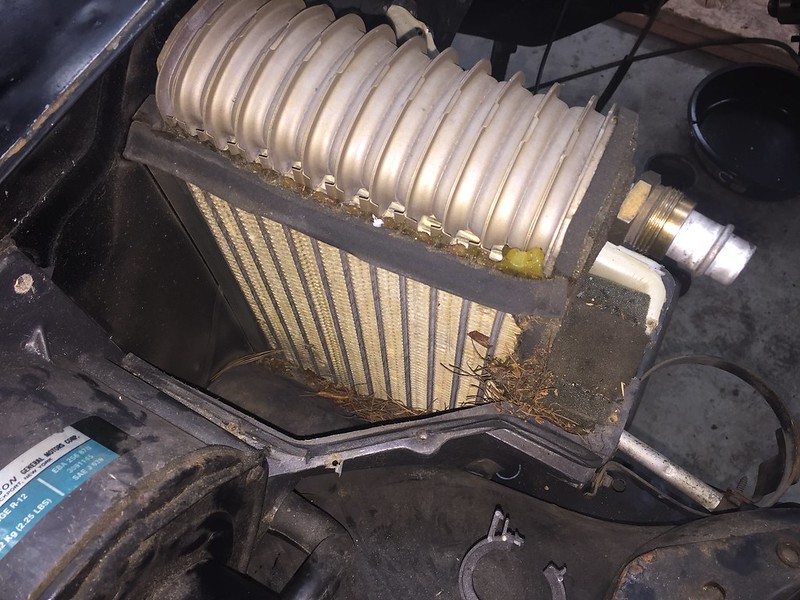
Next up was the A/C box. It took me a little while to figure out where all of the bolts were and then to carefully scrape it off the firewall but eventually it came out. I am going to keep my AC so I will cleaning these pieces off and reinstalling them.
Top cover off:

Nasty stuff in there!
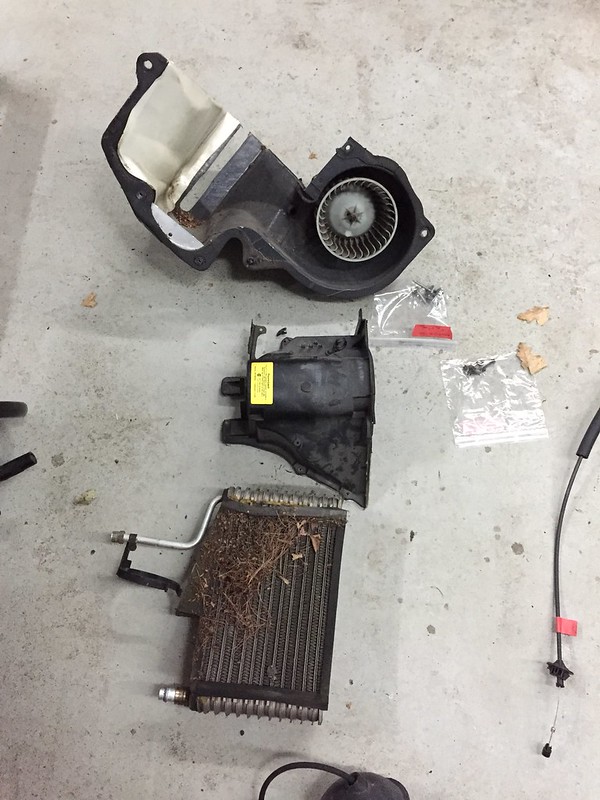
I then pulled the rest of the stuff in there:
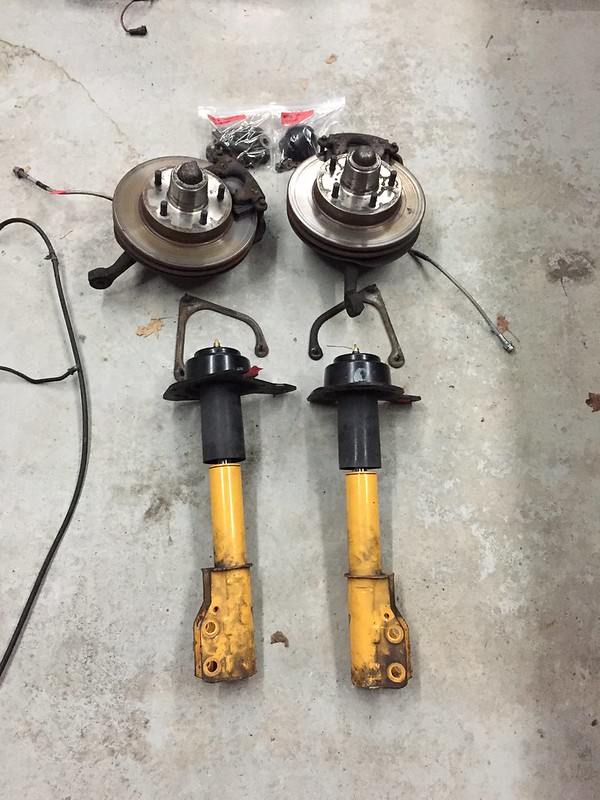
The rest of the shock and spindle assembly:
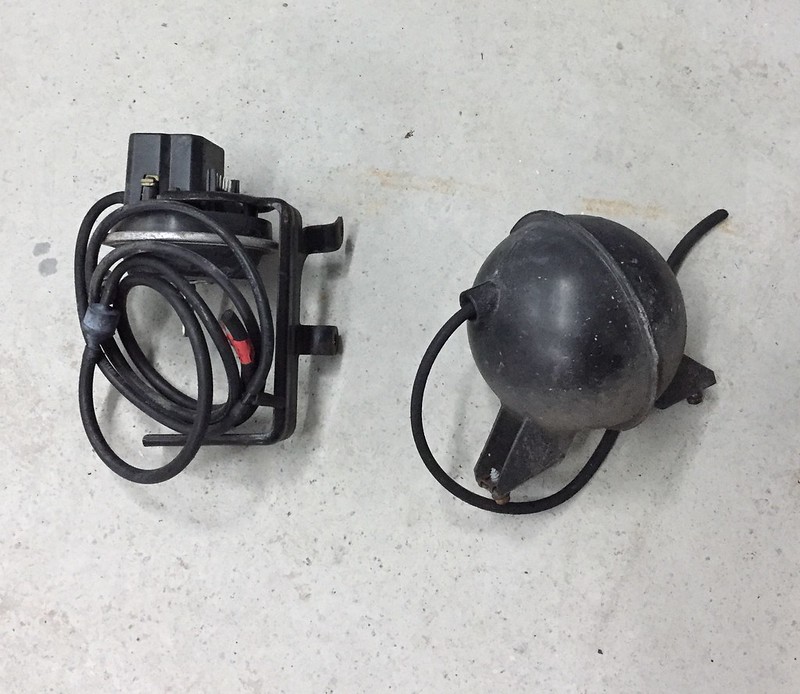
Cruise control module and vacuum tank. These will not be going back in, so they are for sale if anyone wants them?
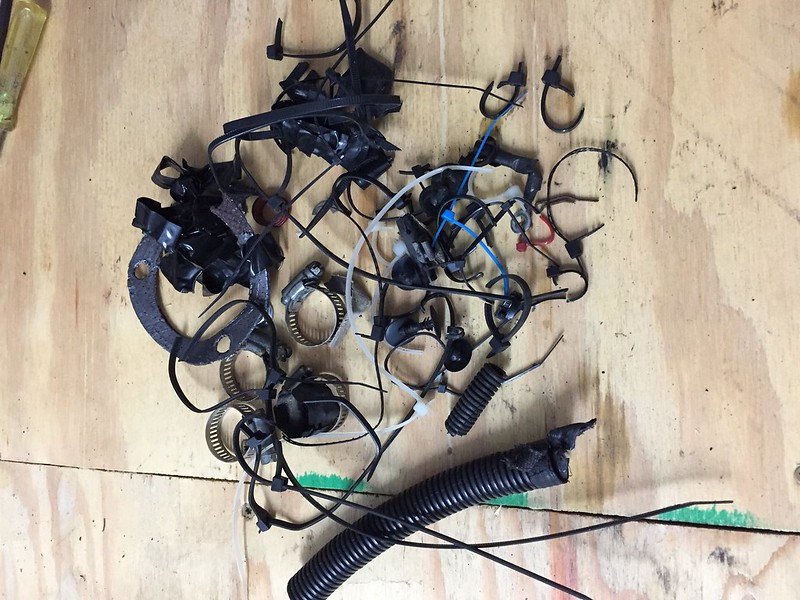
Bunch of zip ties, tape and crap I've taken off the car:
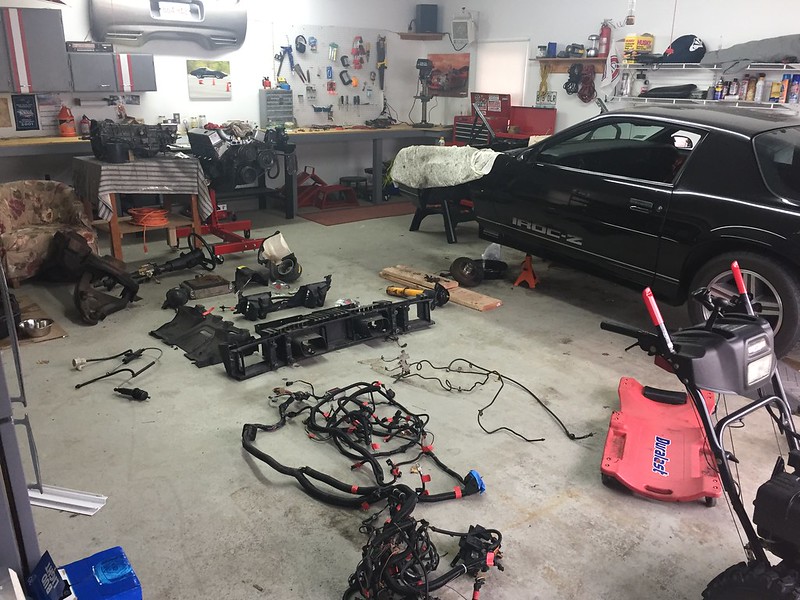
Busy garage!
Next up is power washing the engine bay and getting it ready for paint. I feel like I've hit a milestone here where I stop taking parts off and start cleaning things up now!
Removed the from bumper covers, impact bar and a few other clips and pieces so I can get at the core support to paint it:
Next up was the A/C box. It took me a little while to figure out where all of the bolts were and then to carefully scrape it off the firewall but eventually it came out. I am going to keep my AC so I will cleaning these pieces off and reinstalling them.
Top cover off:
Nasty stuff in there!
I then pulled the rest of the stuff in there:
The rest of the shock and spindle assembly:
Cruise control module and vacuum tank. These will not be going back in, so they are for sale if anyone wants them?
Bunch of zip ties, tape and crap I've taken off the car:
Busy garage!
Next up is power washing the engine bay and getting it ready for paint. I feel like I've hit a milestone here where I stop taking parts off and start cleaning things up now!
02-12-2018, 12:14 AM
#61
Senior Member
Re: 1987 Camaro "Pro-Touring" Budget Build
You want the vacuum ball if you are keeping the full climate controls. This is what keeps the vents from switching to defroster at WOT. There should be a check valve in the vacuum line running from the back of the manifold to this and the interior of the car.
 02-22-2018, 07:48 PM
#63
Re: 1987 Camaro "Pro-Touring" Budget Build
OK, some more updates. Slowly but surely cranking away at this thing. Luckily the weather up here in New England has been reasonable so I'm not freezing my rear end off in the garage.
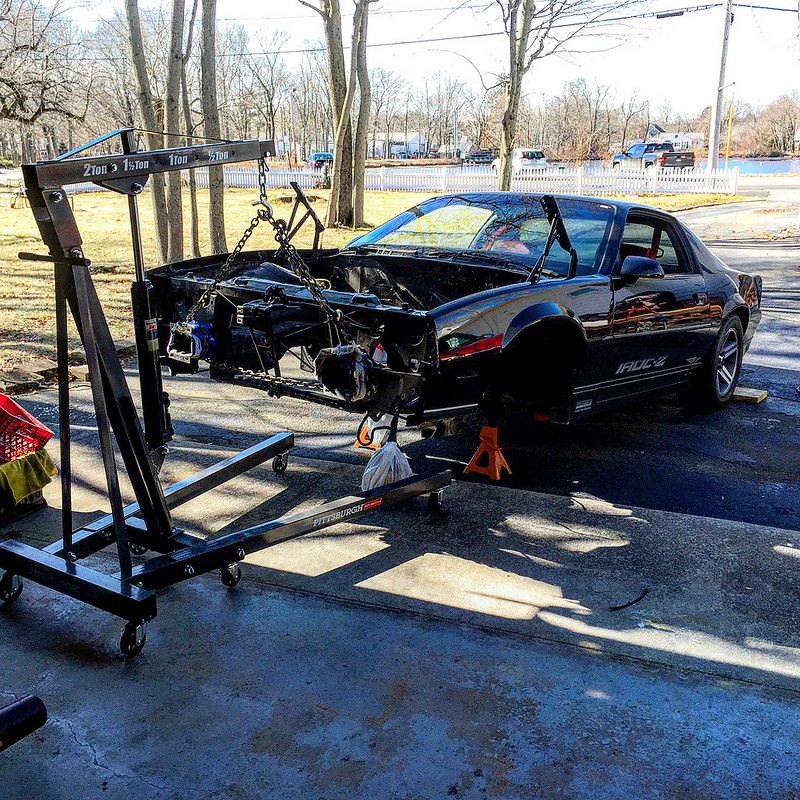
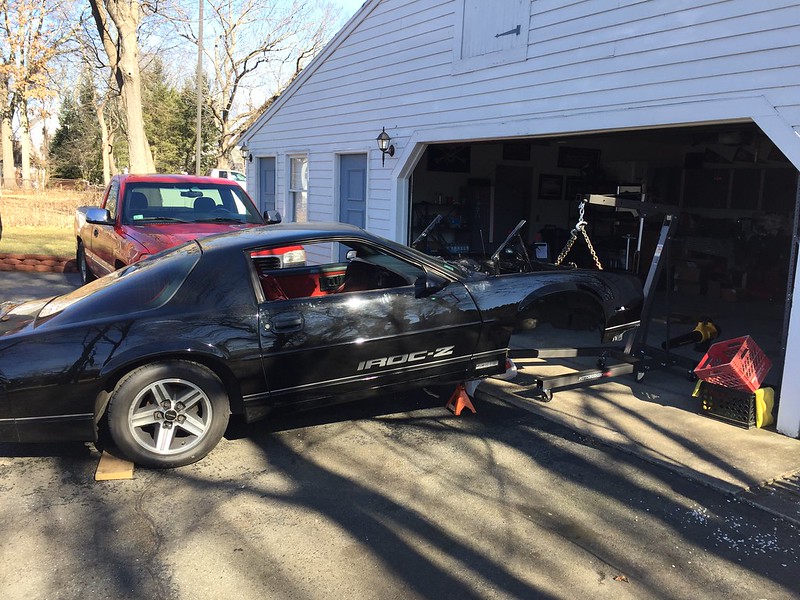
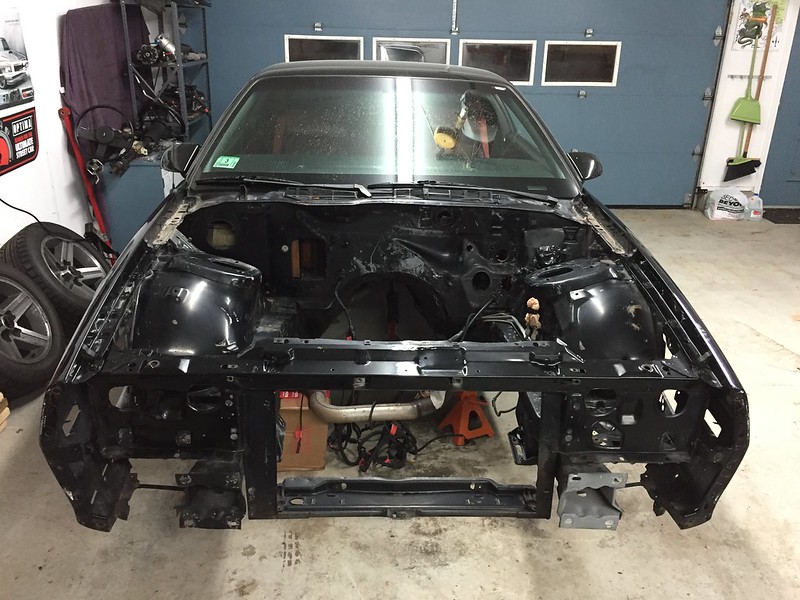
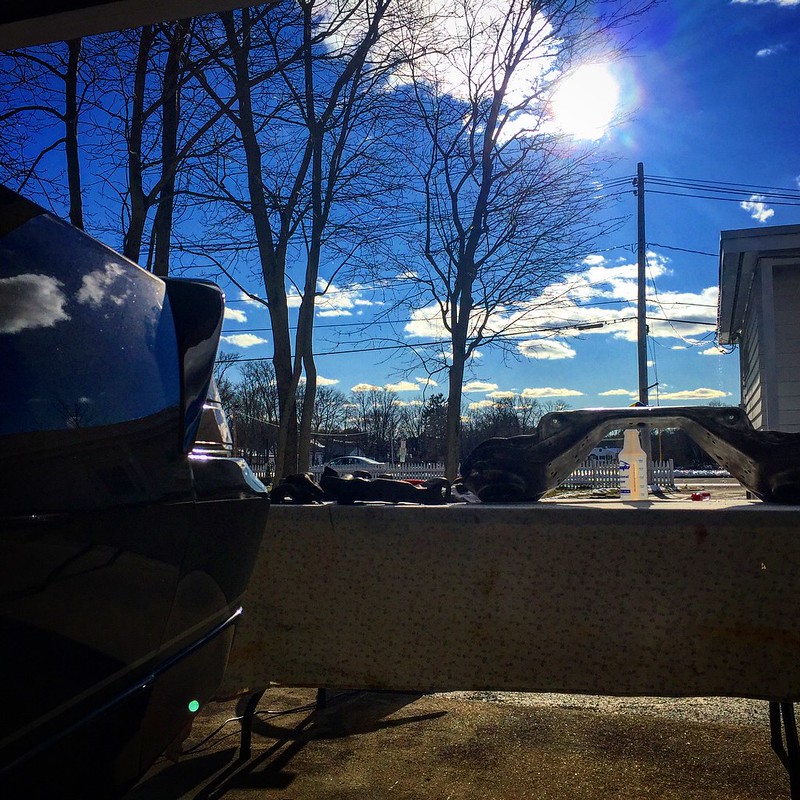
Last weekend we had great weather on Saturday so I took advantage and rolled the car out into the driveway so I could power wash it. Since I have no front suspension in the car right now, I had to get creative with my shop crane and slowly rolled it out of the garage:
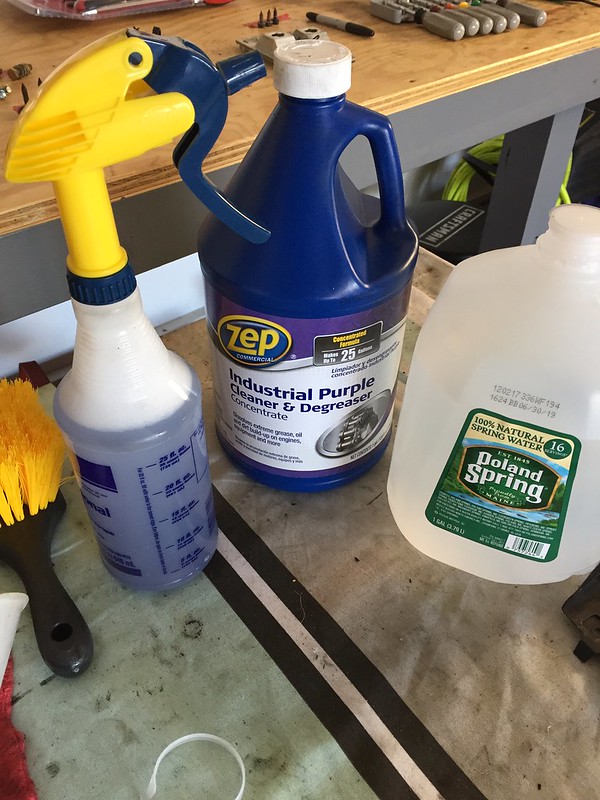
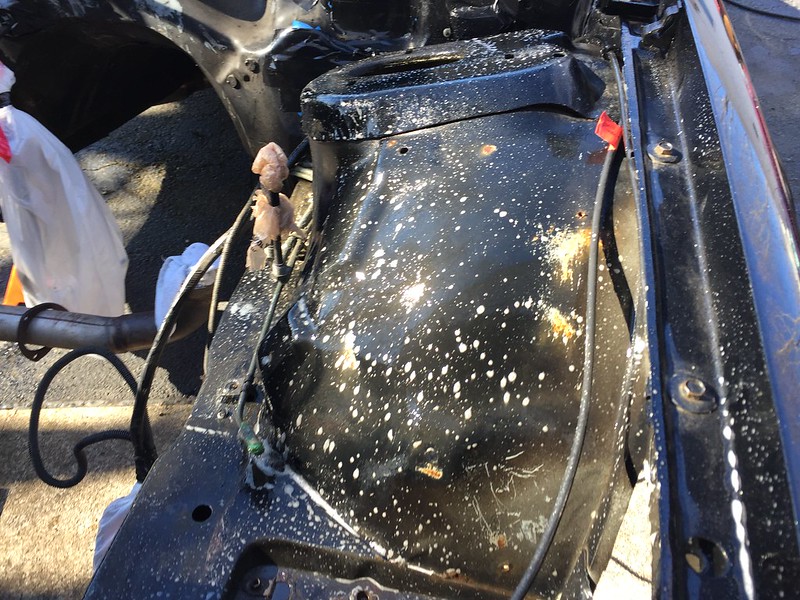
To clean the engine bay, I bought some heavy duty degreaser from Home Depot and diluted it in a mixing bottle. I doused the engine bay with this stuff and it worked great. Perhaps TOO great actually, it actually stripped the paint off in some spots!

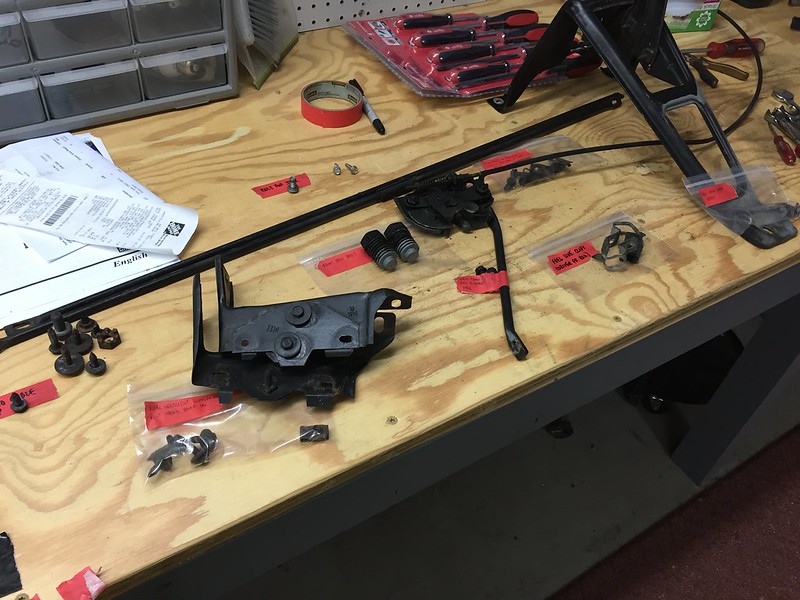
Once that was done, I started taking out all of the last little pieces in the engine bay. Things like the hood latch and cable, small little support rods, broken clips, etc. Tedious little stuff that takes a while to bag and tag.
Here is where I stand tonight. I think I have the engine bay completely stripped (except for a couple of small harnesses I don't want to connect). Next step will be to mask off the entire car and start prepping the surface for paint.
Last weekend we had great weather on Saturday so I took advantage and rolled the car out into the driveway so I could power wash it. Since I have no front suspension in the car right now, I had to get creative with my shop crane and slowly rolled it out of the garage:
To clean the engine bay, I bought some heavy duty degreaser from Home Depot and diluted it in a mixing bottle. I doused the engine bay with this stuff and it worked great. Perhaps TOO great actually, it actually stripped the paint off in some spots!
Once that was done, I started taking out all of the last little pieces in the engine bay. Things like the hood latch and cable, small little support rods, broken clips, etc. Tedious little stuff that takes a while to bag and tag.
Here is where I stand tonight. I think I have the engine bay completely stripped (except for a couple of small harnesses I don't want to connect). Next step will be to mask off the entire car and start prepping the surface for paint.
02-22-2018, 10:24 PM
#64
Supreme Member
Re: 1987 Camaro "Pro-Touring" Budget Build
Somewhat similarly, I had removed ALL of the suspension on the "roller" I bought while on a golf holiday in Virginia. Luckily, an acquaintance of mine loaned his carpet dolly and I was able to wheel the bare chassis about where I needed to.

The 4 corner roller dolly is somewhat hidden in this pic with the chassis on the trailer and heading to the shop for subframe connectors and other stuff.
Last edited by skinny z; 02-22-2018 at 10:31 PM.
02-25-2018, 08:24 PM
#66
Re: 1987 Camaro "Pro-Touring" Budget Build
Making a little more progress. I'm waiting on some paint supplies to keep going with the engine bay, so I've moved on to working on numerous "little projects" that need to get done. I've decided that breaking things into little projects will help me keep moving forward.
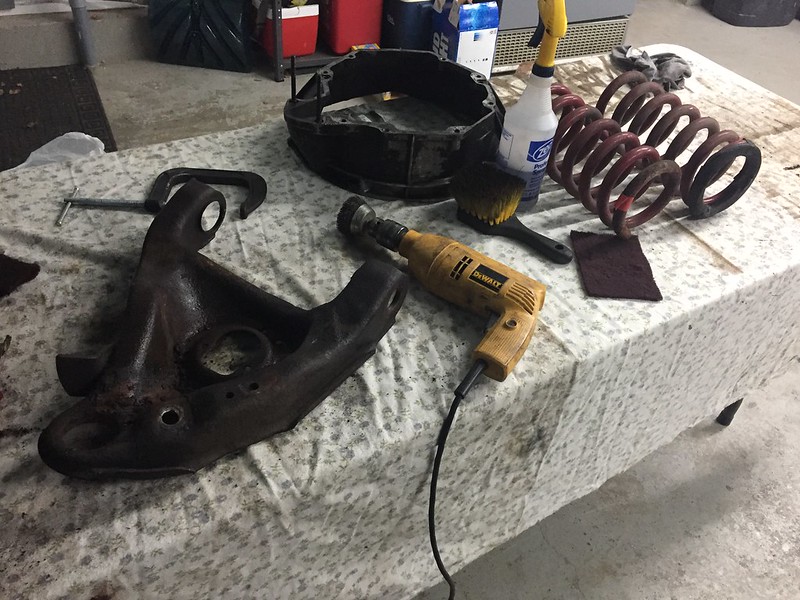
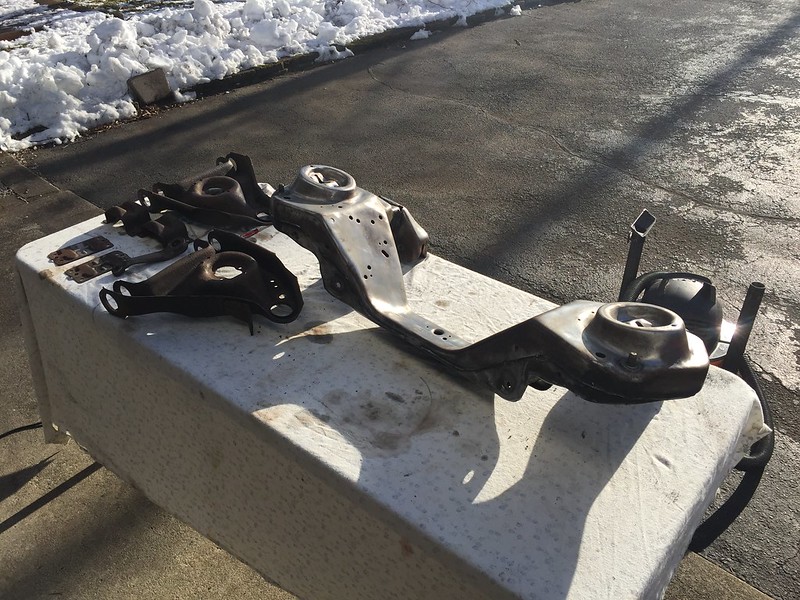
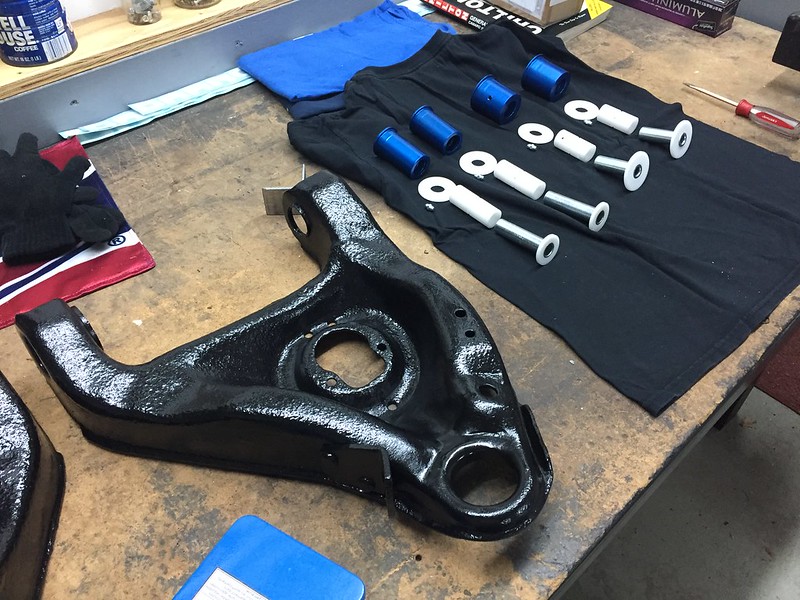
My first project is tackling the K-member. I used the same degreaser I used on the engine bay and hit it with the wire wheel and the paint came flying off! I have a little more work to do on it, and need to figure out a way to get the grime out of the inside of the K-member... might need to get creative there.
K-member all disassembled:
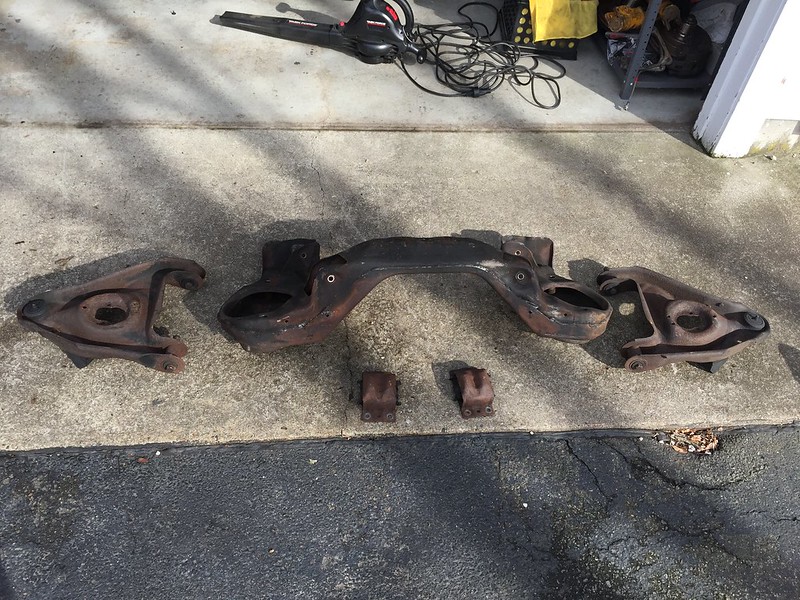
Stripping it down for paint:
I had a busy week, so in order to keep moving forward I dropped my lower control arms off at a local garage to get the bushings and ball joints pressed out. I would have loved to have done them myself and learned a bit in the process, but I have to pick and choose my battles if I ever want to get this done!

In staying with my budget theme, I'm going to be keeping the stock lower control arms but rebuilding them with new components. For bushings, I am going to go with Delrin ones from Global West. Haven't tried them on anything and I am basing my decision purely on reading, but they seem to be the go-to upgrade for these cars. I like the no-binding benefits and am looking forward to seeing how they feel.
For ball joints, I am still torn. Since my car is lowered, it's causing my lower control arm to be at a different angle than factory (with the ball joint higher than the mounting point on the frame). In order to restore the stock geometry (which is essentially a horizontal lower control arm) and keep my lowered ride height, I believe I need to use a taller ball joint. However, I've been having trouble finding the proper part number and if these are even necessary. I'm going to keep searching, but if anyone has any info to save me some time it would be greatly appreciated!
Also, has anyone ever had their K-member seam welded? Might be a good time to get this done if it's beneficial...
My first project is tackling the K-member. I used the same degreaser I used on the engine bay and hit it with the wire wheel and the paint came flying off! I have a little more work to do on it, and need to figure out a way to get the grime out of the inside of the K-member... might need to get creative there.
K-member all disassembled:
Stripping it down for paint:
I had a busy week, so in order to keep moving forward I dropped my lower control arms off at a local garage to get the bushings and ball joints pressed out. I would have loved to have done them myself and learned a bit in the process, but I have to pick and choose my battles if I ever want to get this done!
In staying with my budget theme, I'm going to be keeping the stock lower control arms but rebuilding them with new components. For bushings, I am going to go with Delrin ones from Global West. Haven't tried them on anything and I am basing my decision purely on reading, but they seem to be the go-to upgrade for these cars. I like the no-binding benefits and am looking forward to seeing how they feel.
For ball joints, I am still torn. Since my car is lowered, it's causing my lower control arm to be at a different angle than factory (with the ball joint higher than the mounting point on the frame). In order to restore the stock geometry (which is essentially a horizontal lower control arm) and keep my lowered ride height, I believe I need to use a taller ball joint. However, I've been having trouble finding the proper part number and if these are even necessary. I'm going to keep searching, but if anyone has any info to save me some time it would be greatly appreciated!
Also, has anyone ever had their K-member seam welded? Might be a good time to get this done if it's beneficial...
02-26-2018, 07:13 AM
#67
Supreme Member
iTrader: (11)

Join Date: Sep 1999
Location: NJ
Posts: 4,345
Received 298 Likes
on
234 Posts
Car: 92 Firebird
Engine: 4.8 LR4
Transmission: T56
Axle/Gears: 3.45 9 Bolt
Re: 1987 Camaro "Pro-Touring" Budget Build
//<86TA>\\ knows the part number, he has them on one of his cars, send him a message
02-26-2018, 08:04 PM
#68
Supreme Member
Re: 1987 Camaro "Pro-Touring" Budget Build
Check out this thread.
https://www.thirdgen.org/forums/susp...ll-joints.html
For the short story, the extended ball joint from QA1 is PN 1210-209P. Some interesting reading in that thread.
https://www.qa1.net/suspension/ball-...le-ball-joints
FWIW. I've gone with the Del-A-Lum control arm bushings. That may or may not be the Delrin bushing you've mentioned as this one is a Delrin/aluminium composite.
http://www.globalwest.net/camaro-del...2-global-.html
Last edited by skinny z; 02-26-2018 at 08:10 PM.
02-27-2018, 09:05 AM
#70
Supreme Member
Re: 1987 Camaro "Pro-Touring" Budget Build
Well, yeah. That much is a given. It's what the rest of the OP's bushing is made of is my point. Aluminum? Steel?
02-27-2018, 12:04 PM
#71
Re: 1987 Camaro "Pro-Touring" Budget Build
Check out this thread.
https://www.thirdgen.org/forums/susp...ll-joints.html
For the short story, the extended ball joint from QA1 is PN 1210-209P. Some interesting reading in that thread.
https://www.qa1.net/suspension/ball-...le-ball-joints
FWIW. I've gone with the Del-A-Lum control arm bushings. That may or may not be the Delrin bushing you've mentioned as this one is a Delrin/aluminium composite.
http://www.globalwest.net/camaro-del...2-global-.html
https://www.thirdgen.org/forums/susp...ll-joints.html
For the short story, the extended ball joint from QA1 is PN 1210-209P. Some interesting reading in that thread.
https://www.qa1.net/suspension/ball-...le-ball-joints
FWIW. I've gone with the Del-A-Lum control arm bushings. That may or may not be the Delrin bushing you've mentioned as this one is a Delrin/aluminium composite.
http://www.globalwest.net/camaro-del...2-global-.html
02-27-2018, 03:10 PM
#72
Supreme Member
iTrader: (11)
Join Date: Sep 1999
Location: NJ
Posts: 4,345
Received 298 Likes
on
234 Posts
Car: 92 Firebird
Engine: 4.8 LR4
Transmission: T56
Axle/Gears: 3.45 9 Bolt
Re: 1987 Camaro "Pro-Touring" Budget Build
These are all the bushings they sell for the Camaro/Firebird
http://www.globalwest.net/camaro-198...uspension.html
02-27-2018, 03:16 PM
#73
Supreme Member
Re: 1987 Camaro "Pro-Touring" Budget Build
My point was I don't know what Delrin bushings he's describing. He didn't mention Global West. (I did as you pointed out).
We have blocks of Delrin here at the machine shop and fashion it into all manner of parts. Could be the OP has something else altogether different from the Del-A-Lum.
Anyway, I'm sure he gets the point.
We have blocks of Delrin here at the machine shop and fashion it into all manner of parts. Could be the OP has something else altogether different from the Del-A-Lum.
Anyway, I'm sure he gets the point.
02-27-2018, 07:52 PM
#74
Re: 1987 Camaro "Pro-Touring" Budget Build
Check out this thread.
https://www.thirdgen.org/forums/susp...ll-joints.html
For the short story, the extended ball joint from QA1 is PN 1210-209P. Some interesting reading in that thread.
https://www.thirdgen.org/forums/susp...ll-joints.html
For the short story, the extended ball joint from QA1 is PN 1210-209P. Some interesting reading in that thread.
And I did mean the Del-a-Lum bushings from Global West, sorry for the confusion!
02-27-2018, 07:58 PM
#75
Re: 1987 Camaro "Pro-Touring" Budget Build
I've run into a bit of a problem on my K-member. One of the dowel pins fell off when I was removing it from the car and I will need to bring it to a shop to tack it back in as I don't have a welder. The problem is I don't know the EXACT location where it needs to go back on. I'm sure if it's off by 1/4" or so it won't affect things too much, but if I'm going to be tracking this thing and getting an aggressive alignment I don't want a misaligned K-member to cause an issue.
Any diagrams out there showing how to properly position this thing? I will start searching...
Any diagrams out there showing how to properly position this thing? I will start searching...
 02-28-2018, 07:08 AM
#77
Supreme Member
iTrader: (11)
Join Date: Sep 1999
Location: NJ
Posts: 4,345
Received 298 Likes
on
234 Posts
Car: 92 Firebird
Engine: 4.8 LR4
Transmission: T56
Axle/Gears: 3.45 9 Bolt
Re: 1987 Camaro "Pro-Touring" Budget Build
I've run into a bit of a problem on my K-member. One of the dowel pins fell off when I was removing it from the car and I will need to bring it to a shop to tack it back in as I don't have a welder. The problem is I don't know the EXACT location where it needs to go back on. I'm sure if it's off by 1/4" or so it won't affect things too much, but if I'm going to be tracking this thing and getting an aggressive alignment I don't want a misaligned K-member to cause an issue.
Any diagrams out there showing how to properly position this thing? I will start searching...
Any diagrams out there showing how to properly position this thing? I will start searching...
02-28-2018, 08:29 AM
#78
Supreme Member
03-01-2018, 08:57 PM
#79
COTM Editor
iTrader: (22)
Join Date: Mar 2001
Posts: 9,904
Likes: 0
Received 1,855 Likes
on
1,270 Posts
Car: '89 Firebird
Engine: 7.0L
Transmission: T56
Re: 1987 Camaro "Pro-Touring" Budget Build
Mine is stored on the top shelf near the ceiling of my garage. This is as good a picture as I could get.

03-02-2018, 11:59 AM
#81
COTM Editor
iTrader: (22)
Join Date: Mar 2001
Posts: 9,904
Likes: 0
Received 1,855 Likes
on
1,270 Posts
Car: '89 Firebird
Engine: 7.0L
Transmission: T56
Re: 1987 Camaro "Pro-Touring" Budget Build
Sure. The annoying thing is all the Google pictures in my build thread come out teeny tiny on screen and I share this picture the same way and it comes out large. Wish I knew how that happened. 
03-06-2018, 07:36 PM
#82
Re: 1987 Camaro "Pro-Touring" Budget Build
Not a very exciting update this time but I'm in the cleaning and prepping phase right now so posting updates keeps me motivated! We just a had a big storm up here in Mass over the weekend with lots of trees coming down and power being out for multiple days as well, but not excuses! The show must go on!
I've started to prep the engine bay for paint by first wiping it down with a solvent and then scuffing it up with a maroon Scotch Brite pad.
No turning back now!
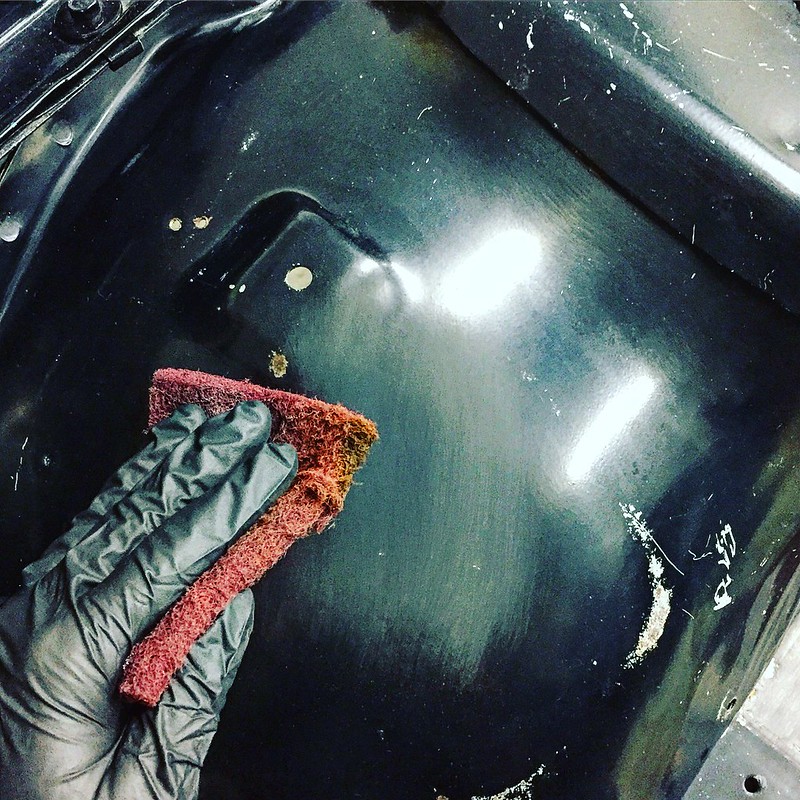
All scuffed up:

It's still a little too cold to get started with painting the engine bay, and my supplies haven't come in yet so that's about as far as I can go with that for now.
I moved on to cleaning up some other parts and getting them prepped for paint. I don't have my hose hooked up right now (still too cold) so I've going at it with just some degreaser, a wire wheel, some scuff pads and a ton of elbow grease!
Scraping the layer of oil and crud off the inside of the bellhousing. Think my rear main seal is leaking??
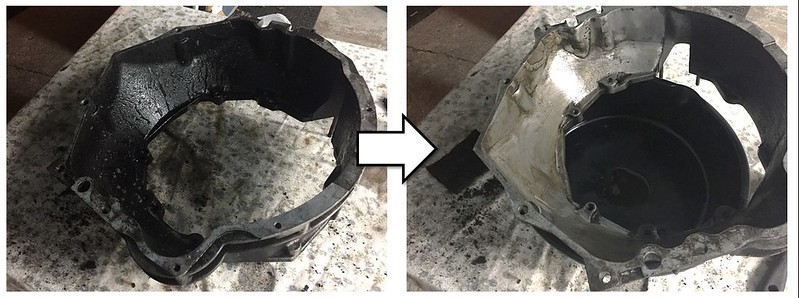
Getting the control arms cleaned up:
Hoping to get some of this parts painted this week so I can start reassembling them! Thanks for following along.
I've started to prep the engine bay for paint by first wiping it down with a solvent and then scuffing it up with a maroon Scotch Brite pad.
No turning back now!
All scuffed up:
It's still a little too cold to get started with painting the engine bay, and my supplies haven't come in yet so that's about as far as I can go with that for now.
I moved on to cleaning up some other parts and getting them prepped for paint. I don't have my hose hooked up right now (still too cold) so I've going at it with just some degreaser, a wire wheel, some scuff pads and a ton of elbow grease!
Scraping the layer of oil and crud off the inside of the bellhousing. Think my rear main seal is leaking??
Getting the control arms cleaned up:
Hoping to get some of this parts painted this week so I can start reassembling them! Thanks for following along.
03-07-2018, 12:56 PM
#83
Supreme Member
iTrader: (2)
Join Date: Feb 2005
Location: West Warwick RI, postal code: 02893
Posts: 4,337
Received 55 Likes
on
41 Posts
Car: Building LS3, T56 Z28
Engine: LS3
Transmission: T-56
Axle/Gears: Moser/ 4.11
Re: 1987 Camaro "Pro-Touring" Budget Build
Don't forget to paint the inside of the frame rails. I had rust in mine and used Eastwood internal frame coating. Piece of mind knowing it won't rust from the inside out.
03-11-2018, 08:20 PM
#85
Re: 1987 Camaro "Pro-Touring" Budget Build
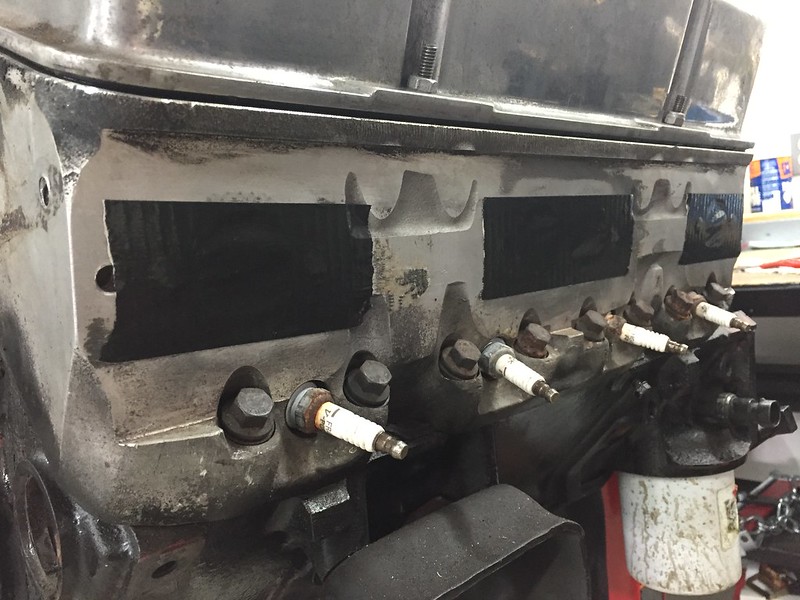
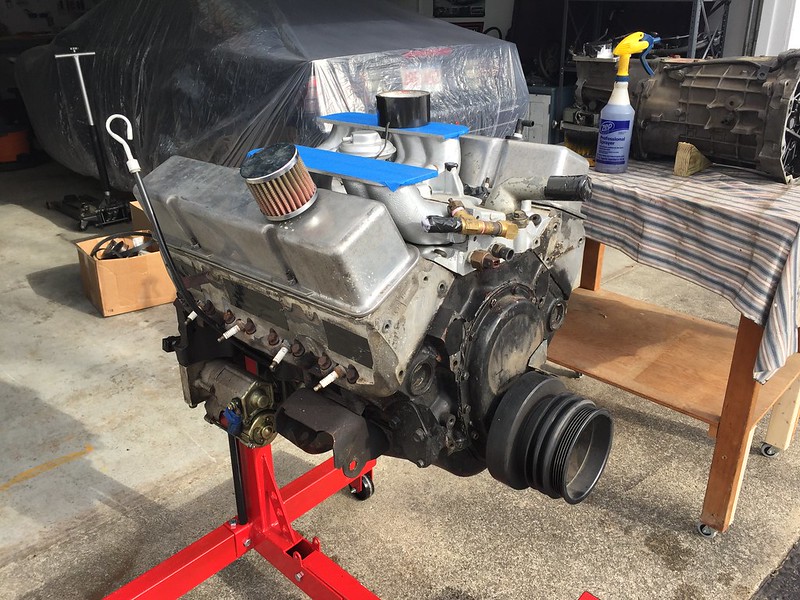
Busted out the power washer again this weekend, but this time on the engine, transmission and some other components that needed a degreasing. I was really nervous about getting any water in the engine, so I took some time to really seal it up with some rags and tape. I also left all of the spark plugs and old sensors in there to act as plugs for those threads... I'll be putting in new ones anyway before the engine goes back in.
Plugging up the exhaust ports:

All sealed up:
I hit the parts with degreaser and let them sit for a bit before blasting them with the power washer:
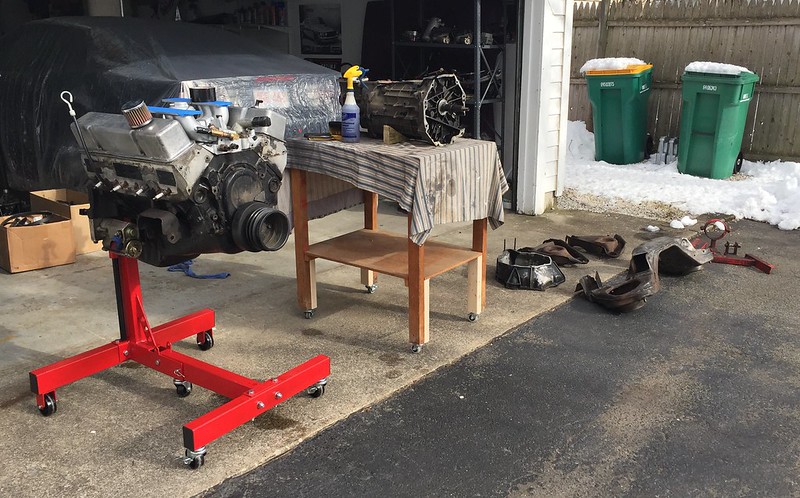
And the aftermath:
I was so happy to get this done this weekend, since we're supposed to get some cold temps for the next week or so. The big layers of grease and oil are off, so I can just work on the smaller intricate areas in my garage.
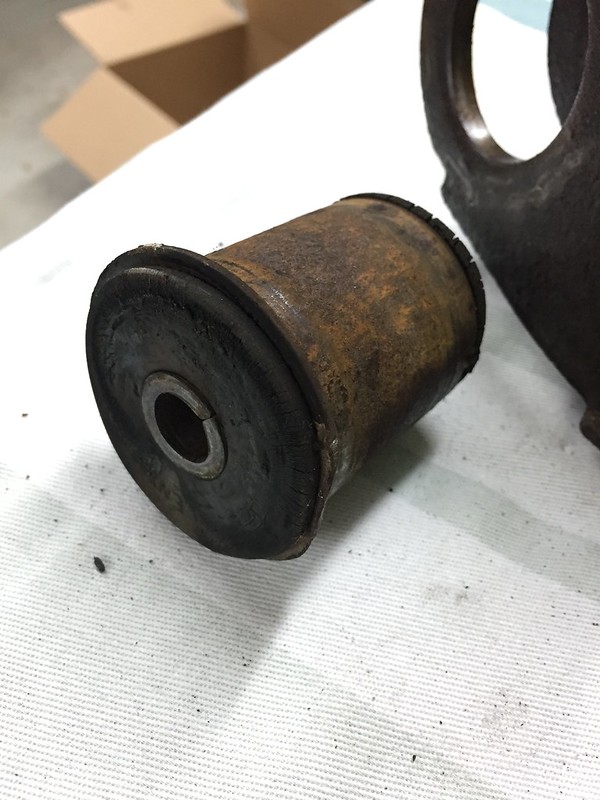
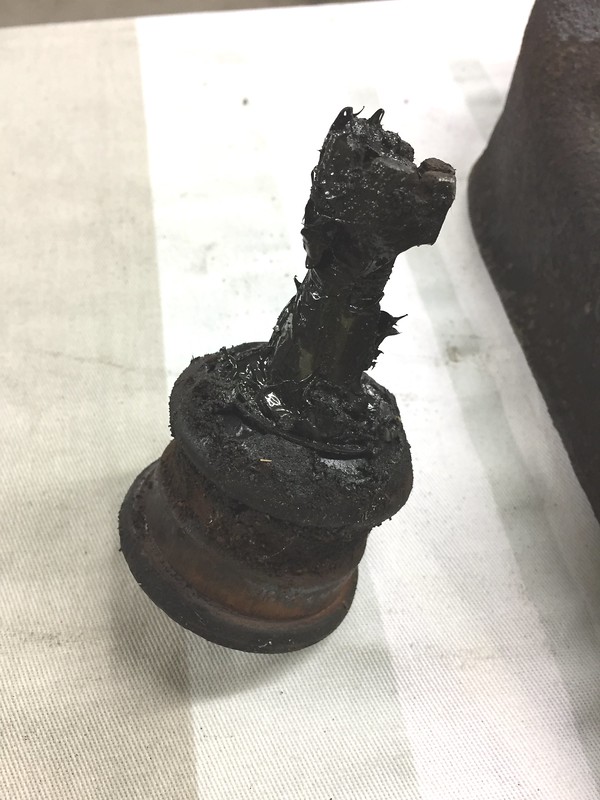
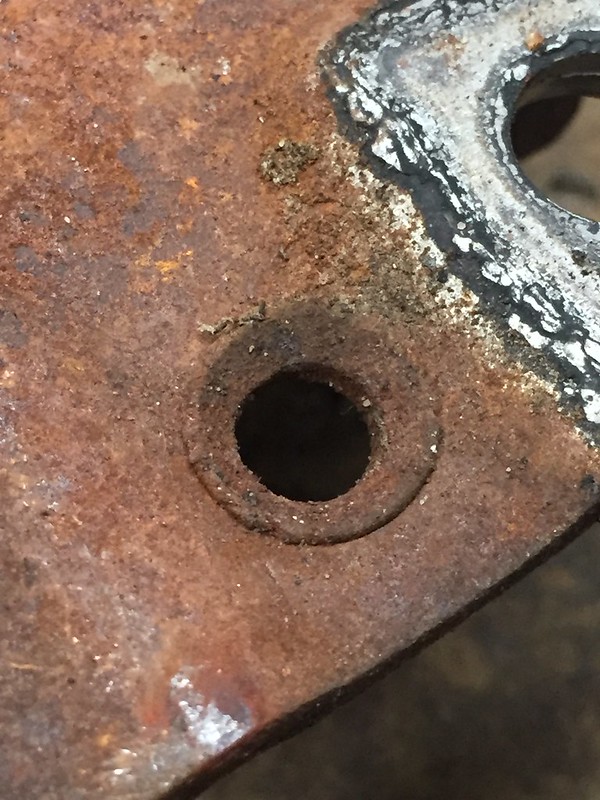
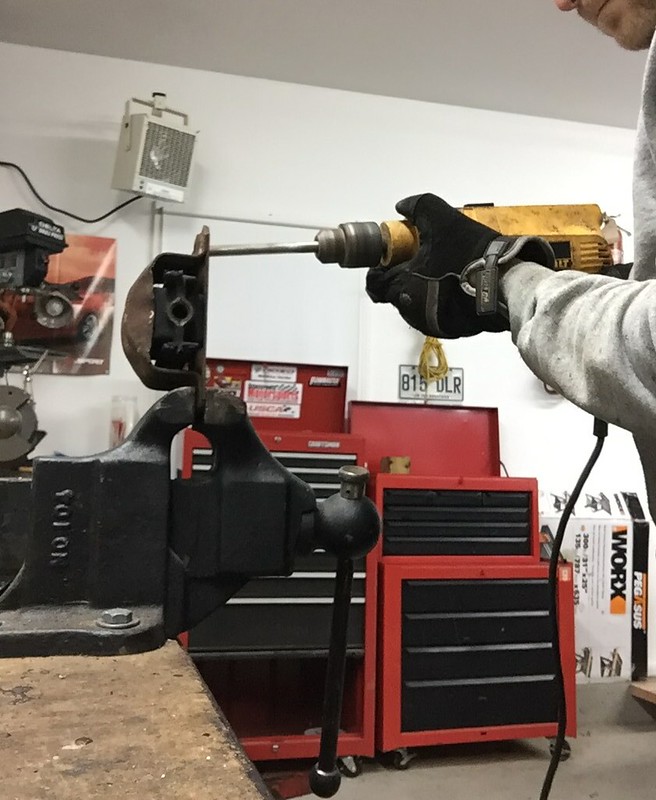
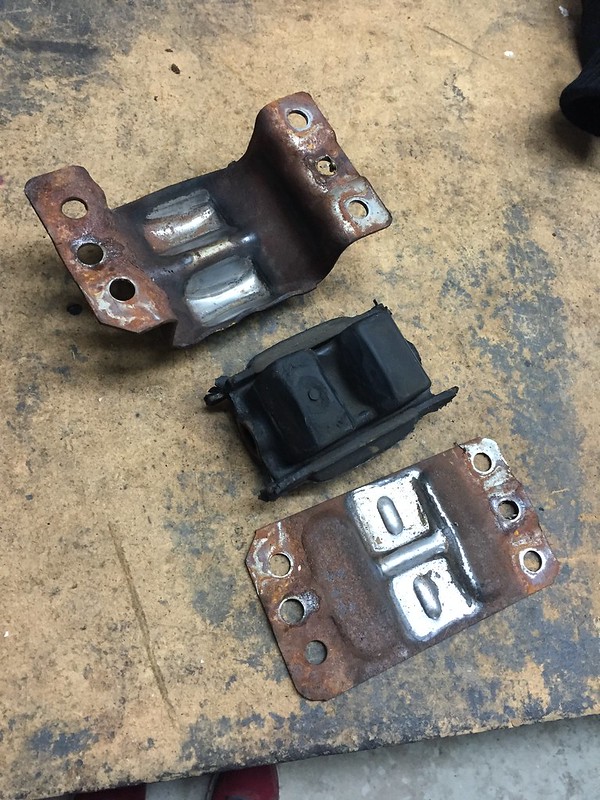
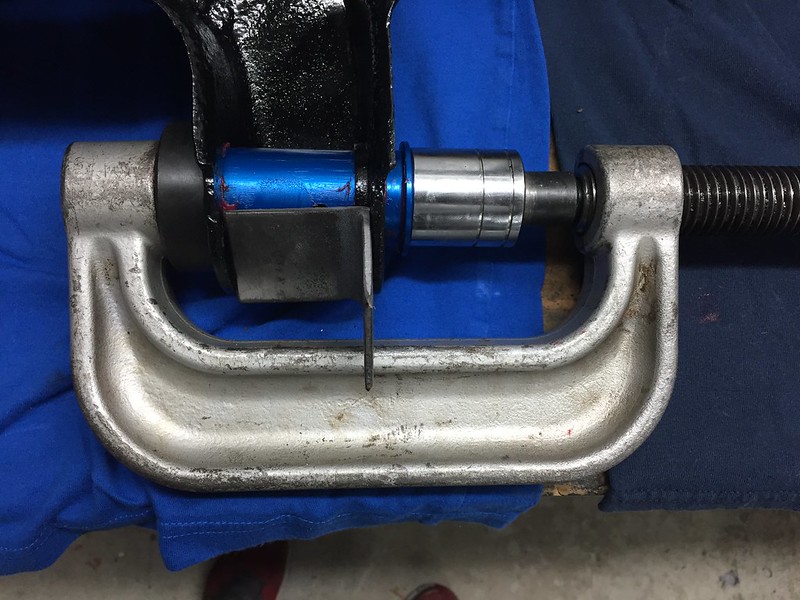
I also tackled a small job of taking apart the engine mounts. I'm going to be replacing the stock rubber pieces with polyurethane so I need to split them open. For those that haven't done this (I'm sure most of you have, but it was a first for me) you have to drill out the rivets that hold the 2 halves of the mounts together:

The rivets that need to be drilled out:
I know my drill looks crooked here!
Plugging up the exhaust ports:
All sealed up:
I hit the parts with degreaser and let them sit for a bit before blasting them with the power washer:
And the aftermath:
I was so happy to get this done this weekend, since we're supposed to get some cold temps for the next week or so. The big layers of grease and oil are off, so I can just work on the smaller intricate areas in my garage.
I also tackled a small job of taking apart the engine mounts. I'm going to be replacing the stock rubber pieces with polyurethane so I need to split them open. For those that haven't done this (I'm sure most of you have, but it was a first for me) you have to drill out the rivets that hold the 2 halves of the mounts together:
The rivets that need to be drilled out:
I know my drill looks crooked here!
03-11-2018, 08:20 PM
#86
Re: 1987 Camaro "Pro-Touring" Budget Build
And last but not least, I FINALLY got to throw some paint on some parts! Sunday we had a break in the weather and the temp got up to about 50deg so I took advantage and got some paint on my K-member, lower controls arms and a couple other odds and ends that needed a coat. Felt great to get some color on there after scraping rust and grease off for the last couple of weeks. I had a can of Eastwood Rust Encapsulator lying around so I used that as my base coat on the bare metal. I'm still debating on whether to go with satin or gloss for the top coat.
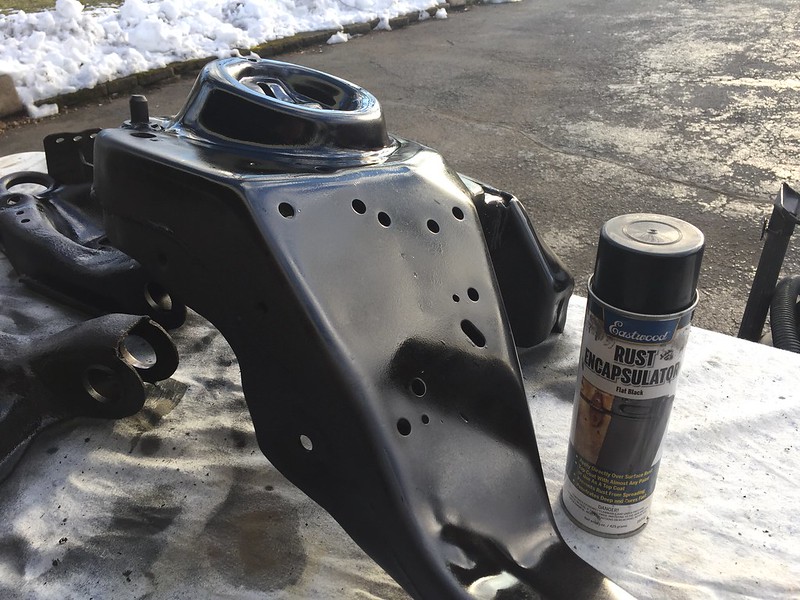
Very pumped to have these pieces cleaned and sealed up! Can't wait to get going with reassembly.
Very pumped to have these pieces cleaned and sealed up! Can't wait to get going with reassembly.
03-12-2018, 07:07 AM
#87
Supreme Member
iTrader: (2)
Join Date: Feb 2005
Location: West Warwick RI, postal code: 02893
Posts: 4,337
Received 55 Likes
on
41 Posts
Car: Building LS3, T56 Z28
Engine: LS3
Transmission: T-56
Axle/Gears: Moser/ 4.11
Re: 1987 Camaro "Pro-Touring" Budget Build
Great progress!
I have a set a powder coated motor mount clamshells and poly mounts if you are interested. I wont be using them on my build. PM/text me if you are interested.
I have a set a powder coated motor mount clamshells and poly mounts if you are interested. I wont be using them on my build. PM/text me if you are interested.
03-18-2018, 08:41 PM
#89
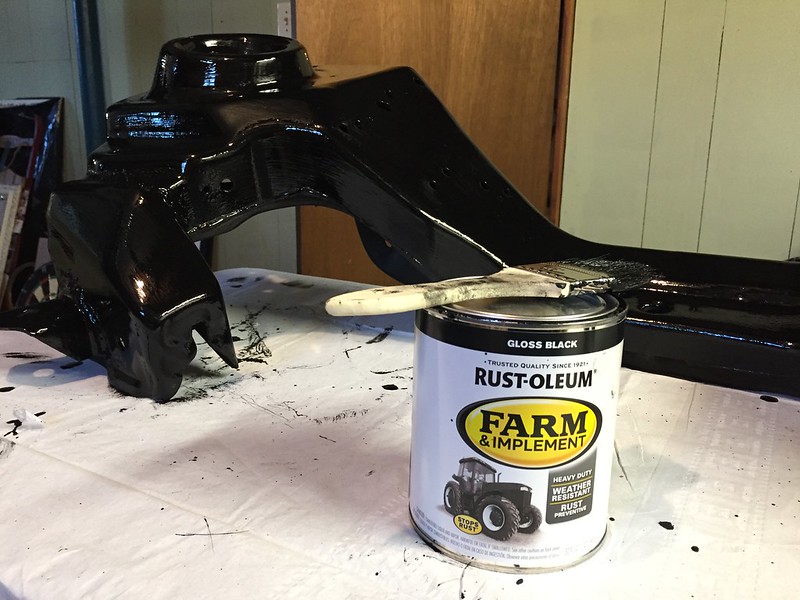
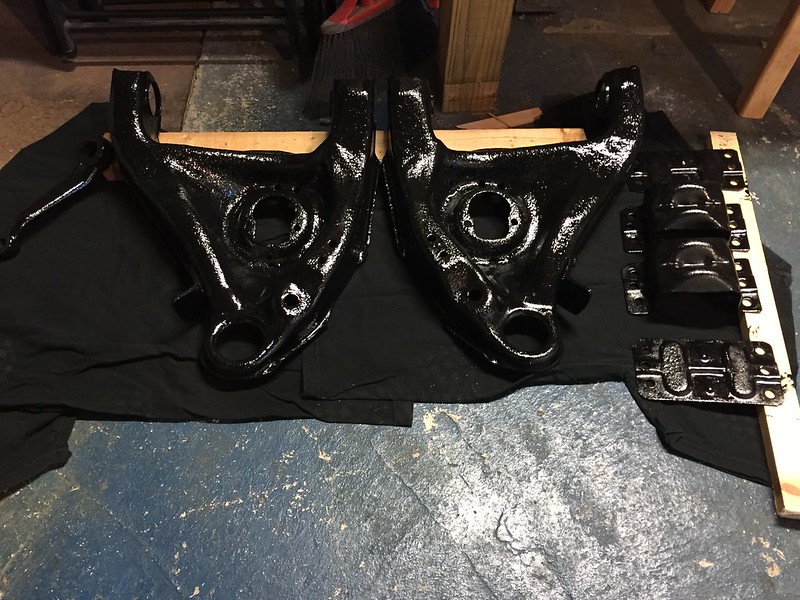
Re: 1987 Camaro "Pro-Touring" Budget Build
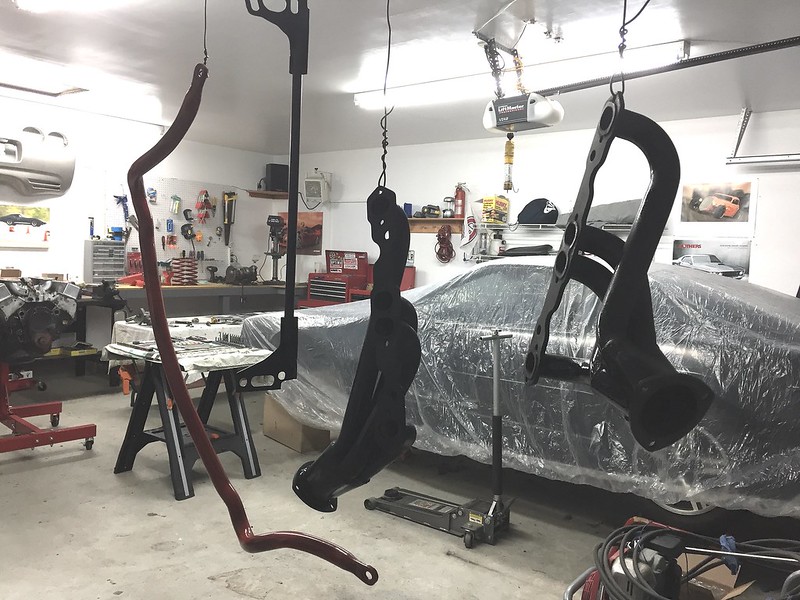
More progress! I have the final coat of paint on my K-member, the control arms and a few other pieces. I had to move everything into my basement as it's still pretty cold up here in the northeast. I'm using a Farm and Implement paint I got at Tractor Supply... it was super cheap and is apparently tough as nails. I'm not sure if I'm sold on the gloss finish though... I may switch over to a satin for the detail pieces in the engine bay.
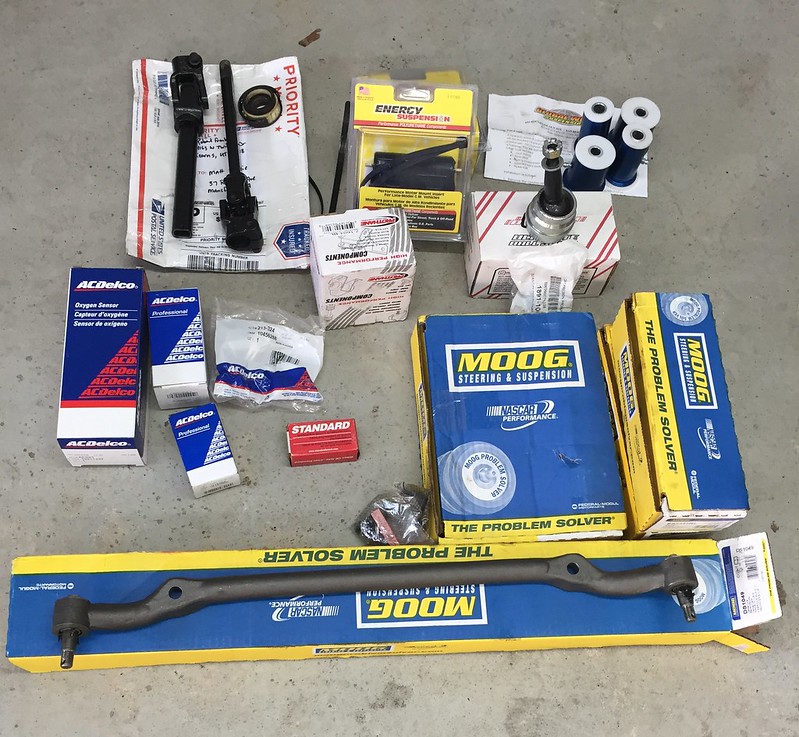
I've also been ordering a bunch or parts that have started to come in. Even though I'm on a budget, I've been trying to order quality parts for important things like steering/suspension components and for pieces that are hard to get to once the engine and trans are back in the car:
Next I started going through a few of my subsystems to see what I need to order next...
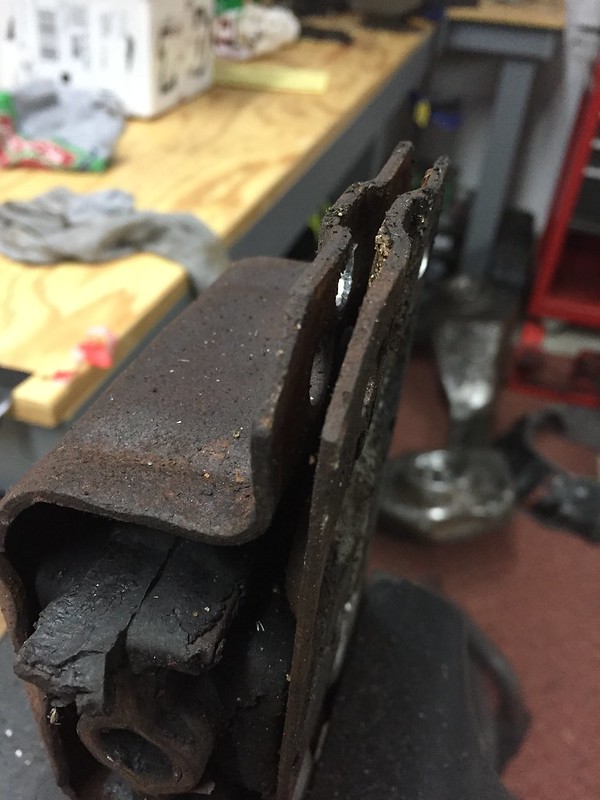
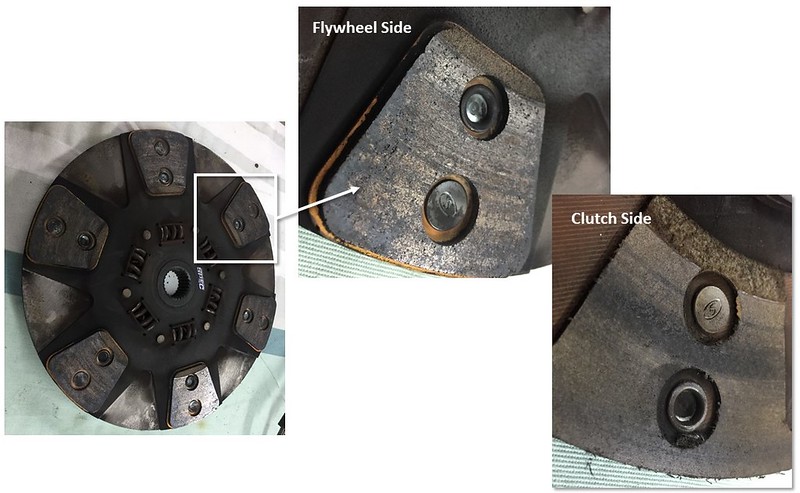
I was hoping someone on here could help me assess the health of my clutch. I tried to take some detailed pictures below. I have been contemplating switching over to an AL flywheel and perhaps swapping out my slave cylinder for something with a stiffer feel. I am going to call SPEC this week to see what I'm working with here but if anyone has any comments that'd be awesome:
Clutch Disk:
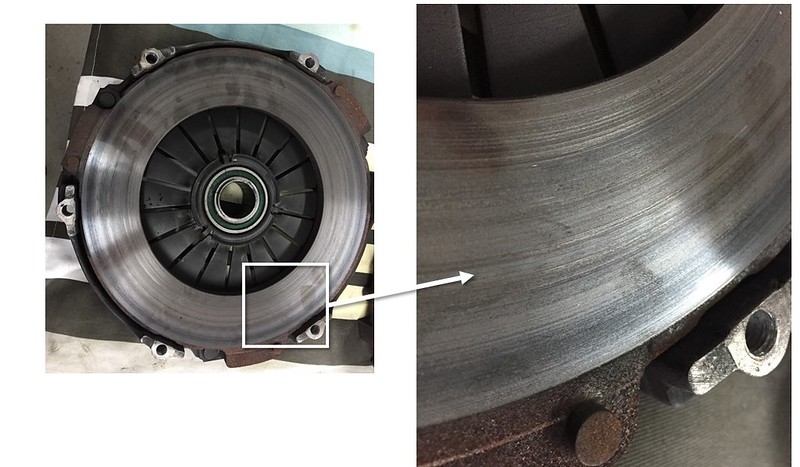
Pressure Plate:
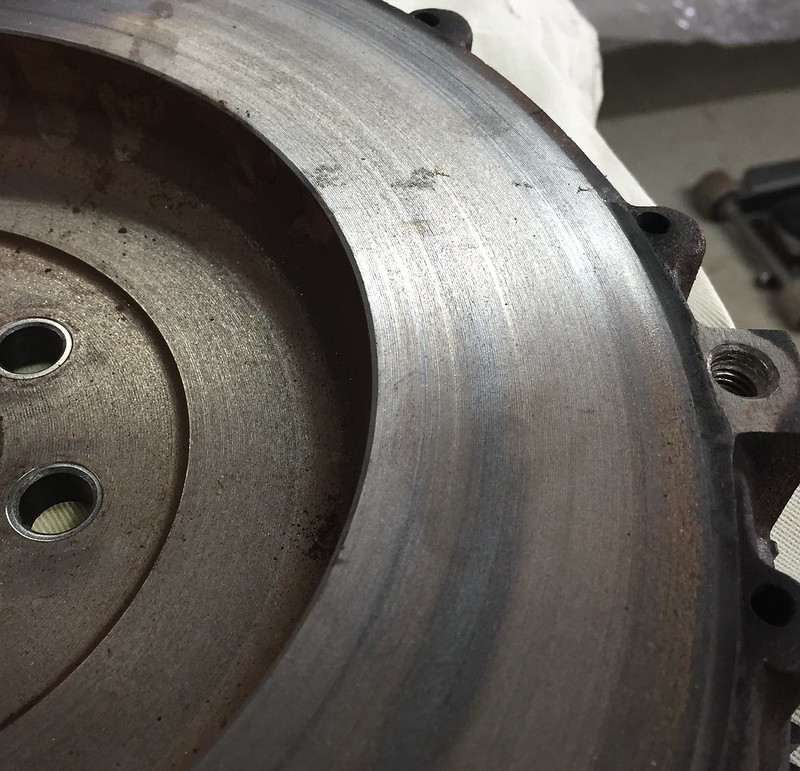
Flywheel Surface:
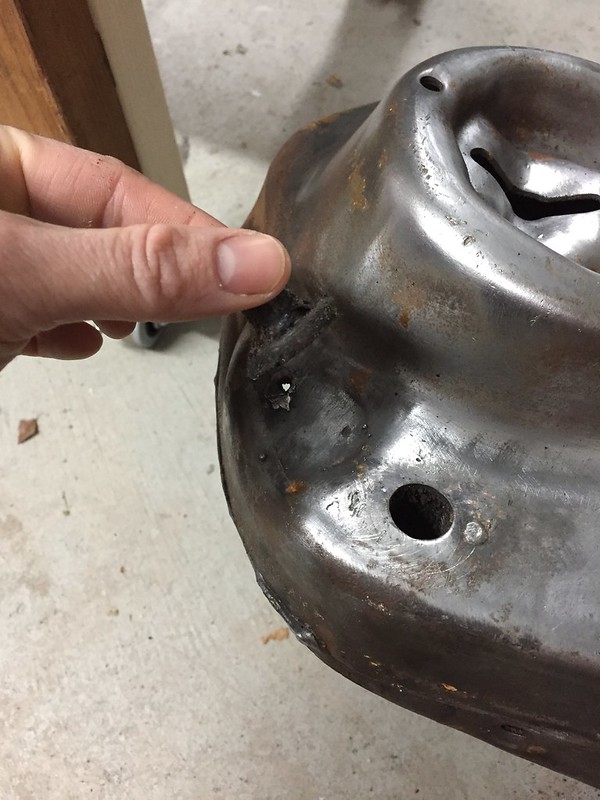
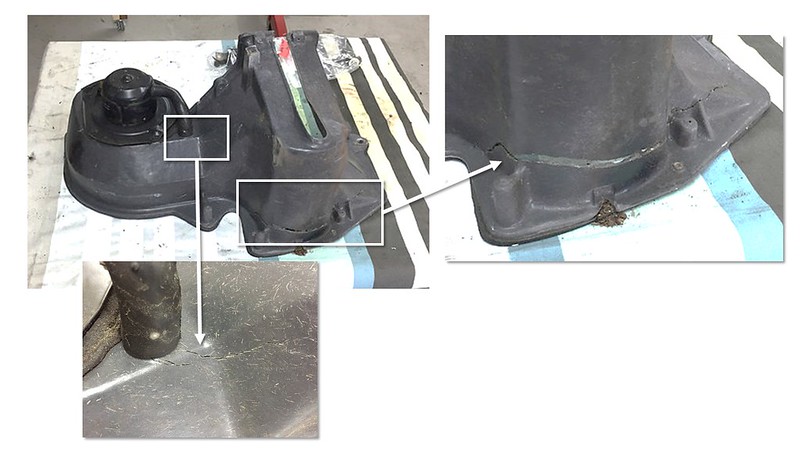
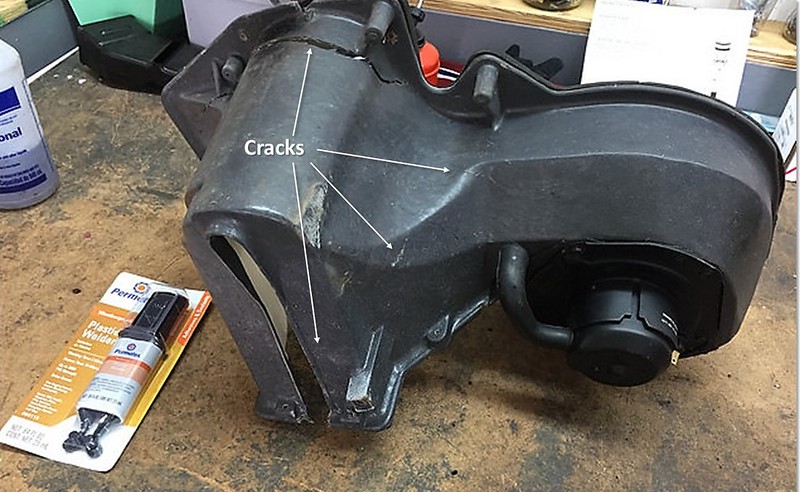
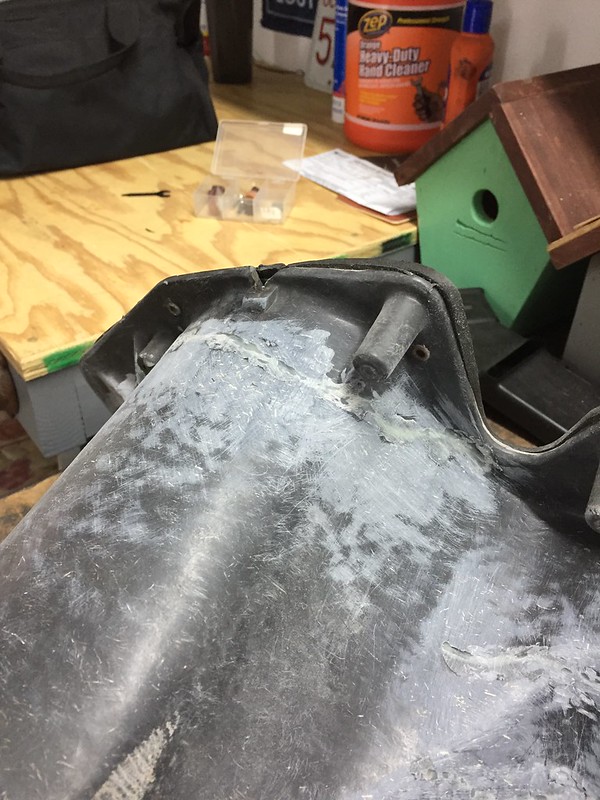
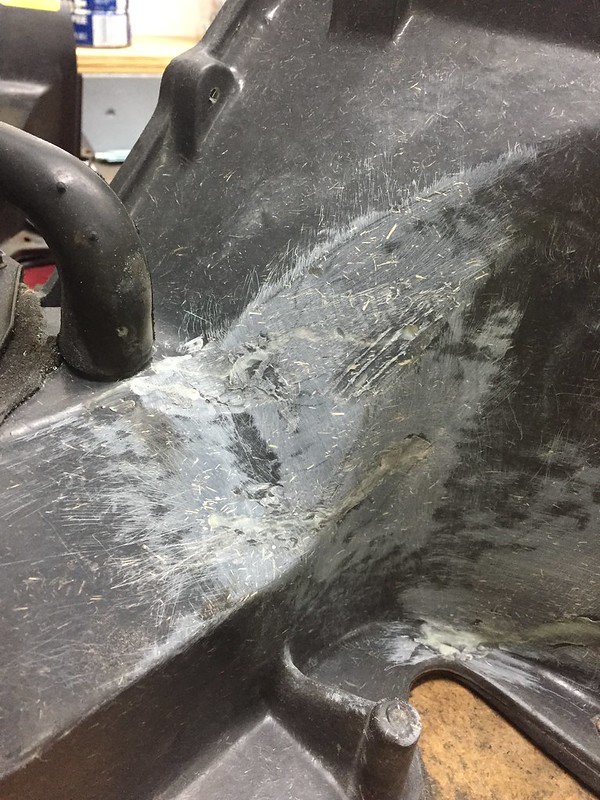
I also need to think about if I should repair my AC box or try to look for a replacement. I'm thinking I could maybe patch up these cracks with some epoxy and then paint it. Has anyone done something like this?
Here is a pic of the cracks:
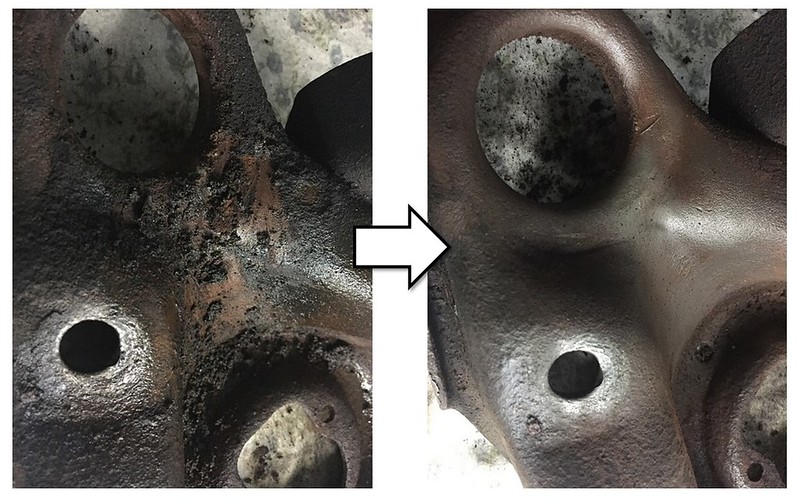
The last thing I'm struggling with is how to clean up my AL heads. They're covered in a bunch of grime and a bit of paint overspray. I'd like to be able clean them up and leave them bare but I've tried a bunch of things and nothing seems to get them clean enough. Any thoughts?
Thanks for keeping up with my progress! Trying to bust my way through this boring stuff so I can start putting the car back together!
I've also been ordering a bunch or parts that have started to come in. Even though I'm on a budget, I've been trying to order quality parts for important things like steering/suspension components and for pieces that are hard to get to once the engine and trans are back in the car:
Next I started going through a few of my subsystems to see what I need to order next...
I was hoping someone on here could help me assess the health of my clutch. I tried to take some detailed pictures below. I have been contemplating switching over to an AL flywheel and perhaps swapping out my slave cylinder for something with a stiffer feel. I am going to call SPEC this week to see what I'm working with here but if anyone has any comments that'd be awesome:
Clutch Disk:
Pressure Plate:
Flywheel Surface:
I also need to think about if I should repair my AC box or try to look for a replacement. I'm thinking I could maybe patch up these cracks with some epoxy and then paint it. Has anyone done something like this?
Here is a pic of the cracks:
The last thing I'm struggling with is how to clean up my AL heads. They're covered in a bunch of grime and a bit of paint overspray. I'd like to be able clean them up and leave them bare but I've tried a bunch of things and nothing seems to get them clean enough. Any thoughts?
Thanks for keeping up with my progress! Trying to bust my way through this boring stuff so I can start putting the car back together!
03-19-2018, 09:18 AM
#91
Supreme Member
iTrader: (11)
Join Date: Sep 1999
Location: NJ
Posts: 4,345
Received 298 Likes
on
234 Posts
Car: 92 Firebird
Engine: 4.8 LR4
Transmission: T56
Axle/Gears: 3.45 9 Bolt
Re: 1987 Camaro "Pro-Touring" Budget Build
I used JB Weld on mine, it had several cracks, I am assuming from a previous accident and repainted it with SEM Landau Black (Or may have been trim Black) and it looks great. I masked off the refrigerant charge label, looks better than new since they don't look like they were painted from the factory.
03-19-2018, 12:54 PM
#92
Re: 1987 Camaro "Pro-Touring" Budget Build
Drill holes in the ends of the cracks and grind a V groove into the crack. Then make a slurry solution of fiberglass resin and body filler. It should be the consistency of a milk shake. You can spoon it on and it will slip into all the little cracks and crevices. Let dry and sand it off. I do that with all my fiberglass projects or repairs.
03-19-2018, 08:54 PM
#93
Re: 1987 Camaro "Pro-Touring" Budget Build
I used JB Weld on mine, it had several cracks, I am assuming from a previous accident and repainted it with SEM Landau Black (Or may have been trim Black) and it looks great. I masked off the refrigerant charge label, looks better than new since they don't look like they were painted from the factory.
Drill holes in the ends of the cracks and grind a V groove into the crack. Then make a slurry solution of fiberglass resin and body filler. It should be the consistency of a milk shake. You can spoon it on and it will slip into all the little cracks and crevices. Let dry and sand it off. I do that with all my fiberglass projects or repairs.
03-22-2018, 08:59 PM
#94
Re: 1987 Camaro "Pro-Touring" Budget Build
Quick update for tonight:
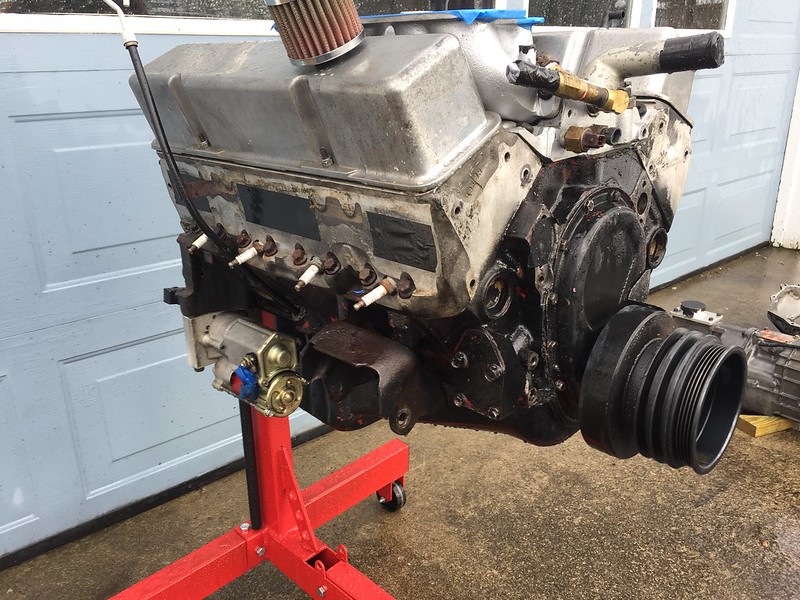
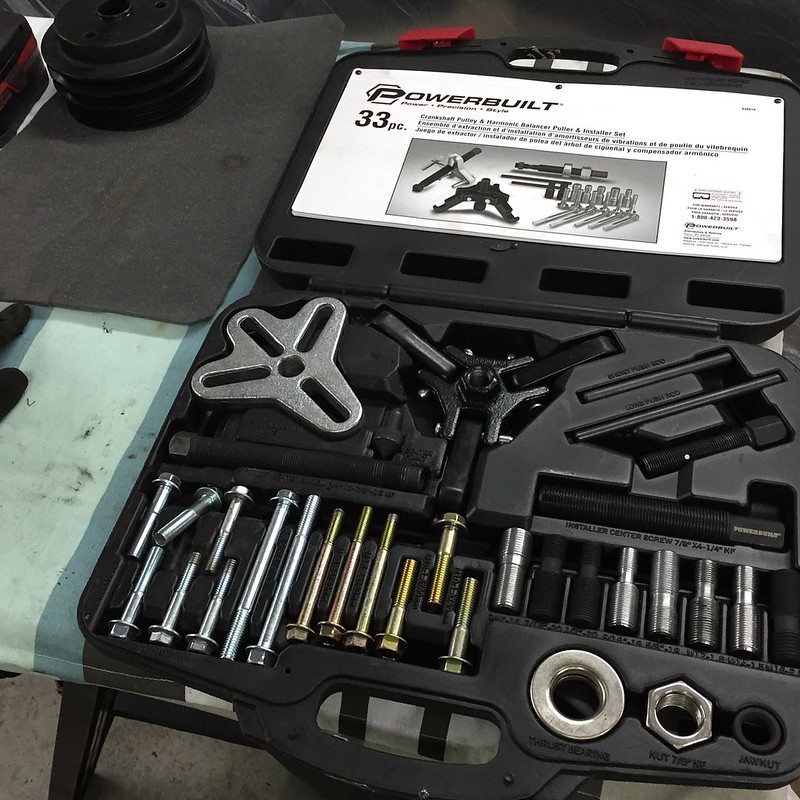
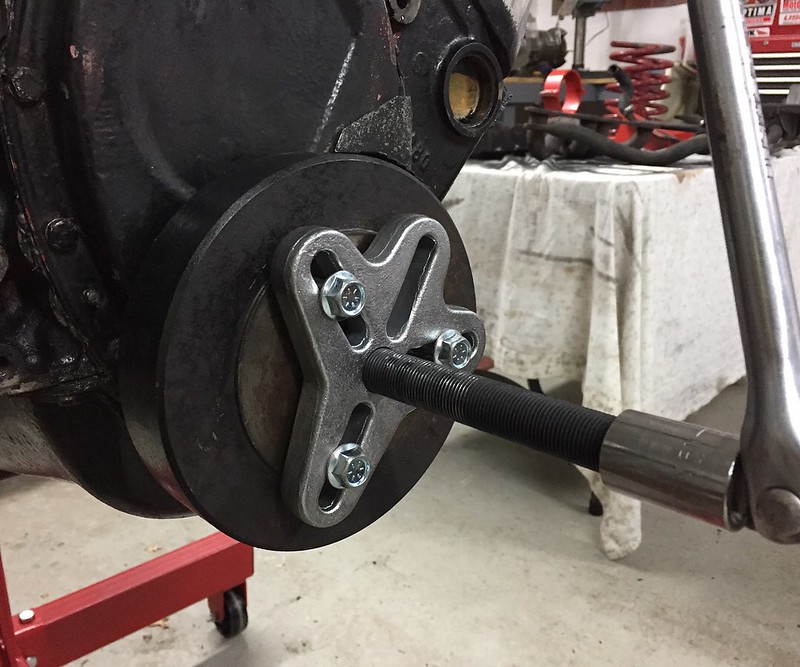
Starting to strip down my motor to get it ready for paint. Borrowed a harmonic balancer removal tool from my local Advance Auto and it worked like a charm! Also got the starter off and a few other pieces. Working on getting the intake off now... I don't know if any of you have ever worked with a Super Ram intake, but they have a ton of fasteners and some are a b*itch to get to!
Starting Point:
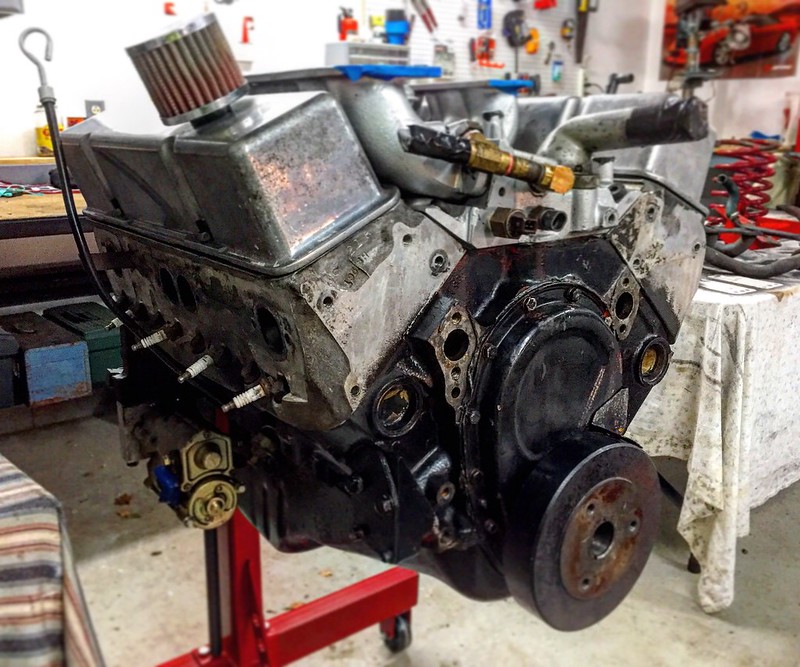
Where she sits today:
I also got started on installing my Del-A-Lum bushings I got from Global West in my freshly painted control arms. Again I rented a ball joint press from my local Advance and it was just wide enough to work. I don't own a hydraulic press but I'm looking to pick one up for future jobs like this. I can't wait to see how the car feels with these new bushings installed!
Some of the delrin sleeves needed a little de-burring before they were installed but nothing a quick pass with a drill bit couldn't fix:
The bushings were supplied with a piece of angle iron to use a spacer between the control arm faces so they didn't collapse when pressing in the outer sleeves. I had to trim it just a bit but it worked great.
I only got 2 out of the 4 installed tonight and will post final picture if I can get to the others this weekend. Getting there, little by little!
Starting to strip down my motor to get it ready for paint. Borrowed a harmonic balancer removal tool from my local Advance Auto and it worked like a charm! Also got the starter off and a few other pieces. Working on getting the intake off now... I don't know if any of you have ever worked with a Super Ram intake, but they have a ton of fasteners and some are a b*itch to get to!
Starting Point:
Where she sits today:
I also got started on installing my Del-A-Lum bushings I got from Global West in my freshly painted control arms. Again I rented a ball joint press from my local Advance and it was just wide enough to work. I don't own a hydraulic press but I'm looking to pick one up for future jobs like this. I can't wait to see how the car feels with these new bushings installed!
Some of the delrin sleeves needed a little de-burring before they were installed but nothing a quick pass with a drill bit couldn't fix:
The bushings were supplied with a piece of angle iron to use a spacer between the control arm faces so they didn't collapse when pressing in the outer sleeves. I had to trim it just a bit but it worked great.
I only got 2 out of the 4 installed tonight and will post final picture if I can get to the others this weekend. Getting there, little by little!
03-23-2018, 10:45 AM
#96
Re: 1987 Camaro "Pro-Touring" Budget Build
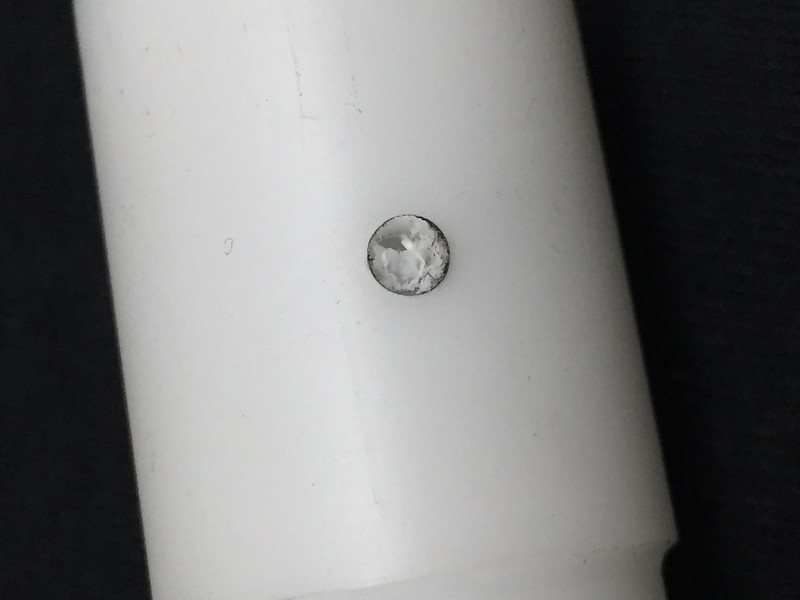
I am actually going through all of my sensors and determining what they are, replacing them, etc so this a good time to talk about this. I'm thinking this might be the coolant switch that turns on the fans?
03-25-2018, 07:44 PM
#97
Re: 1987 Camaro "Pro-Touring" Budget Build
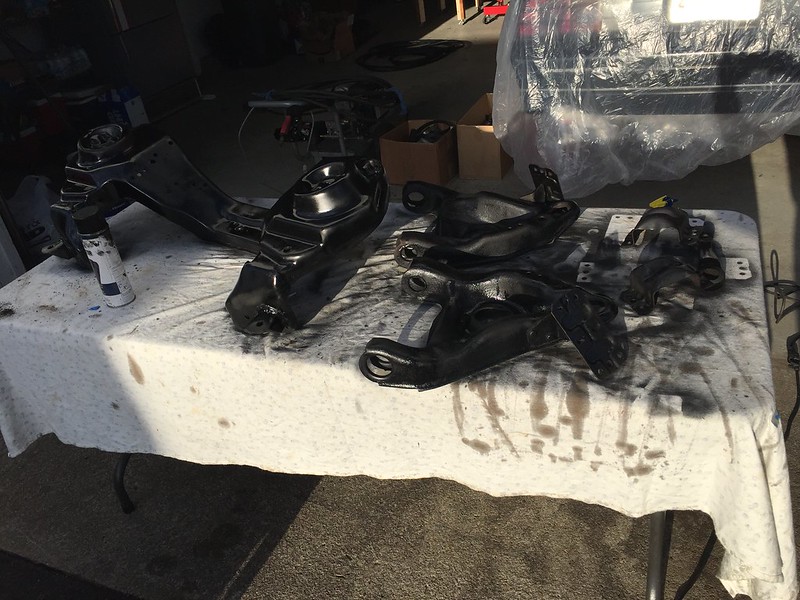
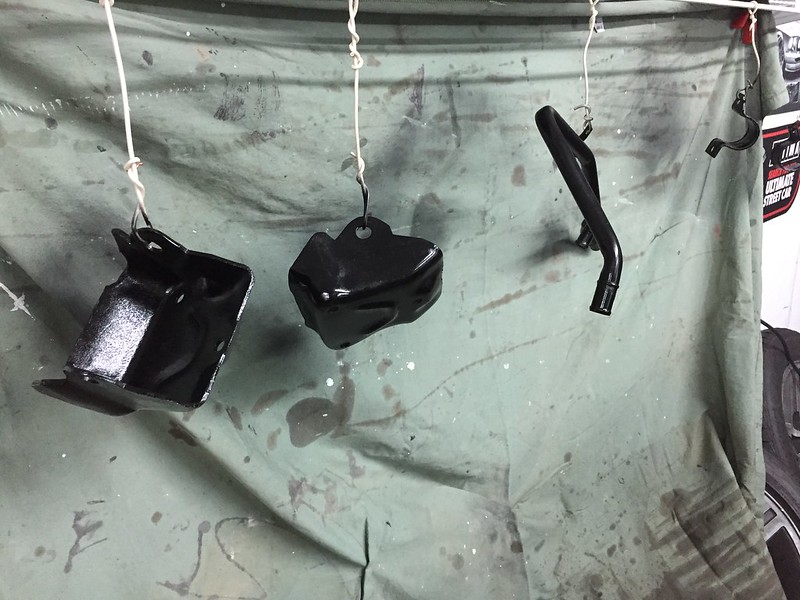
Spent a lot of time in the garage this weekend but unfortunately not a lot of the work was photo-worthy. I had a table full of parts that needed to be scraped, scuffed, cleaned and painted so I spent the majority of the time doing that.
Just a couple crappy pics of the freshly painted pieces:
Next I tackled my cracked AC box. I ended up using some Permatex Plastic Welder I found at my local Advance Auto. It was only about $6 for the tube and seems to be working OK so far. Since it's still cold here, I'm going to give it a while to set before I sand and paint it.
I did not get a picture of it, but I first drilled the ends of the cracks and then used my Dremel to create a little V-channel out of each crack to help it hold the plastic welder. Thanks for the tip Tibo, worked like charm!
Plastic welder applied:
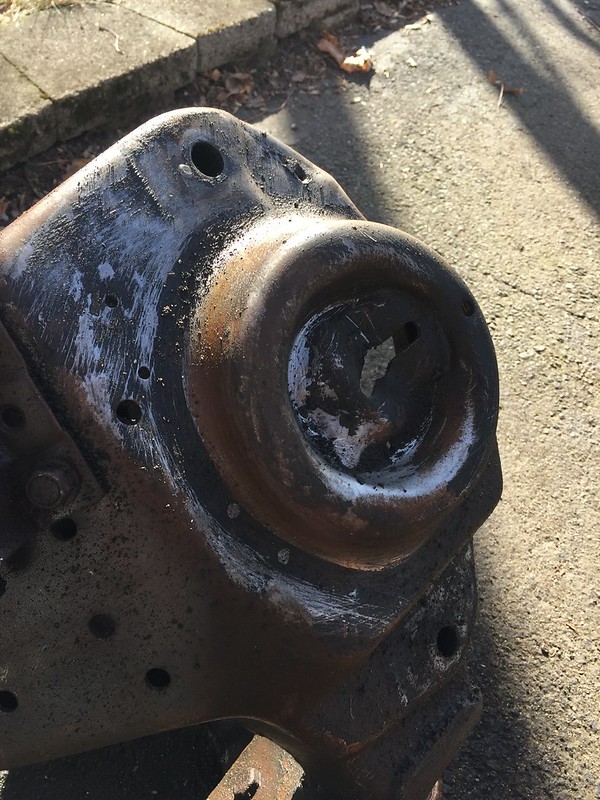
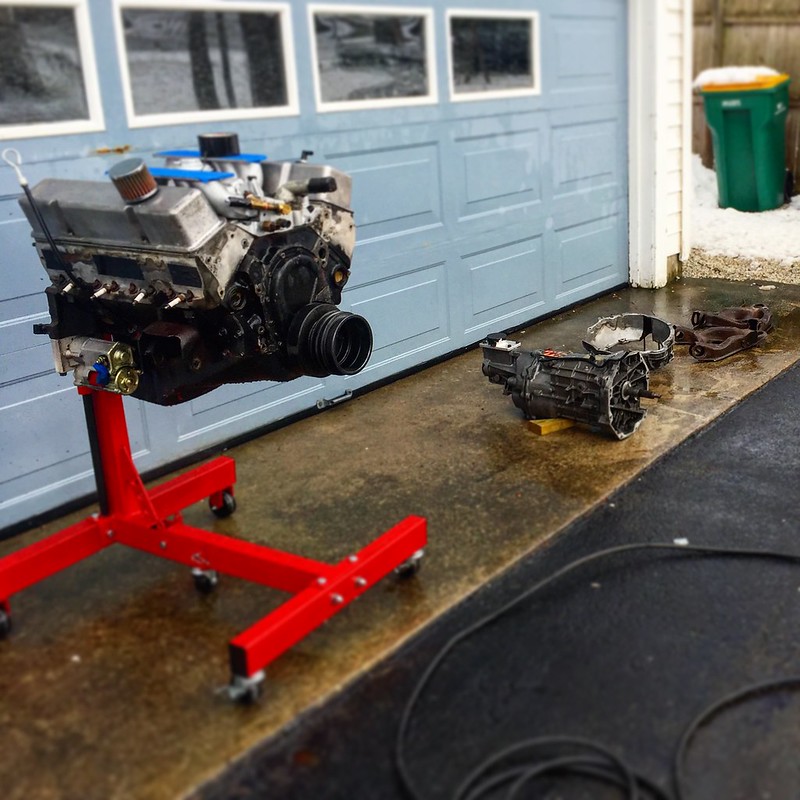
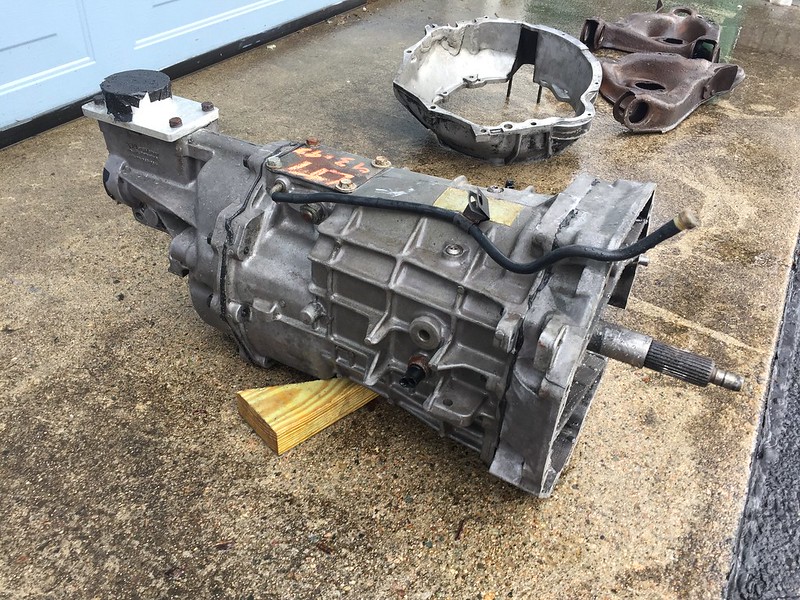
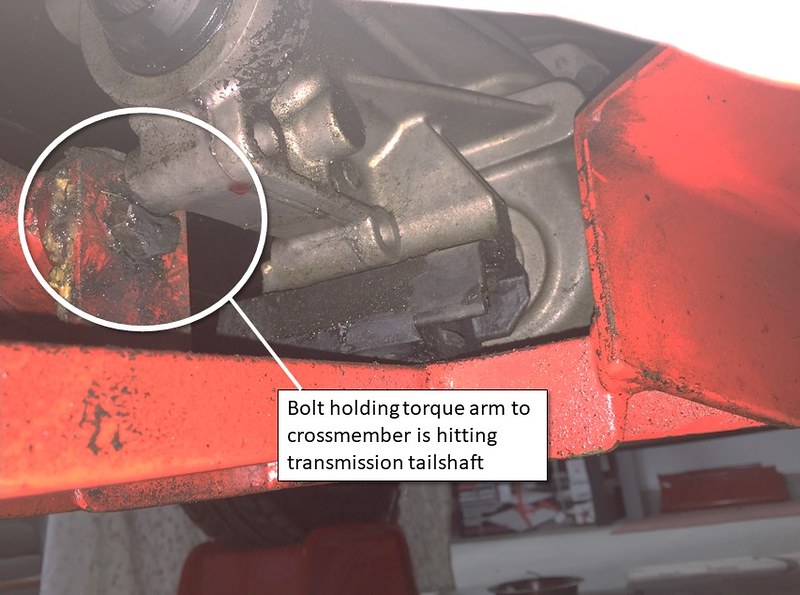
The next job was addressing the interference problem between my transmission tailshaft and the bolt that holds my torque arm to the crossmember. This is what it looked like before I took it all apart:
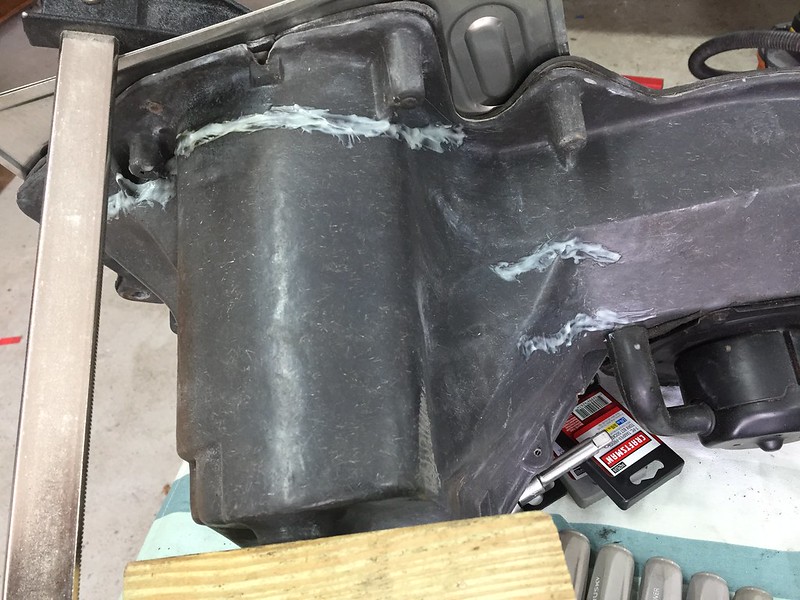
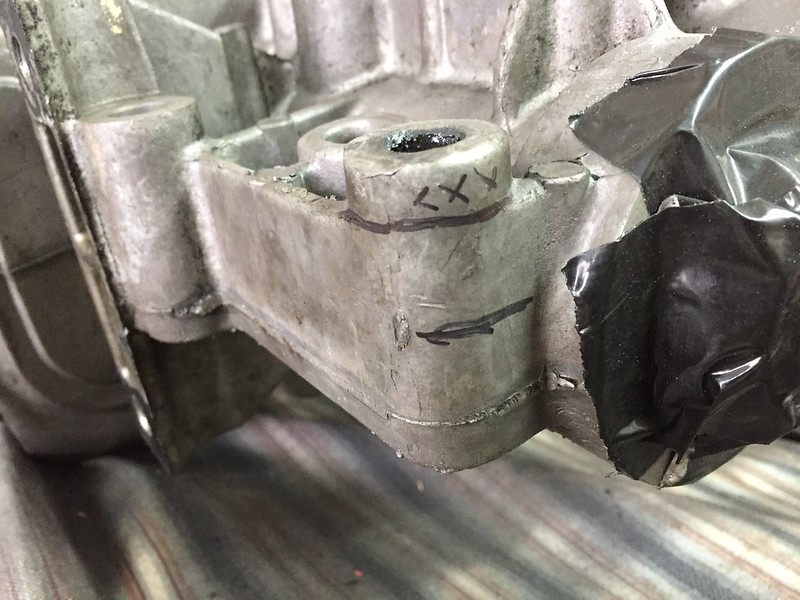
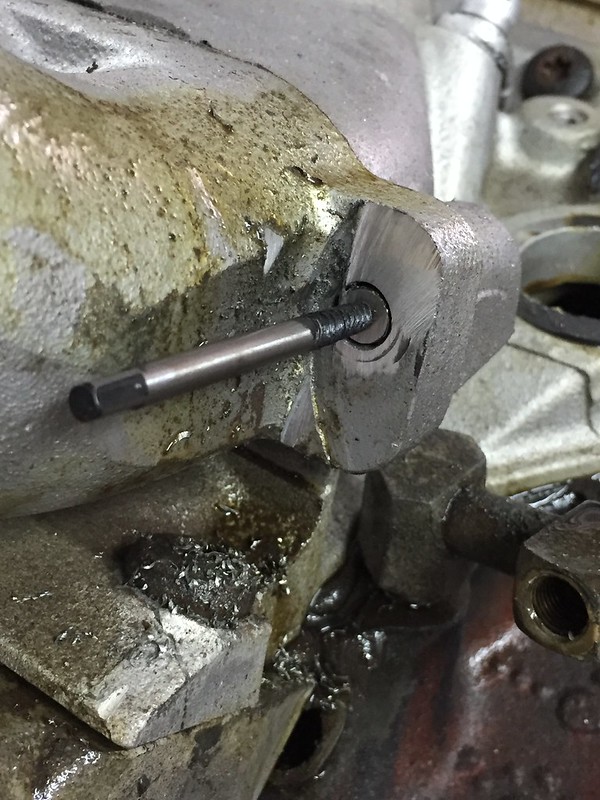
I trimmed a small piece from my tailshaft which I'm hoping will cure the issue. I took as little material as possible and then blended in any sharp edges to minimize the chances of creating a stress riser:
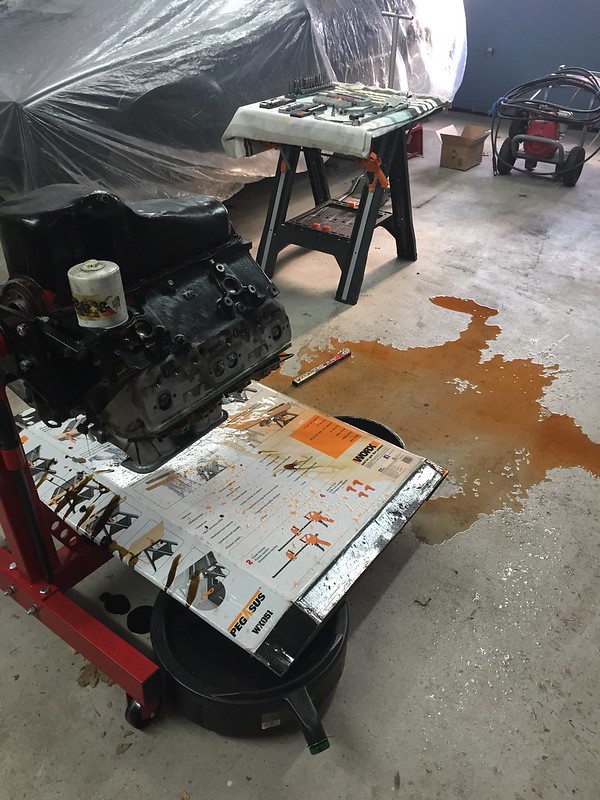
I ended my weekend by rotating my engine on its stand and spilling coolant and oil everywhere. Awesome! :bang::bang: There was way more in there than I expected! I thought it was a good time to call it quits for the day after that...
Just a couple crappy pics of the freshly painted pieces:
Next I tackled my cracked AC box. I ended up using some Permatex Plastic Welder I found at my local Advance Auto. It was only about $6 for the tube and seems to be working OK so far. Since it's still cold here, I'm going to give it a while to set before I sand and paint it.
I did not get a picture of it, but I first drilled the ends of the cracks and then used my Dremel to create a little V-channel out of each crack to help it hold the plastic welder. Thanks for the tip Tibo, worked like charm!
Plastic welder applied:
The next job was addressing the interference problem between my transmission tailshaft and the bolt that holds my torque arm to the crossmember. This is what it looked like before I took it all apart:
I trimmed a small piece from my tailshaft which I'm hoping will cure the issue. I took as little material as possible and then blended in any sharp edges to minimize the chances of creating a stress riser:
I ended my weekend by rotating my engine on its stand and spilling coolant and oil everywhere. Awesome! :bang::bang: There was way more in there than I expected! I thought it was a good time to call it quits for the day after that...
04-08-2018, 08:22 PM
#98
Re: 1987 Camaro "Pro-Touring" Budget Build
Been a little while since my last update so I have lots of material to share!
Repairs on my AC box are coming along nicely. I sanded the first coat of filler and applied a thin 2nd coat to fill in some pinholes and low spots. After one more round of sanding it should be ready for paint. It won't be perfect, but much better than it was.
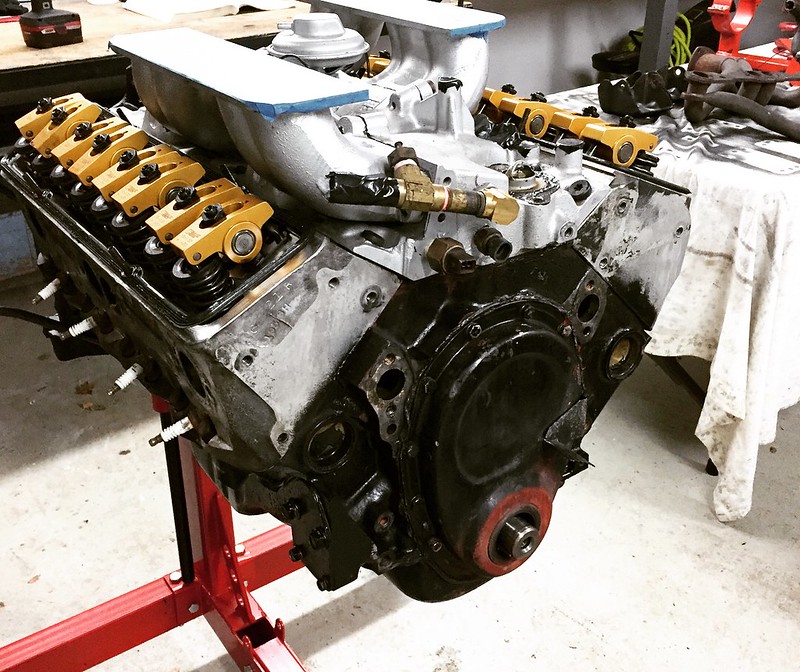
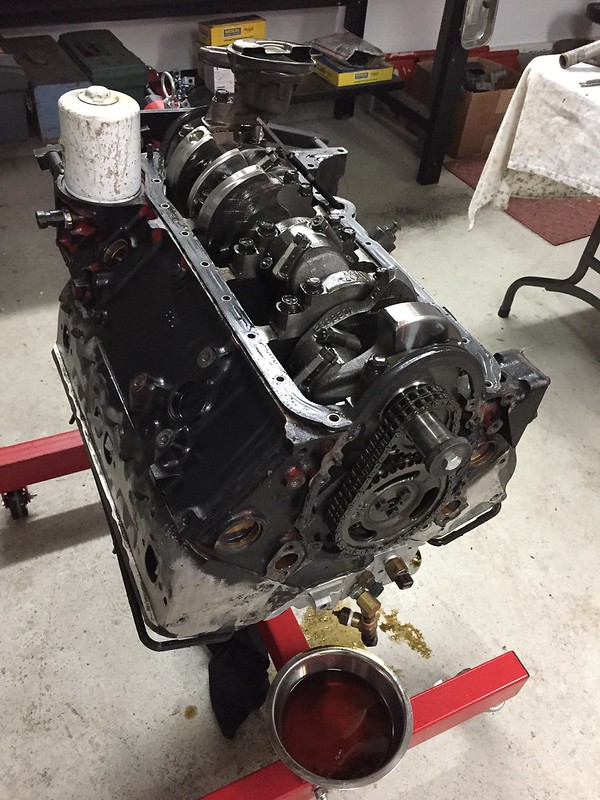
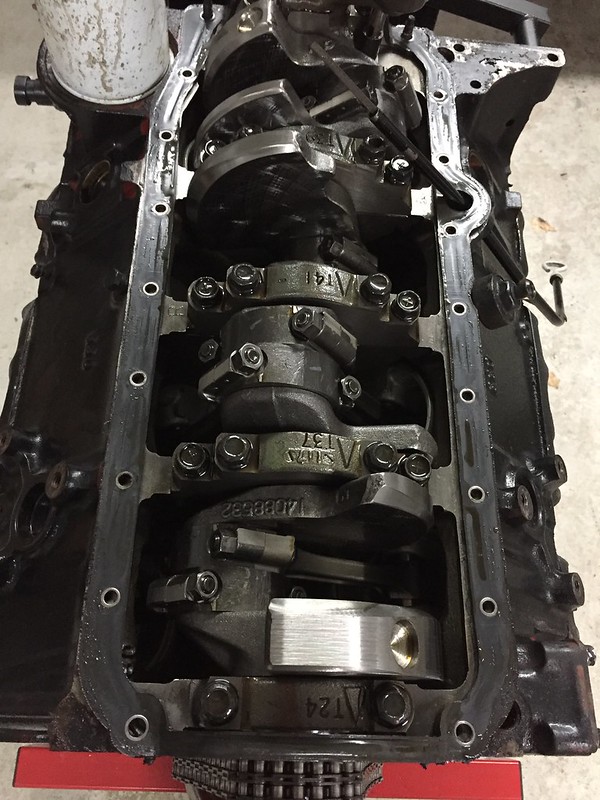
Next I got started on my engine teardown and resealing. I don't know much about this engine, other than the previous owner telling me it's a ZZ4 with AL heads. It looks pretty good from what I am finding so far:
The engine has 4-bolt main bearings (which checks out for a ZZ4) and a nice double roller timing chain:

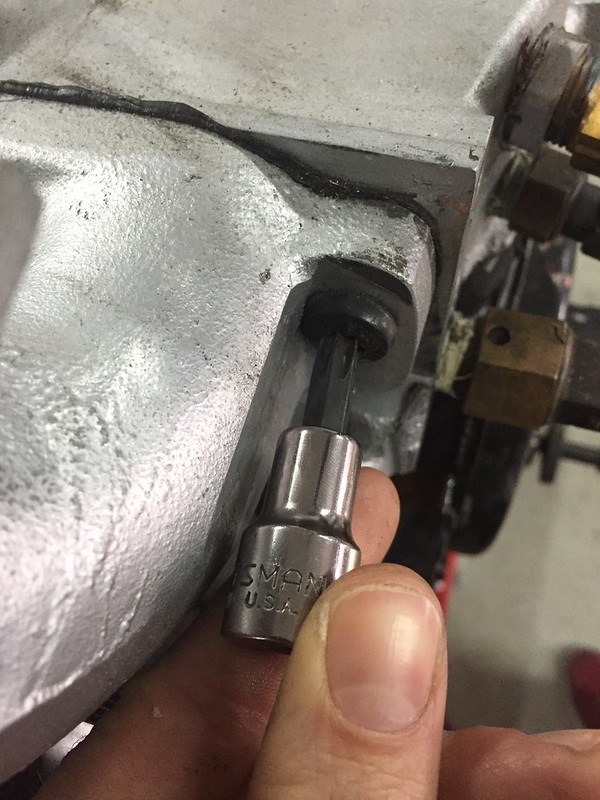
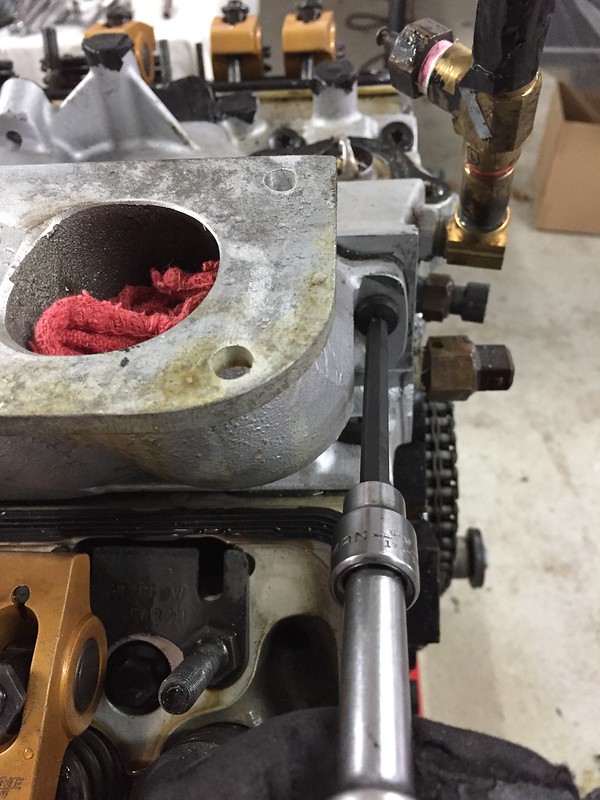
Taking the intake manifold off was a royal pain in the rear. If anyone here hasn't worked with a Super Ram intake, it's made up of 5 pieces that are all connected with Allan and Torx bolts. I stripped one of the Torx bolts trying to use a standard socket and had a bear of a time trying to get it out. Lesson learned, get the right tools the first time!
Standard-length sockets come in at a slight angle, not good for Torx!
The resulting stripped bolt:
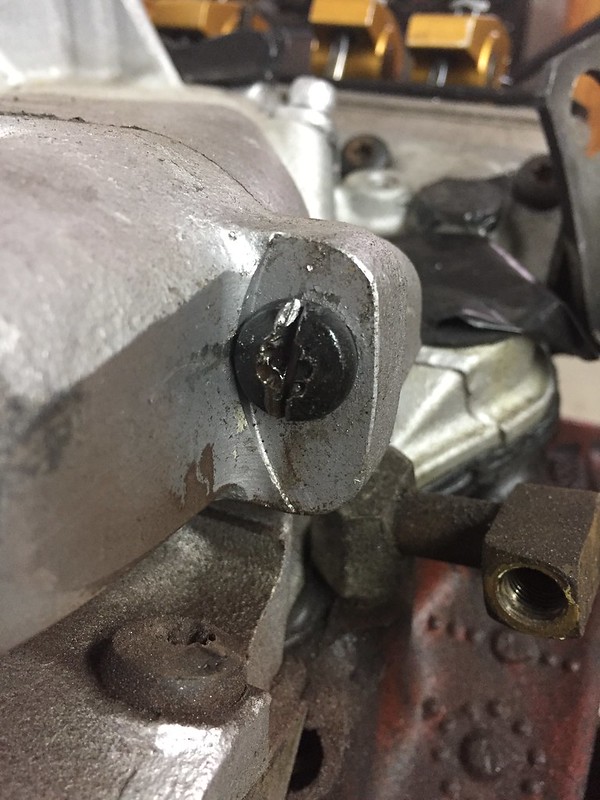
First I tried a flathead and then an EZ-out but neither worked:
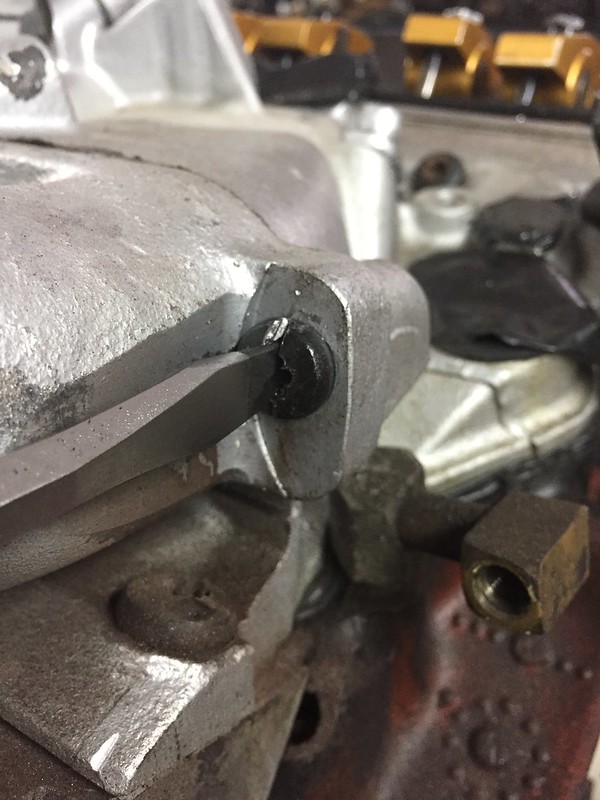
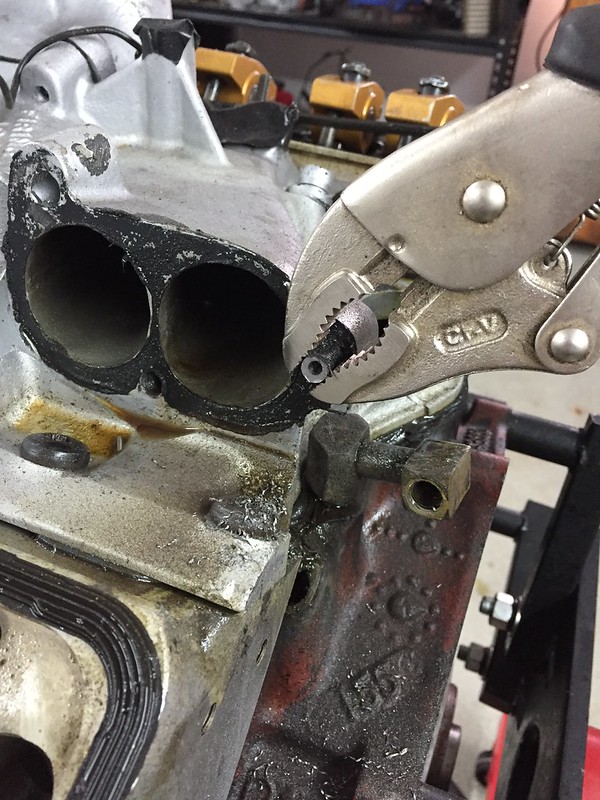
Finally, I ended up grinding the head off the bolt and removing that section of the intake which luckily left just the threaded portion of the bolt that I could get some Vice-Grips on:
I smartened up and ordered the proper tools for the rest of the bolts!
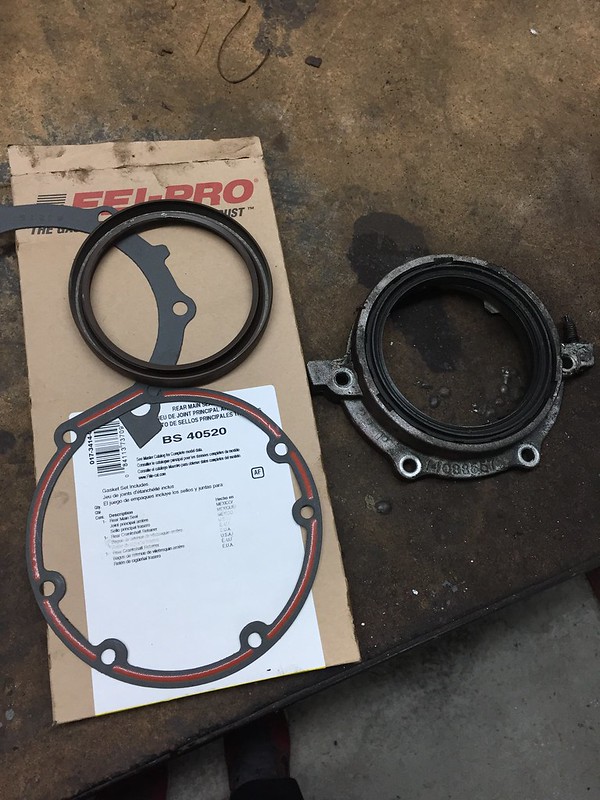
Next I moved on to replacing my rear main seal (which is 1-piece) with a new one. There was a ton of oil in my bellhousing and I'm hoping this was the cause.
Finally, I ran the numbers on my oil pump and figured out it is a Melling high-volume one. Nothing wrong with it, but from lot of research I have been doing this is not the right fit for this engine and my needs (mild small block with occasional road racing). A high volume pump is appropriate if you are running larger-stock-bearing clearances. If you are not, the extra volume is simply wasted and ends up in your oiling system being inefficient and pulling more horsepower and heating up the oil more than it needs to be. A stock Chevy oiling system is actually quite stout and should be adequate for my needs. That doesn't mean it can't benefit from a couple of well thought out upgrades however
That being said, I have ordered a standard-volume pump and have decided to upgrade my pan to one with a slightly larger volume and a crank scraper/windage tray. When I was on the track last season, I was noticing my oil pressure gauge start to bounce all over the place at higher revs... I'm hoping the crack scraper and windage tray can help with this.
I'll have that install in the next post!
Repairs on my AC box are coming along nicely. I sanded the first coat of filler and applied a thin 2nd coat to fill in some pinholes and low spots. After one more round of sanding it should be ready for paint. It won't be perfect, but much better than it was.
Next I got started on my engine teardown and resealing. I don't know much about this engine, other than the previous owner telling me it's a ZZ4 with AL heads. It looks pretty good from what I am finding so far:
The engine has 4-bolt main bearings (which checks out for a ZZ4) and a nice double roller timing chain:
Taking the intake manifold off was a royal pain in the rear. If anyone here hasn't worked with a Super Ram intake, it's made up of 5 pieces that are all connected with Allan and Torx bolts. I stripped one of the Torx bolts trying to use a standard socket and had a bear of a time trying to get it out. Lesson learned, get the right tools the first time!
Standard-length sockets come in at a slight angle, not good for Torx!
The resulting stripped bolt:
First I tried a flathead and then an EZ-out but neither worked:
Finally, I ended up grinding the head off the bolt and removing that section of the intake which luckily left just the threaded portion of the bolt that I could get some Vice-Grips on:
I smartened up and ordered the proper tools for the rest of the bolts!
Next I moved on to replacing my rear main seal (which is 1-piece) with a new one. There was a ton of oil in my bellhousing and I'm hoping this was the cause.
Finally, I ran the numbers on my oil pump and figured out it is a Melling high-volume one. Nothing wrong with it, but from lot of research I have been doing this is not the right fit for this engine and my needs (mild small block with occasional road racing). A high volume pump is appropriate if you are running larger-stock-bearing clearances. If you are not, the extra volume is simply wasted and ends up in your oiling system being inefficient and pulling more horsepower and heating up the oil more than it needs to be. A stock Chevy oiling system is actually quite stout and should be adequate for my needs. That doesn't mean it can't benefit from a couple of well thought out upgrades however
That being said, I have ordered a standard-volume pump and have decided to upgrade my pan to one with a slightly larger volume and a crank scraper/windage tray. When I was on the track last season, I was noticing my oil pressure gauge start to bounce all over the place at higher revs... I'm hoping the crack scraper and windage tray can help with this.
I'll have that install in the next post!
04-09-2018, 08:16 PM
#99
Supreme Member
Re: 1987 Camaro "Pro-Touring" Budget Build
I use a stock volume pump with a higher pressure spring. Generically referred to as a Z28 spring. FWIW I have excellent oil pressure at all RPMs and conditions. Canton road race pan with the requisite baffles, windage tray but no real scraper.
Short block was machined and assembled by a "race shop".
http://www.beattywoodsperformance.com/.
PS. My bet is that your timing chain is toast.
Short block was machined and assembled by a "race shop".
http://www.beattywoodsperformance.com/.
PS. My bet is that your timing chain is toast.
Last edited by skinny z; 04-09-2018 at 08:23 PM.
04-11-2018, 08:35 AM
#100
Re: 1987 Camaro "Pro-Touring" Budget Build
I use a stock volume pump with a higher pressure spring. Generically referred to as a Z28 spring. FWIW I have excellent oil pressure at all RPMs and conditions. Canton road race pan with the requisite baffles, windage tray but no real scraper.
Short block was machined and assembled by a "race shop".
http://www.beattywoodsperformance.com/.
PS. My bet is that your timing chain is toast.
Short block was machined and assembled by a "race shop".
http://www.beattywoodsperformance.com/.
PS. My bet is that your timing chain is toast.
How does you Canton road race pan fit in your chassis? I am concerned with fitment on the one I purchased, especially with my stock-style Y-pipe that crosses underneath the car to get to the passenger side.