1991 Formula Build. PIC HEAVY!
 02-28-2016, 12:10 PM
#1
Member

Thread Starter

Join Date: Apr 2009
Location: Minnesoata/Wisconsin
Posts: 153
Likes: 0
Received 1 Like
on
1 Post
Car: 1991 Pontiac Firebird Formula
Engine: 5.0 TBI
Transmission: T5
Axle/Gears: 3.08
1991 Formula Build. PIC HEAVY!
Well, it is time to finally start my build after purchasing the car in 2009 as a roller. I have a 1991 Pontiac Firebird Formula 5 spd. The end goal is to have a fun summer daily and weekend car that I can enjoy at AutoX events and make the occasional Ľ mile run without breaking. My goal is for this to be picture heavy.
I will update the top post with the “List” as things get done as well as post updates. An * means I am in progress with that item.
Car is currently a 305 TBI completely stock. Then end goal is:
The "List"
Y-pipe
SLP exhaust
Adjustable TA
9 inch with 4.11 gear
4th gen washer and coolant reservoir
SFCs
Black 4th gen seats
Swap to black interior
New carpet
New door glass
New window in-door sweeps
Window tint
Upgrade sound system phase 2 (Sub and Amp)
Hushmat
*Empty wallet mod
Completed:
LS - solid mount
T56 - poly mount
Longtube headers
4th gen gas tank
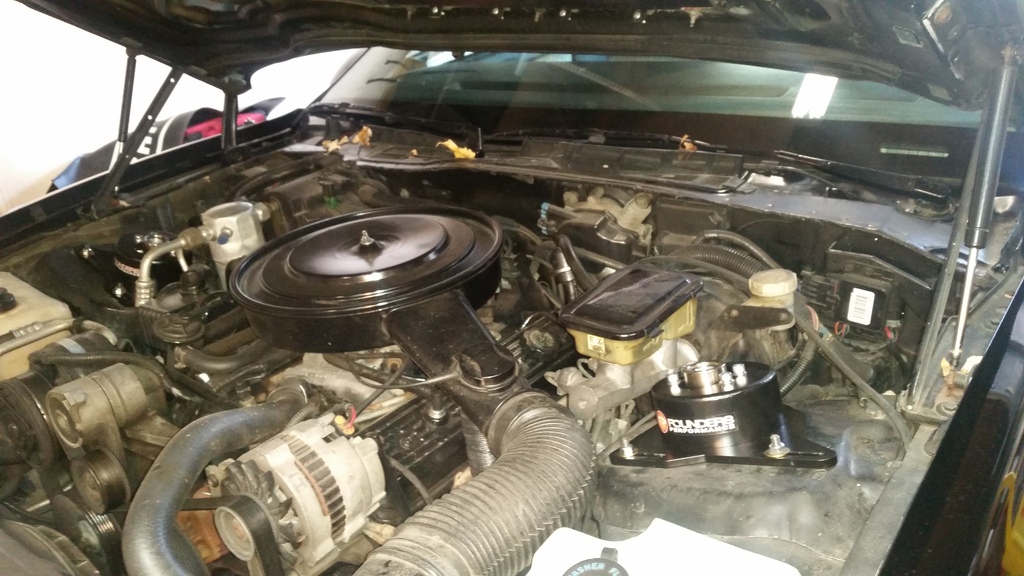
Paint engine bay
Undercoat
New window motors
86-90 TA sequential taillights
Refinished cross lace wheels.
Outside door window sweeps
Caster/camber plates
Walter Racecraft big black shaft
Adjustable panhard bar
Panhard bar relocation kit (room for new exhaust)
Adjustable LCAs
Lower Control Arm Relocation Brackets
Del-a-lum control arm bushings
New Shocks/Struts on all 4 corners
All new poly graphite bushings front and rear (Sway bar, endlinks, etc)
New Steering rebuild from tie rod to tie rod and everything in between.
Wonderbar
LS1 front brake upgrade
Upgrade sound system phase 1 (Speakers and 4th gen CD deck, aux)
I will update the top post with the “List” as things get done as well as post updates. An * means I am in progress with that item.
Car is currently a 305 TBI completely stock. Then end goal is:
The "List"
Y-pipe
SLP exhaust
Adjustable TA
9 inch with 4.11 gear
4th gen washer and coolant reservoir
SFCs
Black 4th gen seats
Swap to black interior
New carpet
New door glass
New window in-door sweeps
Window tint
Upgrade sound system phase 2 (Sub and Amp)
Hushmat
*Empty wallet mod
Completed:
LS - solid mount
T56 - poly mount
Longtube headers
4th gen gas tank
Paint engine bay
Undercoat
New window motors
86-90 TA sequential taillights
Refinished cross lace wheels.
Outside door window sweeps
Caster/camber plates
Walter Racecraft big black shaft
Adjustable panhard bar
Panhard bar relocation kit (room for new exhaust)
Adjustable LCAs
Lower Control Arm Relocation Brackets
Del-a-lum control arm bushings
New Shocks/Struts on all 4 corners
All new poly graphite bushings front and rear (Sway bar, endlinks, etc)
New Steering rebuild from tie rod to tie rod and everything in between.
Wonderbar
LS1 front brake upgrade
Upgrade sound system phase 1 (Speakers and 4th gen CD deck, aux)

Last edited by joshy1410; 07-02-2018 at 08:57 AM.
 02-28-2016, 12:12 PM
#2
Member
Thread Starter
Join Date: Apr 2009
Location: Minnesoata/Wisconsin
Posts: 153
Likes: 0
Received 1 Like
on
1 Post
Car: 1991 Pontiac Firebird Formula
Engine: 5.0 TBI
Transmission: T5
Axle/Gears: 3.08
Re: 1991 Formula Build. PIC HEAVY!
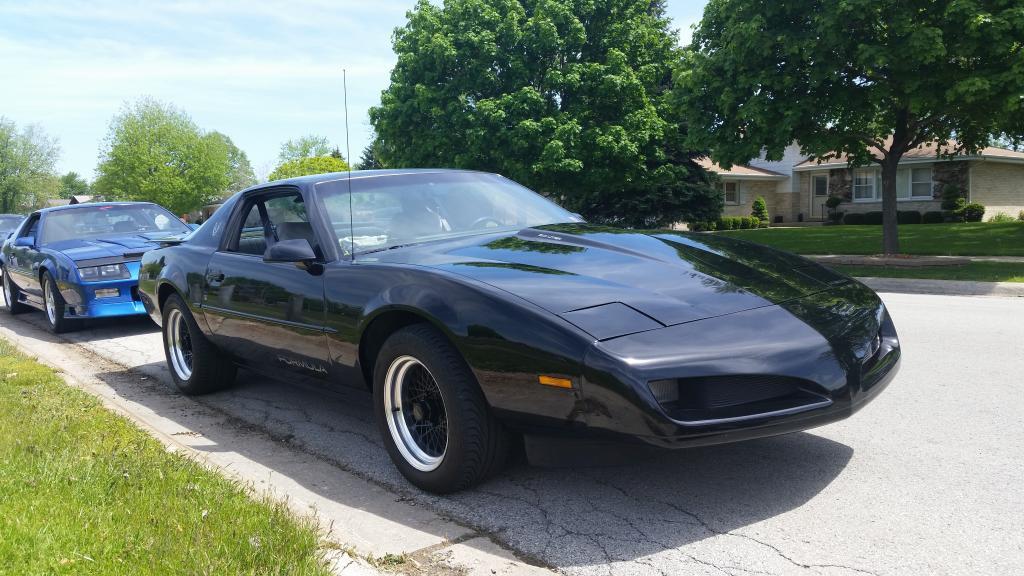
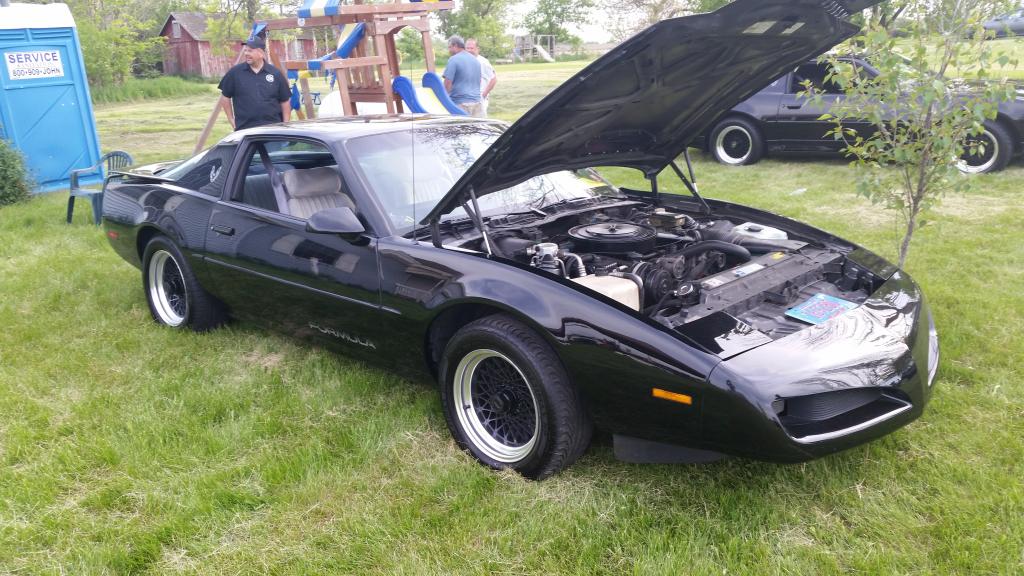
Here is the car when I bought it in 2009 as a roller.
And again in 2011.
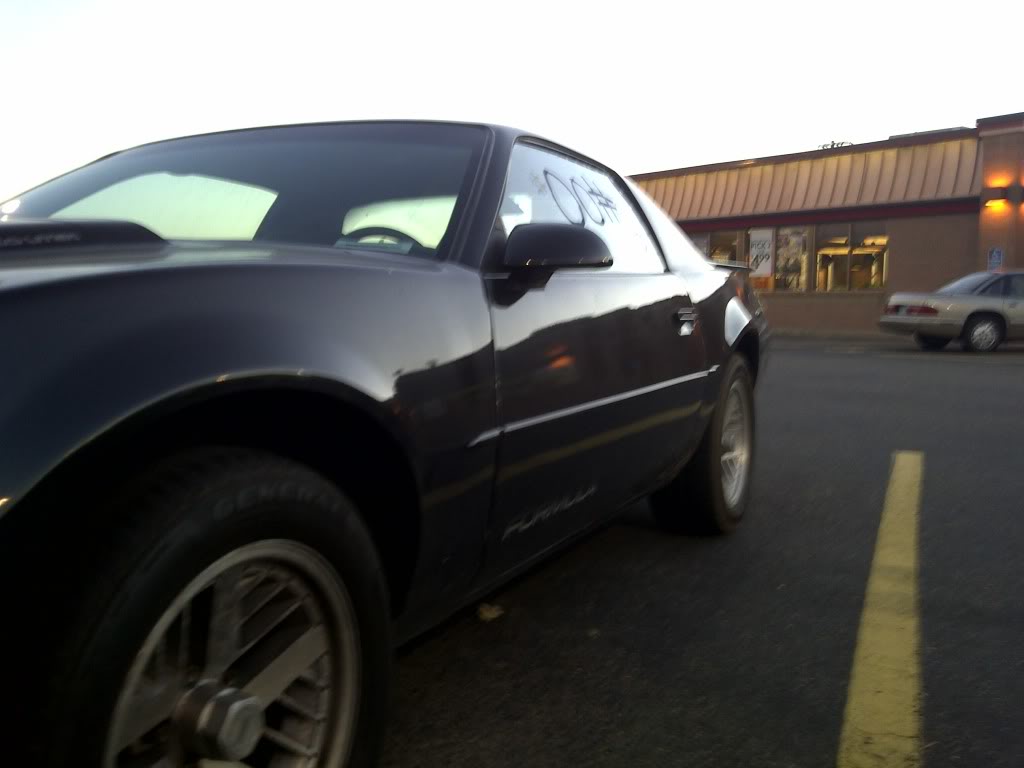
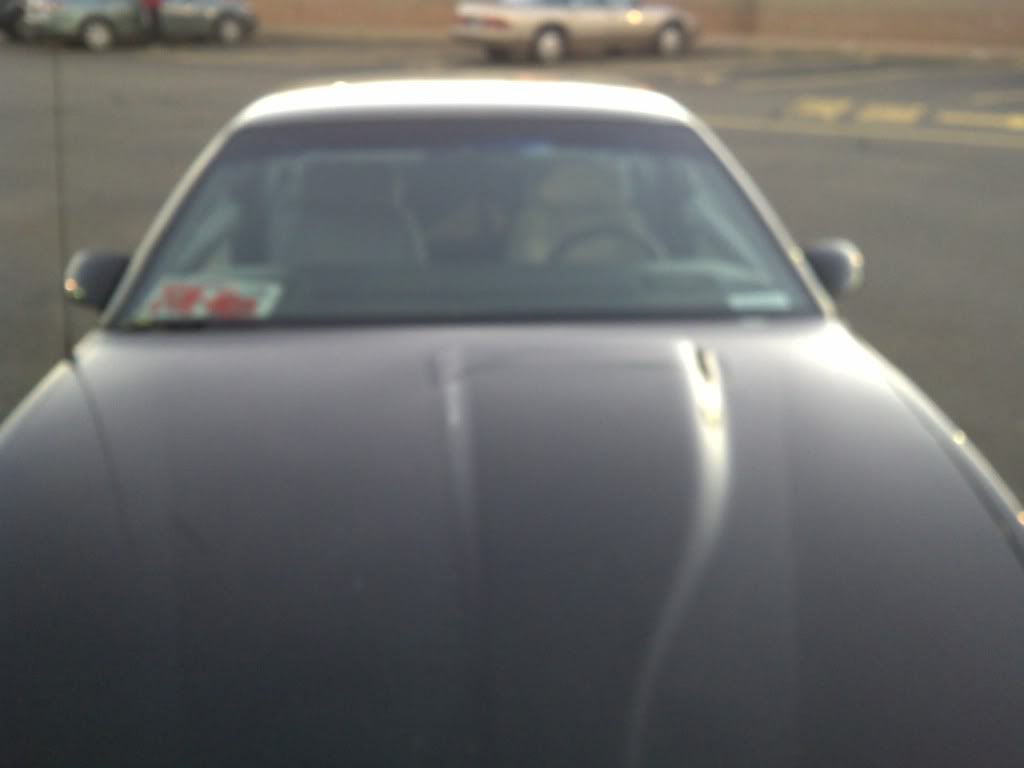

And again in 2011.

 02-28-2016, 12:30 PM
#3
Member
Thread Starter
Join Date: Apr 2009
Location: Minnesoata/Wisconsin
Posts: 153
Likes: 0
Received 1 Like
on
1 Post
Car: 1991 Pontiac Firebird Formula
Engine: 5.0 TBI
Transmission: T5
Axle/Gears: 3.08
Re: 1991 Formula Build. PIC HEAVY!
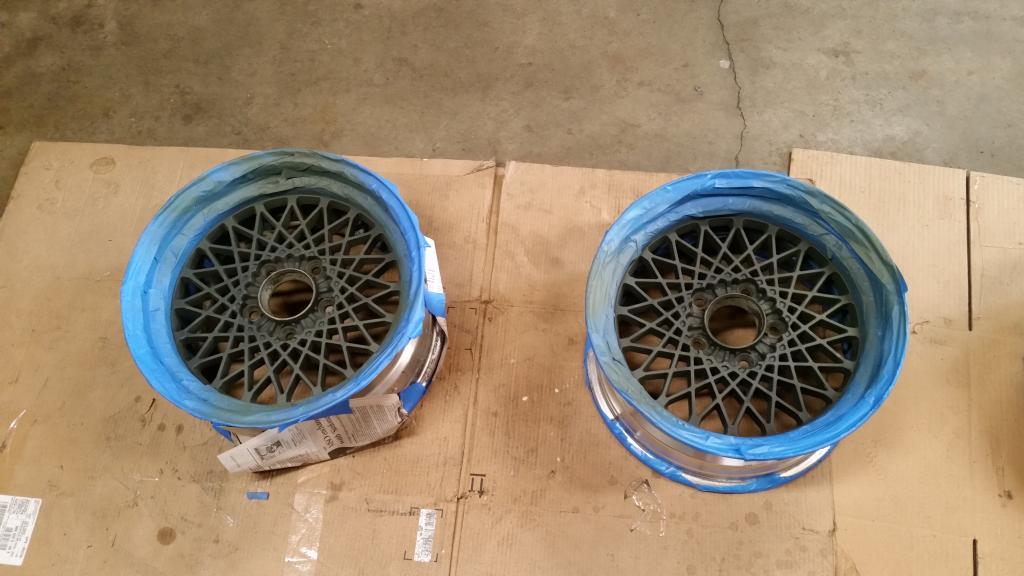
Wheels:
I really wanted crosslace wheel in black for my car. I found a member who had a set for sale 3 hours away. Picked them up and ran them they way they were for a couple years.
They were looking like they had seen better days. I decided to refinish them.
First thing was to clean them really well.
Before
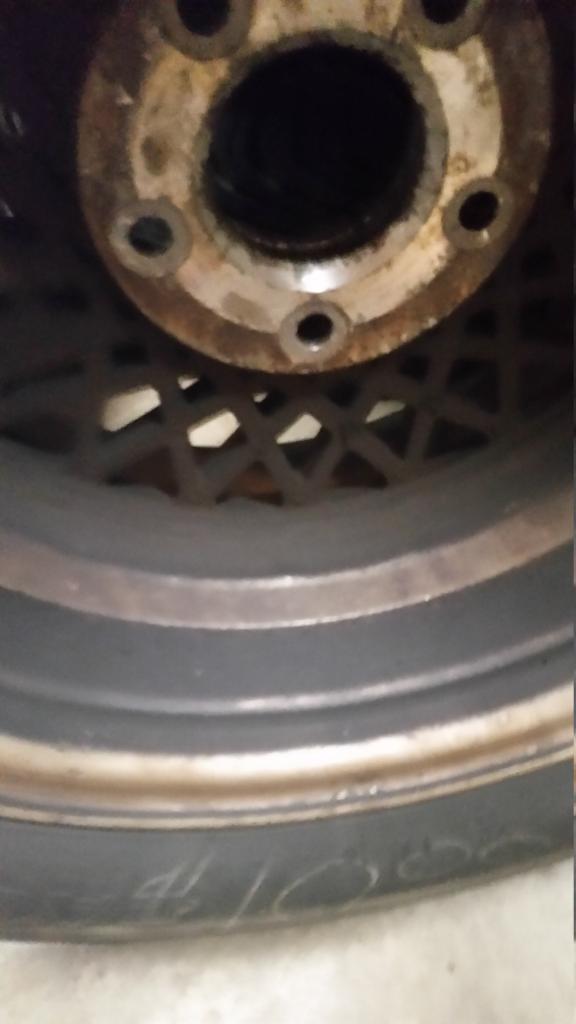
After
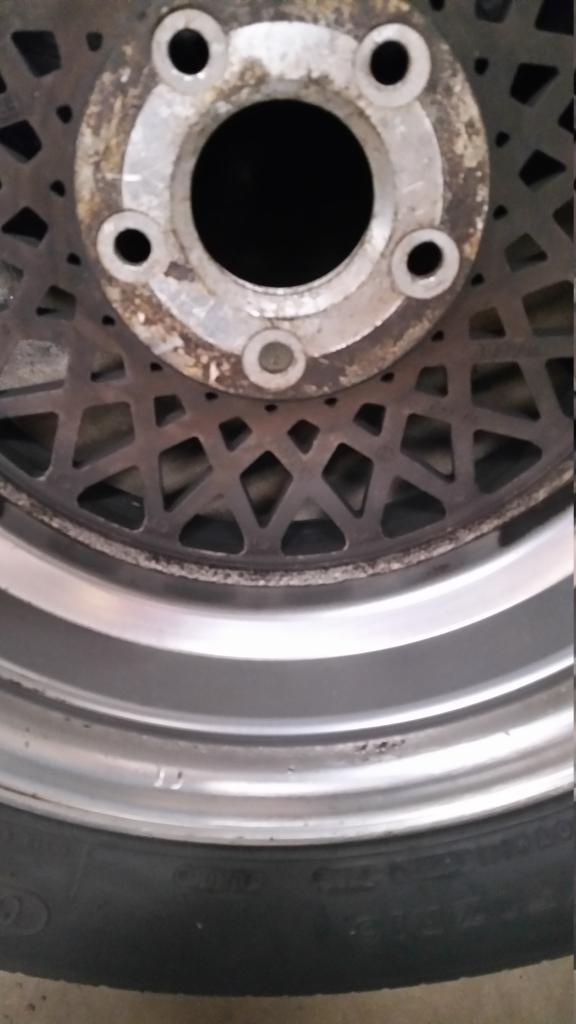
Sanding took forever about 5 hours per wheel, but they were ready for paint.
I used VHT wheel paint. Self-etching primer, primer, Gloss black, and clear.
Self-etching primer 2 coats
Primer 2 coats
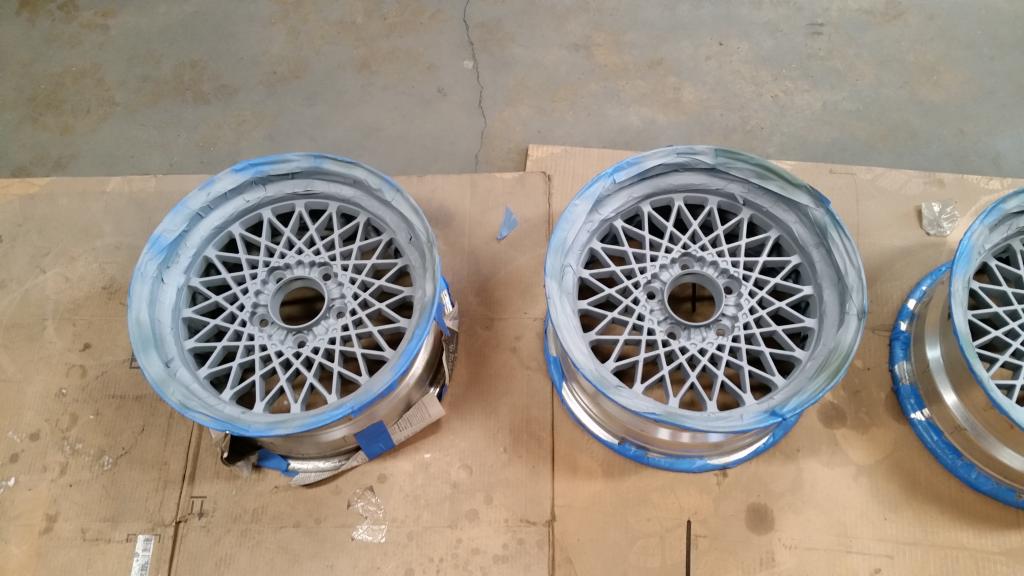
Gloss black 4 coats and 3 coats of clear
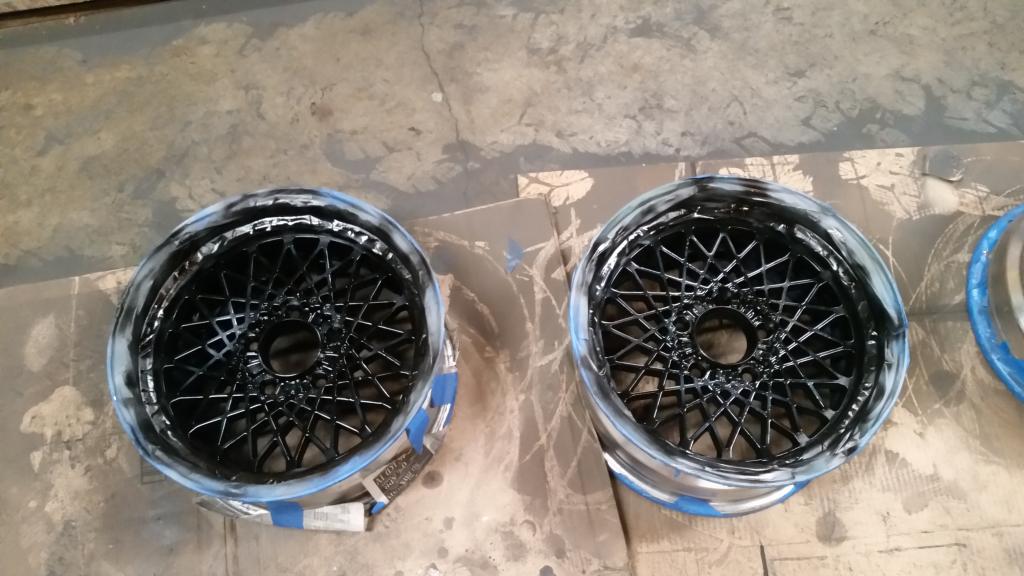
I polished the lips with Mothers Billet polish. If I had to do them again I would have them powder coated. Painting was a pain as there are so many angles and crevasses. Overall I think thy turned out really well.
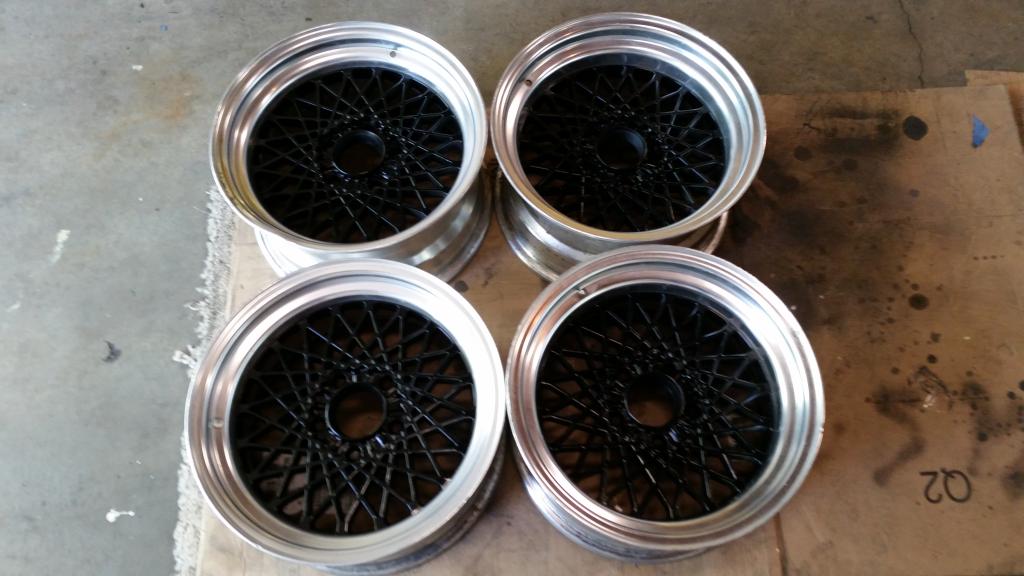
Here they are on the car.
I really wanted crosslace wheel in black for my car. I found a member who had a set for sale 3 hours away. Picked them up and ran them they way they were for a couple years.
They were looking like they had seen better days. I decided to refinish them.
First thing was to clean them really well.
Before

After

Sanding took forever about 5 hours per wheel, but they were ready for paint.
I used VHT wheel paint. Self-etching primer, primer, Gloss black, and clear.
Self-etching primer 2 coats

Primer 2 coats

Gloss black 4 coats and 3 coats of clear

I polished the lips with Mothers Billet polish. If I had to do them again I would have them powder coated. Painting was a pain as there are so many angles and crevasses. Overall I think thy turned out really well.

Here they are on the car.
 02-28-2016, 06:30 PM
#4
Supreme Member
iTrader: (8)
Join Date: Oct 2001
Location: Il
Posts: 11,687
Received 745 Likes
on
505 Posts
Car: 1989-92 FORMULA350 305 92 Hawkclone
Engine: 4++,350 & 305 CIs
Transmission: 700R4 4800 vig 18th700R4 t56 ZF6 T5
Axle/Gears: 3.70 9"ford alum chunk,dana44,9bolt
Re: 1991 Formula Build. PIC HEAVY!
Just go ahead and ship that car my way !
 03-02-2016, 06:01 AM
#6
Supreme Member
iTrader: (8)
Join Date: Oct 2001
Location: Il
Posts: 11,687
Received 745 Likes
on
505 Posts
Car: 1989-92 FORMULA350 305 92 Hawkclone
Engine: 4++,350 & 305 CIs
Transmission: 700R4 4800 vig 18th700R4 t56 ZF6 T5
Axle/Gears: 3.70 9"ford alum chunk,dana44,9bolt
Re: 1991 Formula Build. PIC HEAVY!
I may even send a couple bux and a thank you card!
Trending Topics
03-06-2016, 10:20 PM
#8
Member
Thread Starter
Join Date: Apr 2009
Location: Minnesoata/Wisconsin
Posts: 153
Likes: 0
Received 1 Like
on
1 Post
Car: 1991 Pontiac Firebird Formula
Engine: 5.0 TBI
Transmission: T5
Axle/Gears: 3.08
Re: 1991 Formula Build. PIC HEAVY!
Well here is my weekly update. I feel like I made some decent progress in the last few days. Well anything is progress compared to just searching the internet and buying things without installing them.
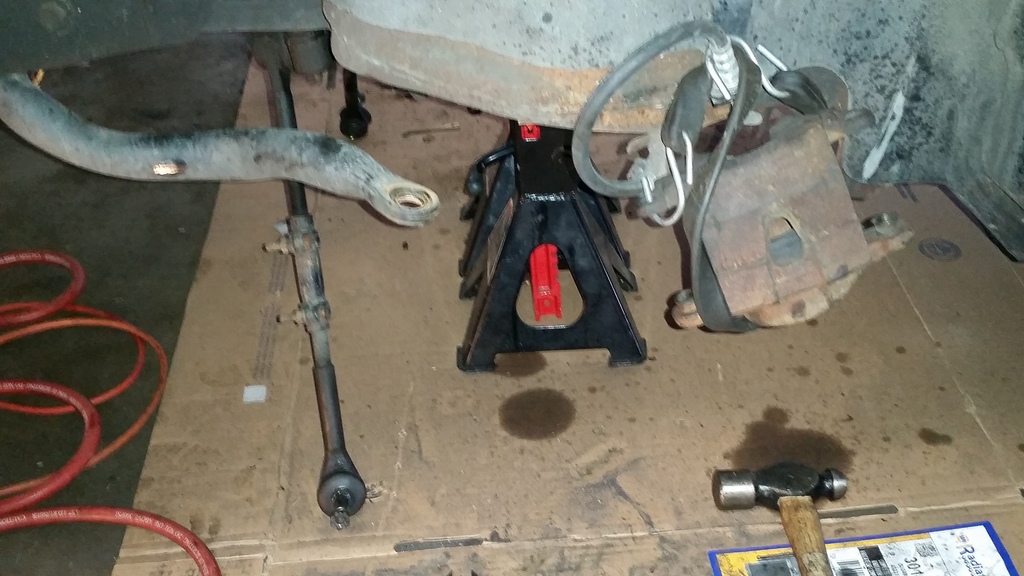
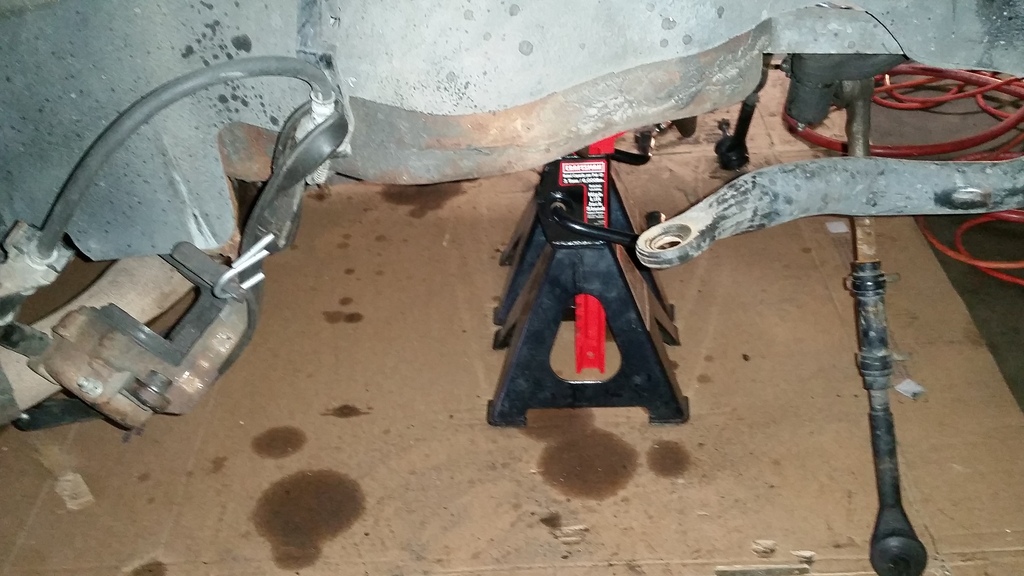
Rotors have been cut off and are ready for the machine shop to be turned to fit my LS1 brakes as well has have new longer ARP wheel studs pressed in. Once they come back they will be cleaned and painted.
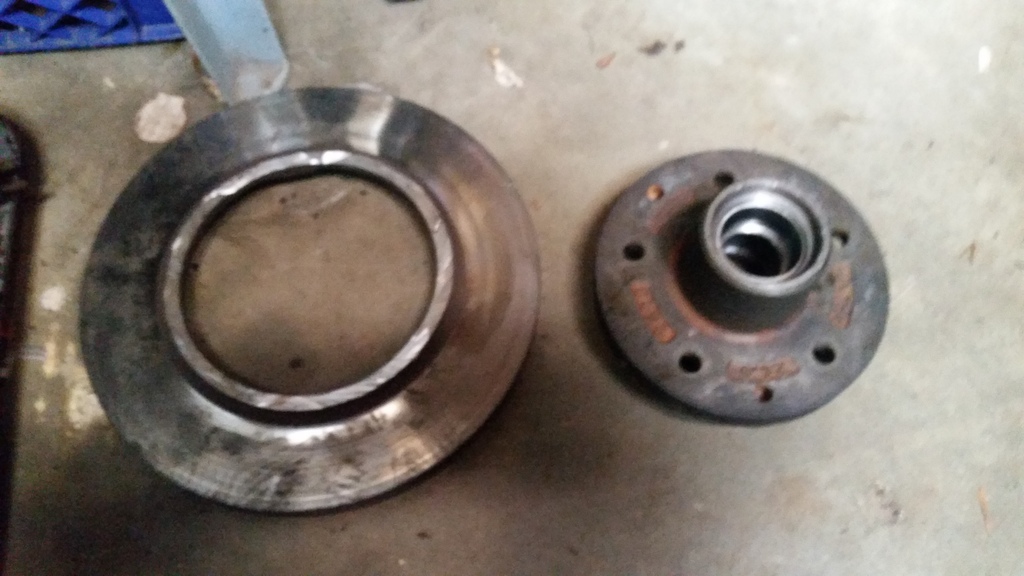
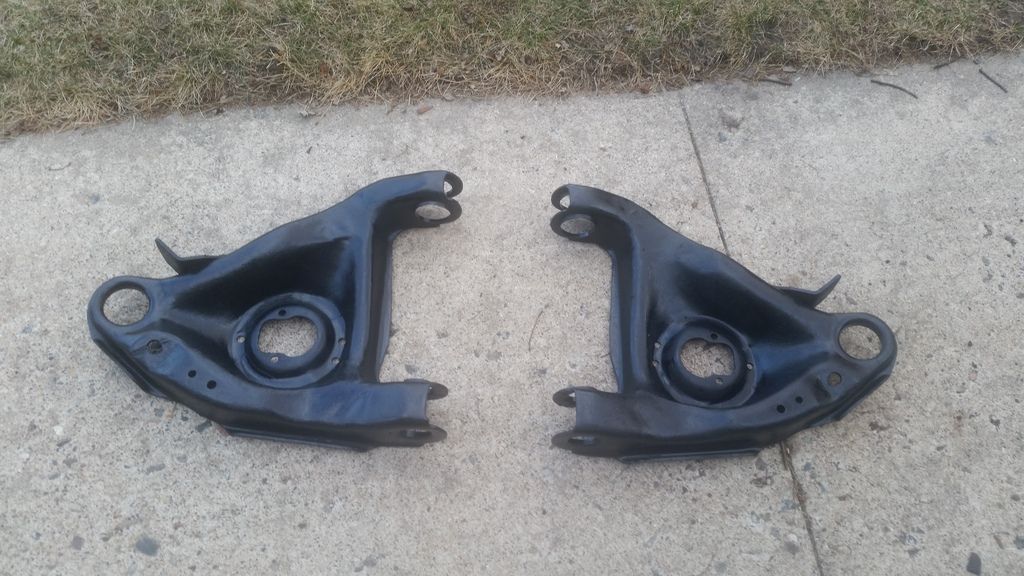
Spindles have been cut down, removed and are ready for the machine shop to drill and tap. (I was going to drill and tap, but then I realized I needed to get the bit and the tap, so this time around I will let the shop do it). Once they come back they will be cleaned and painted.
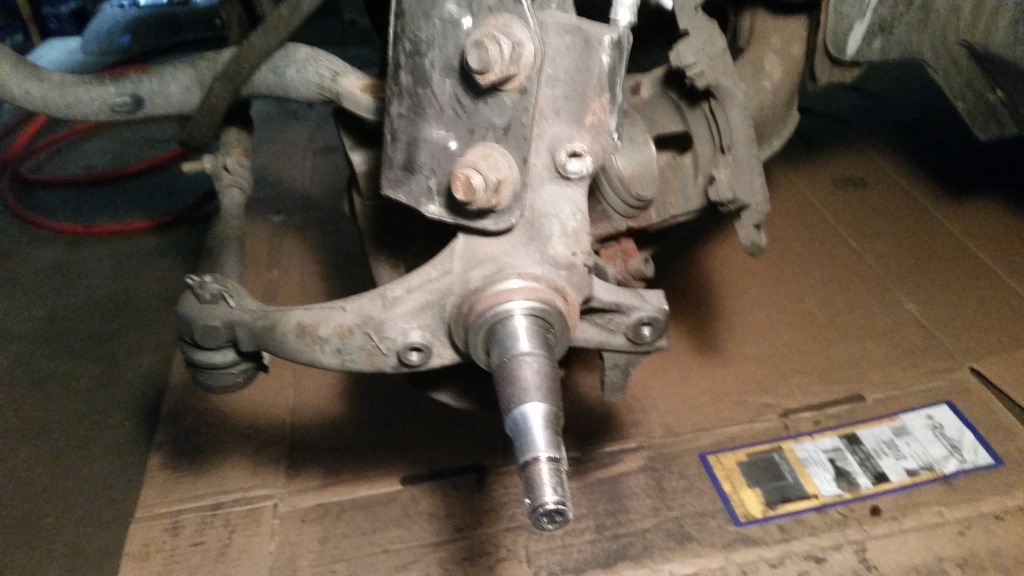
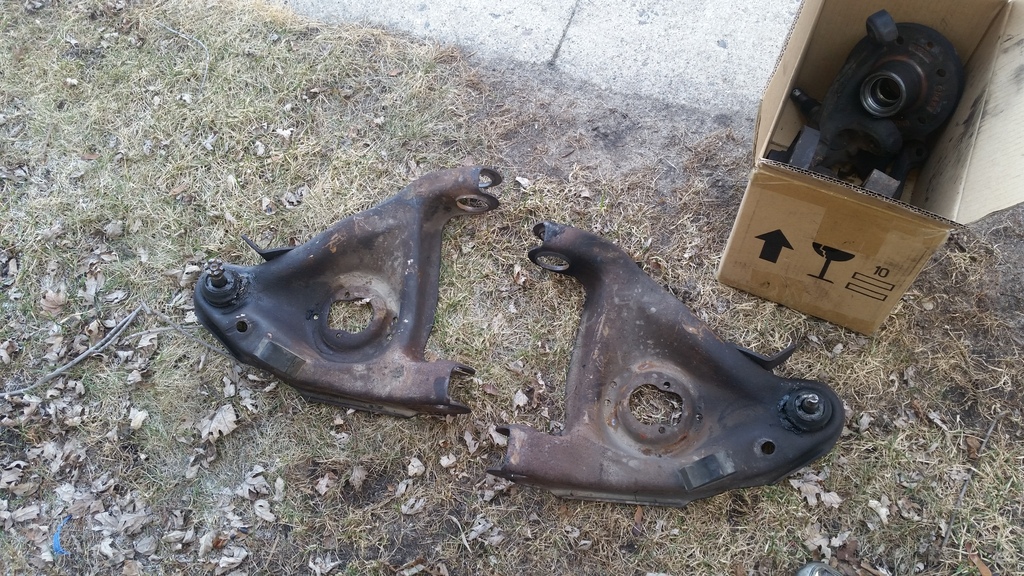
LCA arms have been removed, rubber bushings and metal sleeved have been removed. They are ready for the machine shop to get new ball joints and del-a-lum bushings. Once they come back they will be cleaned and painted.
Once everything is back, I can start the installation of everything. Including new shocks.
Hopefully I will be able to post more frequent updates. If you have any questions please ask!
-Josh
Rotors have been cut off and are ready for the machine shop to be turned to fit my LS1 brakes as well has have new longer ARP wheel studs pressed in. Once they come back they will be cleaned and painted.


Spindles have been cut down, removed and are ready for the machine shop to drill and tap. (I was going to drill and tap, but then I realized I needed to get the bit and the tap, so this time around I will let the shop do it). Once they come back they will be cleaned and painted.


LCA arms have been removed, rubber bushings and metal sleeved have been removed. They are ready for the machine shop to get new ball joints and del-a-lum bushings. Once they come back they will be cleaned and painted.

Once everything is back, I can start the installation of everything. Including new shocks.


Hopefully I will be able to post more frequent updates. If you have any questions please ask!
-Josh
03-08-2016, 02:50 PM
#9
Member
Thread Starter
Join Date: Apr 2009
Location: Minnesoata/Wisconsin
Posts: 153
Likes: 0
Received 1 Like
on
1 Post
Car: 1991 Pontiac Firebird Formula
Engine: 5.0 TBI
Transmission: T5
Axle/Gears: 3.08
Re: 1991 Formula Build. PIC HEAVY!
Some goodies came in the mail yesterday.
I was able to install the Caster/Camber mounts as well.
I have class tonight so I won't be able to work on the car today.

I was able to install the Caster/Camber mounts as well.

I have class tonight so I won't be able to work on the car today.
03-09-2016, 10:27 PM
#10
Re: 1991 Formula Build. PIC HEAVY!
You got the PHB relocation bar and the PHB upside down in the pic lol
You need to lower the mounting points on the rear end for the PHB. Given its location now lower on the frame with the bracket your PHB is going to be angled way high on the axle tube side.
I have almost the same on mine but the PHB is UMI double rod ended but I made a mount with 4 lowering adjustment holes on the rear and it's barely level with a mild lowering.
03-10-2016, 03:23 PM
#11
Member
Thread Starter
Join Date: Apr 2009
Location: Minnesoata/Wisconsin
Posts: 153
Likes: 0
Received 1 Like
on
1 Post
Car: 1991 Pontiac Firebird Formula
Engine: 5.0 TBI
Transmission: T5
Axle/Gears: 3.08
Re: 1991 Formula Build. PIC HEAVY!
Yup, I just had them laid out after unboxing them. That would be some feat installing them backwards.
You need to lower the mounting points on the rear end for the PHB. Given its location now lower on the frame with the bracket your PHB is going to be angled way high on the axle tube side.
I have almost the same on mine but the PHB is UMI double rod ended but I made a mount with 4 lowering adjustment holes on the rear and it's barely level with a mild lowering.
I have almost the same on mine but the PHB is UMI double rod ended but I made a mount with 4 lowering adjustment holes on the rear and it's barely level with a mild lowering.

I get this is done to keep the panhard bar at an ideal angle, but is this necessary on a stock height vehicle? Do you have any pictures of your setup?
Last edited by joshy1410; 03-22-2016 at 09:48 AM.
03-10-2016, 03:35 PM
#12
Re: 1991 Formula Build. PIC HEAVY!
Yup, I just had them laid out after unboxing them. That would be some fear installing them backwards.
Do you mean something like this?
I get this is done to keep the panhard bar at an ideal angle, but is this necessary on a stock height vehicle? Do you have any pictures of your setup?
Do you mean something like this?
I get this is done to keep the panhard bar at an ideal angle, but is this necessary on a stock height vehicle? Do you have any pictures of your setup?
Yup, that's what u need. The drop is considerable on the frame side even on a stock height vehicle. You will need to level it out at least one hole lower.
Mine is hard to see now with the 4" exhaust and I had to lower it to the last hole after i swapped my 20s to 18" and lowered the ride height alittle.


It drops the frame mount over 2" by looking at the pic.


This was before the last hole was used. It's now basically level but will know more after its on the ground and everything settles.
03-10-2016, 03:42 PM
#13
Member
Thread Starter
Join Date: Apr 2009
Location: Minnesoata/Wisconsin
Posts: 153
Likes: 0
Received 1 Like
on
1 Post
Car: 1991 Pontiac Firebird Formula
Engine: 5.0 TBI
Transmission: T5
Axle/Gears: 3.08
Re: 1991 Formula Build. PIC HEAVY!
Yup, that's what u need. The drop is considerable on the frame side even on a stock height vehicle. You will need to level it out at least one hole lower.
Mine is hard to see now with the 4" exhaust and I had to lower it to the last hole after i swapped my 20s to 18" and lowered the ride height alittle.
It drops the frame mount over 2" by looking at the pic.
This was before the last hole was used. It's now basically level but will know more after its on the ground and everything settles.
03-10-2016, 03:47 PM
#14
Re: 1991 Formula Build. PIC HEAVY!
Yes, PHB should be level at ride height. This means on the ground and after a few miles as the suspension settles. This puts the rear in an equal arc through suspension movment. But since the bars location is much lower than stock at both mounting points it creates a lot of problems with IRC and lots of other things. Slicktrackgod can explain everything way more in depth. I know though you should probably increase spring rate in the rear considerably to offset the IRC. I've run 150, 175 and 200 on mine. Stock WS6 rear springs are 105lbin.
03-10-2016, 03:58 PM
#15
Member
Thread Starter
Join Date: Apr 2009
Location: Minnesoata/Wisconsin
Posts: 153
Likes: 0
Received 1 Like
on
1 Post
Car: 1991 Pontiac Firebird Formula
Engine: 5.0 TBI
Transmission: T5
Axle/Gears: 3.08
Re: 1991 Formula Build. PIC HEAVY!
Perfect, thanks for the advise customblackbird. I will look into fabing something up when all finished. How far apart are all your holes? I am curious to where my panhard is right now being stock. I would be curious to see how this changes with a 9 inch in the back.
03-10-2016, 04:04 PM
#16
Re: 1991 Formula Build. PIC HEAVY!
You can buy a bracket already made from Jegs. Made by jegster.
Figure yours is pretty close to level OEM now drop the frame side 2+" and that will give u an idea of how it's going to look lol.
03-10-2016, 04:18 PM
#17
Member
Thread Starter
Join Date: Apr 2009
Location: Minnesoata/Wisconsin
Posts: 153
Likes: 0
Received 1 Like
on
1 Post
Car: 1991 Pontiac Firebird Formula
Engine: 5.0 TBI
Transmission: T5
Axle/Gears: 3.08
Re: 1991 Formula Build. PIC HEAVY!
I took a look and I don't think Jegster makes them anymore. I hope I'm wrong.
03-11-2016, 11:19 AM
#18
Member
Thread Starter
Join Date: Apr 2009
Location: Minnesoata/Wisconsin
Posts: 153
Likes: 0
Received 1 Like
on
1 Post
Car: 1991 Pontiac Firebird Formula
Engine: 5.0 TBI
Transmission: T5
Axle/Gears: 3.08
Re: 1991 Formula Build. PIC HEAVY!
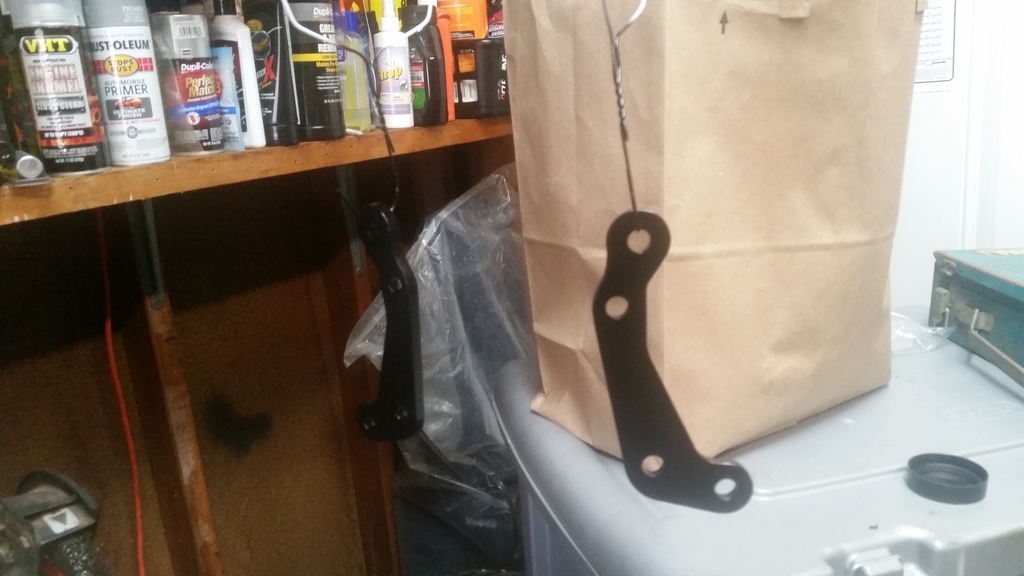
The last part of my TDS order came. Now I have polygraphite sway bar bushings for the front and rear with zerk fittings and zink plated brackets from TDS as well as their wonderbar. I can't wait to get this stuff on. A little more pricey than a generic set, but everything looks well built.
 03-12-2016, 07:09 PM
#19
Member
Thread Starter
Join Date: Apr 2009
Location: Minnesoata/Wisconsin
Posts: 153
Likes: 0
Received 1 Like
on
1 Post
Car: 1991 Pontiac Firebird Formula
Engine: 5.0 TBI
Transmission: T5
Axle/Gears: 3.08
Re: 1991 Formula Build. PIC HEAVY!
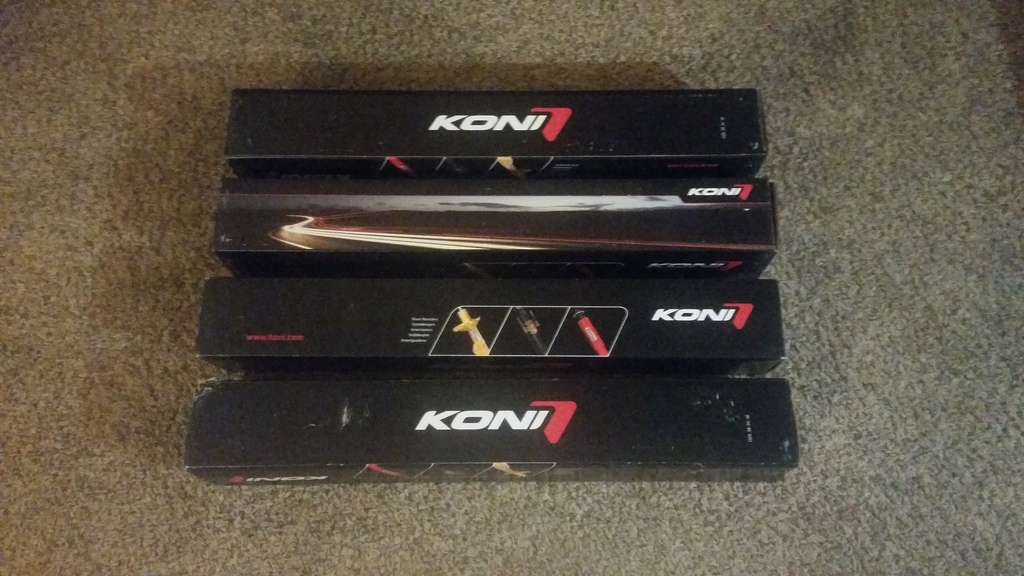
Look what showed up. I decided to splurge and took the plunge and went with some Koni Yellows. The rears should be on by the end off the weekend.
 03-13-2016, 10:06 PM
#20
Member
Thread Starter
Join Date: Apr 2009
Location: Minnesoata/Wisconsin
Posts: 153
Likes: 0
Received 1 Like
on
1 Post
Car: 1991 Pontiac Firebird Formula
Engine: 5.0 TBI
Transmission: T5
Axle/Gears: 3.08
Re: 1991 Formula Build. PIC HEAVY!
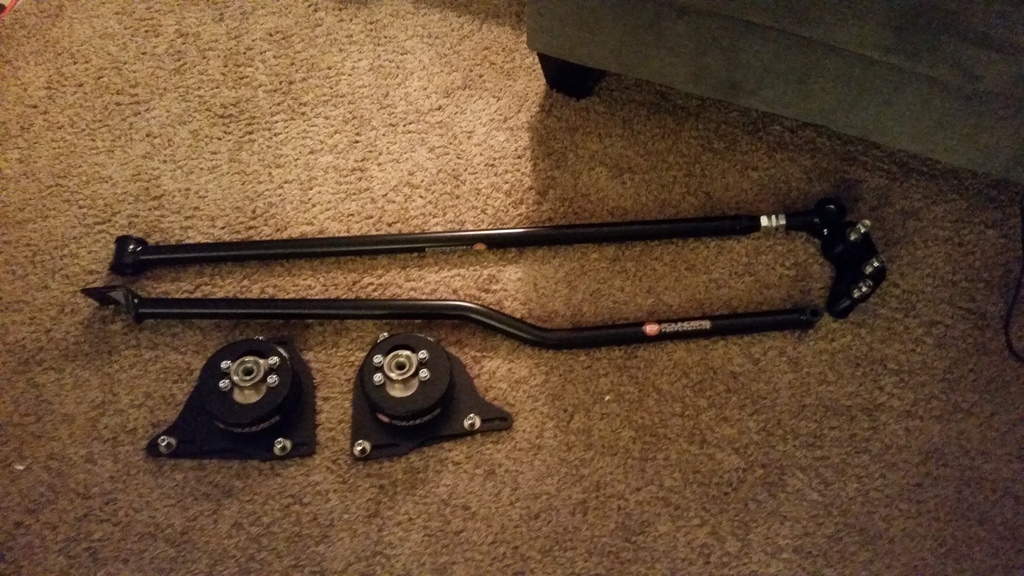
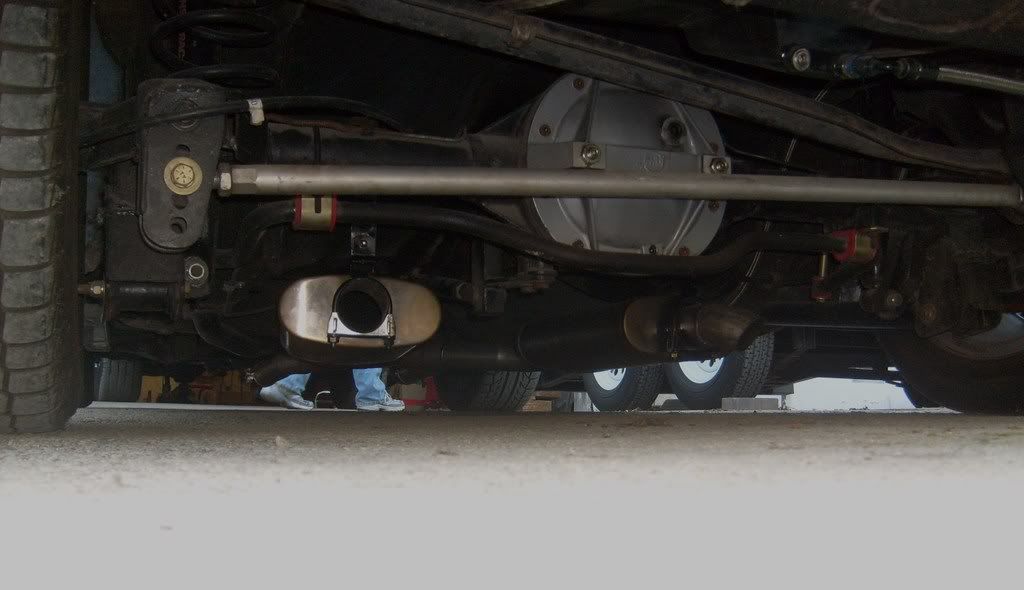
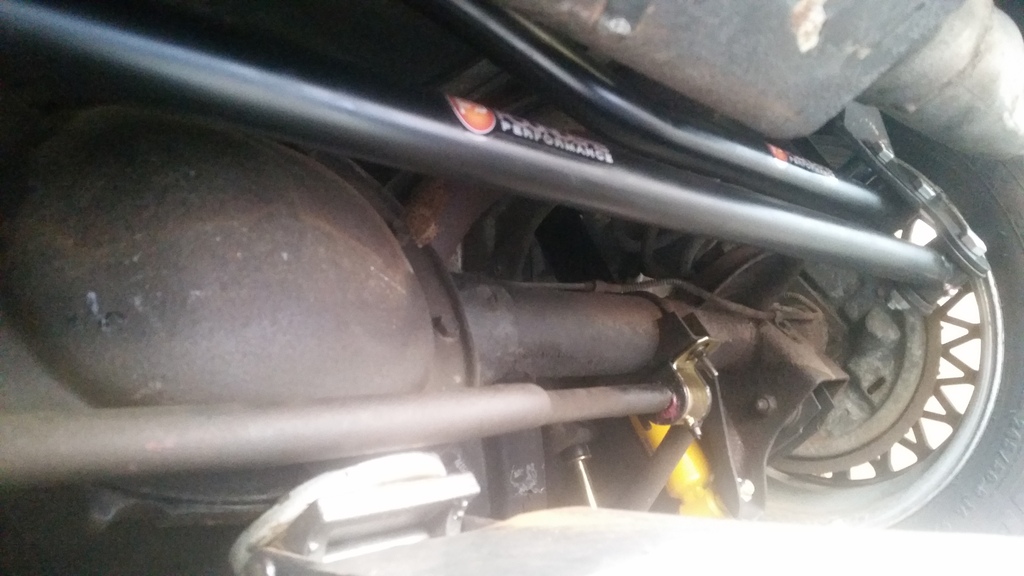
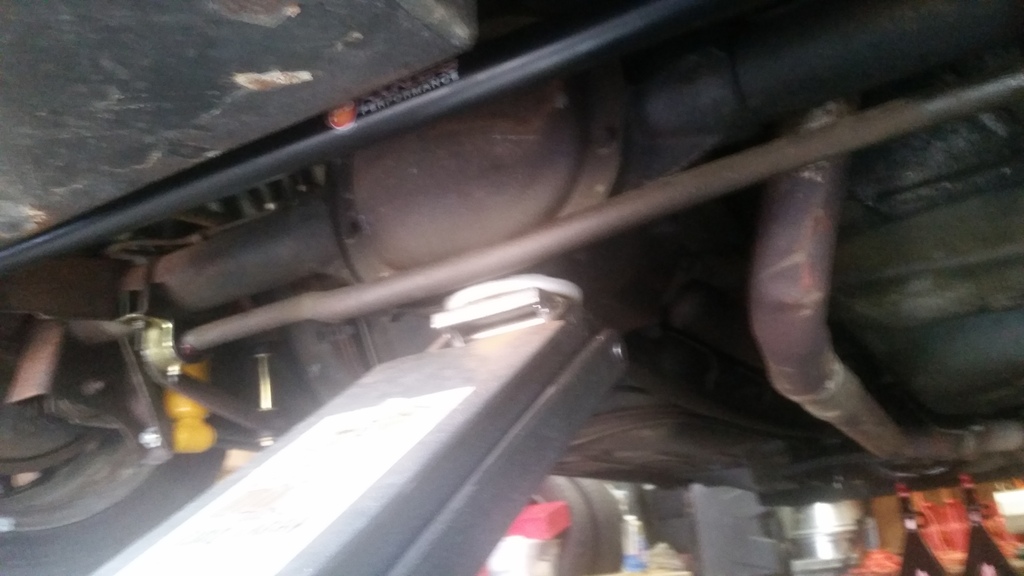
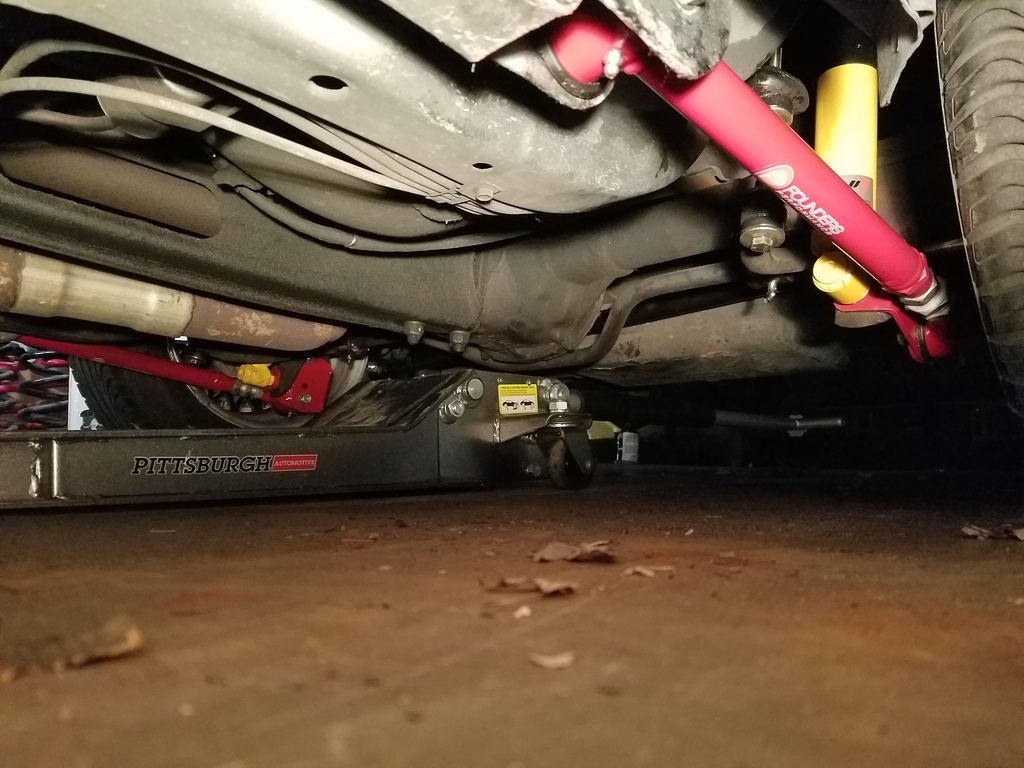
The weekend was very productive. My dad visited from out of town and we got some garage time in. We replaced the panhard bar and upper bar with on car adjustable from Founders. Once ride height is finalized I will be lowering the panhard bar on the axle side to correct it. It was really easy to center the rear in the car. It went quire smooth. We also Installed polygraphite end links and TDS polygraphite rear sway bar bushings. To top it off we installed rear Koni yellow shocks.
We removed the ball joints from the lower control arms and prepped them for paint. I used VHT Epoxy paint. It went on very well and turned out great.
Before

After
Painted my LS1 brake swap brackets as well.
Once my del-a-lum lower control arm bushings come in everything is going to the machine shop to get pressed in. Then the assembly can continue.


We removed the ball joints from the lower control arms and prepped them for paint. I used VHT Epoxy paint. It went on very well and turned out great.
Before
After

Painted my LS1 brake swap brackets as well.

Once my del-a-lum lower control arm bushings come in everything is going to the machine shop to get pressed in. Then the assembly can continue.
03-14-2016, 08:30 AM
#21
Member

Join Date: Aug 2007
Location: Long Island, NY
Posts: 201
Likes: 0
Received 2 Likes
on
2 Posts
Car: 1992 z28
Engine: LS1
Transmission: T-56
Re: 1991 Formula Build. PIC HEAVY!
Nice progress! Getting me motivated to get back to work on my project. It is always a nice treat when pops is around to help turn a wrench or give some advice about how to do things properly. Wish I had more opportunities to wrench with my dad. Keep up the good work!
03-14-2016, 11:39 AM
#22
Member
Thread Starter
Join Date: Apr 2009
Location: Minnesoata/Wisconsin
Posts: 153
Likes: 0
Received 1 Like
on
1 Post
Car: 1991 Pontiac Firebird Formula
Engine: 5.0 TBI
Transmission: T5
Axle/Gears: 3.08
I agree, sometimes I wait to do things just so we can do it together. I'm very thankful for garage time with my dad.
03-16-2016, 10:35 PM
#23
Member
Thread Starter
Join Date: Apr 2009
Location: Minnesoata/Wisconsin
Posts: 153
Likes: 0
Received 1 Like
on
1 Post
Car: 1991 Pontiac Firebird Formula
Engine: 5.0 TBI
Transmission: T5
Axle/Gears: 3.08
Re: 1991 Formula Build. PIC HEAVY!
I was able to install my Water Racecraft steering shaft tonight. No more rag joint for me. Slow progress, but it is better then none.
 03-21-2016, 11:01 PM
#24
Member
Thread Starter
Join Date: Apr 2009
Location: Minnesoata/Wisconsin
Posts: 153
Likes: 0
Received 1 Like
on
1 Post
Car: 1991 Pontiac Firebird Formula
Engine: 5.0 TBI
Transmission: T5
Axle/Gears: 3.08
Re: 1991 Formula Build. PIC HEAVY!
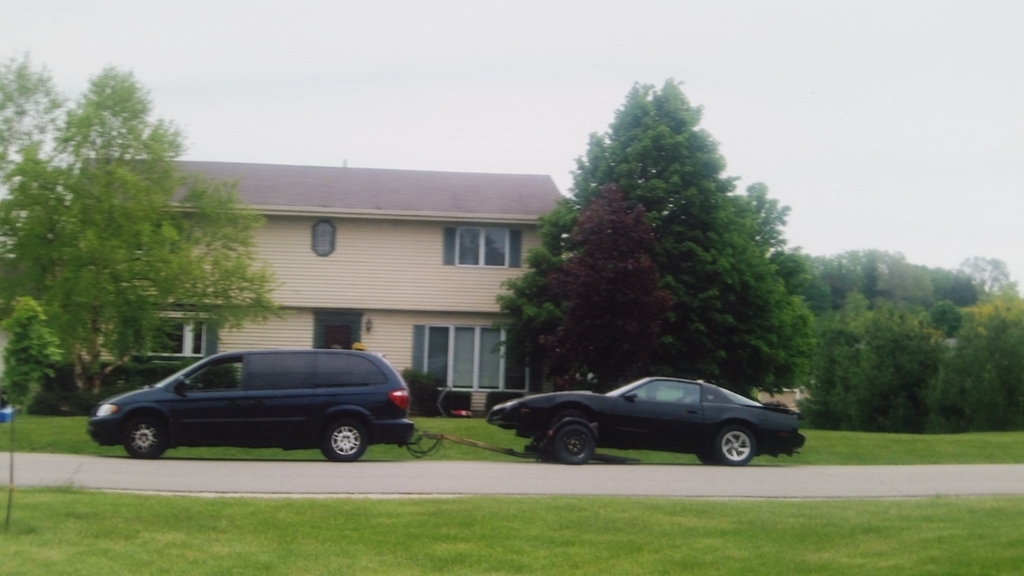
Busy weekend – Drove to my parents’ house in SE Wisconsin (I live in MN) and got all my parts off the Camaro. Since it was stripped down to the shell my dad and I took the car over to the to the scrap yard.
It took a little ingenuity, but we got it on the trailer.
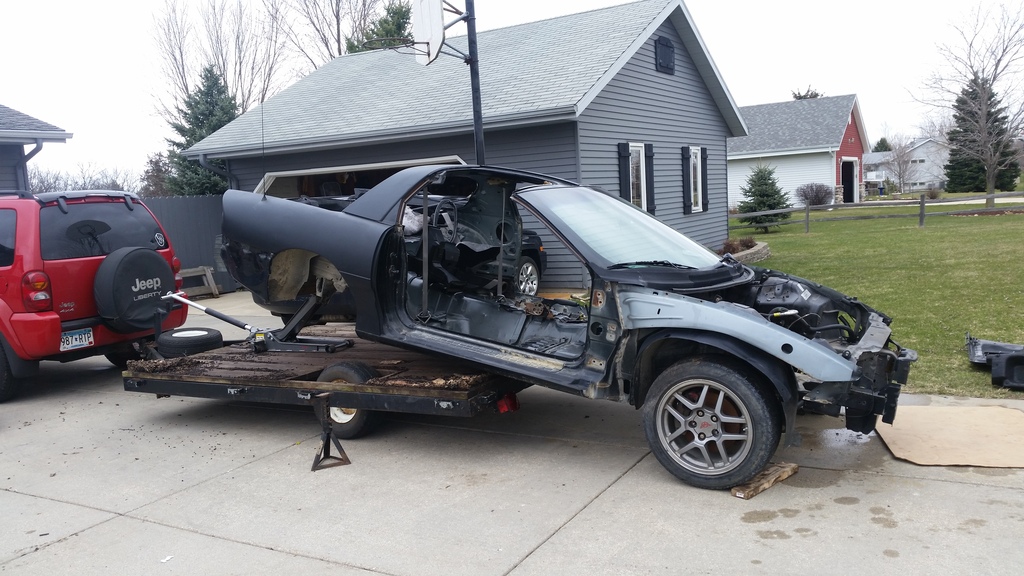
Special thanks to Cole and his buddy for helping us slide the Camaro into place.
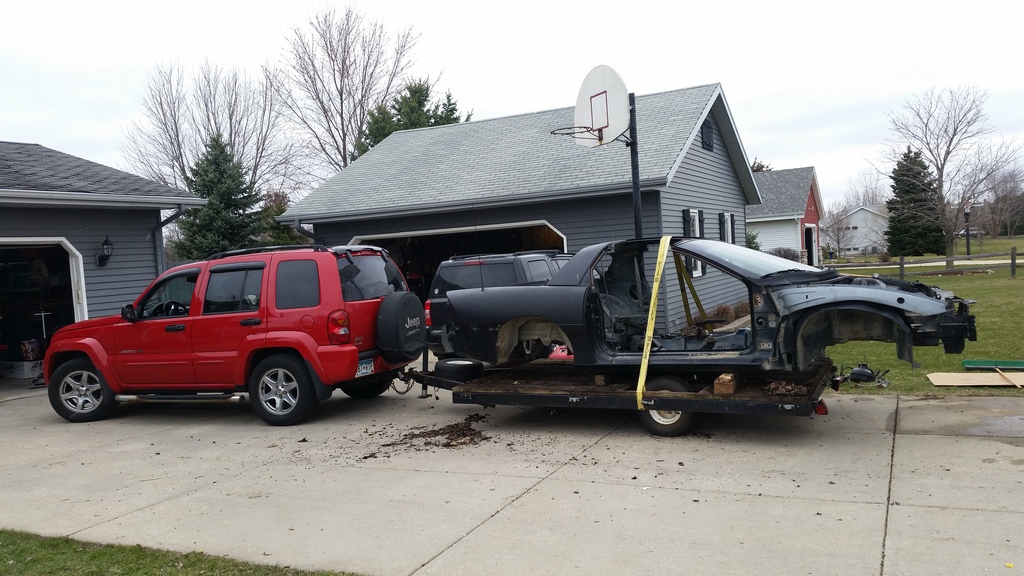
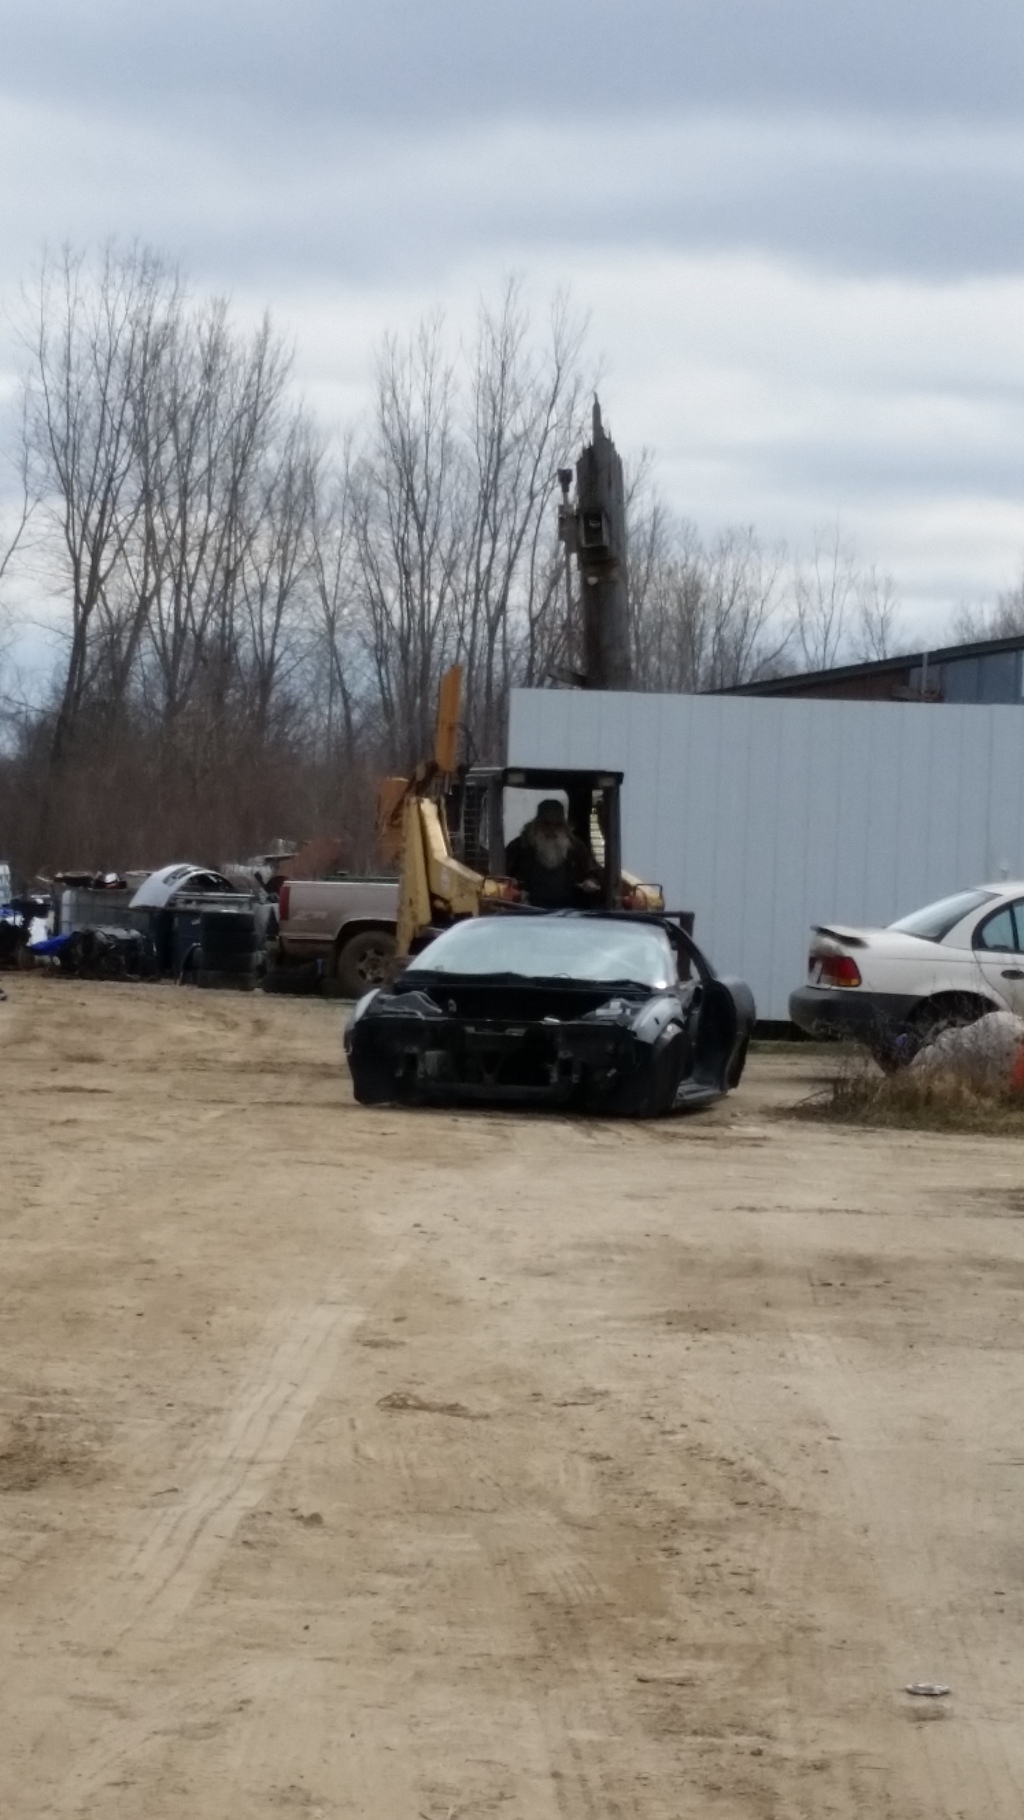
At the salvage yard.
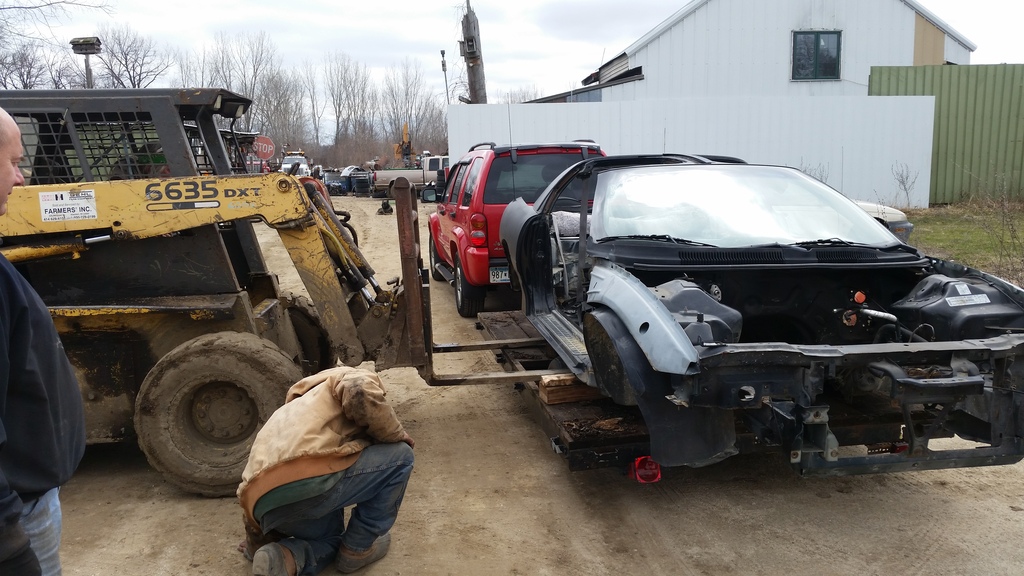
She looks so sad, but most of her parts are going to a good home.
It took a little ingenuity, but we got it on the trailer.

Special thanks to Cole and his buddy for helping us slide the Camaro into place.

At the salvage yard.

She looks so sad, but most of her parts are going to a good home.
 03-21-2016, 11:28 PM
#25
Member
iTrader: (2)

Join Date: May 2013
Location: Texas
Posts: 235
Likes: 0
Received 1 Like
on
1 Post
Car: 1989 GTA
Engine: LS coming soon
Transmission: 80E coming soon
Axle/Gears: S60/35 Spline/S-Trac/3.73
Re: 1991 Formula Build. PIC HEAVY!
Great build. Makes me sad remembering my 2nd car, 92Formula 350tpi. It was my favorite car, and they're hard to find nice like yours.
Did you put 3rd or 4th gen rear Koni's?
Have you acquired your I interior yet?
Are you putting new seamsealer and recoating the front fenderwells?
Did you put 3rd or 4th gen rear Koni's?
Have you acquired your I interior yet?
Are you putting new seamsealer and recoating the front fenderwells?
03-22-2016, 10:25 AM
#26
Member
Thread Starter
Join Date: Apr 2009
Location: Minnesoata/Wisconsin
Posts: 153
Likes: 0
Received 1 Like
on
1 Post
Car: 1991 Pontiac Firebird Formula
Engine: 5.0 TBI
Transmission: T5
Axle/Gears: 3.08
Re: 1991 Formula Build. PIC HEAVY!
I went with 3rd gen Koni's. As much as it would have been nice to be able to adjust them on the car. I don't think I would have changed them after I found the setting I liked. Also, the 3rd gen shock is a mono tube design and I liked that over the 4th gen twin tube design.
I have my seats. I will be running 4th gen TA ebony leather seats. I will be purchasing new black carpet. I am still looking for black interior plastics with rear shoulder belts.
Eventually I will be re-coating the front fender wheel well area. I am undecided if I will do it now or when I drop the K member for the LS. I will see how the seam sealer looks when I get in there.
03-22-2016, 07:43 PM
#27
Member
Thread Starter
Join Date: Apr 2009
Location: Minnesoata/Wisconsin
Posts: 153
Likes: 0
Received 1 Like
on
1 Post
Car: 1991 Pontiac Firebird Formula
Engine: 5.0 TBI
Transmission: T5
Axle/Gears: 3.08
Re: 1991 Formula Build. PIC HEAVY!
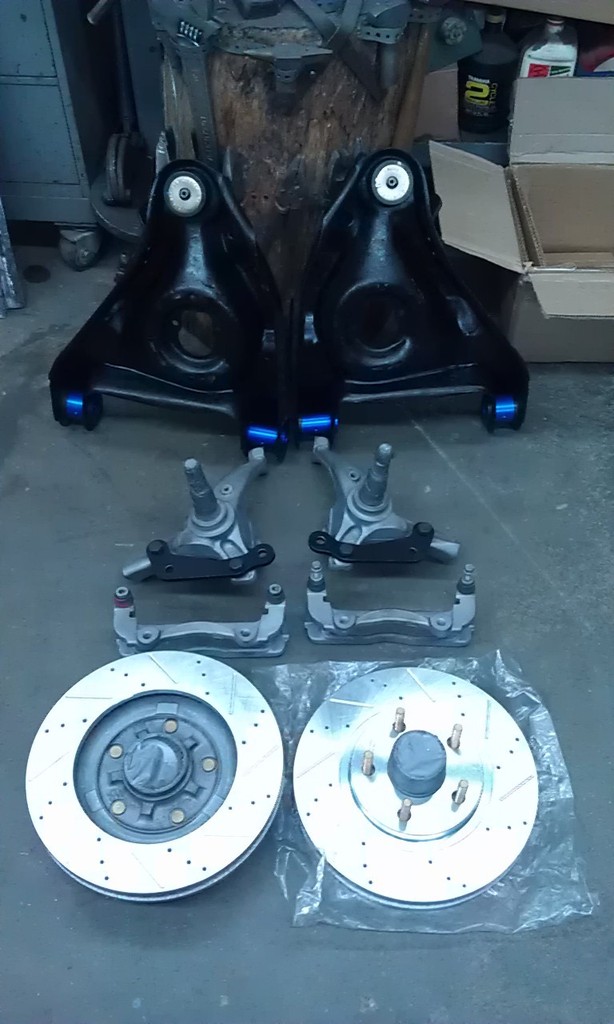
My Global West Del-a-lum bushings for my front lower control arms finally came. Hopefully in the next day or two I can get them to the machine shop to be pressed in along with new ball joints. The rotors will be turned town and my spindles will be drilled and tapped too.
03-23-2016, 09:58 PM
#28
Member
Thread Starter
Join Date: Apr 2009
Location: Minnesoata/Wisconsin
Posts: 153
Likes: 0
Received 1 Like
on
1 Post
Car: 1991 Pontiac Firebird Formula
Engine: 5.0 TBI
Transmission: T5
Axle/Gears: 3.08
Re: 1991 Formula Build. PIC HEAVY!
I was able to get everything dropped off at the machine shop today. Everything should be ready to pick up on Saturday. In the mean-time my goal is to button up the rear suspension. I found a squeak and it is definitely coming from both springs although they were never touched. Shocks are off the car, and so are the end links. I am wondering if I should just let it be and see if it goes away after some driving.
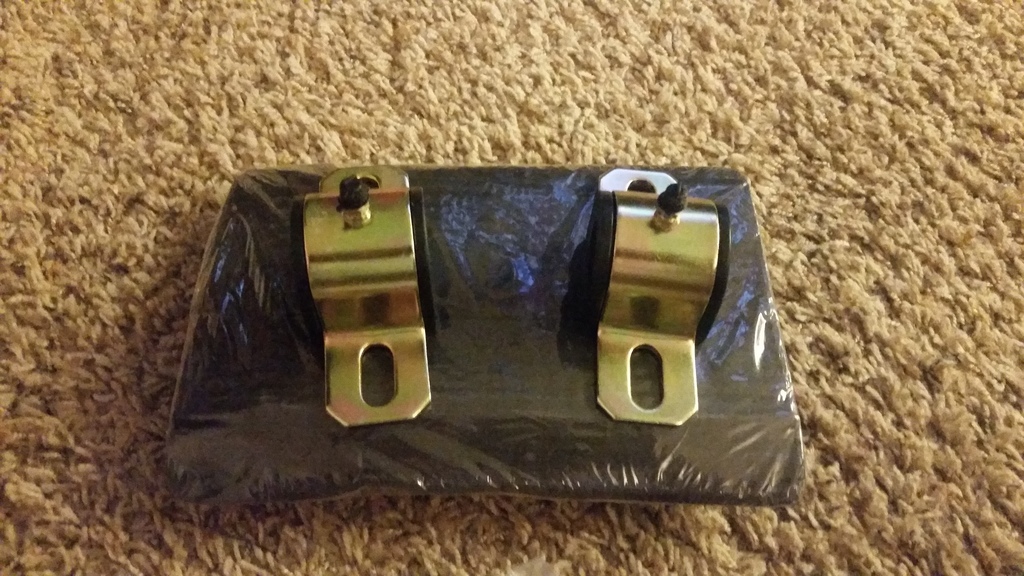
Also was able to pick up my Founders LCAs and LCARBs from a member on here. Thanks Mark. These will finish out the rear of the car until the 9 inch comes. Everything will move over except the LCARBs.

Also was able to pick up my Founders LCAs and LCARBs from a member on here. Thanks Mark. These will finish out the rear of the car until the 9 inch comes. Everything will move over except the LCARBs.
 03-24-2016, 01:18 PM
#30
Member
Thread Starter
Join Date: Apr 2009
Location: Minnesoata/Wisconsin
Posts: 153
Likes: 0
Received 1 Like
on
1 Post
Car: 1991 Pontiac Firebird Formula
Engine: 5.0 TBI
Transmission: T5
Axle/Gears: 3.08
Re: 1991 Formula Build. PIC HEAVY!
It's apart because I was trying to isolate the squeak I found. Turns out it's something with the springs although I never touched them. I think I will drive it and see if that helps.
03-24-2016, 01:43 PM
#31
Member
iTrader: (1)

Join Date: Aug 2012
Location: Bella Vista, AR
Posts: 221
Likes: 0
Received 0 Likes
on
0 Posts
Car: 1991 Camaro Z28
Engine: LS Conversion
Transmission: 4L60E
Axle/Gears: Stock for now...
Re: 1991 Formula Build. PIC HEAVY!
Looking forward to this progressing. I just put on some founders LCA's and LCARB's. Haven't driven on them yet, but they are made very well IMO.
03-24-2016, 03:25 PM
#32
Junior Member
iTrader: (1)
Join Date: Mar 2015
Location: Pennsylvania
Posts: 24
Likes: 0
Received 0 Likes
on
0 Posts
Car: 91 Firebird Formula
Engine: 5.7
Transmission: 700r4
Axle/Gears: 3.23
Re: 1991 Formula Build. PIC HEAVY!
Big thumbs up for your Formula! Mine needs to look that good ASAP!
03-28-2016, 09:26 PM
#35
Member
Thread Starter
Join Date: Apr 2009
Location: Minnesoata/Wisconsin
Posts: 153
Likes: 0
Received 1 Like
on
1 Post
Car: 1991 Pontiac Firebird Formula
Engine: 5.0 TBI
Transmission: T5
Axle/Gears: 3.08
Re: 1991 Formula Build. PIC HEAVY!
Well, with Easter and family stiff I got less done than I was planning on. I did get the LCARBs on. One was twisted a bit so it took a while to get it to work. I would like to by the end of this week to finish the rear end, get the panhard measurements and start putting the front back together.
I was able to pick up everything from the machine shop. LS1 brake swap, ball joints, and some Del-a-lum bushings. I think it turned out really nice. For those in the Minneapolis, MN area let me know if you want his name. Just need to paint and assemble after a few more parts I ordered come in.
I was able to pick up everything from the machine shop. LS1 brake swap, ball joints, and some Del-a-lum bushings. I think it turned out really nice. For those in the Minneapolis, MN area let me know if you want his name. Just need to paint and assemble after a few more parts I ordered come in.
 03-29-2016, 05:33 AM
#36
Supreme Member
iTrader: (8)
Join Date: Oct 2001
Location: Il
Posts: 11,687
Received 745 Likes
on
505 Posts
Car: 1989-92 FORMULA350 305 92 Hawkclone
Engine: 4++,350 & 305 CIs
Transmission: 700R4 4800 vig 18th700R4 t56 ZF6 T5
Axle/Gears: 3.70 9"ford alum chunk,dana44,9bolt
Re: 1991 Formula Build. PIC HEAVY!
Looking good,tasteful mods and right on schedule for me to come pick it up!
03-29-2016, 09:02 AM
#37
Senior Member
iTrader: (9)
Join Date: Jul 2003
Location: DFW
Posts: 582
Received 200 Likes
on
142 Posts
Car: 90 Formula 350
Engine: 350
Transmission: 700r4
Axle/Gears: Dana 44 3.54
Re: 1991 Formula Build. PIC HEAVY!
Nice build I should of done LS1 brakes on my 87 - it cost way too much to do the 1LE brakes I did in 2004, stock discs are wimpy wimpy wimpy
04-02-2016, 10:54 PM
#41
Member
Thread Starter
Join Date: Apr 2009
Location: Minnesoata/Wisconsin
Posts: 153
Likes: 0
Received 1 Like
on
1 Post
Car: 1991 Pontiac Firebird Formula
Engine: 5.0 TBI
Transmission: T5
Axle/Gears: 3.08
Re: 1991 Formula Build. PIC HEAVY!
I was able to get the measurements after finishing up the rear. At stock ride height with the founders upper relocation mount the driver side of the panhard rod was 2.5 inched higher than the passenger side. I am not sure where I will land on ride height, but I would like to go a tad lower in the rear. I will wait until I have a different rear and an adjustable torque arm before worrying about adjusting ride height.
04-02-2016, 11:11 PM
#42
Member
Thread Starter
Join Date: Apr 2009
Location: Minnesoata/Wisconsin
Posts: 153
Likes: 0
Received 1 Like
on
1 Post
Car: 1991 Pontiac Firebird Formula
Engine: 5.0 TBI
Transmission: T5
Axle/Gears: 3.08
Re: 1991 Formula Build. PIC HEAVY!
Today I was finally able to install the adjustable lower control arms. It took a while to free them up, but once I got the right size open and used my torch I was home free. Cleaned up the threads with the wire wheel, and once I added some new ant seize and they were good as new. I torqued everything down and greased the zerks up.
The LCAs have 6.5 degrees of sloop going back to the rear wheels. So I should have plenty or room in the event I lower to keep that greater than 0-2 degrees.
The rear end work is done with the exception of adjusting the level on my panhard bar to be level. New polygraphite sway bar bushings with zerk fittings, polygraphite end links, adjustable panhard bar and upper relocation bracket, adjustable lower control arms, lower control arm relocation brackets, and to round it all out, Koni Yellows.
Now onto the front end…..
The LCAs have 6.5 degrees of sloop going back to the rear wheels. So I should have plenty or room in the event I lower to keep that greater than 0-2 degrees.

The rear end work is done with the exception of adjusting the level on my panhard bar to be level. New polygraphite sway bar bushings with zerk fittings, polygraphite end links, adjustable panhard bar and upper relocation bracket, adjustable lower control arms, lower control arm relocation brackets, and to round it all out, Koni Yellows.
Now onto the front end…..
04-03-2016, 08:11 AM
#43
Re: 1991 Formula Build. PIC HEAVY!
I was able to get the measurements after finishing up the rear. At stock ride height with the founders upper relocation mount the driver side of the panhard rod was 2.5 inched higher than the passenger side. I am not sure where I will land on ride height, but I would like to go a tad lower in the rear. I will wait until I have a different rear and an adjustable torque arm before worrying about adjusting ride height.
04-07-2016, 07:02 PM
#44
Member
Thread Starter
Join Date: Apr 2009
Location: Minnesoata/Wisconsin
Posts: 153
Likes: 0
Received 1 Like
on
1 Post
Car: 1991 Pontiac Firebird Formula
Engine: 5.0 TBI
Transmission: T5
Axle/Gears: 3.08
Re: 1991 Formula Build. PIC HEAVY!
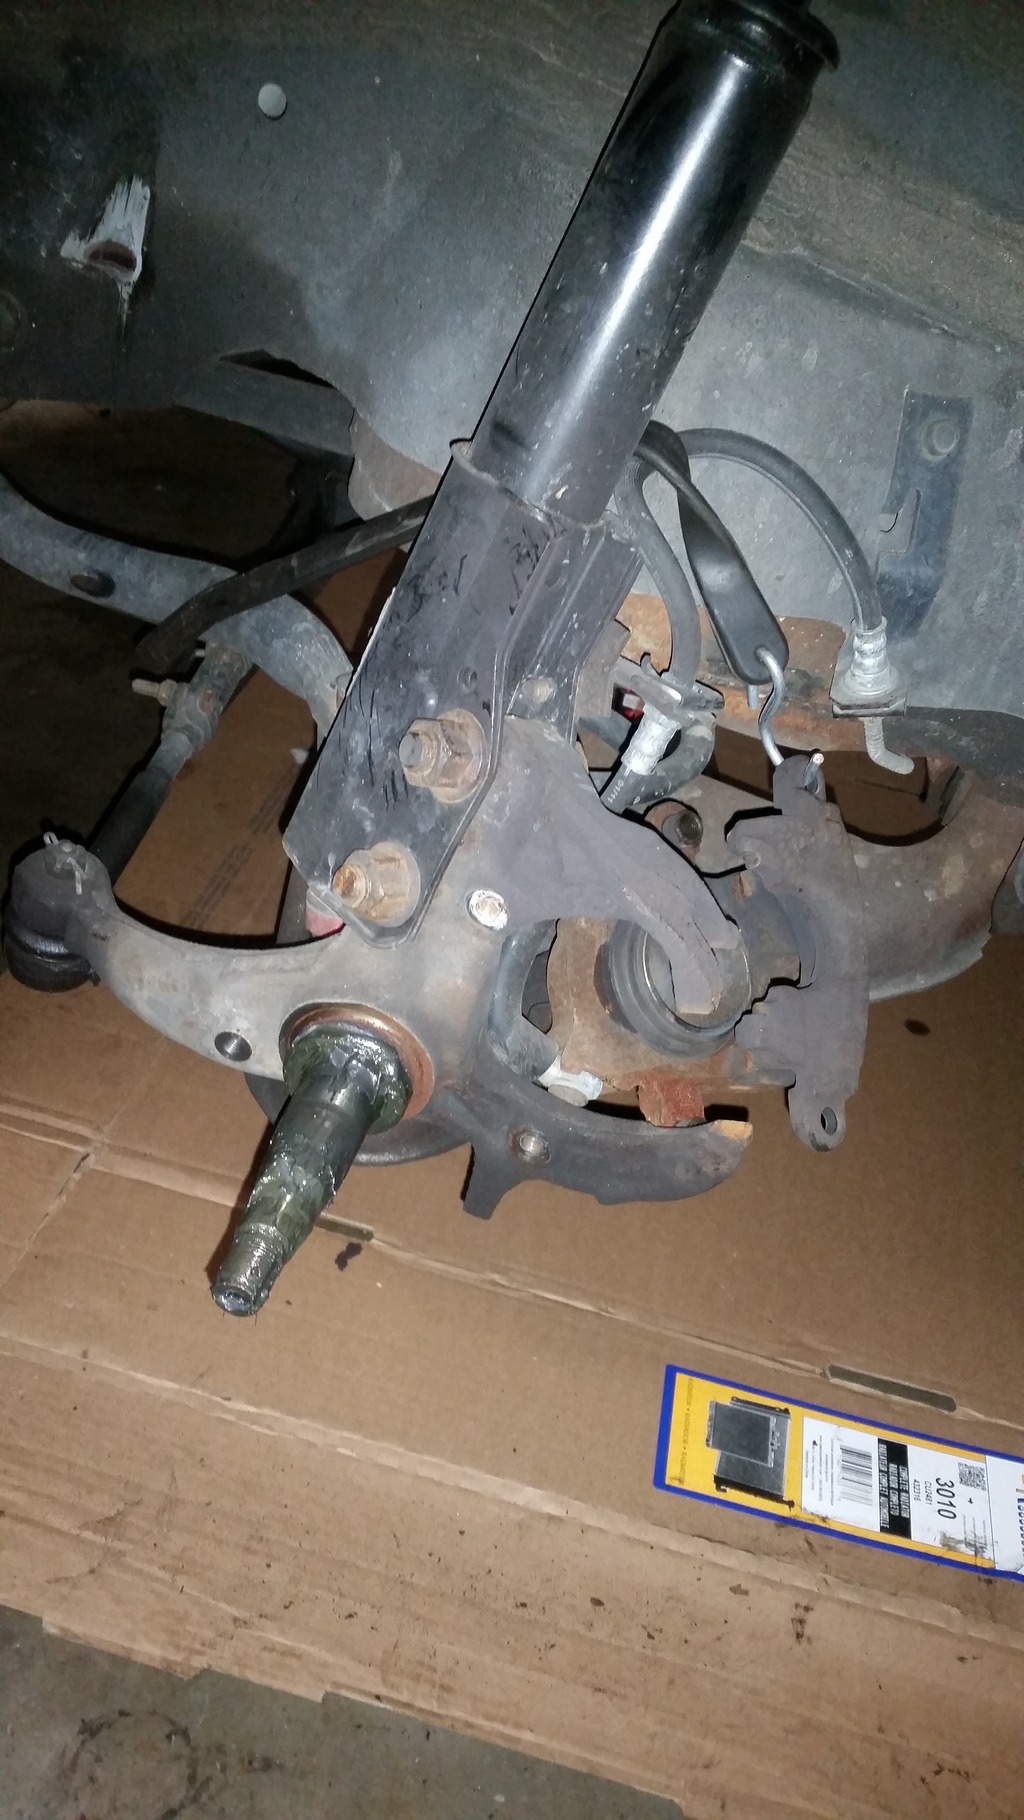
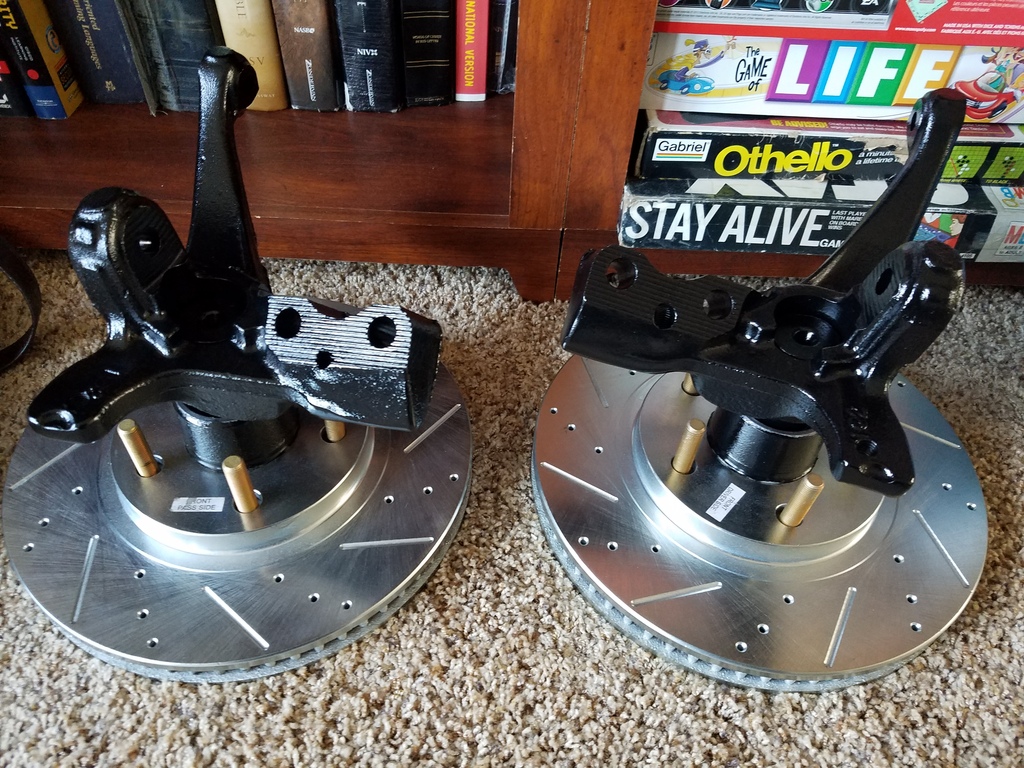
Over the weekend I was able to finish prepping and painting the spindles, backing plates and hubs with black epoxy paint. It turned out really well and the paint went on smooth. The LS1 rotors look huge compared to the stock thirdgen pieces. Hopefully they will be installed within the next couple weeks.
Some other performance parts came in the mail. Life is changing. Less than 3 weeks until our first arrives.
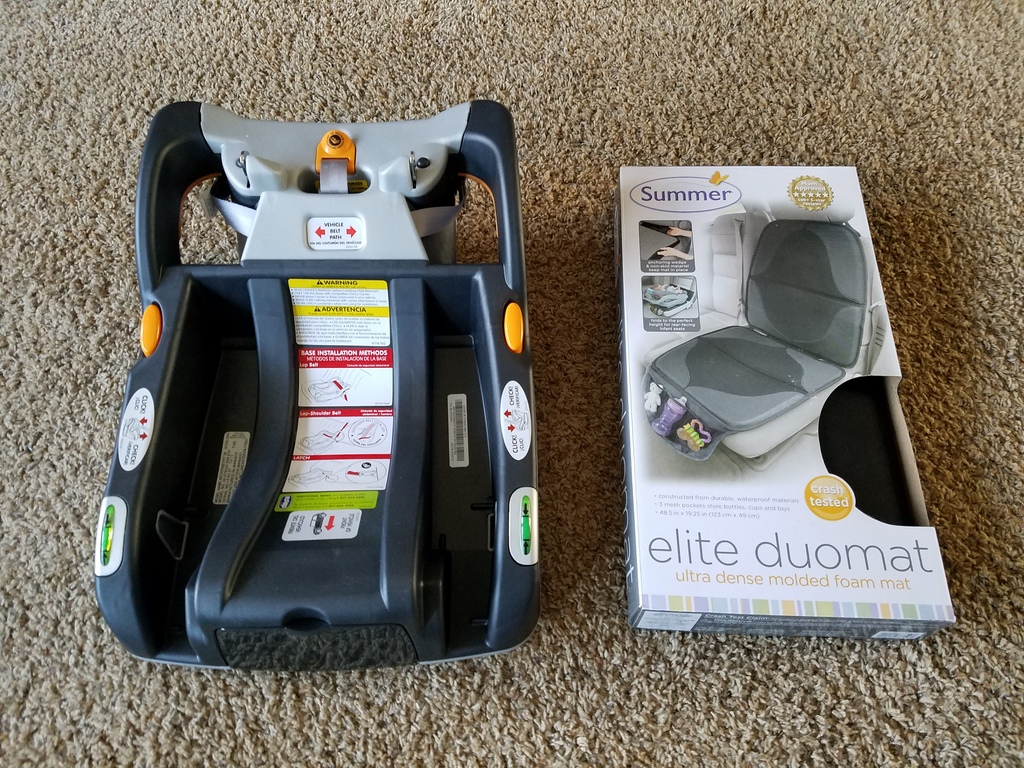

Some other performance parts came in the mail. Life is changing. Less than 3 weeks until our first arrives.
 04-07-2016, 07:10 PM
#45
Supreme Member
iTrader: (8)
Join Date: Oct 2001
Location: Il
Posts: 11,687
Received 745 Likes
on
505 Posts
Car: 1989-92 FORMULA350 305 92 Hawkclone
Engine: 4++,350 & 305 CIs
Transmission: 700R4 4800 vig 18th700R4 t56 ZF6 T5
Axle/Gears: 3.70 9"ford alum chunk,dana44,9bolt
Re: 1991 Formula Build. PIC HEAVY!
Better get all that car playing done b4 the 1st arrives!!!!
You will be very busy soon!
You will be very busy soon!
04-07-2016, 10:06 PM
#46
Member
Thread Starter
Join Date: Apr 2009
Location: Minnesoata/Wisconsin
Posts: 153
Likes: 0
Received 1 Like
on
1 Post
Car: 1991 Pontiac Firebird Formula
Engine: 5.0 TBI
Transmission: T5
Axle/Gears: 3.08
Re: 1991 Formula Build. PIC HEAVY!
The plan is to finish the suspension and chassis stuff before he arrives, but at the rate I am going I won't finish. I just spend two hours trying the put the front spring back in and zero progress.
04-07-2016, 10:22 PM
#47
Re: 1991 Formula Build. PIC HEAVY!
Ya springs are a GIANT pain. I rebuilt my whole front end just to have to take it all apart 3 times. First I found out that my springs were worn out. Then I had to modify my spohn A arms to work with the Moog springs I bought. The best way I found was to line the spring up by placing it on the A Arm so that its indexed right. Then pulling it out, putting it vertical while still keeping the spring turned right so that it stayed indexed, and the jacking the a arm up slowly. With the help of a few wacks of a rubber mallet they just snapped in.
Basically what I did ^^^^^^^^^^^^^^^^^
Basically what I did ^^^^^^^^^^^^^^^^^
04-07-2016, 10:55 PM
#48
Member
Thread Starter
Join Date: Apr 2009
Location: Minnesoata/Wisconsin
Posts: 153
Likes: 0
Received 1 Like
on
1 Post
Car: 1991 Pontiac Firebird Formula
Engine: 5.0 TBI
Transmission: T5
Axle/Gears: 3.08
Thanks t/aws61985. I will give that a try. I will definitely need to get a pry bar like his first.
04-09-2016, 03:48 PM
#49
Senior Member

Re: 1991 Formula Build. PIC HEAVY!
I use an internal spring compressor, slightly modified to work. The first time I did it, It took my about 30 minuted each side to get the spring in and spindle bolted to the strut.
The second time, I figured I had it all figured out, took me only a few minutes per side... Didn't get the springs in the upper pockets, I figured they needed to settle in with a test drive, when they didn't I figured out they had to come back out for me to get them in there all the way. Passenger side took me like an hour to get in there for some reason, drivers side was a 5 minute job lol.
The second time, I figured I had it all figured out, took me only a few minutes per side... Didn't get the springs in the upper pockets, I figured they needed to settle in with a test drive, when they didn't I figured out they had to come back out for me to get them in there all the way. Passenger side took me like an hour to get in there for some reason, drivers side was a 5 minute job lol.
04-09-2016, 07:21 PM
#50
Member
Thread Starter
Join Date: Apr 2009
Location: Minnesoata/Wisconsin
Posts: 153
Likes: 0
Received 1 Like
on
1 Post
Car: 1991 Pontiac Firebird Formula
Engine: 5.0 TBI
Transmission: T5
Axle/Gears: 3.08
Re: 1991 Formula Build. PIC HEAVY!
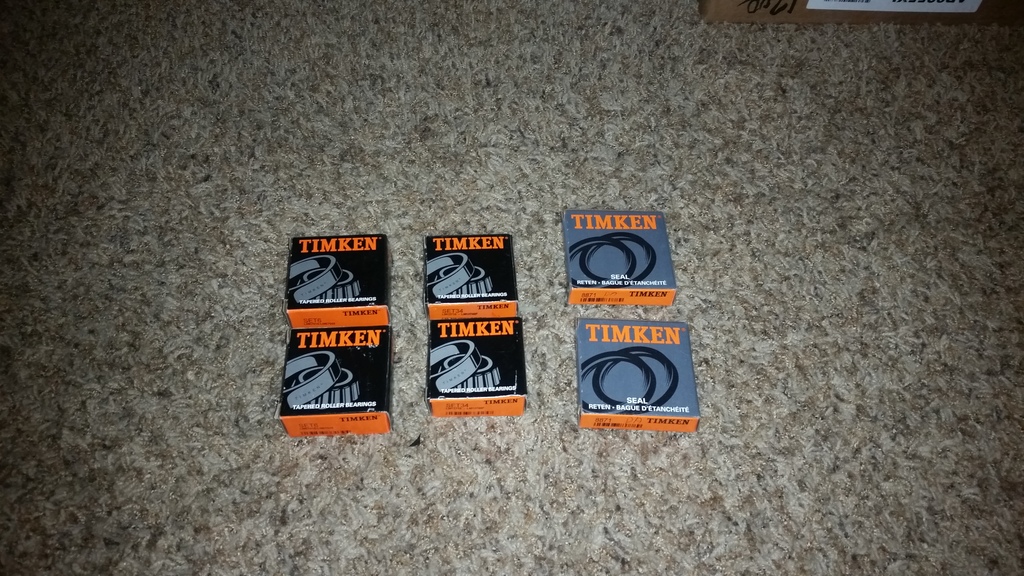
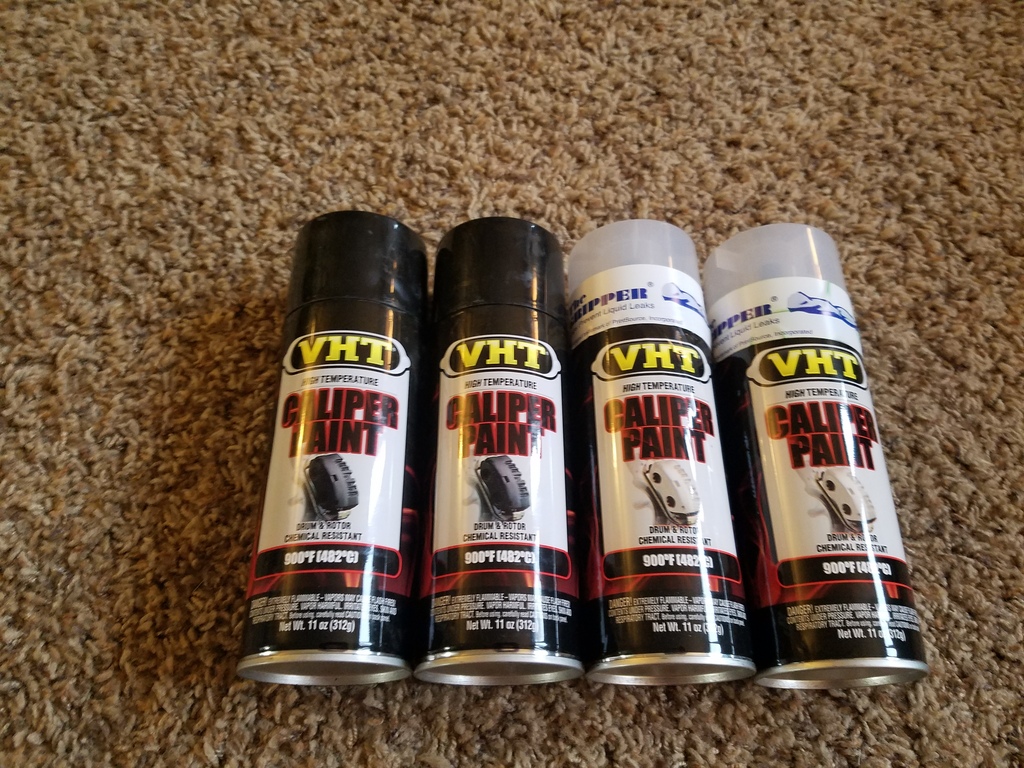
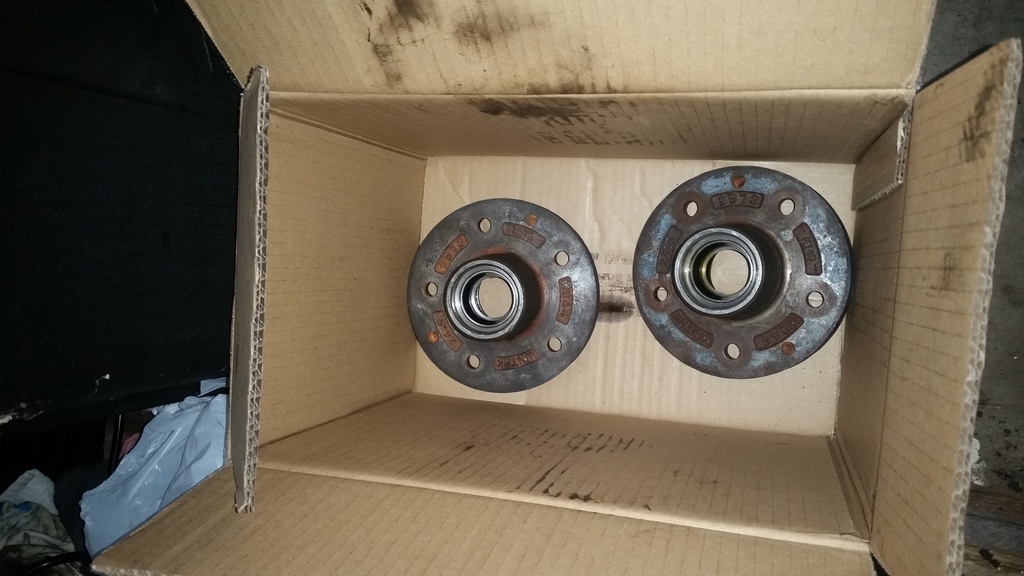
Got my new wheel bearings and seals this as well as my caliper paint. Every little bit helps.