When you click on links to various merchants on this site and make a purchase, this can result in this site earning a commission. Affiliate programs and affiliations include, but are not limited to, the eBay Partner Network.
Discussion: Texture improvement on 3D printed double DIN radio bezel (Firebird)
The time has come that FM radio will be shut down in a few years, at least where I live the days of analog radio are counted. So I'm planning for a new radio and of course next to DAB I want a GPS as well, which means double DIN.
There have been several attempts to create a 2-DIN bezel for Firebirds and Camaros. While those 3D printed faceplates for Camaros have reached a satisfactory level of OEM style there are still no comparable results for Firebirds.
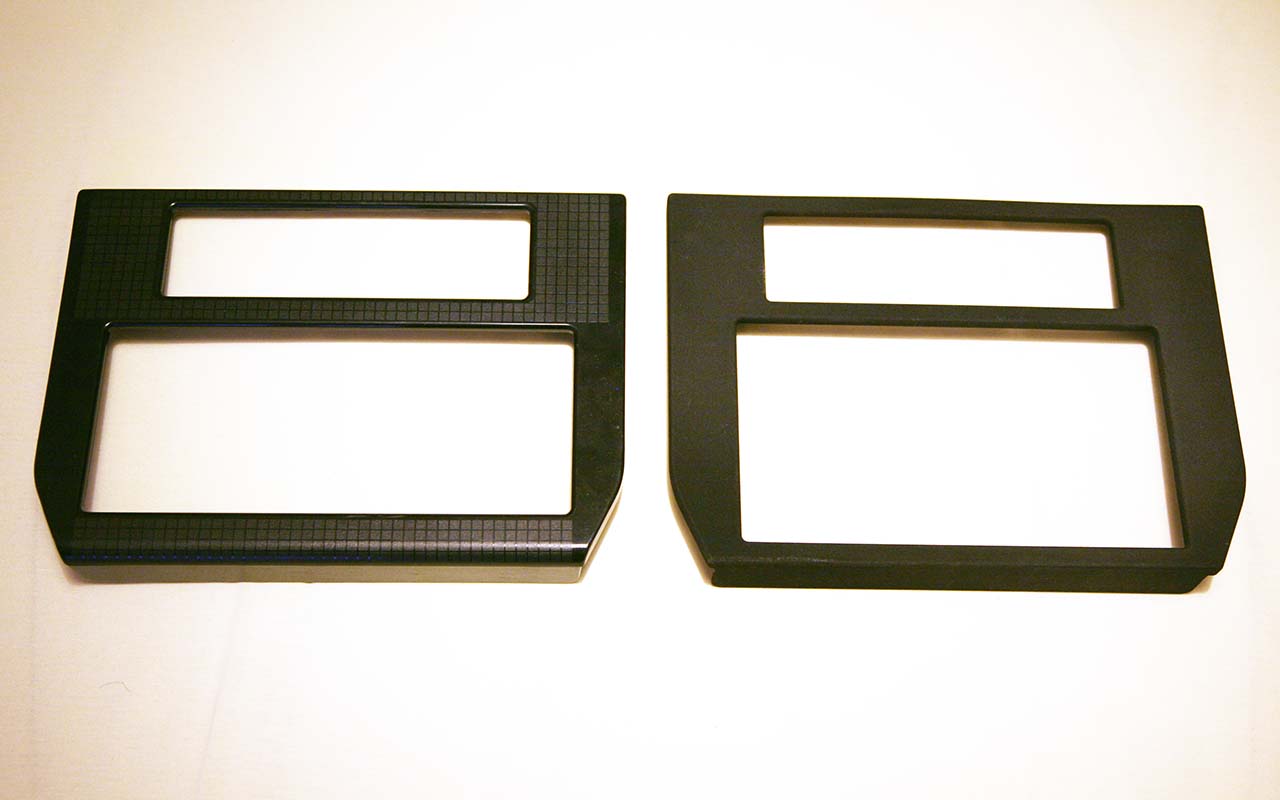
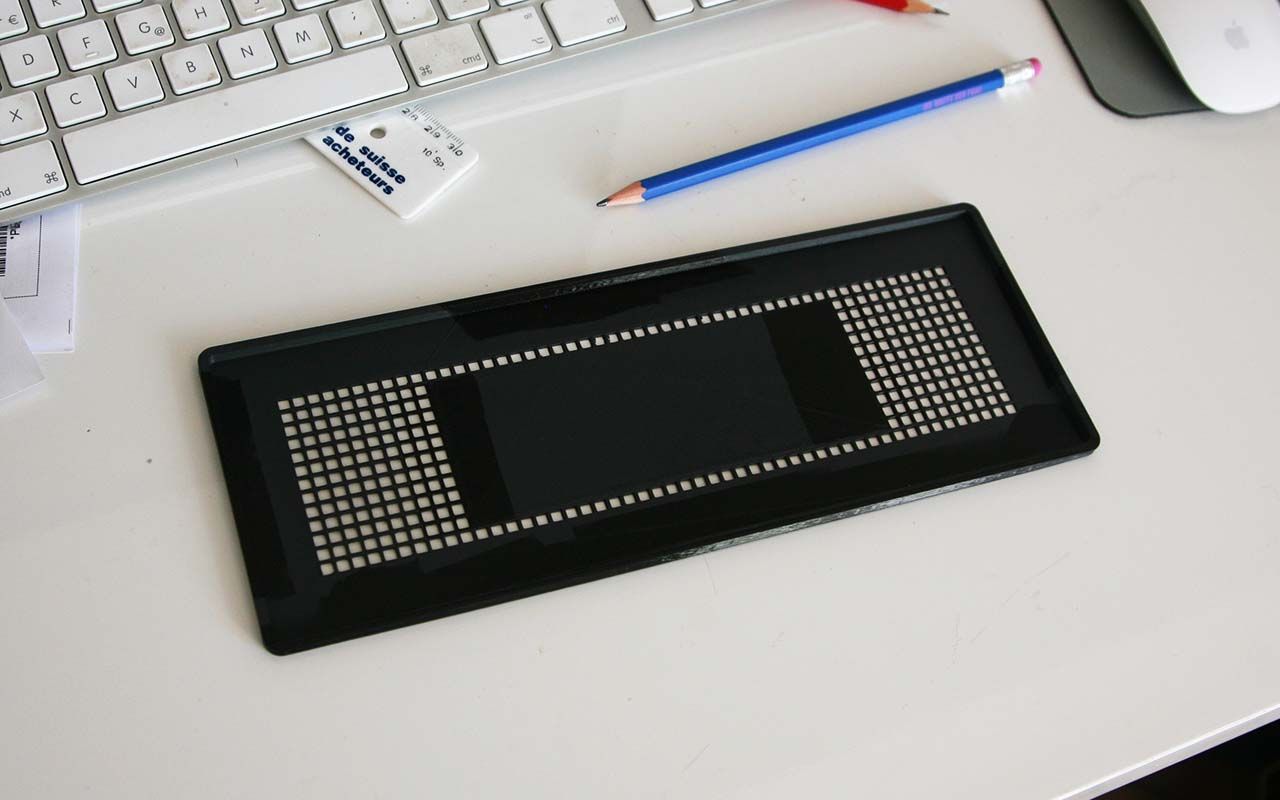
The main problem is the surface. While Camaros have a rough textured but otherwise monomorphous surface the Firebird version is glossy with a granular checkered pattern. This is much harder to reproduce. However, it is crucial to me - and as I have learned to many other fellow thirdgen enthusiasts as well - to have an adequate reproduction of the surface before putting something in a car that looks out of place.
So this thread is not primarily about creating a double DIN bezel for Firebirds, but rather about the finish. I�m glad if you can bring in your ideas as to how we can eventually reach that goal in a satisfactory manner.
EDIT:
If you don�t want to read through all of the posts below, here are the essentials:
1. Get one of these files and have it 3D printed in a high-quality material like nylon (e.g. shapeways, 3dhubs etc.)
2. wet sand, use filler, black coat, and clear coat to get a smooth finish
3. use the attached svg file and have it cut out on a plotter on matte black foil (e.g. Oracal 751). Make sure to not plot the contours but the middle of the lines
4. remove the grid and transfer the squares to the bezel with a masking paper
Re: Discussion: Texture improvement on 3D printed double DIN radio bezel (Firebird)
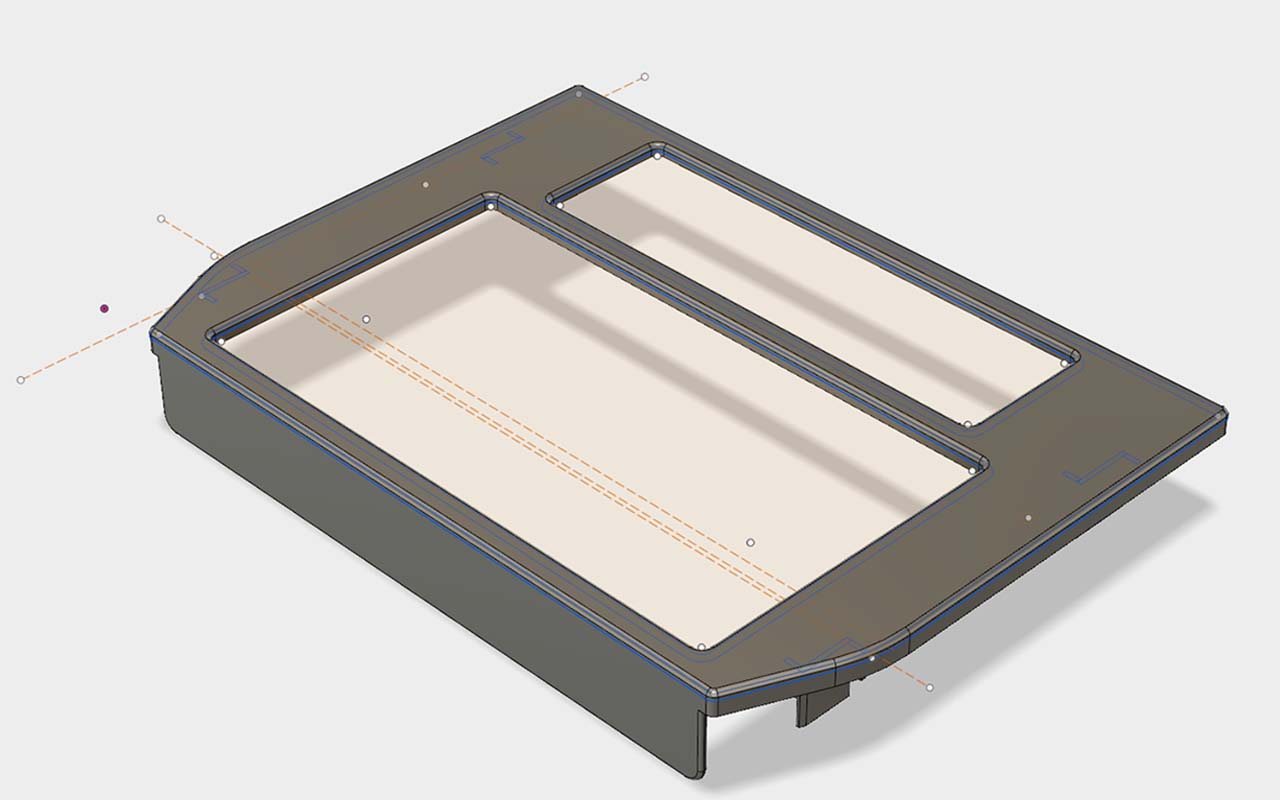
Obviously in 2017 3D printing is the way to go to reproduce plastic parts that are no longer made. Unfortunately the 3D designs I found on the net didn’t meet my quality requirements. So I went on and designed a first prototype in Fusion 360 myself. I got it printed in Nylon (strong and flexible PA 2200) at Shapeways. While waiting for the part to arrive I made an improved and detailed version of this design, more on that later.
Nylon has a furry texture, and I think it looks quite nice as it comes out of the printer. However, it doesn’t look like the stock part, so some refinement is needed.
Re: Discussion: Texture improvement on 3D printed double DIN radio bezel (Firebird)
This is what I did, and I think it did a decent job so far, but it can still be improved a lot:
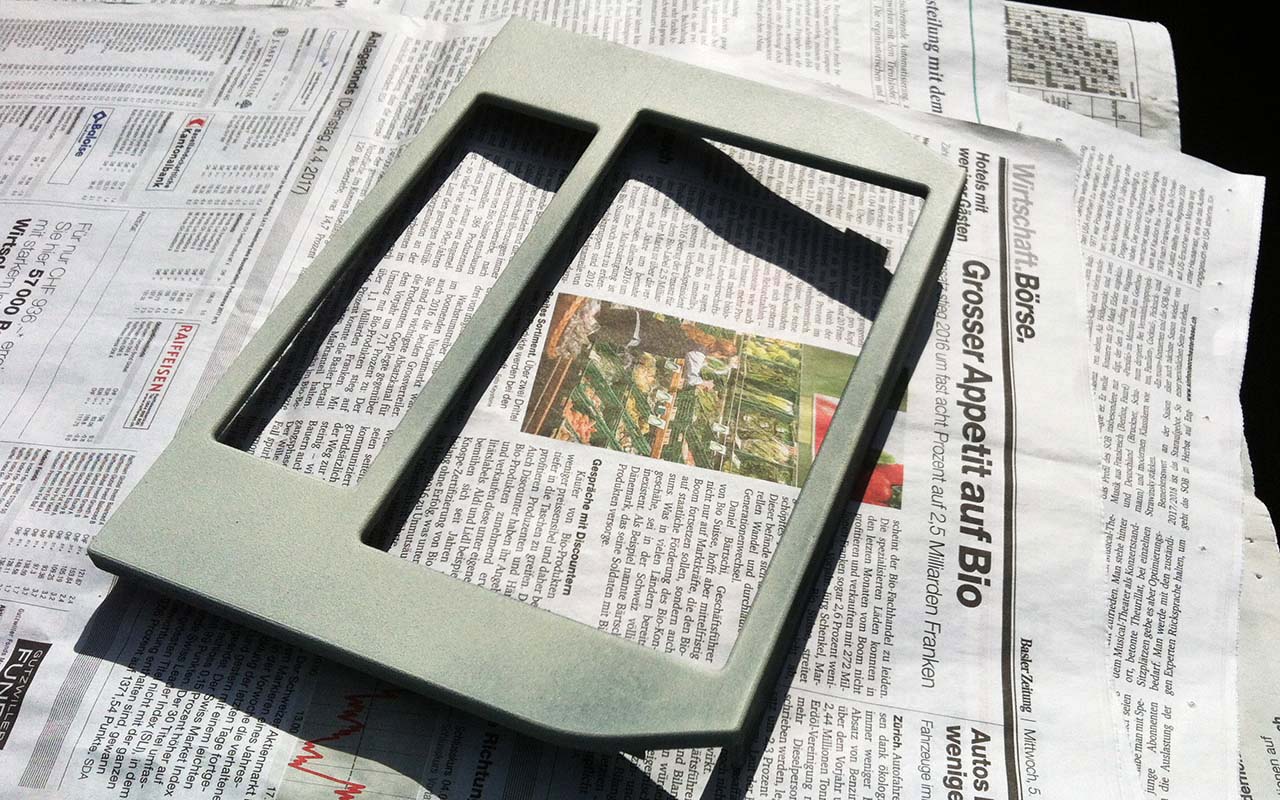
- Sprayed with a layer of grey filler
- sanded with 600 grit
- repeat twice
- after three coats of filler wet sanding with 600, 1200, 2000 grit
- one coat of black
- one clear coat
- buffing with 2000, then 3000 grit
- one last clear coat
Re: Discussion: Texture improvement on 3D printed double DIN radio bezel (Firebird)
Some hate that OEM Firebird checker pattern, I actually like it and I want to reproduce it as close as possible to get that OEM look.
Here are some ideas on how to get that pattern on top of a 3d printed part: - relief printing with a (3D printed?) stamp
- silk screen printing
- a template screen to cover the areas which shall not be sprayed
- the same template screen as above, but used for sandblasting
Well my first attempt was to 3D print a template and color spray the pattern on the surface.
As I had to learn the hard way, the template needs to rest totally flush on the surface, which is a problem with such delicate objects as they tend to warp. Accordingly the results are a little� well underwhelming.
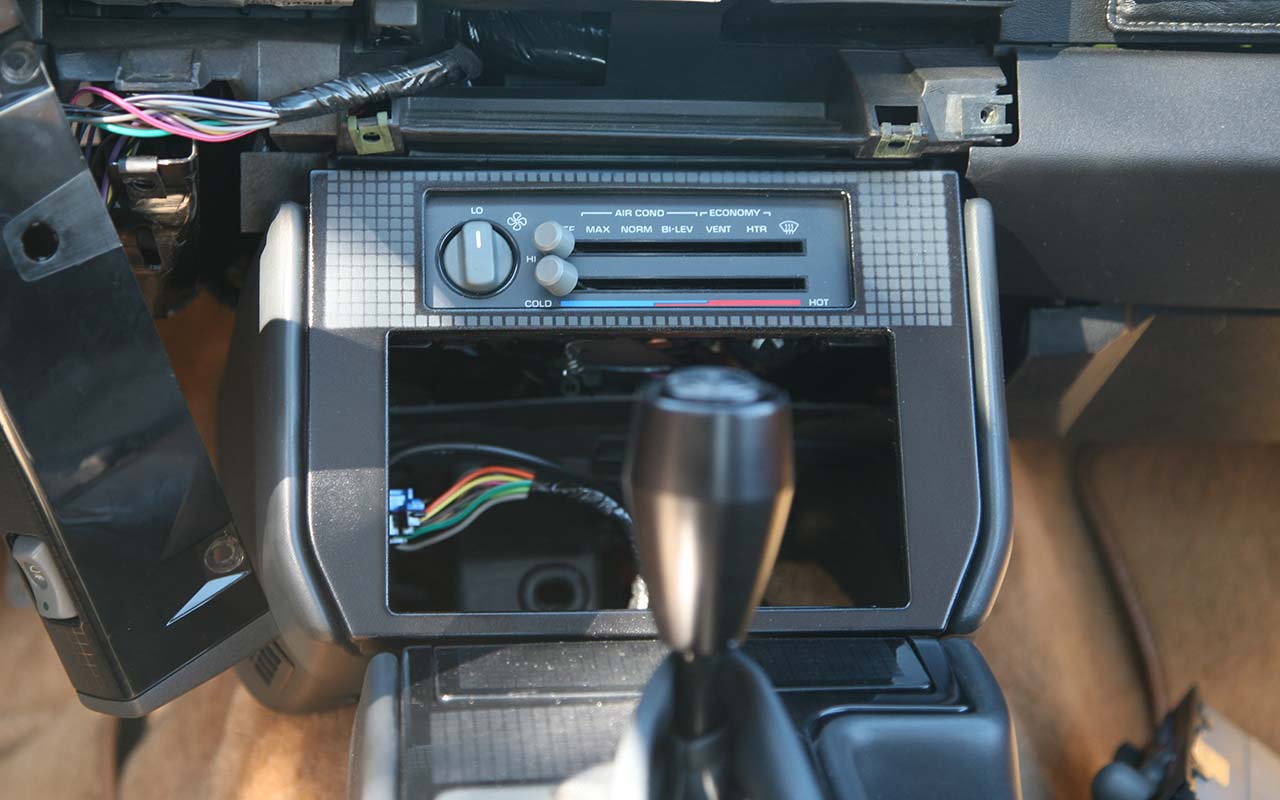
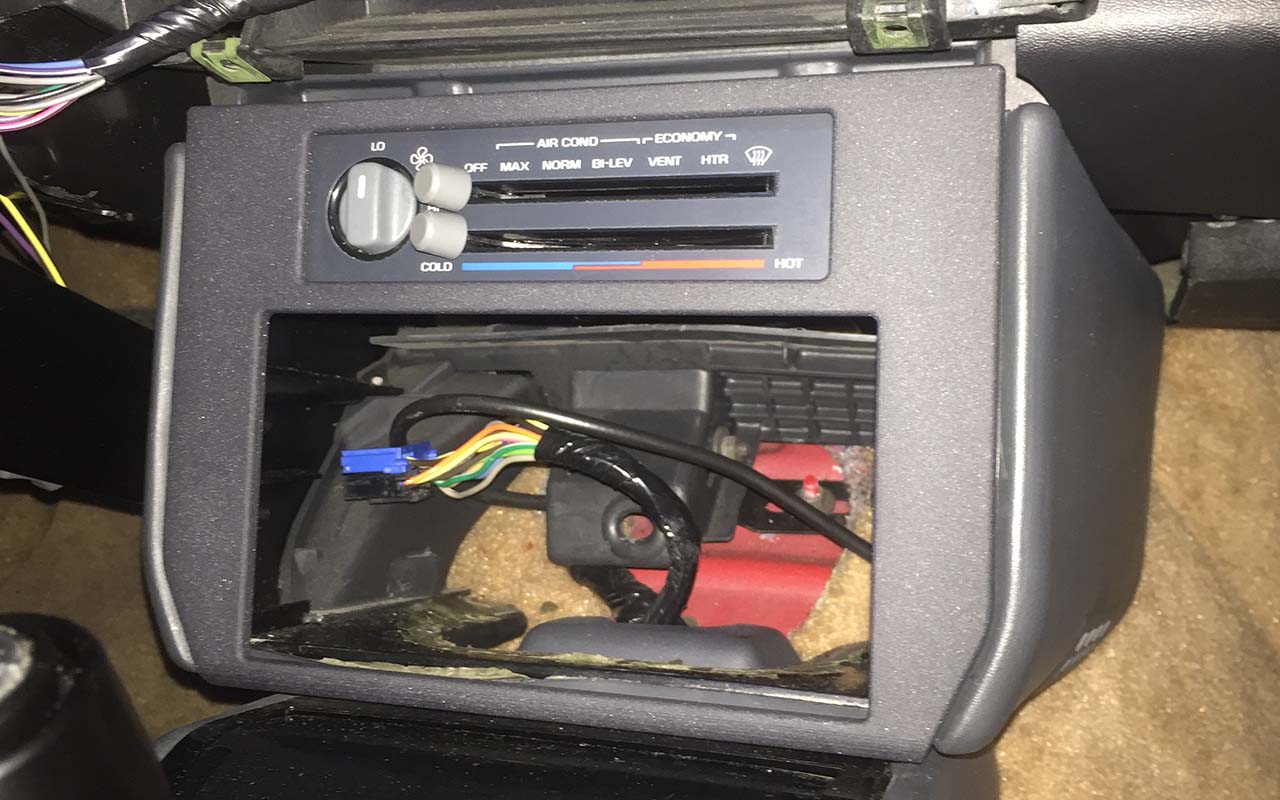
I had a lot of undersprayed paint. I used SEM Graphite, which is a tad too light, but still looks nice. Interestingly, when mounted in the car it looks good. Not perfect by any means, but more OEM than all I have seen so far in a Firebird.
I need a double DIN radio, haven't decided on the model yet.
Re: Discussion: Texture improvement on 3D printed double DIN radio bezel (Firebird)
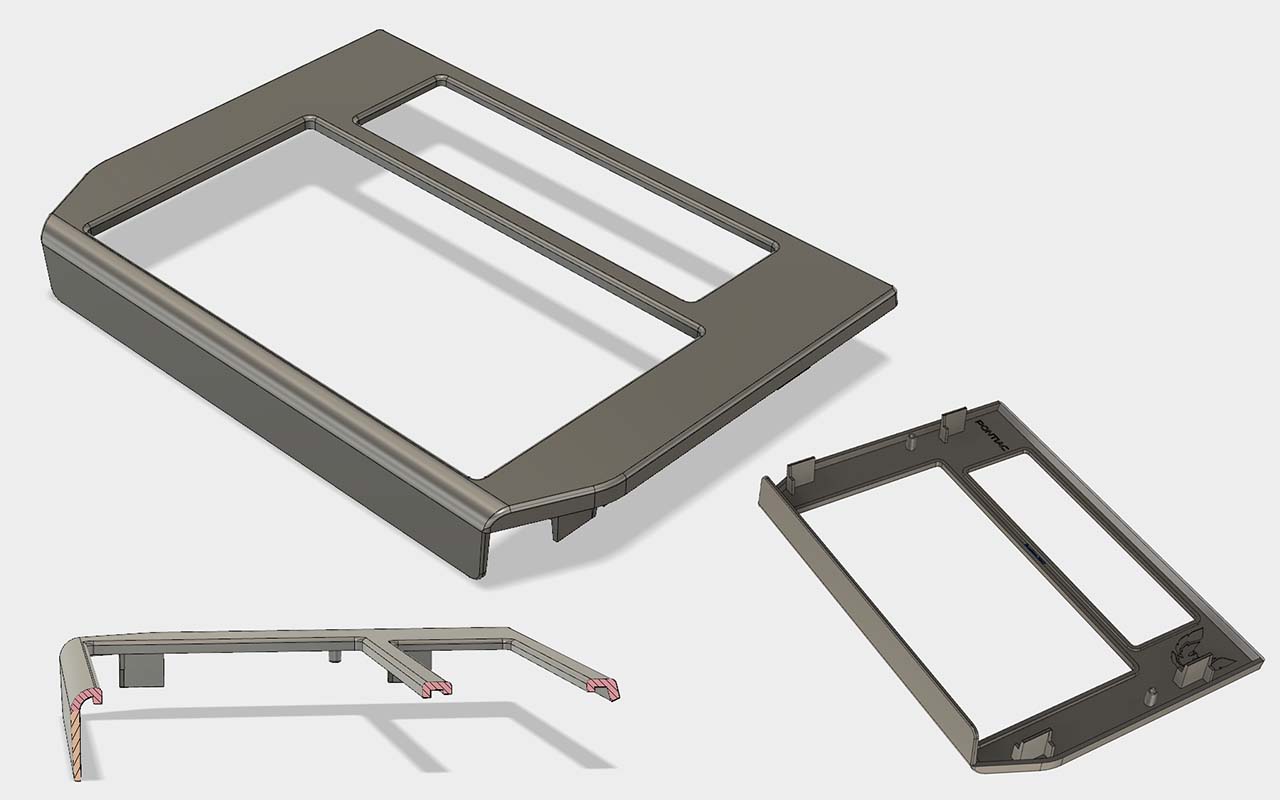
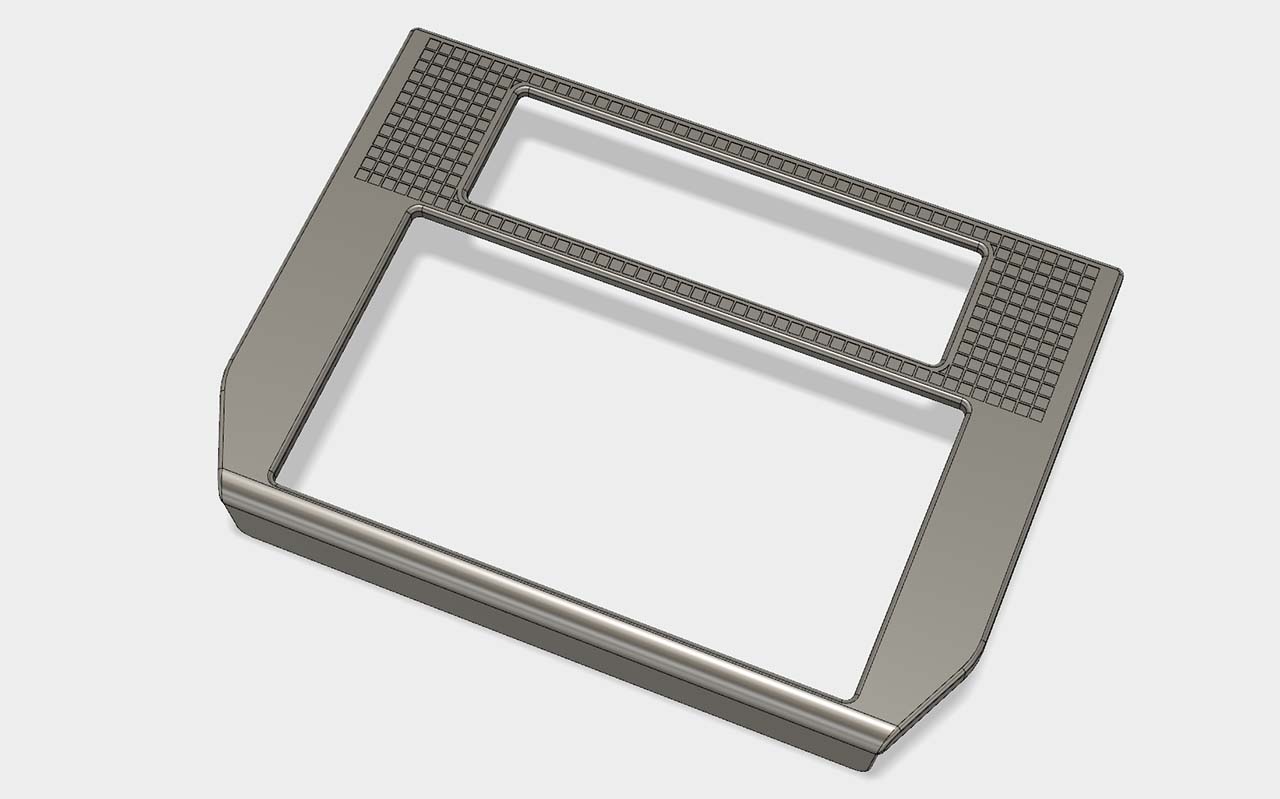
As I mentioned, the above bezel was just a quick prototype. I made a new version with all the correct drafts, fillets, chamfers and wedges, down to 0.1 mm precision. I haven't printed this one out yet, but I believe it is as close to the original as ever possible:
Re: Discussion: Texture improvement on 3D printed double DIN radio bezel (Firebird)
First, allow me to applaud your efforts thus far! Nice work Cehbra!
Very impressive. Envious of those who have the computer skills to do something like this.
The pattern does look good. As you said, not perfect, but much better than a Camaro-like single finish.
A mask was my original idea too, but you would have to apply some sort of light adhesive (like on a Post-It note) to try to keep it from blowing under, or bleeding through at the many edges, yet be easily removed later.
My other thought was that again, with a mask, to etch the surface, like with a light acid. Say you finish as described up through the first coat of clear, then mask, etch (say with a mild acid, like a spray over cleaner), remove, then add the second coat of clear?
Last thought would be to take the color finished part as above, and have the pattern laser etched into the surface. But this involves another program, and another machine or shop to do the work. But it would be much more precise, with no bleed.
Re: Discussion: Texture improvement on 3D printed double DIN radio bezel (Firebird)
Originally Posted by DynoDave43
First, allow me to applaud your efforts thus far! Nice work Cehbra!
Very impressive. Envious of those who have the computer skills to do something like this.
The pattern does look good. As you said, not perfect, but much better than a Camaro-like single finish.
A mask was my original idea too, but you would have to apply some sort of light adhesive (like on a Post-It note) to try to keep it from blowing under, or bleeding through at the many edges, yet be easily removed later.
My other thought was that again, with a mask, to etch the surface, like with a light acid. Say you finish as described up through the first coat of clear, then mask, etch (say with a mild acid, like a spray over cleaner), remove, then add the second coat of clear?
Last thought would be to take the color finished part as above, and have the pattern laser etched into the surface. But this involves another program, and another machine or shop to do the work. But it would be much more precise, with no bleed.
Thank you, that is very helpful!!!!!
As a matter of fact, those are some nice tipps indeed!
That idea with the removable adhesive is great, why didn't I think of that? It would have given me a definitely better result.
I'll look into laser etching and see if there is a service in my area.
Also interesting idea with the acid. Did you have a specific acid in mind and if yes what concentration would you use?
Re: Discussion: Texture improvement on 3D printed double DIN radio bezel (Firebird)
When I pictured the acid etch in my mind, I pictured spray oven cleaner. If I recall correctly, people used to use it to etch patterns into auto glass. Was popular for custom van windows in the '70s.
Now does spray oven cleaner still have the strong stuff in it that it once did? That I don't know. The govt. is working on saving us from ourselves you know.
Re: Discussion: Texture improvement on 3D printed double DIN radio bezel (Firebird)
Originally Posted by DynoDave43
When I pictured the acid etch in my mind, I pictured spray oven cleaner. If I recall correctly, people used to use it to etch patterns into auto glass. Was popular for custom van windows in the '70s.
Now does spray oven cleaner still have the strong stuff in it that it once did? That I don't know. The govt. is working on saving us from ourselves you know.
This is very helpful, thanks a lot! I think I'll give it a try. I'm going to wet sand the faceplate and redo it with that etching acid. It's a prototype after all.
Re: Discussion: Texture improvement on 3D printed double DIN radio bezel (Firebird)
I tried out some of the etching suggestions. I glued the mask to the bezel with 3M repositionable spray mount. I did some testing on a blank coated surface before. The problem was that the etching liquid started to eat into the plastic from the mask, resulting in jagged edges.
Anyways there are limits on how thick the grid can be without too much bending and breaking. As far as I calculated the width of the grid bars is 0.66 mm in the original but I had to go up to 0.9 mm in my grid which is a visible difference.
Re: Discussion: Texture improvement on 3D printed double DIN radio bezel (Firebird)
So in the end I ran into too many difficulties using a mask. And there is too much technical overhead in silk screen or relief printing. As Dynodave suggested laser etching might just be the perfect solution. I�m gonna go ahead and try one more thing before that: I extruded the pattern directly in the 3D file using a cut of 0.3 mm depth.
Of course this will involve a different sanding and coating technique, probably I will have to wet sand the new piece without a filler.
I�ll give this a try in a few days. Or is any of you guys willing to take the risk?
Re: Discussion: Texture improvement on 3D printed double DIN radio bezel (Firebird)
Not sure when I could get to it, and Tape material would have to be determined.
And I will have to get on a reg. PC, then determine whether the measurements can be accomplished on the cutter.
Maybe you'll beat me to it, but I think masking is the right direction to take.
Re: Discussion: Texture improvement on 3D printed double DIN radio bezel (Firebird)
Originally Posted by jmd
Not sure when I could get to it, and Tape material would have to be determined.
And I will have to get on a reg. PC, then determine whether the measurements can be accomplished on the cutter.
Maybe you'll beat me to it, but I think masking is the right direction to take.
Do I understand correctly: you are suggesting cutting the mask on a vinyl cutter or the like? That sounds interesting and it could actually work!
In case you need the measurements for the mask I have attached a Photoshop file with two transparent layers (digital and analog) that would go along with the 3D file above.
Re: Discussion: Texture improvement on 3D printed double DIN radio bezel (Firebird)
I have used a "brothers cut and scan" at work a number of time to make spraying stencils with a light adhesive backing. Worked good. Clean lines and a nice accurate cut.
Re: Discussion: Texture improvement on 3D printed double DIN radio bezel (Firebird)
From my planning in my thread the best course of action so far to achieve the finished product is:
With Your new 3D plate.
Polish smooth entire face.
Then apply the vinyl stencil.
Spray a paint layer or three to RAISE the grid off the faceplate.
Then an acid wash to get the rougher texture.
Peel the vinyl and pray no bleeding occurred.
This or similar IMO is the ONLY way to get the results we want in a home environment.
Re: Discussion: Texture improvement on 3D printed double DIN radio bezel (Firebird)
Originally Posted by 7thdarkangel
I have used a "brothers cut and scan" at work a number of time to make spraying stencils with a light adhesive backing. Worked good. Clean lines and a nice accurate cut.
Also, what are you using for 3d software?
I'm using Fusion 360
That Brother ScanNCut really looks good, can't afford it though. Still a good idea
Re: Discussion: Texture improvement on 3D printed double DIN radio bezel (Firebird)
Originally Posted by Vanilla Ice
From my planning in my thread the best course of action so far to achieve the finished product is:
With Your new 3D plate.
Polish smooth entire face.
Then apply the vinyl stencil.
Spray a paint layer or three to RAISE the grid off the faceplate.
Then an acid wash to get the rougher texture.
Peel the vinyl and pray no bleeding occurred.
This or similar IMO is the ONLY way to get the results we want in a home environment.
Instead of using the acid wash we might try the wrinkle paint as suggested by Twin_Turbo ?
It seems most of you guys believe that a mask is the way to go. You got me there - I do reconsider that and I'm gonna print the flat bezel and redo it with a mask.
Re: Discussion: Texture improvement on 3D printed double DIN radio bezel (Firebird)
Originally Posted by Cehbra
Instead of using the acid wash we might try the wrinkle paint as suggested by Twin_Turbo ?
It seems most of you guys believe that a mask is the way to go. You got me there - I do reconsider that and I'm gonna print the flat bezel and redo it with a mask.
Have you considered making a silk screen to put the grid on? Its fairly easy to do and its reusable.
Re: Discussion: Texture improvement on 3D printed double DIN radio bezel (Firebird)
Originally Posted by Cehbra
Yeah I did. But it's just too expensive at the moment with starter sets beginning at 150 $ around here. I guess it would be the king way though
you don't need a starter set. just get a pint or so of photo emulsion. make your own screen box with some 2x3 (you could even print one out)and wrap it in the screen it would prob cost as low as $30 if you spend some time price checking. made a couple a few years back.
Re: Discussion: Texture improvement on 3D printed double DIN radio bezel (Firebird)
Originally Posted by 7thdarkangel
you don't need a starter set. just get a pint or so of photo emulsion. make your own screen box with some 2x3 (you could even print one out)and wrap it in the screen it would prob cost as low as $30 if you spend some time price checking. made a couple a few years back.
Re: Discussion: Texture improvement on 3D printed double DIN radio bezel (Firebird)
Very impressed with the turn out of the print from this file The dimensions are almost perfect. The printer told he he had a small trouble with a layer trying to separate but turned out good. I opted for the smooth finish and ABS plastic The small attention to detail really gets me. I like the firebird emblem and Pontiac wrote on the backside
Re: Discussion: Texture improvement on 3D printed double DIN radio bezel (Firebird)
Originally Posted by 85Z28NOS
Very impressed with the turn out of the print from this file
<image> The dimensions are almost perfect. The printer told he he had a small trouble with a layer trying to separate but turned out good. I opted for the smooth finish and ABS plastic
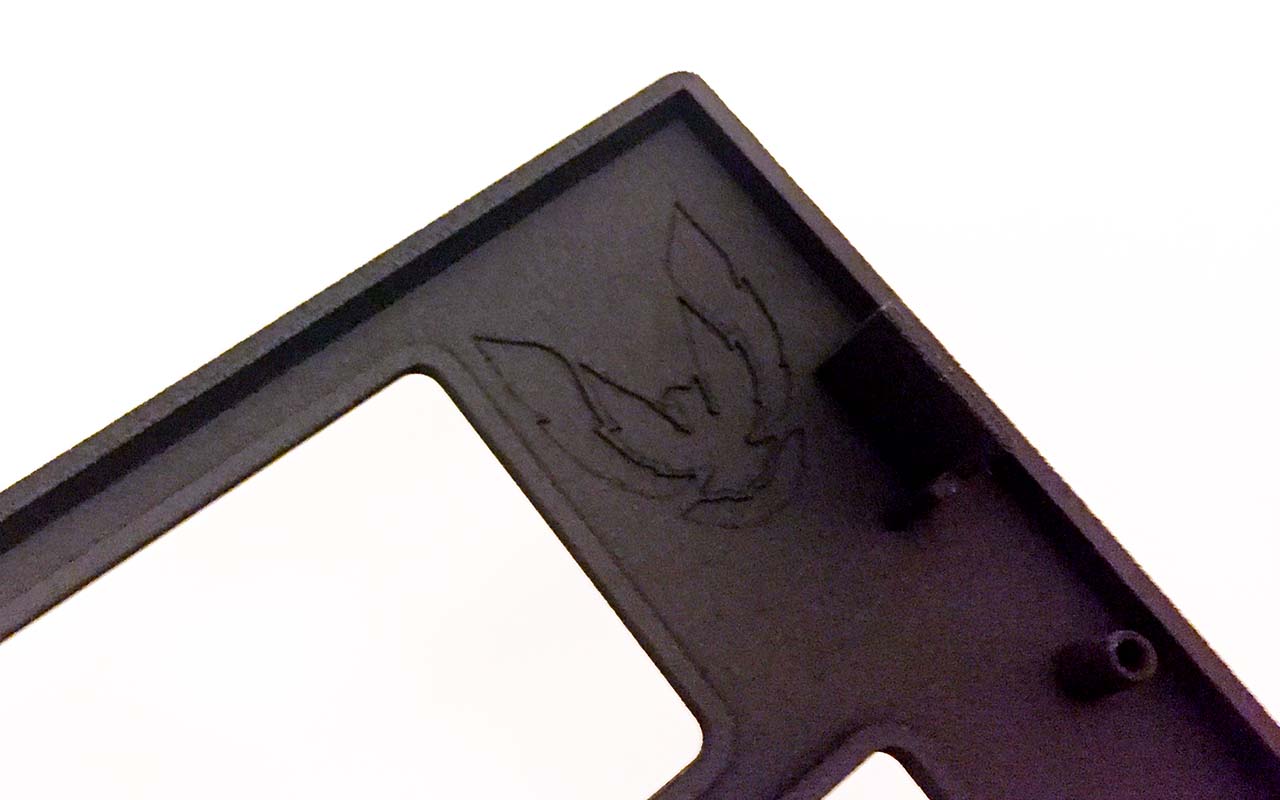
<image> The small attention to detail really gets me. I like the firebird emblem and Pontiac wrote on the backside
<image>
Looking good! Thanks for your confidence!
Did you test the bezel in the car? Does it fit snugly?
Re: Discussion: Texture improvement on 3D printed double DIN radio bezel (Firebird)
It fits very well. Over all I'm very happy with the way this file performed. I would recommend it to anyone wanting a double din in a firebird. Is it a perfect match with just the proper opening, no. But if you spent some time sanding and did an overlay. Or in my case vinyl wrap the whole thing. It is hard to tell
Re: Discussion: Texture improvement on 3D printed double DIN radio bezel (Firebird)
Originally Posted by 85Z28NOS
<image> It fits very well. Over all I'm very happy with the way this file performed. I would recommend it to anyone wanting a double din in a firebird. Is it a perfect match with just the proper opening, no. But if you spent some time sanding and did an overlay. Or in my case vinyl wrap the whole thing. It is hard to tell
Looking good! Glad it fits.
I'm opting for a stock look as much as possible. Actually I just ordered the new bezel at shapeways in black strong and flexible plastic and I also have someone cut the tron pattern on foil. That I'll use as a mask. I'll let you guys know as soon as it's here.
Re: Discussion: Texture improvement on 3D printed double DIN radio bezel (Firebird)
Originally Posted by Cehbra
Looking good! Glad it fits.
I'm opting for a stock look as much as possible. Actually I just ordered the new bezel at shapeways in black strong and flexible plastic and I also have someone cut the tron pattern on foil. That I'll use as a mask. I'll let you guys know as soon as it's here.
Re: Discussion: Texture improvement on 3D printed double DIN radio bezel (Firebird)
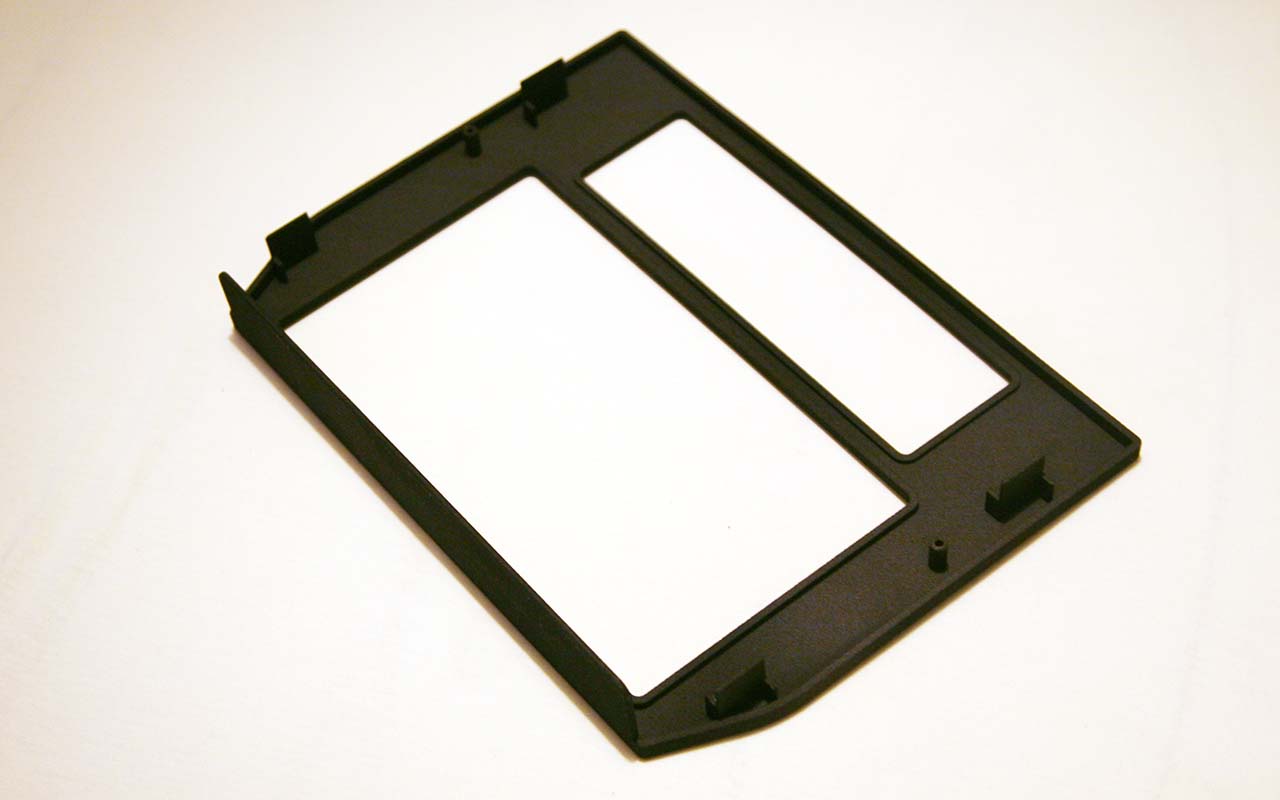
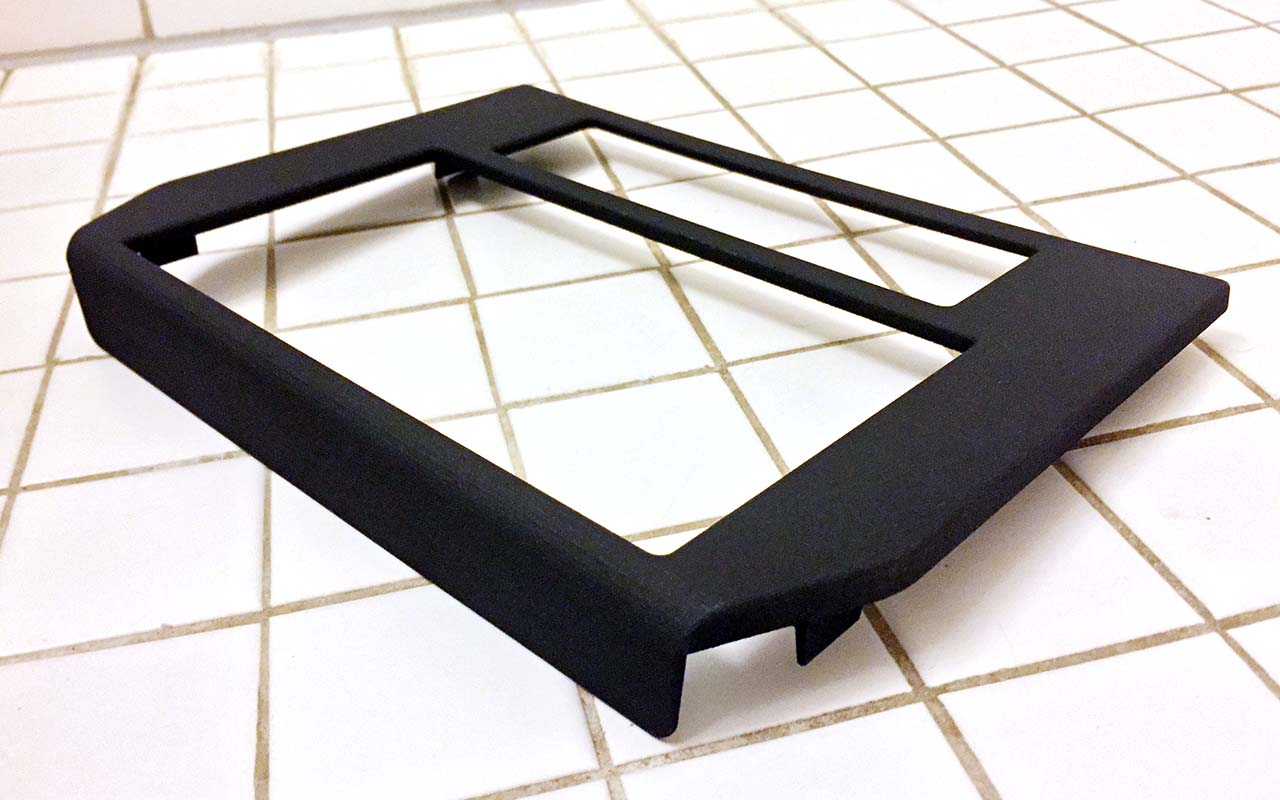
Well now, I received the new 3D printed version of the double DIN face plate today. And I can say IT REALLY ROCKS!!!!
That extra time I invested in perfecting the bezel really paid off! I had it printed in nylon, which is not cheap (about 50 US$) but is very precise.
I�m quite happy with the dimensions as it�s 100 % accurate to the OEM bezel. Of course the surface isn�t OEM style, that�s why I started this thread in the first place. Here are some teaser pictures, I hope I�ll be able to work on the surface in the next days.
Re: Discussion: Texture improvement on 3D printed double DIN radio bezel (Firebird)
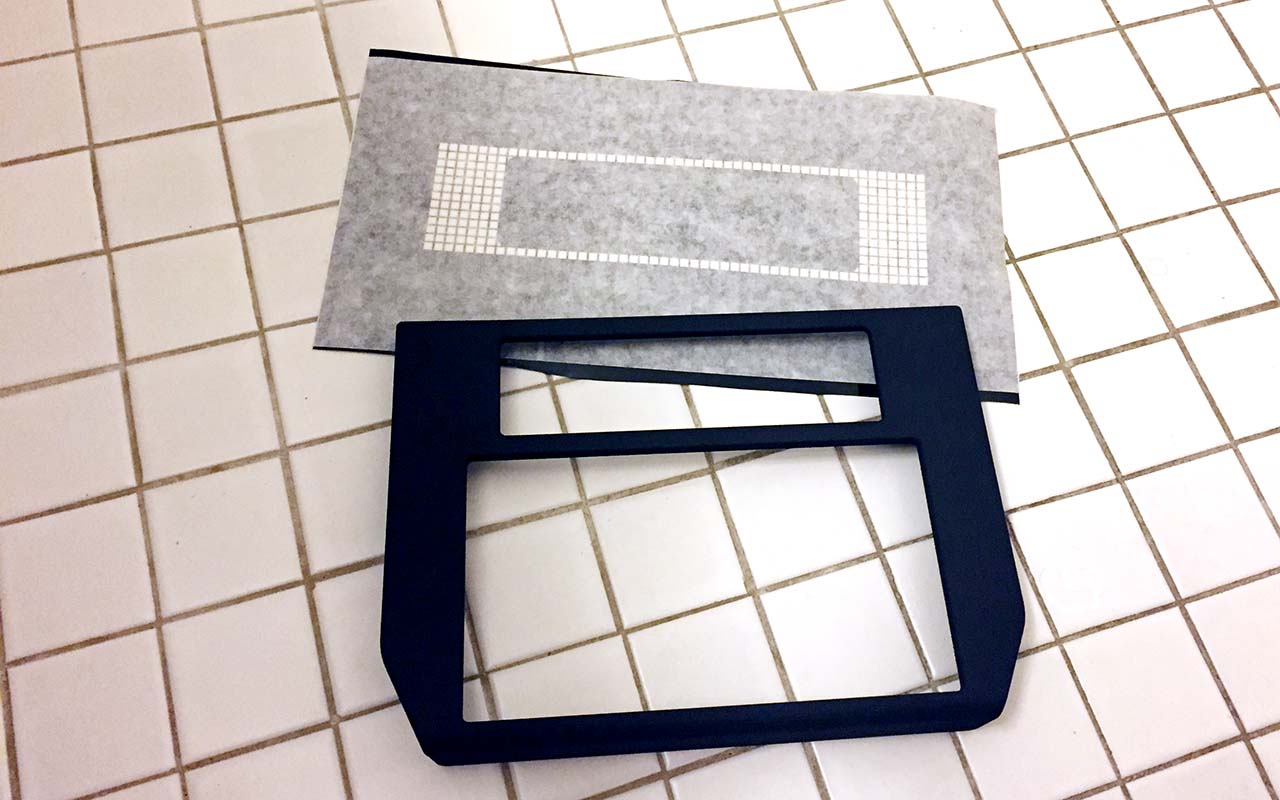
As you guys suggested, I had a mask for the checker pattern cut out on foil. The guy who made it only wanted a few bucks for it, even though the squares are very tiny and he took them out by hand one at a time! Very cool.
Re: Discussion: Texture improvement on 3D printed double DIN radio bezel (Firebird)
Now I'll be wet sanding the surface in the next few days and putting on a few coats of clear. Then I'll add the mask and spray paint it with fine wrinkle spray.
Re: Discussion: Texture improvement on 3D printed double DIN radio bezel (Firebird)
Originally Posted by bk2life
how do we order a completed piece? and this is a double din, is there a single din available?
If you want a single DIN you should keep your original bezel and add a single DIN radio mounting bracket, the best ones I've seen so far are from maptechenterprises.com - look here:
If you want a double DIN you can download my STL file from thingiverse - see my post #16 above. Then you'll have to print it on a 3D printer, maybe a friend of yours can help you out or a service like shapeways.com or 3dhubs.com. These will let you choose quality and almost any material.
Re: Discussion: Texture improvement on 3D printed double DIN radio bezel (Firebird)
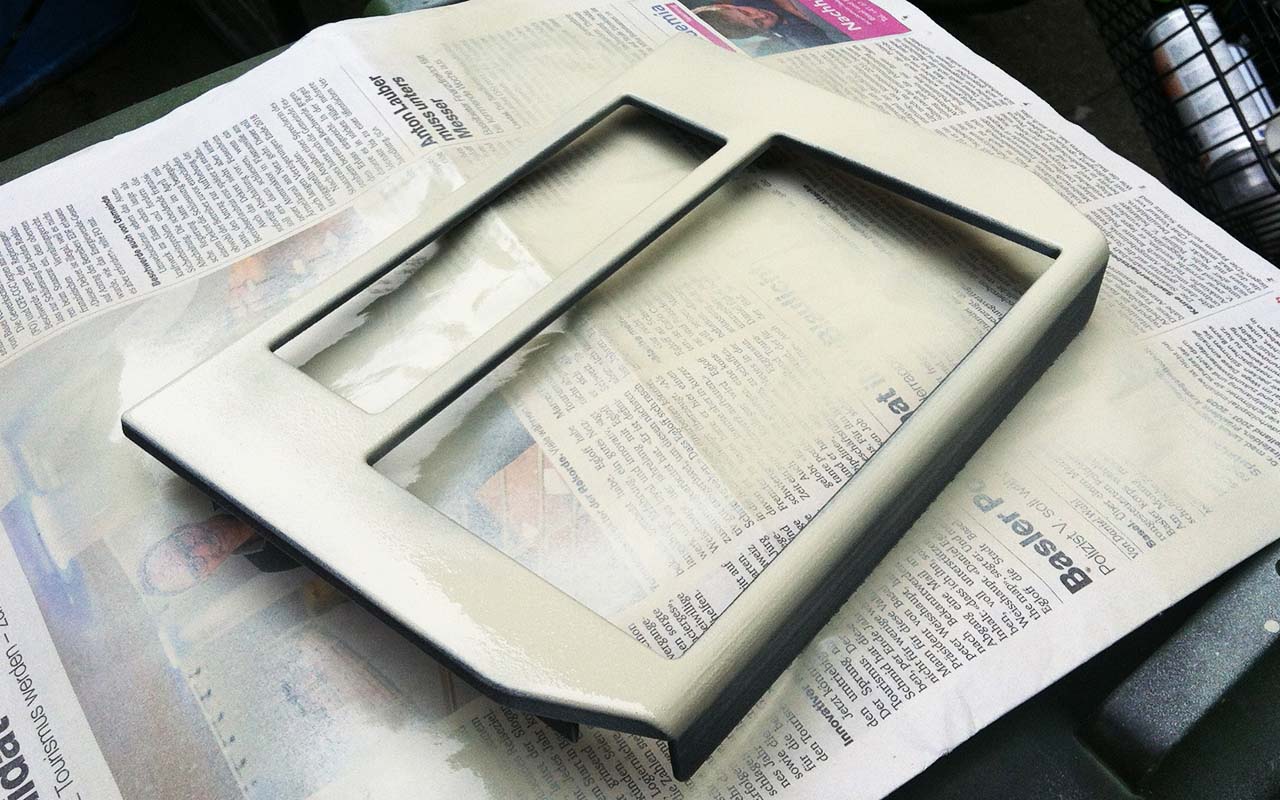
Finally, got to the checker pattern today. I hoped to get this thing done but there has been a throwback
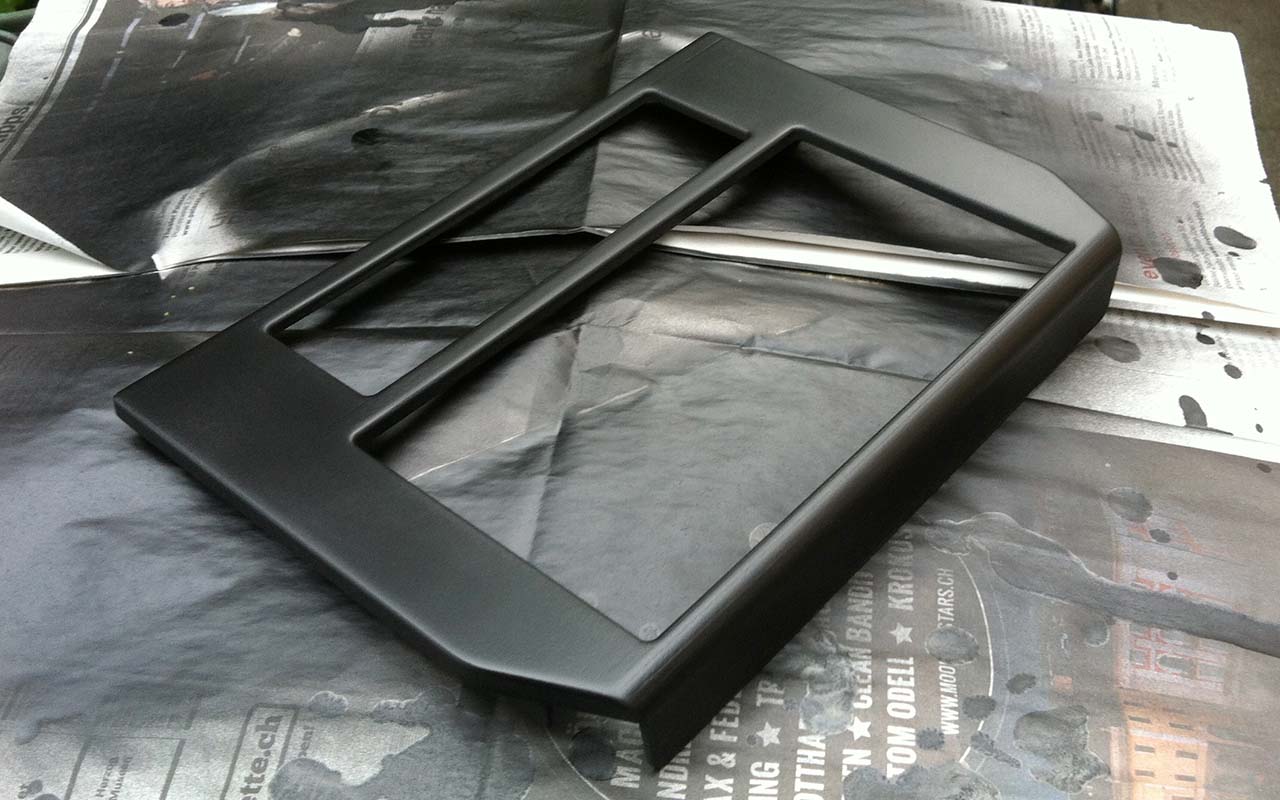
First, to get the surface right I wet sanded the bezel with 600 grit. That turned out to be too fine, so I switched to 400 grit and that got the job done. Then I used two heavy coats of filler with wet sanding between each coat and finished the last filler layer with 600 grit. Following that I used one layer of black spray paint which got me the velvet finish similar to the original. So no clear coat used.
Re: Discussion: Texture improvement on 3D printed double DIN radio bezel (Firebird)
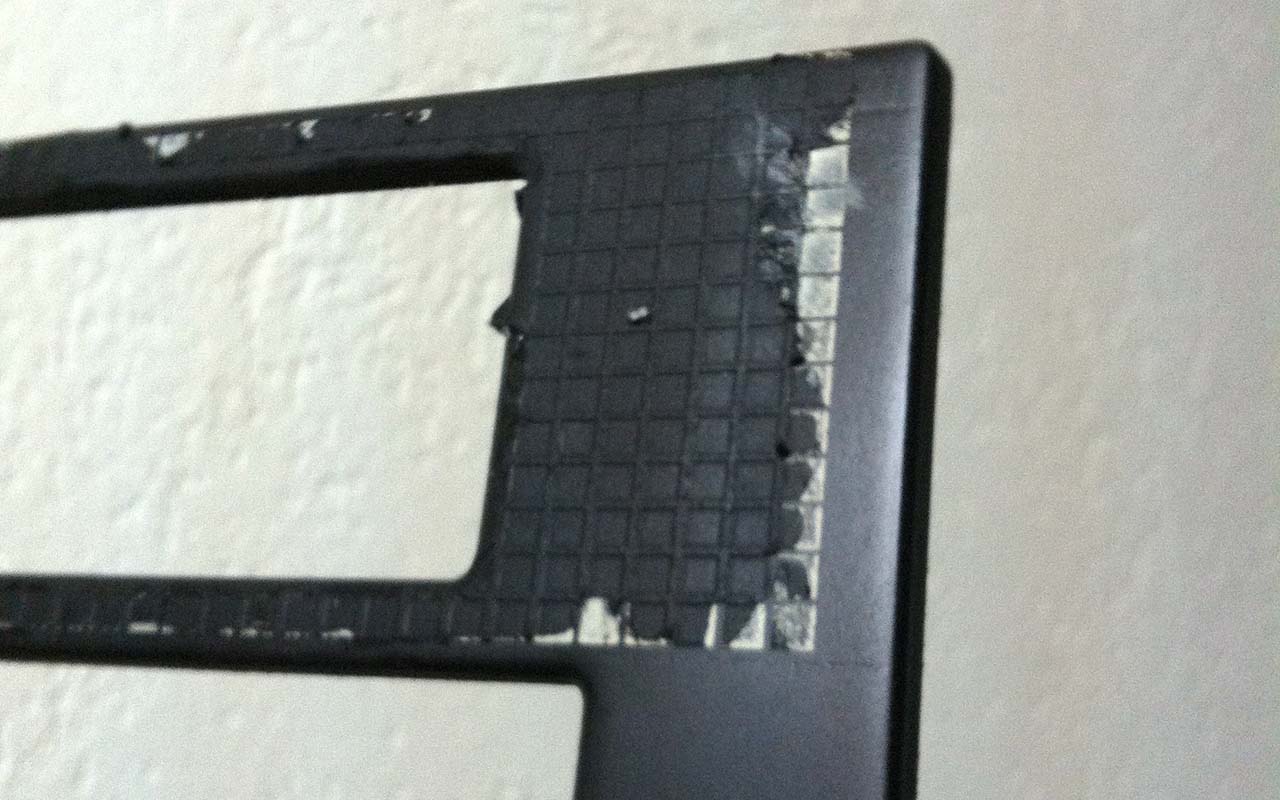
And then for the great moment!!!
When I tried to remove the mask I realized the foil had strongly bonded to the surface and I could hardly remove it. As if that wasn�t enough the wrinkle paint didn't� stick and came off including the black paint underneath.
 04-09-2017, 11:27 AM