When you click on links to various merchants on this site and make a purchase, this can result in this site earning a commission. Affiliate programs and affiliations include, but are not limited to, the eBay Partner Network.
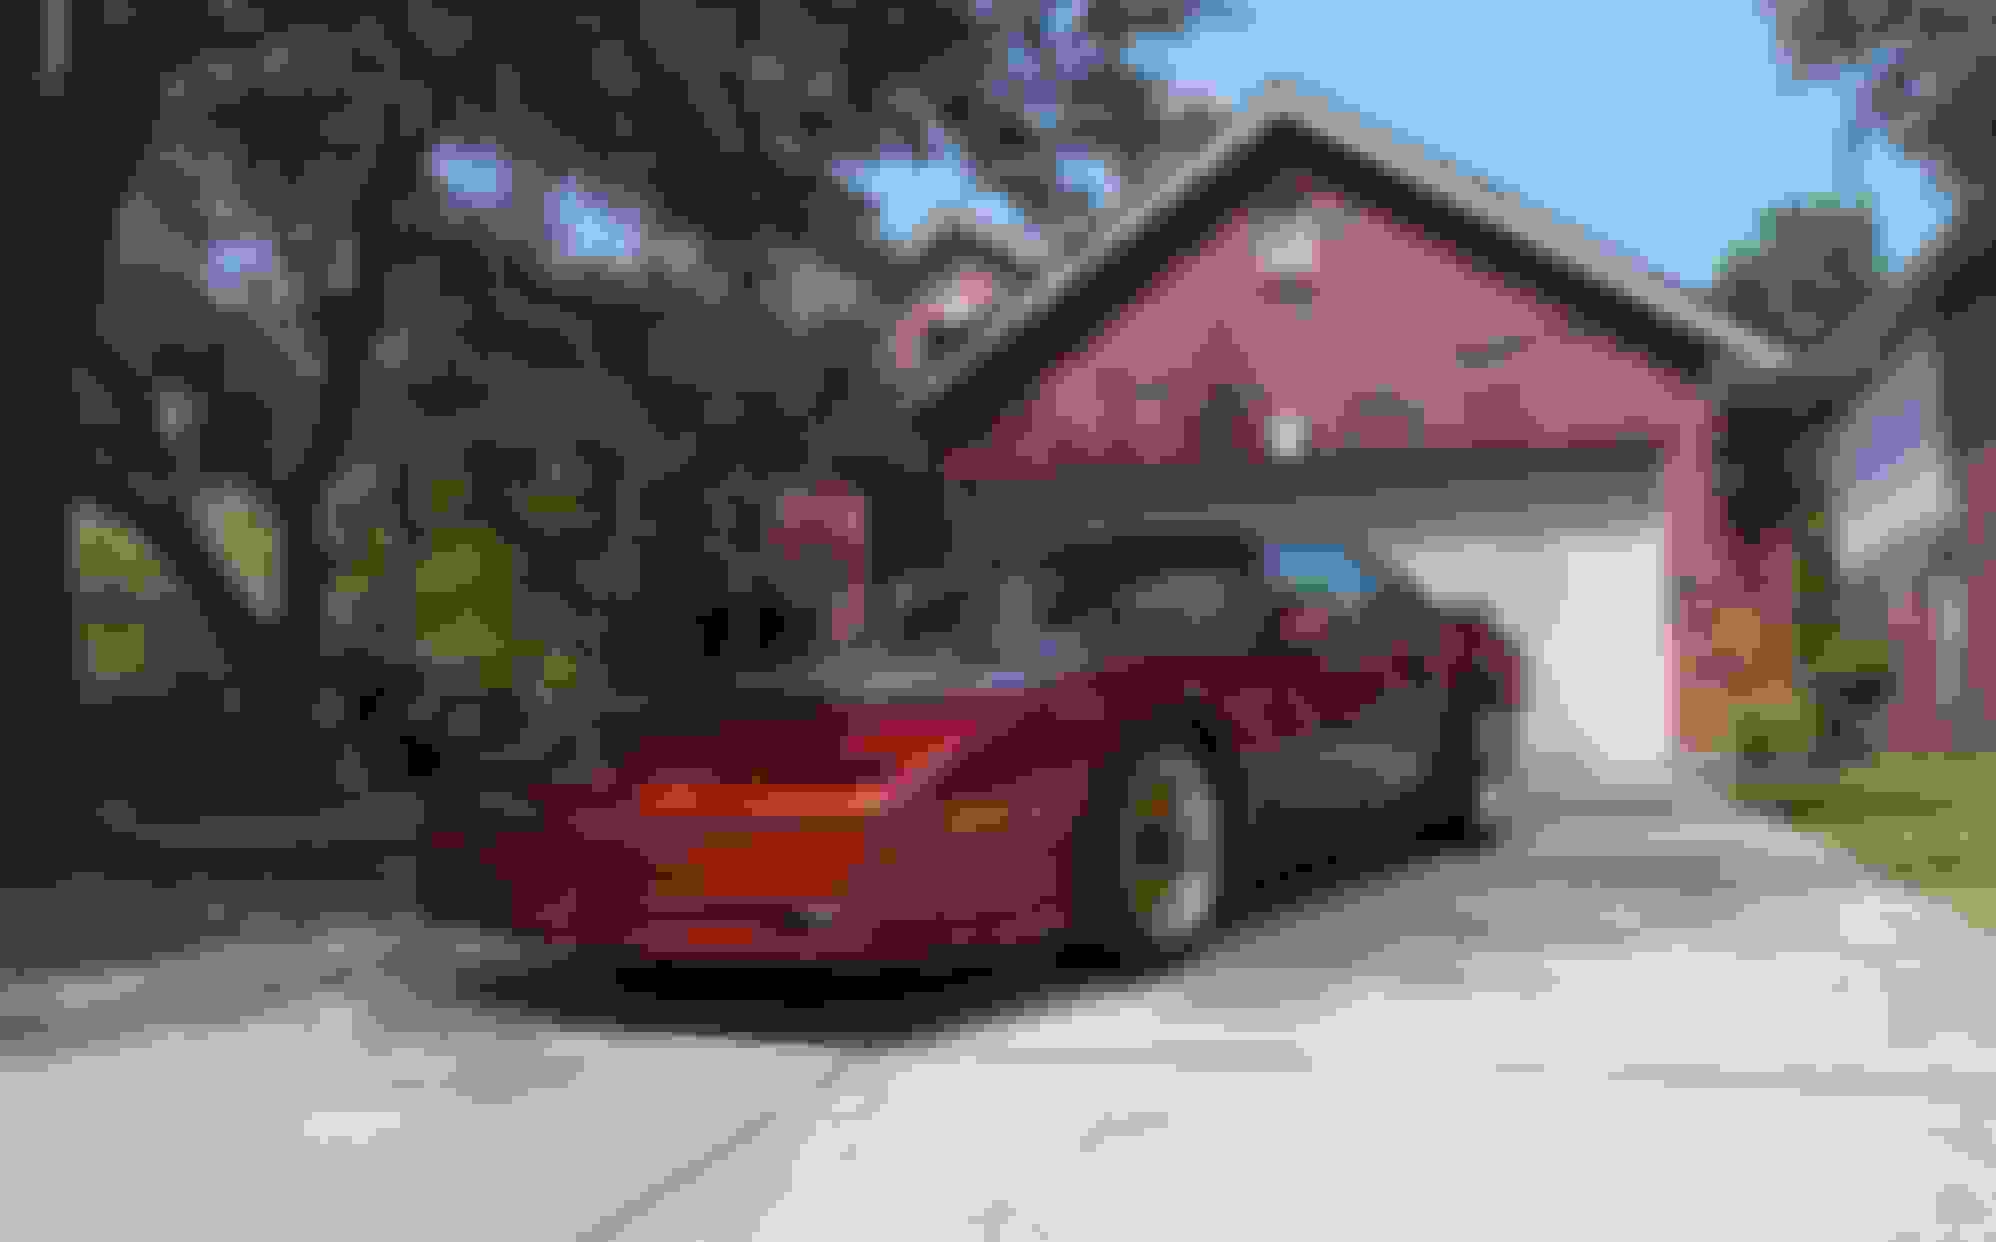
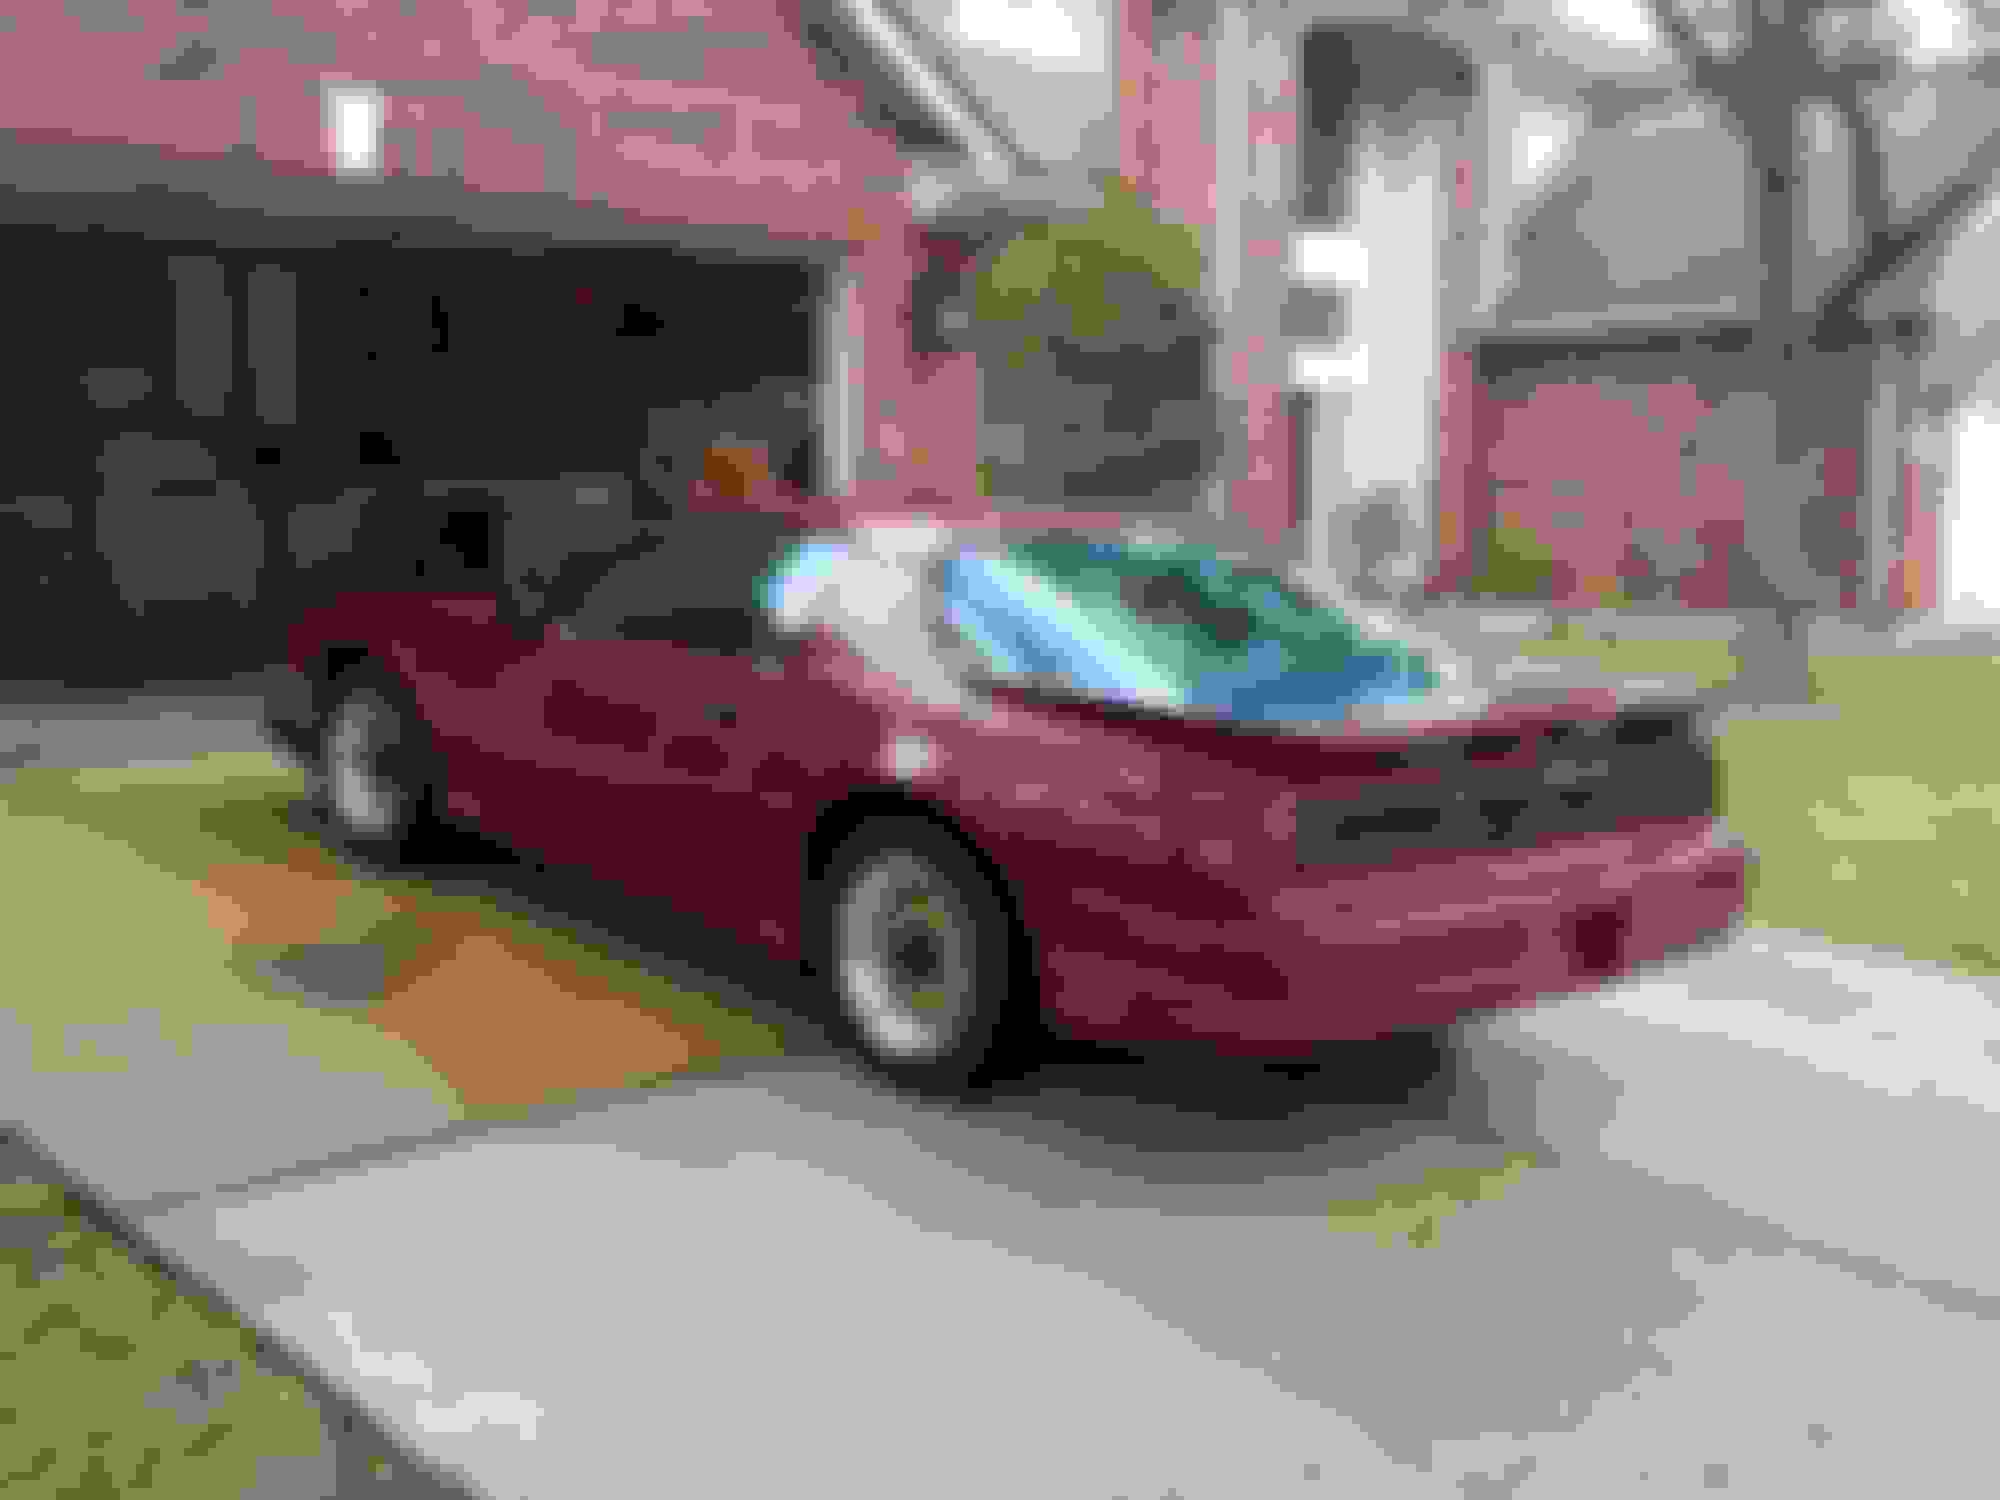
Since the late 90s, I’ve looked at third gen Formulas & GTAs online. In June of ’16, I parted ways with my C6 Corvette, but it wasn’t long till I wanted something else. I started looking at 6th gen Camaro SS’, but after looking at third gens for so long, why not just get one? If I hated it, I could sell it, if I liked it, great. The goal was to find a low mile, hard top L98 car. It had to be clean and stock.
After some disappointments locally, browsing on here, I found an 89 Trans Am GTA in Iowa, 48K miles, all original and appeared well cared for. I spoke to the owner, Mark, 2carsforme and he was awesome. Sending me pictures of everything I wanted to see, being Iowa I had a red flag for rust. From the pics everything looked super solid. The deal was made and the car was on its way to Houston not long after.
Arriving at around 10PM that night, I met the driver in a Lowes parking lot near my house. The car fired up and I drove it home. The next morning, it was time to clean the car. I was surprised at how nice it was, the glass didn’t have water marks, the paint cleaned up incredibly well. The car was nice, but as Mark told me it needed somethings. Mainly all the typical age-related issues that occur with these cars.
The suspension and brakes were a little tired. Luckily a buddy of mine owns a performance shop here in town, so he was willing to lend a lift and help out. I wanted to utilize the stock sway bars and do a simple set up. The factory sway bars were removed and I had them powder coated locally. I then placed an order with Lon at TDS for new GM 1LE end links, TDS sway bar mounts and a TDS wonder bar.
The front steering components were rebuilt with Pro Forged Inner, outer tire rods, center link and AC Delco Idler Arm. UMI HD adjusters were used (Though not tightened yet in the picture.) Also UMI tubular lower controls arms and caster camber plates went on the car to replace the factory pieces. The factory shocks were replaced with a set of Konis and a set of Eibach springs were used.
The rear got UMI lower control arms and an adjustable panhard bar.
The factory brakes were rebuilt in the rear with stock re manufactured calipers, the fronts were converted to 98+ f-body pieces. StopTech rotors, EBC pads and stainless brake lines were installed. The factory GTA wheels were replaced with Hawks 17” GTA wheels.
Later I had Spohn outer sub frame connectors and Alston inner sub frame connectors welded on. One of the pieces couldn’t be used due to the dual cat exhaust. The sub frame connectors were welded on by a local shop ran by a Third Gen guy, Gustavo.
The car got a fresh tune up, all fluids, hoses, new belt. I also purchased a Dewitt radiator and LS1 electric fans to keep cool in Houston traffic. I don't have any pictures of the radiator.
Thanks guys, I travel for work so I don't get much time to mess with this car. Hopefully next few months make some interior and exterior progress. New spoiler, seat covers, etc.
My girl friend sent me some pictures, my leather seat covers arrived from Lethal Interiors. I'll be taking the seats to the upholstery shop later in the week when I get home. Been a long wait for these!
Thanks guys, the interior has been something I’ve been working on since getting the car. It had all the typical wear associated with age. Seat bolsters, head liner, steering wheel. Nothing out of the ordinary but all to be expected.
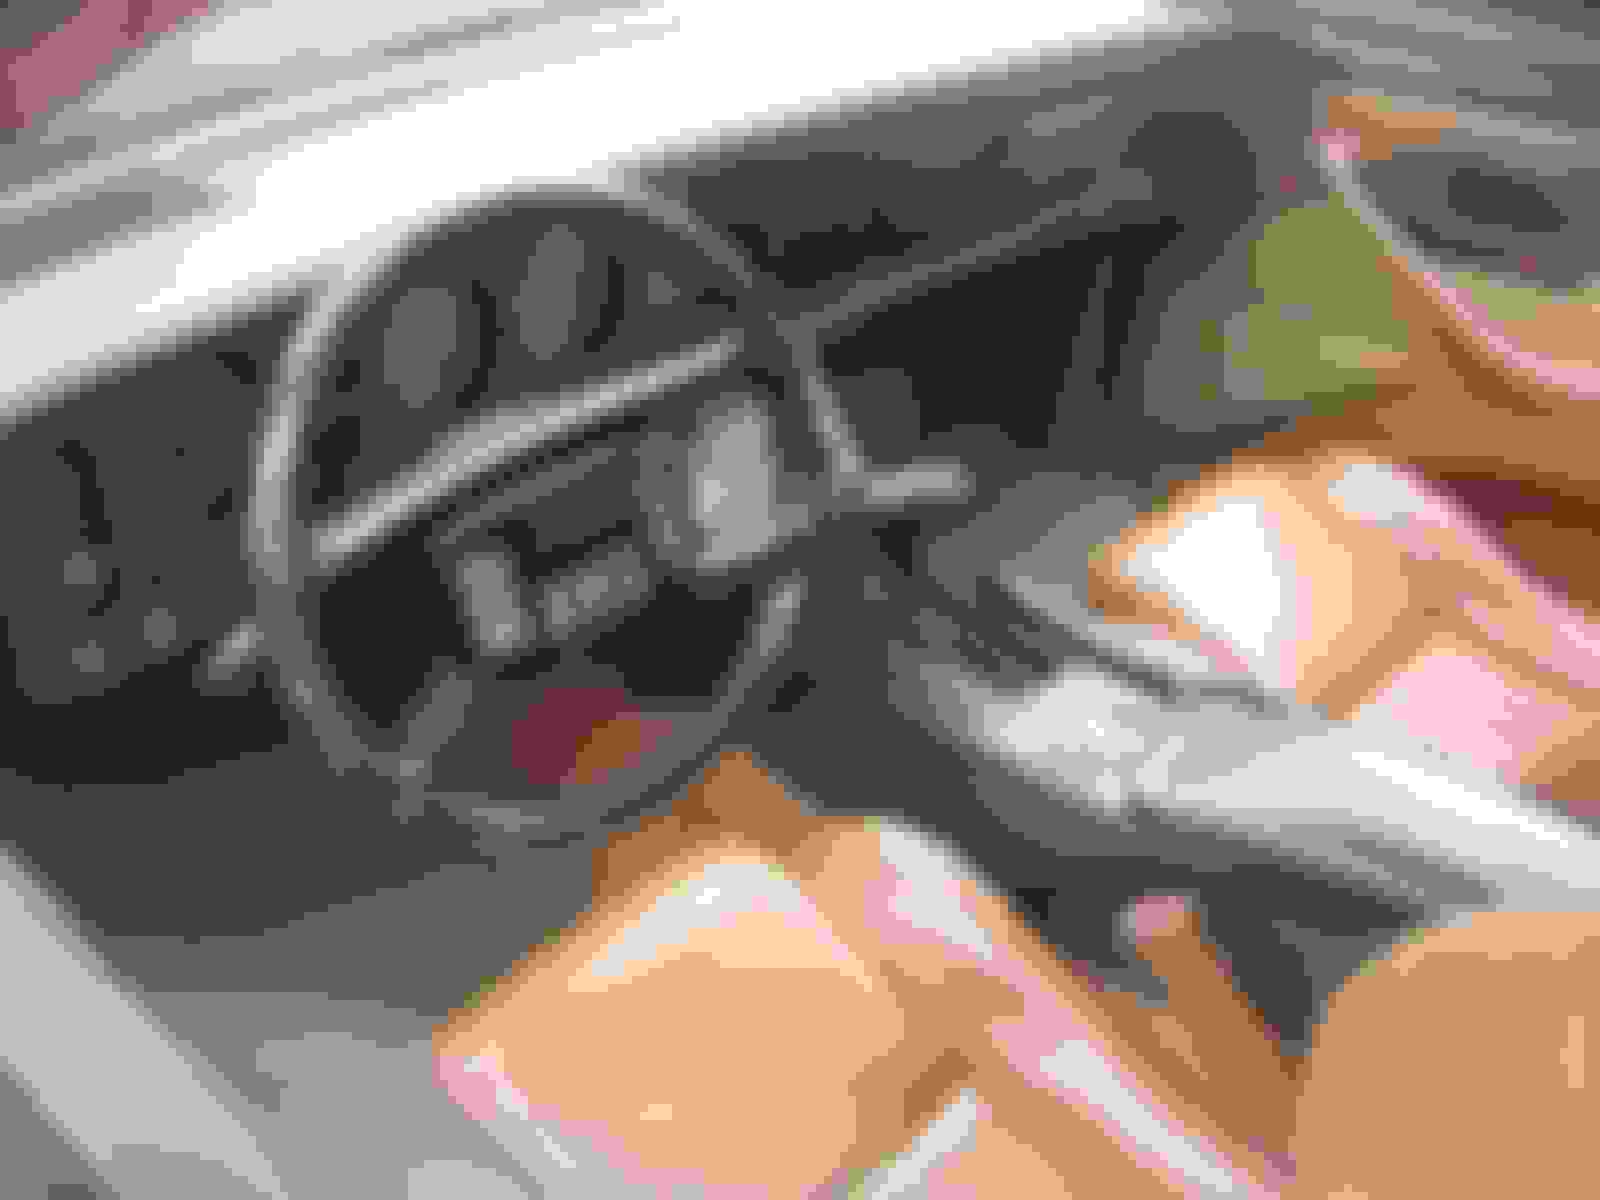
The original GTA wheel was removed and rewrapped in black leather by a local upholstery shop. This took a while as it had to be switched by hand. The car was also missing a trim piece that went between the kick panel and pillar trim. Which required the dash pad to be removed. It was kind of odd for it to be missing. As it's not easily removed.
After
Before.
I debated doing the carpet however since I was doing head liner and new seats doing the carpet seemed logical. The carpet was replaced with ACC cognac, mass backing. In some of the pics you’ll see the door cards are off. Every piece of weather stripping was replaced on the car. While the door panels were off, the window motors were also replaced as they were original.
I bought a new head liner kit from Rockauto and installed a new head liner, sun visors and sail covers. The new head liner began to sag not long after install. Which then required me to have it recovered by a local upholstery shop. From what the shop told me, the board wasn’t completely prepped. So my suggestion is, buy the bare ABS board and have your local upholster recover it.
I ordered new seat covers from Lethal Interiors, the wait was a test of a patience but the result was well worth it. The covers look like factory but feel way nicer. I had them installed locally by Trend Setters in Katy, Texas. They’ve been around a while and they were happy with the covers. No issues on their end far as how the covers fit. He did go through the seats, rebuild the lower seat foam as well as the bolsters. They also went through all the springs and different mechanisms in the seat to make sure they were o.k. With the GTA seats, no one wanted to do mess with them with out me buying covers.
Something really bothered me about doing new seat covers and have original looking plastics. I contacted a local SEM dealer and had them mix the GM Beechwood paint. I plan to refinish some of the seat trim that’s scuffed or worn with age. That’s why the seats are missing trim. My plan is, throw a junk yard seat in the car, send it off to have the new Hawks spoiler painted and while thats there, paint all the seat trim and finish the seats. It'll be a few weeks though as I have to travel for work.
Have been a silent follower on your progress, but must say those seat covers look amazing! That GTA will look new once you've finished with it. Keep us posted.
Thanks, the seat covers turned out to be well worth waiting for. Unfortunately I'll be busy with work for the next 4-6 weeks so the old GTA won't get much attention. Oh well, pay bills so I don't have to live in it.
You are doing an amazing job on the car. Once you get some free time. I live out in Cinco Ranch if you ever want to get together for a cruise. We used to do a monthly meet here in Houston but not a lot of activity. PM me when you get it done. My car is also a 1989 GTA but pearl white with the beechwood interior.
Beautiful car!! I have a black 89 GTA and we’ve been doing some work on it as well but so far have tried to keep the car as stock and original as possible. Similar story. We bought the car from the original owner about 3 years ago. Did some basic suspension and brakes tuneup work and then spent the last 16 months getting a fresh coat of paint on it.
Love the 17” GTA rims. Plan to look at those. The change to 98 and up front brakes also piqued my interest. Questions:
Would those fit inside the stock 16” rims?
Did you have to replace the spindles or modify the caliper mounting brackets?
You are doing an amazing job on the car. Once you get some free time. I live out in Cinco Ranch if you ever want to get together for a cruise. We used to do a monthly meet here in Houston but not a lot of activity. PM me when you get it done. My car is also a 1989 GTA but pearl white with the beechwood interior.
Sounds good, I am in the Cinco Ranch area as well, Westheimer and Fry road. I need to get this things back out and drive it when I get the seats in. I work off shore, so it's tough to know when I will be home. Hence why any progress moves in such slow motion for me.
Originally Posted by thefirebirdm@n
Would those fit inside the stock 16” rims?
Did you have to replace the spindles or modify the caliper mounting brackets?
The spindles are modified, they have adapter plates for the caliper mounting. I bought the set up from Scott Degeer. He specializes in third gen brake upgrades. The LS brakes would have fit under the 16" wheels, that's a reason I chose them. But I was pretty disappointed in the lack of tire options available for the 16" wheels. The 17s which for all accounts are small wheels by modern standards, but are still popular enough to have decent tire options.
Originally Posted by instro84
i have the same carpet installing in my car this weekend. thats some nice work you've done looks good!
It isn't an exact carbon copy of the factory carpet. The best advice is, disregard the factory carpet and fit this new one to the car. Center to the hole for the shifter console cut and just go from there. Small cuts and be patient.
More interior progress, all trim panels back in the car. Also installed the rear seats. Went down to LKQ and found a suitable driver seat to use for the time being. Not the prettiest thing, but the track works and I am able to move the car in and out of the garage. The idea still is while the car gets the spoiler painted, to repaint the interior seat trim plastics and finish assembling the front seats.
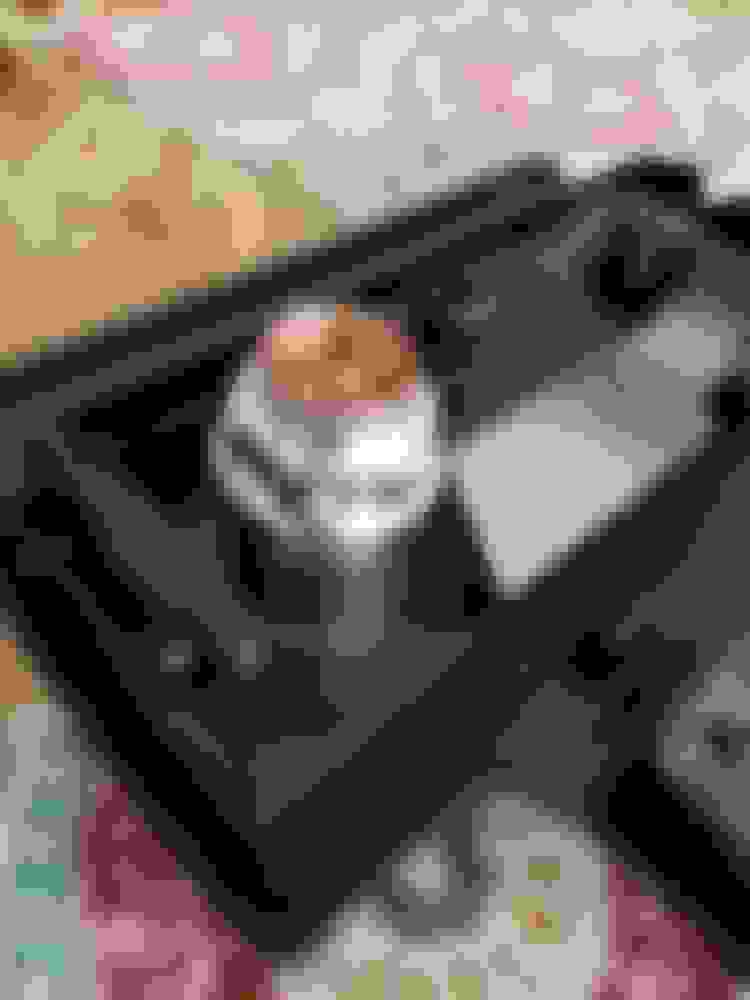
Also while doing the carpet, I managed to break the cig lighter plug. Converted to the 93-98 4th gen style lighter.
After putting the junker Camaro seat in, I was able to pull the car out of the garage. Really got tired of seeing the giant spoiler box in the garage, so in an effort to do a little spring cleaning, installed the Hawks replacement spoiler. This is basically just to get it on and get the car to the paint shop to have it painted in a few weeks. I didn't drill the holes for the spear clips to attach, the body shop can mess with that. Over all the fitment isn't bad for just out of the box, the bolt holes lined up well for the most part. Not passing judgment on the spears due to not having the clips in.
Do you have any fitment notes or pictures with the headliner installed? Last I looked into the ABS board, it wasn't the greatest fitment. Just wondering if they improved it or not? Eventually I will need one for my other car
Sub'd! Looks Great Neil.
Just a thought while the car is in the shop for the spoiler paint. Maybe ask if they can reset the deck to the glass to get it all lined back up.
I need to do mine too.....sigh..
Do you have any fitment notes or pictures with the headliner installed? Last I looked into the ABS board, it wasn't the greatest fitment. Just wondering if they improved it or not? Eventually I will need one for my other car
The ABS board does not have the clips up front like the factory board did which causes it to sag somewhat up front. I think this could be rectified with good two sided tape, i.e 3M. The other issue I had was with the prep, the thing started sagging pretty quickly and had to redone by a local upholstery shop. They told me it was an issue with board prep, to do it again, buy a bare board and have a trusted local place upholster it.
Originally Posted by TTOP350
Wow, veeeery nice work!
Thanks, you have a killer Formula. I wanted a Formula 350 pretty bad, but this car was a deal I knew I would have regretted.
Originally Posted by Bob88GTA
Sub'd! Looks Great Neil.
Just a thought while the car is in the shop for the spoiler paint. Maybe ask if they can reset the deck to the glass to get it all lined back up.
I need to do mine too.....sigh..
Bob, I am looking at biting the bullet and just ordering the Hawks Billet hinges. The body shop I had planned to do seems to be stalling out in regard to setting up a time to get me in. If that's the case I'll order the Hawks pieces and work on some other projects on the car for the time being.
Originally Posted by TallTim
So what's your position on the anemic power plant? Will more horses be coming?
Back in '98 these cars felt great, I like every thing about the car minus the lack of power. I started looking at LS based pull outs and was really not seeing much I wanted. I didn't see the point of spending what these people want for a 100K mile pull out. What I ended up doing was having Pocket build me a harness, buying a bare LS2 block and doing the build out from there. Basically a stock bottom end NA build with LS3 heads a very mild cam shaft. All new accessories etc, just have some thing really reliable and makes modern power. That's a while a ways from being done.
The ABS board does not have the clips up front like the factory board did which causes it to sag somewhat up front. I think this could be rectified with good two sided tape, i.e 3M. The other issue I had was with the prep, the thing started sagging pretty quickly and had to redone by a local upholstery shop. They told me it was an issue with board prep, to do it again, buy a bare board and have a trusted local place upholster it.
Yes, you said most of that already, but how did it actually FIT in the car? Did it line up at dome light? IIRC there was an issue where they put the hole for the dome in the wrong spot. Was it the proper width for the roof? Was it the proper contour to the panels? From your back-side picture, it looks like they changed the design and it has humps? Is that correct or is it flat across the bottom similar to the factory one?
Yes, you said most of that already, but how did it actually FIT in the car? Did it line up at dome light? IIRC there was an issue where they put the hole for the dome in the wrong spot. Was it the proper width for the roof? Was it the proper contour to the panels? From your back-side picture, it looks like they changed the design and it has humps? Is that correct or is it flat across the bottom similar to the factory one?
The car didn't have the factory head liner in it, so I can't comment on it compared to stock. But the width appears fine, if there was any slight variance the pillar trim and the rear header trim easily masks it. The dome and sun visors holes were in the correct place. With the dome light in and the two small retaining nuts it pulls the head liner very flush against the roof of the car. Like I said other not using the front clips, you would be hard pressed to see it as looking out of place in anyway.
Seats are installed! Repainted all the plastic trim to the factory Medium beech wood, also installed new Hawk's inner fender liners. Next stop this week will be the paint shop to have the rear spoiler repainted as well as having the Hawks Billet hatch hinges installed.
Pictures of the Hawks fender liner installed, these come with fair warning from Hawks that they aren't going to fit exact as the factory liners did. Which is true, but it just meant drilling in a couple new fasteners where it wasn't close to lining up. Over all, really nice product.
Repainted interior trim, allowed 24-48 hours of cure time, being so hot out helped a lot. I finally broke down and bought a Dewalt 1/4 drive impact, that thing made putting the seat trim back together so easy.
Fixing where the center console was starting to act bow legged.
The Hatch alignment isn't all that great on this car, it rubs the driver fender. The car is now at paint getting the spoiler painted as well as addressing various dings and scratches it has. Bough the Hawks billet hinges to help get things back in order. I wish they made hood hinges.
Progress pictures from the body shop. Going in the main thing was getting the spoiler fitting properly/painted as well as having the new Hawks Billet hinges and glass fasteners installed. Another issue was the black glass trim needed to be repainted. In regard to the Hawk's hinges, this should cure the alignment issues with the hatch itself. Hopefully. After dropping the car off, it soon progressed in to well if you have the paint mixed and the car is already there may as well ____. The may as well list consists of removing the front plate, filling the holes in as well as fixing various dings the car has acquired over the years.
Third Gens look right with a 17” wheel, which is nice because it opens up modern tires without breaking the bank. I also like the factory wheels on them because it’s like GM put time and effort to designing them to compliment the cars. I did not want to take away from that when doing wheels.
Front nose filled in
Some chips and dings around the door handle repaired.
Some issues taken care of:
Astro Van shaft & steering column bearing installed. This cleaned up a lot of the steering slop.
The car had an aftermarket fan switch that was a bit temperamental, replaced it for one that was listed for a Buick Grand National. Seems to be fine.
After replacing the original Rochester Multecs, the car honestly never really ran that well. Read a thread on here about how the ECM needed to be tuned with the new Injector data. Reached out to Brian at Tuned Performance and had him burn a new chip. Installed, car seems to run really well. The girl friend ever noticed how the car had a lot of get up and go, before it felt labored just to get to the posted speed limit. Now it feels really torquey and fun to drive.
Exterior/Body
The original Hatch mounts and pins were replaced with the Hawks billet and the hatch was readjusted by the body shop. The hatch was slightly off centered rubbing the driver side of the car. By centering it, this took care of a squeak I had. The paint shop did an excellent job with matching the paint, however getting it back the car needed a serious detail due to some over spray and compound being left on it.
 02-14-2018, 03:50 AM


 Been a long wait for these!