When you click on links to various merchants on this site and make a purchase, this can result in this site earning a commission. Affiliate programs and affiliations include, but are not limited to, the eBay Partner Network.
This thread covers all the parts, and all the steps along with the trials and tribulations on converting a factory R12 A/C to r134a. Thanks to all the TGO members who have blazed this trail before, and special thanks to Sofakingdom as I've read so many of his a/c posts from the past on how to do this. Using all factory parts except compressor just in case it doesn’t work out, want to eventually rebuild it.
Check list of things you'll need.
SWITCHES/SENSORS
Get High Pressure Safety switch that mounts on Compressor if you don't have one already
Pressure switch that mounts to accumulator for r134
Correct Orifice for r134 - several remarks around here on what to use. ( I ended up using auto adjusting type)
ACCUMULATOR
replace, make sure it has r134a compatible XH7 or XH9 desiccant
O-RINGS:
replace with green ones compatible with r134a, don't want old ones that are contaminated with mineral oil
mine ended up leaking - might be worth replacing before starting, one less thing to give you trouble.
FLUSHING
See below
also flush the A/C hard lines that bolt to body
EVAPORATOR
Clean coils
Make certain your evaporator housing and evaporator are well sealed, both inside and outside. Don't want hot air slipping past the housing or the condenser. There is lots of opportunity for this to be a point of failure.
CONDENSER
Make certain all condenser fins are straight and open so air can flow thru condenser, otherwise condenser doesn't have a chance to cool down hot coolant before returning to evaporator (I have read r134a is more efficient than r12, however, since it operates at higher temps, condenser is KEY to getting things to work as you expect)
Give condenser a good cleaning to remove dust/road dirt that could rob it of its cooling powers
Make certain condenser has good 1" x 3/4" foam insulation between vertical edges of condenser and body. Don't want air slipping thru this gap, needs to be forced thru condenser. (1" x 1" may even be better, as there are some gaps at the top, not sure if those caps are there by design in case air flow gets to much for condenser and radiator to handle)
FRESH AIR FLOW
make sure all fans are operating as they should
all front end baffles are in place, these direct correct airflow over condenser and radiator.
getting good fresh air flow over that condenser is key
HOSES/LINES
If in doubt, replace a/c line rubber hoses - there are companies out there that will rebuild yours using the factory parts.
OIL
Add oil per compressor manufacture specs : AC Delco recommends 8 oz split into 4 areas: evap, accumulator, condenser, compressor
a good r134a can tap - don't skimp on cheap ones, they can blow off the can from the high pressures (happened to me during this saga)
cutoff valve to put at end of vacuum hose - once vacuum is achieved, use it to maintain vacuum in yellow hose while switching from vacuum pump to r134a can
Re: R22 to r134 conversion. here goes, all factory
No need to flush the evap. The orifice tube filters debris from entering the evap. Worry about the condenser, and the High Pressure side of the circuit. That's where you'll find the debris from compressor death.
Re: R22 to r134 conversion. here goes, all factory
Originally Posted by Drew
No need to flush the evap. The orifice tube filters debris from entering the evap. Worry about the condenser, and the High Pressure side of the circuit. That's where you'll find the debris from compressor death.
Compressor didn't die - just sat for 25 years. I've read even small traces of old mineral oil mixed with PAG150 will gell and cause your compressor to fail. #1 reason for compressor failure, wrong oil used. Which is why one would want to flush the evap?
Re: R22 to r134 conversion. here goes, all factory
Nah, I'm good. Thanks anyway.
You use ester oil for R134a retrofits. No matter how thoroughly you flush the system, you're not going to get it all out. Unless you want to replace all the components.... That's actually probably not a bad idea if you can stomach the cost.
Really doesn't matter, R134a conversions are pretty much doomed from the start. Could probably recharge the system with spray paint and have the same vent temps, but hey it's your funeral.
Re: R22 to r134 conversion. here goes, all factory
Originally Posted by Drew
You use ester oil for R134a retrofits.
Well why didn't you say so the first time and save us both some typing. I've read you can use ester oil to flush mineral oil. Might be able to do that and then go to PAG.
Re: R22 to r134 conversion. here goes, all factory
One of the car mags, maybe Hot Rod, recently did a R12 to R134 conversion, and it did not cool well. I have done a couple conversions and bought used cars w/ said conversion. NONE of them worked out well, at all. I have R12 and R134 equipment and have had NO luck w/ R134.
Re: R22 to r134 conversion. here goes, all factory
My first question, is it FLAMMABLE? (R12, R134A is not). The MDS on the Redtech website conforms it IS flammable. Like so many other "R12 Replacements". (Gee whiz, I wonder why Redtech doesn't list "Is it flammable" under it's FAQ Section)? I for one would not want a flammable liquid, under pressure, in the interior of my vehicles.
As I said, many times, ACQUIRE THE CORRECT R12 and be done with it!
Re: R22 to r134 conversion. here goes, all factory
Originally Posted by mikeceli
My first question, is it FLAMMABLE?
was concerned about that. Hey, if it works, I'm environmentally friendly. if it doesnt, I'm out a few cans of r134 and 150ml of oil. nothing ventured, nothing gained.
One thing I have learned today, is Accumlators use different types of desiccants. if you are moving over to r134a, make sure you get the right kind. older desiccants (XH-5) types for r12 will disintegrate and get into your system. https://www.chemours.com/Refrigerant...e-handling.pdf
meanwhile, maybe I should go visit that dude with the 4 cans
Re: R22 to r134 conversion. here goes, all factory
Maybe you guys can answer a question for me - why do so many recommend pulling a vacuum for an hour? why the prolonged period? a vacuum is a vacuum???? my Robin Air 15500 will probably pull -30hg in 5 minutes.
Re: R22 to r134 conversion. here goes, all factory
In Auto Mechanic's School, I was taught 30 inches of mercury, for 30 minutes, to allow any moisture time to boil off, out of the system. I generally go 60 minutes "to be sure", but it's not necessary, if you have 30 in mercury.
Re: R22 to r134 conversion. here goes, all factory
Originally Posted by mikeceli
In Auto Mechanic's School, I was taught 30 inches of mercury, for 30 minutes, to allow any moisture time to boil off, out of the system. I generally go 60 minutes "to be sure", but it's not necessary, if you have 30 in mercury.
Thanks, I guess a better question would be is it possible to get to -30hg and still have water in the system?
Re: R22 to r134 conversion. here goes, all factory
There's always HFC-152a... Sold at Walmart as canned air duster. You can google it. It's viable, compatible with mineral oil, and is closer to being a good substitute for R12 than 134a. Oh, and it's like $11 for 3 cans at Walmart. All the usual arguments against alternate refrigerants apply, but it works. In theory it's flammable under certain conditions, but people have done non-scientific tests showing it can extinguish open flame and is difficult to ignite. It's not like it's gasoline. Chances of leaking inside the car are slim anyway... This isn't an endorsement or anything, read about it and make your own call.
Edit: Apparently flammable in liquid form. Good luck getting it out of an A/C system without it converting to a gas. LOL
Re: R22 to r134 conversion. here goes, all factory
I've done LOTS of 12 -> 134a conversions, and all of them have worked reasonably well. Not always quite as well as they did with 12, but, � reasonable. And, cheeeeep, and eeeeeezy to maintain, and I could get the cold juice ANYWHERE, and ANYBODY who looked at the system could deal with it (my wife or daughter driving across country and pulling into a garage somewhere for example) and no special knowledge or ANYTHING is required.
I've always used lacquer thinner to flush the hard parts (evap & cond). I take a funnel with some rubber hose, pour a bit in, and blow it through with compressed air. Put a towel over the opposite end of the Thing to catch the solvent. Blow it through once, wait awhile for the solvent to solve whatever, repeat until the solvent coming back out is PERFECTLY clean and clear on a white rag.
I always replace the compressor, ALL the rubber lines, the accumulator/dryer, ALL the O-rings, and the orifice tube. I use the Frod orange/red OT; its characteristics seem closer to the needs of a GM 12 system converted to 134a, than the GM 12 one. I order one for like a 96 Crown Vic.
ALL the rubber hoses should be replaced. I like to cut the crimped-on bands off of the factory lines, put new barrier hose on them, and put 2 of the genuine A/C typoe hose clamps on each hose end. NOT, the little weenie POS clamps you find hanging on cards at AZ or wherever in the cooling system aisle; GENUINE A/C ones. Once you see the difference you'll IMMEDIATLEY know why.
All new O-rings of course. The green ones. You can buy an assortment of a million of em for the same price as ordering 2 of some specific size. Buy the assortment.
I avoid "special" refrigerants. Stuff that's EEEEEEEEZZZZZZY to buy is worth ALOT, going into the future. I DO NIT EVER want to be in the situation where I'm in [hot place] and my A/C quits, and some member of the desired sex is in the car and complaining about discomfort, and I can't find [special stuff] somewhere. 134a is the juice of choice for that reason even though it's not perhaps "the best" in some technical sense; it's kinda like, putting a LS1 brake conversion on yer car is better than some Brembo/Wilwood/whatever, because you can buy the pads for it ANYWHERE ANYTIME no questions asked. Maintainability is key.
I use the medium-grade PAG oil. Not the 40, not the 150, I prefer the stuff that's like 75 or 80. I think the thinner stuff might be just as good but I've always had good luck with the medium.
Vacuum is CRITICAL. What it does is, it forces ALL of the volatiles in the system, to evaporate. Water, leftover solvent, moisture, contaminants, water, moisture,... oh did I forget to mention, WATER. Just like boiling a pan of water on your stove, the entire quart of water doesn't all instantly flash into vapor instantly as the temp reaches the boiling point instantly. It is NOT instantaneous, it takes time. THAT'S what vacuum is for, more so even than demonstrating a lack of leaks: you want to put a deep enough vacuum on the system that ANY foreign contaminants get the chance to boil off. You can watch this happening; if you pull a vacuum on the system, turn the pump off, and watch it for awhile, the pressure might rise; then you can pull a vacuum on it again, turn it off again, and it won't rise as fast or as much; then you can pull a vac again, and keep doing that, and eventually it will stabilize. Stabilizing is an indication of both freedom from leaks, AND freedom from volatile contaminants. I will say, EVERY system I've ever put PAG oil into, won't hold a deep-space vacuum; it'll come up to maybe 28" and hold. I think the PAG oil itself is slightly volatile and has a vapor pressure of around 1 - 1�" absolute (28 - 28�" of vacuum) although I don't have any kind of "spec" indicating that. Main thing is though, that the pressure should STABILIZE. It usually takes AT LEAST a half-hour of vacuum, and usually more than a full hour, to boil everything off inside a system. Patience is your friend at this stage of the operation. Both time and negative pressure are NECESSARY.
I like to put about 2 - 2� oz of PAG oil in my NEW compressor (poured into the suction port), and about 3 oz into the accumulator.
Re: R22 to r134 conversion. here goes, all factory
I'm seeing a lot of people recommending red, the '95/'96 Crown Victoria is an orange. Some people say the variable worked for them, others say its a waste of money.
GM White .072
Blue .067"
Red .062"
Orange .057"
Green .052"
Brown .047"
Sanden retrofit guide. Interestingly, they are not concerned about mixing PAG/mineral oil. Also, yet another source who says if cooling not working, look at condenser capacity as a source of problem. airflow across it, or larger sized condenser. https://www.sanden.com/objects/retro.pdf
This guy covers GM retrofit guide and has shop experience recommendations included - again GM not worried about residual mineral oil but he recommends ester http://www.e38.org/pparish/gm-rp.htm
Last edited by LiquidBlue; 06-30-2019 at 02:09 PM.
Reason: found orfice tube size chart pdf
Re: R22 to r134 conversion. here goes, all factory
Originally Posted by sofakingdom
I've done LOTS of 12 -> 134a conversions, and all of them have worked reasonably well. .............................................................................or.
Why settle for "reasonably Well"? Especially given that Third-Gen F bodies didn't have great AC to begin with. Obtain the correct R12, save a bundle $$ of whatever retrofitting you do, (even if it's just flush and fill) and have AC as good as it was, back in the 80-90's.
Re: R22 to r134 conversion. here goes, all factory
Previous owner of my car converted to R134a but didn't cool enough for Houston. He swapped to R152a and said it cooled much better. I think it cools alright. I guess I'll find out myself driving it this summer.
Re: R22 to r134 conversion. here goes, all factory
Sofakingdom, I enjoy reading your posts, you seem to have a lot of good experience, especially on this topic. Have you ever written a full "how to" w/photos etc. on this subject for someone to follow on converting a 3rd gen to R134a?
Re: R22 to r134 conversion. here goes, all factory
Originally Posted by sofakingdom
I've done LOTS of 12 -> 134a conversions, and all of them have worked reasonably well. Not always quite as well as they did with 12, but, � reasonable. And, cheeeeep, and eeeeeezy to maintain, and I could get the cold juice ANYWHERE, and ANYBODY who looked at the system could deal with it (my wife or daughter driving across country and pulling into a garage somewhere for example) and no special knowledge or ANYTHING is required.
I've always used lacquer thinner to flush the hard parts (evap & cond). I take a funnel with some rubber hose, pour a bit in, and blow it through with compressed air. Put a towel over the opposite end of the Thing to catch the solvent. Blow it through once, wait awhile for the solvent to solve whatever, repeat until the solvent coming back out is PERFECTLY clean and clear on a white rag.
I always replace the compressor, ALL the rubber lines, the accumulator/dryer, ALL the O-rings, and the orifice tube. I use the Frod orange/red OT; its characteristics seem closer to the needs of a GM 12 system converted to 134a, than the GM 12 one. I order one for like a 96 Crown Vic.
ALL the rubber hoses should be replaced. I like to cut the crimped-on bands off of the factory lines, put new barrier hose on them, and put 2 of the genuine A/C typoe hose clamps on each hose end. NOT, the little weenie POS clamps you find hanging on cards at AZ or wherever in the cooling system aisle; GENUINE A/C ones. Once you see the difference you'll IMMEDIATLEY know why.
All new O-rings of course. The green ones. You can buy an assortment of a million of em for the same price as ordering 2 of some specific size. Buy the assortment.
I avoid "special" refrigerants. Stuff that's EEEEEEEEZZZZZZY to buy is worth ALOT, going into the future. I DO NIT EVER want to be in the situation where I'm in [hot place] and my A/C quits, and some member of the desired sex is in the car and complaining about discomfort, and I can't find [special stuff] somewhere. 134a is the juice of choice for that reason even though it's not perhaps "the best" in some technical sense; it's kinda like, putting a LS1 brake conversion on yer car is better than some Brembo/Wilwood/whatever, because you can buy the pads for it ANYWHERE ANYTIME no questions asked. Maintainability is key.
I use the medium-grade PAG oil. Not the 40, not the 150, I prefer the stuff that's like 75 or 80. I think the thinner stuff might be just as good but I've always had good luck with the medium.
Vacuum is CRITICAL. What it does is, it forces ALL of the volatiles in the system, to evaporate. Water, leftover solvent, moisture, contaminants, water, moisture,... oh did I forget to mention, WATER. Just like boiling a pan of water on your stove, the entire quart of water doesn't all instantly flash into vapor instantly as the temp reaches the boiling point instantly. It is NOT instantaneous, it takes time. THAT'S what vacuum is for, more so even than demonstrating a lack of leaks: you want to put a deep enough vacuum on the system that ANY foreign contaminants get the chance to boil off. You can watch this happening; if you pull a vacuum on the system, turn the pump off, and watch it for awhile, the pressure might rise; then you can pull a vacuum on it again, turn it off again, and it won't rise as fast or as much; then you can pull a vac again, and keep doing that, and eventually it will stabilize. Stabilizing is an indication of both freedom from leaks, AND freedom from volatile contaminants. I will say, EVERY system I've ever put PAG oil into, won't hold a deep-space vacuum; it'll come up to maybe 28" and hold. I think the PAG oil itself is slightly volatile and has a vapor pressure of around 1 - 1�" absolute (28 - 28�" of vacuum) although I don't have any kind of "spec" indicating that. Main thing is though, that the pressure should STABILIZE. It usually takes AT LEAST a half-hour of vacuum, and usually more than a full hour, to boil everything off inside a system. Patience is your friend at this stage of the operation. Both time and negative pressure are NECESSARY.
I like to put about 2 - 2� oz of PAG oil in my NEW compressor (poured into the suction port), and about 3 oz into the accumulator.
All excellent advice here. Also, adjusting the low pressure cutout switch about 2psi lower will bring the low end evaporator temperature down to the R12 design temperature. I don't recall the factory R12 pressure setting, but it's around 35 degrees F. Measure the cut out pressure with gauges, look at the chart under R12 temperatures and then reset the pressure to the same temperature under the R134A column.
This chart also shows why R134A does not cool as well as R12 unless you change out the orifice tube for a smaller one (orange or red vs. stock white) in order to restrict the refrigerant flow and increase the high side pressure. If your high side condenser temperature needs to be 120 degrees in order to transfer enough heat to 95 degree ambient air, that requires 157psi of R12, but it requires 171psi of R134A for the same 120 degrees. If you left the stock white orifice tube in place, the same 157psi high side pressure would result in about 114 degree F condenser temperature. That 6 degrees less makes a difference when you are trying to cool with 95 degree air. When designed correctly, R134A works fine. When it is just dropped in and no thought to system operating pressures/temperatures, it works marginal at best.
not sure why there are multiple on/off's listed - perhaps based on temperature range?
There should be an adjustment screw in between the two electrical connection terminals. I would bet those two switches are the exact same part, just preset to different pressures.
The 28/33 listed on the R12 switch is just the tolerance of the cut out pressure setting. It will cut out somewhere between 28 and 33psi and cut back in somewhere between 37 and 47psi. It's a mechanical switch that isn't terribly precise (although it's precise enough for this purpose).
Re: R22 to r134 conversion. here goes, all factory
Originally Posted by TransamGTA350
There should be an adjustment screw in between the two electrical connection terminals. I would bet those two switches are the exact same part, just preset to different pressures.
The 28/33 listed on the R12 switch is just the tolerance of the cut out pressure setting. It will cut out somewhere between 28 and 33psi and cut back in somewhere between 37 and 47psi. It's a mechanical switch that isn't terribly precise (although it's precise enough for this purpose).
I would think the switch would be solid state, and could be extremely precise and the relay would be the mechanical portion of the switch. Edit : Think I found answer on why the temp range for both low and high (on/off). The chart over here says it's based on temp and humidity, which makes sense. So our pressure sensor may also be a temp/humidity sensor..... my guess is that is is primarily temperature that causes the range, as this seems to have most effect on pressure.
QUESTION: Why the red/orange orifice tube. Did someone scientifically run a calculation and determine this size was needed for our cars? I have yet to run across an orifice tube -vs- pipe size -vs- r134 chart that tells one which orifice to select.
Re: R22 to r134 conversion. here goes, all factory
Originally Posted by LiquidBlue
I would think the switch would be solid state, and could be extremely precise and the relay would be the mechanical portion of the switch. Edit : Think I found answer on why the temp range for both low and high (on/off). The chart over here says it's based on temp and humidity, which makes sense. So our pressure sensor may also be a temp/humidity sensor..... my guess is that is is primarily temperature that causes the range, as this seems to have most effect on pressure.
QUESTION: Why the red/orange orifice tube. Did someone scientifically run a calculation and determine this size was needed for our cars? I have yet to run across an orifice tube -vs- pipe size -vs- r134 chart that tells one which orifice to select.
I've never torn apart one of these switches, but I doubt it is electronic solid state. It's likely just a spring and a contactor. Sure, you could make a very accurate solid state switch that operates at +-0.5psi, but there is no need to be that precise in this application.
The switch operates only based on pressure. It does not react to humidity or temperature directly. That chart you are referencing is the A/C system operational chart from the service manual. Outdoor temperature and humidity does affect the system pressures and evaporator discharge air temperature. That chart is there to allow you to determine if the system is operating within it's design specs and can assist with proper amount of refrigerant charge.
Regarding the orifice tube, I don't know of anyone who has done engineering calculations on the required orifice tube size (I have not). The recommendations are based more on empirical pressure/temperature measurements and personal experience. Leaving the white orifice will work, it just results in a warmer discharge air temperature sitting in traffic on a hot day. When the car is moving, it works fine. Red seems to be the most common recommendation for GM R134A conversions. Worst case if it doesn't work correctly, change it out to one size up or one size down, depending on what is going on.
Re: R22 to r134 conversion. here goes, all factory
round one of flushing. evap, then condenser. this system sat for 25 years. evap was the most oily. once evap fluid clear, continued to flush it and then reuse clear fluid to flush condenser. evap took about 6 flushes before clear, condenser 3. will use ac flush gun next. for this round, hook up air and set to 40psi at end of hose. pictures tell the rest of the story
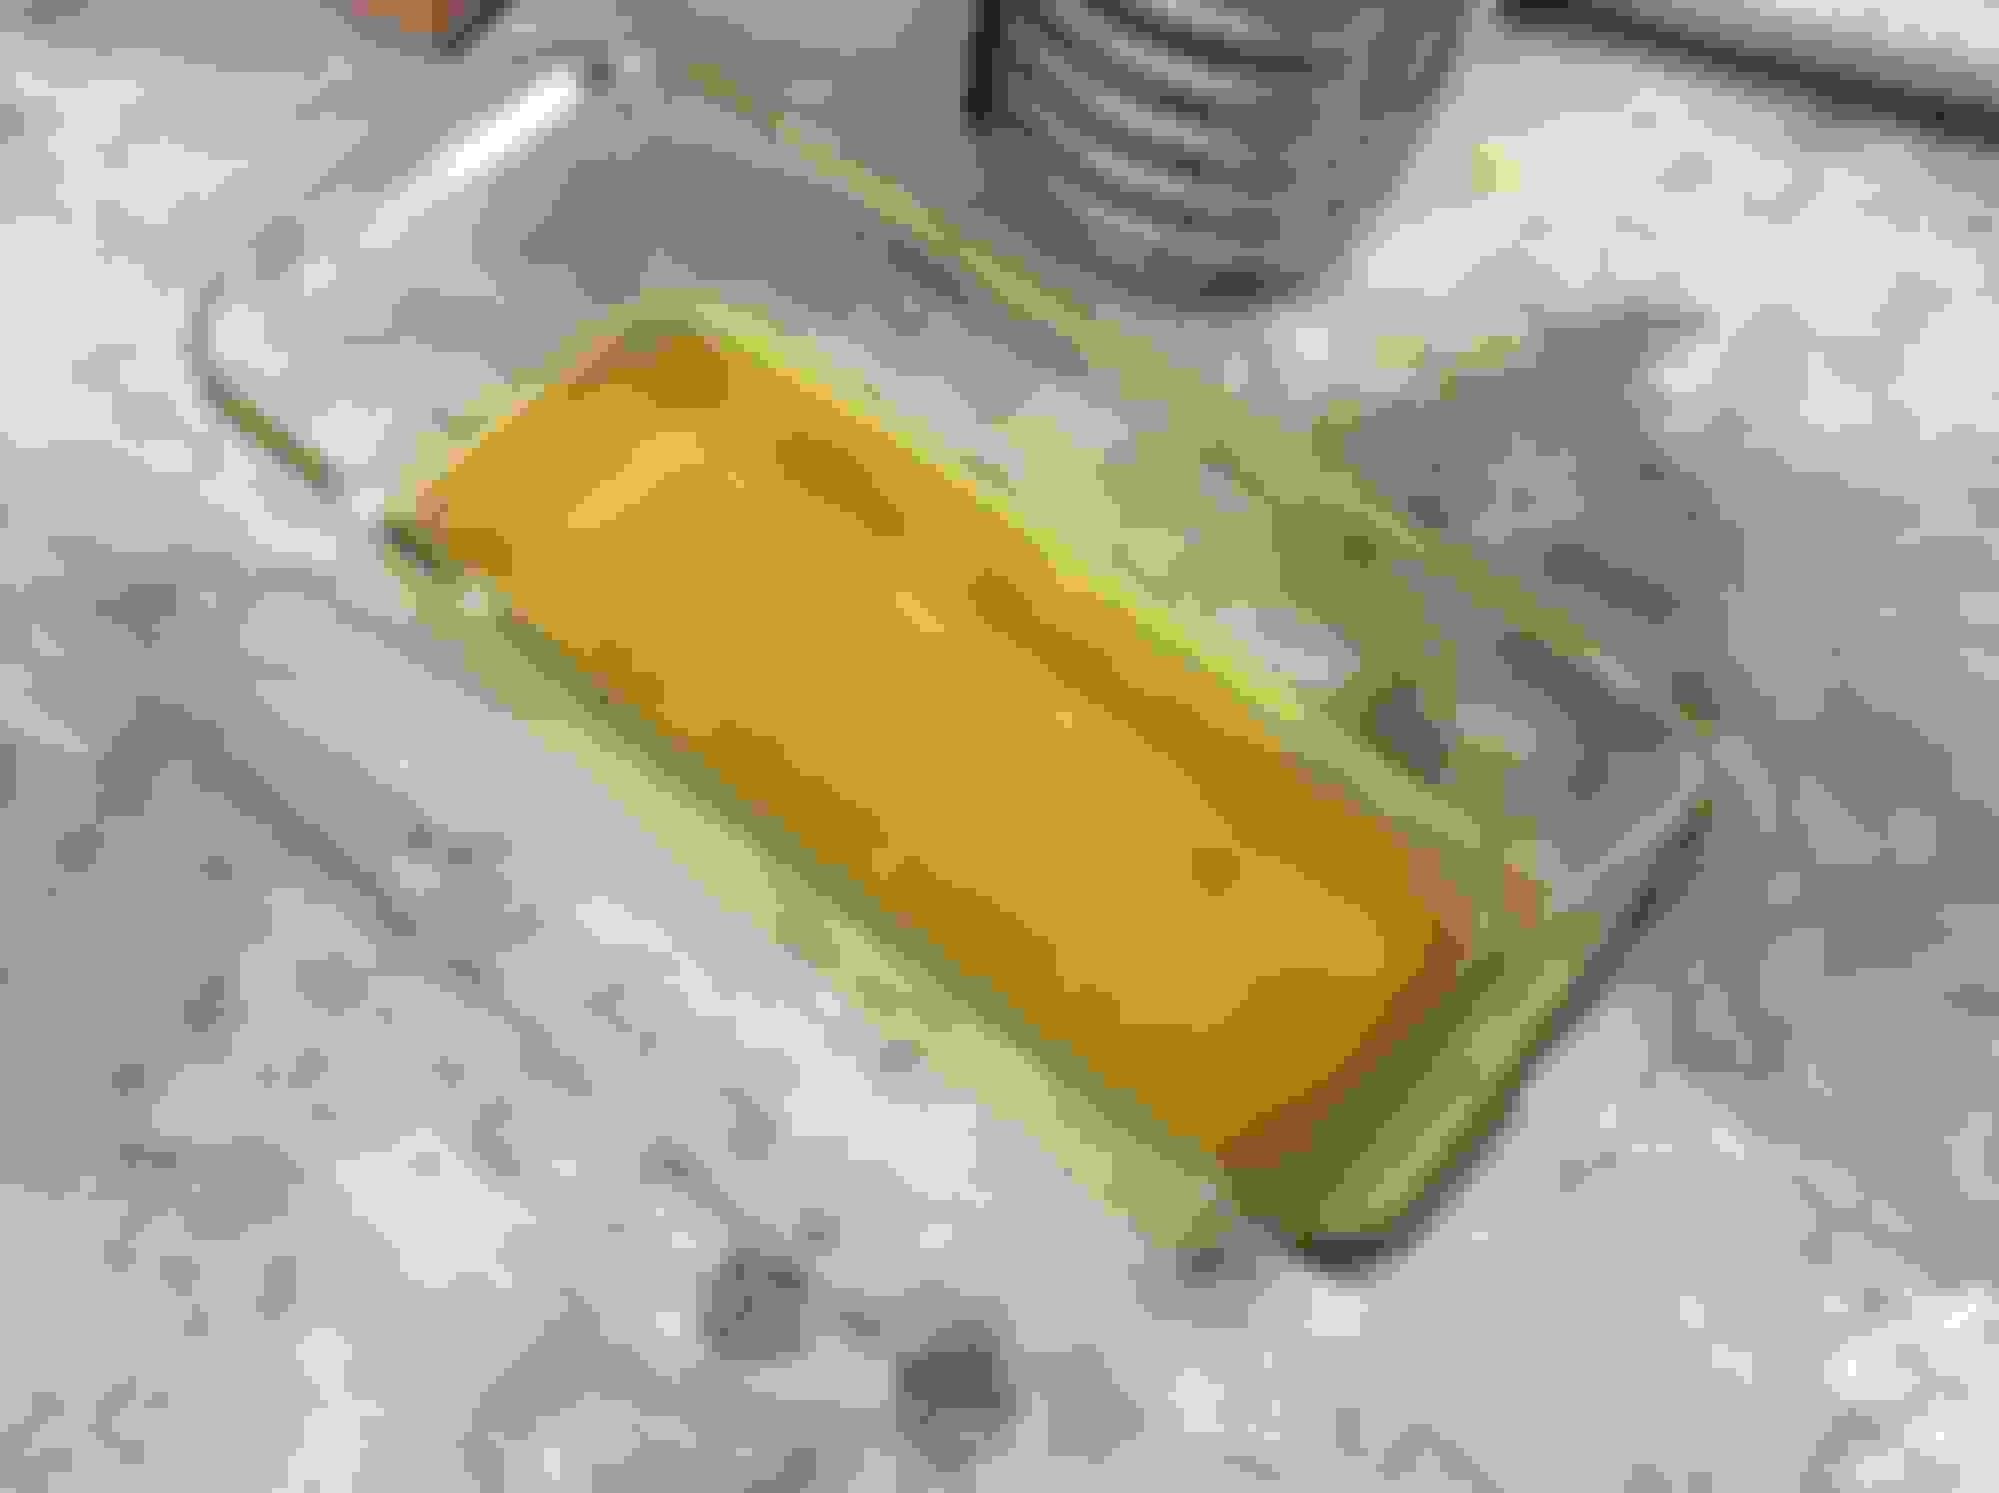
BTW - color of your oil is a clue to the condition of your system. color below appears to be good. darker colors, indicative something is wrong.
Last edited by LiquidBlue; 07-16-2019 at 11:30 AM.
Re: R22 to r134 conversion. here goes, all factory
Hi LiquidBlue ,
Just to reassure you a bit here , I'll relate my R134 experience . When I got my car it was still on R12 , and the compressor was dead (leaking due to play in the input shaft) . After flushing the evaporator and condenser I installed a new compressor , receiver/dryer , red orifice tube , low pressure cycling switch (For R134 rather than R12 operation) and the (rubber ?) lines connected to the compressor . The sticker on the evaporator housing said it wanted 2.25 pounds of R12 and I read that using R134 your supposed to use less so I went with 2 pounds plus the 6 ounces of PAG oil .
Let's just say that on a 90 degree day I can make it uncomfortably cold in my Firebird if I want to , R12 who ??? Don't need none of that at $130 for a few cans around here
Re: R22 to r134 conversion. here goes, all factory
Thanks for words of encouragement. I'll keep documenting in the event it works out. About the only worse place than Austin in summer is Houston where humidity makes it tough to keep up. We hit 100 here easy, but humidity much lower than Houston. Houston hits 90, but feels much hotter than 100 in Austin. I'm in both cities quite a bit, I know!
MORE ON FLUSHING - when I flushed, for the evap, I put fluid in and then turned the evap on all sides for about 10 min a side. (was doing other things and am in no hurry, so why not) With the condenser, I pushed the fluid thru a little, and let sit for 10 minutes, and kept pushing thru a little more. Also used what one person refered to as the pop method. plug the hole and push air, then release other end after building up pressure. so I did a lot of little different tricks to try to remove as much junk as possible, which really turned out to be old mineral oil. So I'm off to a good start.
I will probably go with ester oil, in the event I need to go back to R12.
HIGH PRESSURE SAFETY SWITCH: If you look at pressures for this, it will cut off much earlier for r134 than R12. Not sure if temps get this high, but this could be an issue for some. i.e headers heating things up.
FRESH AIR DOOR: was looking at this very close last night. I noticed mine does not seal 100%, it is probably about 1-2 mm from closing perfectly. But diagrams show that it should be ok as long as you have it on MAX A/C which cuts off hot water flow to the heater.
Re: R22 to r134 conversion. here goes, all factory
Received my new AC Delco compressor yesterday. A few words, it ships w/ no oil. Which is a good thing, don't have to flush PAG oil to put in Ester. Instead, it is sealed with nitrogen (my guess) when the cover was popped gas was emitted. Also ships with new sealing washers, but these are very confusing. Still need to decipher what is going on with the washers they provided. It is made in Mexico. Appears to be a nice, solid unit.
Also opted to experiment with the ACDELCO 1550120 Automatic Adjusting Orifice Tube For Normal Climates Under 105 Degrees. It is longer than the white factory one that was in there, by 1-1.5", but I think it will still fit.
Also went with the Four Seasons 33198 Accumulator. Ugly thing made in China. But it indicated correct desiccant, unlike Delco, which does not state what is in there. I'd imagine, since the r134 type, seems to be compatible with r12, they'd make them all for r134, but wasn't willing to gamble.
will post comparison photos soon.
Last edited by LiquidBlue; 07-06-2019 at 11:58 AM.
Re: R22 to r134 conversion. here goes, all factory
Hi Liquid blue , when I did my compressor they supplied the same kit and strange instructions , but I eventually made sense of it . Depending on what type of aluminum block is on the end of your suction and discharge hoses you will use one or more of those press in inserts and of course whichever of the different thickness washers corresponds to your particular aluminum block (Presumably there must have been a few variants depending on which car the compressor is going into) . I now wish I took pictures when I did mine , but I didn't . For my type of aluminum block I ended up needing to press in one of the extension sleeves only , and of course used two (of the three supplied) different thickness washers .
Re: R22 to r134 conversion. here goes, all factory
Thanks for the feedback. I took a quick peek at the washers, and it seems like they were all too thick for low pressure side. also, was afraid the insert could potentially fall thru the low pressure side, into the compressor. I also took a quick look at factory compressor washers, and I don't see inserts on it. its still on car, so didn't look that close.
I also bought a washer package, because I didn't know the compressor shipped with washers. these don't come with inserts, just washers. looks like factory from what I could tell.
Re: R22 to r134 conversion. here goes, all factory
The early compressors used O rings. Later compressors use washers with built in seals. In the interests of one compressor fits multiple applications, the service part industry brings you semi-universal/semi-application specific parts with adapters.
Re: R22 to r134 conversion. here goes, all factory
Originally Posted by Drew
The early compressors used O rings. Later compressors use washers with built in seals. In the interests of one compressor fits multiple applications, the service part industry brings you semi-universal/semi-application specific parts with adapters.
Technology. It's grand... Or else!
I agree with the "Or Else"
Of course they've made it so that the new compressor will not fit on the old aluminum block without using their new washers/seals instead of the O rings , having it a 100% bolt in replacement woulda been too easy .
The washers/seals in themselves aren't actually all that bad , it's those little aluminum inserts that the instructions blithely tell you to "tap into place" with a hammer . BS on that , I knew that would have made a mess of the end of the insert had I followed their instructions because it's more than just a "oh it'll just pop in" fit . I used a C clamp and a small brass block to press in the one insert I needed and it worked perfectly . The actual difference is that my original compressor had the suction and discharge ports being at the same depth where the aluminum block bolts on , whereas the new compressor has one of those ports (can't recall which) recessed further into itself than the other , causing the need for the insert and different thickness washers/seals .
Re: R22 to r134 conversion. here goes, all factory
As long as I'm whining, I'd like to give a special shout-out to the nitwit who figured a can of R134a with a foil seal (the type pierced by 134A can tappers since the 90s) was too risky for the environment, and decided to introduce new cans that use a push button type self sealing valve like spray paint... Because why not make everyone that bought the stupid new R134a fitting compatible tools, have to go get yet another can tap for the new environmentally safe cans... As if the minority recharging our A/C from disposable cans are going to vent so much of this "environmentally safe" refrigerant to the atmosphere when disposing of half empty cans that don't self-seal.
If anything, I ended up venting more to atmosphere trying to figure why my oldstyle can tapper wasn't working. Talk about a tree-hugging hippie bright idea, almost as dumb as portable gas cans without vents and with start/stop valves that make it such a pain to put gas in the mower, that more gas ends up on the ground then if they'd just left us with the open vents.
Re: R22 to r134 conversion. here goes, all factory
Originally Posted by TransamGTA350
There should be an adjustment screw in between the two electrical connection terminals. I would bet those two switches are the exact same part, just preset to different pressures..
For anyone wondering, here is the pressure adjustment screw for the r12 switch.
Re: R22 to r134 conversion. here goes, all factory
Quote:
Originally Posted by Drew
Originally Posted by Drew
Nah, I'm good. Thanks anyway.
You use ester oil for R134a retrofits. No matter how thoroughly you flush the system, you're not going to get it all out. Unless you want to replace all the components.... That's actually probably not a bad idea if you can stomach the cost.
Really doesn't matter, R134a conversions are pretty much doomed from the start. Could probably recharge the system with spray paint and have the same vent temps, but hey it's your funeral.
The "expert" speaks! LOL!
Quote:
Originally Posted by Drew
You use ester oil for R134a retrofits.
Well why didn't you say so the first time and save us both some typing. I've read you can use ester oil to flush mineral oil. Might be able to do that and then go to PAG.
Funny my 93 Deville and 84 Z-28 134 Retrofits are STILL working throwing cold air YEARS down the road! Conversion sitcker warning
Re: R22 to r134 conversion. here goes, all factory
It's probably possible to flush a compressor out well enough to swap out oil, but possibly not practical.
Best time to do the 12 -> 134a thing is when the compressor is getting swapped anyway.
But: I would ABSOULTELY NOT put the original rubber lines back on!!! IMO that's just leaving yourself a land mine that you'll have to come back and step on in about 6 months. As said, I'd STRONGLY recommend cutting off the ferrules and replacing the rubber parts.
I've never done a complete write-up w photos... not a bad idea, maybe next time I do one, I'll see about that. I've written the process abuncha times though. Last conversion I did was my son's 90ish 4.3 S truck which woulda been near perfect... it's all but identical to the system in these cars. Still working perfectly after 5 or 6 yrs BTW.
Re: R22 to r134 conversion. here goes, all factory
Originally Posted by sonjaab
The "expert" speaks! LOL! Conversion sitcker warning
Um , Sonjaab dude , , , if your gonna be dissing people with the whole "Expert" thing , and posting pictures to try to prove whatever point it is your tryin to make , the least ya could do would be to make sure the readers can actually SEE what your picture is supposed to prove
Guys , if we had a TGO contest for the absolute WORST picture ever posted , focus wise , do ya think Sonjaab's little gem here would win the prize ? ..... I do !
Re: R22 to r134 conversion. here goes, all factory
Originally Posted by sofakingdom
It's probably possible to flush a compressor out well enough to swap out oil, but possibly not practical.
I've seen the "experts" do it in video's. They say if you flush with Ester, you will be good if you are moving from Mineral to PAG. Ester and Mineral will mix and flush the Mineral. Or, you could do a rebuild, and that would do the trick.
Originally Posted by sofakingdom
Best time to do the 12 -> 134a thing is when the compressor is getting swapped anyway.
I'm only swapping because I don't want to put new seals in old one, and want to preserve original factory for later use, and simply don't have time to do every thing, so it was more or less a short cut for me to get a new compressor.
Originally Posted by sofakingdom
But: I would ABSOULTELY NOT put the original rubber lines back on!!! IMO that's just leaving yourself a land mine that you'll have to come back and step on in about 6 months. As said, I'd STRONGLY recommend cutting off the ferrules and replacing the rubber parts.
Correct me if I'm wrong, but the worst that can happen is a leak??? Or are you concerned with a small explosion?
Re: R22 to r134 conversion. here goes, all factory
Originally Posted by Drew
As long as I'm whining, I'd like to give a special shout-out to the nitwit who figured a can of R134a with a foil seal (the type pierced by 134A can tappers since the 90s) was too risky for the environment, and decided to introduce new cans that use a push button type self sealing valve like spray paint.
I've been struggling to buy something online due to this exact problem. (heading to store in Austin, TX...... traffic nightmare.... must avoid at all cost) The reviews I read of people poo-pooing on the adapter are most certainly because they didn't understand this. And all of the choices I've seen are either wrong when they state refrigerant type or don't know what type adapter it is. Looks like I'm heading to the parts store for this one.
Re: R22 to r134 conversion. here goes, all factory
the worst that can happen is a leak???
Zackly!!!! That is THE WORST!
What could possibly be WORSE on a BRAND NEW A/C system that you just sweated blood and money over to make RIGHT??? How would it be A Good Idea to re-install an OLD EXISTING LEAK BACK onto your nice new otherwise perfect job?
Re: R22 to r134 conversion. here goes, all factory
Originally Posted by sofakingdom
Zackly!!!! That is THE WORST!
What could possibly be WORSE on a BRAND NEW A/C system that you just sweated blood and money over to make RIGHT??? How would it be A Good Idea to re-install an OLD EXISTING LEAK BACK onto your nice new otherwise perfect job?
trying to go factory. will eventually put factory compressor back on. this is best way to know if hoses don�t leak. please let me know if there is bigger danger than slow leak that can be rectified via new hose/vac pull and new fridge
Re: R22 to r134 conversion. here goes, all factory
did another flush today with the official stuff. this time at 90psi and reverse flow. was still clear. yikes. watch out when doing this one. wear safety glasses and stand back. when it finally flows it’s like yellowstone park. here are some photos of stuff going on new on left new ac delco vs factory factory washers washer instructions that came with new compressor new washers at rest the gap, not torqued yet that is mentioned by instructions orem tools was very good flush tool orem tools instructions
Re: R22 to r134 conversion. here goes, all factory
Originally Posted by OrangeBird
Um , Sonjaab dude , , , if your gonna be dissing people with the whole "Expert" thing , and posting pictures to try to prove whatever point it is your tryin to make , the least ya could do would be to make sure the readers can actually SEE what your picture is supposed to prove
Guys , if we had a TGO contest for the absolute WORST picture ever posted , focus wise , do ya think Sonjaab's little gem here would win the prize ? ..... I do !
Re: R22 to r134 conversion. here goes, all factory
Originally Posted by OrangeBird
Um , Sonjaab dude , , , if your gonna be dissing people with the whole "Expert" thing , and posting pictures to try to prove whatever point it is your tryin to make , the least ya could do would be to make sure the readers can actually SEE what your picture is supposed to prove
Guys , if we had a TGO contest for the absolute WORST picture ever posted , focus wise , do ya think Sonjaab's little gem here would win the prize ? ..... I do !
I don't know, he's posted some doozies in other threads recently too. Not sure what his hangup is with me, but it's good for a laugh.
The easy way around the new self sealing cans is the side-tapper. Just annoying the dedicated R134a tapper that's been fine for 20 years, suddenly isn't good enough. So the quick can tapper/basic charging hose isn't good enough, instead I have to break out the gauge set, and hook everything up, then tear it all down and try to get it back in the retarded blow-molded case... All because someone might hurt the ozone layer's feelings... As if enough 134a escapes unscrewing the old school service hose to really make a difference.
 06-28-2019, 10:40 PM


") Of course they've made it so that the new compressor will not fit on the old aluminum block without using their new washers/seals instead of the O rings , having it a 100% bolt in replacement woulda been too easy .
Of course they've made it so that the new compressor will not fit on the old aluminum block without using their new washers/seals instead of the O rings , having it a 100% bolt in replacement woulda been too easy .


 How would it be A Good Idea to re-install an OLD EXISTING LEAK BACK onto your nice new otherwise perfect job?