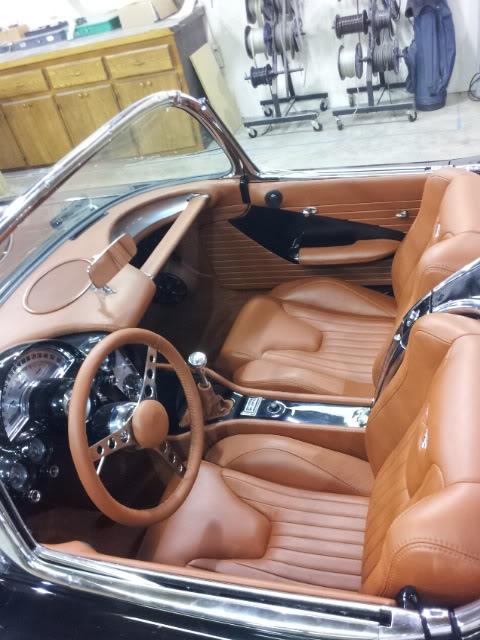
You wouldnt use what again..? The expandable foam or the spot putty?
And for either answer, what would you use in its place?
Im trying to figure out how you sewed up the corners. I have sewn a few things lately...like shift and e-brake boots. But I cant wrap my head around how you did that.
J.
The spot putty, or anything that dries hard.The foam is perfect density.Feels like a gel pad when cured, wont dent, is easy to cut/shape/sand.In fact i'm using it for a console lid im currently re-doing to match the console/wheel/seats.
By not glueing the corners i was ablle to pull the leather back & sew from behind.Afterwards i use a little glue, but mostly i stretched the leather back over the corner.Then finished stitching the underside, but from the outside.Most of that will be covered by the dash & only about 1" will be visible, if you look underneath.
Thanks, almost done w/ this.
Figured i'd do the console lid.Its a JY piece w/ many cracks.Repaired & installed steel rod to reinforce it.
Sealed it Oatey ABS cement.
Rebuilt foam.
That looks amazing... Seriously... If it was something you could easily reproduce at home, and get shipping at a reasonable cost, you'd have yourself a pretty decent business. I have never seen a dash pad refinished like this and it looking so nice in the end.
Great work! Im DEF keeping my old cracked dash from my 87 now! I might try to find material that is more consistent in finish rather than the unique characteristics of the leather finish (so probably synthetic), but Im DEF following your example on how to make it look awesome!
That looks amazing... Seriously... If it was something you could easily reproduce at home, and get shipping at a reasonable cost, you'd have yourself a pretty decent business. I have never seen a dash pad refinished like this and it looking so nice in the end.
Great work! Im DEF keeping my old cracked dash from my 87 now! I might try to find material that is more consistent in finish rather than the unique characteristics of the leather finish (so probably synthetic), but Im DEF following your example on how to make it look awesome!
Justin
Cost of the leather, plus the shipping, would be too high.I lucked out when I scored the leather for this.It's twice as big as the dash at least & I paid peanuts for it.Just for the dash alone real leather will cost about two bills.Just not feaseable.
This was my first try at this & I figured it out along the way.Shouldn't be too difficult for others.
84 1LE - Another great thread by you on modding a 3rd gen. This is gonna be a project for sure in the summer as I have quite a few wrecked dash pads I was saving to do something with. Thanks for the write up and the idea to fix them
Great job, i had plans of doin this after finding a huge roll of nogahide in my dads garage... Glad to see some pics of what u did as a reference... New dash pad and headliner comin up!!!
Great job, i had plans of doin this after finding a huge roll of nogahide in my dads garage... Glad to see some pics of what u did as a reference... New dash pad and headliner comin up!!!
I started doing mine. Got the old hard cracked vinyl peeled off and got some foam sprayed on and sanded about 1/4 of it smooth. There are quite a few little air bubbles up to 1/4 inch. Should I try to fill them or will they be ok?
It sucks that we can't do this to the Camaro pad because of the speaker grille are not the same....
As mark said, that is a camaro pad.
Quote:
Originally Posted by Duane's 91 Z/28
I started doing mine. Got the old hard cracked vinyl peeled off and got some foam sprayed on and sanded about 1/4 of it smooth. There are quite a few little air bubbles up to 1/4 inch. Should I try to fill them or will they be ok?
I would try to fill them in.Especially the larger ones.Anything bigger than about 3/16.If the leather or material used is fairly thick the smaller ones wont show thru
One trick i learned while doing this is to gently press the nozzle so less air mixes with the foam.Flows very slow, but result is denser foam/smaller holes.
I would try to fill them in.Especially the larger ones.Anything bigger than about 3/16.If the leather or material used is fairly thick the smaller ones wont show thru
One trick i learned while doing this is too slowly press the nozzle so the foam comes out real slow.This causes less air to escape.Resulting in denser foam & smaller holes.
Ok thanks I will give that a try once I am done sanding the whole dash. I just have to be patient with it.
WOW!!!!! I am impressed!! That looks great!! I havee been looking at getting a new pad, but you have givin me inspiration as well!!!! I am very excited about starting mine!! Thank you for all the posts!! But how did you sew the corner pieces? That looks real difficult!!
By not glueing the corners i was ablle to pull the leather back & sew from behind.Afterwards i use a little glue, but mostly i stretched the leather back over the corner.Then finished stitching the underside, but from the outside.Most of that will be covered by the dash & only about 1" will be visible, if you look underneath.
Awesome. Thanks!! I think I'm gonna give it a shot!!! Cheaper than buyin a new one!! Plus, I like the idea of having the original one in!! Now, did you use any special kind of needle or thread to do your sewing? Is there anything that you wish you woulda done different? I think this may be next months project!!
Not sure, but i know they could better.Thankfully, they pop out.
Did you consider filling them in and just covering the speaker opening up with material? I don't have speakers in my dash anyway so I thought filling them in would work well and be very clean.
Looks great! Also, good for you for actually trying something on your own. Hopefully it lasts you a long time.
I tried searching for a post one member made but couldn't find it. This guy actually had his recovered by a shop and had the lip stitches in white to match his interior. It looked fantastic. Wish I could find it.
Looks great! Also, good for you for actually trying something on your own. Hopefully it lasts you a long time.
I tried searching for a post one member made but couldn't find it. This guy actually had his recovered by a shop and had the lip stitches in white to match his interior. It looked fantastic. Wish I could find it.
Could be me. I just converted my center console from gray to black and finally get to see how the shift boot and arm rest will look together with the center console. But 84 1LE gets super pimp points for doing all the work himself. It looks great. I don't have the skills to do stitching myself. Mine was done by the folks who did my seats.
I still need to convert the console vents to black.