When you click on links to various merchants on this site and make a purchase, this can result in this site earning a commission. Affiliate programs and affiliations include, but are not limited to, the eBay Partner Network.
LTX and LSXPutting LT1s, LS1s, and their variants into Third Gens is becoming more popular. This board is for those who are doing and have done the swaps so they can discuss all of their technical aspects including repairs, swap info, and performance upgrades.
The shop I�m using is very concerned about the work they do. They want to make sure I�m happy with the fitting of body parts and keep me updated of the progress. I stop by about once a week and snap pics. This shop is primarily a Corvette restoration business but they also do other cars on occasion. The owner wants his customers to be happy when their car is completed. Expensive but worth it.
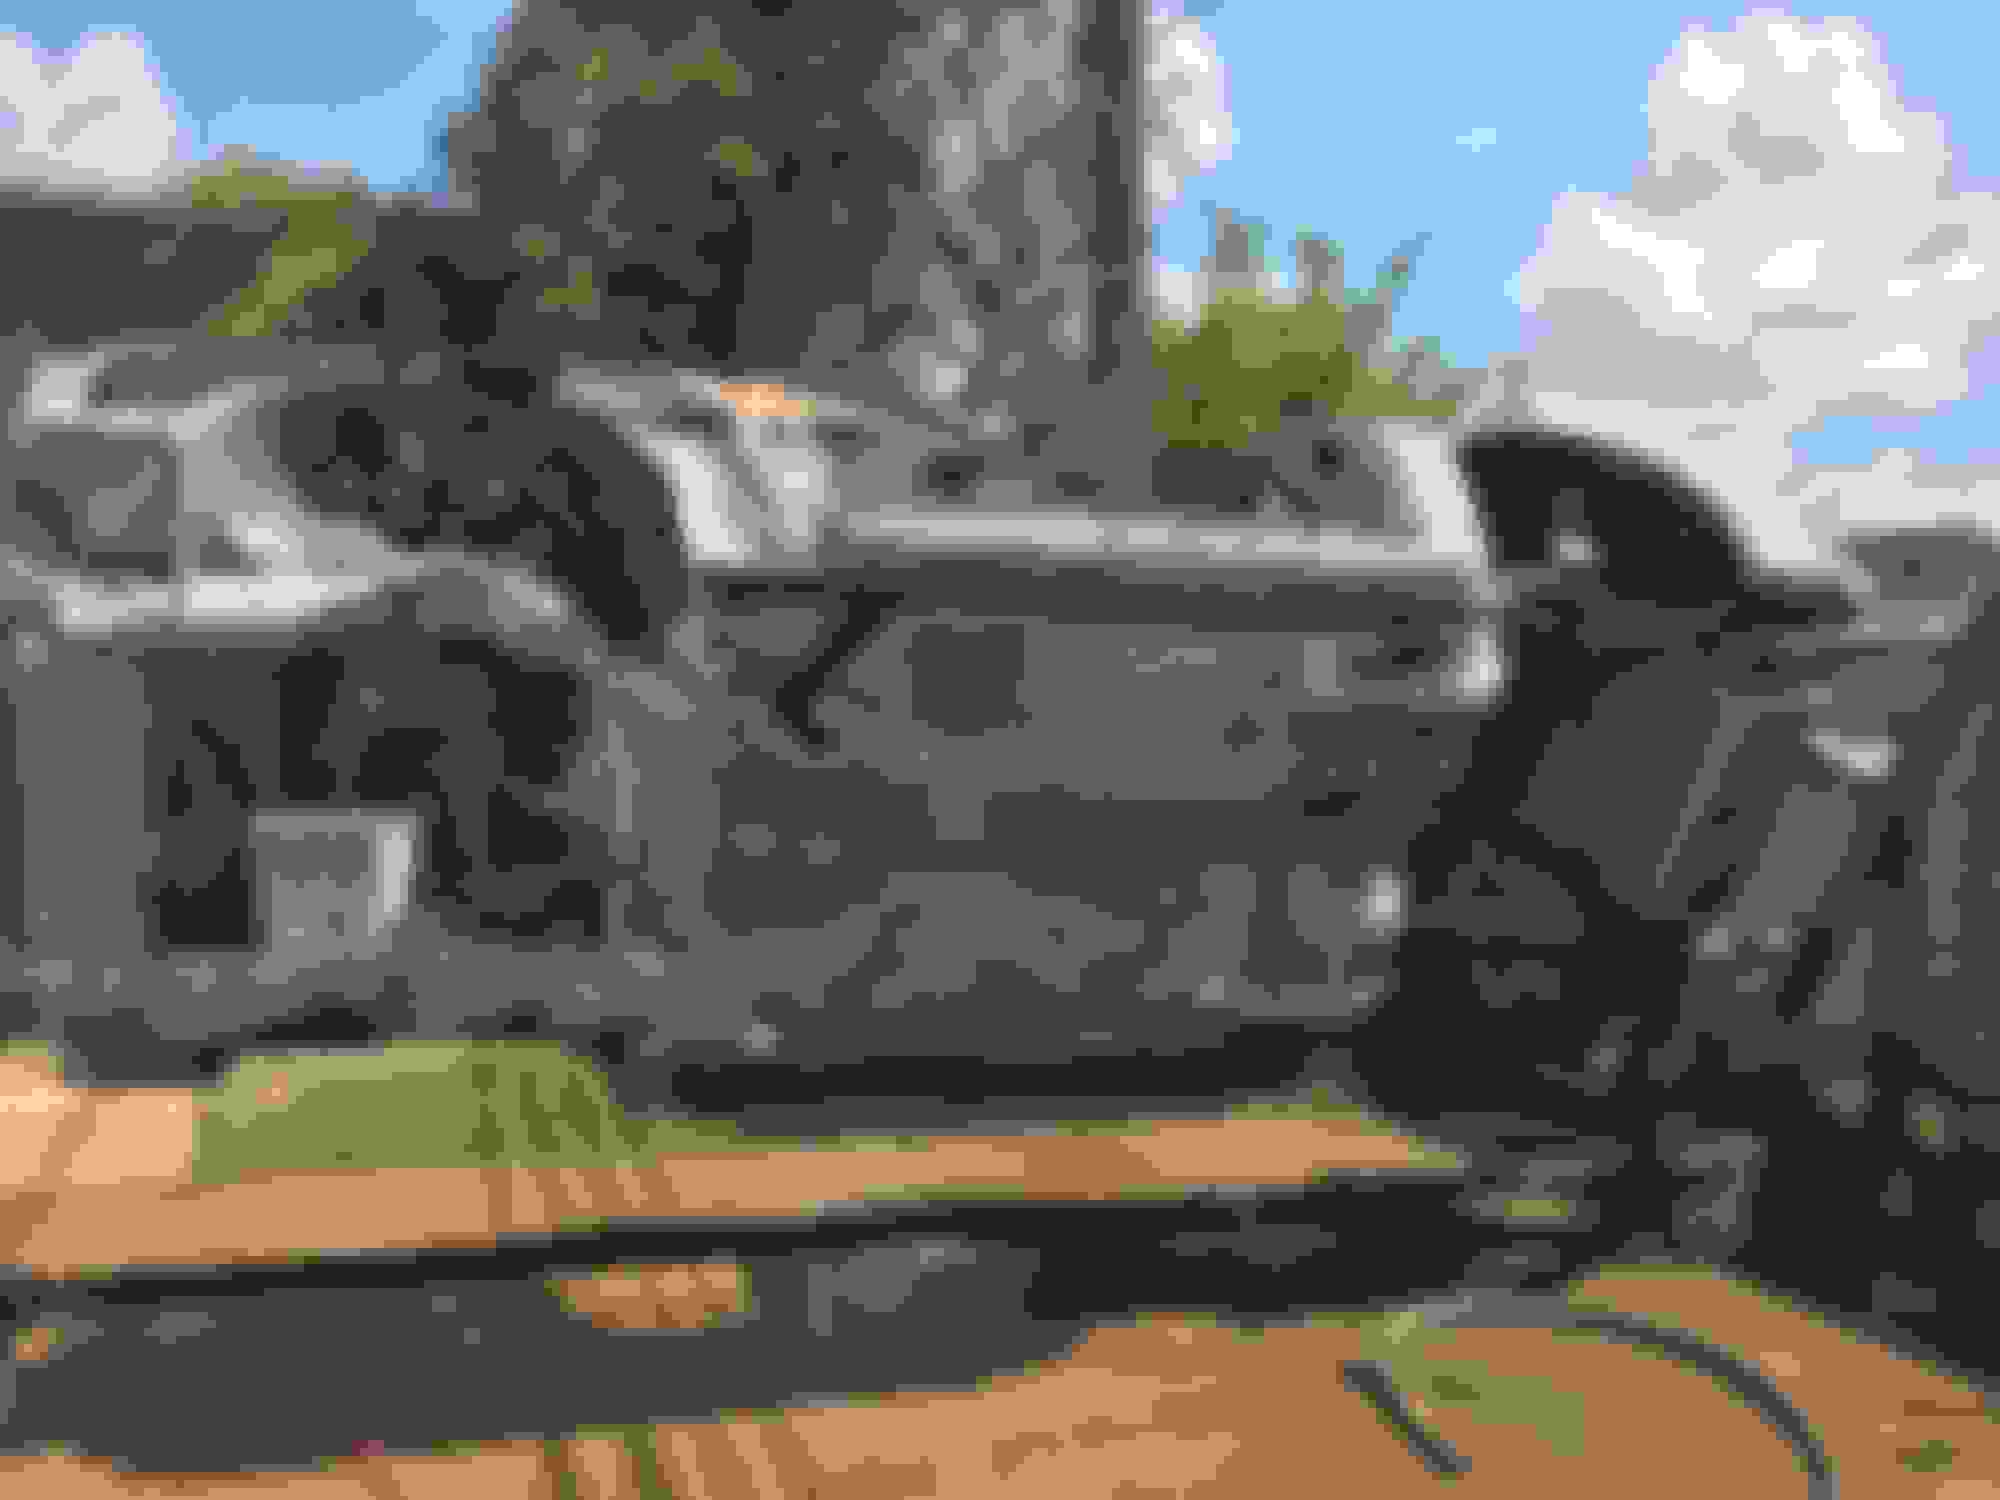
https://www.facebook.com/houstoncorvetteservice/videos/2442426382712986/Car on rotisserie for wet sandblasting to remove all paint and road crud,top,bottom and inside.
thanks,sometimes when you are down you think you are the only one.
don't get me wrong im proud of what i do have and i still have the things that really matter
(place to live,wife,kids,job etc)
but i couldn't build a $100,000 car unless the "build" time-frame was closely related to infinity
Last edited by 1986BANDIT; Aug 10, 2019 at 03:34 PM.
this is dream level building here,you are doing the stuff we "little guys" only dream of while driving ratty turd gens.
You can make your car pretty nice, you just have to do it yourself. There are gobs of good examples on this forum of DIY builds. jworks has a good DIY thread going on right now. And yours could be the next build thread!
Measure for fitment with the accessory drive before ordering. I was looking at some of the mid mount units like in your original engine picture and the clearance from engine to radiator is tight on those. Factory accessories stick more to the sides of the engine and don't need as much space between the engine and radiator to install them. Nice looking build so far though.
Wow - A complete tear down and rebuild! That's cool that you are the original owner of a 1985 car. And your neighbor learned that your toys can still be taken away if you misbehave. Yikes!
Point of story is he had the entire inside floorboards and rear area �insulated � with foil backed butyl based roof seam insulation. Kind of crap you get at Lowe�s/Home Depot. Have spent the last week with a vibrating scraper and then wiping residual tar with lacquer thinner. PITA. I know some folks advocate this as poor mans Dynomat. Dont. Just don�t!
I'm curious to know how long the material had been in place, how it held up and why you hold such a poor opinion of it.
I'm curious to know how long the material had been in place, how it held up and why you hold such a poor opinion of it.
I haven't used this stuff specifically, but I know that most people use Dynamat, and the like, improperly. There are much better ways to achieve the desired results. Using these products with 100% coverage is a waste of money since they only dampen vibration and do not block sound transmission. You only need 25-40% coverage at most for vibration, then you cover with mass like MLV (mass loaded vinyl) or lead with a foam decoupling layer in between. I also used FatMat extreme and it melted in areas of the floor where the exhaust is in my Suburban, the foil layer may block heat but it is just going to hold it between the sheet metal and the foil. The Foil in that location is not really helping control heat into the vehicle from outside, so 100% coverage is just a waste for that purpose too.
The Home Depot/ Lowe�s foil backed butyl stuff works but there is a downside. When I removed the carpet it had that "hot roof" smell. Also bottom of carpet had the same odor. Car has been sitting in a garage for around 8 years. I'm sure if it had been driven more the odor would have been coming through the carpet. It is also very heavy. I probably removed 60-70 pounds of that crap. It�s not the same type of rubber that DynaMat uses. With the heat here in Texas it adds up to a future problem. And I know a little bit about butyl and synthetic rubber. I worked for Goodyear Chemical for 35 years.
BTW I just left the folks who manufacture Lizard Skin. I�m going to do my floorboards and wheel wells with it. Lighter, and easier to apply considering car is stripped down to the bare body. Not cheap but lasts longer. Long term use DynaMat can start coming loose, particularly on doors. Seen it on several restored cars getting a redo.
Now back to the car. Getting wet sandblasted. Messy but does a great job. Kudos to the guy doing the work. Hot as Hell this week here. Brutal. Car is only partially done. Will be put in primer after this to prevent rusting.Some pics.
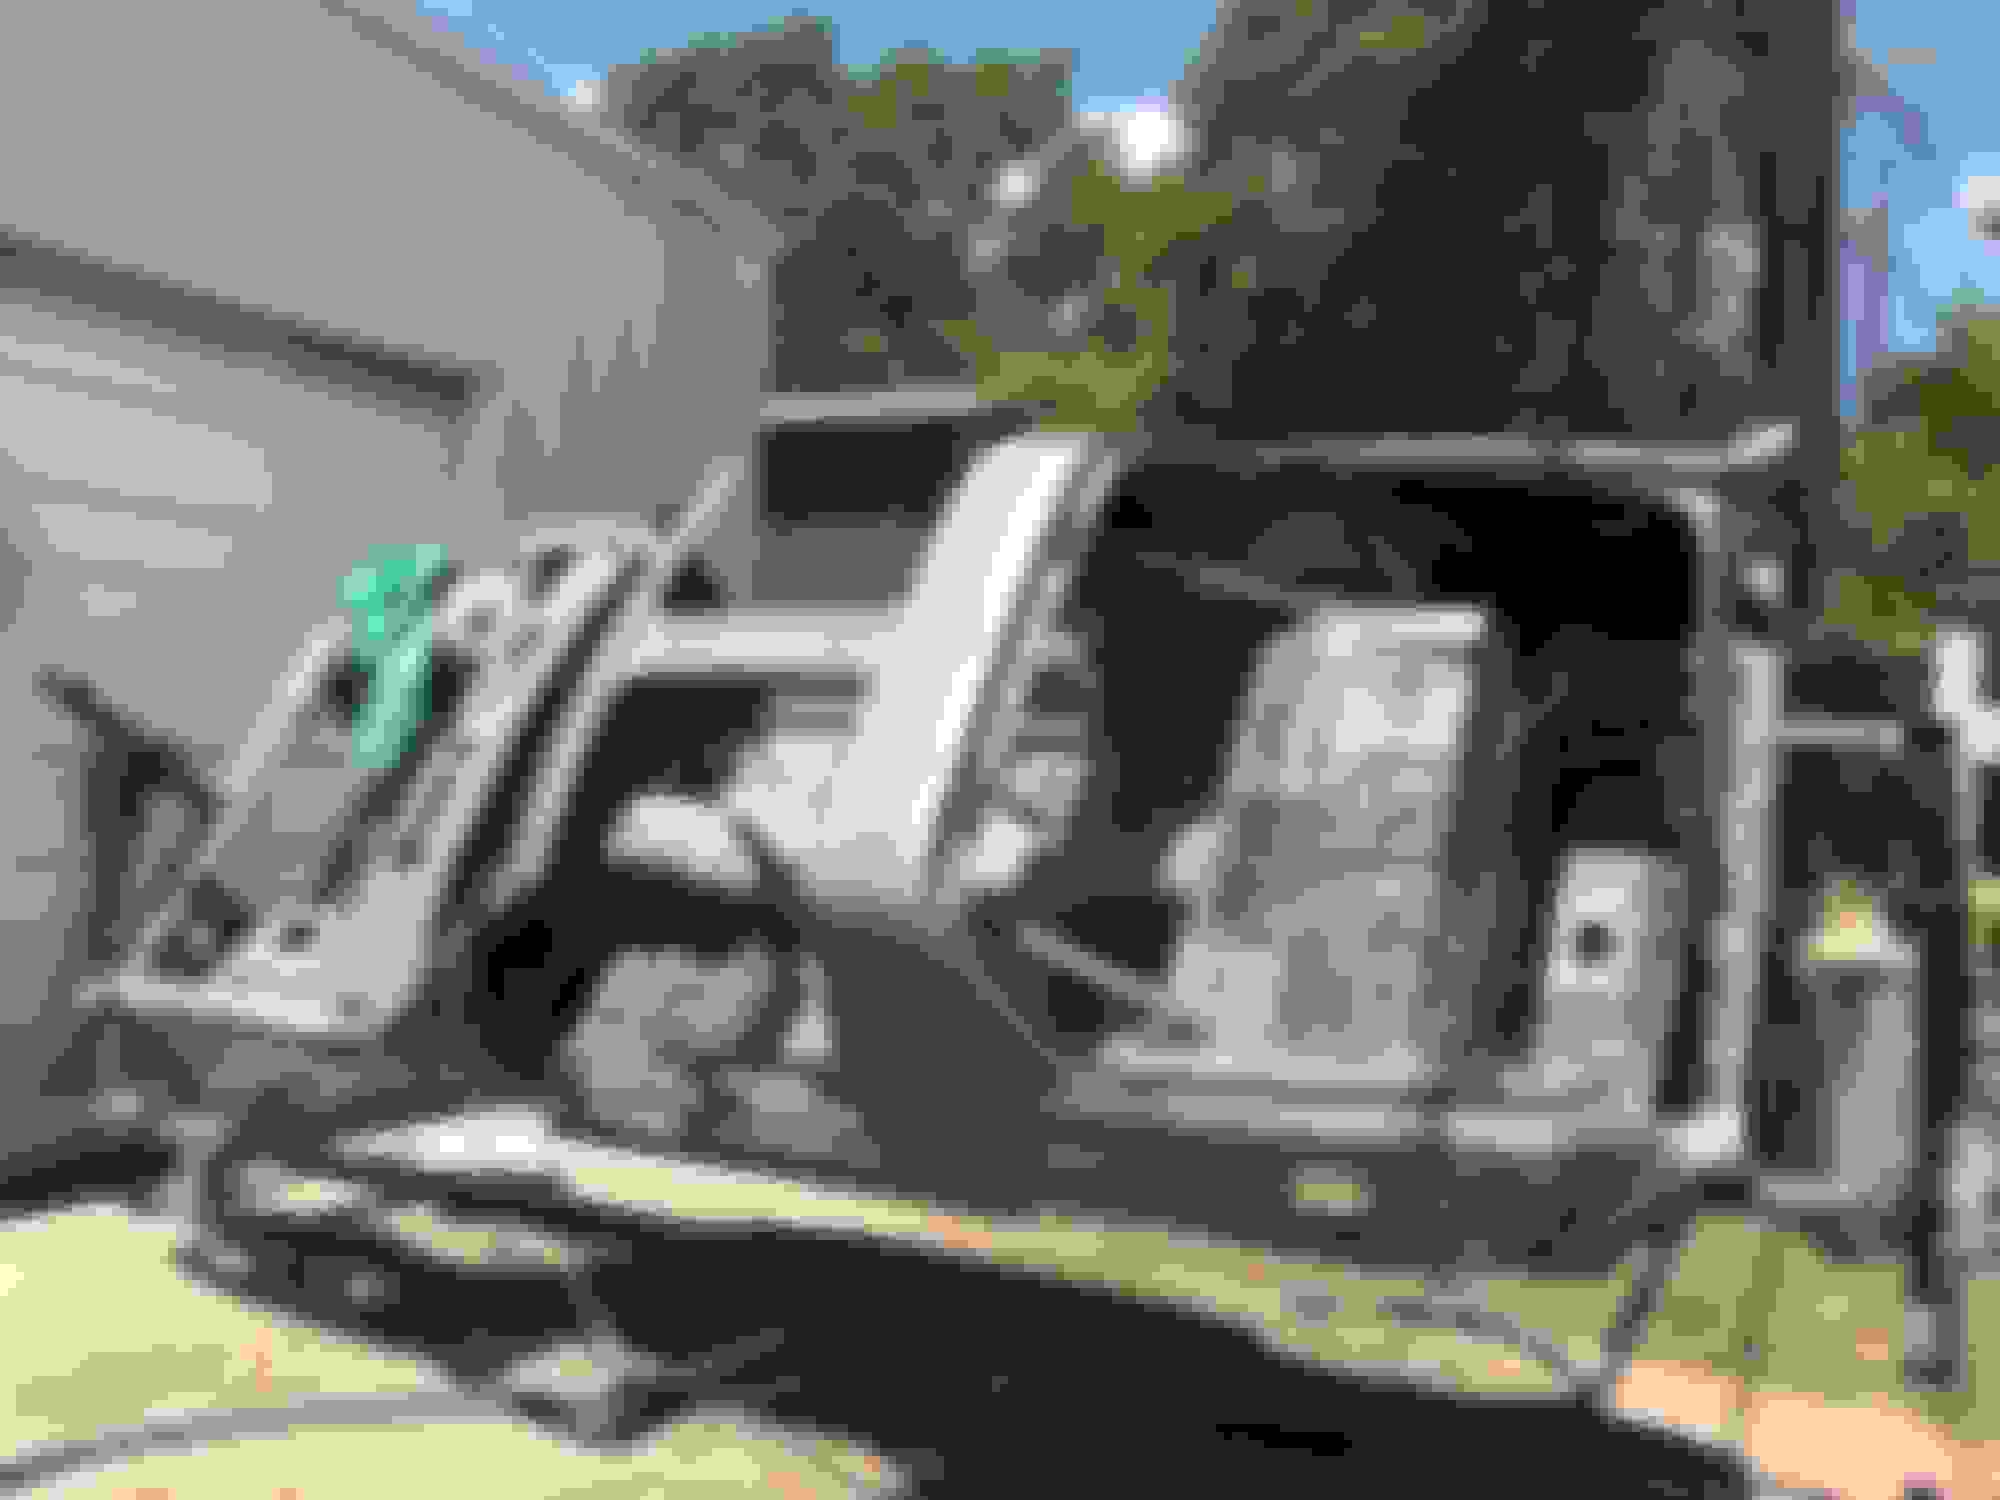
Car in paint and prep area. Sanding and priming panels. Lizard Skin for heat and sound insulation going on interior area and wheel wells once sanding and blocking done.
but god i love it,its street-able but kind of excessive isn't it?
the front tires are wider than most rear tires,this car is the ultimate third gen.
did you ever see the third gen camaro troy trepannier was working on(f-87) ?
shame it was never completed as far as i know,it definitely had a few good
ideas and some questionable ones,lol
Last edited by 1986BANDIT; Aug 14, 2019 at 07:47 PM.
Measure for fitment with the accessory drive before ordering. I was looking at some of the mid mount units like in your original engine picture and the clearance from engine to radiator is tight on those. Factory accessories stick more to the sides of the engine and don't need as much space between the engine and radiator to install them. Nice looking build so far though.
From a cosmetic standpoint, what are you planning on doing with the rear seat area? It looks like the down bars on the cage into the hatch area will prevent the seat backs from being installed without notching them around the cage bar. I've got bars in a similar spot on my 92 and had to leave the seat backs out.
From a cosmetic standpoint, what are you planning on doing with the rear seat area? It looks like the down bars on the cage into the hatch area will prevent the seat backs from being installed without notching them around the cage bar. I've got bars in a similar spot on my 92 and had to leave the seat backs out.
There will be no rear seating. Haven't finalized plans for that area yet. Working on various ideas currently.
have you started applying the lizard skin and do you have any previous experience with this product?
my friend just did his fox and has half a pail left over,i told him i would gladly take it but i would love to hear someone else's opinion and personal view of it
I don�t paint. Body shop is doing it. Have had several friends use it in their cars. Works great. You have to apply heat insulation and sound suppression separately. Has to dry between coats. Some say put heat coating on one side of firewall/underbody and sound coating on other, creating a �sandwich � per say. Suggest check out their website.
What impresses me is the pace of the work the paint shop is doing. Typically cars disappear into "paint prison" and aren't seen again for months. Or longer.
They mostly work on Corvettes. And they wait on parts for months sometimes. So they are able to knock mine out because it�s just a bare body. There will be some idle time as they work on other cars, but the owner gave me a timeframe of 3 months to completion. And I added the Lizard Skin application recently. So a little added wait. But it will be worth it.
They mostly work on Corvettes. And they wait on parts for months sometimes. So they are able to knock mine out because it�s just a bare body. There will be some idle time as they work on other cars, but the owner gave me a timeframe of 3 months to completion. And I added the Lizard Skin application recently. So a little added wait. But it will be worth it.
And the owner gets some quick cash flow from my project, versus the older Vettes which can be in his shop for several months. LOL
Anyone have any idea what the paint code or the name of the OEM underbody color is? Looking to do the underbody similar to the DSE Iroc. The exterior color will be black as is my rearend, suspension, and other parts. Want a contrast underneath with all the moving parts. Also will listen to reasonable opinions on underbody paint and pics if you have them. Final paint on my build coming soon.
I think DSE painted under body white so that it is easy to inspect for cracks and damage.
I prefer dark colors (flat black) on parts so it all just blends into the shadows. Easy to touch up with a rattle can from the hardware store. Personally, I think it looks extremely silly when people have random bright red or whatever colors on control arms and such.
I'm sure "rattle can" wasn't exactly what you were aiming for. But honestly, that's reality when you drive something long enough.
I did the underside myself including sandblasting, etch primer and top coat. It's far from the build quality that you're seeking however these pictures might give you an idea.
Keep in mind that this was all rattle can and matching the existing bottom-side colour was largely a guess on my part. I can't recall the specific shade of grey but I might be able to go through my pile of spray bombs if someone else doesn't give you better info.
FWIW here are a couple of build pictures. (circa 2010)
Final prep almost done on bottom. Then on to paint. Color Jet Black on exterior and frame rails. Medium Gray on underbody. Paint scheme similar to DSE Iroc-Z.
I think DSE painted under body white so that it is easy to inspect for cracks and damage.
I prefer dark colors (flat black) on parts so it all just blends into the shadows. Easy to touch up with a rattle can from the hardware store. Personally, I think it looks extremely silly when people have random bright red or whatever colors on control arms and such.
I'm sure "rattle can" wasn't exactly what you were aiming for. But honestly, that's reality when you drive something long enough.
All suspension components are black in color. I�m not a fan of the red stuff either. The underbody of the car will be a medium grey. Will �highlight � the underbody components and make it easier to see when working underneath. Paint soon.
I did the underside myself including sandblasting, etch primer and top coat. It's far from the build quality that you're seeking however these pictures might give you an idea.
Keep in mind that this was all rattle can and matching the existing bottom-side colour was largely a guess on my part. I can't recall the specific shade of grey but I might be able to go through my pile of spray bombs if someone else doesn't give you better info.
FWIW here are a couple of build pictures. (circa 2010)


 But honestly, that's reality when you drive something long enough.