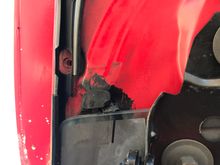
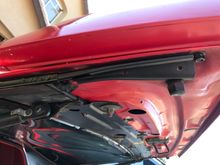
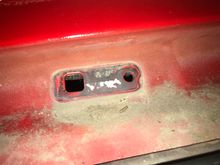
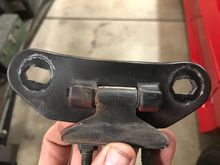
So I loosened all the 13mm nuts that sandwich the black bracket and the deck lid. But here's the trick. There's so much force from the struts, you have to disconnect them to push the deck lid forward. Then tighten the 13mm nuts. Don't forget to take the 2 trim screws out of the rear of the outer metal trim. On my car I had to redrill (1/8") the holes to reinstall the trim. I can't explain why these holes are off when you get the deck lid in the proper position. Maybe the trim stretched.