Polishing Tail Lights
Well I am getting constant PM’s asking me how I polished my tail lights. Here are some constant questions I get:
Q: Do I have to sand all of the tail light?
A: No. Only sand the parts that have blemishes. I sanded down the DOT lettering flush to get rid of the ugly things. WET sand this using 400 grit sandpaper on a sanding block.
Q: What do I need to do this project?
A: You will need a buffing wheel – loose style, plastic polishing compound from Eastwood, and something to mount the buffing wheel on…I.E.- bench grinder or a high RPM drill (1250+).
Q: What steps do I take to do this right?
A: Take your time when buffing. Pay attention to what you are doing. Be careful for heat build-up as it can happen quickly. Apply medium pressure as hard pressure is not required…let the buffing compound do the work. Wear safety glasses and no loose clothing. Work in a well lit area so you can see what you are doing. It may require going over it several times to acheive the results that I received.
Q: Can this be done on Camaro tail lights?
A: Yes, but I haven’t ever done it before so I don’t know if the steps are any different.
Q: How much are supplies?
A: Supplies will run you about $20. However, if you don’t have a drill or bench grinder/buffer you may have to rent/borrow/buy one.
Here are the steps that I took:
1) Remove the tail lights from the car. If you look at the lenses, you will see raised DOT numbers. These have no use except for collecting dirt and wax, so I solved that problem. Take your 400 grit sandpaper on a sanding block, apply water to the lense, and in about 20 swipes the letters are gone and flush with the surface of the lense.
2) Wash the lenses with soap and water to get rid of any dirt or plastic particles.
3) Apply the buffing compound to the buffing wheel sparingly…once the wheel has started to change to the color of the compound, you have enough. You now have 2 choices when buffing:
A) Go slow and go over the surface once B) Go fast and go over the surface several times.
*I chose to go slow…the only disadvantage with this is heat build-up. I didn’t have a problem with heat build-up, but you may want to check every so often when you are doing it to avoid it.
4) Keep a clean terry cloth nearby so you can wipe away any compound build-up or particles/strings from the buffing wheel. If you start to get a rubber type residue on the lense, this signifies that you are using too much compound, so back off with the compound.
5) You can buff for as long as you want to…it just depends on how well you want it to look. I settled for what I have and they look like glass and took me about an hour of actual buffing.
6) Keep in mind that buffing is a project that requires time. If you rush through it, you will not get brilliant results. Also keep in mind that you do not need to apply much pressure at all when buffing, let the compound do the work, not your arms.
If you have any more questions, please ask and I will add them to the list and answer your question.
-Josh
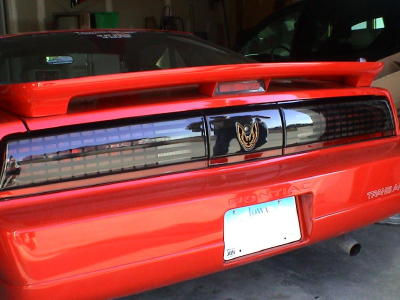
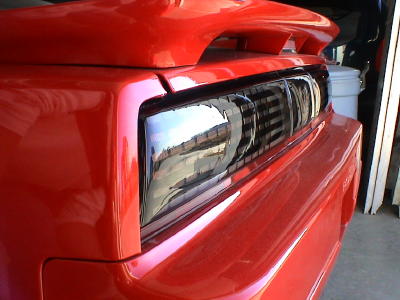
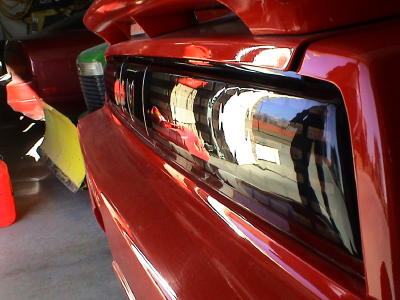
Here are my results: