Step by Step Overhead Console Installation
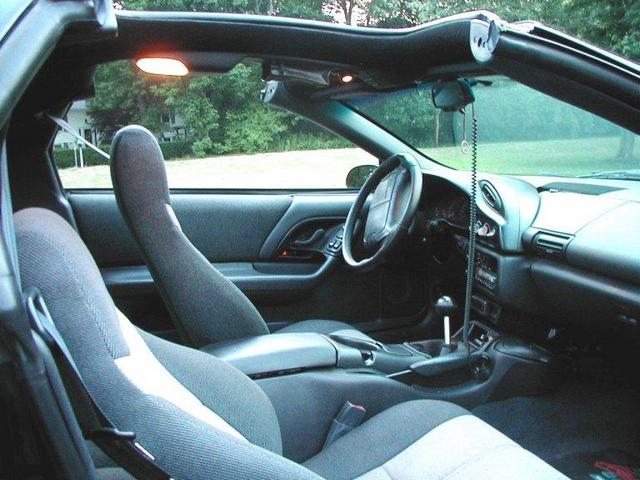
Installing an Overhead Console in a Third Generation F-Body Car with T-Tops.
Written by: Noah Purdy
The overhead console was an addition to your Camaro or Firebird available for $50.00. They contained a jubilee of neat little features for your car:
Parts Needed:
NOTE: There were to my knowledge two versions of the overhead console made. One for Third Gen cars with T-Tops and the coupe style cars. The coupe style of cars has different mounting pillars, a very significant curve to it compared to the T-Top version, and comes with a reinforcement piece for the headliner. This guide is for installing this console on a car with T-Tops.
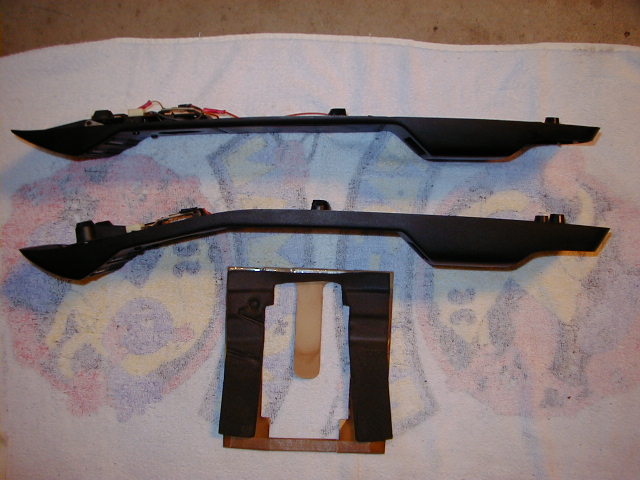
In this pictures, the T-Top version of the console is shown on top, while the coupe version is on the bottom. Make sure you have the right one!
Okay, down to business!
Step 1: Take your overhead console and trace an outline of it on cardboard. Cut the outline out, and punch holes where the dome light mount pillars are.
Step 2: Using the following diagram, cut your template to match mine, this will assist you in the cutting of the headliner.
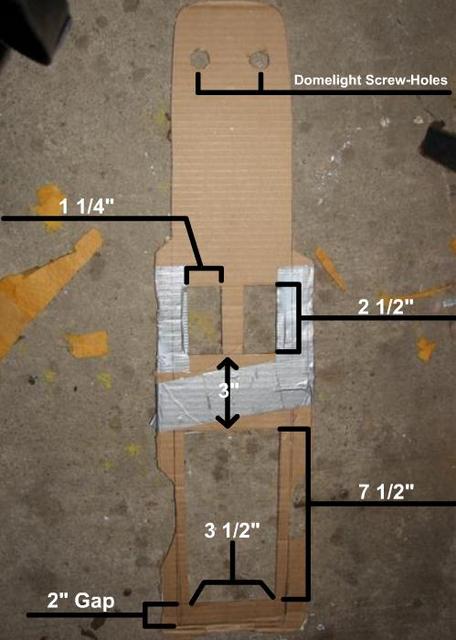
Remember to line everything up by punching holes where the dome light screw’s go, and then lining the rest up with the mounting pillars. The large box starts 2”s from the edge of the console.
Step 3: Time to go out to the car! First thing’s first, DISCONNECT YOUR BATTERY! You’ll be working with wires in the interior of your car, and I’m sure you don’t want to pop a fuse.
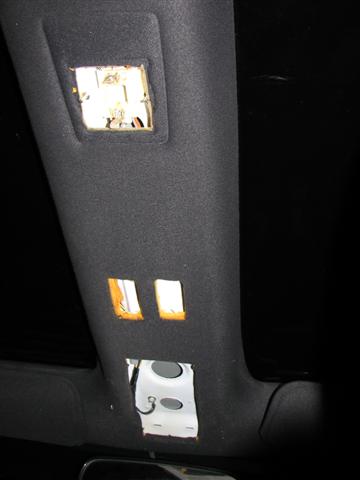
Step 4: Remove your stock dome light. The screws for it may be held in with little clips, those are easily removed with a flat blade screwdriver.
Step 5: Once everything is removed from the headliner, take you’re template, and using the holes you punched for your dome light screw posts, line it up on your headliner, and then use masking tape to hold it up.
Time to get your trusty razor blade.
Cutting the headliner can be very intimidating, but it’s a lot easier than you think. Remember, patients is the key here, start slow, go slow! Start with the two smaller rear boxes, cut each edge along the template with the razor and start to peel layers of the headliner out, until you have a remotely clean looking hole, rinse wash and repeat for the second smaller box. Watch for the dome light wires when cutting!
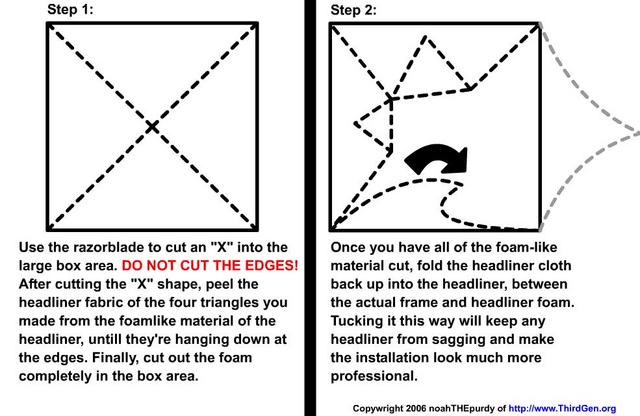
Step 6: Now it’s time to cut the larger square, don’t rush into this! This square gets cut a certain way to keep the headliner upholstery looking nice and tight after the installation. Follow the instructions in the following diagram:
Step 7: You’re final cuts should look something like this:
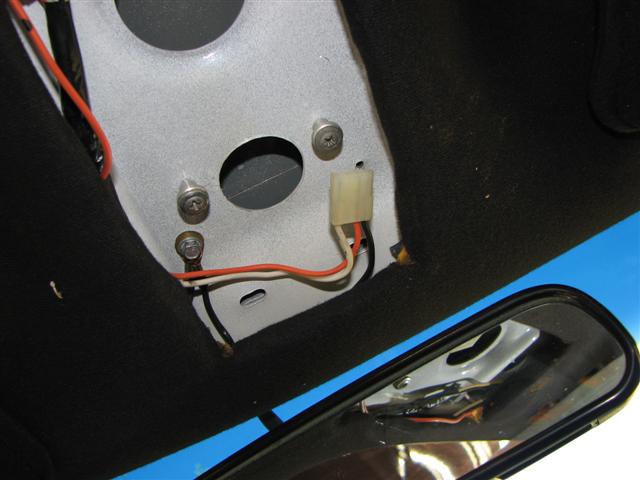
Step 8: Time to splice some wire!
If you got the wiring harness with your overhead console, this’ll allow you to do a neater installation. Cut the plug that goes into the console with about 3” of slack after the plug. You’ll have three color wires to worry about, Black, Orange, and White/Purple. You splice these wires into the stock dome light wires, which are tucked under the headliner, in my case, on the left side. Pull them into view, strip a bit on each of them, and solder your wires to them. Patch up with electrical tape, and tuck the wires back into place. Note: Do this as neat as possible, there’s not a lot of free space up there and you’ll need as much as you can get to slide the console in.
Note: If you console did not come with the wiring harness, then simply get about 3” of slack from the plug on your console, cut behind it, and splice from there.
My end result was a nice and neat little plug:
Step 9: Take those four mounting screws and screw them into the pre-drilled holes. Pretty simple step, right? One thing to look for here is a ground wire screwed into one of the mounting screw holes, simply unscrew it, and screw it into one of the spare holes. Another issue was the drilled holes not being threaded, easy fix to that: Take that ground screw, and screw it into the mounting holes a few times, problem solved!
Step 10: Before sliding the console into place, grab your dome light bulb, make sure it works, and hook up the battery, and test that everything in the console works, map light, dome light, buttons, etc. Once you’re good to go hold up your console, and begin to slowly, but sternly push back and up, it’s a bugger to get on. Eventually it’ll clip onto the mounting screws and your dome light screw pillars will line up.
Note: Right here! Test to make sure the buttons still work, you may have issues with the headliner not being cut enough and the buttons sticking, if this happens take the console off and clear out the headliner. Be careful when doing this, because the console can rip up your headliner.
Once one and you are satisfied, screw in the two screws for the dome light, put your bulb in, clip the white plastic piece in and marvel in your new interior centerpiece! Good job.
Just some other notes:
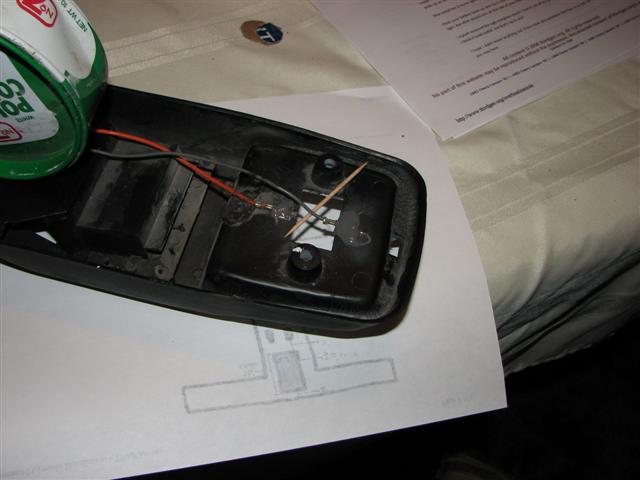
The dome light bulb clips in the overhead consoles tend to be weak, and can not even properly clip the bulb in at times. Best thing to do here is to JB weld them into place, as we had to do:
Special Thanks To:
JamesC of the ThirdGen forums, for your great help, and coupe / T-Top version pictures.
IROCZDave(iroczdave@aol.com) for writing the original installation guide, and with the measurements of the cuts.