Fiberglass Spolier & under spoiler brake light install. HMSL (86) delete. LONG & PICS
 04-05-2010, 10:12 AM
#1

Fiberglass Spolier & under spoiler brake light install. HMSL (86) delete. LONG & PICS
What’s up everyone? A while back, when I smashed up my 87, I went looking for parts. A member on here was parting out his red GTA, so he had a nice hood for cheap. When I got there, I saw some other parts so I made him some offers. Ended up getting a bunch of stuff for a few hundred…including an aftermarket fiberglass Aero Spoiler. Not sure of the brand…but Im pretty sure it’s the one offered by Hawks, if there is another brand.
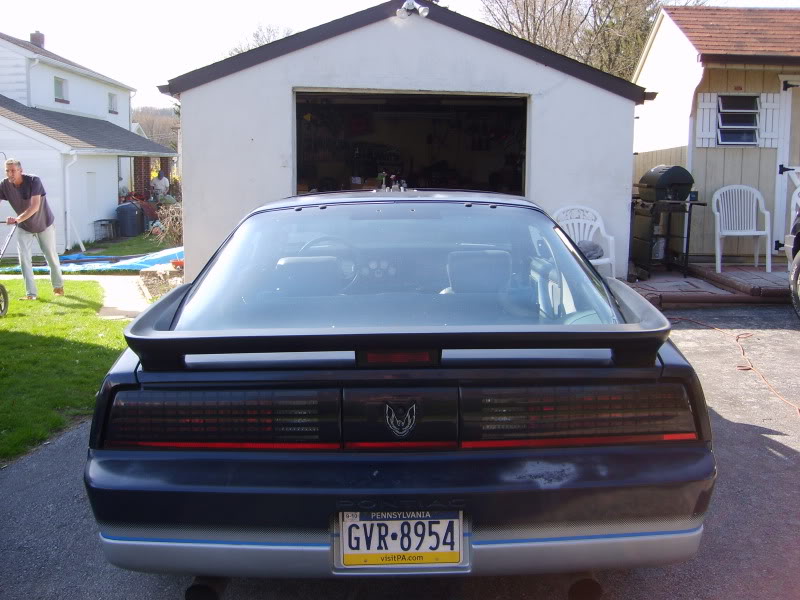
The spoiler on my 86 was in really good shape. It was the original non painted, textured spoiler. I thought about it, and since I wanted to repaint the car, and wanted to color match the spoiler, I figured Ide use it. I decided to pull it off sooner rather than later, while it was in good shape. So someone could get some use out of it on a show car or for a resto project.
Also, my only hang up with the 86 is that high mount stop light. I HATED that thing. Totally ruined the lines in my opinion. I also picked up the brake light that mounts under the spoiler from the guy selling me the parts.
So this little write up is about painting and installing an aftermarket fiberglass spoiler, and also deleting the high mount stop lamp, and installing the “under spoiler” stop lamp.
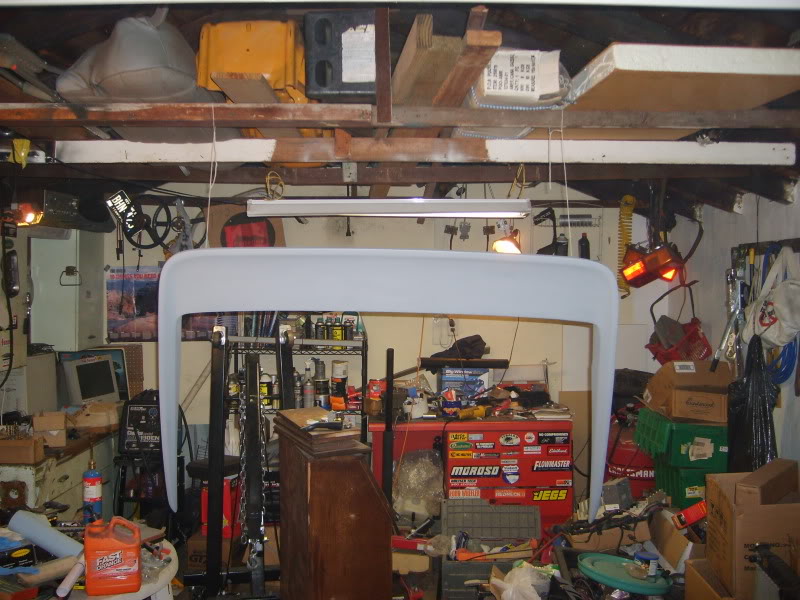
Let start with paint. The fiberglass was pretty nice to begin with. This was to be a quick paint job, to make it look decent until the car gets painted. All primer and paint was from Lowes and is Valspar. General primer, and their satin black. First I sanded with 320 grit to get rid of some scratches and little things. Then I used spot putty in a few places where there was gouges or scratches. Sanded again with 320. Wiped it down, hung it in my very messy garage, and started to prime it.
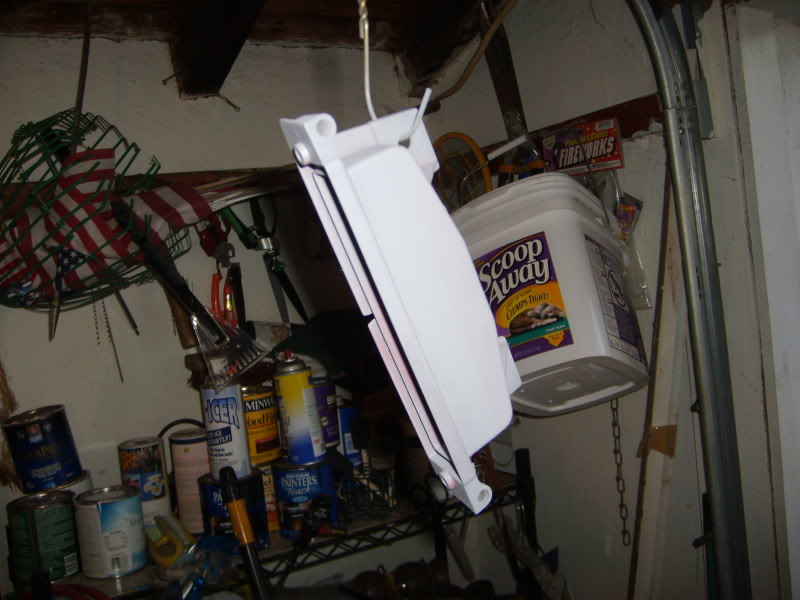
Also primed and painted the brake light parts since they were red.
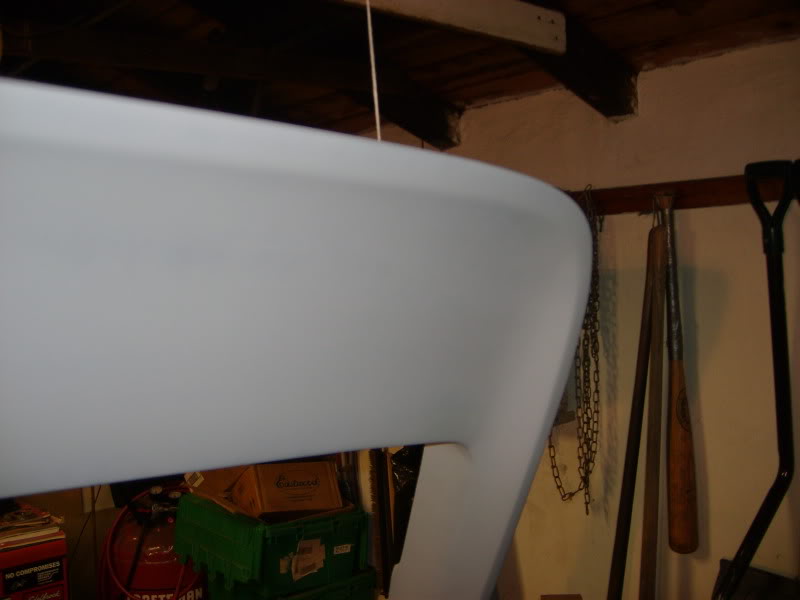
Sorry no paint progress pics, you’ll just see the finished product.
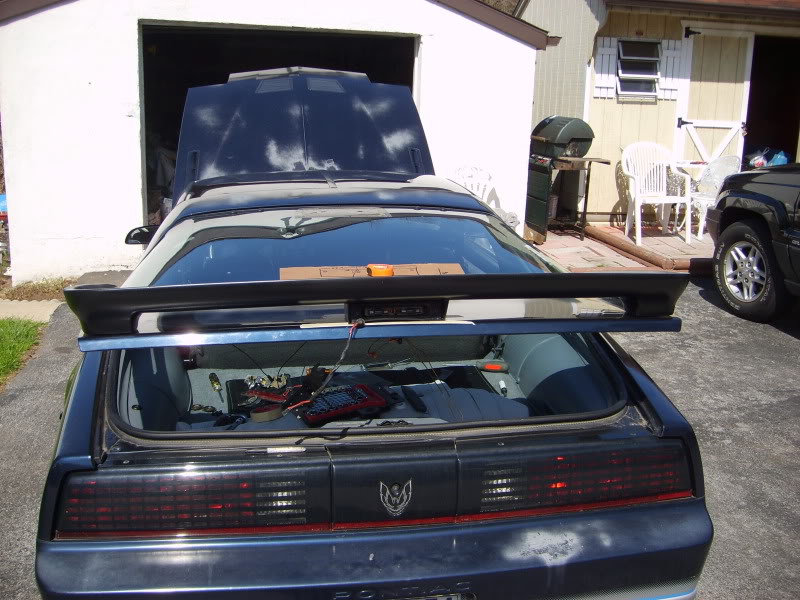
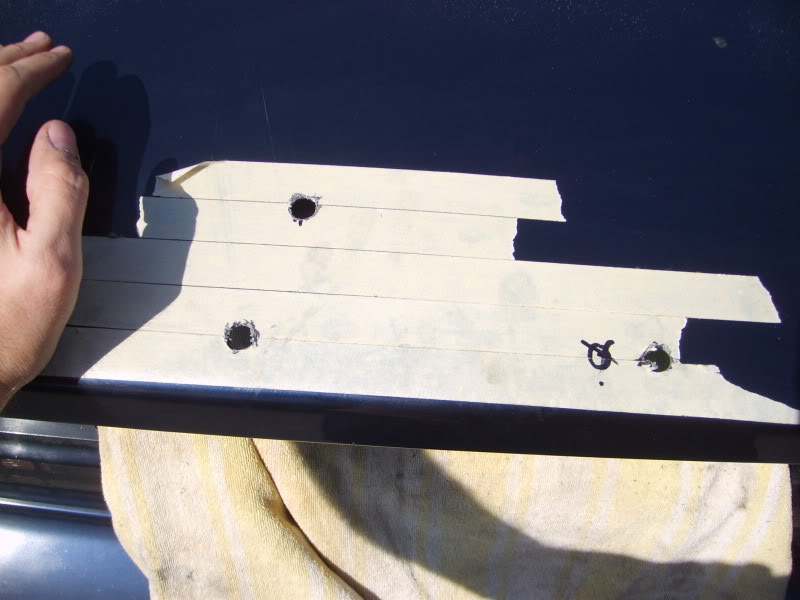
Now we have to jump to preparing for the new brake light. Since that has to mount to the spoiler, and also to the decklid. The difference between the deck lids wasn’t too bad. Obviously there are mount holes for the brake light. And also a hole for the wires to pass through. The wiring is ready to go for the light though.
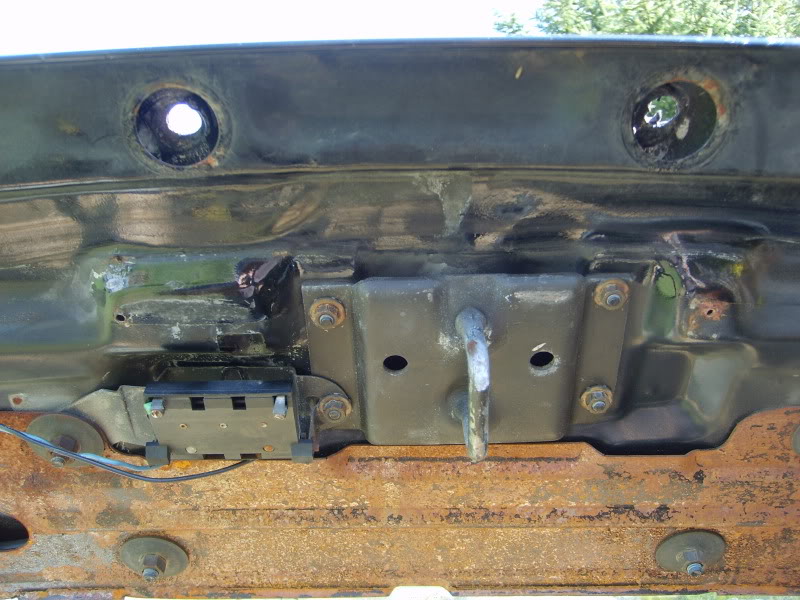
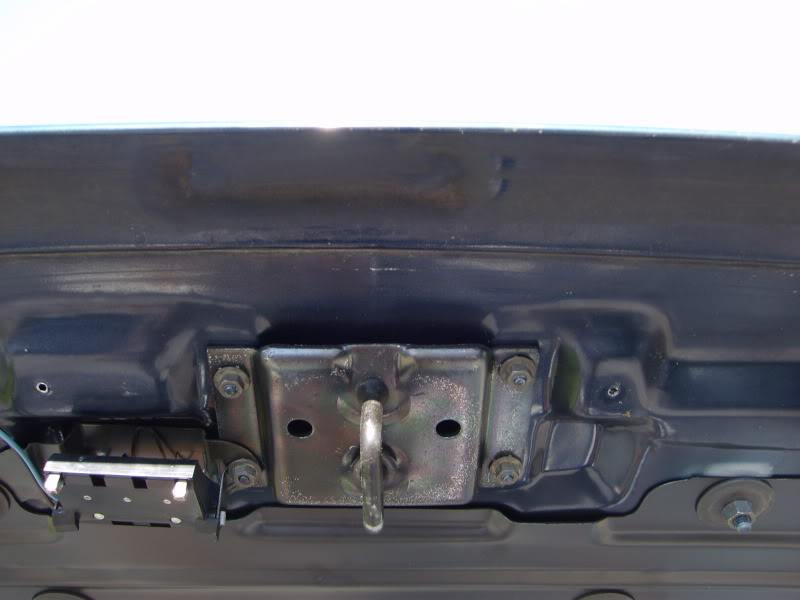
Here’s the 87’s deck lid, and then the 86. You can see the mount holes.
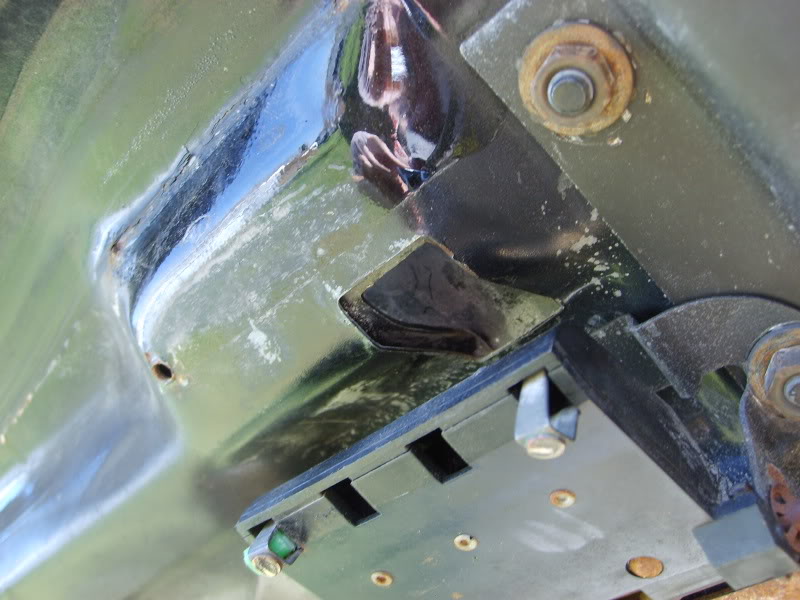
Here is a notch cut for the wiring to come through on the 87.
And on the 86…
....
The spoiler on my 86 was in really good shape. It was the original non painted, textured spoiler. I thought about it, and since I wanted to repaint the car, and wanted to color match the spoiler, I figured Ide use it. I decided to pull it off sooner rather than later, while it was in good shape. So someone could get some use out of it on a show car or for a resto project.
Also, my only hang up with the 86 is that high mount stop light. I HATED that thing. Totally ruined the lines in my opinion. I also picked up the brake light that mounts under the spoiler from the guy selling me the parts.
So this little write up is about painting and installing an aftermarket fiberglass spoiler, and also deleting the high mount stop lamp, and installing the “under spoiler” stop lamp.
Let start with paint. The fiberglass was pretty nice to begin with. This was to be a quick paint job, to make it look decent until the car gets painted. All primer and paint was from Lowes and is Valspar. General primer, and their satin black. First I sanded with 320 grit to get rid of some scratches and little things. Then I used spot putty in a few places where there was gouges or scratches. Sanded again with 320. Wiped it down, hung it in my very messy garage, and started to prime it.
Also primed and painted the brake light parts since they were red.
Sorry no paint progress pics, you’ll just see the finished product.
Now we have to jump to preparing for the new brake light. Since that has to mount to the spoiler, and also to the decklid. The difference between the deck lids wasn’t too bad. Obviously there are mount holes for the brake light. And also a hole for the wires to pass through. The wiring is ready to go for the light though.
Here’s the 87’s deck lid, and then the 86. You can see the mount holes.
Here is a notch cut for the wiring to come through on the 87.
And on the 86…
....
Last edited by ghettocruiser; 04-05-2010 at 12:14 PM.
 04-05-2010, 10:13 AM
#2
Re: Fiberglass Spolier & under spoiler brake light install. HMSL (86) delete. LONG &
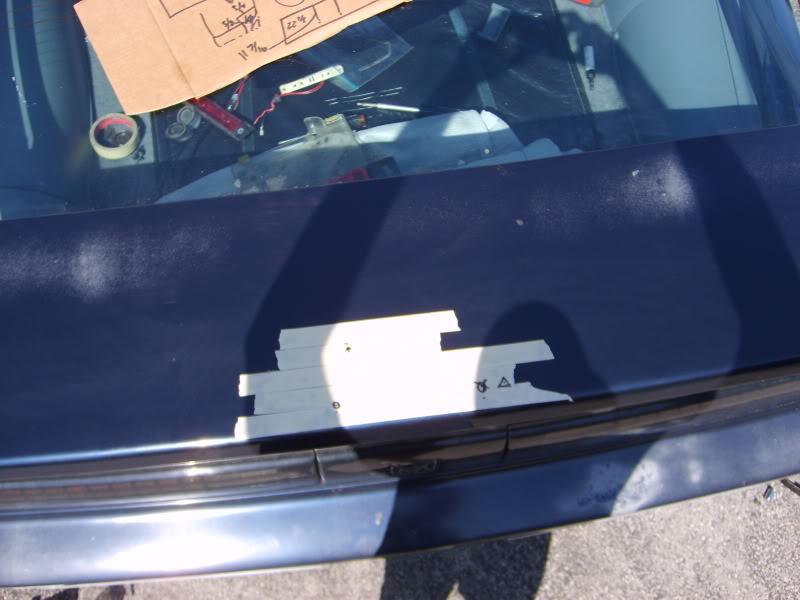
Finally, the holes in the decklid of the 87.
I assembled the new brake light with new wires and terminals to avoid issues.
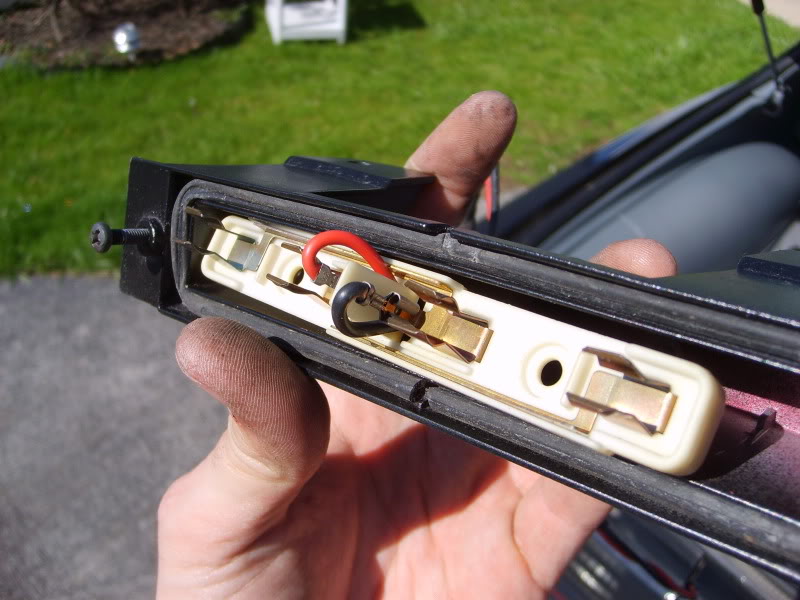
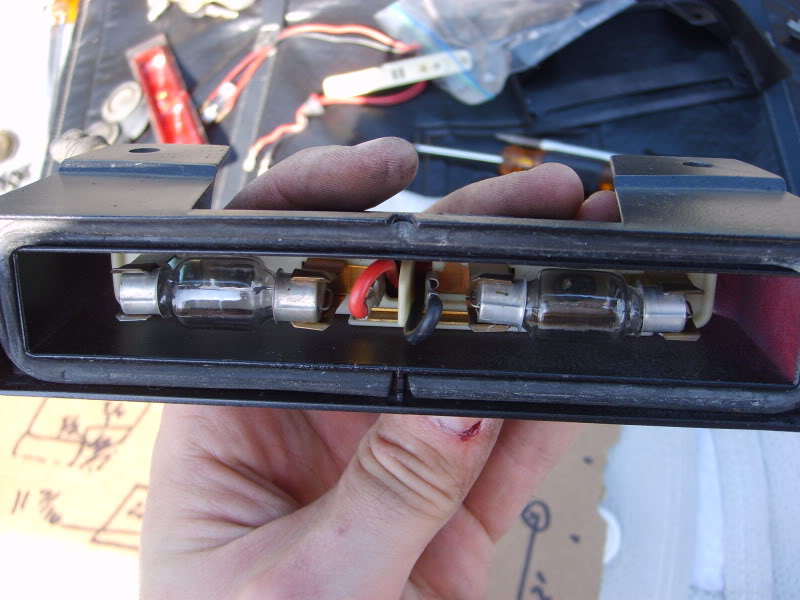
The plugs are the same, and ready to go. I wanted to verify that it worked before going further.
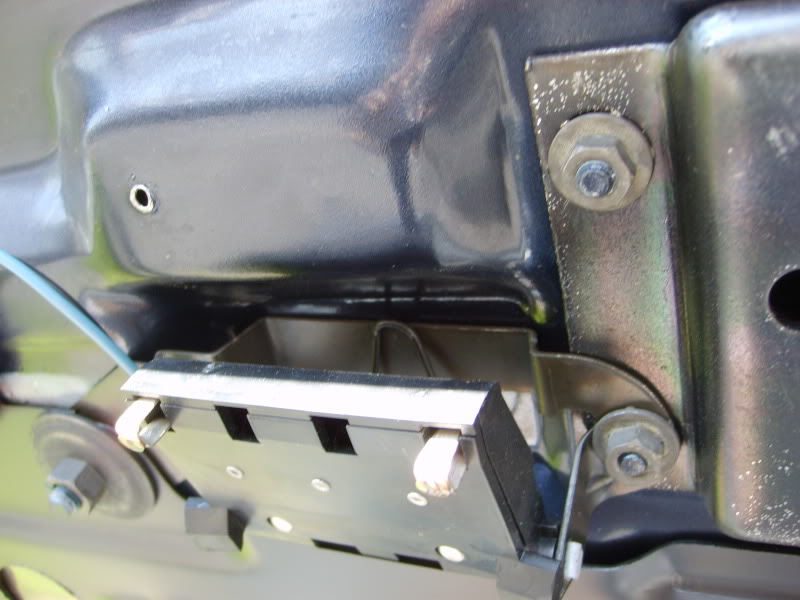
After that, I wanted to move the switch contact so I could make my wire hole and all. Scribe around the bracket so it goes back in the same spot. There is a 10mm nut on the right, then a big 13mm nut on the left that also holds the decklid together. You only have to loosen the 13mm, then the switch brake will slide out like so.
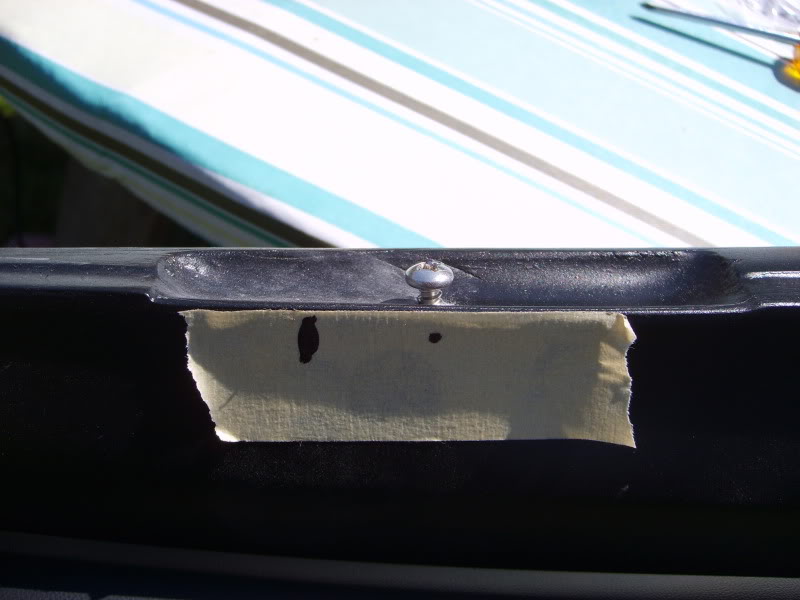
Time for mock up. I measured the holes on the 87, and transferred the measurements onto the 86. I still wanted to verify them all, but this would act as a guide.
Lightly bolt the spoiler down with the two bolts on the ends of the spoiler. Shift it around, check for hole locations, and try to get it centered and lined up as best as possible. Then tighten down on the bolts a little more.

....
I assembled the new brake light with new wires and terminals to avoid issues.
The plugs are the same, and ready to go. I wanted to verify that it worked before going further.
After that, I wanted to move the switch contact so I could make my wire hole and all. Scribe around the bracket so it goes back in the same spot. There is a 10mm nut on the right, then a big 13mm nut on the left that also holds the decklid together. You only have to loosen the 13mm, then the switch brake will slide out like so.
Time for mock up. I measured the holes on the 87, and transferred the measurements onto the 86. I still wanted to verify them all, but this would act as a guide.
Lightly bolt the spoiler down with the two bolts on the ends of the spoiler. Shift it around, check for hole locations, and try to get it centered and lined up as best as possible. Then tighten down on the bolts a little more.
....
04-05-2010, 10:15 AM
#3
Re: Fiberglass Spolier & under spoiler brake light install. HMSL (86) delete. LONG &
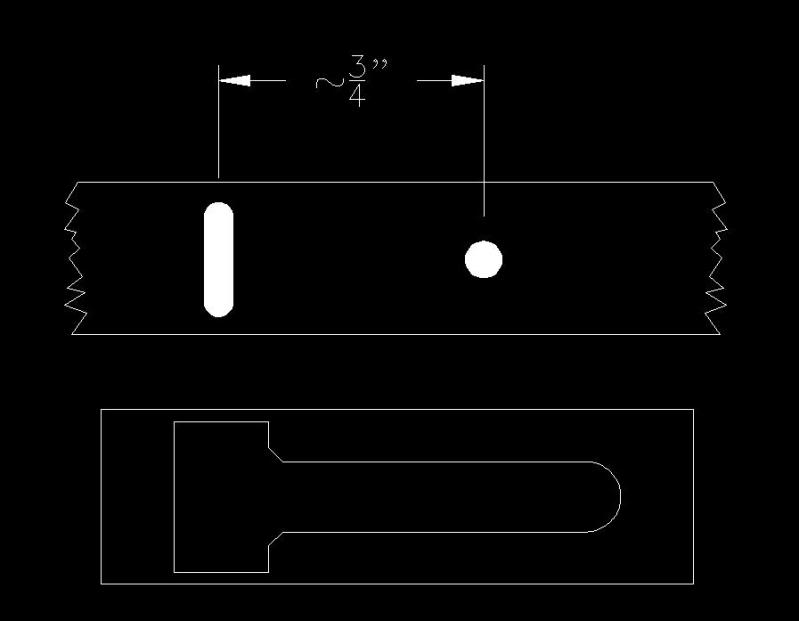
Instead of using the cheesy metal clips that come with the spoiler, I decided to use the stock hatch glass clips. So I got some screws as suggested on other write ups on this board. I think they were #6, stainless pan heads. I got different lengths, but you really only need 1� long and �� long. The �� goes at the very tip, since there isn�t much material there. To get the screws positioned, I put a piece of tape at the location of each clip. Then I put a mark where the opening for the clip is, and then put a mark about �� back from there. The clip is longer than this, but I wanted wiggle room. You really only need it to just engage the clip. Here is what I mean. Crude drawing� Check your brake hole locations while its bolted together. Then remove the spoiler.
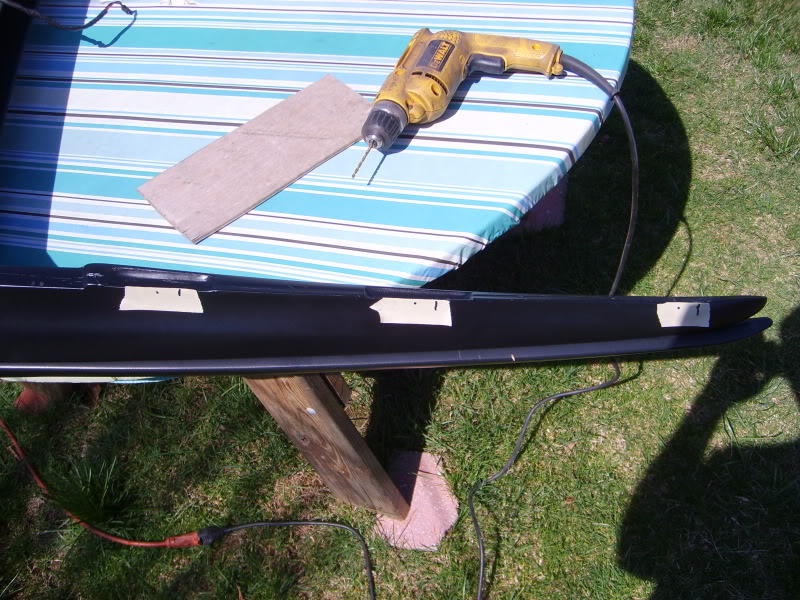
I predrilled with a 9/64 bit, I think, and screwed in the screws until they were just barely sticking out.
Point of no return. I drilled the holes in the deck lid from the top down. I let the drill bit go through the first layer, and through the second layer with the first couple pilot holes. That gave me the marks on the underside, and a pilot hole for the hole saw. All the top side holes were drilled out to ��.
Then from the underside, I used a 1.25� hole saw from the underside. This allows you to use stock hole plugs, which I stole from the 87, and also gives plenty of room for the bolt washer and socket.
For the wire pass through, I just made a �� hole. Didn�t see the reason to make a big notch like in the 87. The plug fits through, and it takes a little bit of fiddling to fish it through, but it works fine.

On the spoiler pads, I used dense foam tape. I believe its camper tape. Designed to go between a camper shell and the bed of a pick up truck? The reason I used this was the holes on my 86�s deck lid were raised a good bit. The stock spoiler had recesses for them, but the fiberglass does not. Its flat. So the foam made up the difference, and made a nice seal.
To install the spoiler, just do what you�d normally do. The screws may need to be adjusted here and there. And you might have to tug on the spoiler a bit. I had to hit mine with my palm a few times to get everything into position. Mine fit TIGHT on the first try. So I never bothered taking it back off. The screws in the clips worked great, and its def not going anywhere.
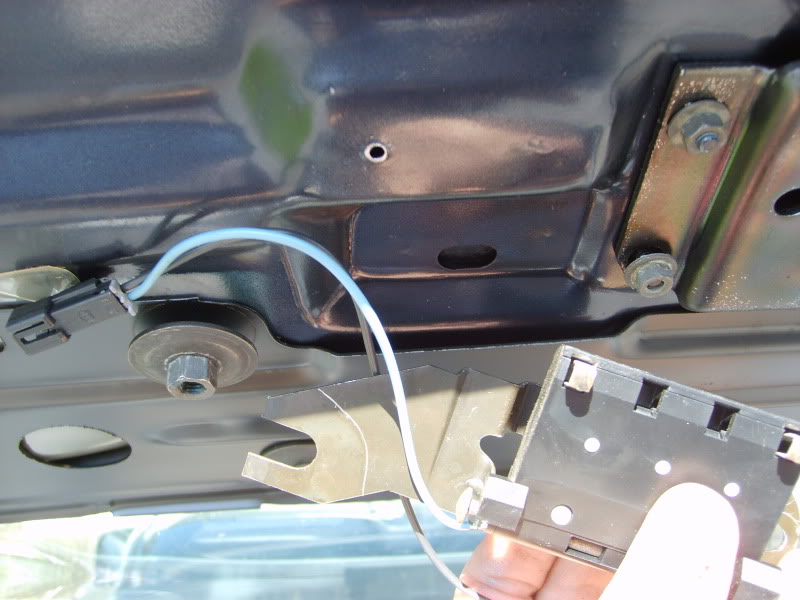
Here�s what the wiring looks like when hooked up and routed.
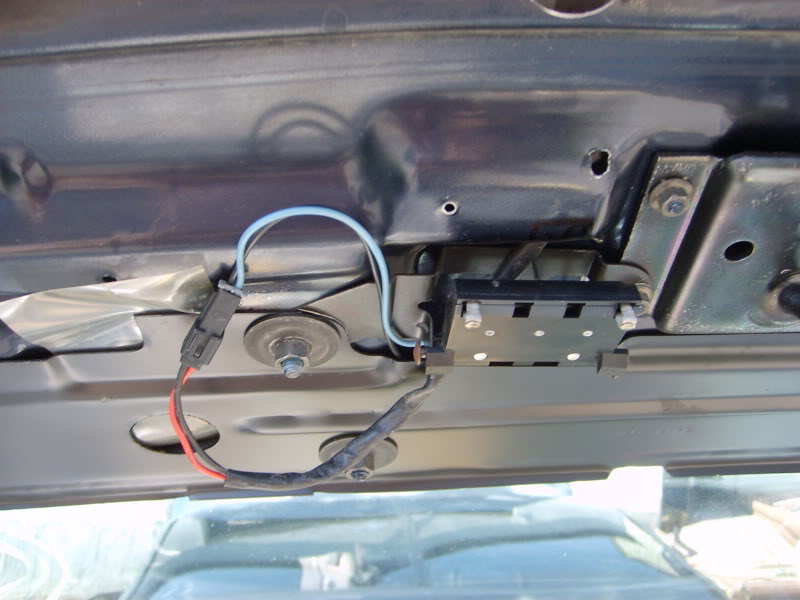
Once everything was bolted, and fitting half decent, and working, I took the bolts out one at a time so nothing would shift, and used RTV to seal them. I basically just put some around the washer and screwed them back in. Seemed to work fine.
....
I predrilled with a 9/64 bit, I think, and screwed in the screws until they were just barely sticking out.
Point of no return. I drilled the holes in the deck lid from the top down. I let the drill bit go through the first layer, and through the second layer with the first couple pilot holes. That gave me the marks on the underside, and a pilot hole for the hole saw. All the top side holes were drilled out to ��.
Then from the underside, I used a 1.25� hole saw from the underside. This allows you to use stock hole plugs, which I stole from the 87, and also gives plenty of room for the bolt washer and socket.
For the wire pass through, I just made a �� hole. Didn�t see the reason to make a big notch like in the 87. The plug fits through, and it takes a little bit of fiddling to fish it through, but it works fine.
On the spoiler pads, I used dense foam tape. I believe its camper tape. Designed to go between a camper shell and the bed of a pick up truck? The reason I used this was the holes on my 86�s deck lid were raised a good bit. The stock spoiler had recesses for them, but the fiberglass does not. Its flat. So the foam made up the difference, and made a nice seal.
To install the spoiler, just do what you�d normally do. The screws may need to be adjusted here and there. And you might have to tug on the spoiler a bit. I had to hit mine with my palm a few times to get everything into position. Mine fit TIGHT on the first try. So I never bothered taking it back off. The screws in the clips worked great, and its def not going anywhere.
Here�s what the wiring looks like when hooked up and routed.
Once everything was bolted, and fitting half decent, and working, I took the bolts out one at a time so nothing would shift, and used RTV to seal them. I basically just put some around the washer and screwed them back in. Seemed to work fine.
....
04-05-2010, 10:17 AM
#4
Re: Fiberglass Spolier & under spoiler brake light install. HMSL (86) delete. LONG &
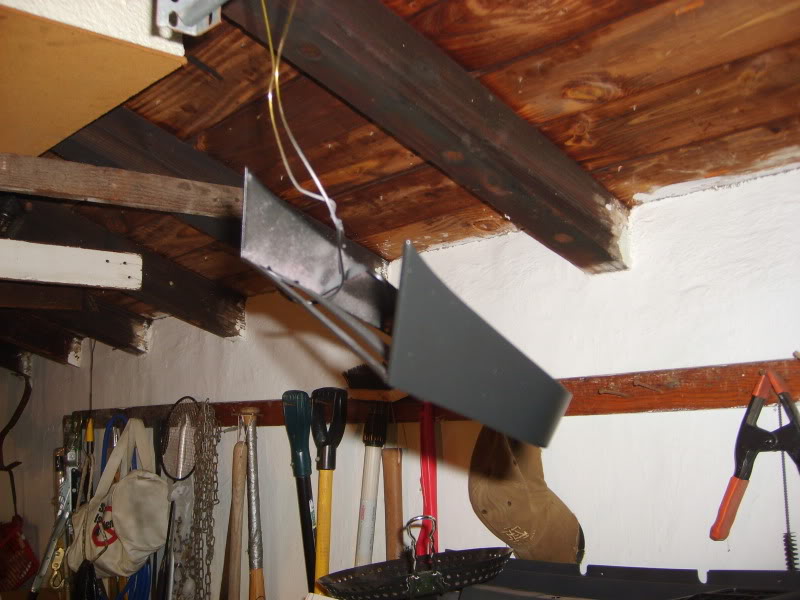
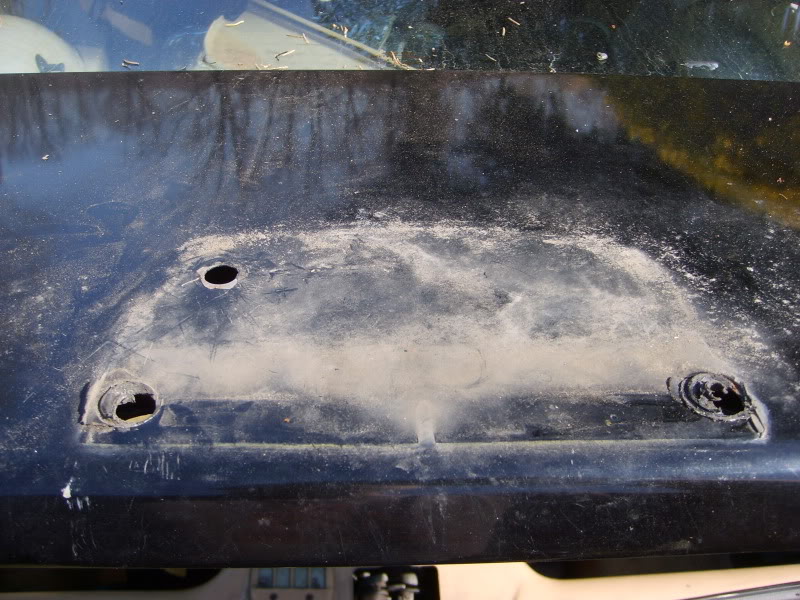
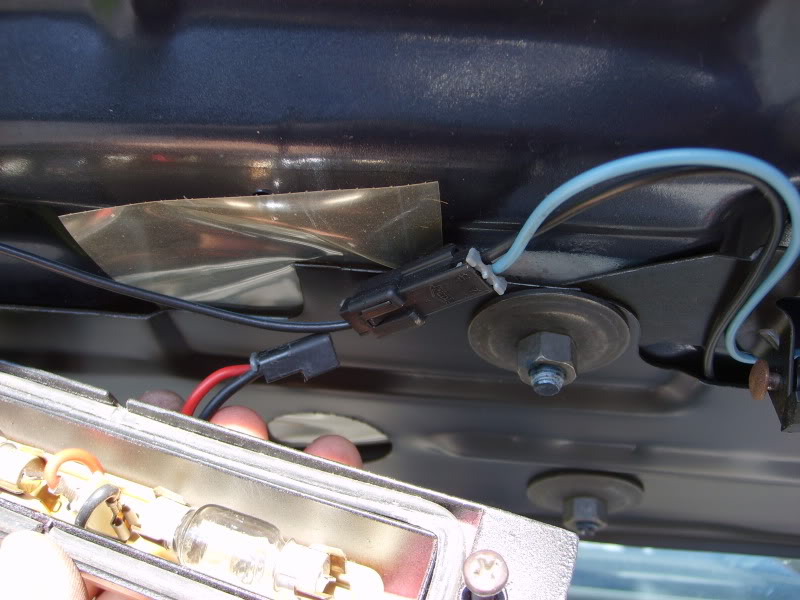
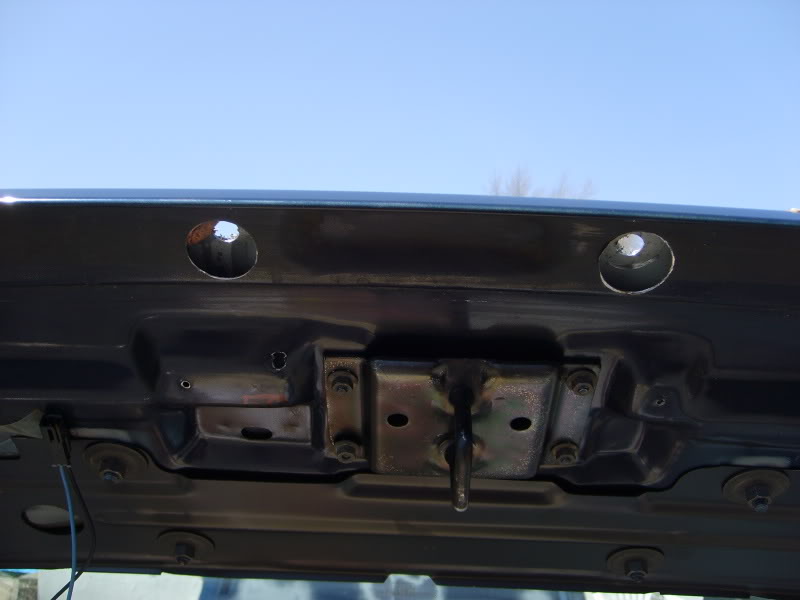
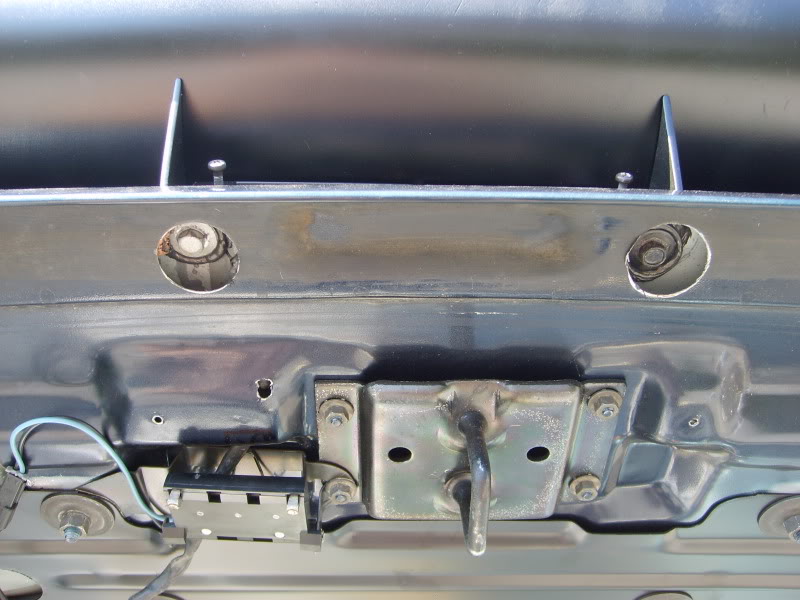
What about the old brake light you ask?? Well that�s easy enough. On the passenger side, it uses part of the track for the defroster. On the drivers side, there is a separate track, that runs up the side for the light. That�s where the wire from the switch goes. The light comes off the glass via two big torx caps. Here�s what it looks like from underneath. You can see the two copper caps too.

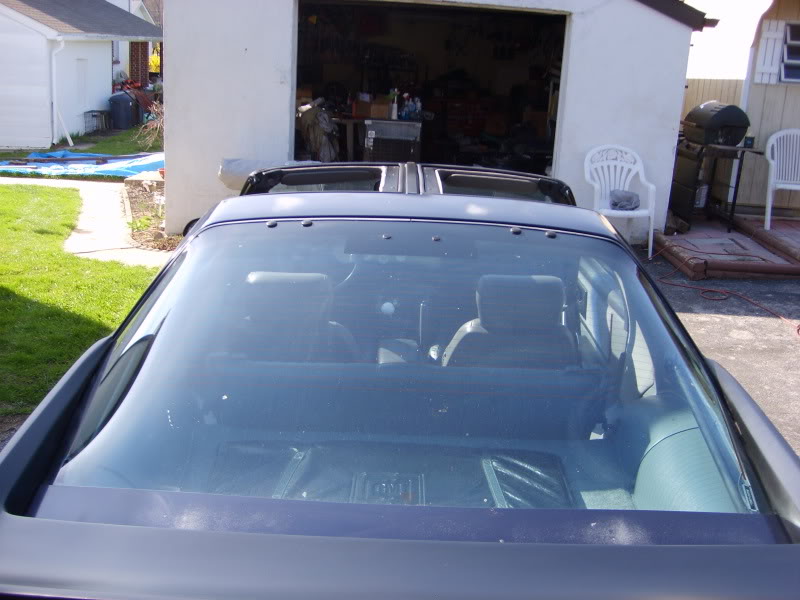
The holes in the glass are approximately 5/8�. They are apparently a tad smaller. I got some metal 5/8� hole plugs, and they were snug. But since they were metal, they just bent and fit. I scuffed and painted them black, gobbed some RTV on them, and shoved them in.
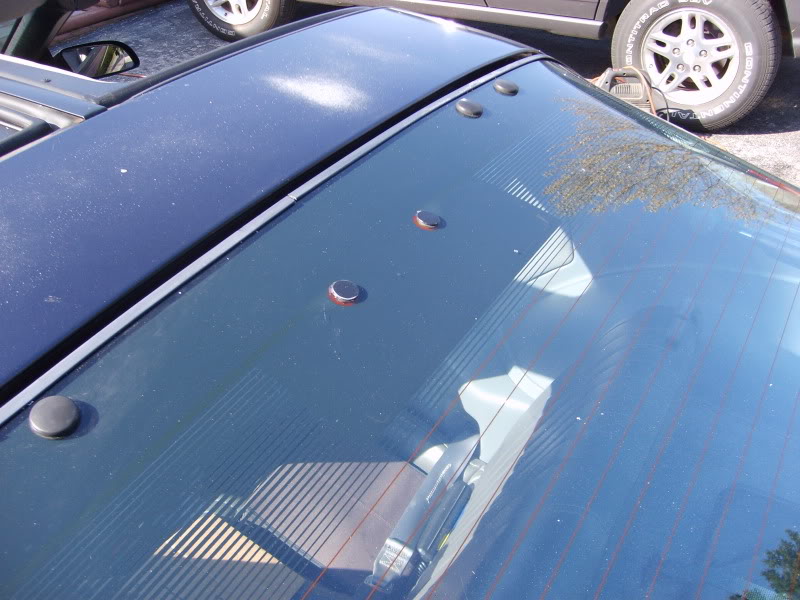
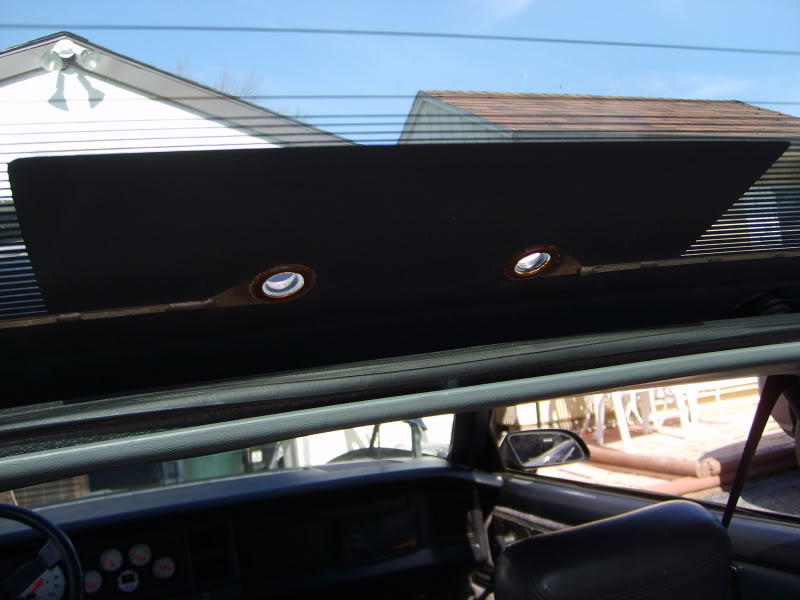
I let them set up, then on the under side, I used some small plastic discs that were about the right size, and filled in the hole with more RTV, then stuck the plastic discs on. It looks a lot better than I thought it would actually. You can still see the big black area where the light sat, and I was planning on spray painting the inside of the glass where the black lines are at the top, but it looked good enough as is so Im leaving it. Still thinking about swapping glass so for now, its water proof, and doesn�t look too ugly.
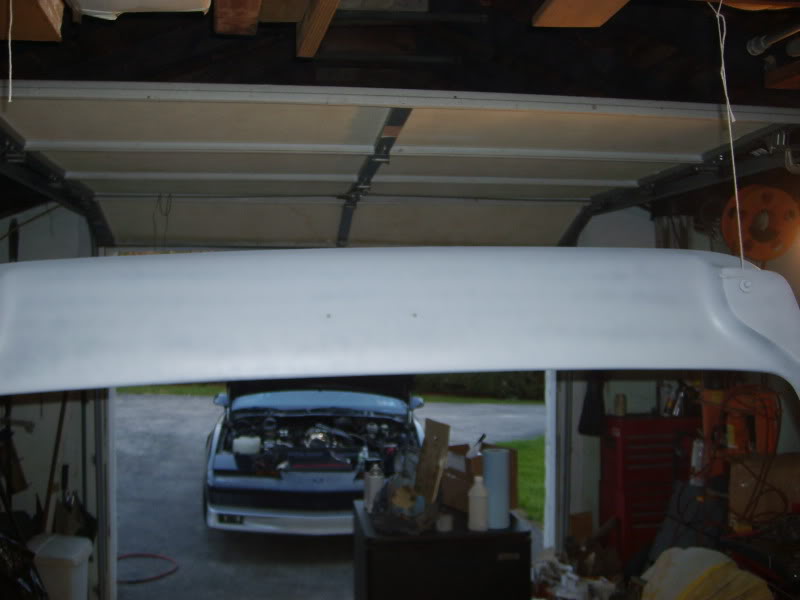
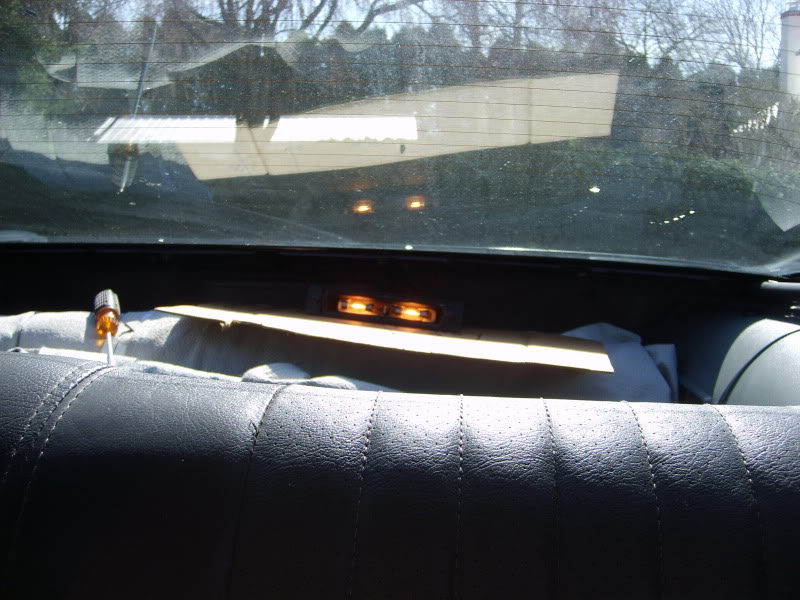
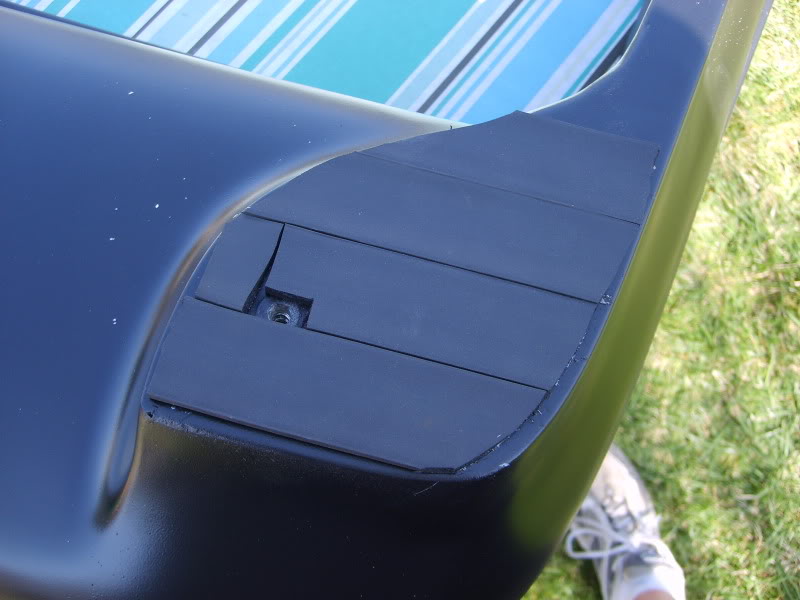
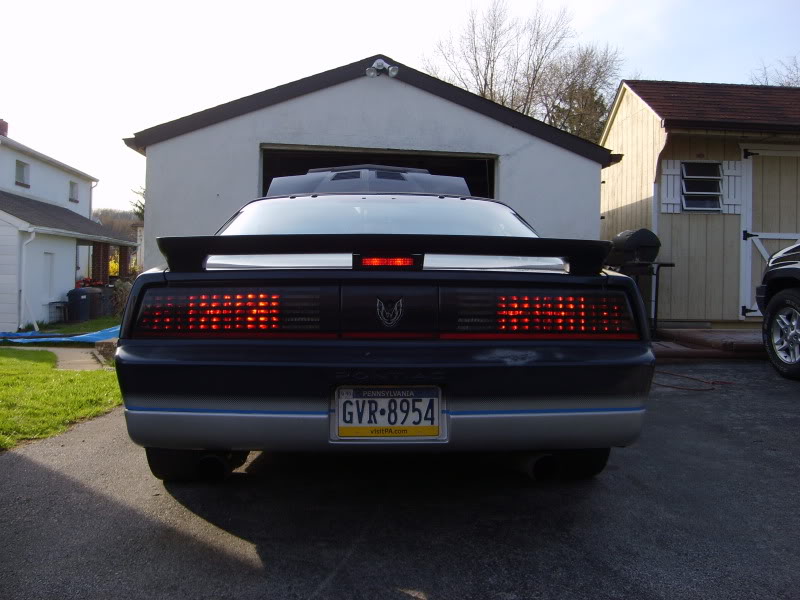
Finally, just some finished pictures. Overall Im really happy with how the spoiler fit. The quickie paint job I did isn�t great, but it doesn�t look terrible either.
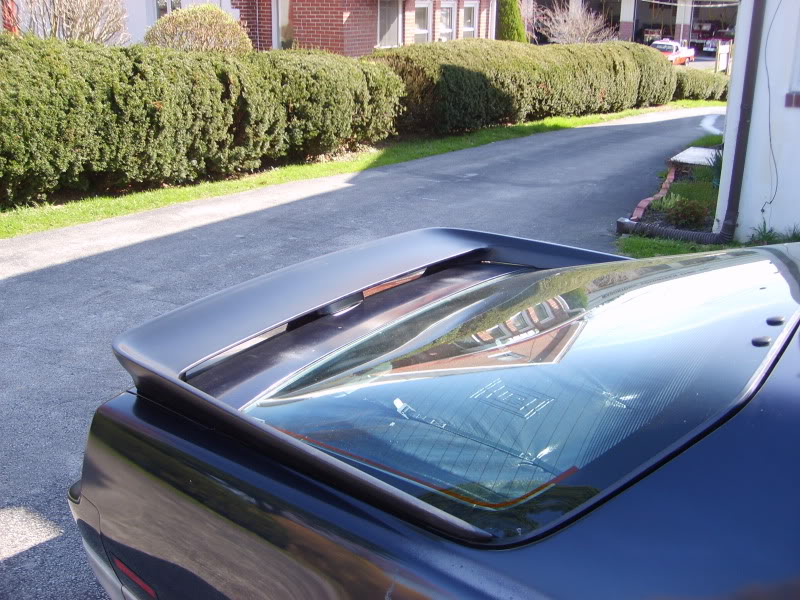
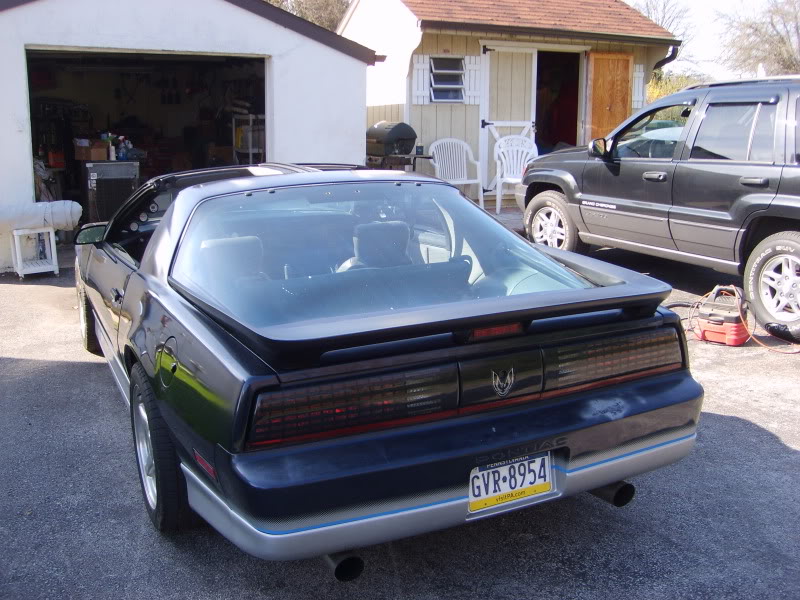

And with the lights all working�
That�s it�any questions or if you want to add anything that I left out, feel free. I DO still have my measurements for the holes� I could post it if someone would find it useful. But be warned�everyones car might be a big different. My measurements would only be GUIDELINES to check your findings. If anyone wants it, let me know and Ill draw something up and post it.
Justin
The holes in the glass are approximately 5/8�. They are apparently a tad smaller. I got some metal 5/8� hole plugs, and they were snug. But since they were metal, they just bent and fit. I scuffed and painted them black, gobbed some RTV on them, and shoved them in.
I let them set up, then on the under side, I used some small plastic discs that were about the right size, and filled in the hole with more RTV, then stuck the plastic discs on. It looks a lot better than I thought it would actually. You can still see the big black area where the light sat, and I was planning on spray painting the inside of the glass where the black lines are at the top, but it looked good enough as is so Im leaving it. Still thinking about swapping glass so for now, its water proof, and doesn�t look too ugly.
Finally, just some finished pictures. Overall Im really happy with how the spoiler fit. The quickie paint job I did isn�t great, but it doesn�t look terrible either.
And with the lights all working�
That�s it�any questions or if you want to add anything that I left out, feel free. I DO still have my measurements for the holes� I could post it if someone would find it useful. But be warned�everyones car might be a big different. My measurements would only be GUIDELINES to check your findings. If anyone wants it, let me know and Ill draw something up and post it.
Justin
04-21-2010, 06:19 PM
#5
Junior Member

Join Date: Jul 2009
Location: Fort Collins, CO
Posts: 20
Likes: 0
Received 0 Likes
on
0 Posts
Car: 86 iroc z28
Engine: 383 stroker, vortec heads
Transmission: T56
Axle/Gears: 3.73's
Re: Fiberglass Spolier & under spoiler brake light install. HMSL (86) delete. LONG &
nice write up man...Thinking about doing the 3rd brake delete on the hatch as well. Good to know.
04-22-2010, 07:32 AM
#6
Re: Fiberglass Spolier & under spoiler brake light install. HMSL (86) delete. LONG &
Good man..glad it helped! I was beginning to wonder. Thought Ide get more feedback that this haha. Ah well, as long as it helps someone out.
The plugs I used for the outside of the glass were from ACE, but any decent hardware store should have them. They are 5/8", and look like this:

I used those because the metal fingers bent in, and with the RTV they stayed put. On the underside, I used nothing more than plastic discs that I found laying around that were of the right diameter. The RTV held em up.
Piece of cake really...
J.
The plugs I used for the outside of the glass were from ACE, but any decent hardware store should have them. They are 5/8", and look like this:
I used those because the metal fingers bent in, and with the RTV they stayed put. On the underside, I used nothing more than plastic discs that I found laying around that were of the right diameter. The RTV held em up.
Piece of cake really...
J.

Thread
Thread Starter
Forum
Replies
Last Post
AkDrifted
Engine/Drivetrain/Suspension Parts for Sale
6
08-17-2015 07:45 PM