
Sub frames (final design and build)

Thread Starter
Joined: Dec 2007
Posts: 1,924
Likes: 12
From: Minnesota
Car: 84 camaro, 88 trans am, 98 camaro
Engine: Modded , stock, LSX modded
Transmission: 700r4, 700r4, t-56
Axle/Gears: 327, 308, 373
Sub frames (final design and build)
So after trying to decide on a few of my designs. I finally came up with one i liked and i felt was adequate. My dad stop over one night and i showed him some of the previous designs i had drawn out on some note book paper. He liked them but tweaked one of my ideas which was to angle the center tubes a bit differently, something i over looked so i drew it out and this is what i came up with.
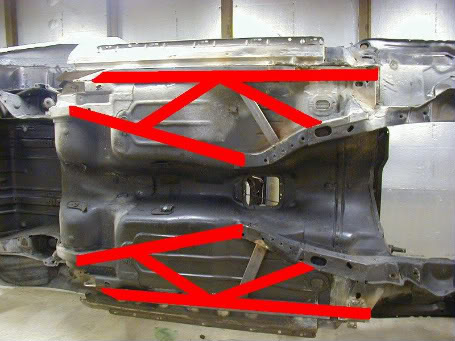
After that i wanted to see how it would look and at the same time figure out how much materiel i would need. so i used some twine and duck tape to give me a rough idea of placement and a estimate on materiel under the car

After that i wanted to see how it would look and at the same time figure out how much materiel i would need. so i used some twine and duck tape to give me a rough idea of placement and a estimate on materiel under the car
Thread Starter
Joined: Dec 2007
Posts: 1,924
Likes: 12
From: Minnesota
Car: 84 camaro, 88 trans am, 98 camaro
Engine: Modded , stock, LSX modded
Transmission: 700r4, 700r4, t-56
Axle/Gears: 327, 308, 373
Re: Sub frames (final design and build)
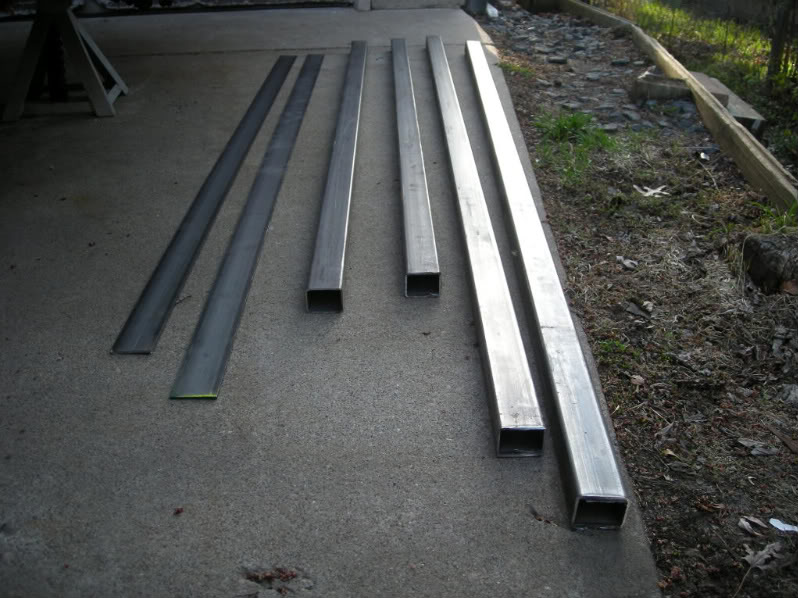
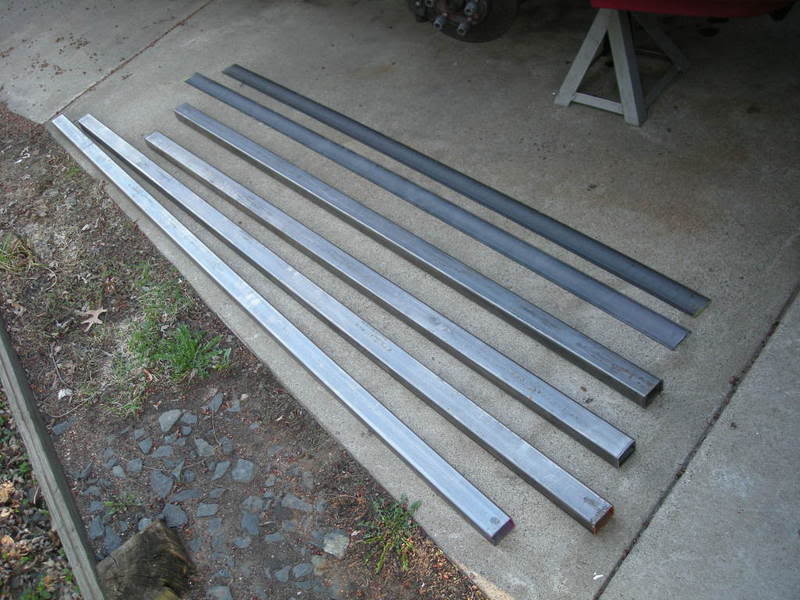
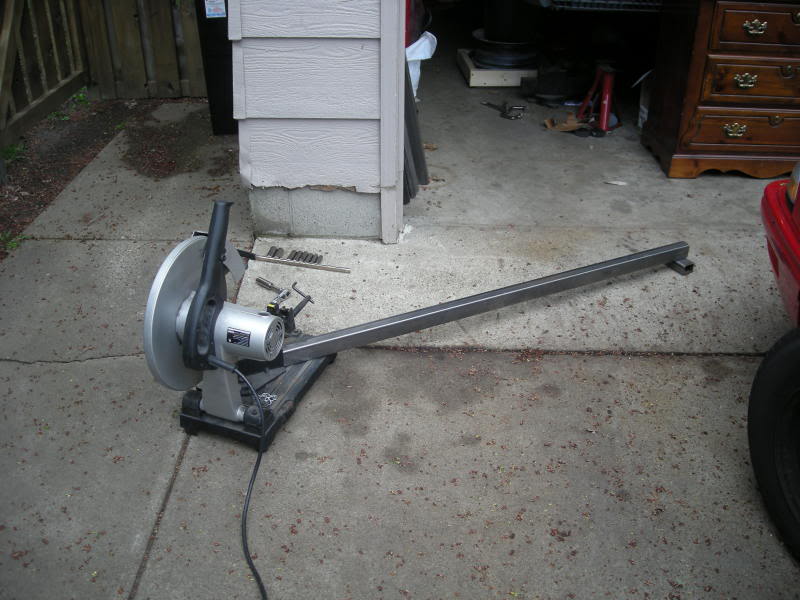
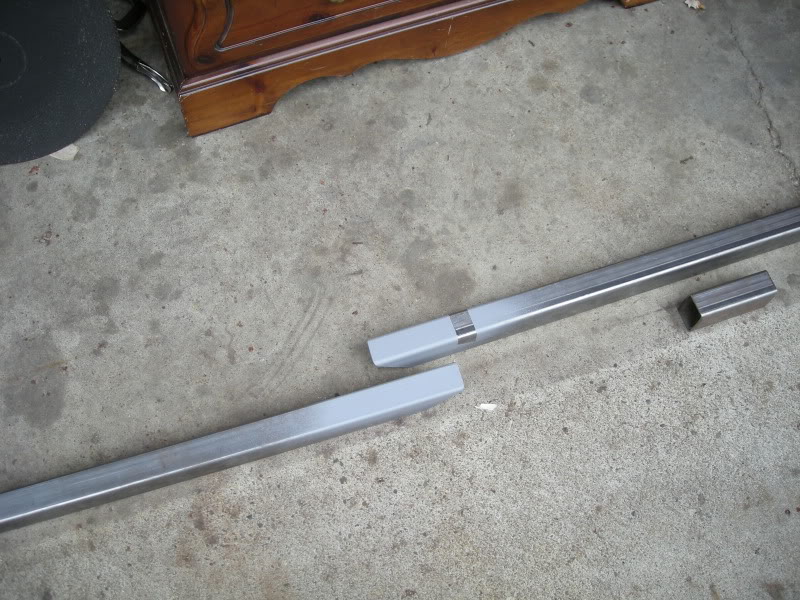
I decided on 14 gauge 2 x 1-1/2" rectangular tubing. and 2 -1/4 plate
Thread Starter
Joined: Dec 2007
Posts: 1,924
Likes: 12
From: Minnesota
Car: 84 camaro, 88 trans am, 98 camaro
Engine: Modded , stock, LSX modded
Transmission: 700r4, 700r4, t-56
Axle/Gears: 327, 308, 373
Re: Sub frames (final design and build)
I already had a game plan before i started and that was to start making the LCA mounts frist.
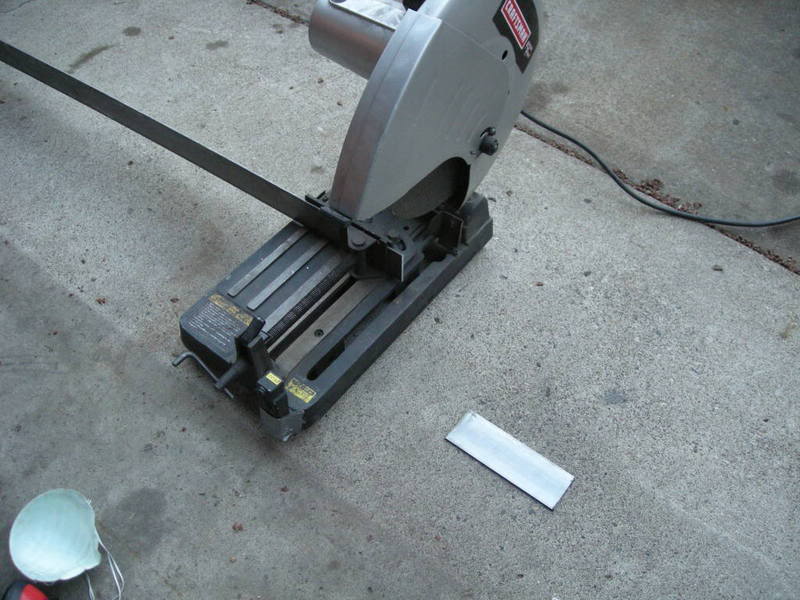
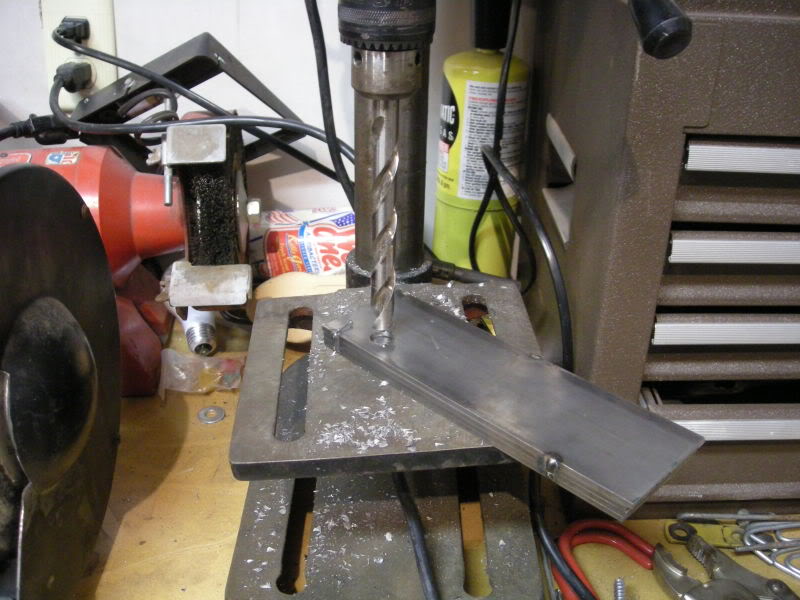
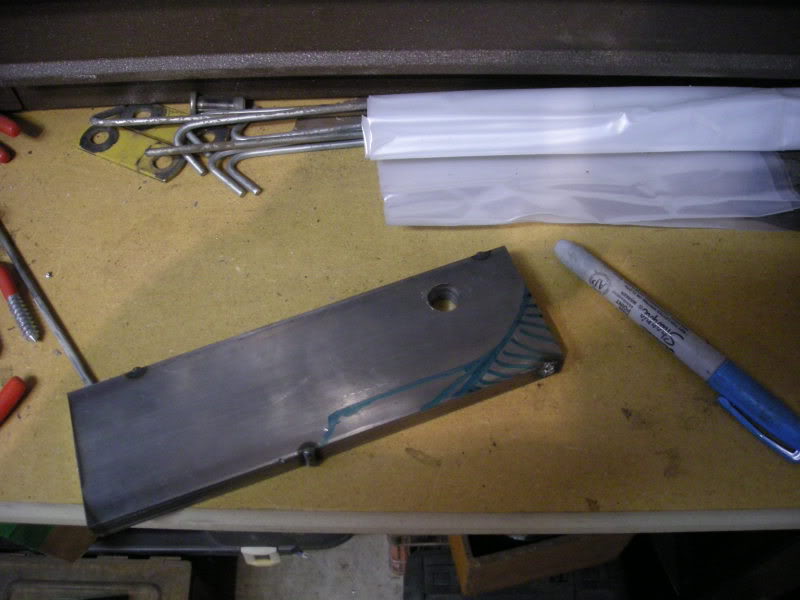
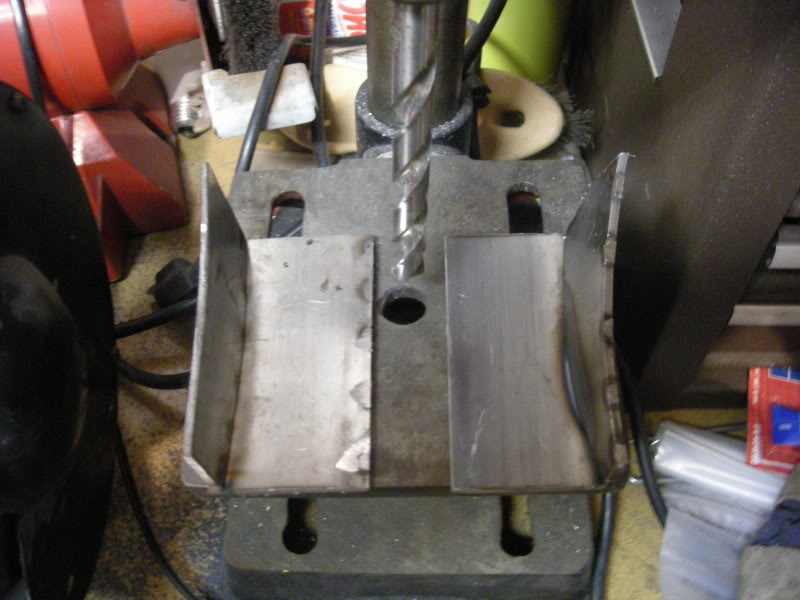
After i cut out four peaces about the same length. i used the LCA mounting point as my guide and took one of the four peaces and marked where i wanted a hole. then i drilled a hole in one of the peaces and clamped all of peaces together and tack welded them together. after that i drilled the rest of the holes so all of them where even then trimmed all the peaces to the same lengths.

After i cut out four peaces about the same length. i used the LCA mounting point as my guide and took one of the four peaces and marked where i wanted a hole. then i drilled a hole in one of the peaces and clamped all of peaces together and tack welded them together. after that i drilled the rest of the holes so all of them where even then trimmed all the peaces to the same lengths.
Last edited by FueledSoul; May 6, 2009 at 12:00 AM.
Thread Starter
Joined: Dec 2007
Posts: 1,924
Likes: 12
From: Minnesota
Car: 84 camaro, 88 trans am, 98 camaro
Engine: Modded , stock, LSX modded
Transmission: 700r4, 700r4, t-56
Axle/Gears: 327, 308, 373
Re: Sub frames (final design and build)

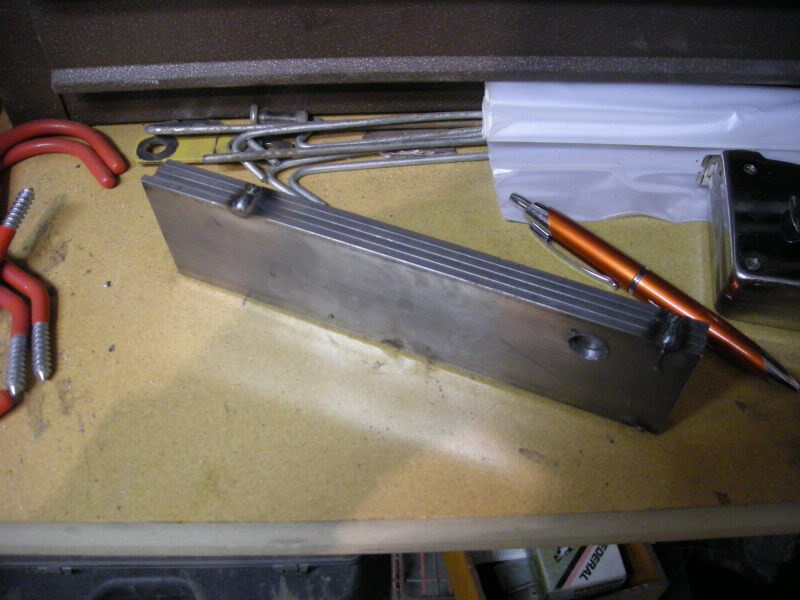
After that i used the LCA mounting point once again to mark some lines to shape the plates to the contours of the where the LCAs mount too

Thread Starter
Joined: Dec 2007
Posts: 1,924
Likes: 12
From: Minnesota
Car: 84 camaro, 88 trans am, 98 camaro
Engine: Modded , stock, LSX modded
Transmission: 700r4, 700r4, t-56
Axle/Gears: 327, 308, 373
Re: Sub frames (final design and build)
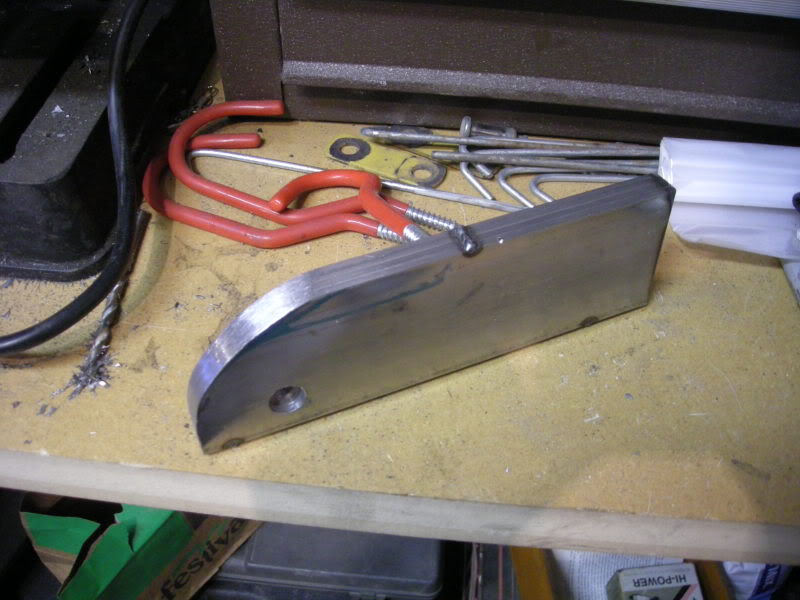
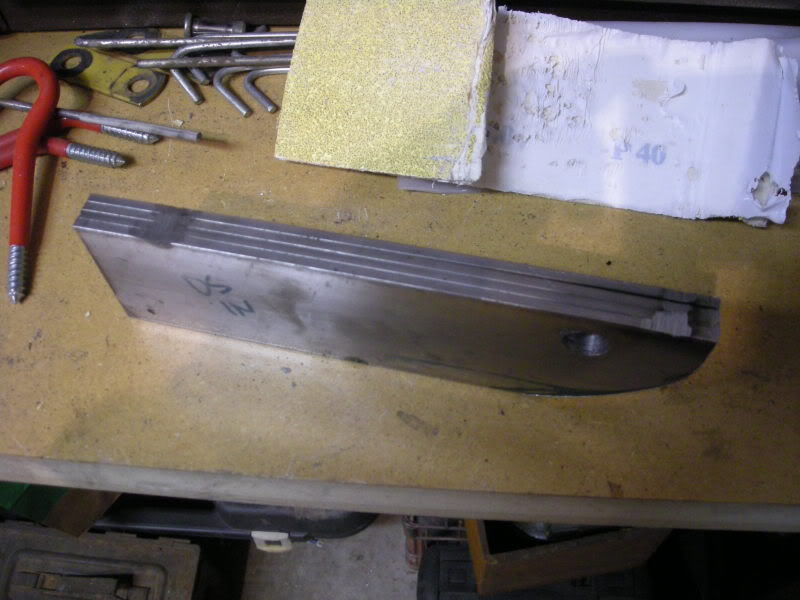
Ground down the tack welds. and clamped them where i wanted them and made some bottom plates.

Thread Starter
Joined: Dec 2007
Posts: 1,924
Likes: 12
From: Minnesota
Car: 84 camaro, 88 trans am, 98 camaro
Engine: Modded , stock, LSX modded
Transmission: 700r4, 700r4, t-56
Axle/Gears: 327, 308, 373
Re: Sub frames (final design and build)
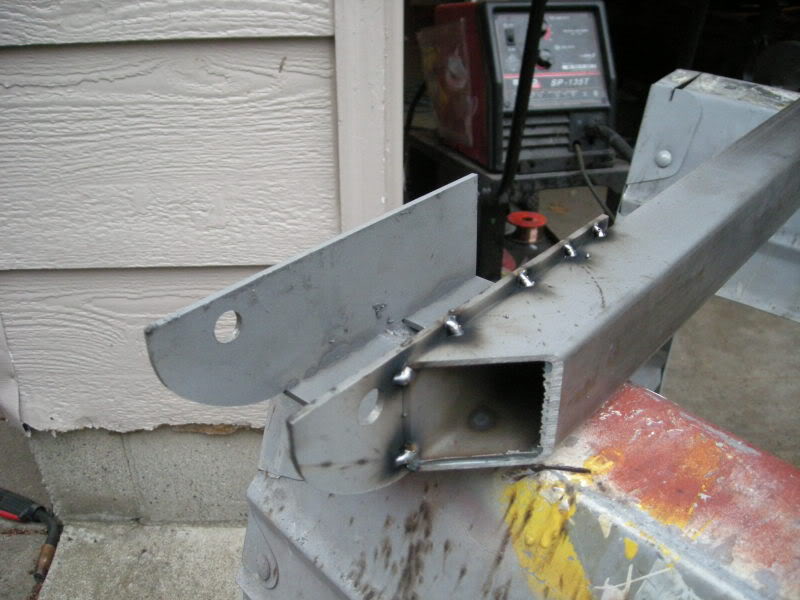
Here is the end result after i tacked the bottom plates on.


Joined: Sep 2002
Posts: 1,099
Likes: 21
From: Melbourne Australia but from South Carolina
Car: 1991 Trans Am convertible
Engine: 305 TPI
Transmission: Auto
Re: Sub frames (final design and build)
Youre going great on these. Very interested to see the final product. Great going. thanks.
Trending Topics
Member
iTrader: (6)
Joined: Oct 2006
Posts: 320
Likes: 0
From: WA
Car: 1989 Camaro Iroc-Z
Engine: 305 TPI (LB9)
Transmission: 700R4
Axle/Gears: 2.77 posi
Thread Starter
Joined: Dec 2007
Posts: 1,924
Likes: 12
From: Minnesota
Car: 84 camaro, 88 trans am, 98 camaro
Engine: Modded , stock, LSX modded
Transmission: 700r4, 700r4, t-56
Axle/Gears: 327, 308, 373
Re: Sub frames (final design and build)
Thanks. I figured this thread might help others out or at least ad some motivation for someone to make there own set. its been a very busy week for me but i plan on working on these a lot this weekend. I will keep updating this thread with more progress pics and info as i move along 
Thread Starter
Joined: Dec 2007
Posts: 1,924
Likes: 12
From: Minnesota
Car: 84 camaro, 88 trans am, 98 camaro
Engine: Modded , stock, LSX modded
Transmission: 700r4, 700r4, t-56
Axle/Gears: 327, 308, 373
Re: Sub frames (final design and build)
Next step. I started with about 80" long tubing i just eye balled them under the car and marked them where i was going to cut. The drivers side was easy. I cut it at 65" The right side (passenger side) i left even more since i was planing on over lapping two tubes.
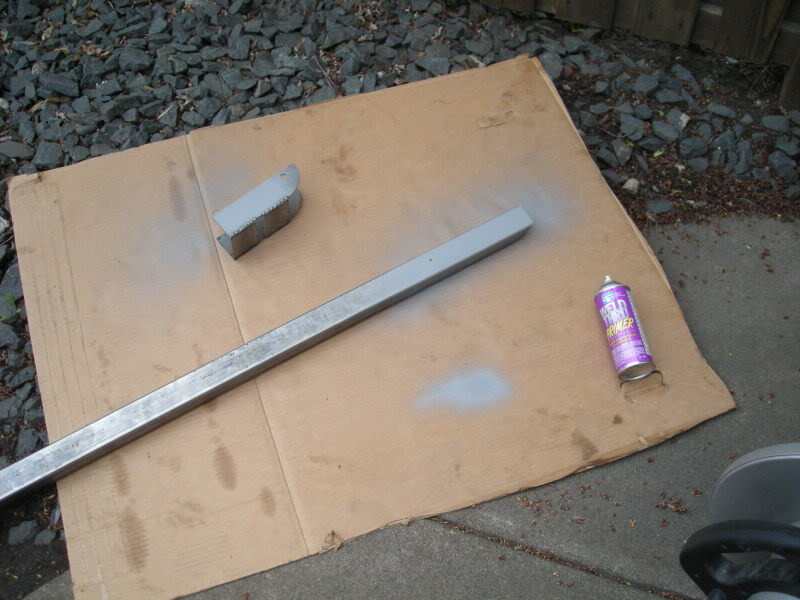
i angle cut them and lined the tubes up to the LCA brackets where i wanted them and marked
Since i was welding them metal on metal i used a weldable corrosion proof primer on both sides that where being matted together its not necessary but i like to
i angle cut them and lined the tubes up to the LCA brackets where i wanted them and marked
Since i was welding them metal on metal i used a weldable corrosion proof primer on both sides that where being matted together its not necessary but i like to
Thread Starter
Joined: Dec 2007
Posts: 1,924
Likes: 12
From: Minnesota
Car: 84 camaro, 88 trans am, 98 camaro
Engine: Modded , stock, LSX modded
Transmission: 700r4, 700r4, t-56
Axle/Gears: 327, 308, 373
Re: Sub frames (final design and build)
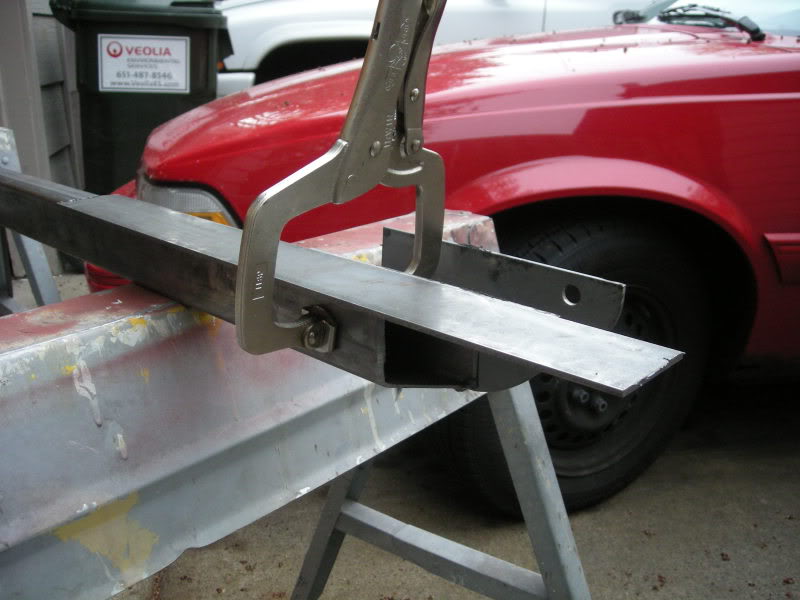
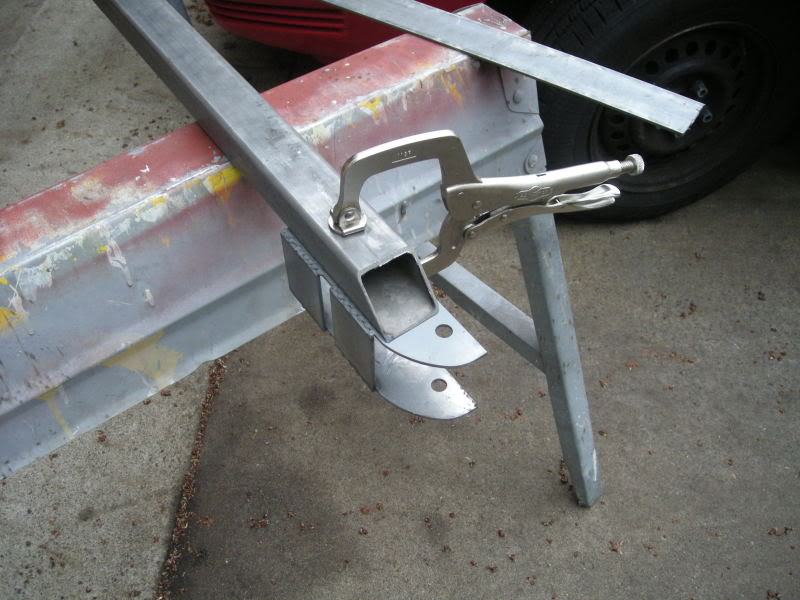
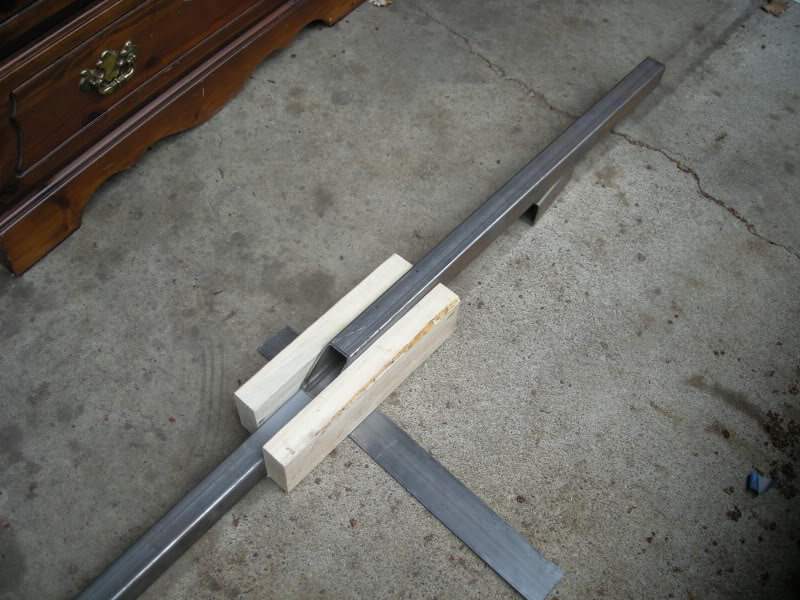
I wanted to leave a even lip on the top so i could fully weld these in later so i used the steel plate as a guide before i clamp them down not only did it work to give me a gap i wanted but i also used to to line the tubing up perfectly straight. Then tacked them in place


Thread Starter
Joined: Dec 2007
Posts: 1,924
Likes: 12
From: Minnesota
Car: 84 camaro, 88 trans am, 98 camaro
Engine: Modded , stock, LSX modded
Transmission: 700r4, 700r4, t-56
Axle/Gears: 327, 308, 373
Re: Sub frames (final design and build)
Thread Starter
Joined: Dec 2007
Posts: 1,924
Likes: 12
From: Minnesota
Car: 84 camaro, 88 trans am, 98 camaro
Engine: Modded , stock, LSX modded
Transmission: 700r4, 700r4, t-56
Axle/Gears: 327, 308, 373
Re: Sub frames (final design and build)
I bolted both in. the drivers side was perfect just needed to be trimmed. The passenger side was longer but i marked where i was going to cut it in the middle to have the other tube over lap it on the top. then angle cut it them
Thread Starter
Joined: Dec 2007
Posts: 1,924
Likes: 12
From: Minnesota
Car: 84 camaro, 88 trans am, 98 camaro
Engine: Modded , stock, LSX modded
Transmission: 700r4, 700r4, t-56
Axle/Gears: 327, 308, 373
Re: Sub frames (final design and build)
i marked the over lap under the car and since both where being over lap and welded i taped the line then cleaned them up and used the weldable primmer again
I used a few props to support the end of the tube and boards to straighten them out before tacking and clamping them down to do the rest of the sides
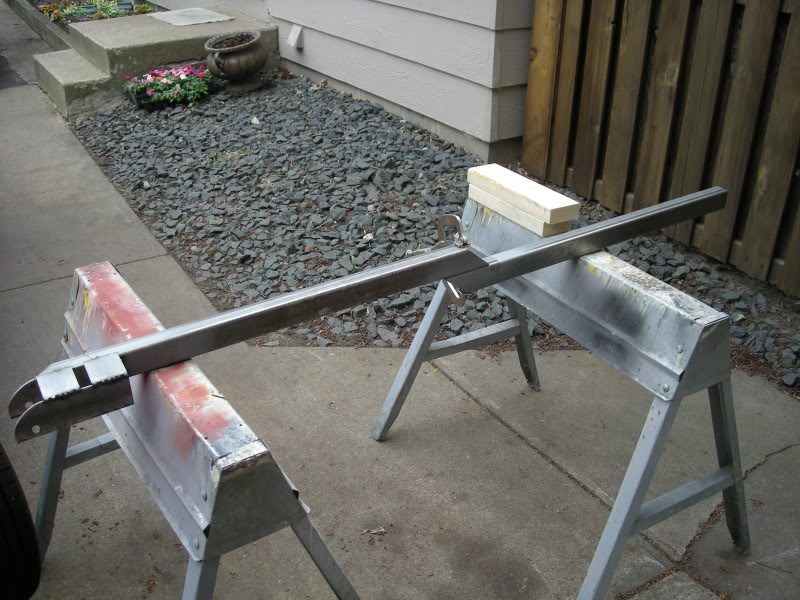
After that i bolted them up and swong them into place and marked where i was going to trim the ends
I used a few props to support the end of the tube and boards to straighten them out before tacking and clamping them down to do the rest of the sides
After that i bolted them up and swong them into place and marked where i was going to trim the ends
Thread Starter
Joined: Dec 2007
Posts: 1,924
Likes: 12
From: Minnesota
Car: 84 camaro, 88 trans am, 98 camaro
Engine: Modded , stock, LSX modded
Transmission: 700r4, 700r4, t-56
Axle/Gears: 327, 308, 373
Re: Sub frames (final design and build)
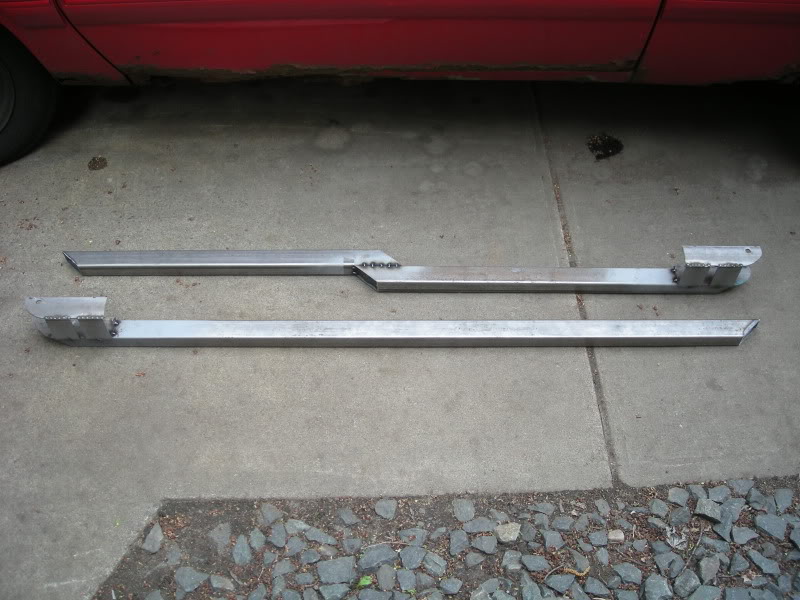
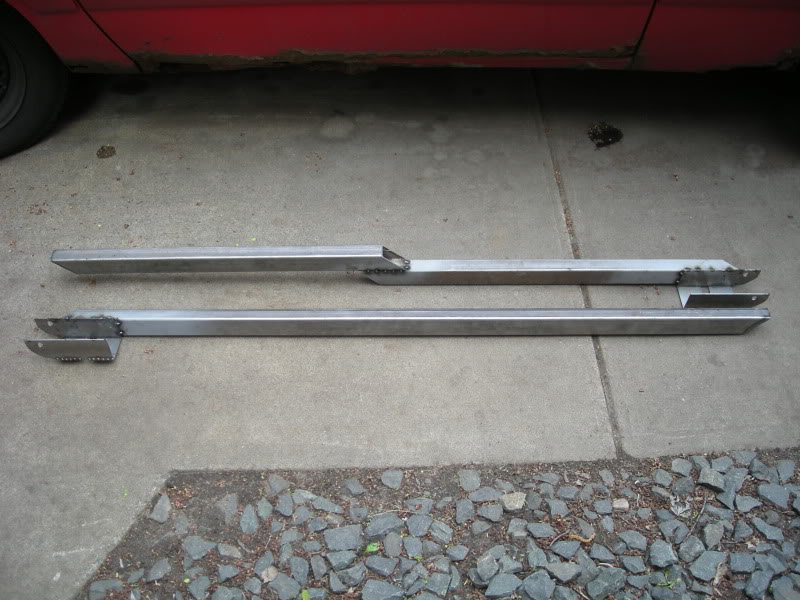
here is the end result. i have a lilte bit of modifying to do on the ends to fit the contours of the front sub frames.
Joined: Aug 2006
Posts: 12,813
Likes: 110
From: Central NJ
Car: 86 Trans Am
Engine: 408 stroker sbc
Transmission: TKO600
Axle/Gears: Moser full floater m9, 3:70 trutrac
Re: Sub frames (final design and build)
looking good, and seem to be similar in design as a sponsors offerings.....
Thread Starter
Joined: Dec 2007
Posts: 1,924
Likes: 12
From: Minnesota
Car: 84 camaro, 88 trans am, 98 camaro
Engine: Modded , stock, LSX modded
Transmission: 700r4, 700r4, t-56
Axle/Gears: 327, 308, 373
Re: Sub frames (final design and build)
That wasn't my intent at all they are how ever smiler in a appearance i guess.
Senior Member
iTrader: (5)
Joined: Apr 2008
Posts: 696
Likes: 0
From: Putnam Valley, NY
Car: 1992 RS 6spd
Engine: Carbed 357c.i.
Transmission: Built T56
Axle/Gears: Soon to be Strange S60
Re: Sub frames (final design and build)
They are def. similar to my UMI's. Yours look incredible though, wish I had thought of it before making my purchase.
Senior Member
Joined: Mar 2007
Posts: 586
Likes: 0
From: south of kansas city
Car: 86 berlinetta 92rs gfx
Engine: 4 bolt 384 stroker
Transmission: th350 4000 stall manual/T brake
Axle/Gears: 87 iroc 9 bolt
Re: Sub frames (final design and build)
lookin good! how much was the flat plating, if u dont mind me asking?

Junior Member
Joined: Mar 2009
Posts: 29
Likes: 0
Re: Sub frames (final design and build)
They look nice. About how much money do you have in the steel and other stuff you needed? This is just the motivation I need to make some too. Doesn't really seem like to difficult of a project. Nice work and thanks for the pics.
Thread Starter
Joined: Dec 2007
Posts: 1,924
Likes: 12
From: Minnesota
Car: 84 camaro, 88 trans am, 98 camaro
Engine: Modded , stock, LSX modded
Transmission: 700r4, 700r4, t-56
Axle/Gears: 327, 308, 373
Thread Starter
Joined: Dec 2007
Posts: 1,924
Likes: 12
From: Minnesota
Car: 84 camaro, 88 trans am, 98 camaro
Engine: Modded , stock, LSX modded
Transmission: 700r4, 700r4, t-56
Axle/Gears: 327, 308, 373
Re: Sub frames (final design and build)
but for steel and gas im at half the price as some of the populer ones people install. As far as price goes its the time factor on this build
Thread Starter
Joined: Dec 2007
Posts: 1,924
Likes: 12
From: Minnesota
Car: 84 camaro, 88 trans am, 98 camaro
Engine: Modded , stock, LSX modded
Transmission: 700r4, 700r4, t-56
Axle/Gears: 327, 308, 373
Re: Sub frames (final design and build)
Inner subframes. i started mocking up the rear plates and they turnned out great but i was running into to many issues with these so i had to came up with something else.
Last edited by FueledSoul; May 11, 2009 at 01:10 AM.
Thread Starter
Joined: Dec 2007
Posts: 1,924
Likes: 12
From: Minnesota
Car: 84 camaro, 88 trans am, 98 camaro
Engine: Modded , stock, LSX modded
Transmission: 700r4, 700r4, t-56
Axle/Gears: 327, 308, 373
Re: Sub frames (final design and build)
Here is what i came up with.
The tubing is 2x1" and since the floor pan is lower then the rear rails these will allow me to have a close gap between the froor pan and when i run the tubing to connet the frort and rear rails
i used a hydraulic jack to hold them in place as i tacked them.
The tubing is 2x1" and since the floor pan is lower then the rear rails these will allow me to have a close gap between the froor pan and when i run the tubing to connet the frort and rear rails
i used a hydraulic jack to hold them in place as i tacked them.
Last edited by FueledSoul; May 11, 2009 at 01:10 AM.
Thread Starter
Joined: Dec 2007
Posts: 1,924
Likes: 12
From: Minnesota
Car: 84 camaro, 88 trans am, 98 camaro
Engine: Modded , stock, LSX modded
Transmission: 700r4, 700r4, t-56
Axle/Gears: 327, 308, 373
Re: Sub frames (final design and build)
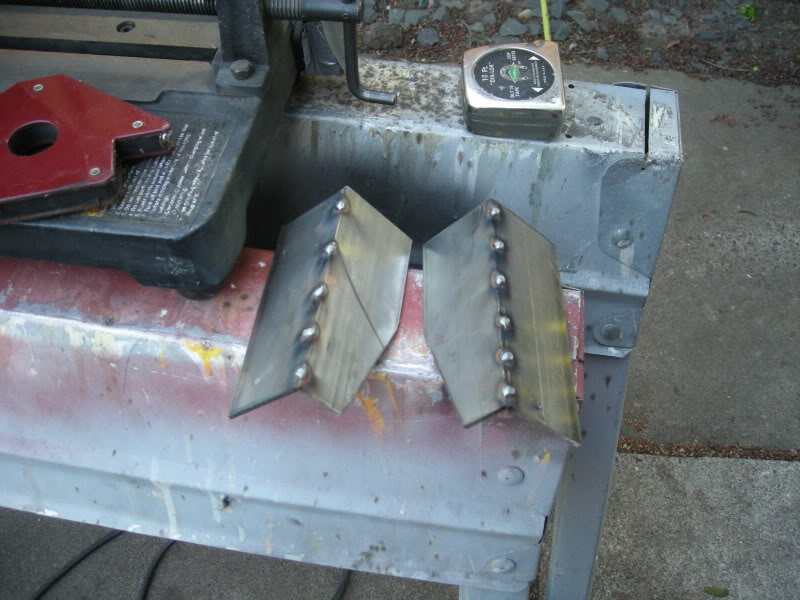
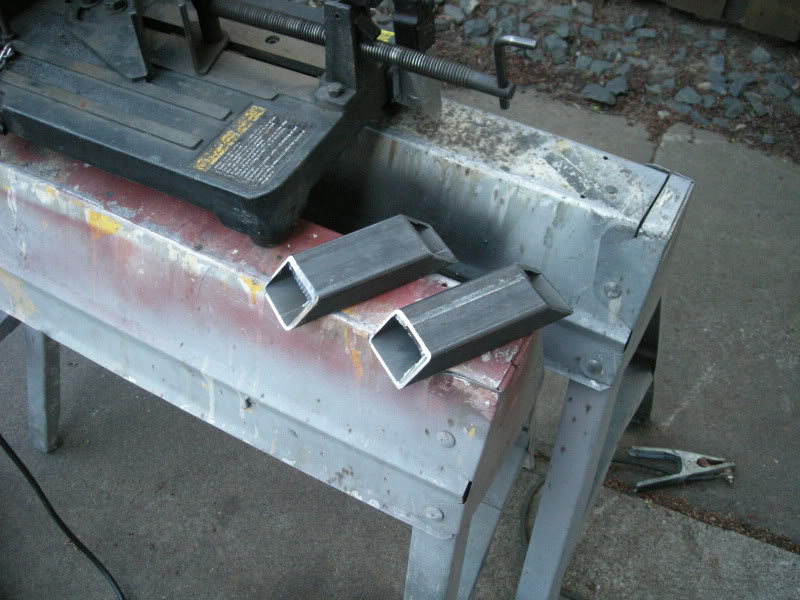
Front plates. I started to cut and pound the sides for the frame rails into shape.
Then i tacked the bottem plates on. Heres what they look like they fallow the contours of the rails perfectly

Then i tacked the bottem plates on. Heres what they look like they fallow the contours of the rails perfectly
Last edited by FueledSoul; May 11, 2009 at 01:00 AM.
Thread Starter
Joined: Dec 2007
Posts: 1,924
Likes: 12
From: Minnesota
Car: 84 camaro, 88 trans am, 98 camaro
Engine: Modded , stock, LSX modded
Transmission: 700r4, 700r4, t-56
Axle/Gears: 327, 308, 373
Joined: Sep 2002
Posts: 1,099
Likes: 21
From: Melbourne Australia but from South Carolina
Car: 1991 Trans Am convertible
Engine: 305 TPI
Transmission: Auto
Re: Sub frames (final design and build)
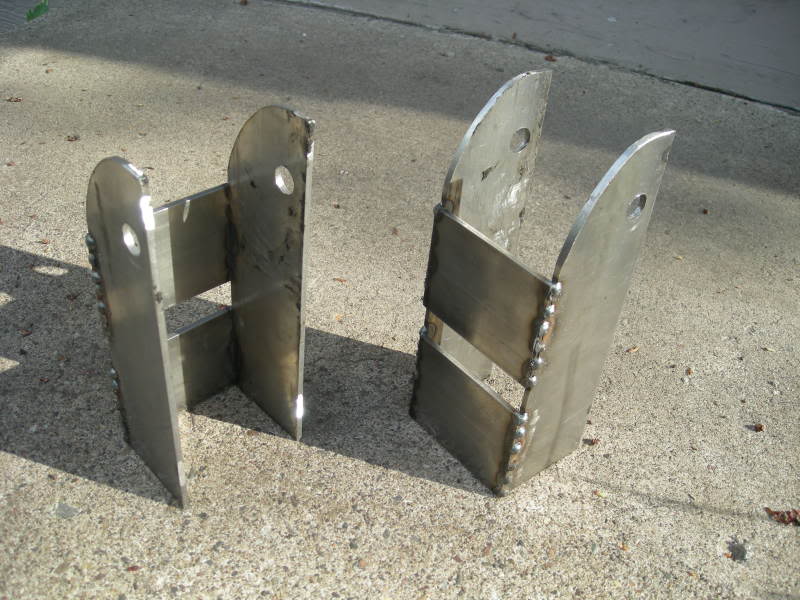
How did you make those cuts that go on each side of the lower control arm? The rounded sort of flat metal? Looks so good. Did you do them in multiple layers?
Thread Starter
Joined: Dec 2007
Posts: 1,924
Likes: 12
From: Minnesota
Car: 84 camaro, 88 trans am, 98 camaro
Engine: Modded , stock, LSX modded
Transmission: 700r4, 700r4, t-56
Axle/Gears: 327, 308, 373
Re: Sub frames (final design and build)

Joined: Feb 2008
Posts: 504
Likes: 1
From: newfoundland canada
Car: 1989 camaro rs
Engine: ls 5.3 carb
Transmission: t56 six speed
Axle/Gears: 3:73
Re: Sub frames (final design and build)
hey really nice work! good fabrication skills also, here is a set i made when i done a fabrication course, just something simple. 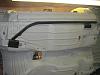

Thread Starter
Joined: Dec 2007
Posts: 1,924
Likes: 12
From: Minnesota
Car: 84 camaro, 88 trans am, 98 camaro
Engine: Modded , stock, LSX modded
Transmission: 700r4, 700r4, t-56
Axle/Gears: 327, 308, 373
Re: Sub frames (final design and build)
Thanks! im not done yet!
Senior Member
iTrader: (2)
Joined: Dec 2008
Posts: 990
Likes: 1
From: Peoria, IL
Car: 1988 Camaro Sport Coupe
Engine: 5.0 305 Carb'd
Transmission: 700R4
Axle/Gears: 3.23
Re: Sub frames (final design and build)
dude looks real good. whenever i see peoples SFC they dont look very strong imo, yours look heavy duty as hell lol. i bet your adding about 40-50 pounds by doing this? well worth it though huh?
Thread Starter
Joined: Dec 2007
Posts: 1,924
Likes: 12
From: Minnesota
Car: 84 camaro, 88 trans am, 98 camaro
Engine: Modded , stock, LSX modded
Transmission: 700r4, 700r4, t-56
Axle/Gears: 327, 308, 373
Re: Sub frames (final design and build)
I was really trying to keep the weight down when i was coming up with different designs. because i have so many connecting points i was able to scale back to 14 gauge which is 1.882 weight per lineal foot Vs 11 gauge 2.66lbs weight per lineal foot (talking in 2x1.5" rectangular tubing of course). most sub frames are made from 11 gauge steel.

Member
Joined: Mar 2005
Posts: 113
Likes: 0
From: Milton Ontario Canada
Car: 1986 Camaro z28
Engine: 350 v8
Transmission: T5
Re: Sub frames (final design and build)
i was debating making my own! ended up ordering UMI's because of time. Regardless, yours are looking great! Are you using mig gas? argon/co2?
Joined: Sep 2002
Posts: 3,685
Likes: 10
From: PA
Car: 86 Trans AM
Engine: LS1 (not stock...)
Transmission: Built T56
Axle/Gears: Strange 12-bolt w/ 3.73
Re: Sub frames (final design and build)
These are looking pretty good. I want to see where you are going with your bracing though. I like them so far!
As far as cost, I was going to build my own, but after I added up steel prices for what I wanted, it was pretty close to some pre-builts. The biggest savings to me was time. I just didnt have the time to mess with them. I was waiting to have my SFCs installed before I started the motor swap, so I wanted them in and done. Otherwise...making your own is def a good idea.
They'll fit how you want them, and work a LOT better than pre-built units. I saw work better because they'll most likely be tighter and you'll be able to weld to more areas...which I believe is VERY important.
Mine now are so far away from the pinch seam and floor boards that Ide have to make filler pieces to weld them. They work ok as is...but my Spohns tucked up against the floors, and made a noticable difference in stiffness since they were welded alla long the car.
Good work man! Keep us posted! Im really anxious to see how they turn out for you. Oh...good call on the weld-thru primer. That stuff is expensive, but if youre any good at fabbing you know to use it. Great stuff!
J.
Supreme Member
iTrader: (3)
Joined: Jun 2007
Posts: 2,359
Likes: 5
From: Pennsylvania
Car: 1992 Camaro RS
Engine: Rebuilt 350 going in after paint
Transmission: WCT5, 7k & counting behind the 350
Axle/Gears: 4thgen disc rear w/ 3.73 Posi
Re: Sub frames (final design and build)
What are the lengths of the tubing and plate that you got? Any other measurements you have would be appreciated as well. I like the design and want to try this on my Camaro when I get around to fabbing the subframes. I know the exact measurements will probably be slightly different, but if you can post yours I'll know I'm in the ballpark. That way I also know how much steel I need to pick up.


Joined: Feb 2007
Posts: 4,770
Likes: 64
From: Trumbull CT
Car: 87 TA clone
Engine: 70/70 Turbo 5.3 LS
Transmission: bullet proof 2004R
Axle/Gears: ford 8.8, 3.55 gears
Re: Sub frames (final design and build)
those are turning out really good. good job! are you gona cap the ends of the 2x1.5 tubing? i would... cap both sides this would increase strength and not allow water to enter the tubing. u could leave it open but it would rust from the inside out.
also are u gona pinch/stitch weld them to the floor boards? this would also increase strength. i would also think about stitch welding the STOCK subframes where they are spot welded to the floor pan, these are extremly weak and scary. at least do an area that would be behind the SFC since u wont be able to get to them after they are installed. if i had a choice and the time i would stitch weld the entire car to increase the rigidy of a factory spot welded car lol
also are u gona pinch/stitch weld them to the floor boards? this would also increase strength. i would also think about stitch welding the STOCK subframes where they are spot welded to the floor pan, these are extremly weak and scary. at least do an area that would be behind the SFC since u wont be able to get to them after they are installed. if i had a choice and the time i would stitch weld the entire car to increase the rigidy of a factory spot welded car lol

Senior Member

Joined: Aug 2007
Posts: 682
Likes: 45
Re: Sub frames (final design and build)
great looking sfc's and workmanship. just a thought to share. 3rd gens sit low and most are lowered even more making jacking the car difficult. since you are obviously not going to run a cat in the exhaust why not just run the right side rail straight along the rocker pinch weld and give yourself a front jacking point on the right side.
Thread Starter
Joined: Dec 2007
Posts: 1,924
Likes: 12
From: Minnesota
Car: 84 camaro, 88 trans am, 98 camaro
Engine: Modded , stock, LSX modded
Transmission: 700r4, 700r4, t-56
Axle/Gears: 327, 308, 373
Re: Sub frames (final design and build)
Im just tacking everything with my 110v mig welder with 75% 25% mix, i havent decided what im going to finish it off with yet but probably the 220 mig
Thread Starter
Joined: Dec 2007
Posts: 1,924
Likes: 12
From: Minnesota
Car: 84 camaro, 88 trans am, 98 camaro
Engine: Modded , stock, LSX modded
Transmission: 700r4, 700r4, t-56
Axle/Gears: 327, 308, 373
Re: Sub frames (final design and build)
Thanks man, yea i hope to get to them more this week but iv been busy but i will deff keep updating this thread with my progress
Thread Starter
Joined: Dec 2007
Posts: 1,924
Likes: 12
From: Minnesota
Car: 84 camaro, 88 trans am, 98 camaro
Engine: Modded , stock, LSX modded
Transmission: 700r4, 700r4, t-56
Axle/Gears: 327, 308, 373
Re: Sub frames (final design and build)
What are the lengths of the tubing and plate that you got? Any other measurements you have would be appreciated as well. I like the design and want to try this on my Camaro when I get around to fabbing the subframes. I know the exact measurements will probably be slightly different, but if you can post yours I'll know I'm in the ballpark. That way I also know how much steel I need to pick up.
Thread Starter
Joined: Dec 2007
Posts: 1,924
Likes: 12
From: Minnesota
Car: 84 camaro, 88 trans am, 98 camaro
Engine: Modded , stock, LSX modded
Transmission: 700r4, 700r4, t-56
Axle/Gears: 327, 308, 373
Re: Sub frames (final design and build)
those are turning out really good. good job! are you gona cap the ends of the 2x1.5 tubing? i would... cap both sides this would increase strength and not allow water to enter the tubing. u could leave it open but it would rust from the inside out.
also are u gona pinch/stitch weld them to the floor boards? this would also increase strength. i would also think about stitch welding the STOCK subframes where they are spot welded to the floor pan, these are extremly weak and scary. at least do an area that would be behind the SFC since u wont be able to get to them after they are installed. if i had a choice and the time i would stitch weld the entire car to increase the rigidy of a factory spot welded car lol
also are u gona pinch/stitch weld them to the floor boards? this would also increase strength. i would also think about stitch welding the STOCK subframes where they are spot welded to the floor pan, these are extremly weak and scary. at least do an area that would be behind the SFC since u wont be able to get to them after they are installed. if i had a choice and the time i would stitch weld the entire car to increase the rigidy of a factory spot welded car lol
Thread Starter
Joined: Dec 2007
Posts: 1,924
Likes: 12
From: Minnesota
Car: 84 camaro, 88 trans am, 98 camaro
Engine: Modded , stock, LSX modded
Transmission: 700r4, 700r4, t-56
Axle/Gears: 327, 308, 373
Thread Starter
Joined: Dec 2007
Posts: 1,924
Likes: 12
From: Minnesota
Car: 84 camaro, 88 trans am, 98 camaro
Engine: Modded , stock, LSX modded
Transmission: 700r4, 700r4, t-56
Axle/Gears: 327, 308, 373
Re: Sub frames (final design and build)
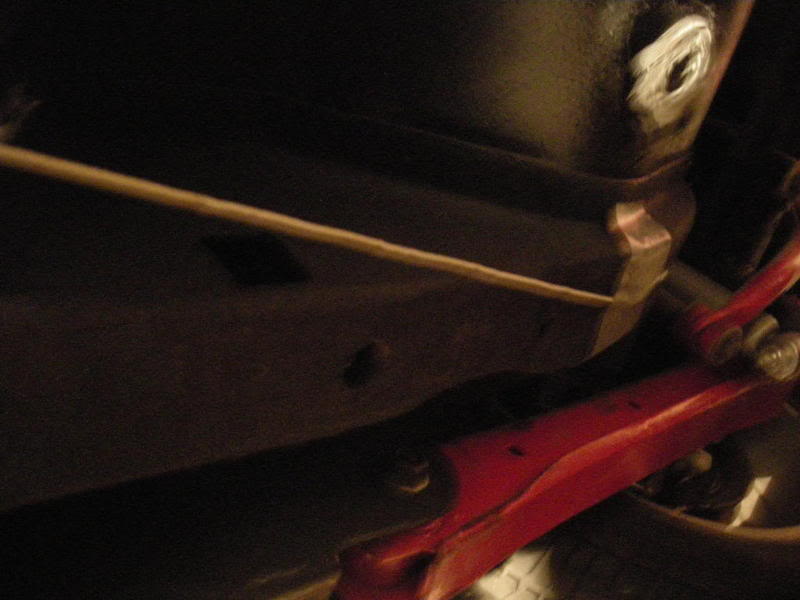
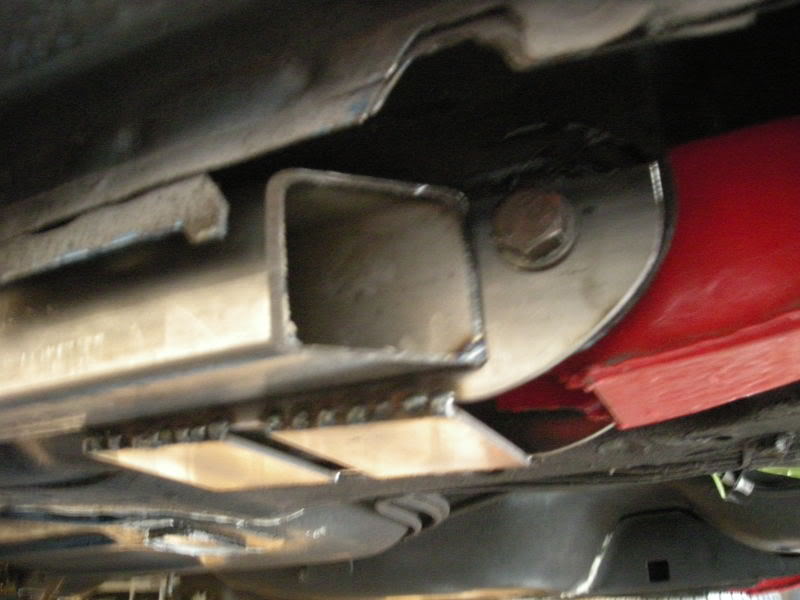
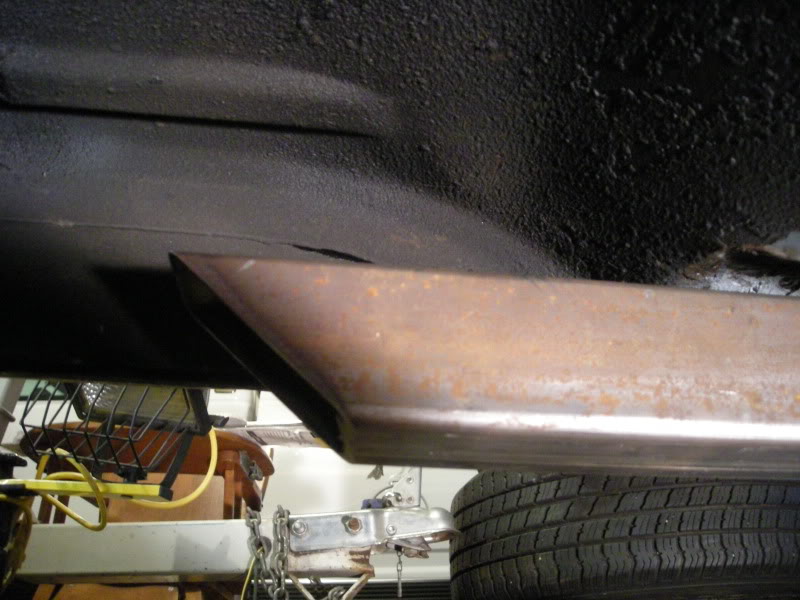
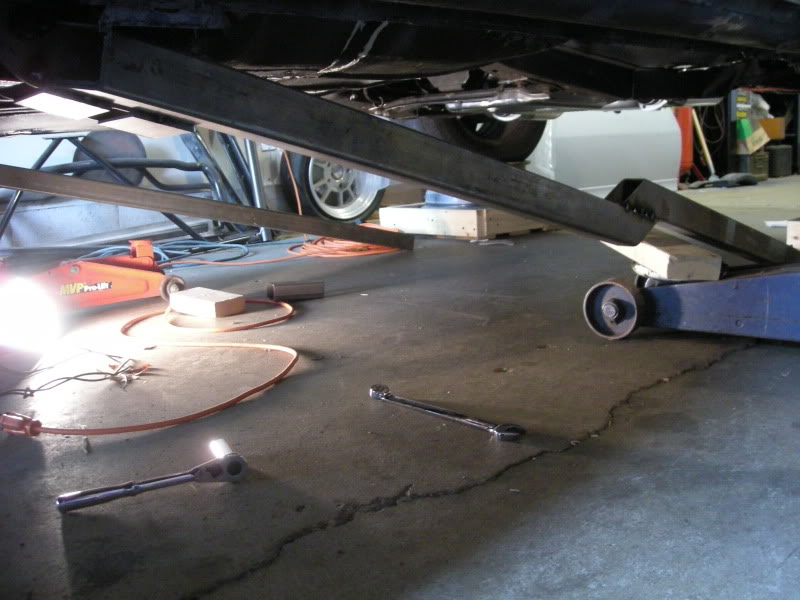
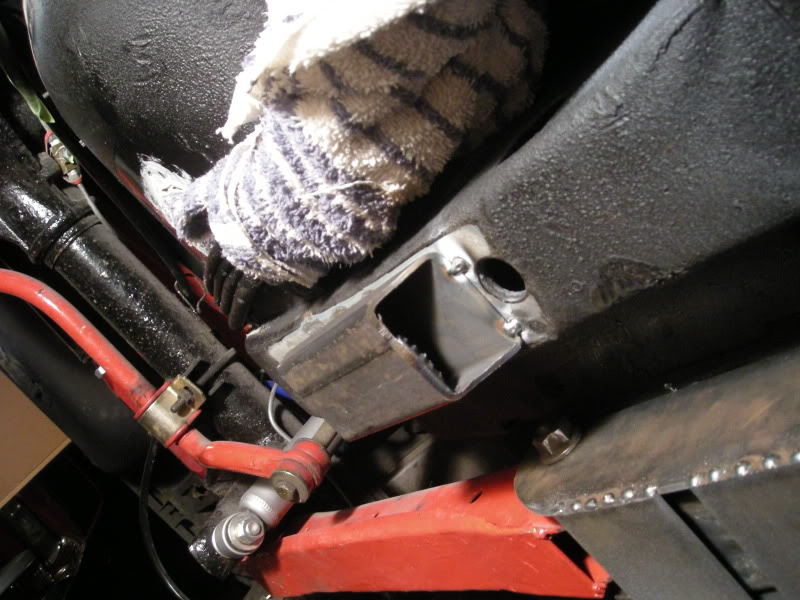
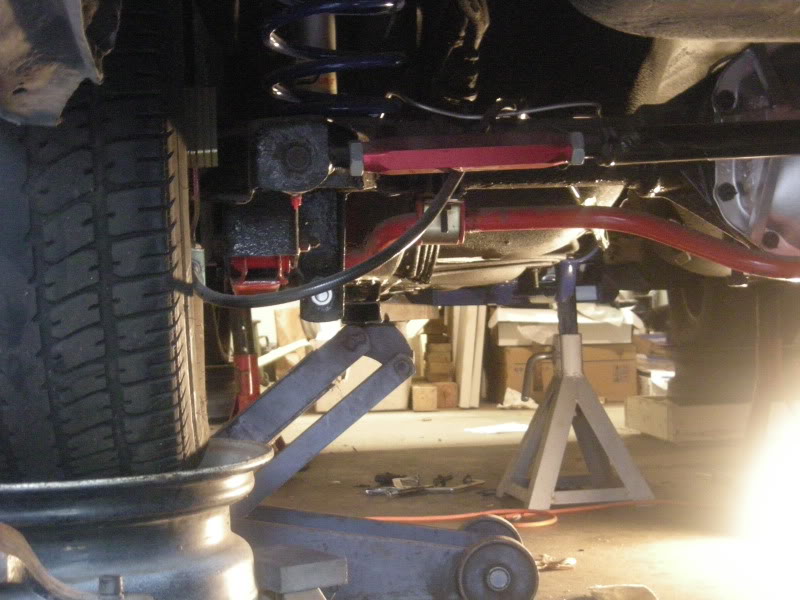
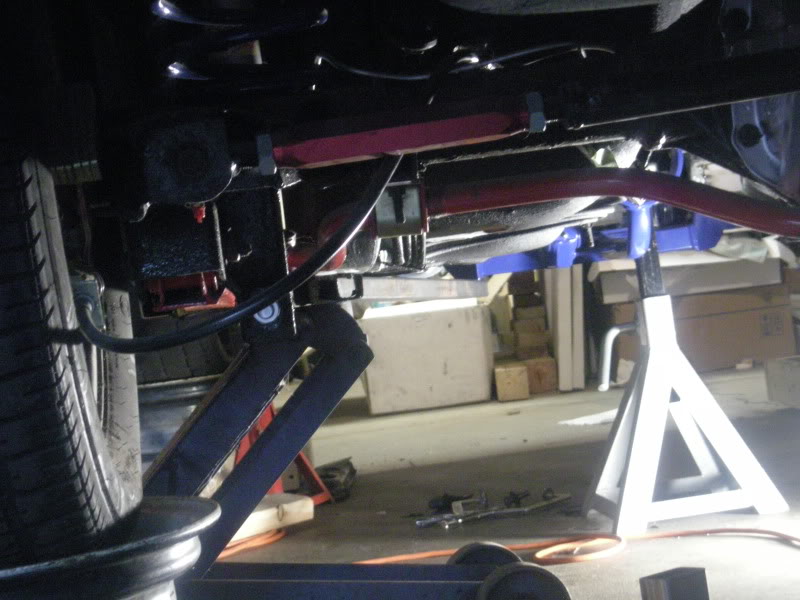
I got done tacking the front peaces in and started on the the main inner sub frame tubes, but i ran into a dilemma with the 2 x 1.5" tubing. my plan was to notch the tubing 0.5" over the rear peaces so it would run really close to the floor boards. but after looking at it, its going to hang to low even if i notch it. here is example with exactly how low it would be the tubing in this pic is 2x1 im talking the bottom of the tubing not the top area from the tube to the floor pan just the bottom. this is how the 2x1.5" would sit.
(Sits lower then the rear shock mount)
(Sits lower then the rear shock mount)
Last edited by FueledSoul; May 13, 2009 at 09:18 PM.
Thread Starter
Joined: Dec 2007
Posts: 1,924
Likes: 12
From: Minnesota
Car: 84 camaro, 88 trans am, 98 camaro
Engine: Modded , stock, LSX modded
Transmission: 700r4, 700r4, t-56
Axle/Gears: 327, 308, 373
Re: Sub frames (final design and build)
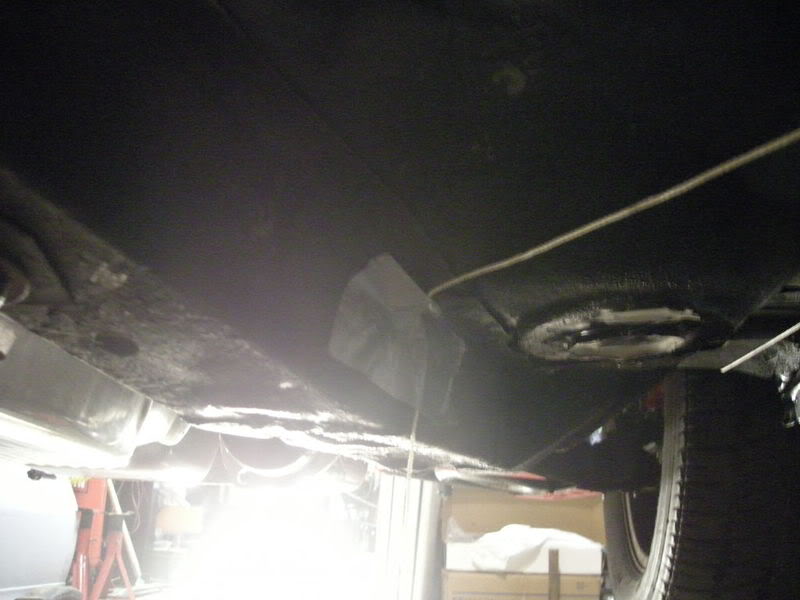
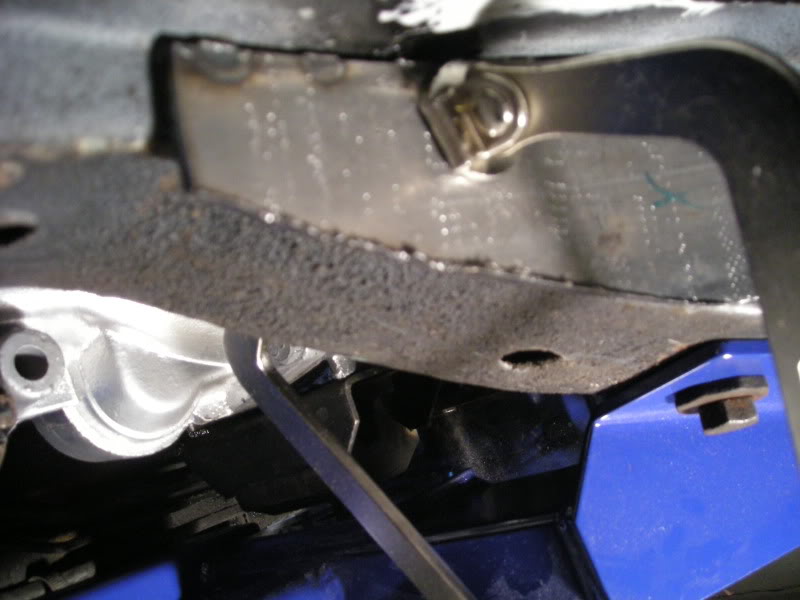
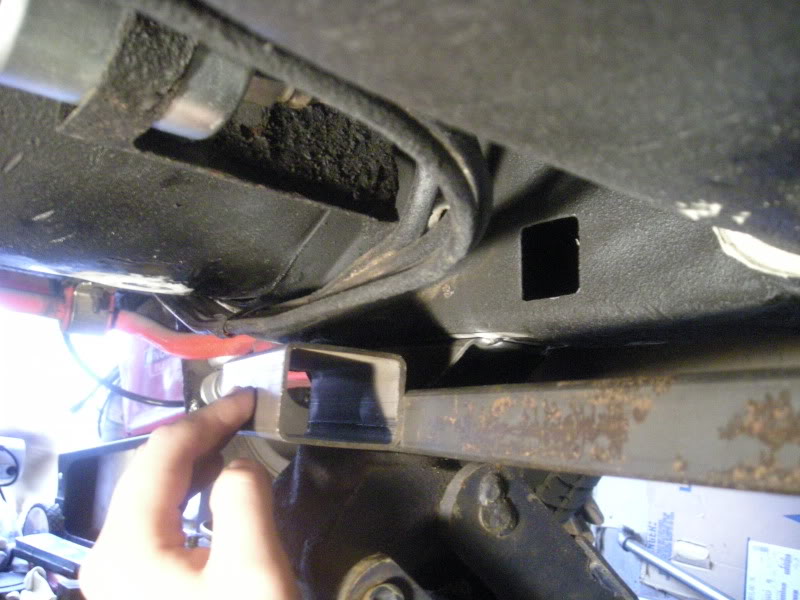
Here is how nicey it was going to tuck up to the floor boards after i notched it
Last edited by FueledSoul; May 13, 2009 at 07:23 PM.
Thread Starter
Joined: Dec 2007
Posts: 1,924
Likes: 12
From: Minnesota
Car: 84 camaro, 88 trans am, 98 camaro
Engine: Modded , stock, LSX modded
Transmission: 700r4, 700r4, t-56
Axle/Gears: 327, 308, 373
Re: Sub frames (final design and build)
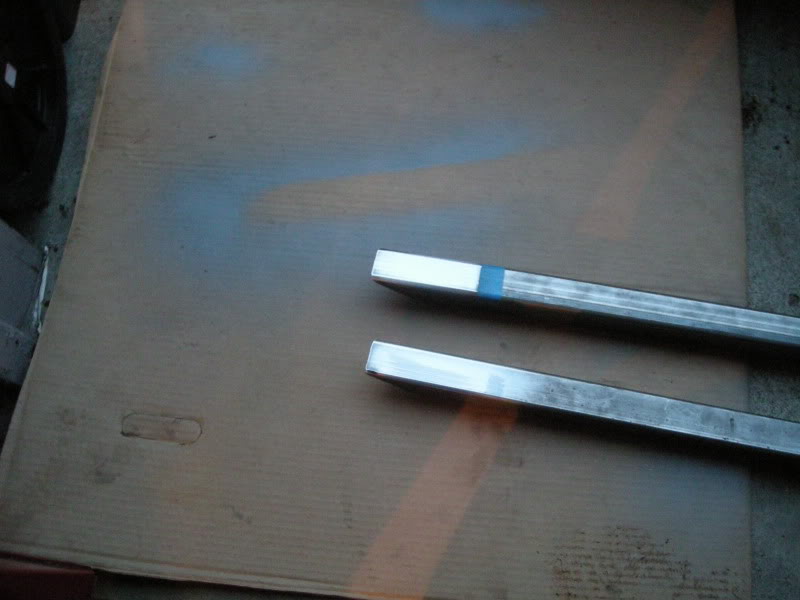
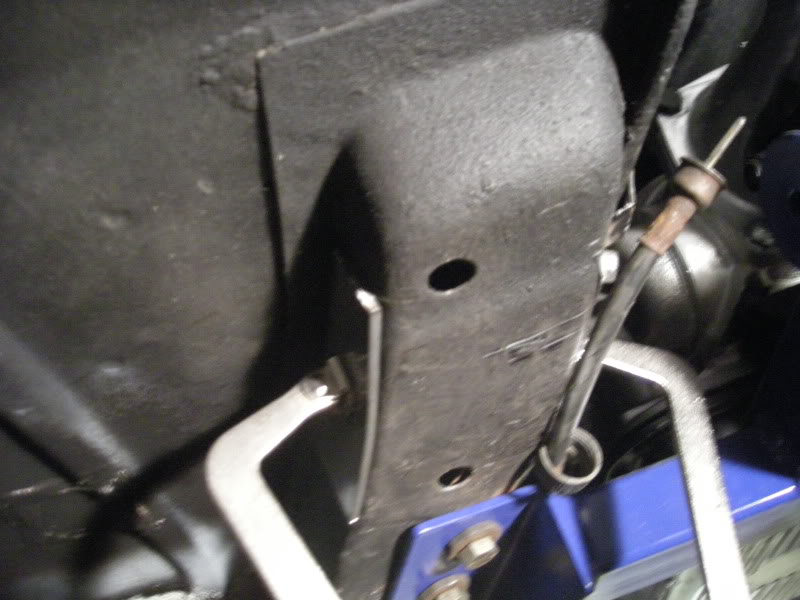
So I'm undecided at this point i guess the only idea i have is doing the inners and center tubes in 2x1"
(here is how nicey 2x1" would tuck up to the floor boards just like the 2x1.5" but woudn't hang nearly as low)
(here is how nicey 2x1" would tuck up to the floor boards just like the 2x1.5" but woudn't hang nearly as low)
Thread Starter
Joined: Dec 2007
Posts: 1,924
Likes: 12
From: Minnesota
Car: 84 camaro, 88 trans am, 98 camaro
Engine: Modded , stock, LSX modded
Transmission: 700r4, 700r4, t-56
Axle/Gears: 327, 308, 373
Re: Sub frames (final design and build)
Thanks.