My LT1 swap project (PICS)
 05-27-2008, 02:23 PM
#1
Member

Thread Starter
iTrader: (1)
Join Date: Feb 2005
Location: Columbus, OH, USA
Posts: 424
Likes: 0
Received 0 Likes
on
0 Posts
Car: '91 Z28, '13 Civic EX-L
Engine: 355 LT1, 1.8 I4
Transmission: T56, 5spd auto
Axle/Gears: 10 bolt 3.42(as long as no breaky)
My LT1 swap project (PICS)
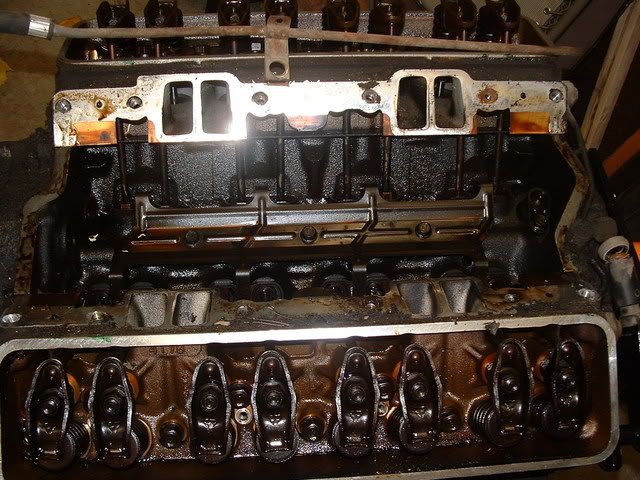
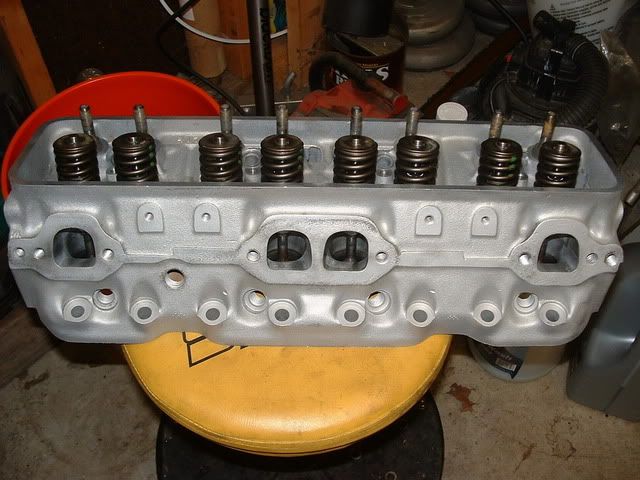
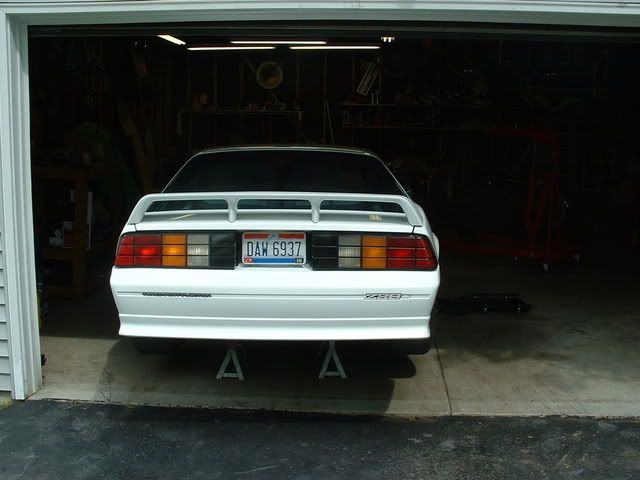
Well i started on this by buying an LT1 last november. It was an old ragged out motor with high mileage on it. I did a full rebuild on it, keeping the stock crank and rods, and putting some speed pro hypers at .030" over. The motor recieved an LT4 hot cam, LT4 springs, with some 1.6 GMPP rocker arms, and some chrome moly cc pushrods. I also had my heads ported out, and i did a hack job on my intake .
.
This is what i started with:
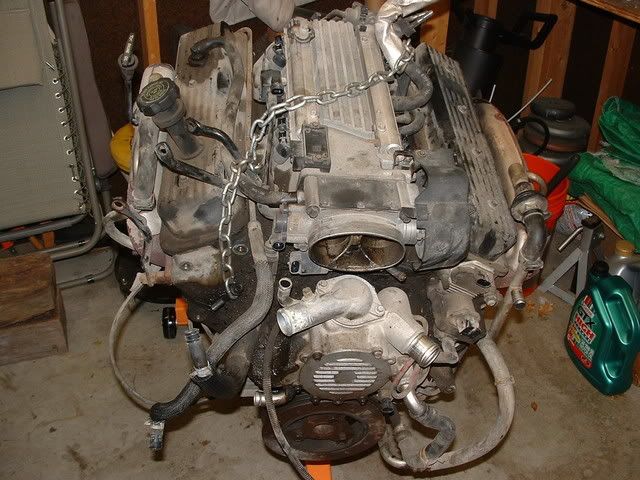
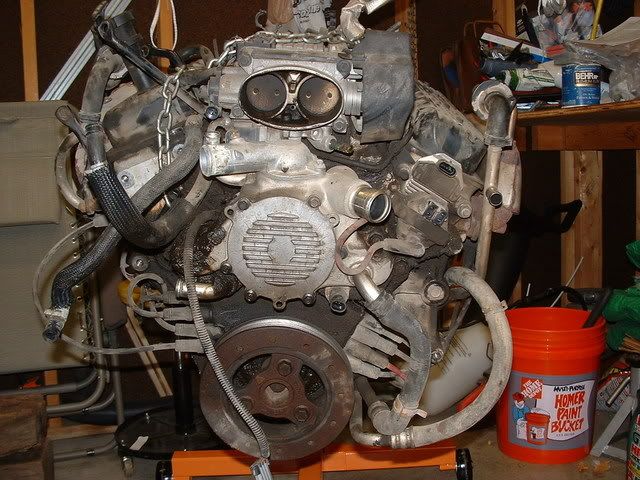
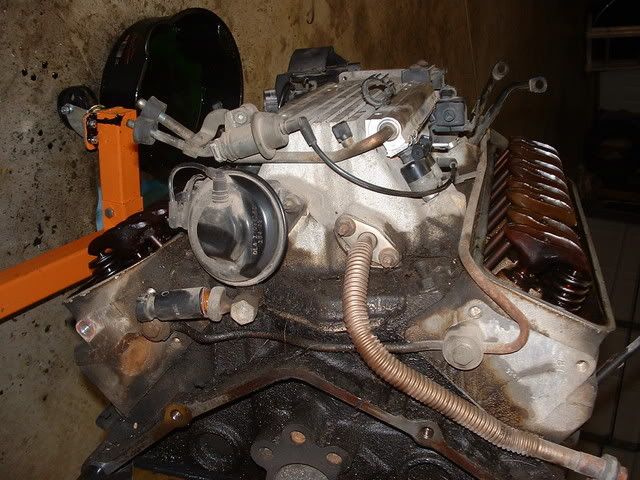
Some pics of the tear down:

.This is what i started with:
Some pics of the tear down:
 05-27-2008, 02:32 PM
#2
Member
Thread Starter
iTrader: (1)
Join Date: Feb 2005
Location: Columbus, OH, USA
Posts: 424
Likes: 0
Received 0 Likes
on
0 Posts
Car: '91 Z28, '13 Civic EX-L
Engine: 355 LT1, 1.8 I4
Transmission: T56, 5spd auto
Axle/Gears: 10 bolt 3.42(as long as no breaky)
Re: My LT1 swap project (PICS)
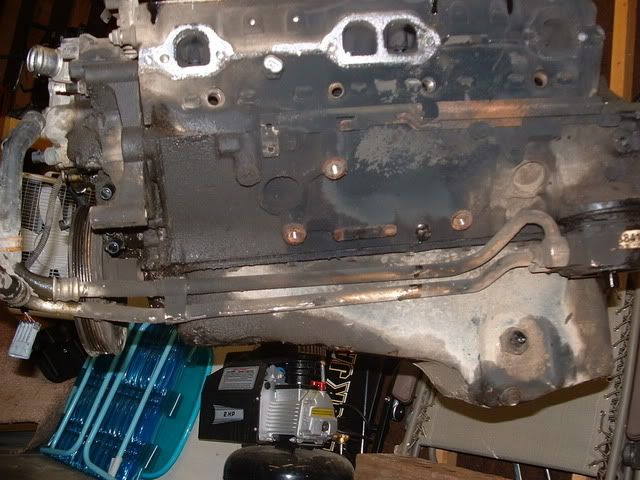
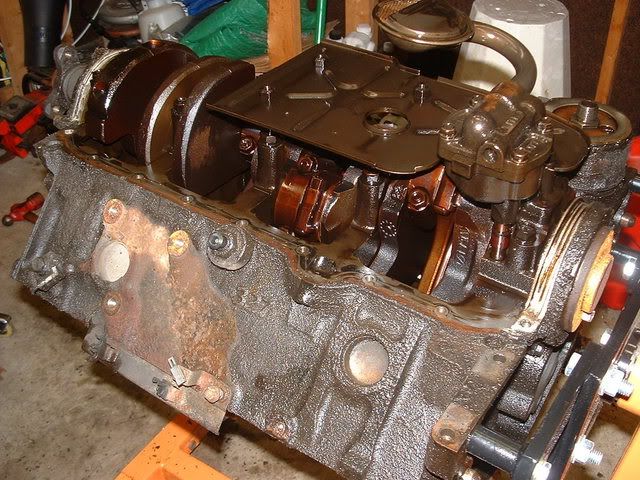
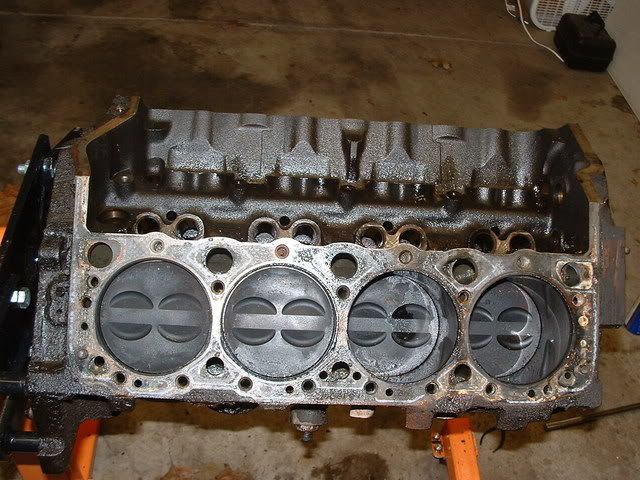
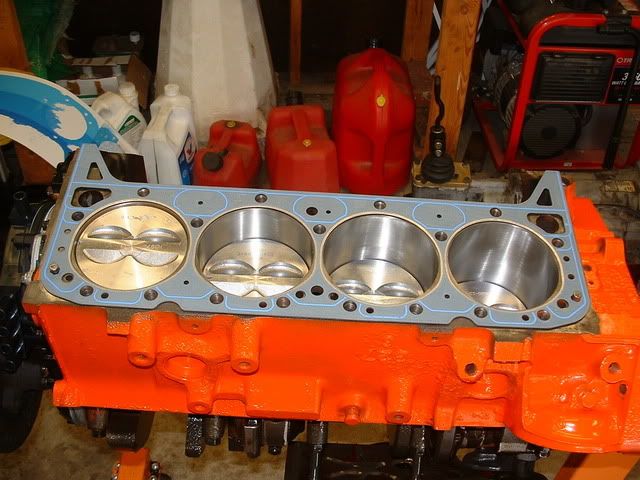
Here it is on the way to the machine shop, i had them bore and hone it and do a rebuild on the short block with new pistons bearings plugs ect.
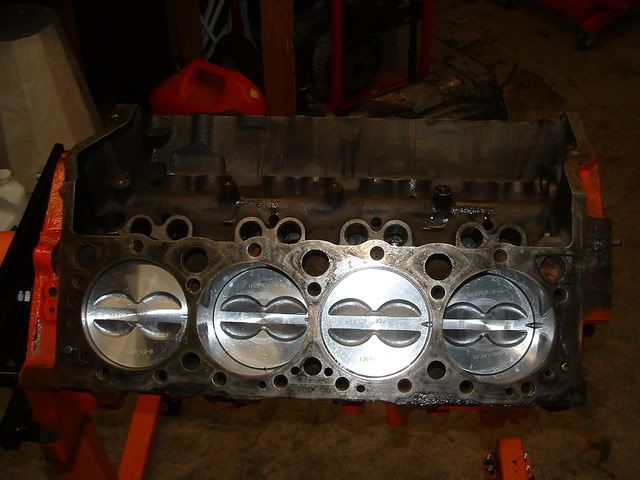
And then this is what i got back...
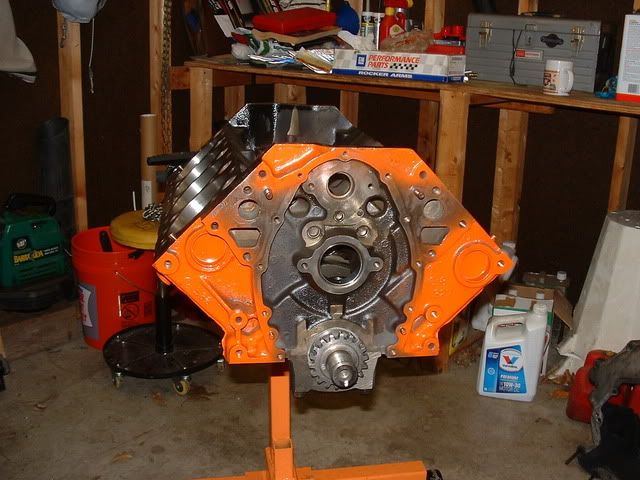
The new pistons. The deck looks a little rough but they said it would seal up without any problems and i trust their word cause they have been dealing with engines alot longer than i have..
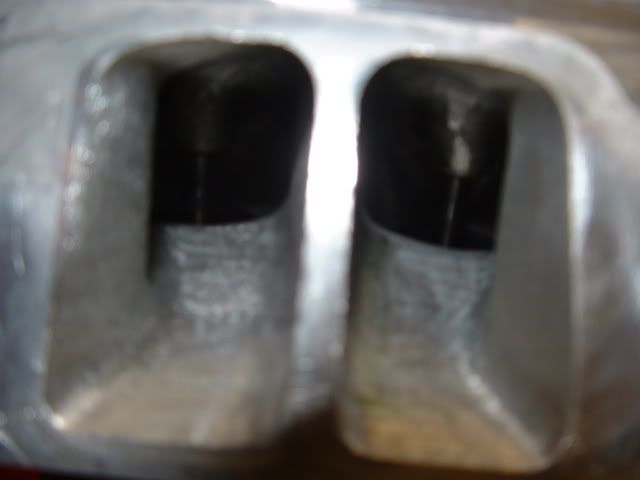
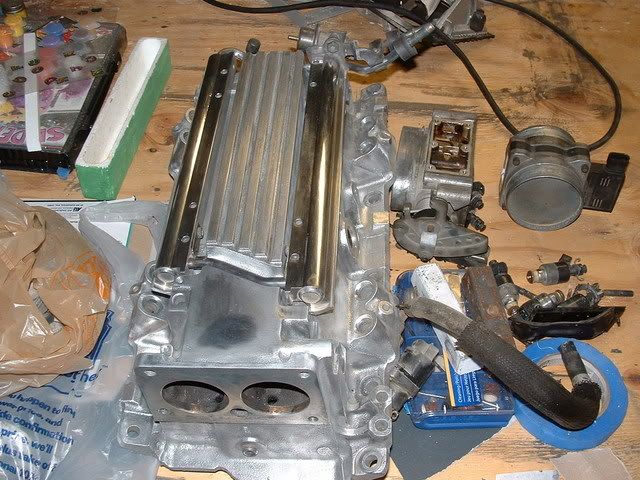
I cleaned up the intake myself, i was going to polish it but i realized it would be alot less work just to paint it
And then this is what i got back...
The new pistons. The deck looks a little rough but they said it would seal up without any problems and i trust their word cause they have been dealing with engines alot longer than i have..
I cleaned up the intake myself, i was going to polish it but i realized it would be alot less work just to paint it
05-27-2008, 02:39 PM
#3
Member
Thread Starter
iTrader: (1)
Join Date: Feb 2005
Location: Columbus, OH, USA
Posts: 424
Likes: 0
Received 0 Likes
on
0 Posts
Car: '91 Z28, '13 Civic EX-L
Engine: 355 LT1, 1.8 I4
Transmission: T56, 5spd auto
Axle/Gears: 10 bolt 3.42(as long as no breaky)
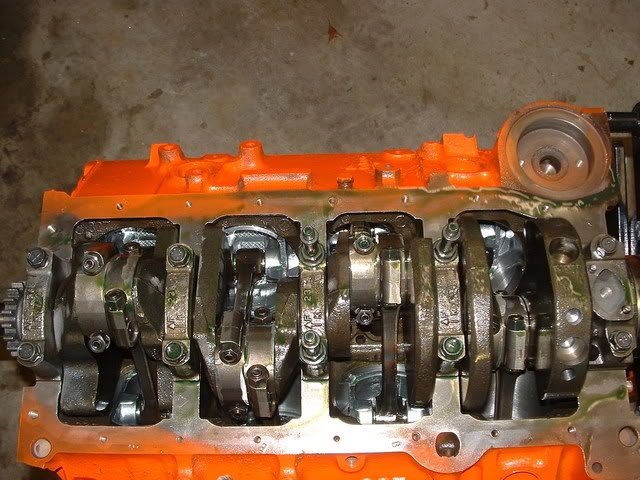
Re: My LT1 swap project (PICS)
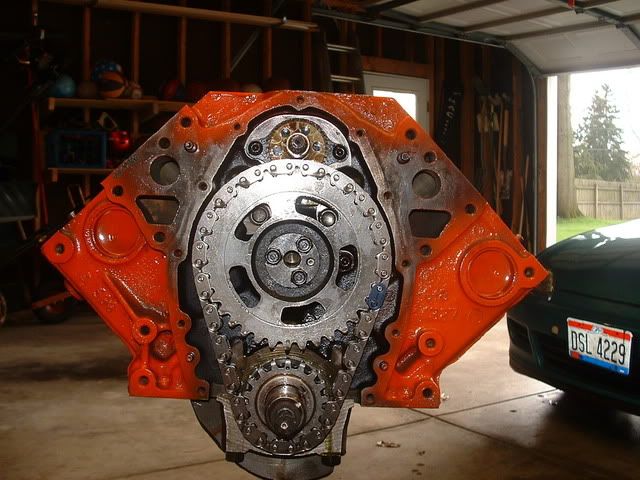
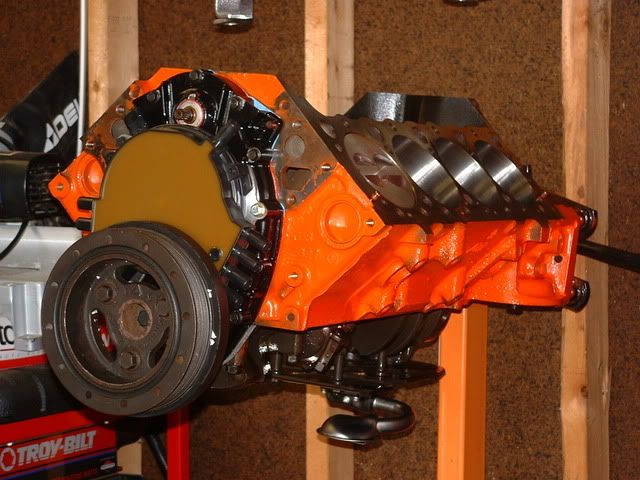
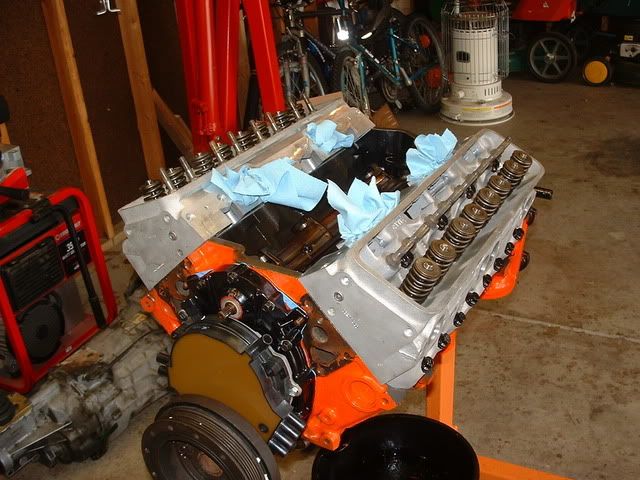
Some assembley pics
05-27-2008, 02:50 PM
#5
Member
Thread Starter
iTrader: (1)
Join Date: Feb 2005
Location: Columbus, OH, USA
Posts: 424
Likes: 0
Received 0 Likes
on
0 Posts
Car: '91 Z28, '13 Civic EX-L
Engine: 355 LT1, 1.8 I4
Transmission: T56, 5spd auto
Axle/Gears: 10 bolt 3.42(as long as no breaky)
Re: My LT1 swap project (PICS)
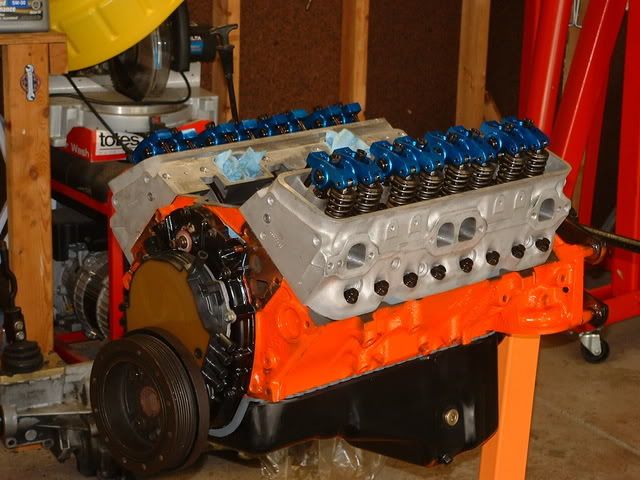
Some more shots with the valve covers and trying to figure out the spark plug wires. I also went with the corvette routing for accessories to keep A/C.
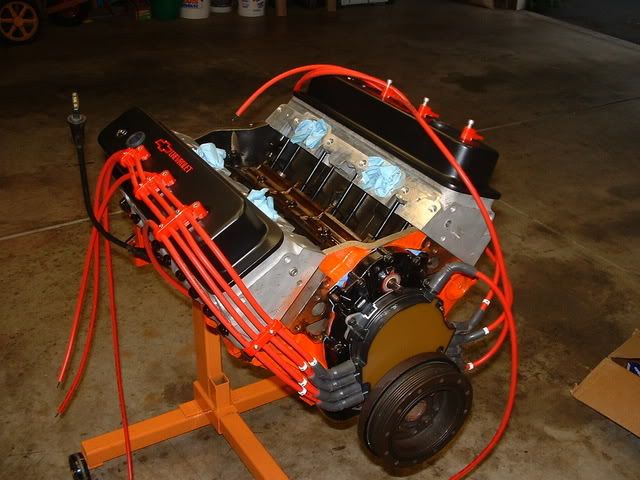
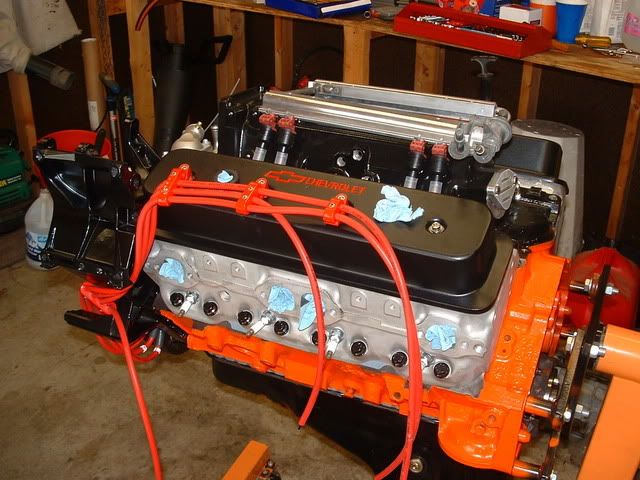
And here is a general mockup to get an idea what she will look like when done

And here is a general mockup to get an idea what she will look like when done
05-27-2008, 03:01 PM
#6
Member
Thread Starter
iTrader: (1)
Join Date: Feb 2005
Location: Columbus, OH, USA
Posts: 424
Likes: 0
Received 0 Likes
on
0 Posts
Car: '91 Z28, '13 Civic EX-L
Engine: 355 LT1, 1.8 I4
Transmission: T56, 5spd auto
Axle/Gears: 10 bolt 3.42(as long as no breaky)
Re: My LT1 swap project (PICS)
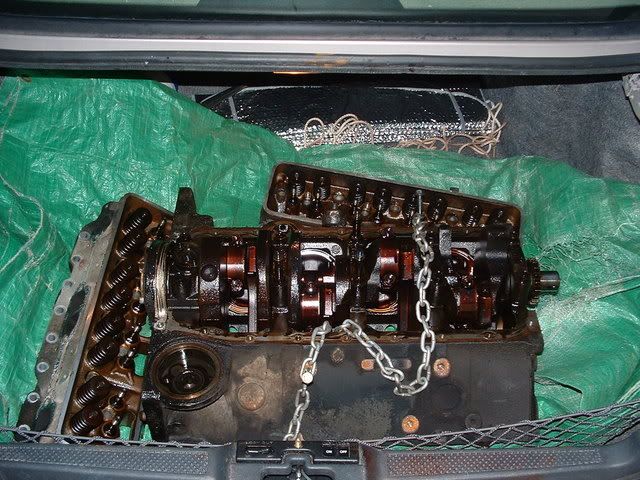
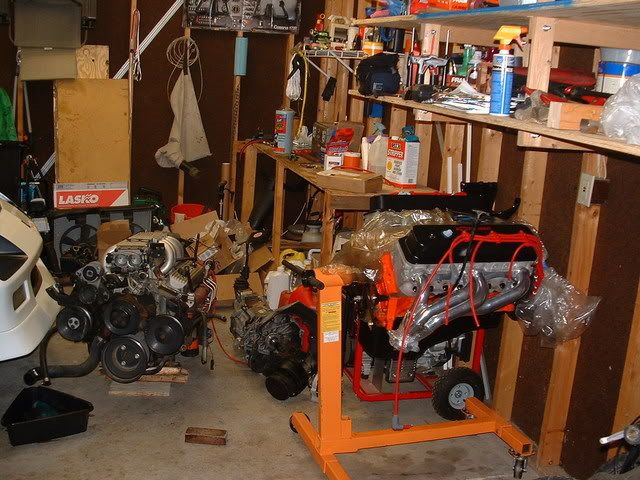
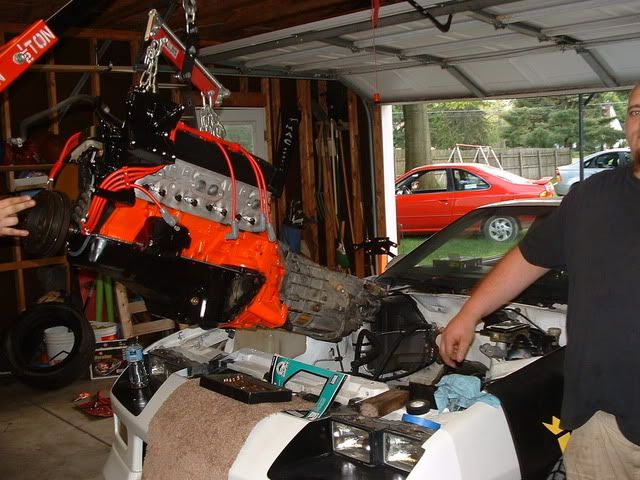
And getting ready for the swap.
(The Engine(Lb9) and the tranny(T5) will be up for sale if anyone is interested PM me)
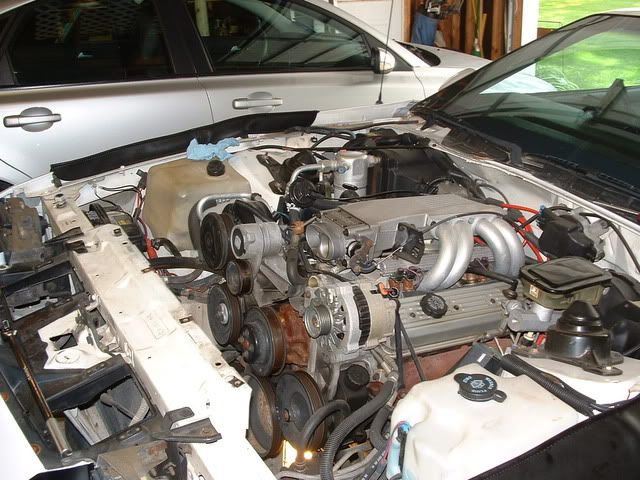
Get ready....
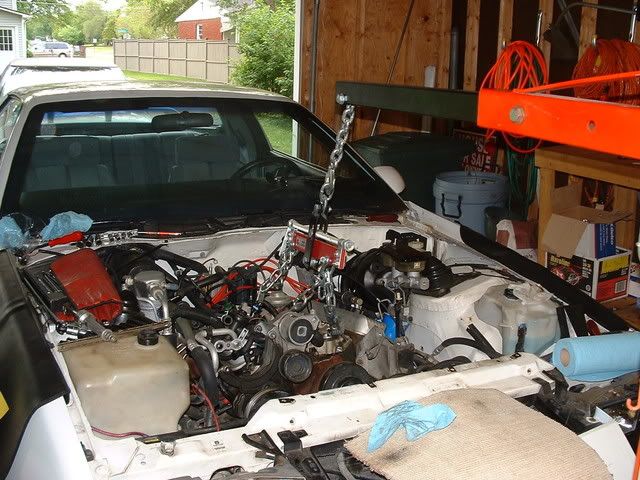
 Where did it go??
Probably should have drained the tranny first. Oh well, live and learn.
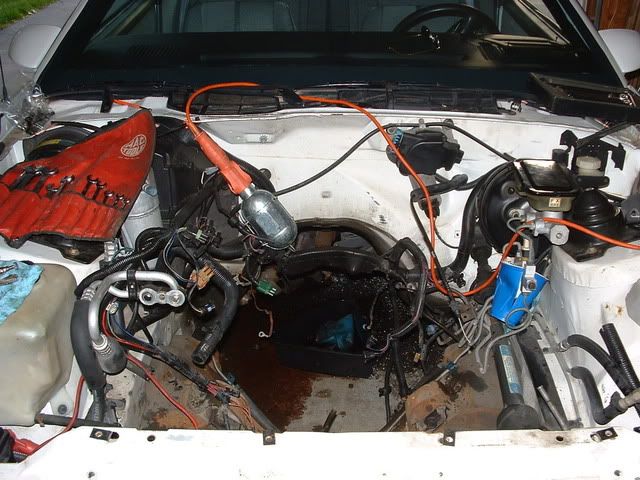
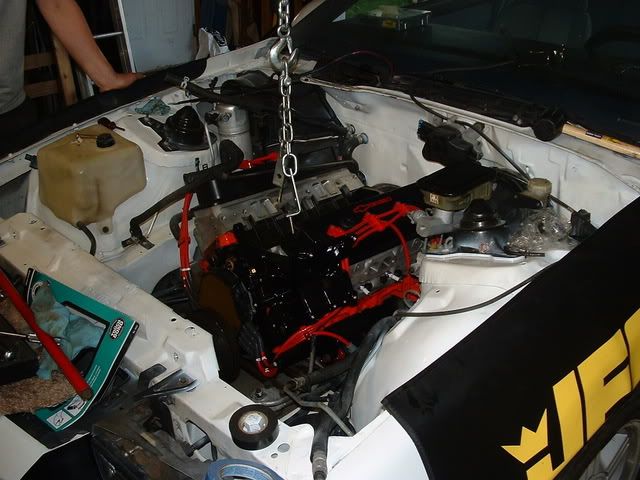
And this is where i sit right now..
Plan on putting the other motor back in in a few days will definatley keep you guys updated!!!
(The Engine(Lb9) and the tranny(T5) will be up for sale if anyone is interested PM me)
Get ready....
Where did it go??Probably should have drained the tranny first. Oh well, live and learn.
And this is where i sit right now..
Plan on putting the other motor back in in a few days will definatley keep you guys updated!!!


Trending Topics
05-27-2008, 08:51 PM
#9
Member
Thread Starter
iTrader: (1)
Join Date: Feb 2005
Location: Columbus, OH, USA
Posts: 424
Likes: 0
Received 0 Likes
on
0 Posts
Car: '91 Z28, '13 Civic EX-L
Engine: 355 LT1, 1.8 I4
Transmission: T56, 5spd auto
Axle/Gears: 10 bolt 3.42(as long as no breaky)
Re: My LT1 swap project (PICS)
The valve covers are from summit
http://store.summitracing.com/partde...5&autoview=sku
thanks for the compliments
http://store.summitracing.com/partde...5&autoview=sku
thanks for the compliments
05-28-2008, 05:18 PM
#11
Supreme Member
iTrader: (4)
Join Date: Apr 2006
Location: Windsor Ontario
Posts: 1,128
Likes: 0
Received 2 Likes
on
2 Posts
Car: 1987 Z28
Engine: 2005 5.3L, LS6 Cam
Transmission: T56
Axle/Gears: DTS 9" 3.50 TrueTrac
Re: My LT1 swap project (PICS)
I was just gonna post that...i was like ohhhh nice valve covers I want, then noticed they arent notched for the alt.
You will have to relocate the alt to run those...I may relocate it just to run these lol
lol
Looks sweeet tho.
Jay
You will have to relocate the alt to run those...I may relocate it just to run these
lolLooks sweeet tho.
Jay
05-28-2008, 08:47 PM
#12
Supreme Member
iTrader: (2)

Join Date: Jan 2001
Location: Tampa, FL, USA
Posts: 4,149
Likes: 0
Received 2 Likes
on
2 Posts
Car: 93 240SX
Engine: LQ9
Transmission: T56
Axle/Gears: 3.54 R200 IRS
Re: My LT1 swap project (PICS)
You can grind the back of the alternator enough to clear them, I had those on my LT1 a few years back.
05-29-2008, 01:31 AM
#13
Supreme Member
Join Date: Jul 2003
Location: any clime or place...
Posts: 2,779
Likes: 0
Received 2 Likes
on
2 Posts
Car: 1987 Camaro SC, 1999 Z28
Engine: GMPP 350HO, LS1
Transmission: Built 700r4/EDGE 3200, T56
Axle/Gears: 3.42 Eaton 7.625, 3.42 Zexel Torsen
Re: My LT1 swap project (PICS)
very clean operation you're running! wish my toys were that nice!
05-29-2008, 10:26 PM
#16
Member
Thread Starter
iTrader: (1)
Join Date: Feb 2005
Location: Columbus, OH, USA
Posts: 424
Likes: 0
Received 0 Likes
on
0 Posts
Car: '91 Z28, '13 Civic EX-L
Engine: 355 LT1, 1.8 I4
Transmission: T56, 5spd auto
Axle/Gears: 10 bolt 3.42(as long as no breaky)
Re: My LT1 swap project (PICS)
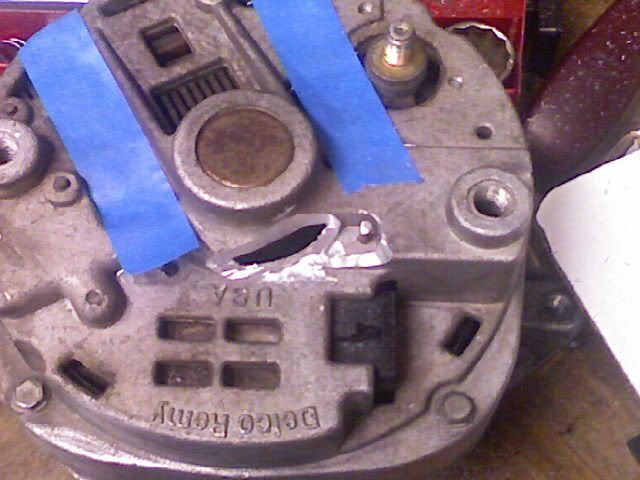
I did have to grind a significant amount off the alternator. but i got it to clear no problem. I used a dremel with a cutter on it, worked like a charm, then i took apart the alternator to blow out the aluminum shavings. Man it was a pita to figure out how to put it back together with those brushes sticking out!
I think i have a pic ill post it.
I think i have a pic ill post it.
Last edited by BCdawg57; 05-29-2008 at 10:45 PM.
05-29-2008, 10:57 PM
#17
Member
Thread Starter
iTrader: (1)
Join Date: Feb 2005
Location: Columbus, OH, USA
Posts: 424
Likes: 0
Received 0 Likes
on
0 Posts
Car: '91 Z28, '13 Civic EX-L
Engine: 355 LT1, 1.8 I4
Transmission: T56, 5spd auto
Axle/Gears: 10 bolt 3.42(as long as no breaky)
Re: My LT1 swap project (PICS)
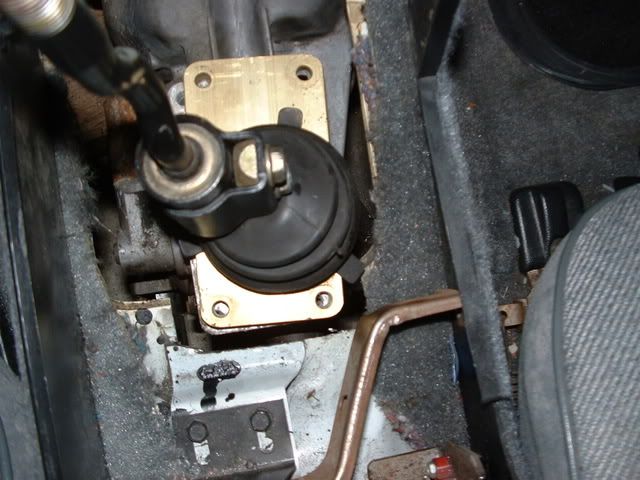
Here is the motor hook up to the t56, i decided to paint the bellhousing at the last minute, so if i ever crawl under the car ill have something pretty to look at! And dont worry, i painted the shifter cover so now we're high speed!
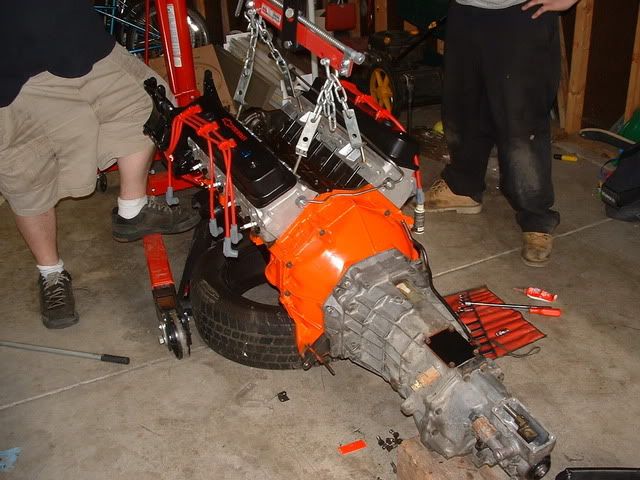
There we are!
I am curious about one thing at the moment...where does the steam pipe go?
And dont worry, i painted the shifter cover so now we're high speed!There we are!
I am curious about one thing at the moment...where does the steam pipe go?
Last edited by BCdawg57; 05-29-2008 at 11:20 PM.
05-30-2008, 12:21 AM
#18
Member
Thread Starter
iTrader: (1)
Join Date: Feb 2005
Location: Columbus, OH, USA
Posts: 424
Likes: 0
Received 0 Likes
on
0 Posts
Car: '91 Z28, '13 Civic EX-L
Engine: 355 LT1, 1.8 I4
Transmission: T56, 5spd auto
Axle/Gears: 10 bolt 3.42(as long as no breaky)
Re: My LT1 swap project (PICS)
I am also going to try and modify my stock crossmember. Anybody have and experience they would like to share?
I havent really gotten a chance to see how im going to measure how far back it needs to go or anything like that yet.
Just any tips or.....measurements...
Thanks guys, and incase you didnt see it in the above post...Where does the steam pipe hose go? Is it possible to just block off the holes in the head and not worry about it?
05-30-2008, 12:49 AM
#19
Re: My LT1 swap project (PICS)
I am also going to try and modify my stock crossmember. Anybody have and experience they would like to share?
I havent really gotten a chance to see how im going to measure how far back it needs to go or anything like that yet.
Just any tips or.....measurements...
Thanks guys, and incase you didnt see it in the above post...Where does the steam pipe hose go? Is it possible to just block off the holes in the head and not worry about it?
I havent really gotten a chance to see how im going to measure how far back it needs to go or anything like that yet.
Just any tips or.....measurements...
Thanks guys, and incase you didnt see it in the above post...Where does the steam pipe hose go? Is it possible to just block off the holes in the head and not worry about it?
05-30-2008, 06:10 AM
#20
Supreme Member
Join Date: May 2004
Location: Kingston, Tn
Posts: 2,924
Likes: 0
Received 1 Like
on
1 Post
Car: 1987 GTA
Engine: LT1
Transmission: T56
Axle/Gears: 9 bolt 3.70 posi
Re: My LT1 swap project (PICS)
The steam pipe bolts to the back of the heads, and it's actually not a steam pipe, it has coolant running through it going back to the radiator.
05-30-2008, 09:31 AM
#22
Senior Member
iTrader: (2)
Join Date: Nov 2002
Location: Idaho Falls
Posts: 774
Likes: 0
Received 0 Likes
on
0 Posts
Car: 82 Trans Am
Engine: LTX
Transmission: T56
Axle/Gears: 3.42 strengthed 7.5 inch
Re: My LT1 swap project (PICS)
Some folks run it into the upper radiator hose, I am not sure what model/year car has the correct upper hose though..do a quick search it is in here, or someone else might chime in.
With mine I was going with an aluminum radiator so I had a 6an fitting welded on and that was that..
With mine I was going with an aluminum radiator so I had a 6an fitting welded on and that was that..
05-30-2008, 04:16 PM
#23
Supreme Member
Join Date: May 2004
Location: Kingston, Tn
Posts: 2,924
Likes: 0
Received 1 Like
on
1 Post
Car: 1987 GTA
Engine: LT1
Transmission: T56
Axle/Gears: 9 bolt 3.70 posi
Re: My LT1 swap project (PICS)
If you're using an LT1 radiator/fan setup, it will have the place to connect it right under the radiator cap
05-31-2008, 10:04 AM
#25
Member
Thread Starter
iTrader: (1)
Join Date: Feb 2005
Location: Columbus, OH, USA
Posts: 424
Likes: 0
Received 0 Likes
on
0 Posts
Car: '91 Z28, '13 Civic EX-L
Engine: 355 LT1, 1.8 I4
Transmission: T56, 5spd auto
Axle/Gears: 10 bolt 3.42(as long as no breaky)
Re: My LT1 swap project (PICS)
Hey thanks for the compliments guys.
I think ill just get a t adapter and splice it in to the radiator or something.
My power steering pump ended up being for some other car, and i have no idea what car(damn ebay), but i was able to use it as a core and i ordered a new one from napa. Damn those things are pricey.
Does anyone know where i can get a valve cover oil cap that just pushes in?
i looked on summit and cant find one.
I ordered my wiring harness from speartech and they said about 2 1/2 weeks and they will have it out to me so that should be fun!
I did get my torque arm mounted to the tranny and the driveshaft back in the car. And i got my shifter hole extended back, so have gotten some things done!
Thanks for the help so far guys im sure ill need more.
Jake
06-01-2008, 12:12 AM
#26
Member
Thread Starter
iTrader: (1)
Join Date: Feb 2005
Location: Columbus, OH, USA
Posts: 424
Likes: 0
Received 0 Likes
on
0 Posts
Car: '91 Z28, '13 Civic EX-L
Engine: 355 LT1, 1.8 I4
Transmission: T56, 5spd auto
Axle/Gears: 10 bolt 3.42(as long as no breaky)
Re: My LT1 swap project (PICS)
I further examined my radiator today. i had in fact replaced it a few years back and it has a fitting that i could attach the steam pipe to so thats good news.
I have a few more pics for your viewing pleasure
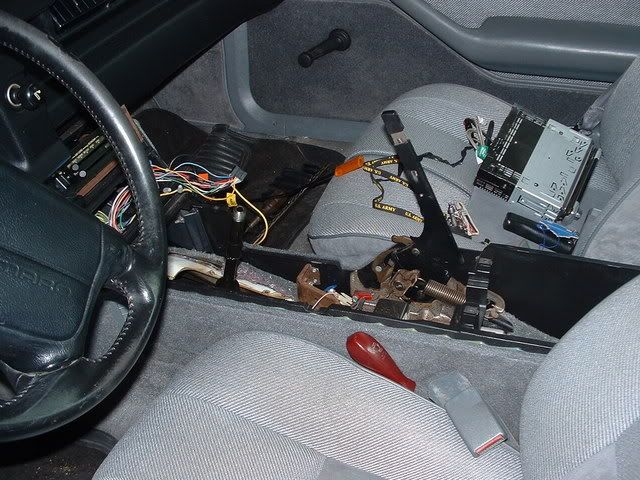
A view of the modifications needed to the shifter hole
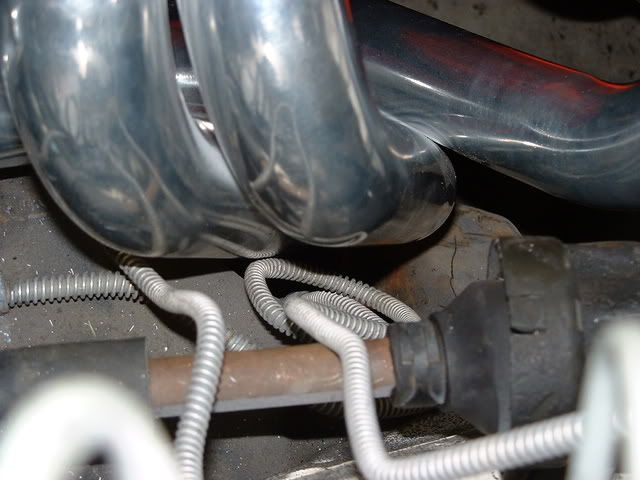
I got the headers on also. they are dyno don's, and they fit very well. On the passenger side i had to remove the solid cooling line routed for the heater core and the drivers side was nothing i couldnt fix.
A little too close for comfort!
I have a few more pics for your viewing pleasure
A view of the modifications needed to the shifter hole
I got the headers on also. they are dyno don's, and they fit very well. On the passenger side i had to remove the solid cooling line routed for the heater core and the drivers side was nothing i couldnt fix.
A little too close for comfort!
06-02-2008, 04:02 PM
#28
Member
Thread Starter
iTrader: (1)
Join Date: Feb 2005
Location: Columbus, OH, USA
Posts: 424
Likes: 0
Received 0 Likes
on
0 Posts
Car: '91 Z28, '13 Civic EX-L
Engine: 355 LT1, 1.8 I4
Transmission: T56, 5spd auto
Axle/Gears: 10 bolt 3.42(as long as no breaky)
Re: My LT1 swap project (PICS)
Well guys im kind of stuck now untill i get some more parts in.
I had to order some new header gaskets cause the ones i had the outter bolt holes didnt line up properly. I tried to drill them but that didnt work out too well. Dyno don recomended earl's gaskets so i am going to give those a shot. I also ordered the oil cap and a breather for the extra hole on my valve covers.
And still about 2 more weeks till my harness is done...
will keep updated
06-03-2008, 04:47 AM
#29
Supreme Member
iTrader: (1)
Join Date: Apr 2000
Location: Northern CA.
Posts: 5,321
Likes: 0
Received 4 Likes
on
4 Posts
Car: '82 Z28
Engine: 350
Transmission: TH400 4,000 stall
Axle/Gears: Currie 9", 4.56 gears
Re: My LT1 swap project (PICS)
Quick question... I'm guessing you can just reuse your stock TPI throttle cable on the LT1? Possibly switching to one later this year (finally) and I'm gathering parts. Just stuck a different cam in it over the weekend plus pulled the heads off to see how things looked.
06-03-2008, 11:23 AM
#30
Member
Thread Starter
iTrader: (1)
Join Date: Feb 2005
Location: Columbus, OH, USA
Posts: 424
Likes: 0
Received 0 Likes
on
0 Posts
Car: '91 Z28, '13 Civic EX-L
Engine: 355 LT1, 1.8 I4
Transmission: T56, 5spd auto
Axle/Gears: 10 bolt 3.42(as long as no breaky)
Re: My LT1 swap project (PICS)
afaik throttle cables are best to use from 90-92 cars. I havent really messed with it yet but it looks like mine will work alright.
I'm unsure about earlier years though.
I'm unsure about earlier years though.
06-03-2008, 12:59 PM
#31
Member

Join Date: Mar 2007
Location: Slinger WI
Posts: 185
Received 0 Likes
on
0 Posts
Car: 55 chevy Belair & 86IROC Z
Engine: 350 in 55 86IROC Z LT1
Transmission: 55 4speed IROC Z4L60e
Axle/Gears: 12 bolt 410 in55 and 342 inCamaro
Re: My LT1 swap project (PICS)
The valve covers are from summit
http://store.summitracing.com/partde...5&autoview=sku
thanks for the compliments
http://store.summitracing.com/partde...5&autoview=sku
thanks for the compliments
06-03-2008, 01:10 PM
#32
Member
Thread Starter
iTrader: (1)
Join Date: Feb 2005
Location: Columbus, OH, USA
Posts: 424
Likes: 0
Received 0 Likes
on
0 Posts
Car: '91 Z28, '13 Civic EX-L
Engine: 355 LT1, 1.8 I4
Transmission: T56, 5spd auto
Axle/Gears: 10 bolt 3.42(as long as no breaky)
Re: My LT1 swap project (PICS)
Yes im using the stock LT1 throttle body. I am using the same cable that was in my '91 TPI car. I think most of the difficultly with the cable is that the earlier year fbodies had different ends on their cabes that made it so you could'nt hook up to the LT1 TB. i got mine to hook up to the LT1 TB no problem. The only thing i could see being an issue is the length but i dont know about that yet.
06-05-2008, 02:01 PM
#33
Member
Thread Starter
iTrader: (1)
Join Date: Feb 2005
Location: Columbus, OH, USA
Posts: 424
Likes: 0
Received 0 Likes
on
0 Posts
Car: '91 Z28, '13 Civic EX-L
Engine: 355 LT1, 1.8 I4
Transmission: T56, 5spd auto
Axle/Gears: 10 bolt 3.42(as long as no breaky)
Re: My LT1 swap project (PICS)
Well it apears ive hit my first road block. Well, not my first one, you guys didnt get to hear about breaking the bolt off in the bock for the rear main housing. that sucker was a pita.
Well, while trying to mount the headers up i got the passenger side done, then t he last bolt starts to go in crooked and i was starting to get tired and frustrated and im sure you all know how that goes. Anyway, i crossthreaded the first few threads and no i have to try and straighten them out. I definatley was not up for that task today in this 100 degree weather with 99% humidity.
On the other side the back two holes wouldnt want to thread in at the same time, and of course i start getting frustrated again. After i calmed down a bit i examined it a little closer and it apears that my bolt simply isnt long enough for the back hole. I got the 3/4" arp header bolts. I think im giong to go with another set of 1" to solve that problem.
If anyone has any tips for straigtening out that hole please let me know. any "what not to do's" would be appreciated also! Thanks.
Oh and i also ordered a xmember from sphon and it went on very nice!
that sucker was a pita.Well, while trying to mount the headers up i got the passenger side done, then t he last bolt starts to go in crooked and i was starting to get tired and frustrated and im sure you all know how that goes. Anyway, i crossthreaded the first few threads and no i have to try and straighten them out. I definatley was not up for that task today in this 100 degree weather with 99% humidity.
On the other side the back two holes wouldnt want to thread in at the same time, and of course i start getting frustrated again. After i calmed down a bit i examined it a little closer and it apears that my bolt simply isnt long enough for the back hole. I got the 3/4" arp header bolts. I think im giong to go with another set of 1" to solve that problem.
If anyone has any tips for straigtening out that hole please let me know. any "what not to do's" would be appreciated also! Thanks.
Oh and i also ordered a xmember from sphon and it went on very nice!
06-05-2008, 03:54 PM
#34
Moderator
iTrader: (14)
Join Date: Mar 2000
Location: Littleton, CO USA
Posts: 43,169
Likes: 0
Received 35 Likes
on
34 Posts
Car: 82 Berlinetta/57 Bel Air
Engine: LS1/LQ4
Transmission: 4L60E/4L80E
Axle/Gears: 12B-3.73/9"-3.89
An expanding tap that is inserted back in the good threads and backed out to clean out the front threads would be ideal, but I've only seen those in spark plug sizes.
Helicoil or other thread insert would be best since this is aluminum, but that would require the head to be out of the car (at least I assume you don't have room like that to work on it where it is).
I've got a broken off exhaust manifold bolt in my LS1 (arrived that way). All of the exhaust manifold bolts were difficult to remove - no anti-seize, I presume. I'll probably be drilling it out and helicoiling it - another 2-4 hour task I didn't plan and am not looking forward to.
Last 2 engine installs in the Camaro, I put the headers on first. Sure saves a lot of hassle.
06-05-2008, 04:27 PM
#35
Member
Thread Starter
iTrader: (1)
Join Date: Feb 2005
Location: Columbus, OH, USA
Posts: 424
Likes: 0
Received 0 Likes
on
0 Posts
Car: '91 Z28, '13 Civic EX-L
Engine: 355 LT1, 1.8 I4
Transmission: T56, 5spd auto
Axle/Gears: 10 bolt 3.42(as long as no breaky)
Re: My LT1 swap project (PICS)
An expanding tap that is inserted back in the good threads and backed out to clean out the front threads would be ideal, but I've only seen those in spark plug sizes.
Helicoil or other thread insert would be best since this is aluminum, but that would require the head to be out of the car (at least I assume you don't have room like that to work on it where it is).
I've got a broken off exhaust manifold bolt in my LS1 (arrived that way). All of the exhaust manifold bolts were difficult to remove - no anti-seize, I presume. I'll probably be drilling it out and helicoiling it - another 2-4 hour task I didn't plan and am not looking forward to.
Last 2 engine installs in the Camaro, I put the headers on first. Sure saves a lot of hassle.
Helicoil or other thread insert would be best since this is aluminum, but that would require the head to be out of the car (at least I assume you don't have room like that to work on it where it is).
I've got a broken off exhaust manifold bolt in my LS1 (arrived that way). All of the exhaust manifold bolts were difficult to remove - no anti-seize, I presume. I'll probably be drilling it out and helicoiling it - another 2-4 hour task I didn't plan and am not looking forward to.
Last 2 engine installs in the Camaro, I put the headers on first. Sure saves a lot of hassle.
Idealy i would like to try and fix the threads without pulling the head.
You think i could run a tap like tool in there and try and smooth out the first few threads?
Problem is getting the tap to go in straight....
06-05-2008, 04:53 PM
#36
Moderator
iTrader: (14)
Join Date: Mar 2000
Location: Littleton, CO USA
Posts: 43,169
Likes: 0
Received 35 Likes
on
34 Posts
Car: 82 Berlinetta/57 Bel Air
Engine: LS1/LQ4
Transmission: 4L60E/4L80E
Axle/Gears: 12B-3.73/9"-3.89
Problem is getting the tap started straight, and getting the thread cut to line up with the existing. That's why the expanding tap is such a great idea.
06-08-2008, 06:53 PM
#37
Member
Thread Starter
iTrader: (1)
Join Date: Feb 2005
Location: Columbus, OH, USA
Posts: 424
Likes: 0
Received 0 Likes
on
0 Posts
Car: '91 Z28, '13 Civic EX-L
Engine: 355 LT1, 1.8 I4
Transmission: T56, 5spd auto
Axle/Gears: 10 bolt 3.42(as long as no breaky)
Re: My LT1 swap project (PICS)
Well. I got that hole straightned out, but i am having some clearance issues with the a/c evap box in the engine bay, i think this may be attributed to the poly mounts making the engine sit a hair higher? Who knows, i will have to figure something out.
The driver side header flange turned out to be warped. I noticed i couldnt get it to seal on the #7 cylinder. I layed it on a flat surface and both ends were a little higher than the middle, more so towards the back. I talked to dyno don about it and he was really cool about it and i plan on sending that header back to get that issue resolved.
Thats it for now!
Stay tuned!
06-14-2008, 09:44 PM
#38
Member
Thread Starter
iTrader: (1)
Join Date: Feb 2005
Location: Columbus, OH, USA
Posts: 424
Likes: 0
Received 0 Likes
on
0 Posts
Car: '91 Z28, '13 Civic EX-L
Engine: 355 LT1, 1.8 I4
Transmission: T56, 5spd auto
Axle/Gears: 10 bolt 3.42(as long as no breaky)
Re: My LT1 swap project (PICS)
I changed my poly motor mounts out for some rubber ones. Changing the mounts, which sucks already, sucks even more when you arent even sure if it is going to solve your problem or not.
Well looks like i lucked out. The header no longer interferes withe the a/c evap box. For a while i thought i was going to have some issues with the frame now, but after i stared at it for a few hours, the problem resolved itself. lol.
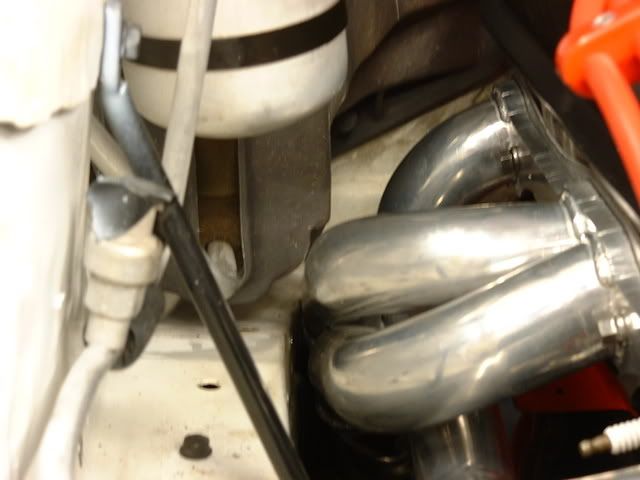
There is actually a little more clearance for the evap box and the frame than the picture lets on. I think it will be ok, however i may still have some rattling issues. I figure i still have to put all the accessories and all that other junk on so the motor may tilt forward, come down a little more, and because of the way the header is constucted it woud allow for some more room.
Im thinking some header wrap around the tube by the a/c box, will this be sufficient?
I have 2 new energy suspension poly motor mounts if anyone is interested.
Well looks like i lucked out. The header no longer interferes withe the a/c evap box. For a while i thought i was going to have some issues with the frame now, but after i stared at it for a few hours, the problem resolved itself. lol.
There is actually a little more clearance for the evap box and the frame than the picture lets on. I think it will be ok, however i may still have some rattling issues. I figure i still have to put all the accessories and all that other junk on so the motor may tilt forward, come down a little more, and because of the way the header is constucted it woud allow for some more room.
Im thinking some header wrap around the tube by the a/c box, will this be sufficient?
I have 2 new energy suspension poly motor mounts if anyone is interested.
Last edited by BCdawg57; 06-14-2008 at 09:47 PM.
07-03-2008, 10:15 PM
#41
Member
Thread Starter
iTrader: (1)
Join Date: Feb 2005
Location: Columbus, OH, USA
Posts: 424
Likes: 0
Received 0 Likes
on
0 Posts
Car: '91 Z28, '13 Civic EX-L
Engine: 355 LT1, 1.8 I4
Transmission: T56, 5spd auto
Axle/Gears: 10 bolt 3.42(as long as no breaky)
Re: My LT1 swap project (PICS)
As i wait for the return of my header and the arival of the fuel and ps lines..i have decided to tackle the wiring!
I ordered a new engine harness from Speartech and besides the pricetag, it is a VERY nice piece.
Here is what i got out of the box:
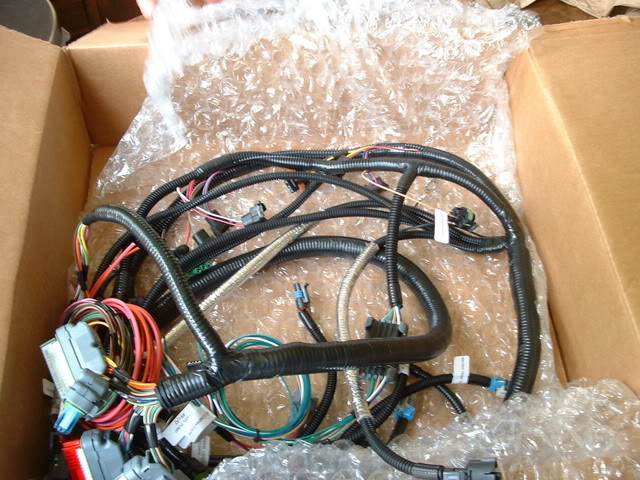
The hookup to the engine is self explanatory. They brought out a bunch of wires right behind the intake manifold that splice into the bulkhead connector. ( tach, oil press, coolant temp, ect). They also made the harness extra long so i could take it down the factory route so the PCM can be mounted behind the dash. I am almost completley retarded when it comes to wiring so progress is coming slow.
If you look closley here you can see the wiring they brought out behind the manifold.
I took my old harness from the 305 and separated the bulkhead connector and the relays from the harness. I did the best i could here, getting rid of old engine connectors and ecm wires. I kept the connector for the A/C harness off the old harness which included the red power wire and black ground wire and cut the wires for the connectors to the old compressor off.
As i said, there is a red(pwr), black(ground), and blue wire on the connector. The blue was the wire for the old compressor connector. There is an "A/C Compressor" wire on the new harness that was brought out behind the manifold, and to the best of my knowleage there is no A/C wire in the C100 connector. Would i run this "A/C compressor" wire to this blue wire on the original harness?
I don't know if any of you guys have experience with Speartech, but there were a bunch of wires routed along the PCM wires to the inside of the car.
These wires included the pink ignition(full time 12v) and orange (switched 12v supply), and both back up light wires( green, and brown i think). These were routed all to the C100 connector in the old set up. What gives?? Do i have to rearrange this harness and drag those wires back outside or can i splice them under the dash? (they have plenty of lenth and the 2 power wires were routed through a fuse block).
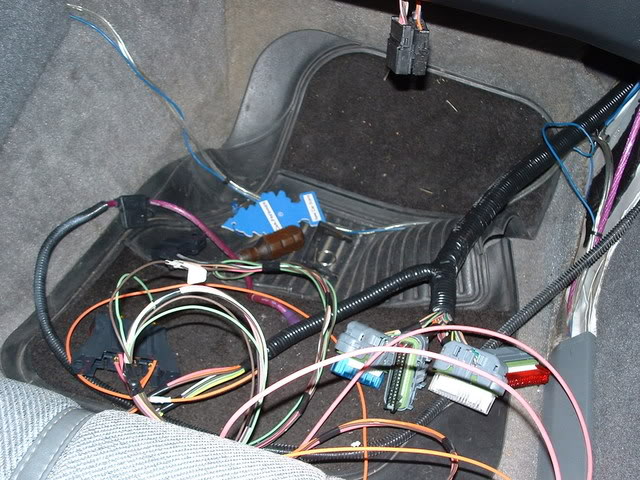
This is what i got so far with the original 305 harness
The inside
I ordered a new engine harness from Speartech and besides the pricetag, it is a VERY nice piece.
Here is what i got out of the box:
The hookup to the engine is self explanatory. They brought out a bunch of wires right behind the intake manifold that splice into the bulkhead connector. ( tach, oil press, coolant temp, ect). They also made the harness extra long so i could take it down the factory route so the PCM can be mounted behind the dash. I am almost completley retarded when it comes to wiring so progress is coming slow.
If you look closley here you can see the wiring they brought out behind the manifold.
I took my old harness from the 305 and separated the bulkhead connector and the relays from the harness. I did the best i could here, getting rid of old engine connectors and ecm wires. I kept the connector for the A/C harness off the old harness which included the red power wire and black ground wire and cut the wires for the connectors to the old compressor off.
As i said, there is a red(pwr), black(ground), and blue wire on the connector. The blue was the wire for the old compressor connector. There is an "A/C Compressor" wire on the new harness that was brought out behind the manifold, and to the best of my knowleage there is no A/C wire in the C100 connector. Would i run this "A/C compressor" wire to this blue wire on the original harness?
I don't know if any of you guys have experience with Speartech, but there were a bunch of wires routed along the PCM wires to the inside of the car.
These wires included the pink ignition(full time 12v) and orange (switched 12v supply), and both back up light wires( green, and brown i think). These were routed all to the C100 connector in the old set up. What gives?? Do i have to rearrange this harness and drag those wires back outside or can i splice them under the dash? (they have plenty of lenth and the 2 power wires were routed through a fuse block).
This is what i got so far with the original 305 harness
The inside
Last edited by BCdawg57; 07-03-2008 at 10:18 PM.
07-04-2008, 08:55 AM
#42
Supreme Member
iTrader: (10)

Join Date: Sep 2002
Location: Ga.
Posts: 2,113
Likes: 0
Received 0 Likes
on
0 Posts
Car: sold
Re: My LT1 swap project (PICS)
Well on the header issue I used heat resistant tape, it seemed to work. The harness thing I used a harness from www.lt1350.com
07-05-2008, 09:08 AM
#43
Member
Thread Starter
iTrader: (1)
Join Date: Feb 2005
Location: Columbus, OH, USA
Posts: 424
Likes: 0
Received 0 Likes
on
0 Posts
Car: '91 Z28, '13 Civic EX-L
Engine: 355 LT1, 1.8 I4
Transmission: T56, 5spd auto
Axle/Gears: 10 bolt 3.42(as long as no breaky)
Re: My LT1 swap project (PICS)
Well on the header issue I used heat resistant tape, it seemed to work. The harness thing I used a harness from www.lt1350.com
Anyone know about those wiries on the inside of the car? This is a really long 4th of July weekend and Speartech is unavailable!!
 07-11-2008, 09:19 AM
#45
Member
Thread Starter
iTrader: (1)
Join Date: Feb 2005
Location: Columbus, OH, USA
Posts: 424
Likes: 0
Received 0 Likes
on
0 Posts
Car: '91 Z28, '13 Civic EX-L
Engine: 355 LT1, 1.8 I4
Transmission: T56, 5spd auto
Axle/Gears: 10 bolt 3.42(as long as no breaky)
Re: My LT1 swap project (PICS)
Well ive gotten most of the wiring done. Only a couple more splices to be made, namley the Igntion, battery, and two back up lights wires. Which all have to be spliced under the dash at the fuse box cause of the way the new harnes was routed. I really dont like that idea cause it is very cramped under there. The VSS wire also needs done over at the C207. Thats the only wire i have going to the C207, is that right?
There is a grey wire on the "heavy duty cooling" fan relay.
On the original 305 harness i know the wire went to the ECM and also to te fan a/c pressure switch.
Obviously i no longer will be running a ECM, so i believe i can just splice the PCM wire on the new harness into that wire by the relay. Correct me if im wrong.
There is also a red wire on the fuel pump relay, i know it is the fuel pump prime connectior. To put it in a nutshell, i have absolutley no idea where it goes, or where it went on the old harness. Please sombody enlighten me.
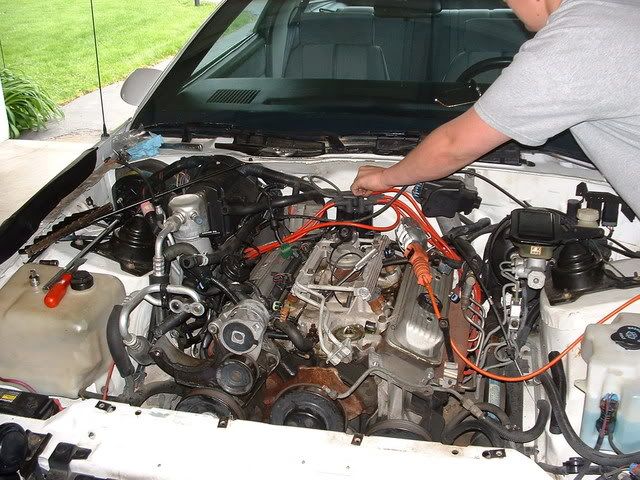
Oh, i also got my header back from DynoDon and with a lot of sweat and a little patience, got it to go in and seal up just fine.
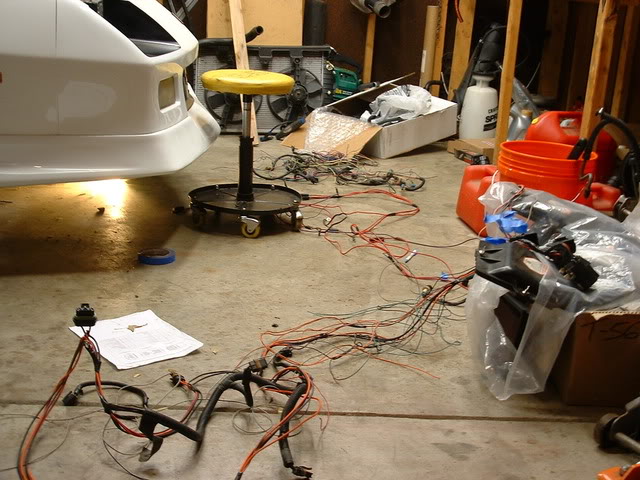
Couple pics of my progress.
What a mess!

I personaly think the alternator and compressor are eyesores. I was going to polish them but i just want this thing to run already!
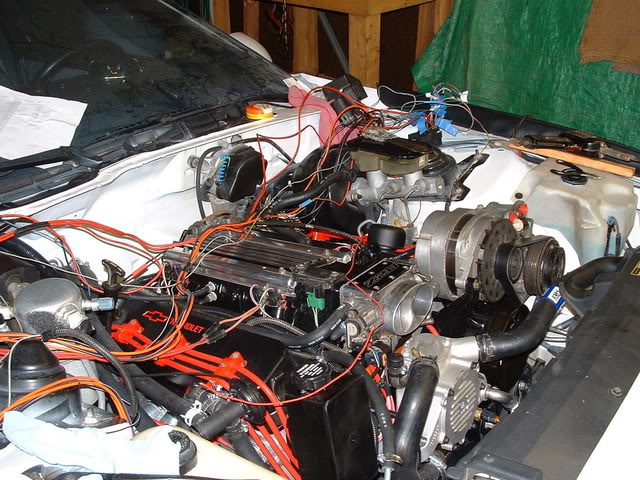
If all goes well ill have a vid of it running by next week!
I really dont like that idea cause it is very cramped under there. The VSS wire also needs done over at the C207. Thats the only wire i have going to the C207, is that right?There is a grey wire on the "heavy duty cooling" fan relay.
On the original 305 harness i know the wire went to the ECM and also to te fan a/c pressure switch.
Obviously i no longer will be running a ECM, so i believe i can just splice the PCM wire on the new harness into that wire by the relay. Correct me if im wrong.
There is also a red wire on the fuel pump relay, i know it is the fuel pump prime connectior. To put it in a nutshell, i have absolutley no idea where it goes, or where it went on the old harness. Please sombody enlighten me.
Oh, i also got my header back from DynoDon and with a lot of sweat and a little patience, got it to go in and seal up just fine.
Couple pics of my progress.
What a mess!
I personaly think the alternator and compressor are eyesores. I was going to polish them but i just want this thing to run already!
If all goes well ill have a vid of it running by next week!
08-15-2008, 02:11 PM
#46
Member
Thread Starter
iTrader: (1)
Join Date: Feb 2005
Location: Columbus, OH, USA
Posts: 424
Likes: 0
Received 0 Likes
on
0 Posts
Car: '91 Z28, '13 Civic EX-L
Engine: 355 LT1, 1.8 I4
Transmission: T56, 5spd auto
Axle/Gears: 10 bolt 3.42(as long as no breaky)
Re: My LT1 swap project (PICS)
Well dont i feel like an idiot.
I have been having issues starting the car because of a no spark problem. I went through all the tests for the ignition and the wiring, and ruled that the opti was bad. So i returned it and recieved a new one. Still nothing. No pulse at the ICM, no spark at the coil, nothing. I was throwing a code 42 (ignition circuit grounded) and a code 16 (low res failure). So i figured the odds of having 2 bad optis are slim so i start the process of elimination again. First things first i decided to test the wiring. Yesterday i tested continuity from the end of the opti harness, back to the black connector on the PCM and read good on all 4 wires. Today i decided to do the same to the ICM. pin B5 on the PCM was Ignition Control, a white wire. The wire on the ICM side was lt green, so im like wtf that doesnt make any sence and obviously i had no connection when i tested it. So i call speartech and ask them what the deal is and he goes through the skematic with me and tells me which wire it should be. I tell him i get nothing when i test it with an ohm meter, and the colors of the wires. He then procedes to tell me that i had the IAT plug plugged into my ICM this whole time and the ICM pluged into the IAT.
Needless to say as soon as i switched them it fired right up! Sounds absolutley amazing too if i might add.
Ill get a vid for you guys in the next few days, im pretty busy and wont be able to get it done.
All thats left to do is to clean up the wriing a bit, get my shift boot on the tranny tunnel, and put the interrior back together and get my exhaust welded up.
Oh, also i did back it out of the garage a little bit, and i felt a pulsing in the clutch pedal, and i heard a squeaking, i havent taken the shatter shield off yet to see if there is something in there, but do you guys have any other ideas to what might cause this? The squeaking was at idle.
08-26-2008, 07:32 AM
#47
Member
Thread Starter
iTrader: (1)
Join Date: Feb 2005
Location: Columbus, OH, USA
Posts: 424
Likes: 0
Received 0 Likes
on
0 Posts
Car: '91 Z28, '13 Civic EX-L
Engine: 355 LT1, 1.8 I4
Transmission: T56, 5spd auto
Axle/Gears: 10 bolt 3.42(as long as no breaky)
Re: My LT1 swap project (PICS)
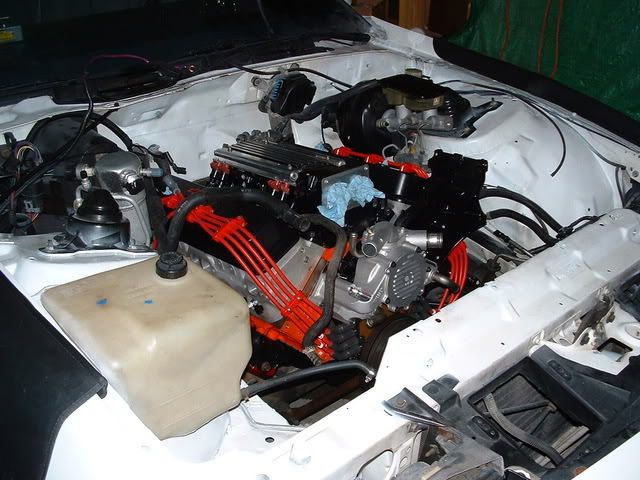
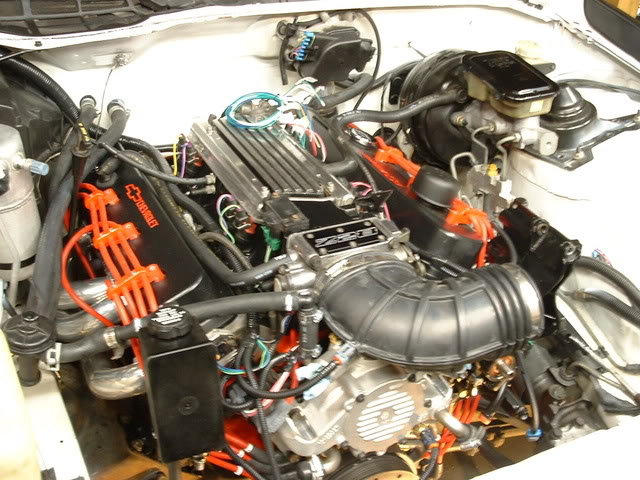
Here is final image of the engine.
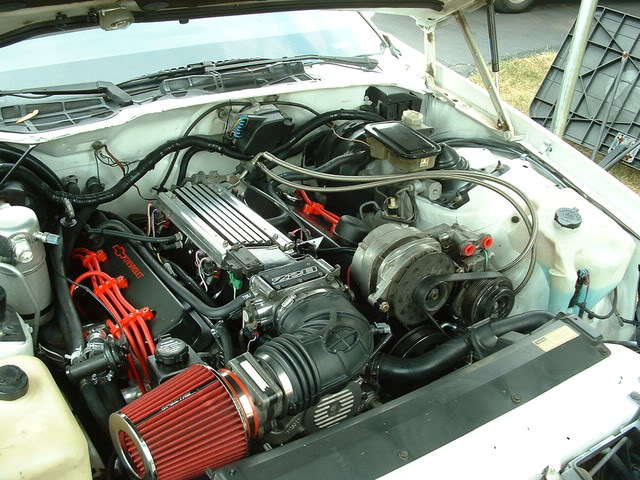
As soon as i can get a video of it running with quality good enough to actually hear it i will post it. I have one but you cant hear crap.
And thanks for all the help from everyone on here. She runs great! It's nice to have some ***** after 3000 rpm's finally!
As soon as i can get a video of it running with quality good enough to actually hear it i will post it. I have one but you cant hear crap.
And thanks for all the help from everyone on here. She runs great! It's nice to have some ***** after 3000 rpm's finally!
08-28-2008, 04:44 PM
#50
Member
Thread Starter
iTrader: (1)
Join Date: Feb 2005
Location: Columbus, OH, USA
Posts: 424
Likes: 0
Received 0 Likes
on
0 Posts
Car: '91 Z28, '13 Civic EX-L
Engine: 355 LT1, 1.8 I4
Transmission: T56, 5spd auto
Axle/Gears: 10 bolt 3.42(as long as no breaky)
Re: My LT1 swap project (PICS)
Here is a vid for you
i only reved it up a litte to about 2500 rpms

i only reved it up a litte to about 2500 rpms