3rd Brake Light Mod
Things you will need:
- Sandpaper – . 50, 250, and 400 grit
- Paint – (to match your car)
- Clear coat – (to protect)
- Phillips Screwdriver
PREP
I started off by pulling the 2 Phillips screws from the 3rd brake light lens; I cleaned it up, and decided that in order to create a nice smooth area for the paint to stick, and for it to look right, the bumps molded into the lens would need to come off. So, I started with 50 grit on a belt sander to get thru it quickly. After that, I moved up to 250 grit and got the lens a little bit smoother. Once it was smooth, I wet sanded it with 400 grit.
SET UP
I actually used run of the mill stick on letters purchased from Wal-Mart for less than 3 dollars. Make sure they are centered and on there clean with no wrinkles for obvious reasons! Other than that, just lay it out before you stick it on, and keep the lens clean so they stick secure.
PAINTING
I used Testors model paint for this since the lens is plastic. There are tons of colors out there, I was able to use Gloss Bright Blue and it matches my Maui Blue rather well. So, just go to your local hobby shop, and pick out a color that matches your car. Simple as that. I also used Testors Clear Lacquer Paint after the project was done.
I did two light coats of the body color paint, and let it completely dry, and then one coat of the clear. Make sure the paint isn.t tacky from the clear before you attempt pulling the letters off. After I pulled the letters, I went ahead and did one light coat of the clear.
After the paint is dry and your done, just put the lens back in place, and you are done. A nice simple subtle mod to your 3rd generation F-body for less than $10!!
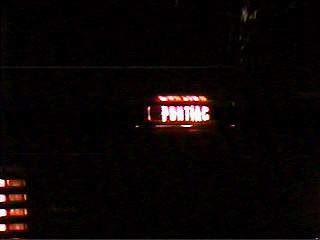
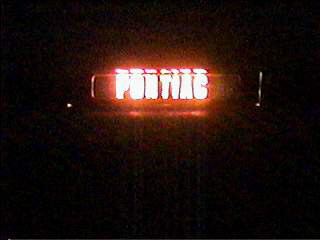
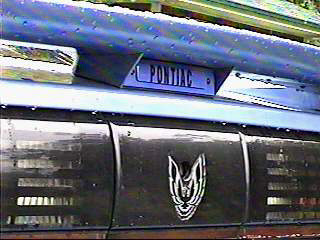
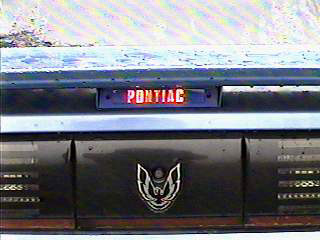
Here are a few pictures of the brake light at night and during the day. They were taken with my video camera, so the quality is not the best. But, you get the idea!