Installing a Floor Dimmer
When I bought my 91 RS, dimming the headlights was a feat seldom accomplished, I had to reach through the steering wheel and brace the plastic cover of the dimmer assembly, then pull the lever with my other hand (while driving). If another car came down the road, they were just out of luck, I couldn’t dim the lights. Finally, one day I got fed up. I took the plactic cover off of the assembly in the column, hoping to find something loose, something simple to fix. I was out of luck, the plastic guides for the rod the actuates the dimmer switch were wore out and broke. I decided do do something about it.
I always though floor dimmers were cool, so I decided to install one, bypassing the stock switch. First step, find an acceptable switch. I tried thinking of cars that came stock with the floor dimmer, then it dawned on me, my freinds 79 Z28 had one. I went to my parts counter and asked for the switch for a 79 Z28.
The first thing I did was unplug the stock harness from the stock switch at the base of the steering column and plug it into the new switch. I tested the switch, it worked perfectly.
Here’s my guide to replacing the stock headlamp dimmer switch.
Parts needed:
- Razor Blade
- New 1979 Z28 dimmer switch
- Roughly 7 ft of 12 guage wire
- Two sheetmetal screws
- Drill and a small drill bit
- Dimmer switch grommet
Installation:
Step 1: Remove the plastic harness from the stock dimmer switch, note the orientation of the wires to the corresponding terminals on the new switch. Clip the wires on that harness, giving yourself enough wire to splice to.
Step 2: Splice your new wire to the plastic harness and the wires you just separated it from, giving yourself enough slack to mount the new switch wherever you like in your floorboard area.
Step 3: Plug the new switch into the stock harness, test your lights, make sure it works before you go cutting carpet… when you finally install the switch, you’ll need to remove the retainer clip from the stock harness, it isn’t used on the new switch.
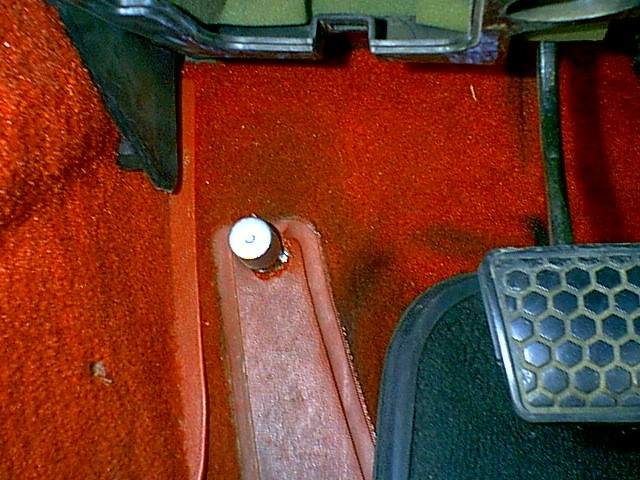
Step 4: Find a suitable mounting place on your floorboard (Note the postion I put mine in, in the picture below). Actually sit in your car and pretend you are going to dim your headlights, I placed mine high enough where I can also use the dead pedal in I need to, but I have big feet, you may need it lower.
Step 5: Once you find a suitable position, get a punch, or a nail, or whatever, tap a mark through the carpet so you can locate the position you chose for your switch by using the mark on the sheetmetal. Use the razor blade and cut a 1" X pattern using the hole you just made as the center. Cut the "ears" off the X pattern to complete the hole for the switch.
Step 6: Remove the kick panel and pull back the carpet. Route your extended wiring harness out of the way, center your new switch using the mark you made with the punch/awl/nail. Mark and drill two tiny hole using the mounting "ears" on the new switch, screw yoursheetmetal screws in to the holes you just drilled, securing the new switch. Make sure your connections are correct, test the new switch again.
Step 7: Reinstall your carpet temporarily, make sure the fit is good, cut accordingly. Once everything is ok, pull the carpet back off the switch, install the grommet.
Step 8: Put everything back together and marvel at your MacGyverish craftsmanship using old-school parts 🙂
Note: I lucked out finding a grommet, Drew was kind enough to send me one that he recieved with his new carpet for his 91 Formula, I haven’t looked in restoration catalogs for one, so I can’t tell you about the availability. Oh, and I haven’t gotten around to installing that grommet 🙁