Watch a Rookie Learn How To Swap a LS1 and T56 into a 1992 Z28
 09-03-2014, 03:35 PM
#201
Senior Member

Re: Watch a Rookie Learn How To Swap a LS1 and T56 into a 1992 Z28
I THINK I'm done ordering all those small little things... Hard to say. Being in Canada stuff sometimes gets held up in customs and it takes 2 weeks for something like a simple fitting to clear.
Your wiring is cleaner than mine, but I haven't done my final tucking in yet. I mounted my fuse/relay center on the firewall, but I don't have a nice neat little block like you do, so yours might be easier to hide.
Your wiring is cleaner than mine, but I haven't done my final tucking in yet. I mounted my fuse/relay center on the firewall, but I don't have a nice neat little block like you do, so yours might be easier to hide.
 09-04-2014, 12:47 PM
#202
Junior Member


Re: Watch a Rookie Learn How To Swap a LS1 and T56 into a 1992 Z28
Great project and write up!!
10-13-2014, 03:48 PM
#203
Member
Thread Starter

Join Date: Aug 2007
Location: Long Island, NY
Posts: 201
Likes: 0
Received 2 Likes
on
2 Posts
Car: 1992 z28
Engine: LS1
Transmission: T-56
Re: Watch a Rookie Learn How To Swap a LS1 and T56 into a 1992 Z28
Damn it has already been over a month since the last time I updated this thread. **** always hits the fan when the school semester starts up again. Dont worry...I haven't forgotten about the car or this thread though. I have been plugging along for the past month getting things done when I could. I have run into a bunch of headaches and had a couple of moments where I wanted to burn the car to the ground, but I fixed all the problems and im right back on track. The light at the end of the tunnel is soooo close. Just going to hit you guys with a couple of posts to try to get you guys up to speed with where im at. Also going to need more advice from you guys towards the end of these posts....any help would be appreciated.
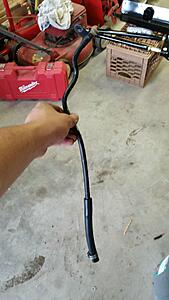
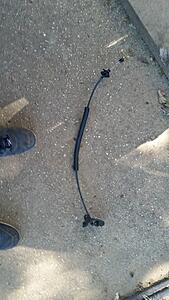
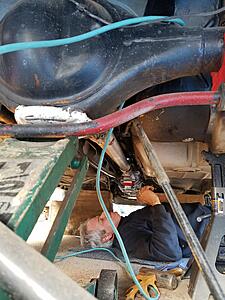
Sooo picking up where the last post left off....I stumbled across the vent tube that was supposed to go with my T56 in a box in my garage. Yep thats a freakin problem I couldnt believe that I forgot to install this before I put the tranny in the car. I was pissed off beyond belief because this meant I would have to drop the tranny crossmember and tranny so I could try to get my hand up inbetween the tranny and tunnel to put this stupid vent on. Especially after all the headaches I went through to get the tranny crossmember squared away...this had me using a lot of colorful language.
Anyways, I modified the vent tube because the end was a little messed up and this way made it easier for me to install in the position I was in. Heres a pic of what I did:
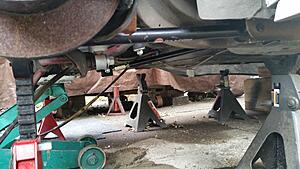
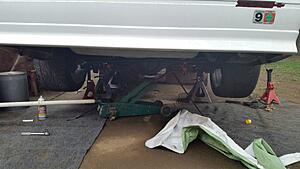
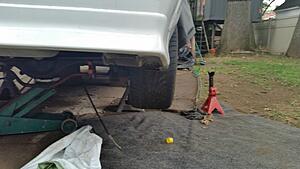
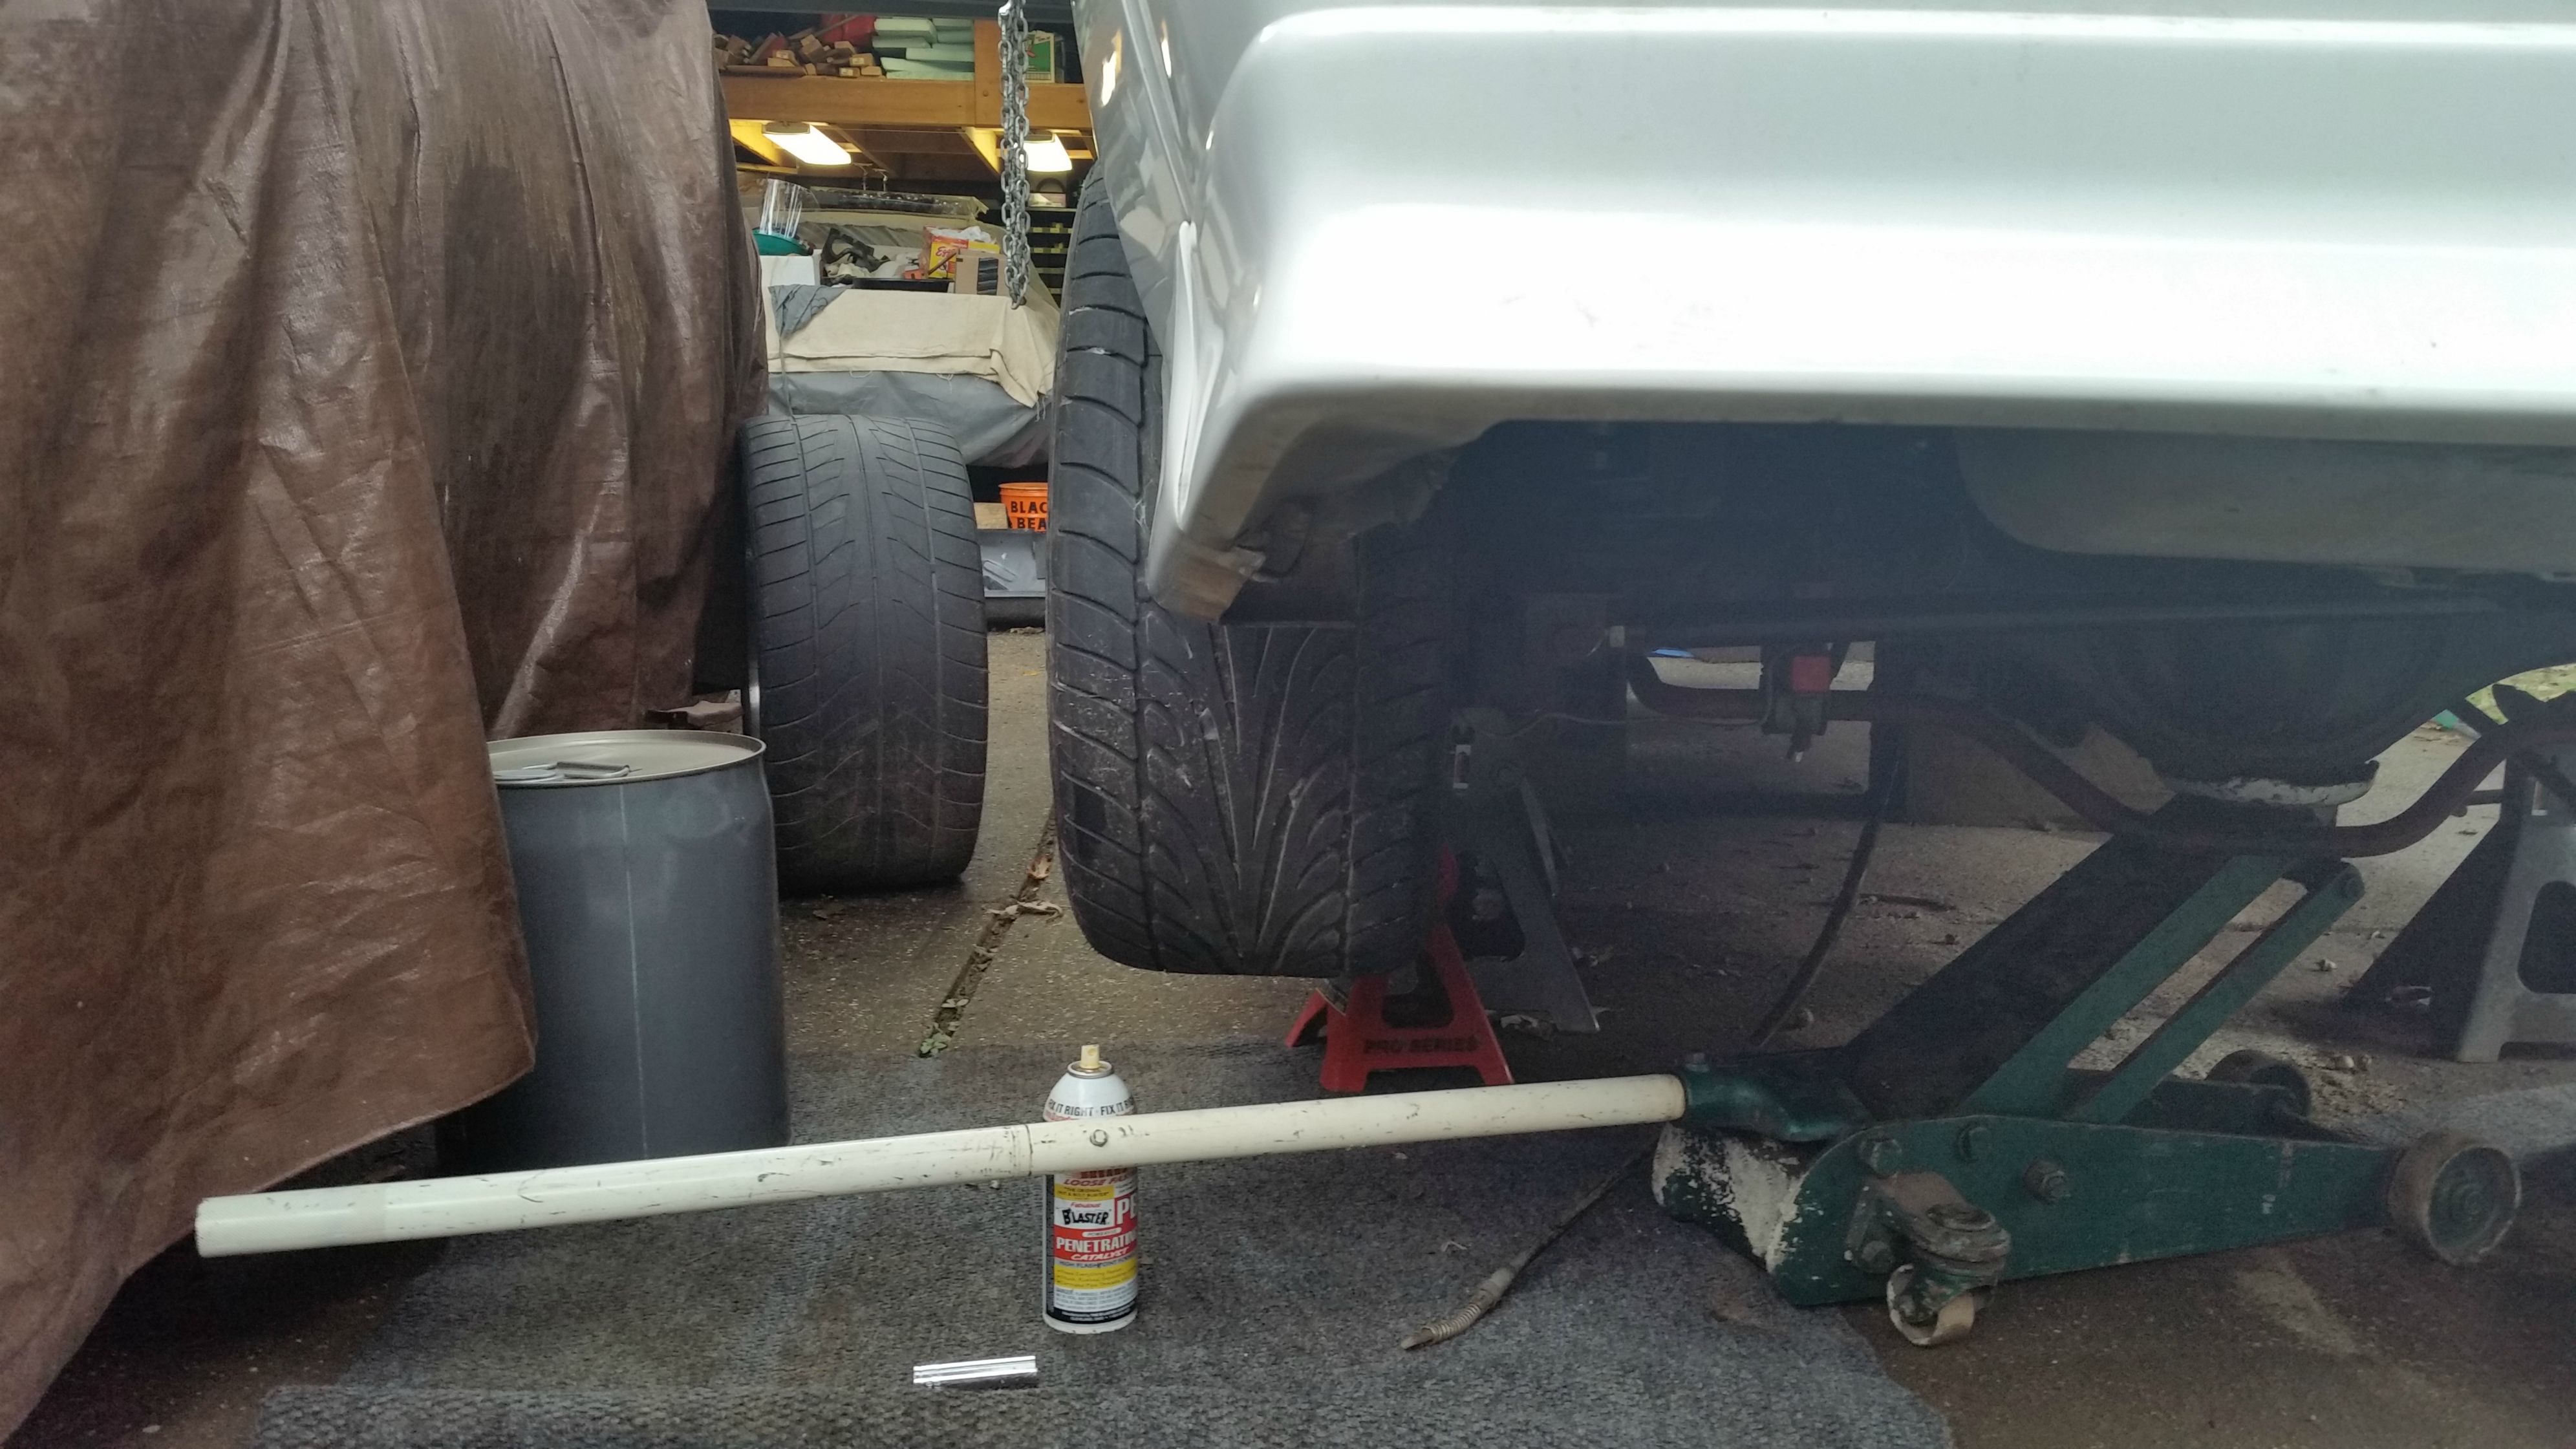
Next project was getting the 9 inch rear situated in the back on the camaro. Was a pain in the *** to do by myself and its not all the way in yet (need to mount jegster mount to the tunnel), but it eventually went in. Here are some pics of that:
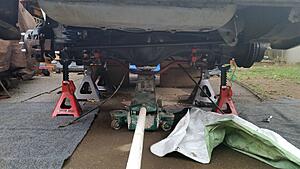
Founders lower control arms and jegster torque arm peaking out:
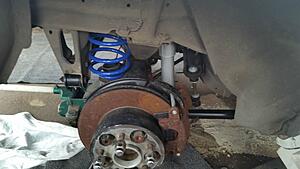
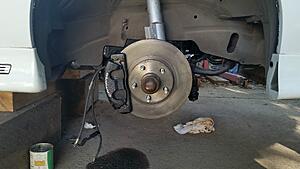
Ignore the disgusting brake rotors and pads...they will be swapped out eventually but I cant focus on that right now. Dont even know what kind of brakes they are haha:
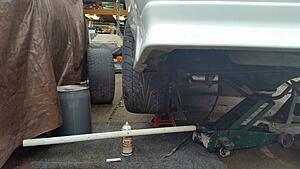
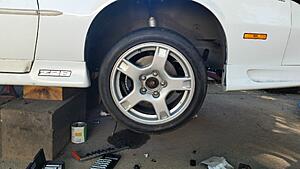
Then I threw the wheels on the car to give myself a little teaser of what its going to look like and to make sure everything was going to fit:
Front brakes back together also:
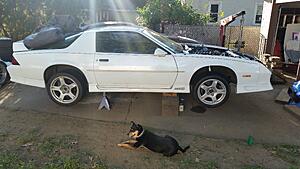
And the whole car with my helper Jacks:
Sooo picking up where the last post left off....I stumbled across the vent tube that was supposed to go with my T56 in a box in my garage. Yep thats a freakin problem
I couldnt believe that I forgot to install this before I put the tranny in the car. I was pissed off beyond belief because this meant I would have to drop the tranny crossmember and tranny so I could try to get my hand up inbetween the tranny and tunnel to put this stupid vent on. Especially after all the headaches I went through to get the tranny crossmember squared away...this had me using a lot of colorful language.Anyways, I modified the vent tube because the end was a little messed up and this way made it easier for me to install in the position I was in. Heres a pic of what I did:

Next project was getting the 9 inch rear situated in the back on the camaro. Was a pain in the *** to do by myself and its not all the way in yet (need to mount jegster mount to the tunnel), but it eventually went in. Here are some pics of that:

Founders lower control arms and jegster torque arm peaking out:

Ignore the disgusting brake rotors and pads...they will be swapped out eventually but I cant focus on that right now. Dont even know what kind of brakes they are haha:

Then I threw the wheels on the car to give myself a little teaser of what its going to look like and to make sure everything was going to fit:


Front brakes back together also:


And the whole car with my helper Jacks:
 10-13-2014, 04:00 PM
#204
Member
Thread Starter
Join Date: Aug 2007
Location: Long Island, NY
Posts: 201
Likes: 0
Received 2 Likes
on
2 Posts
Car: 1992 z28
Engine: LS1
Transmission: T-56
Re: Watch a Rookie Learn How To Swap a LS1 and T56 into a 1992 Z28
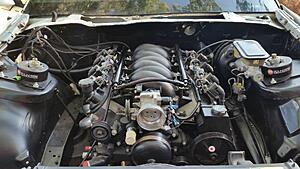
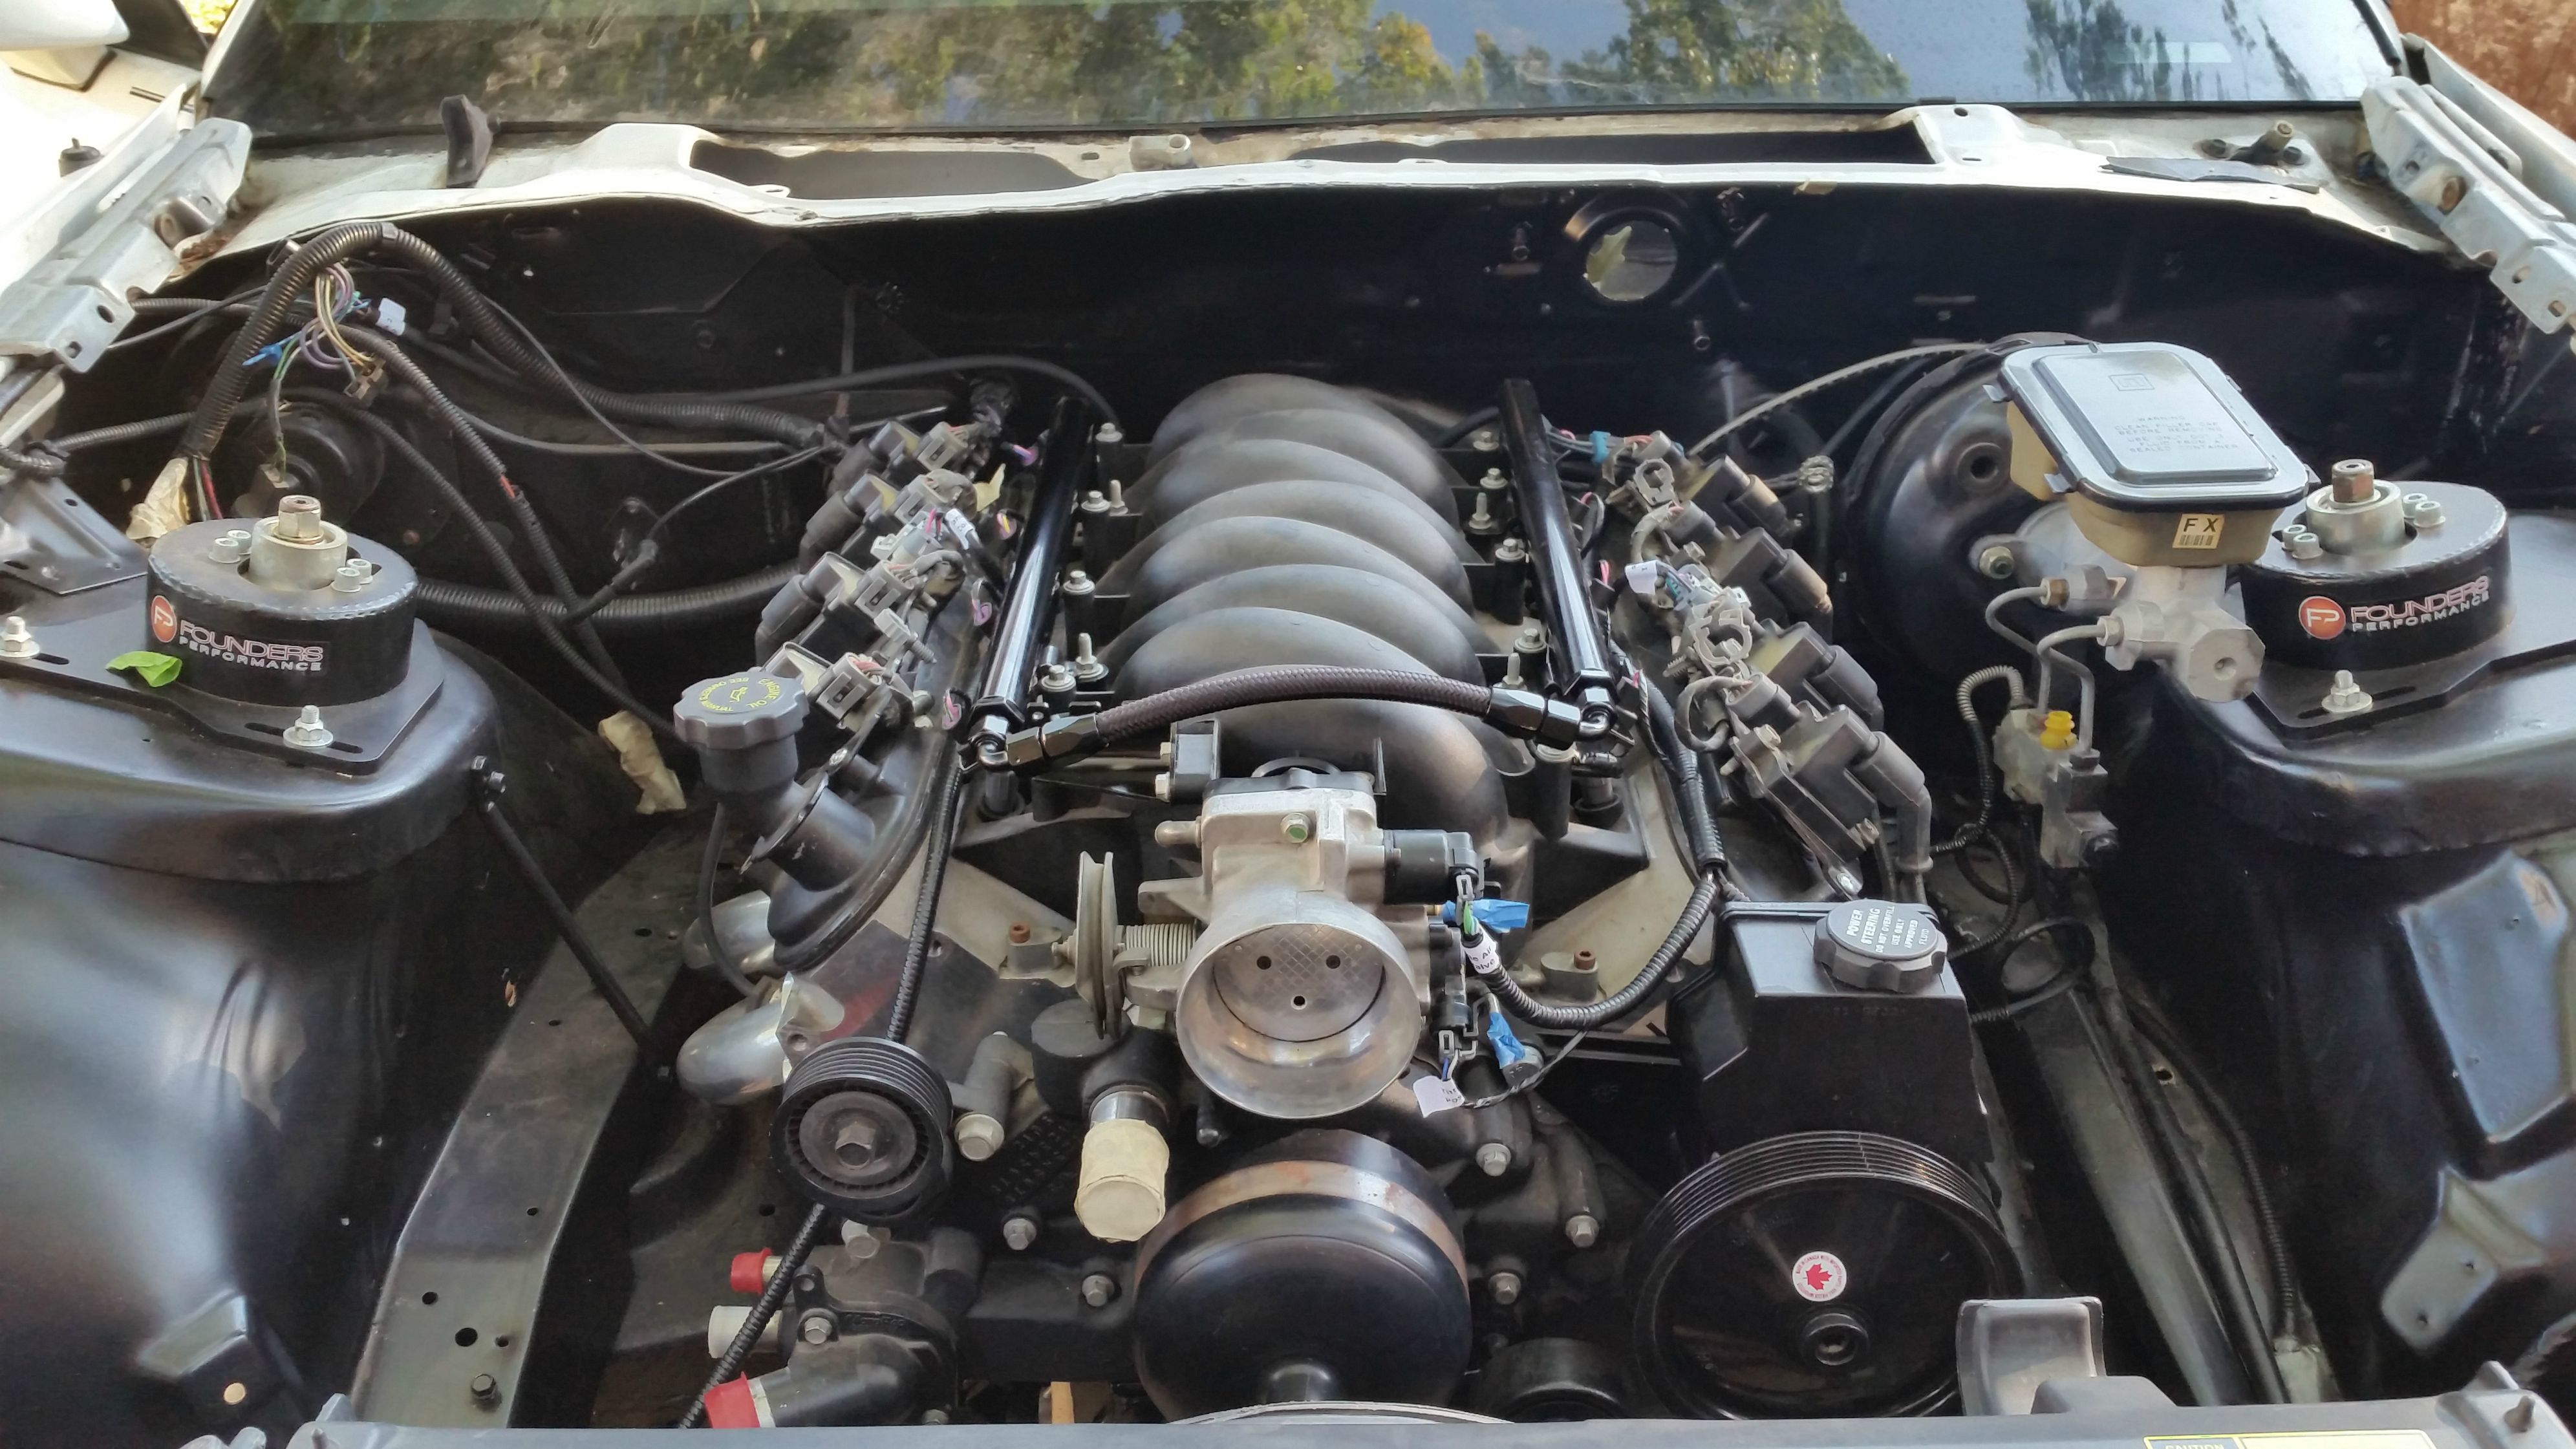
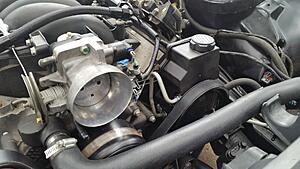
Got the fuel rail cross over line done and the throttle body reinstalled:

Had to get this AN plug fitting from summit to complete the new setup...plug was 2.50 and shipping was 3.50 LOL...came in a huge box the size of a textbook....
Clutch fluid reservoir finally installed...Also not pictured but I finished hooking up all clutch hydraulics. This is 100% ready to go minus the fluid:
Next up are the throttle cable install pictures. I took the same route that many others on this board chose. I took the stock 3rd gen grommet by the firewall and drilled it out to accept the new lokar swap cable. There is a lot of info about this already but here are the pics that I took:
Stock cable:
Lokar cable i got from hawks:

All drilled out with the lokar cable installed:
My friend Steve is really excited about the throttle cable...He didnt think I would put this here hahaha
Cable installed to firewall:
Throttle body connection:
Gas pedal end uses the stock 3rd gen cup that came from the stock cable. Mounts right into the top of the gas pedal and is the cleanest install. No picture of that unfortunately.

Had to get this AN plug fitting from summit to complete the new setup...plug was 2.50 and shipping was 3.50 LOL...came in a huge box the size of a textbook....

Clutch fluid reservoir finally installed...Also not pictured but I finished hooking up all clutch hydraulics. This is 100% ready to go minus the fluid:

Next up are the throttle cable install pictures. I took the same route that many others on this board chose. I took the stock 3rd gen grommet by the firewall and drilled it out to accept the new lokar swap cable. There is a lot of info about this already but here are the pics that I took:
Stock cable:

Lokar cable i got from hawks:

All drilled out with the lokar cable installed:

My friend Steve is really excited about the throttle cable...He didnt think I would put this here hahaha

Cable installed to firewall:

Throttle body connection:

Gas pedal end uses the stock 3rd gen cup that came from the stock cable. Mounts right into the top of the gas pedal and is the cleanest install. No picture of that unfortunately.
10-13-2014, 04:13 PM
#205
Member
Thread Starter
Join Date: Aug 2007
Location: Long Island, NY
Posts: 201
Likes: 0
Received 2 Likes
on
2 Posts
Car: 1992 z28
Engine: LS1
Transmission: T-56
Re: Watch a Rookie Learn How To Swap a LS1 and T56 into a 1992 Z28
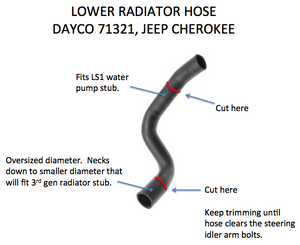
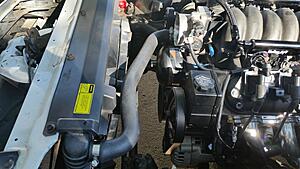
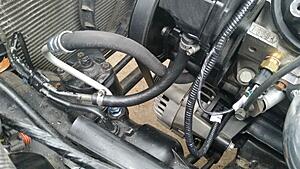
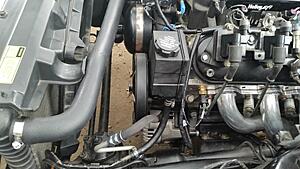
Also got the radiator hoses installed...Upper hose is the stock ls1 fbody hose. Lower is the jeep dayco one that people recommend.
Here is a picture from Qwktrip for everyones reference:
Both of them installed:

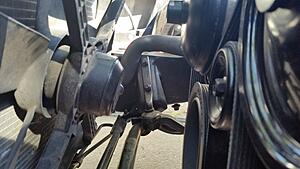
And thennn I ran into another problem...While trying to finalize the powersteering lines...I snapped the nipple off the reservoir for the low pressure side:
Needless to say..at this point I was beyond rage. This happened to me late at night after a long day of work and school and this pushed me over the edge. Not proud of how I reacted but I eventually cooled off haha. This meant I was going to have to buy an overpriced reservoir (60 bux) and pull the whole damn thing to put the new reservoir on. Not really a big deal, but not what I wanted to do when I was making good progress. Here are some pics of that process:
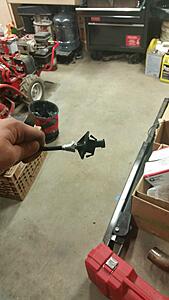
Pulling the PS Pulley...Rented this from advanced auto but I should have just bought it:
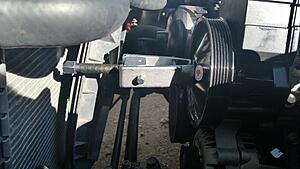
When I returned the PS Pulley puller I picked up the tool to push the pulley back on. Worth the 20 bucks...made the reinstall a breeze. Here are the finished pics with the lines all installed:
That is done with the 4th gen camaro high pressure hose. Fit without any bending necessary.
Here is a picture from Qwktrip for everyones reference:

Both of them installed:


And thennn I ran into another problem...While trying to finalize the powersteering lines...I snapped the nipple off the reservoir for the low pressure side:

Needless to say..at this point I was beyond rage. This happened to me late at night after a long day of work and school and this pushed me over the edge. Not proud of how I reacted but I eventually cooled off haha. This meant I was going to have to buy an overpriced reservoir (60 bux) and pull the whole damn thing to put the new reservoir on. Not really a big deal, but not what I wanted to do when I was making good progress. Here are some pics of that process:
Pulling the PS Pulley...Rented this from advanced auto but I should have just bought it:

When I returned the PS Pulley puller I picked up the tool to push the pulley back on. Worth the 20 bucks...made the reinstall a breeze. Here are the finished pics with the lines all installed:


That is done with the 4th gen camaro high pressure hose. Fit without any bending necessary.
10-13-2014, 04:23 PM
#206
Member
Thread Starter
Join Date: Aug 2007
Location: Long Island, NY
Posts: 201
Likes: 0
Received 2 Likes
on
2 Posts
Car: 1992 z28
Engine: LS1
Transmission: T-56
Re: Watch a Rookie Learn How To Swap a LS1 and T56 into a 1992 Z28
Ok so that pretty much brings everyone up to speed. All I have left to do is finish installing the rear end (install jegster torque arm to tunnel) and finish up the little bit of wiring with the fuse box.
Here is where my questions are. I am going to mount my fuse box right in front of the AC delete box, but I need some help figuring out where I have to make these remaining connections. Here is what I have left coming out of the BP wiring harness fuse block
-Switch Ignition (pink/black)
-Fan 1 (Green)
-Fan 2 (Blue)
-Fuel pump (Grey)
-Ground (Black)
-Battery (thick Red)
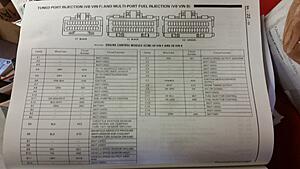
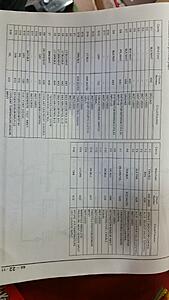
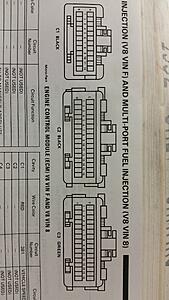
Are these the connections that need to be spliced into the dash side of the C207 plug? I took some pictures of the pin outs that I found in my GM service manual for 1992 camaros, but Im having a hard time matching everything up. Maybe someone could give me a hand with this?
Any help I could get with this would be greatly appreciated. I am soooo close to getting this thing started I can feel it....just need to make this last few connections.
Also really stupid question, but do you guys use the stock thirdgen battery or do you use the battery that came in the ls1 f-body cars? Prob a dumb question, but I couldnt find any info about this.
Thanks for looking....lemme know what you guys think.
Here is where my questions are. I am going to mount my fuse box right in front of the AC delete box, but I need some help figuring out where I have to make these remaining connections. Here is what I have left coming out of the BP wiring harness fuse block
-Switch Ignition (pink/black)
-Fan 1 (Green)
-Fan 2 (Blue)
-Fuel pump (Grey)
-Ground (Black)
-Battery (thick Red)
Are these the connections that need to be spliced into the dash side of the C207 plug? I took some pictures of the pin outs that I found in my GM service manual for 1992 camaros, but Im having a hard time matching everything up. Maybe someone could give me a hand with this?


Any help I could get with this would be greatly appreciated. I am soooo close to getting this thing started I can feel it....just need to make this last few connections.
Also really stupid question, but do you guys use the stock thirdgen battery or do you use the battery that came in the ls1 f-body cars? Prob a dumb question, but I couldnt find any info about this.
Thanks for looking....lemme know what you guys think.
10-13-2014, 04:41 PM
#207
Senior Member
Re: Watch a Rookie Learn How To Swap a LS1 and T56 into a 1992 Z28
stock battery will be fine.
10-13-2014, 05:07 PM
#208
Member
iTrader: (2)
Join Date: Feb 2010
Posts: 460
Likes: 0
Received 3 Likes
on
3 Posts
Car: '89 Camaro
Engine: LS1
Transmission: 4L65/70E
Axle/Gears: 9 Inch, 3.70 gears
Re: Watch a Rookie Learn How To Swap a LS1 and T56 into a 1992 Z28
I use the 4th gen battery, because I have the 4th gen coolant overflow tank that is also part of the battery tray. If you aren't using that, like STREETDEMON said, the 3rd gen battery will be fine.
10-14-2014, 11:24 AM
#209
Member
Thread Starter
Join Date: Aug 2007
Location: Long Island, NY
Posts: 201
Likes: 0
Received 2 Likes
on
2 Posts
Car: 1992 z28
Engine: LS1
Transmission: T-56
Re: Watch a Rookie Learn How To Swap a LS1 and T56 into a 1992 Z28
Ok thanks for the info guys. Guess I will go pick up a new battery thats made for the 92 camaro.
Anyone have any clue on the wiring question in the last post? Really wanna try to finish up this wiring before the weekend comes. Any help would be greatly appreciated.
Anyone have any clue on the wiring question in the last post? Really wanna try to finish up this wiring before the weekend comes. Any help would be greatly appreciated.
10-14-2014, 03:36 PM
#210
Supreme Member
iTrader: (24)
Join Date: Jun 2005
Location: NC
Posts: 7,890
Likes: 0
Received 67 Likes
on
49 Posts
Car: 92 Firebird
Engine: Supercharged 6.0
Transmission: T56
Axle/Gears: 8.8 3.73
Re: Watch a Rookie Learn How To Swap a LS1 and T56 into a 1992 Z28
Ok so that pretty much brings everyone up to speed. All I have left to do is finish installing the rear end (install jegster torque arm to tunnel) and finish up the little bit of wiring with the fuse box.
Here is where my questions are. I am going to mount my fuse box right in front of the AC delete box, but I need some help figuring out where I have to make these remaining connections. Here is what I have left coming out of the BP wiring harness fuse block
-Switch Ignition (pink/black)
-Fan 1 (Green)
-Fan 2 (Blue)
-Fuel pump (Grey)
-Ground (Black)
-Battery (thick Red)
Are these the connections that need to be spliced into the dash side of the C207 plug? I took some pictures of the pin outs that I found in my GM service manual for 1992 camaros, but Im having a hard time matching everything up. Maybe someone could give me a hand with this?
https://i.imgur.com/hOVtnSX.jpg
https://i.imgur.com/aUaz5uJ.jpg
https://i.imgur.com/SOBbztm.jpg
Any help I could get with this would be greatly appreciated. I am soooo close to getting this thing started I can feel it....just need to make this last few connections.
Also really stupid question, but do you guys use the stock thirdgen battery or do you use the battery that came in the ls1 f-body cars? Prob a dumb question, but I couldnt find any info about this.
Thanks for looking....lemme know what you guys think.
IGN: C100 A7, F4 (unfused), C207 B, F (recommended pin), G
Fans depend on size. 18-20ga means they trigger your relays, find the dk grn/wht and gry wires and tap one to each, 10-12ga are power to the fans, so crimp them to the B term of your old fan connectors
FP C100 G4
GRD anywhere engine or chassis
Batt starter lug or power dist block
Since Im here, these are for gauges:
C100 C7 to ground for all gauges
C100 D6 tach
C100 E5 oil pressure
C100 F5 coolant gauge
C100 B5, C4 back-up lights (manual only)
C100 E7 brake sw (auto only)
C207 C MIL
C207 D (V6/TPI only) K (TBI only, need buffer box bypass) speedo
C207 N P/neutral (auto only)
My 3rd gen battery fits the 4th get coolant tank, so I dont see why they wouldnt be interchangable
10-14-2014, 03:47 PM
#211
Member
Thread Starter
Join Date: Aug 2007
Location: Long Island, NY
Posts: 201
Likes: 0
Received 2 Likes
on
2 Posts
Car: 1992 z28
Engine: LS1
Transmission: T-56
Re: Watch a Rookie Learn How To Swap a LS1 and T56 into a 1992 Z28
Thanks pocket you really are a life saver. Invaluable resource to the members of this board. Knew you would come through for me haha.
Now I cant wait to get out of class tonight so i can go look at the maintenance manual and try to understand all the info you just gave me. Probably seems pathetic to the people who made their whole harnesses but connecting these last few wires is really stressing me out lmao. Its probably going to be so simple once i get under there to connect everything...just have to wrap my head around everything
Thanks again!
10-14-2014, 04:03 PM
#212
Supreme Member
iTrader: (24)
Join Date: Jun 2005
Location: NC
Posts: 7,890
Likes: 0
Received 67 Likes
on
49 Posts
Car: 92 Firebird
Engine: Supercharged 6.0
Transmission: T56
Axle/Gears: 8.8 3.73
Re: Watch a Rookie Learn How To Swap a LS1 and T56 into a 1992 Z28
These should help with pin locations. Pin descriptions are quite vague
http://www.austinthirdgen.org/mkport..._1992_C100.gif
http://www.austinthirdgen.org/mkport..._1992_C207.gif
http://www.austinthirdgen.org/mkport..._1992_C100.gif
http://www.austinthirdgen.org/mkport..._1992_C207.gif
10-14-2014, 04:10 PM
#213
Member
Thread Starter
Join Date: Aug 2007
Location: Long Island, NY
Posts: 201
Likes: 0
Received 2 Likes
on
2 Posts
Car: 1992 z28
Engine: LS1
Transmission: T-56
Re: Watch a Rookie Learn How To Swap a LS1 and T56 into a 1992 Z28
These should help with pin locations. Pin descriptions are quite vague
http://www.austinthirdgen.org/mkport..._1992_C100.gif
http://www.austinthirdgen.org/mkport..._1992_C207.gif
http://www.austinthirdgen.org/mkport..._1992_C100.gif
http://www.austinthirdgen.org/mkport..._1992_C207.gif
I feel like I should buy you some beers haha thanks man.
10-14-2014, 10:07 PM
#216
Member
Thread Starter
Join Date: Aug 2007
Location: Long Island, NY
Posts: 201
Likes: 0
Received 2 Likes
on
2 Posts
Car: 1992 z28
Engine: LS1
Transmission: T-56
Re: Watch a Rookie Learn How To Swap a LS1 and T56 into a 1992 Z28
Sweet im definitely going to go with the 3rd gen battery then because it sounds like it will work even if i wanna switch to the 4th gen coolant tank.
So this is going to be a stupid question, but since I have removed the old 3rd gen engine harness, where is the c100 terminal located that I am supposed to be splicing these wires into. I know where the c207 plugs are, but not too sure where this c100 connector is that I am supposed to be making all these connections that pocket mentioned in his post.
Also follow up stupid question...what is the best way to make these connections? Soldering? Crimping with connectors?
10-15-2014, 07:54 AM
#217
Supreme Member
iTrader: (24)
Join Date: Jun 2005
Location: NC
Posts: 7,890
Likes: 0
Received 67 Likes
on
49 Posts
Car: 92 Firebird
Engine: Supercharged 6.0
Transmission: T56
Axle/Gears: 8.8 3.73
Re: Watch a Rookie Learn How To Swap a LS1 and T56 into a 1992 Z28
Since we're talking about batteries, you can reuse your 3rd gen cables for no-cost proper fitting parts. They're heavier gauge than 4th gens too
C100 is the large connector near the booster held in by a 1/4" bolt. Dunk the whole connector in paint thinner for a few hours to soften the goo up then blow as much away with compressed air as you can. Use canned degreaser to clean the last few bits
If you have the proper crimper, Id advise to put new terminals on the ends for a seamless install. If you dont, then soldering joints 8-12" away from the connector work great. Do NOT butt crimp anything that will be permanent
10-15-2014, 09:49 AM
#218
Member
Thread Starter
Join Date: Aug 2007
Location: Long Island, NY
Posts: 201
Likes: 0
Received 2 Likes
on
2 Posts
Car: 1992 z28
Engine: LS1
Transmission: T-56
Re: Watch a Rookie Learn How To Swap a LS1 and T56 into a 1992 Z28
Since we're talking about batteries, you can reuse your 3rd gen cables for no-cost proper fitting parts. They're heavier gauge than 4th gens too
C100 is the large connector near the booster held in by a 1/4" bolt. Dunk the whole connector in paint thinner for a few hours to soften the goo up then blow as much away with compressed air as you can. Use canned degreaser to clean the last few bits
If you have the proper crimper, Id advise to put new terminals on the ends for a seamless install. If you dont, then soldering joints 8-12" away from the connector work great. Do NOT butt crimp anything that will be permanent
C100 is the large connector near the booster held in by a 1/4" bolt. Dunk the whole connector in paint thinner for a few hours to soften the goo up then blow as much away with compressed air as you can. Use canned degreaser to clean the last few bits
If you have the proper crimper, Id advise to put new terminals on the ends for a seamless install. If you dont, then soldering joints 8-12" away from the connector work great. Do NOT butt crimp anything that will be permanent
10-15-2014, 05:14 PM
#219
Supreme Member
iTrader: (24)
Join Date: Jun 2005
Location: NC
Posts: 7,890
Likes: 0
Received 67 Likes
on
49 Posts
Car: 92 Firebird
Engine: Supercharged 6.0
Transmission: T56
Axle/Gears: 8.8 3.73
Re: Watch a Rookie Learn How To Swap a LS1 and T56 into a 1992 Z28
The C100 takes 280, 480 and 630 terminals. I use this crimper
http://www.ebay.com/itm/WEATHERPACK-CRIMPER-TOOL-DELPHI-PACKARD-CONNECTORS-/230874222354?pt=LH_DefaultDomain_0&hash=item35c12d0f12&vxp=mtr
It doesnt do the 12ga 480/630 terminals very good so I lightly crimp then solder them. If this is your only wiring job, get the cheap tool and a few terminals
I use 5 terminals for C100's (mouser PNs)
630 12ga 12066493
630 18ga 12064734
480 12ga 12033820
480 18ga 12020119
280 18ga 12034047
To get the old terminals out you need to soak the C100 in paint thinner for a few hours, then find the white strip along one side and gently pry it out. If it breaks off in the connector you are SOL
After the finger lock is out, use a pick on the firewall side to release the terminals and pull out the rear. Crimp the new end on and push back in
If you can produce a competent solder joint, then I wouldnt go through the trouble to crimp new ends on. All the joints are 18ga, not bad at all
10-15-2014, 06:37 PM
#220
Member
Thread Starter
Join Date: Aug 2007
Location: Long Island, NY
Posts: 201
Likes: 0
Received 2 Likes
on
2 Posts
Car: 1992 z28
Engine: LS1
Transmission: T-56
Re: Watch a Rookie Learn How To Swap a LS1 and T56 into a 1992 Z28
Thanks Pocket, you have made this virtually fool proof for someone who is just learning all of this stuff. I think im going to go through the trouble of crimping on the new terminals and doing it that way. It might be more work but it will be a good learning process and it sounds like the better option for a cleaner install.
Im about to order a bunch of terminals of each of the part numbers you listed. Are there any different terminals I should order while im here? Anything that im going to need for the c207 plug at some point?
Im about to order a bunch of terminals of each of the part numbers you listed. Are there any different terminals I should order while im here? Anything that im going to need for the c207 plug at some point?
10-15-2014, 07:48 PM
#221
Member
iTrader: (2)
Join Date: Feb 2010
Posts: 460
Likes: 0
Received 3 Likes
on
3 Posts
Car: '89 Camaro
Engine: LS1
Transmission: 4L65/70E
Axle/Gears: 9 Inch, 3.70 gears
Re: Watch a Rookie Learn How To Swap a LS1 and T56 into a 1992 Z28
Everything that Pocket just said would have been very helpful about a month ago. Did learn something about the batteries though.
10-15-2014, 10:26 PM
#222
Supreme Member
iTrader: (24)
Join Date: Jun 2005
Location: NC
Posts: 7,890
Likes: 0
Received 67 Likes
on
49 Posts
Car: 92 Firebird
Engine: Supercharged 6.0
Transmission: T56
Axle/Gears: 8.8 3.73
Re: Watch a Rookie Learn How To Swap a LS1 and T56 into a 1992 Z28

These are C207 terminals for speedo, MIL, main IGN
12162595
Skip all the 12ga C100 terminals, all your hook-ups will be 18ga
Get a few extra terminals of each in case you goof a crimp or two
10-16-2014, 07:47 PM
#223
Member
iTrader: (2)
Join Date: Feb 2010
Posts: 460
Likes: 0
Received 3 Likes
on
3 Posts
Car: '89 Camaro
Engine: LS1
Transmission: 4L65/70E
Axle/Gears: 9 Inch, 3.70 gears
Re: Watch a Rookie Learn How To Swap a LS1 and T56 into a 1992 Z28
Yeah, I know, but the problem happened at something like 4am and had no time to work on the car. 4 days later I finally got about 30 minutes to look at the car. Ended up being a 12 volt constant that went bad and I got it taken care of. Never thought to ask how to take that connector apart before that day, and now I know. I will keep you and Nick in mind in the future if I have anymore issues that I can't figure out on my own.
10-19-2014, 06:43 PM
#224
Member
Thread Starter
Join Date: Aug 2007
Location: Long Island, NY
Posts: 201
Likes: 0
Received 2 Likes
on
2 Posts
Car: 1992 z28
Engine: LS1
Transmission: T-56
Re: Watch a Rookie Learn How To Swap a LS1 and T56 into a 1992 Z28
So I made some progress over the weekend, but unfortunately I was still unable to start the car
I didn't anticipate integrating the BP harness with the thirdgen harness being such a long process so I guess I only have myself to blame for that. Basically I am at the point where I THINK I have de-pinned everything from the C100 connector that I dont need anymore. I wouldn't have been able to get any of this done without the help of Pocket's thread : https://www.thirdgen.org/forums/ltx-...p-3rd-gen.html
Unfortunately I did not take his advice of selling my 92 5.7 TPI harness, because well I am impatient and I already had this one laying around. Probably the wrong move in the end...because now I have to figure out how to add in the wiring necessary for the manual transmission. The BP harness came with a wire for the clutch safety switch, but I think there is also one for the backup lights if I remember reading that correctly.
Anyways here are some pictures:
Pile of crap that I dont need anymore...someone somewhere that needs a mint condition 5.7 TPI harness is upset right now:
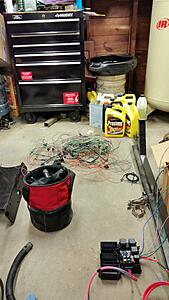
Here is when I thought I was done:
Turns out I dont need the relays anymore because the BP harness fuseblock has all of those relays built in.
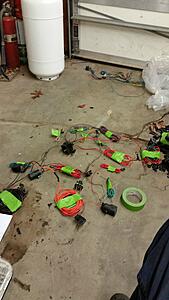
Here is where the harness is at right now with the relays deleted:
Going to label what I have here because I still a little confused. Starting at the bottom with the C100 connector and working my way around clockwise.
Bottom middle: C100 Engine side connector
Bottom left: Brake Sensor
Left: Ground for gauges
Top middle: Starter
Top right middle: Oil pressure sending unit
Right: These red wires are the wires I have the question about. One is Power distribution block and the other says power distribution IGN SW. Not really sure what to do with these.
Bottom right: Coolant Temp sensor....Also not sure what to do about this one. I understand that it is responsible for the coolant temp gauge, but I already have 3 wires going into my coolant temp sensor. Those three wires are already built into the BP engine harness so Im not sure what to do about that either.
Beyond that I am just waiting to crimp some new terminals onto the wires for my fuel pump, ignition, speedometer, and tach. Once I have those terminals crimped on I will insert them into the proper pins in the C100 and finally wrap all of this crap up and be done with it.
Also about my two fan wires coming from the BP fuse block. Can I splice these two wires into my old fan connector and plug it into my single fan and be done with it? The fan 1 and fan 2 wires already both have their own relays in the fuse box if that matters at all.
Jeeze thats a lot of questions in one post. I dont expect to get answers to all of them but it just helps if I write them all down for when I research later during the week.
Thanks for looking and all the help so far!
I didn't anticipate integrating the BP harness with the thirdgen harness being such a long process so I guess I only have myself to blame for that. Basically I am at the point where I THINK I have de-pinned everything from the C100 connector that I dont need anymore. I wouldn't have been able to get any of this done without the help of Pocket's thread : https://www.thirdgen.org/forums/ltx-...p-3rd-gen.html
Unfortunately I did not take his advice of selling my 92 5.7 TPI harness, because well I am impatient and I already had this one laying around. Probably the wrong move in the end...because now I have to figure out how to add in the wiring necessary for the manual transmission. The BP harness came with a wire for the clutch safety switch, but I think there is also one for the backup lights if I remember reading that correctly.
Anyways here are some pictures:
Pile of crap that I dont need anymore...someone somewhere that needs a mint condition 5.7 TPI harness is upset right now:

Here is when I thought I was done:

Turns out I dont need the relays anymore because the BP harness fuseblock has all of those relays built in.
Here is where the harness is at right now with the relays deleted:
Going to label what I have here because I still a little confused. Starting at the bottom with the C100 connector and working my way around clockwise.
Bottom middle: C100 Engine side connector
Bottom left: Brake Sensor
Left: Ground for gauges
Top middle: Starter
Top right middle: Oil pressure sending unit
Right: These red wires are the wires I have the question about. One is Power distribution block and the other says power distribution IGN SW. Not really sure what to do with these.
Bottom right: Coolant Temp sensor....Also not sure what to do about this one. I understand that it is responsible for the coolant temp gauge, but I already have 3 wires going into my coolant temp sensor. Those three wires are already built into the BP engine harness so Im not sure what to do about that either.
Beyond that I am just waiting to crimp some new terminals onto the wires for my fuel pump, ignition, speedometer, and tach. Once I have those terminals crimped on I will insert them into the proper pins in the C100 and finally wrap all of this crap up and be done with it.
Also about my two fan wires coming from the BP fuse block. Can I splice these two wires into my old fan connector and plug it into my single fan and be done with it? The fan 1 and fan 2 wires already both have their own relays in the fuse box if that matters at all.
Jeeze thats a lot of questions in one post. I dont expect to get answers to all of them but it just helps if I write them all down for when I research later during the week.
Thanks for looking and all the help so far!
10-19-2014, 09:43 PM
#225
Supreme Member
iTrader: (24)
Join Date: Jun 2005
Location: NC
Posts: 7,890
Likes: 0
Received 67 Likes
on
49 Posts
Car: 92 Firebird
Engine: Supercharged 6.0
Transmission: T56
Axle/Gears: 8.8 3.73
Re: Watch a Rookie Learn How To Swap a LS1 and T56 into a 1992 Z28
The two big red wires supply 12v to the whole car. Move them back to a 12v point, the starter lug works nicely
If your harness has the 3 wire CTS already in it, then it will have a coolant gauge output wire somewhere for you to connect. This is where it goes
Speedo is in the C207 along with MIL
Fan wires are conditional. If they are 18ga, then they are triggers for the relay. They connect to the PCM. If they are 12ga, they are power to the fans. Hook them to the B terminal for each fan motor
All in a days work
10-19-2014, 10:10 PM
#226
Member
Thread Starter
Join Date: Aug 2007
Location: Long Island, NY
Posts: 201
Likes: 0
Received 2 Likes
on
2 Posts
Car: 1992 z28
Engine: LS1
Transmission: T-56
Re: Watch a Rookie Learn How To Swap a LS1 and T56 into a 1992 Z28
The two big red wires supply 12v to the whole car. Move them back to a 12v point, the starter lug works nicely
If your harness has the 3 wire CTS already in it, then it will have a coolant gauge output wire somewhere for you to connect. This is where it goes
Speedo is in the C207 along with MIL
Fan wires are conditional. If they are 18ga, then they are triggers for the relay. They connect to the PCM. If they are 12ga, they are power to the fans. Hook them to the B terminal for each fan motor
All in a days work
If your harness has the 3 wire CTS already in it, then it will have a coolant gauge output wire somewhere for you to connect. This is where it goes
Speedo is in the C207 along with MIL
Fan wires are conditional. If they are 18ga, then they are triggers for the relay. They connect to the PCM. If they are 12ga, they are power to the fans. Hook them to the B terminal for each fan motor
All in a days work
10-20-2014, 11:46 AM
#227
Supreme Member
iTrader: (24)
Join Date: Jun 2005
Location: NC
Posts: 7,890
Likes: 0
Received 67 Likes
on
49 Posts
Car: 92 Firebird
Engine: Supercharged 6.0
Transmission: T56
Axle/Gears: 8.8 3.73
Re: Watch a Rookie Learn How To Swap a LS1 and T56 into a 1992 Z28
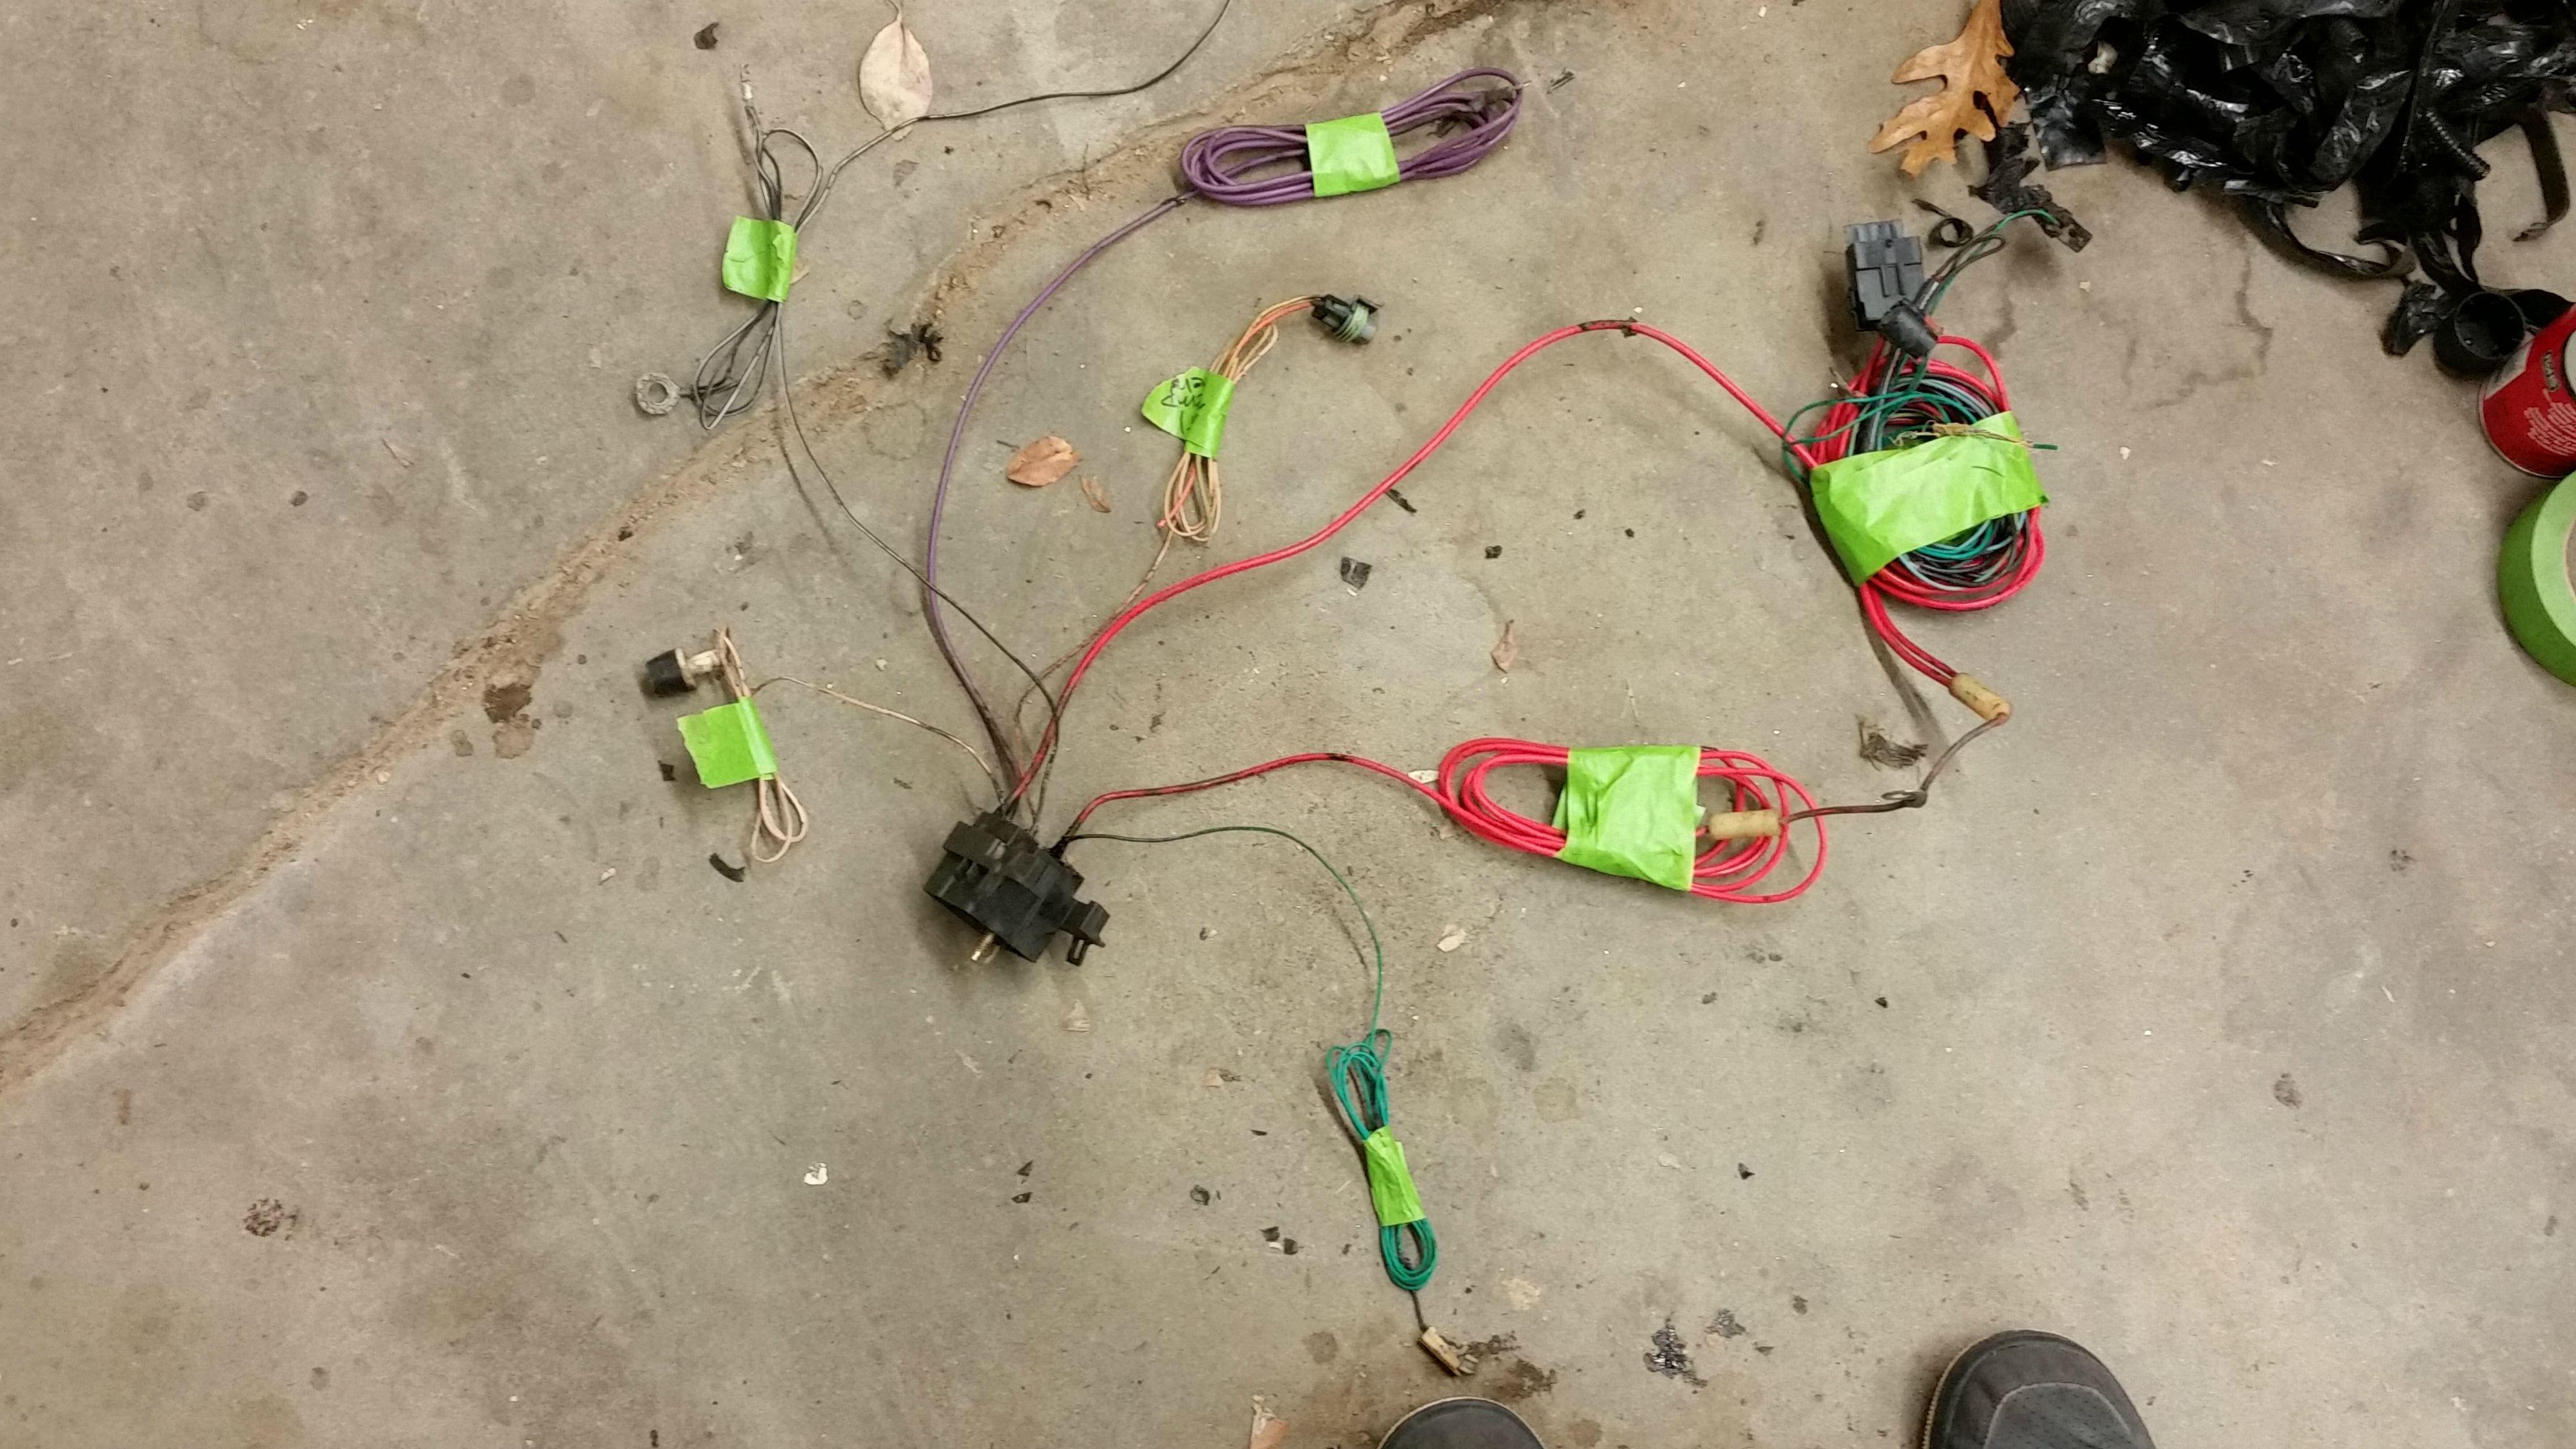
The wad in the top right is HVAC (black connector). If you are keeping AC or even just heat, then you need that connector
Big red is 12v to the blower motor, big black is blower ground. LT blu AC request to the PCM, green is not used in any swap. It was fan override which the PCM now completely controls
Big red is 12v to the blower motor, big black is blower ground. LT blu AC request to the PCM, green is not used in any swap. It was fan override which the PCM now completely controls
10-22-2014, 11:17 AM
#228
Member
Thread Starter
Join Date: Aug 2007
Location: Long Island, NY
Posts: 201
Likes: 0
Received 2 Likes
on
2 Posts
Car: 1992 z28
Engine: LS1
Transmission: T-56
Re: Watch a Rookie Learn How To Swap a LS1 and T56 into a 1992 Z28
The wad in the top right is HVAC (black connector). If you are keeping AC or even just heat, then you need that connector
Big red is 12v to the blower motor, big black is blower ground. LT blu AC request to the PCM, green is not used in any swap. It was fan override which the PCM now completely controls
Big red is 12v to the blower motor, big black is blower ground. LT blu AC request to the PCM, green is not used in any swap. It was fan override which the PCM now completely controls
Of course I do have more questions for you because im a pain in the ***

My questions are in regards to the specific wiring for the t56 portion of the swap. The two things that are confusing me are the back up lights, and the clutch safety switch. From what I understand with the back up lights, I have to add two wires, one dark blue wire to the b5 pin and one green wire to the c4 pin on the c100, but where do these wires go once they are pinned into the c100? What kind of connector do I need for this? Is it already on my car somewhere?
Next question is about the clutch safety switch. One of the threads I was reading says I take this wire from by the automatic shifter, but I was given a wire with my BP ls1 harness that is for the clutch safety. I understand that this wire goes to the clutch pedal, but what connector do I need for this to work? Is this something that is already in my automatic car somewhere?
Last annoying question of the day. There is one left over orange wire ffrom my BP harness. I believe it is to tell the car if it is in park on drive. Where does this one have to go? Does it also need a connector?
10-22-2014, 01:11 PM
#229
Supreme Member
iTrader: (24)
Join Date: Jun 2005
Location: NC
Posts: 7,890
Likes: 0
Received 67 Likes
on
49 Posts
Car: 92 Firebird
Engine: Supercharged 6.0
Transmission: T56
Axle/Gears: 8.8 3.73
Re: Watch a Rookie Learn How To Swap a LS1 and T56 into a 1992 Z28
P/neutral isnt used on a manual swap. The CPP sw is optional, all it does it bump idle under load so you dont stall with the AC on pulling the RPMs low at a late stop. I dont include it on my harnesses unless someone asks for it specifically
Where the back-up wires go depends on what trans you had from the start. Auto cars need them ran to the old shifter connector. Manual cars run them to the C100. If you had an auto from the start and run them to the C100, they wont connect to anything
From the old auto shifter connector:
Top two are 12ga, these go to the clutch safety switch
Middle two are back-up lights 18ga
Bottom two are P/neutral 18ga. Ignore these
10-22-2014, 01:29 PM
#230
Member
Thread Starter
Join Date: Aug 2007
Location: Long Island, NY
Posts: 201
Likes: 0
Received 2 Likes
on
2 Posts
Car: 1992 z28
Engine: LS1
Transmission: T-56
Re: Watch a Rookie Learn How To Swap a LS1 and T56 into a 1992 Z28
P/neutral isnt used on a manual swap. The CPP sw is optional, all it does it bump idle under load so you dont stall with the AC on pulling the RPMs low at a late stop. I dont include it on my harnesses unless someone asks for it specifically
Where the back-up wires go depends on what trans you had from the start. Auto cars need them ran to the old shifter connector. Manual cars run them to the C100. If you had an auto from the start and run them to the C100, they wont connect to anything
From the old auto shifter connector:
Top two are 12ga, these go to the clutch safety switch
Middle two are back-up lights 18ga
Bottom two are P/neutral 18ga. Ignore these
Where the back-up wires go depends on what trans you had from the start. Auto cars need them ran to the old shifter connector. Manual cars run them to the C100. If you had an auto from the start and run them to the C100, they wont connect to anything
From the old auto shifter connector:
Top two are 12ga, these go to the clutch safety switch
Middle two are back-up lights 18ga
Bottom two are P/neutral 18ga. Ignore these
So i guess that clutch wire from my BP harness is the CPP sw that your talking about? I dont even have AC so i guess ill leave that out. Thanks again man!
10-22-2014, 01:35 PM
#231
Supreme Member
iTrader: (24)
Join Date: Jun 2005
Location: NC
Posts: 7,890
Likes: 0
Received 67 Likes
on
49 Posts
Car: 92 Firebird
Engine: Supercharged 6.0
Transmission: T56
Axle/Gears: 8.8 3.73
Re: Watch a Rookie Learn How To Swap a LS1 and T56 into a 1992 Z28
Right, old shifter connector to trans
Same crimper from before crimps these nicely
Body 12015792
Terminals 12089040
Seal 15324985
Ive never seen a connector that first the clutch safety switch for the 12ga wires, not even on 4th gens. I use female spade terminals. If you use electrical tape to strap it to something rigid nearby, they cannot pull out
10-22-2014, 09:33 PM
#232
Member
iTrader: (2)
Join Date: Feb 2003
Location: ME
Posts: 219
Likes: 0
Received 0 Likes
on
0 Posts
Car: 1986 IROC-Z
Engine: LS1-ish
Transmission: T56 stage II
Axle/Gears: S60 4:10's
Re: Watch a Rookie Learn How To Swap a LS1 and T56 into a 1992 Z28
 What Pocket said...
I soldered additional wire from my old auto neutral safety switch wiring and routed it back to the pedal. Not sure what pedals you're using, but on 4th gens the wire gauge on the connector is too small for my liking. I was going to splice into the 4th gen connector, but I didn't feel comfortable putting a constant 12v to one side of it due to the wire gauge. I think the 4th gen's used a relay which is why they got away with such a small gauge.
All I did was tighten the ends of the female spade connectors slightly with pliers to ensure a tight grip. I used small zip ties to secure the wire close to the pedal so it wouldn't pull out.
05-27-2016, 12:54 PM
#233
Member
Thread Starter
Join Date: Aug 2007
Location: Long Island, NY
Posts: 201
Likes: 0
Received 2 Likes
on
2 Posts
Car: 1992 z28
Engine: LS1
Transmission: T-56
Re: Watch a Rookie Learn How To Swap a LS1 and T56 into a 1992 Z28
Hollllllllllllly crap I can't believe it has almost been 2 years since the last time that I looked at this car! That is incredibly depressing haha.
I am sure you guys know how the story goes... Life got in the way and the car had to unfortunately take a back seat. I have been finishing up graduate school and starting my first teaching job. On top of that, my brother and I bought a house so any and all available time in the past year has been spent renovating our house. Well now that the house is 100 percent renovated (had to do this 2 times after a pipe burst and ruined everything!) and my free time is slowing returning, it is time to get back to work on the camaro. I am vowing to have this car completed and back on the road during this driving season....no more excuses. I am so close to firing this thing up that I can taste it. Just need to spend time buttoning up the little things.
And now some actual info about what has been going on with the car. Over the past week, I have been trying to sort out my driveshaft and torque arm situation so that I can start this thing up. I had to get a new u-joint for the stock aluminum ls1 driveshaft in order to mount it to this ford 9 inch rear that I have. Unfortunately I did not have any information about the rear, so it was a little tricky to figure out which conversion u-joint was needed. After a bunch of measuring and a few trips back and forth to the driveshaft shop, I figured out that I needed a 1330 Special conversion u-joint. Had the driveshaft shop remove the old u-joint and press the new one in for me. So that whole situation is sorted out and ready to go. I also decided against installing the jegster torque arm in my car. Not really in love with the idea of drilling a bunch of holes into the body of my car at this point, and I really just want to see this thing going down the road so for now I am going to stick with the stock torque arm. I will eventually look into a weld in style torque arm in the future.
Sorry for the boring update, but now that I am diving back into the car I wanted to let you guys know that I have not given up on this project and that I am still alive! haha....crazy how life has a way of changing our plans real quick....
Stay tuned this weekend for some real updates with pictures!
07-14-2016, 04:37 PM
#234
12-04-2016, 09:02 PM
#236
Member
Thread Starter
Join Date: Aug 2007
Location: Long Island, NY
Posts: 201
Likes: 0
Received 2 Likes
on
2 Posts
Car: 1992 z28
Engine: LS1
Transmission: T-56
Re: Watch a Rookie Learn How To Swap a LS1 and T56 into a 1992 Z28
Ok so a little bit of an update to share with you guys. I finally managed to get over a point in the build that was holding up my progress for a while. I was having an absolute bitch of a time trying to get my 9 inch and torque arm lined up and bolted in by myself for the longest time. Well, I finally got some help with that this weekend from my pops and got everything bolted in. I guess it was one of those times where you just need a fresh set of eyes (and someone who is a much better mechanic than me ) because he made everything line up effortlessly. I do have to say though that it was much easier done with 2 people. The key for me was to drop the rear end enough to bolt the torque arm on first and then worry about sliding it in by the tranny afterwards. Anyways here are some pics of that:
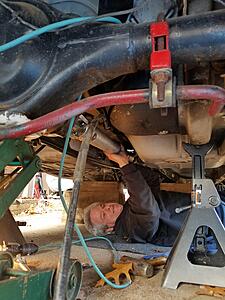
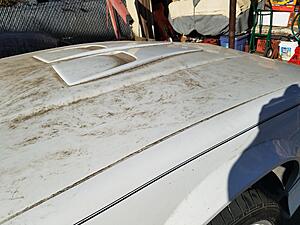
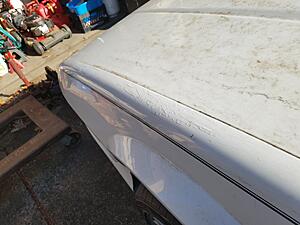
Incredibly happy that all of that headache is done and im excited to move on in the build. While I was over at my parents house working on the car, I realized how much of a beating my car has taken after being left out under this cover for so many seasons. The paint is in terrible shape and it makes me sad, but I can worry about that once it actually moves on its own lol. Here are some pics of me being a neglectful parent:
Ive seen this coming for a while, but was never able to get it out of the shitty weather...until we moved into this new house. There is a decent garage at our new place, and over this past summer I have been spending a lot of time to completely re do it so that my car would have a home. Well that garage is finally finished enough and the rear end is back in the car, so I decided to bring the car over to its new home today....more pics in next post...
) because he made everything line up effortlessly. I do have to say though that it was much easier done with 2 people. The key for me was to drop the rear end enough to bolt the torque arm on first and then worry about sliding it in by the tranny afterwards. Anyways here are some pics of that:

Incredibly happy that all of that headache is done and im excited to move on in the build. While I was over at my parents house working on the car, I realized how much of a beating my car has taken after being left out under this cover for so many seasons. The paint is in terrible shape and it makes me sad, but I can worry about that once it actually moves on its own lol. Here are some pics of me being a neglectful parent:


Ive seen this coming for a while, but was never able to get it out of the shitty weather...until we moved into this new house. There is a decent garage at our new place, and over this past summer I have been spending a lot of time to completely re do it so that my car would have a home. Well that garage is finally finished enough and the rear end is back in the car, so I decided to bring the car over to its new home today....more pics in next post...
12-04-2016, 09:20 PM
#237
Member
Thread Starter
Join Date: Aug 2007
Location: Long Island, NY
Posts: 201
Likes: 0
Received 2 Likes
on
2 Posts
Car: 1992 z28
Engine: LS1
Transmission: T-56
Re: Watch a Rookie Learn How To Swap a LS1 and T56 into a 1992 Z28
Just for fun I thought Id share some of the work I did on the garage before moving the camaro...this is what it looked like when we moved in:
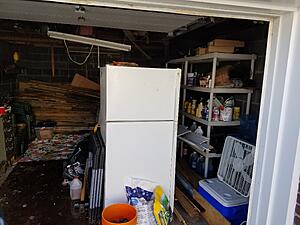
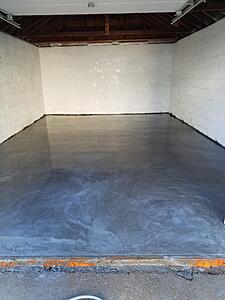
There was a crappy built in loft and 30 years worth of garbage piled up everywhere...took a nice sized dumpster to clean everything out. I also decided to rip out the old concrete and pour 6 inches of 4000psi concrete in case I wanted to put in a lift down the road. I also dug a 50 foot trench by hand from my house to the garage to run electric and ethernet...had a panel installed in the garage but I need to save up more for lighting. Here is what it looked like after that and painting the walls:
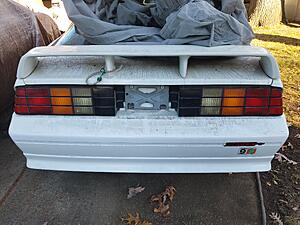
Anyways back to the car...I decided it would be a good idea to give the car a quick was before I brought it over. This is the first time the car has been on all four wheels in a longgggggggggggg time... forgive the mismatched wheels:
Pushed it out into the street to get it ready for towing:
Its exciting seeing it in the street even though it hasnt started yet!

My brother and I moved only a few minutes away from our old house and it is only a couple of blocks away, so we decided to just tow the car over with some straps. We went really slow and had someone follow behind the camaro with hazards on:
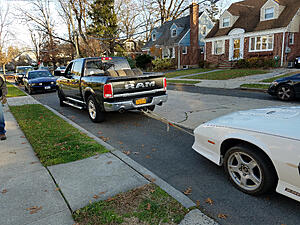
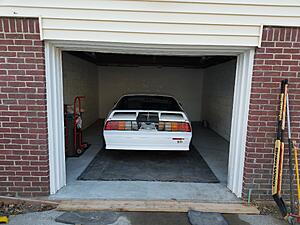
The short journey was a success and I am incredibly happy to have my car in my very own garage out of the weather. Now I can work on it like a classy guy haha:
I am very excited to work on it now that it is at my house. With the rear suspension finally installed, there are only a couple of odds and ends as far as wiring goes to finish up before I can start this thing. Anyone have any tips before I try to start this? Should I prime the engine somehow? It has been sitting for so long besides me just turning it over by hand every now and then.
I plan to make a list of everything left to do in the next coming days...stay tuned for more progress!

There was a crappy built in loft and 30 years worth of garbage piled up everywhere...took a nice sized dumpster to clean everything out. I also decided to rip out the old concrete and pour 6 inches of 4000psi concrete in case I wanted to put in a lift down the road. I also dug a 50 foot trench by hand from my house to the garage to run electric and ethernet...had a panel installed in the garage but I need to save up more for lighting. Here is what it looked like after that and painting the walls:

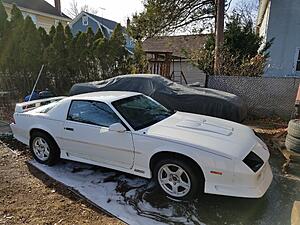
Anyways back to the car...I decided it would be a good idea to give the car a quick was before I brought it over. This is the first time the car has been on all four wheels in a longgggggggggggg time... forgive the mismatched wheels:

Pushed it out into the street to get it ready for towing:

Its exciting seeing it in the street even though it hasnt started yet!

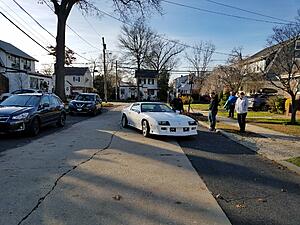
My brother and I moved only a few minutes away from our old house and it is only a couple of blocks away, so we decided to just tow the car over with some straps. We went really slow and had someone follow behind the camaro with hazards on:

The short journey was a success and I am incredibly happy to have my car in my very own garage out of the weather. Now I can work on it like a classy guy haha:

I am very excited to work on it now that it is at my house. With the rear suspension finally installed, there are only a couple of odds and ends as far as wiring goes to finish up before I can start this thing. Anyone have any tips before I try to start this? Should I prime the engine somehow? It has been sitting for so long besides me just turning it over by hand every now and then.
I plan to make a list of everything left to do in the next coming days...stay tuned for more progress!
 12-28-2016, 12:32 PM
#239
Member
iTrader: (2)
Join Date: Feb 2010
Posts: 460
Likes: 0
Received 3 Likes
on
3 Posts
Car: '89 Camaro
Engine: LS1
Transmission: 4L65/70E
Axle/Gears: 9 Inch, 3.70 gears
Re: Watch a Rookie Learn How To Swap a LS1 and T56 into a 1992 Z28
The paint isn't as good as it looks in pictures. It photographs well, but there are a lot of scratches and chips in it, but thank you none the less.
02-24-2017, 08:02 PM
#240
Member
Thread Starter
Join Date: Aug 2007
Location: Long Island, NY
Posts: 201
Likes: 0
Received 2 Likes
on
2 Posts
Car: 1992 z28
Engine: LS1
Transmission: T-56
Re: Watch a Rookie Learn How To Swap a LS1 and T56 into a 1992 Z28
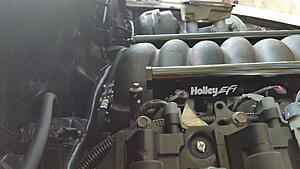
So I have been working on the car a lot lately, and I am at the point where I am ready to fire it up, but I have a few last minute questions I was wondering if I could get some help with before I try to fire it up tomorrow.
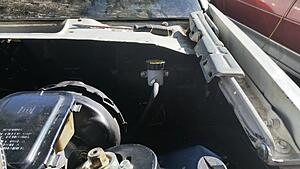
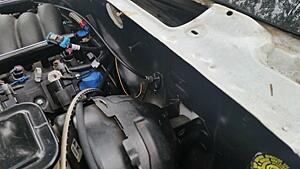
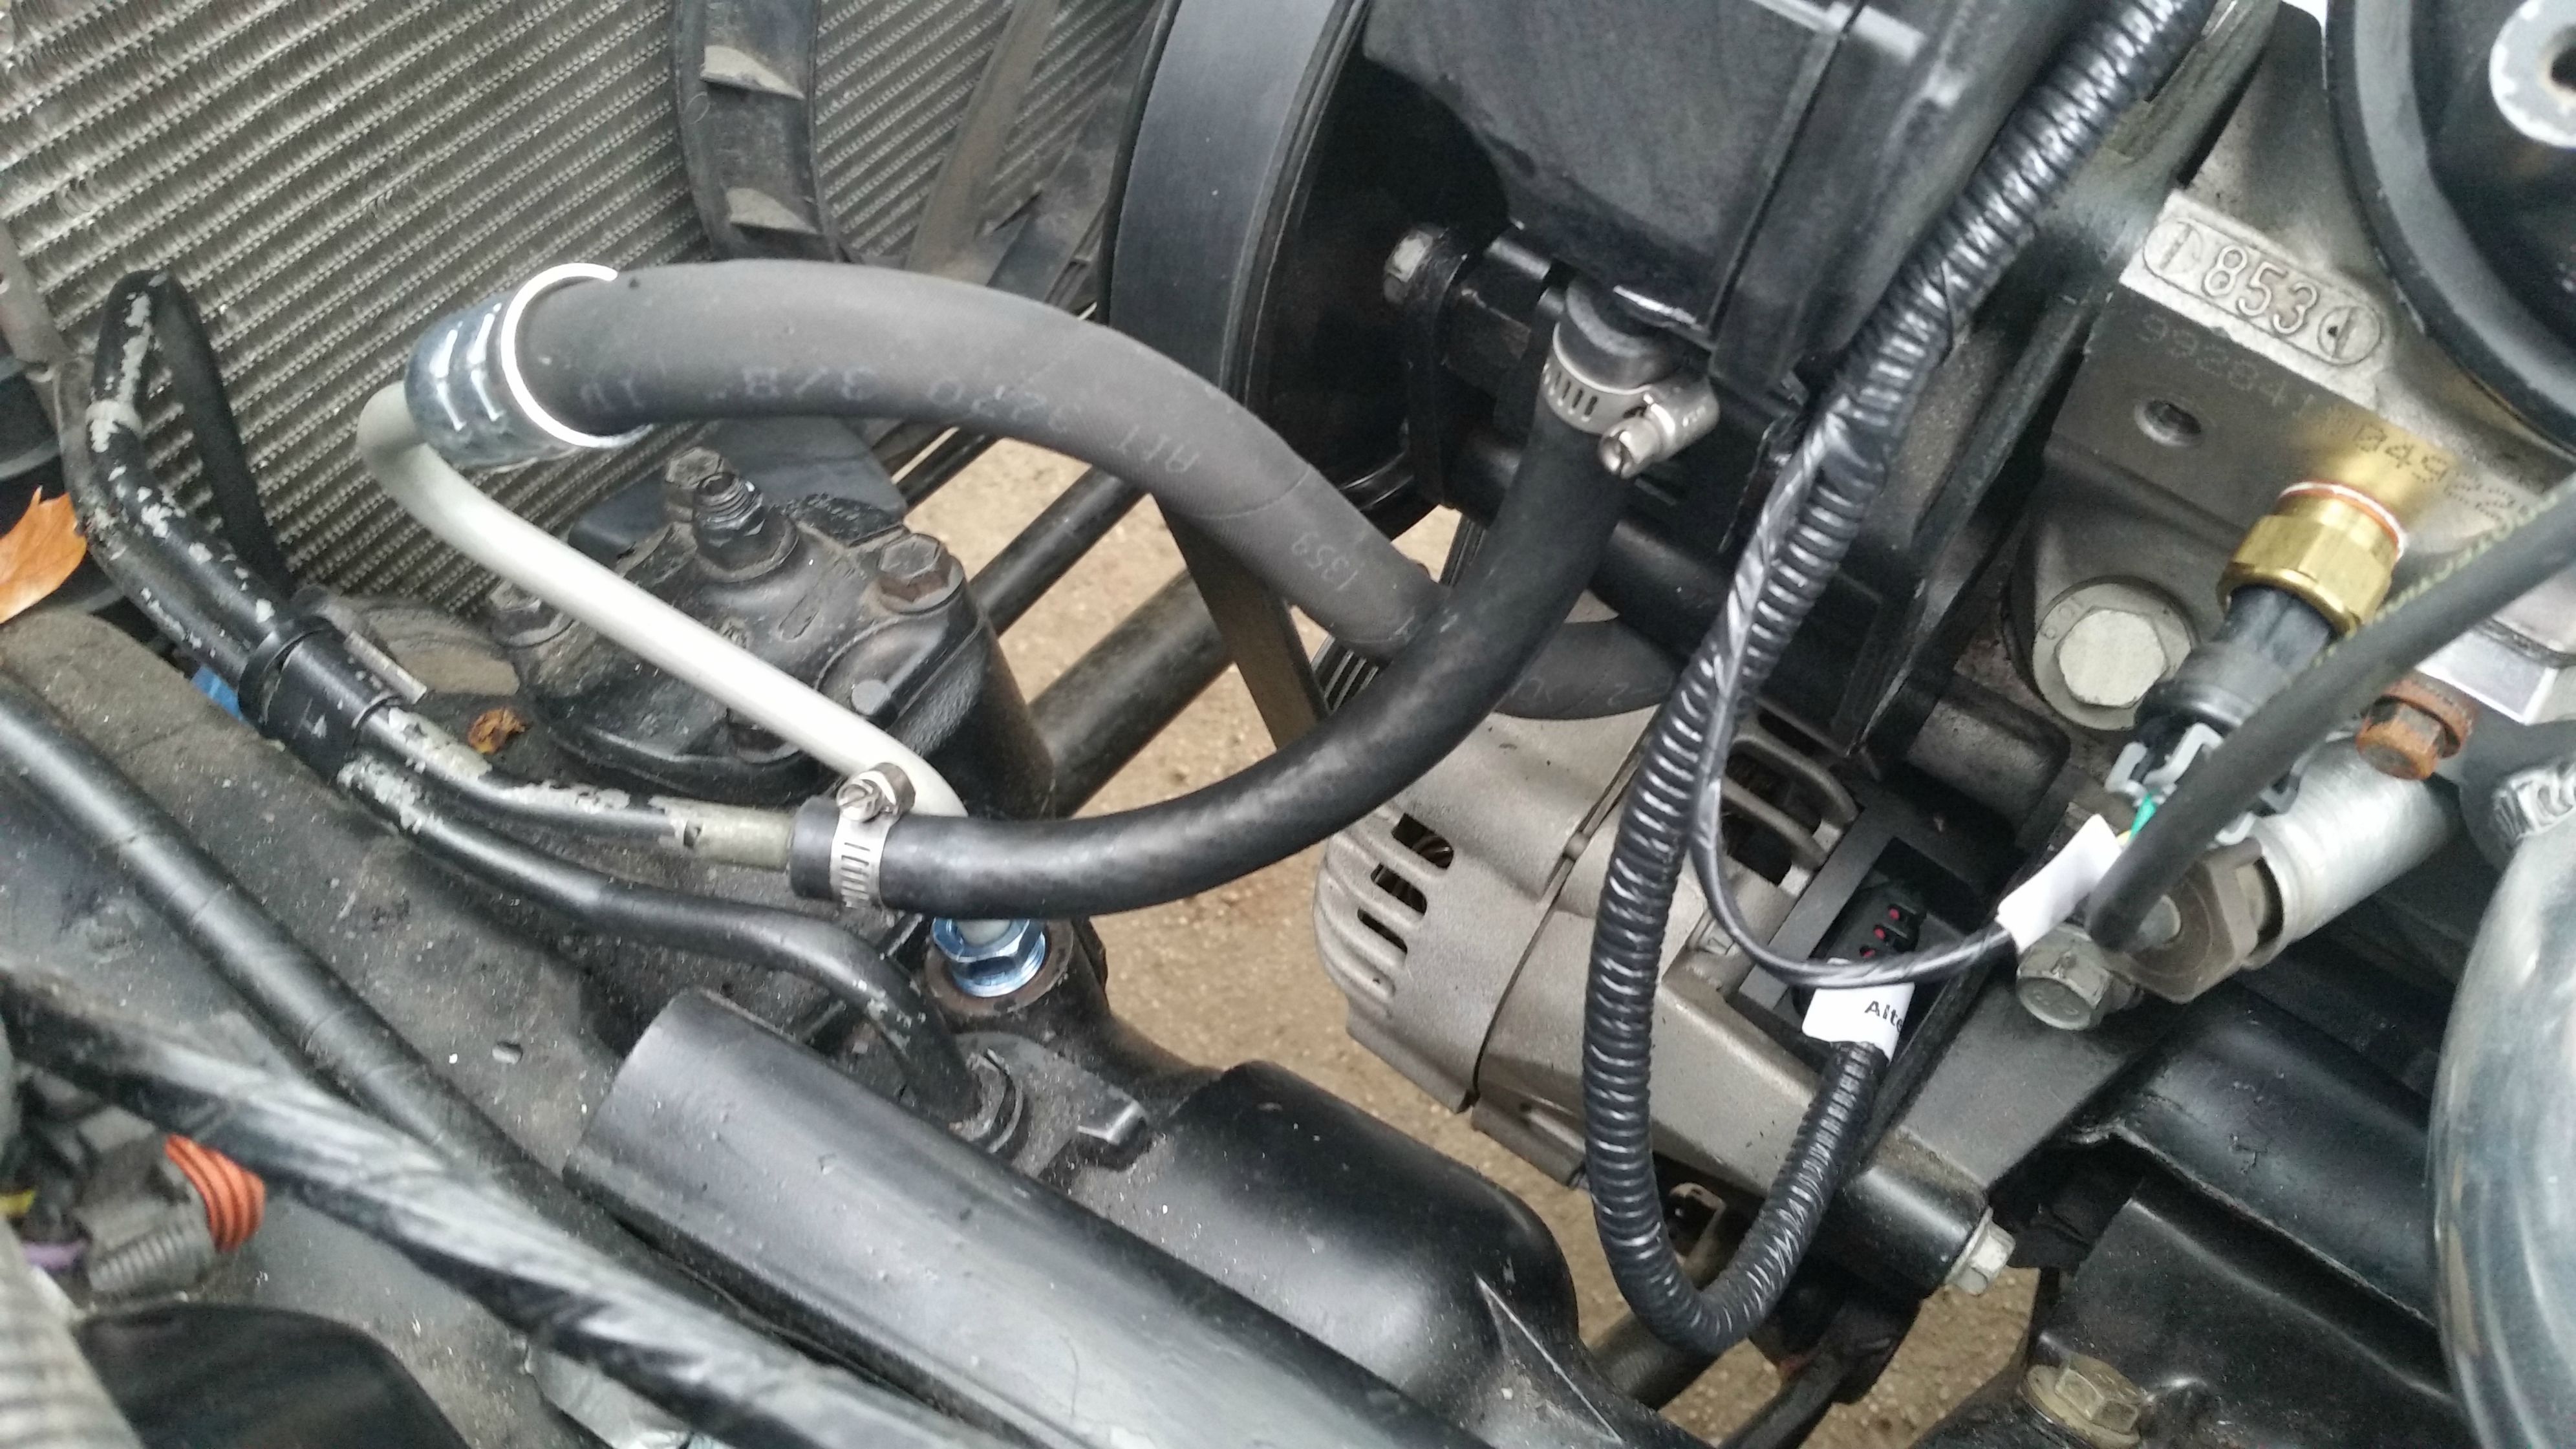
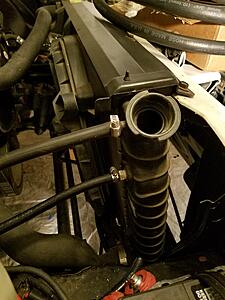
The first question is about the steam vent line that is supposed to be fed back into the cooling system. I know some people put it into the radiator and some people have that T-fitting for the upper radiator hose from jagsthatrun. I tried to go with the first option of feeding it into the radiator. I saw some people said there was an extra port that was threaded, but I think I misunderstood that and hooked it up to the wrong spot. Long story short please take a look at the pics and tell me if this is a terrible idea. There is also another hole exactly like this on the bottom of the radiator...can I just plug the bottom one?

Im guessing this is no good?
Also, second random question before I try to start it: Do I need to worry about VATS if it was already tuned out of the LS1 PCM? Will the VATS that came stock on the vehicle in 1992 pose problems? If that is the case can I jump A3 and B1 on the PASSkey module and be good?
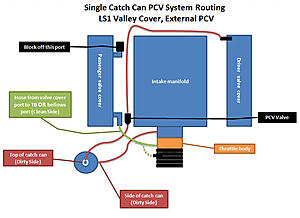
Last question, this is the diagram that I was going off of to set up my catch can...is this effective? Can I put the PCV valve right into the drivers side cylinder head, or should I put it where it appears in the diagram:
I figured these last minute questions are a shot in the dark, but it never hurts to ask. Other than that everything with the car is ready to roll for its first test fire. Got the clutch bled the other night (pedal feels nice), and spent the whole week fixing little problems and tidying up wiring.
Lets hope this doesnt go terribly wrong...
The first question is about the steam vent line that is supposed to be fed back into the cooling system. I know some people put it into the radiator and some people have that T-fitting for the upper radiator hose from jagsthatrun. I tried to go with the first option of feeding it into the radiator. I saw some people said there was an extra port that was threaded, but I think I misunderstood that and hooked it up to the wrong spot. Long story short please take a look at the pics and tell me if this is a terrible idea. There is also another hole exactly like this on the bottom of the radiator...can I just plug the bottom one?


Im guessing this is no good?
Also, second random question before I try to start it: Do I need to worry about VATS if it was already tuned out of the LS1 PCM? Will the VATS that came stock on the vehicle in 1992 pose problems? If that is the case can I jump A3 and B1 on the PASSkey module and be good?
Last question, this is the diagram that I was going off of to set up my catch can...is this effective? Can I put the PCV valve right into the drivers side cylinder head, or should I put it where it appears in the diagram:

I figured these last minute questions are a shot in the dark, but it never hurts to ask. Other than that everything with the car is ready to roll for its first test fire. Got the clutch bled the other night (pedal feels nice), and spent the whole week fixing little problems and tidying up wiring.
Lets hope this doesnt go terribly wrong...
02-24-2017, 08:18 PM
#241
Supreme Member
iTrader: (11)

Join Date: Sep 1999
Location: NJ
Posts: 4,345
Received 298 Likes
on
234 Posts
Car: 92 Firebird
Engine: 4.8 LR4
Transmission: T56
Axle/Gears: 3.45 9 Bolt
Re: Watch a Rookie Learn How To Swap a LS1 and T56 into a 1992 Z28
That port on the radiator is the transmission cooler. You will need to ground the starter relay on the black/white wire, I believe, because the VATS grounds that pin, otherwise you can remove the VATS
02-24-2017, 08:25 PM
#242
Member
Thread Starter
Join Date: Aug 2007
Location: Long Island, NY
Posts: 201
Likes: 0
Received 2 Likes
on
2 Posts
Car: 1992 z28
Engine: LS1
Transmission: T-56
Re: Watch a Rookie Learn How To Swap a LS1 and T56 into a 1992 Z28
Thanks for answering quick!
02-24-2017, 08:49 PM
#243
Supreme Member
iTrader: (11)
Join Date: Sep 1999
Location: NJ
Posts: 4,345
Received 298 Likes
on
234 Posts
Car: 92 Firebird
Engine: 4.8 LR4
Transmission: T56
Axle/Gears: 3.45 9 Bolt
Re: Watch a Rookie Learn How To Swap a LS1 and T56 into a 1992 Z28
No, it's not part of the cooling system, it is a closed system for the transmission, it just passes the fluid inside the radiator as a heat exchanger. You have to put it into the cooling system. I put an 1/8" nipple in the water outlet and ran my hose there so I didn't have to re-tap the water pump if the pump ever needs to be replaced
02-24-2017, 09:07 PM
#244
Member
Thread Starter
Join Date: Aug 2007
Location: Long Island, NY
Posts: 201
Likes: 0
Received 2 Likes
on
2 Posts
Car: 1992 z28
Engine: LS1
Transmission: T-56
Re: Watch a Rookie Learn How To Swap a LS1 and T56 into a 1992 Z28
No, it's not part of the cooling system, it is a closed system for the transmission, it just passes the fluid inside the radiator as a heat exchanger. You have to put it into the cooling system. I put an 1/8" nipple in the water outlet and ran my hose there so I didn't have to re-tap the water pump if the pump ever needs to be replaced

Would it be a big deal to start the engine with this steam vent tube just dropped into an empty bottle or something? Just to let the engine run for like a minute until I can get this fitting in the mail?
02-25-2017, 12:13 PM
#245
Re: Watch a Rookie Learn How To Swap a LS1 and T56 into a 1992 Z28
Should be fine to just start it up as some guys just cap the steam vent and drive like that. Most recommend tying into cooling system though.
On a side note, thanks for tip on where to purchase that fitting. I just saw the other day where someone tied it into upper hose and liked that idea. Never saw it before. Have no room to tap pump, and didnt feel like running over to radiator.
On a side note, thanks for tip on where to purchase that fitting. I just saw the other day where someone tied it into upper hose and liked that idea. Never saw it before. Have no room to tap pump, and didnt feel like running over to radiator.
Last edited by indebt; 02-25-2017 at 12:16 PM.
02-25-2017, 01:24 PM
#246
Member
Thread Starter
Join Date: Aug 2007
Location: Long Island, NY
Posts: 201
Likes: 0
Received 2 Likes
on
2 Posts
Car: 1992 z28
Engine: LS1
Transmission: T-56
Re: Watch a Rookie Learn How To Swap a LS1 and T56 into a 1992 Z28
Should be fine to just start it up as some guys just cap the steam vent and drive like that. Most recommend tying into cooling system though.
On a side note, thanks for tip on where to purchase that fitting. I just saw the other day where someone tied it into upper hose and liked that idea. Never saw it before. Have no room to tap pump, and didnt feel like running over to radiator.
On a side note, thanks for tip on where to purchase that fitting. I just saw the other day where someone tied it into upper hose and liked that idea. Never saw it before. Have no room to tap pump, and didnt feel like running over to radiator.
02-25-2017, 01:32 PM
#247
Member
Thread Starter
Join Date: Aug 2007
Location: Long Island, NY
Posts: 201
Likes: 0
Received 2 Likes
on
2 Posts
Car: 1992 z28
Engine: LS1
Transmission: T-56
Re: Watch a Rookie Learn How To Swap a LS1 and T56 into a 1992 Z28
Well its so FREAKING close to running! It does everything like it wants to start up, and it kinda does and runs for a second or two, but not well. I took a quick video to see if you guys could help me figure out what is going on. Oil pressure looks to be good on the engine.
I did not try to do the bypass wiring on the PASSKey system yet. Is that was is causing this problem? I would assume so, but the fact that the starter is kicking the engine over makes me think that might not be it. Either way you guys would know better than me! Please watch the video and let me know what you think!
https://www.youtube.com/watch?v=lZRo...ature=youtu.be
Trying to figure out how to embed the video now.....I cant figure it out for the life of me, but please click the link above, it should work!
Last edited by Warnd; 02-25-2017 at 01:46 PM.
02-26-2017, 01:18 PM
#249
COTM Editor
iTrader: (22)
Join Date: Mar 2001
Posts: 9,905
Likes: 0
Received 1,855 Likes
on
1,270 Posts
Car: '89 Firebird
Engine: 7.0L
Transmission: T56
Re: Watch a Rookie Learn How To Swap a LS1 and T56 into a 1992 Z28
I saw some people said there was an extra port that was threaded, but I think I misunderstood that and hooked it up to the wrong spot. Long story short please take a look at the pics and tell me if this is a terrible idea. There is also another hole exactly like this on the bottom of the radiator...can I just plug the bottom one?
https://www.thirdgen.org/forums/ltx-...ml#post6007530
02-26-2017, 01:26 PM
#250
Member
Thread Starter
Join Date: Aug 2007
Location: Long Island, NY
Posts: 201
Likes: 0
Received 2 Likes
on
2 Posts
Car: 1992 z28
Engine: LS1
Transmission: T-56
Re: Watch a Rookie Learn How To Swap a LS1 and T56 into a 1992 Z28
Those unused ports are the transmission cooler inlet and outlet. Yes, you can use the top port for steam line if you're handy with a drill. Pictures and part numbers of upper and lower fitting are in link below. Easiest and cleanest version of the steam line there is, in my opinion.
https://www.thirdgen.org/forums/ltx-...ml#post6007530
https://www.thirdgen.org/forums/ltx-...ml#post6007530
Did you get a chance to watch the start up video? Trying to figure out the problem here. I actually sent you a PM about the PASS Key system...I saw what you did in your thread, but I cant find the passkey module for the life of me. Did you remove the dash to get to it?