
New to this Section- First LS Swap

Thread Starter
Supreme Member
iTrader: (1)
Joined: Feb 2003
Posts: 2,024
Likes: 3
From: Marietta, GA
Car: 92 Z28
Engine: LS1
Transmission: T56
Axle/Gears: 3.73 10 bolt
Re: New to this Section- First LS Swap
Lol, fair enough. Just coming to the point where I'm going to have to STOP spending money pretty soon.
Found a deal on a ac compressor and bracket. So still have to get gas tank, shifter plate, different shifter stick, fuel fittings, harmonic balancer, hoses, belts, push rods, fluids, fuel level sensor, block plugs, a few sensors, stuff for wiring, ls3 coils?, clutch upgrade?, intake upgrade?, valley cover upgrade? and whatever else I'm forgetting..
Found a deal on a ac compressor and bracket. So still have to get gas tank, shifter plate, different shifter stick, fuel fittings, harmonic balancer, hoses, belts, push rods, fluids, fuel level sensor, block plugs, a few sensors, stuff for wiring, ls3 coils?, clutch upgrade?, intake upgrade?, valley cover upgrade? and whatever else I'm forgetting..
Member
Joined: Dec 2014
Posts: 431
Likes: 1
From: Garland, TX
Car: 2014 Z28 #80
Re: New to this Section- First LS Swap
I understand your pain perfectly, sir. I still have a lot I need to do, but money and other vehicles going boom take my time up. My wife's camaro... my friends Honda... our family van's transmission yesterday.
Still need to get my AC delete box so I can have the blower motor back... need to get my windshield replaced and my headliner redone... need to get my seats finished, get the LS1 tank swapped in, paint etc. lol. I did just enough to get it on the road safely, and tuned (and even that needs to be touched up).
Still need to get my AC delete box so I can have the blower motor back... need to get my windshield replaced and my headliner redone... need to get my seats finished, get the LS1 tank swapped in, paint etc. lol. I did just enough to get it on the road safely, and tuned (and even that needs to be touched up).

Joined: Mar 2000
Posts: 43,187
Likes: 45
From: Littleton, CO USA
Car: 82 Berlinetta/57 Bel Air
Engine: L92/LQ4 (both w/4" stroke)
Transmission: 4L80E/4L80E
Axle/Gears: 12B-3.73/9"-3.89
Yes, LS3 coils use the same type connector as LS1/LS2/LQ4, etc.
Thread Starter
Supreme Member
iTrader: (1)
Joined: Feb 2003
Posts: 2,024
Likes: 3
From: Marietta, GA
Car: 92 Z28
Engine: LS1
Transmission: T56
Axle/Gears: 3.73 10 bolt
Re: New to this Section- First LS Swap
Thank you, makes it a little easier. Thought I found as set for $80 and then he sent me a picture of the truck coils.. boo. They have all new sets on the bay for like $130 though, which if I don't need the harness seems like the way to go.
Went ahead and ordered the LS6 valley cover so I can clearance the block before I clean it. Won't need the coils until I'm ready to paint stuff as I think I'm gonna do them body color.
Went ahead and ordered the LS6 valley cover so I can clearance the block before I clean it. Won't need the coils until I'm ready to paint stuff as I think I'm gonna do them body color.

Re: New to this Section- First LS Swap
Which begs the question... how the hell is it running well? Vacuum is always within range for the cam, oil always comes out looking relatively clean (considering my rings are gapped for boost)... I'm at a loss at how this has worked fine for over 1k miles now without a way for fresh air to get in properly.
Needless to say, I'm going to run a line and see what happens
Needless to say, I'm going to run a line and see what happens
Should keep it from sucking up oil too, not sure if worth $90 or not.
The LS3 coils take the same plug right?
The LS3 coils take the same plug right?
Thread Starter
Supreme Member
iTrader: (1)
Joined: Feb 2003
Posts: 2,024
Likes: 3
From: Marietta, GA
Car: 92 Z28
Engine: LS1
Transmission: T56
Axle/Gears: 3.73 10 bolt
Re: New to this Section- First LS Swap
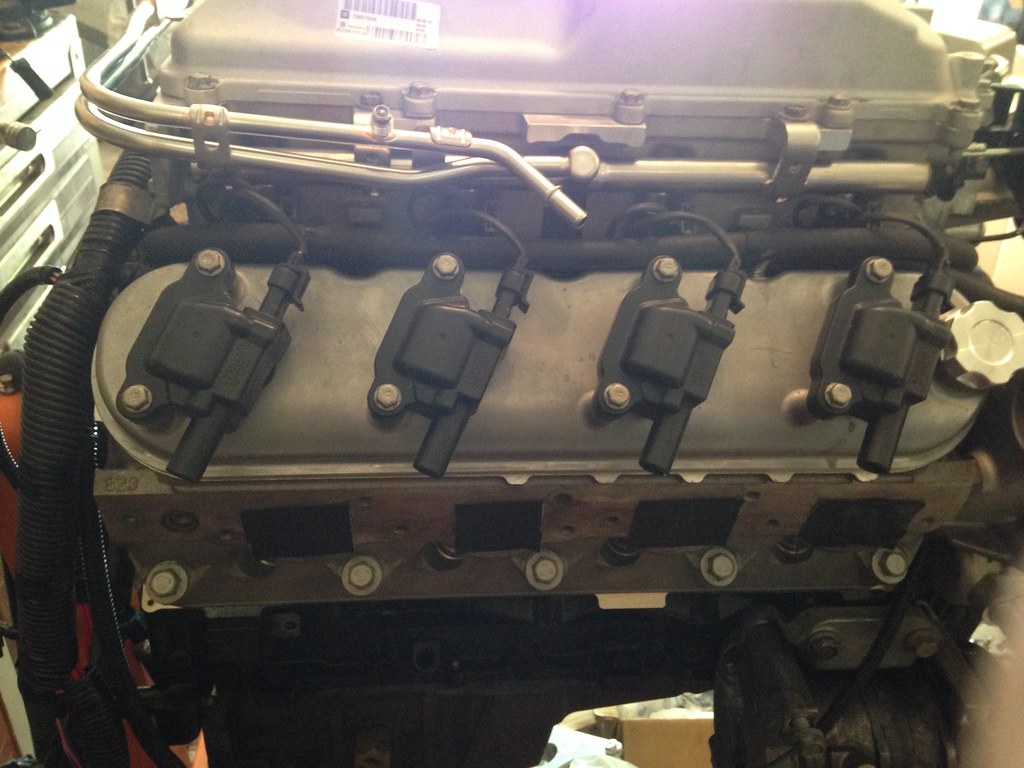
This style below.
Got a little bit done over xmas. Block is completely polished and pretty much ready for assembly. I cleaned up the head gasket area and let the block soak in degreaser along with some other dirty parts and pressure washed them. Started sanding the other stuff down to polish and blew up my air compressor. Vengeance sent me a second wrong cam, LS6 valley showed up and I got the block notched before I PWd it. Letting the pistons soak a day per in Carb bucket and cleaning each one right now. Want to finish poslishing/sanding before I assemble the short block so I don't get metal shavings in it after it's put together.

Re: New to this Section- First LS Swap
So the LS3 Coil itself takes a different plug, but if you get the whole set with the harness it plugs right up, correct?

LS1/6 coils look like this:

And take this unique connector

All other LSx coils use this connector

Thread Starter
Supreme Member
iTrader: (1)
Joined: Feb 2003
Posts: 2,024
Likes: 3
From: Marietta, GA
Car: 92 Z28
Engine: LS1
Transmission: T56
Axle/Gears: 3.73 10 bolt
Re: New to this Section- First LS Swap
Got it, guess i'll stay on the lookout for a used set then. Thank you Pocket.
Still polishing stuff. Got almost everything but the alt/wp sanded down to 400 to start polishing, will get those done next weekend and hopefully make some progress with polish. Starter is staying as is, and not sure what to do with the PS pump, it is the only steel piece there and the tank is plastic. Will probably paint the pump aluminum or cast iron.


Pistons were pretty coated, I have been soaking them one by one overnight in carb cleaner and then cleaning them up. Almost all the way clean after that but will have to get a little bit of grit out of the ring grooves on a few.


Then soak all the valves and clean em up, start working on heads. Hopefully Vengeance will get me the correct cam I ordered back in November.. Glad I was planning on doing this instead of assembly.
COTM Editor
iTrader: (11)
Joined: Mar 2006
Posts: 4,098
Likes: 14
From: WINDSOR, CO
Car: 91 Z28, 87 SC, 90 IROC, 92 RS
Engine: LS1, 305 TPI, L98, NADA
Transmission: T56, 700r4's, and NADA
Axle/Gears: 3.89, 3.42, 3.23, NADA
Re: New to this Section- First LS Swap
You are a mad man polishing the entire block and all the aluminum accessories, but... I like it. Its all in the details.
Joined: Mar 2000
Posts: 43,187
Likes: 45
From: Littleton, CO USA
Car: 82 Berlinetta/57 Bel Air
Engine: L92/LQ4 (both w/4" stroke)
Transmission: 4L80E/4L80E
Axle/Gears: 12B-3.73/9"-3.89

COTM Editor
iTrader: (11)
Joined: Mar 2006
Posts: 4,098
Likes: 14
From: WINDSOR, CO
Car: 91 Z28, 87 SC, 90 IROC, 92 RS
Engine: LS1, 305 TPI, L98, NADA
Transmission: T56, 700r4's, and NADA
Axle/Gears: 3.89, 3.42, 3.23, NADA


Joined: Feb 2007
Posts: 4,770
Likes: 64
From: Trumbull CT
Car: 87 TA clone
Engine: 70/70 Turbo 5.3 LS
Transmission: bullet proof 2004R
Axle/Gears: ford 8.8, 3.55 gears
Re: New to this Section- First LS Swap
I hope your sealing those polished parts! lol.
Thread Starter
Supreme Member
iTrader: (1)
Joined: Feb 2003
Posts: 2,024
Likes: 3
From: Marietta, GA
Car: 92 Z28
Engine: LS1
Transmission: T56
Axle/Gears: 3.73 10 bolt
Re: New to this Section- First LS Swap
Thank you for the support, I need it 
I knew I would regret the decision when I made it, and I still do. Hopefully the last engine that ever goes in this car, so better do it right.
I will. I need to do some research on what do use. Is Zoop Seal still the best game in town, or has something better come out?
I will. I need to do some research on what do use. Is Zoop Seal still the best game in town, or has something better come out?
Joined: Feb 2007
Posts: 4,770
Likes: 64
From: Trumbull CT
Car: 87 TA clone
Engine: 70/70 Turbo 5.3 LS
Transmission: bullet proof 2004R
Axle/Gears: ford 8.8, 3.55 gears
Re: New to this Section- First LS Swap
My newest thing I put it on was my new billet torque storm supercharger. In the process of doing it but got the bracket all sealed i think.
I use it on everything and the 1qt jug has lasted me a few years and I still have like 1/2 left. Its so thin that it doesn't take a lot of cover a large area so even tho its kinda expensive (still less than Zoop seal I think) its a lot of product for your money.
Site
http://www.sharkhide.com/index.html
Pulled from there Q&A
Q: How long will the average application last?
A: On things like Motorcycles, Street Rods, Aircraft and other things that see limited fair weather use, it's not uncommon to get 6 or more years of protection
Joined: Mar 2000
Posts: 43,187
Likes: 45
From: Littleton, CO USA
Car: 82 Berlinetta/57 Bel Air
Engine: L92/LQ4 (both w/4" stroke)
Transmission: 4L80E/4L80E
Axle/Gears: 12B-3.73/9"-3.89
Re: New to this Section- First LS Swap
I thought so, was corrected. The LS3 coil harness has the same connector to the PCM as the LS1 harness, but I was told the individual LS3 coils have a different connector.
I have a set of LS3 valve covers and coils that I eventually plan on installing. But, that's probably going to wait until I do other things to the engine/car.
I used an LS6 valley cover on my stroked LQ4. Well worth it, in my opinion. Didn't totally eliminate oil in the intake manifold, but reduced it significantly.
Thread Starter
Supreme Member
iTrader: (1)
Joined: Feb 2003
Posts: 2,024
Likes: 3
From: Marietta, GA
Car: 92 Z28
Engine: LS1
Transmission: T56
Axle/Gears: 3.73 10 bolt
Re: New to this Section- First LS Swap
I thought so, was corrected. The LS3 coil harness has the same connector to the PCM as the LS1 harness, but I was told the individual LS3 coils have a different connector.
I have a set of LS3 valve covers and coils that I eventually plan on installing. But, that's probably going to wait until I do other things to the engine/car.
I used an LS6 valley cover on my stroked LQ4. Well worth it, in my opinion. Didn't totally eliminate oil in the intake manifold, but reduced it significantly.
I have a set of LS3 valve covers and coils that I eventually plan on installing. But, that's probably going to wait until I do other things to the engine/car.
I used an LS6 valley cover on my stroked LQ4. Well worth it, in my opinion. Didn't totally eliminate oil in the intake manifold, but reduced it significantly.
Picked up the LS6 valley cover too and notched that ash tray in the block, just need to get the engine together after I finish polishing.
I think I have decided to switch from Kooks to the Holley exhaust system, trying to see if I can get an account number here at work for some kind of discount since I missed out on the holiday pricing.
What do you guys use to clean the valves off? Soaking in carb cleaner doesn't seem to be cutting it at all. Are the roloc cookies ok? I know you don't want to use those on pistons because it removes the hypereutectic coating, what about valves?
Also is there any list of what to apply to what bolts? I realize it is mostly common sense; oil on the internals and blue lock tight on externals for the most part. But a check sheet during assembly wouldn't hurt, I have the torque speck sheet for all the bolts but it doesn't have anything on what to apply to the bolts.
Last edited by grngryoutmyway; Jan 14, 2016 at 07:51 AM.
Joined: Feb 2007
Posts: 4,770
Likes: 64
From: Trumbull CT
Car: 87 TA clone
Engine: 70/70 Turbo 5.3 LS
Transmission: bullet proof 2004R
Axle/Gears: ford 8.8, 3.55 gears
Re: New to this Section- First LS Swap
Thank you for the follow up. I switched gears and am looking for a used set LS3 coils with harness now instead. I could get new coils for $140, but then adding 8 plugs to that at probably $10-$15 per, no thanks.
If your going to be changing all the coils I would look for a complete set of the truck coils (the ones with the heat sink coils at the top of each) they are the most powerful of the stock coils... considerably hotter spark than the car versions. Trucks got the best coils and hottest sparks.
Picked up the LS6 valley cover too and notched that ash tray in the block, just need to get the engine together after I finish polishing.
I think I have decided to switch from Kooks to the Holley exhaust system, trying to see if I can get an account number here at work for some kind of discount since I missed out on the holiday pricing.
Holley system looks super nice... with a big price tag. Im sure either one would perform, fit and look great. Wish I had the money for those setups.
What do you guys use to clean the valves off? Soaking in carb cleaner doesn't seem to be cutting it at all. Are the roloc cookies ok? I know you don't want to use those on pistons because it removes the hypereutectic coating, what about valves?
Carb cleaner/sea foam usually does the job. I've used dollar store oven cleaner to eat all the crap off my LS which had 150K on it and years of baked on oil and $hit. That did a great job. Not sure if I would use that on the valves though. Maybe an ultrasonic cleaner? or take them to a machine shop to get hot tanked?
Also is there any list of what to apply to what bolts? I realize it is mostly common sense; oil on the internals and blue lock tight on externals for the most part. But a check sheet during assembly wouldn't hurt, I have the torque speck sheet for all the bolts but it doesn't have anything on what to apply to the bolts.
I don't use locktite on much. If your using ARP hardware then all you need is the ARP moly assembly lube. If using OEM hardware then you prob dont need anything but lube if required by OEM. OEM tq to yeild require special tq values. Def Dont put any locktite on the balancer bolt as alot of people snap them in the crank due to that. They use so much tq and have a coating on the underside of the bolt head to help from loosening. I use locktite on flexplate bolts, tq converter bolts for sure. I might use blue locktite on the cam bolts but thats about it.
Re: New to this Section- First LS Swap
Thank you for the follow up. I switched gears and am looking for a used set LS3 coils with harness now instead. I could get new coils for $140, but then adding 8 plugs to that at probably $10-$15 per, no thanks.
Also is there any list of what to apply to what bolts? I realize it is mostly common sense; oil on the internals and blue lock tight on externals for the most part. But a check sheet during assembly wouldn't hurt, I have the torque speck sheet for all the bolts but it doesn't have anything on what to apply to the bolts.
The rest should be standard use anywhere any amount of times bolts. Gaskets are reusable to an extent. Examine the rubber, if its squished flat like the aluminum frame then its trash. If the rubber sticks up and isnt torn, then reuse it. Its not required, but I like to put a dab or RTV at the bottom of the timing and rear covers where the gaskets meet the oil pan. Ive seen minor seepage and its simple to solve. Remember the timing, rear and oil pans all need to be aligned. There are special tools for this but I prefer to let the gasket do what its going to do. Havent had a leak
Loosely bolt all 3 on with gaskets and press the balancer on. Use a 360* bellhousing or strait edge to align oil pan to block and torque to spec. Snug the rear cover bolts to the block, then torque the bottom two from the oil pan. Torque the block bolts. Snug the timing to block bolt then torque the two on the bottom. Torque the last timing cover bolts
Oil pan alignment is based of the BH and everything else needs to be centered off the crank and pulled down to its top edge. The F/R main seals will ensure L/R alignment of the F/R covers. L/R alignment of the pan is not critical
Thread Starter
Supreme Member
iTrader: (1)
Joined: Feb 2003
Posts: 2,024
Likes: 3
From: Marietta, GA
Car: 92 Z28
Engine: LS1
Transmission: T56
Axle/Gears: 3.73 10 bolt
Re: New to this Section- First LS Swap
Hit up rockauto and check out LS7 coils. $11ea brand new. Use any truck coil harness, I can build some for you alot cheaper than you expect if you cant find any
Stock TTY head bolts have some lube on the bolts already. Since these have to be replaced after each use, you dont have to worry about this. The crank main cross bolts have RTV on the underside of the heads to seal, not lube. They're listed as one time use bolts, but if you put a dab under the heads they can be reused as many times as youd like. Standard 24lb/ft like all M8 bolts on the LS engine. The crank bolt also has this sealant under the head but is TTY, get a new one
The rest should be standard use anywhere any amount of times bolts. Gaskets are reusable to an extent. Examine the rubber, if its squished flat like the aluminum frame then its trash. If the rubber sticks up and isnt torn, then reuse it. Its not required, but I like to put a dab or RTV at the bottom of the timing and rear covers where the gaskets meet the oil pan. Ive seen minor seepage and its simple to solve. Remember the timing, rear and oil pans all need to be aligned. There are special tools for this but I prefer to let the gasket do what its going to do. Havent had a leak
Loosely bolt all 3 on with gaskets and press the balancer on. Use a 360* bellhousing or strait edge to align oil pan to block and torque to spec. Snug the rear cover bolts to the block, then torque the bottom two from the oil pan. Torque the block bolts. Snug the timing to block bolt then torque the two on the bottom. Torque the last timing cover bolts
Oil pan alignment is based of the BH and everything else needs to be centered off the crank and pulled down to its top edge. The F/R main seals will ensure L/R alignment of the F/R covers. L/R alignment of the pan is not critical
I have all new gaskets, most all were trashed when I removed them so I got everything. I already grabbed Fel Pro head bolts, and a GM crank bolt, and I was debating on getting main cross bolts, some say yes some say no, but if it is just because of the RTV that is an easy fix.
Your oil and timing cover alignment directions help a lot as well. Most of what I had read just said kinda tighten the covers, put the pan on torque it and then torque the covers. I've seen the tools, but too much money if you don't really need them.
And thanks CBB as well. I'm just using the ARP connecting rod bolts and have some of the lube. Would be nice to have a full set, but for what it costs, not worth it on this build.
Joined: Feb 2007
Posts: 4,770
Likes: 64
From: Trumbull CT
Car: 87 TA clone
Engine: 70/70 Turbo 5.3 LS
Transmission: bullet proof 2004R
Axle/Gears: ford 8.8, 3.55 gears
Re: New to this Section- First LS Swap
This is all I could find on the coils. Typing in LS7 coils doesn't net any results on rock auto. AIRTEX / WELLS 5C1555 {#12573190, 1788399, C1512} These go for 10.23 each and are the rounded delphi coil design for a 2014 camaro with a 6.2. These are made my airtex.
Pocket got any part numbers for those coils? are they hotter than the truck coils with the heat sinks? Do the heat sink truck coils take the same plug as the regular square D581 coils do? I'm thinking I might need a coil upgrade in the future with a 10psi supercharged 5.3
Pocket got any part numbers for those coils? are they hotter than the truck coils with the heat sinks? Do the heat sink truck coils take the same plug as the regular square D581 coils do? I'm thinking I might need a coil upgrade in the future with a 10psi supercharged 5.3
Re: New to this Section- First LS Swap
Thanks Pocket, that is cheaper than I have seen on the coils. I think I am going to hard wire the coil plugs into the harness like you suggested before. So if I can find cheap plugs it will be worth getting new.
Compare the crossmain bolts to standard cover bolts ie timing. Same thing, just different length and has sealant under the head
This is all I could find on the coils. Typing in LS7 coils doesn't net any results on rock auto. AIRTEX / WELLS 5C1555 {#12573190, 1788399, C1512} These go for 10.23 each and are the rounded delphi coil design for a 2014 camaro with a 6.2. These are made my airtex.
Pocket got any part numbers for those coils? are they hotter than the truck coils with the heat sinks? Do the heat sink truck coils take the same plug as the regular square D581 coils do? I'm thinking I might need a coil upgrade in the future with a 10psi supercharged 5.3
Pocket got any part numbers for those coils? are they hotter than the truck coils with the heat sinks? Do the heat sink truck coils take the same plug as the regular square D581 coils do? I'm thinking I might need a coil upgrade in the future with a 10psi supercharged 5.3
Like I said above, LS1/6 coils pictured take a unique connector. All other LS coils use the same
FWIW, 10psi on a 5.3 wont come close to maxing even the weakest LS coil, so anything you run will be fine
Thread Starter
Supreme Member
iTrader: (1)
Joined: Feb 2003
Posts: 2,024
Likes: 3
From: Marietta, GA
Car: 92 Z28
Engine: LS1
Transmission: T56
Axle/Gears: 3.73 10 bolt
Re: New to this Section- First LS Swap
Well I guess I'm not switching to the Hooker exhaust since my Kooks showed up without warning yesterday. Guy said for the 4th time it would be two weeks last week and it looks like they shipped out last Tues? Still waiting on the Y pipe tho.
These things are realllly nice though. I've never had headers this nice before.


Also decided to just cheap it out and get an LS6 intake and port the stock throttle body. I wouldn't mind paying for a Fast intake, but after that, fuel rails, TB, MAF and intake it is way over what I want to throw down. I think this car will have more power than I'll ever use anyways.
Joined: Feb 2007
Posts: 4,770
Likes: 64
From: Trumbull CT
Car: 87 TA clone
Engine: 70/70 Turbo 5.3 LS
Transmission: bullet proof 2004R
Axle/Gears: ford 8.8, 3.55 gears
Re: New to this Section- First LS Swap
Well I guess I'm not switching to the Hooker exhaust since my Kooks showed up without warning yesterday. Guy said for the 4th time it would be two weeks last week and it looks like they shipped out last Tues? Still waiting on the Y pipe tho.
These things are realllly nice though. I've never had headers this nice before.


Also decided to just cheap it out and get an LS6 intake and port the stock throttle body. I wouldn't mind paying for a Fast intake, but after that, fuel rails, TB, MAF and intake it is way over what I want to throw down. I think this car will have more power than I'll ever use anyways.
These things are realllly nice though. I've never had headers this nice before.
Also decided to just cheap it out and get an LS6 intake and port the stock throttle body. I wouldn't mind paying for a Fast intake, but after that, fuel rails, TB, MAF and intake it is way over what I want to throw down. I think this car will have more power than I'll ever use anyways.
They did a intake shootout for all LS intakes on the market recently in one of the big mags, CHP or carcraft. Basically the Truck intake performed better than most till 5500 and basically on par with the LS6. Speed master at only $220 shipped performed alittle better than both in the upper ranges. Then of course all your hi rpm expensive intakes like Holley, fast etc. if u haven't gotten the intake yet and if it's not cheap (everyone with a LS6 intake thinks they are gold for some reason) look into your options.
Thread Starter
Supreme Member
iTrader: (1)
Joined: Feb 2003
Posts: 2,024
Likes: 3
From: Marietta, GA
Car: 92 Z28
Engine: LS1
Transmission: T56
Axle/Gears: 3.73 10 bolt
Re: New to this Section- First LS Swap
They look good. Depends how much u paid for them lol. I went with the cheap RI SS full length and I'm happy with them esp for $300 to my door. They are not a work of art on the inside of the collector tho but as long as they don't leak I'm not worried.
They did a intake shootout for all LS intakes on the market recently in one of the big mags, CHP or carcraft. Basically the Truck intake performed better than most till 5500 and basically on par with the LS6. Speed master at only $220 shipped performed alittle better than both in the upper ranges. Then of course all your hi rpm expensive intakes like Holley, fast etc. if u haven't gotten the intake yet and if it's not cheap (everyone with a LS6 intake thinks they are gold for some reason) look into your options.
They did a intake shootout for all LS intakes on the market recently in one of the big mags, CHP or carcraft. Basically the Truck intake performed better than most till 5500 and basically on par with the LS6. Speed master at only $220 shipped performed alittle better than both in the upper ranges. Then of course all your hi rpm expensive intakes like Holley, fast etc. if u haven't gotten the intake yet and if it's not cheap (everyone with a LS6 intake thinks they are gold for some reason) look into your options.
LS6 intake should be here tomorrow. That speedmaster is a good bang for your buck on the intake, but then still.. $300 TB and $300 MAF ect.. I'm really going to need new tires and a few other things when I get this done which that money should be going to.
Thread Starter
Supreme Member
iTrader: (1)
Joined: Feb 2003
Posts: 2,024
Likes: 3
From: Marietta, GA
Car: 92 Z28
Engine: LS1
Transmission: T56
Axle/Gears: 3.73 10 bolt
Re: New to this Section- First LS Swap
Well I couldn't miss Football, but have a lot of work to do still. So I made do lol.

Got all the polishing with Emery finished. Just need to clean them up and finish the rest of the polishing and then coat with something.

I finally bothered opening my LS7 clutch and realized there is a slave cylinder in there? I can't use this can I? It doesn't look like the line will hook up and no clue on spacing ect..

Member
Joined: Dec 2014
Posts: 431
Likes: 1
From: Garland, TX
Car: 2014 Z28 #80
Re: New to this Section- First LS Swap
I removed the line from the slave cylinder I got... also removed the fitting. Replaced it with Russel quick-fittings and a 36" line I routed through the cabin to cut down on exposure to heat. Running stock third gen clutch master cyl with it. Also, if you hadn't planned on it yet, get a quick bleeder... trust me, you'll want it.
Thread Starter
Supreme Member
iTrader: (1)
Joined: Feb 2003
Posts: 2,024
Likes: 3
From: Marietta, GA
Car: 92 Z28
Engine: LS1
Transmission: T56
Axle/Gears: 3.73 10 bolt
Re: New to this Section- First LS Swap
.
Last edited by grngryoutmyway; Feb 1, 2016 at 08:16 AM.
Member
Joined: Dec 2014
Posts: 431
Likes: 1
From: Garland, TX
Car: 2014 Z28 #80
Re: New to this Section- First LS Swap
Was it LS7 or LS1? I have an LS1 master, but the line is definitely different. Not sure if the line will link up with this slave or it the slave will work physically. I already got a new LS1 slave so no big deal, but could always take it back and save some monies if I don't need it.
Sorry, it was an LS1 slave.

Senior Member
Joined: Jun 2013
Posts: 746
Likes: 24
From: Atlantic Canada
Car: 87 Trans Am
Engine: LS1
Transmission: T56
Re: New to this Section- First LS Swap
I also used the LS7 clutch with LS1 slave, 3rd gen master. I used a stock 4th gen line, I just made the master fit the line, did the "drill mod" on the 4th gen line, routed in "stock" position and it works great, I've had no fade issues due to exhaust heat.
Get a long bleeder line, mine is long enough it reaches the master reservoir, part of my bleed process involved me cracking the line open and leaving it in the reservoir as I pumped the clutch.
Get a long bleeder line, mine is long enough it reaches the master reservoir, part of my bleed process involved me cracking the line open and leaving it in the reservoir as I pumped the clutch.
Thread Starter
Supreme Member
iTrader: (1)
Joined: Feb 2003
Posts: 2,024
Likes: 3
From: Marietta, GA
Car: 92 Z28
Engine: LS1
Transmission: T56
Axle/Gears: 3.73 10 bolt
Re: New to this Section- First LS Swap
Yes I know the LS1 slave and master work, curious if the LS7 slave works with block and LS1 T56/master as it is essentially free.
Thread Starter
Supreme Member
iTrader: (1)
Joined: Feb 2003
Posts: 2,024
Likes: 3
From: Marietta, GA
Car: 92 Z28
Engine: LS1
Transmission: T56
Axle/Gears: 3.73 10 bolt
Re: New to this Section- First LS Swap
Well still no exciting progress. But I am pretty much done with polishing. I'm going to hit them with a soft flappy cotton wheel with White Rouge and then probably some Mothers power metal, but not until I'm ready to seal everything. Otherwise I'll just have to polish them again.
Unknown to me Zoop Seal went out of business like 10 years ago lol. But they have a new company from the same people Shine Seal, which is I guess what I'm going with. Kind of nervous about using something I haven't tested before and I don't think it is a two part mix like the Zoop, but I can't go back in time so this is it.
Next weekend I'm going to start on the heads, port and polish and sand/polish the outsides. Then I can actually start assembling stuff finally. Hopefully I can get the heads done in one weekend, but I kinda doubt it.

Thread Starter
Supreme Member
iTrader: (1)
Joined: Feb 2003
Posts: 2,024
Likes: 3
From: Marietta, GA
Car: 92 Z28
Engine: LS1
Transmission: T56
Axle/Gears: 3.73 10 bolt
Re: New to this Section- First LS Swap
This weekends work. Finally starting to get to the good stuff. Gasket matched the Ex, removed rocker bolt nub, swirl ramp, and blended both seats and valve guides and smoothed the runners. Need to clean them up a bit, intake is pretty much done, just need to hit the Ex with some higher grit paper. Should be able to finish this up and hopefully get the outside of the heads polished as well (shiny).


Thread Starter
Supreme Member
iTrader: (1)
Joined: Feb 2003
Posts: 2,024
Likes: 3
From: Marietta, GA
Car: 92 Z28
Engine: LS1
Transmission: T56
Axle/Gears: 3.73 10 bolt
Re: New to this Section- First LS Swap
Not much time this weekend, but finished polishing out the exhaust runners up to 320 grit, sanded the combustion chambers down, cleaned up the valve seats, pulled the freeze plugs, and started sanding the casting off of the outside of the heads to polish them up. Should finish and coat all the polishing next weekend, and hopefully get some traction on the short block assembly. If a miracle happens maybe I can get the heads together as well and mounted to measure for push rods, but I doubt it.
Before sanding

After

P/P finished, cleaned up the seats.

Before sanding

After

P/P finished, cleaned up the seats.

Thread Starter
Supreme Member
iTrader: (1)
Joined: Feb 2003
Posts: 2,024
Likes: 3
From: Marietta, GA
Car: 92 Z28
Engine: LS1
Transmission: T56
Axle/Gears: 3.73 10 bolt
Re: New to this Section- First LS Swap
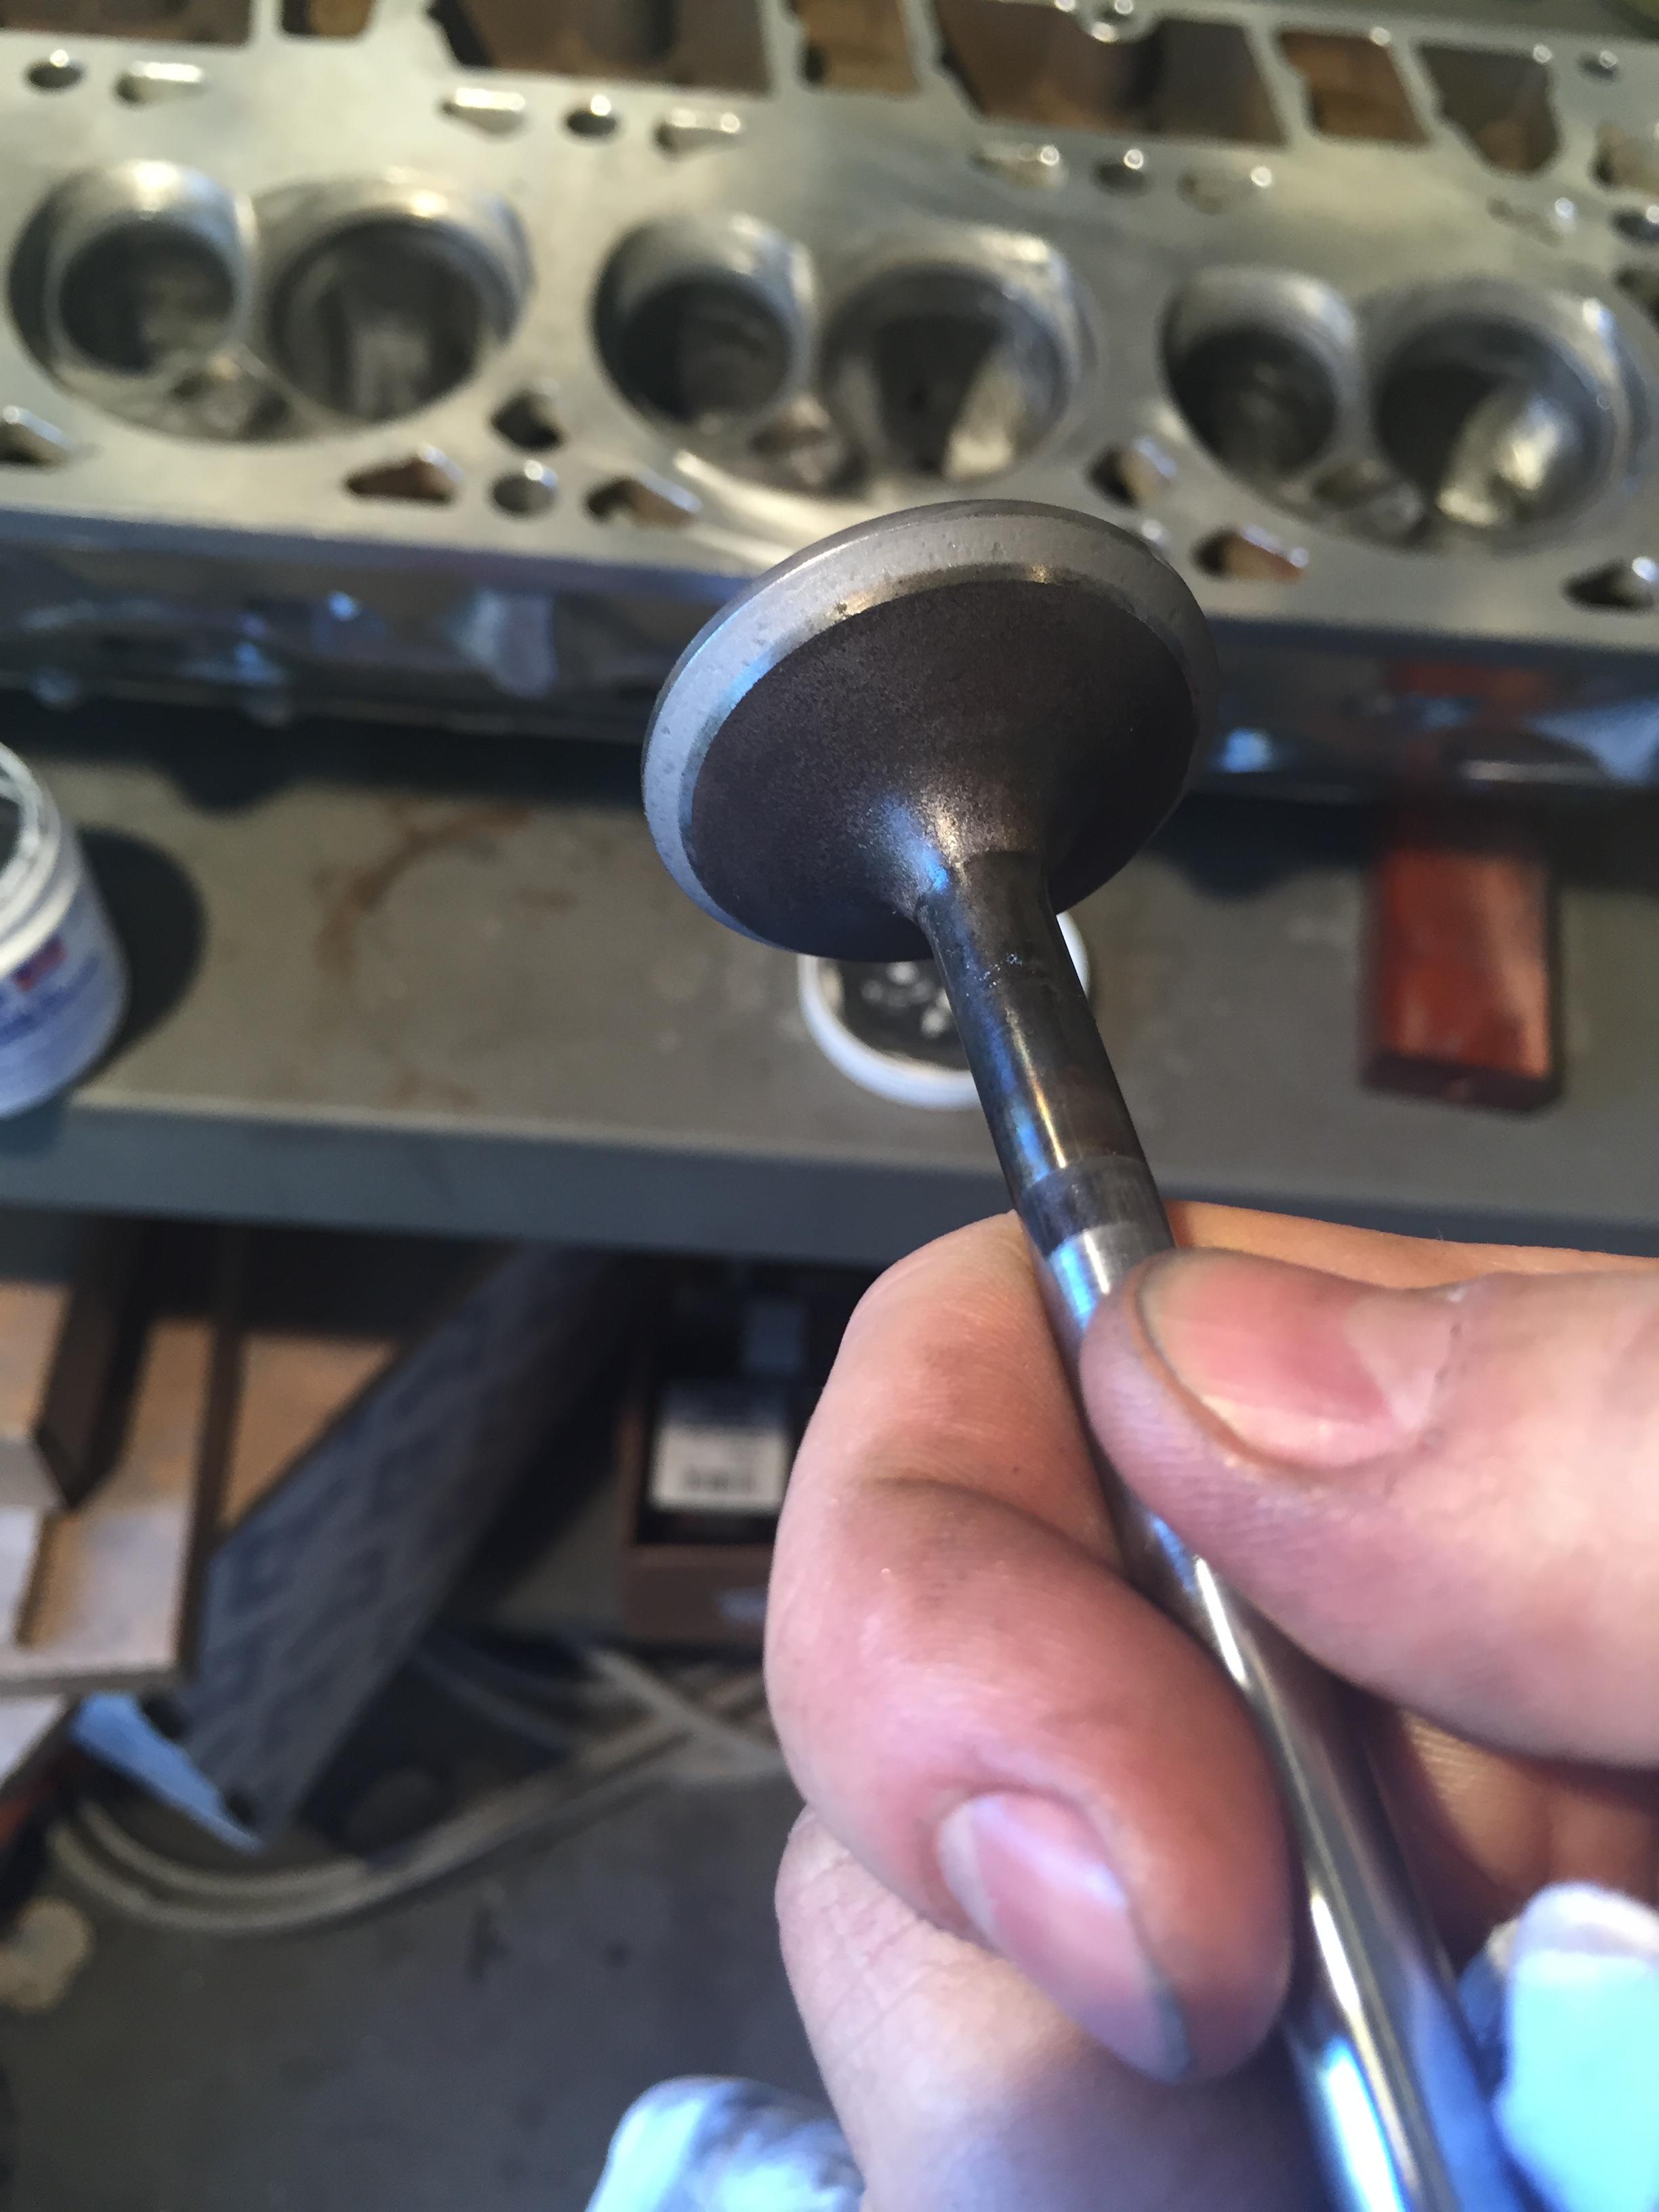
Never thought I was going to say this, but I finally finished polishing stuff. Got everything sealed as well, just have to go over it with a coat of polish for the sealant after it cures. I cleaned up the valves too and the Exhaust is really pitted. Was thinking just buy new but I don't see any decent options. The only stock size I see is some Manleys that are like $150 a set, and OE is $30 or so per. I guess I'll try to lap these and if not I might have to have them re cut or buy the Manley valves.


Going to the Sprint cup race next weekend so I'll just have Saturday. Guess I'll try to lap the ex valves and hopefully get the crank blue printed and in the block at least.


Going to the Sprint cup race next weekend so I'll just have Saturday. Guess I'll try to lap the ex valves and hopefully get the crank blue printed and in the block at least.
Thread Starter
Supreme Member
iTrader: (1)
Joined: Feb 2003
Posts: 2,024
Likes: 3
From: Marietta, GA
Car: 92 Z28
Engine: LS1
Transmission: T56
Axle/Gears: 3.73 10 bolt
Re: New to this Section- First LS Swap
Wow.. finally doing something other than polishing, feels good!
Exhaust valves still have a tiny bit of pitting, but I think they will seal fine. Did not want to cut into the seat any more.

Got all the valves done and heads assembled

Cylinders honed

New Oil Galley Plugs in, have to find a allen socket big enough for the big one.

New cam bearings are in. The old ones actually had a bit of wear I couldn't see with them in the block so it is good I changed them. New mains in and caps on to check clearances and that is all I got to.

Should be able to finish the short block and measure for push rods next weekend. Then just pop the heads and accessories back on and probably rebuild the trans next.
Exhaust valves still have a tiny bit of pitting, but I think they will seal fine. Did not want to cut into the seat any more.
Got all the valves done and heads assembled

Cylinders honed

New Oil Galley Plugs in, have to find a allen socket big enough for the big one.

New cam bearings are in. The old ones actually had a bit of wear I couldn't see with them in the block so it is good I changed them. New mains in and caps on to check clearances and that is all I got to.

Should be able to finish the short block and measure for push rods next weekend. Then just pop the heads and accessories back on and probably rebuild the trans next.
Thread Starter
Supreme Member
iTrader: (1)
Joined: Feb 2003
Posts: 2,024
Likes: 3
From: Marietta, GA
Car: 92 Z28
Engine: LS1
Transmission: T56
Axle/Gears: 3.73 10 bolt
Re: New to this Section- First LS Swap
Finished cleaning up pistons, bored guage/Mic'd everything, double checked with plastigauge, covered in assembly lube, indexed piston rings, stretched the ARP bolts, and bolted the bottom end down. I didn't get to measure for rods yet, but it shouldn't take too long. Need to get the cam in too.
Most all of my clearances were .0020 so on the looser end for the mains but still in spec, right in line on the connecting rods, ring gap is right around .020.

Most all of my clearances were .0020 so on the looser end for the mains but still in spec, right in line on the connecting rods, ring gap is right around .020.

Thread Starter
Supreme Member
iTrader: (1)
Joined: Feb 2003
Posts: 2,024
Likes: 3
From: Marietta, GA
Car: 92 Z28
Engine: LS1
Transmission: T56
Axle/Gears: 3.73 10 bolt
Re: New to this Section- First LS Swap
Well I've hit my first roadblock in the build, as usual self induced. Was measuring for push rods and coming up with 7.30 including .075 pre load which seems way to short. Heads were shaved, but only .018. Tried to clay it with this length using the PR checker and pushing the valve in the clay bent the push rod checker (I guess they are kinda soft to prevent too much damage, makes sense). But doing this I also realized I was checking for length at TDC on the Exhaust stroke instead of Compression so the valves were slightly open already. Double oops 
With no checker anymore I tried to utilize the stock 7.4 pushrods and used the old school method of counting turns and got almost 2 full turns. Which I had read last week was .05 per turn, however finding out now that it is more like .07 which matches what I was finding when using the measurer. (This contributed to a lot of wasted time over the weekend going back and forth between the checker and old school not matching up.) Pre load on the LS7 lifters shouldn't be more than .1. So I was at .14 ish with those. Well I clayed it with these anyways since I didn't have anything else to use. And my PTV is way too close. However it looks like I do need to run an undersized rod. Hopefully the right length will give me enough PTV to squeeze by.
But good news I finally remembered to check end play and it is good.

This is what the clay looked like running a solid LS1 lifter with a 7.4 rod. Ex clearance is probably ok, but intake I've got like .03 at max. Hopefully a little shorter PR will yield better results, otherwise I will have to flycut the piston.

Anyway ordered another PR checker which should hopefully be here tomorrow. Then start checking all over again and hope everything comes together.
Joined: Feb 2007
Posts: 4,770
Likes: 64
From: Trumbull CT
Car: 87 TA clone
Engine: 70/70 Turbo 5.3 LS
Transmission: bullet proof 2004R
Axle/Gears: ford 8.8, 3.55 gears
Re: New to this Section- First LS Swap
Well I've hit my first roadblock in the build, as usual self induced. Was measuring for push rods and coming up with 7.30 including .075 pre load which seems way to short. Heads were shaved, but only .018. Tried to clay it with this length using the PR checker and pushing the valve in the clay bent the push rod checker (I guess they are kinda soft to prevent too much damage, makes sense). But doing this I also realized I was checking for length at TDC on the Exhaust stroke instead of Compression so the valves were slightly open already. Double oops
With no checker anymore I tried to utilize the stock 7.4 pushrods and used the old school method of counting turns and got almost 2 full turns. Which I had read last week was .05 per turn, however finding out now that it is more like .07 which matches what I was finding when using the measurer. (This contributed to a lot of wasted time over the weekend going back and forth between the checker and old school not matching up.) Pre load on the LS7 lifters shouldn't be more than .1. So I was at .14 ish with those. Well I clayed it with these anyways since I didn't have anything else to use. And my PTV is way too close. However it looks like I do need to run an undersized rod. Hopefully the right length will give me enough PTV to squeeze by.
But good news I finally remembered to check end play and it is good.

This is what the clay looked like running a solid LS1 lifter with a 7.4 rod. Ex clearance is probably ok, but intake I've got like .03 at max. Hopefully a little shorter PR will yield better results, otherwise I will have to flycut the piston.

Anyway ordered another PR checker which should hopefully be here tomorrow. Then start checking all over again and hope everything comes together.
With no checker anymore I tried to utilize the stock 7.4 pushrods and used the old school method of counting turns and got almost 2 full turns. Which I had read last week was .05 per turn, however finding out now that it is more like .07 which matches what I was finding when using the measurer. (This contributed to a lot of wasted time over the weekend going back and forth between the checker and old school not matching up.) Pre load on the LS7 lifters shouldn't be more than .1. So I was at .14 ish with those. Well I clayed it with these anyways since I didn't have anything else to use. And my PTV is way too close. However it looks like I do need to run an undersized rod. Hopefully the right length will give me enough PTV to squeeze by.
But good news I finally remembered to check end play and it is good.
This is what the clay looked like running a solid LS1 lifter with a 7.4 rod. Ex clearance is probably ok, but intake I've got like .03 at max. Hopefully a little shorter PR will yield better results, otherwise I will have to flycut the piston.
Anyway ordered another PR checker which should hopefully be here tomorrow. Then start checking all over again and hope everything comes together.
Also when checking pushrod length you should be using a low pressure spring... Don't see it in the pics or in the info.
Remember with pushrod length and rocker wear pattern on the valve stem your not looking for the mark to be center on the stem as much as you are looking for the thinnest mark on the stem.
Thread Starter
Supreme Member
iTrader: (1)
Joined: Feb 2003
Posts: 2,024
Likes: 3
From: Marietta, GA
Car: 92 Z28
Engine: LS1
Transmission: T56
Axle/Gears: 3.73 10 bolt
Re: New to this Section- First LS Swap
Stupid question... But are you checking Pushrods length with head gaskets? Lol. Or at least shimming the head to compressed gasket thickness?
Also when checking pushrod length you should be using a low pressure spring... Don't see it in the pics or in the info.
Remember with pushrod length and rocker wear pattern on the valve stem your not looking for the mark to be center on the stem as much as you are looking for the thinnest mark on the stem.
I used the push rod tool with the LS7 lifters which is what I'm going to be running. Unfortunately just with the cam in the wrong spot. Just supposed to find 0 lash and then add in the pre load you need. I just had the cam at the overlap spot instead of on the circle.
And I thought you only marked valves when you are running a roller rocker on a stud? These are just stock rockers with the trunion kit, flat valve contact, pretty big too. I haven't seen anything on marking these to test proper length.
Joined: Feb 2007
Posts: 4,770
Likes: 64
From: Trumbull CT
Car: 87 TA clone
Engine: 70/70 Turbo 5.3 LS
Transmission: bullet proof 2004R
Axle/Gears: ford 8.8, 3.55 gears
Re: New to this Section- First LS Swap
Yes I had head gaskets on, though that is a reasonable question considering I was checking from the wrong TDC, lol.
I used the push rod tool with the LS7 lifters which is what I'm going to be running. Unfortunately just with the cam in the wrong spot. Just supposed to find 0 lash and then add in the pre load you need. I just had the cam at the overlap spot instead of on the circle.
And I thought you only marked valves when you are running a roller rocker on a stud? These are just stock rockers with the trunion kit, flat valve contact, pretty big too. I haven't seen anything on marking these to test proper length.
Ah... gotcha. Didnt know you were going to run the OEM rockers. I just threw the 150k back on mine when I swapped the stock springs for new blue LS6 springs. Trunion upgrade is good insurance and will probably do mine as well when I tear the motor apart down the line.
I wonder how your going to check the rocker contact patch since its a flat rocker on a flat stem? If you mess with the pushrod length too much I would suspect cocking of the rocker surface against the stem causing wear issues and lots of friction. How are you checking preload with the OEM rockers lol? Arent they just a bolt down... theres no preload nut. unless this is due to the LS7 lifters... which Im not sure if they are different than stock in length.
Why Dont you just deduce the amount you removed from the heads or whatever and subtract that from the OEM pushrod length. Throw in a tool for the heads and flycut the pistons. You said you took off .018 off the head... so for ***** and giggles 7.4" - .018" = 7.382" Since the pushrods are parallel to the head/stems right? Maybe compensate for difference in head gasket thickness if you running different than stock. But I'm sure the large contact patch of the OEM rockers allows for large fluctuations in tolerances from the factory.
Sorry, I'm rather new to the LS motors. I assumed you were running aftermarket rockers since your trying to adjust preload which shouldnt be possible with the OEM setup.
Thread Starter
Supreme Member
iTrader: (1)
Joined: Feb 2003
Posts: 2,024
Likes: 3
From: Marietta, GA
Car: 92 Z28
Engine: LS1
Transmission: T56
Axle/Gears: 3.73 10 bolt
Re: New to this Section- First LS Swap
Ah... gotcha. Didnt know you were going to run the OEM rockers. I just threw the 150k back on mine when I swapped the stock springs for new blue LS6 springs. Trunion upgrade is good insurance and will probably do mine as well when I tear the motor apart down the line.
I wonder how your going to check the rocker contact patch since its a flat rocker on a flat stem? If you mess with the pushrod length too much I would suspect cocking of the rocker surface against the stem causing wear issues and lots of friction. How are you checking preload with the OEM rockers lol? Arent they just a bolt down... theres no preload nut. unless this is due to the LS7 lifters... which Im not sure if they are different than stock in length.
Why Dont you just deduce the amount you removed from the heads or whatever and subtract that from the OEM pushrod length. Throw in a tool for the heads and flycut the pistons. You said you took off .018 off the head... so for ***** and giggles 7.4" - .018" = 7.382" Since the pushrods are parallel to the head/stems right? Maybe compensate for difference in head gasket thickness if you running different than stock. But I'm sure the large contact patch of the OEM rockers allows for large fluctuations in tolerances from the factory.
Sorry, I'm rather new to the LS motors. I assumed you were running aftermarket rockers since your trying to adjust preload which shouldnt be possible with the OEM setup.
I might be wrong but I think since the rockers are pedestal mounted instead of stud mounted you don't need to worry about the contact pattern. The pre load goes on the lifter so the rocker to valve contact stays in the same spot when you are on the circle of the cam.
As far as fly cutting the pistons, I would prefer not to. But I'm going to measure and then block it again and do what needs to be done. Even if I do have to cut them, I need to figure out how much. Using just the gasket and mil difference assuming I run a stock length rod that is only cutting .032, but my PTV checked down to .03 with those rods. So even with a cut I'm still at .062 and should be at about .1. Gotta measure and clay it again
This is a pretty good vid, but he is off on his measurments for a turn on the rocker stud, it is more like .07 and change than .05 per turn.
Last edited by grngryoutmyway; Mar 15, 2016 at 08:44 AM.
Thread Starter
Supreme Member
iTrader: (1)
Joined: Feb 2003
Posts: 2,024
Likes: 3
From: Marietta, GA
Car: 92 Z28
Engine: LS1
Transmission: T56
Axle/Gears: 3.73 10 bolt
Re: New to this Section- First LS Swap
Bunch of parts that have showed up recently. Stuff for fuel hook up, PS pulley, coils, ss bolts for the coils, generic shifter boot, trans bleeder line, got some 3rd gen pedals too since they are supposed to be better, got the harmonic balancer and all my poly mounts as well. Just need tank, push rods, hoses, and then stuff for AC, Heater, and wiring and I should be good.

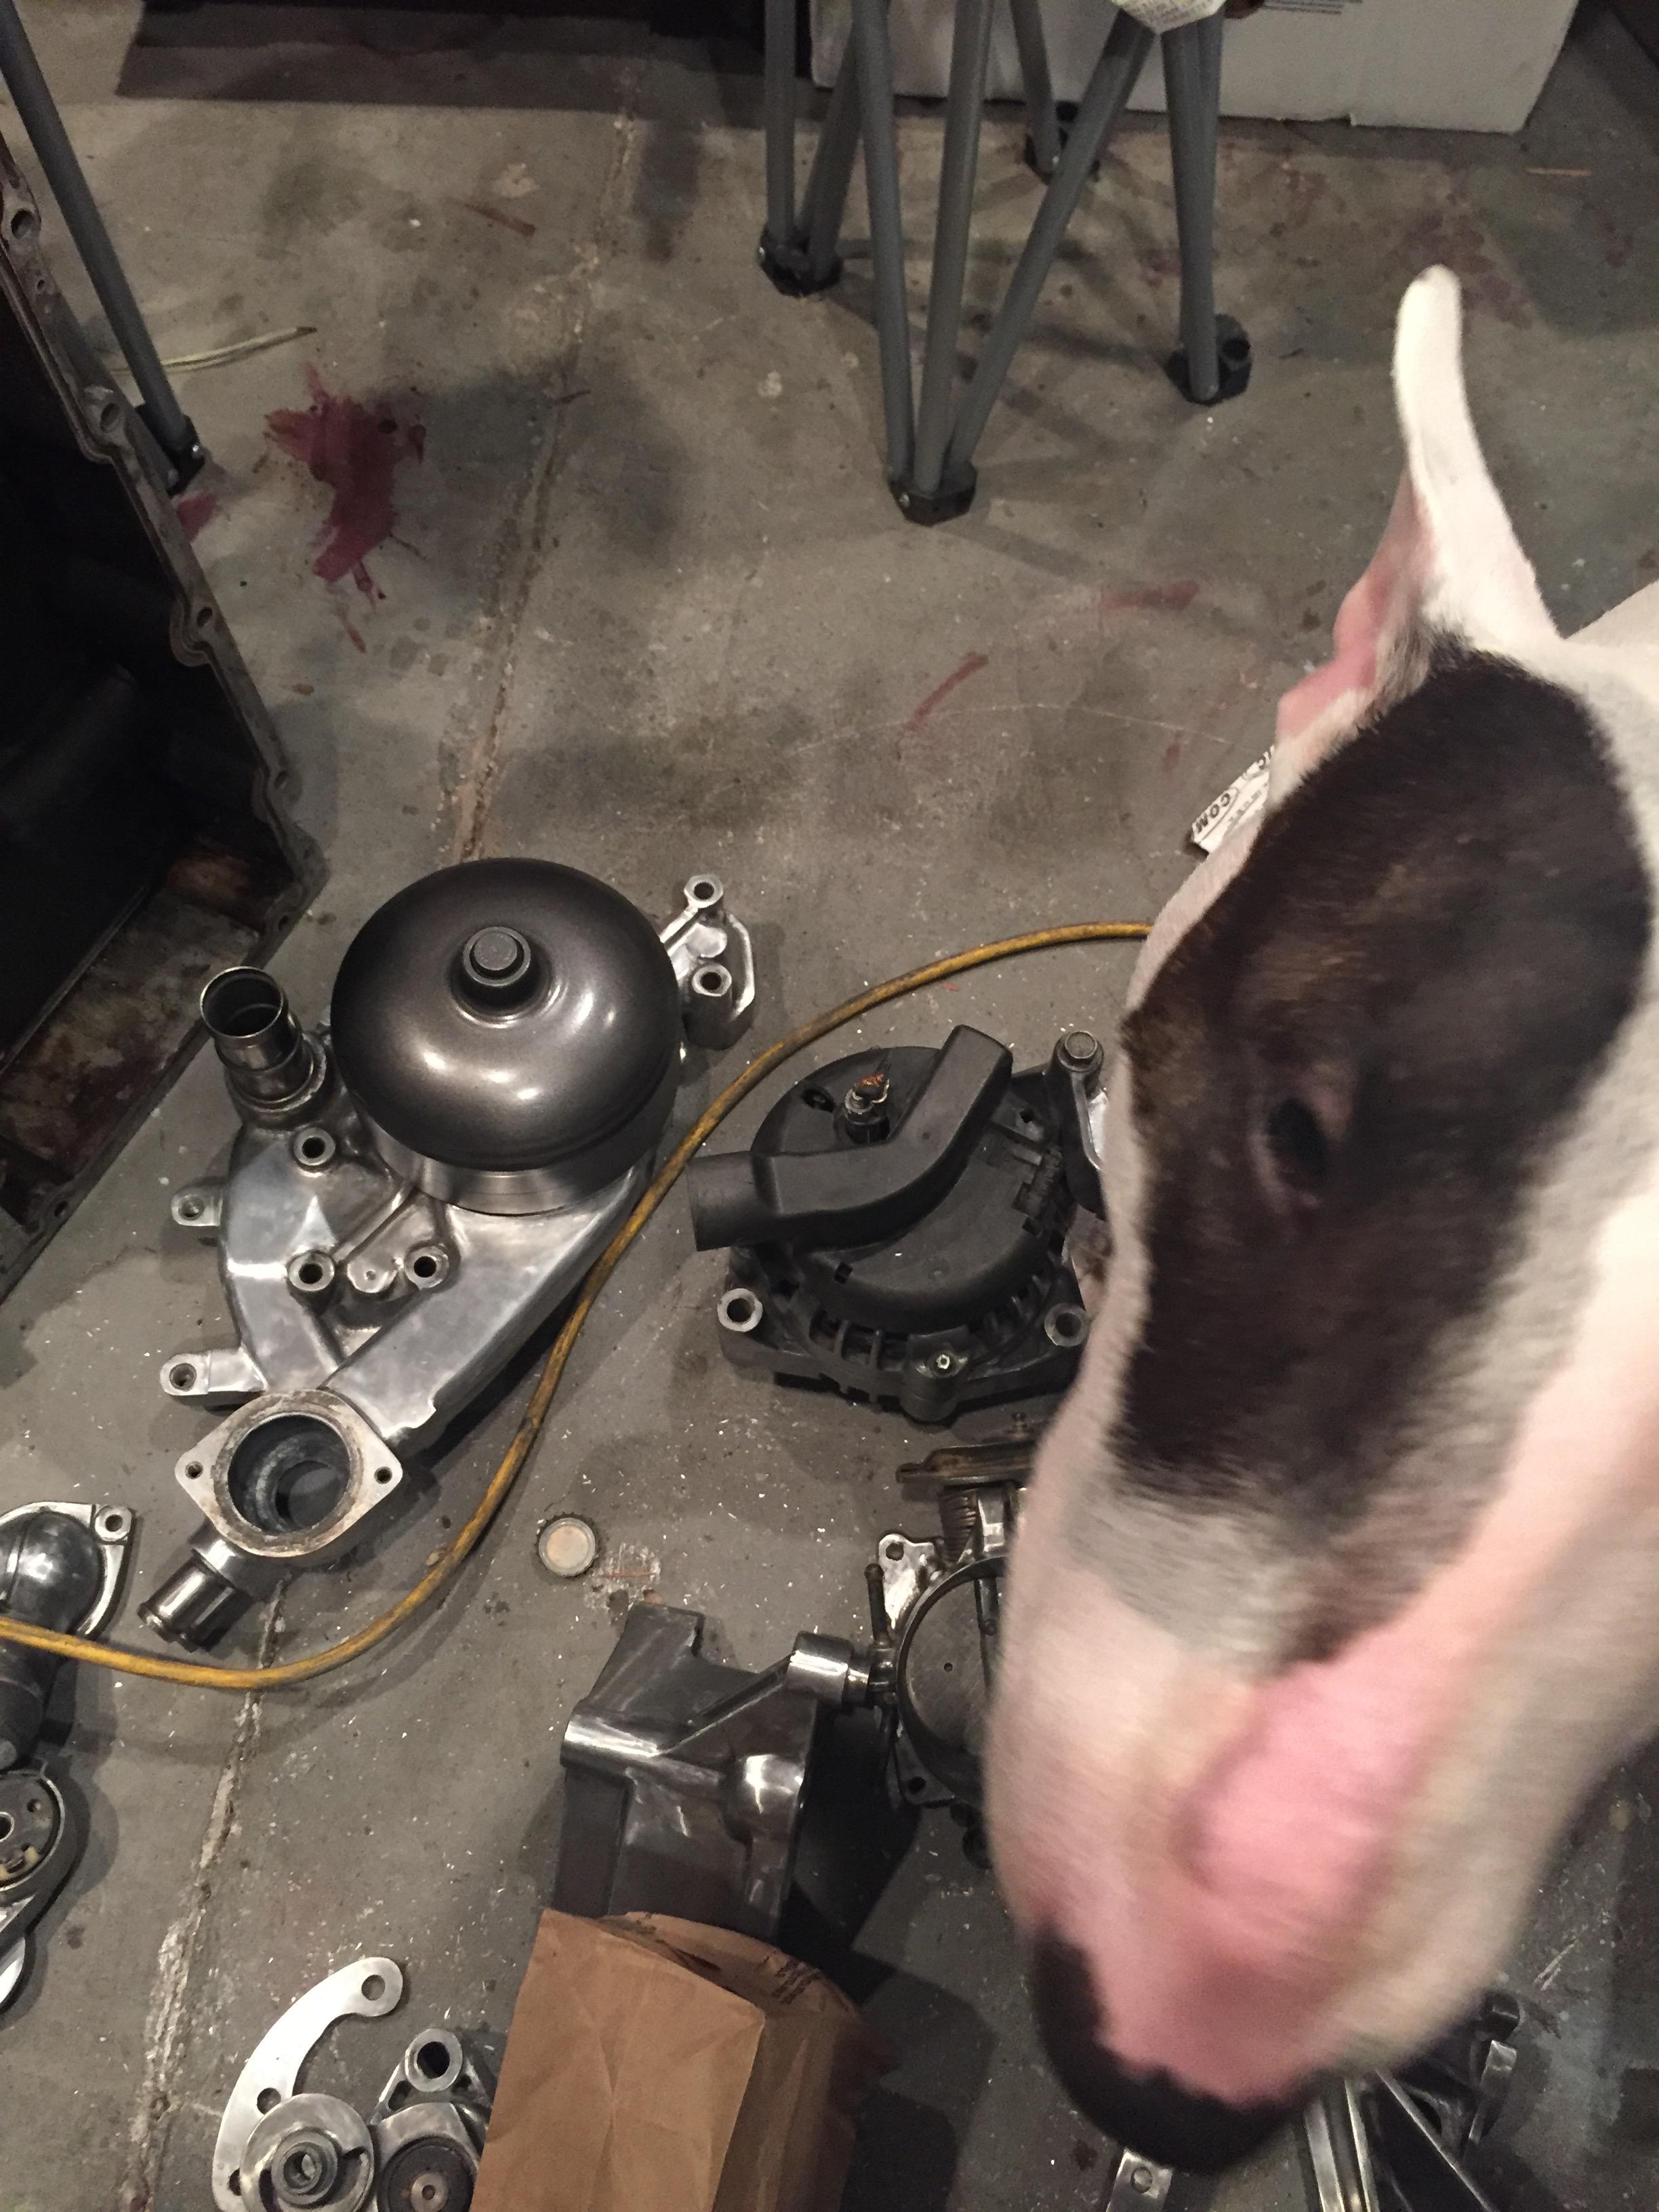
Would have liked to paint everything that was getting paint body color, but the car will be driven and I decided to to do spray can on stuff that will need to be touched up. So PW pulley, stater, PS pump done, will do the k member and all my suspension stuff in this color as well. It is a metallic dark grey, should match the car color and polished stuff well. You can see it on the water pump pulley here, along with my helper.


Would have liked to paint everything that was getting paint body color, but the car will be driven and I decided to to do spray can on stuff that will need to be touched up. So PW pulley, stater, PS pump done, will do the k member and all my suspension stuff in this color as well. It is a metallic dark grey, should match the car color and polished stuff well. You can see it on the water pump pulley here, along with my helper.
Joined: Feb 2007
Posts: 4,770
Likes: 64
From: Trumbull CT
Car: 87 TA clone
Engine: 70/70 Turbo 5.3 LS
Transmission: bullet proof 2004R
Axle/Gears: ford 8.8, 3.55 gears
Re: New to this Section- First LS Swap
Hmmm parts! I love getting boxes of parts. It's like xmass everytime!
Nice color! As it's the exact color of my car lol I shot it with $250 worth of summit dark charcoal metallic grey including the clear and sealer etc and found a dupicolor can that's the exact same color! So I use that on painting the ECM and other things that isn't worth breaking out the paint gun.
Nice color! As it's the exact color of my car lol I shot it with $250 worth of summit dark charcoal metallic grey including the clear and sealer etc and found a dupicolor can that's the exact same color! So I use that on painting the ECM and other things that isn't worth breaking out the paint gun.
Thread Starter
Supreme Member
iTrader: (1)
Joined: Feb 2003
Posts: 2,024
Likes: 3
From: Marietta, GA
Car: 92 Z28
Engine: LS1
Transmission: T56
Axle/Gears: 3.73 10 bolt
Re: New to this Section- First LS Swap
I bought a bunch of Cast Iron paint thinking it would be the right color, but it was way too gold. Had to go grab like 4 cans of what looked close to what I wanted and picked the best one. It is "wheel paint" so hopefully it is a pretty durable for the undercarriage. Will probably still do the trans in aluminum paint.
Joined: Feb 2007
Posts: 4,770
Likes: 64
From: Trumbull CT
Car: 87 TA clone
Engine: 70/70 Turbo 5.3 LS
Transmission: bullet proof 2004R
Axle/Gears: ford 8.8, 3.55 gears
Re: New to this Section- First LS Swap
Yea the dupicolor that I got is also wheel paint. I will say its not as tough as you would think. I painted my valve covers with it and I cleaned everything with brake cleaner before even though the valve covers where pretty dirty they came out pretty good. but the coil covers rubbed alittle and now the paint is flaking alittle.

Member
iTrader: (1)
Joined: Aug 2012
Posts: 221
Likes: 0
From: Bella Vista, AR
Car: 1991 Camaro Z28
Engine: LS Conversion
Transmission: 4L60E
Axle/Gears: Stock for now...
Re: New to this Section- First LS Swap

Thanks
Thread Starter
Supreme Member
iTrader: (1)
Joined: Feb 2003
Posts: 2,024
Likes: 3
From: Marietta, GA
Car: 92 Z28
Engine: LS1
Transmission: T56
Axle/Gears: 3.73 10 bolt
Re: New to this Section- First LS Swap
I tried a few different strippers and nothing seemed to take that paint or powder coat or whatever it is off. Ended up just sanding it off, though a soft wire brush might get in the cracks a little better. Then just polish like everything else - sand to 400 wet, then Emery, Tripoli, White Rouge on a buffer wheel/felt bob.