When you click on links to various merchants on this site and make a purchase, this can result in this site earning a commission. Affiliate programs and affiliations include, but are not limited to, the eBay Partner Network.
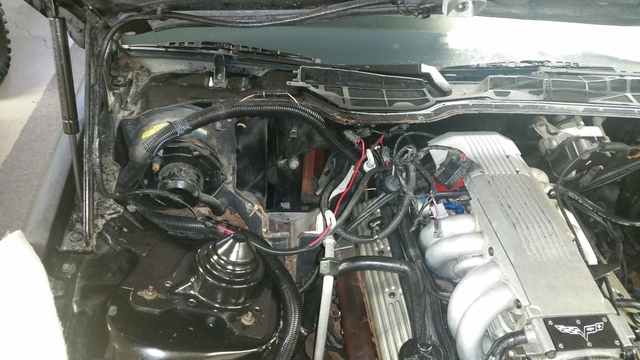
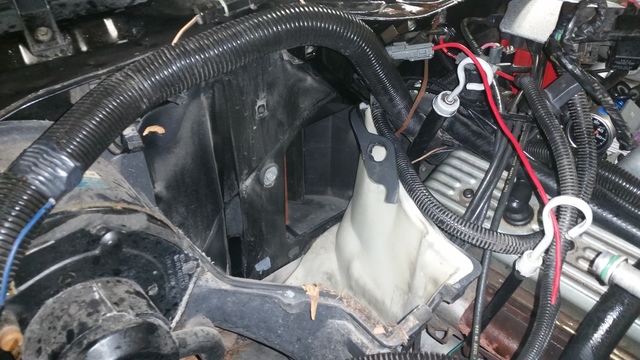
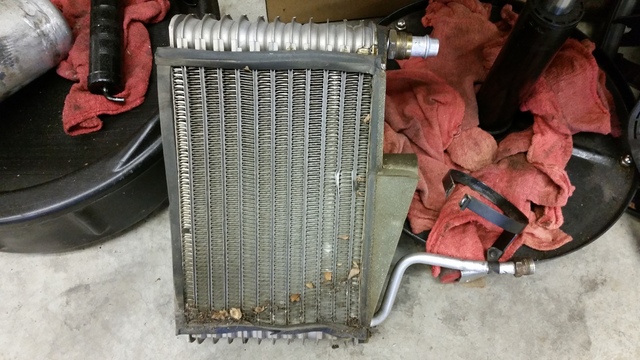
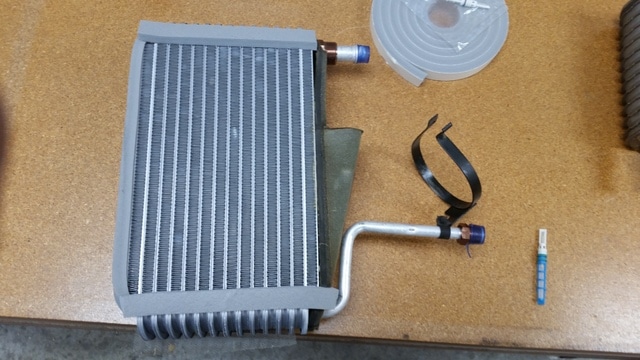
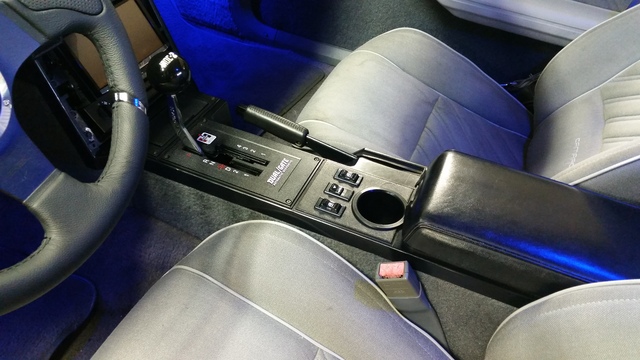
Still working away at the car. I modified the brackets for the Dual Gate shifter to get it over to the left more in the console so it would not be hitting the top plate. I still need to mess with the cable at the transmission. I started working on the A/C system again. Found out the Evaporator Core is leaking so I have a new one on the way. Should be here by Friday. I also have a new dryer and an orifice tube for a Ford to put in. When I removed the lines I thought I had let off most of the pressure that was left. Also thought the Evaporator Core had as well. So when I left those lines off it sprayed all over and made a nice mess. got all over me and the car. Hopefully it cleans off easily since the car wont get a bath for a couple of days till this is fixed. It's pretty much all oil anyway. Here are some pictures of the core removed from the car.
Last edited by J. Chris Davis; May 2, 2018 at 01:32 PM.
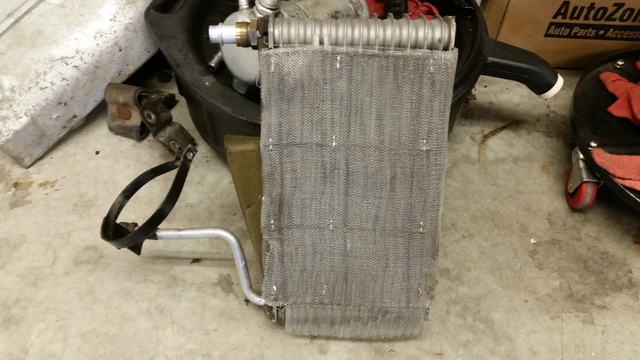
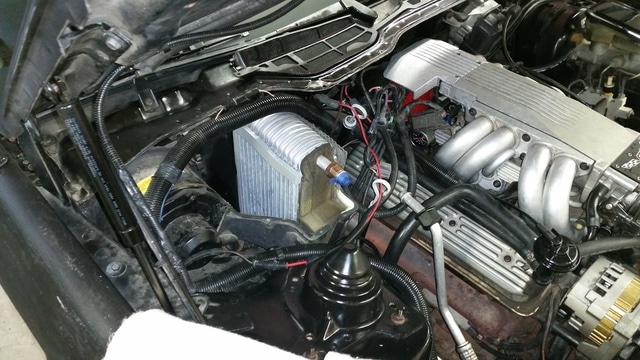
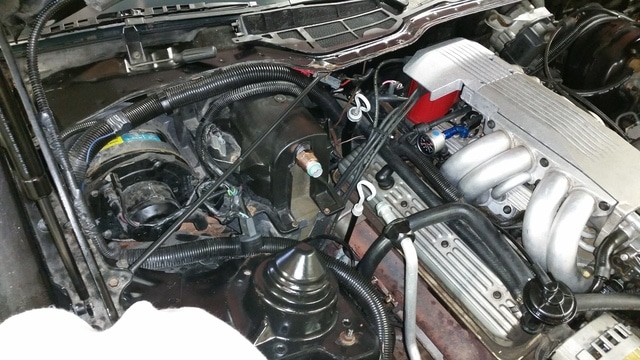
Got the evaporator core today and got the A/C fixed tonight. I exchanged the screen and front foam from the old core and bought some weather stripping material from the hardware store. The refrigerant I used was R12 and R134 substitute from Enviro-save and I used 3 5oz cans of it. It was starting to cool off outside to about 65, but I was getting A/C temps of 40 degrees. I need a warm day to really test it. I'm posting some pictures of different stages of reassembly just incase any one needs them for reference.
Last edited by J. Chris Davis; May 2, 2018 at 01:34 PM.
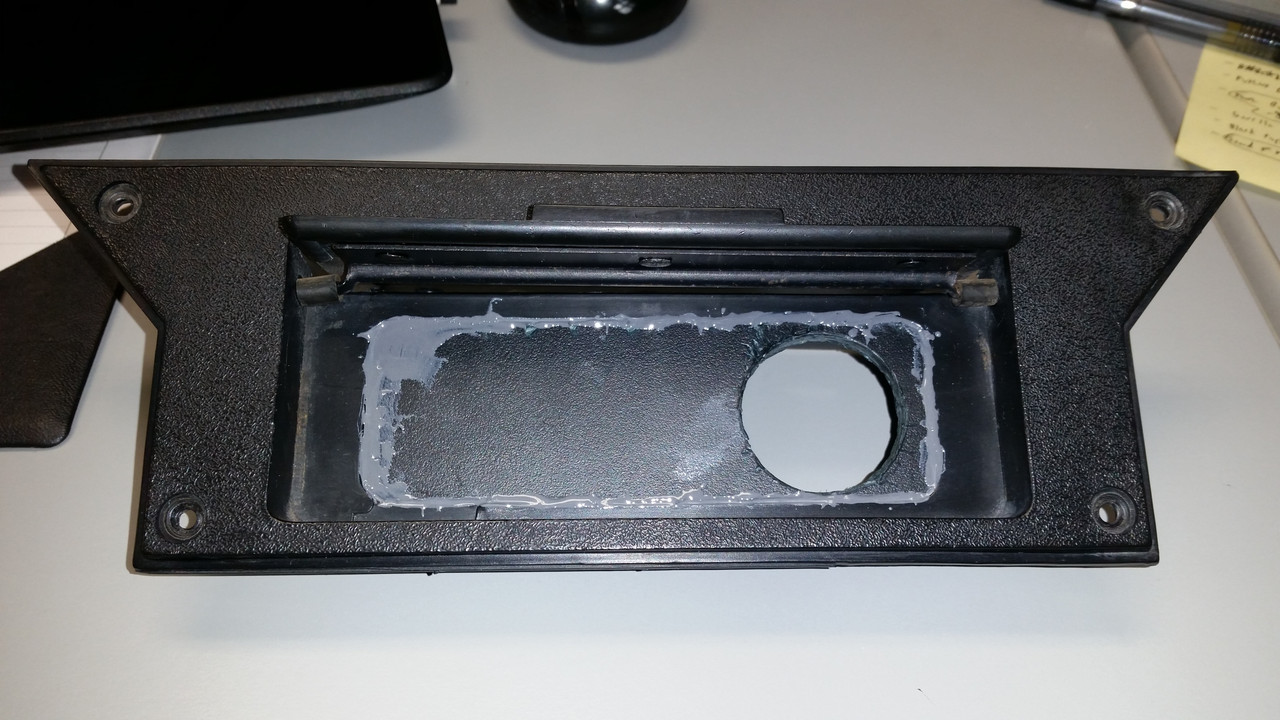
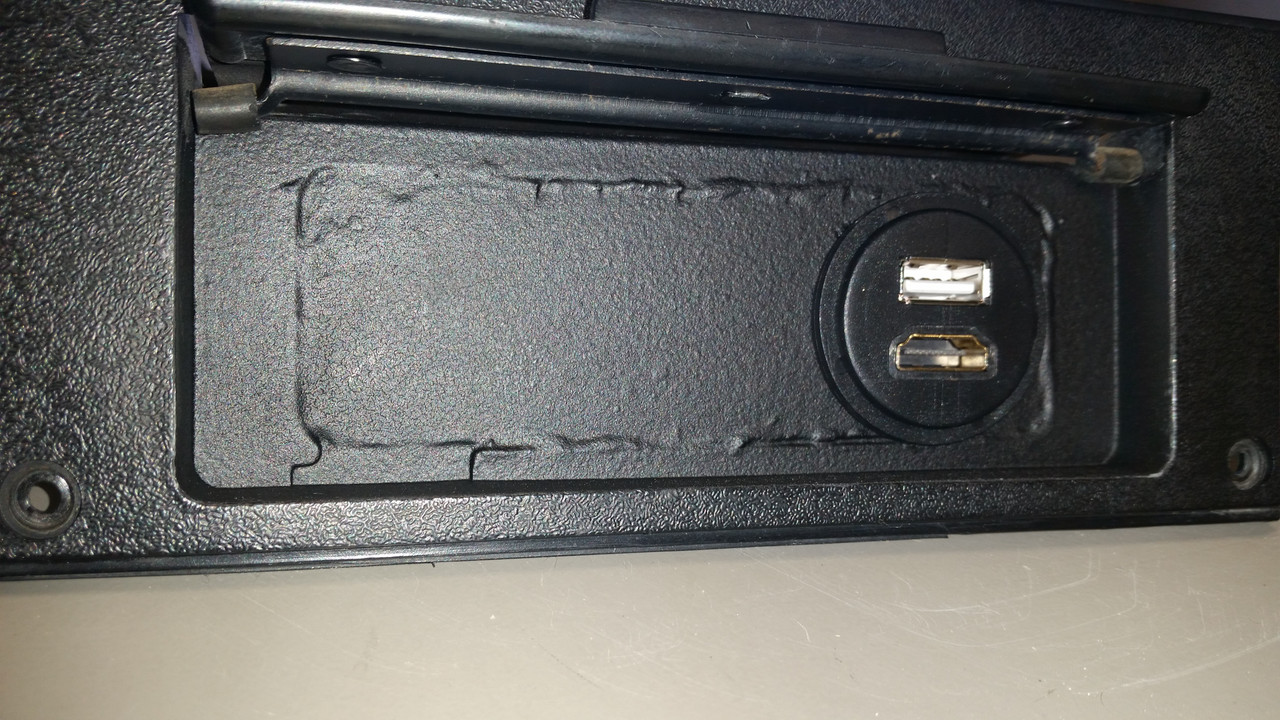
Thanks guys! This was what I was just working on. It could have turned out better. I was hoping that the texture coating and paint would fill some of that in (first time using that stuff). I'll have to come back later sand it down and redo it. At least it's hidden under the ash tray lid. This usbl/hdmi adapter is for my stereo for being able to use the Android Auto feature or Pioneers mirror radio or whatever else. Next project is get the stereo and climate control aligned and get that double din bezel finshed up.
Last edited by J. Chris Davis; May 2, 2018 at 01:35 PM.
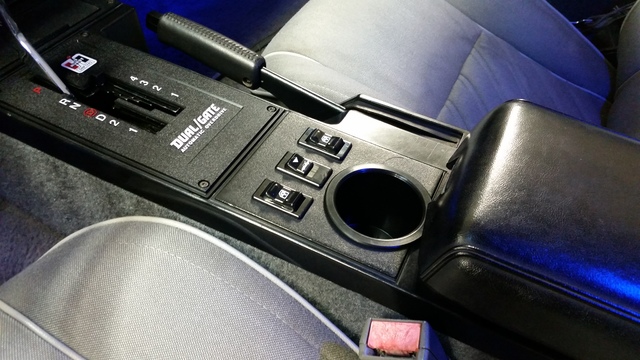
Well I can't comment to the product quality of this dual gate shifter. I was still trying to get the shifter adjustment quite right which left me having to do a little filling on the shifter stops so the shifter could go a little farther to get it to go into first gear and over drive. I tried to get the cable adjustment as close as possible. So then I'm testing the shifter while stopped and the shifter arm falls off. Cheap looking push pin rivets seem to be what hold it on the assembly. Going to go to the hardware store tonight and try to find a good solution to get it back together without anything being in the way of the internal assembly. What I need to find is a pin and clip type fastener that fits in the hole and has the right length to it.
Thanks guys! This was what I was just working on. It could have turned out better. I was hoping that the texture coating and paint would fill some of that in (first time using that stuff). I'll have to come back later sand it down and redo it. At least it's hidden under the ash tray lid. This usbl/hdmi adapter is for my stereo for being able to use the Android Auto feature or Pioneers mirror radio or whatever else. Next project is get the stereo and climate control aligned and get that double din bezel finshed up.
Good idea, what did you use to make this?
It is a bit rough, and will look a lot better once sanded smooth? As you noted it is hidden until you do.
It's in the right place for the stereo for certain.
Like many have done, I plan to install a USB in the lighter opening/area. One guy even cut down the lighter, keeping the **** to cover the port.
Hey J.D.
It's always something with after-market products. They seem to be about 90% there but there's that one little area. . .
Still a very cool piece and worth finding a solution for.
You'll make it right.
That's for sure! It's always something. I should be able to find something at the local hardware store tonight. I might be there a while, but I'll find something, lol.
It is a bit rough, and will look a lot better once sanded smooth? As you noted it is hidden until you do.
It's in the right place for the stereo for certain.
Like many have done, I plan to install a USB in the lighter opening/area. One guy even cut down the lighter, keeping the **** to cover the port.
I had some scrap plastic from work. Basically someone left over ABS plastic dash bezel from a Police squad install and I cut a section of that out and glued it in with JB Weld. Then went over it with the SEM 39853 black texture coating and then some black low gloss paint. I will fix this later and retry the texture coating. It probable I wasn't using it correctly. I have a radio bezel to do with that stuff yet so I hope I get it coating better.
I put a push button start where my lighter was, but I did another one to the console by my parking brake handle.
That's for sure! It's always something. I should be able to find something at the local hardware store tonight. I might be there a while, but I'll find something, lol.
I had some scrap plastic from work. Basically someone left over ABS plastic dash bezel from a Police squad install and I cut a section of that out and glued it in with JB Weld. Then went over it with the SEM 39853 black texture coating and then some black low gloss paint. I will fix this later and retry the texture coating. It probable I wasn't using it correctly. I have a radio bezel to do with that stuff yet so I hope I get it coating better.
I put a push button start where my lighter was, but I did another one to the console by my parking brake handle.
Did you do a write up on the push button start? I checked through a bunch of your posts but couldn't find it. Looks like a nice upgrade.
I don't know the brand of it. I got it off of EBay a couple of years ago. I'll scan and post the instructions I have when I get back to work on Tuesday.
OK. I see several on eBay, did you buy just the button? I see some reviews that claim the use of a button improves starting. Did you find that to be true? The instructions would be nice to have. Thanks!
This looks like the one I have. I'll post the instructions when I have access to a scanner on Tuesday. They are the instructions that came with my button, but I see this auction does not include any instructions. If I remember correctly it was just hooked up to fused switched 12v, ground and ignition sense. I did not bother hooking up the LED light for it. It is a little bright. I did not notice any difference with starting vs the ignition switch itself. It does not drop power to the acc while starting as the ignition does. You can wire that way if you want with an extra relay, but I wasn't concerned about that. My temp gauge needle likes to bounce up and get stuck when starting with the key so this helps that issue since it doesn't effect the acc power.
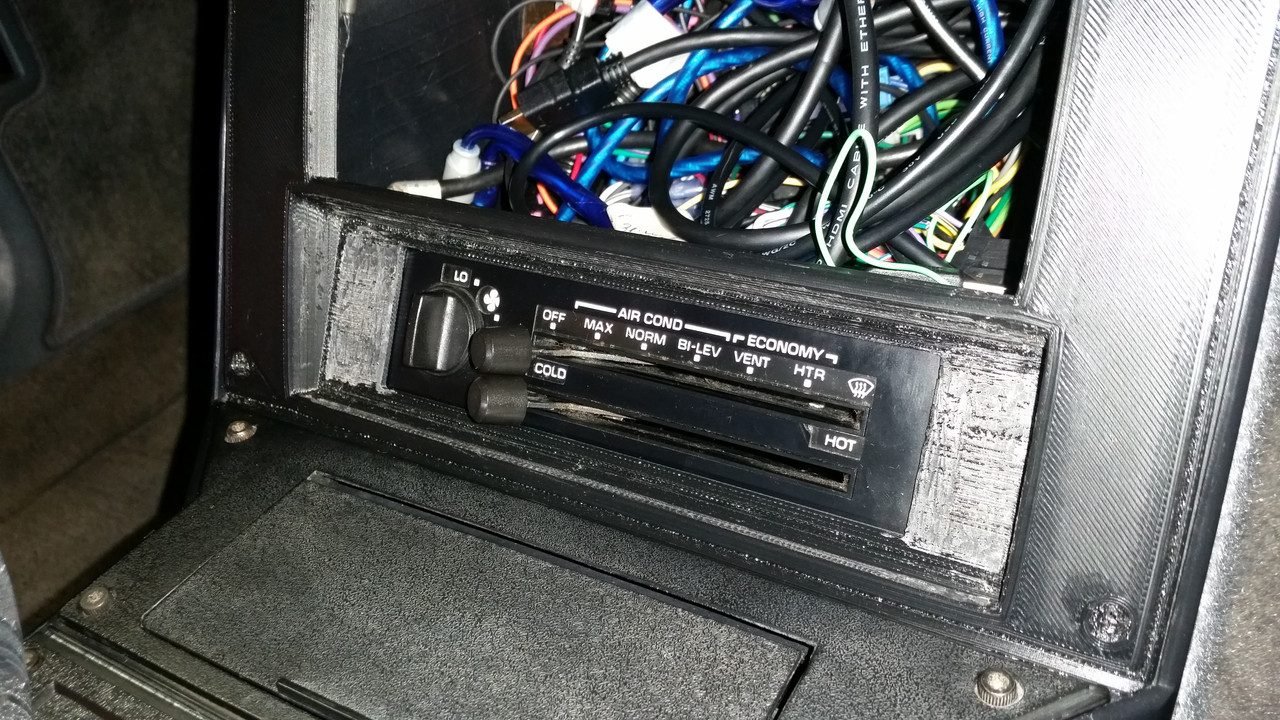
Fixed my brake light switch so I got my 3rd brake light working again. The internal contacts needed to be cleaned. I had to order a set of bulbs for it since 3 are burned out. I also got the 3D printed radio bezel filed and fitted in the car and put the spacers on the climate control to fit the bezel. I still need to texture coat and paint it. Hopefully that turns out better than the ash tray piece. Still got an issue with the shift arm which I'm still working on a fix for that.
Last edited by J. Chris Davis; May 2, 2018 at 01:44 PM.
Ripped my dual gate shifter out yesterday. Could not find a good local solution to get that thing properly reattached without having play in it. I'm just going to weld the arm on to the assembly and be done with it.
J Chris Davis:"This looks like the one I have. I'll post the instructions when I have access to a scanner on Tuesday. They are the instructions that came with my button, but I see this auction does not include any instructions. If I remember correctly it was just hooked up to fused switched 12v, ground and ignition sense. I did not bother hooking up the LED light for it. It is a little bright. I did not notice any difference with starting vs the ignition switch itself. It does not drop power to the acc while starting as the ignition does. You can wire that way if you want with an extra relay, but I wasn't concerned about that. My temp gauge needle likes to bounce up and get stuck when starting with the key so this helps that issue since it doesn't effect the acc power."
Hey JD, thanks for posting the instructions. I will be adding one of these to my growing list of electrical mods.
Fixed my brake light switch so I got my 3rd brake light working again. The internal contacts needed to be cleaned. I had to order a set of bulbs for it since 3 are burned out. I also got the 3D printed radio bezel filed and fitted in the car and put the spacers on the climate control to fit the bezel. I still need to texture coat and paint it. Hopefully that turns out better than the ash tray piece. Still got an issue with the shift arm which I'm still working on a fix for that.
3D printing is amazing. The look of that bezel is factory. Can't wait to see it finished.
As for the 3rd brake light, the one on my 88 IROCZ had some brighter than others and a few burned out. Disassembly showed a variety of bulbs, with 2 or 3 of them soldered in! I cleaned everything up, glued the broken base back together and ordered the lower wattage bulbs from Top Down Solutions. The factory bulbs get too hot and burn out quickly and/or cause damage. TDS is also where I got the epoxy from. I also cleaned the contacts and found some of the wiring was getting pinched. Upon reassembly the upper contact mount would not rotate down freely, so I took it apart, clean & lube and finally, it all works. It always seems to be the little things that take the most time to get right.
Last edited by rurnt88; May 30, 2017 at 06:06 PM.
Reason: Added comment
J Chris Davis:"This looks like the one I have. I'll post the instructions when I have access to a scanner on Tuesday. They are the instructions that came with my button, but I see this auction does not include any instructions. If I remember correctly it was just hooked up to fused switched 12v, ground and ignition sense. I did not bother hooking up the LED light for it. It is a little bright. I did not notice any difference with starting vs the ignition switch itself. It does not drop power to the acc while starting as the ignition does. You can wire that way if you want with an extra relay, but I wasn't concerned about that. My temp gauge needle likes to bounce up and get stuck when starting with the key so this helps that issue since it doesn't effect the acc power."
Hey JD, thanks for posting the instructions. I will be adding one of these to my growing list of electrical mods.
3D printing is amazing. The look of that bezel is factory. Can't wait to see it finished.
As for the 3rd brake light, the one on my 88 IROCZ had some brighter than others and a few burned out. Disassembly showed a variety of bulbs, with 2 or 3 of them soldered in! I cleaned everything up, glued the broken base back together and ordered the lower wattage bulbs from Top Down Solutions. The factory bulbs get too hot and burn out quickly and/or cause damage. TDS is also where I got the epoxy from. I also cleaned the contacts and found some of the wiring was getting pinched. Upon reassembly the upper contact mount would not rotate down freely, so I took it apart, clean & lube and finally, it all works. It always seems to be the little things that take the most time to get right.
I'm pretty happy with how the radio bezel turned out. The factory look is what I was hoping to get with this. I had a printer in Texas do it and it was only about $20 to have printed with the climate control spacers. I did see that TDS had those bulbs. I ended up ordering a pack of 10 from EBay so I'll see how they work out. Eventually I'll be converting the exterior lights to LED.
Got my new Momo steering wheel today. Just waiting for the adapter to get here before I can put it on for a test fit. Then I'm going to paint the aluminum on the steering wheel black.
I drilled out the shifter arm and the mount for the arm in the shifter 1/4" and bought a couple of clevis pins that had multiple holes and added some spacers so the colder pin would fit tight in the hole. Then I trimmed off the rest of the clevis pin that was sticking out so they would clear the gate. So far so good. Been thinking about what is next. I need to get around to tinting the windows to 35% and get that hood sanded and in primer so the whole car matches. I have a couple other small projects I probably need to get out of the way before I do much more. Right now just enjoying the ride.
I am so jealous...been working on mine for nearly 14 years now. BUT! I plan to have it running by the end of the year. Here's a picture so you understand;
Buying a house so things are on hold for now. But following your build has been motivational. Enjoy the Summer.
That's going to look really clean in that engine bay with all that smoothing out and panel patching. Some day I will get there. Probably not for a while though, lol. Enjoy your summer too!
Been a month since I last posted. Still driving around in the IROC. Doing small things here and there to it. Still need to figure out why my cruise control quit working. Replaced the brake switch for it which had no effect. It was working when I went to 3rd gen expo then a few days later it quit. Hoping it's just a dry cracked vacuum line. Whenever we get a cooler day on the weekend and I'm not busy I think I'll be trying to sand and paint that hood so its all one shade of black and fix the roughness on the roof.
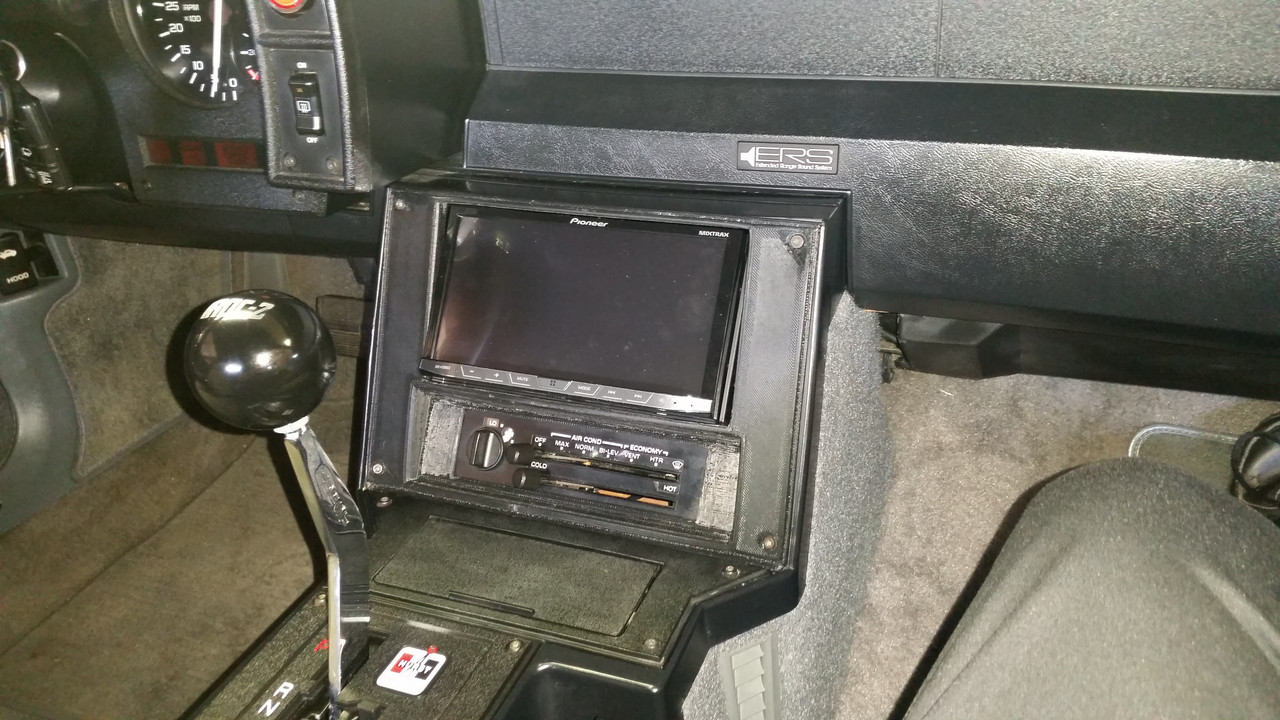
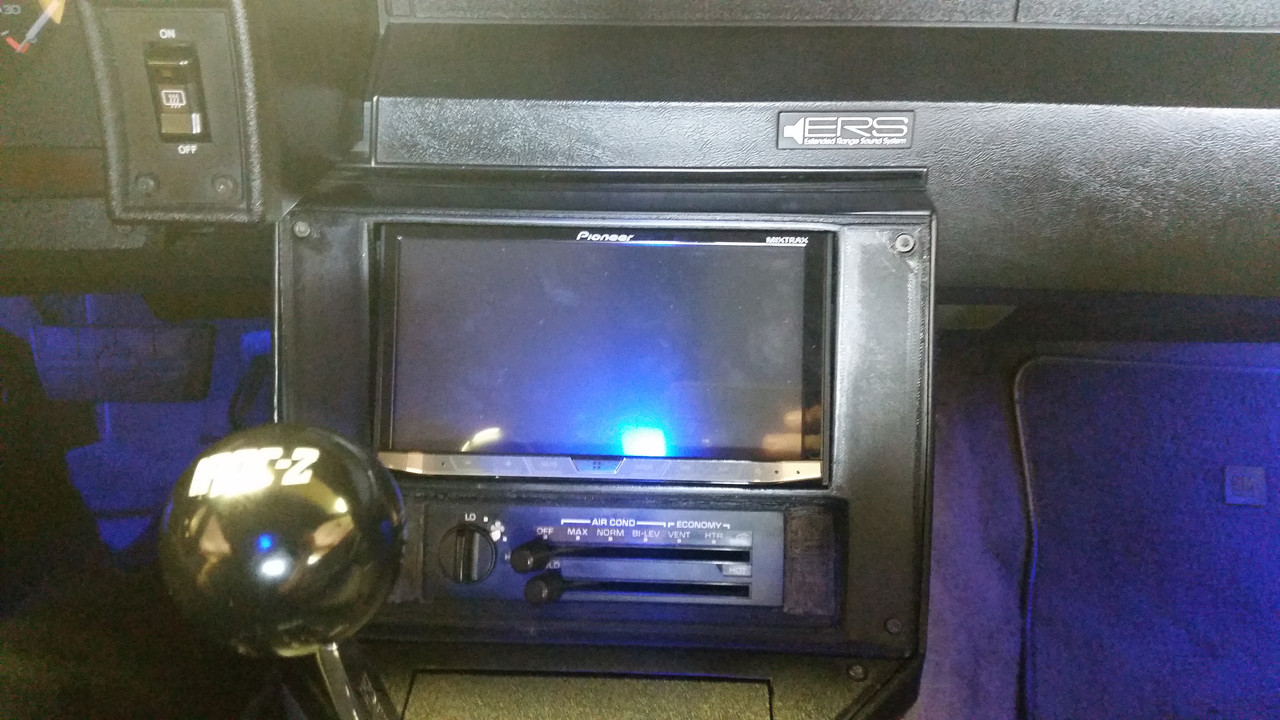
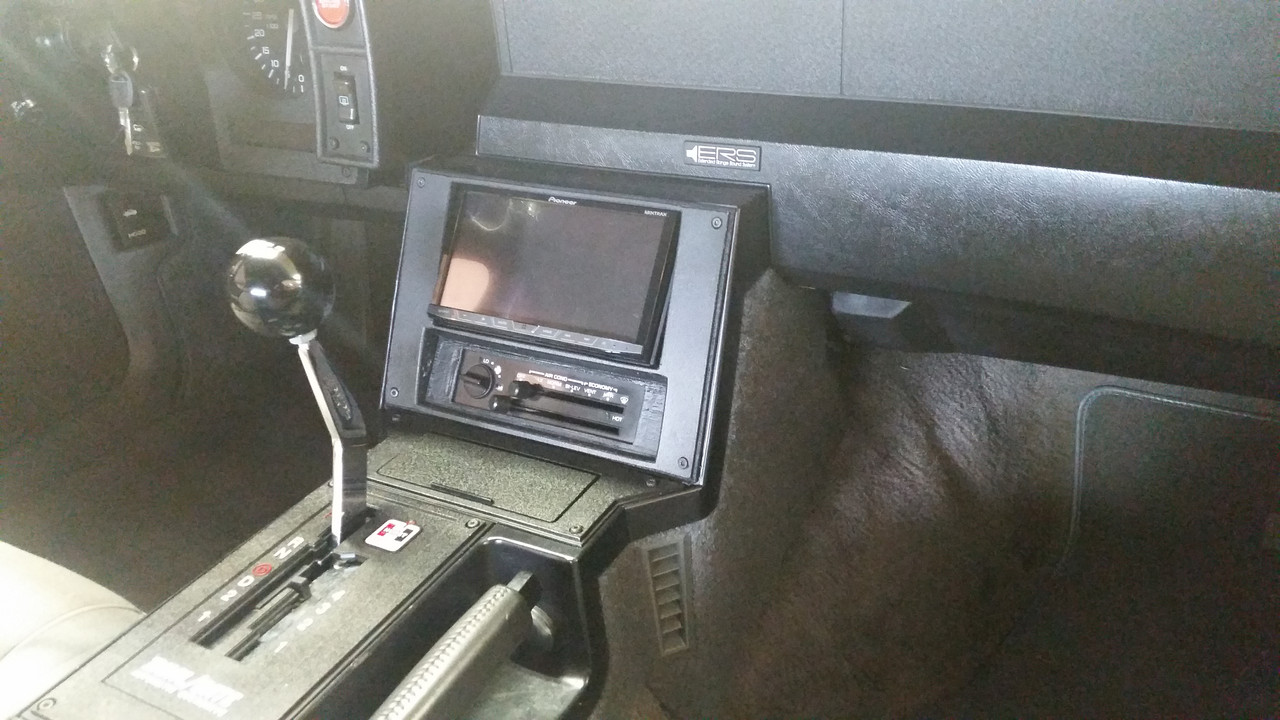
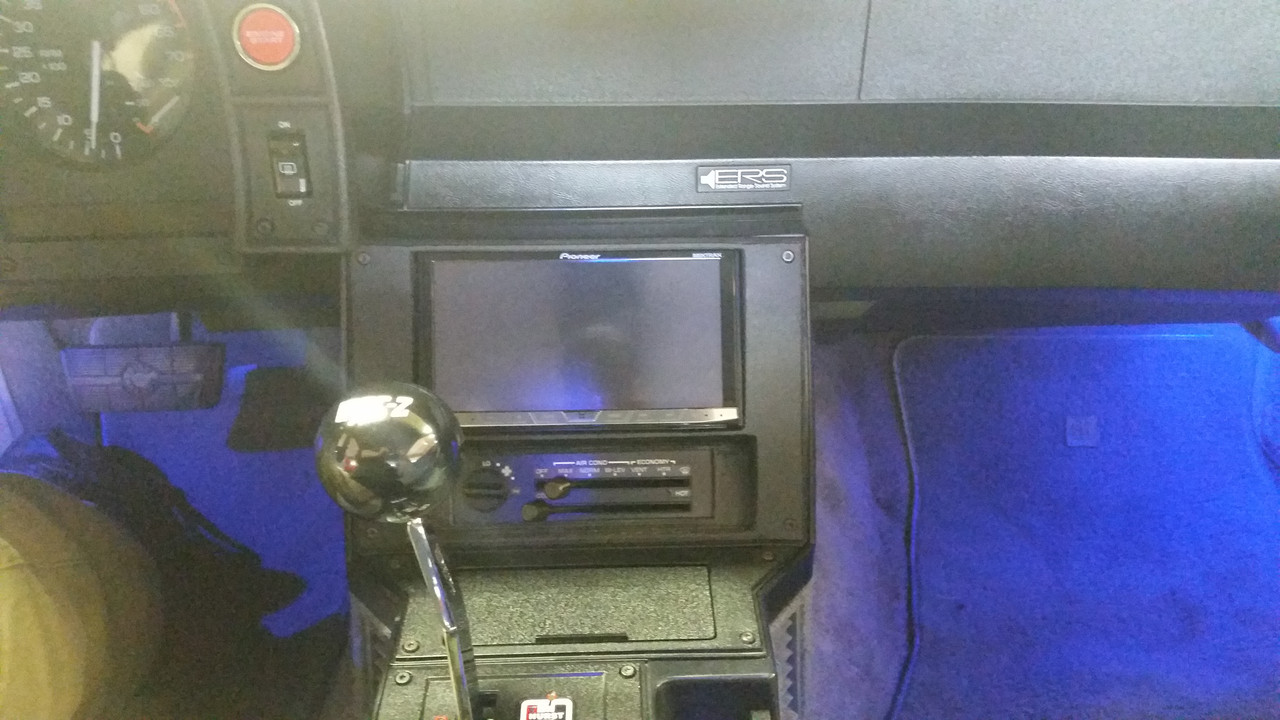
Just went through my thread. I guess I forgot to post pictures after I finished the bezel install with the double din DVD player. I will try to get those taken and posted tonight.
Here are a couple of pictures of the dash bezel installed and after I used that texture coating on it. The coating went on so so. I'll have to get better pictures. I think my flash was off.
Last edited by J. Chris Davis; May 2, 2018 at 01:46 PM.
Thank you! It looks like my alternator may be on its way out. Drove the car yesterday and it had a high pitch wining noise coming from the engine bay and I saw my volt gauge go from above 13 volts to about 8 or 9 volts.
I don't think I will have any more updates on this build. I will be fixing or replacing the alternator this winter, removing the one touch windows and the stereo system and putting a CD player and stock speakers in its place and selling the IROC come this spring. I will be buying another car and will no longer have room for the IROC. If I do get back into a 3rd gen it will most likely be a Firebird for a KITT conversion. I still have threads I follow and will still be around.
I'm keeping it for future use or another car. I made it so it was plug and play that way it is easy enough to remove. I also could only ever find 4 of those modules so I don't want to let them go either.
I'm pretty happy with how the radio bezel turned out. The factory look is what I was hoping to get with this. I had a printer in Texas do it and it was only about $20 to have printed with the climate control spacers.
Do you have the contact info of who printed it? I like that it's somewhere "local" to me.
I signed up on Treatstock.com and you can search by location. Looks like the business that I had do mine was called Modern Blacksmith 3D Design, Printing and Scanning.