When you click on links to various merchants on this site and make a purchase, this can result in this site earning a commission. Affiliate programs and affiliations include, but are not limited to, the eBay Partner Network.
Re: My 91 Z28 build. 17 years in the making... Finally going to do this right
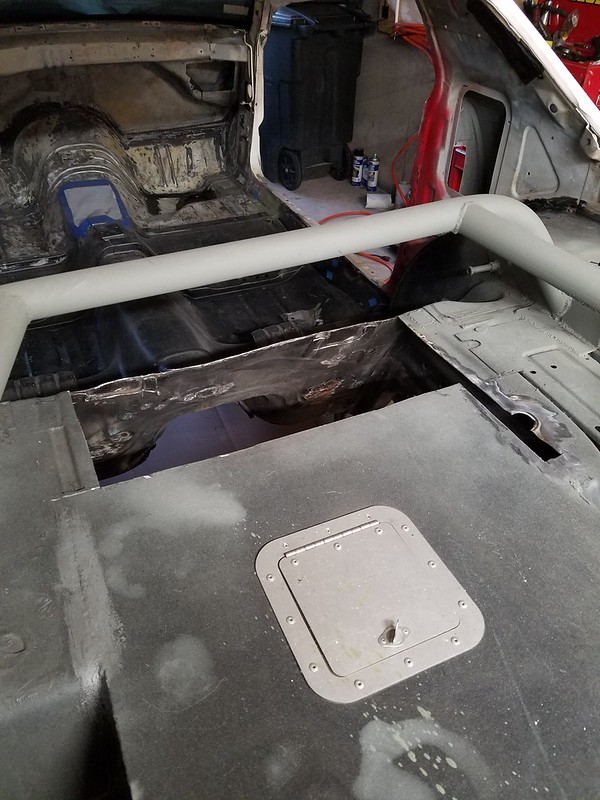
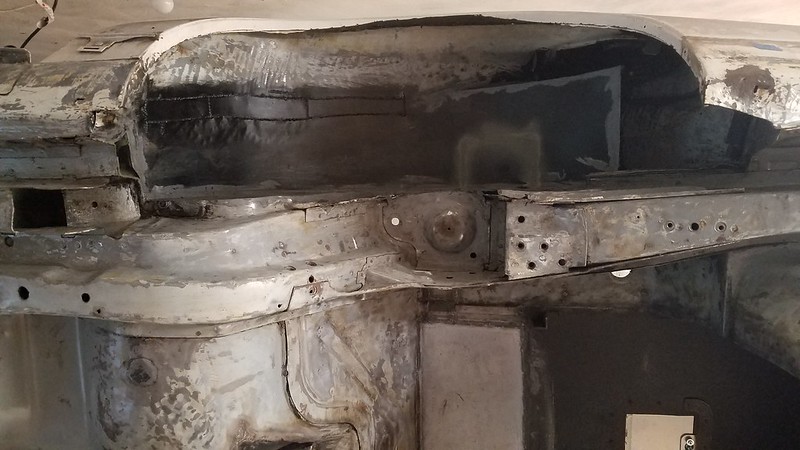
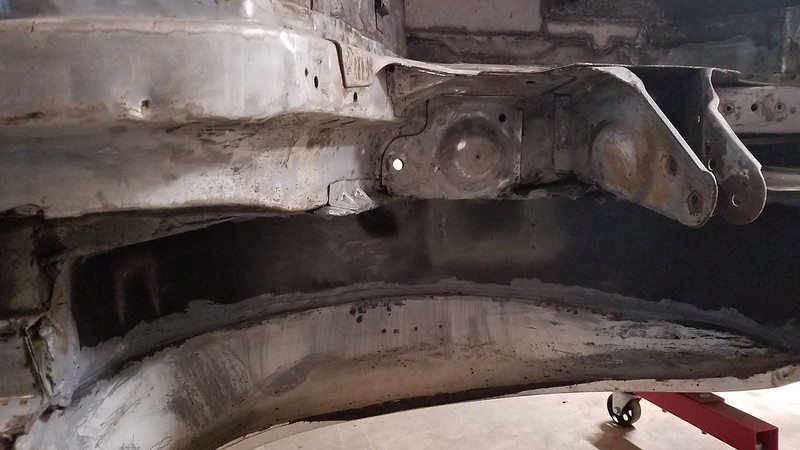
Too cold to paint so I decided to start figuring out the rear bracing reinforcement. This is needed to add strength back to the rear area due to the fuel-cell location. This is my first idea let me know what you think.
Rear frame rail bar to cross tie and corner gusset bar. Just showing what is going on underneath as a reminder.
Re: My 91 Z28 build. 17 years in the making... Finally going to do this right
So it is pretty cold these days and I don't think I can spray paint with it being well below freezing even if my garage is slightly above freezing so I am moving on to other areas of the car for now as you can see in my last post.
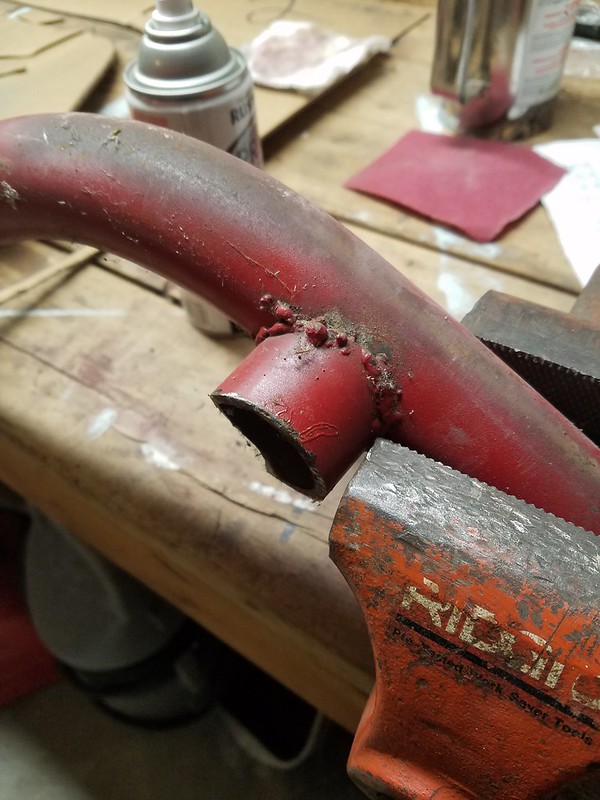
Here are some more progress pics, cleaning up the old roll bar for use as a rear brace and the beginning of the first of the rear shoulder seat belt brackets fitted on top of the minitubs.
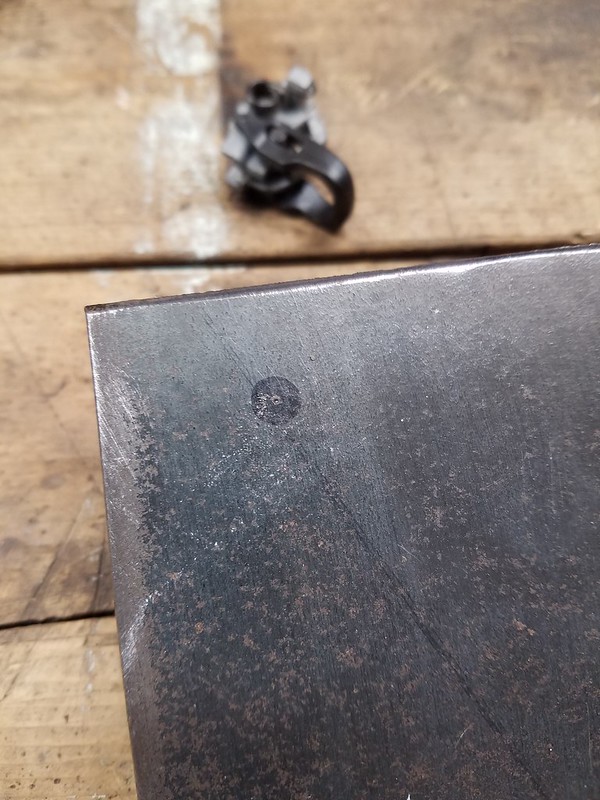
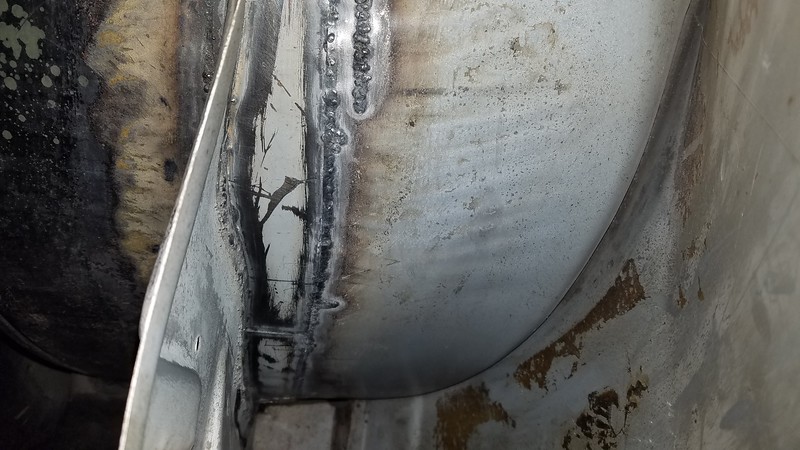
My crappy, dangerous horrible welds from 17 years ago.
Pipe chunks cut off and bar ground smooth-ish
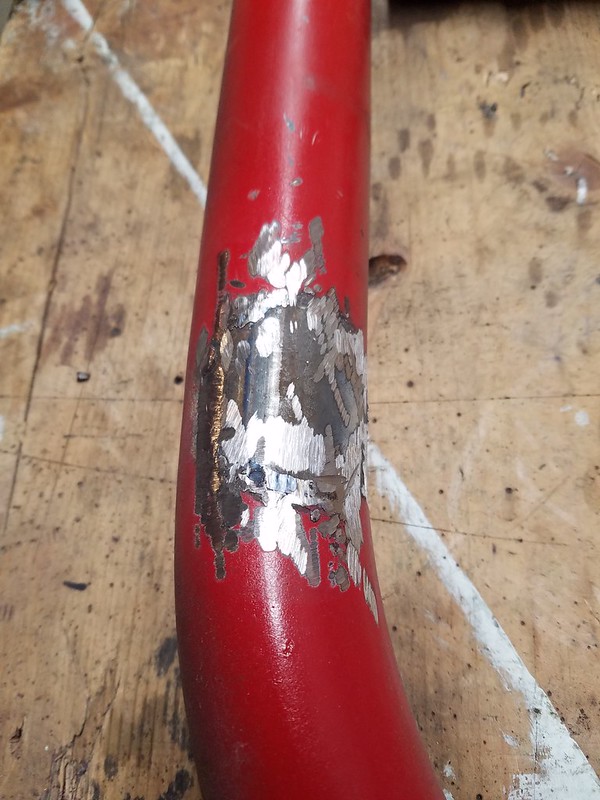
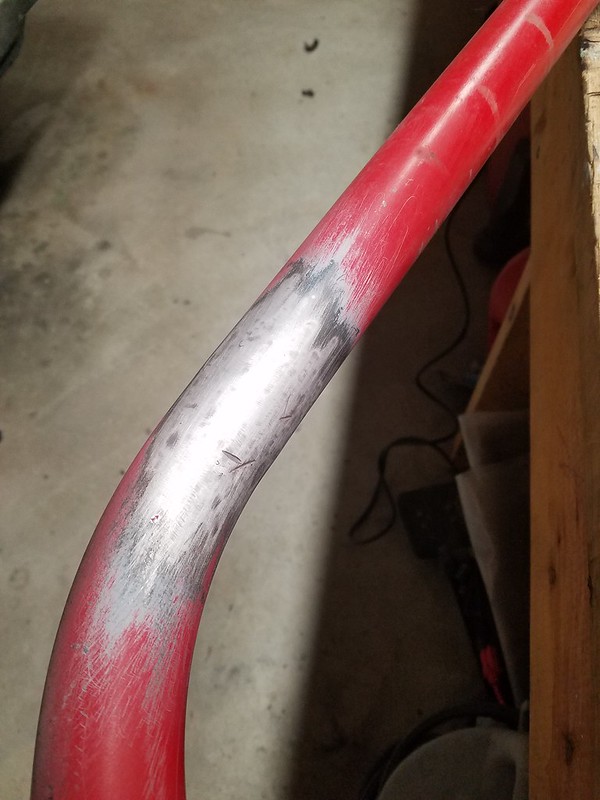
After some flapper disk and some minor hand sanding with 80 grit.
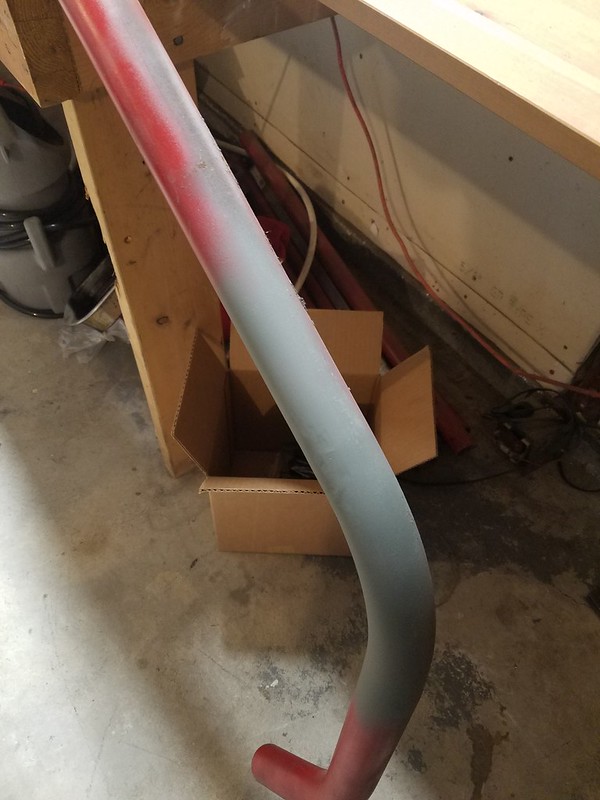
Quick coat of primer to prevent any flash rusting.
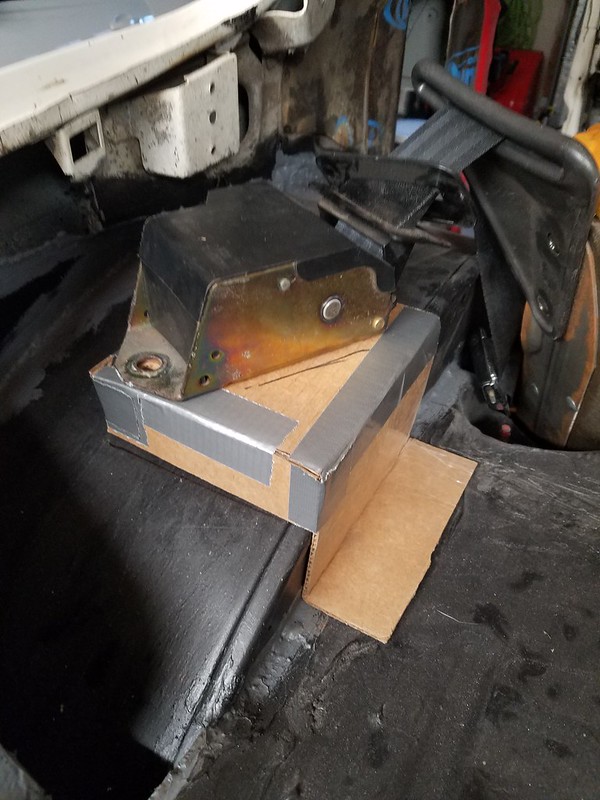
Bracket that will be fabricated from 1/8" steel plate replacing what was lost when the mini tubs were installed.
Under shot of the bracket. Should be a fun mini project. Thick metal is MUCH easier to weld with my little flux core welder.
Re: My 91 Z28 build. 17 years in the making... Finally going to do this right
A bit more progress last night...
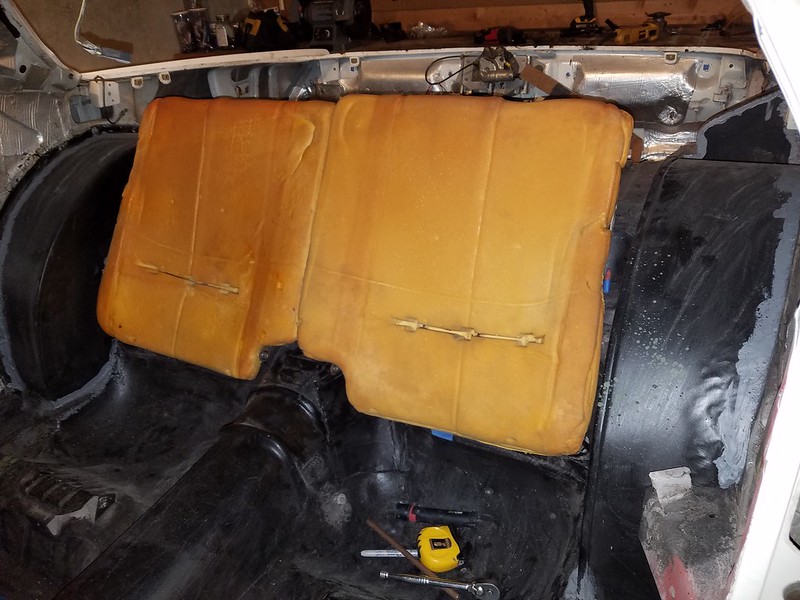
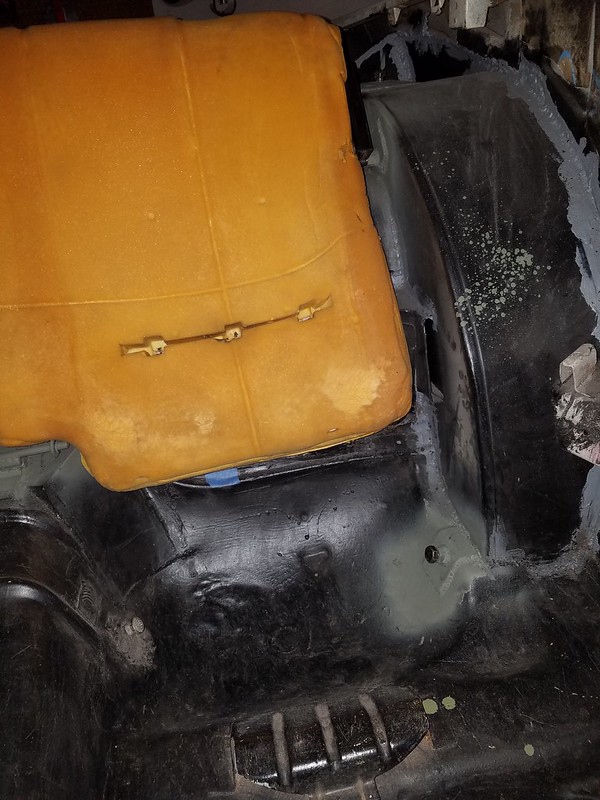
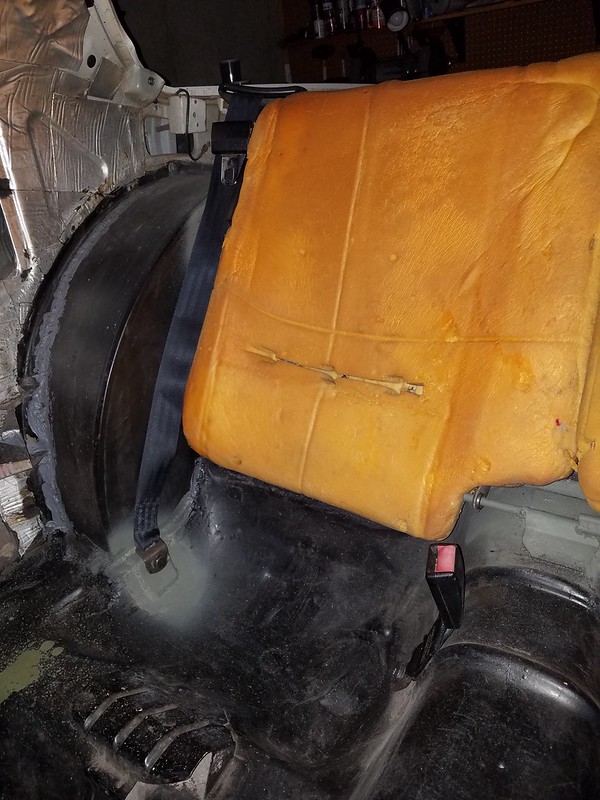
I stripped both rear seat backs and started to figure out how they will be fitted between the wheel wells.
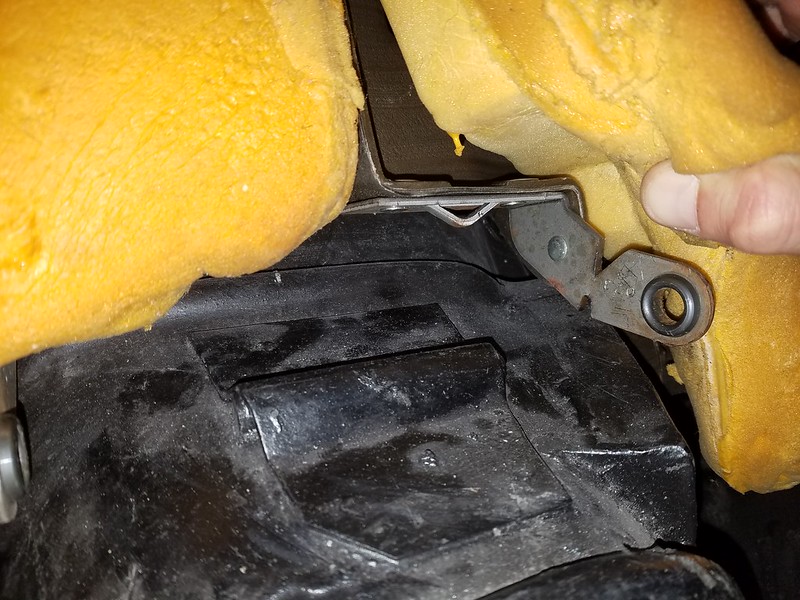
I added a torque arm mount bump since my Spohn unit used to always hit in this area. I added what I think should be more than enough space. I guess when I build bump stops and have my final TQ arm, I will ensure it does not hit.
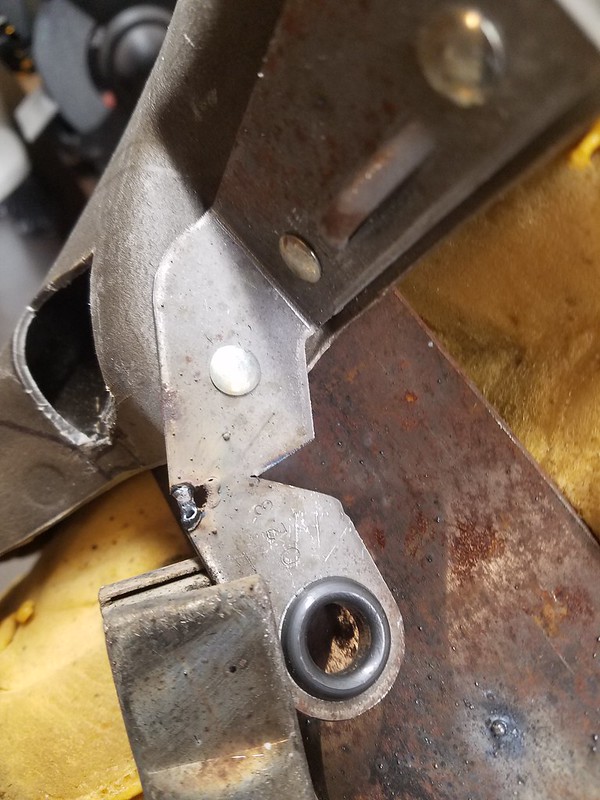
Due to this bump the rear seat pivot for the DS doesn't fit. I had previously cut off the pivot rod when I thought I was getting rid of my back seats. Looks like I will be adding it back...
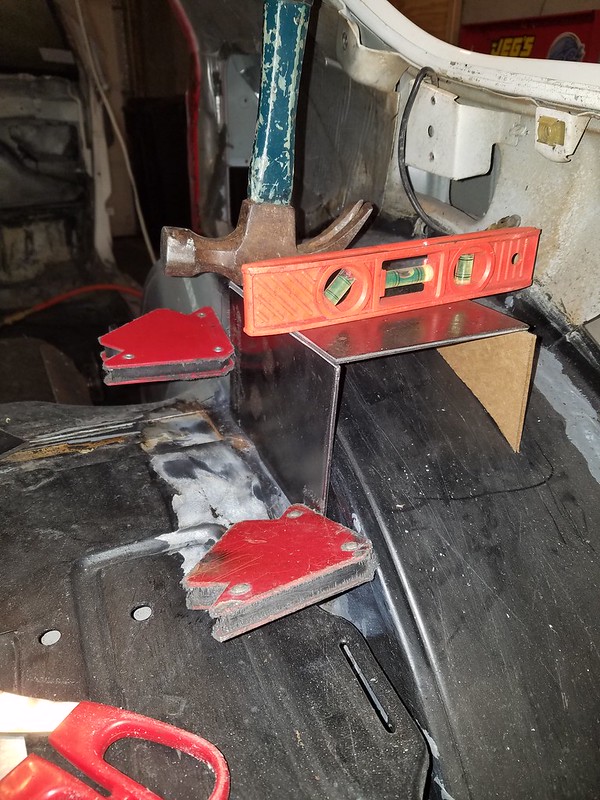
First step to add it back was to bend the mounting tab for the pivot pin.
Will weld it up tonight and weld in the pivot pin. Hoping to have this roughed in tonight with mounting latch catch rod added back as well. Need to decide if this will be a welded rod or something more stock like the huge torques bolt that was there before.
Re: My 91 Z28 build. 17 years in the making... Finally going to do this right
The tub looks pretty close to the seats, will you be able to use the interior panels? If not what are the plans for the backseat area where the plastics went?
Re: My 91 Z28 build. 17 years in the making... Finally going to do this right
Made some good progress over the weekend.
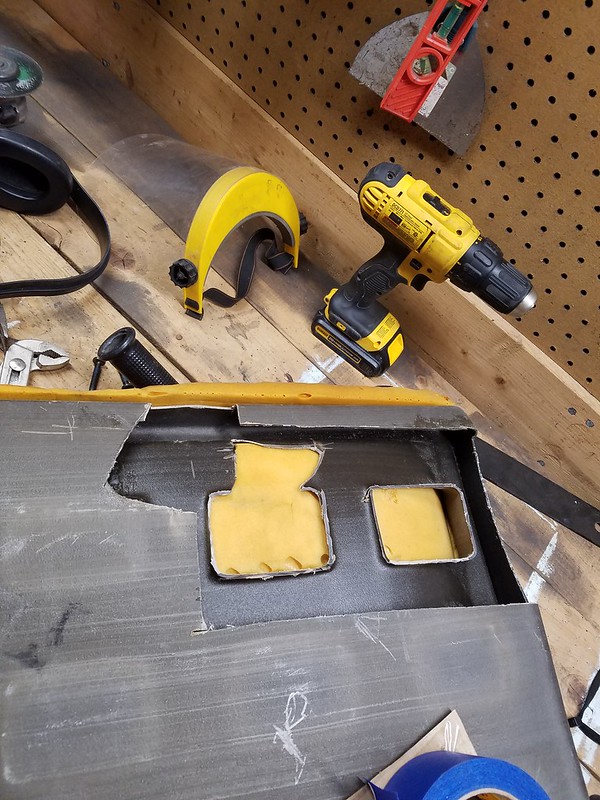
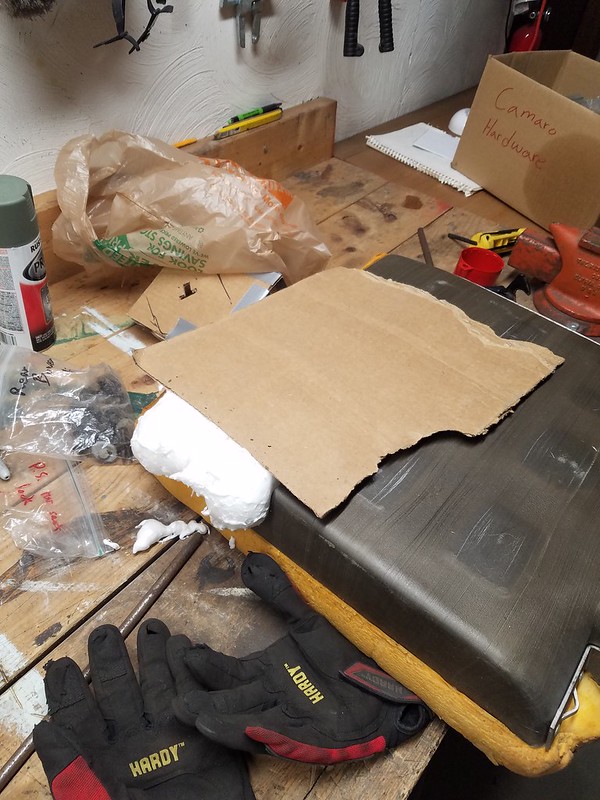
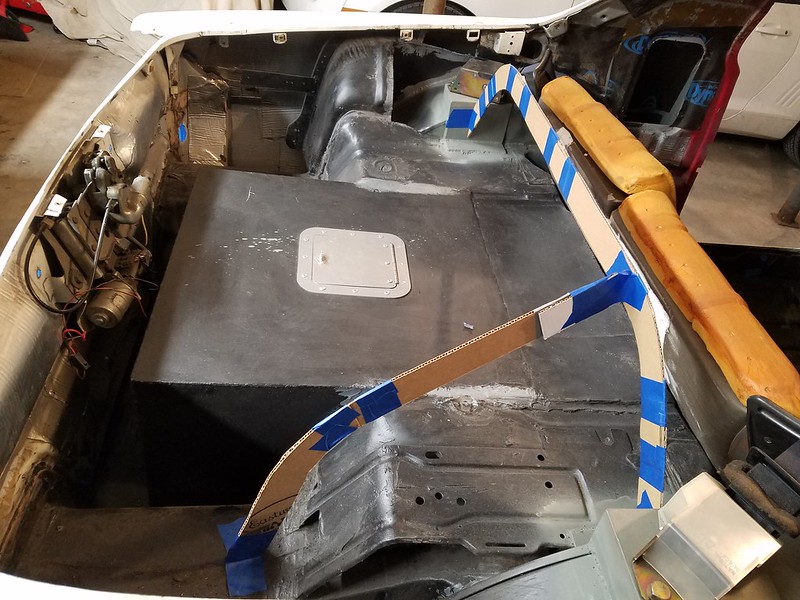
First off, the rear seat back rests, they had big holes from where I had cut them up as a kid, making room for a fuel cell back in the day.... don't ask, it was a horrible setup that was SUPER dangerous. That being said, I needed to fix the big hole.
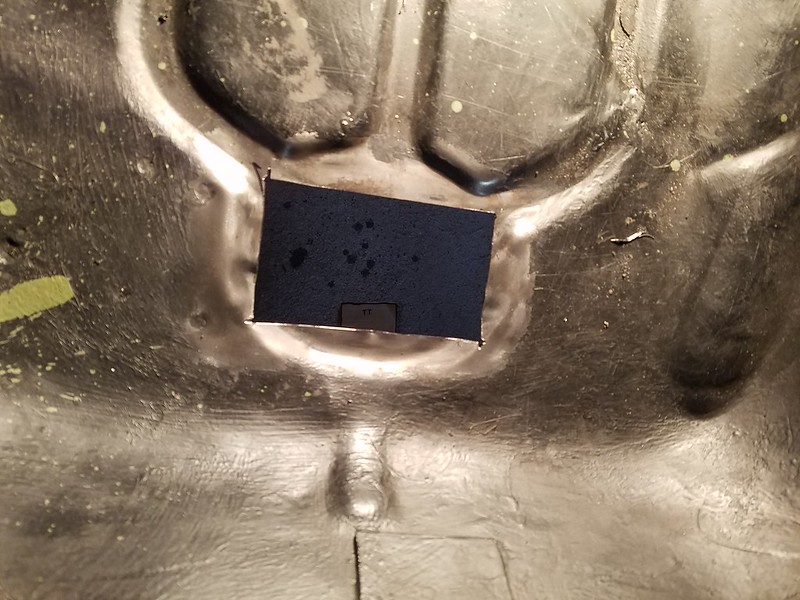
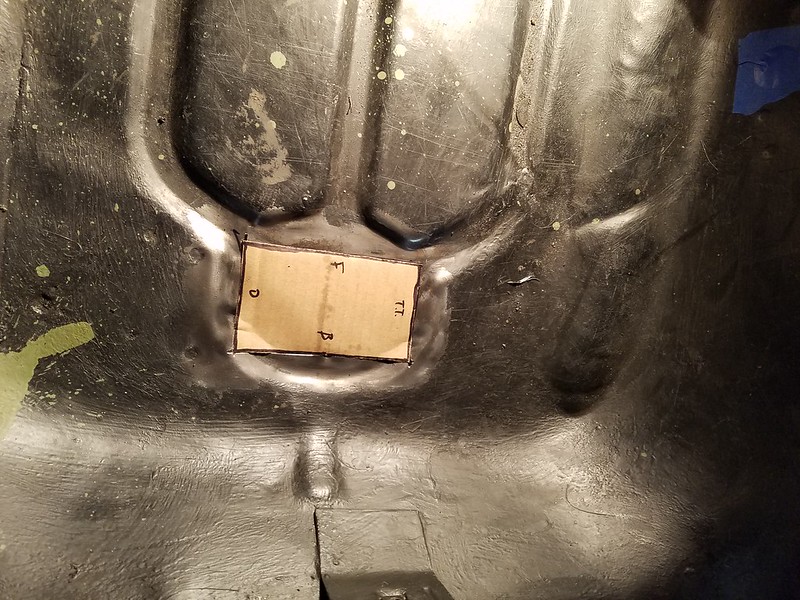
To do that I bought expanding foam and made a cover out of cardboard.
Here you can see the injection sites spitting out expanding foam.
I did one side super nice, but after stating to fill the foam realized that I hadn't done the other side. So I scrambled and filled that side and tossed a piece of cardboard on top!
You will see the finished foam in later images. I didn't take any specific ones.
Re: My 91 Z28 build. 17 years in the making... Finally going to do this right
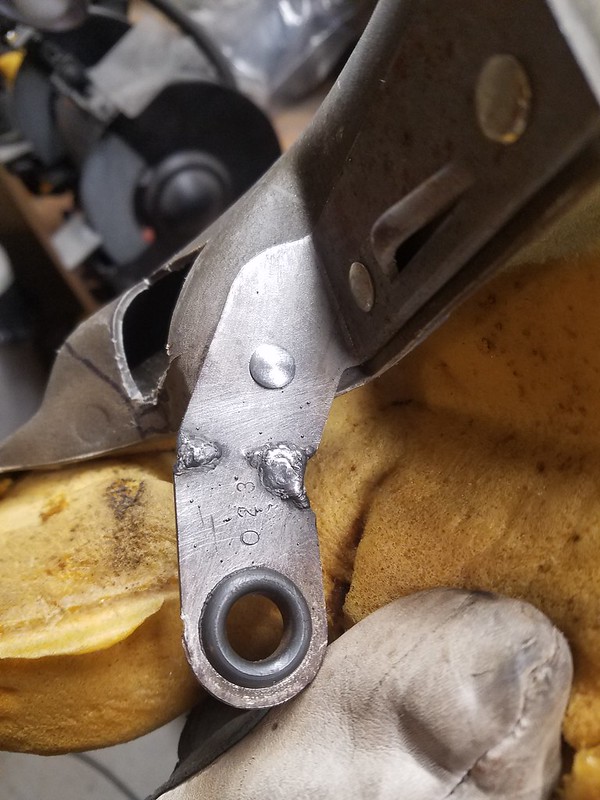
Starting to weld the bent tab.
Final welded before getting some primer. Pivot done.
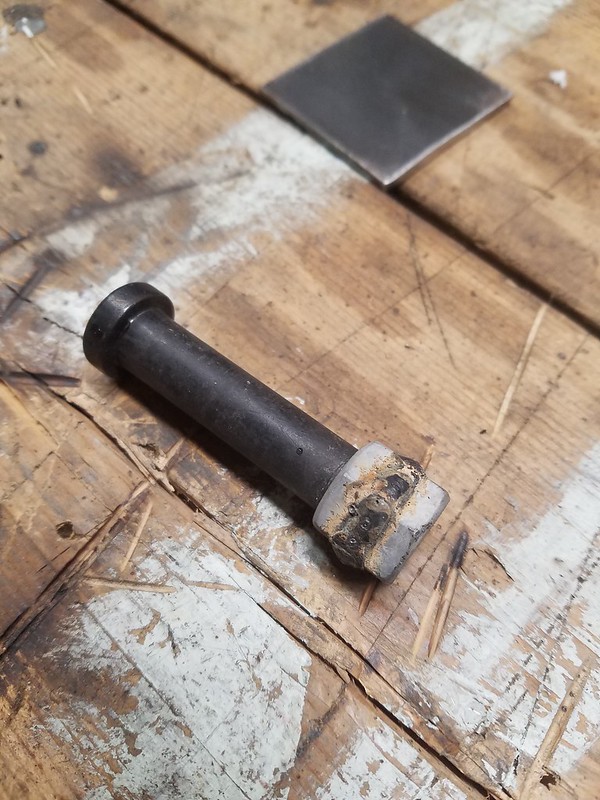
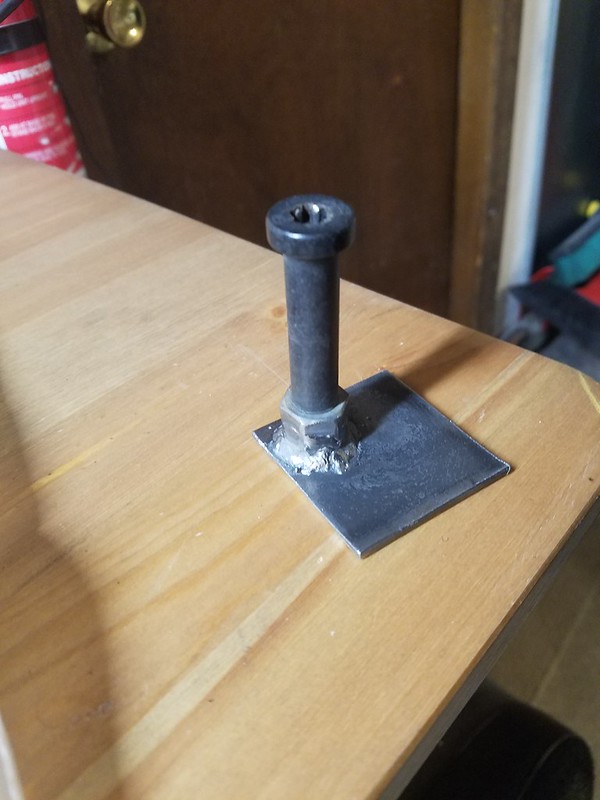
Next up was the rear click hold down rod that got eliminated with the minitub.
Started with the old bolt, a couple nuts and trimming the bolt.
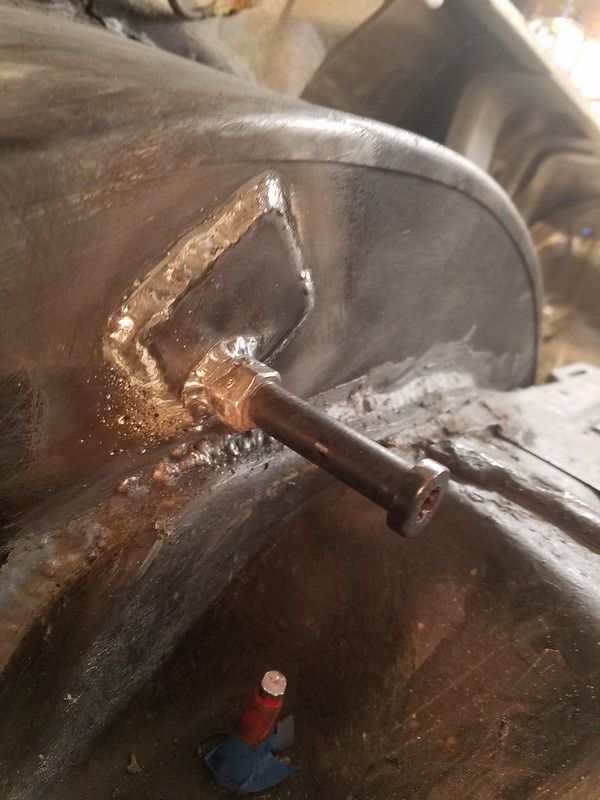
Then I welded that to a plate to help distribute the load onto the minitubs. I don't want this bolt's mounting to flex.
Here you can see the mount welded to the side of the minitub.
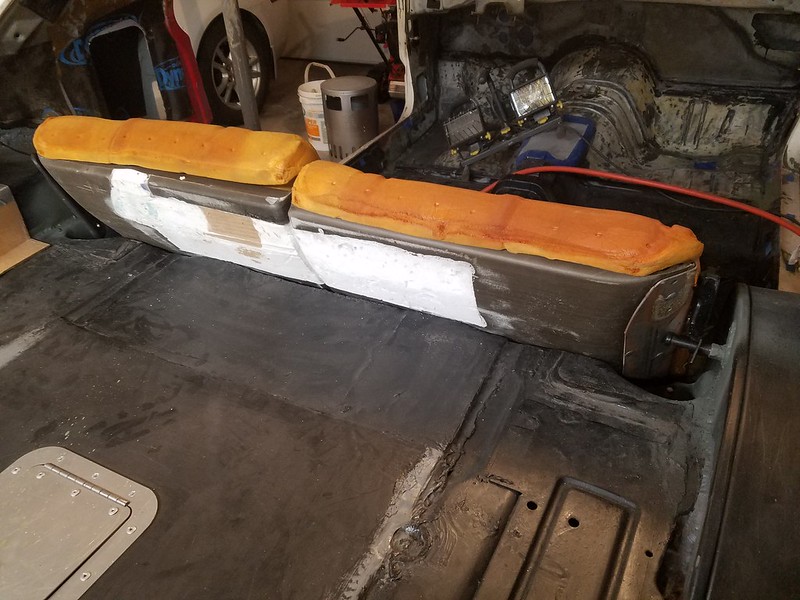
Here you can see the foam from the last post sanded down to be "good enough" for support of the new upholstery later on. I think the foam worked out great. It was a 3M version of the "Great Stuff".
Re: My 91 Z28 build. 17 years in the making... Finally going to do this right
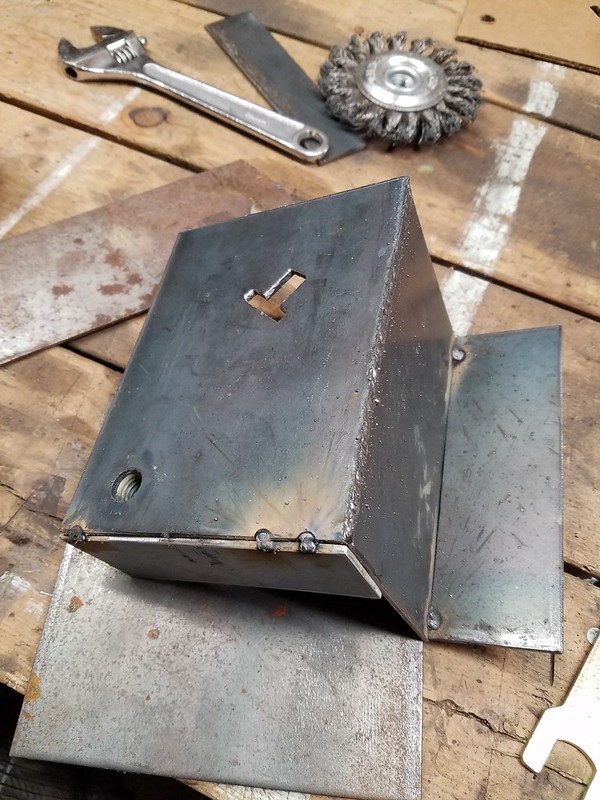
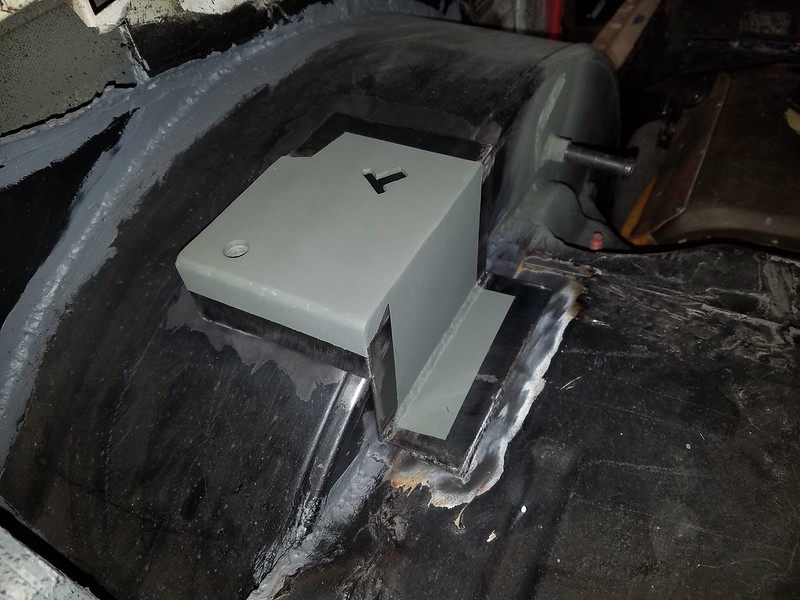
Then it was onto the rear seat belt shoulder mount that needs to go on top of the minitub.
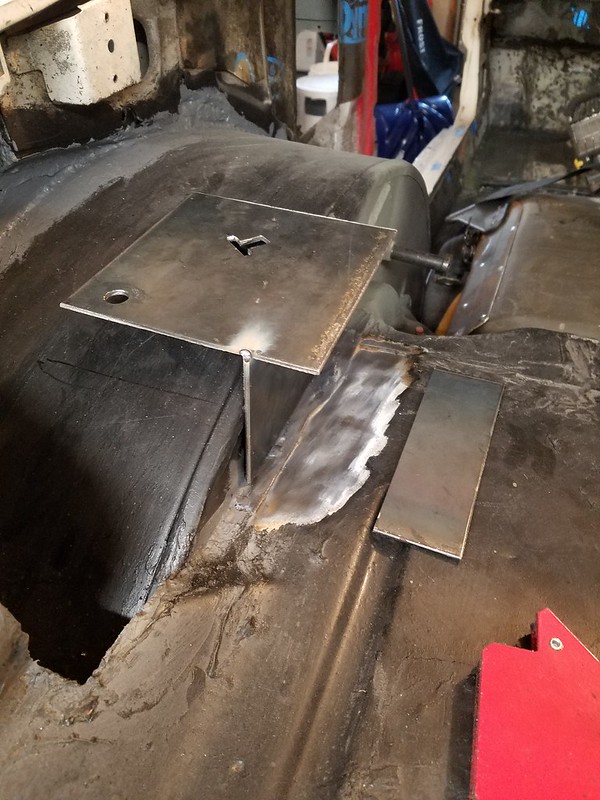
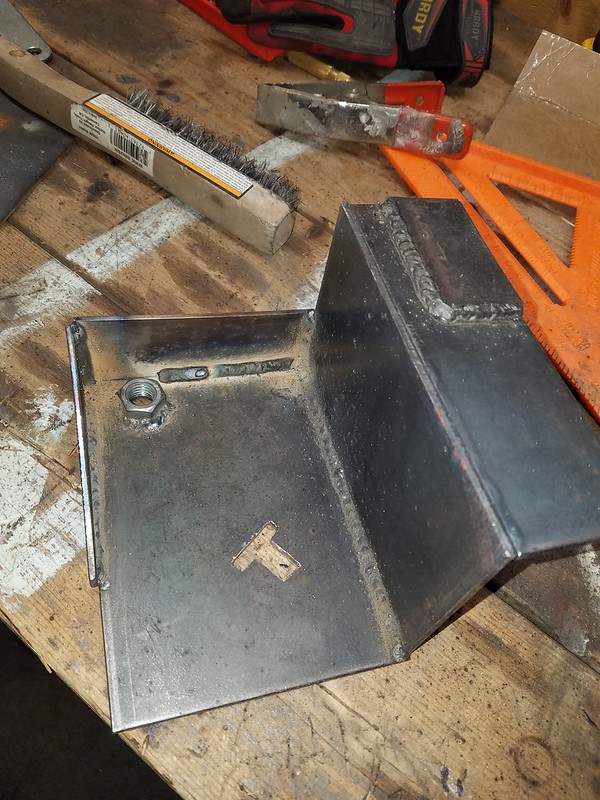
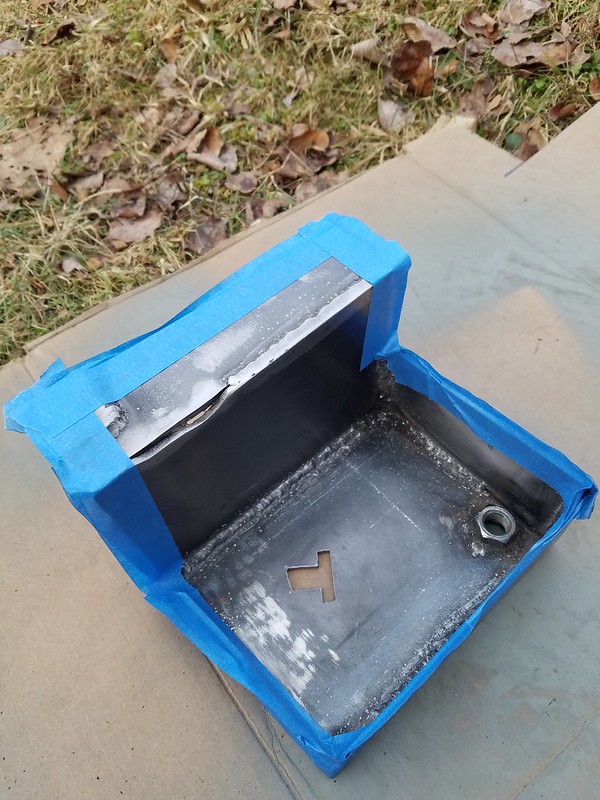
I started by making the T hole mounting plate and tacking that to a vertical plate. All plates are 1/8" thick.
Next step was to add more plates to complete the box.
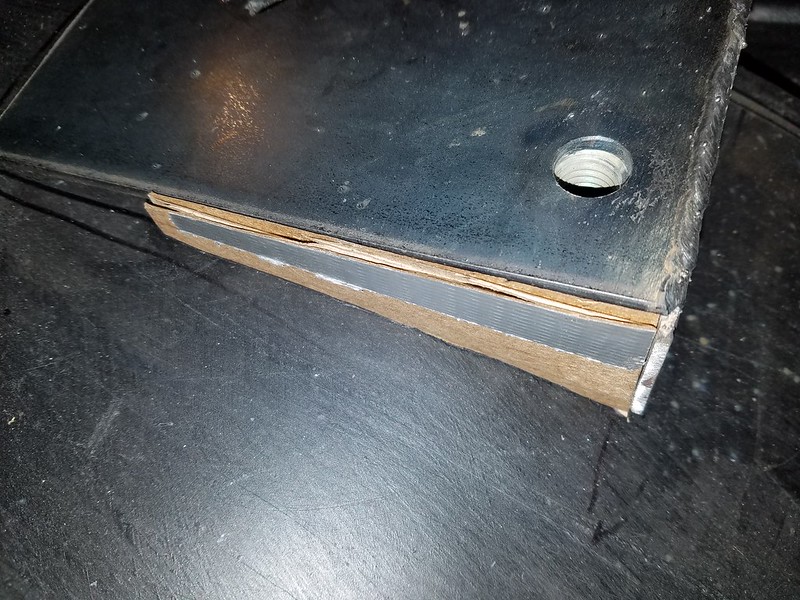
Here is a quick shot showing how I moch every plate out of cardboard first. This is the ramp piece that will follow the contour of the wheel well.
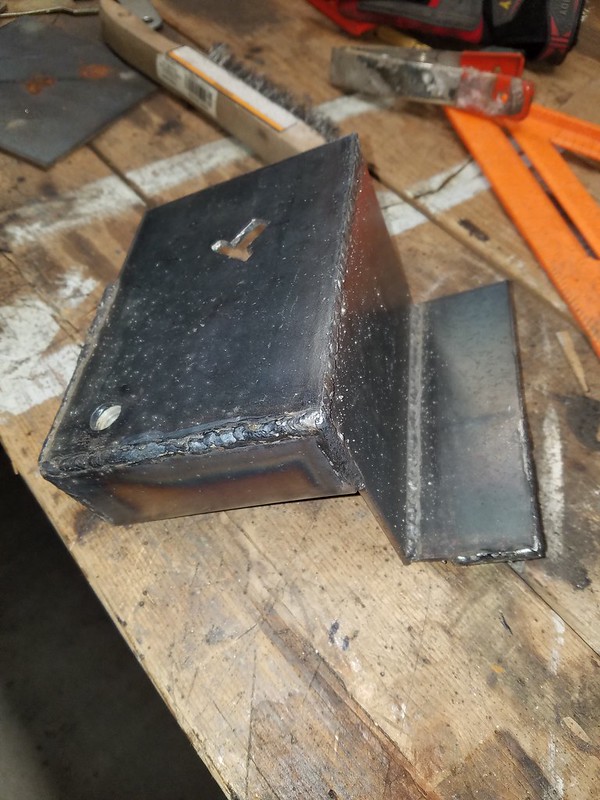
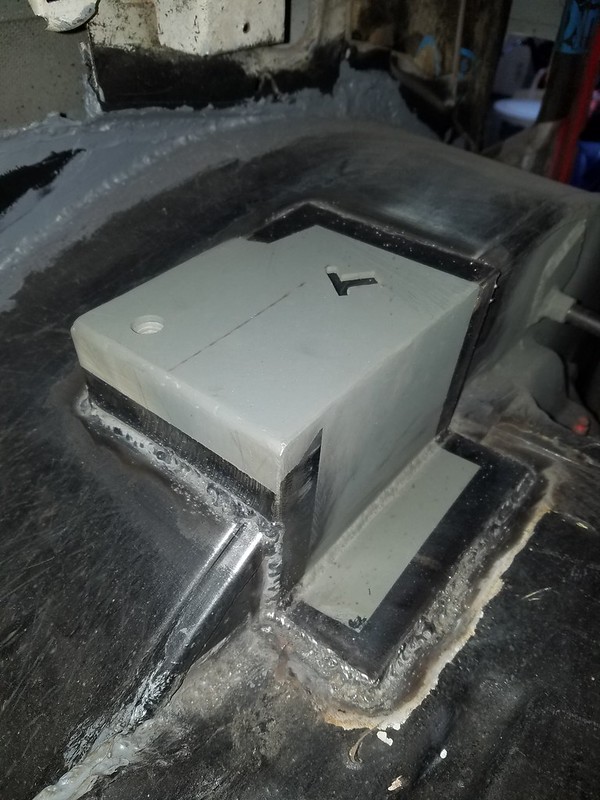
Then I flip the box over and weld all the seams inside and out.
Here is the box ready to have its welds ground down.
I then primed the box on the inside and outside, masking the edges that will need to be welded.
Re: My 91 Z28 build. 17 years in the making... Finally going to do this right
Originally Posted by dennisbernal91z
Here is the box ready to have its welds ground down.
That fabrication looks great. I think for your open corner joints like this you would do better to weave it. Whatever way you like to think of it, C shape, coma shape, wave shape. It looks like you tried to build the root up by staying in one place too long.
Re: My 91 Z28 build. 17 years in the making... Finally going to do this right
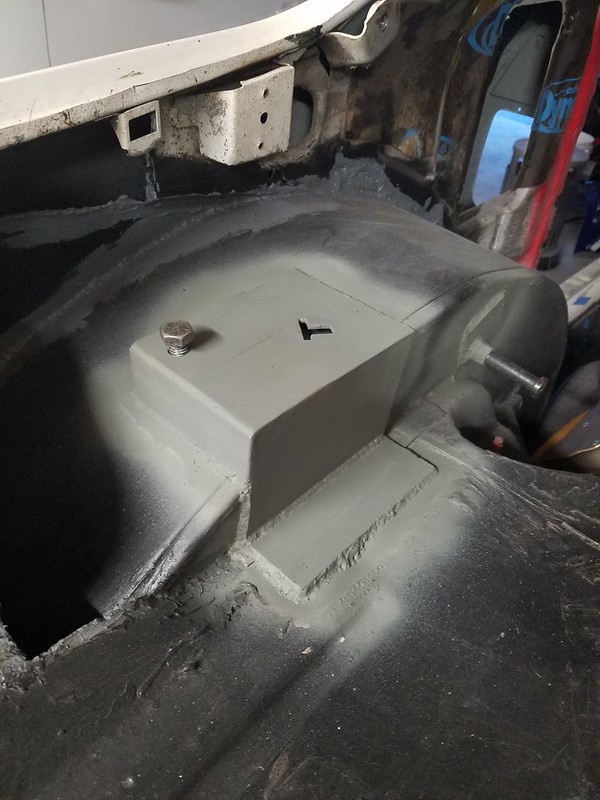
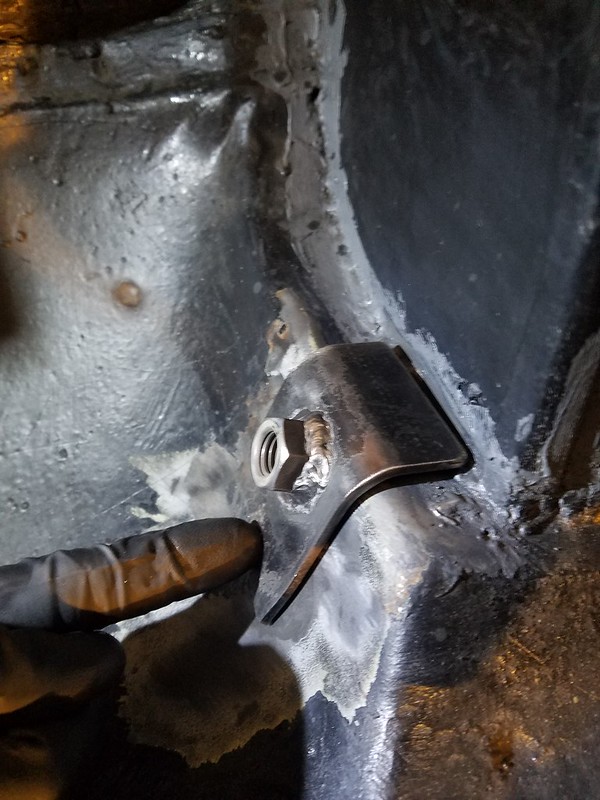
Finished the rear seat belt setup this past weekend. Very happy with the way it all turned out.
Just above this cleaned off area you can see where the mini tub is cutting thru the OEM seat belt mounting location. My relocated mounts are as close to the OEM location as possible.
Mounting plate bent out of 11GA steel with grade 8 nut welded to it.
All done being welded in and a shot of primer to prevent flash rust. New grade 8 bolt cut down slightly being test fit in the image.
Passenger side made the same way as the driver side. Seat belt bolted in for final fitment check.
Passenger side upper mount all done with a shot of self etching primer.
Minor milestone finally being done with the rear seat belts.
Next will be adding back some bracing I cut out when I was installing the mini tubs.
Re: My 91 Z28 build. 17 years in the making... Finally going to do this right
Proposed rear structure brace / harness bar idea.
Side shot
Thoughts? Looking to add strength back to the rear that was lost due to the fuel cell back there. Also looking the add a harness bar for some 4 or 5 points when I want to have some fun.
Re: My 91 Z28 build. 17 years in the making... Finally going to do this right
When I was thinking about how to go about mounting my seatbelt harness I looked to NHRA and the Arizona state highway patrol to give guidance. NHRA says it's ok to wrap the belts around the crossbar of the roll bar provided the angulation is correct. It looks like you'll have the correct angle. For reference it is not an actual angle, I believe it is phrased as between shoulder height and four inches below shoulder height. NHRA also wants the roll bar welded to 1/8" steel plate that is at least 6"x6". I would make the bar 1.75" OD with a 1/8" wall since that size is easy to find and would meet their demands. I think if you built it that way for a harness bar any organization would be hard pressed to not allow you to run a harness to it since you built as if it were a roll bar. I would also make the rear supports either go to both rear subframe rails or to the driver's side rear subframe rail. Makes sense that if the harness goes to the driver's side that the driver's side has the most bracing.
The only thing I wonder about is if NHRA sanctioned event/track would let you in because of the fuel cell situation. I think they would want you to have a firewall between you and that fuel cell. Or is that moot because the fuel cell is thick enough metal?
The only harness that is 50 state street legal is the Schroth Rallye series. Other freedom loving states may be much more lenient when it comes to seatbelt rules. Here in Arizona I spoke with a Captain from the Highway Patrol about seat belts and installing aftermarket sets for public roads and he said "All we care about is that you are wearing a functional seat belt." After I spoke with him I bought a set of Crow harnesses. They can be used for sanctioned racing so will be safe enough.
Re: My 91 Z28 build. 17 years in the making... Finally going to do this right
Haven't been on here or posted in a long time.
great seeing what your doing with the car bud. I'll have to stop back more often and check up on this thread. I'm normally over on the ****** militia page on FB.
Re: My 91 Z28 build. 17 years in the making... Finally going to do this right
Ripped the rest of the sound deadener off the interior over the weekend.
Not big update, but something is better than nothing!
This stuff sucks to rip out. A lot of heat gun and patience goes a long way.
Next up was adding back in a brace I over cut when I installed the mini tubs.
Mock up the pieces to make the brace.
All welded in with no primer on there yet. Also the inside of the car finally clean and free of deadener and tar left over.
Went ahead and cut out the spare tire/ jack brace. This allowed me to rip up the deadener faster and clean up the metal better. Going to paint every square inch in epoxy primer eventually.
Overall shot showing the roof line. This was a big area to clean.
Finally, I also got around to removing the hatch pull down and cleaning the rear tail panel. Only the initial wipe down. I plan to wire wheel as much OEM seam sealer away as possible to see if there is rust hiding anywhere.
Re: My 91 Z28 build. 17 years in the making... Finally going to do this right
The sound deadener was in the way. Very in the way.
While welding anywhere near it, it melts and makes a mess.
On top of that, I can't see if there is any rust hiding under it.
This point of this build it to go down to bare metal in as many places as possible, investigate for rust, treat, repair and coat in high quality epoxy primer before paint.
Over the next week I will be spending more time that I want to say cleaning the interior to rid it of all the tar left over from the sound deadener as well as cut and weld some of the remaining plugs in the floor boards.
Basically detail work that is not fun, gives only minor feelings of advancement to the project but in the end pay off big in the overall finish of the primer/paint.
Re: My 91 Z28 build. 17 years in the making... Finally going to do this right
Call it what you want, but the industry lingo is sound deadening.
It does absorb vibration and turn it into thermal energy.
All sound is, is air vibration. So we are both right. I just use the terminology the company uses that I bought the product from.
Re: My 91 Z28 build. 17 years in the making... Finally going to do this right
Originally Posted by dennisbernal91z
Call it what you want, but the industry lingo is sound deadening.
It does absorb vibration and turn it into thermal energy.
All sound is, is air vibration. So we are both right. I just use the terminology the company uses that I bought the product from.
Just because they use it, doesn't mean they are correct. It does very little to block sound from travelling through the panel. It does exactly what you said' turns vibration into thermal energy. This only "deadens" perceived sound, but it isn't an actual sound dampener. It is a very distinct difference, and people should learn the difference and understand
People would be much better off to understand the differences and apply the correct product for the desired effect, and stop the wrong terminology being thrown around all the time. I will be adding lead sheet to my Suburban when I redo the vehicle for actual sound deadening, in addition to vibration dampeners and other sound control products.
Re: My 91 Z28 build. 17 years in the making... Finally going to do this right
"deadening perceived sound" does in fact mean sound dampening. People want to minimize what they hear from the road. Reducing vibration into the car does this.
Changing one of the resonant frequencies of a certain body panel can do this (what the product you linked to does). You can also simple absorb the sound by reflecting it or braking apart the sound wave once in the car. Like sound studios do with all that triangle foam on the walls.
I am on board with your links showing some better products that help make the interior more comfortable.
Frankly, I don't care.
I don't plan on using ANY stick on products ever again on my car. Period.
And please understand I do in fact know plenty about dampening vibrations and resonant frequency. I am a mechanical engineer with vivid memories of taking classes like Statics and Dynamic, as well Thermodynamics and Vibrations.
Anyways, I will post back when I have more updates to my build. Thanks for the input on other sound products. I plan to use some kind of OEM style non-stick mat under the carpet. That's it.
Re: My 91 Z28 build. 17 years in the making... Finally going to do this right
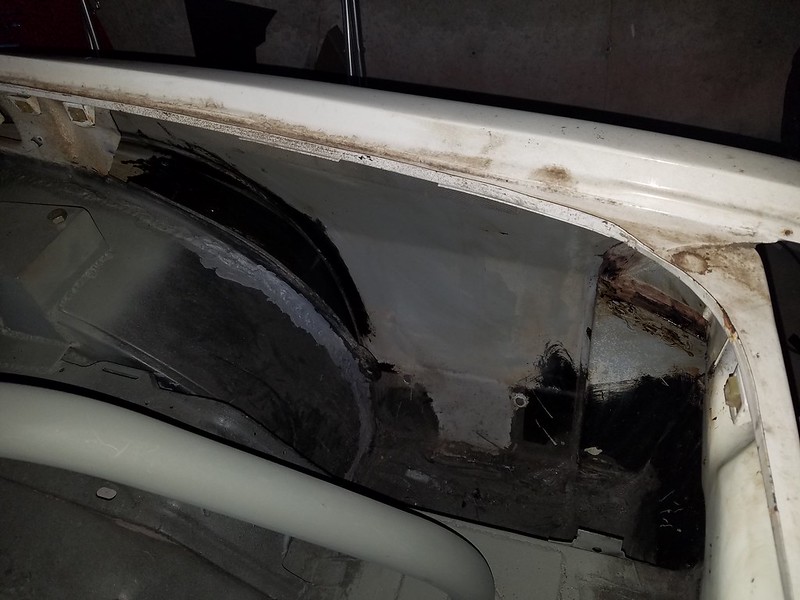
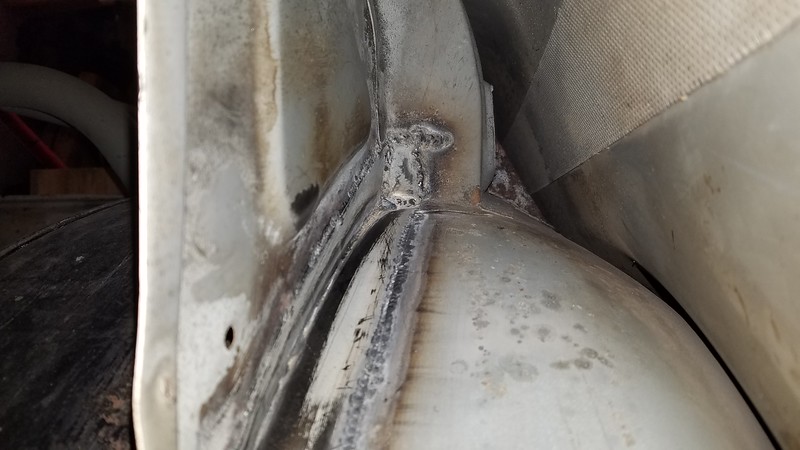
I am in the process of finally fixing an area of the car that was an issue 17 years ago. The rear wheel well seam on the DS tub. This was the only area of the car that had rotted out and was a pain to get to. In the past, even recent past I have always just avoided fixing it properly by tossing product on top of it to hide it. Well those days are over. I am have cut out all the crap steel and am fixing it once and for all now.
First thing to fix was a small wall that connects to the part of the hatch. Some quick tacks took care of that after cutting and grinding.
Then I cut out the entire seam that was the issue. Shot from outside the car.
I also found some lose paint and very small rust spots inside the quarters. My plan now is to buy a car port at HF, build a chassis roller out of my current engine stand and a second that I need to buy. Roll the car outside into the carport and sand blast the inside of the rear quarters. Then clean them out as best I can, paint, then internal frame coat what the gun can't reach. Repeat on the PS.
Between the blasting and the painting, I will do the metal work to get this all closed up.
Gonna wait for some of the 12" if snow I got last night to melt...
Re: My 91 Z28 build. 17 years in the making... Finally going to do this right
Thanks for checking out the build Magsls1.
Minor update and also looking for some advice.
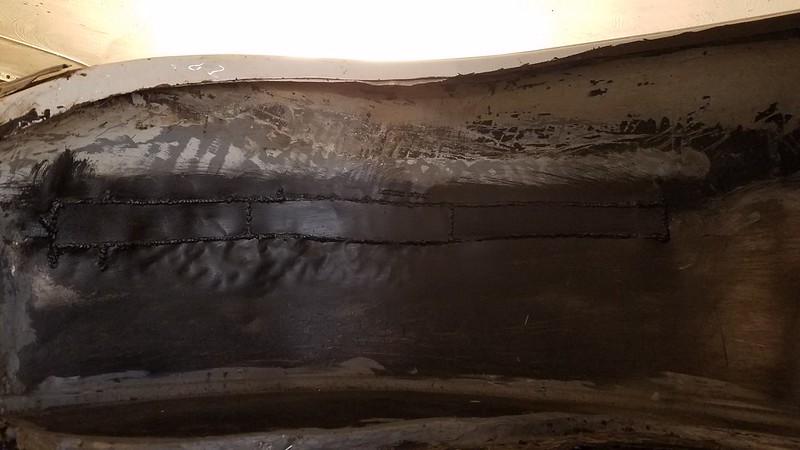
Here is the rear trunk area rebuilt with a couple of panels. I had done a horrible job, so I decided to redo it.
All the crappy metal out, as well as horrible old welds.
Also got to closing the last few OEM holes in the floor.
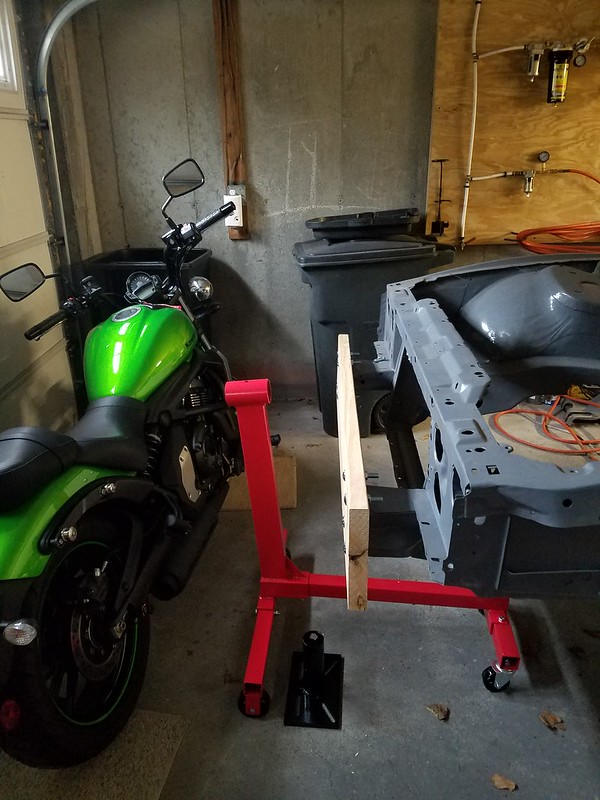
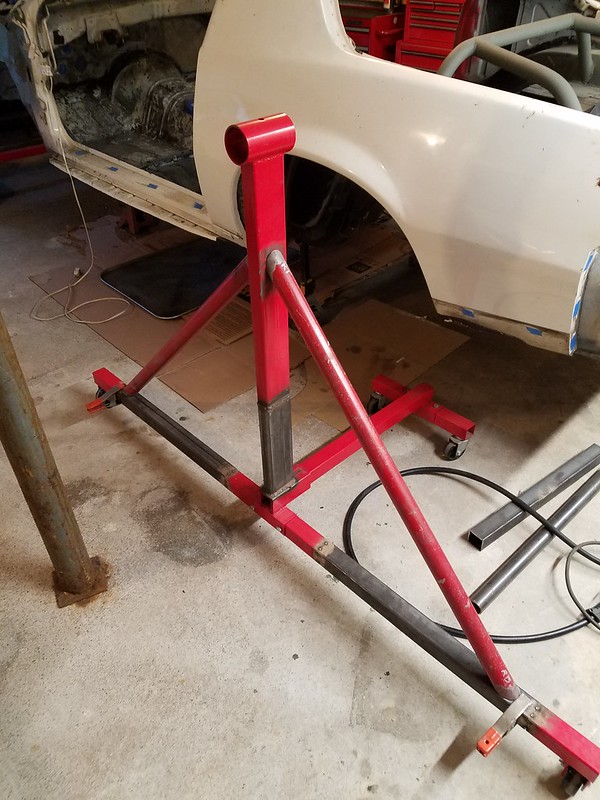
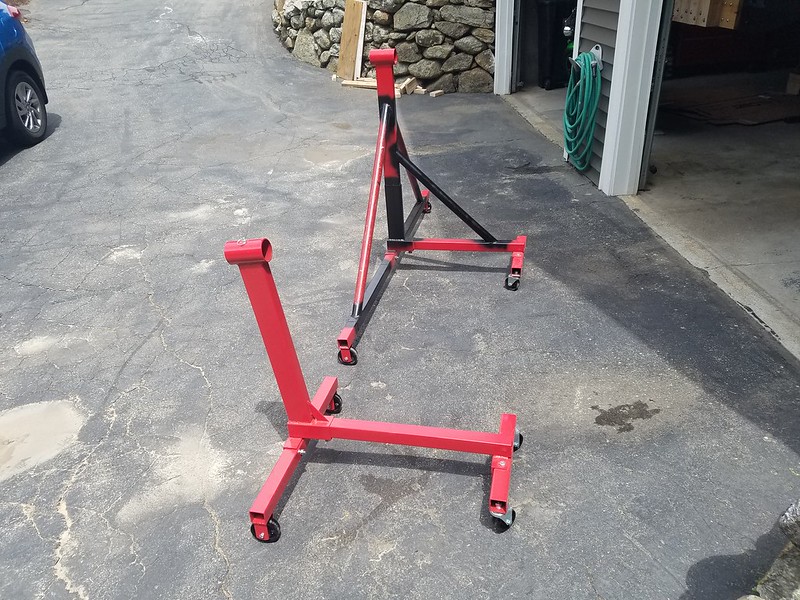
Next up is getting the car way off the ground to get the underside cleaned up and painted. I am thinking if I widen the legs of the engine stands, and set the masts vertical, as well as tie them together, I can roll the body outside as well as tilt it a bit if needed. It would take a few friends to force it over and pin the stands in place, but WAY cheaper than buying a rotisserie for a one time use.
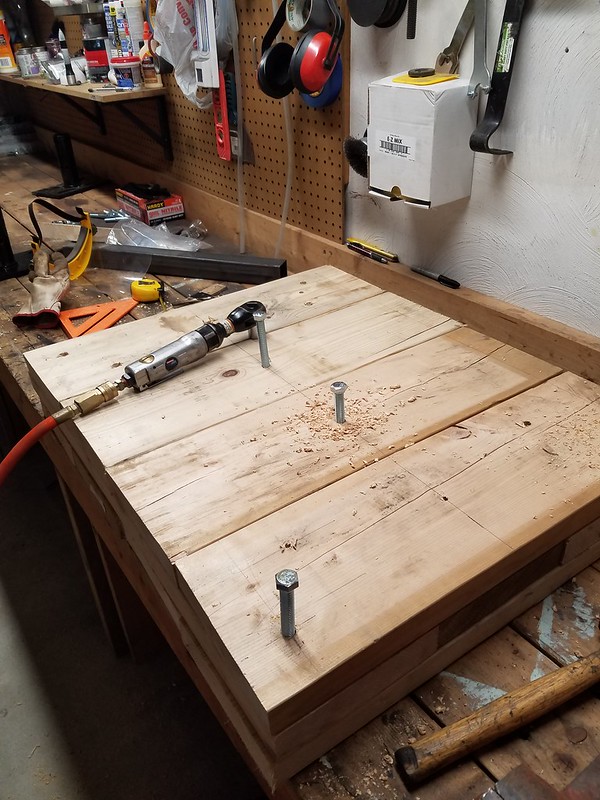
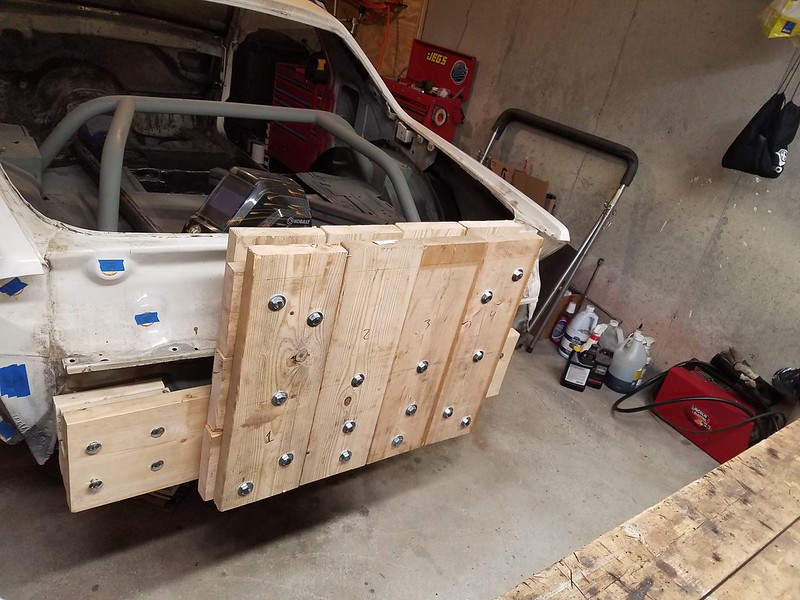
As you can see I have the wooden bumpers made and mounted. I can find 2"x2"x24" square tubing off Amazon for $24 a piece. Not bad. I can't find the size for the center mast, it is close to 1.5" x 3" but not exact. I know I could just buy plates and made the bar stock like that from 1/8" plate, but figured I would see if anyone knew where to easy get a 1/5"x3" bar to see if it would work. I only need about 16" per side I think.
I would also tie the widened legs to the mast for more stability using some old roll bar tubing.
I am thinking of this more as a tilt jig than a rotisserie since all I really have left to do to the underside is strip is best I can section by section and coat it with primer and some kind of bedliner.
Re: My 91 Z28 build. 17 years in the making... Finally going to do this right
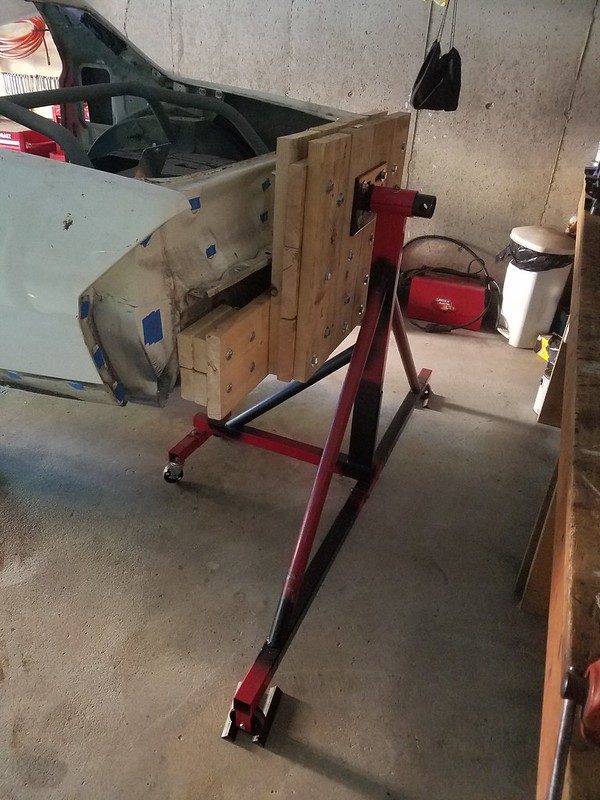
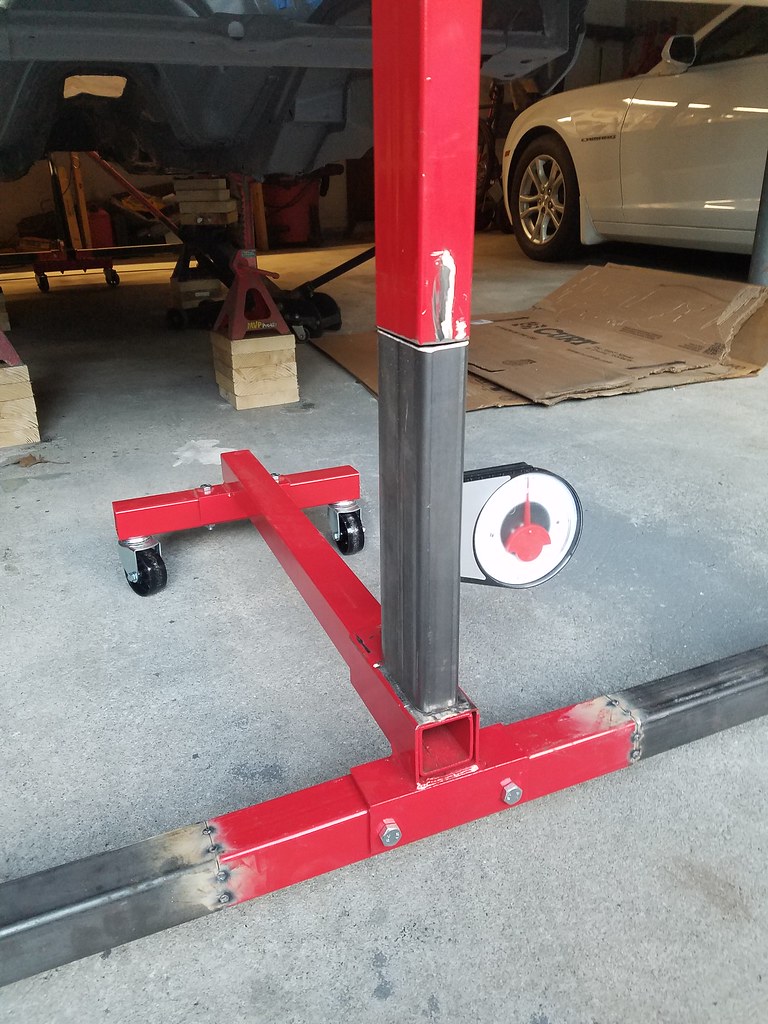
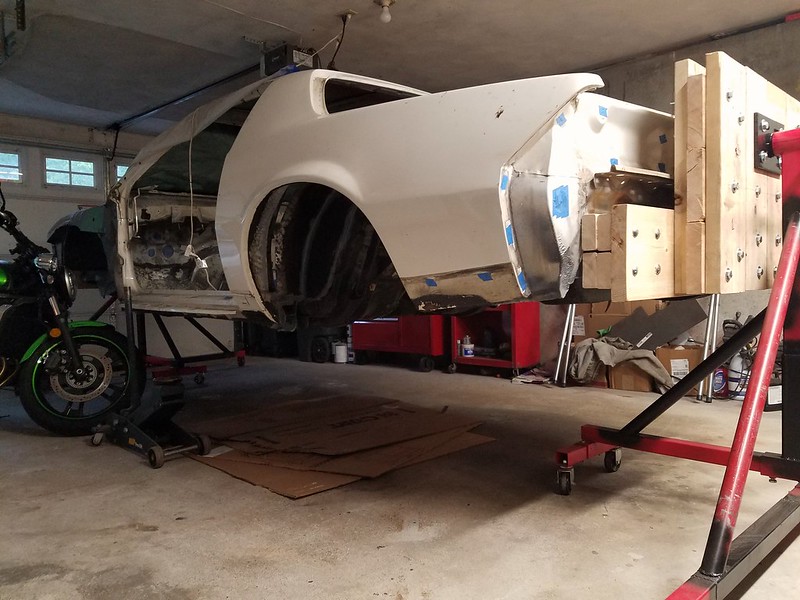
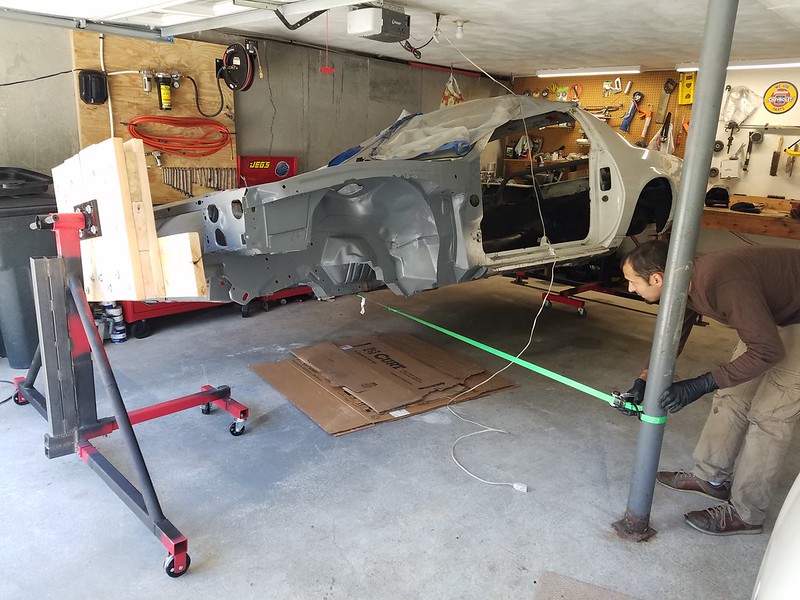
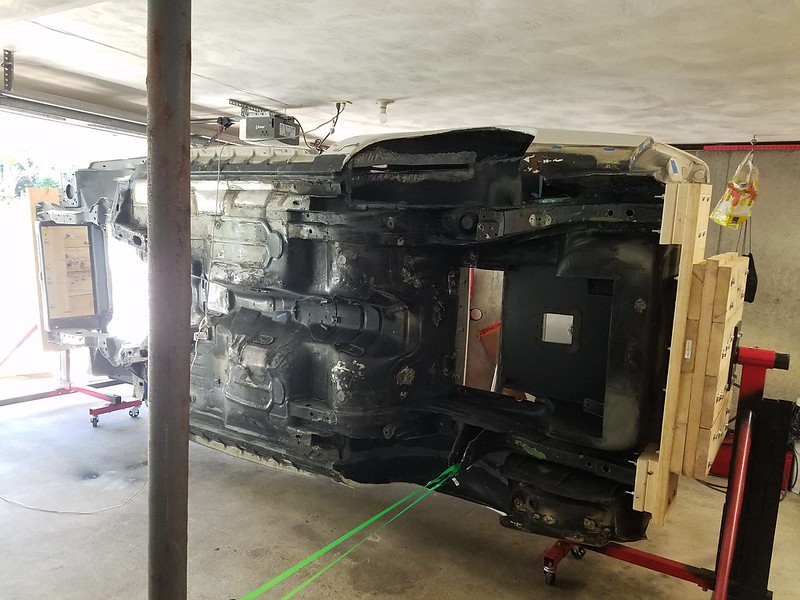
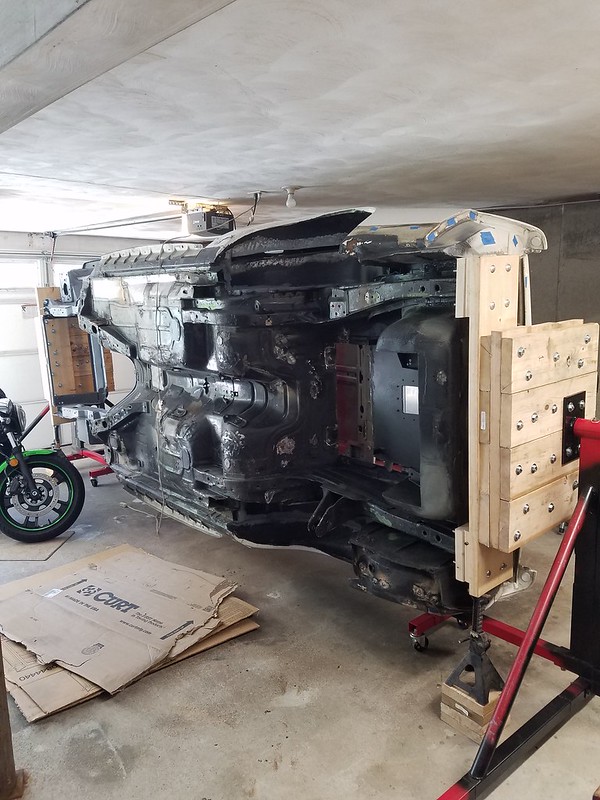
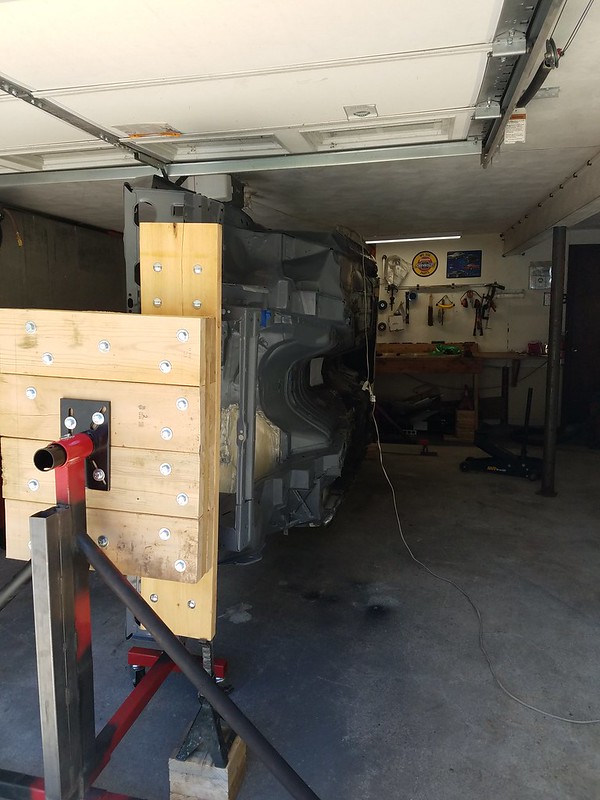
Finally finished the rotisserie units so the car could be rotated 90� over the weekend.
It was scary flipping it as the center of gravity was not in line with the center of rotation. I knew this was going to be the case, but I had no choice as it was the only geometry that would fit in my garage.
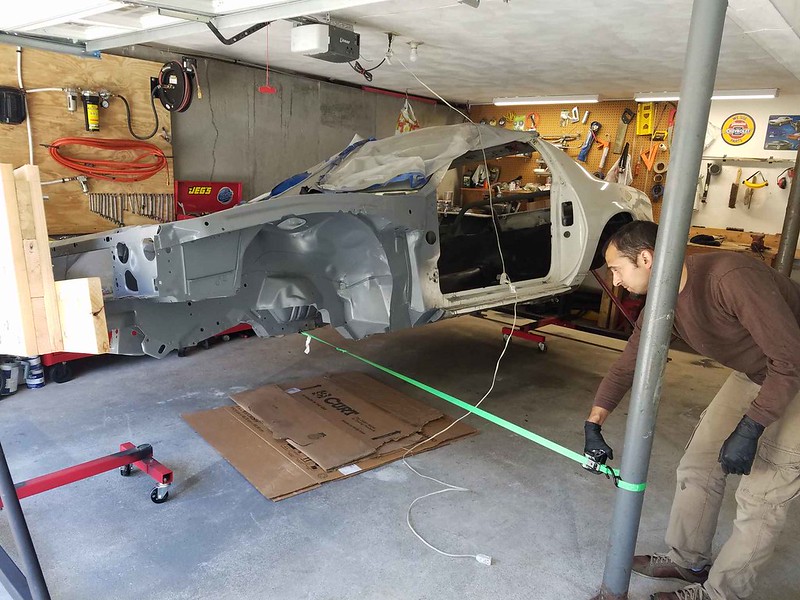
Started rotation with a come along at the front.
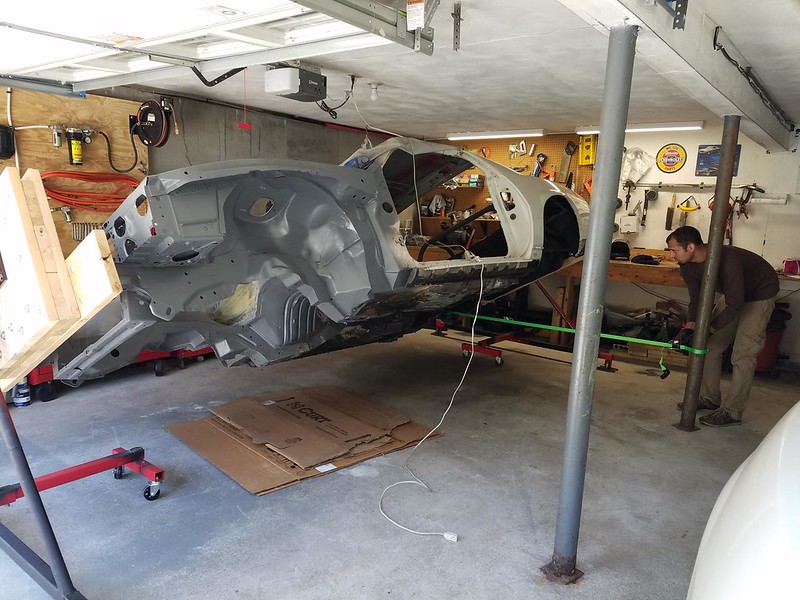
a bit further. (Wife taking pictures. She was there in case something horrible happened)
Decided the front frame hole was not secure enough. Swapped to rear panhard bar brace.
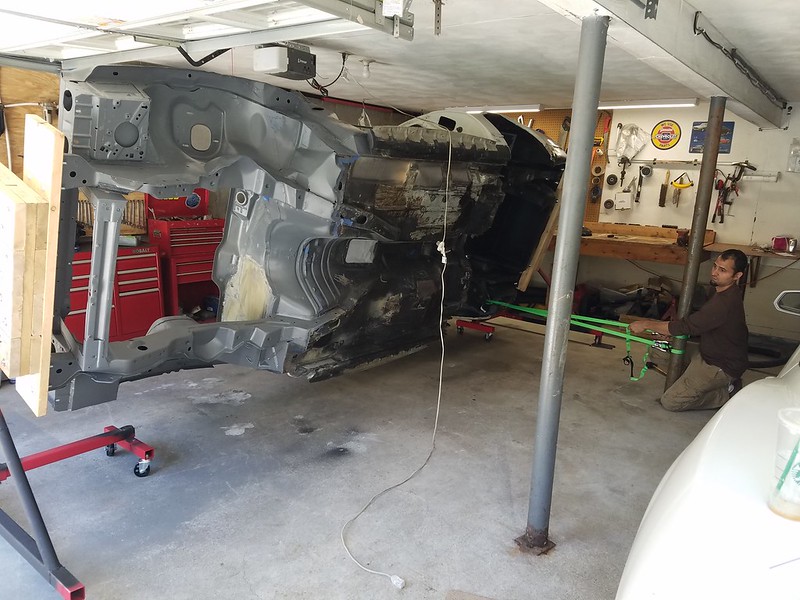
The doubled up the come along for added security.
Almost there.
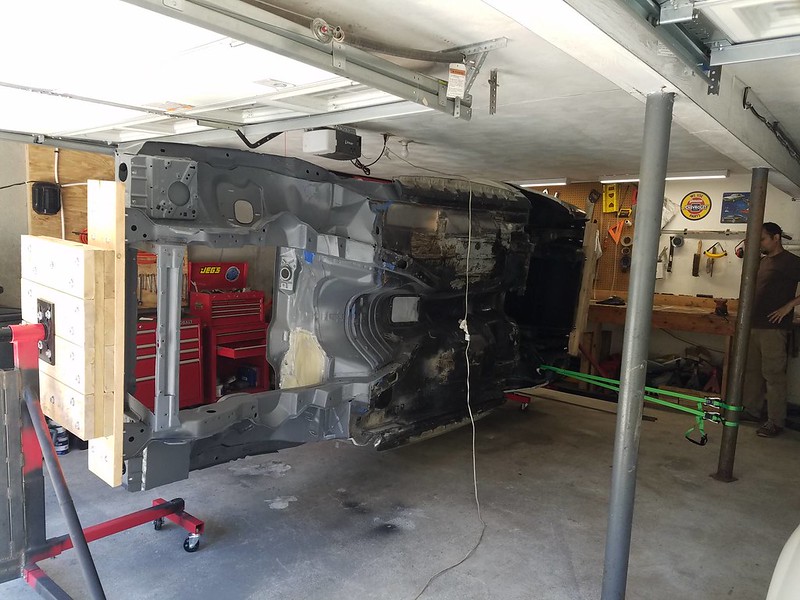
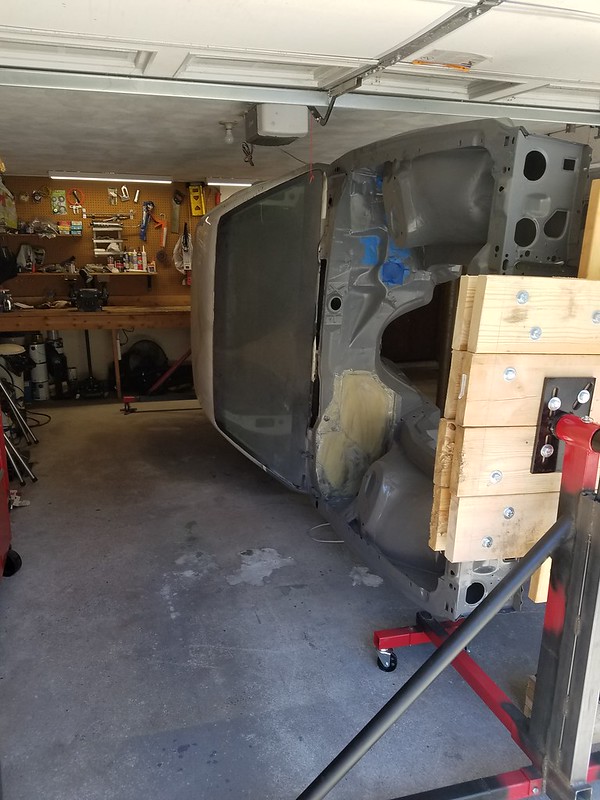
MADE IT.
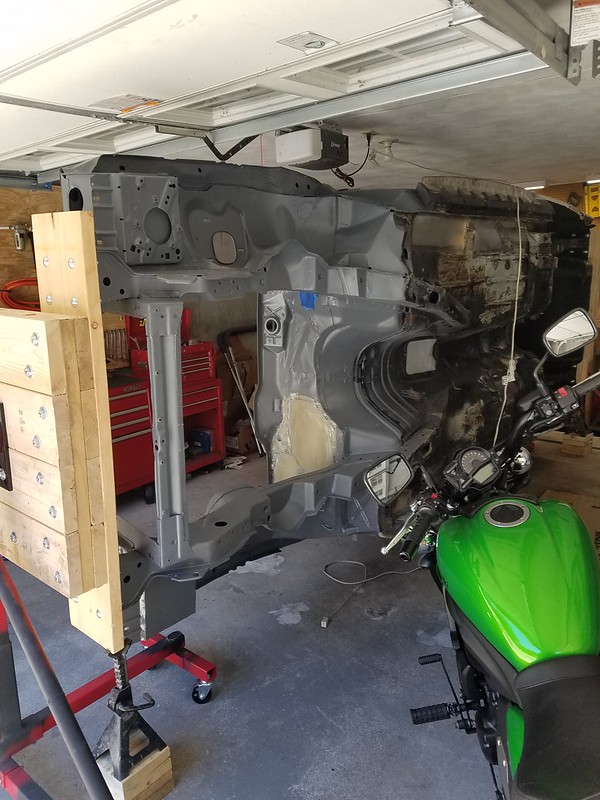
Shot of the other side
Plan is to strip and paint the underside to match the engine bay epoxy primer first.
Re: My 91 Z28 build. 17 years in the making... Finally going to do this right
Thanks for the offer to help!
Mini update
I wire wheeled for a couple hours last Friday. Found some small rust spots under the stock undercoating and paint. Happy to have eyes on so I can fix them.
I sprayed some Eastwood rust converter on the entire floor to inhibit rust. I then wiped off all the extra to stop the reaction. That stuff works awesome. Sprayed to just to prevent rust, but 90% of the places I sprayed, if there was just a bit of rust, in 5 minutes it was completely gone.
Re: My 91 Z28 build. 17 years in the making... Finally going to do this right
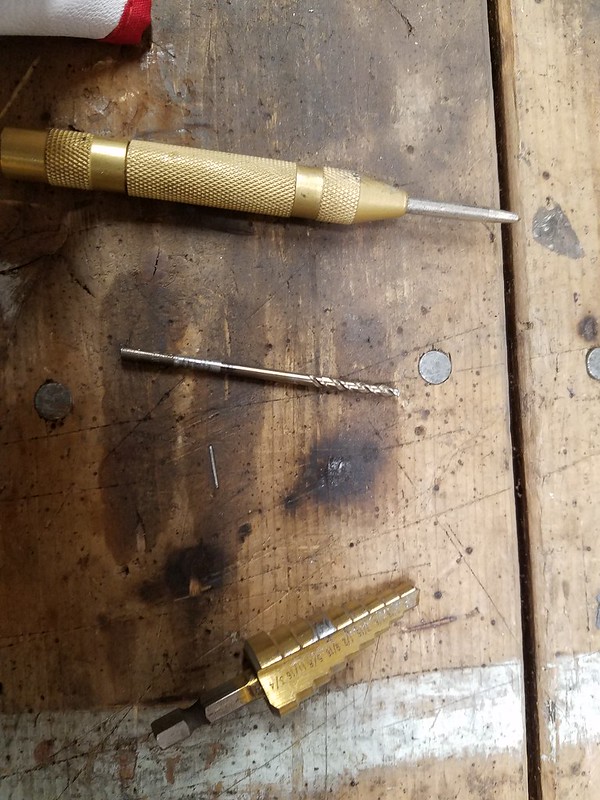
Went ahead and bought some high quality spot weld cutters. Should be here Friday. I also got a panel separator. Sort of like a chisel make to pull panels apart.
Once I have them, I will remove the E-brake cable bracket.
Since I am making a center console from scratch, I think I will also be removing the brackets on the tunnel on the inside so I can make my own.
Re: My 91 Z28 build. 17 years in the making... Finally going to do this right
Small update:
Got the parking brake bracket off the car last night.
As you can see in the images, this was my first time drilling out spot welds. That bracket is REALLY on there.
As I expected, it appeared there was no rust, but once I removed the bracket, rust.
I will clean this area up and weld shut any holes I made before sealing it all off.
Almost done
DONE
I will be buying a universal kit from Lokar to relocate the E-brake to the left of the driver seat so the custom center console will not need that big lever in the way.
Re: My 91 Z28 build. 17 years in the making... Finally going to do this right
Got around to throwing some hours at the car this past weekend.
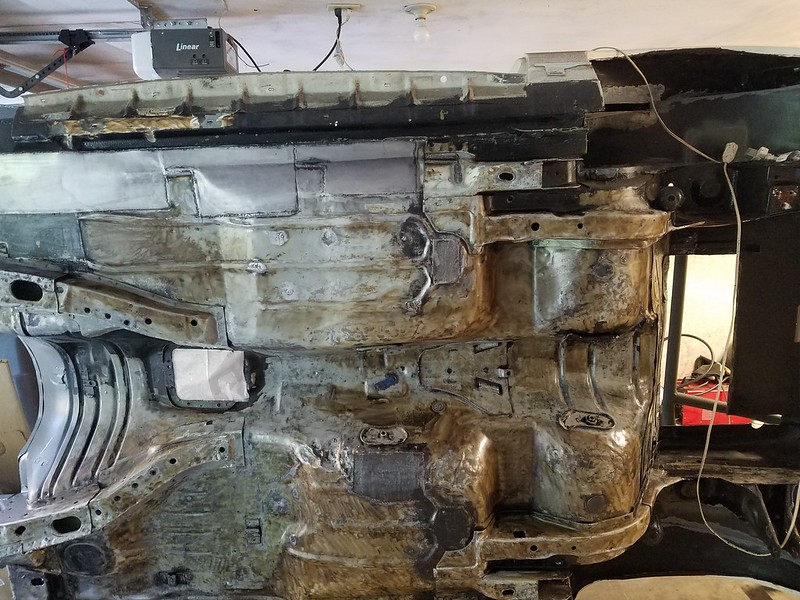
Finally closed the trunk hole and started stripping the rear underside of all the 90's undercoating and old POR-15.
All the nooks and crannies of the rear make it slow going, but it will be worth it in the end. For undercoating I will be using U-POL tintable truck bedliner I think.
Since this is going to be a show car I think the underside should be the same white as the top. Since the truck bed liner that U-POL sells is what DSE use on their third gen build (only in the wheel wells) I figure it should be good enough for me.
I will just use it everywhere. DSE painted the underside of the car and as far as I can tell, just left it painted so no other protection.
Anyways, here are some images of how the car sits now.
Patch panel complete.
Shot from the other side.
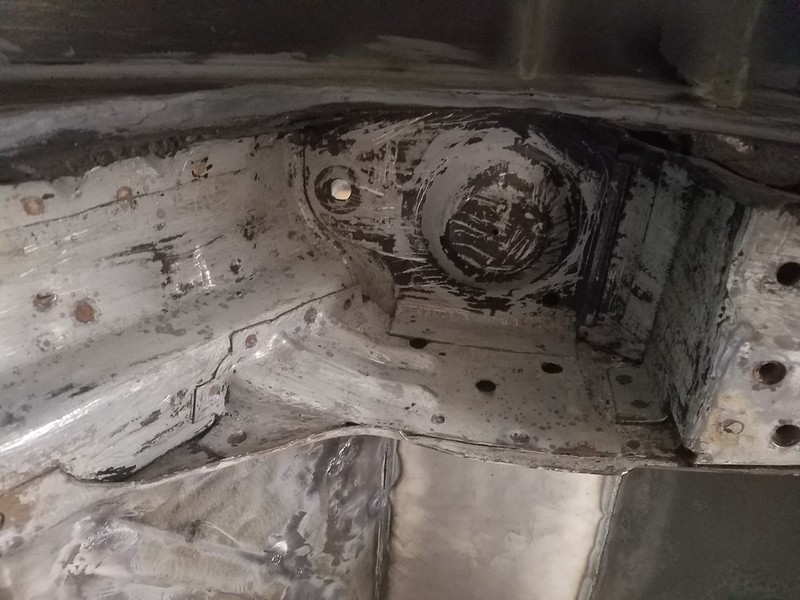
Panhard bar mount stripped (mostly)
Trying to show a bit further back
Spring pocket area took a good while just using a screw driver and a bit of paint stripper. But the $2 HF screwdriver did most of the work.
Once most of the thick undercoating was scraped off I was able to use a few applications of paint remover, then wire brush the liquified coating a bit followed by a wipe down with a rag. This method nets these results. I think it looks pretty good and after some 80 grit and a final wipe down, should be ready for paint.
Re: My 91 Z28 build. 17 years in the making... Finally going to do this right
Thanks!
I am going to sell my BMR subframe connectors and buy the DSE ones instead.
I have a buyer setup to buy the BMR units. I like how the DSE units go thru the floor along the entire length. I will post pics of the install later next month when I buy the parts.
Need to finish cleaning the area they will get installed into first.
Re: My 91 Z28 build. 17 years in the making... Finally going to do this right
Originally Posted by dennisbernal91z
Thanks!
I am going to sell my BMR subframe connectors and buy the DSE ones instead.
I have a buyer setup to buy the BMR units. I like how the DSE units go thru the floor along the entire length. I will post pics of the install later next month when I buy the parts.
Need to finish cleaning the area they will get installed into first.
You will enjoy the dse connectors, thats what i installed on mine. I really like having the additional jacking points on the car, which i know you can have that with some of the others. But I really like how they tie everything together. I cant tell you what they are like once mobile because the car isnt finished yet lol. Dig the build by the way, very thorough.
Re: My 91 Z28 build. 17 years in the making... Finally going to do this right
Originally Posted by dennisbernal91z
Thanks!
I am going to sell my BMR subframe connectors and buy the DSE ones instead.
I have a buyer setup to buy the BMR units. I like how the DSE units go thru the floor along the entire length. I will post pics of the install later next month when I buy the parts.
Need to finish cleaning the area they will get installed into first.
You can weld, you are obviously not afraid of cutting up your car and taking on a project so why not make your own set? Even with the current tariffs steel is cheap. I don't think I have more than $20 in metal between the inner SFC and the tie ins for the front of the outer SFCs. Save the money and put it towards a part you can't make or do yourself of a tool. Doing the exhaust just once for me paid for my own metal bandsaw.
Re: My 91 Z28 build. 17 years in the making... Finally going to do this right
Good point. I like the toque boxes that dse offers with the sfc though. The seat belt anchor would also make my life easier, I could fab the whole thing, but I am still leaning towards purchase.
where do you get your steel tibo? I had to order of metaldirect.com for my rotisserie and prices were not great but I needed specific sizes.
Re: My 91 Z28 build. 17 years in the making... Finally going to do this right
Originally Posted by dennisbernal91z
Good point. I like the toque boxes that dse offers with the sfc though. The seat belt anchor would also make my life easier, I could fab the whole thing, but I am still leaning towards purchase.
where do you get your steel tibo? I had to order of metaldirect.com for my rotisserie and prices were not great but I needed specific sizes.
In my area there is a local place called Endura Steel that sells metal. Most of the buyers are construction companies for the metal (not chain link) fences and gates and there is also a large amount of people who do offroad sports in the desert that buy metal for frames and cages and bumpers.
In your area have you tried Atlantic Metals and alloys, Olympic Metals or Eastern Metal Works? I only mail order metal if it is a small amount like a 2' square sheet of something or similar.
Re: My 91 Z28 build. 17 years in the making... Finally going to do this right
Impressive work - actually, inspiring. I have a huge undertaking of cutting and welding when I finally pull mine off the "road" to give it the full attention it needs, and it wasn't until I stumbled across this thread that I feel I could actually do it myself. It stinks that it'll also take a couple years such as yourself, but the end result will surely be worth it. Looking forward to all your updates. Thanks for sharing this with the community!
Re: My 91 Z28 build. 17 years in the making... Finally going to do this right
Big update that covers a couple different things.
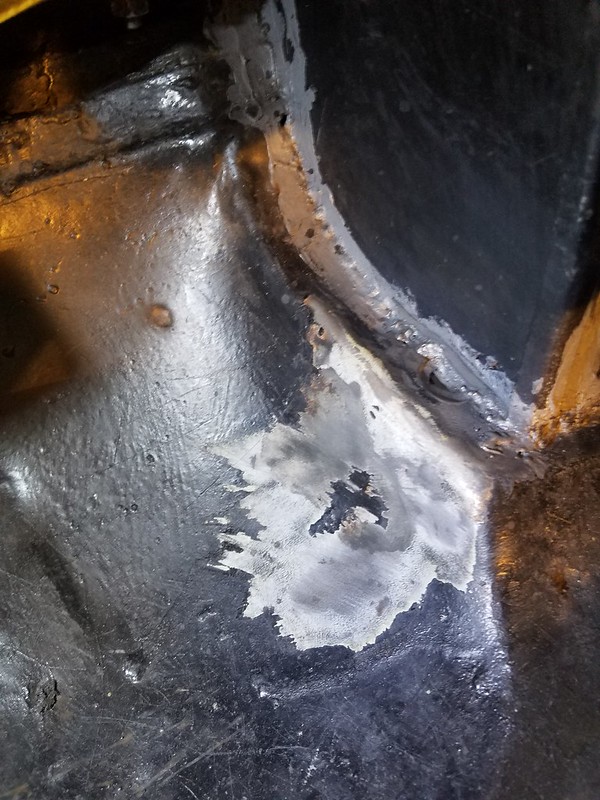
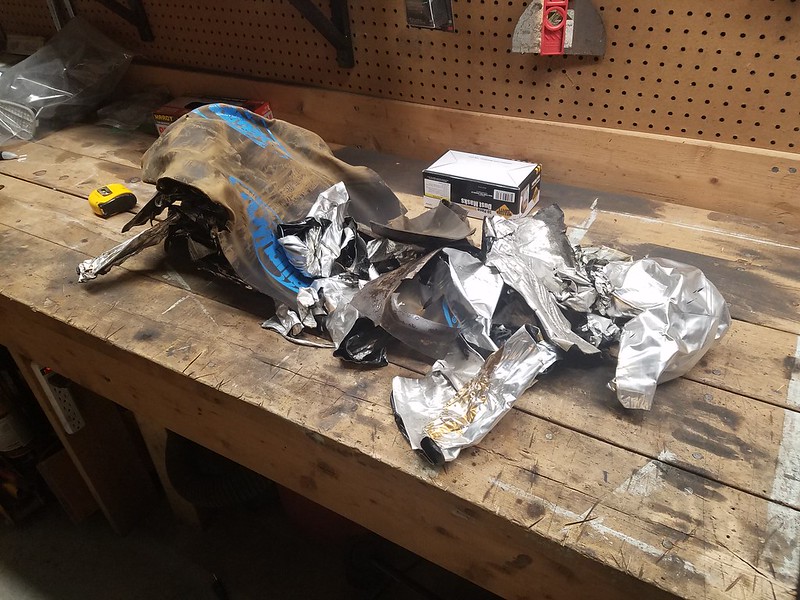
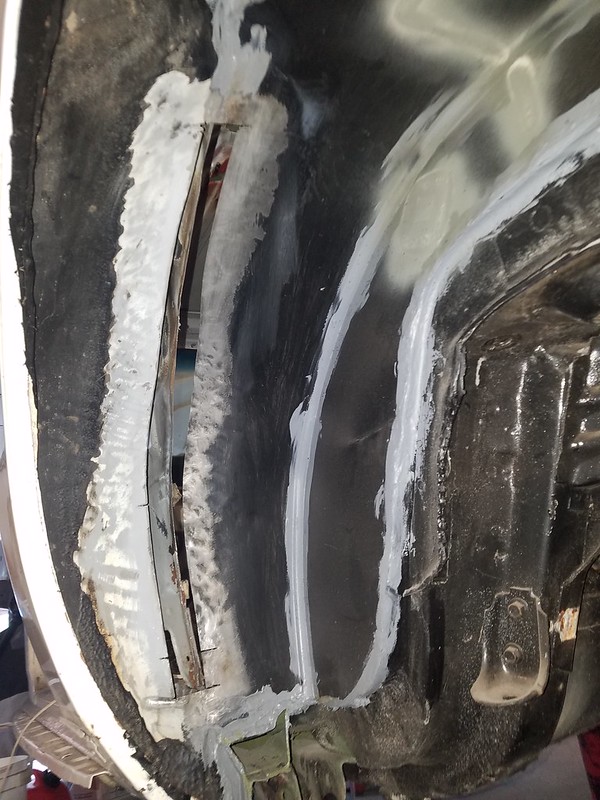
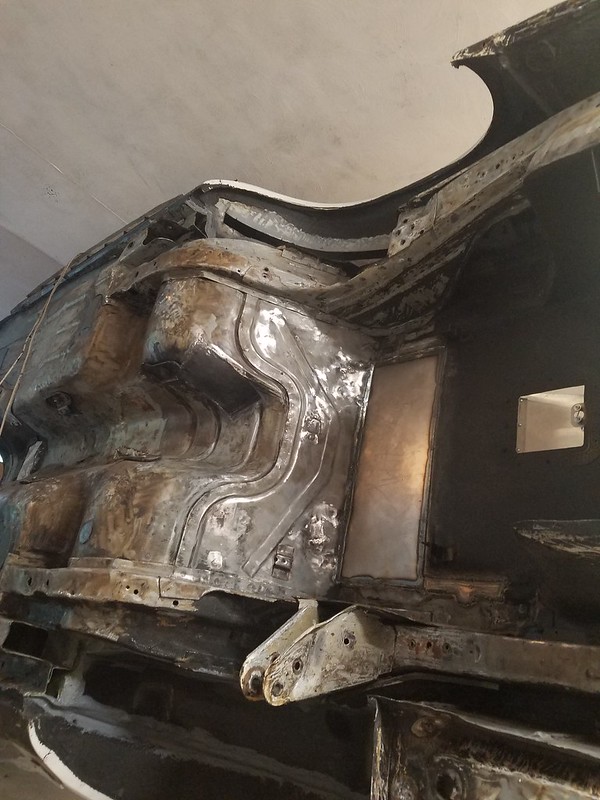
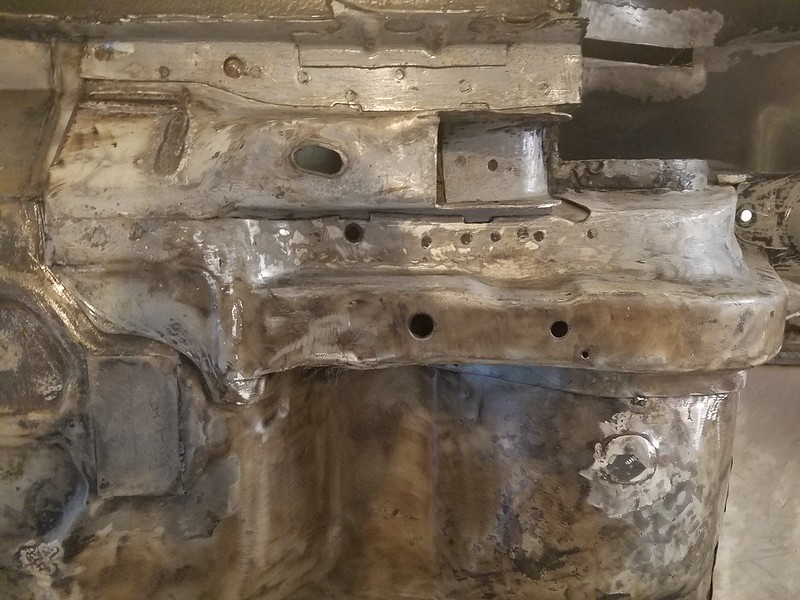
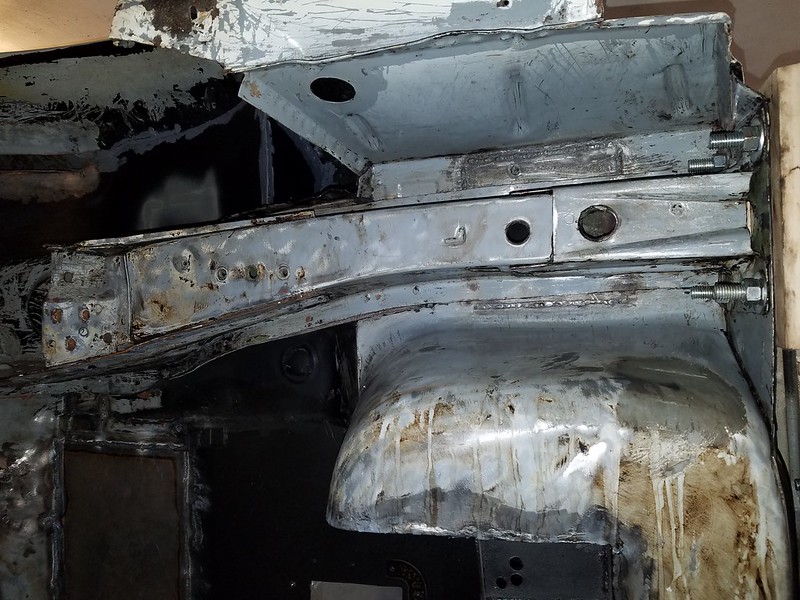
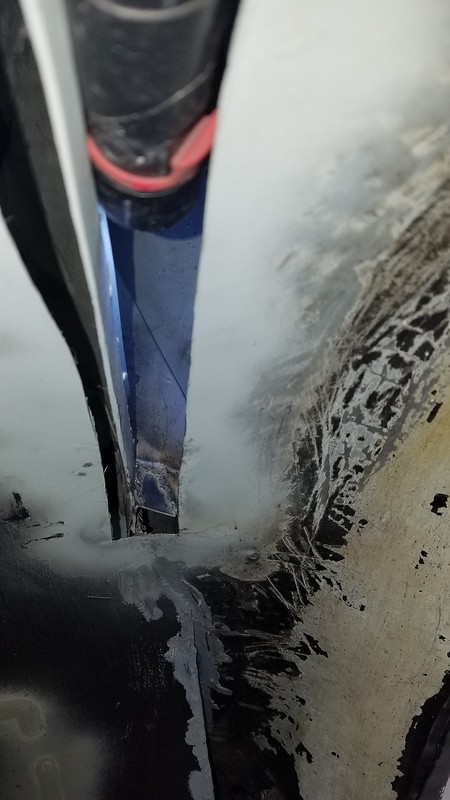
I decided to tackle the inner fender cavity rust issue. After cutting out all the rested metal I turned the rear of the car into a sand blast cabinet.
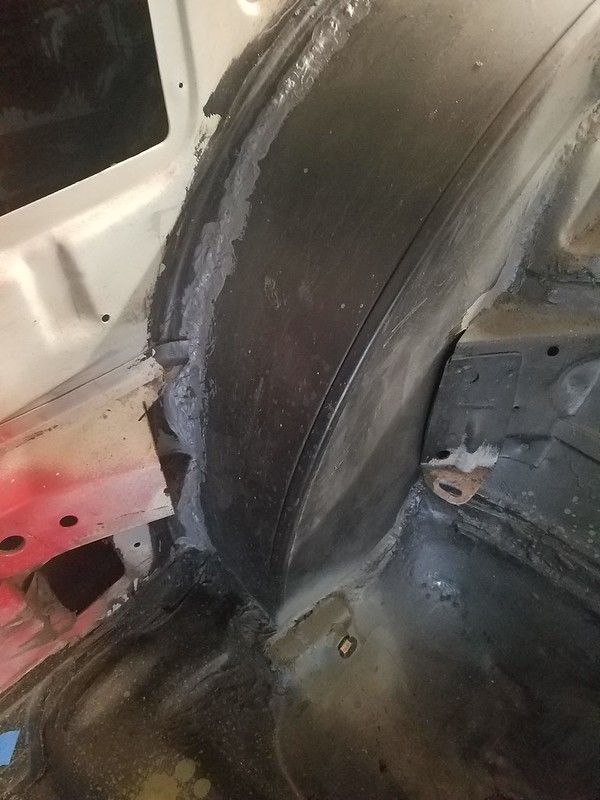
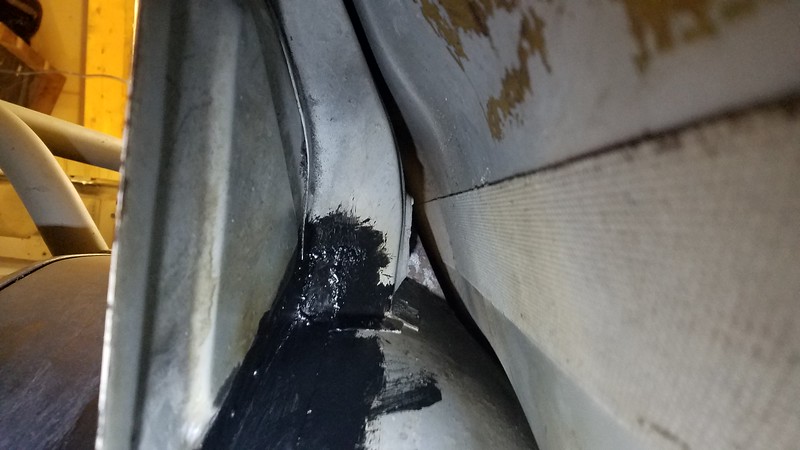
Hard to understand what I am showing here, but it is the convergence of a lot of panels that suck to fix.
The mini tub + the outer tub + the inner quarter frame structure all coming together. Cut out and weld thru primer applied.
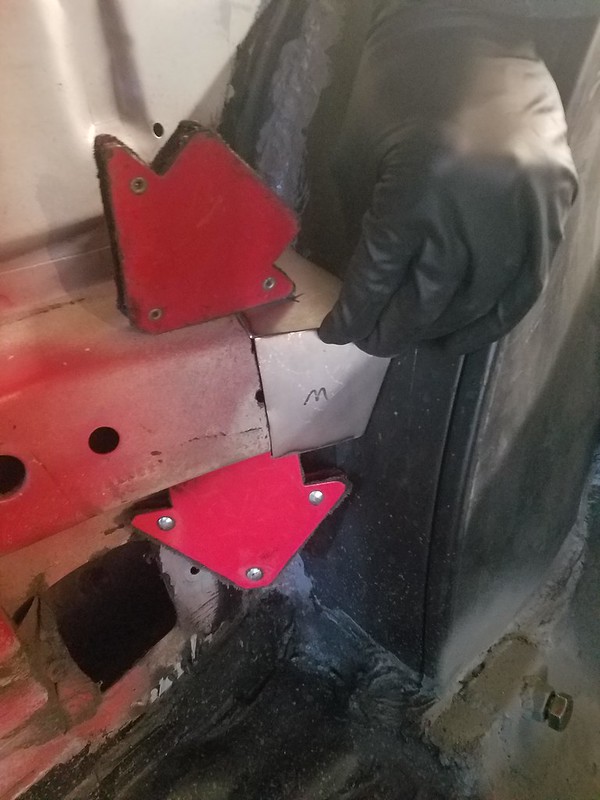
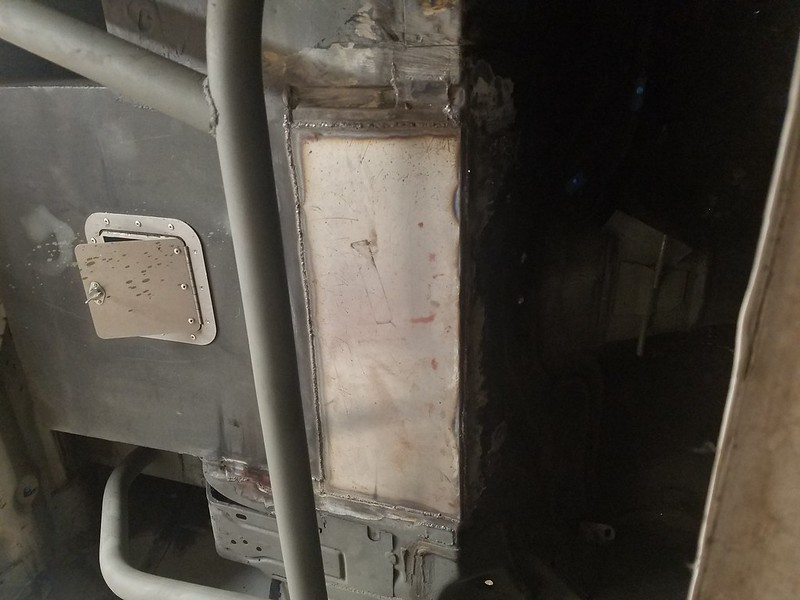
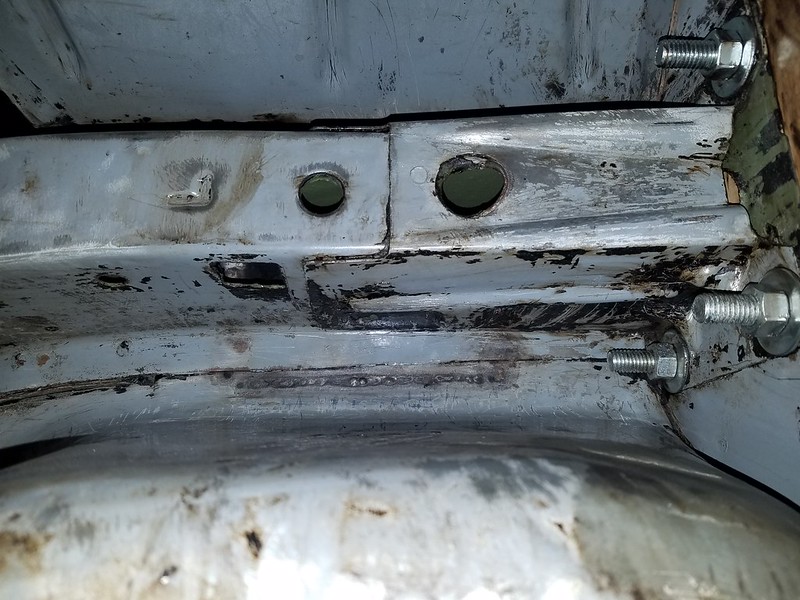
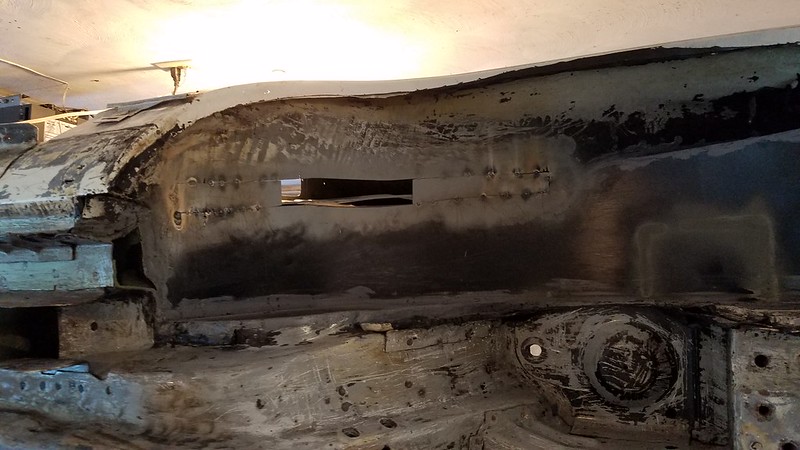
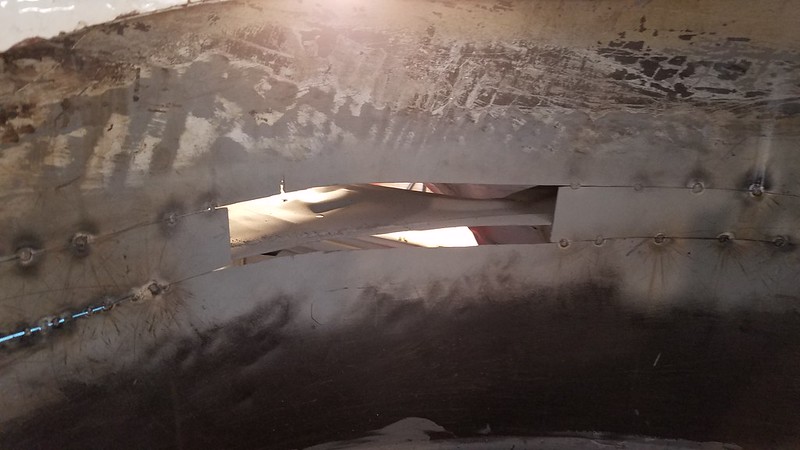
First small panel added back to match up with tub.
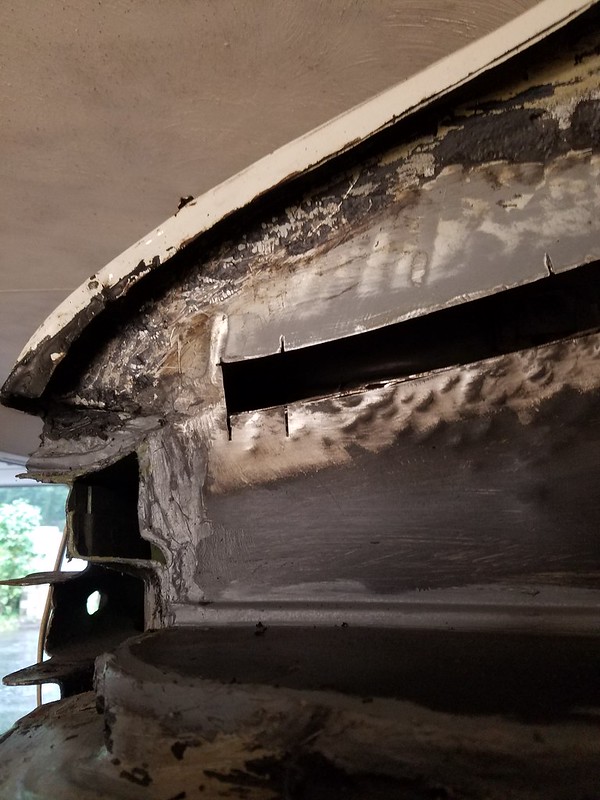
Two close off panels added to start to close up the hole after the inner wall was added and built up towards to tubs (hard to explain)
In this image you can see how I had to add a small sliver of metal about 3/8" back to the inner frame wall to bring it back in contact with the tub skin.
Re: My 91 Z28 build. 17 years in the making... Finally going to do this right
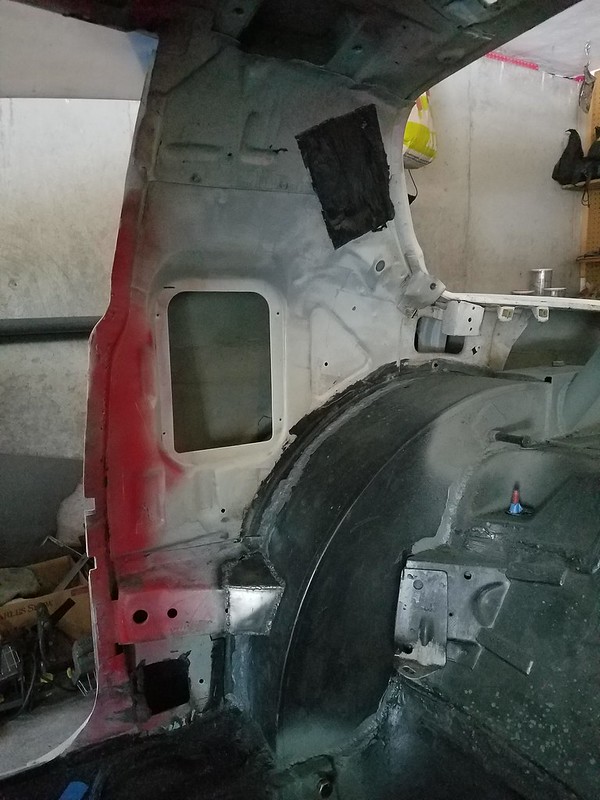
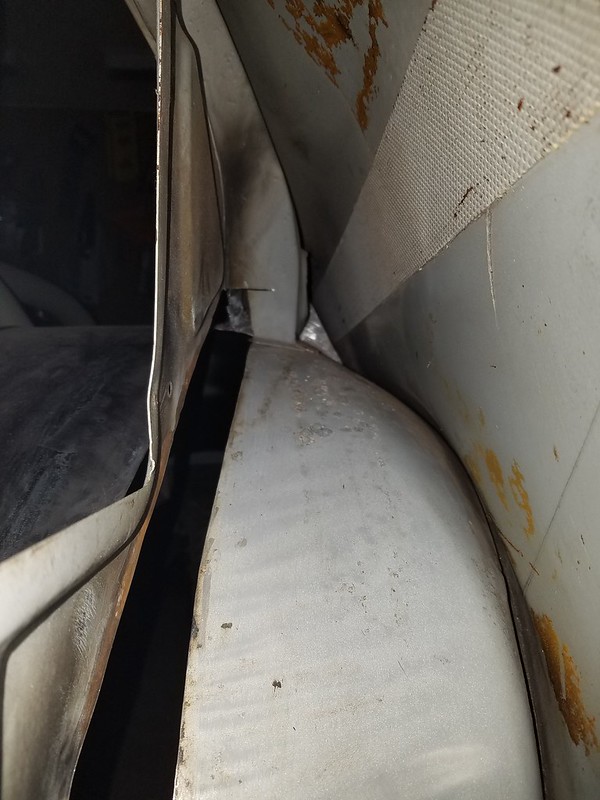
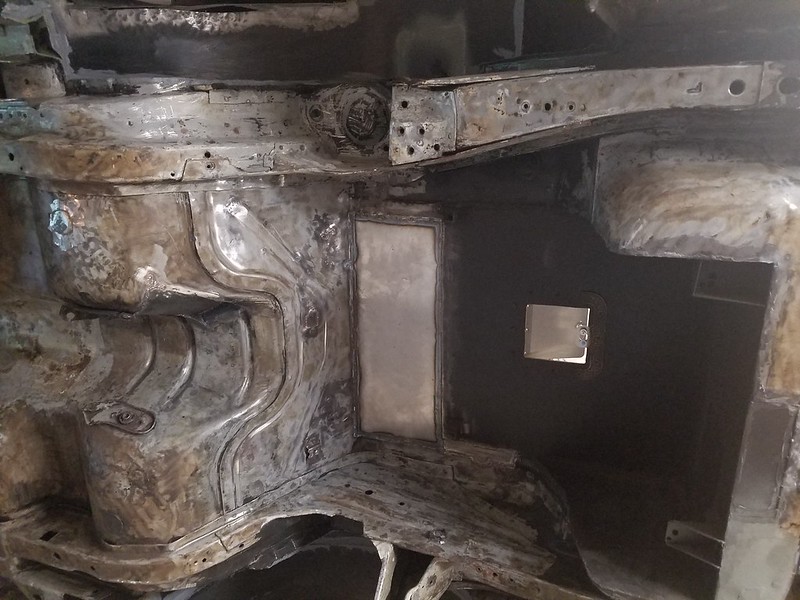
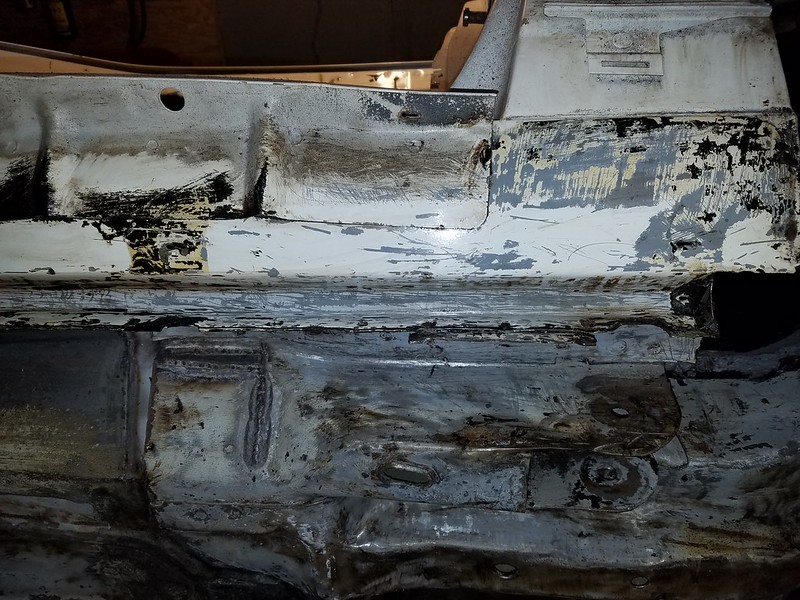
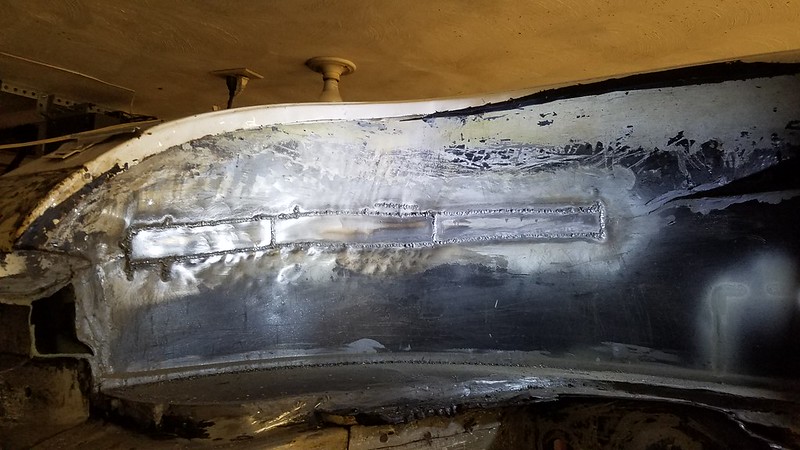
Another shot down towards the the base of the door from inside the quarter.
Couple more coated shots to hold off rust while I finish other areas of the floor.
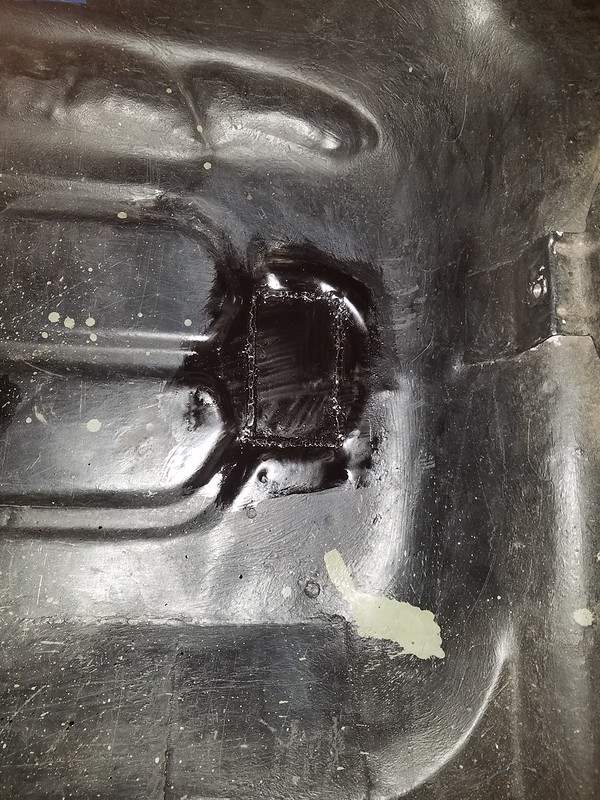
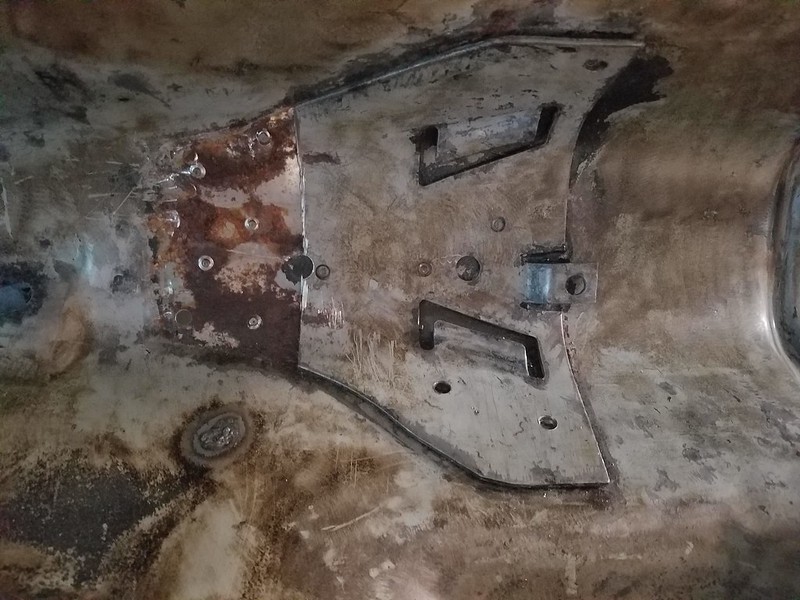
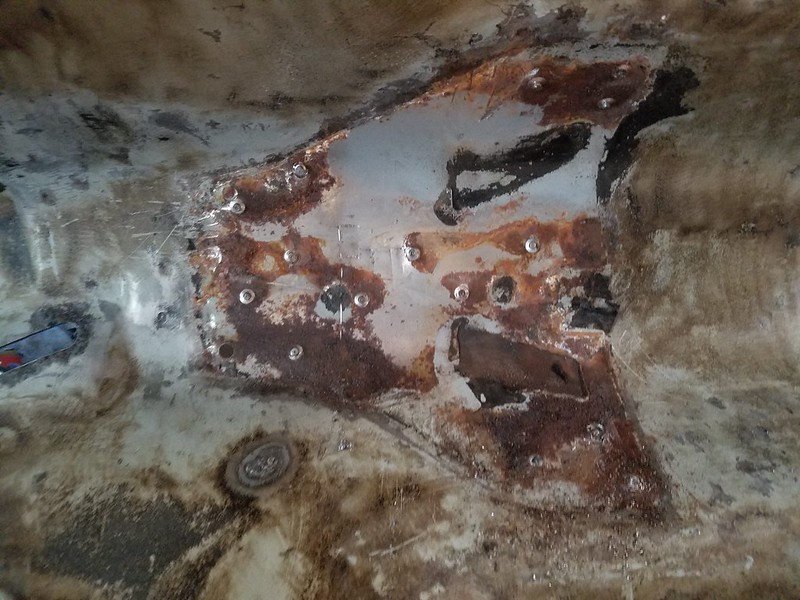
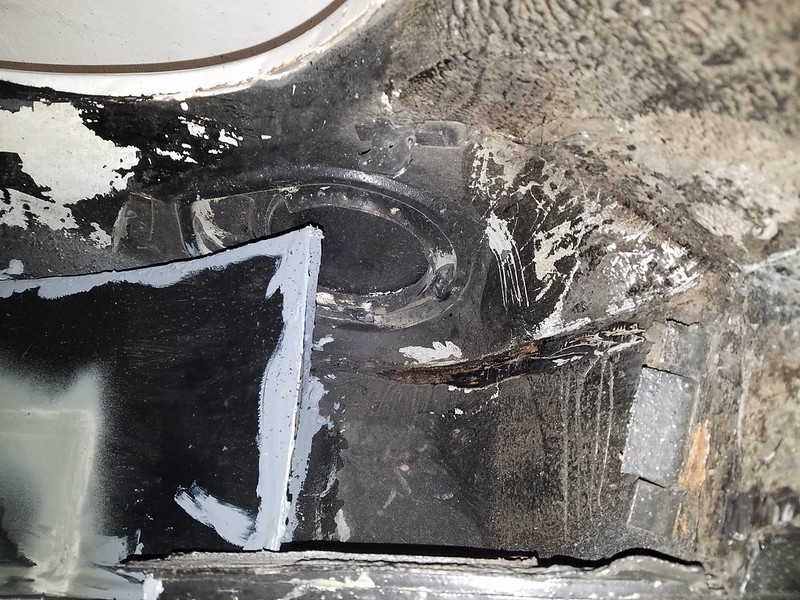
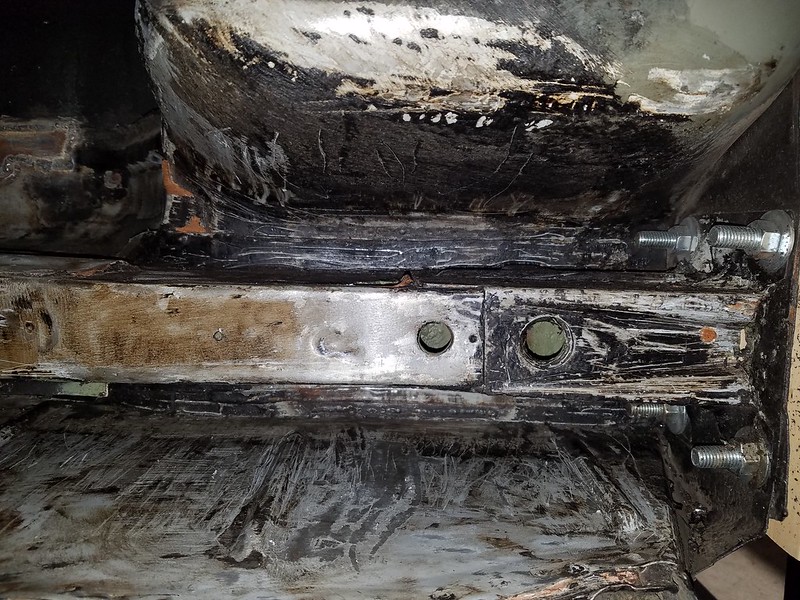
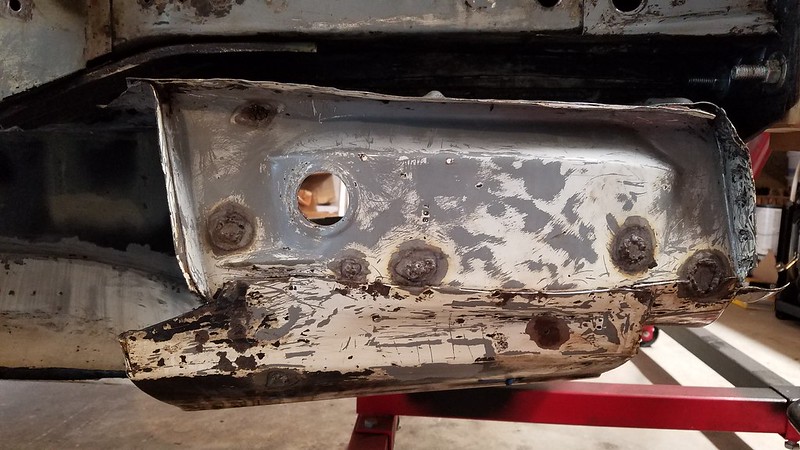
Different area now. The spare tire well has housed my battery in different ways over the years. I have always rushed to patch up the holes so now I took my time to close it all up properly.
Here is what I was starting with.
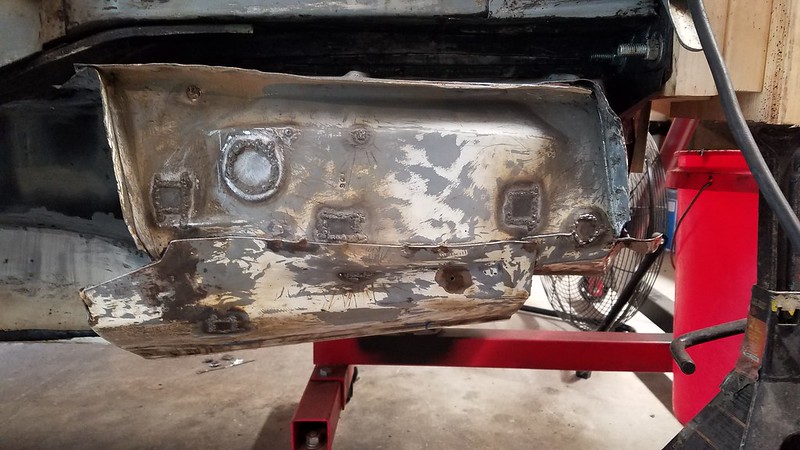
Patches welded in.
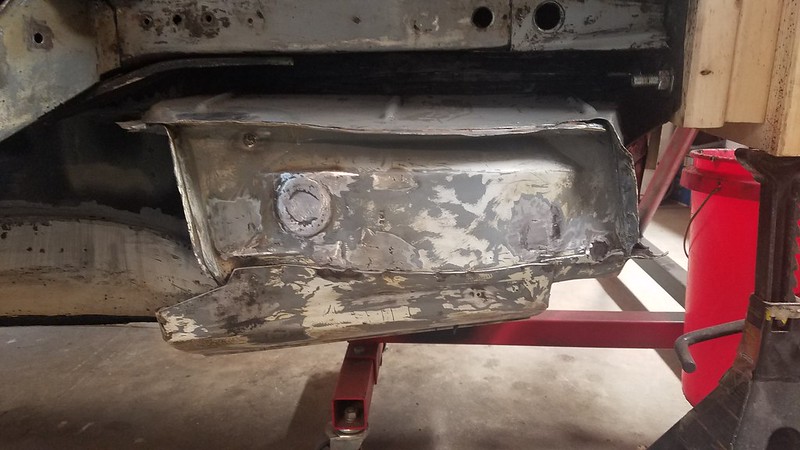
After grind and flapper disk
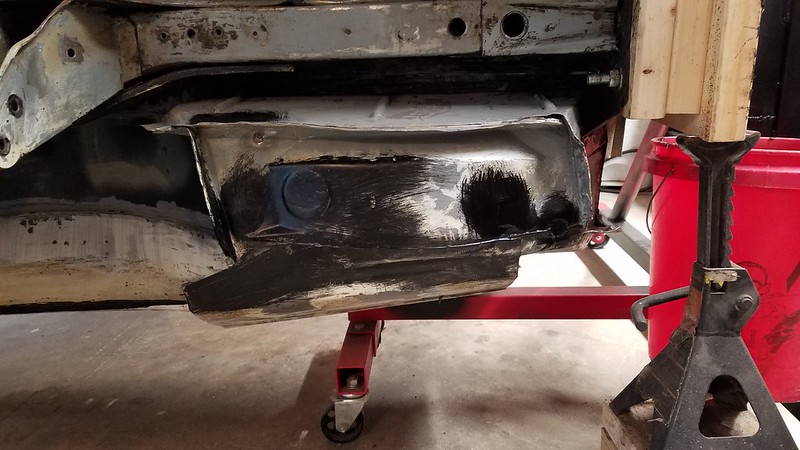
Finally coated to prevent rust for now.
I have since done a bit more touch up work in this area to fix some pinholes and I coated the inside as well.
Next will be finishing the undercoating removal from the rest of the floor boards.
Re: My 91 Z28 build. 17 years in the making... Finally going to do this right
Mini update.
Got more of the stock undercoating removed over the weekend. Trying to get each seam to be as clean as possible takes a lot of time since there are so many.
I use a tinny screwdriver to pick out as much crap as I can.
I would say I am 85% done cleaning the bottom in preparation for primer. Before the primer though I need to fix the shifter hole and the rear spring pocket reinforcements.
After the primer I will buy the DSE SFC and install those, the seal those in. I need to figure out what configuration the car should be in to help guarantee that it is straight and flat before installing those. That is a question for a later post though.
For now, here is how the underside sits. (The annoying areas at least)
Re: My 91 Z28 build. 17 years in the making... Finally going to do this right
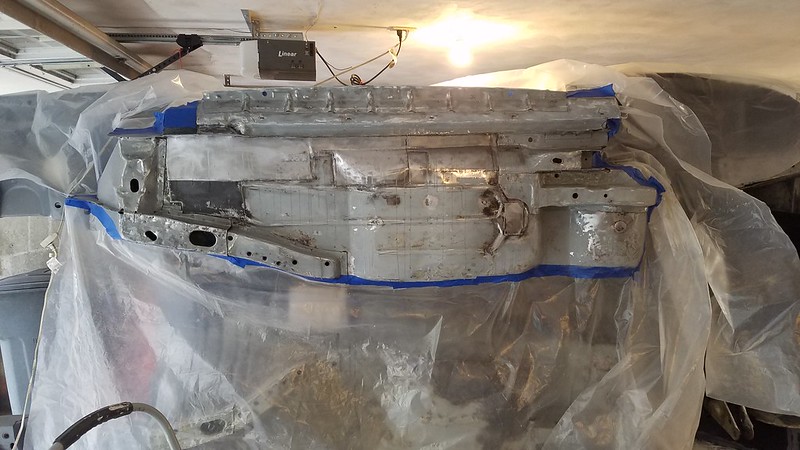
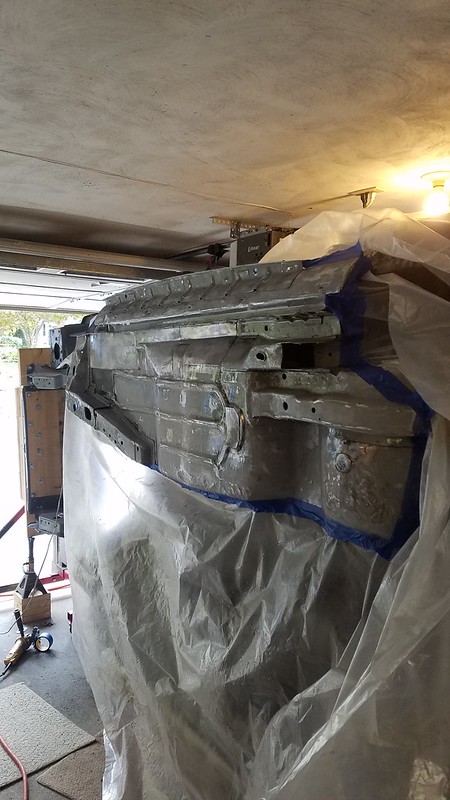
Finally got the first section of the floor painted in a couple coats of primer. I will be moving around the underside of the car doing it all section by section. This is the first.
After a dozen hours (min) of cleaning, scrubbing, spray and scrapping, here is the first section masked off and ready for a final wipe down.
In the image I had already sprayed any rust spots with Eastwood fast etch to treat any minor rust.
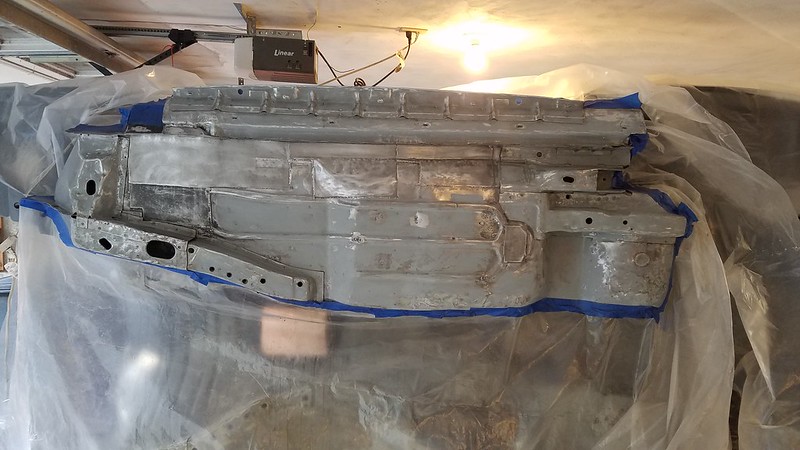
After the acid, I sanded everything down (again) with 80 grit and used Pre Painting Prep to get the surface ready for 2K epoxy primer.
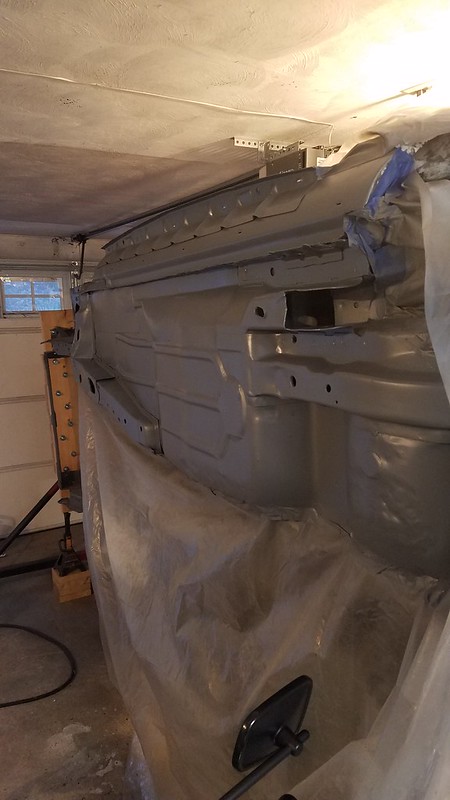
First coat of 2K primer was from a can I had left over from doing the engine bay. I was too tired and it was too late to setup my spray gun.
Just enough paint in one can to get an OK first coat.
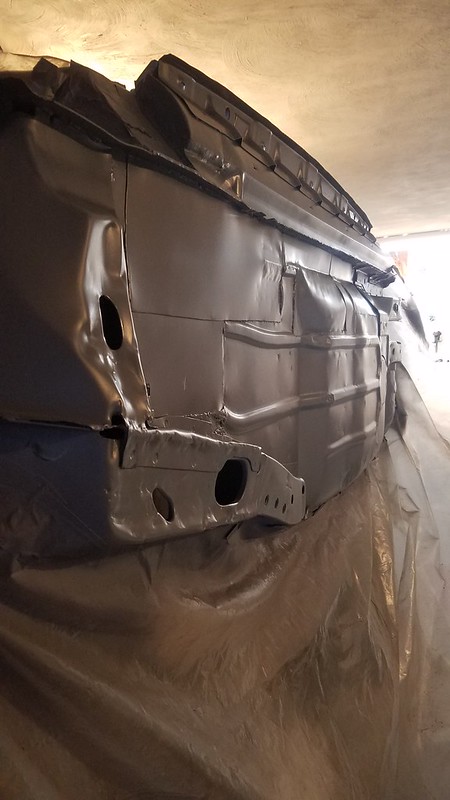
Last night after work I spent a few hours getting my gun out and setup to give a nice thick second coat.
Next I will move to the passenger side of the same area.
Because it is so easy to work on the car in this configuration, I think I may throw some body filler on some of the more minor dents for a couple of reasons.
1. To practice my bondo skills since I know I need to use some under the hood.
2. Make under the car look that much nicer in the event that this build turns out awesome and I show the car with mirrors around the outside at shows. I plan to paint the underside with tintable U-POL truck bed liner the same tint of white as the top of the car.
Textured black U-POL wheel wells and non-textured black frame rails.