At it again: 1992 Firebird Build
 03-24-2014, 09:26 AM
#1
Member

Thread Starter
iTrader: (16)
Join Date: Dec 2006
Location: TX/FL
Posts: 469
Likes: 0
Received 1 Like
on
1 Post
Car: 88 GTA/86 C20 Burb/91 325i
Engine: L98/454/M20
Transmission: 700R4/NV4500/Getrag
Axle/Gears: 3.27 9-bolt/3.73 14 Bolt/3.73 IRS
At it again: 1992 Firebird Build
For any of you that frequent the classifieds, you might have noticed that I've been snapping up parts again and looking for a few things. There's a reason for that. Now that we've started spinning wrenches, I thought I'd go ahead and fire up a build thread so anyone else can follow along.
My roommate had been looking to get a fast and economical car that he could learn to work on for a while, and he particularly liked my '88 GTA. I told him I would help him pick something out. I'd been looking for something to do with my spare Vortec 350 and T56 swap for quite some time, and when I found a nice looking black '92 Firebird on Craigslist with a blown 3.1 V6 and a T5 listed for cheap, I just couldn't resist. We talked over what it would take to build the car, and he said he wanted to do it, so we jumped in the old Suburban, hooked up the car trailer, and went to pick it up.
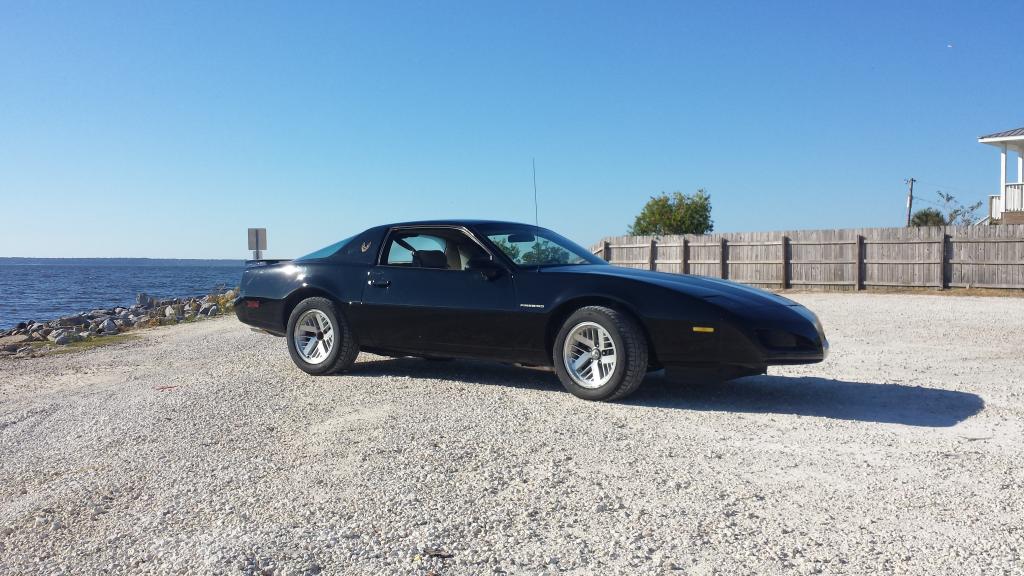
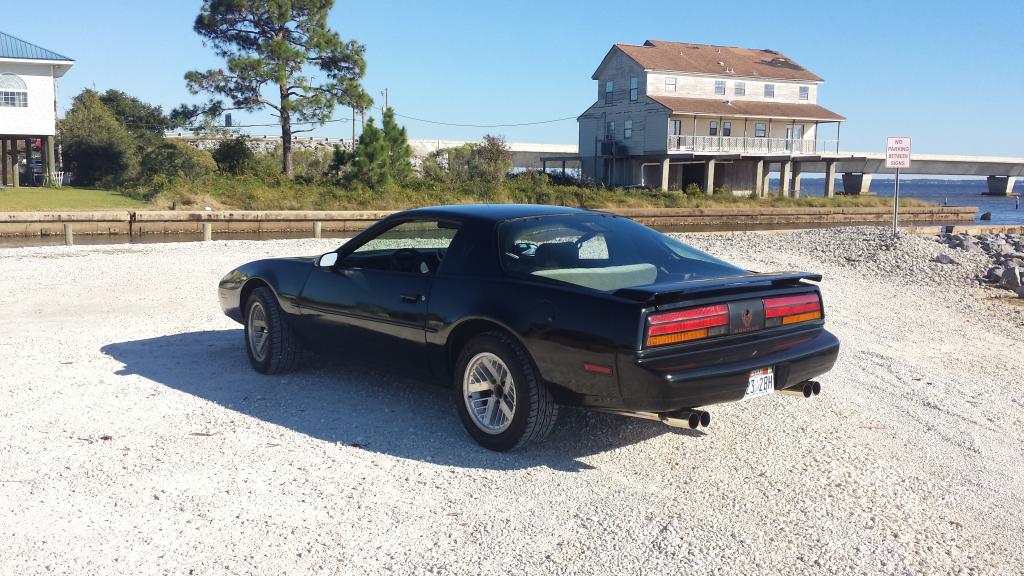
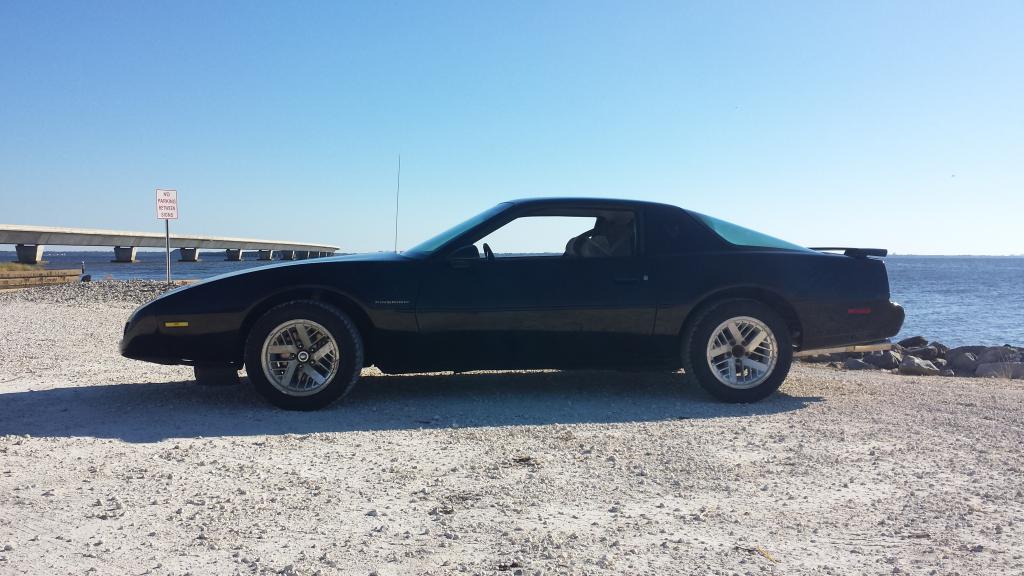
Here's how it sat:
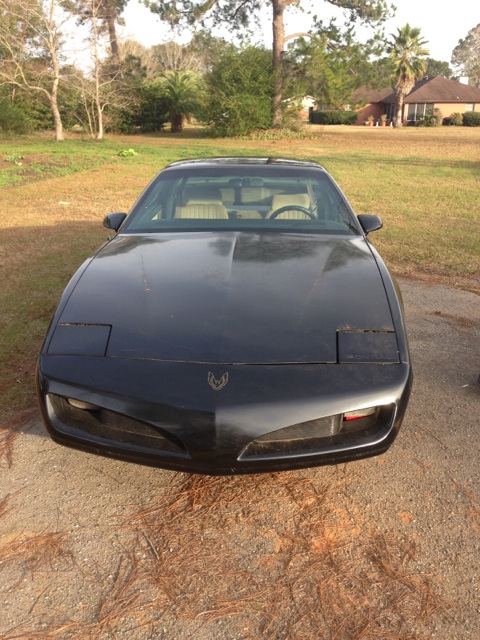
It's a bare bones car. No cruise control, no power windows, no power door locks, no t-tops. As far as I can tell, about the only options it has is a tilt steering column and air conditioning. Should make a great start for a lightweight street bruiser.
So the plan has become to V8 swap using my spare parts and some new stuff he's ordered. Later on we'll move on to brakes and suspension work, building up something similar to what I have done with my GTA. Interior upgrades and exterior polishing will also be in order, but he has a very solid starting point. For the first stage of the build, here's what's going in:
-GM Goodwrench TBI Truck 350 short block
-GM Performance Parts Vortec Heads
-LT4 Production Cam
-GM Roller Cam Gear
-LS6 Valve Springs
-Comp Cams 1.6:1 Magnum Roller Rockers
-Hardened Push Rods
-Holley Stealth Ram Intake
-Hooker Shorty Headers/Y-pipe
-T56 6-speed ('93 Z28)
-Spohn Transmission Crossmember
-88-89 TPI V8 Wiring Harness
-SLP Cold Air Intake
While it's apart, we're also completely rebuilding the front end with new Moog parts, and we've added a UMI Performance Steering Brace.
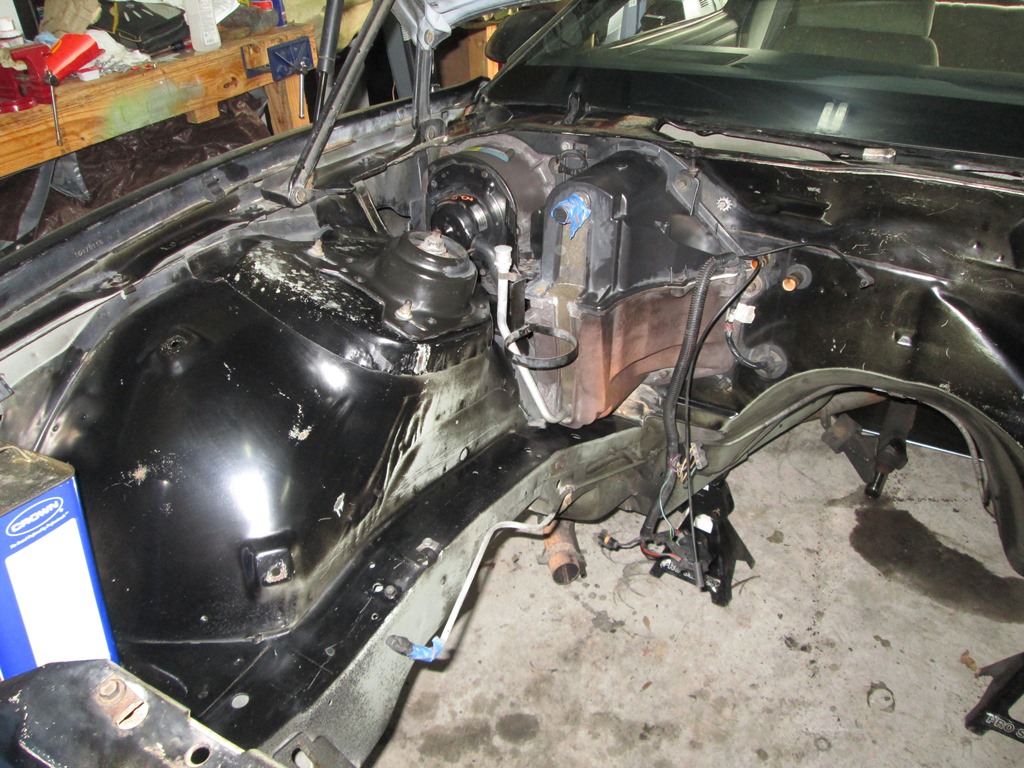
The teardown started last weekend. Here's a few shots of the partially disassembled 3.1 V6:
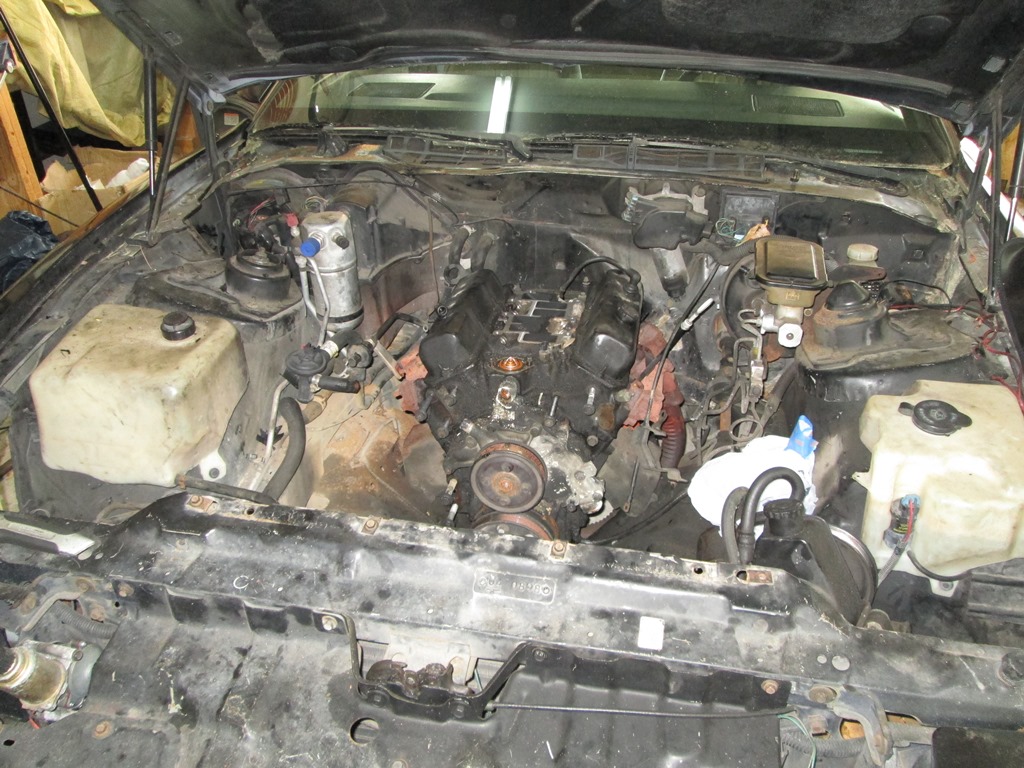
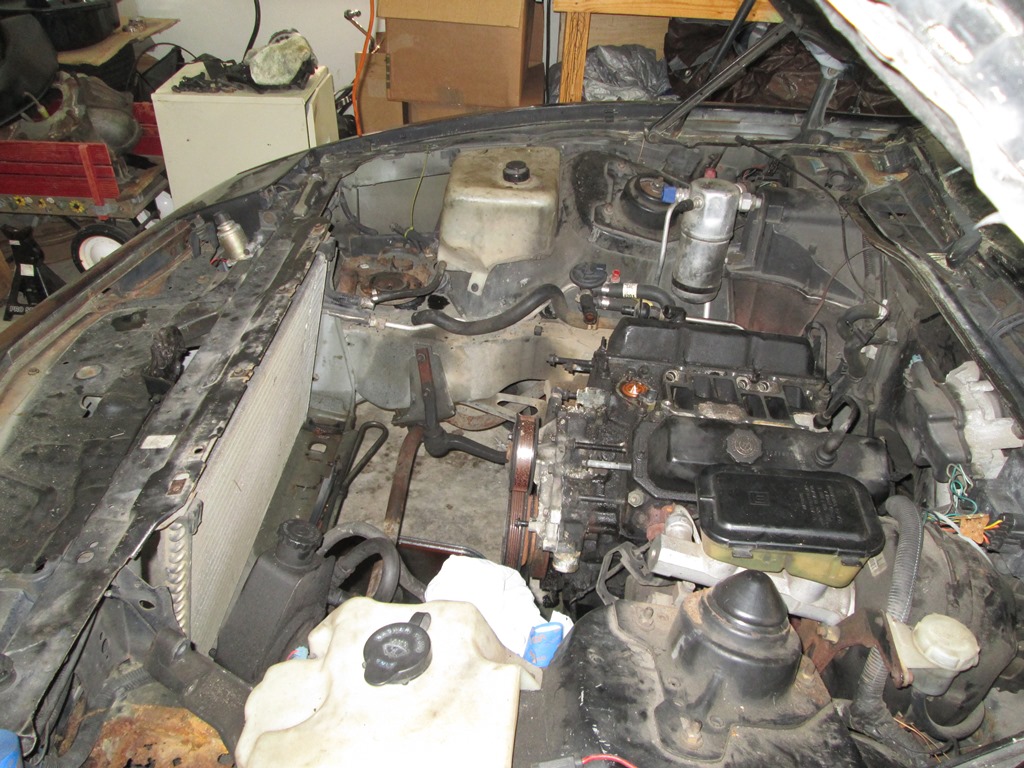
The only rust in the entire car is some corrosion of the battery tray box. There isn't a bit of body damage. Everything looked just like it came from the factory in '92, except for 20 years of grease and dirt (which would be dealt with shortly).
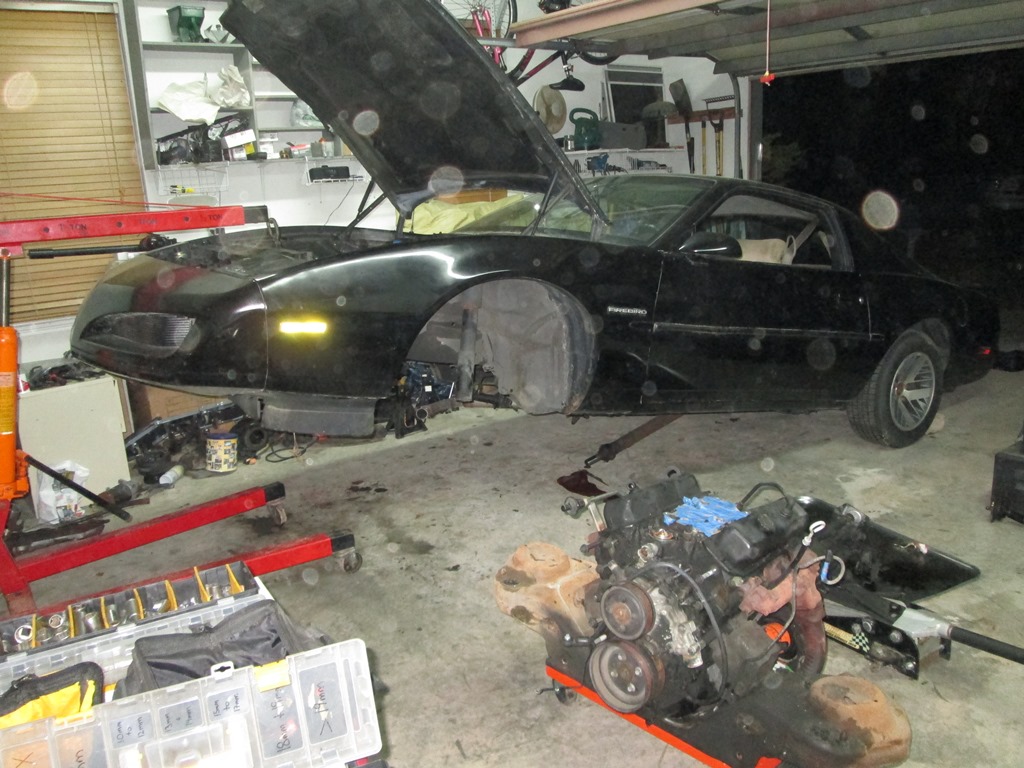
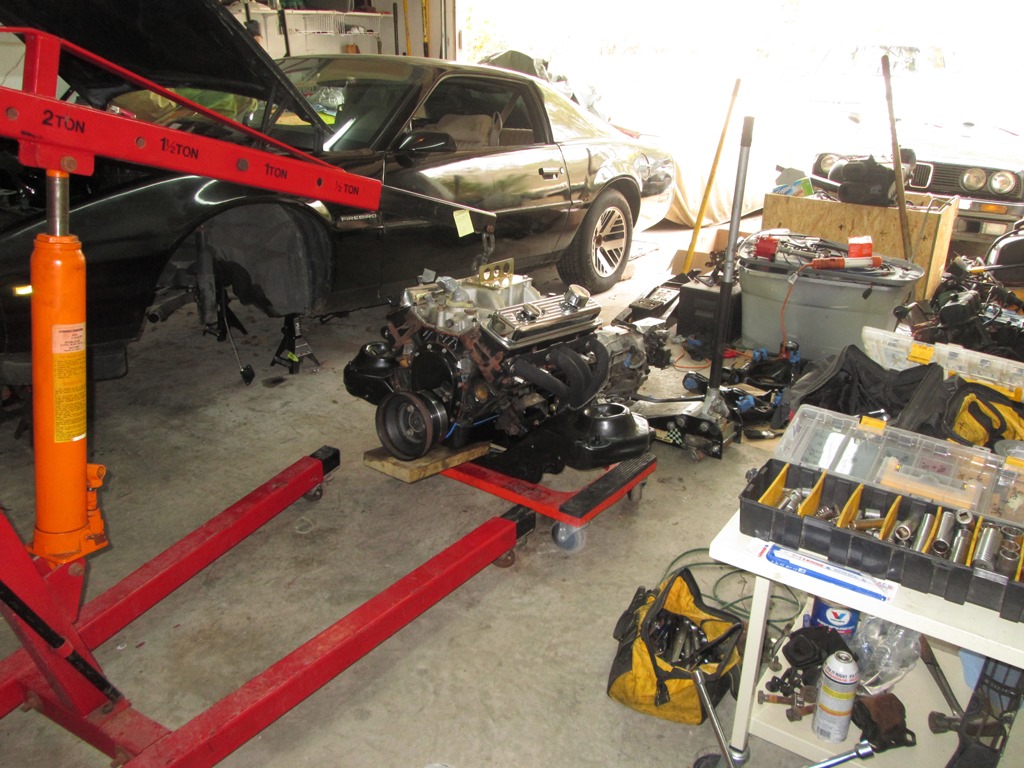
Since I have a special hatred of all things involved with working under cars on jack stands, and I had no desire to repeat the last T56 install I did under the car, or fight all day trying to change motor mounts, we decided to pull the engine and trans out the bottom as a complete unit attached to the crossmember. I count it as special practice for my upcoming LQ4 swap on my GTA. The process was relatively easy, and took about the same or less time as pulling an engine/trans the conventional way. Plus we only had to spend about 30 minutes on our backs undoing transmission bolts, which certainly beats pulling the whole thing out underneath.
Here's the whole shooting match after we got it out:
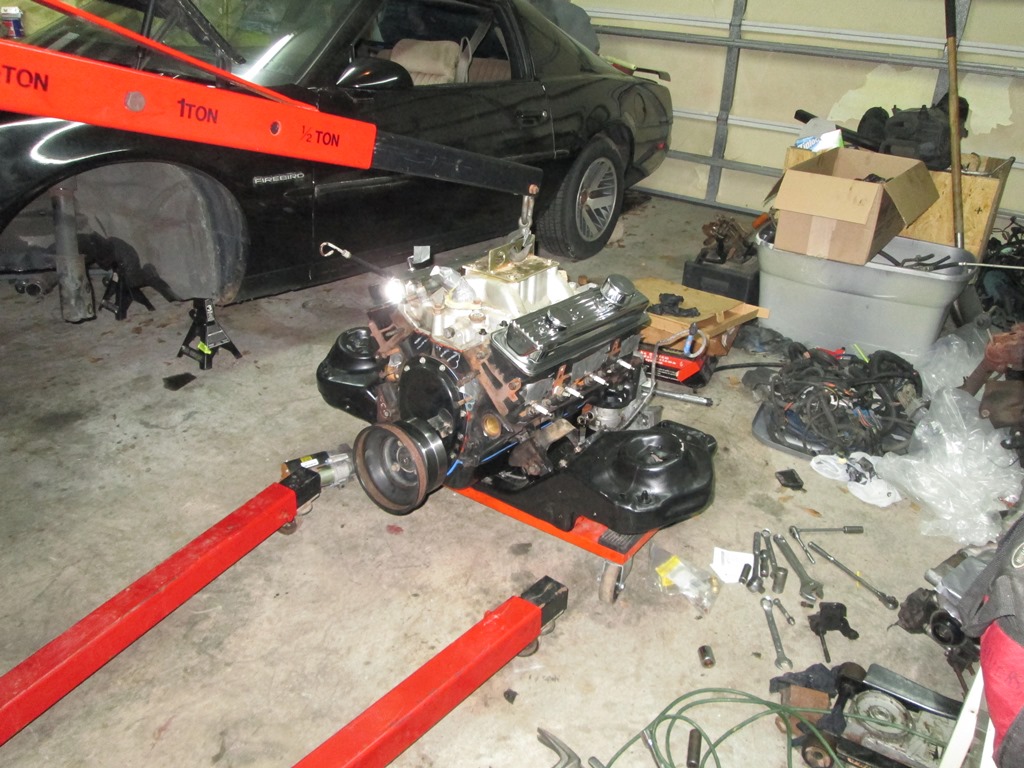
And the pile of new parts waiting to go in (disregard the carb intake, its just something I left on there to facilitate hoisting the engine around):
And the empty engine bay after some degreasing and cleanup:
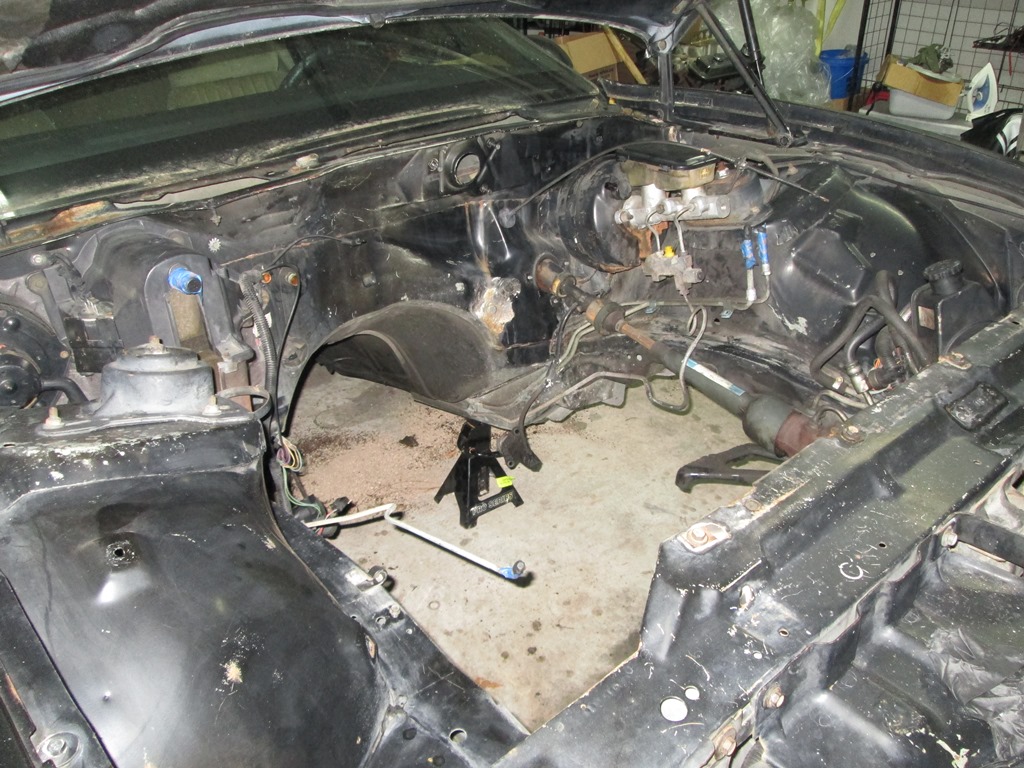
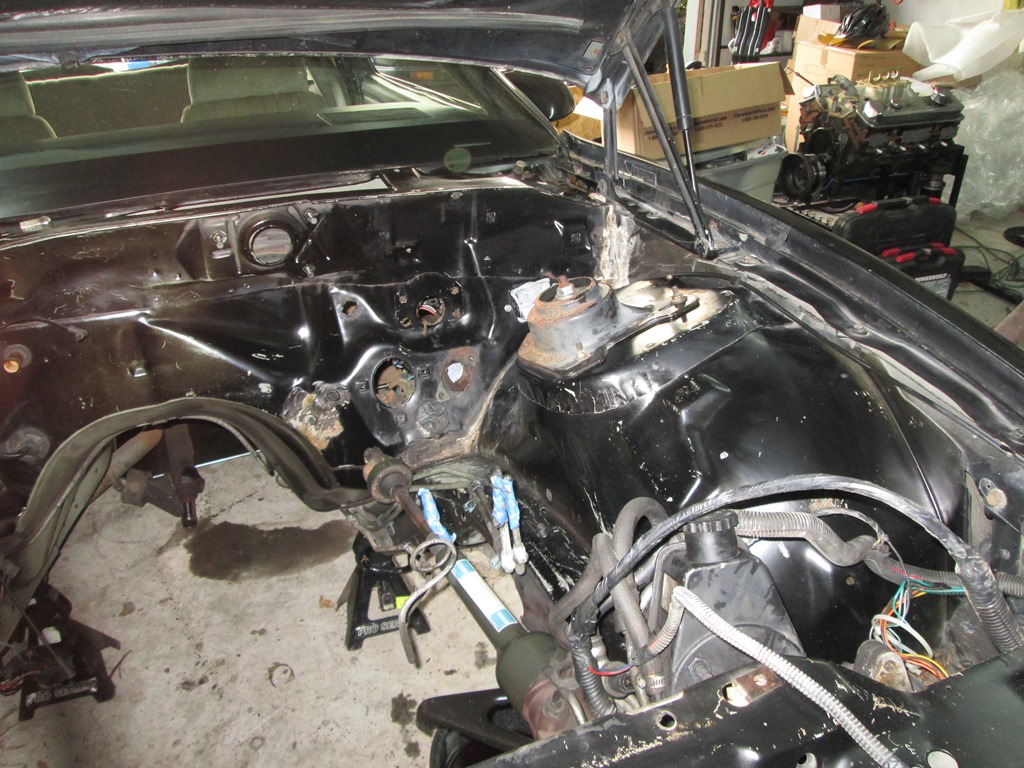
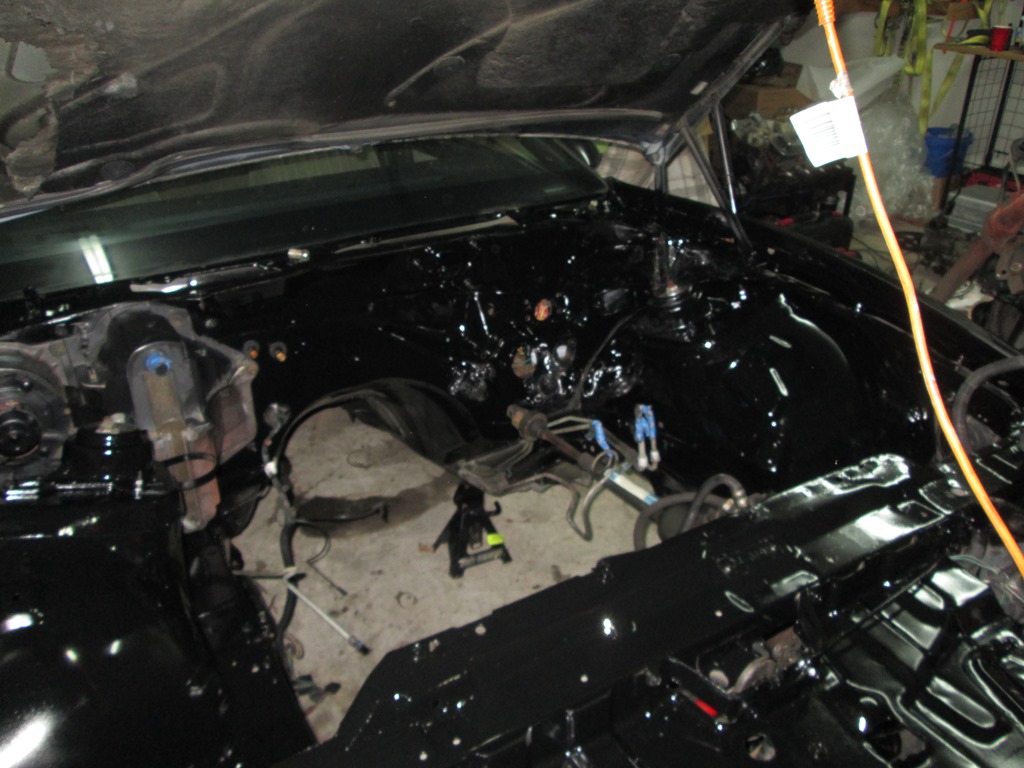
Then, since we had to pull the pedals and everything else to put in the 4th gen stuff, and we planned on painting everything anyways, I figured it would be better to go ahead and pull everything off the firewall and really give it a good coating.
Here it is with everything prepped and ready for paint:
And after a fresh coat of shiny gloss black:
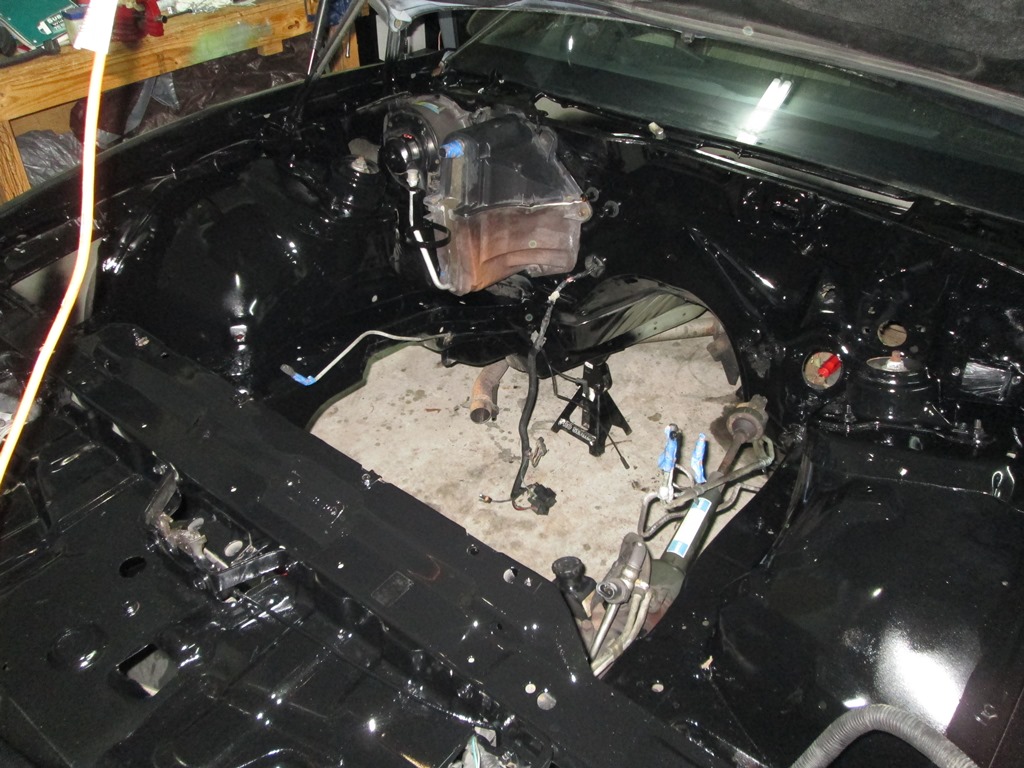
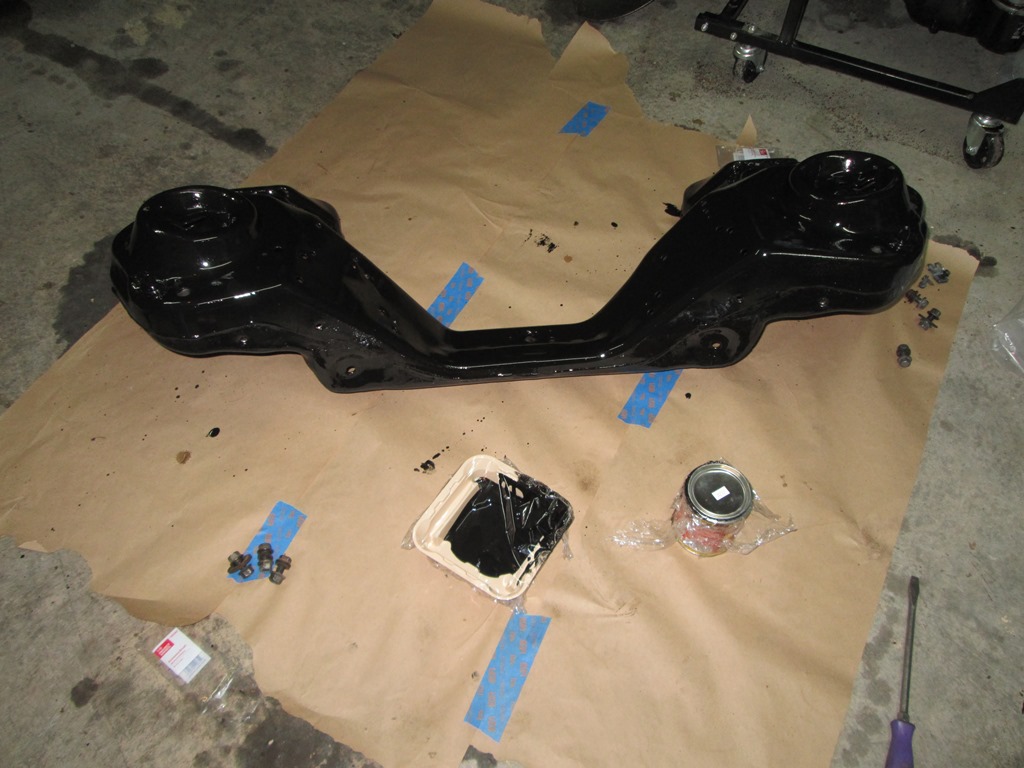
While I was working on gutting the firewall and stuff under the dash, my roommate spent a few hours stripping the grease and rust off the crossmember and getting it down to bare metal. We spent the evening laying down several coats of POR-15 black paint to keep it looking good for the future.
Here's the last coat going on:
That's progress up to now. Today we start putting the dash and firewall back together. We'll also begin the front end rebuild as soon as all the parts get here. Hoping to at least get the engine/trans and suspension together next weekend, although we won't have it running until the fuel injection stuff gets figured out.
Stay tuned for more progress! Opinions and suggestions are always welcome.
-cal30sniper
My roommate had been looking to get a fast and economical car that he could learn to work on for a while, and he particularly liked my '88 GTA. I told him I would help him pick something out. I'd been looking for something to do with my spare Vortec 350 and T56 swap for quite some time, and when I found a nice looking black '92 Firebird on Craigslist with a blown 3.1 V6 and a T5 listed for cheap, I just couldn't resist. We talked over what it would take to build the car, and he said he wanted to do it, so we jumped in the old Suburban, hooked up the car trailer, and went to pick it up.
Here's how it sat:
It's a bare bones car. No cruise control, no power windows, no power door locks, no t-tops. As far as I can tell, about the only options it has is a tilt steering column and air conditioning. Should make a great start for a lightweight street bruiser.
So the plan has become to V8 swap using my spare parts and some new stuff he's ordered. Later on we'll move on to brakes and suspension work, building up something similar to what I have done with my GTA. Interior upgrades and exterior polishing will also be in order, but he has a very solid starting point. For the first stage of the build, here's what's going in:
-GM Goodwrench TBI Truck 350 short block
-GM Performance Parts Vortec Heads
-LT4 Production Cam
-GM Roller Cam Gear
-LS6 Valve Springs
-Comp Cams 1.6:1 Magnum Roller Rockers
-Hardened Push Rods
-Holley Stealth Ram Intake
-Hooker Shorty Headers/Y-pipe
-T56 6-speed ('93 Z28)
-Spohn Transmission Crossmember
-88-89 TPI V8 Wiring Harness
-SLP Cold Air Intake
While it's apart, we're also completely rebuilding the front end with new Moog parts, and we've added a UMI Performance Steering Brace.
The teardown started last weekend. Here's a few shots of the partially disassembled 3.1 V6:
The only rust in the entire car is some corrosion of the battery tray box. There isn't a bit of body damage. Everything looked just like it came from the factory in '92, except for 20 years of grease and dirt (which would be dealt with shortly).
Since I have a special hatred of all things involved with working under cars on jack stands, and I had no desire to repeat the last T56 install I did under the car, or fight all day trying to change motor mounts, we decided to pull the engine and trans out the bottom as a complete unit attached to the crossmember. I count it as special practice for my upcoming LQ4 swap on my GTA. The process was relatively easy, and took about the same or less time as pulling an engine/trans the conventional way. Plus we only had to spend about 30 minutes on our backs undoing transmission bolts, which certainly beats pulling the whole thing out underneath.
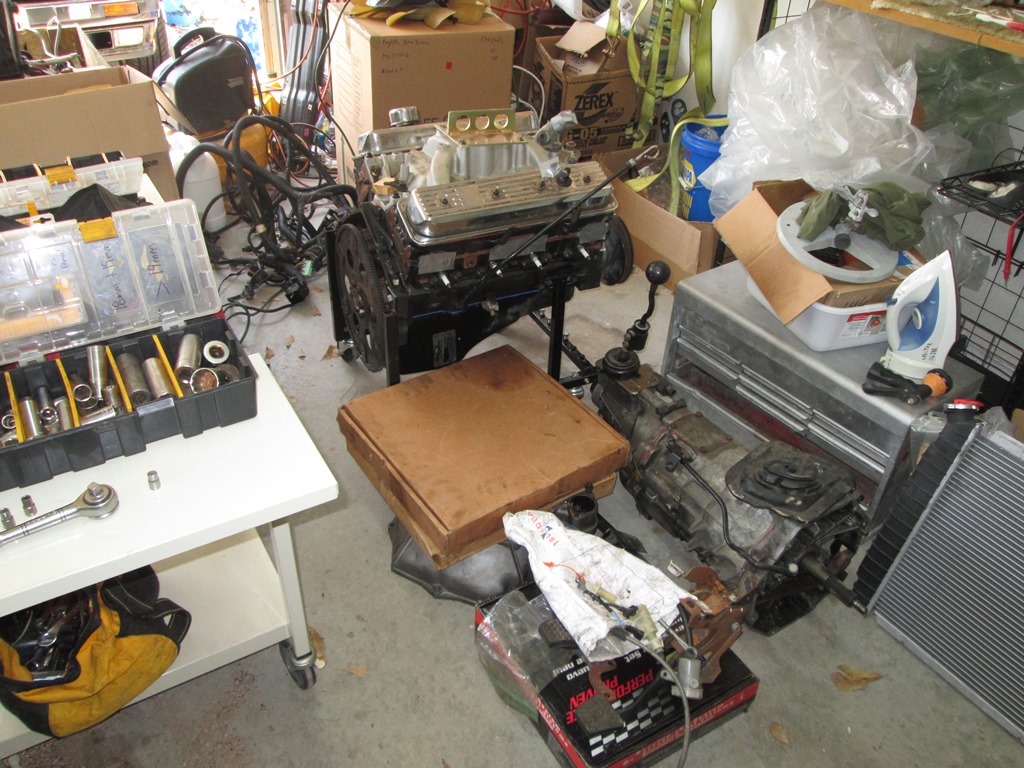
Here's the whole shooting match after we got it out:
And the pile of new parts waiting to go in (disregard the carb intake, its just something I left on there to facilitate hoisting the engine around):
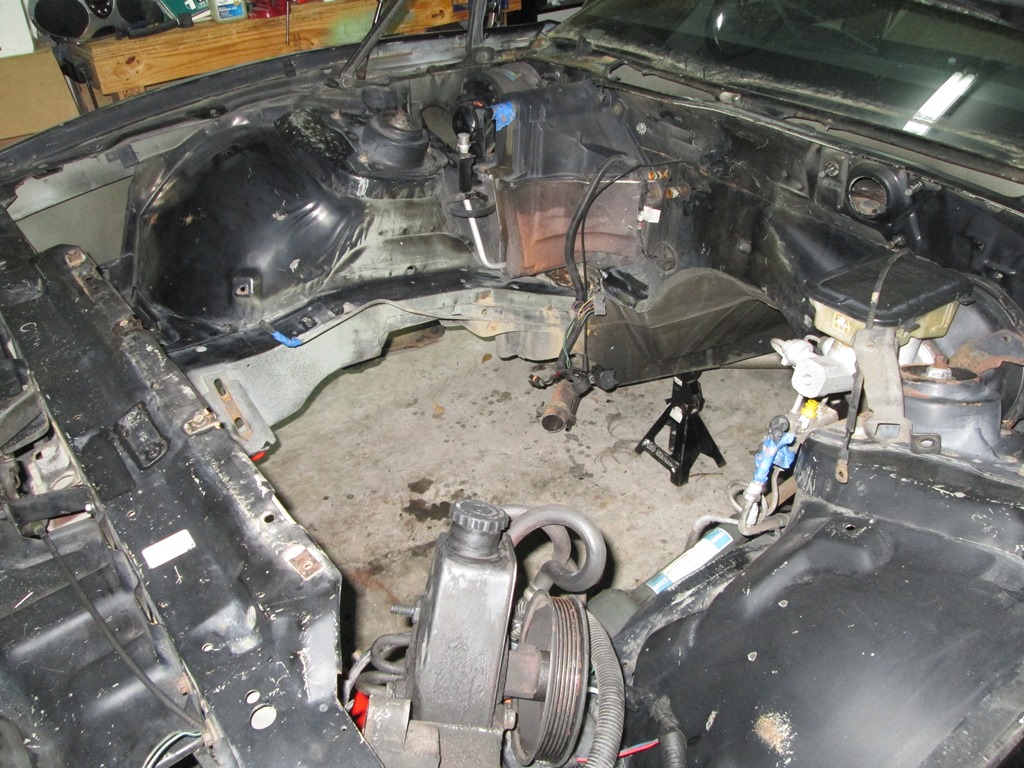
And the empty engine bay after some degreasing and cleanup:
Then, since we had to pull the pedals and everything else to put in the 4th gen stuff, and we planned on painting everything anyways, I figured it would be better to go ahead and pull everything off the firewall and really give it a good coating.
Here it is with everything prepped and ready for paint:
And after a fresh coat of shiny gloss black:
While I was working on gutting the firewall and stuff under the dash, my roommate spent a few hours stripping the grease and rust off the crossmember and getting it down to bare metal. We spent the evening laying down several coats of POR-15 black paint to keep it looking good for the future.
Here's the last coat going on:
That's progress up to now. Today we start putting the dash and firewall back together. We'll also begin the front end rebuild as soon as all the parts get here. Hoping to at least get the engine/trans and suspension together next weekend, although we won't have it running until the fuel injection stuff gets figured out.
Stay tuned for more progress! Opinions and suggestions are always welcome.
-cal30sniper
 03-24-2014, 05:25 PM
#3
03-27-2014, 09:18 PM
#4
Member
Thread Starter
iTrader: (16)
Join Date: Dec 2006
Location: TX/FL
Posts: 469
Likes: 0
Received 1 Like
on
1 Post
Car: 88 GTA/86 C20 Burb/91 325i
Engine: L98/454/M20
Transmission: 700R4/NV4500/Getrag
Axle/Gears: 3.27 9-bolt/3.73 14 Bolt/3.73 IRS
Re: At it again: 1992 Firebird Build
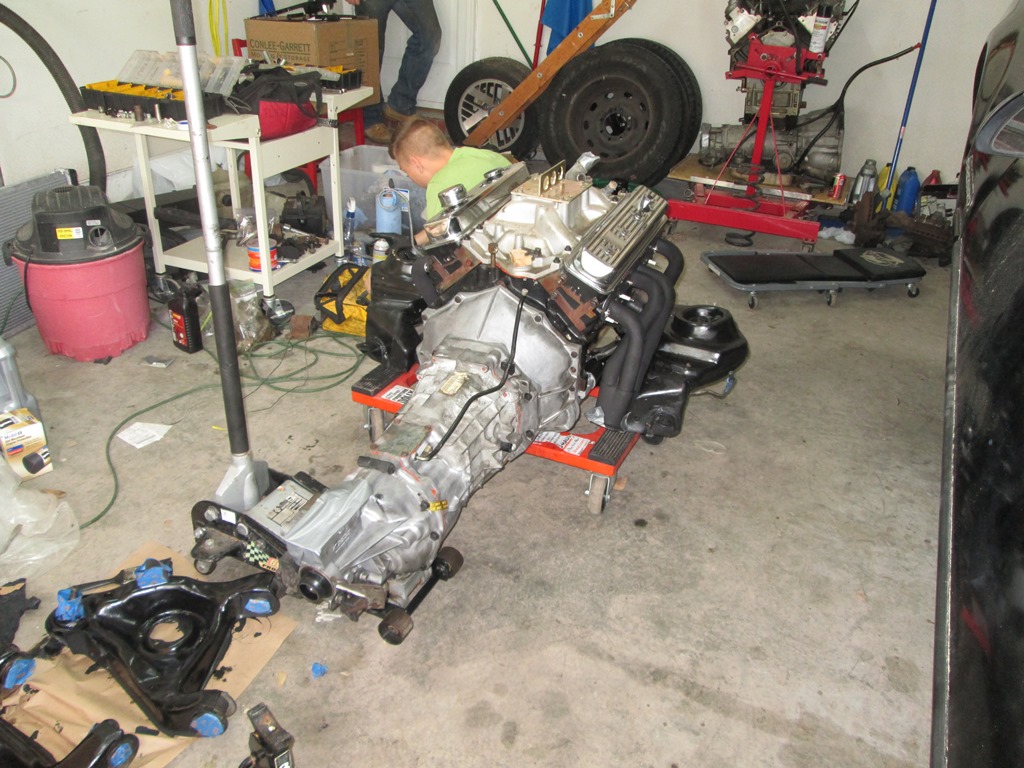
Made some more progress today. My roommate had gotten the engine and transmission all cleaned up and degreased over the last few days. Today we got the 4th gen pedals in under the dash, and got the motor mounts on the crossmember, as well as attaching the engine to the crossmember, attaching the flywheel, and mocking up the clutch, bellhousing, and transmission bolts. We'll go in with the new clutch tomorrow after we pull out the old pilot bearing and install the new one. Hopefully it should be ready to go in by the end of the day. We'll also be dropping the control arms off at the shop to get our new bushings and ball joints pressed in.
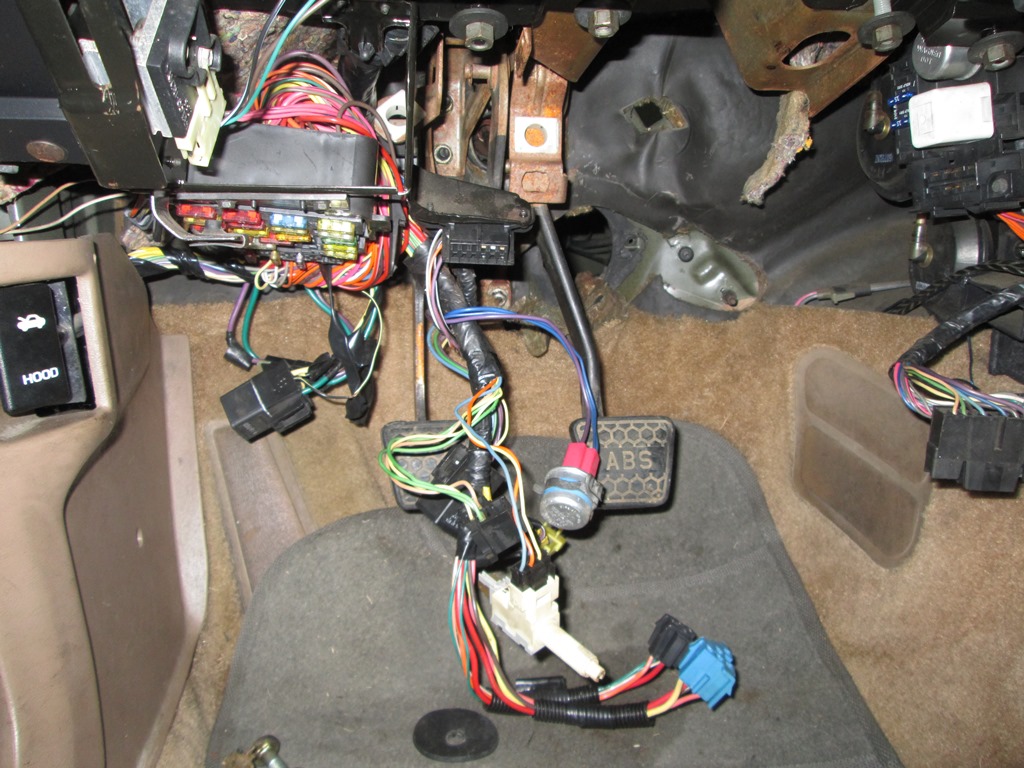
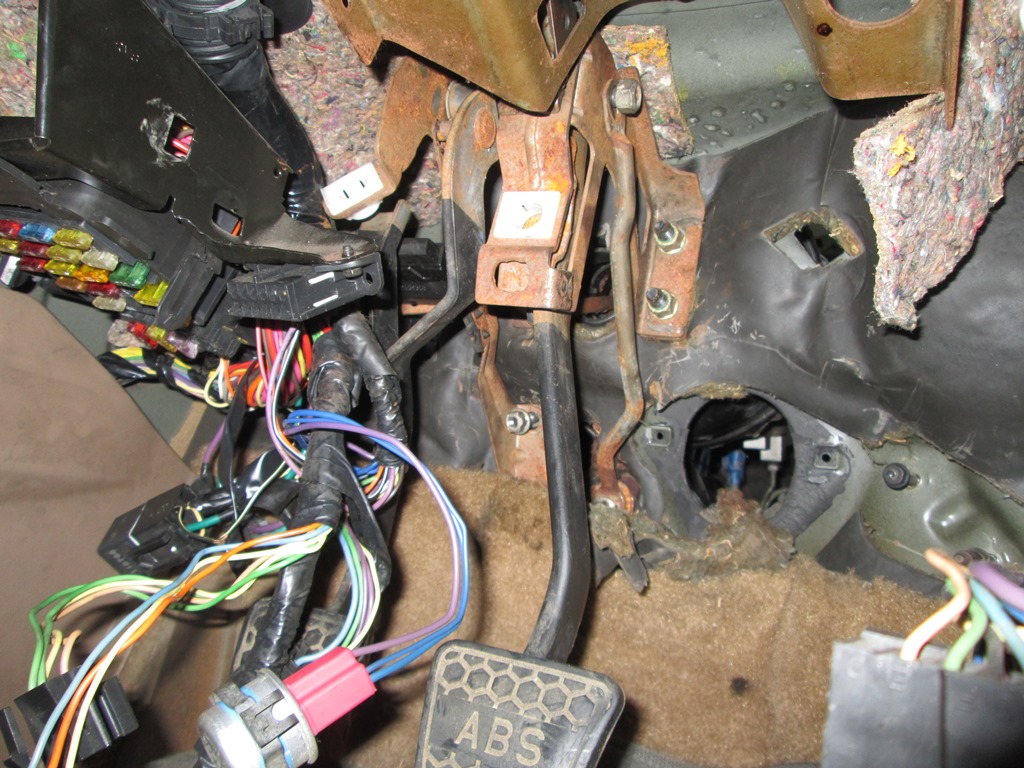
Here's a shot under the dash of the 4th gen pedals. I ended up keeping one of the 3rd gen pedal assembly support braces for the hyrdaulic master cylinder setup. The 4th gen setup does not use the metal rods like the 3rd gen does. However, the passenger side rod from the 3rd gen setup bolts right onto the 4th gen pedals. I figured it couldn't hurt, as I'd never been terribly impressed by the rigidity of the 4th gen pedals in my old Formula.
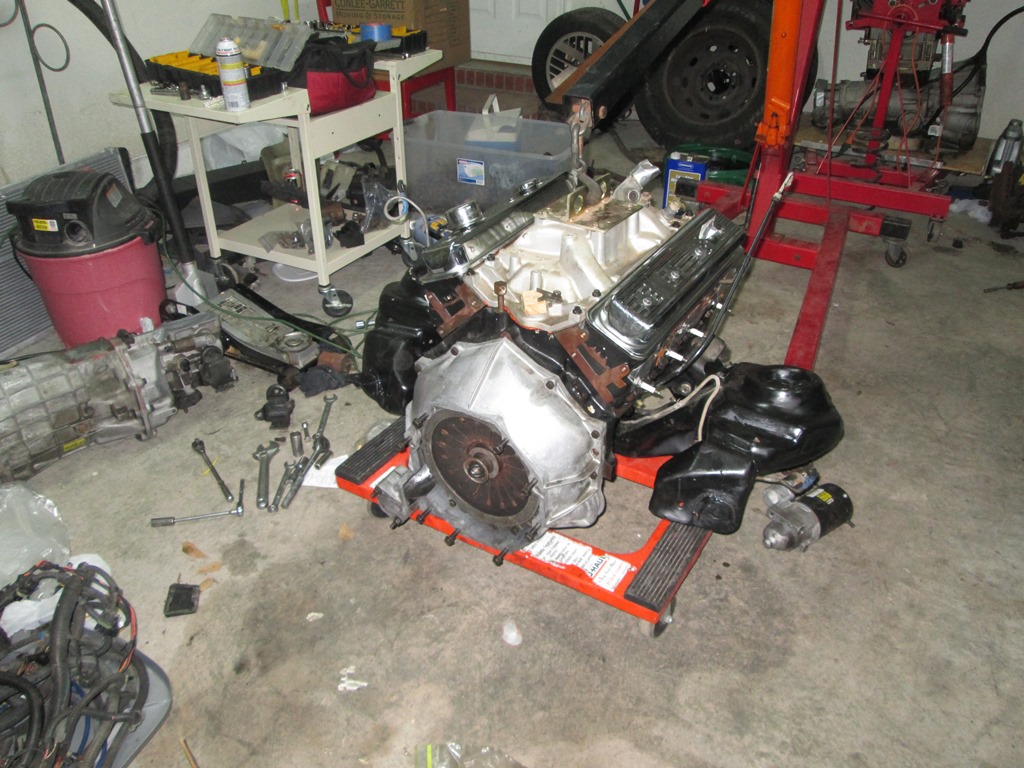
And here's a few of the engine/trans assembly as it sits now on the crossmember.
More progress to follow shortly!
Here's a shot under the dash of the 4th gen pedals. I ended up keeping one of the 3rd gen pedal assembly support braces for the hyrdaulic master cylinder setup. The 4th gen setup does not use the metal rods like the 3rd gen does. However, the passenger side rod from the 3rd gen setup bolts right onto the 4th gen pedals. I figured it couldn't hurt, as I'd never been terribly impressed by the rigidity of the 4th gen pedals in my old Formula.
And here's a few of the engine/trans assembly as it sits now on the crossmember.
More progress to follow shortly!
 03-29-2014, 10:13 AM
#6
 03-30-2014, 01:57 AM
#7
Member
Thread Starter
iTrader: (16)
Join Date: Dec 2006
Location: TX/FL
Posts: 469
Likes: 0
Received 1 Like
on
1 Post
Car: 88 GTA/86 C20 Burb/91 325i
Engine: L98/454/M20
Transmission: 700R4/NV4500/Getrag
Axle/Gears: 3.27 9-bolt/3.73 14 Bolt/3.73 IRS
Re: At it again: 1992 Firebird Build
Gentlemen, as of the end of the day, there is now a nice shiny 350 and T56 nestled inside the heart of the 'bird.
Here's what we got accomplished today:
-Ram HD clutch and new GM clutch hydraulics installed
-350 and T56 joined
-engine and transmission + crossmembers installed
-pedals hooked up and functioning
-complete Moog front end rebuild
-driveshaft, torque arm, etc all hooked up
The install went smooth as butter. We started by bolting on the clutch and T56 while the engine was still out of the car. We also installed the headers and torqued everything down while everything was staged on the piano dolley in the shop floor.
Here it sits, waiting to go in:
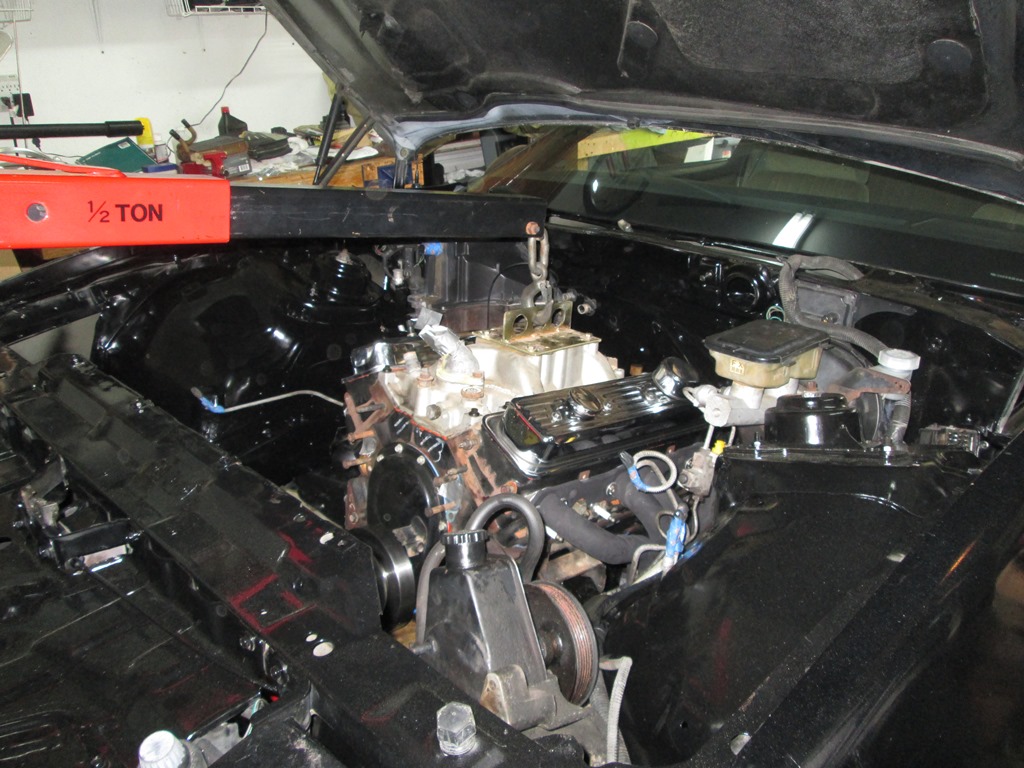
Putting in the engine was super easy. We started by hooking up the engine hoist to the nose of the Firebird, utilizing the front frame ends and the steering brace to lift it up high enough to slide the engine and trans under the side:
Sweet chain attachment:
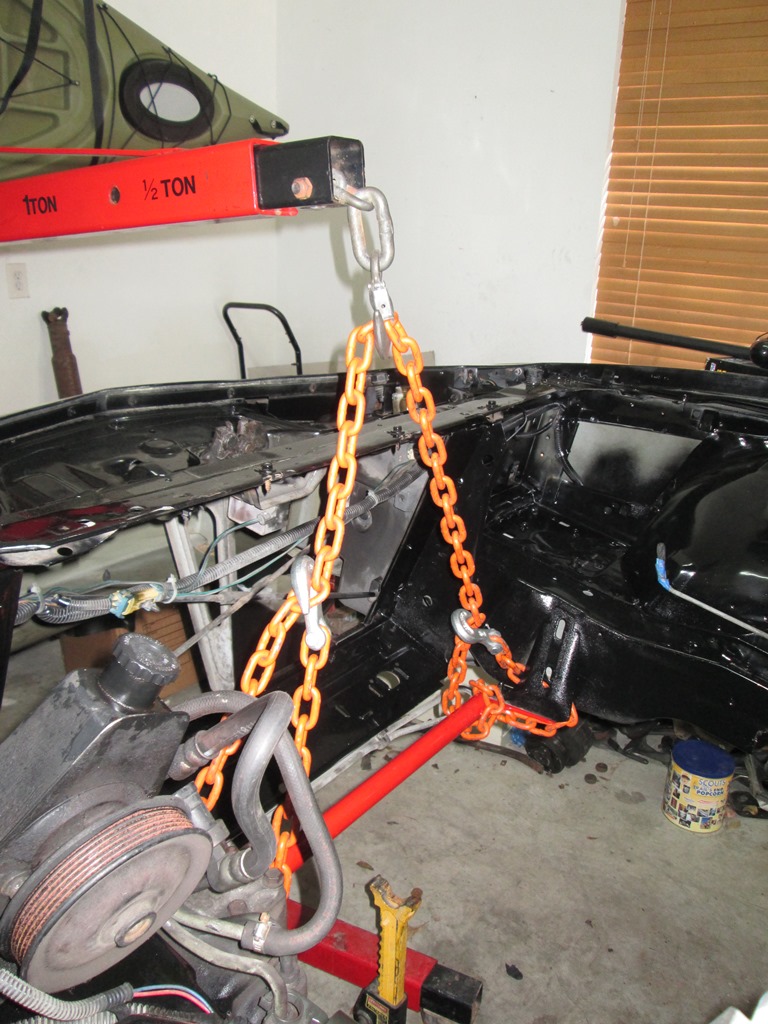
Once the engine, crossmember, and trans were positioned under the car, we slowly lowered it back onto the jackstands, about a foot above the crossmember on the dolley. We then reattached the engine hoist to the engine/crossmember/trans, and used it to pull the assembly up to the body, making it super easy to line up and install the crossmember bolts.
Engine under the car:

Engine below the car from the side, getting ready to pull it up:
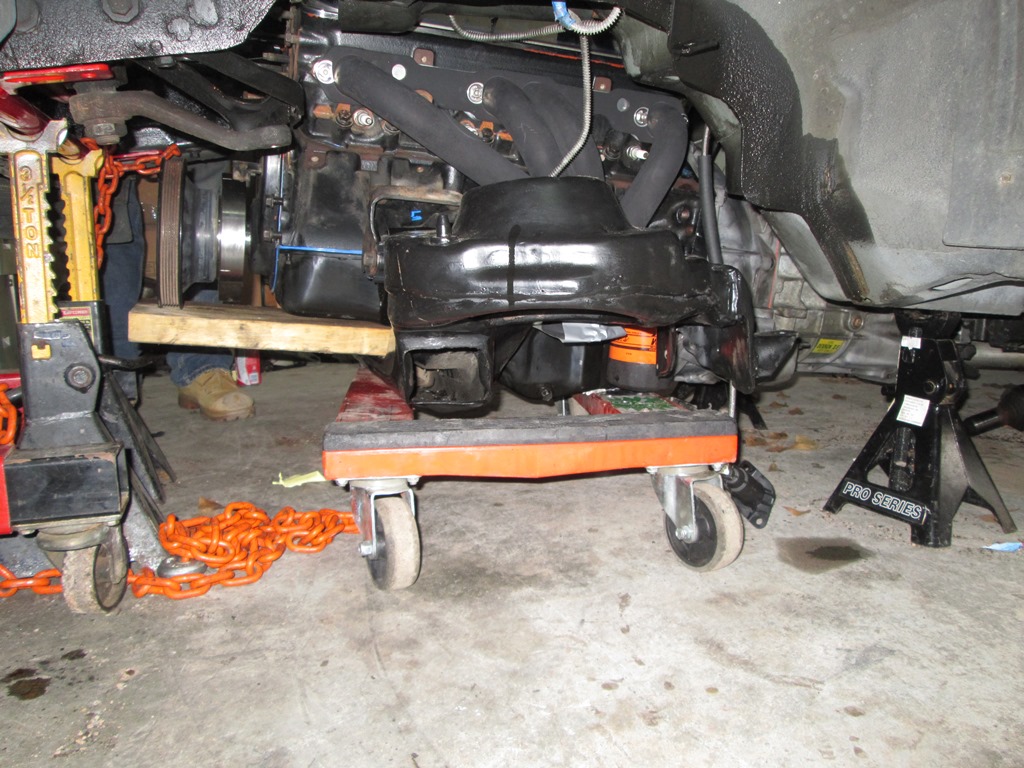
Engine in place:
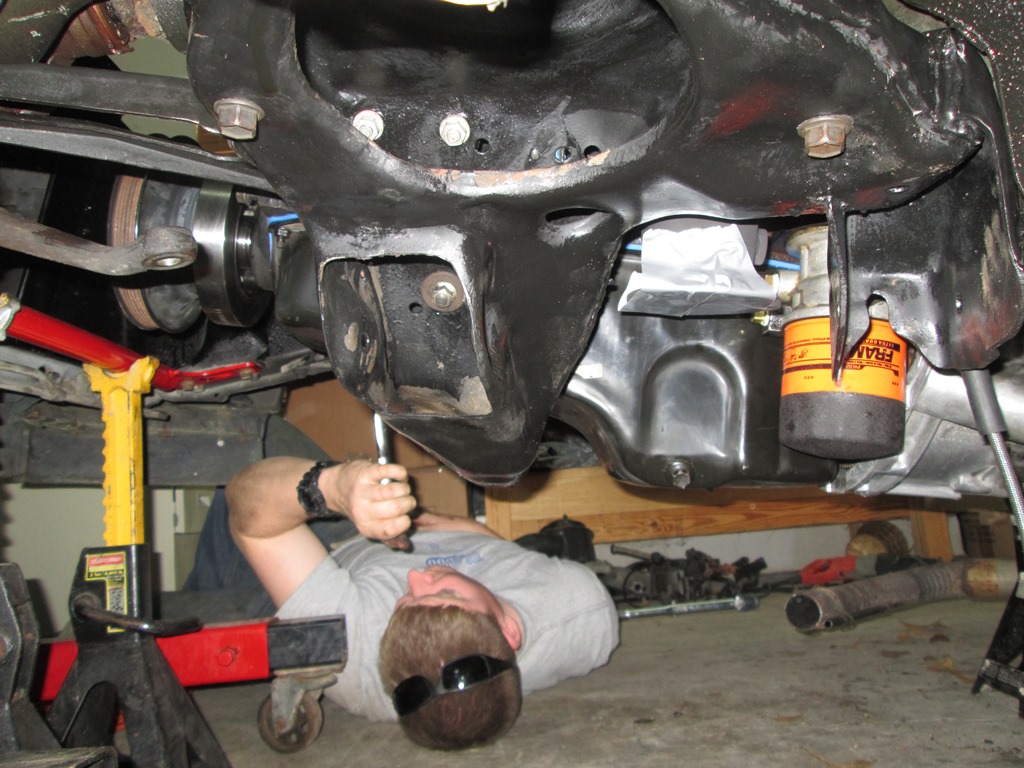
After the crossmember was in and torqued down, we moved straight into the front end rebuild. Control arms went in first, along with new ball joints and bushings. After that, a set of Summit Racing front lowering springs went in, coaxed in place by a really long pry bar and the weight of the vehicle supported by a jack under the control arm (and a strategically placed chain through the spring and control arm). After that, we hooked back up the steering knuckles and factory struts (struts and a big brake upgrade are in the work for a future project).
Control arms going in:
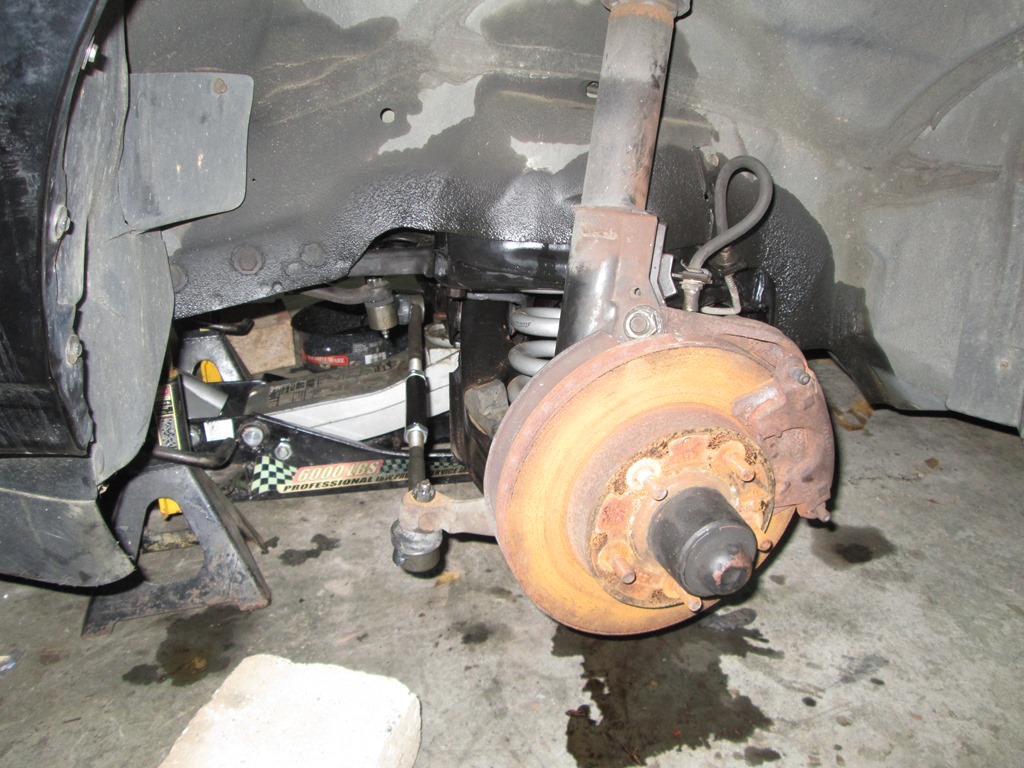
Since everything was already apart, we also treated her to a complete front end rebuild. Idler arm, center link, and tie rod ends were all replaced with Moog parts from RockAuto. UMI Tie Rod End Connectors were also added into the mix to help stiffen things up.
A shot of the finished steering linkage and suspension:
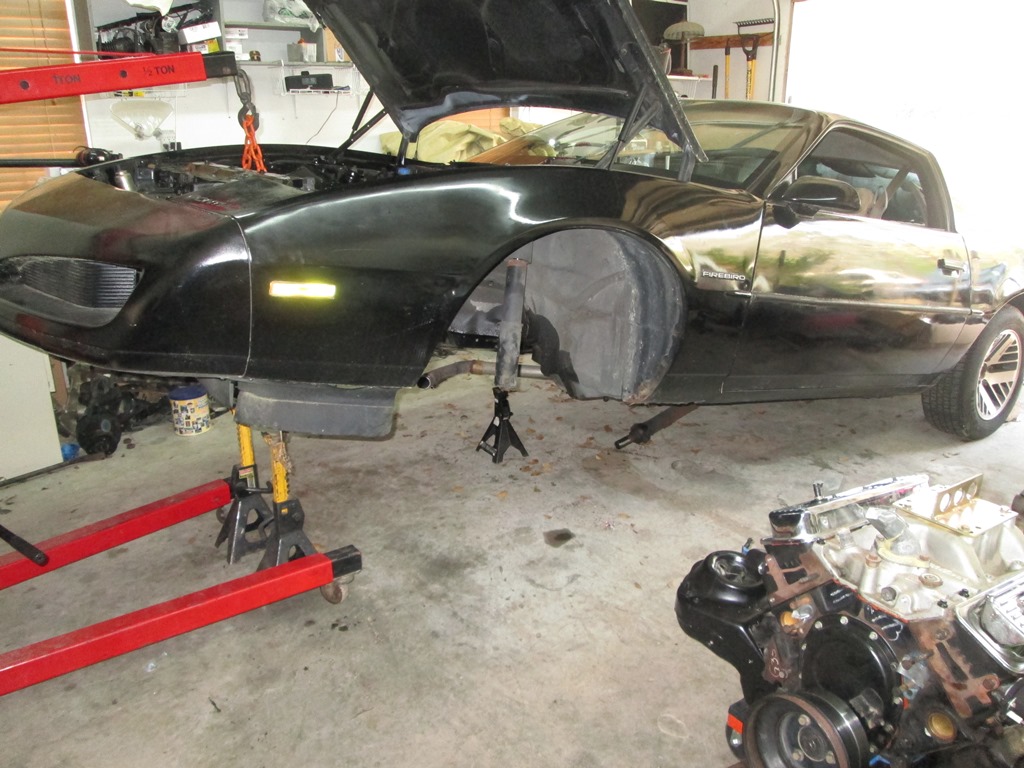
The rest of the evening was spent prepping the car so it could be rolled in and out of the shop again as necessary. The trans crossmember and hydraulics were hooked up, along with the driveshaft and torque arm. Brakes were bled, and we began hooking everything back up under the hood again in preparation for the arrival of our wiring harness and fuel injection parts. The end of the day brought a pretty complete car and a feeling of significant accomplishment.
Here's how she sits now:
Tomorrow we'll tidy up some more odds and ends. The trans tunnel will be modified to get the shifter in. Oil and tranny fluid will go in. The vent assembly below the windshield is being treated to a refresh, with screens being reglued and repainted. If time is on our side, we'll start putting some more stuff together under the engine bay.
We've got a 92 TBI wiring harness on order that I'll convert over to speed density TPI. We're also getting ready to set up a Holley Stealth Ram intake, and complete out the exhaust. Hopefully it won't be too long before the beast is running. I'm excited to see the rest of it come together.
More updates to follow!
Here's what we got accomplished today:
-Ram HD clutch and new GM clutch hydraulics installed
-350 and T56 joined
-engine and transmission + crossmembers installed
-pedals hooked up and functioning
-complete Moog front end rebuild
-driveshaft, torque arm, etc all hooked up
The install went smooth as butter. We started by bolting on the clutch and T56 while the engine was still out of the car. We also installed the headers and torqued everything down while everything was staged on the piano dolley in the shop floor.
Here it sits, waiting to go in:
Putting in the engine was super easy. We started by hooking up the engine hoist to the nose of the Firebird, utilizing the front frame ends and the steering brace to lift it up high enough to slide the engine and trans under the side:
Sweet chain attachment:
Once the engine, crossmember, and trans were positioned under the car, we slowly lowered it back onto the jackstands, about a foot above the crossmember on the dolley. We then reattached the engine hoist to the engine/crossmember/trans, and used it to pull the assembly up to the body, making it super easy to line up and install the crossmember bolts.
Engine under the car:
Engine below the car from the side, getting ready to pull it up:
Engine in place:
After the crossmember was in and torqued down, we moved straight into the front end rebuild. Control arms went in first, along with new ball joints and bushings. After that, a set of Summit Racing front lowering springs went in, coaxed in place by a really long pry bar and the weight of the vehicle supported by a jack under the control arm (and a strategically placed chain through the spring and control arm). After that, we hooked back up the steering knuckles and factory struts (struts and a big brake upgrade are in the work for a future project).
Control arms going in:
Since everything was already apart, we also treated her to a complete front end rebuild. Idler arm, center link, and tie rod ends were all replaced with Moog parts from RockAuto. UMI Tie Rod End Connectors were also added into the mix to help stiffen things up.
A shot of the finished steering linkage and suspension:
The rest of the evening was spent prepping the car so it could be rolled in and out of the shop again as necessary. The trans crossmember and hydraulics were hooked up, along with the driveshaft and torque arm. Brakes were bled, and we began hooking everything back up under the hood again in preparation for the arrival of our wiring harness and fuel injection parts. The end of the day brought a pretty complete car and a feeling of significant accomplishment.
Here's how she sits now:
Tomorrow we'll tidy up some more odds and ends. The trans tunnel will be modified to get the shifter in. Oil and tranny fluid will go in. The vent assembly below the windshield is being treated to a refresh, with screens being reglued and repainted. If time is on our side, we'll start putting some more stuff together under the engine bay.
We've got a 92 TBI wiring harness on order that I'll convert over to speed density TPI. We're also getting ready to set up a Holley Stealth Ram intake, and complete out the exhaust. Hopefully it won't be too long before the beast is running. I'm excited to see the rest of it come together.
More updates to follow!
Trending Topics
03-30-2014, 12:01 PM
#8
Supreme Member
iTrader: (11)
Join Date: Aug 2013
Location: MICHIGAN
Posts: 4,643
Received 754 Likes
on
580 Posts
Car: 1988 Trans Am
Engine: L03
Transmission: 700R4
Axle/Gears: 10 Bolt 2.73 Open
Re: At it again: 1992 Firebird Build
Awesome progress! You guys don't mess around.
Last edited by DynoDave43; 03-30-2014 at 12:04 PM.
03-30-2014, 01:36 PM
#9
Supreme Member
iTrader: (24)
Join Date: Jun 2005
Location: NC
Posts: 7,899
Likes: 0
Received 90 Likes
on
54 Posts
Car: 92 Firebird
Engine: Supercharged 6.0
Transmission: T56
Axle/Gears: 8.8 3.73
Re: At it again: 1992 Firebird Build
We've got a 92 TBI wiring harness on order that I'll convert over to speed density TPI. We're also getting ready to set up a Holley Stealth Ram intake, and complete out the exhaust. Hopefully it won't be too long before the beast is running. I'm excited to see the rest of it come together.
Add two extra injectors and rearrange a few accessory connectors
To update the TBI harness requires adding another ECM connector which requires splitting open the fender grommet along with a bunch of underhood changes
03-30-2014, 01:39 PM
#10
Senior Member
iTrader: (1)
Join Date: Dec 2009
Location: Waxahachie Texas
Posts: 627
Likes: 0
Received 0 Likes
on
0 Posts
Car: 88 IROC Z/28-under re-construction
Engine: 5.7 Tuned Port
Transmission: It's in there....
Axle/Gears: 9 bolt Borg-Warner
Re: At it again: 1992 Firebird Build
THERE YA GO! Your swap was looooong overdue,

03-30-2014, 05:58 PM
#11
Member
Thread Starter
iTrader: (16)
Join Date: Dec 2006
Location: TX/FL
Posts: 469
Likes: 0
Received 1 Like
on
1 Post
Car: 88 GTA/86 C20 Burb/91 325i
Engine: L98/454/M20
Transmission: 700R4/NV4500/Getrag
Axle/Gears: 3.27 9-bolt/3.73 14 Bolt/3.73 IRS
Re: At it again: 1992 Firebird Build
Theres actually less required to update the old V6 harness to TPI than to redo a TBI harness
Add two extra injectors and rearrange a few accessory connectors
To update the TBI harness requires adding another ECM connector which requires splitting open the fender grommet along with a bunch of underhood changes
Add two extra injectors and rearrange a few accessory connectors
To update the TBI harness requires adding another ECM connector which requires splitting open the fender grommet along with a bunch of underhood changes
Jon, maybe I was reading it wrong, but I was under the impression that the TBI to TPI conversion was a very simple operation. I didn't even think about using the V6 harness. I'll sit down with the wiring diagrams this week and have a look at it. We still have the entire unhacked V6 harness, so that is definitely an option. Am I also correct in assuming that the 7730 computer that the 3.1L runs on is the same one I need for speed density TPI, as long as I change out the MEMCAL to one of the V8 ones?
03-30-2014, 09:49 PM
#13
Supreme Member
iTrader: (24)
Join Date: Jun 2005
Location: NC
Posts: 7,899
Likes: 0
Received 90 Likes
on
54 Posts
Car: 92 Firebird
Engine: Supercharged 6.0
Transmission: T56
Axle/Gears: 8.8 3.73
Re: At it again: 1992 Firebird Build
A TBI car upgrading to TPI is a simple operation she using a SD TPI harness
90-92 v6 to SD TPI upgrade is plug and play
Converting a TBI harness to SD TPI is quite involved
90-92 v6 and TPI systems are practically identical
Same ECM box, different chip. Contact tuned performance about that
90-92 v6 to SD TPI upgrade is plug and play
Converting a TBI harness to SD TPI is quite involved
90-92 v6 and TPI systems are practically identical
Same ECM box, different chip. Contact tuned performance about that
03-30-2014, 11:53 PM
#14
Member
Thread Starter
iTrader: (16)
Join Date: Dec 2006
Location: TX/FL
Posts: 469
Likes: 0
Received 1 Like
on
1 Post
Car: 88 GTA/86 C20 Burb/91 325i
Engine: L98/454/M20
Transmission: 700R4/NV4500/Getrag
Axle/Gears: 3.27 9-bolt/3.73 14 Bolt/3.73 IRS
Re: At it again: 1992 Firebird Build
Jon, thanks for the clarification. I've been reading up this evening on harness conversions and SD tuning. I've fooled a bit with $32 and $6E codes for my parent's vettes and my GTA, but I've never delved into SD. Until now.
I'll start modifying the V6 harness tomorrow. I'll splice in the injector wiring from the spare TPI harness we have, as well as deleting the emissions stuff we won't be using and lengthening the necessary wires. I'll also start pulling temp and pressure senders off of the 3.1 and replacing the ones on the 350 with them (it came out of a 90 TBI Suburban originally).
I've been looking over a rough tune to start with, and I think I might have a pretty decent one, at least to get moving with. Given that we're running Vortec heads with an LT4 cam, and a Stealth Ram Intake, with free-flowing exhaust and intake, I'm thinking LT1 tables are going to be a great place to start interpolating data for a base tune.
My plan is to take an AUJP bin (90 5.7L F-car), do the usual VATS and emissions delete, switch it for a manual trans, and import some LT1 table data to get rolling. I will most likely use the 9C1 caprice values for the spark advance tables (iron head LT1 and Vortec heads being very similar, and the 9C1 being the most aggressively tuned/geared of the iron head motors), and 94-95 F-body LT1 VE tables (given the similar camshaft, head, and intake manifold design). That should at least give us a driveable tune from which I can datalog and refine.
Any thoughts or opinions on that process? It only seems logical to me to use as much of the factory developed stuff as possible, at least for a starting point.
-cal30sniper
Edit: I'll also be updating the injector constant to reflect the 24lb injectors we'll be using with the Stealth Ram. Anyone have inputs on a sweet spot for fuel pressure on this setup?
03-31-2014, 07:07 AM
#15
Supreme Member
iTrader: (24)
Join Date: Jun 2005
Location: NC
Posts: 7,899
Likes: 0
Received 90 Likes
on
54 Posts
Car: 92 Firebird
Engine: Supercharged 6.0
Transmission: T56
Axle/Gears: 8.8 3.73
Re: At it again: 1992 Firebird Build
The specifics of the tune are beyond me. That's not something I've learned yet
03-31-2014, 09:51 PM
#16
Member
Thread Starter
iTrader: (16)
Join Date: Dec 2006
Location: TX/FL
Posts: 469
Likes: 0
Received 1 Like
on
1 Post
Car: 88 GTA/86 C20 Burb/91 325i
Engine: L98/454/M20
Transmission: 700R4/NV4500/Getrag
Axle/Gears: 3.27 9-bolt/3.73 14 Bolt/3.73 IRS
Re: At it again: 1992 Firebird Build
Same here, I'm trying to dive into it. I did a bit of work tuning on my GTA in the $6E code, and I worked quite a bit with Microsquirt on 600cc bike motors and LT1 engines on the dyno as an undergrad, but this is my first jump into an extensively modified engine. Coupling that with my jaunt as a computer programmer in high school, I'm hoping to come up with a pretty good base tune. We'll see how it goes.
03-31-2014, 10:32 PM
#17
Member

Join Date: Mar 2013
Location: gladstone
Posts: 325
Likes: 0
Received 0 Likes
on
0 Posts
Car: 72 nova/ 90 camaro rs,04 suburban
Engine: blown 327/ 355/306/355/5.3
Transmission: muncie 4 speed/T5/powerglide,4l80e
Axle/Gears: 342/411/456/ moser axles
Re: At it again: 1992 Firebird Build
great start I'm subscribed, looking forward to more updates
04-02-2014, 10:36 PM
#18
Member
Thread Starter
iTrader: (16)
Join Date: Dec 2006
Location: TX/FL
Posts: 469
Likes: 0
Received 1 Like
on
1 Post
Car: 88 GTA/86 C20 Burb/91 325i
Engine: L98/454/M20
Transmission: 700R4/NV4500/Getrag
Axle/Gears: 3.27 9-bolt/3.73 14 Bolt/3.73 IRS
Re: At it again: 1992 Firebird Build
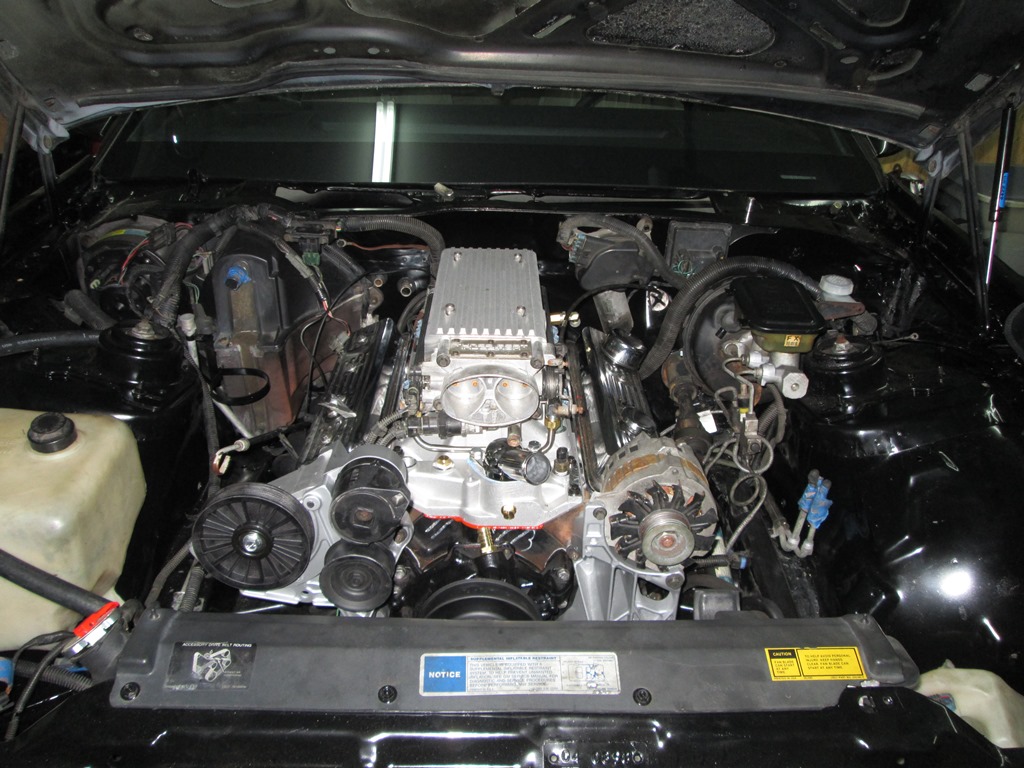
Just a short update here fellas. Parts have been pouring in over the last few days, and I've been spinning wrenches off and on between going to work.
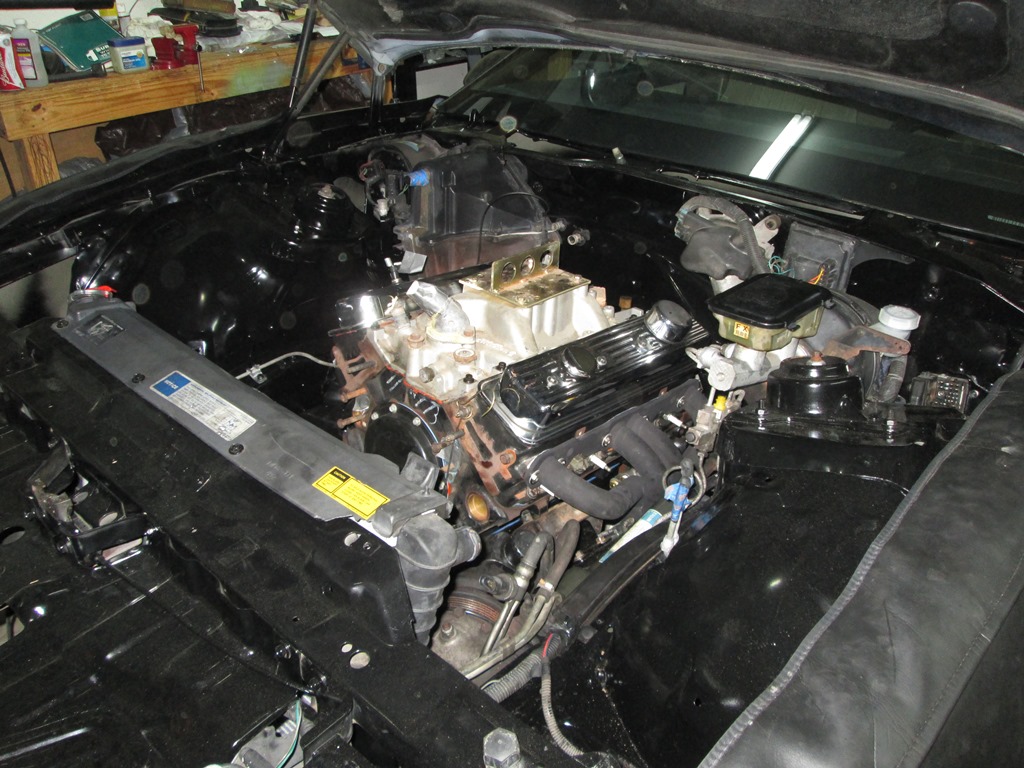
The wiring harness is back in and about 90% hooked up. I still need to splice the wires together for the V8 TPS and IAC into the V6 harness (same wires, just need to get the length right and solder them in). I really do like how the V6 wiring harness came together though. Unlike the V8, which runs everything on top of the intake/valve covers, the V6 harness routes all the wires down below by the oil pan. It makes for a much cleaner engine bay.
The stealth ram is on and mocked up. I'll work on putting in the gaskets and hooking up the fuel rail tomorrow. I need to splice the V8 injector harness into the V6 clip, but I'm going to wait to get the accessories mounted first so I can really get the routing of the wires right. I also need to splice in some wiring for the alternator, since it moved from the passenger side to the driver side with the V8 swap.
After that, it's just vacuum lines and heater hose. The upper radiator hose (87 Firebird carbed) did not fit well at all. I'm going to cut it in half, shorten the ends at the middle, and reconnect them with a short piece of matching diameter pipe or PVC. Here's to hoping it works.
I doubt it will be running by the end of the weekend, but it'll be close.
Here's some pics I took after routing the wiring and installing the stealth ram.
Oh, for anyone interested in this swap, the 3.1V6 cable is almost certainly going to work. I'll have to cut about the last inch off the plastic cable holder, but other than that, it's a direct match for the TPI cable in my '88.
-cal30sniper
04-02-2014, 10:40 PM
#19
Member
Thread Starter
iTrader: (16)
Join Date: Dec 2006
Location: TX/FL
Posts: 469
Likes: 0
Received 1 Like
on
1 Post
Car: 88 GTA/86 C20 Burb/91 325i
Engine: L98/454/M20
Transmission: 700R4/NV4500/Getrag
Axle/Gears: 3.27 9-bolt/3.73 14 Bolt/3.73 IRS
Re: At it again: 1992 Firebird Build
Oh, one more quick note. Whilst digging through the depths of the harness and service manuals this afternoon, I confirmed that the V6 uses a true IAT sensor, while the TPI cars used an MAT sensor and called it an IAT from 90-up. It's fairly obvious that the heat soak of a solid aluminum manifold and a coolant temp sensor stand in is going to lead to very slow temperature response times. I plan to keep the V6 IAT in the intake tubing, and modify the MAT tables as per Grim Reapers table found in the DIY Prom section.
-cal30sniper
-cal30sniper
04-03-2014, 05:02 AM
#20
Senior Member
Join Date: Jul 2009
Location: Morgantown, WV
Posts: 524
Received 100 Likes
on
69 Posts
Car: 1990 Trans Am
Engine: 5.7 350 HSR afr195 xfi268
Transmission: T5
Axle/Gears: 3.08 posi
Re: At it again: 1992 Firebird Build
great work man!!!! give u props for jabbing at tuning
suscribed
suscribed
04-03-2014, 08:58 AM
#21
Member
Join Date: Mar 2013
Location: gladstone
Posts: 325
Likes: 0
Received 0 Likes
on
0 Posts
Car: 72 nova/ 90 camaro rs,04 suburban
Engine: blown 327/ 355/306/355/5.3
Transmission: muncie 4 speed/T5/powerglide,4l80e
Axle/Gears: 342/411/456/ moser axles
Re: At it again: 1992 Firebird Build
looking really good!
04-03-2014, 09:36 PM
#22
Member
Thread Starter
iTrader: (16)
Join Date: Dec 2006
Location: TX/FL
Posts: 469
Likes: 0
Received 1 Like
on
1 Post
Car: 88 GTA/86 C20 Burb/91 325i
Engine: L98/454/M20
Transmission: 700R4/NV4500/Getrag
Axle/Gears: 3.27 9-bolt/3.73 14 Bolt/3.73 IRS
Re: At it again: 1992 Firebird Build
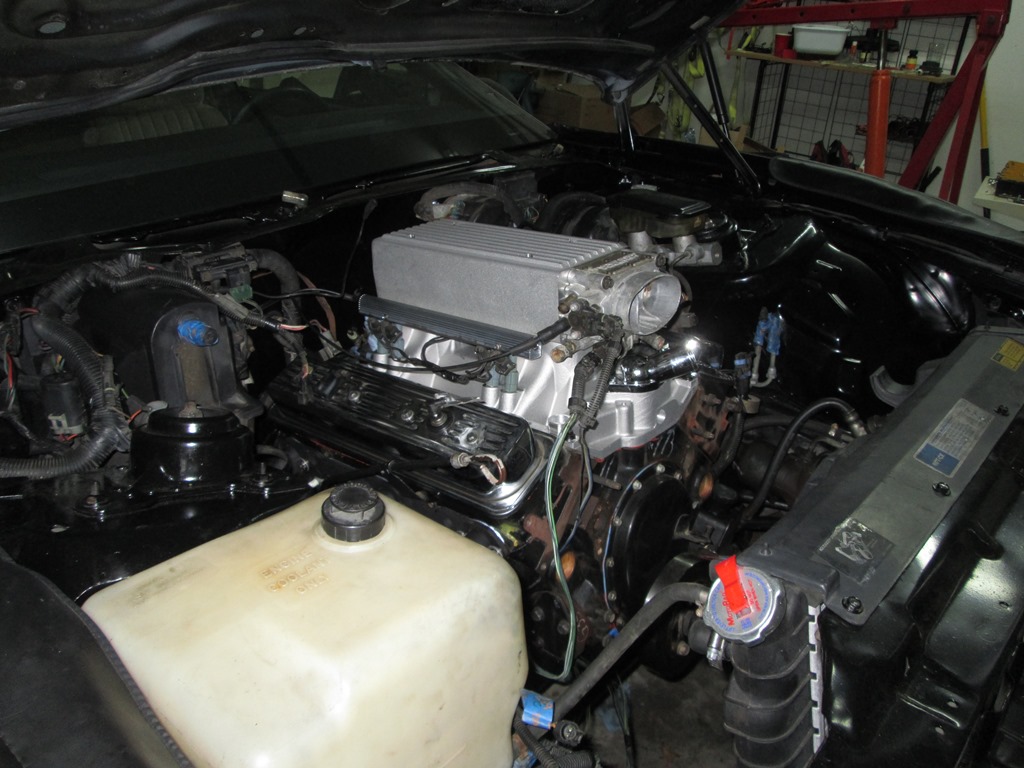
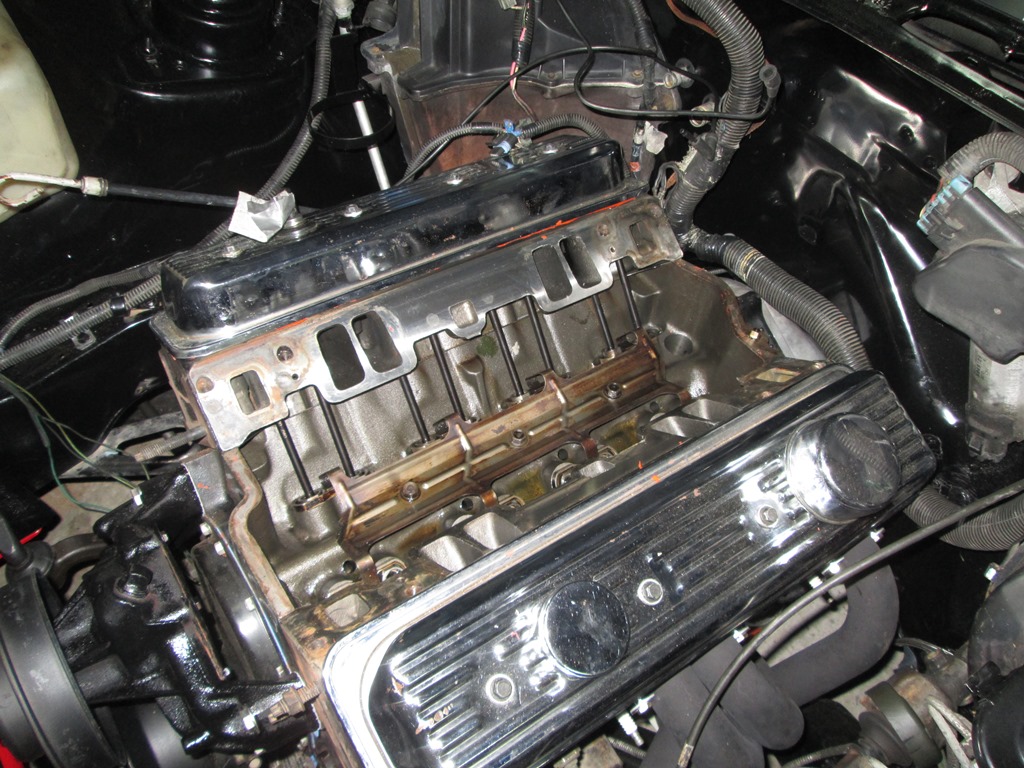
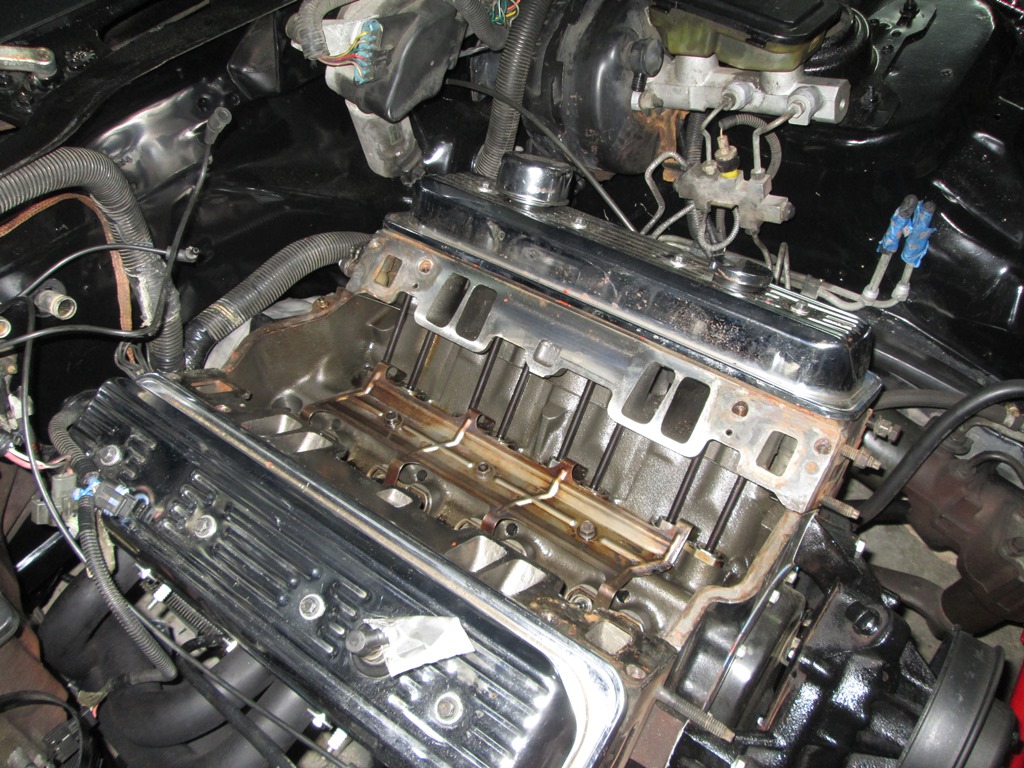
Got a significant amount done for the 4 hours or so I had to work today.
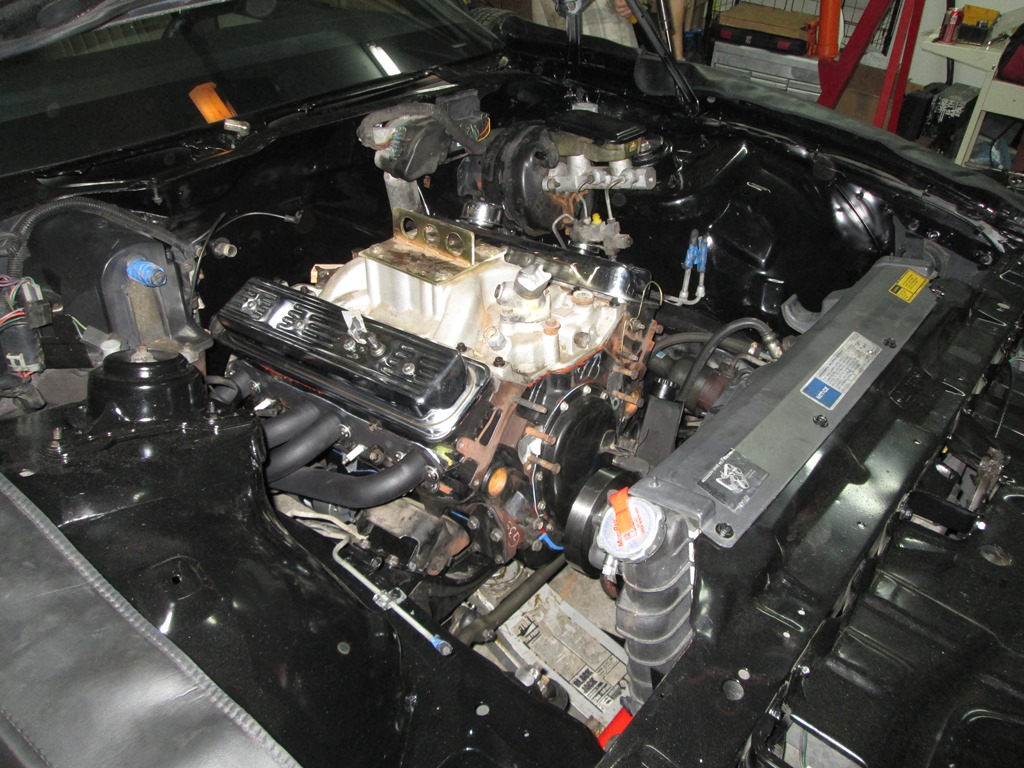
The lower intake is on and sealed down for good, the distributor is in and rough timing is set. The water pump is on for good, as are the crank and water pump pulley. The wiring at the back of the engine is finished, and the brackets/accessories have been mounted up front to finish routing the accessory wiring.
Here's a few shots inside the engine to show how clean this one is, as well as the roller cam addition:
And a few more of the intake and accessories on:
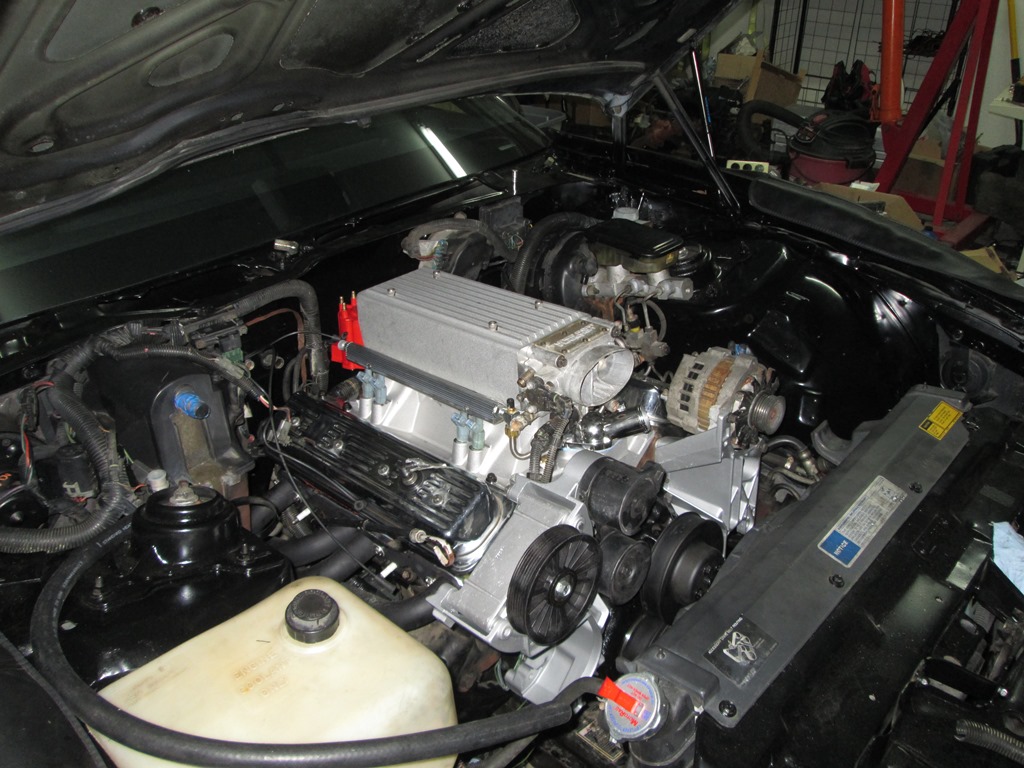
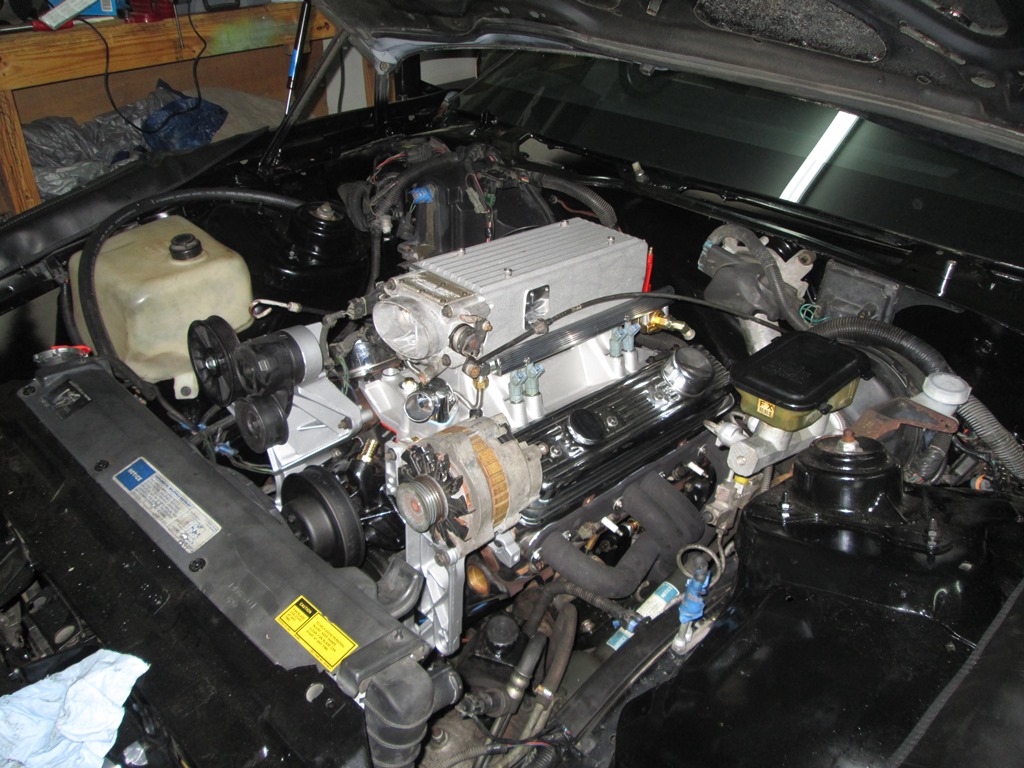
I'll be attempting to finish up the wiring and securely mount all the accessories tomorrow. Then it will be on to fuel lines, heater hoses, and mounting the coil. After the intake comes in, I'll be pretty much ready for ignition. I'm really pleased with how its all starting to come together.
-cal30sniper
The lower intake is on and sealed down for good, the distributor is in and rough timing is set. The water pump is on for good, as are the crank and water pump pulley. The wiring at the back of the engine is finished, and the brackets/accessories have been mounted up front to finish routing the accessory wiring.
Here's a few shots inside the engine to show how clean this one is, as well as the roller cam addition:
And a few more of the intake and accessories on:
I'll be attempting to finish up the wiring and securely mount all the accessories tomorrow. Then it will be on to fuel lines, heater hoses, and mounting the coil. After the intake comes in, I'll be pretty much ready for ignition. I'm really pleased with how its all starting to come together.
-cal30sniper
07-06-2014, 10:39 PM
#23
Member
Thread Starter
iTrader: (16)
Join Date: Dec 2006
Location: TX/FL
Posts: 469
Likes: 0
Received 1 Like
on
1 Post
Car: 88 GTA/86 C20 Burb/91 325i
Engine: L98/454/M20
Transmission: 700R4/NV4500/Getrag
Axle/Gears: 3.27 9-bolt/3.73 14 Bolt/3.73 IRS
Re: At it again: 1992 Firebird Build
4th of July update:
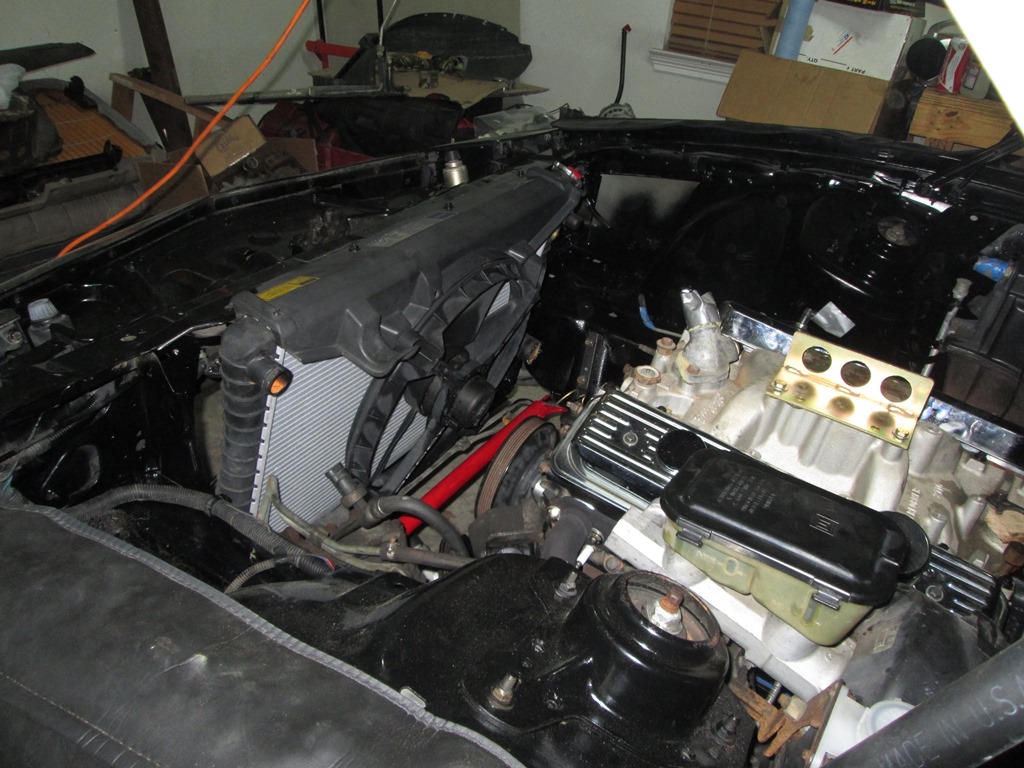
After a few months of downtime courtesy of flight school, I've finally gotten a chance to get a bit closer to completing this thing. Since my last post, I've finished the wiring, gotten the accessories mounted, built and filled the cooling system, and installed the intake. The wiring was relatively straightforward. I mainly had to lengthen some of the harness to get the accessory wiring on the proper side of the engine. I was able to run the loom down low on the block, hiding it from view from above. I thought it came out really clean. I'm using a SLP cold air intake for a MAF setup. I plan on finding a regular hollow pipe to replace the MAF sensor in the tubing. For the cooling system, I ran a 92 Firebird 5.7L lower radiator hose, an '87 Firebird LG4 upper radiator hose (carbed setup, I ended up cutting some of the hose out of the middle and splicing it back together to make up for the weird placement of the stealth ram thermostat), and regular 3/4 and 5/8" heater hose. I plumbed a vacuum valve out of an '87 Firebird LG4 into the 5/8" heater core feed line.
I didn't realize that '88 and '89-92 used a different serpentine belt routing. I was using my '88 as a reference, and couldn't get the belt to fit. Turns out '89-92 routed it quite differently in order to use a shorter belt.
The fuel system is complete except for one incorrect fitting that I am waiting on Holley to send for the Stealth Ram fuel rails (they sent two 90 degree fittings with ports for the schrader valve, when there should only be one). I ended up cutting the factory hard lines for the fuel system as they come up the trans tunnel, installing compression fittings to adapt to AN fittings, and running AN lines up the back of the firewall to the fuel rails. The ignition system is also complete, and the vacuum system is complete except for a few caps that need to be installed here and there.
Other than the Holley fitting, I'm still waiting on a throttle cable bracket, coil wire, and battery to get it running. I burned the chip for it tonight. I'll be installing the ECM tomorrow, and hopefully the fuel fitting if it comes in. As soon as the throttle bracket comes in, I'll pull one of my spare batteries and see if I can get it running. It's been a long time coming, and I can't wait to here it run.
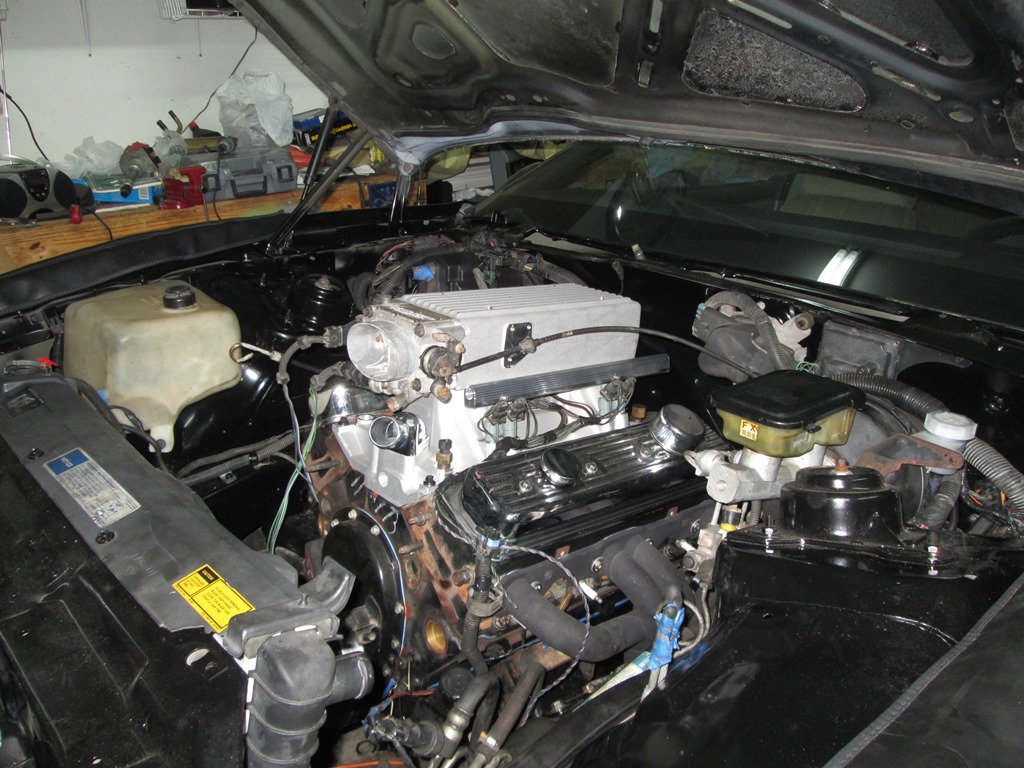
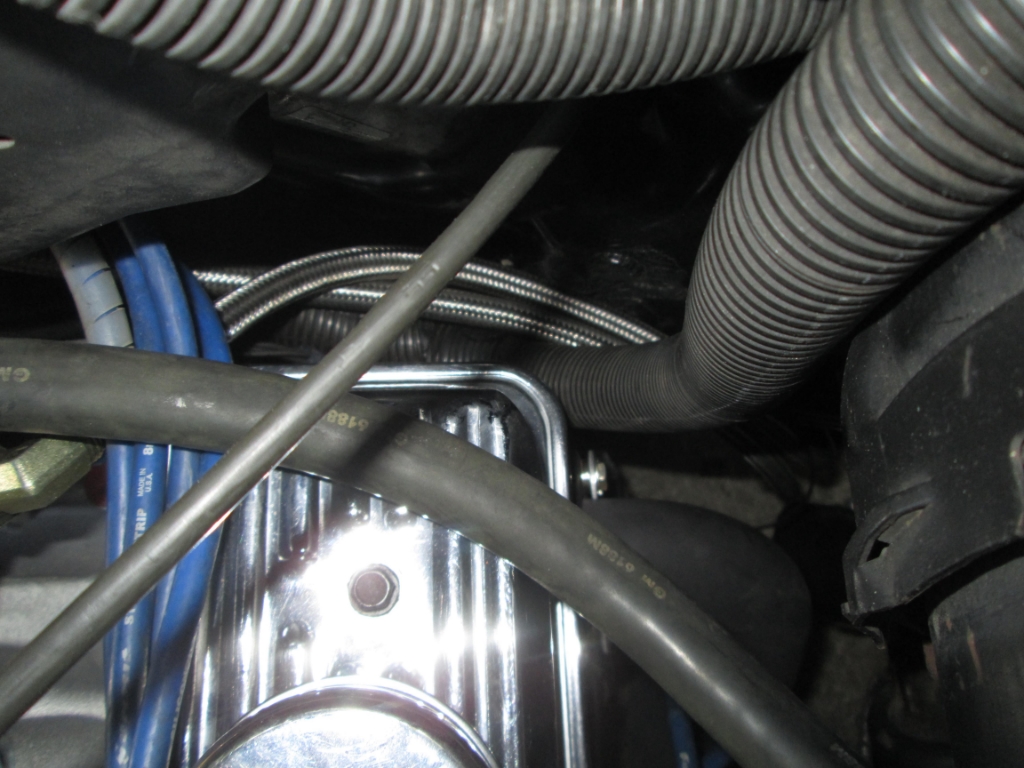
Here's some pictures of how it sits tonight:

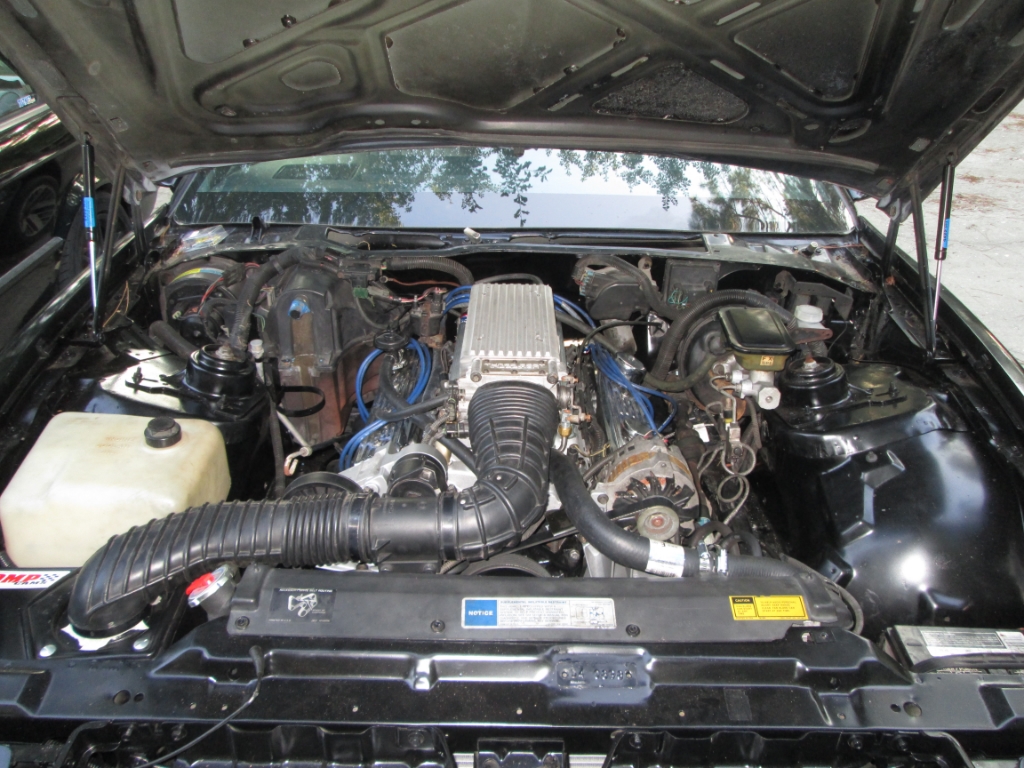
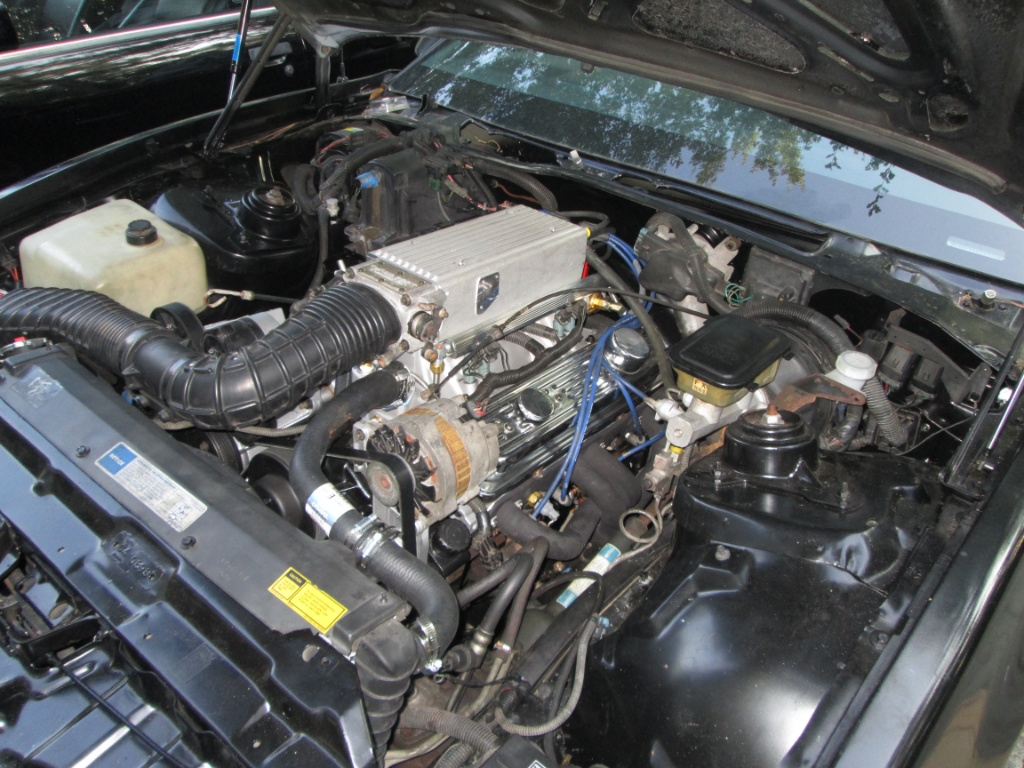
Close-ups of the Fuel Line routing up the back:
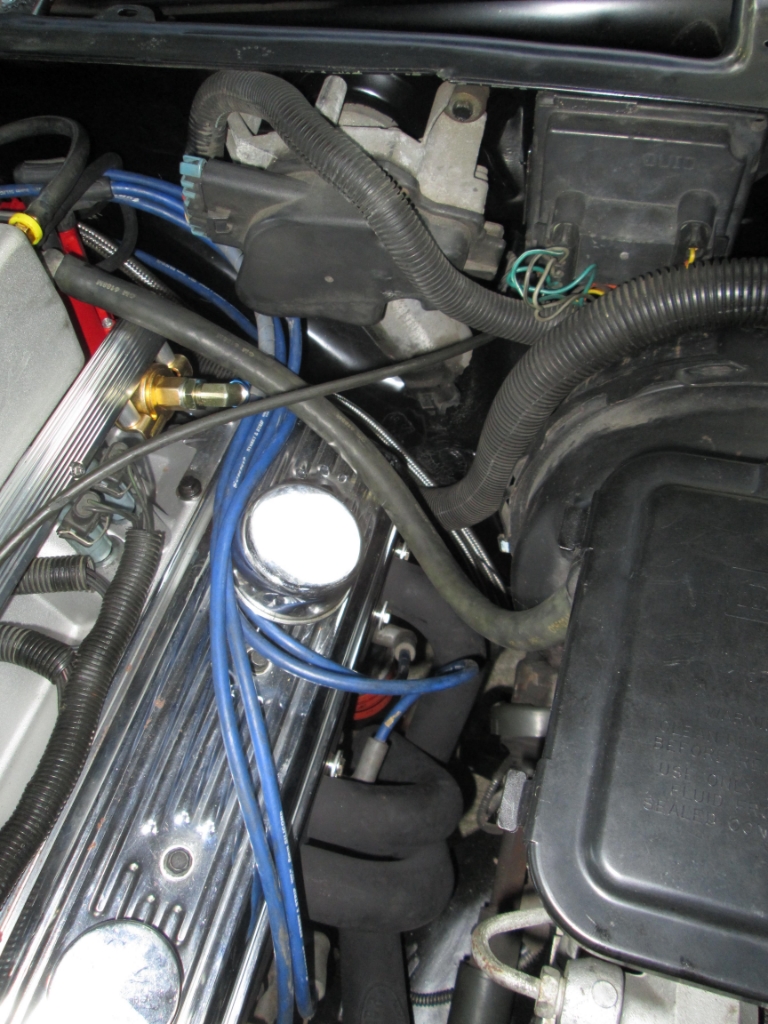
After a few months of downtime courtesy of flight school, I've finally gotten a chance to get a bit closer to completing this thing. Since my last post, I've finished the wiring, gotten the accessories mounted, built and filled the cooling system, and installed the intake. The wiring was relatively straightforward. I mainly had to lengthen some of the harness to get the accessory wiring on the proper side of the engine. I was able to run the loom down low on the block, hiding it from view from above. I thought it came out really clean. I'm using a SLP cold air intake for a MAF setup. I plan on finding a regular hollow pipe to replace the MAF sensor in the tubing. For the cooling system, I ran a 92 Firebird 5.7L lower radiator hose, an '87 Firebird LG4 upper radiator hose (carbed setup, I ended up cutting some of the hose out of the middle and splicing it back together to make up for the weird placement of the stealth ram thermostat), and regular 3/4 and 5/8" heater hose. I plumbed a vacuum valve out of an '87 Firebird LG4 into the 5/8" heater core feed line.
I didn't realize that '88 and '89-92 used a different serpentine belt routing. I was using my '88 as a reference, and couldn't get the belt to fit. Turns out '89-92 routed it quite differently in order to use a shorter belt.
The fuel system is complete except for one incorrect fitting that I am waiting on Holley to send for the Stealth Ram fuel rails (they sent two 90 degree fittings with ports for the schrader valve, when there should only be one). I ended up cutting the factory hard lines for the fuel system as they come up the trans tunnel, installing compression fittings to adapt to AN fittings, and running AN lines up the back of the firewall to the fuel rails. The ignition system is also complete, and the vacuum system is complete except for a few caps that need to be installed here and there.
Other than the Holley fitting, I'm still waiting on a throttle cable bracket, coil wire, and battery to get it running. I burned the chip for it tonight. I'll be installing the ECM tomorrow, and hopefully the fuel fitting if it comes in. As soon as the throttle bracket comes in, I'll pull one of my spare batteries and see if I can get it running. It's been a long time coming, and I can't wait to here it run.
Here's some pictures of how it sits tonight:
Close-ups of the Fuel Line routing up the back:
07-19-2014, 08:41 PM
#24
Member
Thread Starter
iTrader: (16)
Join Date: Dec 2006
Location: TX/FL
Posts: 469
Likes: 0
Received 1 Like
on
1 Post
Car: 88 GTA/86 C20 Burb/91 325i
Engine: L98/454/M20
Transmission: 700R4/NV4500/Getrag
Axle/Gears: 3.27 9-bolt/3.73 14 Bolt/3.73 IRS
Re: At it again: 1992 Firebird Build
It's alive!
Got 'er up and running today. I cranked on it a bit to get the oil flowing, then hooked up the coil wire, and it jumped to on the next bump. Was running a little rough at first, and not very responsive to throttle inputs. I hooked up my laptop, and saw that MAP was pretty much reading atmospheric at idle. Turns out I had forgotten to put one of the plugs in the back of the intake manifold. That's what I get for taking huge breaks in between working sessions.
Got the plug back in, and set the base timing. Here's a short video after it warmed up and I got the timing set (of course, I forgot the parking brake was on and killed it right in the middle, just skip past that part, haha). I'm really pleased with how it runs so far.
I've got a small fuel leak in one of my AN fittings to take care of, and I need to get the exhaust back on. After that, she'll be ready to hit the road for some test and tune!
07-29-2014, 06:10 PM
#25
Member
Thread Starter
iTrader: (16)
Join Date: Dec 2006
Location: TX/FL
Posts: 469
Likes: 0
Received 1 Like
on
1 Post
Car: 88 GTA/86 C20 Burb/91 325i
Engine: L98/454/M20
Transmission: 700R4/NV4500/Getrag
Axle/Gears: 3.27 9-bolt/3.73 14 Bolt/3.73 IRS
Re: At it again: 1992 Firebird Build
The exhaust is on, and I've had a few iterations of test and tune. I've got the mid-range throttle worked out pretty close. Lots of torque at part throttle, and wonderful throttle response. I've got a lot more heavy throttle and PE tuning to do, and I'm also working on tuning out that backfire/pop in the exhaust on deceleration and derevving. Added a chunk of timing in the 20-30kpa range, and that helped quite a bit. I think I'll try fattening up the fuel down there too and see if that doesn't get rid of it. All in all, lots of good progress.
Here's a video of the new exhaust:
Here's a video of the new exhaust:
07-29-2014, 08:50 PM
#26
Member
Join Date: Mar 2013
Location: gladstone
Posts: 325
Likes: 0
Received 0 Likes
on
0 Posts
Car: 72 nova/ 90 camaro rs,04 suburban
Engine: blown 327/ 355/306/355/5.3
Transmission: muncie 4 speed/T5/powerglide,4l80e
Axle/Gears: 342/411/456/ moser axles
Re: At it again: 1992 Firebird Build
sounds pretty good man
08-04-2014, 10:32 PM
#27
Member
Thread Starter
iTrader: (16)
Join Date: Dec 2006
Location: TX/FL
Posts: 469
Likes: 0
Received 1 Like
on
1 Post
Car: 88 GTA/86 C20 Burb/91 325i
Engine: L98/454/M20
Transmission: 700R4/NV4500/Getrag
Axle/Gears: 3.27 9-bolt/3.73 14 Bolt/3.73 IRS
Re: At it again: 1992 Firebird Build
I finally got the knock sensor fixed this weekend. Thing pulls amazing on the few heavy throttle runs that I've done with it.
For anyone's future reference, a "Code 43" error (ESC) was plaguing my tuning for a bit before I figured it out. Once I got it running, it idled great, and part throttle was amazing, but it was an absolute dog under anything more than light throttle. Using datamaster on my laptop, I immediately traced the problem to 20 degrees of spark retard under anything more than 40kpa MAP. I ran the voltage and ohm test from the service manual on the knock sensor, and determined it was bad (good voltage meant good ECM, infinite resistance meant bad sensor). Until I got the chance to replace the sensor, I just coded out knock retard under non-PE operation. Running L31 truck timing tables and premium gas, I knew this wouldn't be a problem, especially at TPS settings of less than 80%.
I got the knock sensor fixed on Friday, and built a custom spark advance table using the highest SA values from both the L31 Truck and 9C1 LT1 (iron head motor) at each respective RPM and MAP point. That woke the motor up an unbelievable amount. I am very, very impressed with the way this thing runs given the extremely mild cam that I'm using. I can't wait to get some good rims, tires, and brakes on the thing to really start giving it a workout.
08-04-2014, 10:37 PM
#28
Member
Thread Starter
iTrader: (16)
Join Date: Dec 2006
Location: TX/FL
Posts: 469
Likes: 0
Received 1 Like
on
1 Post
Car: 88 GTA/86 C20 Burb/91 325i
Engine: L98/454/M20
Transmission: 700R4/NV4500/Getrag
Axle/Gears: 3.27 9-bolt/3.73 14 Bolt/3.73 IRS
Re: At it again: 1992 Firebird Build
As an aside, I'm also very impressed with the Hooker cat-back system. It took a bit of tweaking and sawzall work, but it definitely turned out to be one of the cleanest catbacks that I've messed with. Ground clearance is excellent, and the tips come out very straight as well. I definitely think its the best fitting exhaust in the price category. A little loud for daily driving in my taste, but it does have a very pleasing note and sounds pretty mean.
10-01-2014, 05:12 AM
#29
Member
Re: At it again: 1992 Firebird Build
the engine looks great. about to install a TPI motor myself in my Formula. I'm also building a ZZ3 and hopefully a holley stealth ram for it this winter.
10-10-2014, 01:24 PM
#30
Member
Join Date: Oct 2011
Location: South Bend,IN
Posts: 134
Likes: 0
Received 0 Likes
on
0 Posts
Car: '97 TA WS6 vert & '88 Formula 350
Engine: LT1 & 383 HSR
Transmission: T-56 & T-56
Axle/Gears: 3.42 & 3.27
Re: At it again: 1992 Firebird Build
I am having a code 34 issue with my 383 HSR. My friend thinks there might be an issue with vacuum. Does running your PCV to your TB help?I will try to get a better discription later for you. How are your vacuum lines and sensors hooked up?
11-01-2014, 08:55 PM
#31
Member
Thread Starter
iTrader: (16)
Join Date: Dec 2006
Location: TX/FL
Posts: 469
Likes: 0
Received 1 Like
on
1 Post
Car: 88 GTA/86 C20 Burb/91 325i
Engine: L98/454/M20
Transmission: 700R4/NV4500/Getrag
Axle/Gears: 3.27 9-bolt/3.73 14 Bolt/3.73 IRS
Re: At it again: 1992 Firebird Build
There won't be any difference running the PCV line to the TB or intake, they should always see the same vacuum. I have my MAP run to the back of the intake, on a separate port from anything else. I also have the HVAC vacuum line and as well as vacuum line for the power brake booster hooked up back there.
11-01-2014, 08:59 PM
#32
Member
Thread Starter
iTrader: (16)
Join Date: Dec 2006
Location: TX/FL
Posts: 469
Likes: 0
Received 1 Like
on
1 Post
Car: 88 GTA/86 C20 Burb/91 325i
Engine: L98/454/M20
Transmission: 700R4/NV4500/Getrag
Axle/Gears: 3.27 9-bolt/3.73 14 Bolt/3.73 IRS
Re: At it again: 1992 Firebird Build
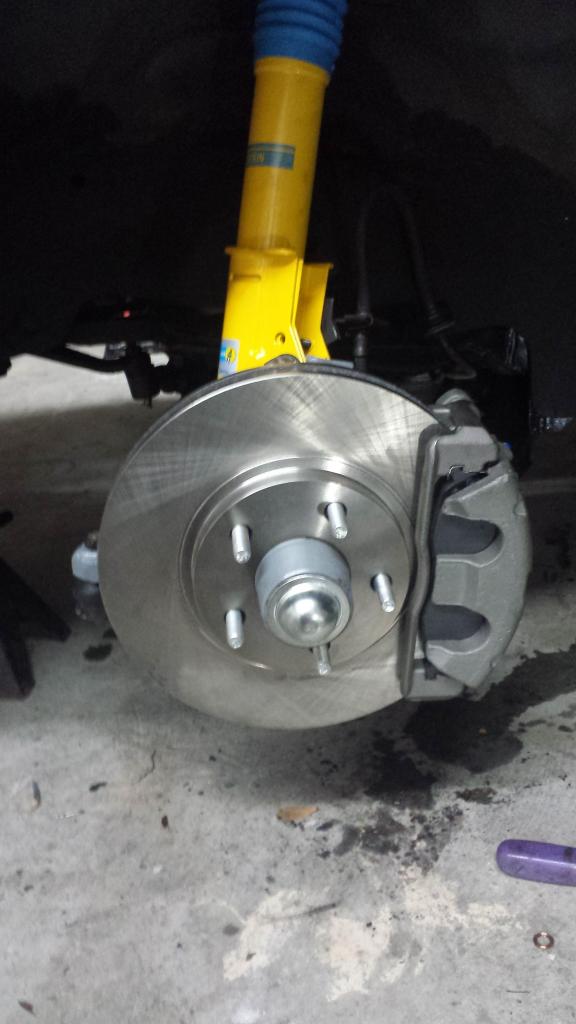
Still rolling on this thing. I finished the Bilstein shocks/struts, WS6 sway bars, LS1 front brake conversion, and WS6 rims and tires all the way around. Front end is aligned and I've been driving the heck out of it getting it tuned out. Driveability is starting to get real nice, and heavy throttle/high RPM tuning is progressing nicely.
Here's a few pictures after a fresh wash and wax:
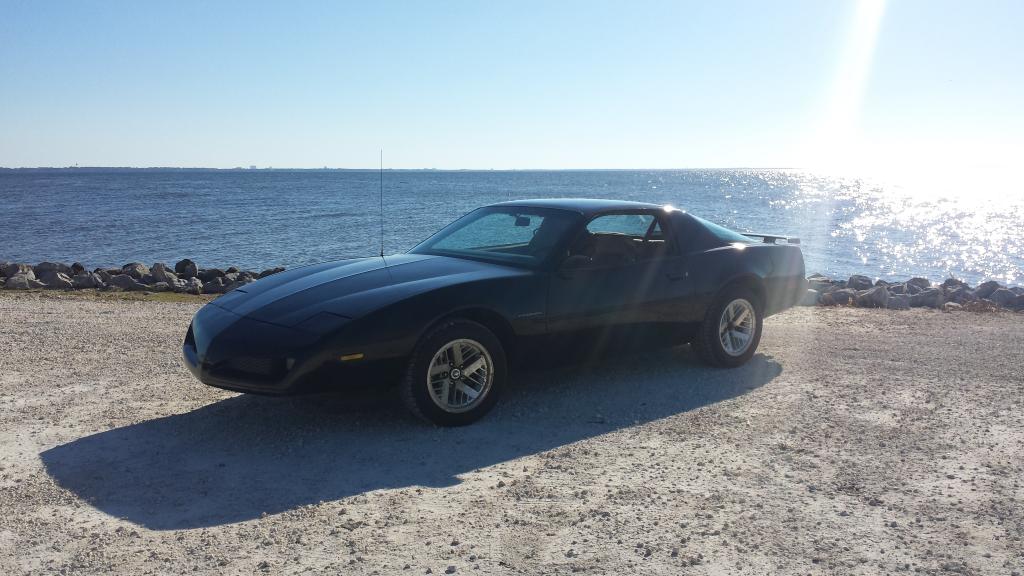
-cal30sniper
11-06-2014, 11:11 AM
#33
COTM Editor (Retired)
Re: At it again: 1992 Firebird Build
awesome thread. i really like what you've done and the parts you've used.
i have the Hooker cat-back exhaust on my Formula, and i always highly recommend it as the best sounding exhaust for these. yours, i noticed, seems to have some crackle and pop when you get on it. any idea why? mine doesnt do that.
as a base model, does this car have an open diff and drum rear brakes? if so, are there any plans to address the rear end with a 4th gen swap or something along those lines?
you gonna keep the stock "base model" appearance or give it a full on "Formula look"?
how's this one compare to your GTA so far?
11-10-2014, 01:01 AM
#34
Member
Thread Starter
iTrader: (16)
Join Date: Dec 2006
Location: TX/FL
Posts: 469
Likes: 0
Received 1 Like
on
1 Post
Car: 88 GTA/86 C20 Burb/91 325i
Engine: L98/454/M20
Transmission: 700R4/NV4500/Getrag
Axle/Gears: 3.27 9-bolt/3.73 14 Bolt/3.73 IRS
Re: At it again: 1992 Firebird Build
Thanks for the compliments!
The crackle and pop is purely a result of the tune that I'm still working out. I've gotten it a lot better, still trying to get rid of it completely.
Open diff and rear drums currently. I like the 3.45 gearing and the older T56, but that will be harder to find with a posi. For now, I'm going to rebuild the rear brakes back to factory spec, change the rear-end fluid, and then let my roommate worry about that upgrade down the road. I really like the base-model 91-92 bird look, but that will also be something that he will worry about down the road. I'd recommend he stay close to the current look, but that's just me. I love the way the Formulas look also, as well as the mighty Firehawk.
Overall, the car isn't in nearly as good condition as my GTA, but that was to be expected giving the purchase price ($700). The car is EXTREMELY solid, with no previous body damage and zero rust. I'm also a big fan of the stripper theme the car left the factory with. There's a certain simplicity of a non-power window/door-lock car with no cruise control, no rear window defog, and no fancy buttons or switches to clutter up the interior. It makes troubleshooting the electrical gremlins way easier at least. Of course, the power and RPM band difference between this car and my GTA is night and day. This sucker moves pretty dang good considering the low-budget parts selection.
Currently I'm just trying to get the car up to reliable daily driver status before I hand over the keys to him. Left to do still: fix the headlights (and high-beam/turn-signal switch), get the screwy HVAC system working right, U-joints and rear brakes, replace the fuel pump (preventative maintenance), and finish out the tune. I'm trying to get that done and drop off the car by Christmas, but we'll see what primary flight training has to say about speed of progress.
12-23-2014, 01:14 PM
#35
Re: At it again: 1992 Firebird Build
As an aside, I'm also very impressed with the Hooker cat-back system. It took a bit of tweaking and sawzall work, but it definitely turned out to be one of the cleanest catbacks that I've messed with. Ground clearance is excellent, and the tips come out very straight as well. I definitely think its the best fitting exhaust in the price category. A little loud for daily driving in my taste, but it does have a very pleasing note and sounds pretty mean.

Thread
Thread Starter
Forum
Replies
Last Post