
The ULTIMATE budget paint job (pic heavy)

Member
Joined: Aug 2008
Posts: 259
Likes: 1
From: Eastern Ohio!
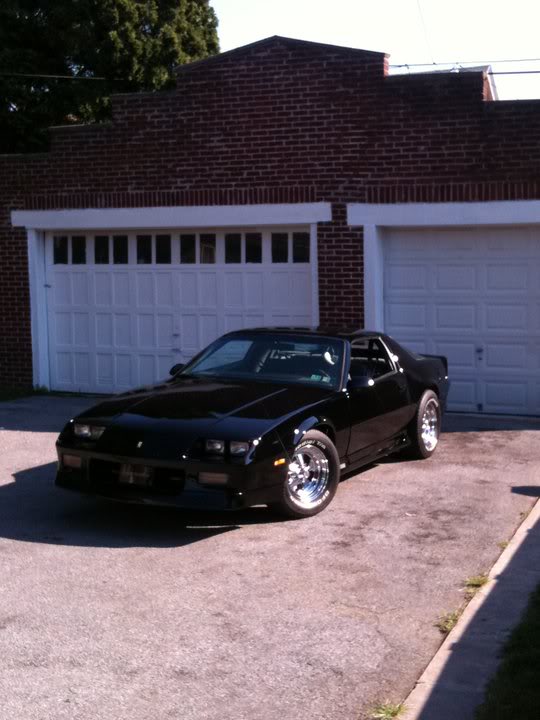
Car: Mystifying 1989 TBI Camaro.
Engine: 1992 350 Truck Engine. TBI
Transmission: 700R4 when it wants to be.
Axle/Gears: 2.73
Re: The ULTIMATE budget paint job (pic heavy)

If I could get the tractor pain in my color, (bright / ultra blue metallic.) I would do it in a heartbeat because I'm too poor right now for anything else.
Farm equipment paint holds up to some pretty harsh treatment. Darn cheap for something that lasts so long!

My car needs painted in a bad way because it has the California water base paint and it's peeling off in many places.
From the sounds of things, I would say the tractor paint holds up a little better than water paint.

My poor little Cam Cam. Barely keeping it going, but a little TLC goes a long way.

Last edited by jamienoel; Aug 6, 2011 at 01:13 AM. Reason: Being silly


Senior Member
iTrader: (4)
Joined: Jan 2008
Posts: 545
Likes: 0
From: Rustfree Gilbert Arizona
Car: 1989 IROC
Engine: 305TPI
Transmission: 700R4
Axle/Gears: 2:73 posi
Re: The ULTIMATE budget paint job (pic heavy)
I like it the way it looks now..

Member
Joined: Apr 2011
Posts: 166
Likes: 1
From: La Crosse WI
Car: '91 Firebird '85 Firebird
Engine: 305 TPI
Member
Joined: May 2011
Posts: 117
Likes: 1
Re: The ULTIMATE budget paint job (pic heavy)
Thanks for the heads up. I probably will end up smoothing the areas near the doors chemically with leveler and putting the Iroc logos back on.
Junior Member
Joined: Apr 2011
Posts: 2
Likes: 0
From: Co
Car: 1985 trans am red
Engine: 305 roller cam out of a 88 formula
Transmission: 700r4 rebuilt
Axle/Gears: 3.42 gears
 and i hope i can get to doing this some time soon
Member
Joined: Sep 2002
Posts: 128
Likes: 0
From: Wyoming, Mi
Car: 89 Camaro RS Convertible
Engine: 355 chevy power
Transmission: 5 speed manual
Axle/Gears: standard
Re: The ULTIMATE budget paint job (pic heavy)
just a quick question Fyrchkn. I have just primed my car with the valspar primer after doing the body work and my question is really a general question would you then after spraying first coat go over that coat with the longboard with say a 220 or maybe a 320 grit sandpaper to get the high low spots out then spray again or just go over it with a wetsand 400 and hit it again with primer...only reason i ask im a newbie when it comes to paint but i think i did a good job so far with it. i just want to be sure,.
Senior Member
iTrader: (3)
Joined: May 2010
Posts: 976
Likes: 0
From: Northwest Indiana, Kouts
Car: 88' White-Black Trans Am
Engine: Trying to find a motor
Transmission: 4L60E
Axle/Gears: 3.23
Re: The ULTIMATE budget paint job (pic heavy)
Ive been watching this thread for the past year,youve inspired me to do mine. I was thinking of doing what you did,all the steps included,But using the gloss black. I might want to try mine with Clear though considering black is such a paint to get shiny. I still need a gun and a compressor though,my compressor motor shot.Ill let you know when i start! Ive gotta save money though,also,theres not much time between High school and everything else so it will either be winter or a little later

Senior Member
Joined: Mar 2004
Posts: 773
Likes: 0
From: Clovis NM
Car: 2012 F350 lariot/1991 Camaro RS
Engine: Powerstroke/6.0
Transmission: 6R100/4L80e
Axle/Gears: 3.73/3.42
Re: The ULTIMATE budget paint job (pic heavy)
hot rod mag just did an article on this they got the rustoleum flat black and a can of acetone sanded the car with 240 thats it and sprayed it and it looks good
its this months mag
its this months mag

Junior Member
Joined: Aug 2004
Posts: 37
Likes: 0
From: Tallahassee Florida
Car: 92 Camaro RS Heritage Edition
Engine: 355 V8
Transmission: 700R4
Re: The ULTIMATE budget paint job (pic heavy)
I'm really tempted to try this with my car. The only concern i have is what happens with the Enamel paint on the plastic bumper covers when they flex? Is it just going to crack immediately or does it give a little?
Thread Starter
Supreme Member
Joined: Jan 2007
Posts: 1,002
Likes: 12
From: Bastrop, TX
Car: 1988 SC Convertible
Engine: LT-1
Transmission: 700R4
Axle/Gears: 3.23 posi w/PBR's
Re: The ULTIMATE budget paint job (pic heavy)
NO need for flex agent if you paint with the bumpers on the car. It doesn't crack. I was rough with the nose leaning on it after it was painted for over a year with no issues.

Junior Member
Joined: Sep 2011
Posts: 16
Likes: 0
Re: The ULTIMATE budget paint job (pic heavy)
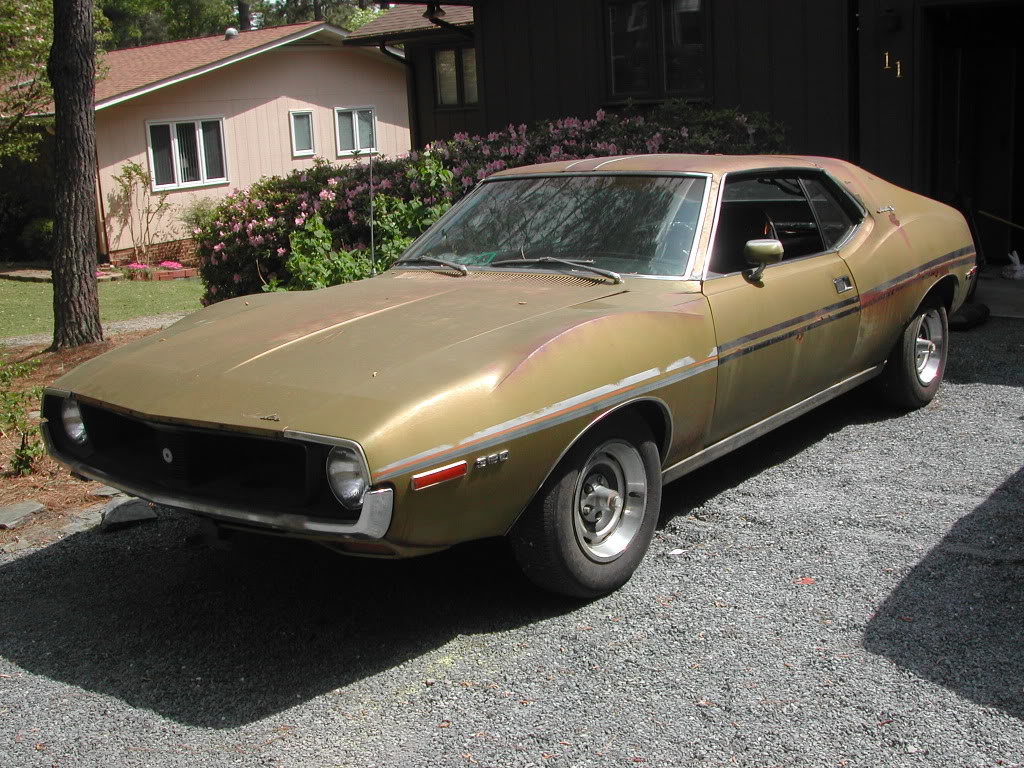
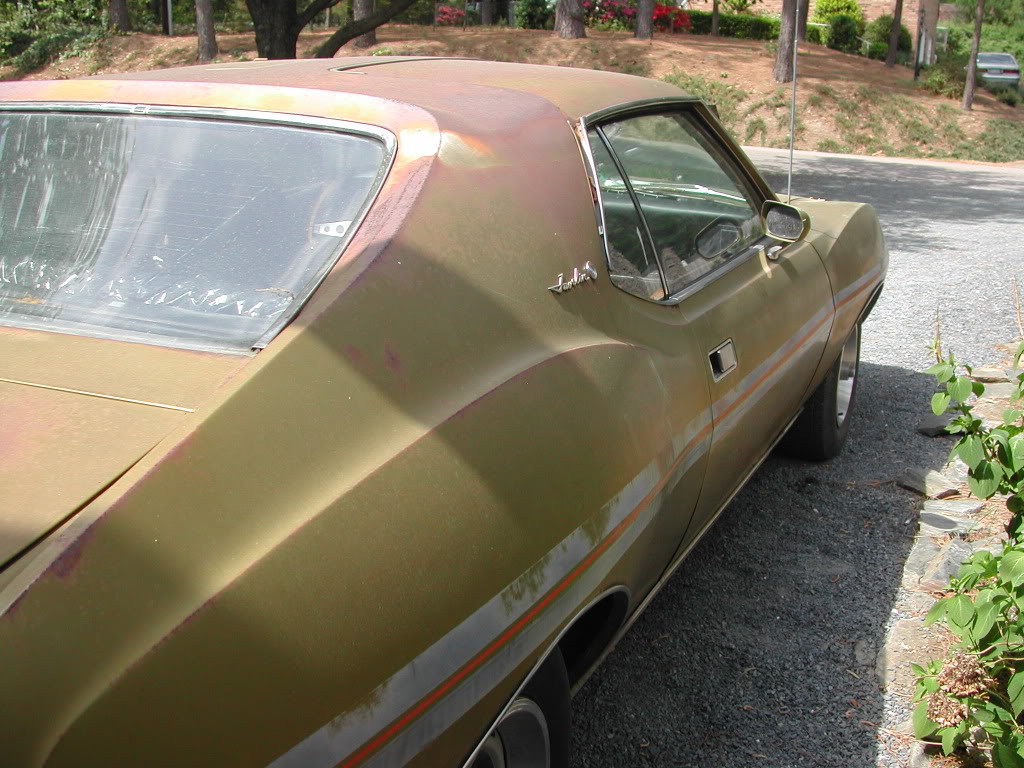
great work. I did the rustoleum roller job on a 71 Javelin I picked up that had sat for 20 plus years with a bunch of surface rust. It was not selling and the guy had to get rid of cars and I got it before he was about to part it out. Pretty ugly up close but going by fast or from ten paces not so bad.
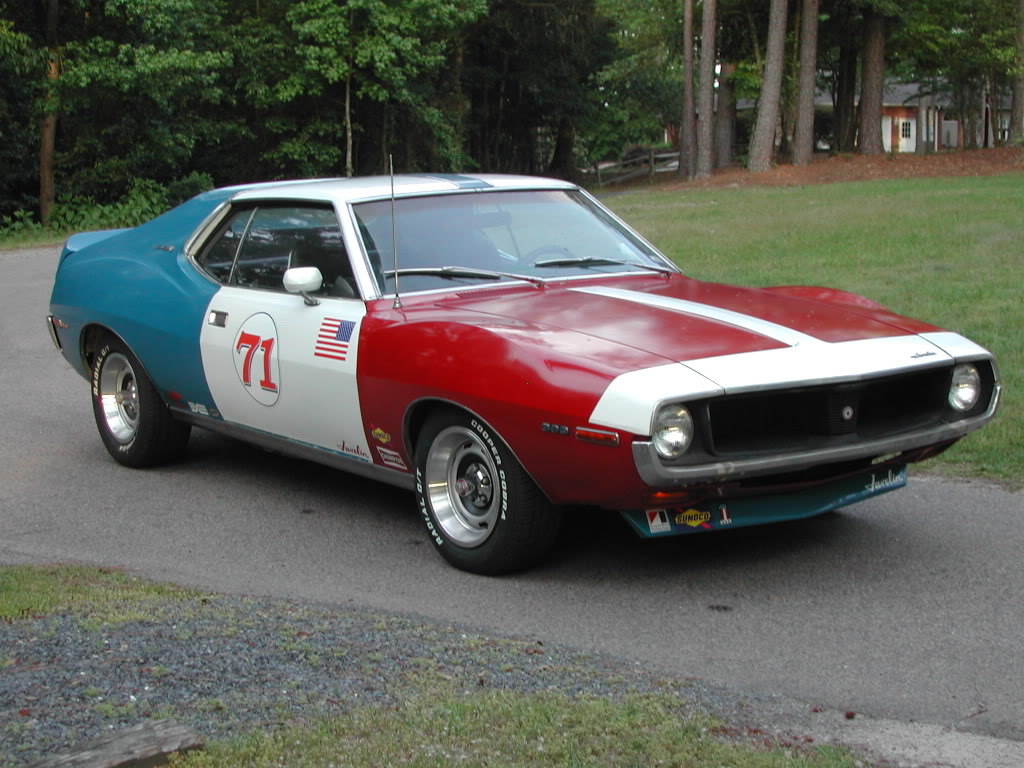
http://www.youtube.com/watch?v=-MXl8VJ6dUw
The time for all the coats is a pain, I did it outside also, and it sure does dull fast like you said. It also never cures real hard and scratches are a problem. (As is tape pulling off pain if your kids decide to tape some pictures to car...)
I did a rattle can spray rustoleum job on a 74 Roadrunner that was about to get crushed or scrapped before I got it.
It was a small block automatic I got a free 73 Satellite interior for and some wrong pattern/color buckets, but it had a cool window crank sunroof I got working... sort of.

When I tried some sample pieces like the valence and stuff with clear rattle can, it either made it less shiny, or I had to spray real thick and wet and made it shinier but also runs. I also had problems with my overspray taking off some of the gloss when I was putting on the black.
I like your idea of the spray on hardened enamel. Did you have to strip your rustoleum enamel, or could you have prepped than and sprayed?
Thanks for any info.
http://www.youtube.com/watch?v=-MXl8VJ6dUw
The time for all the coats is a pain, I did it outside also, and it sure does dull fast like you said. It also never cures real hard and scratches are a problem. (As is tape pulling off pain if your kids decide to tape some pictures to car...)
I did a rattle can spray rustoleum job on a 74 Roadrunner that was about to get crushed or scrapped before I got it.
It was a small block automatic I got a free 73 Satellite interior for and some wrong pattern/color buckets, but it had a cool window crank sunroof I got working... sort of.
When I tried some sample pieces like the valence and stuff with clear rattle can, it either made it less shiny, or I had to spray real thick and wet and made it shinier but also runs. I also had problems with my overspray taking off some of the gloss when I was putting on the black.
I like your idea of the spray on hardened enamel. Did you have to strip your rustoleum enamel, or could you have prepped than and sprayed?
Thanks for any info.

Member
Joined: Aug 2011
Posts: 173
Likes: 0
From: miami
Car: 87 camaro Z28 convertible
Engine: 350 carb
Transmission: th-700r4
Axle/Gears: Posi traction 3.42 gears
Re: The ULTIMATE budget paint job (pic heavy)
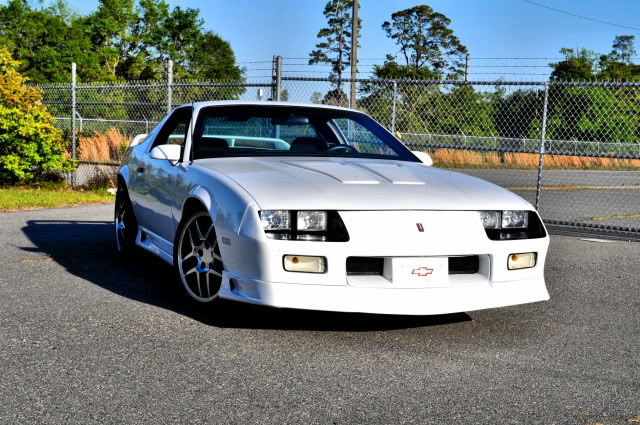
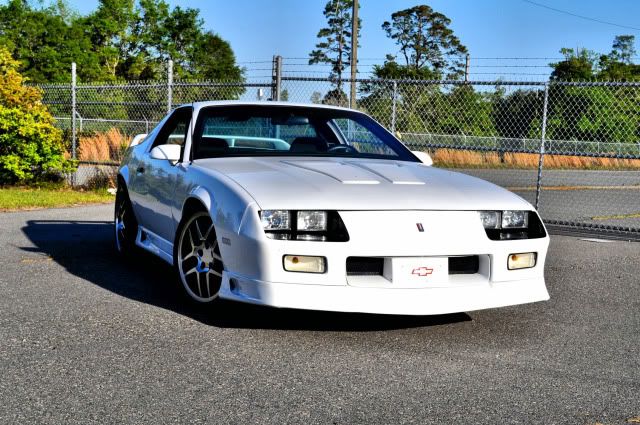
The white one looks sweet .
Where can I buy some of the valspar paint
Where can I buy some of the valspar paint
Member
Joined: Sep 2011
Posts: 120
Likes: 0
From: Seoul, South Korea
Car: 1990 RS
Engine: SBC 350 YearOne Crate
Transmission: T56 (LT1)
Axle/Gears: 3.73
Re: The ULTIMATE budget paint job (pic heavy)
.I did a DIY paint job but caught some serious orange peelage lol. But you paint job look like you sprayed the wetsand on with the paint::: good job man!

Member
iTrader: (1)
Joined: Nov 2008
Posts: 291
Likes: 0
From: Sinking Spring, Pa
Car: 91' camaro rs and an 87' trans am
Engine: stang eater..slower ones. lolololol
Transmission: 700r4-camaro t5-trans am
Axle/Gears: stock :(
Re: The ULTIMATE budget paint job (pic heavy)
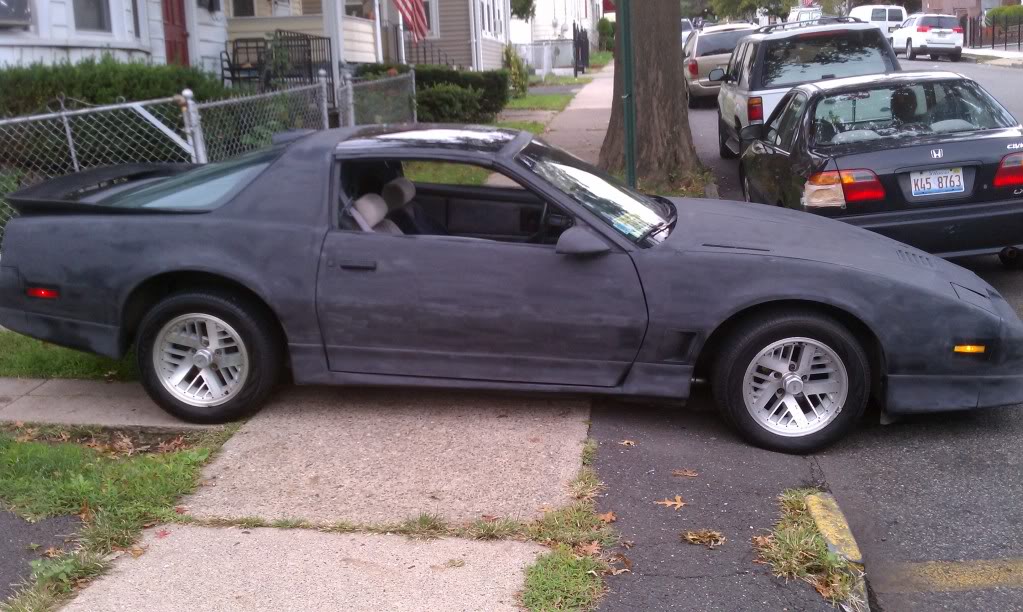
heres my $500 paint job..$320 for supplies and i gave the guy 180 to paint it....
did it in a garage...
did it in a garage...
Member
iTrader: (1)
Joined: Nov 2008
Posts: 291
Likes: 0
From: Sinking Spring, Pa
Car: 91' camaro rs and an 87' trans am
Engine: stang eater..slower ones. lolololol
Transmission: 700r4-camaro t5-trans am
Axle/Gears: stock :(
Re: The ULTIMATE budget paint job (pic heavy)
There 255/60/15 all the way around, i only payed $400 for them.
To add to my pics- it is gm black paint and the guy who did it is a bidy shop guy. Me and my buddy e ded up only sanding it for. Total of 5hrs...and it was painted and finished the night before super chevy at maple grove. I had signs up saying wet paint do not touch hhahahahahahahha
To add to my pics- it is gm black paint and the guy who did it is a bidy shop guy. Me and my buddy e ded up only sanding it for. Total of 5hrs...and it was painted and finished the night before super chevy at maple grove. I had signs up saying wet paint do not touch hhahahahahahahha

Junior Member
Joined: Aug 2010
Posts: 11
Likes: 0
Re: The ULTIMATE budget paint job (pic heavy)
There 255/60/15 all the way around, i only payed $400 for them.
To add to my pics- it is gm black paint and the guy who did it is a bidy shop guy. Me and my buddy e ded up only sanding it for. Total of 5hrs...and it was painted and finished the night before super chevy at maple grove. I had signs up saying wet paint do not touch hhahahahahahahha
To add to my pics- it is gm black paint and the guy who did it is a bidy shop guy. Me and my buddy e ded up only sanding it for. Total of 5hrs...and it was painted and finished the night before super chevy at maple grove. I had signs up saying wet paint do not touch hhahahahahahahha
Looks really nice what brand paint did you use?
Member
iTrader: (1)
Joined: Nov 2008
Posts: 291
Likes: 0
From: Sinking Spring, Pa
Car: 91' camaro rs and an 87' trans am
Engine: stang eater..slower ones. lolololol
Transmission: 700r4-camaro t5-trans am
Axle/Gears: stock :(
Re: The ULTIMATE budget paint job (pic heavy)
alls i know its a GM black..gallon of black and i think 3-4 coats of clear...ohh and filler
Member
iTrader: (3)
Joined: Dec 2008
Posts: 418
Likes: 0
From: Culpeper, Va
Car: 1989 5.7 IROC Dark Red/Blk 92Z28
Engine: 5.7
Transmission: 700R
Re: The ULTIMATE budget paint job (pic heavy)
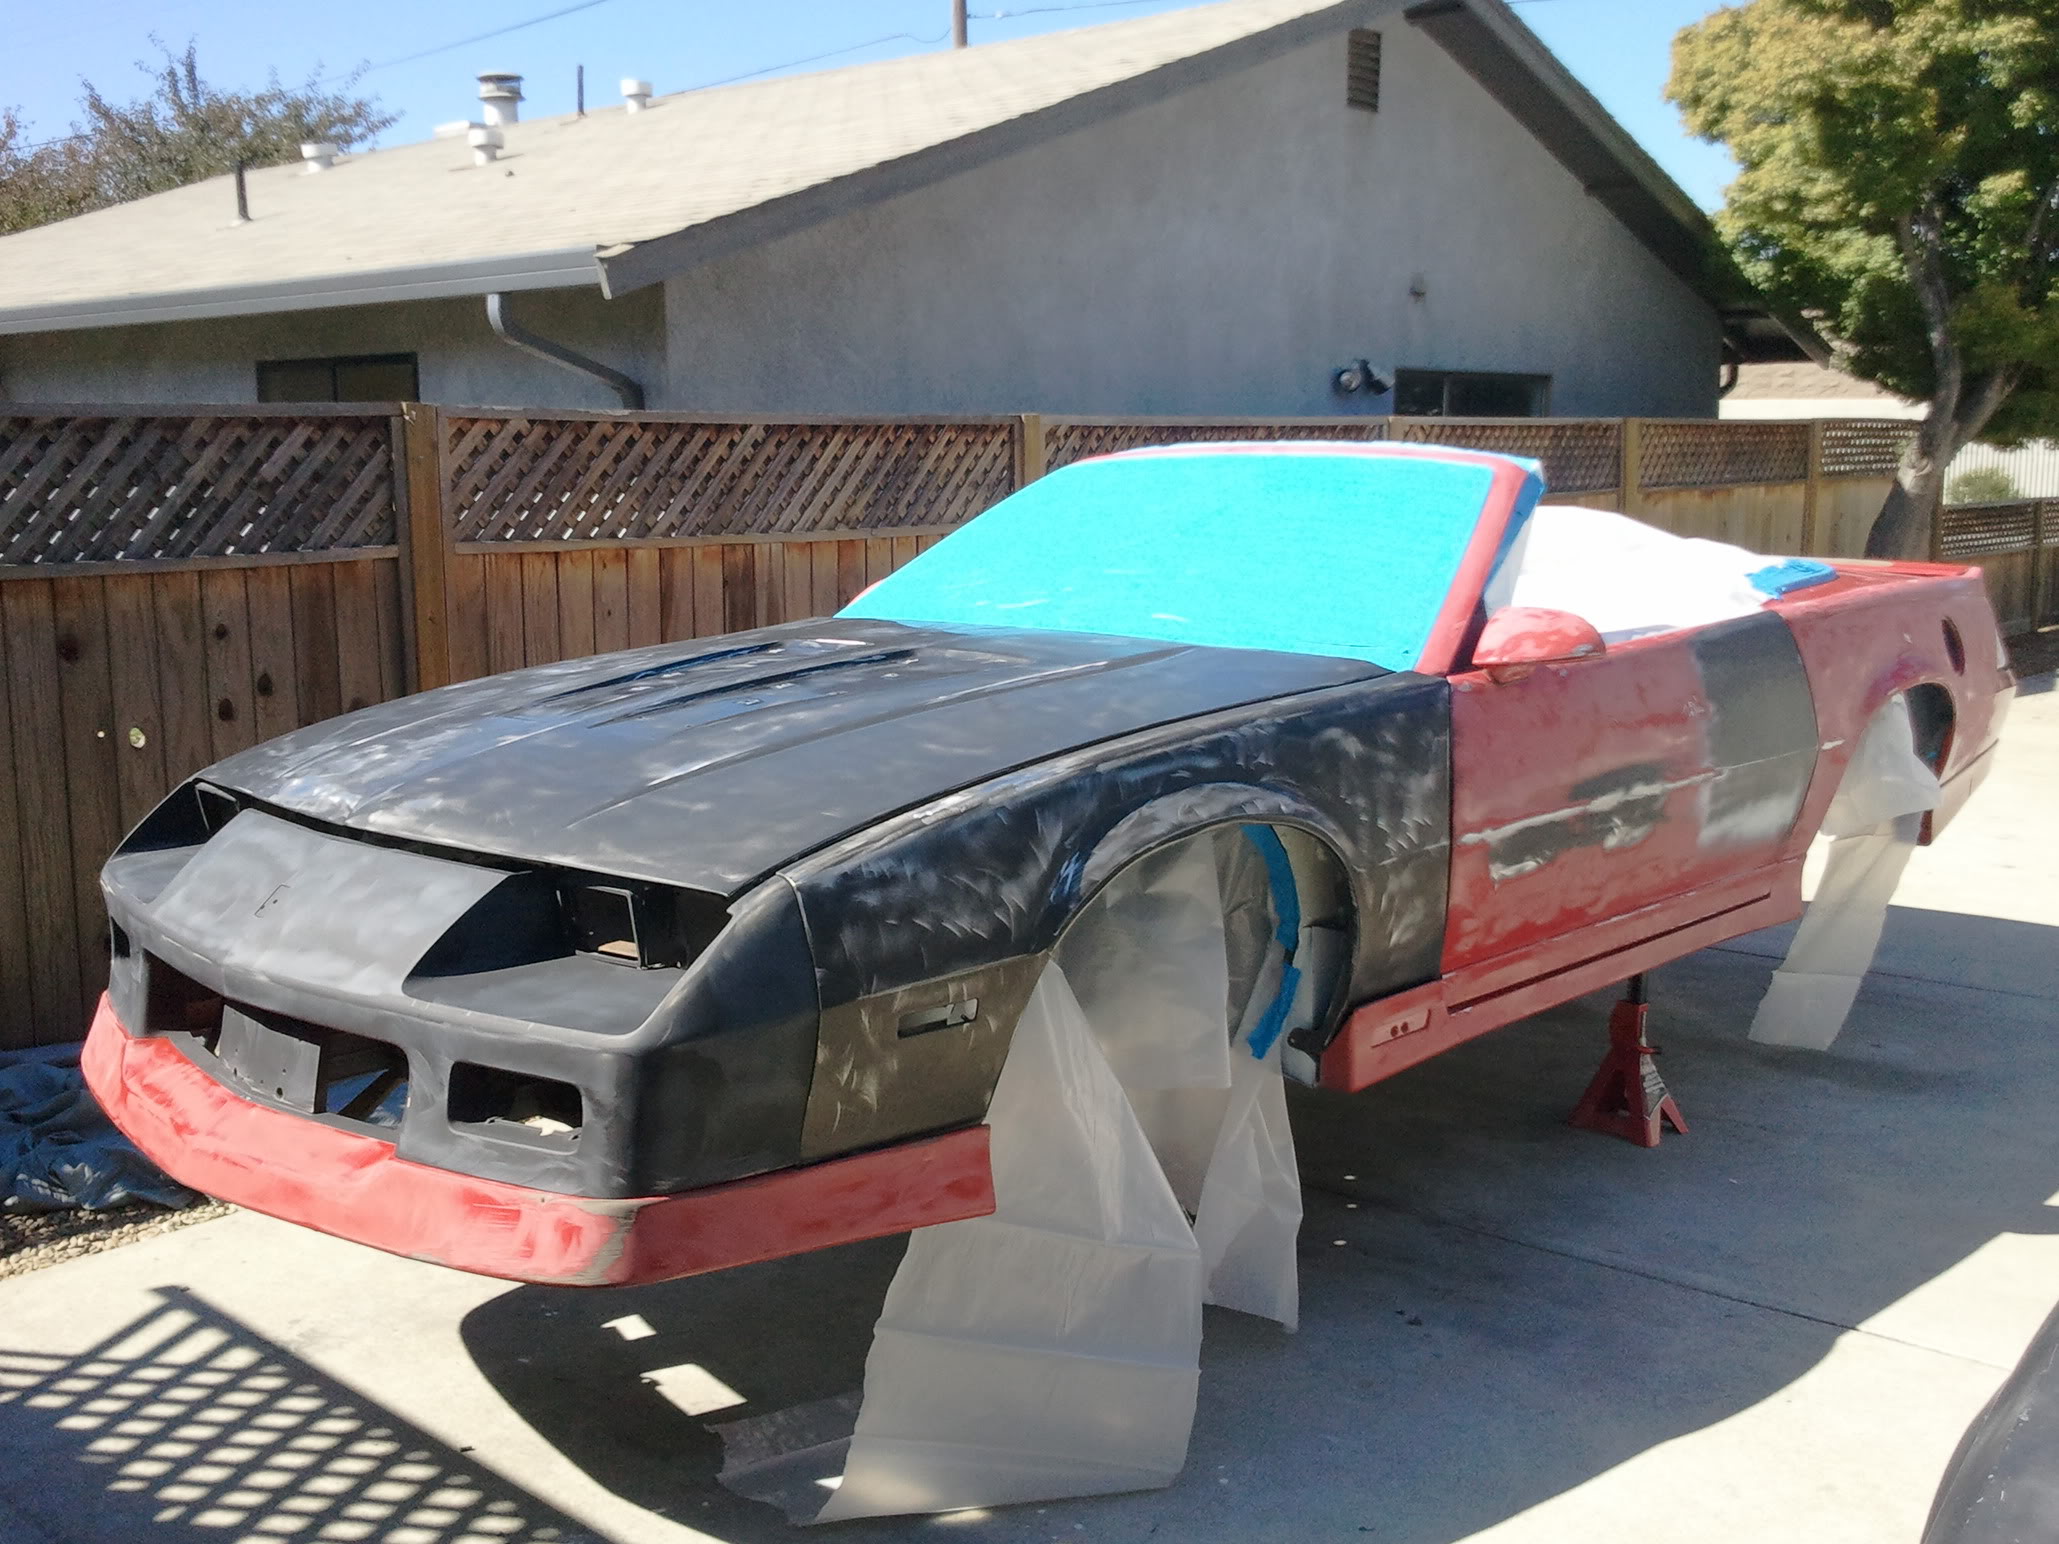
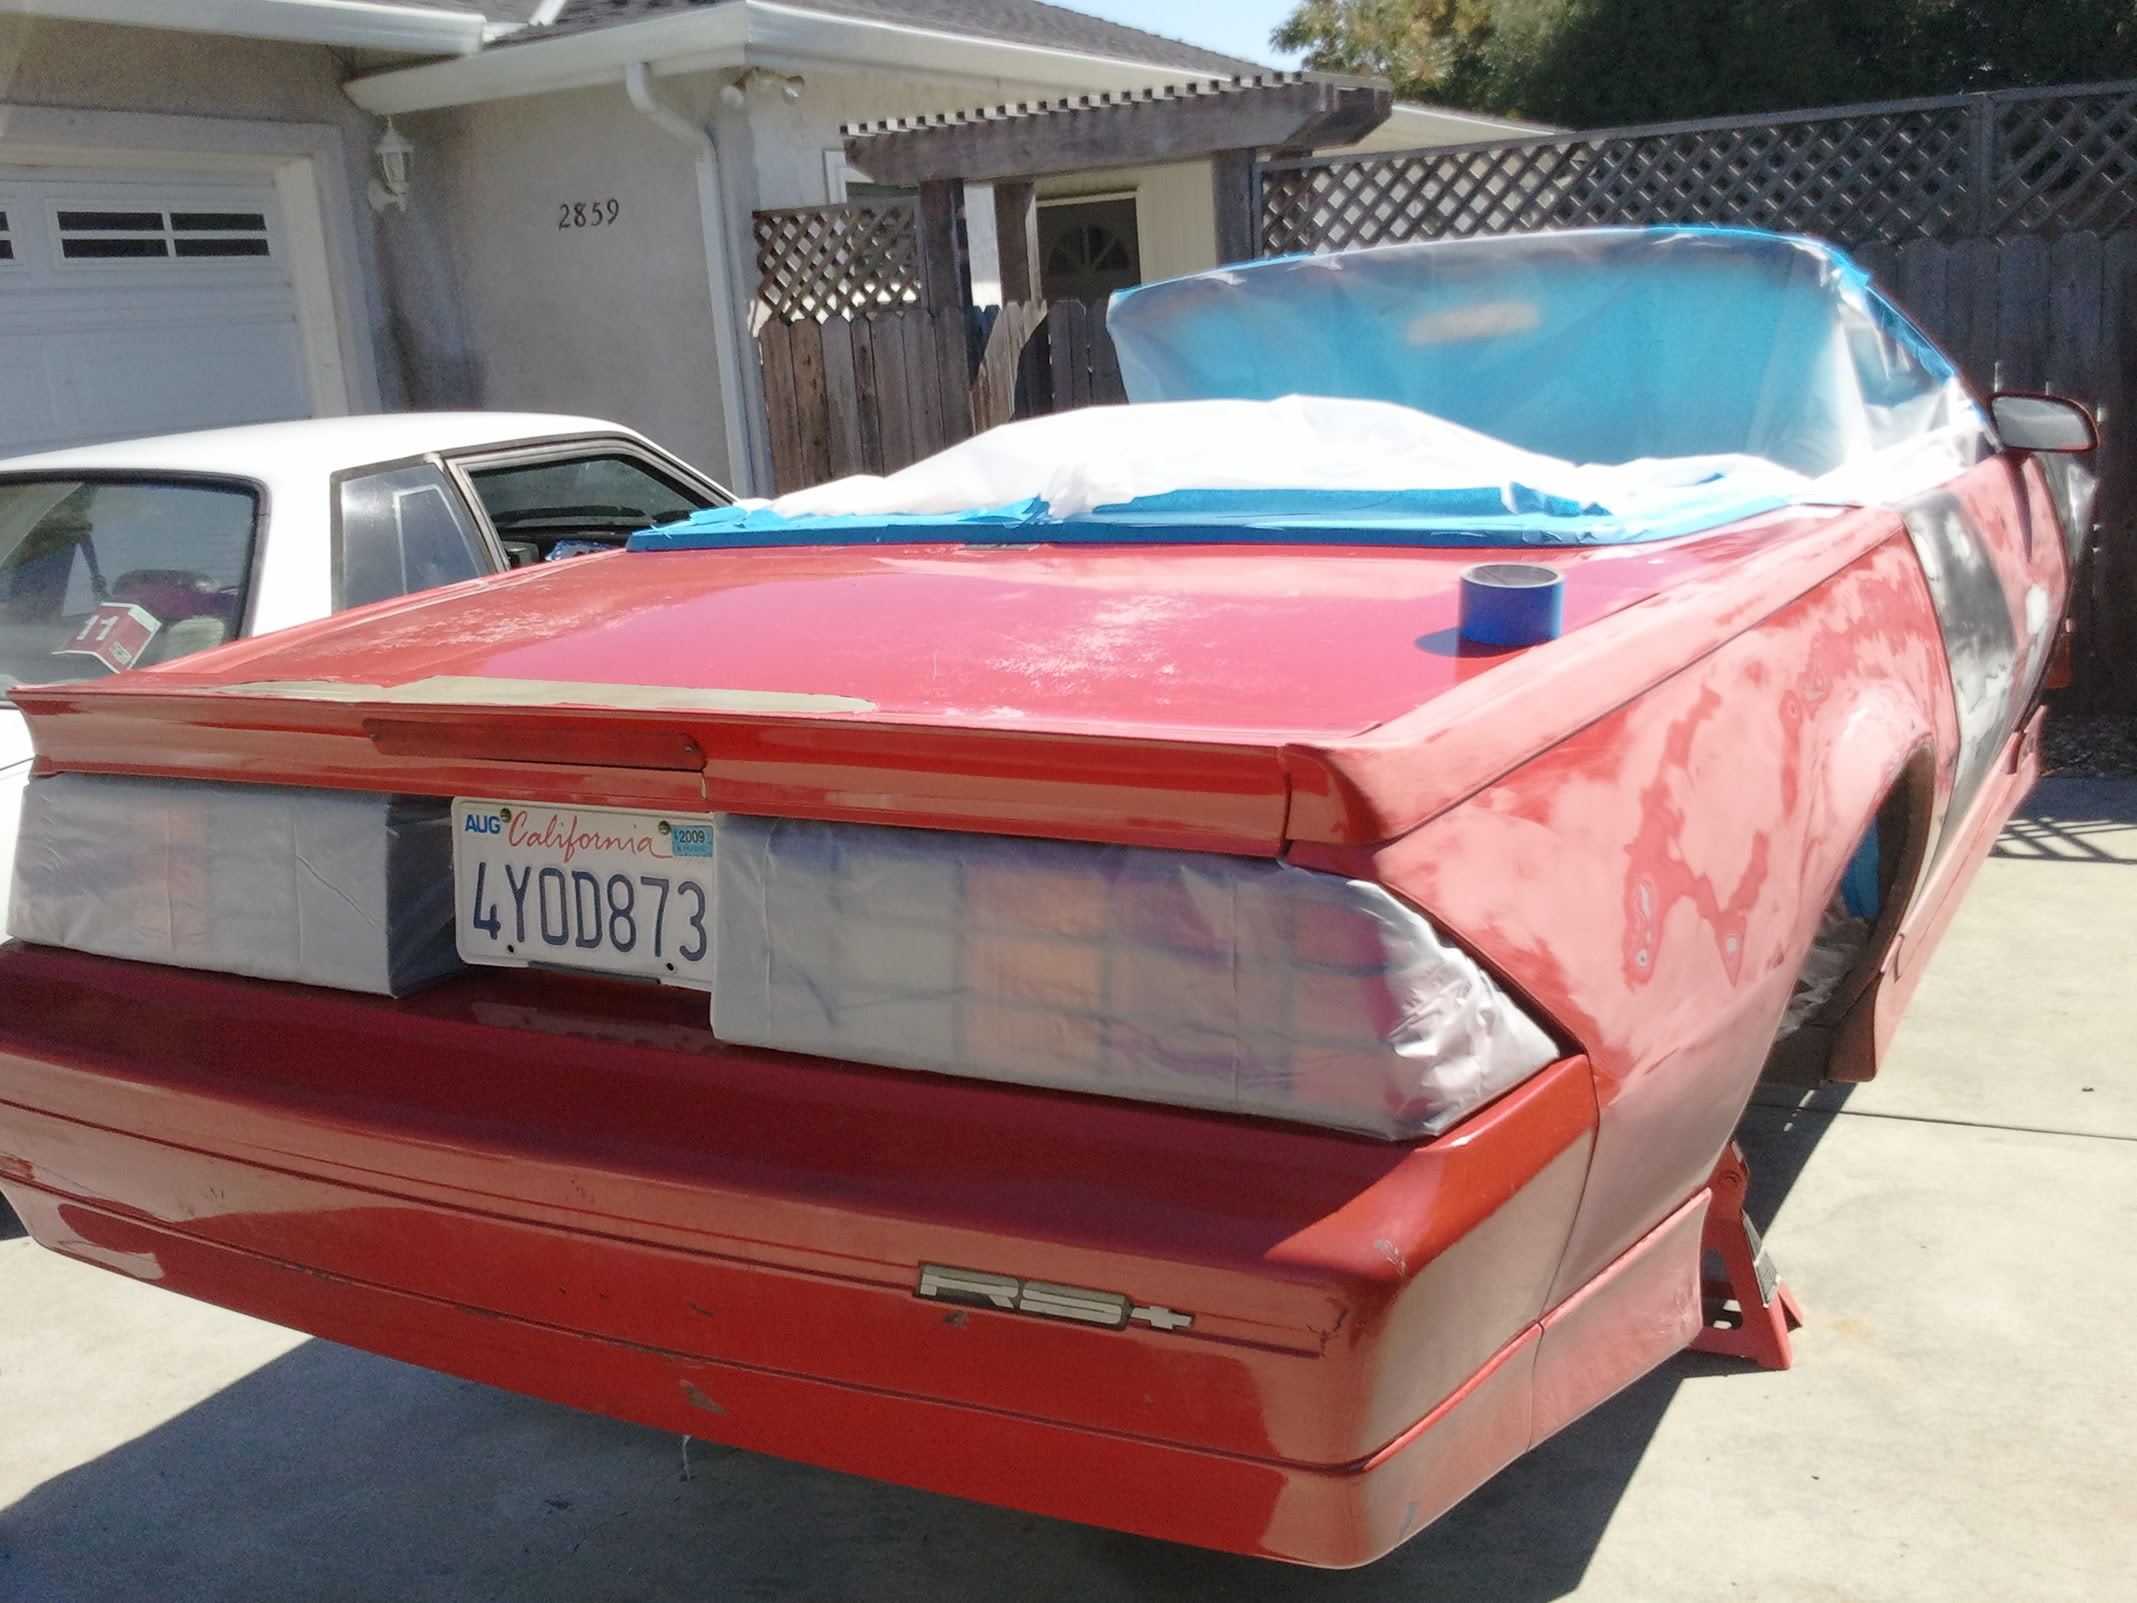
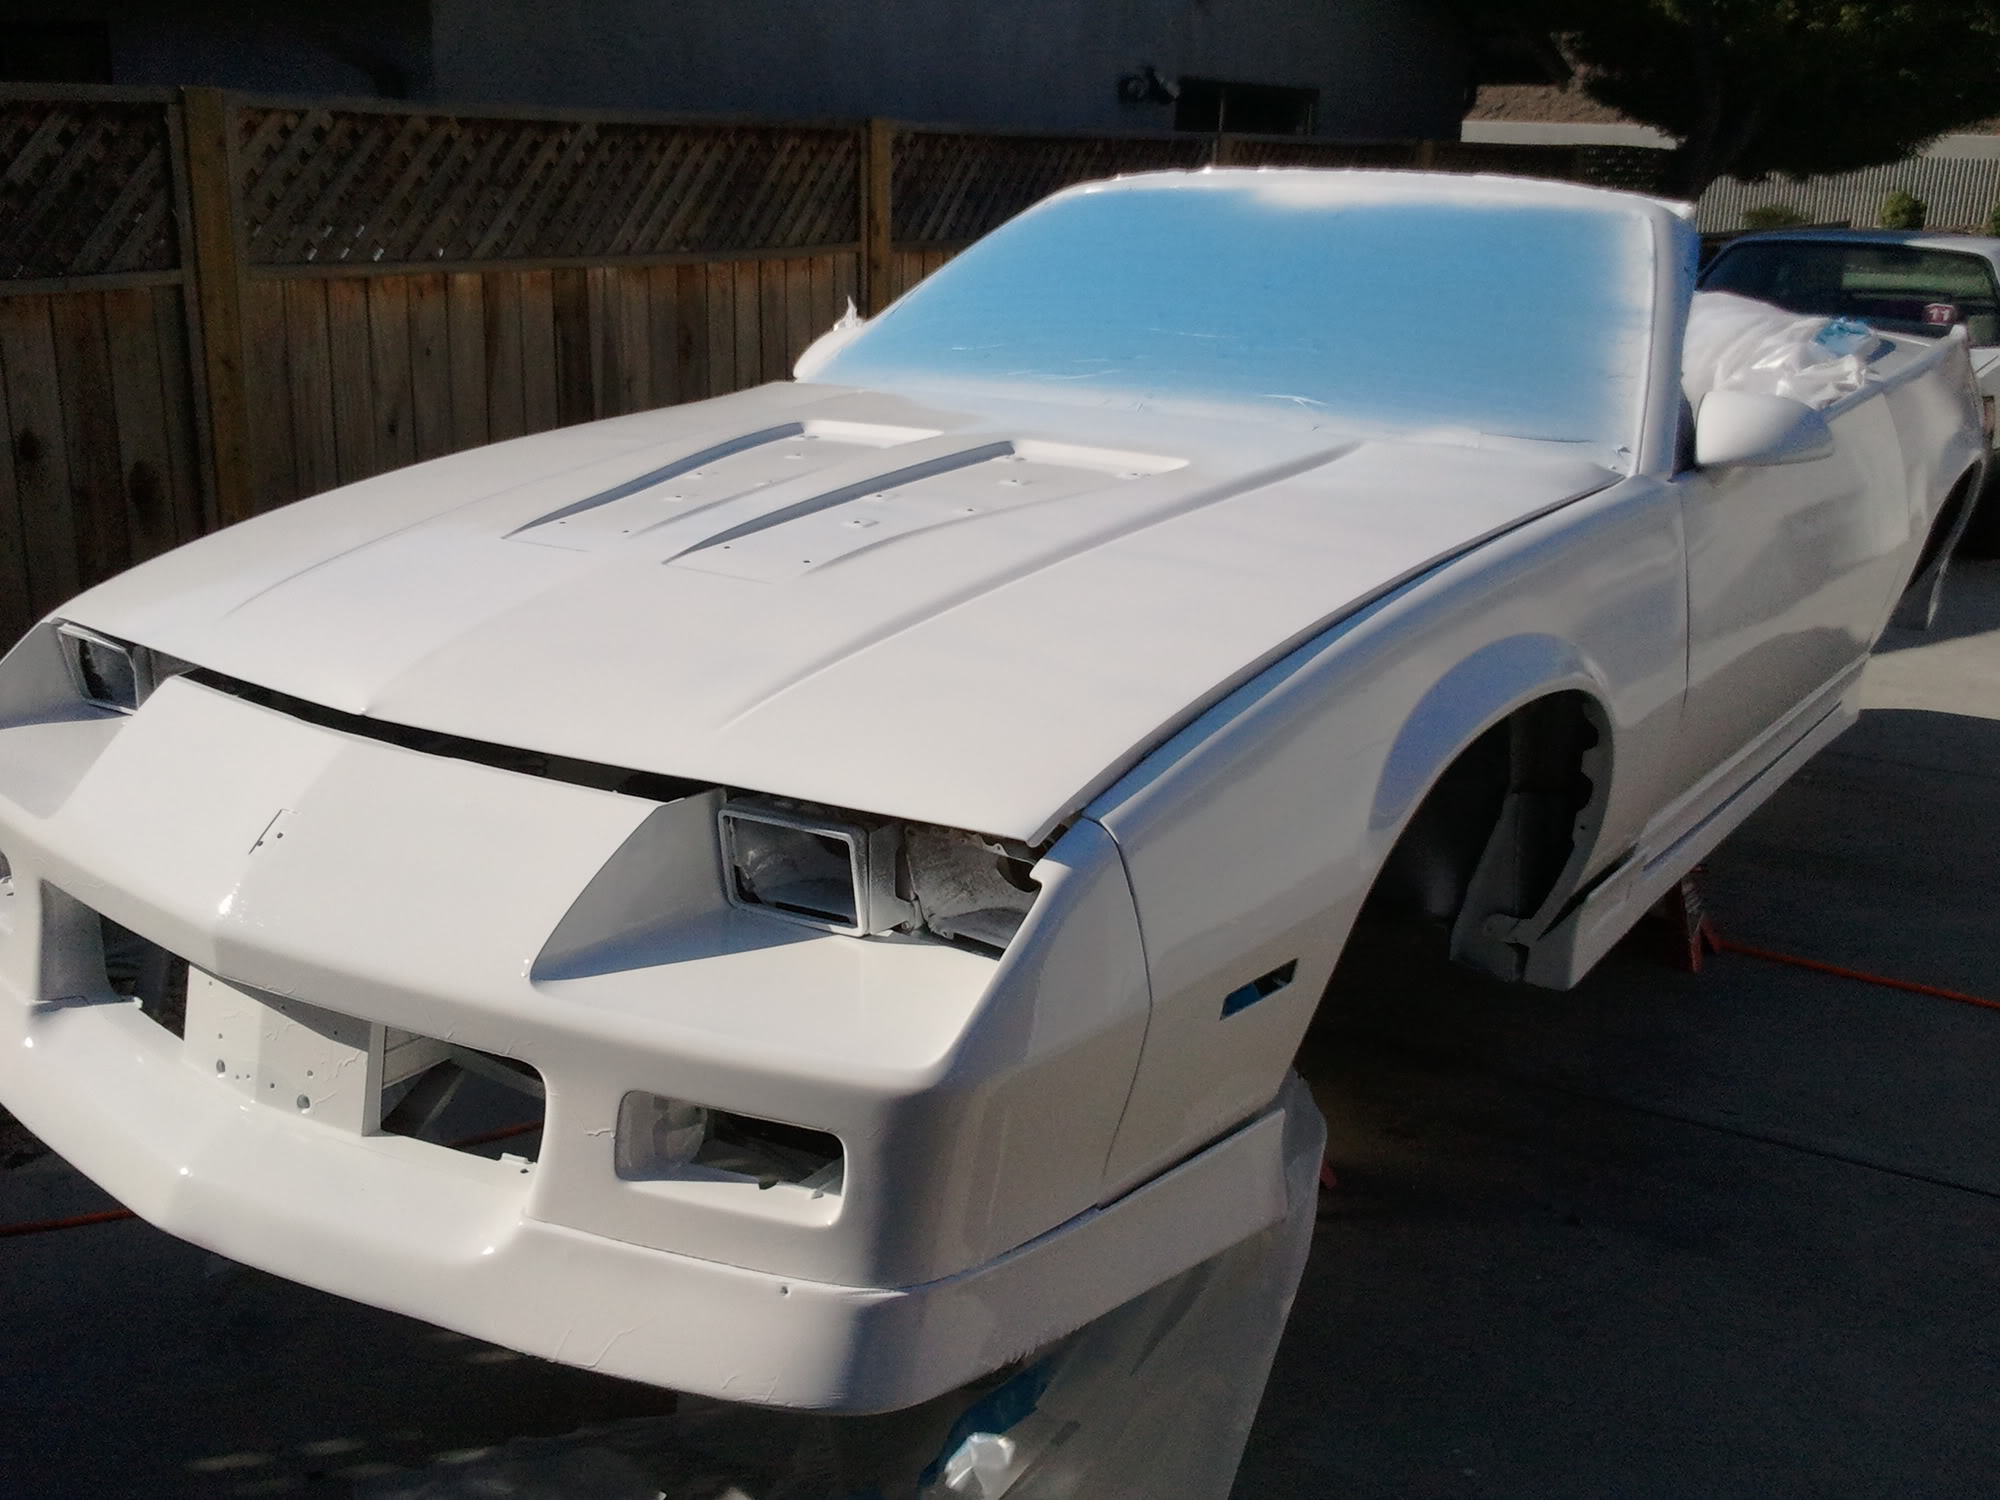
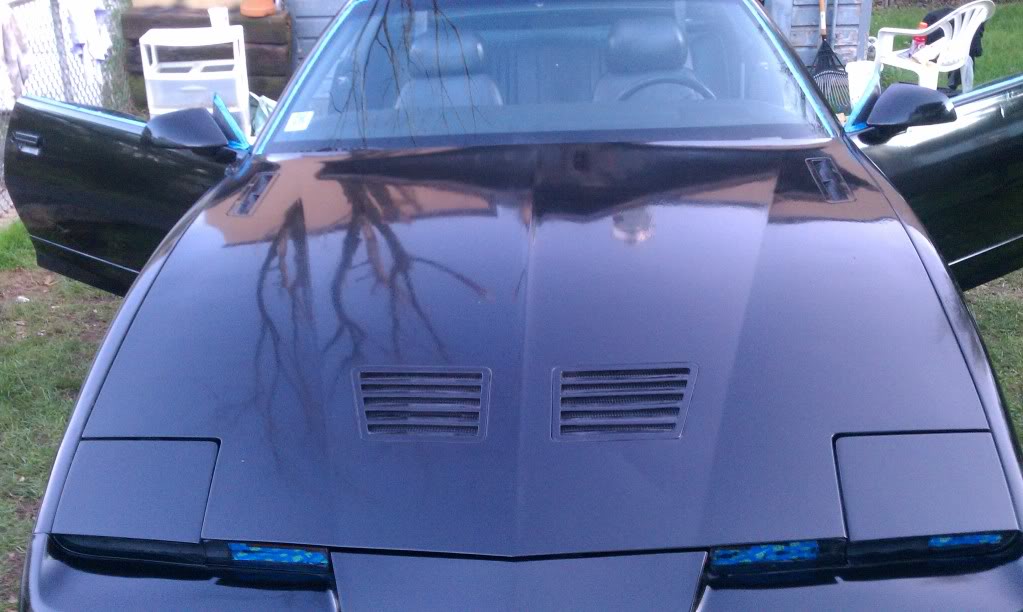
Some of you probably remember my original budget paint job thread that centered around using Rust-O-leum. While that produced a decent paint job at a very affordable price, the upkeep on said paint job was quite a bit of work. It required nearly weekly waxing to keep it from dulling. So, I decided to strip all of the Rustoleum off and start over again with a better paint that I know for a fact can withstand the extreme sun in Central Texas.
The paint that I used this time is Valspar Tractor & Implement paint. I've used it many times in the past on various horse & cattle trailers and it holds up great. The best part is that it's only $29.99/gallon. Of course there are added expenses such as thinner and hardener. It suggests using naptha as a thinner for spraying, and it works great.
Here is what I used:

Paint material costs:
1 gallon Valspar Massey Ferguson Red - $29.99
1 gallon Naptha ---------------------- $13.99
2 8oz cans of hardener--------------- $12.99 (X2)
-----------------------------------------------
Total cost for just paint supplies-------$69.96
This does NOT include all the sand paper, masking tape, etc.. that goes into a paint job.
I disregarded the mixing instructions on the paint. I poured 16oz of paint out of the can and mixed in both cans of hardener (The paint calls for only 1). Then I used a 2:1 mixture of paint to naptha.
After all the prep work was done I sprayed the paint with the $12 purple HVLP gun from Harbor Freight. My compressor is a 25 gallon Craftsman.
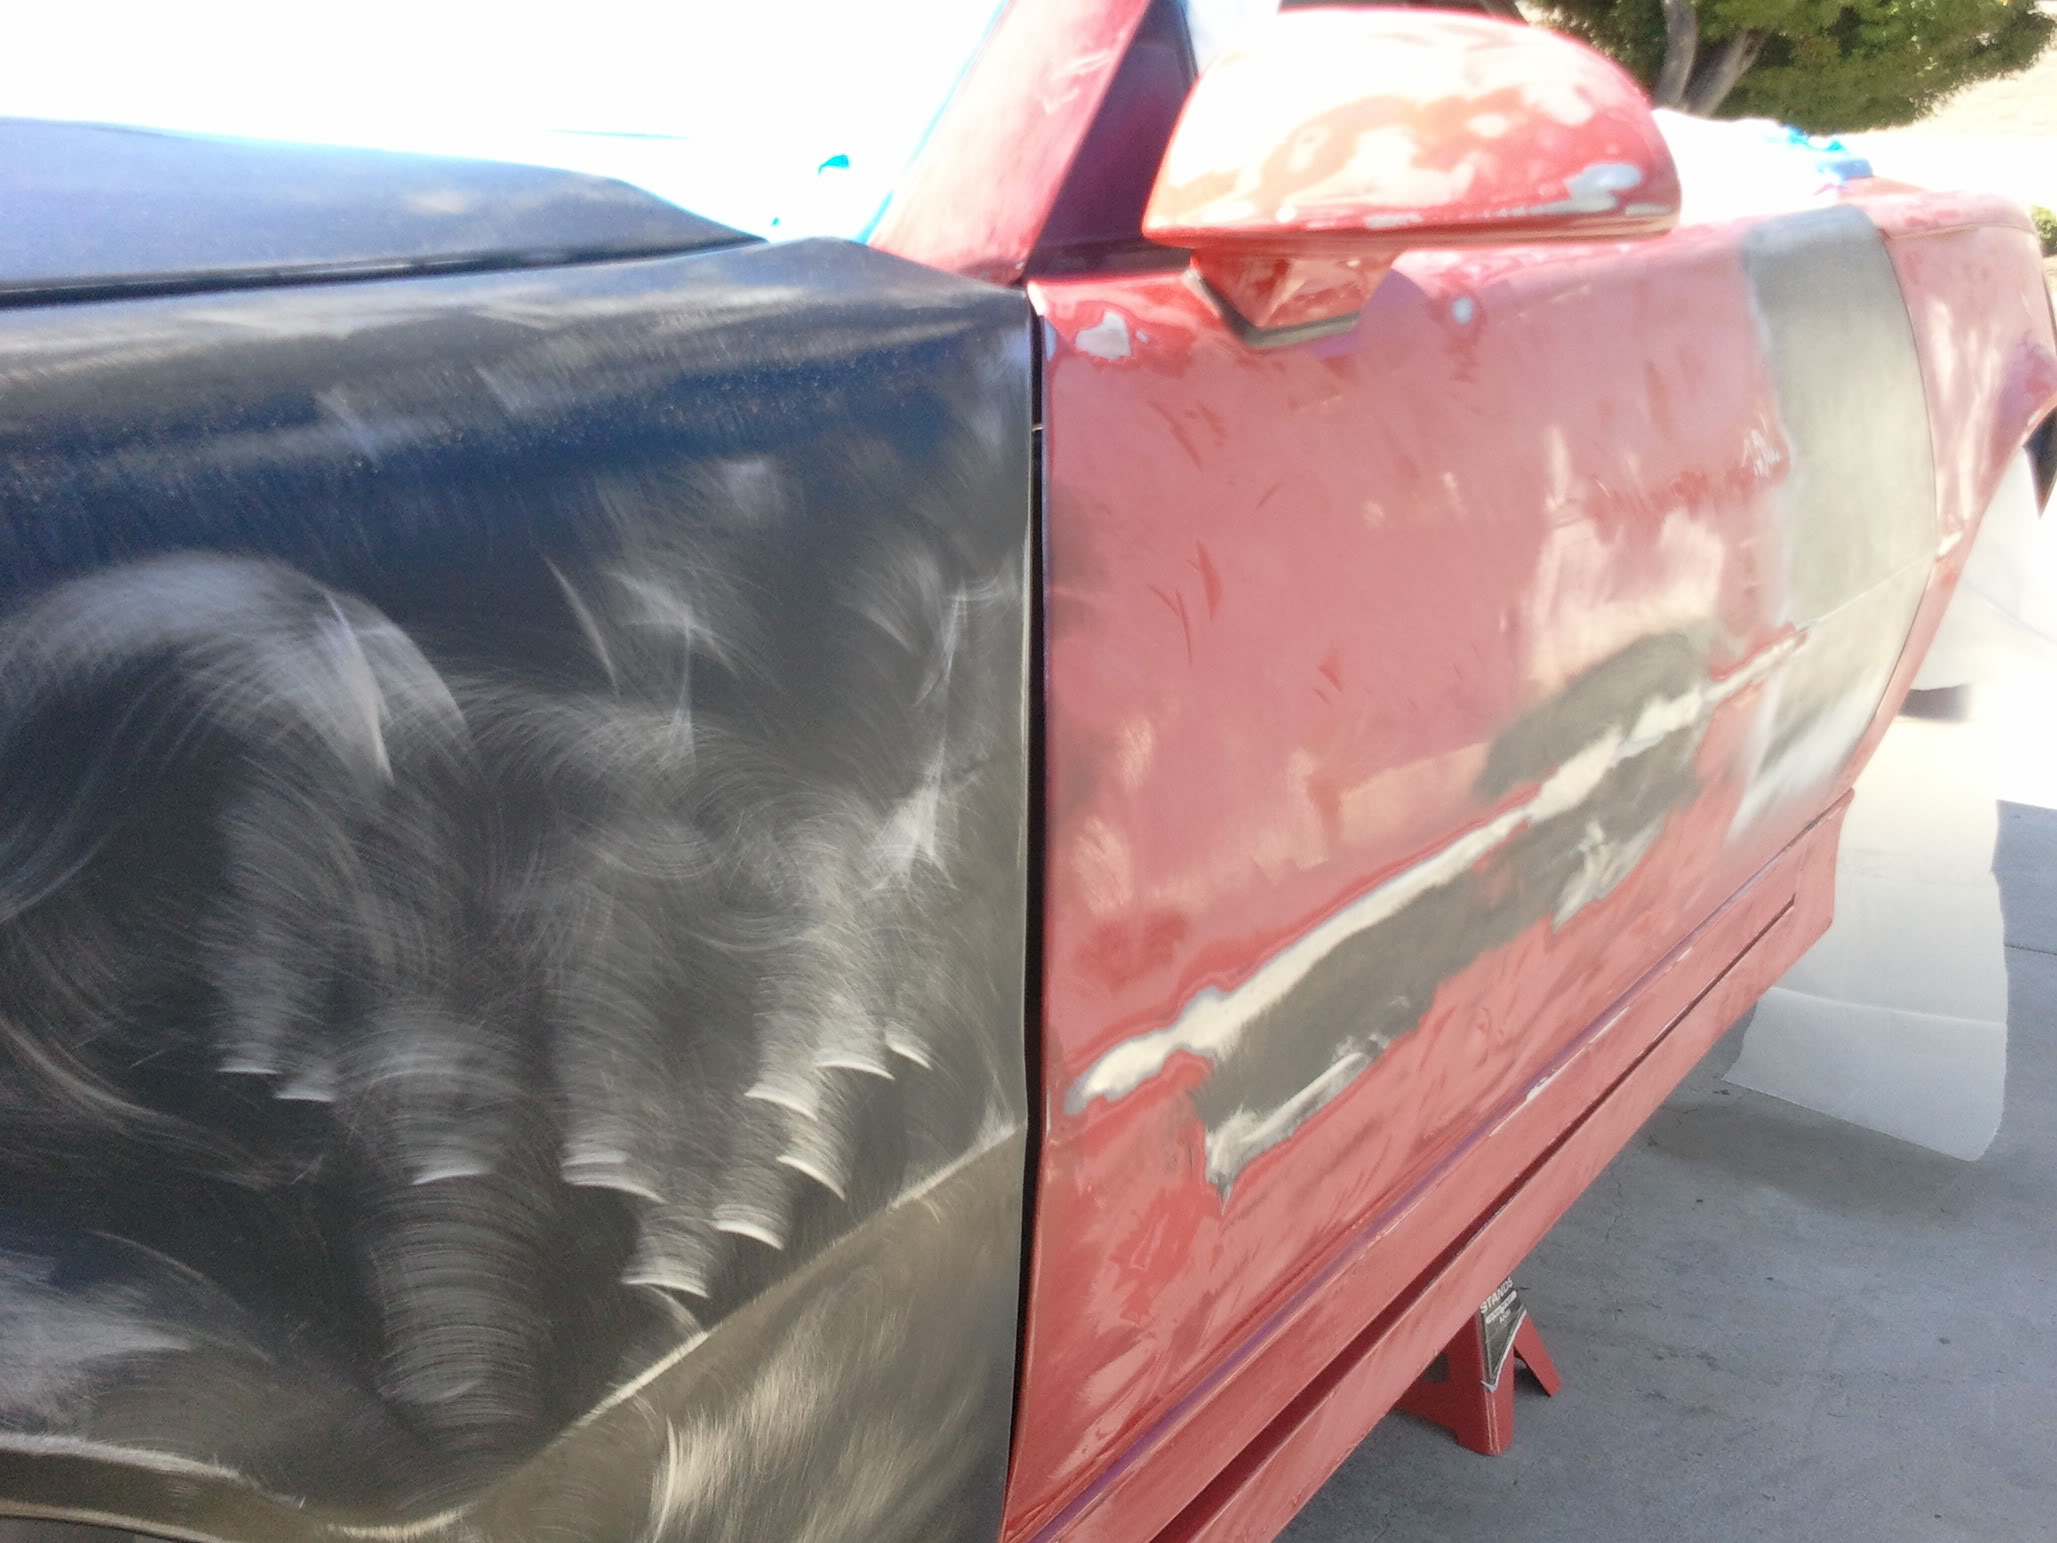
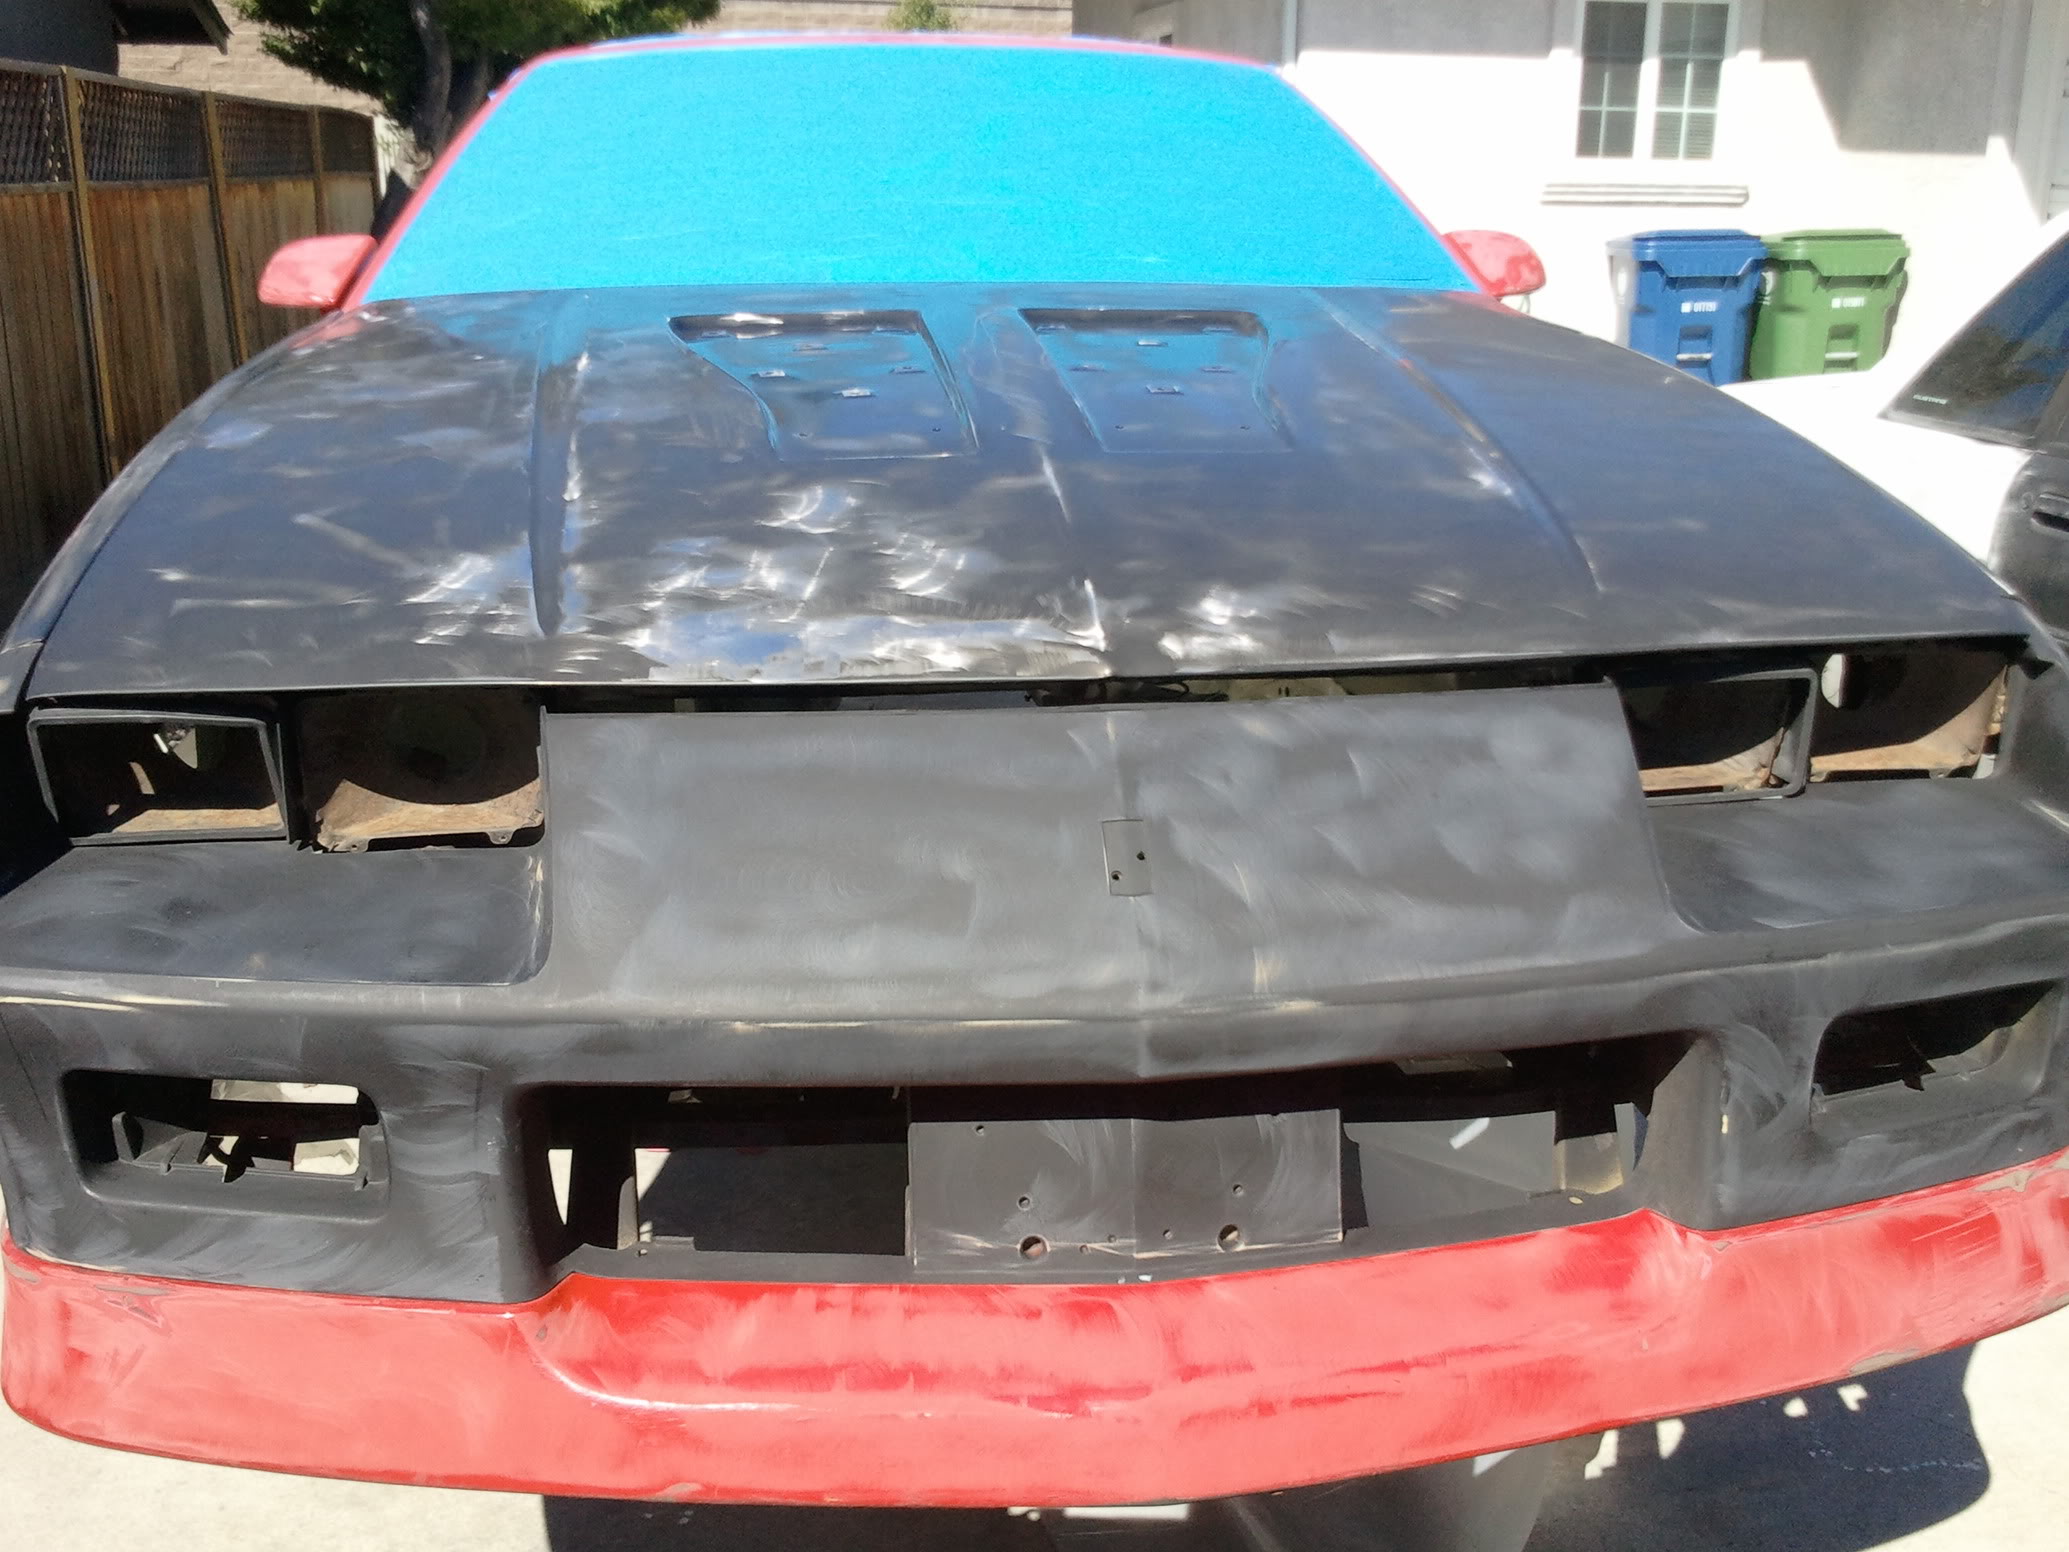
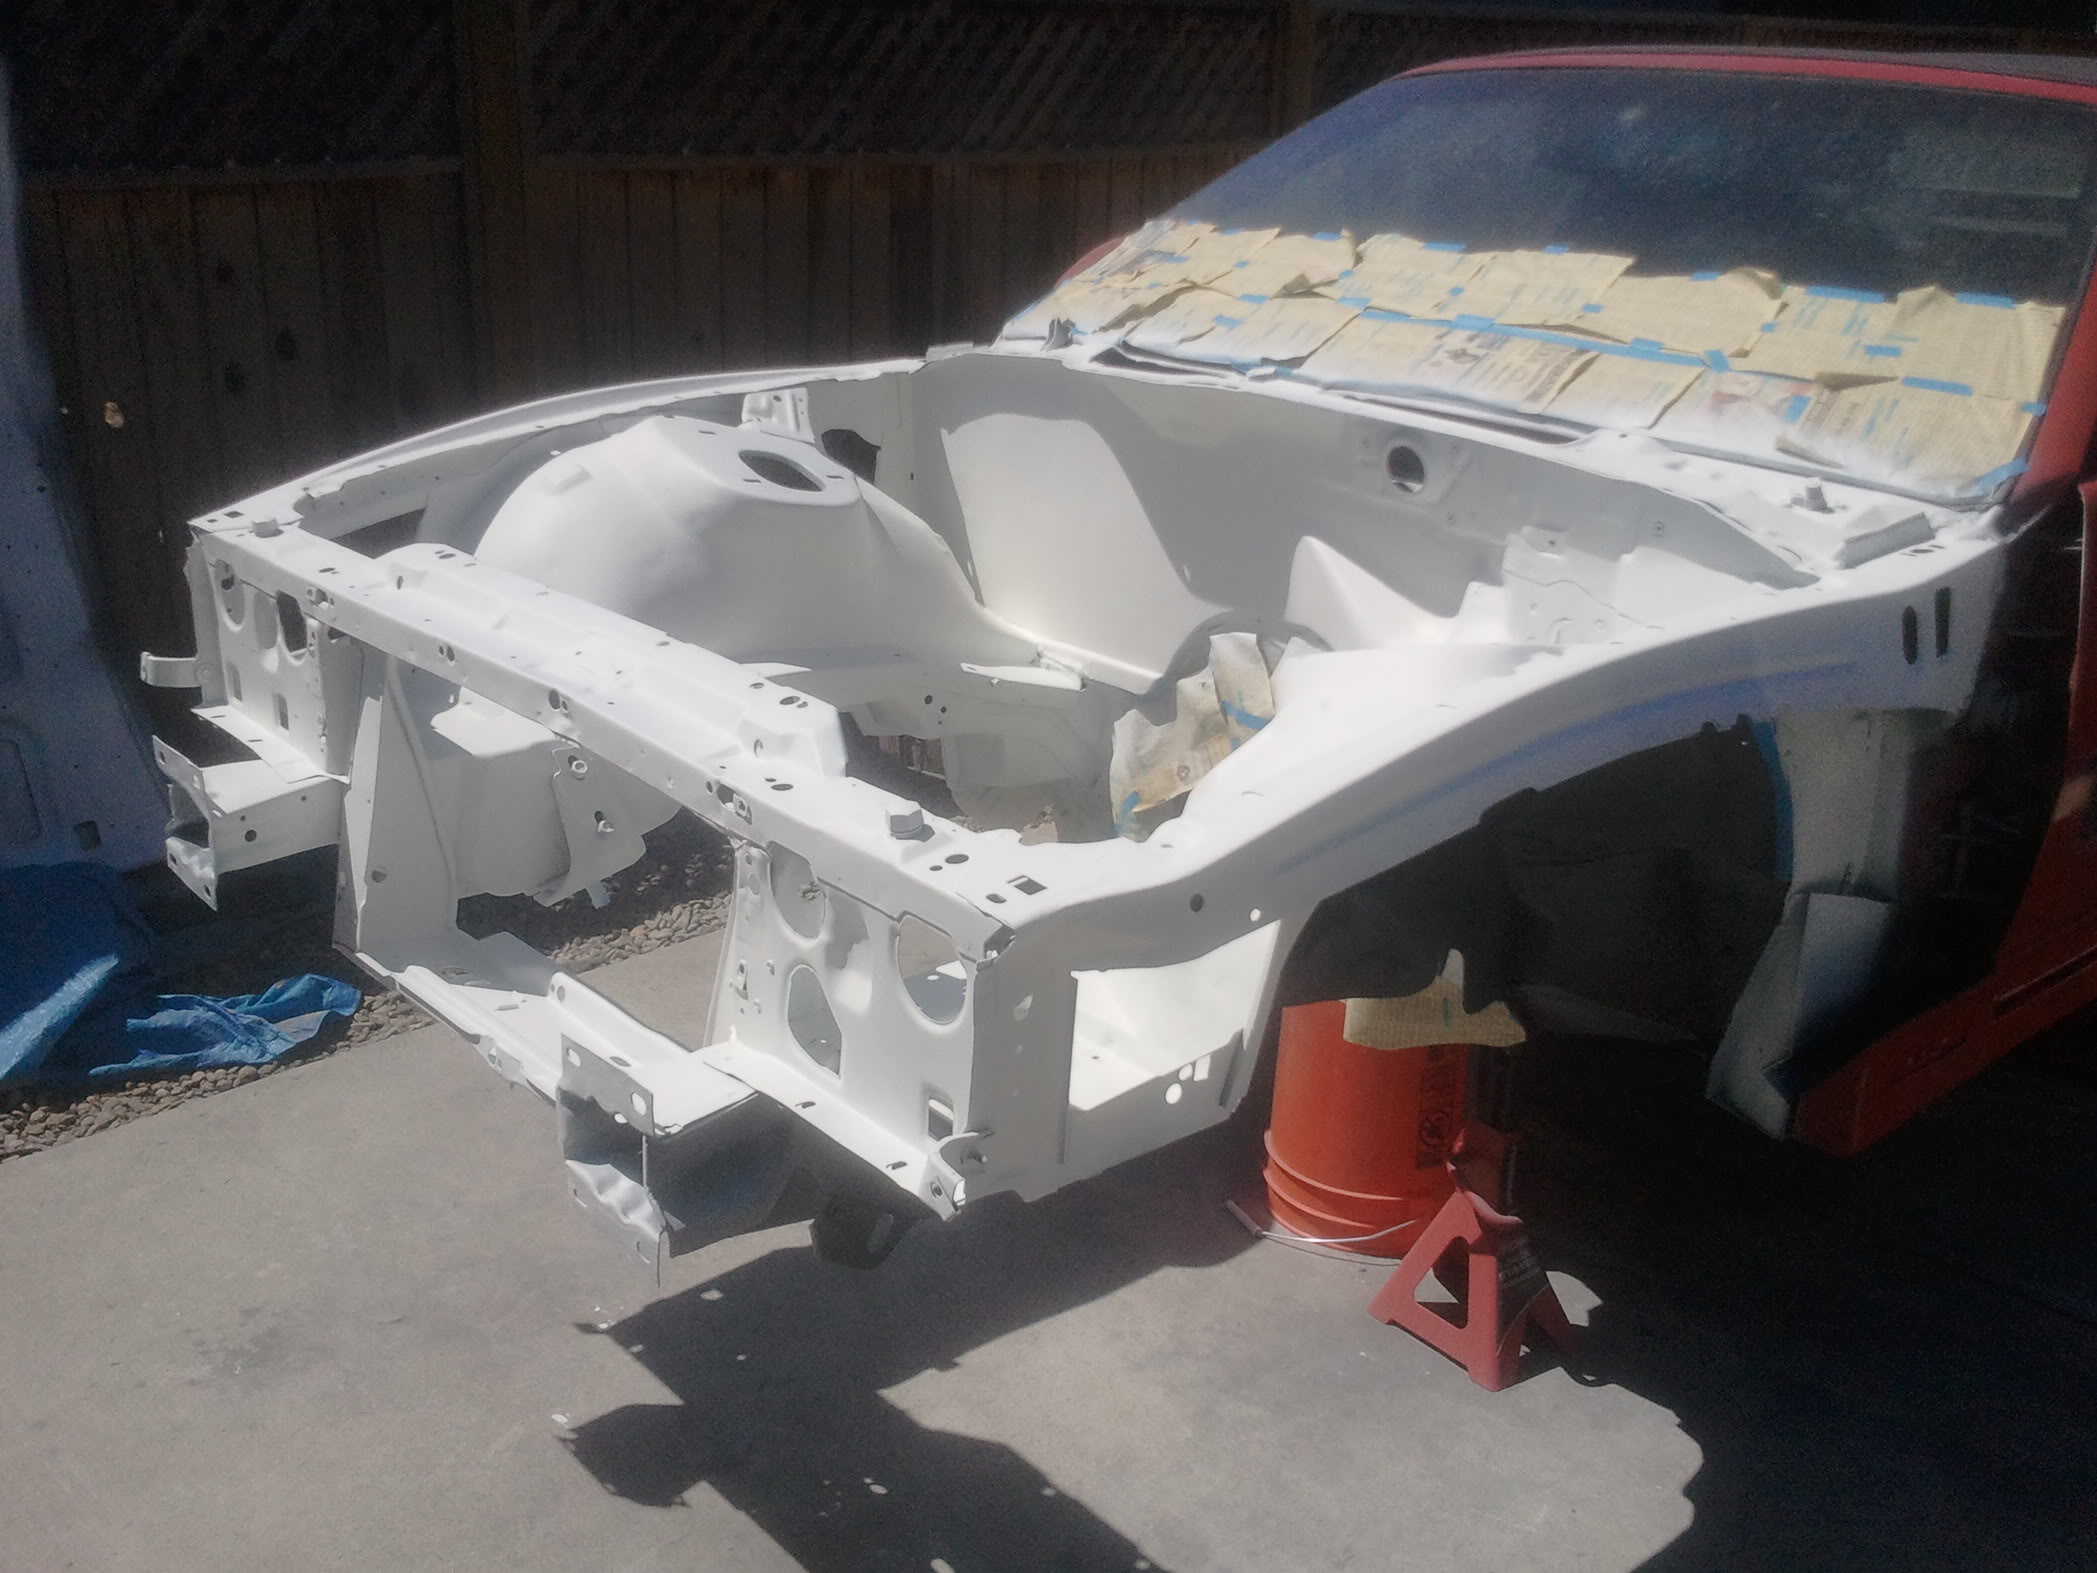
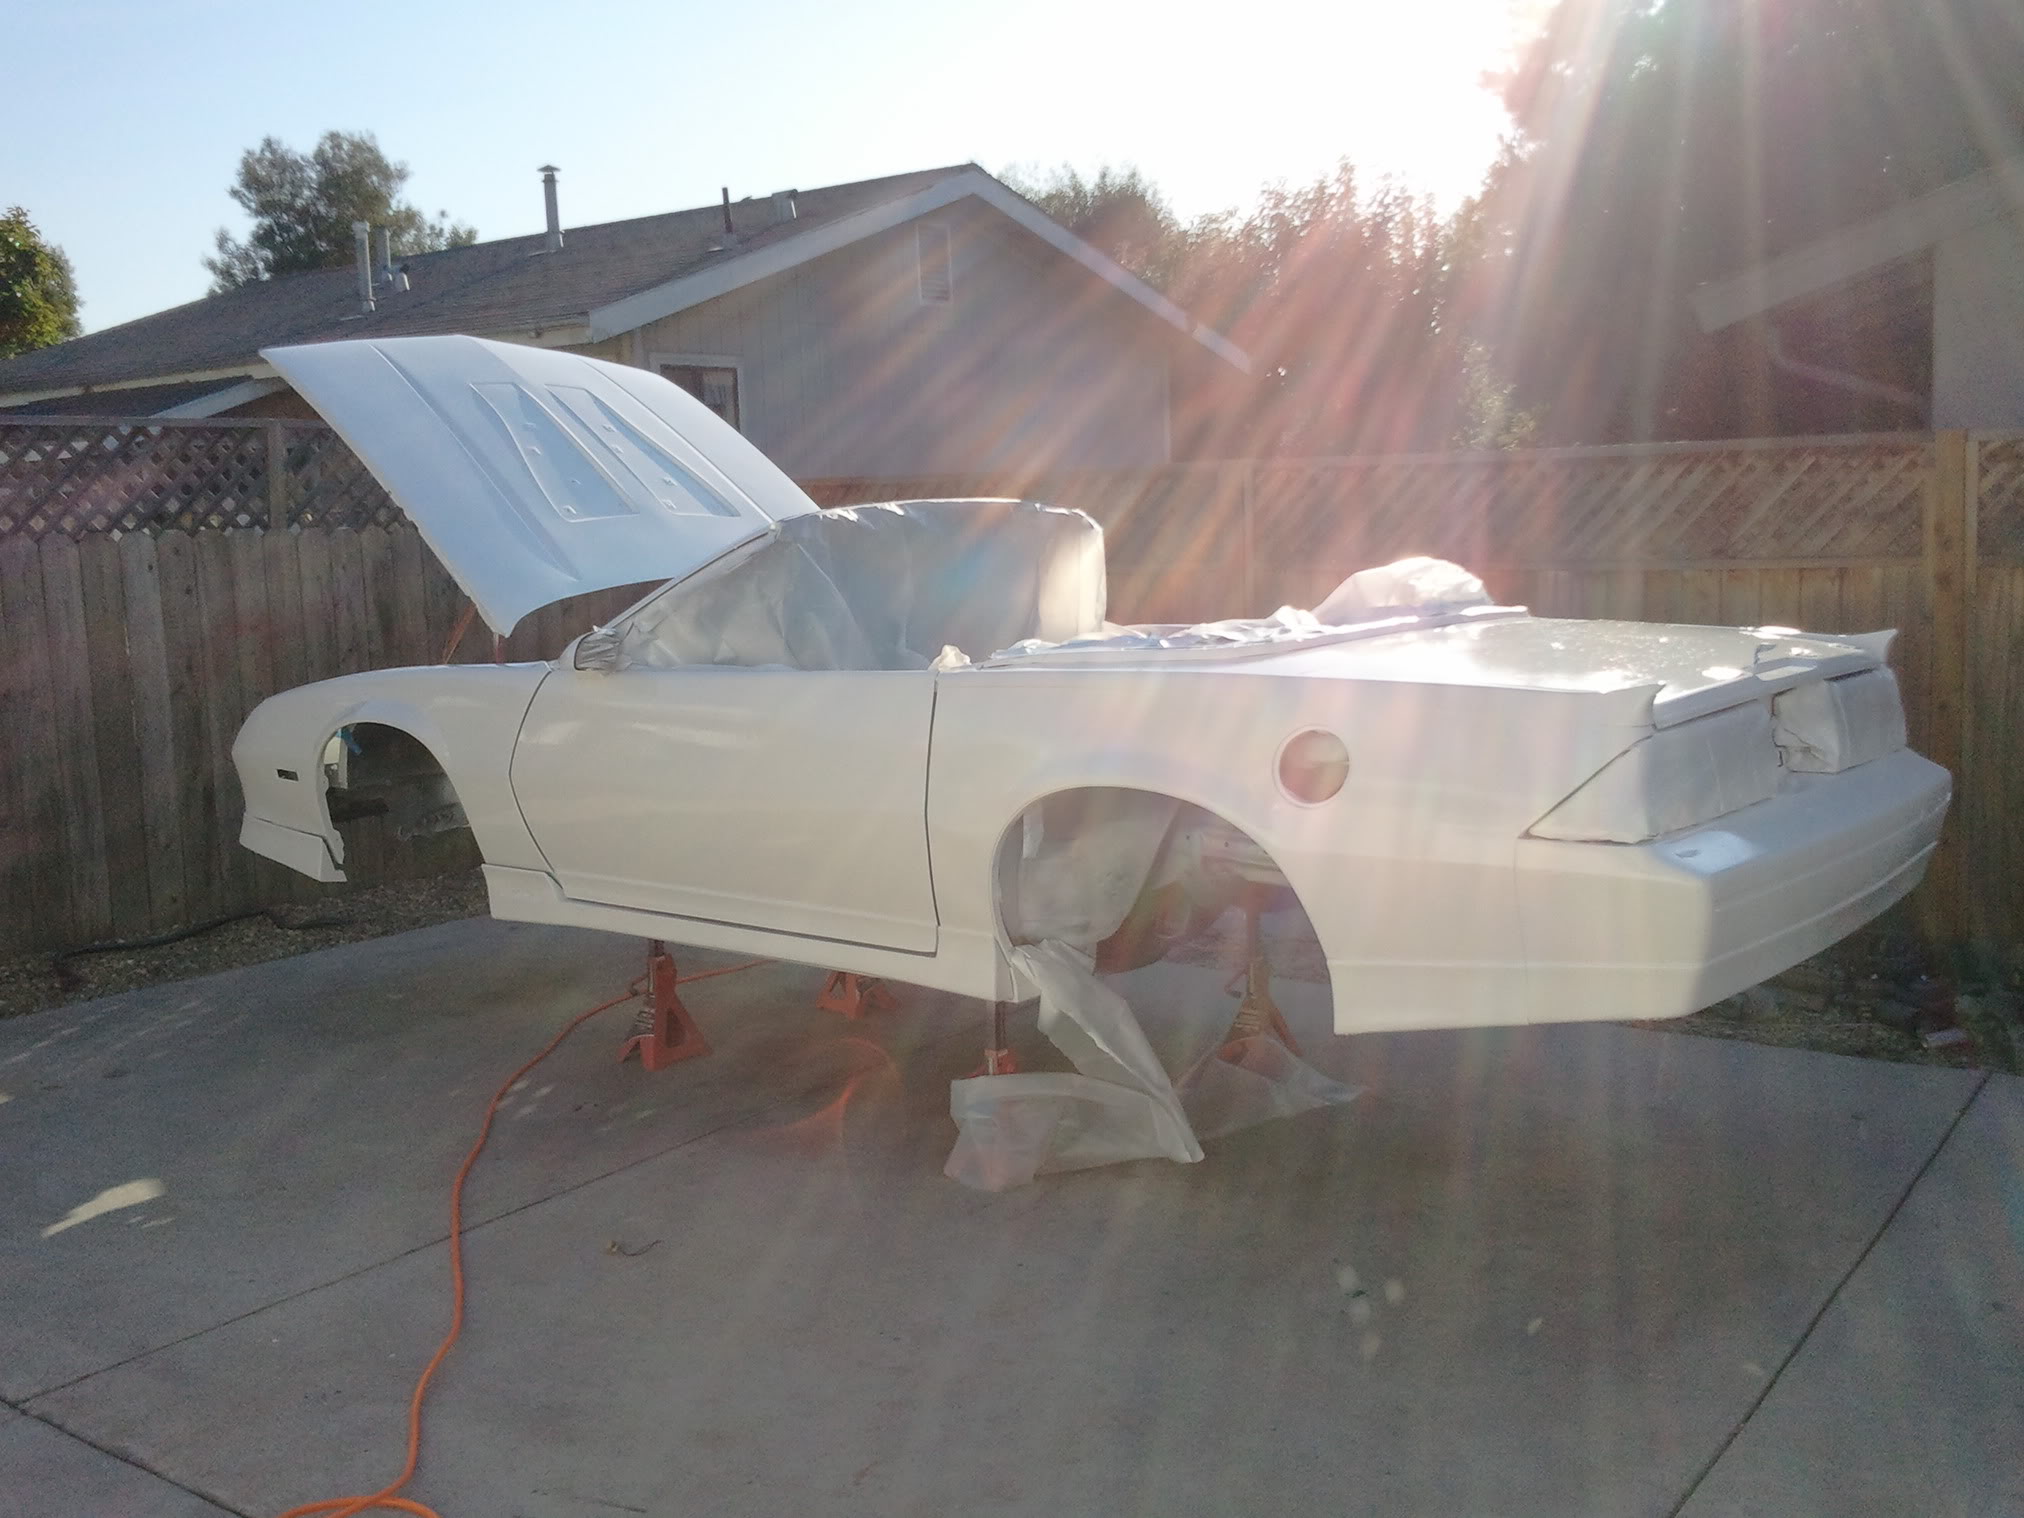
Once again I sprayed the paint in my gravel driveway under the oak trees. I stretched a tarp out over the hood of the car to minimize any sap that might fall on the fresh paint. I applied 8 light coats with about 10-15 minutes between coats. The air temperature was around 100* +/-.
Here is right after the last coat:


The paint that I used this time is Valspar Tractor & Implement paint. I've used it many times in the past on various horse & cattle trailers and it holds up great. The best part is that it's only $29.99/gallon. Of course there are added expenses such as thinner and hardener. It suggests using naptha as a thinner for spraying, and it works great.
Here is what I used:
Paint material costs:
1 gallon Valspar Massey Ferguson Red - $29.99
1 gallon Naptha ---------------------- $13.99
2 8oz cans of hardener--------------- $12.99 (X2)
-----------------------------------------------
Total cost for just paint supplies-------$69.96
This does NOT include all the sand paper, masking tape, etc.. that goes into a paint job.
I disregarded the mixing instructions on the paint. I poured 16oz of paint out of the can and mixed in both cans of hardener (The paint calls for only 1). Then I used a 2:1 mixture of paint to naptha.
After all the prep work was done I sprayed the paint with the $12 purple HVLP gun from Harbor Freight. My compressor is a 25 gallon Craftsman.
Once again I sprayed the paint in my gravel driveway under the oak trees. I stretched a tarp out over the hood of the car to minimize any sap that might fall on the fresh paint. I applied 8 light coats with about 10-15 minutes between coats. The air temperature was around 100* +/-.
Here is right after the last coat:
Thread Starter
Supreme Member
Joined: Jan 2007
Posts: 1,002
Likes: 12
From: Bastrop, TX
Car: 1988 SC Convertible
Engine: LT-1
Transmission: 700R4
Axle/Gears: 3.23 posi w/PBR's
Re: The ULTIMATE budget paint job (pic heavy)
Hey man !! your mom just called! She said you left and big square red section over overspray in her driveway and she wants it gone! I told her I'd mention it to you.. just kidding. Paint job looks great. And I'm sure it feels really rewarding to know you did it yourself.. Stone

Member
iTrader: (2)
Joined: Nov 2009
Posts: 471
Likes: 0
From: Zanesville, Ohio
Car: 1984 Formula ws6
Engine: 370 LSX
Transmission: 4L80E with a brake and 4500 Stall
Axle/Gears: Moser 9" 4.30 gear
Member
Joined: Sep 2011
Posts: 120
Likes: 0
From: Seoul, South Korea
Car: 1990 RS
Engine: SBC 350 YearOne Crate
Transmission: T56 (LT1)
Axle/Gears: 3.73
Re: The ULTIMATE budget paint job (pic heavy)
Does anybody now what I can use on the plastic peices to get the paint off...I'm using a random orbit sander it works but it will be time for new years time I see any progress at this rate
Member
iTrader: (2)
Joined: Nov 2009
Posts: 471
Likes: 0
From: Zanesville, Ohio
Car: 1984 Formula ws6
Engine: 370 LSX
Transmission: 4L80E with a brake and 4500 Stall
Axle/Gears: Moser 9" 4.30 gear
Re: The ULTIMATE budget paint job (pic heavy)
By plastic pieces do you mean the bumper covers? If so I used my DA with 120 grit and took them all the way till they were black.

Supreme Member
Joined: May 2009
Posts: 1,032
Likes: 0
Re: The ULTIMATE budget paint job (pic heavy)
Hey thread,
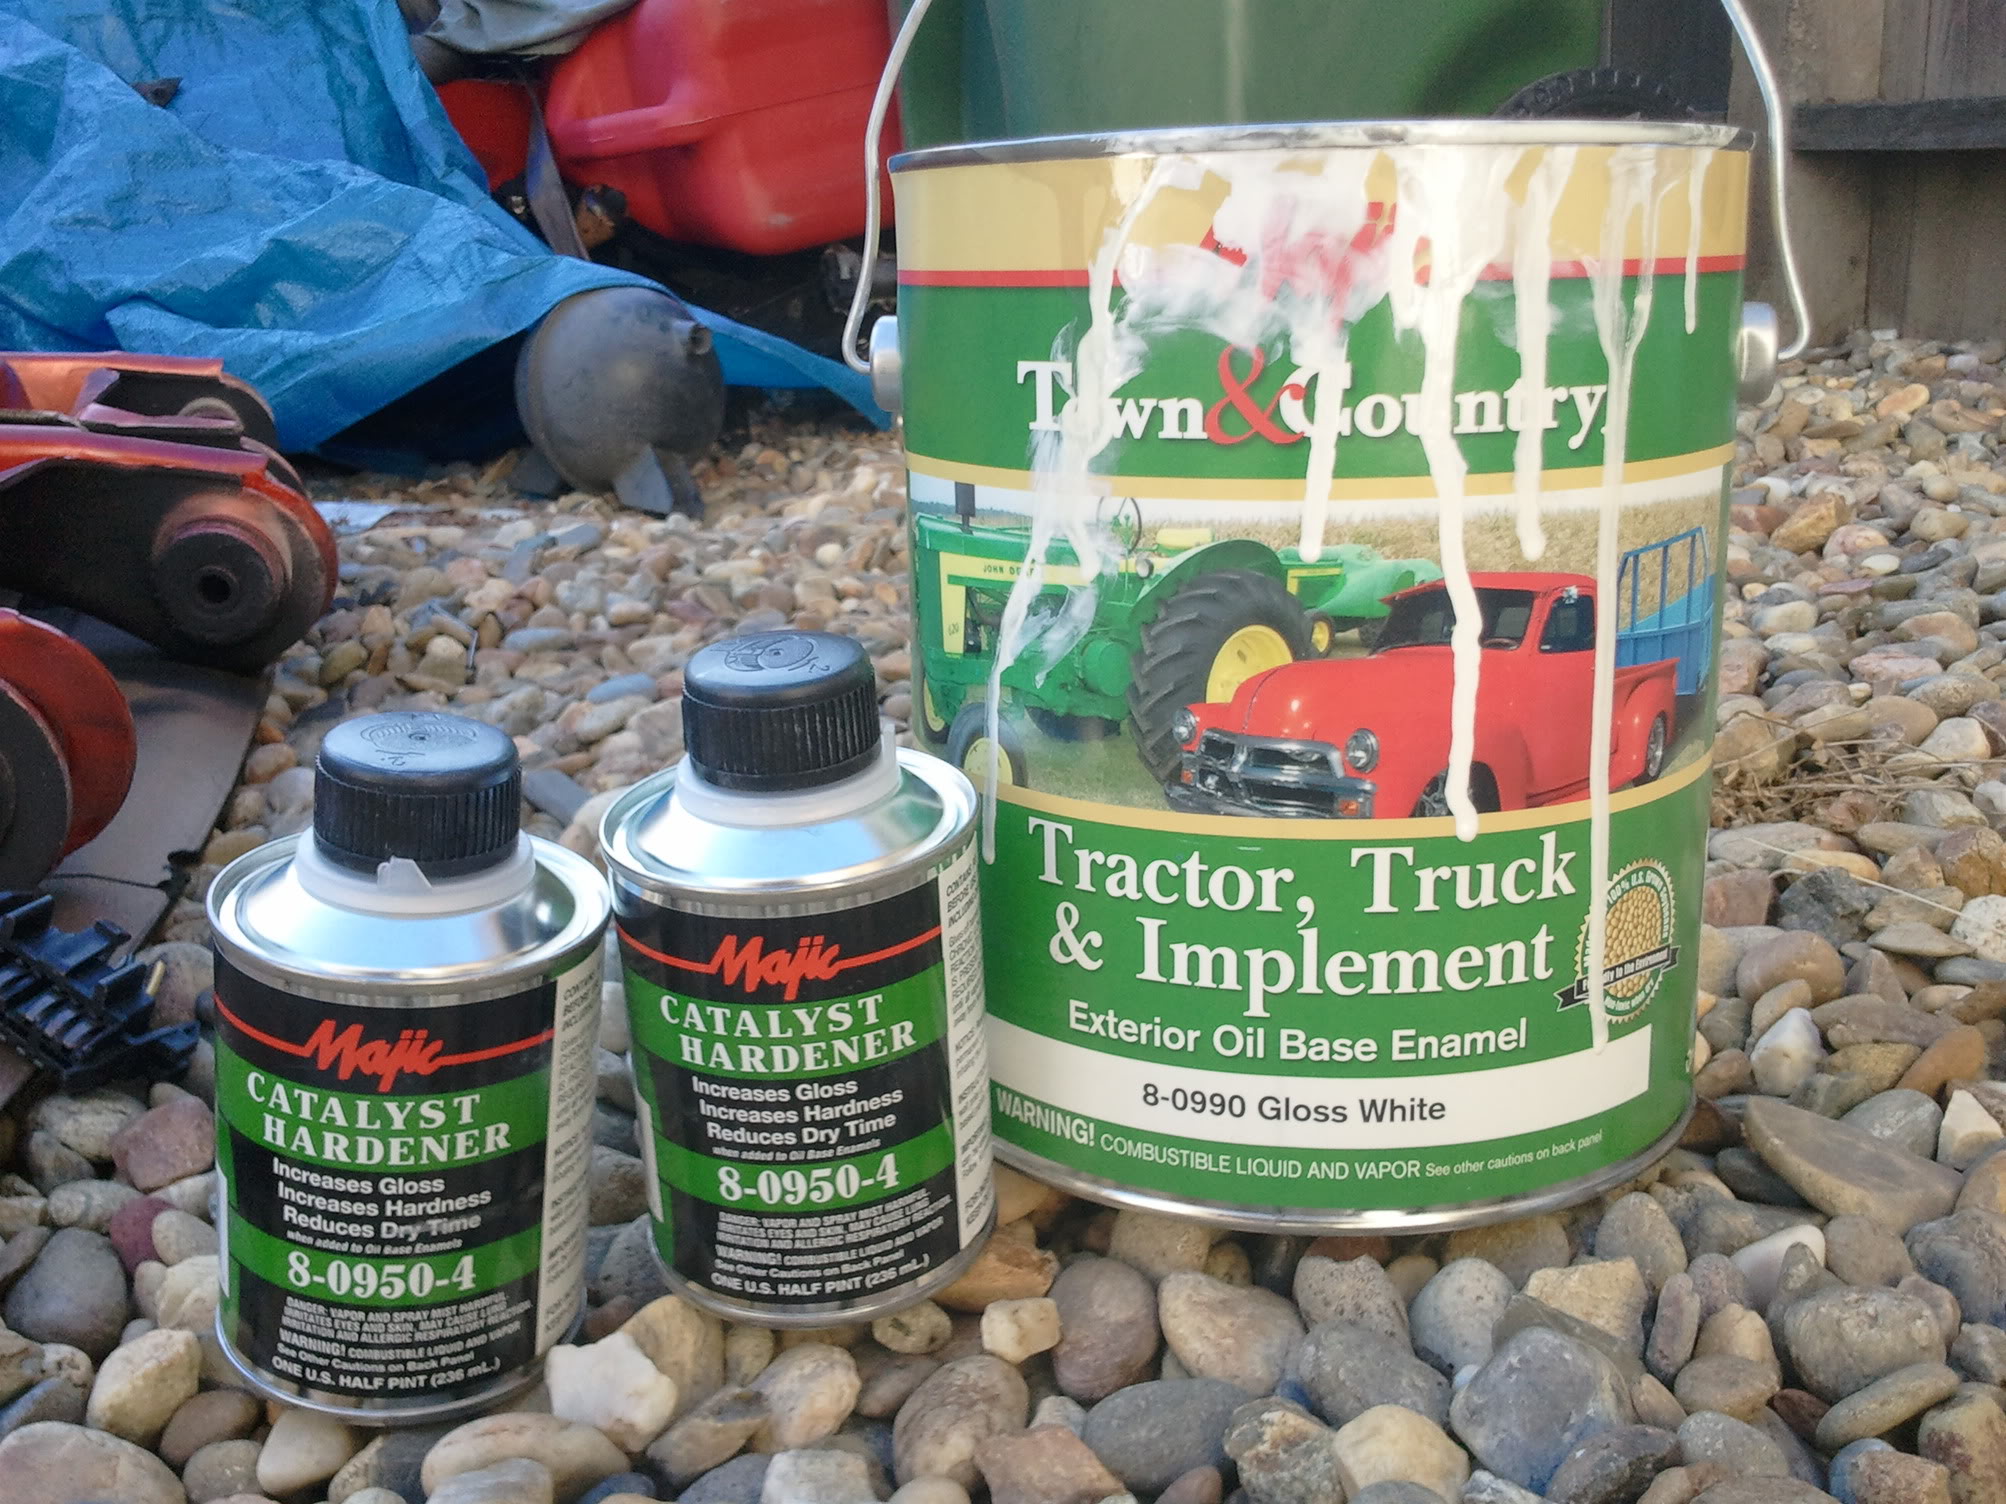
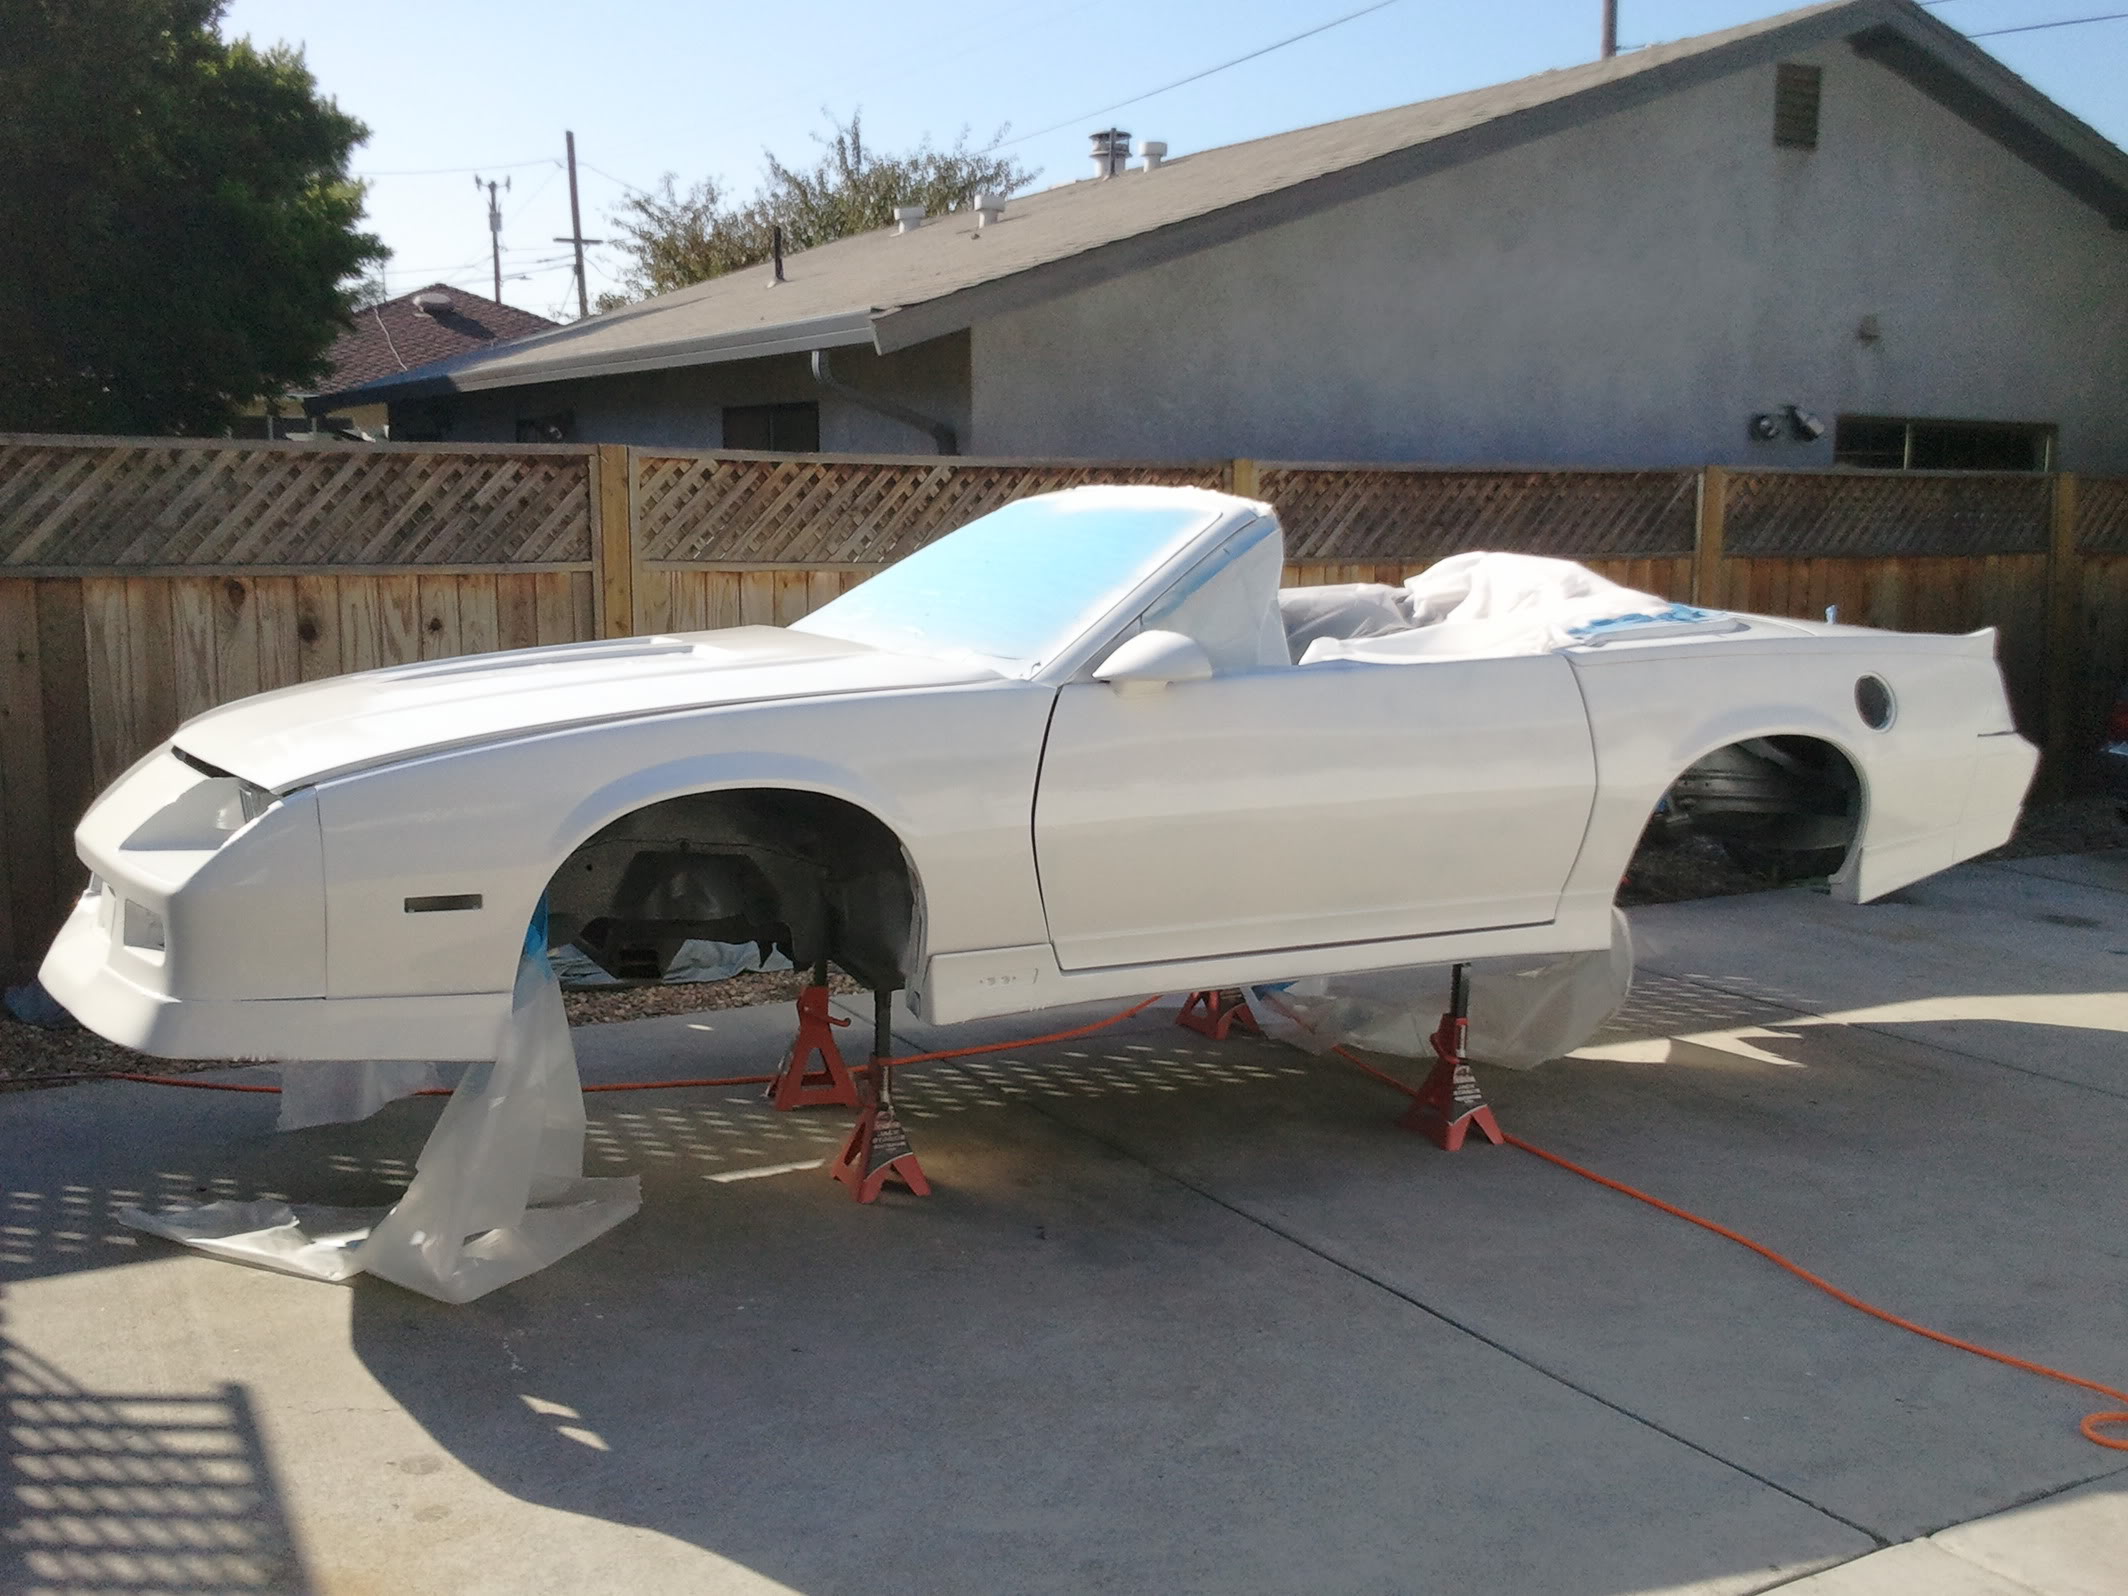
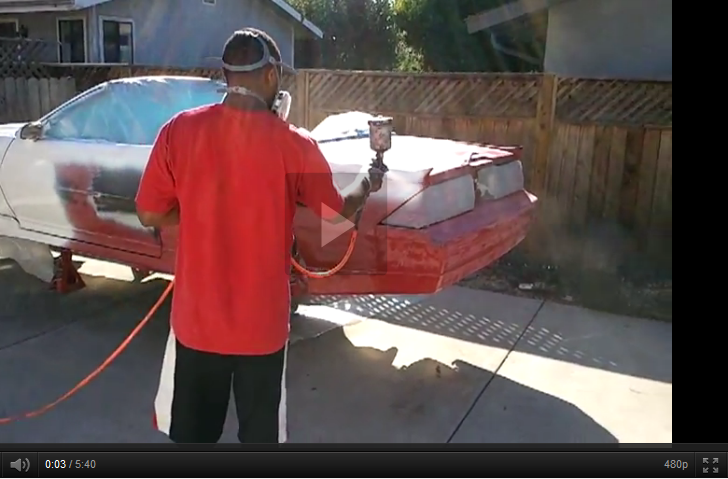
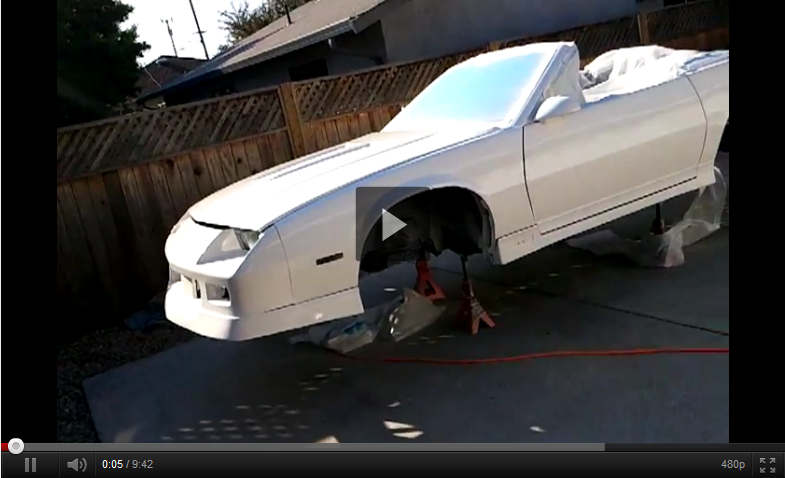
add me to the list of ppl using industrial/tractor enamel. I did no bodywork at all. I just sanded the car with 80 grit, then 320 on an electric drill. Also sanded by hand a bit.
I tried to buy Valspar only to find that it is no longer sold in Northern Cali due to EPA. They guy at the local Tractor Supply gave me another option. Majic Tractor/Truck enamel. I am surprised how shiny and white it came out!! Let me show you what I did....
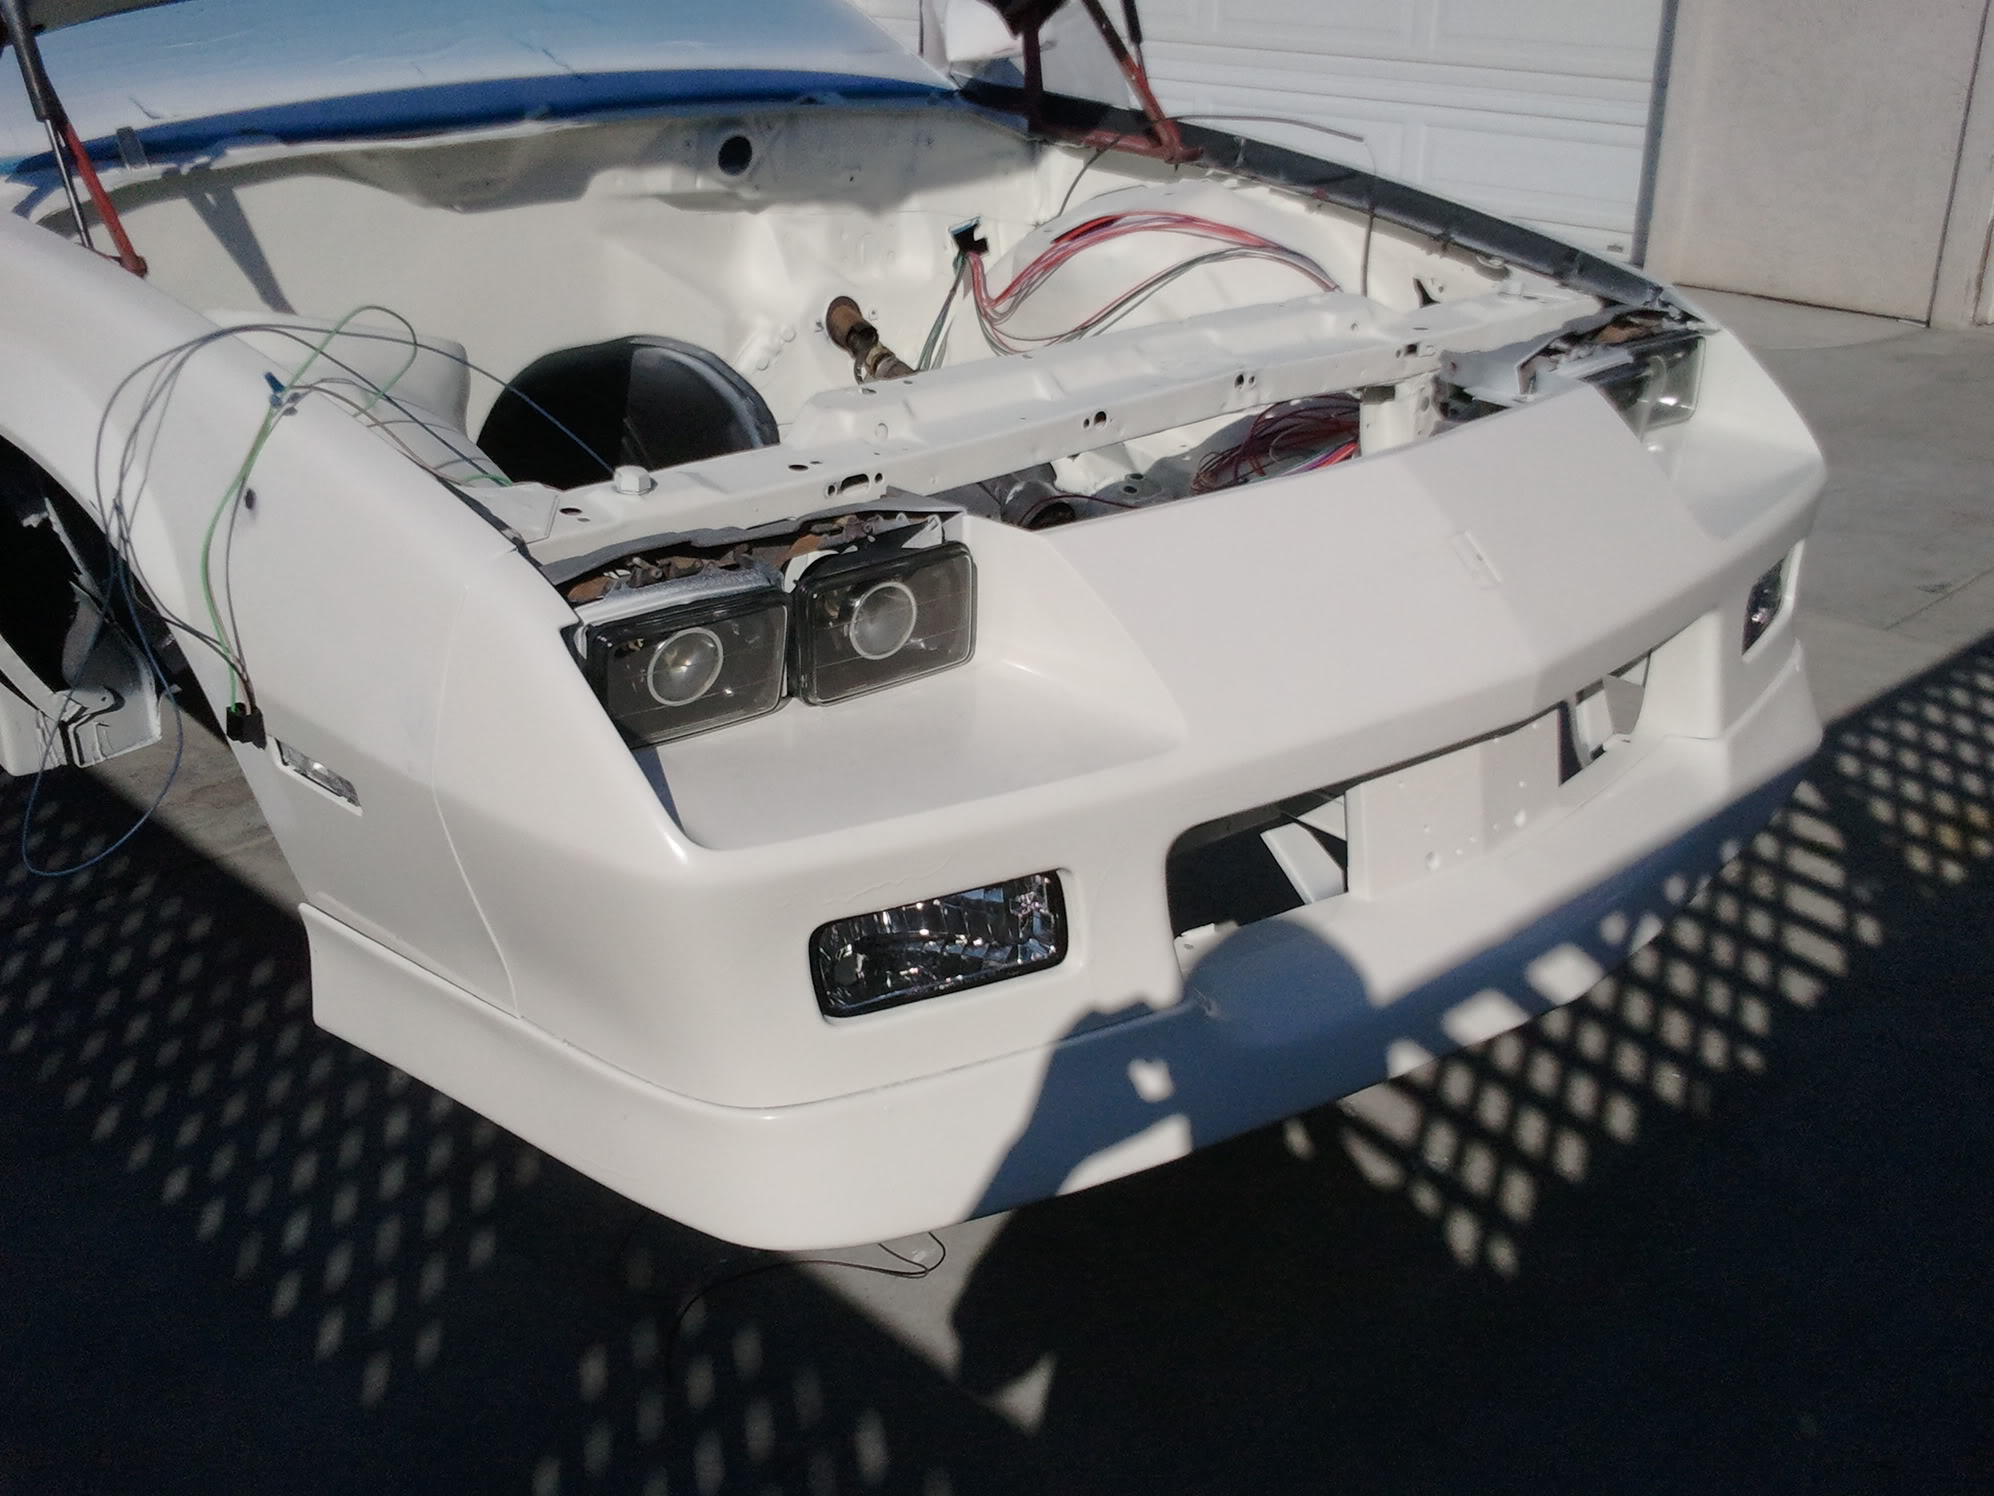
New - fenders, hood, GM bumper (vary hard 2 find), front end bolt kit
Used - front chin spoiler (old one was cracked).
I shaved the doors and firewall, other then that... no body work done at all.
Bay painted - Zero Rust White $25/qt
add me to the list of ppl using industrial/tractor enamel. I did no bodywork at all. I just sanded the car with 80 grit, then 320 on an electric drill. Also sanded by hand a bit.
I tried to buy Valspar only to find that it is no longer sold in Northern Cali due to EPA. They guy at the local Tractor Supply gave me another option. Majic Tractor/Truck enamel. I am surprised how shiny and white it came out!! Let me show you what I did....
New - fenders, hood, GM bumper (vary hard 2 find), front end bolt kit
Used - front chin spoiler (old one was cracked).
I shaved the doors and firewall, other then that... no body work done at all.
Bay painted - Zero Rust White $25/qt
Last edited by blakecharles; Oct 9, 2011 at 05:24 AM.
Supreme Member
Joined: May 2009
Posts: 1,032
Likes: 0
Re: The ULTIMATE budget paint job (pic heavy)
Below is a shot of the paint. For those who have never painted
- everything is already measured (no need for a measuring cup)
- it's cheap (just over $54 for paint, hardener, reducer)
- it can be rolled or burshed on and still looks nice)
- IT'S DUMMY PROOF
Per instructions: Mix 1 hardener + reducer per gallon of paint. Then mix and shoot. The container of reducer already has the PERFECT amount measured out (same for the hardener). When everything is mixed, you get the perfect consistency for spray.
I (like the OP) USED 2x HARDENERS. Be warned that this stuff may crack when fully dry, if pannel painting... you should get the parts back on the car before the paint is fully cured
Last edited by blakecharles; Oct 9, 2011 at 05:11 AM.
Supreme Member
Joined: May 2009
Posts: 1,032
Likes: 0
Re: The ULTIMATE budget paint job (pic heavy)
sorry to take over the tread, I always post lots of pix (see above).
Just want to do my part to help the next person.
- shell paint -
Majic Tractor paint =$32/gal
majic reducer = $12
majic hardener = $14
- underbody -
chassis black (POR15 topcoat) = $40/qt
"Zero Rust" paint = $25/qt
I used a cheap harbor freight HVLP (purple) and 17 gal compressor = $220
Far as I know, all the above is DTM (direct to metal - primer can be used but not needed). had I known about tractor paint from the start I could have save some more money. But this can all be done for under $500 and that includes the tools. waaay less if you have your own.
Last edited by blakecharles; Oct 9, 2011 at 08:15 PM.
Member
Joined: Sep 2011
Posts: 120
Likes: 0
From: Seoul, South Korea
Car: 1990 RS
Engine: SBC 350 YearOne Crate
Transmission: T56 (LT1)
Axle/Gears: 3.73
Re: The ULTIMATE budget paint job (pic heavy)
How did you prep the plastic bumpers??? I painted my bumpers and had to pushed my car and they cracked like dry lips...but I guess that's gonna happen regardless huh?
Supreme Member
Joined: May 2009
Posts: 1,032
Likes: 0
Re: The ULTIMATE budget paint job (pic heavy)
I got a new front bumper, it came from GM primed. I just scuffed it with 320 grit on an electric sander. same for the rear....
but they where on the car when I painted. I purposely left them on so they would not crack due to flexing while re-installing. maybe if the bumper is pushed too hard, mine will crack too (I used no flex agent).
but they where on the car when I painted. I purposely left them on so they would not crack due to flexing while re-installing. maybe if the bumper is pushed too hard, mine will crack too (I used no flex agent).
Member
Joined: Sep 2011
Posts: 120
Likes: 0
From: Seoul, South Korea
Car: 1990 RS
Engine: SBC 350 YearOne Crate
Transmission: T56 (LT1)
Axle/Gears: 3.73
Re: The ULTIMATE budget paint job (pic heavy)
What's the trick to minmizing the orange peel while spraying I did all white as well my first time and I guess I was rushing or didn't pay much attention to what I was doing idk but it turned out shitty...and will it hurt to NOT use hardener and just thin it out and spray if so that would be great for cleaning the gun I'm sure it will take forever to dry
Supreme Member
Joined: May 2009
Posts: 1,032
Likes: 0
Re: The ULTIMATE budget paint job (pic heavy)
I dont have a trick, just didn't get any... I'm still going to take a few places back down to bare metal and apply filler (deep scratches), after that I am going to cut the whole car down with 1000 grit. This will smooth down the high places where paint ran then spot spray....
after all that I will be using the SPI universal clear
- it's vary strong
- it's shiny
- it's cheap
will follow up soon
after all that I will be using the SPI universal clear
- it's vary strong
- it's shiny
- it's cheap
will follow up soon
Last edited by blakecharles; Oct 9, 2011 at 10:40 PM.
Member
Joined: Sep 2011
Posts: 120
Likes: 0
From: Seoul, South Korea
Car: 1990 RS
Engine: SBC 350 YearOne Crate
Transmission: T56 (LT1)
Axle/Gears: 3.73
Re: The ULTIMATE budget paint job (pic heavy)
Well damn! I wish I could have the luck of jus spraying paint and it atomize perfectly first time go but. We gone see what the deal is here in few days
Supreme Member
Joined: May 2009
Posts: 1,032
Likes: 0
Re: The ULTIMATE budget paint job (pic heavy)
I also didn't use valspar, the majic paint suggested only 1 coat be applied....
I would have normally put down a light/tacking coat then 2 med coats... instead I put down 1 thorough coat and stood back a bit further from the surface I was painting.
I did end up retouching some smaller places though...
I would have normally put down a light/tacking coat then 2 med coats... instead I put down 1 thorough coat and stood back a bit further from the surface I was painting.
I did end up retouching some smaller places though...
Junior Member
Joined: Jun 2011
Posts: 29
Likes: 0
From: NE GA
Re: The ULTIMATE budget paint job (pic heavy)
Is there any reason you used 2 cans of hardener when only one is called for? I am about to paint my car using this method and I was wondering if I should use 1 or 2 cans.
Supreme Member
Joined: May 2009
Posts: 1,032
Likes: 0
Re: The ULTIMATE budget paint job (pic heavy)
the above vids are a bit old, I have sense then hit the whole car with 1000 grit... It's soooo much smoother now w/o peel or runs anywhere...
but it lost it's shine (due to sanding).... going to remove bumper/lights and paint behind them. Will be using the SPI clear soon.
but it lost it's shine (due to sanding).... going to remove bumper/lights and paint behind them. Will be using the SPI clear soon.


Joined: Jun 2001
Posts: 8,028
Likes: 93
From: DC Metro Area
Car: 87TA 87Form 71Mach1 93FleetWB 04Cum
Re: The ULTIMATE budget paint job (pic heavy)
did you buff it out after sanding? how long after? Some paints with hardener you have a fairly short window to buff them in unless you want to use one of the newer super hard buffing compounds and they're a bear to sand after that time period


Member
iTrader: (2)
Joined: Aug 2011
Posts: 205
Likes: 0
From: New Jersey
Car: 1986 Pontiac Trans Am
Engine: LG4 305/V8
Transmission: 700r4
Re: The ULTIMATE budget paint job (pic heavy)
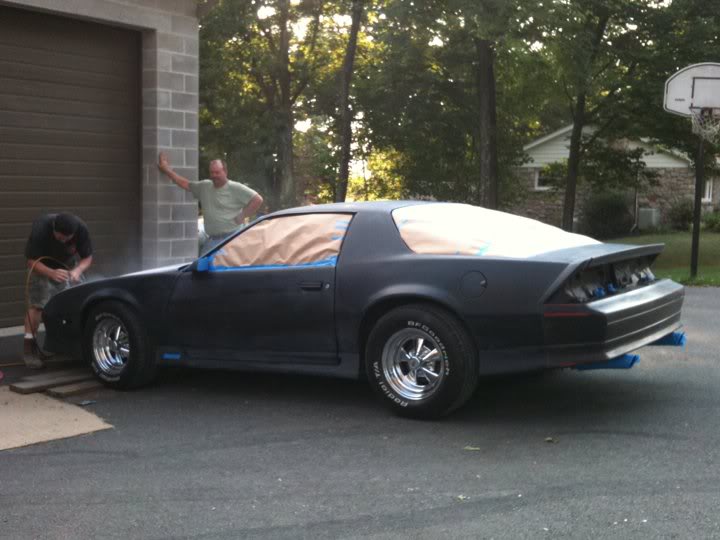
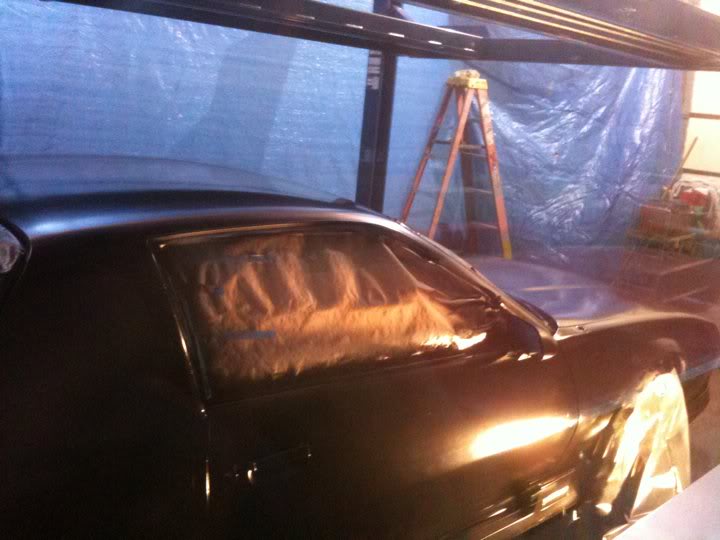
Just thought id share my progress so far ..used this as reference as well as 2 other sources... This is my 6th coat Rolled on, sanded with 800grit so far... I will be laying 2 more coats and sanding 3 more times till i reach 2000 grit...So the car is only half way done...looks ok i think. Its almost there

Rustoleum Interior (plastics&carpet) lol

Rustoleum Interior (plastics&carpet) lol
Last edited by 86blackbetty; Oct 25, 2011 at 12:28 AM.

Joined: Dec 2005
Posts: 6,499
Likes: 31
From: Macon, GA
Car: 1992 Camaro RS
Engine: Vortec headed 355, xe262
Transmission: T56
Axle/Gears: 9-bolt 3.70
Re: The ULTIMATE budget paint job (pic heavy)
So do you guys just paint with the doors and gfx and mirrors still attached? I wasnt really sure how to tackle that.
And with the valspar you have to apply the whole color coat in one coat? Really?
And with the valspar you have to apply the whole color coat in one coat? Really?
Member
iTrader: (1)
Joined: May 2010
Posts: 254
Likes: 0
From: Dallas
Car: 85z28(sold),91 rs, 15'Mazda3GT
Engine: 5.7L V8 350 (ZZ4)
Transmission: 700r4 rebuilt with kits+ vette serv
Re: The ULTIMATE budget paint job (pic heavy)

Supreme Member
Joined: May 2009
Posts: 1,032
Likes: 0
Re: The ULTIMATE budget paint job (pic heavy)
but look... Here is the car after I sanded it back down again w. 1000 grit.

I applied some filler and sanded the car down 1 more time. Below is a video of the last time I painted... This time around I ignored the instructions and adjusted the spray pattern as wide as it would go @ 70psi and put down 1 light layer, waited 20 min then a med layer...
The paint came out MUCH better, w/o any runs and less peel. I painted under the hood too this time, but I missed a few places.
FYI:
light layer - 0-25% overlap between strokes (tacking coat, dose not always cover whole surface)
med layer - 50% overlap
heavy layer - 50% ++
(uploading video)
Last edited by blakecharles; Oct 28, 2011 at 11:14 AM.
Supreme Member
Joined: May 2009
Posts: 1,032
Likes: 0
Re: The ULTIMATE budget paint job (pic heavy)
I did everything with out taking the mirrors and plastics off the car. worked out fine.