When you click on links to various merchants on this site and make a purchase, this can result in this site earning a commission. Affiliate programs and affiliations include, but are not limited to, the eBay Partner Network.
Nearly 10 years ago I posted a now well know thread all about the C100 Connector and nearly everything about it.
The Original Thread only survived about 3 years before Photos/ Hyperlinks became inoperable... And now most all Threads that old have all broken or inoperable Photos/ Hyperlinks.
I am making an attempt to finally return to being routinely active on OUR message-boards again; after about 6 to 7 years of being almost entirely devoid from ThirdGen.ORG
My apologies to you all for considerably dropping off the planet as far as TGO goes.
I plan to try and add to this Thread twice a week until I can repopulate the needed NEW Photos/ Hyperlinks and corresponding information.
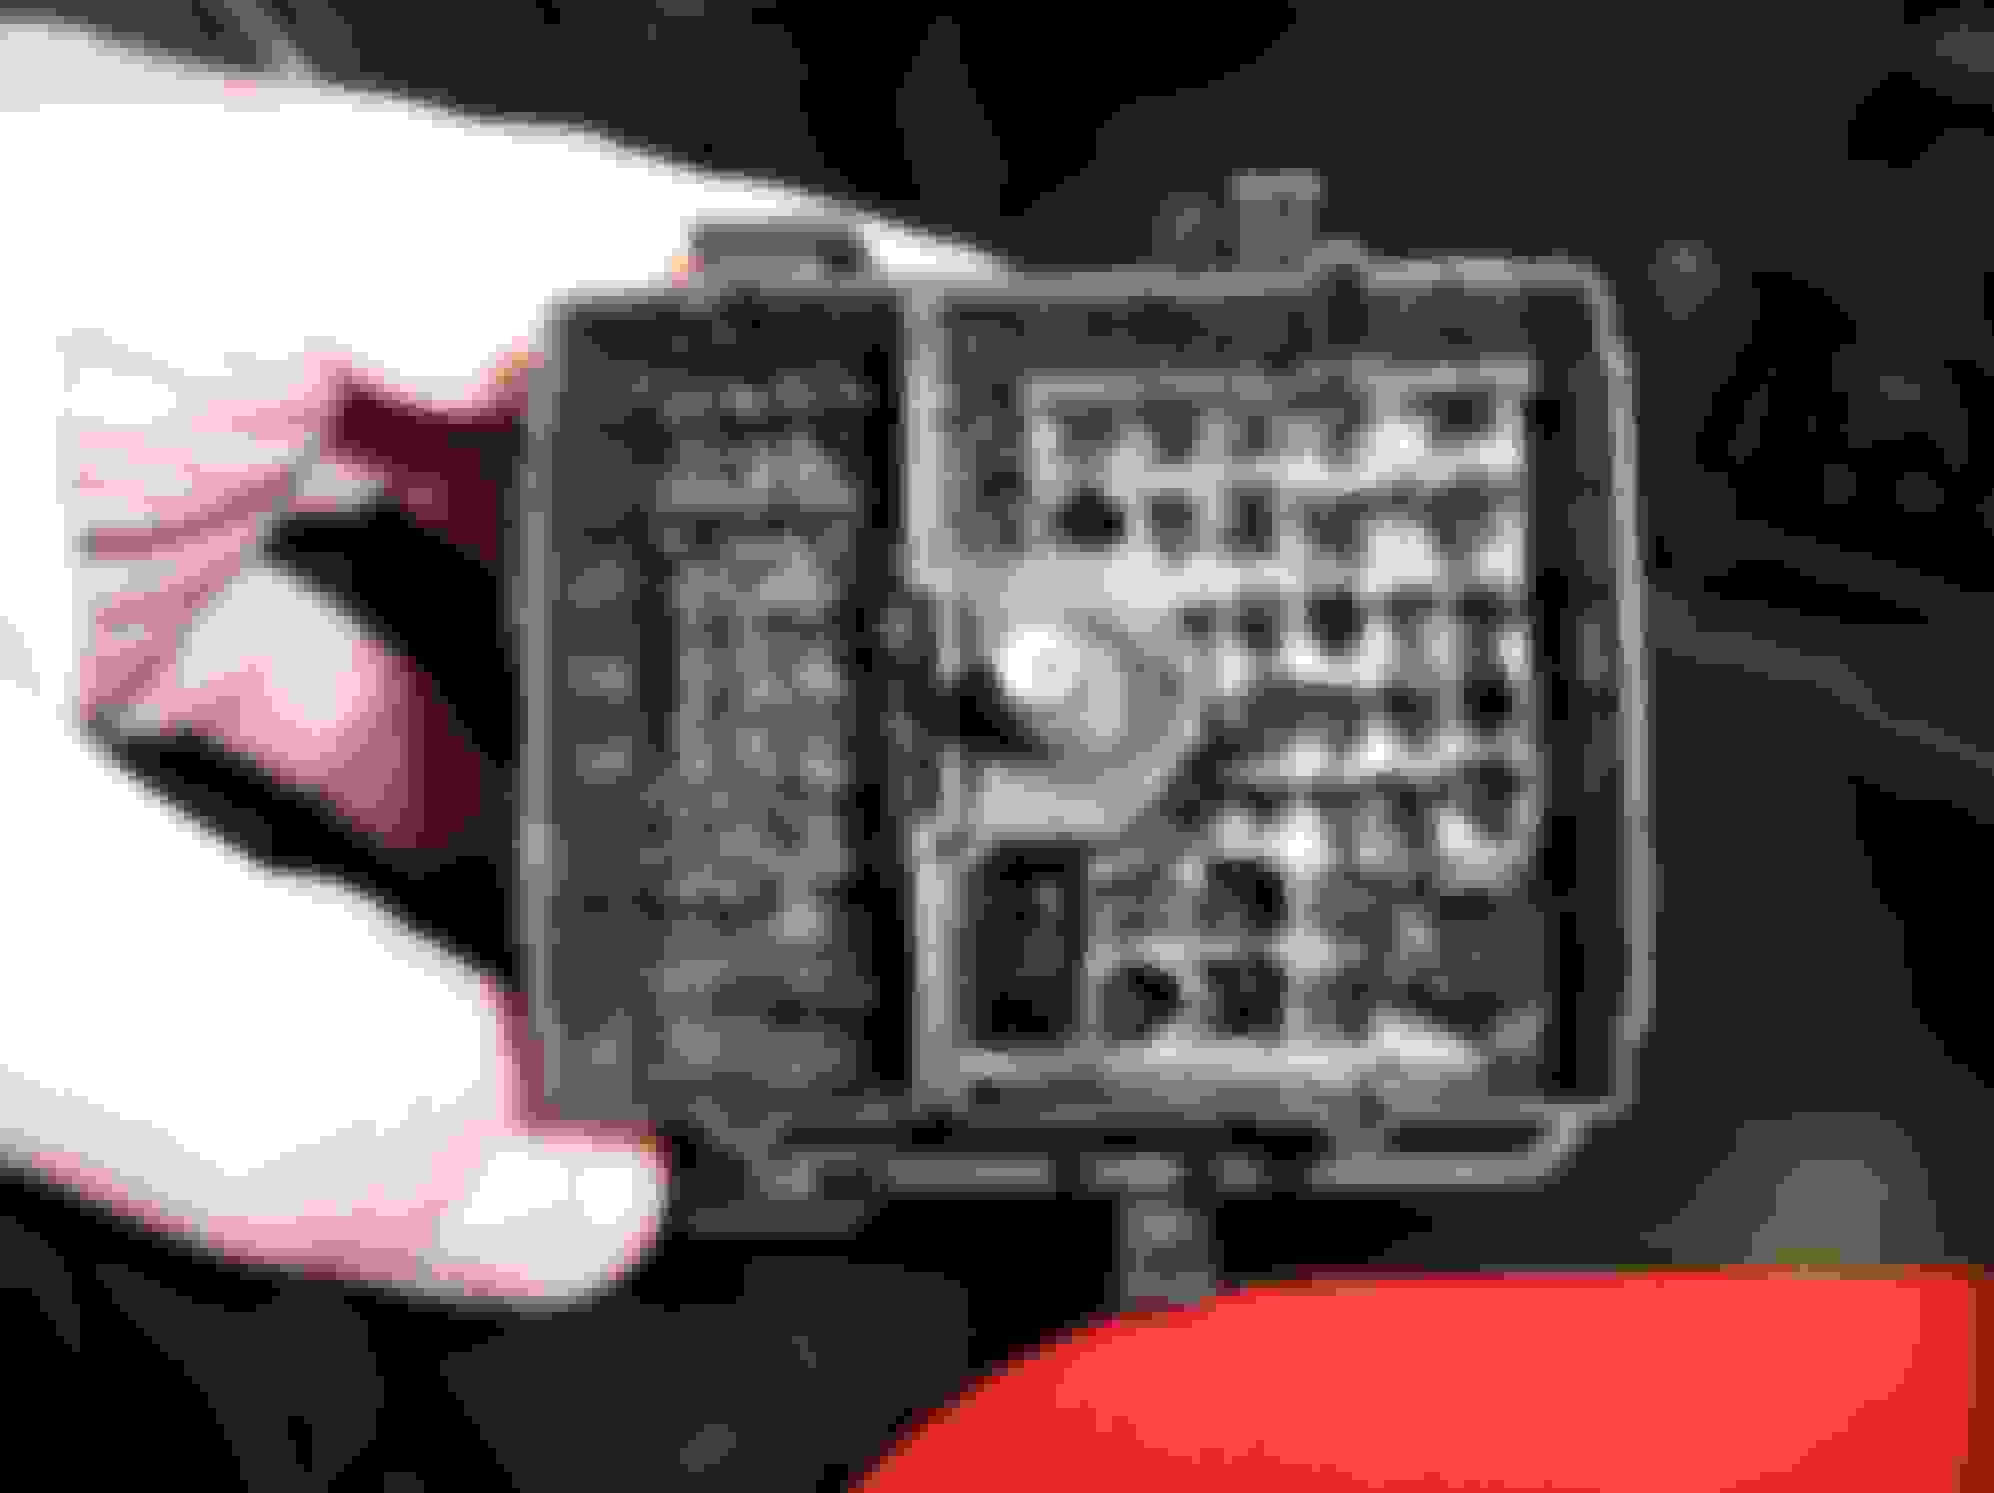
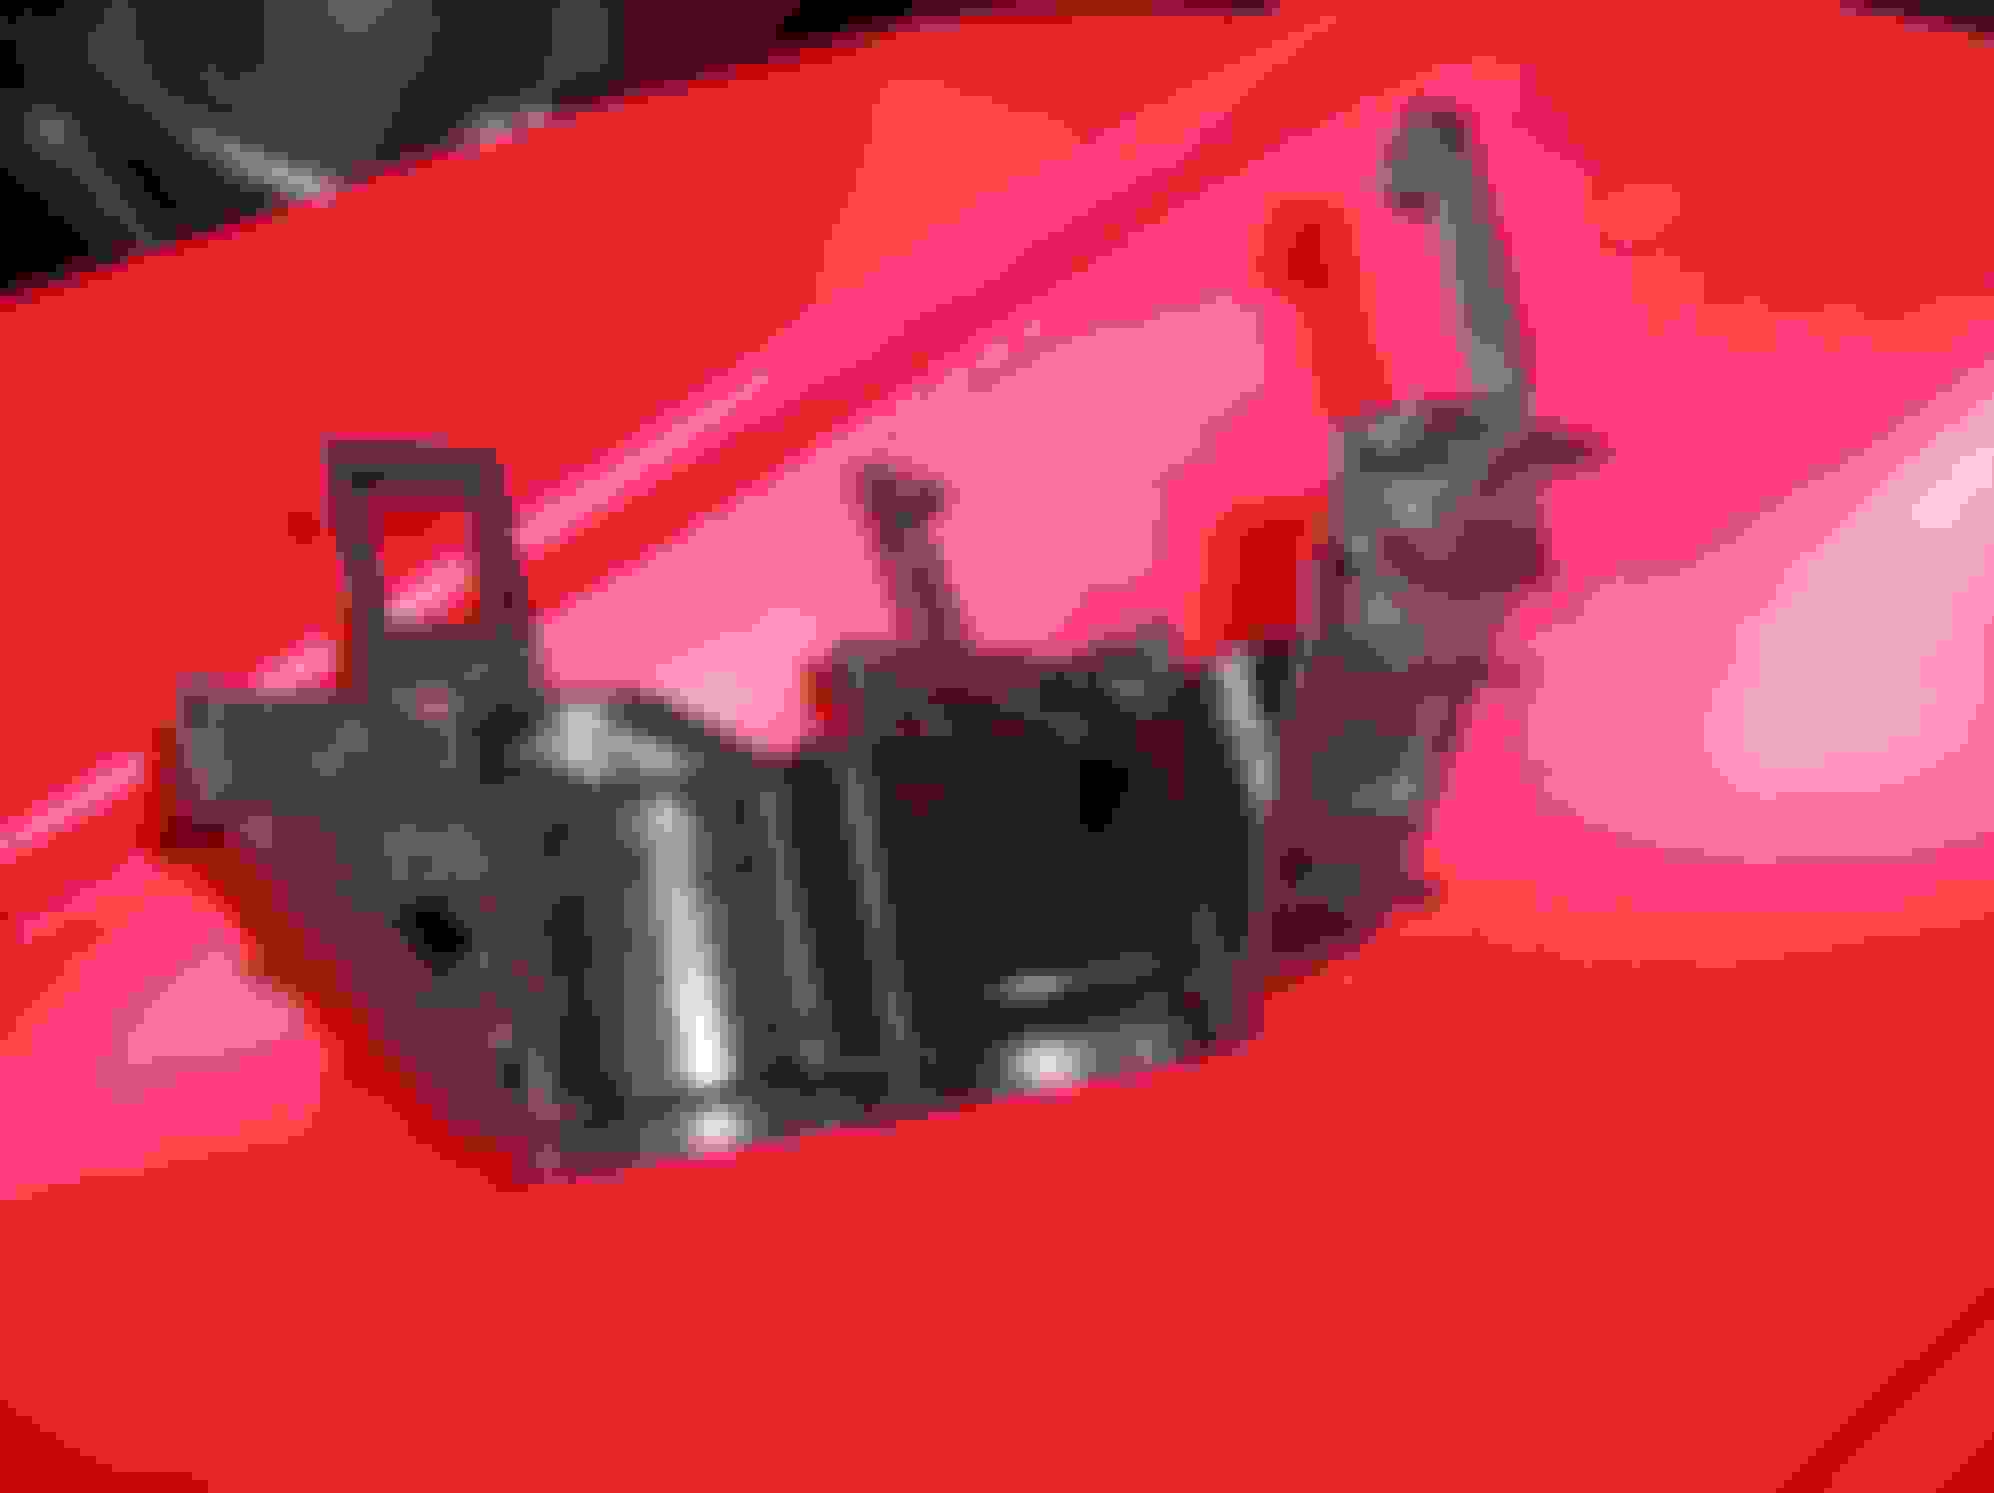
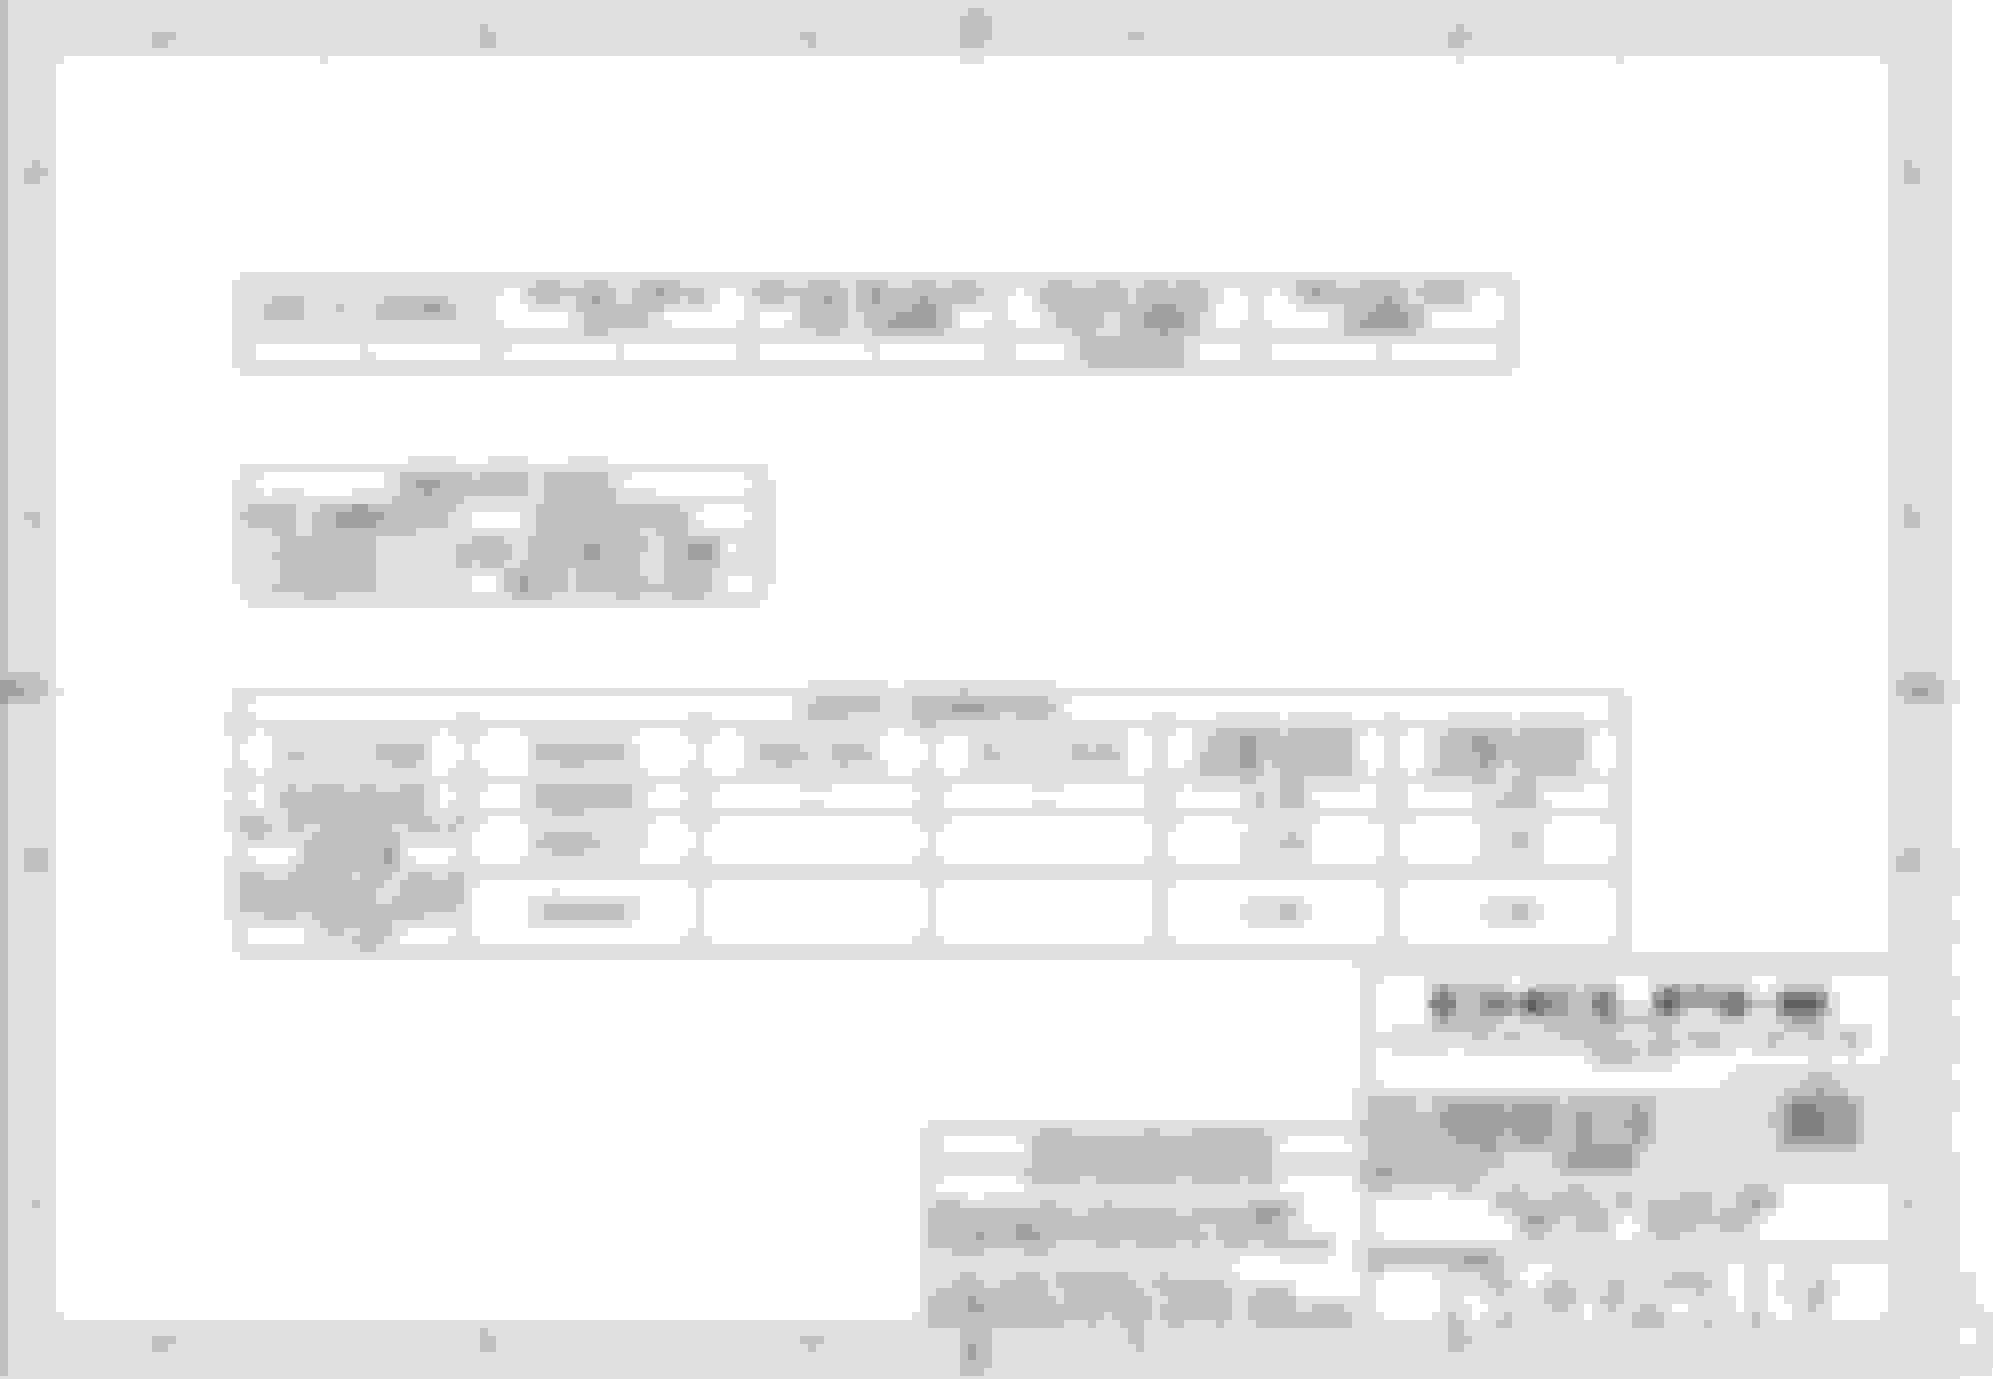
To start things of properly. Here is the 2019 Delphi product listings concerning our C100.
These are all original parts, still manufactured to date with little to no physical changes and have a 100% fit and function for our application.
See photo below:
All part numbers listed are "DELPHI part numbers".
Do not confuse these part numbers with General Motors or ACDelco part numbers.
General Motors DID create and own Delphi Electronics (formerly Packard Electrical Division [P.E.D.] of GM), however Delphi was sold off during our last US financial crisis circa 2008/ 2009 when "General Motors Corporation" nearly went bankrupt and dissolved to be come the NEW "General Motors Company" that we have today.
Some Delphi part numbers were sometimes the same part number in a Genuine GM or ACDelco part listing. However this should no longer be the case as Delphi is now owned by APTIV Automotive (Headquartered in Dublin Ireland). I believe the focus of Aptiv is on the technologies involved around autonomous automobile networks and the corresponding logistics.
These part numbers; as well as any other Delphi part number should be routinely available from any retailer or wholesaler carrying Delphi products.
One of the largest electrical and electronics parts businesses that carry the parts WE require is: MOUSER.COM
Type the Delphi part number in which you require into the search box... and BOOM! Parts are available.
PART NUMBERS FROM PHOTO
-(A) Interior/ cabin/ cockpit side connector body: 15492518
-(B) TPA (terminal locking device) for #15492518, side with lights and horn wiring: 12015511 (towards Passenger side of vehicle)
-(C) TPA (terminal locking device) for #15492518, side with engine and power wiring: 12015510 (towards Driver side of vehicle)
-(D) Exterior/ engine side connector body with engine and power wiring: 15492519 (towards Driver side of vehicle)
-(C) TPA (terminal locking device) for #15492519, side with engine and power wiring: 12015510 (towards Driver side of vehicle)
-(E) Exterior/ engine side connector body with lights and horn wiring: 12020629 (towards Passenger side of vehicle)
-(B) TPA (terminal locking device) for #15492519, side with lights and horn wiring: 12015511 (towards Passenger side of vehicle)
Parts "F" and "G" are new parts that did not exist when OUR vehicles were produced. I believe parts "F" and "G" were created in the early 2000s or late 1990s.
If you are looking to replace parts "D" and/ or "E" ...for your vehicle, with NEW Delphi parts. I would recommend also purchasing parts "F" and/ or "G".
Parts "F" and "G" are not required parts. They are intended to be used with a C100 connector assembly that uses modern "Di-Electric grease" ( just like what is used inside spark plug wire boots or inside head lamp sockets) instead of the hard and Tar like grease that was originally used in our F-Body vehicles (the stuff in your current C100 Connector).
Should you replace the C100 connector; do not look to use a substance like the hard, tar stuff that is packed into the connector.
Instead use nice, soft, and clean Di-Electric grease from Permatex or ACDelco.
Because there will be not hard tar stuff in the connector; the long male terminals in the exterior/ engine side connector bodies should have the extra support added from parts "F" and "G".
-(F) Stabilizer for terminals in body for #15492519. = :12162412 (towards Driver side of vehicle)
-(G) Stabilizer for terminals in body for #12020629. = :12162413 (towards Passenger side of vehicle)
Last edited by vorteciroc; Sep 22, 2022 at 06:38 PM.
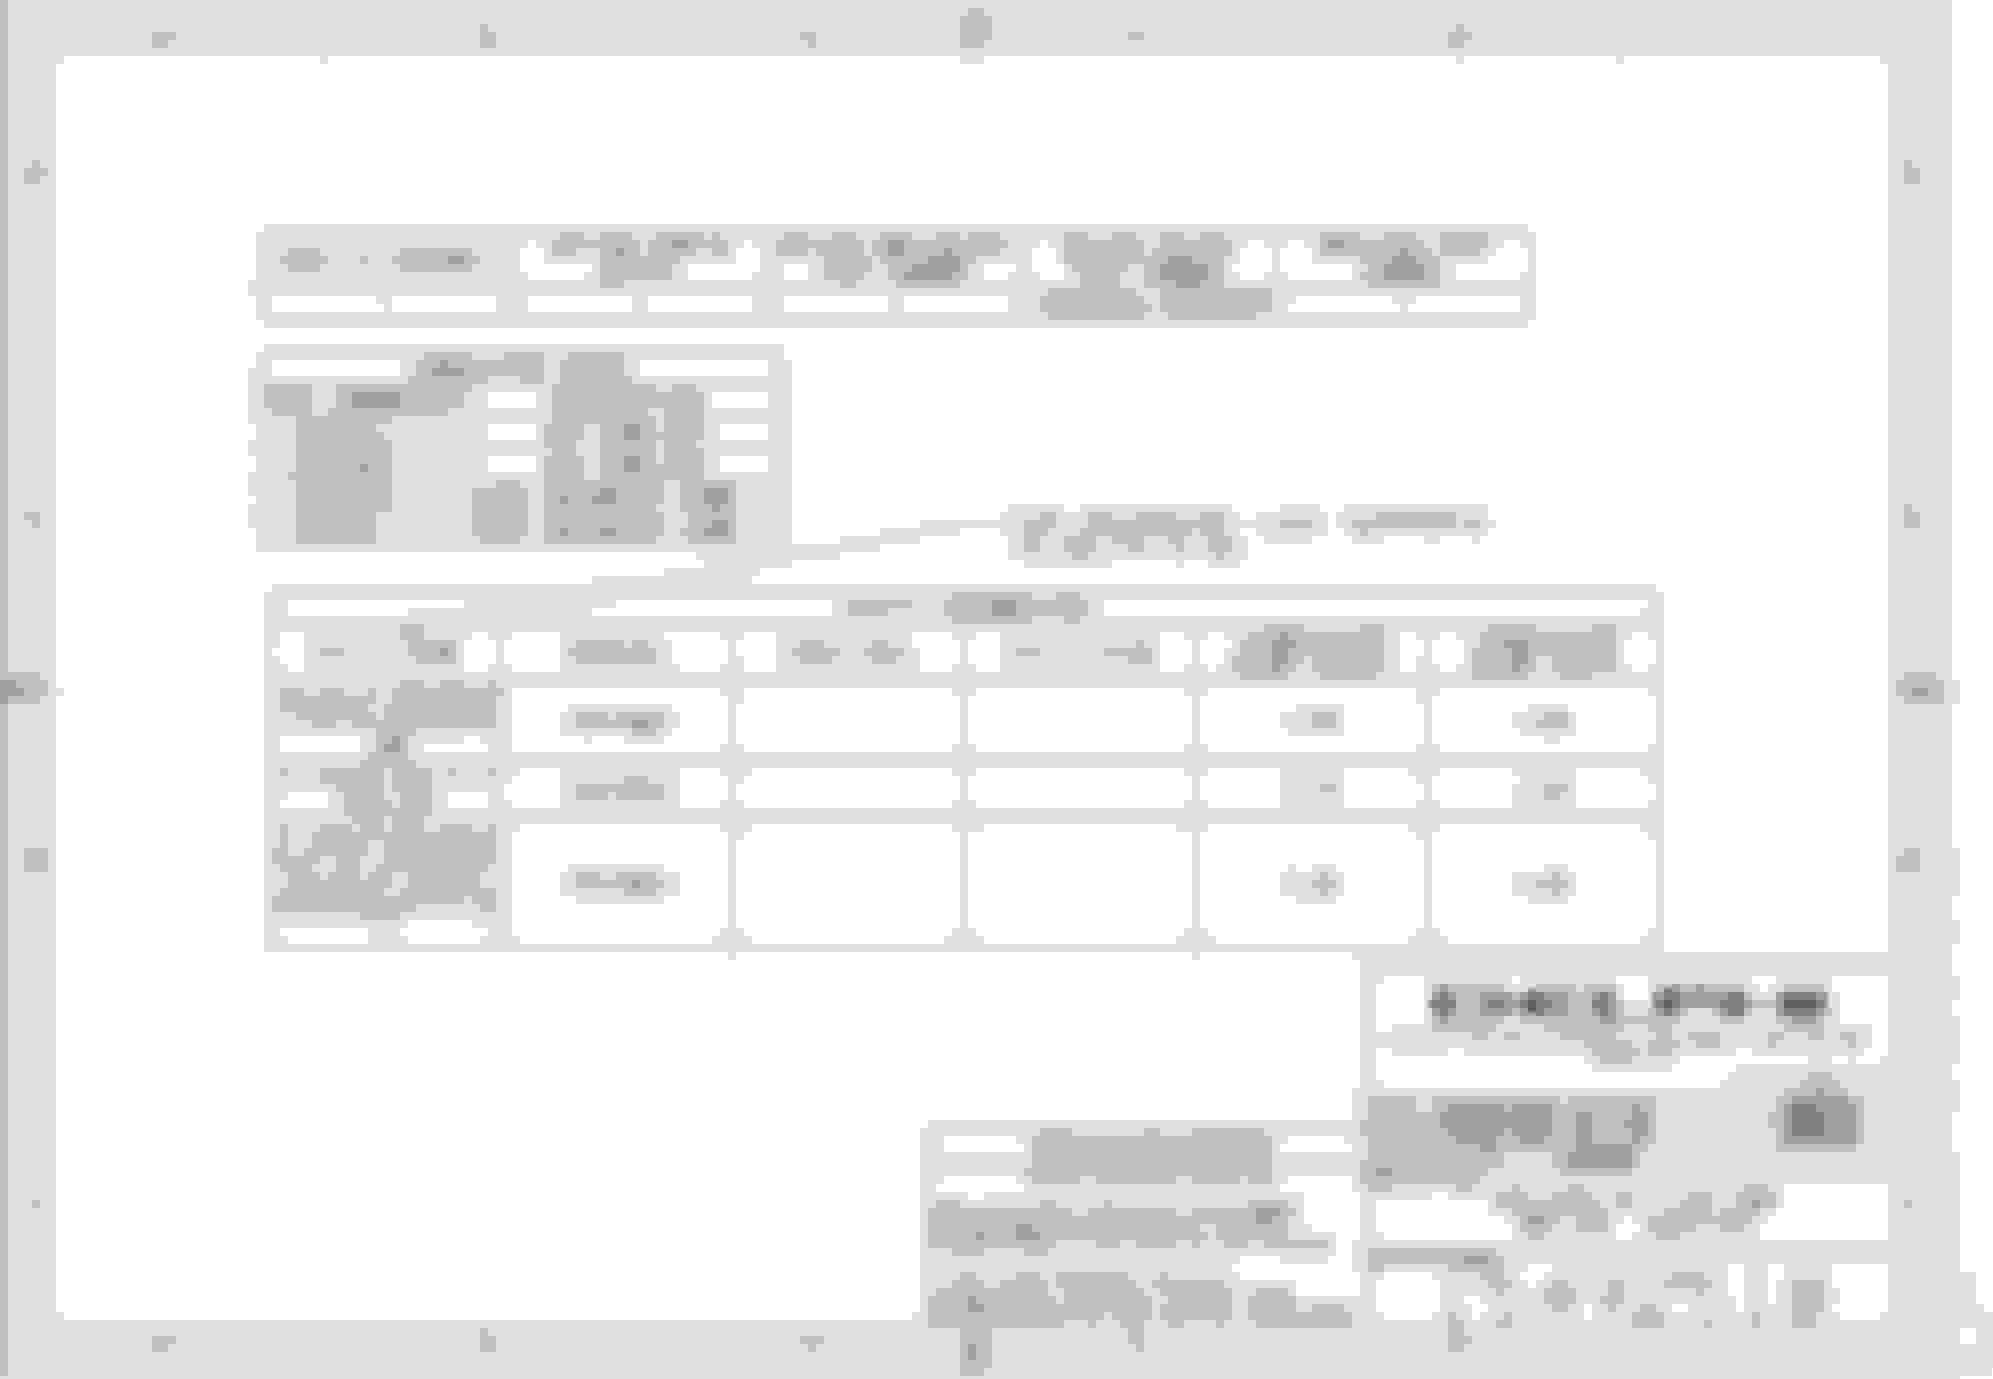
The C100 Connector uses 3 different types of terminals, each of which has a male and a female variant (making 6 different terminals in actuality).
Each terminal is also made in slightly different forms pertaining to wire gauge to be used/ crimped into the terminal (thus making an even higher amount of terminals).
The 3 types of terminals are as follows:
-Metri-Pack 280 series (male type and female type terminal) rated for up to 30 Amps continuous load per circuit or 45A surge on start-up
-Metri-Pack 480 series (male type and female type terminal) rated for up to 42 Amps continuous load per circuit or 63A surge on start-up
-Metri-Pack 630 series (male type and female type terminal) rated for up to 46 Amps continuous load per circuit or 69A surge on start-up
-Metri-Pack 280 series terminals should be used with wire gauges ranging from 20AWG to 12AWG.
-Metri-Pack 480 series terminals should be used with wire gauges ranging from 18AWG to 10AWG.
-Metri-Pack 630 series terminals should be used with wire gauges ranging from 18AWG to 10AWG.
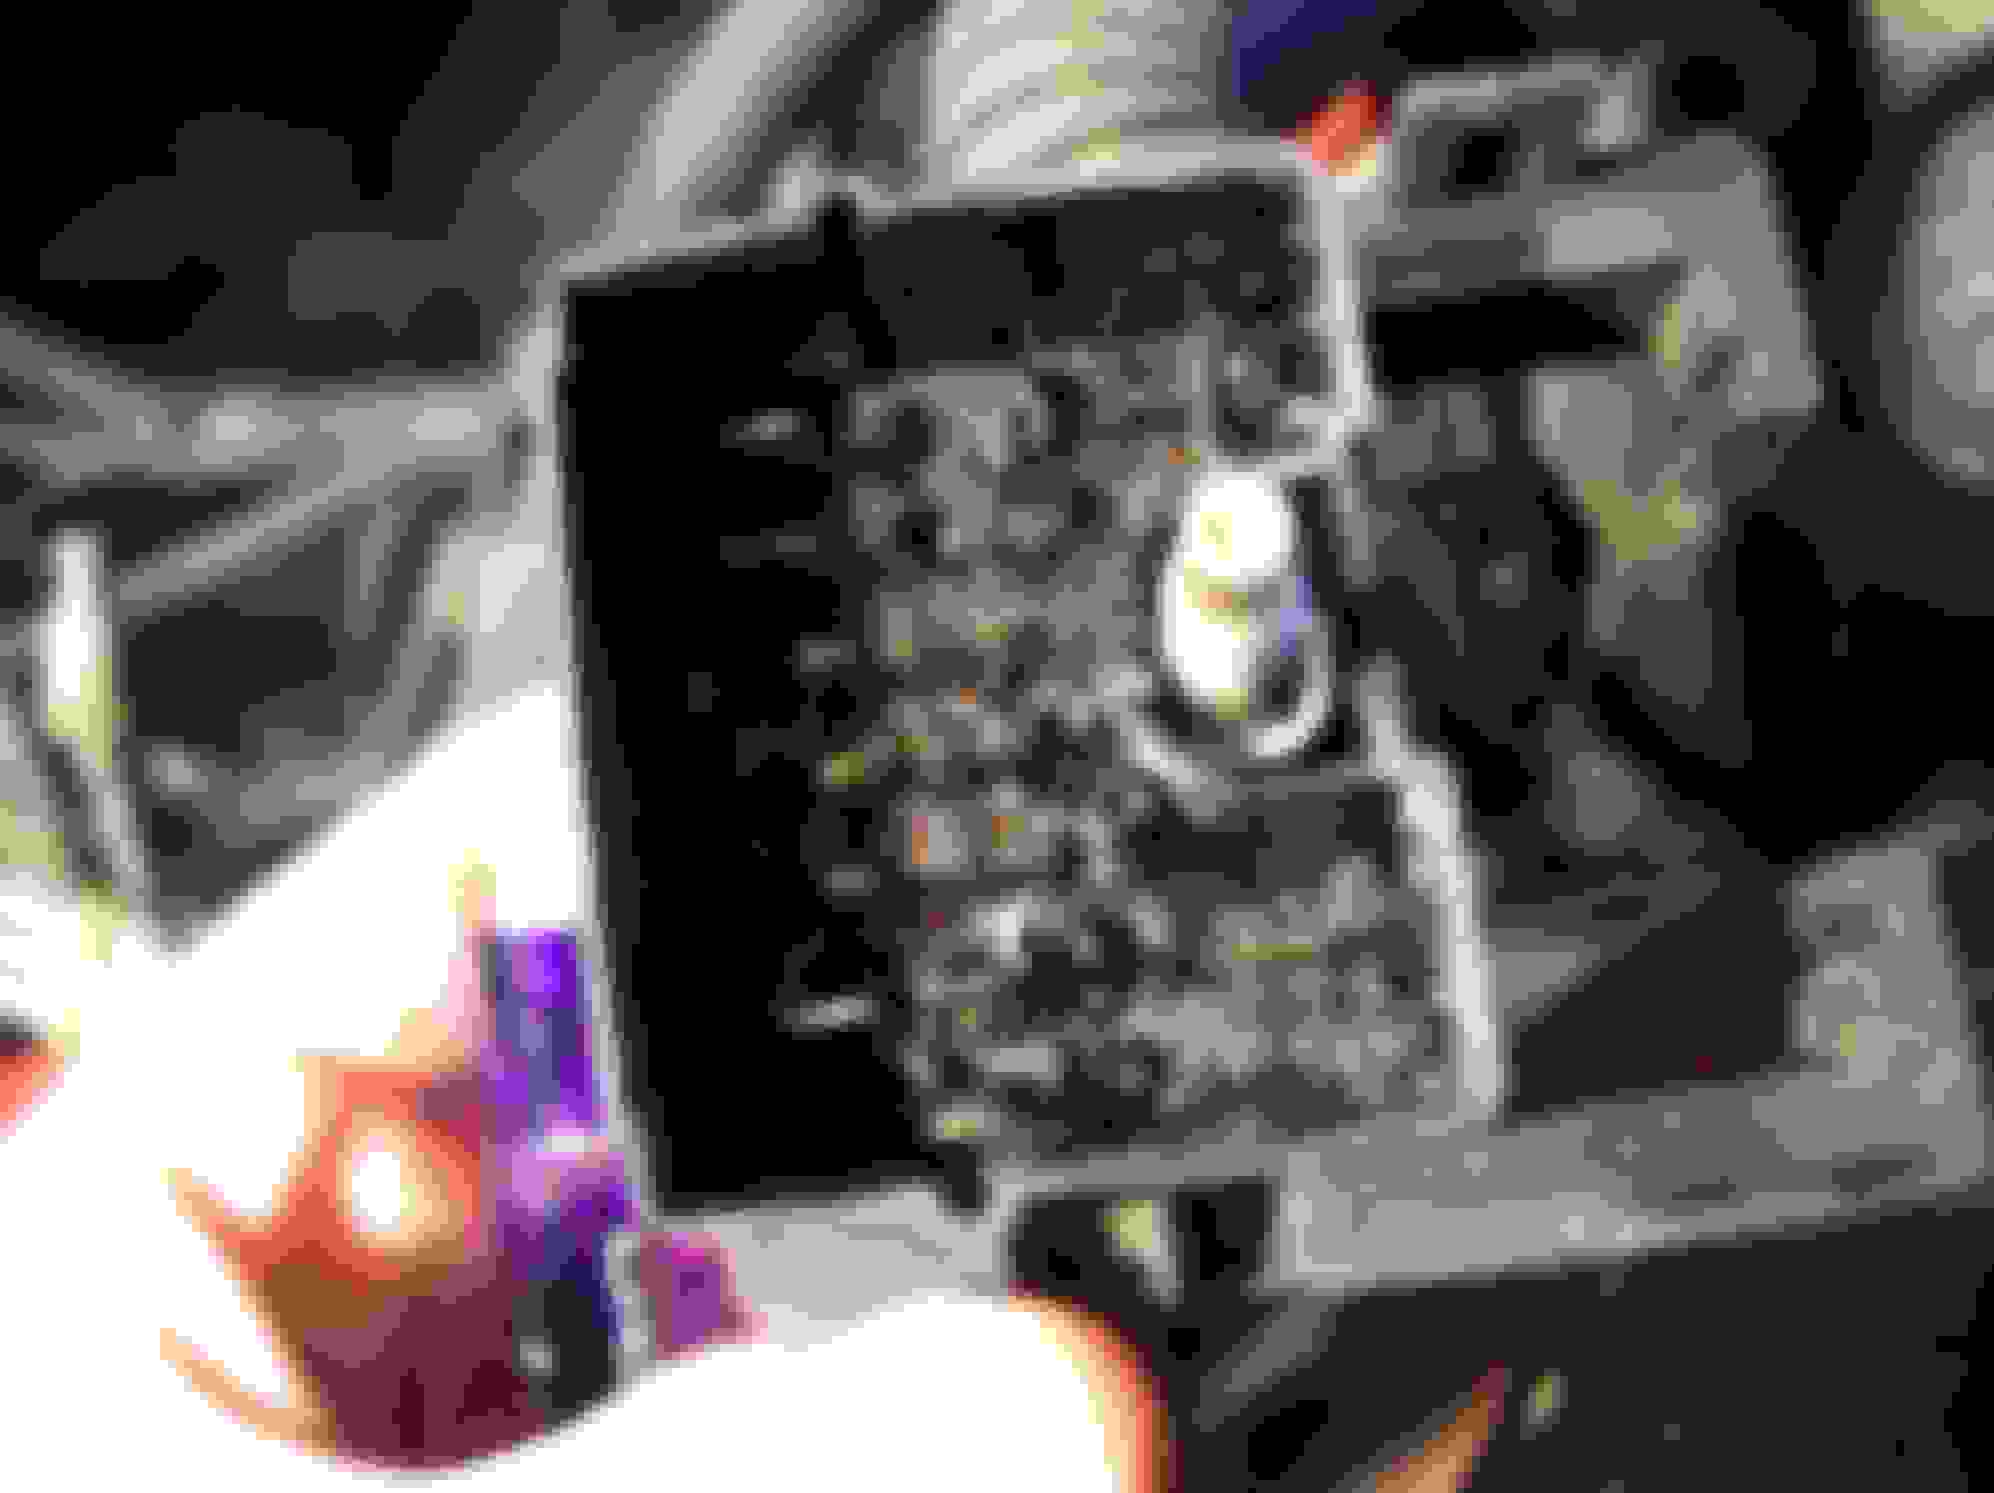
The C100 Connector body TERMINAL identification key is shown below:
Nice to see someone talk about the C100 again. I have been ordering lots of terminals for these lately. I have been buying terminals for my LS swap harnesses I make, and for personal projects.
"F" and "G" are not available from Mouser, I didn't understand what their function really was so I didn't bother trying to look anymore.
Also I can't really find part "A", I was looking to buy some for some of my older projects with bulkheads with a lot less cavities. I did find it from one large truck site, but the shipping was cost prohibitive, so I didn't try ordering. I think Mouser can get them if you order hundreds of them, but I am not spending thousands of dollars for something no one else is going to need, lol
Some of the terminals are also not available anymore. I forget exactly which ones though. I was ordering a variety of terminals to populate the used inside, "A", bulkhead connectors that I have gotten, and a few of them are not showing as available.
I looked at other aftermarket solutions for bulkhead connections, but I wasn't happy with the amount of cavities, sizes of connectors and amperage ratings, so I came back around to using these since they will look kind of factory once I finish up the vehicle
O well... I'll wait and see if any interest builds. Otherwise there is no point for me to continue adding more information to the thread.
I'm sorry guys. I screwed up taking so long to do this...
I for one DO appreciate your efforts , and I'd like you to keep two things in mind WRT the seeming lack of interest in your thread ;
#1 , The C100 is not something that generates a lot of interest , till someone has a problem with it .
#2 , Site traffic at this site , and at many other non related sites I visit , is generally pretty sparse in the summer months when folks are likely doing more driving than wrenching .
Post as much as you got on the C100 , one of us will likely eventually need it ....
Thank you for updating the c100 info, I do truly appreciate it. I am in the process of switching a 89 over to a 90 to include the air bag and your info has been extremely helpful.
Thanks
I'm interested. I need to replace the tach wire. I know what I need to do for the most part, and I think I have the right connectors, but I'm concerned about whether that goop inside will cause me problems...
Can someone tell me how the male connectors go in?
I know on the female side, there's a plastic retainer on the side that slides out, but I don't see one on the male (engine compartment) side...
This may give me motivation to try blending the LS harness and factory harness more than just laying them over top of each other and ignoring the old circuits.
Can someone tell me how the male connectors go in?
I know on the female side, there's a plastic retainer on the side that slides out, bit don't see one on the male (engine compartment) side...
There is also supposed to be a terminal position assurance in the male side of the connector.
Okay, HOW do you get this thing out of here (secondary lock)? It will not budge, and I don't wanna break it.
The one for the passenger compartment side slid out easily. I'm trying to add two auxillary wires for accesories...
Okay, HOW do you get this thing out of here (secondary lock)? It will not budge, and I don't wanna break it.
The one for the passenger compartment side slid out easily. I'm trying to add two auxillary wires for accesories...
If I remember correctly, there are two nubs in there and you have to overcome them.I take a small screwdriver on the inside and push the lock in the corner to slide it out, then the other corner, then it should slide right out
Okay, I got that thing out of there. Just had to be careful and persistant. That secondary lock was surprisingly flexible. I thought it would be brittle and snap into pieces. It was that tar-like substance that was holding it firmly in there. The interior side connector doesn't have that stuff in it. So I was able to accomplish my task, which was to add two 18 awg wires to the C100 for accessories, so I won't need to drill holes in the firewall...
Nice. I like using the connector instead of more holes in the firewall too. I just did the same thing on the bulkhead in my second gen with the LQ4 engine swap
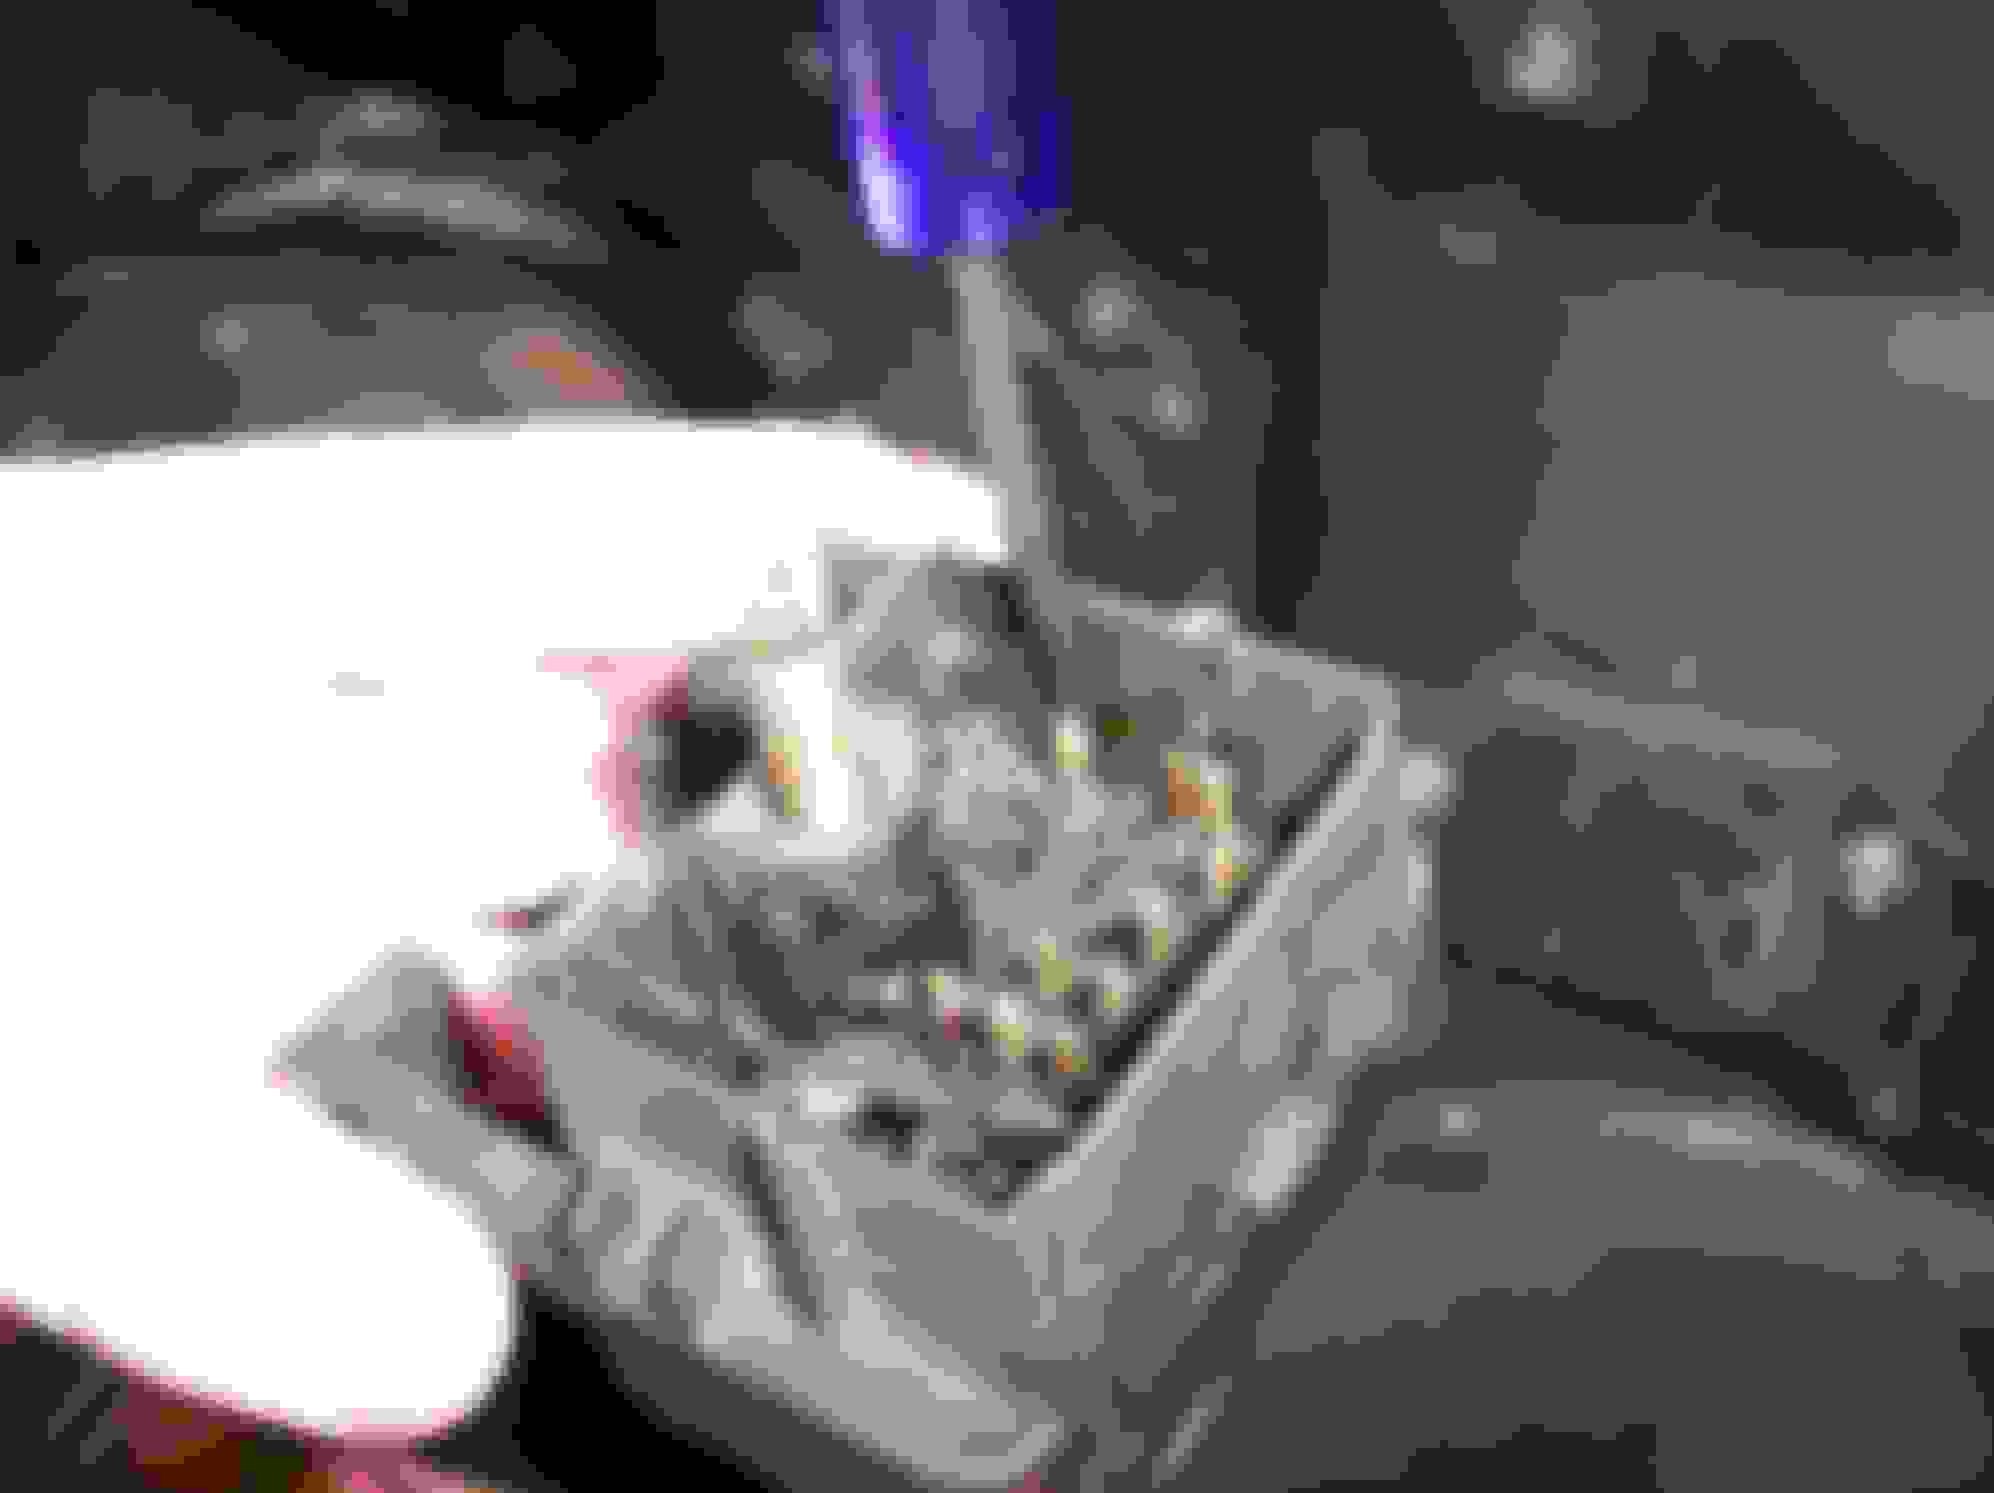
Here are some of the old photos from my original thread that show disassembly...
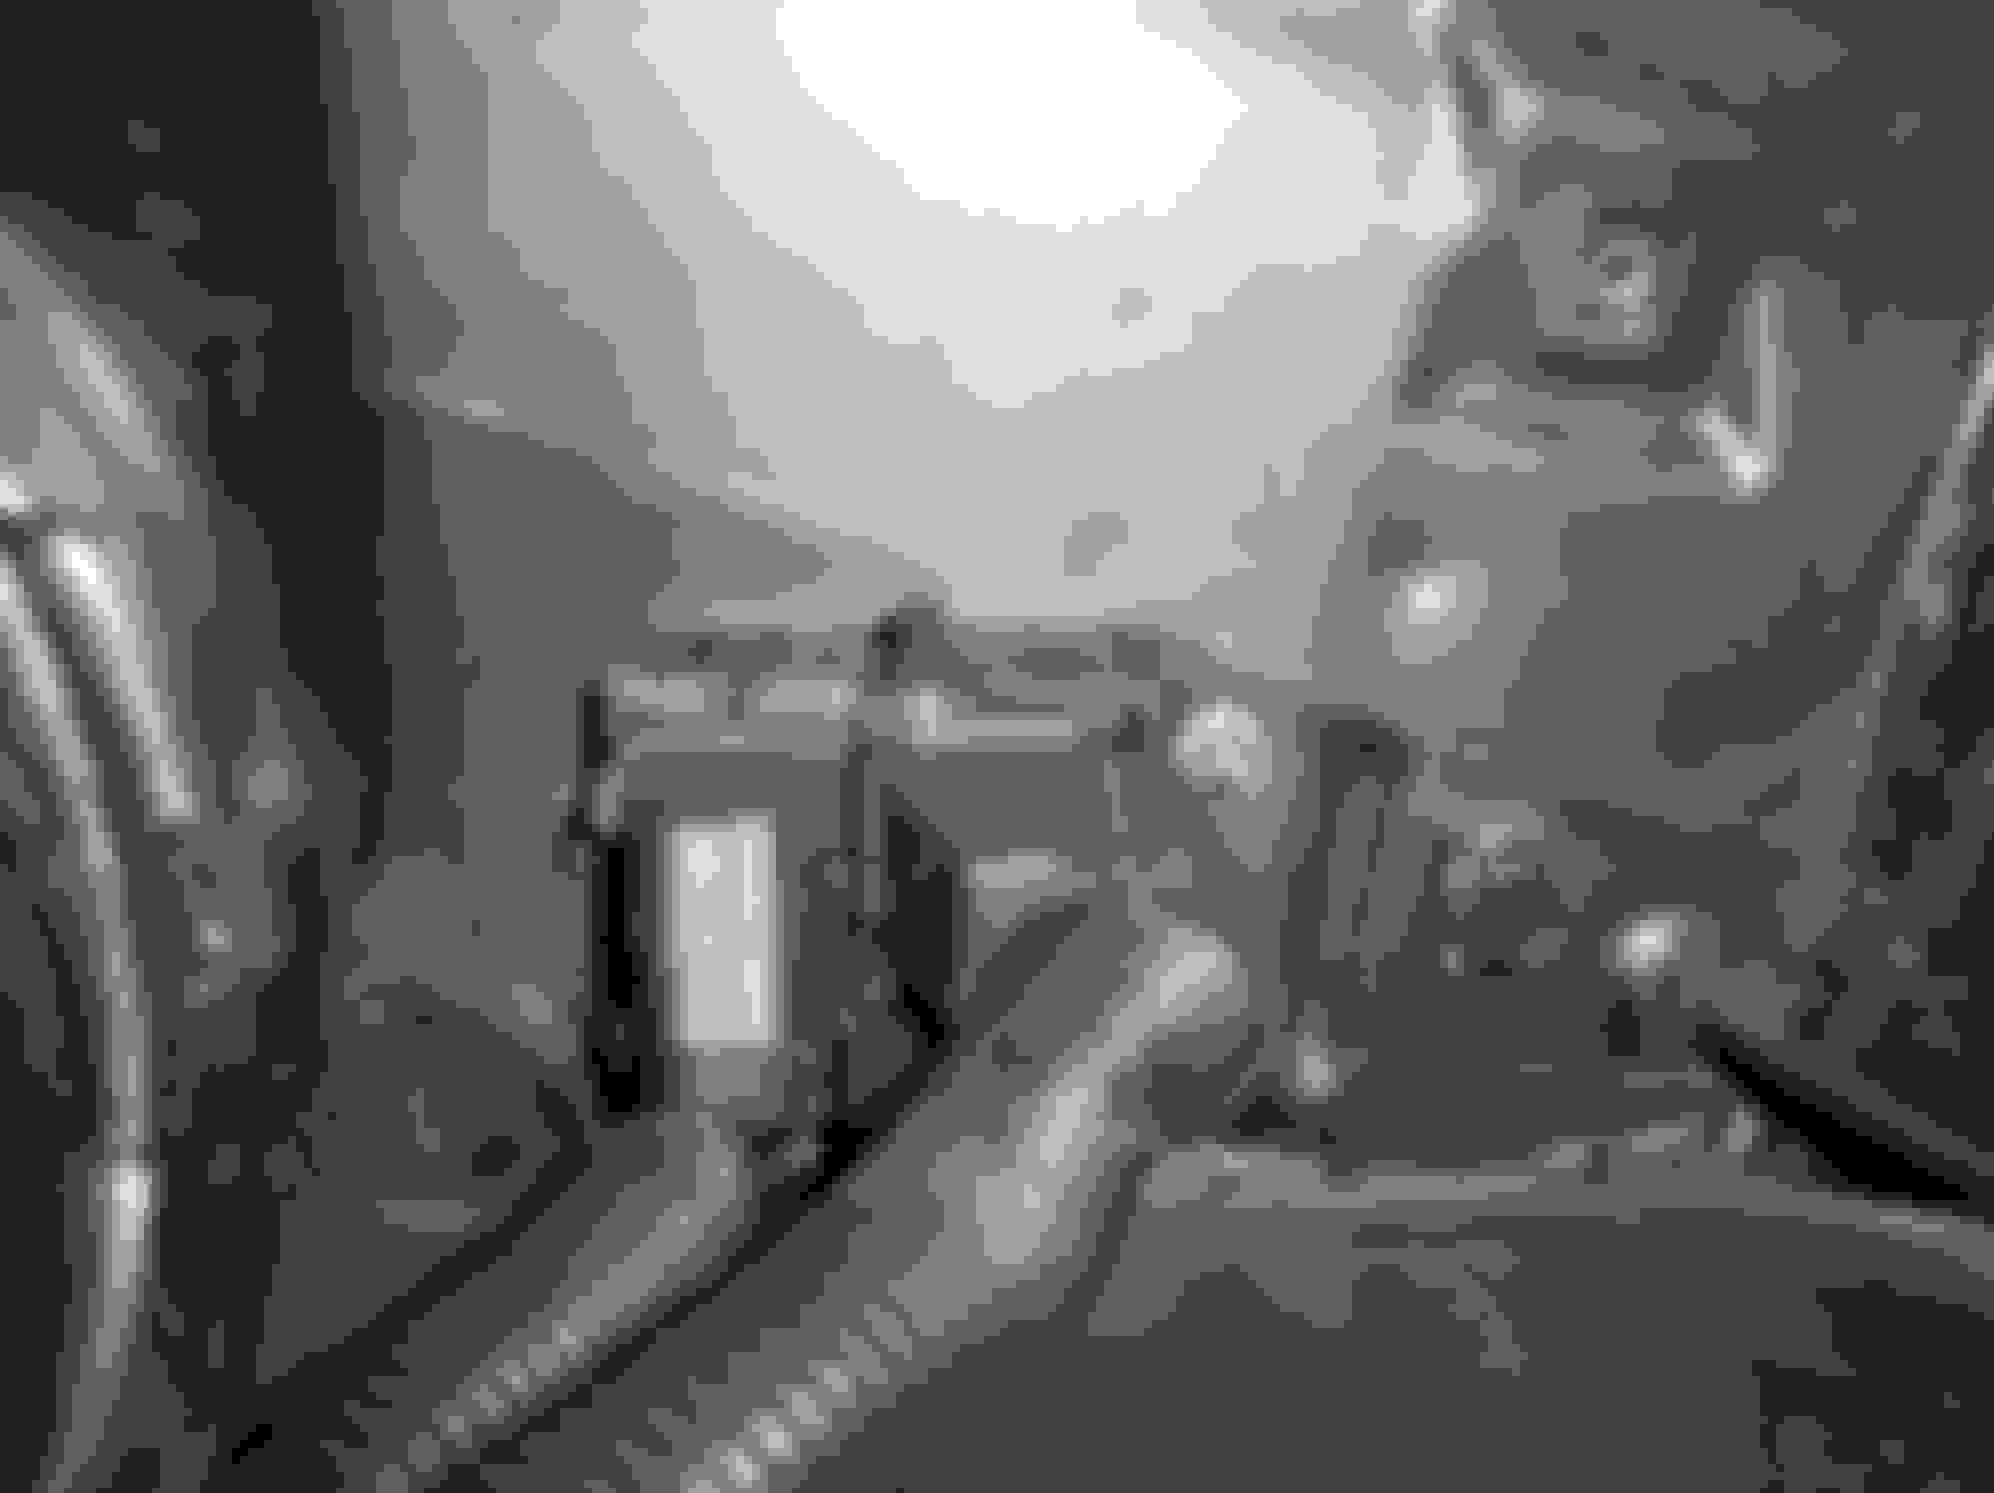
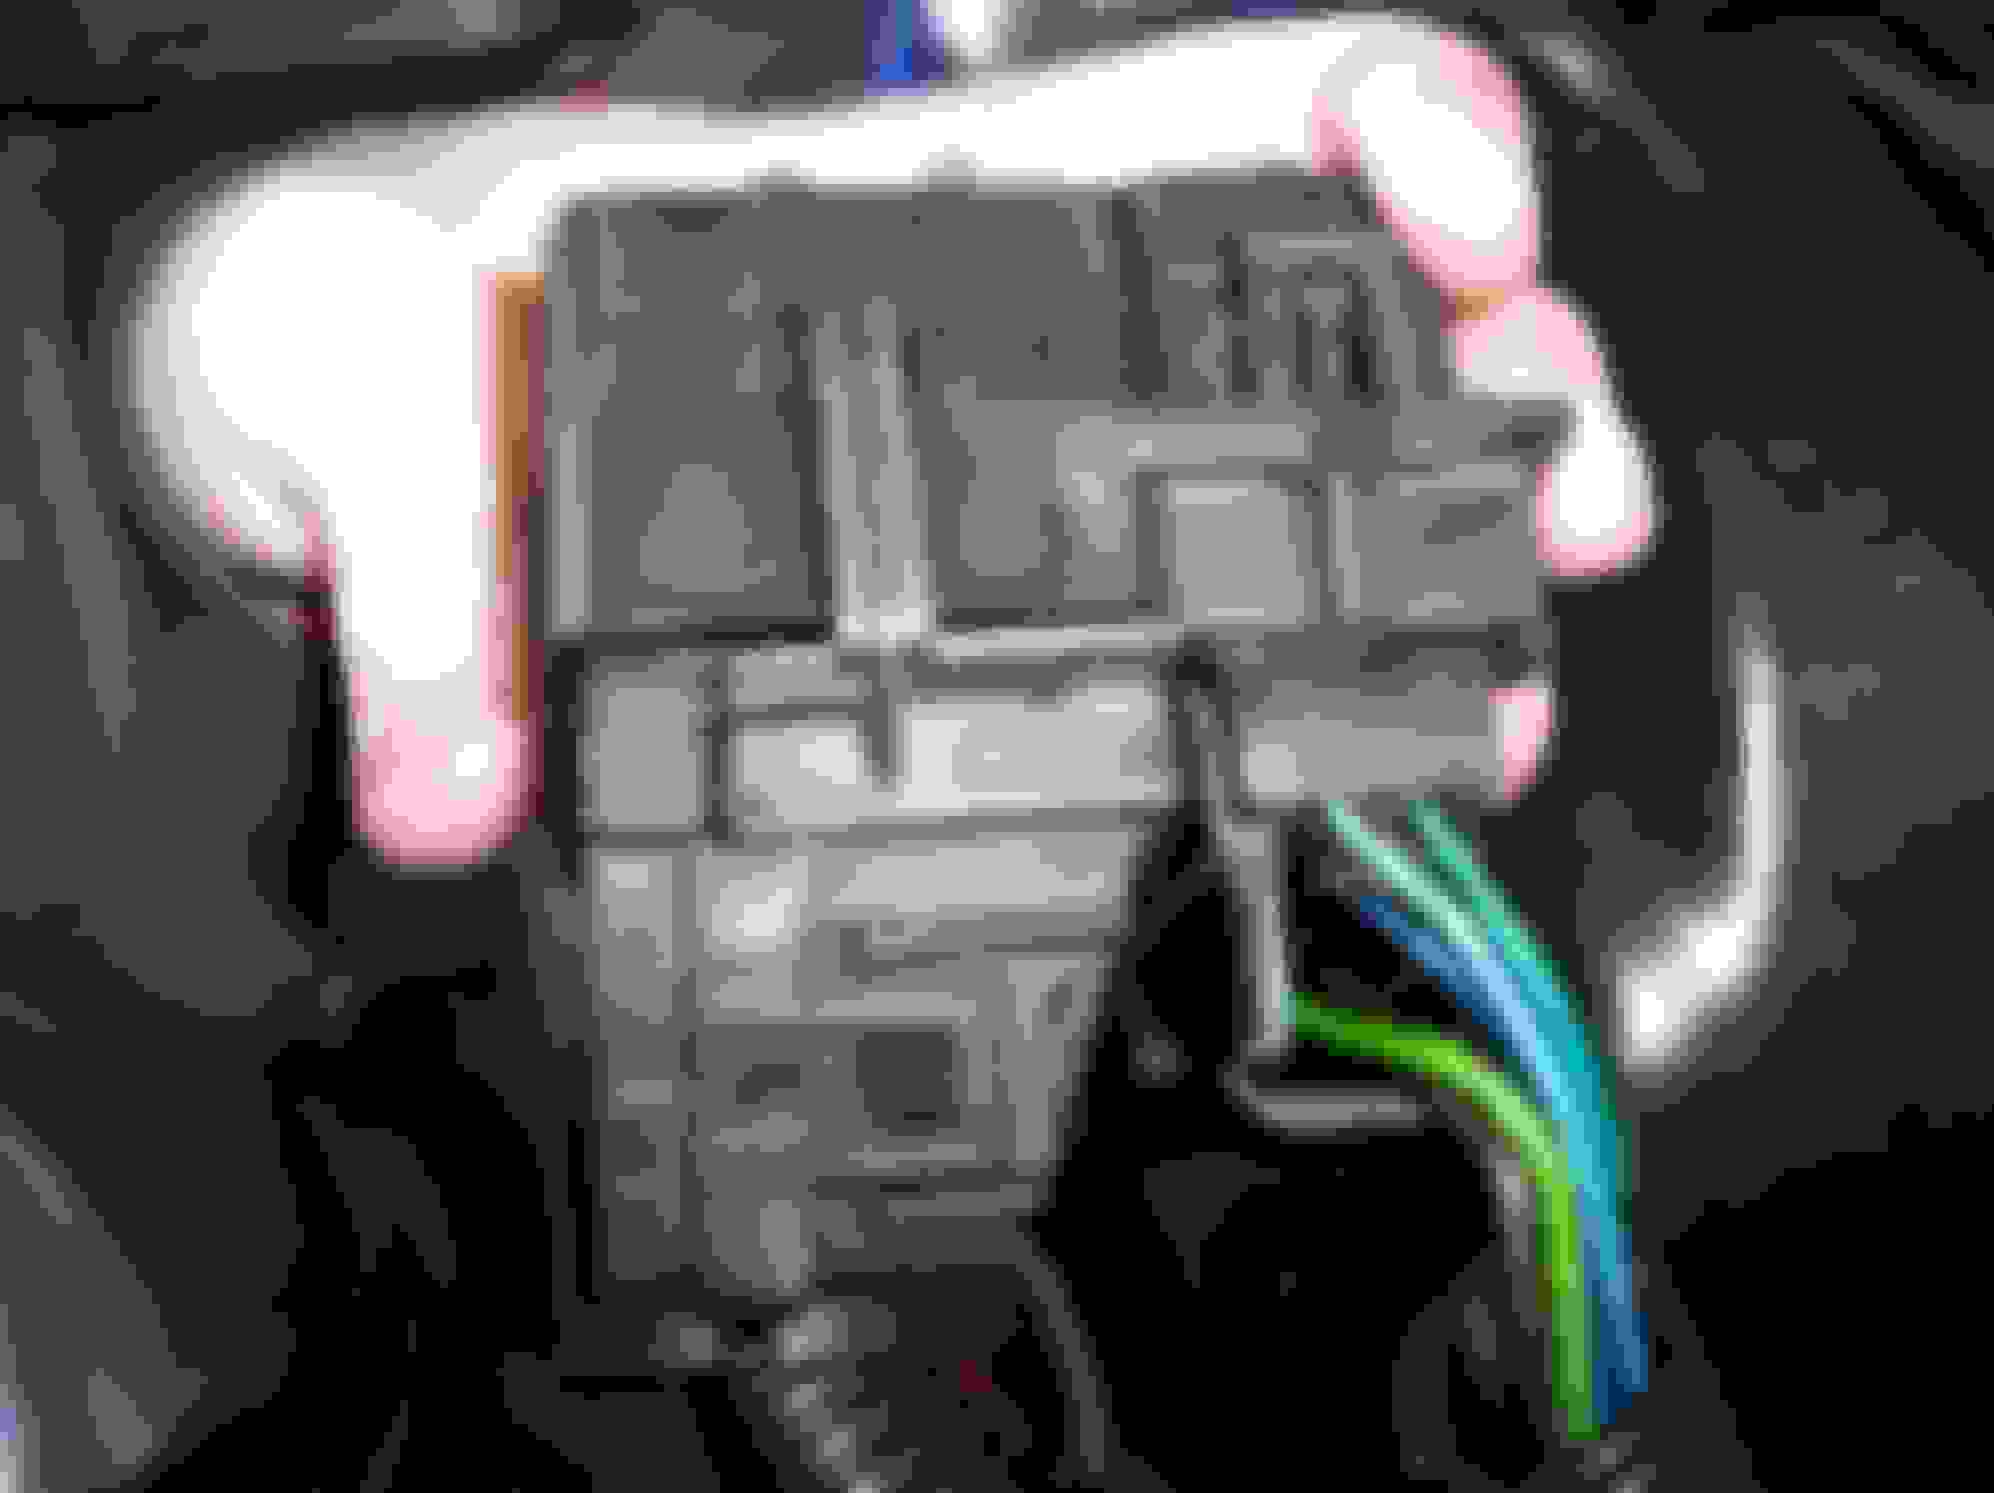
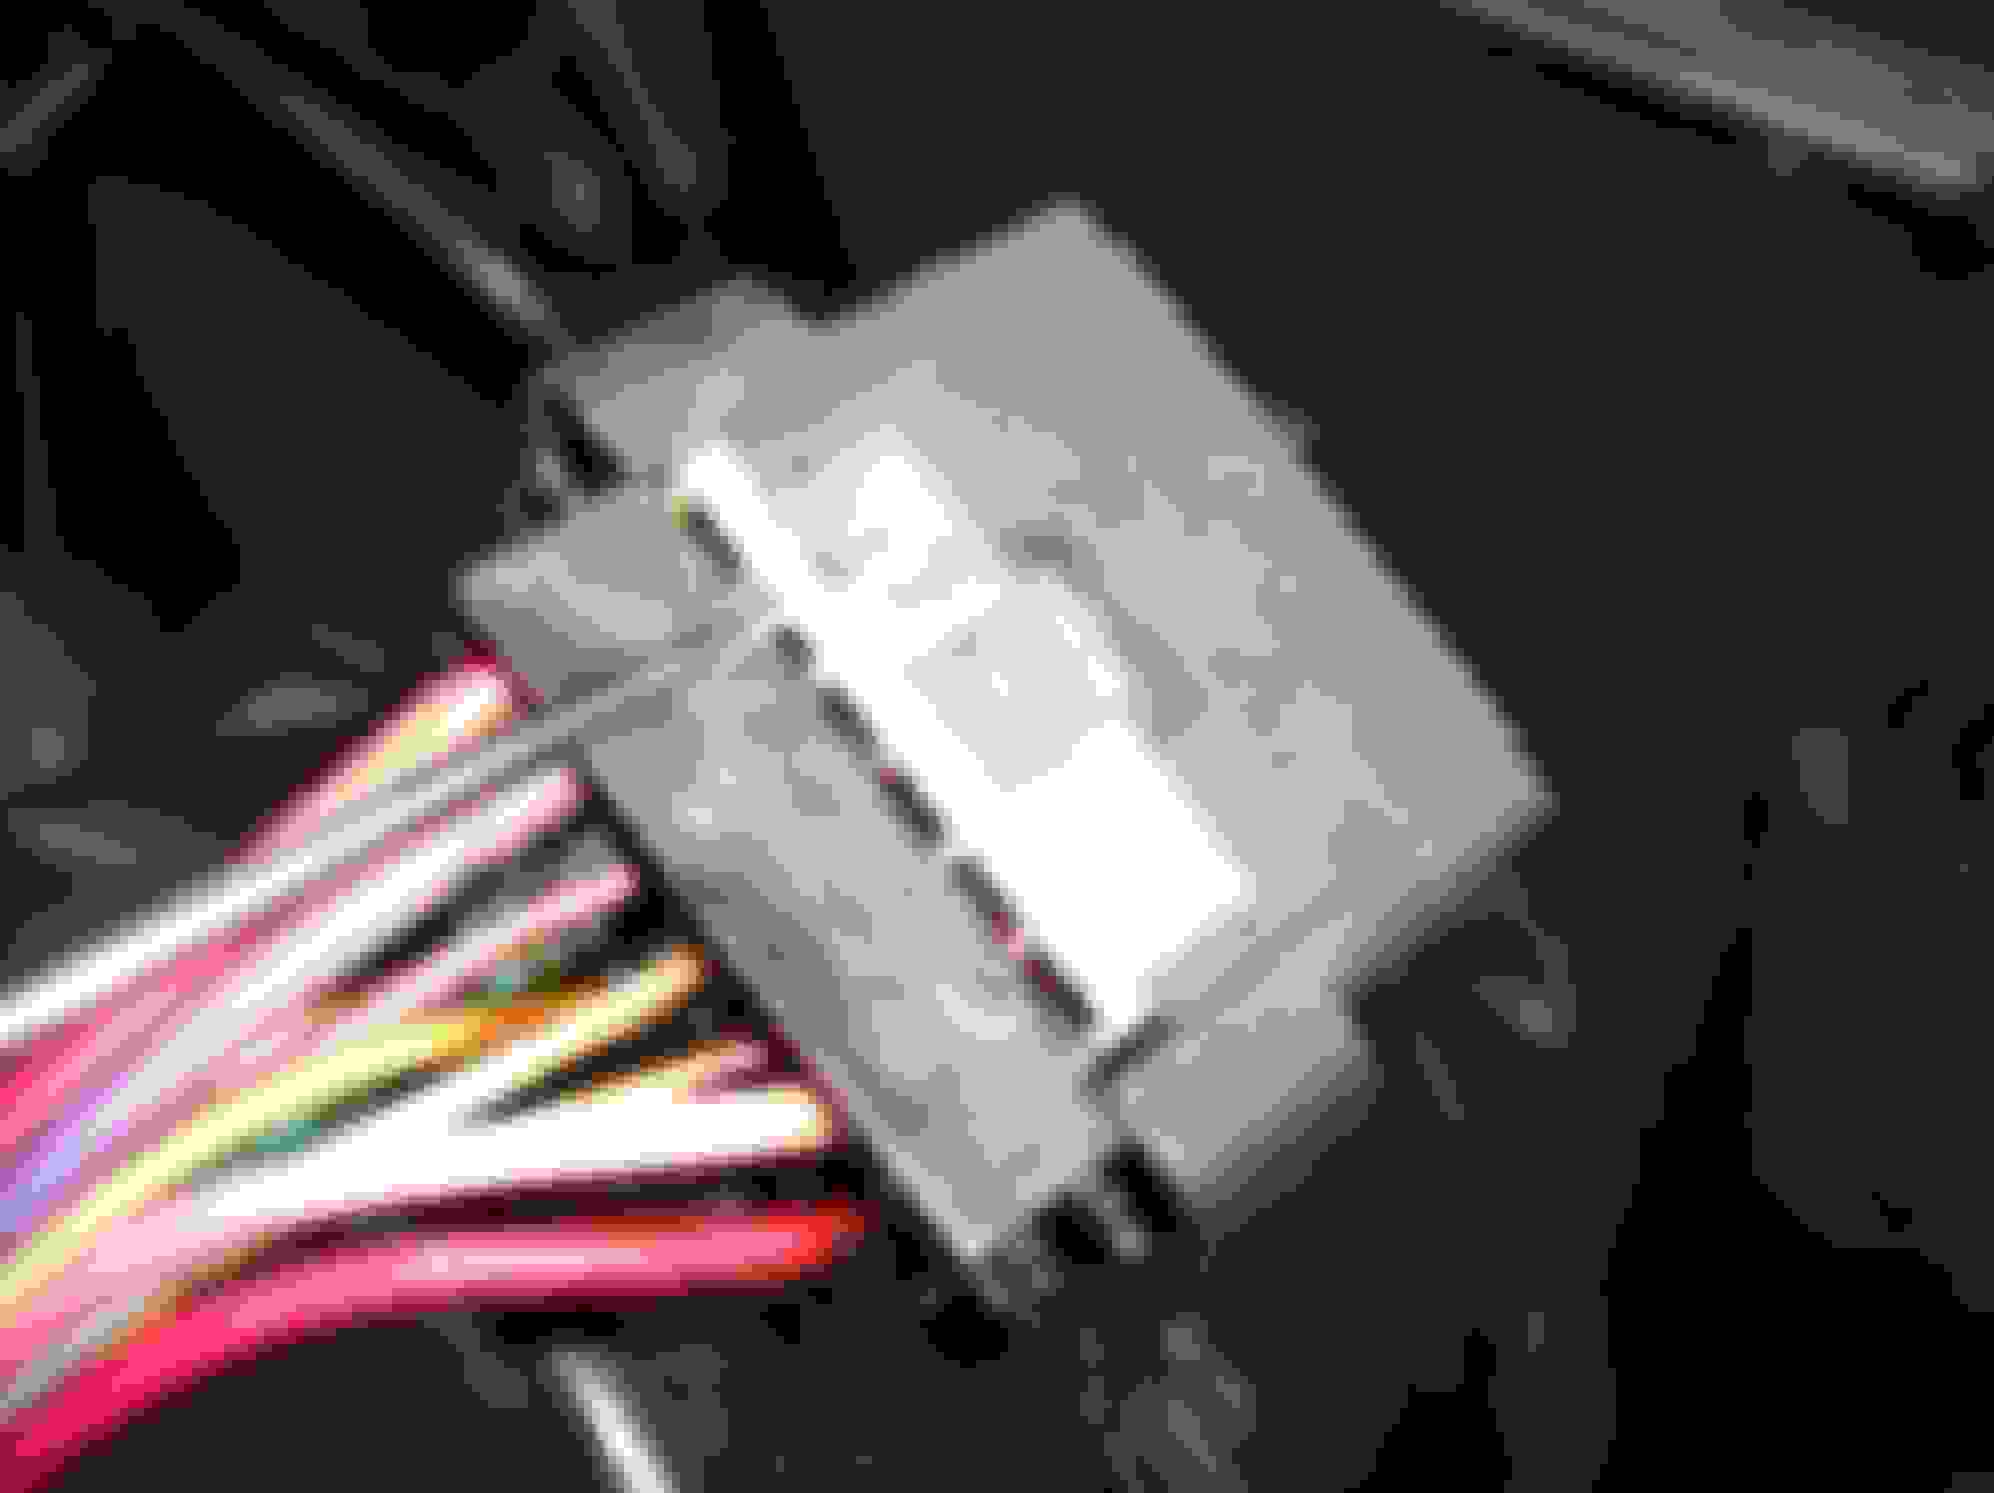
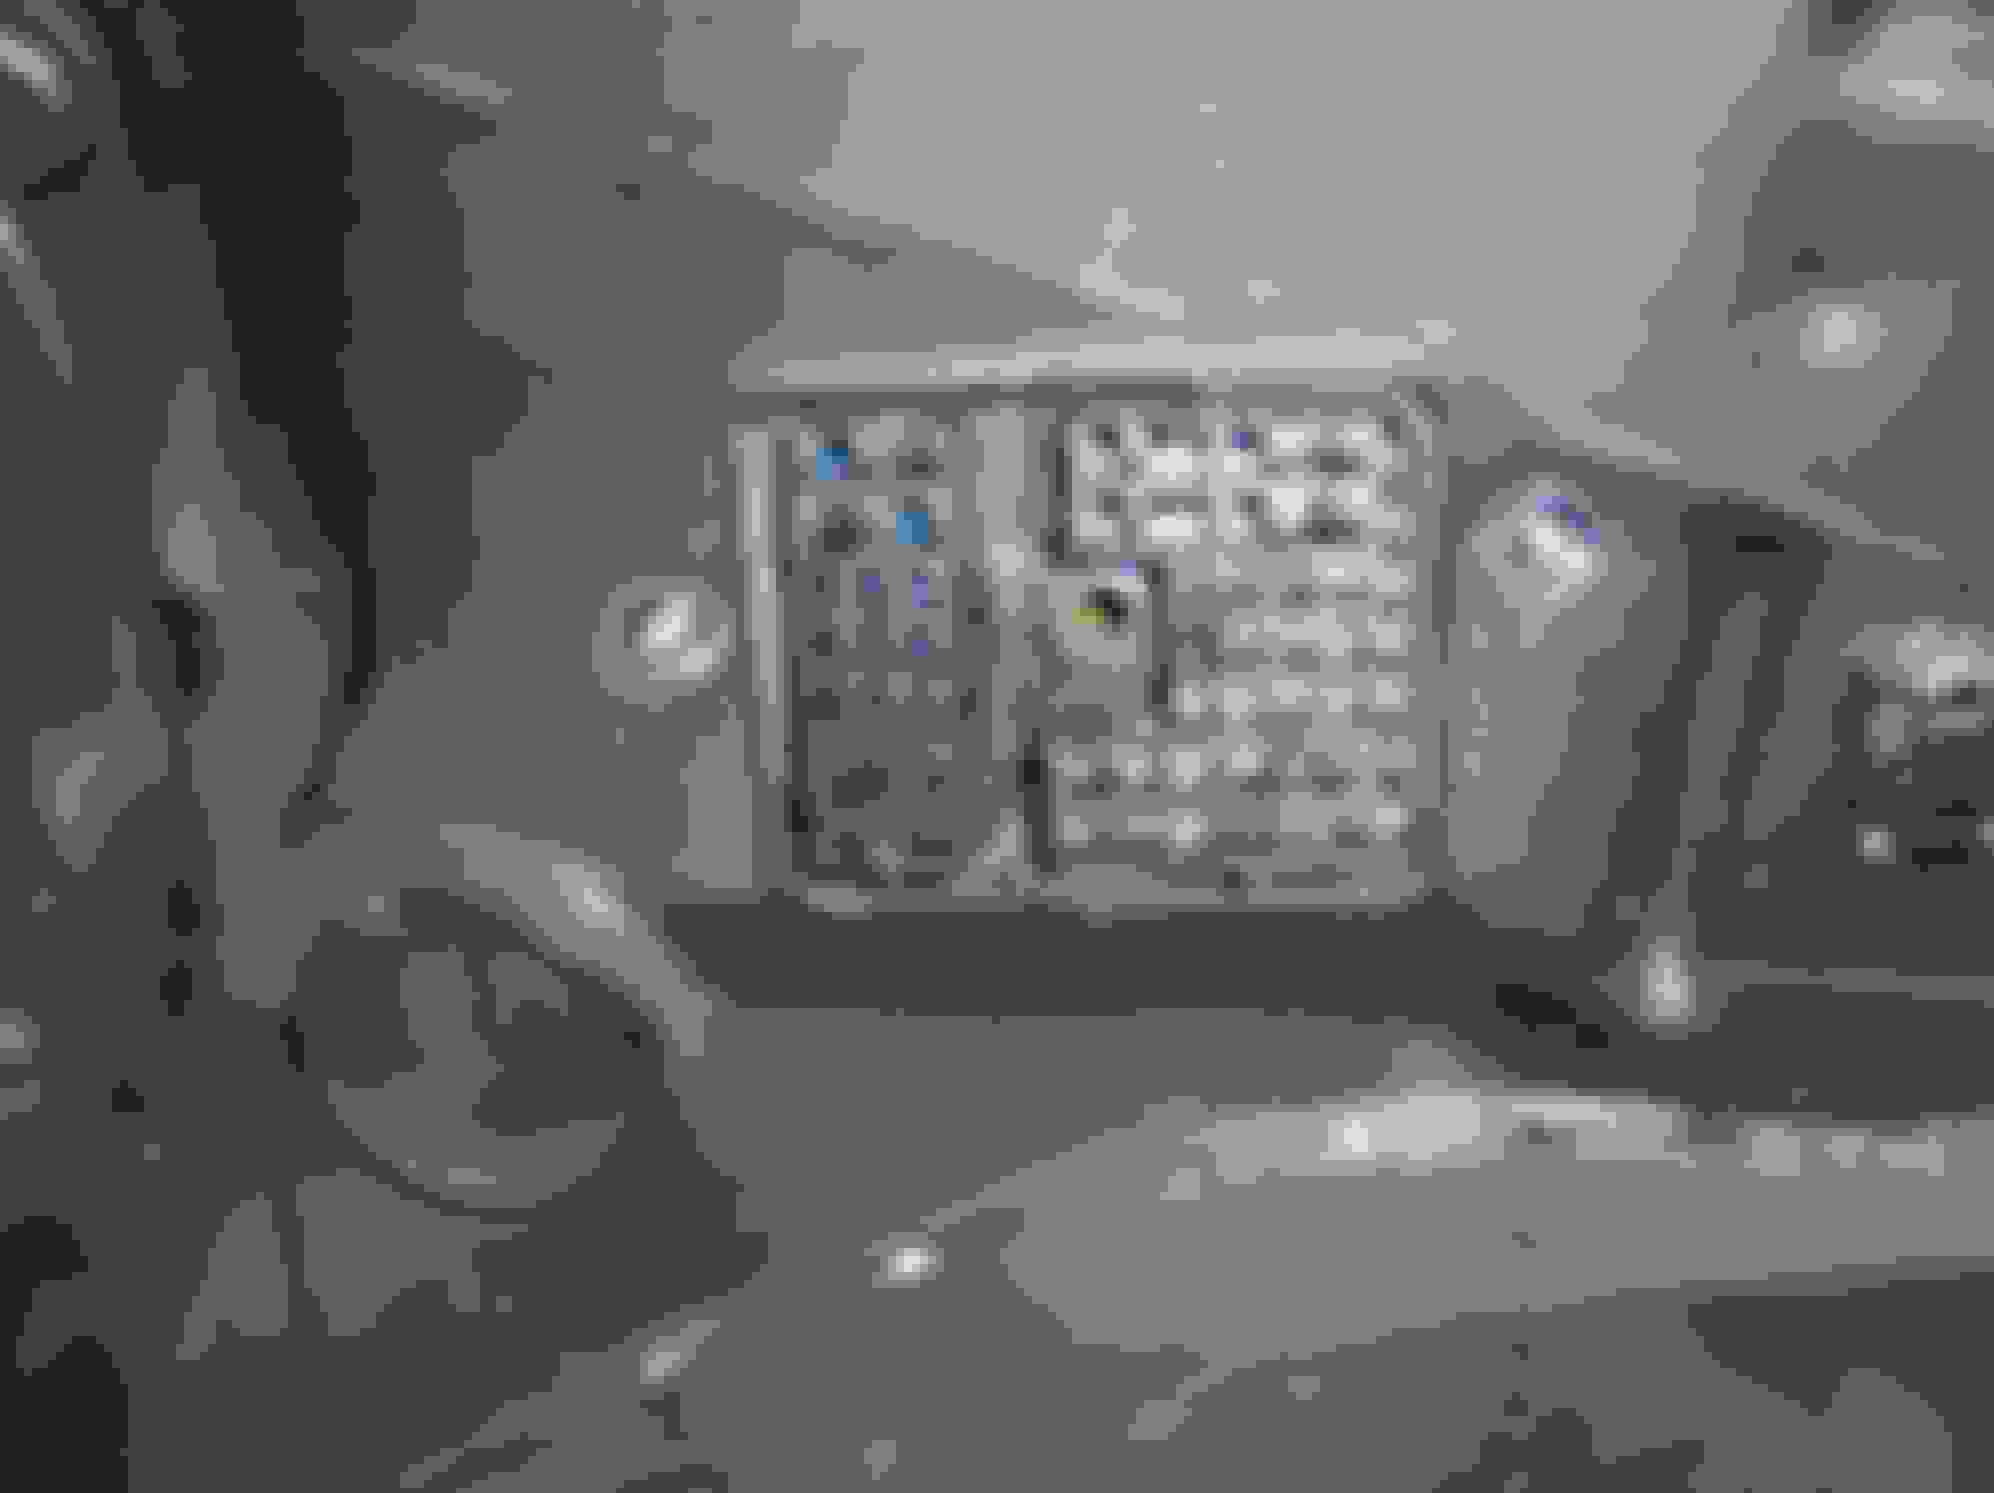
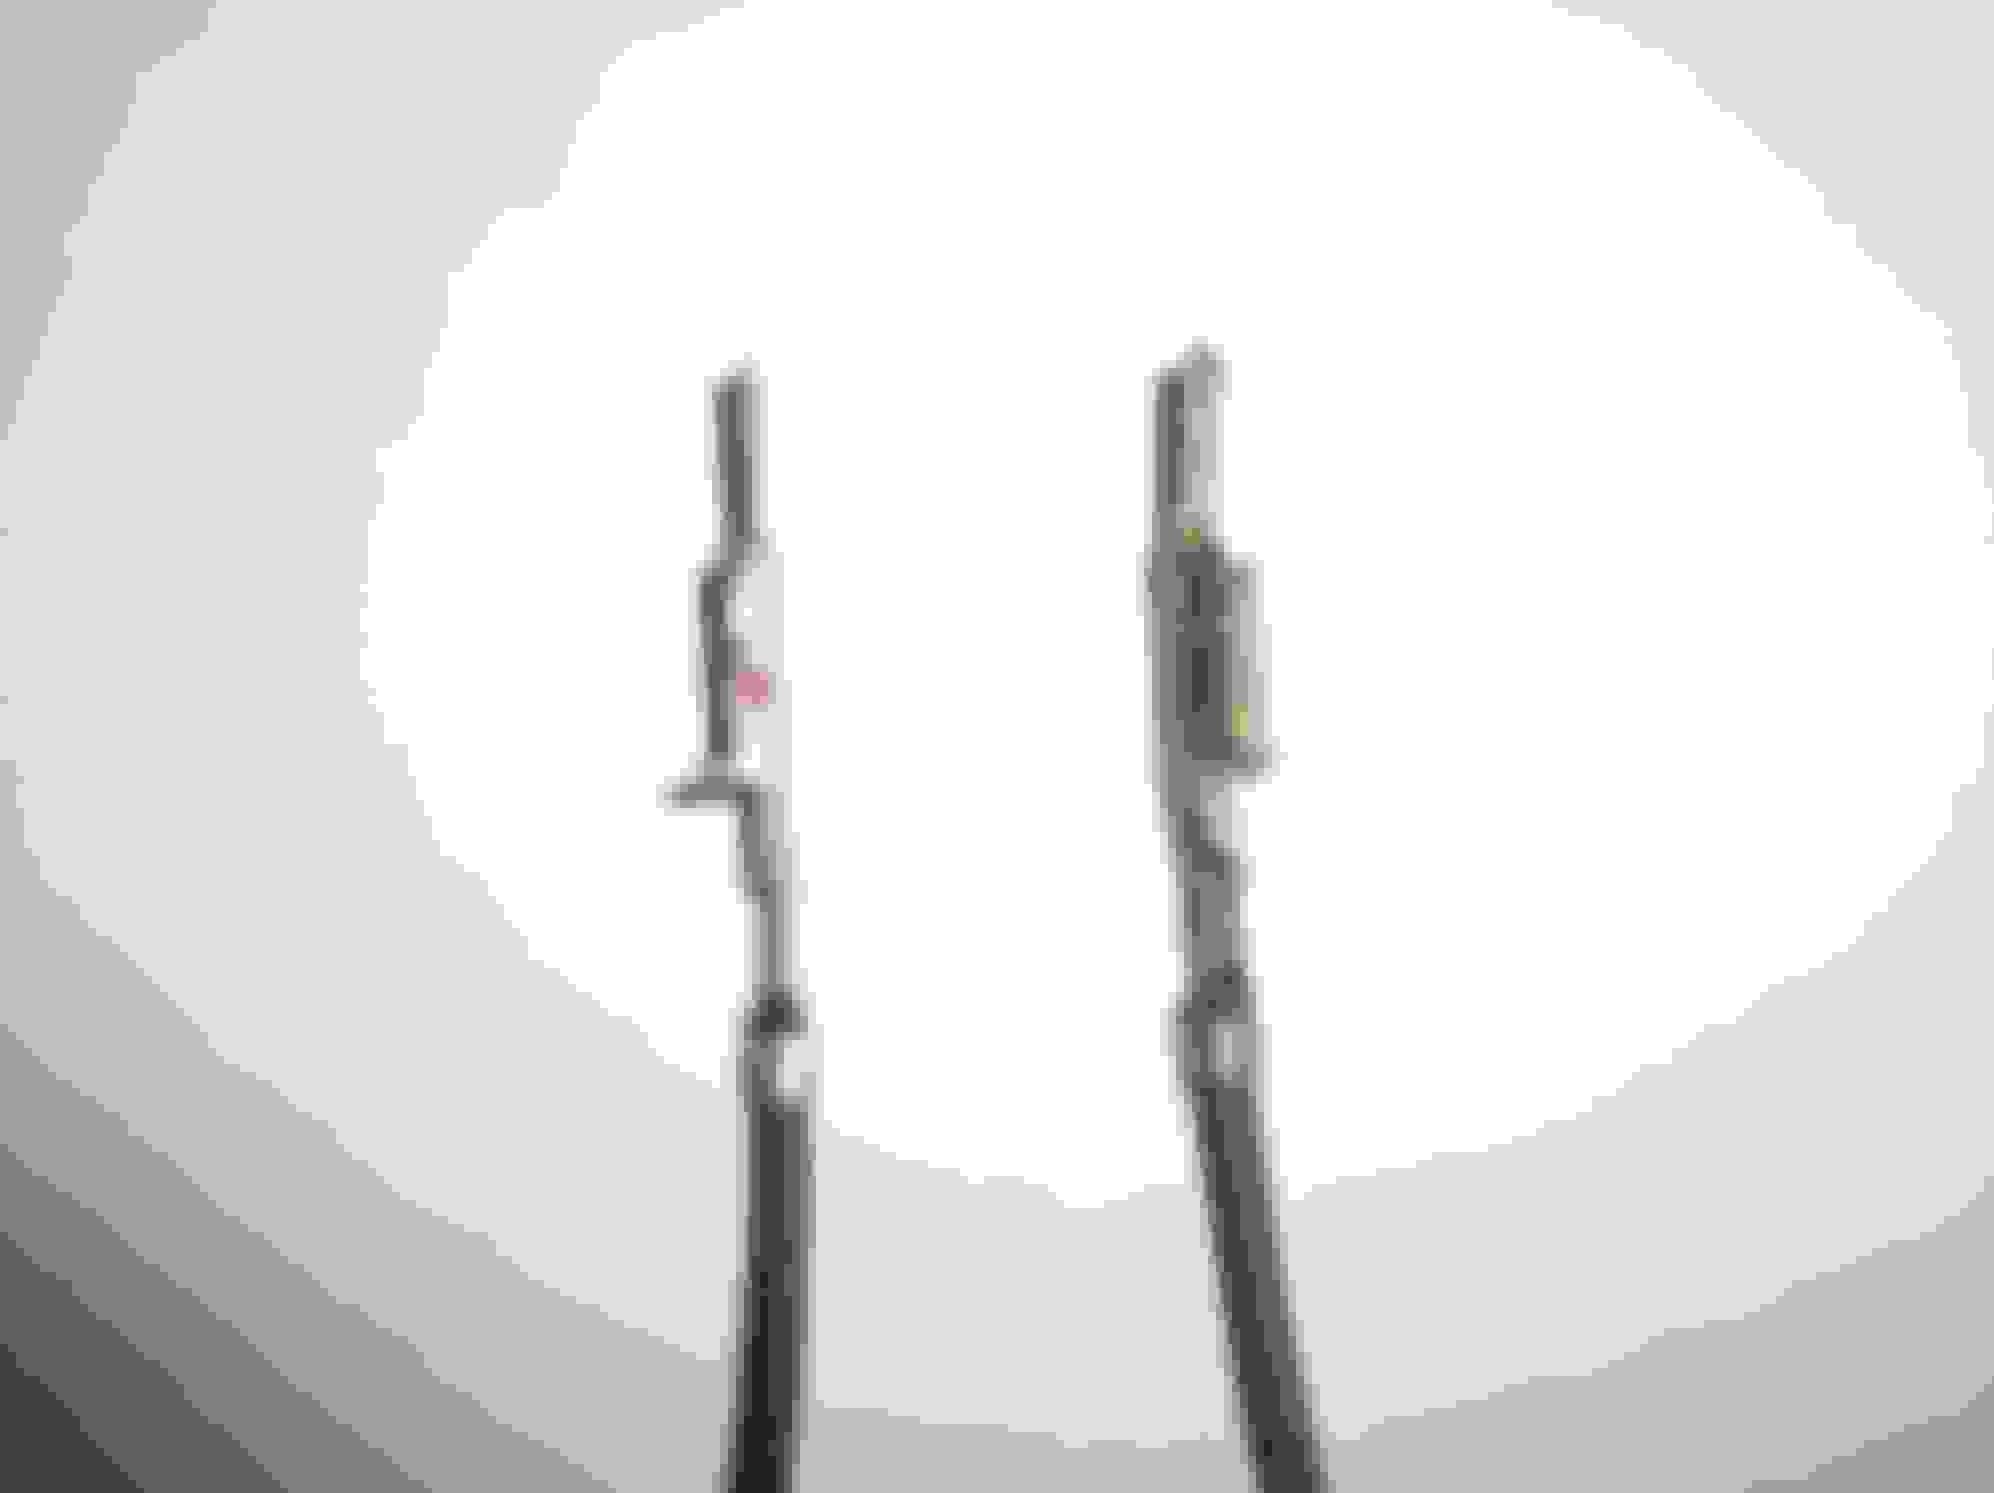
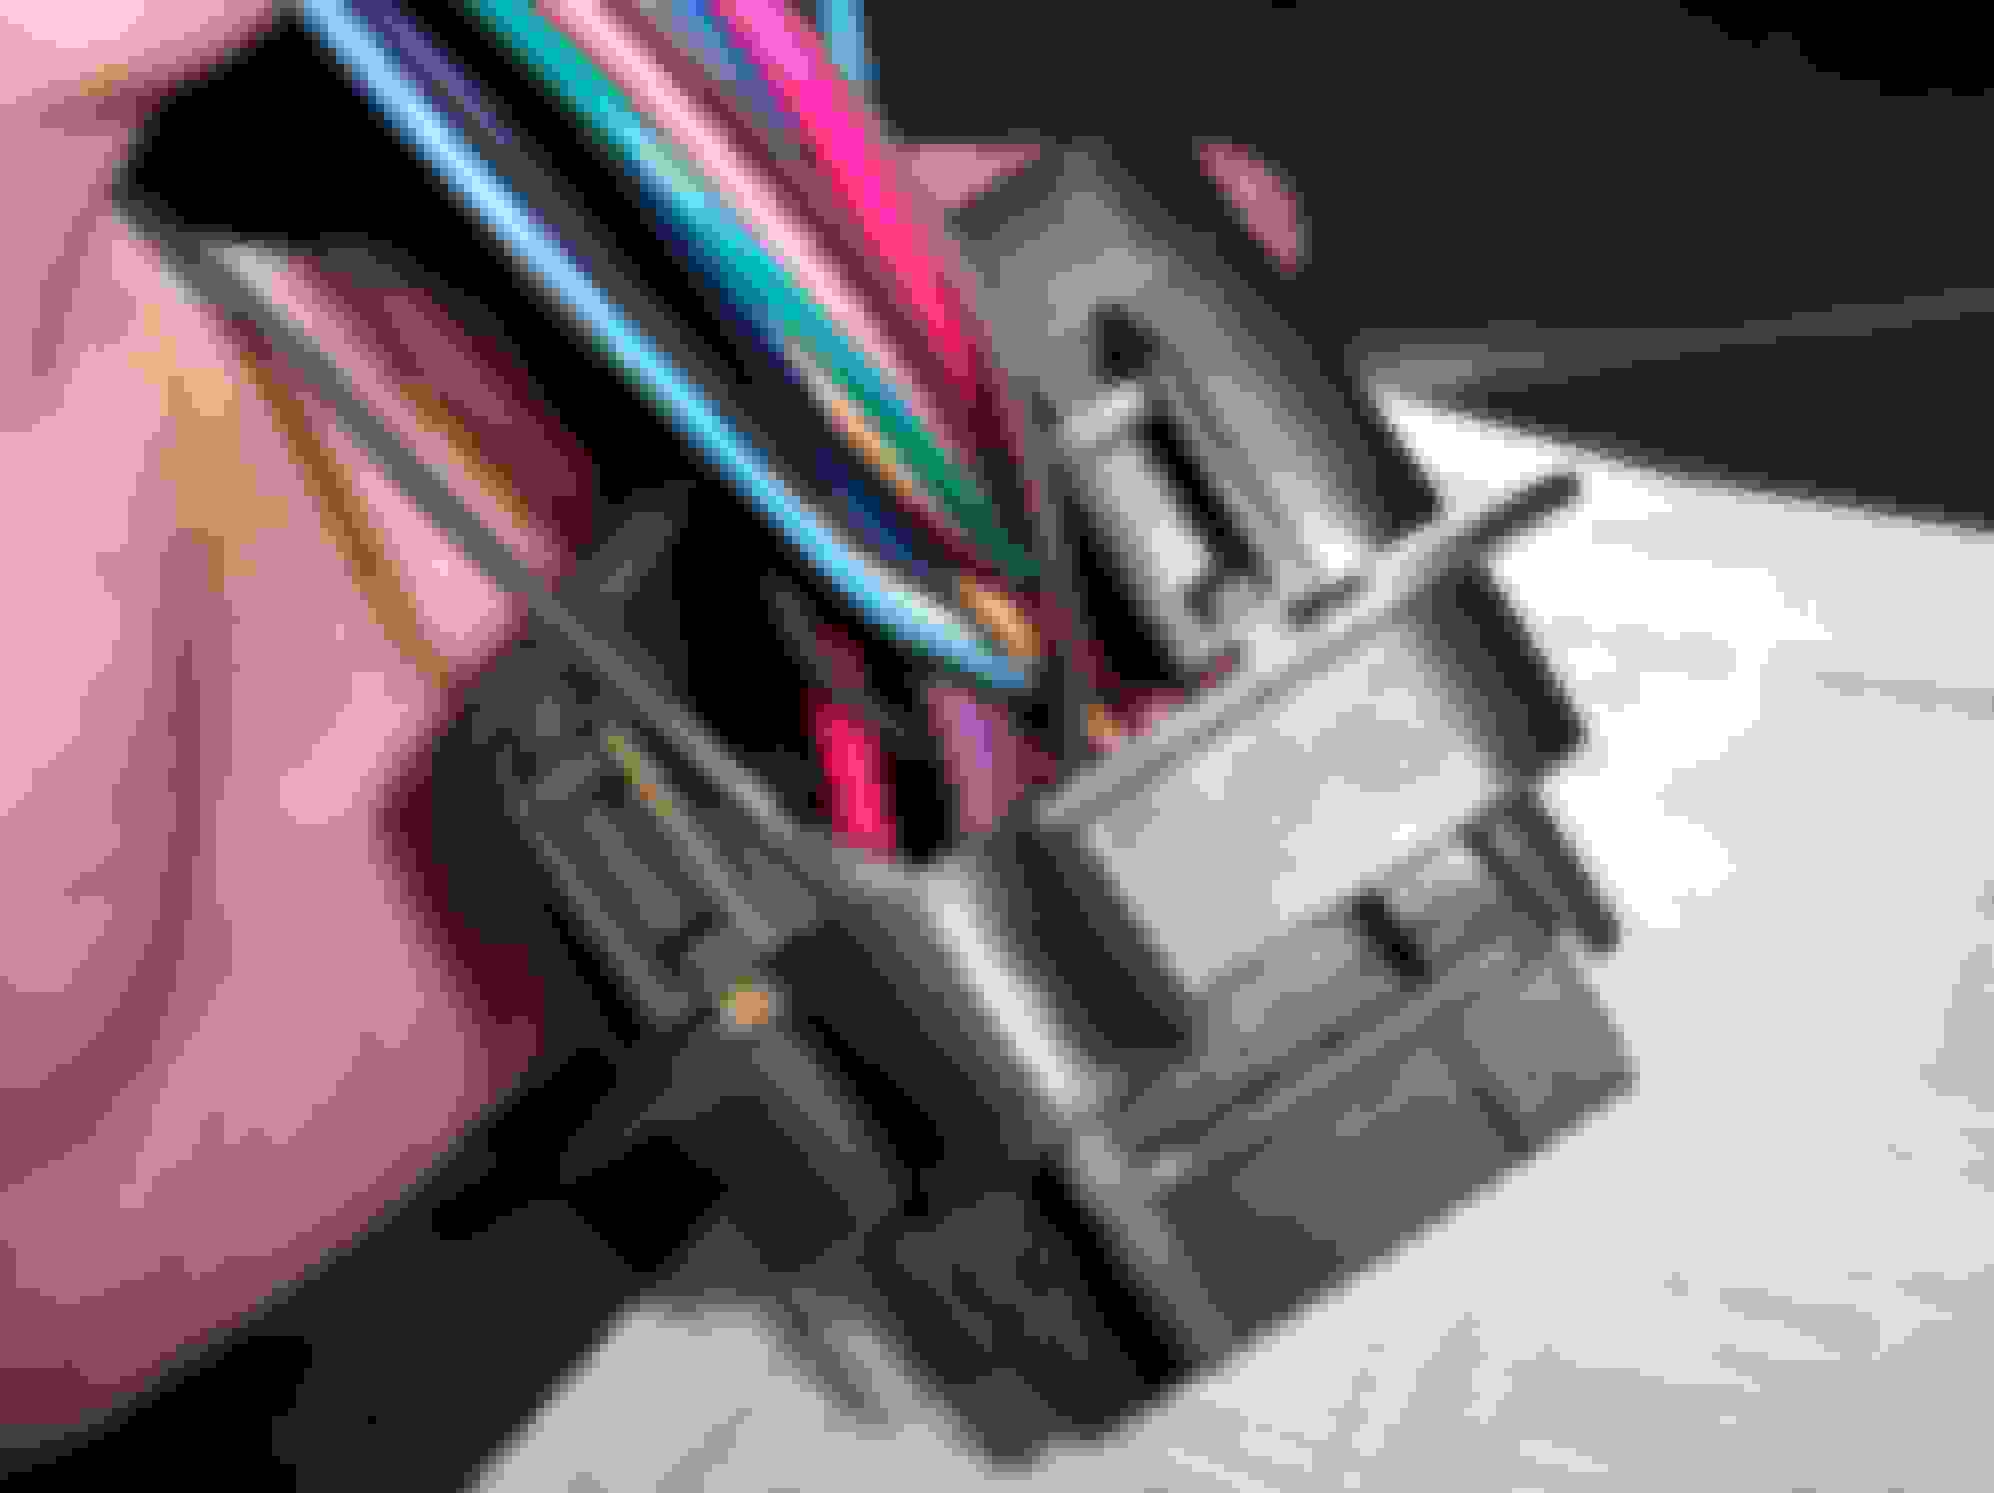
C100 Bulkhead Fire-Wall Connector assembly location on Driver-Side of Fire-Wall:
Locate and remove C100 Connector assembly Retaining Fastener (Bolt) with a Ratchet and Long-Extension.
Torque Spec = 70 Inch/ Lbs:
Pull the Engine Compartment side of the C100 Connector towards front of Vehicle...
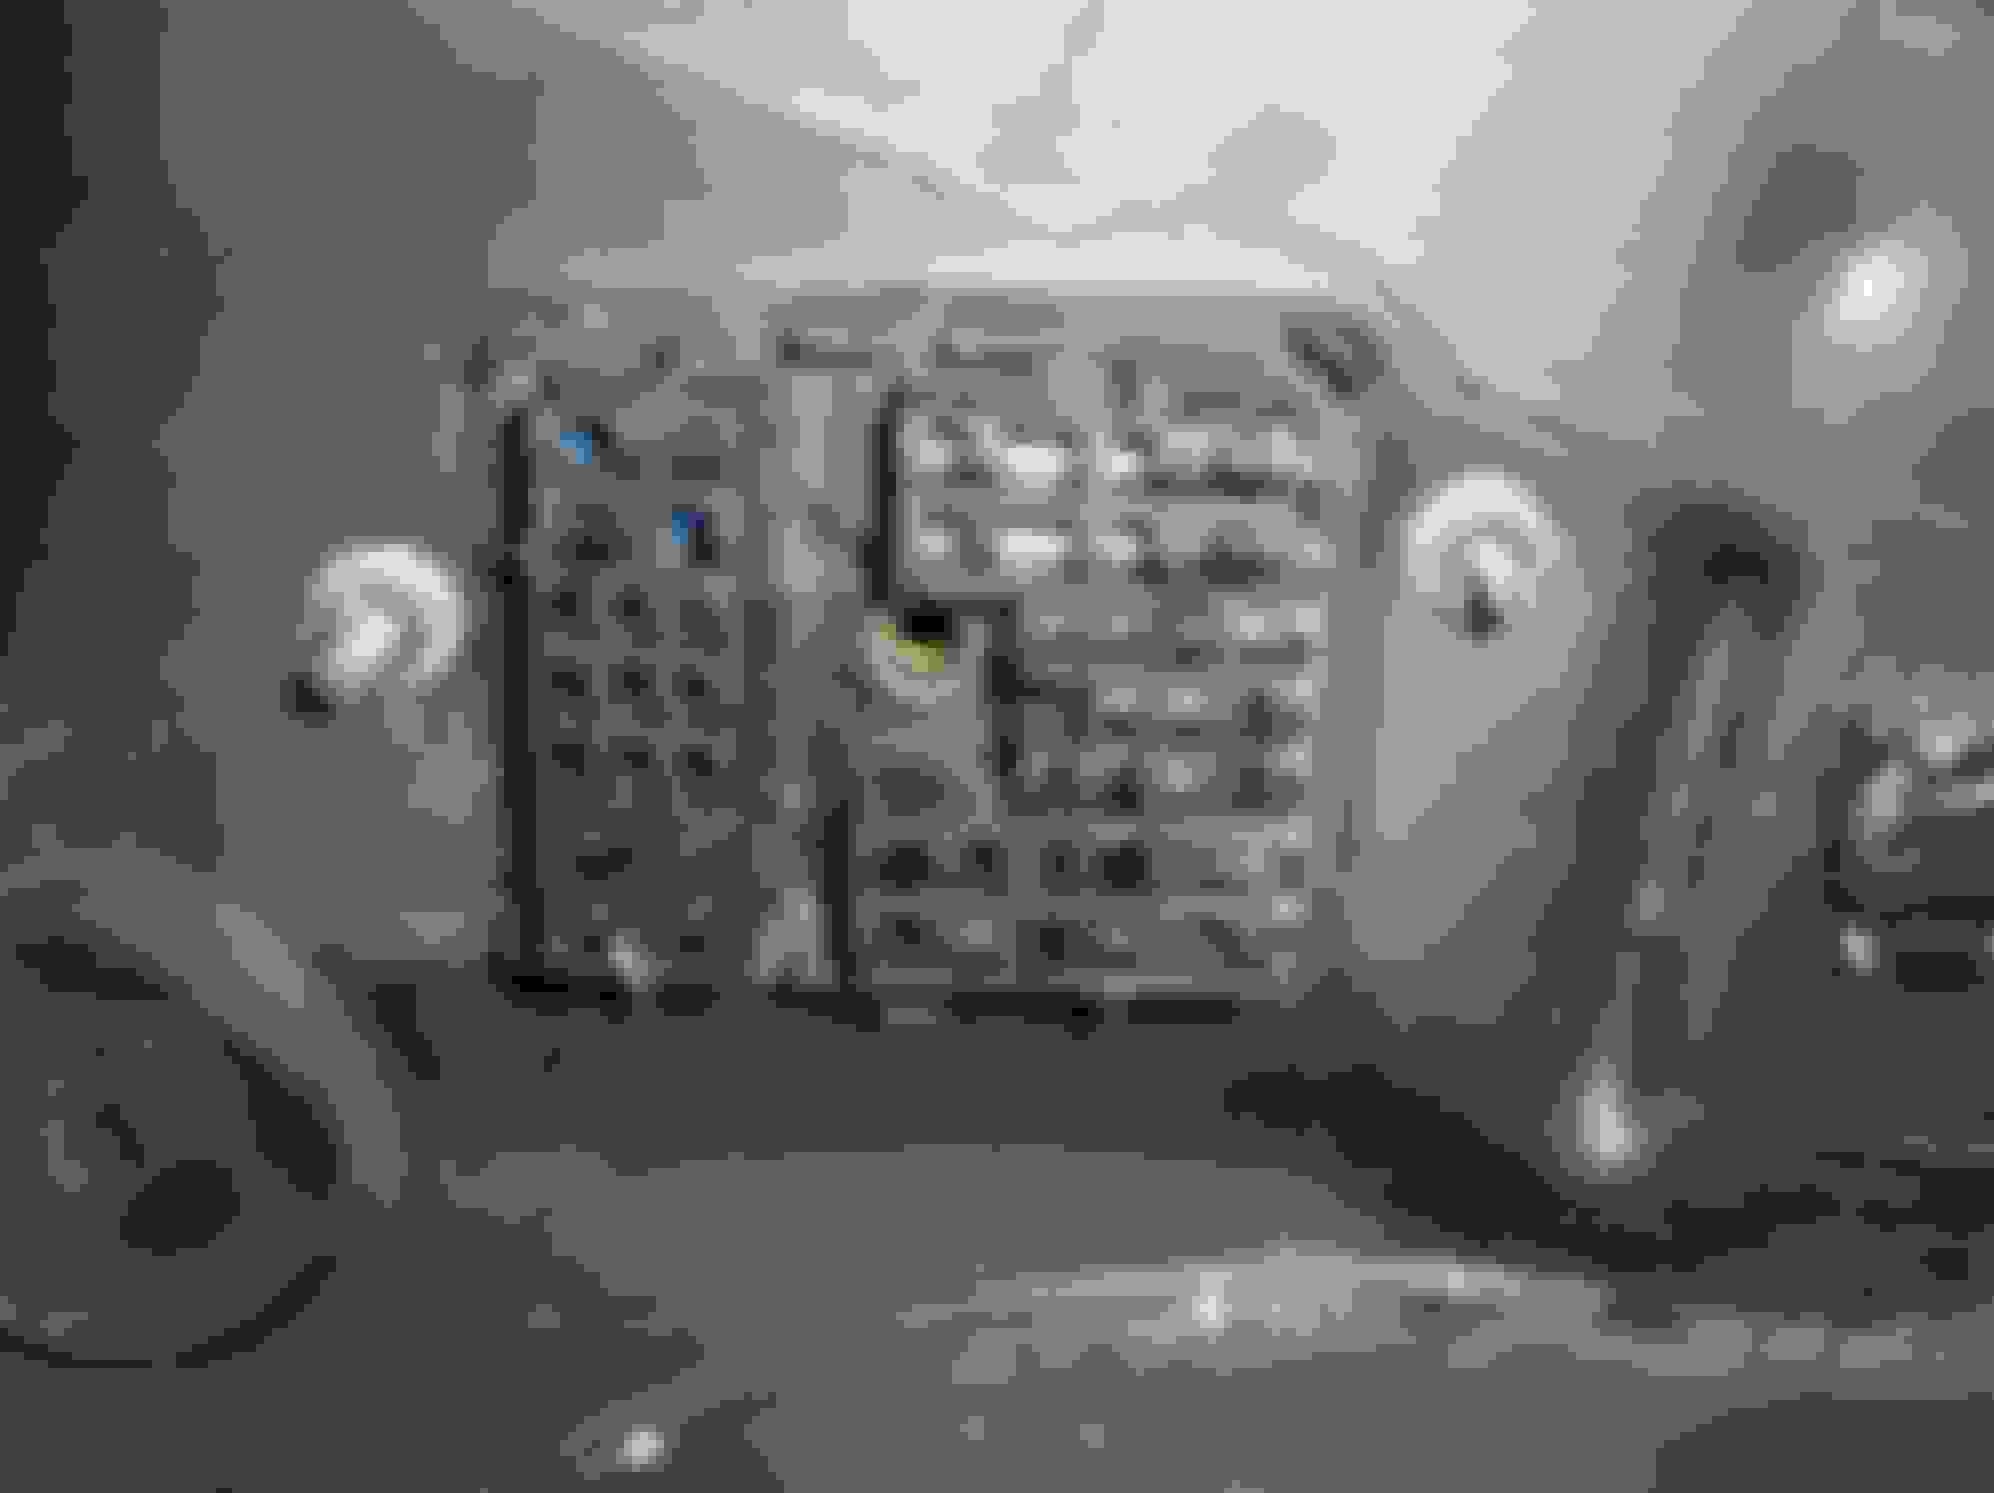
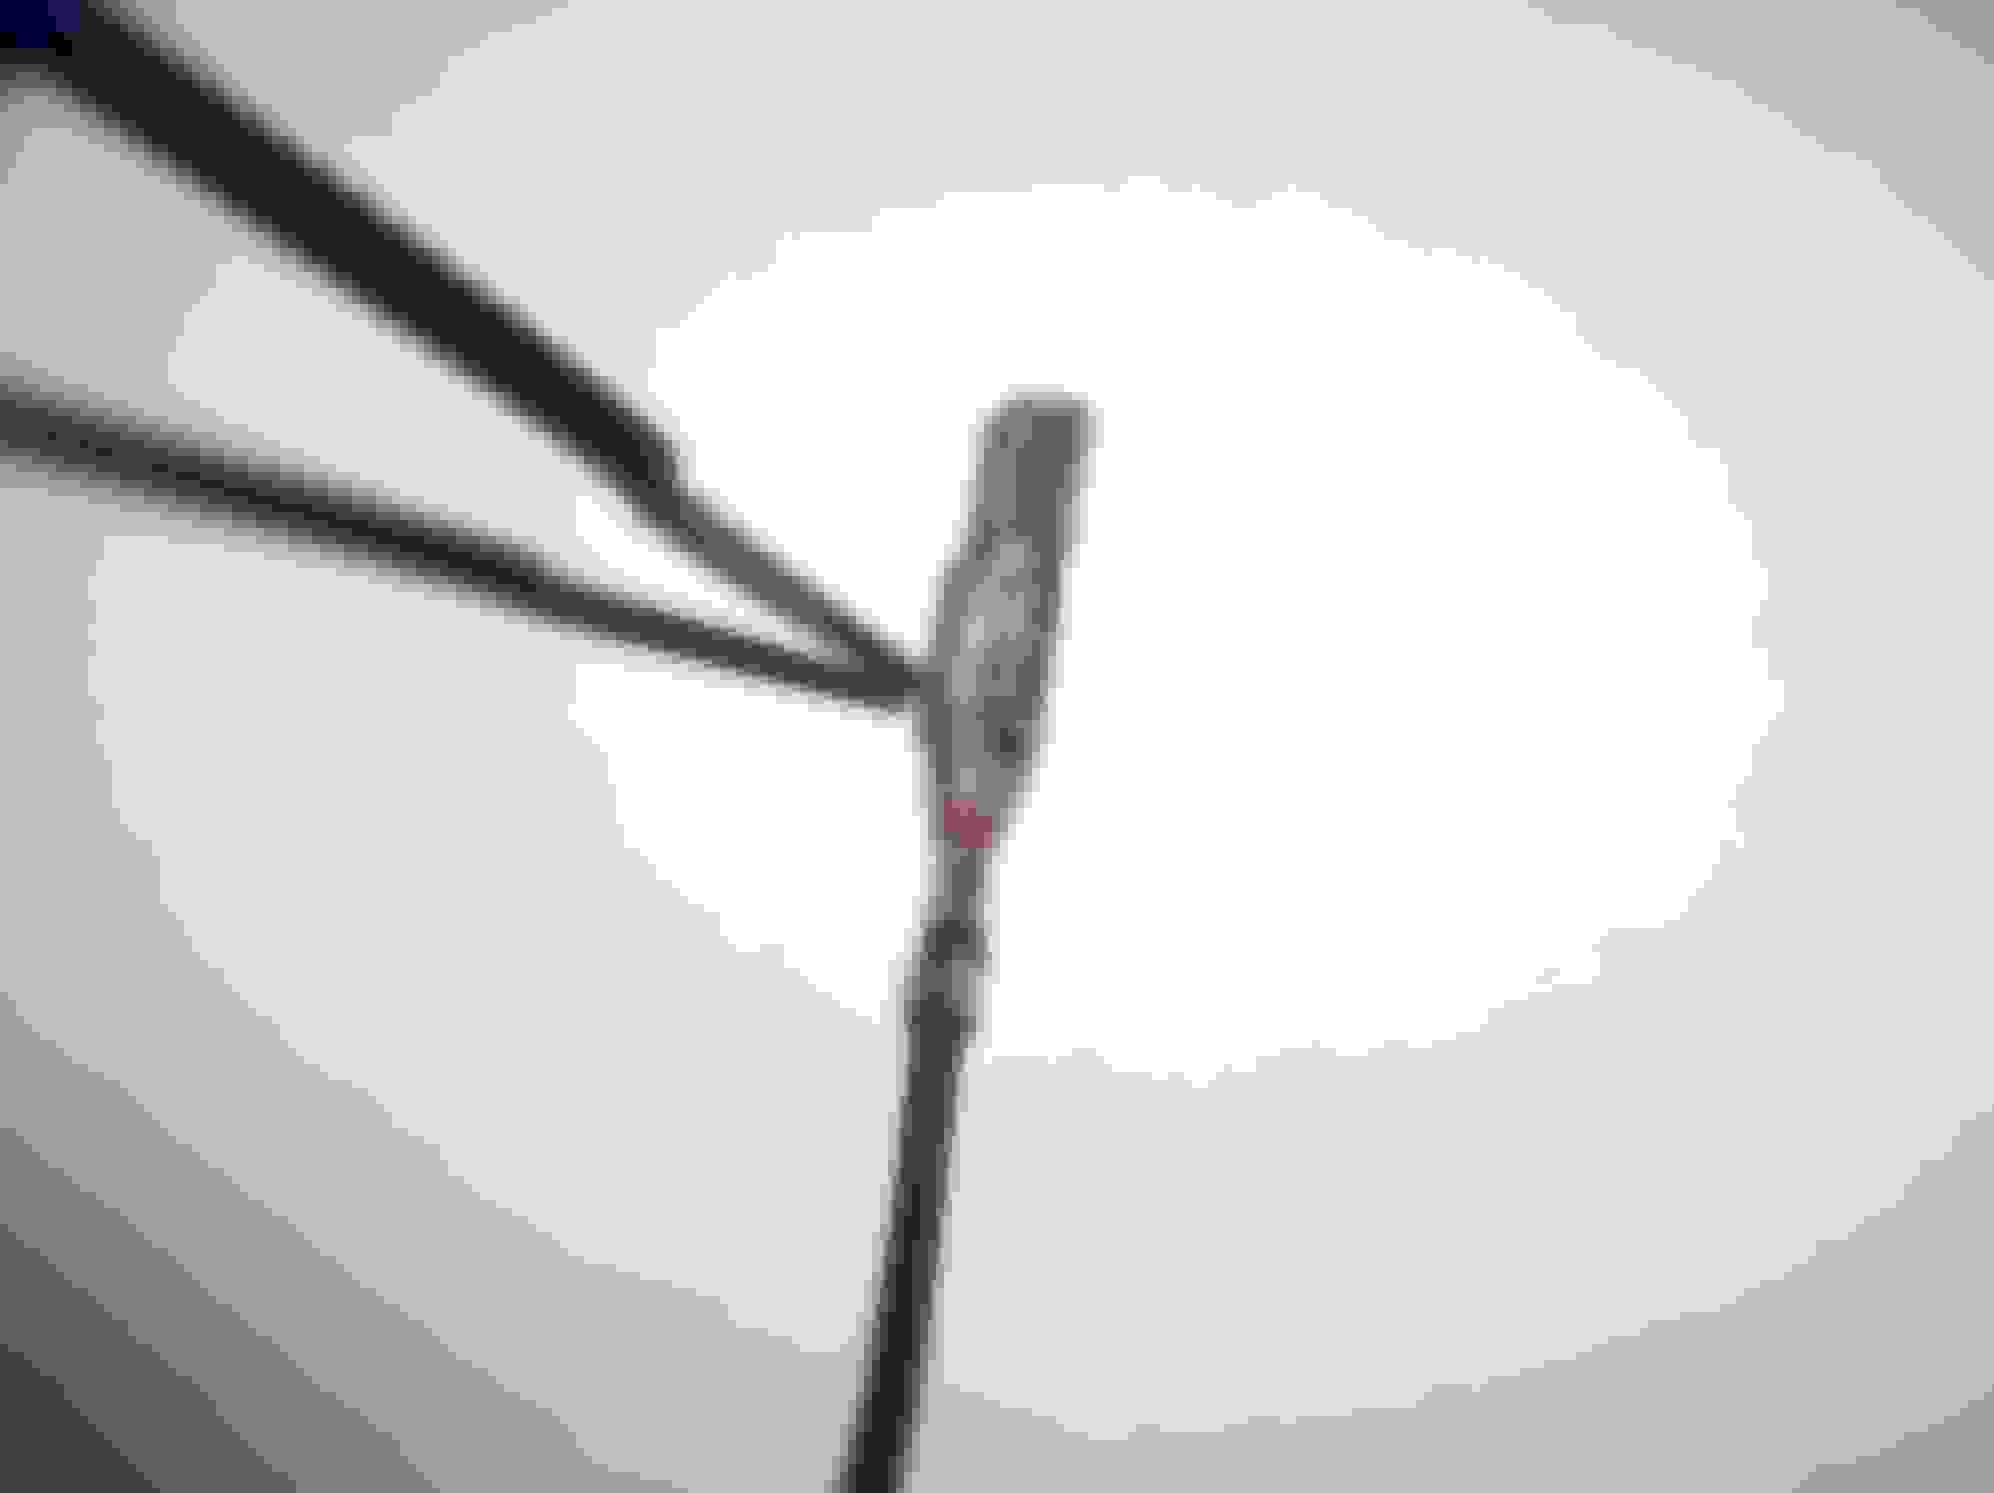
Separating half of the Connector Assembly from the Fire-Wall:
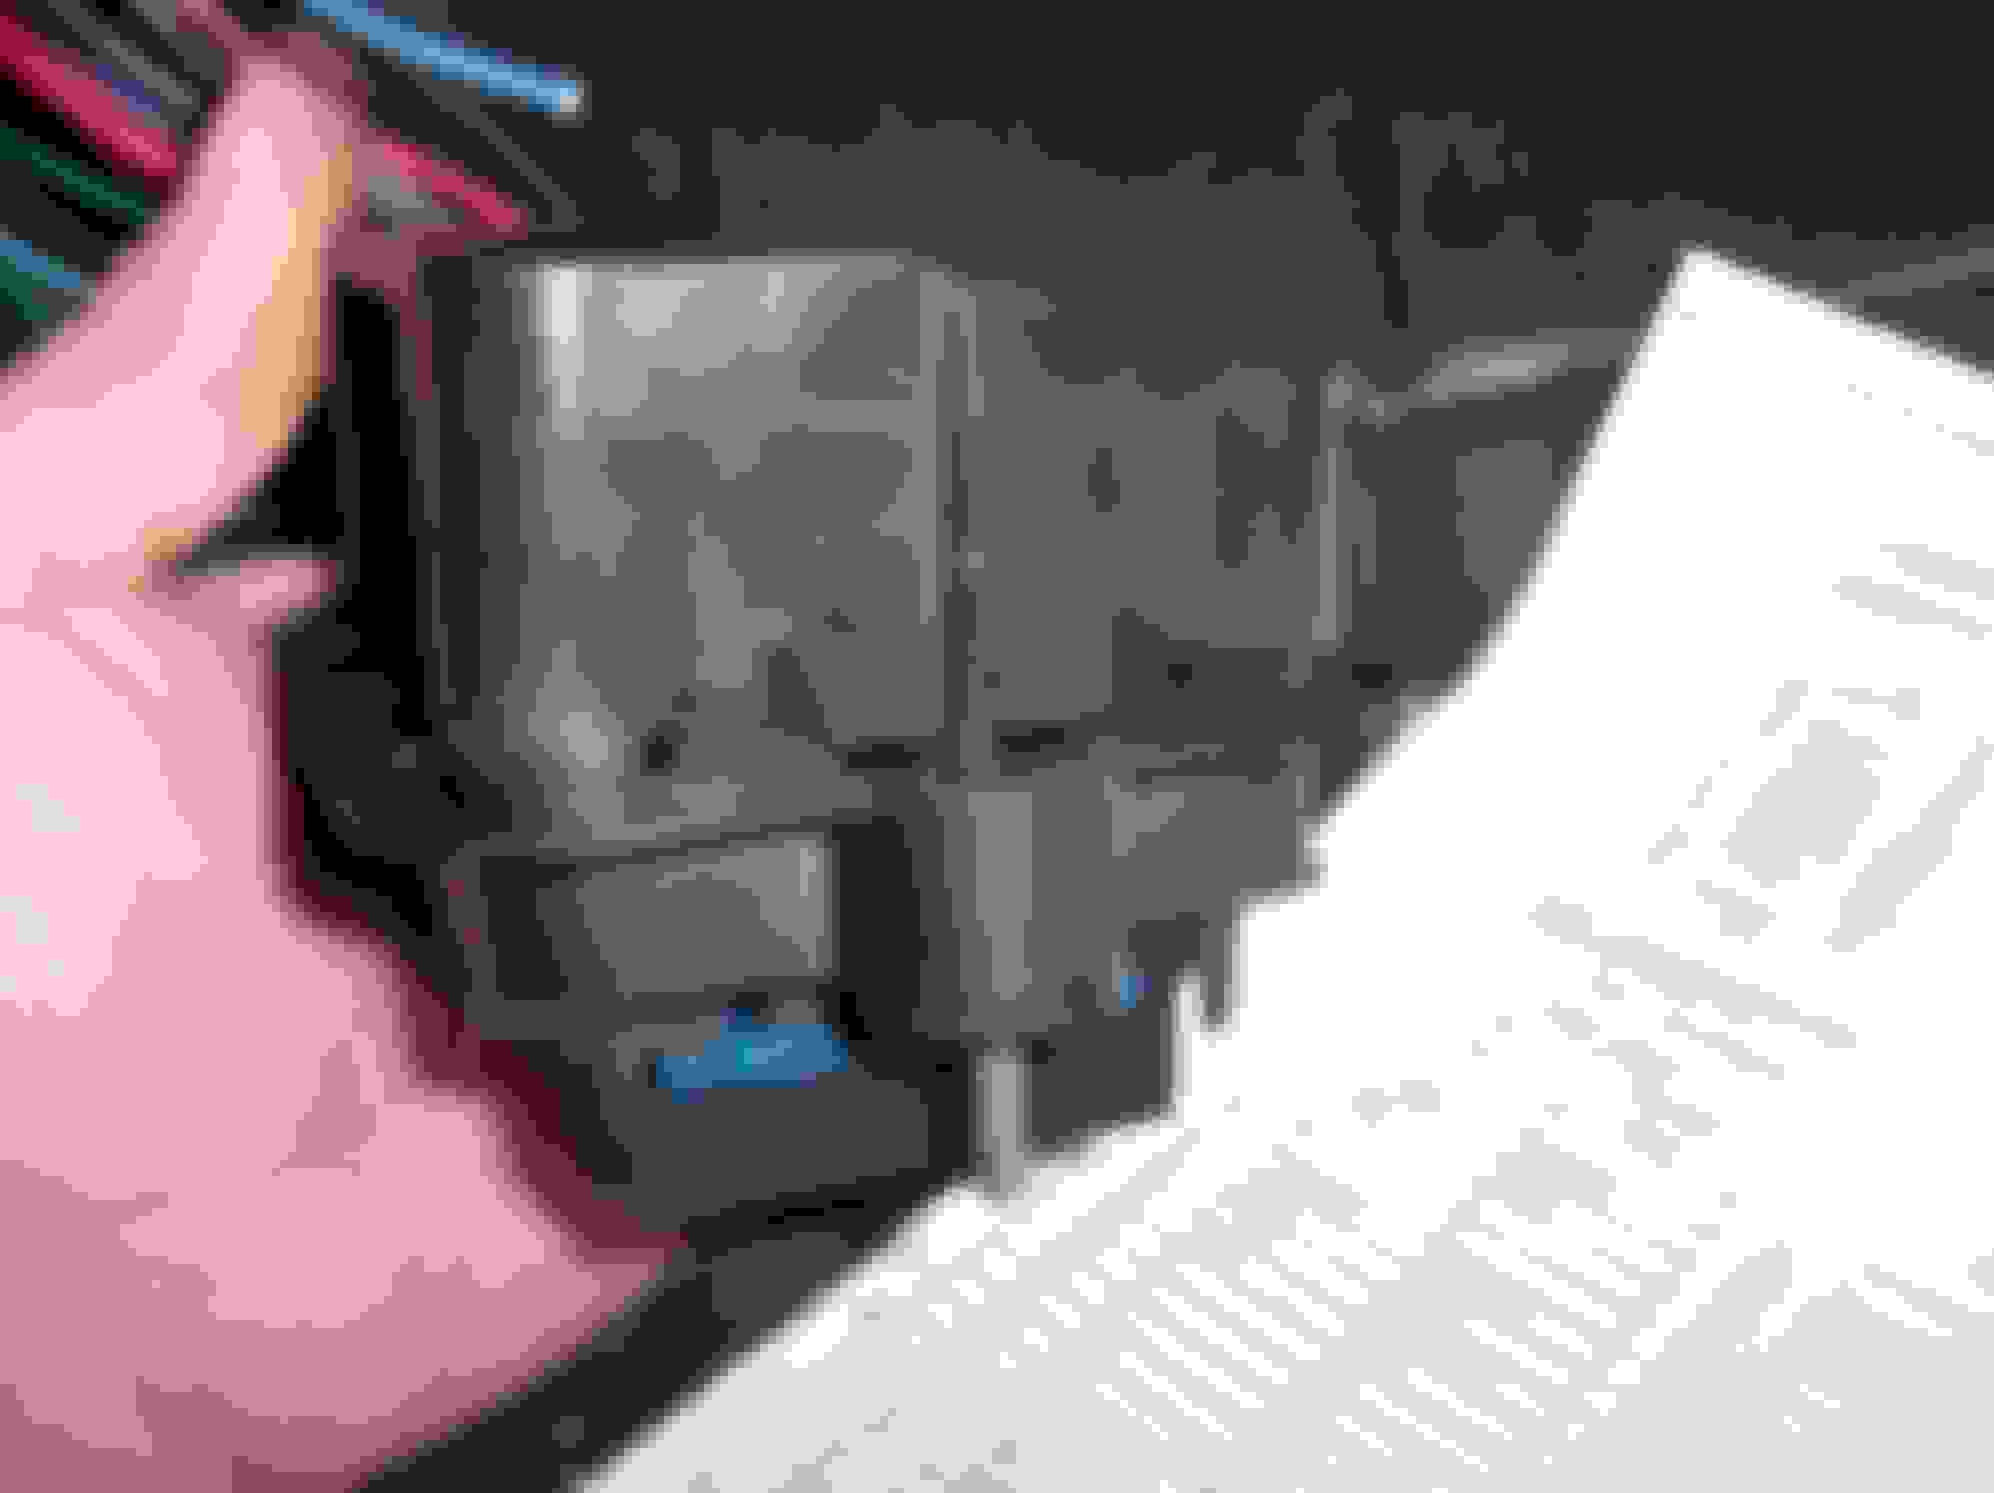
The Above Image shows the 2 Parts/ Sections of this half of the C100 Connector.
2 separate Conduits/ Wire Harness Sections can be seen coming out of the C100 Connector.
The Left side of the Image shows the Passenger Side of the C100 Connector...
It is the Smaller Headlight Harness Section of the C100 Connector.
The Right side of the Image shows the Driver Side of the C100 Connector...
It is the Larger Power Harness Section of the C100 Connector.
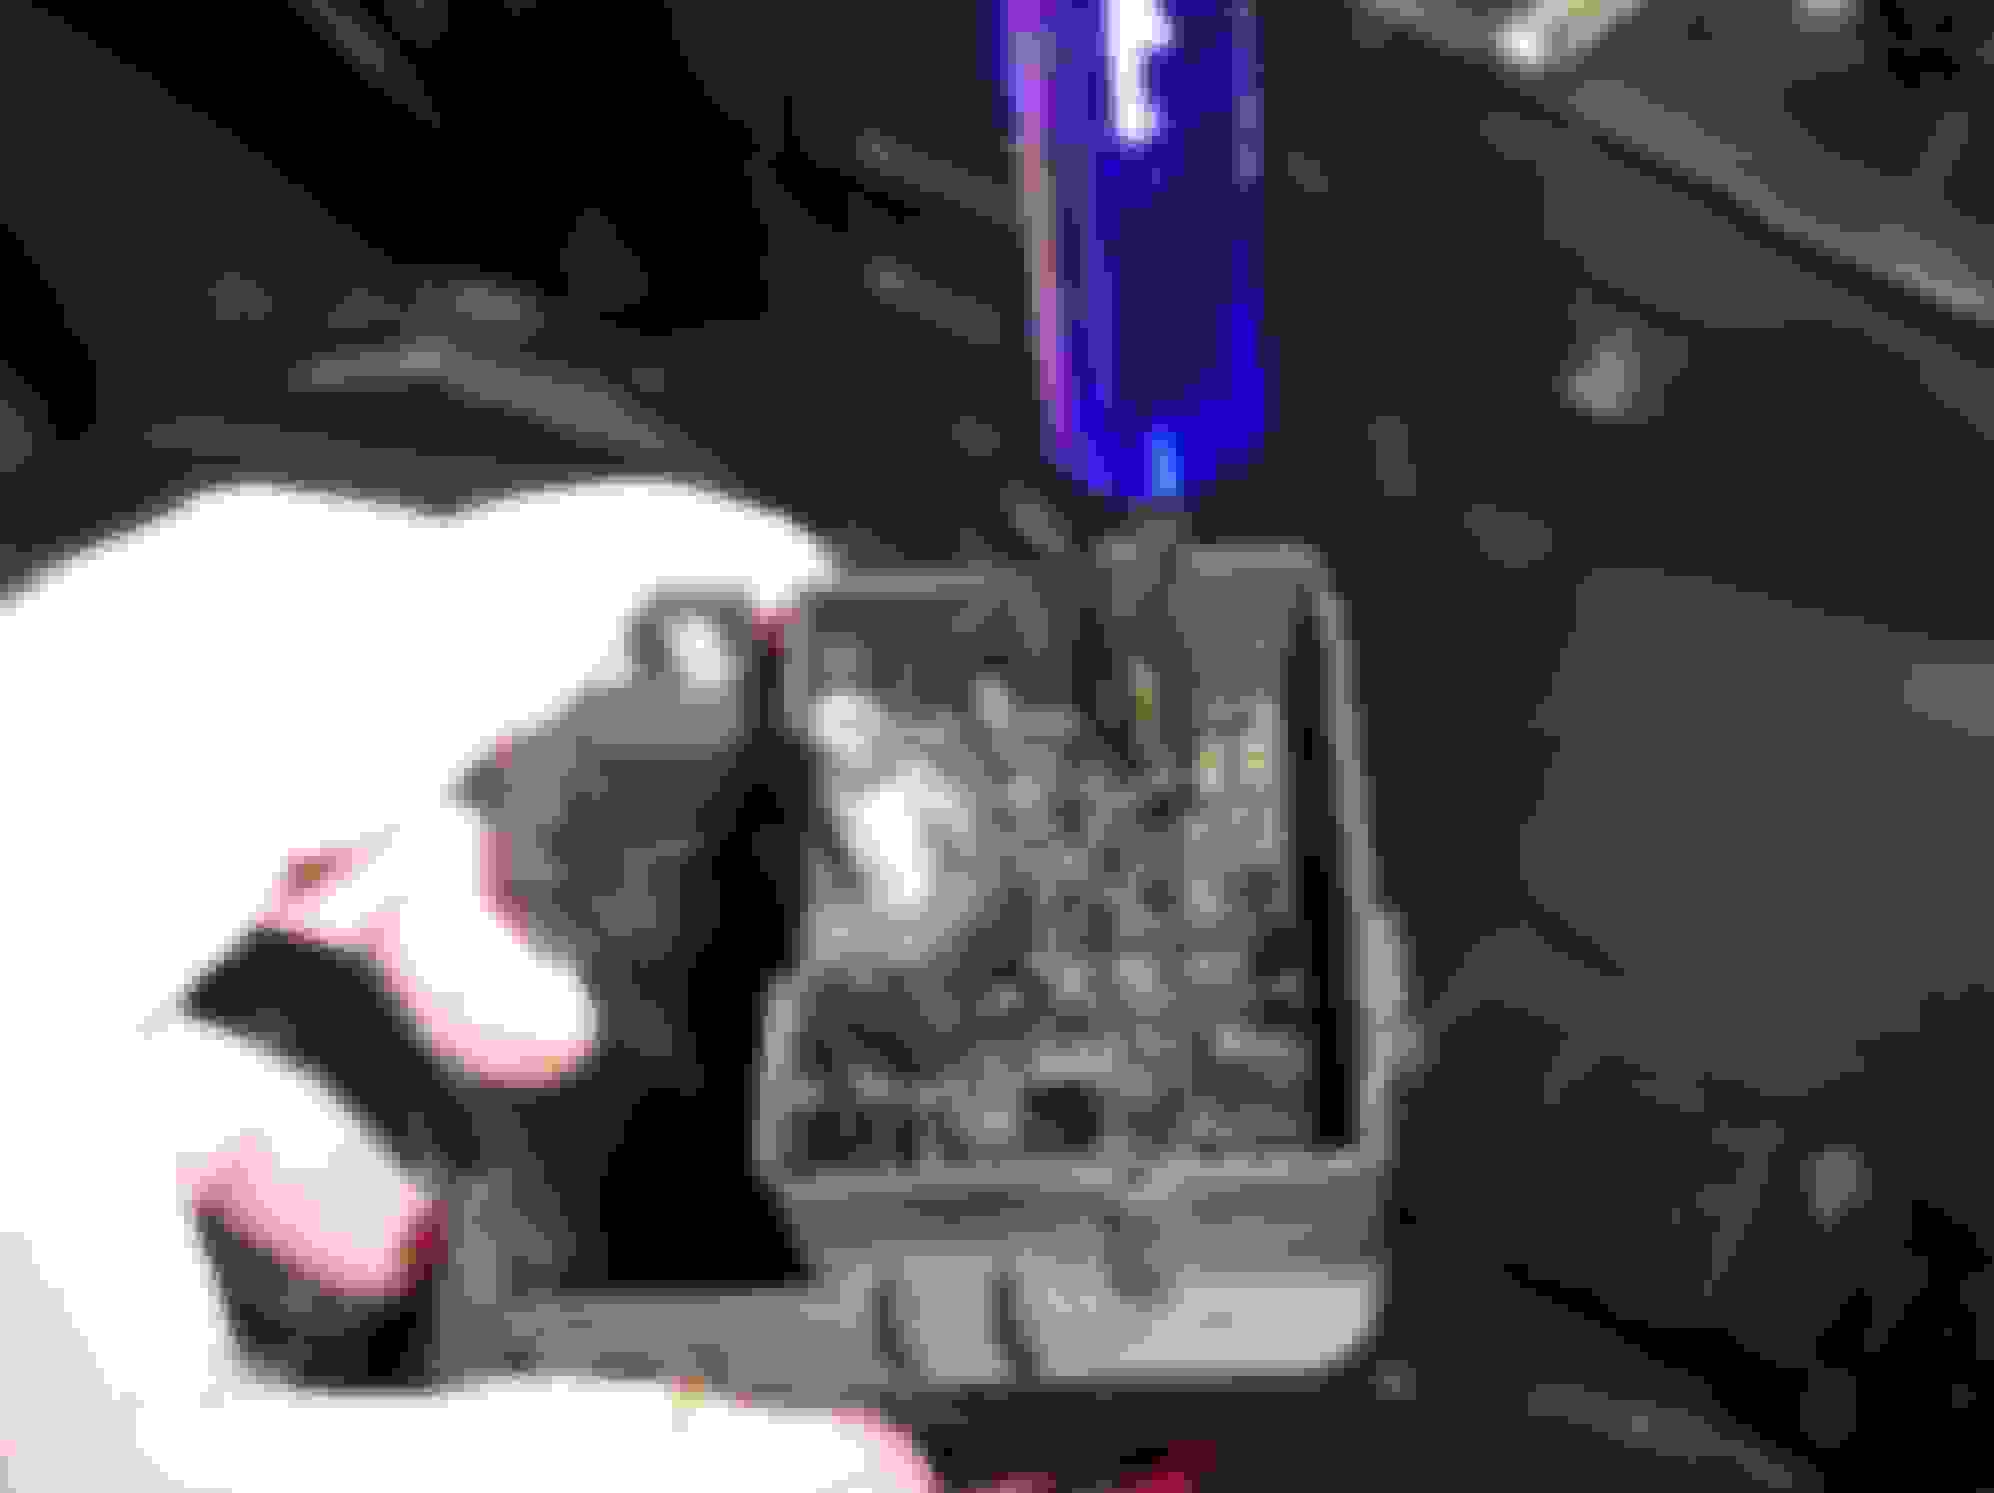
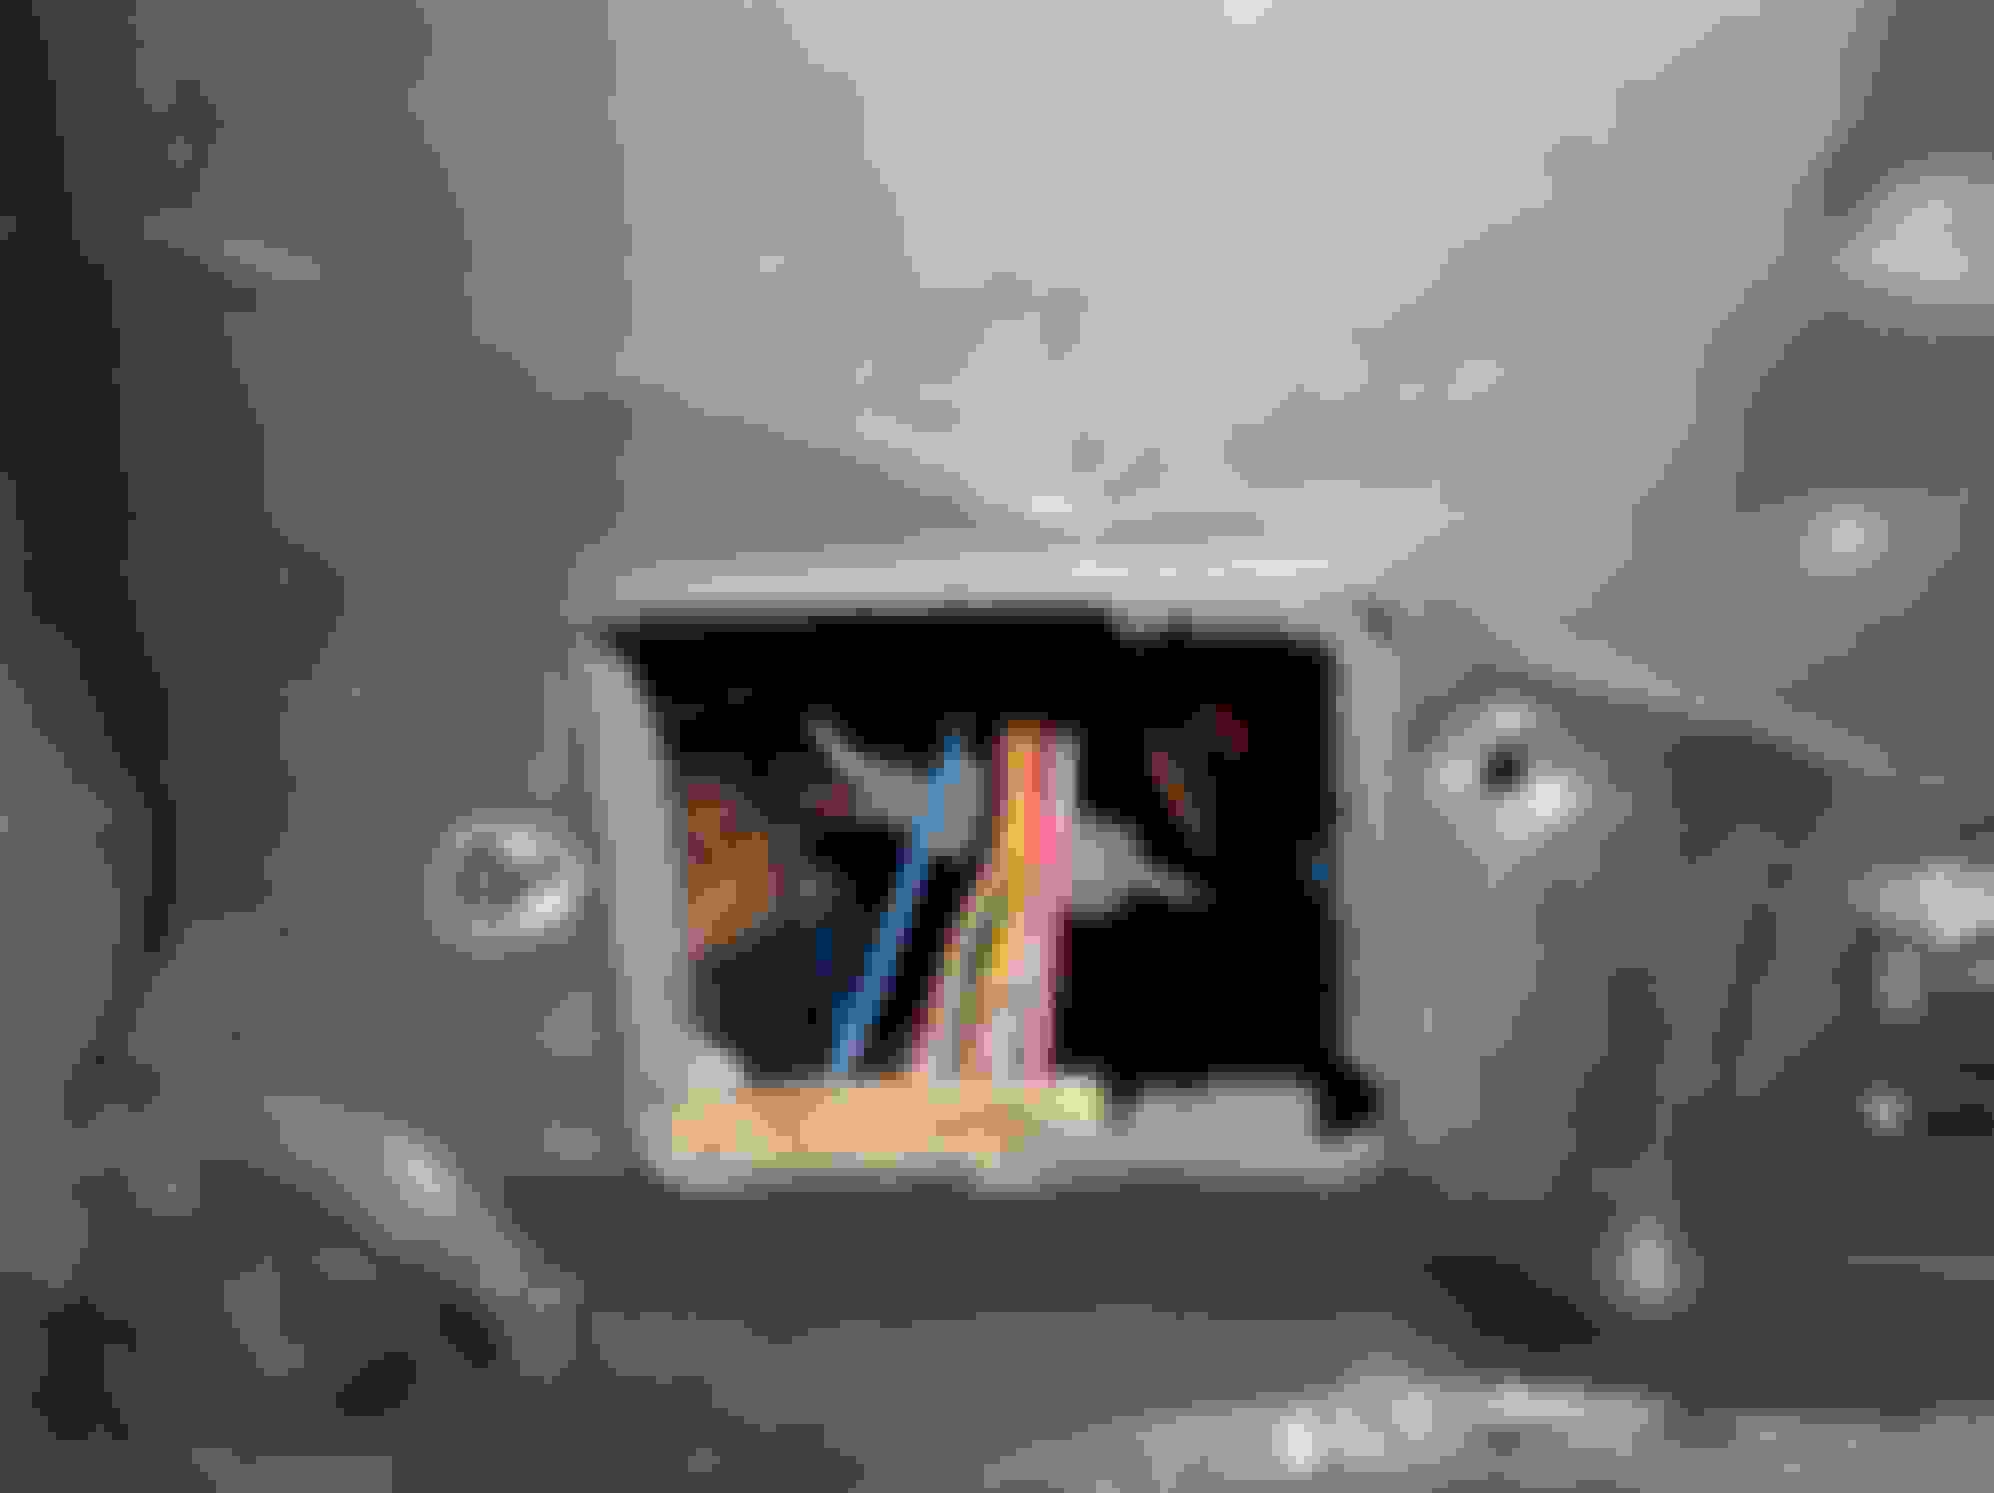
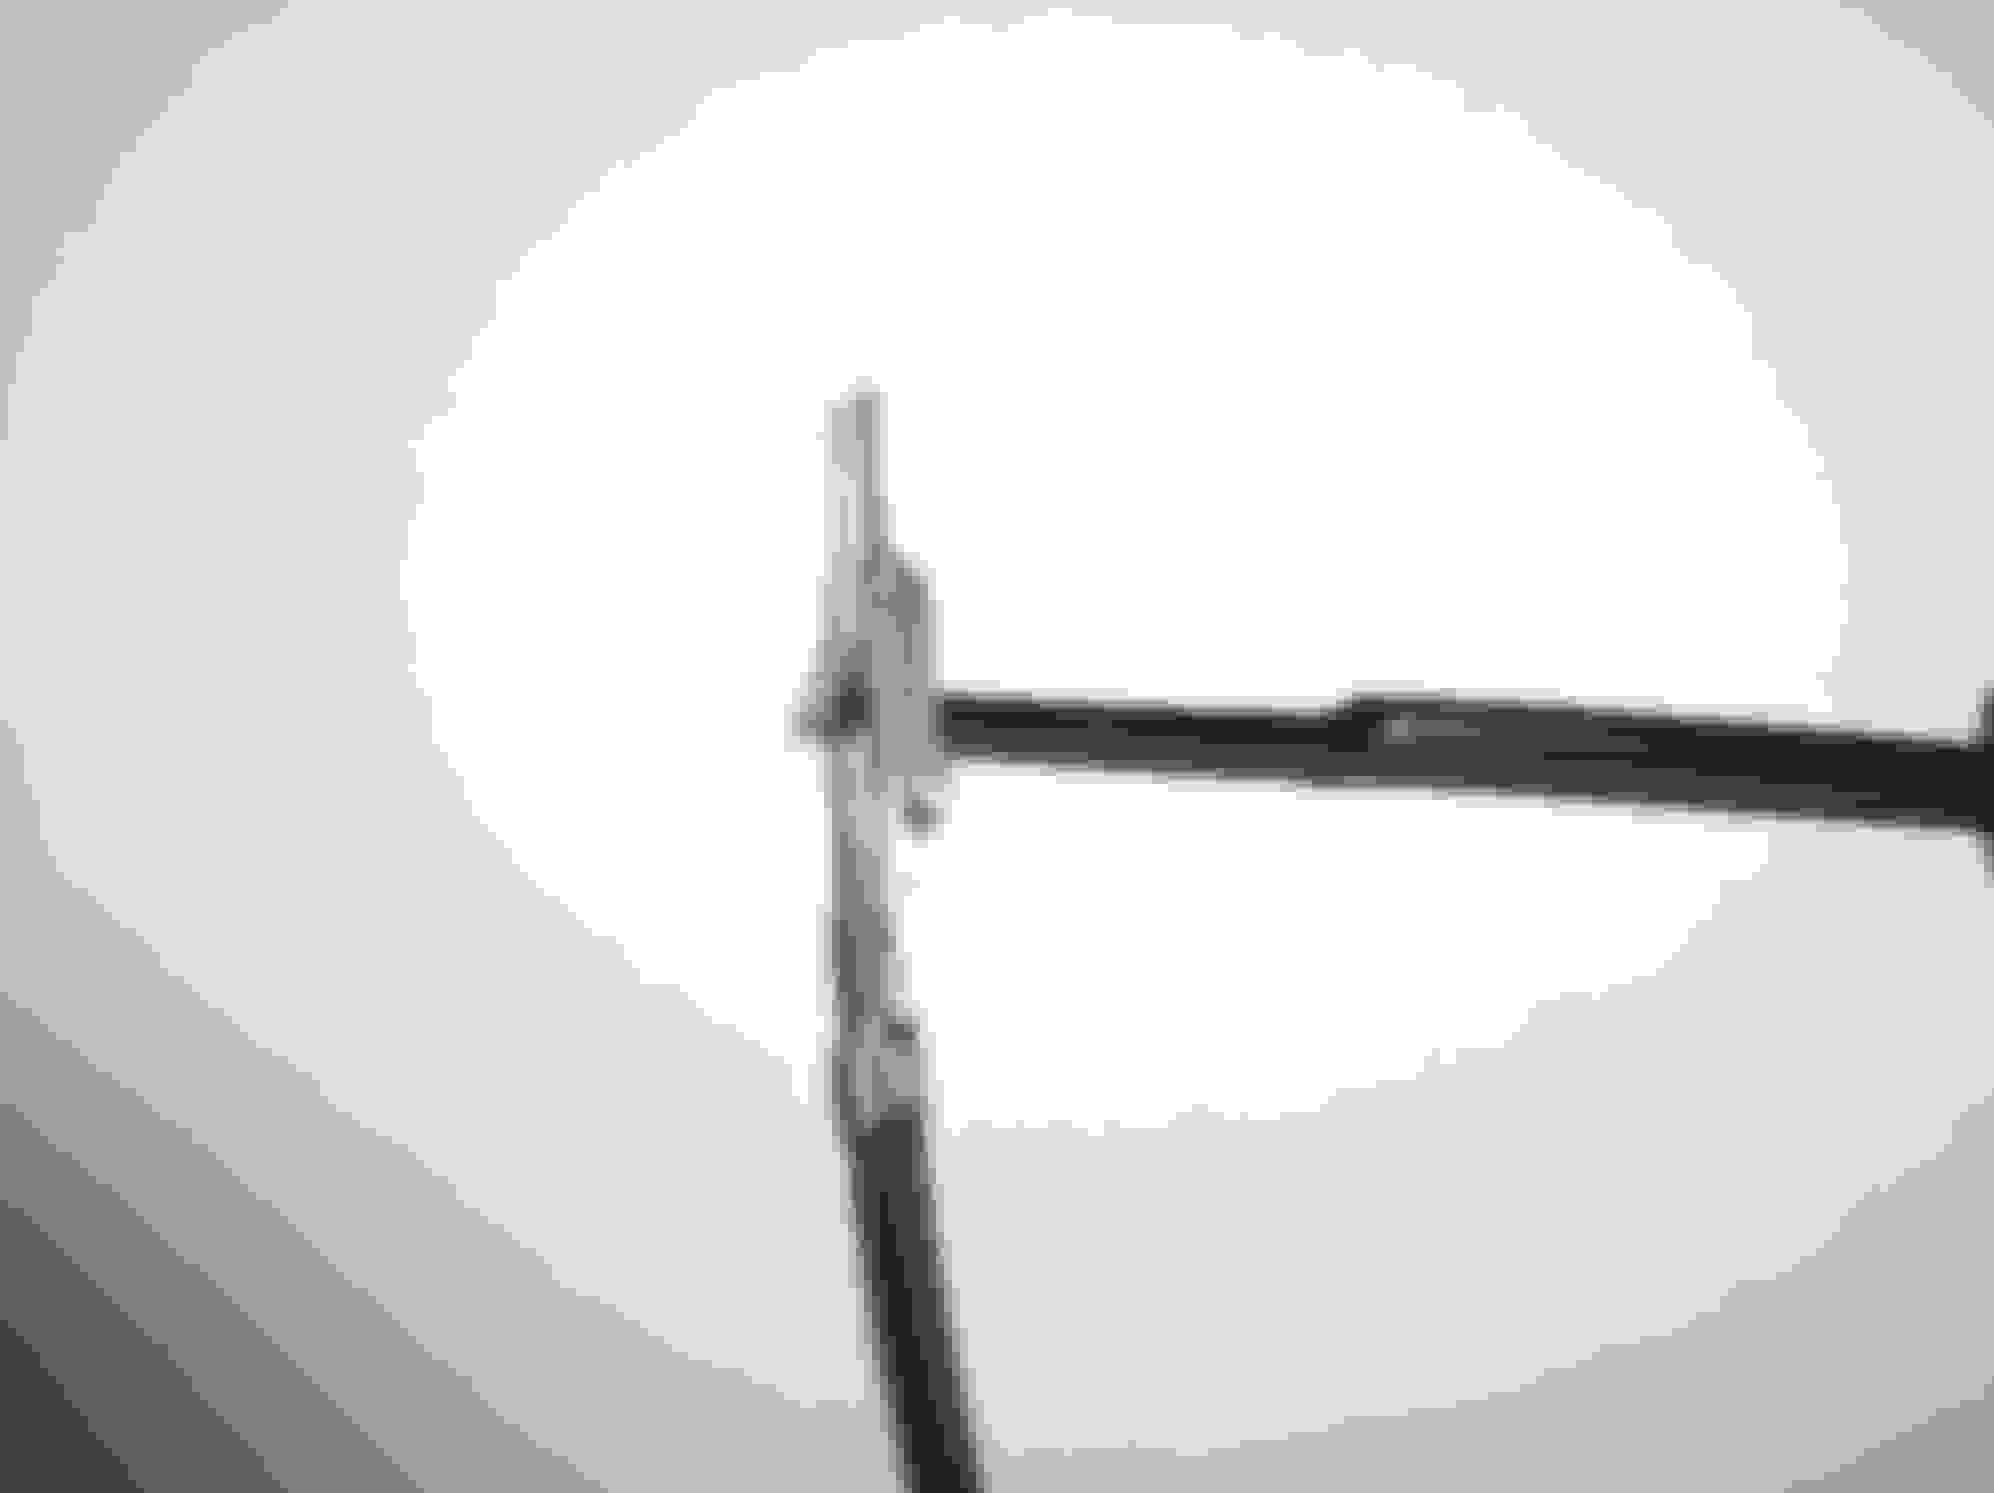
Cabin side half of C100 Connector shown attached to Fire-Wall:
View of TOP of half of C100 Connector:
View of Driver-Side of half of C100 Connector:
Last edited by vorteciroc; Sep 22, 2022 at 07:34 PM.
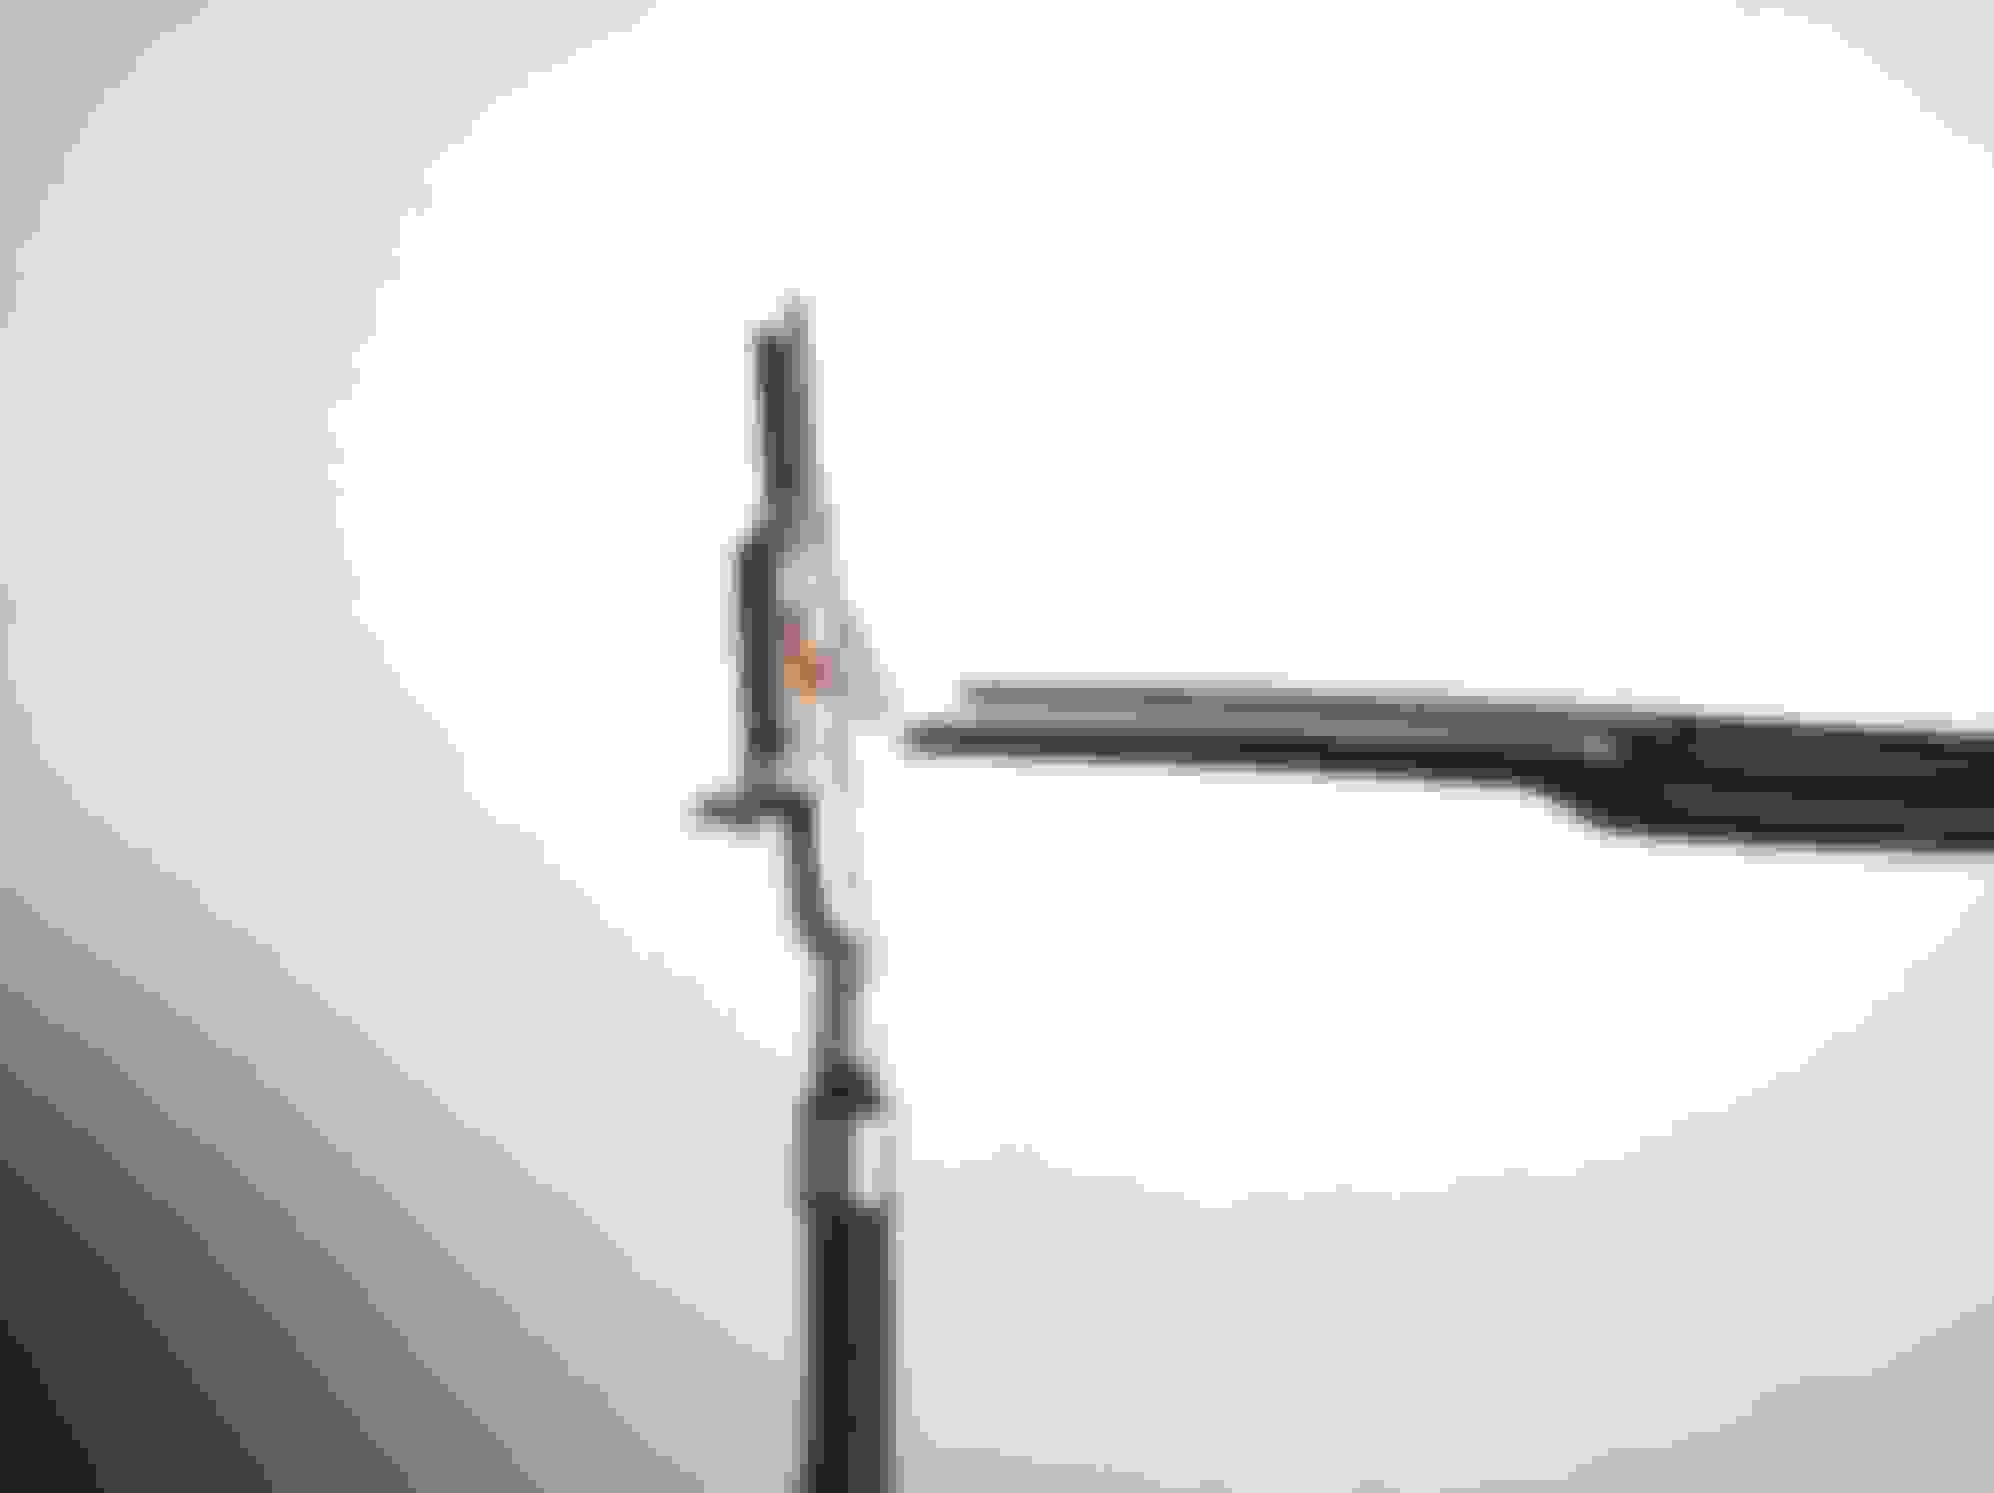
Continue unclipping the Large Grease Cover...
Next is the Top side of the Connector.
Now all 3 Sides of the Large Grease Cover are unclipped...
View of Large Grease Cover once fully removed from C100 Connector:
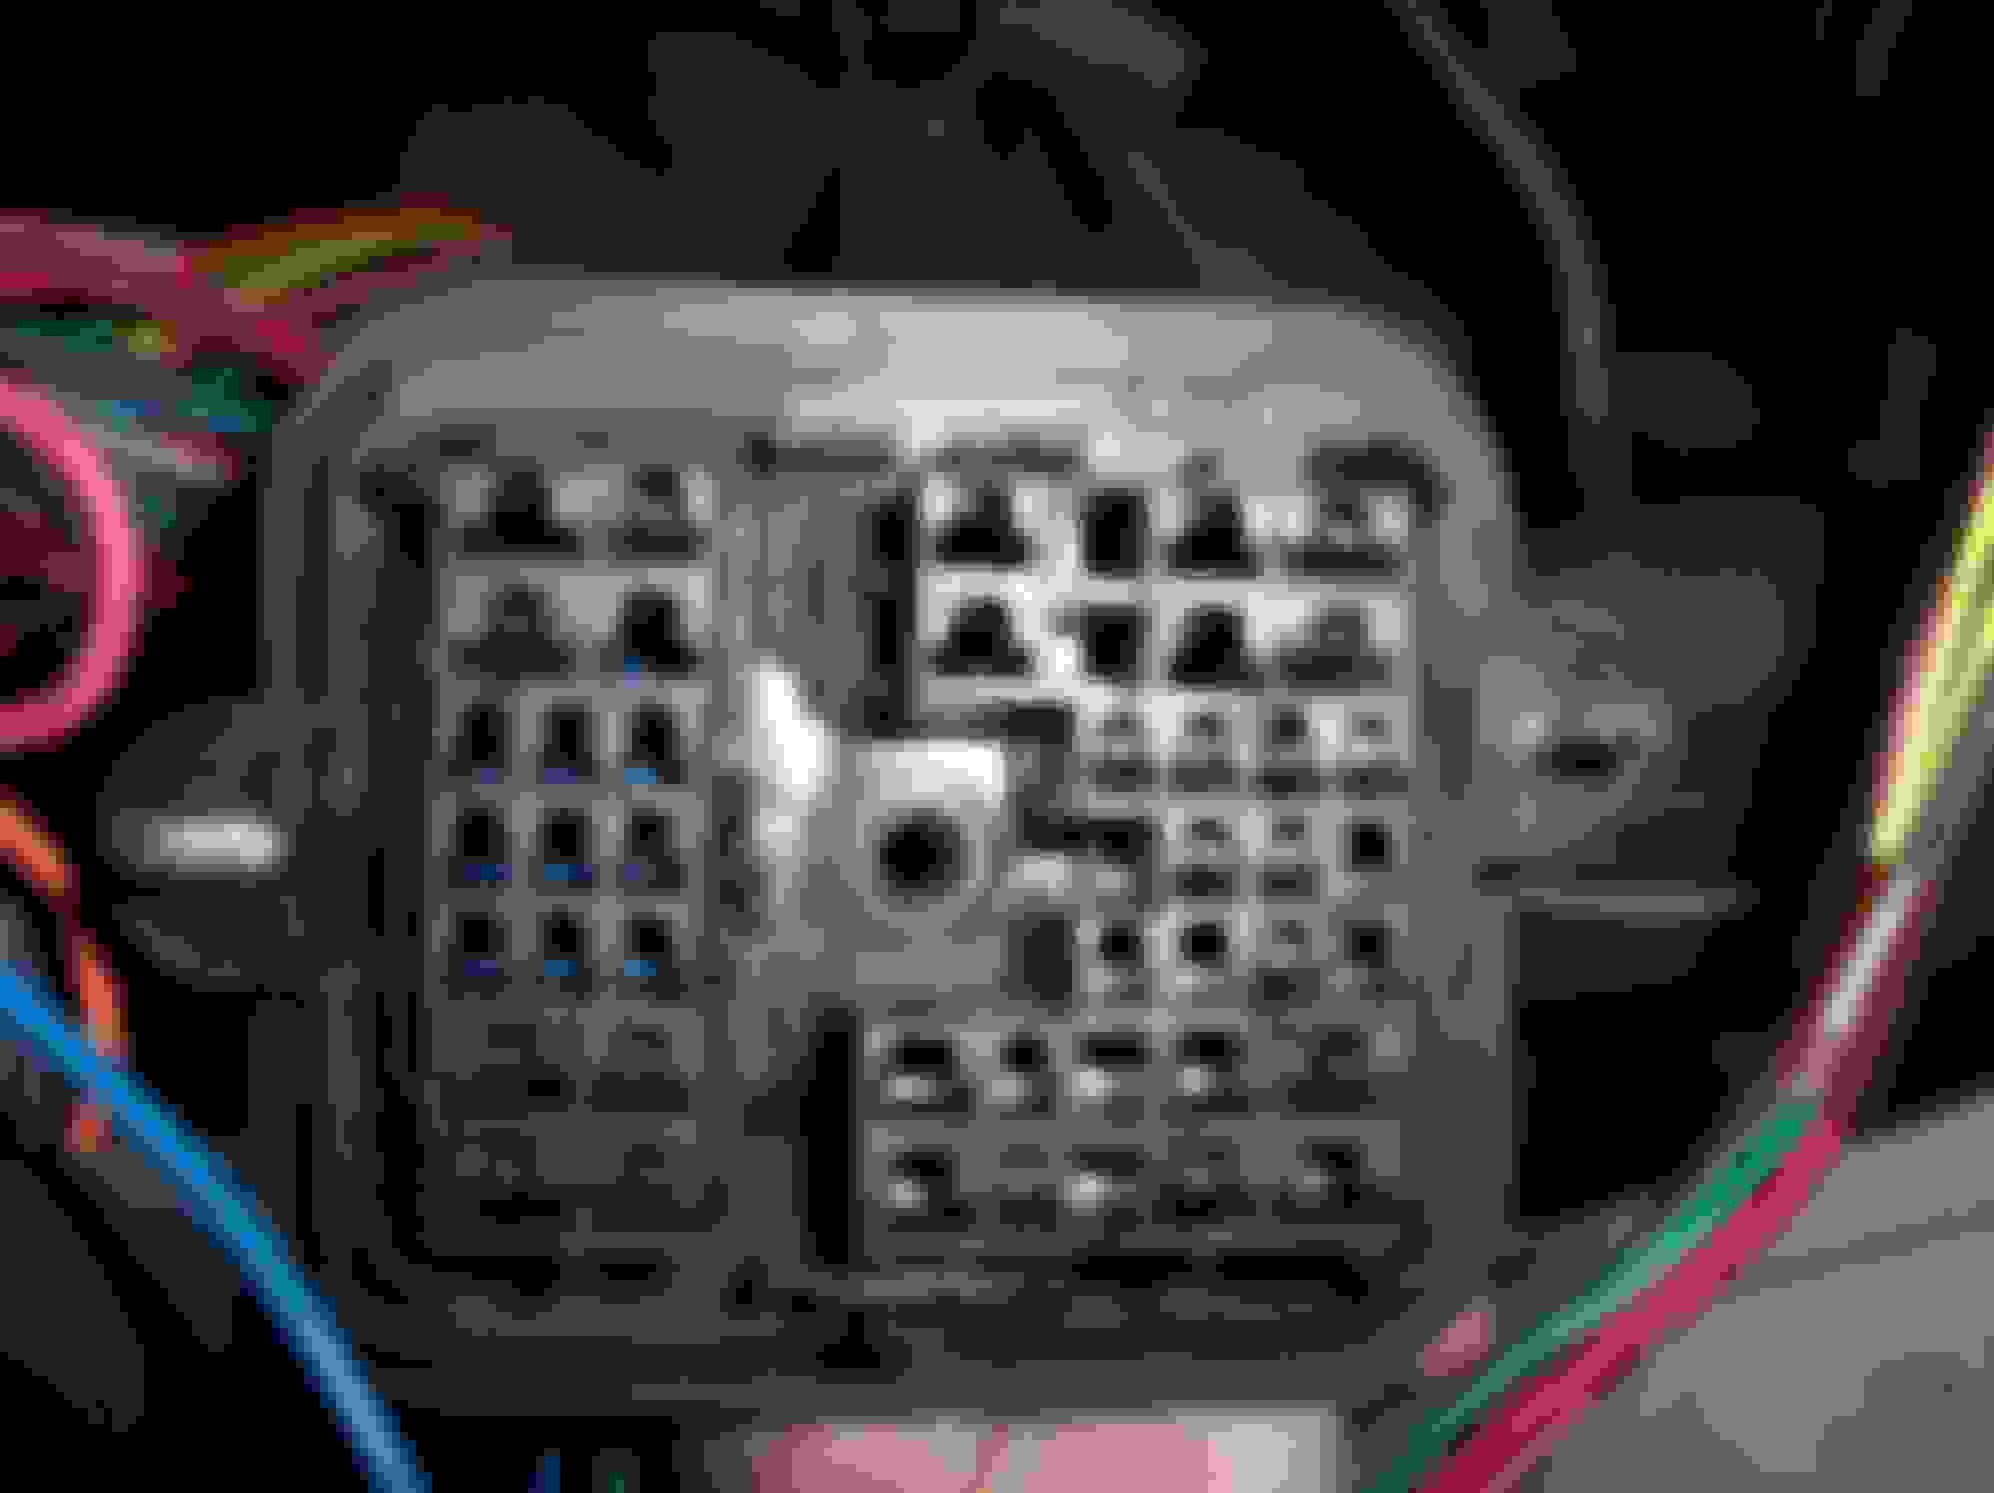
View of C100 Connector with Large Grease Cover fully removed:
Next, repeat the same process for the Smaller Headlight Harness Section of the C100 Connector.
The Smaller Headlight Harness Section of the C100 Connector can now be separated from the Larger Power Harness Section of the C100 Connector.
The Image below shows both the Smaller Headlight Harness Section...
And the Larger Power Harness Section of the C100 Connector... STILL TOGETHER:
The Image below shows the Larger Power Harness Section of the C100 Connector...
With the Smaller Headlight Harness Section now separated:
Last edited by vorteciroc; Sep 22, 2022 at 07:28 PM.
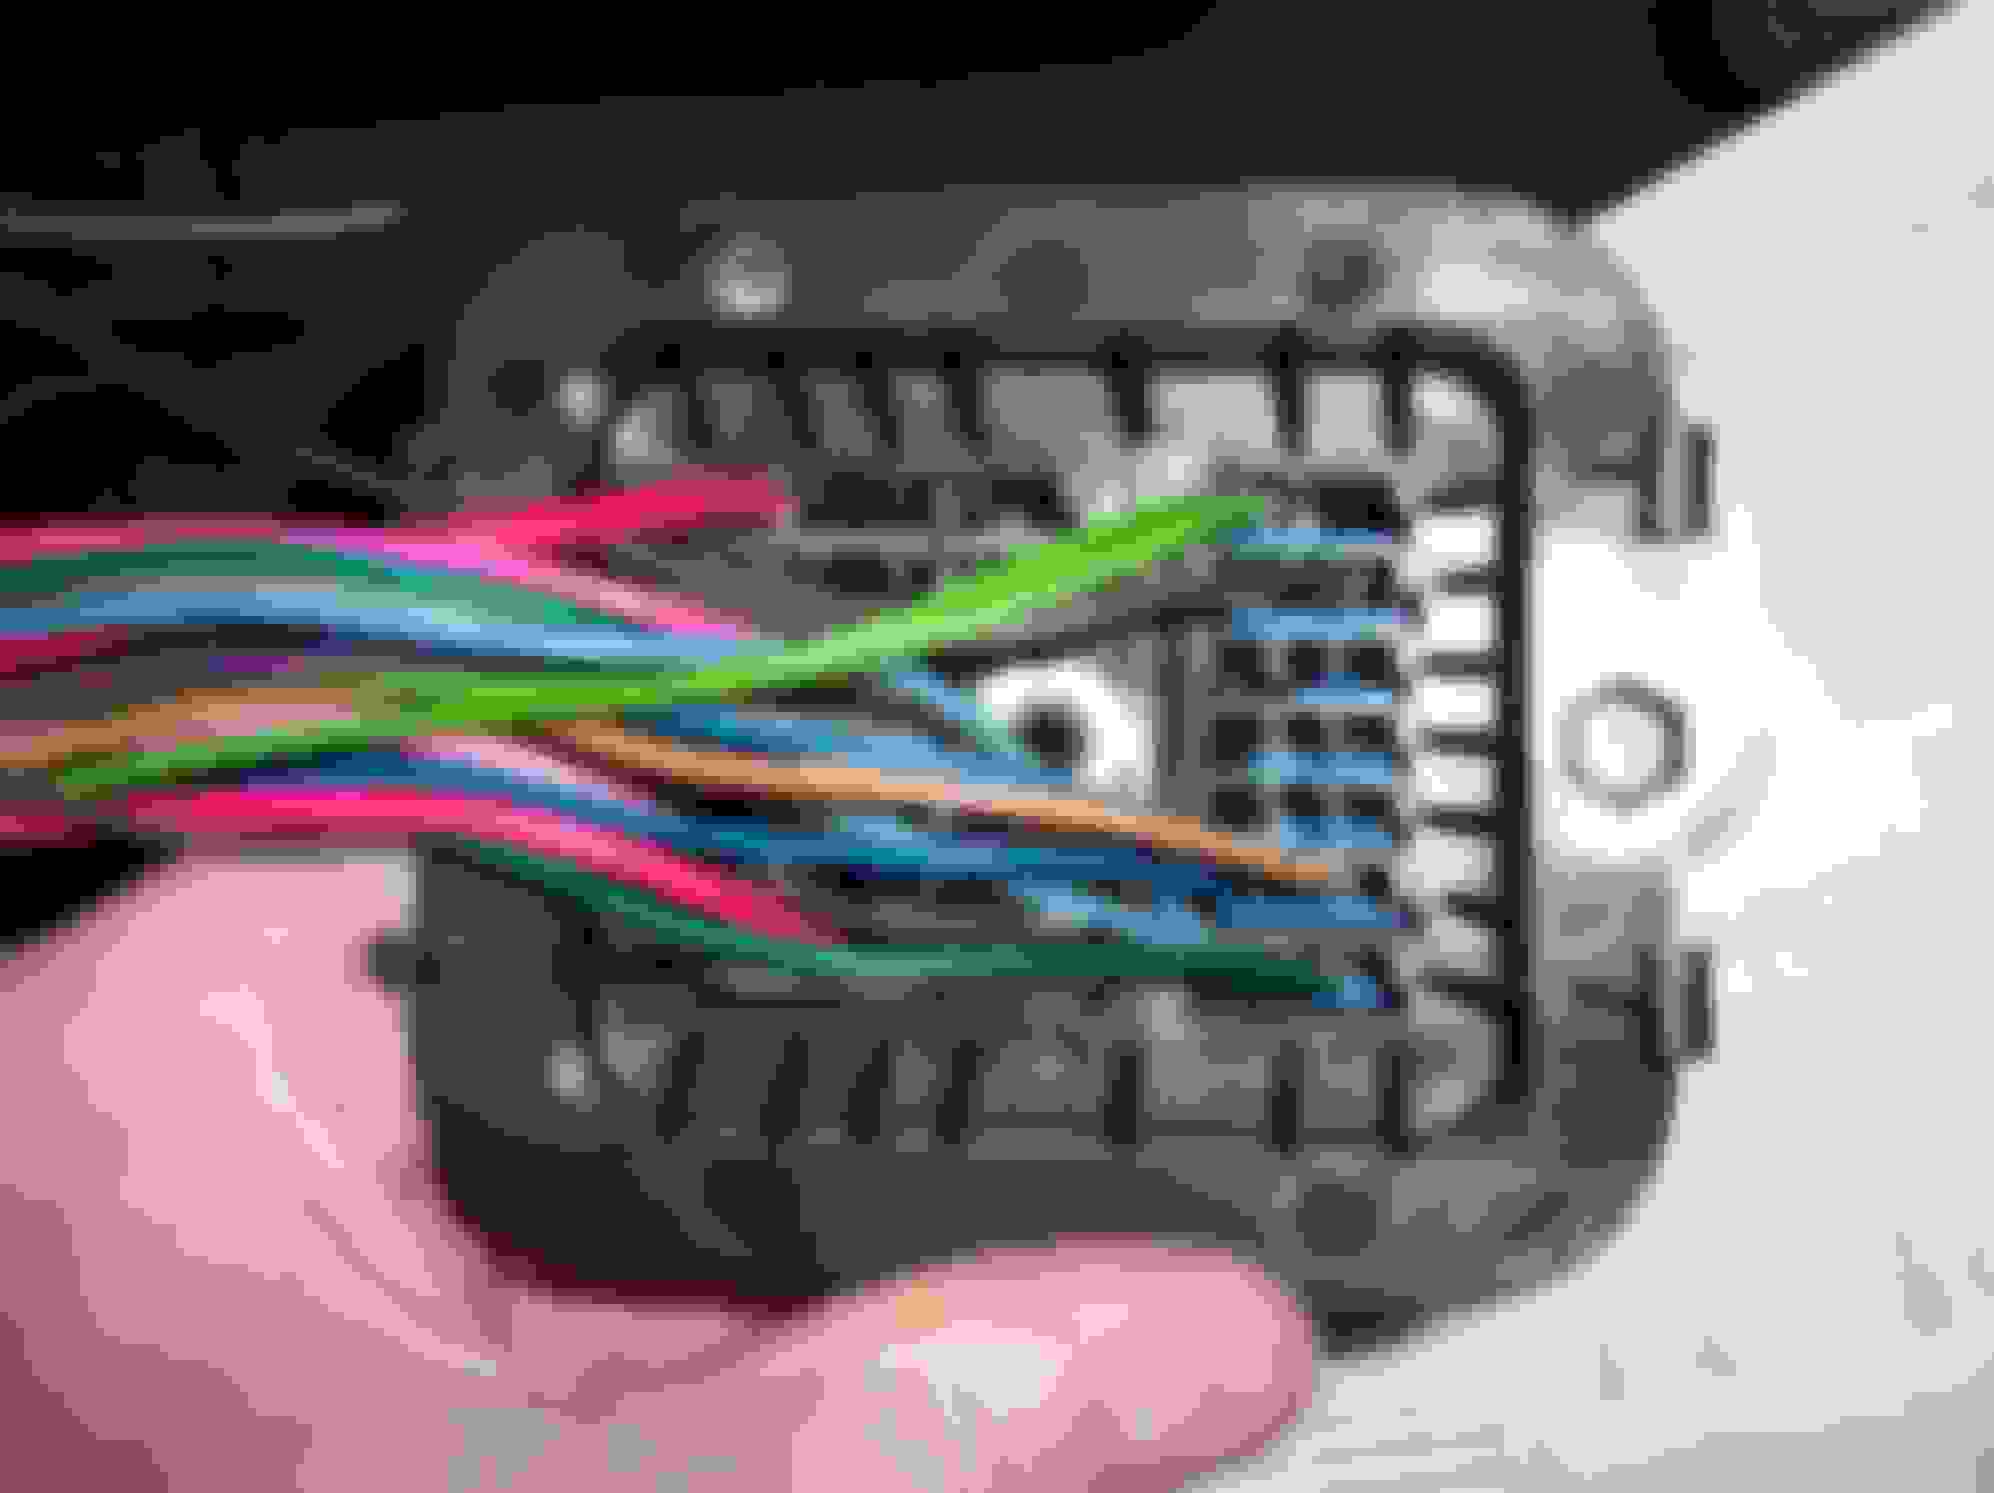
The Image below shows...
The White TPA Lock completely REMOVED from the Larger Power Harness Section Connector:
The same process is also done for the Smaller Headlamp Harness Section Connector...
However, instead of being WHITE in Color, the TPA Lock is BLUE.
The Cabin Half of the C100 Connector that is still in the Fire-Wall...
Uses 2 more TPA Locks, that are identical to the Engine Compartment Side TPAs (that we just removed).
In the Image Below:
I am showing the Cabin Half of the C100 Connector AGAIN.
Look closely, and you will see both the Blue and the White TPA Locks... inside the Connector Body:
The Image Below, just shows an example of the type of Screw-Driver that I used to remove the 2 TPA Locks:
Last edited by vorteciroc; Sep 23, 2022 at 12:57 AM.
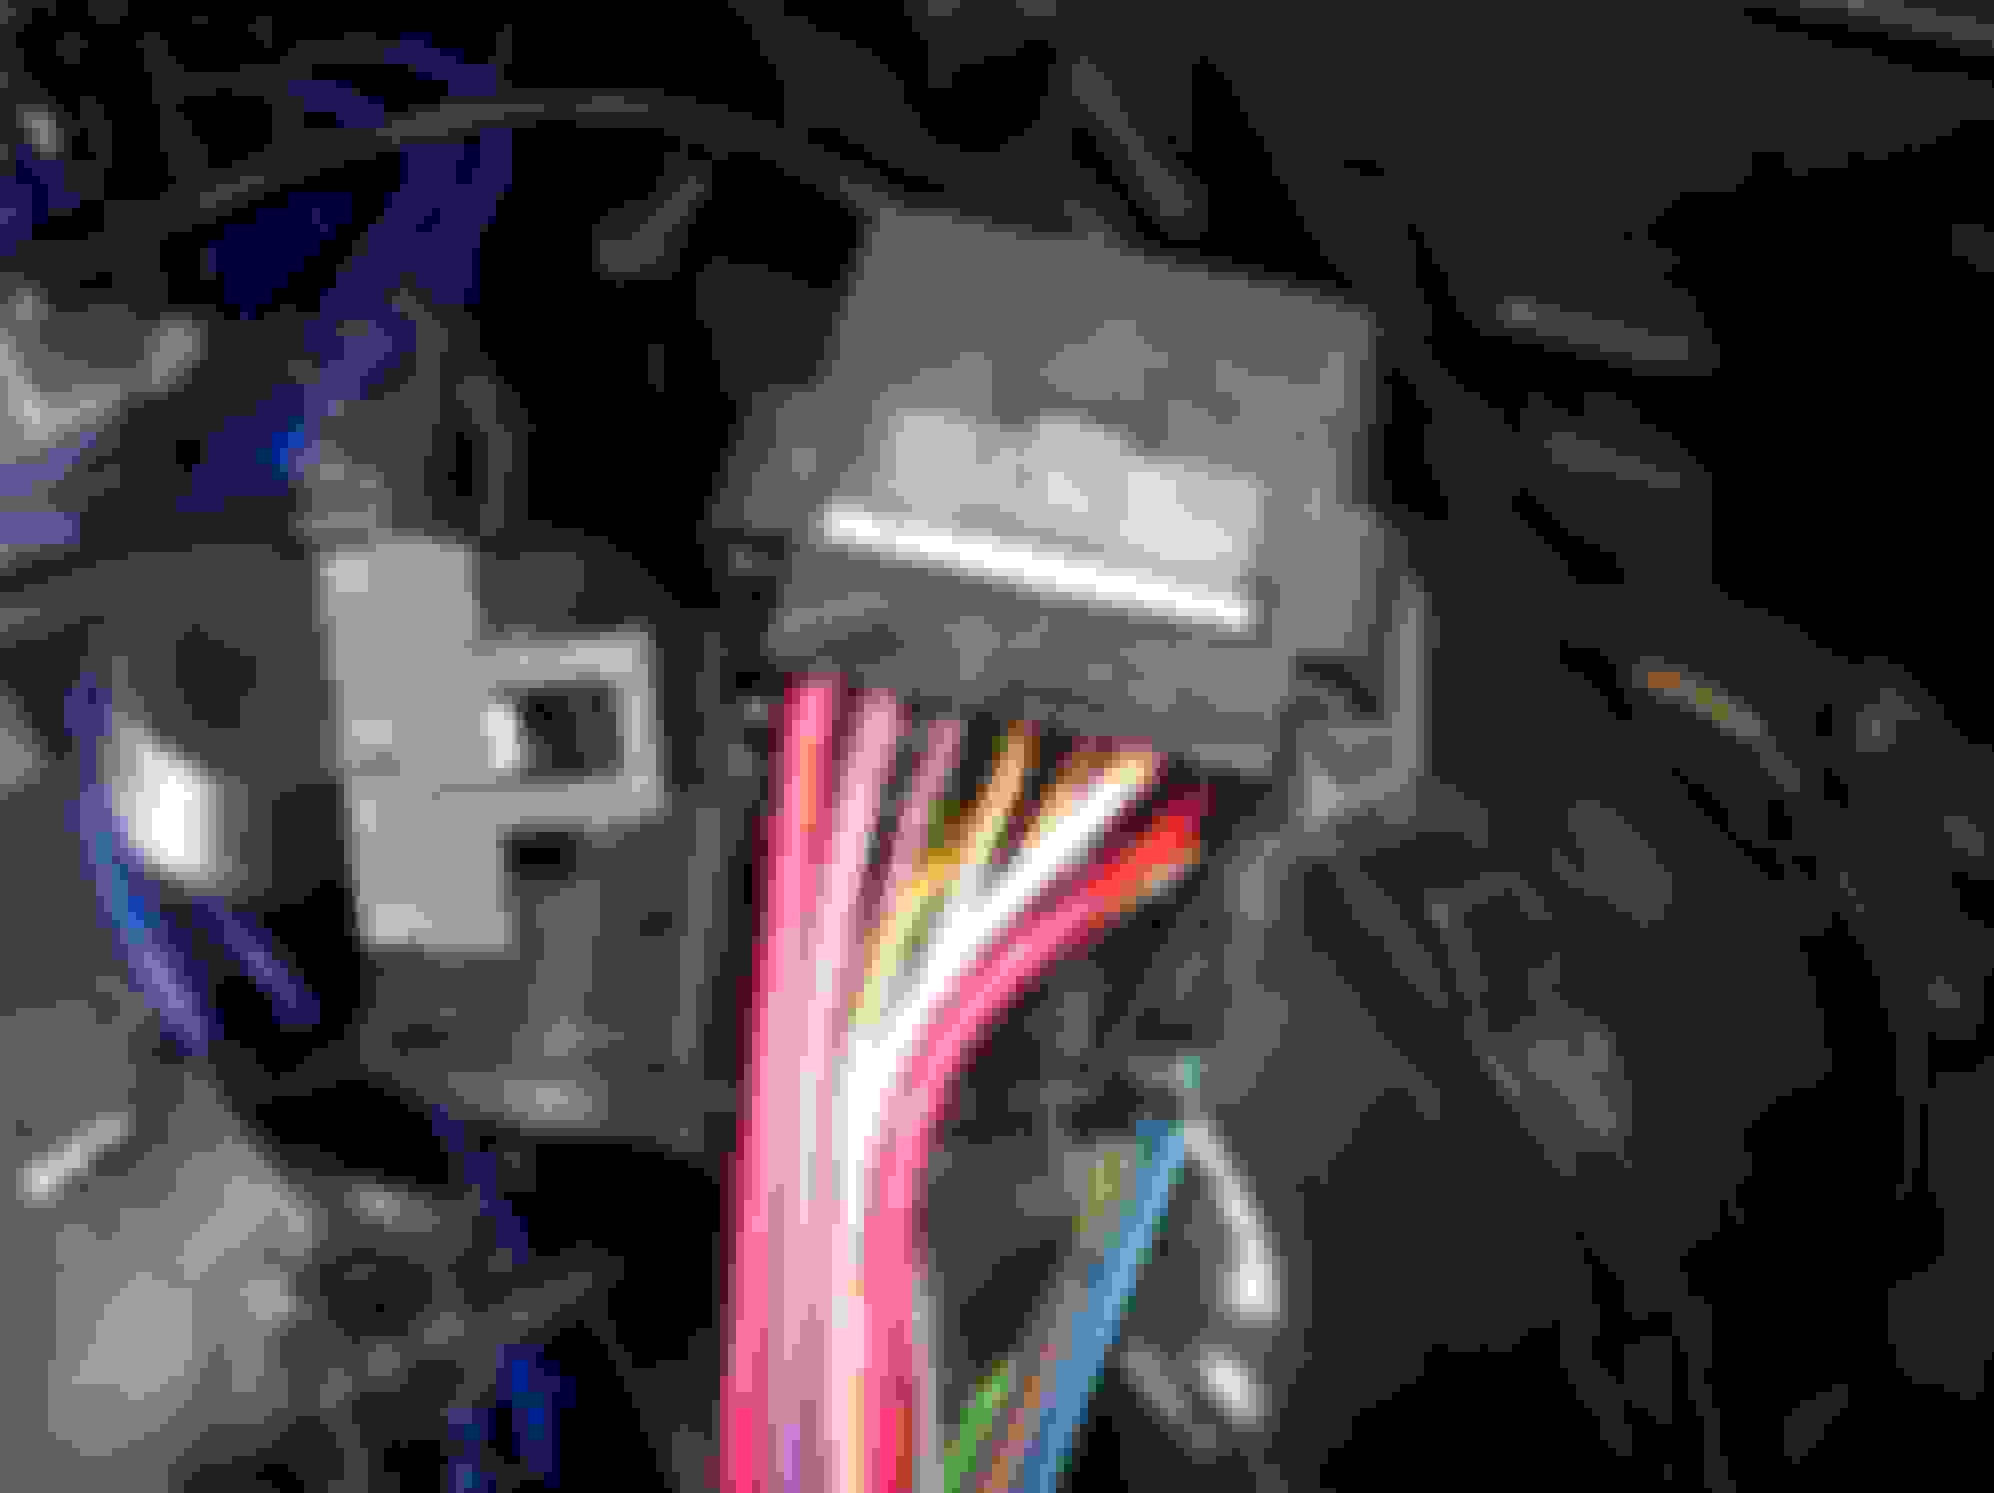
The Image Below shows the Tool required for REMOVING the Terminals from the C100 Connector Bodies.
It is Delphi Tool/ Part Number: #12094430.
Do NOT purchase One of these Delphi Terminal Removal Tools from any Retailer that charges more than $8 or $9.
The Tool should be very inexpensive (and it is worth it to use an OEM Tool, over an Aftermarket Tool that damages the Connector):
The Image Below shows how/ where the Tool needs to be inserted into the Connector Body...
And One of the Terminals:
The Image above shows One Terminal prepared for Removal.
The Image Below shows the same...
But at a different Terminal (and from a different viewing angle)...
YouTube Videos have been Posted by several People; on how to remove the Terminals (incase you have never done so yourself):
The Image Below shows the same 2 Terminals (from the 2 Images Above) completely removed from the C100 Connector:
The Above Image shows 2 of the Male Terminals that have been removed from the (Engine Compartment Side) C100 Connector.
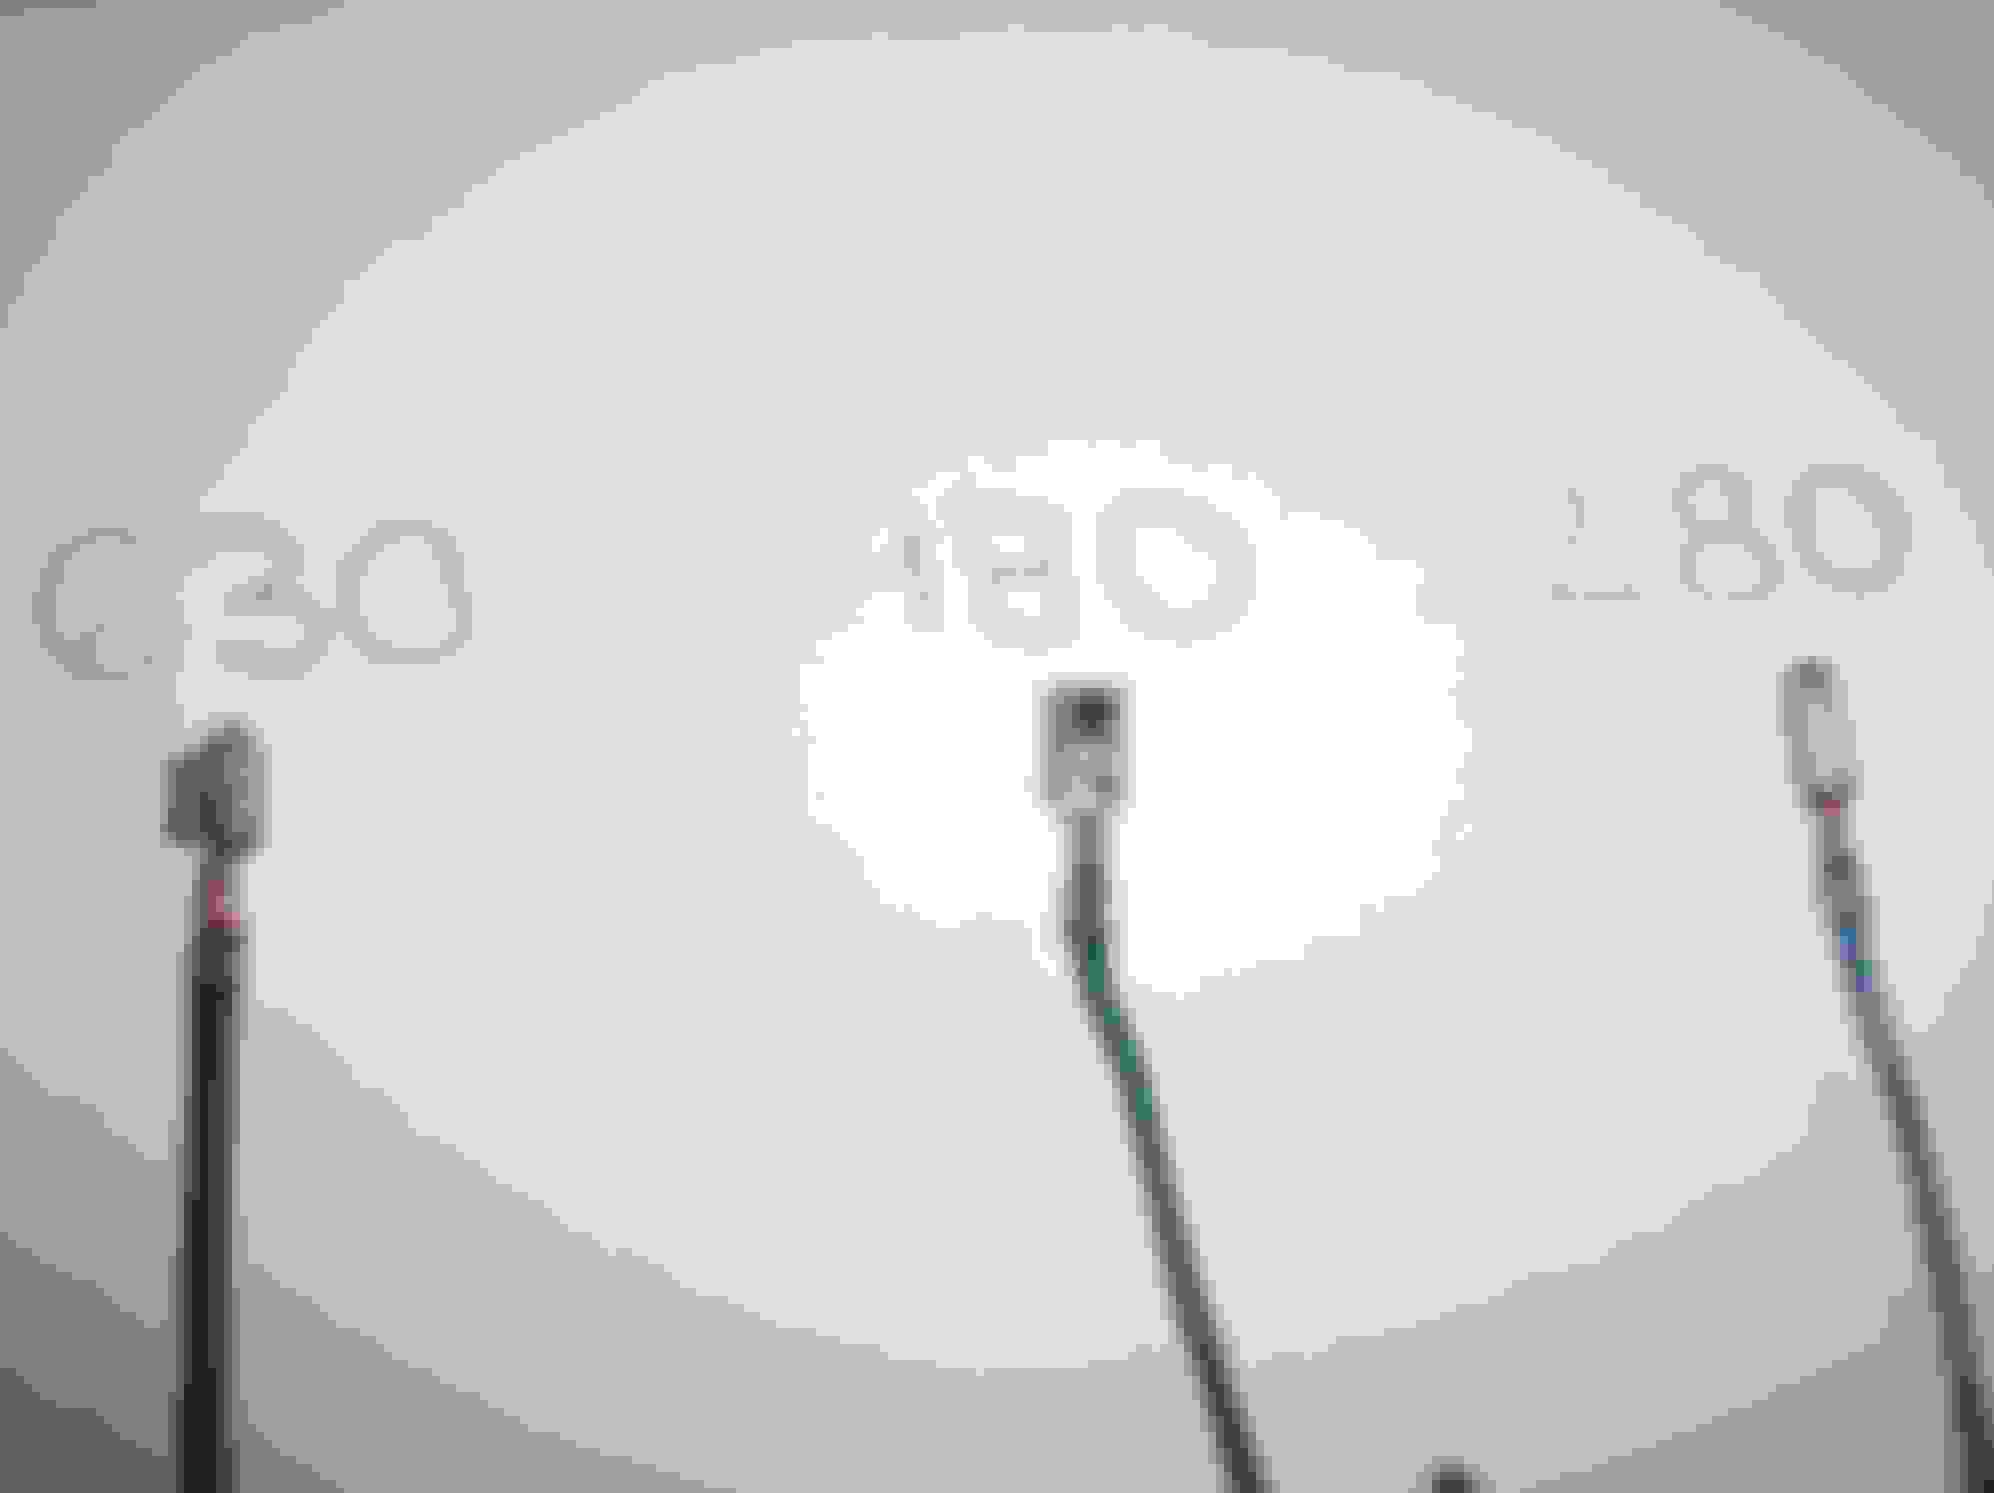
The Image Below shows the 3 different Types of Female Terminals that are in the C100 Connector half.
These are Female Terminals from the Cabin Side of the C100 Connector (that is still bolted to the Fire-Wall at this time).
As gone over already (in the Earlier Posts of this Thread)...
The 3 Types of Metri-Pack Terminals are shown (Metri-Pack 280, metri-Pack 480, and Metri-Pack 630 Series Terminals):
The 3 Terminals above are NOT from the Engine Compartment Side of the C100 Connector.
The Product in the Image Below from CRC...
Seems to help loosen some of the Old Hard Dark Di-Electric Grease...
Helping the Terminals be removed:
Last edited by vorteciroc; Sep 22, 2022 at 10:47 PM.
I just joined after scouring several C100 pages for the last 6.5 hours on various websites just to let you know that this is very important information and I think if it is not responded well at this time, it will be a great resource for people in the future. Many of the threads I've come across are from early 2000's, and many of the pictures are missing. Some of the stuff that you have posted here already is stuff I have not found anywhere. Please do not stop uploading what you have.
I'm currently looking for C100 information on all of the popular LS swap vehicles for use with my harness builds - The multi-generation Squarebody/C10/OBS/NBS, S10, A/B/F/G Body Cars, etc.
Thank you for what you've posted so far. I look forward to seeing the updates as they get posted. Thank you!
The next 4 Images are of the Male Terminals, that are from the (Engine Compartment Side) C100 Connector Half.
The Image below shows Two Male Terminals...
The way that they look as they come out of the Connector Body.
The Locking-Tangs of the Terminals, are NOW FLAT as a result of the Removal Process:
In the Image Below...
The Terminal Locking-Tang is shown at the Tip of the Terminal removal Tool:
In the Image Below...
The Terminal Locking-Tang is being PUSHED back into the Correct Position...
So that the Terminal can be used again/ re-installed back into the C100 Connector Body...
Again, this is shown by the Tip of the Terminal removal Tool:
The Next Image Below shows...
The Terminal Locking-Tang back at the Original Position (as when the Terminal was New and Ready for Insertion)...
Again, shown by the Tip of the Terminal removal Tool:
Last edited by vorteciroc; Sep 22, 2022 at 09:42 PM.
Here is a HyperLink from @John in RI that goes over many of the C100 Connector Diagrams...
For the different Terminal Positions/ Configurations, that were used over the different Model-Years:
One of these days I really need to take the connectors that come out of the C100 and add some weather pack connectors so I can easily remove the harness from there car where it blends with the LT1 harness.
But these pics are nice, really nice to have. I have the pin-out diagrams, and that's what I reference but its nice to see a clean picture of one, and the cad drawings are nice too.
I propose this be made a sticky. This information will become more and more important as these cars age. Content written by a real Delphi connection systems engineer too, it doesn't get better than that!
This is a great information thread. I currently have my car gutted for upgrades. I have to say the factory wiring does leave a lot to be desired. It's has undersized wire and the whole joining of grounds and power distribution is pathetic. Depinning and pinning the C100 is a must!
I know this is an older thread, but just wanted to let you know I found this VERY helpful. I need to replace the inside bulkhead connector and some of the main power feeds leading out of it and found this invaulable. Mouser still has everything listed and in stock and I got it within a couple of days. Thanks!
I know this is an older thread, but just wanted to let you know I found this VERY helpful. I need to replace the inside bulkhead connector and some of the main power feeds leading out of it and found this invaulable. Mouser still has everything listed and in stock and I got it within a couple of days. Thanks!
I started back on my 89 Formula project after a 10 year hiatus. I had completely gutted the car, and was intending to merge a Painless MAP harness in with the C100 wires. This thread has been valuable, just in being able to recognize the port, as well as getting various pin, outs and wire information. Thank you!
Need help identifying what wire is the ground wire and what wires are mainly needed for carburetor 350?
can anyone out there help me out? I need to find the ground wire and the main wires needed to go carburetor?
Need help identifying what wire is the ground wire and what wires are mainly needed for carburetor 350?
can anyone out there help me out? I need to find the ground wire and the main wires needed to go carburetor?
I can tell from the Fire-Wall/ C100 Images that you Posted, that you have a 3rd-Gen F-Body of some type.
You need to HELP us before we can HELP you!
Kindly provide us with Information on your Vehicle.
At the least, I need answers to what I have below.
We are NOT mind readers.
The C100 Bulk-Head Connector Assembly Terminal Positions/ Locations change from Model-Year to Model-Year and Sub-Model RPOs/ Engine and Transmission RPOs.
Are the C100 Harnesses in your Vehicle still Original?
What is the Year, Model, and Engine/ Transmission Combination that Originally came in the Vehicle?
Your vehicle may still have the SPID Label in the Glove-Box/ Center-Console with the RPOs listed (that will help).
Come back and Post the Information for your Vehicle...
At that time, I will go and look up the Line-Diagrams/ Schematics, and the C100 Connected End-Views for the Information that you are looking for.
Also here is a HyperLink to a Thread on Information regarding the C100 Connector itself, as will as Parts and Info if you need to move or install any Terminals/ Wires: HyperLink
Get back to us soon!
The car is a 1989 iroc. Its has a 350 sbc but the wire harness is not hooked up to anything it�s just out so I�m trying to figure out first does the car even have power. I don�t know much about about working on car engines and wire harness wise. I�m just trying to work on it myself but need a little help. Thanks
Might want to hot wire the ignition coil, check out how fuel system is plumed . And put a temporary bump starter to run the engine. Once it can run then wire up the engine . You will have to read schematics to wire up alternator, electric fuel pump. If 700r4 a tcc lockup kit. Or might be better to sell off and invest in something that needs less work.
Might want to hot wire the ignition coil, check out how fuel system is plumed . And put a temporary bump starter to run the engine. Once it can run then wire up the engine . You will have to read schematics to wire up alternator, electric fuel pump. If 700r4 a tcc lockup kit. Or might be better to sell off and invest in something that needs less work.
Do you mind if i direct message you some questions?


 Post as much as you got on the C100 , one of us will likely eventually need it ....