
Interior Preparations (pics!)

Thread Starter
Senior Member

Joined: May 2003
Posts: 744
Likes: 0
From: California
Car: '91 Firebird
Interior Preparations (pics!)
I've got my interior completely stripped out. This originally started when I had to take the carpet out to weld in my subframe connectors. Here's some pictures of the progress I've been making.
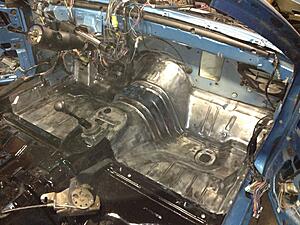
Preparing the floor pan for POR-15. I never want to do this again. My friends and I used grinders with braided wire brushes for the most part, and airplane stripper for the more cumbersome areas.


Started painting the POR in sections. The prep effort really paid off. I had absolutely no problems with adhesion.
Hatch area

Backseat

Front seat, firewall area

Floor plugs. I originally wanted to weld shut the floor plugs before I started painting the POR, but my welder friend decided to move across the country. Oh well, at least I got my SFC's and rear coilovers on before he left.

Preparing the floor pan for POR-15. I never want to do this again. My friends and I used grinders with braided wire brushes for the most part, and airplane stripper for the more cumbersome areas.

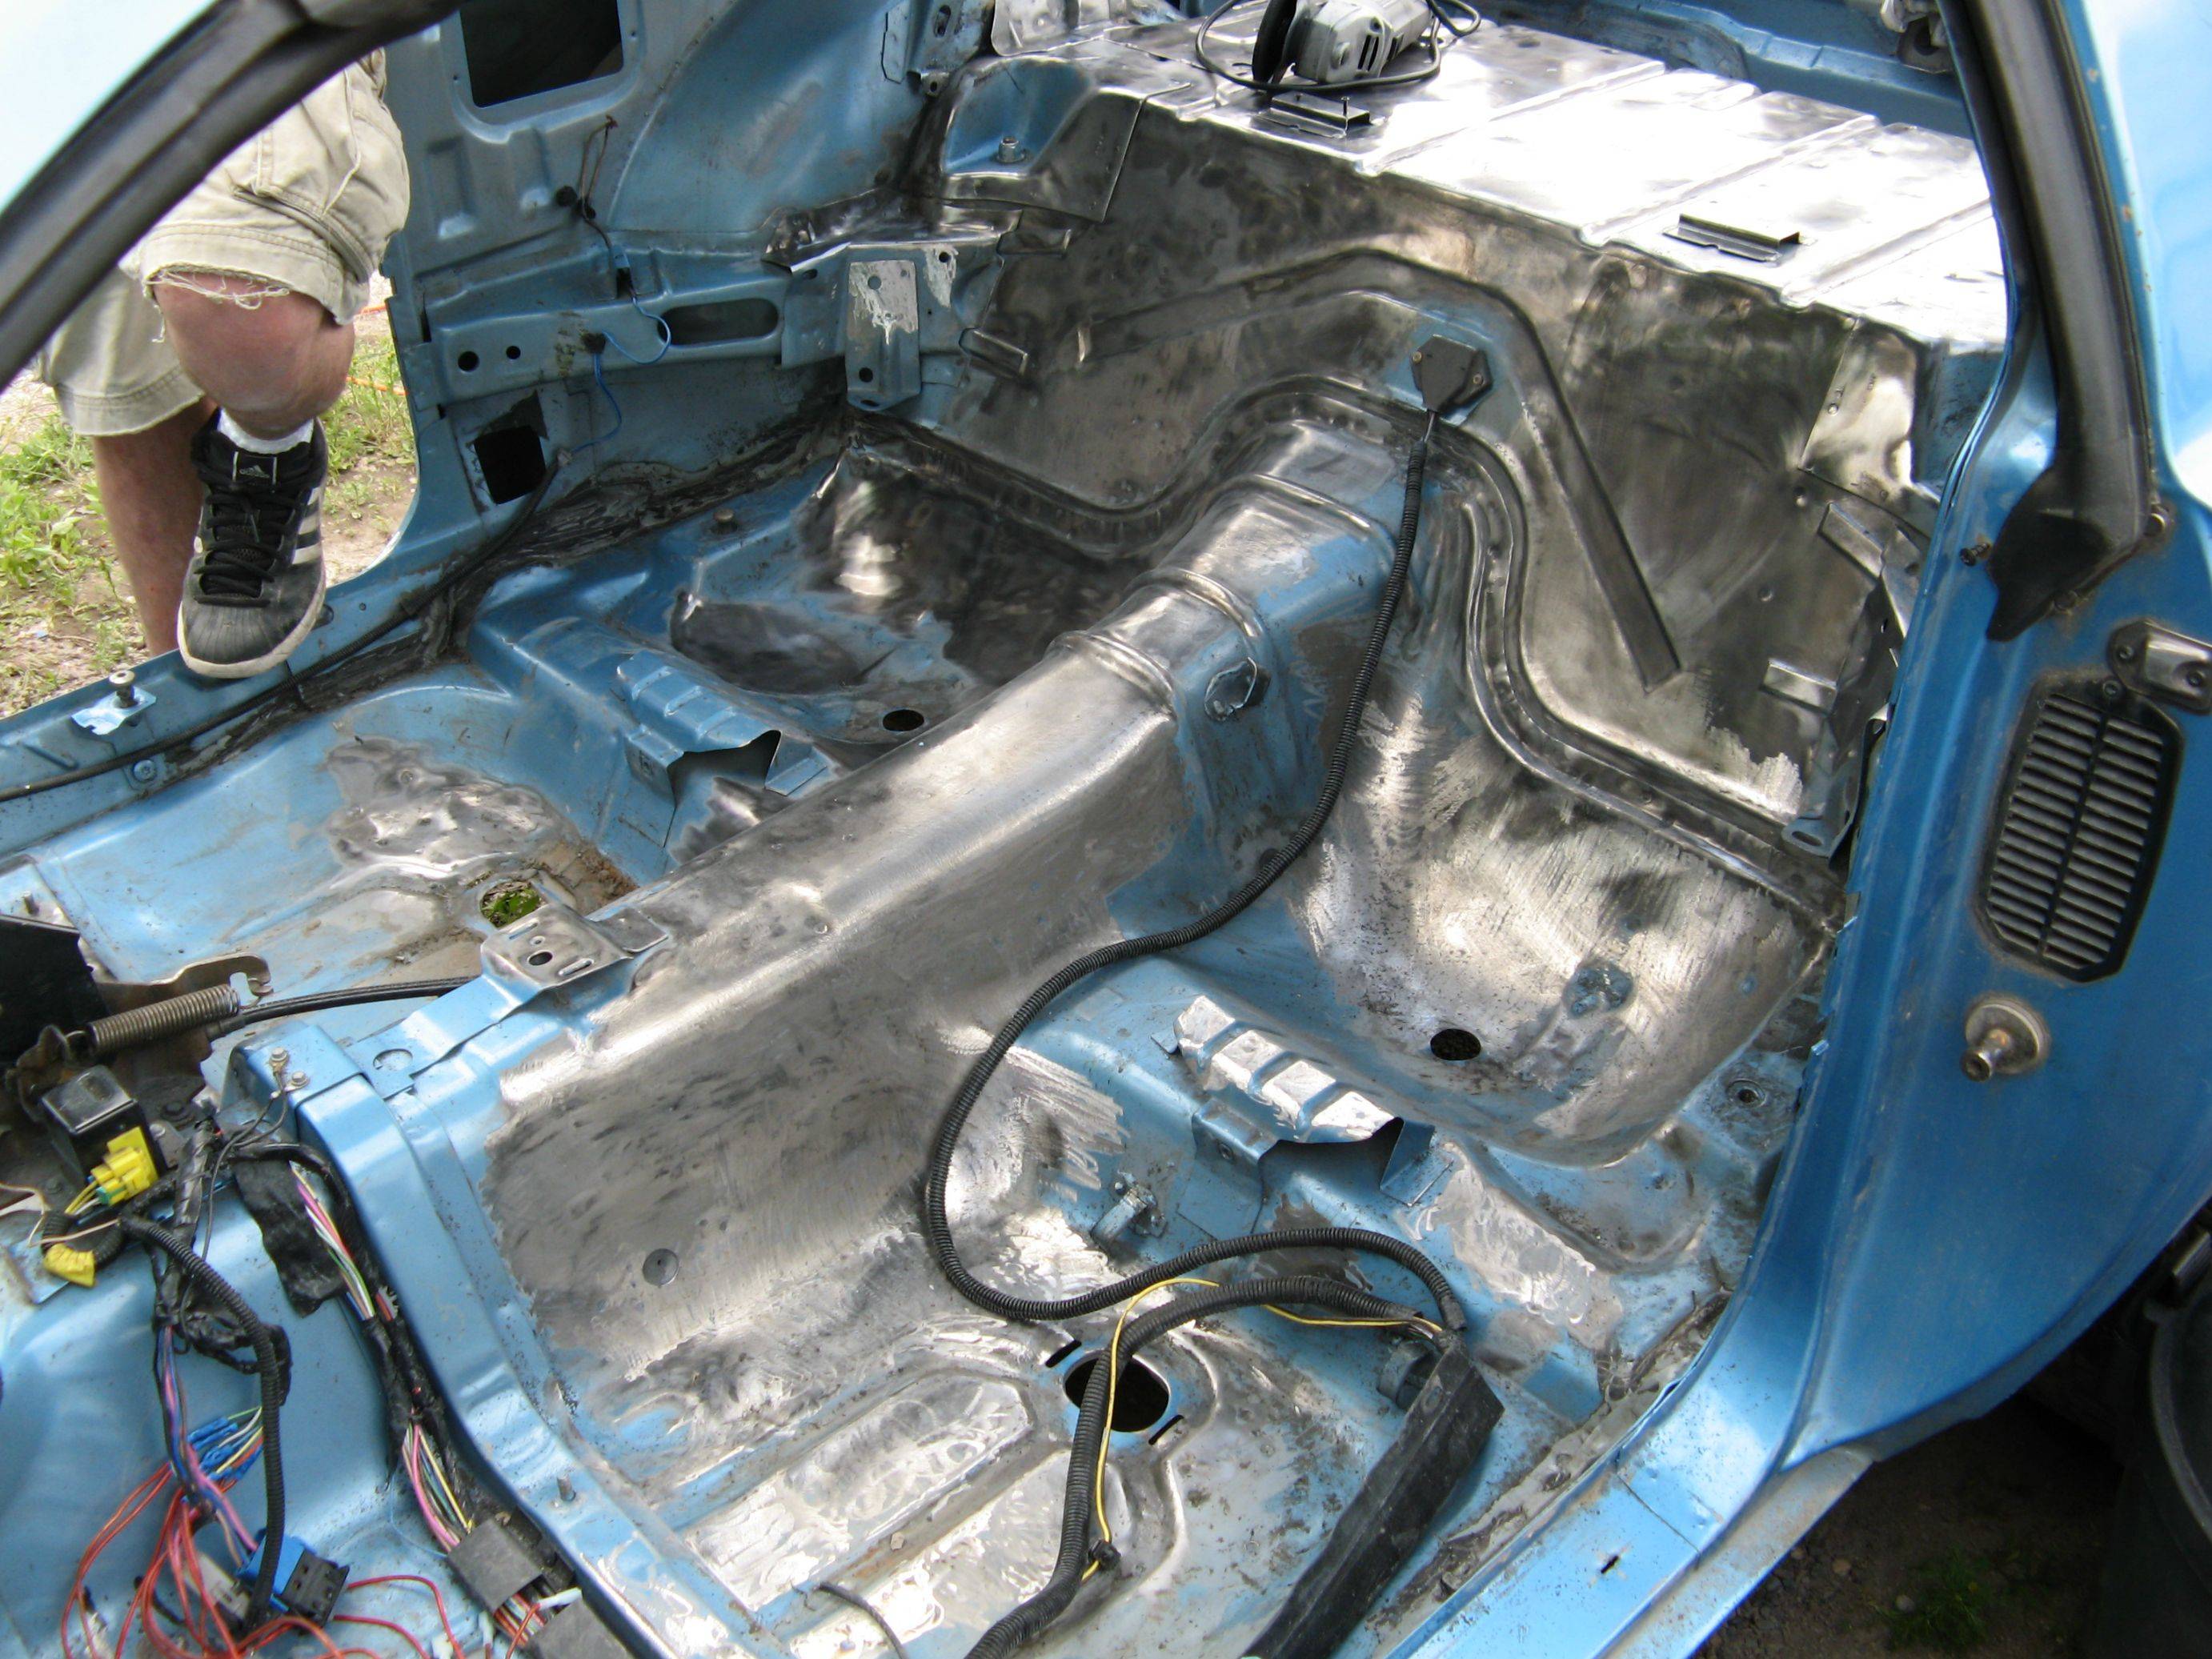
Started painting the POR in sections. The prep effort really paid off. I had absolutely no problems with adhesion.
Hatch area

Backseat

Front seat, firewall area

Floor plugs. I originally wanted to weld shut the floor plugs before I started painting the POR, but my welder friend decided to move across the country. Oh well, at least I got my SFC's and rear coilovers on before he left.

Thread Starter
Senior Member
Joined: May 2003
Posts: 744
Likes: 0
From: California
Car: '91 Firebird
Re: Interior Preparations (pics!)
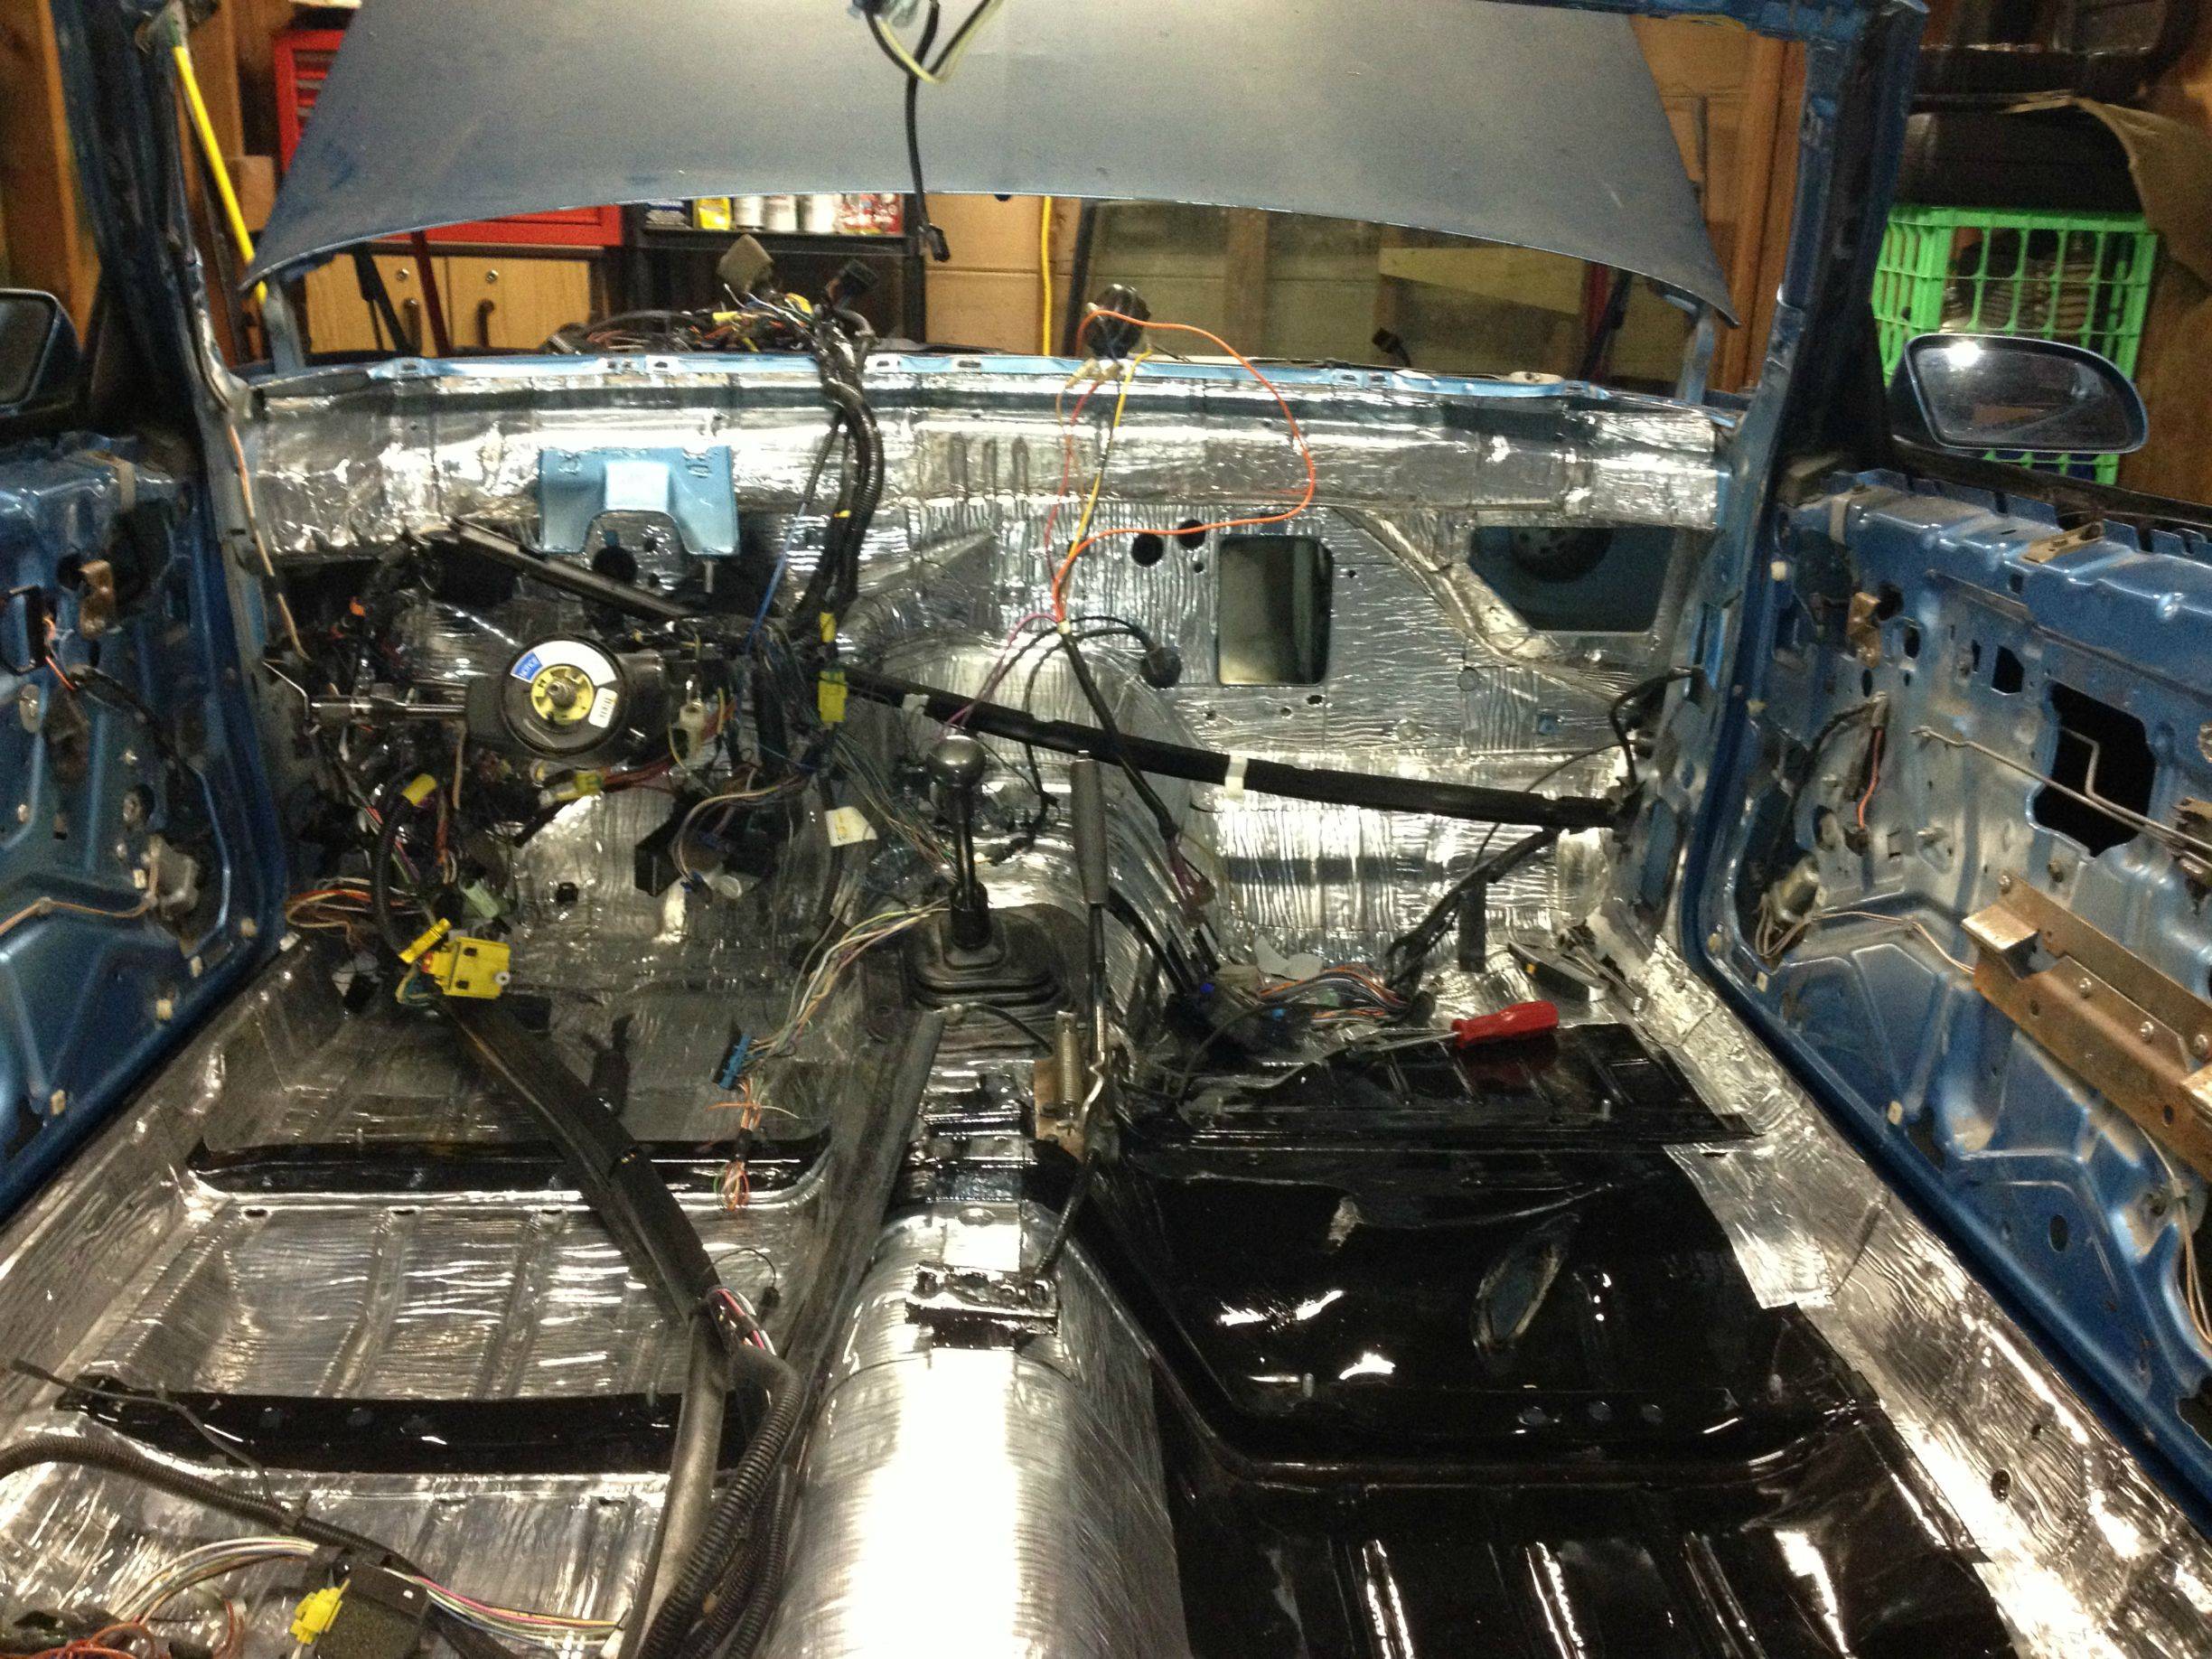
Next I moved on to sound deadener. I started with about half a roll of RaamMat original, and also bought a second box of RaamMat BXT II.
I started with the passenger side firewall.
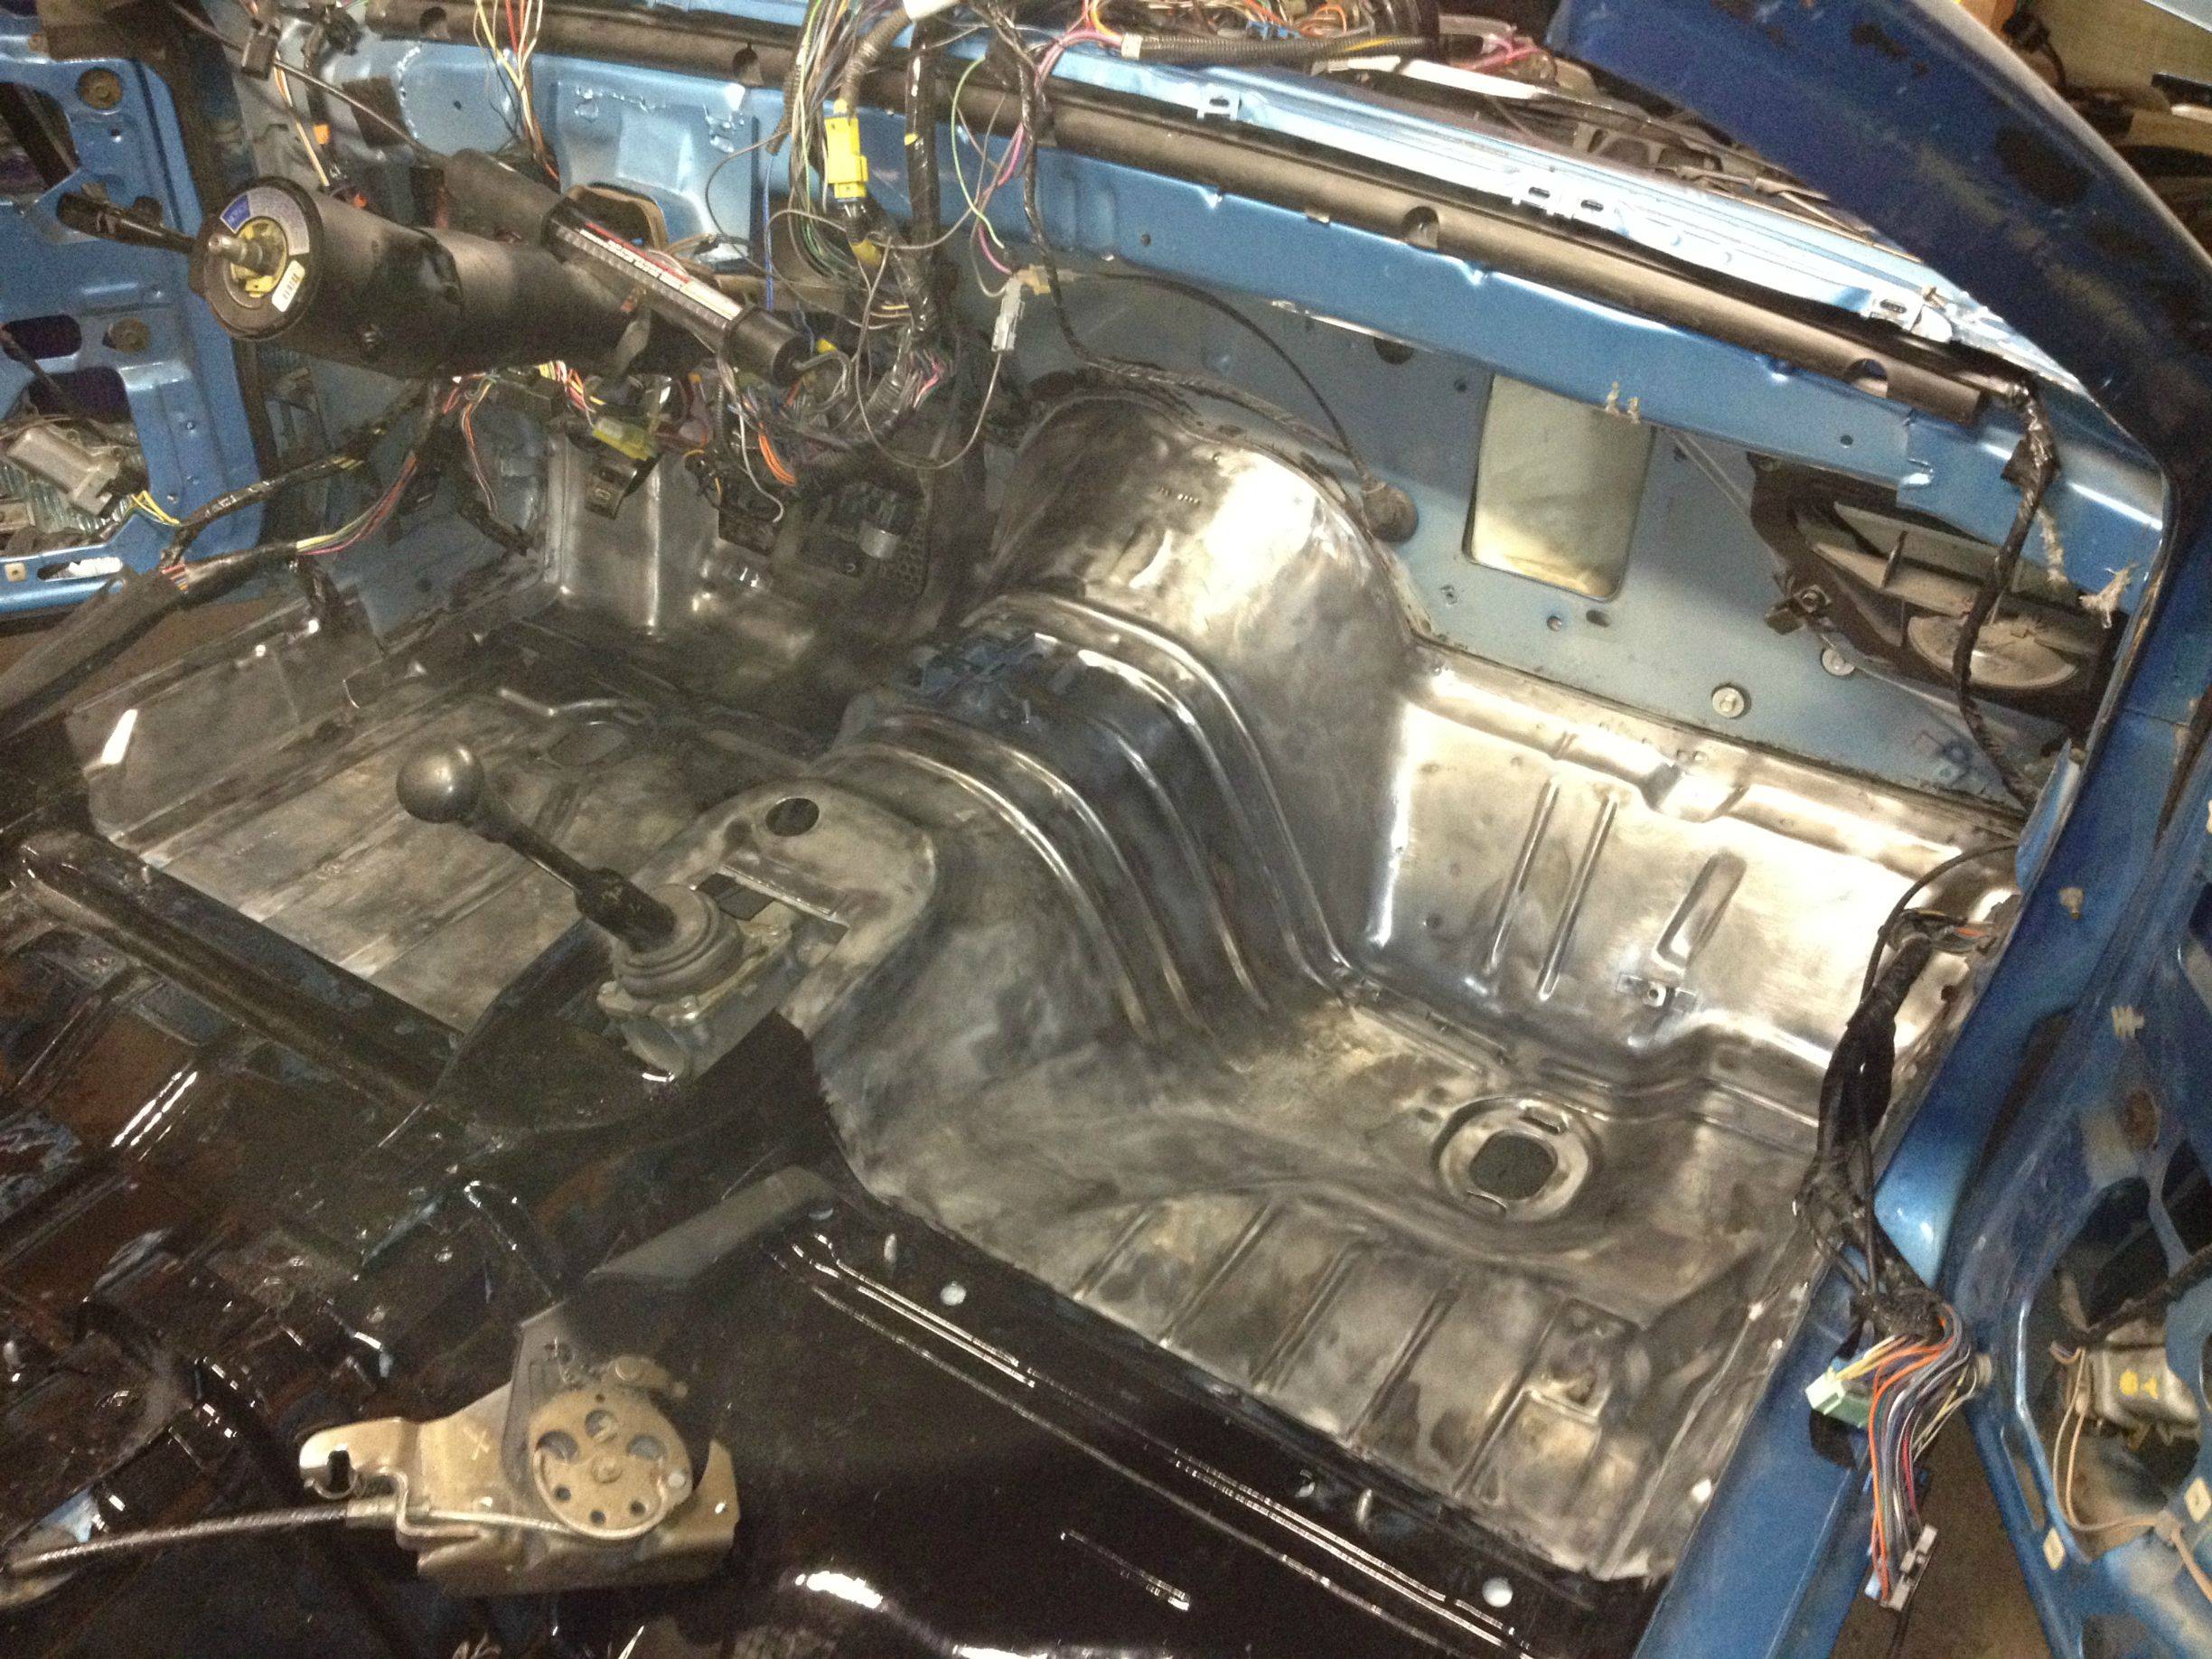
A shot of the floor plugs installed with the new seam sealer. I used white 3M body sealer. The white made it easy to see any spots I was missing, as opposed to using black. Contrary to popular belief, the seam sealer stuck to the POR-15 surface exceptionally.

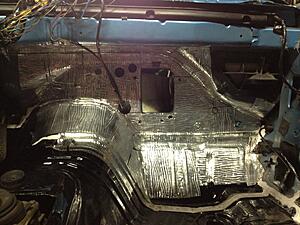
Completed laying deadener on the firewall and the drivers side floor.

The old firewall insulation was smelling pretty bad (t-top car), so I just threw it out. For a replacement I'm using 3/8" neoprene matting. I glued it on with 3M Super Trim Adhesive. Here is just the upper section.

And that's as far as I am right now. I'm going to finish the neoprene firewall next and get the HVAC system back together.
I am thoroughly sick of laying RaamMat at the moment.
I started with the passenger side firewall.

A shot of the floor plugs installed with the new seam sealer. I used white 3M body sealer. The white made it easy to see any spots I was missing, as opposed to using black. Contrary to popular belief, the seam sealer stuck to the POR-15 surface exceptionally.

Completed laying deadener on the firewall and the drivers side floor.
The old firewall insulation was smelling pretty bad (t-top car), so I just threw it out. For a replacement I'm using 3/8" neoprene matting. I glued it on with 3M Super Trim Adhesive. Here is just the upper section.

And that's as far as I am right now. I'm going to finish the neoprene firewall next and get the HVAC system back together.
I am thoroughly sick of laying RaamMat at the moment.
Senior Member
iTrader: (3)
Joined: Jan 2012
Posts: 790
Likes: 4
From: Downriver, MI
Car: 1986 IROC-Z
Engine: 350
Transmission: T5
Axle/Gears: 4:10
Re: Interior Preparations (pics!)
Nice work! I used the FatMat and had good results as well. Por 15 is killer stuff. Just don't get it on your hand like I did lol
Thread Starter
Senior Member
Joined: May 2003
Posts: 744
Likes: 0
From: California
Car: '91 Firebird
Re: Interior Preparations (pics!)
I only had one mishap. I wore gloves the whole time, but afterwards I poured lacquer thinner in my container to clean it out. Took my gloves off and accidently stuck my finger right in it while I was moving it. The end of my finger was black for about a week haha.
Senior Member
Joined: Sep 2003
Posts: 738
Likes: 1
From: Hurlburt Field
Car: 84 Z28, '15 Colorado
Engine: L69
Transmission: A4
Axle/Gears: 3.73
Re: Interior Preparations (pics!)
Just makes me realize how much I'm NOT looking forward to doing this on my car. The wifey gets mad when I spend too much time out in the garage.....
Member
Joined: Jan 2007
Posts: 371
Likes: 1
From: Lawrenceville Ga
Car: 1986 BBC Iroc
Engine: 454
Transmission: th400
Axle/Gears: 3.42
Re: Interior Preparations (pics!)
I need to do this to the iroc but the wife already gets upset if even touch the car after it being apart for 4 years and finally got it together last summer when i went to change the headers to the big block swap headers she got made and told me to leave teh car alone I can just imagine if i tried to pull out the interior and do this plus I have to pull the motor now cause my oil pan has wings and the swap headers don't fit right LOL she is not happy Oh well life goes on. maybe i just wont tell her and just do it she will never know LOL
Oh well life goes on. maybe i just wont tell her and just do it she will never know LOL Supreme Member
iTrader: (35)
Joined: Aug 2006
Posts: 1,470
Likes: 1
From: Mississauga,Ont,Canada
Car: 89 IROC
Engine: LSX 6.0 370, TU2 Cam, Fast intake
Transmission: T56 w/ lots of goodies
Axle/Gears: 8.8, Posi, 4.10, 31 Spline
Re: Interior Preparations (pics!)
I got to do this to my car eventually when I get time. I rocker guarded the floors inside and out for now to protect them in the mean time.
LOL my wife gave up on telling me to not work on my car. Told her a gave up drinkin and wasting money on other **** so STFU and go buy some shoes or something. she leaves me the hell alone now LOL. Its come to the mutal understanding that she has her stuff and I got my car plain and simple.
LOL my wife gave up on telling me to not work on my car. Told her a gave up drinkin and wasting money on other **** so STFU and go buy some shoes or something. she leaves me the hell alone now LOL. Its come to the mutal understanding that she has her stuff and I got my car plain and simple.
Trending Topics
Thread Starter
Senior Member
Joined: May 2003
Posts: 744
Likes: 0
From: California
Car: '91 Firebird
Re: Interior Preparations (pics!)
For anyone else planning this, I'd recommend using something besides POR15. The stuff works great and the results are awesome, but the prep work took a really long time. If I had to do it again, I'd use something that didn't require bare metal.
I was originally planning to do the wheel wells and underside with POR as well, but there's no way I'm going to put myself through that again. Instead I'll just be prepping any rough areas with some good old rust converter, and then rolling on Herculiner.
And I have no wife to yell at me about any of it!

Supreme Member
Joined: Apr 2011
Posts: 1,051
Likes: 0
From: Huntsville, AL
Car: 89 Black IROC-Z convertible
Engine: 305 TBI
Transmission: Auto
Re: Interior Preparations (pics!)
It looks like you're doing a great job. Keep us posted on the completion. I'd be interested in know if it lowered the noise level inside the car.
Member
Joined: Jan 2007
Posts: 371
Likes: 1
From: Lawrenceville Ga
Car: 1986 BBC Iroc
Engine: 454
Transmission: th400
Axle/Gears: 3.42
Re: Interior Preparations (pics!)
Ok, this is the WIFE!!! I'm with 6SIX6, give me the credit card and I'll leave you alone with the black Z-28, but LEAVE THE POOR IROC-Z ALONE!! He's amazing just like he is!!! (Just Sayin) That's all, Rebecca Hainer ;=}~
Thread Starter
Senior Member
Joined: May 2003
Posts: 744
Likes: 0
From: California
Car: '91 Firebird
Re: Interior Preparations (pics!)
Sanded, primed and painted pedals and steering column brace. I got sick of looking at the bare rusty metal, even though you never see these when they're in the car.
I also got new rubber pads for the clutch and brake pedals. The clutch pad is a Dorman item that can be special ordered from Autozone. Their brake pedal pad has been discontinued though, so I ordered Hawk's new reproduction.

I also got new rubber pads for the clutch and brake pedals. The clutch pad is a Dorman item that can be special ordered from Autozone. Their brake pedal pad has been discontinued though, so I ordered Hawk's new reproduction.

Last edited by Faded; Oct 31, 2012 at 05:49 PM.

Thread
Thread Starter
Forum
Replies
Last Post
92camaroJoe
Tech / General Engine
6
Aug 13, 2015 06:07 AM