When you click on links to various merchants on this site and make a purchase, this can result in this site earning a commission. Affiliate programs and affiliations include, but are not limited to, the eBay Partner Network.
I think most of us 1985+ Firebird guys can agree that the center console situation is in bad shape for our cars. I don�t personally want to switch to a gen 4 console, but most of the ones for our cars I can find for sale are in at least as bad a shape as my current one is.
So I�m working on a replacement. Saw a few threads dating back to 2009 discussing a desire for a hard plastic replacement with the same shape, and that�s what I�m going to target.
My plan is a printed ABS plastic skeleton that I can lay a layer or two of fiberglass/carbon fiber on top of to solidify and finish. Could be possible to paint after that, or even upholster if you were better at that than I am.
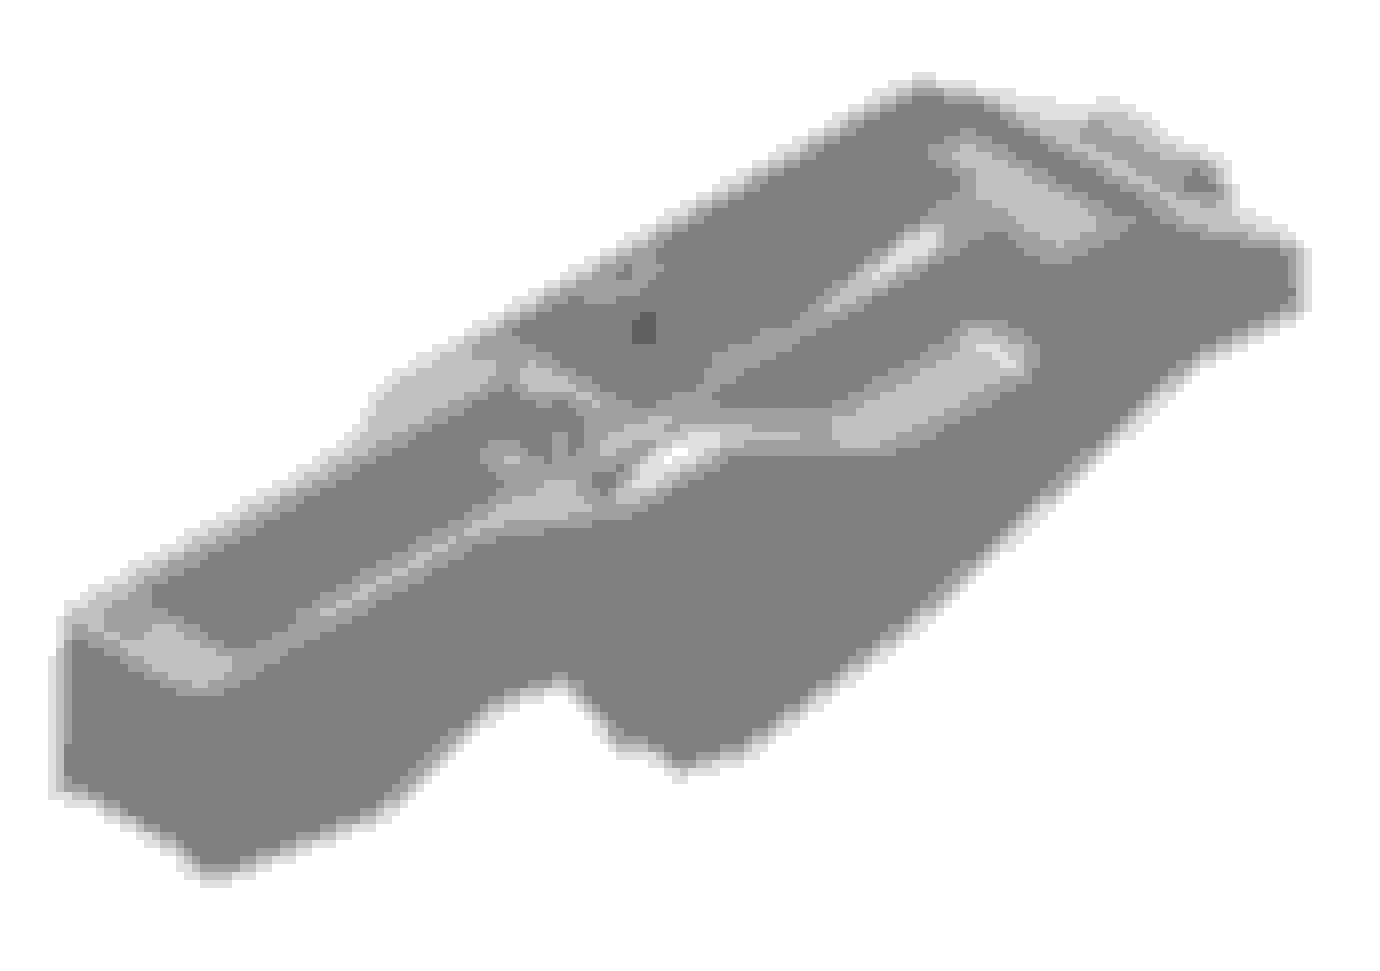
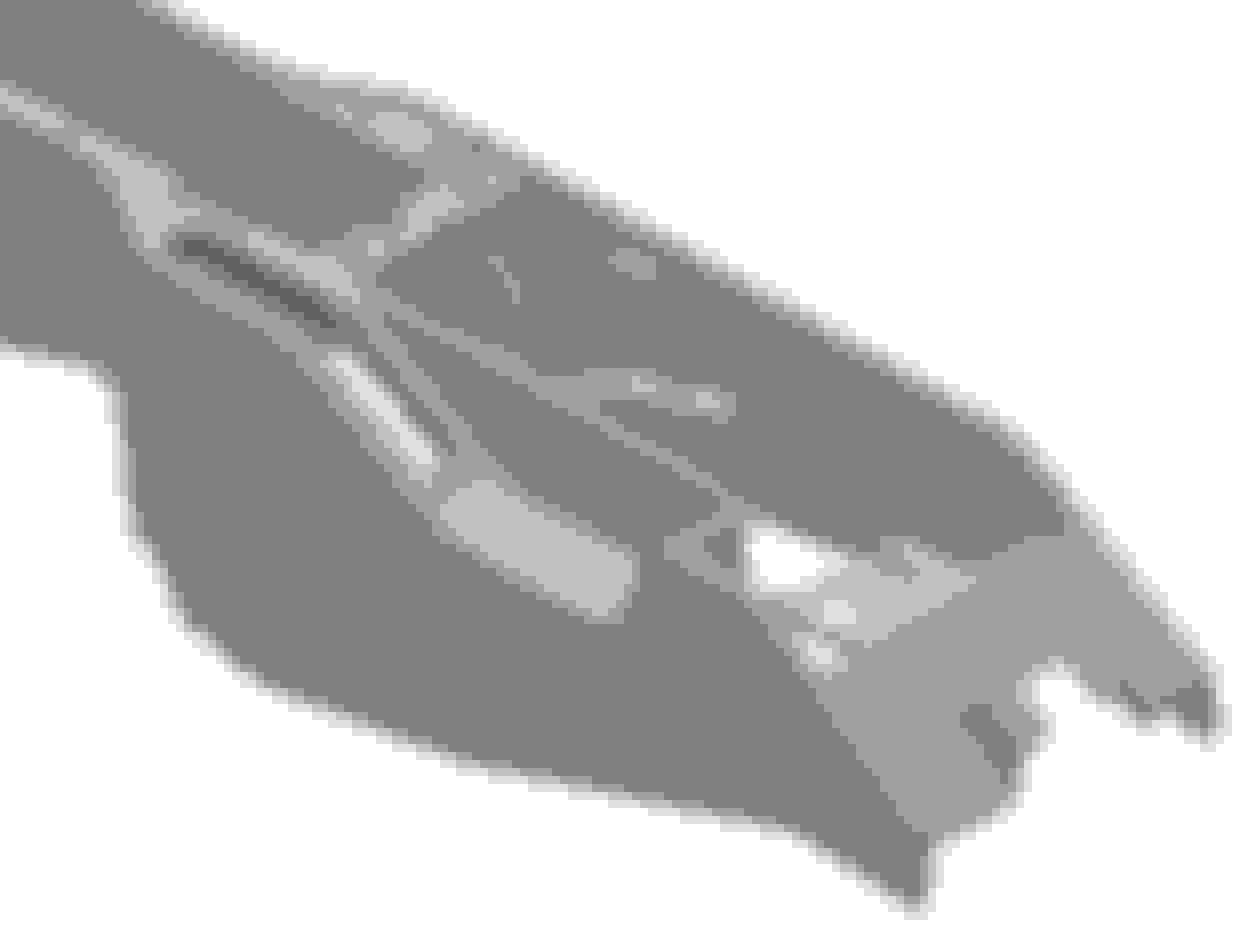
Or maybe I�ve missed something and Jim-Bob�s Consoles in Utica has perfect repops for sale. If so, let me know so I can stop wasting time 🤙. See below for early progress. Ignore the colors, it�s a bunch of junk plastic spools I wanted to finish off.
Early prototype next to original center console. Passenger view. Early prototype next to original center console. Top View. Early prototype next to original center console. Driver View. Original center console with automatic shift plate insert. Early prototype with automatic shift plate insert.
I could see where 'bulk' might work against you, at least in the short term. It's not going to take long for the plastic base to 'bulk-up' once you cover it in a layer or 2 of anything and there's not a lot of room in a Thirdgen to start with so anything larger than factory WILL be noticed. Maybe shaving the plastic down a bit to "soften' the sharp edges before adding layers/covering/coating it ?? Maybe starting with a slightly smaller "base". ( I don't know - quick passing thoughts ! )
Looks like a great start with a lot of potential for a good fitting and highly customizable Thirdgen center console.
Maybe shaving the plastic down a bit to "soften' the sharp edges before adding layers/covering/coating it ?
This is absolutely the plan, just working on getting the proportions correct before slicing it down. Hopefully I�ll be able to get a result that is within fractions of an inch to the original part.
Keeping updates coming, I've been trying to get the existing console 3D scanned at work, but it has been a challenge. Turns out, the material it is made from is a near perfect IR absorbing color, and therefor just will not scan. I've ordered some special temporary paint that should help get a good scan. Hopefully early next week I'll have some more interesting results to share!
Update Time! I got a semi-decent scan of the console done today. Really not impressed with the scanner's capability for the effort expended, but it will get me moving at least. Hoping to get the the model adjusted to match the scan this weekend, and hopefully get a decent second prototype ready for printing over next weekend.
Spraying the console with specialty paint Post Scan. Paint slowly sublimating away. Console Scan Results
Last edited by codyman125; May 20, 2025 at 12:16 PM.
Reason: removed broken image from post. tried to fix several times.
This is surely needed out there as any used ones out there are usually worse than the one you have and still needed fixing up. You might consider incorporating cup holders in place of the ash tray (keep the cigar lighter for accessories). I know there is someone in Colorado that makes a new console top panel that does this.
It looks like your factory console just needs to be re-glued. commonly done and found in threads in this board.
I could definitely make it better by re-gluing it (again - I did back in 2010 when I owned the car the first time), but lots of little plastic bits are broken off and completely missing at this point. Where the screws go through in the storage area is completely missing, the plastic is broken internally by the E-Brake, etc, etc. A factory correct replacement would be the ideal outcome, but I decided it would be better to have a nicer replacement, even if it isn't factory correct.
This is surely needed out there as any used ones out there are usually worse than the one you have and still needed fixing up. You might consider incorporating cup holders in place of the ash tray (keep the cigar lighter for accessories). I know there is someone in Colorado that makes a new console top panel that does this.
The initial goal is to make something that any factory or replacement shift plate will drop into. But I have certainly considered that at this level of modification, I could build one in from the get go. I was considering adding one on the passenger side by the ashtray!
Well, another week, another prototype. This time, I got it close enough to actually install the shift plate, arm rest, and rear ash tray!
This prototype has a few key issues still. Notably:
1. Method of connecting sections together is weak and difficult. Threaded fasteners could still work, but there has got to be a better way.
2. Gap around shift plate is a little inconsistent. Need to adjust a few radii to get it right.
3. Clips for the shift plate are a little too short for the design. Need to move the receivers up about 0.025- 0.050�.
I am thinking the next prototype might be the first one designed for a layer of fiberglass and resin, so other modifications will be needed before I can jump into it. I�m out of town for the long weekend, but looking forward to test fitting the v2 prototype in the car on Monday! Let me know your thoughts in the meantime.
awesome progress, once you have the fitment correct, could you plastic "weld" the sections together on the inside and outside for a permanent bond?
Thanks! I�m pretty happy with it so far!
A plastic weld solution could work, but will inevitably disrupt the exterior surface. Not a deal breaker, but I was hoping to avoid it. However, the exterior surface isn�t nearly as aligned as I was hoping for with fasteners anyway, so this is probably a non-issue.
I�ve been thinking a plastic hot stapler might be the fast and strong solution, but doesn�t offer much in the way of adjustability after use if I screw it up a little.
Great progress. Is this something that you plan to reproduce? Or just a one-off?
I�m not entirely sure yet. I just knew I needed one, and wanted to give it a go. Biggest problem with reproduction is that I can�t guarantee that it won�t have issues after a few hot summer days yet.
If I get Quality, Repeatability, Durability, and Thermal Stability all down, then I will probably make a post offering them up. But any one of those criteria could be out of reach at the moment.
Great work. Is the console a version of the original in bare plastic or with the vinyl cover still on it?
Thanks!
Ideally, a covered version would be nicer than the bare plastic version, but until I can get the bare plastic down upholstery is out of the conversation. Once I get a workable solution to hard plastic though, I might not be too far off of a version that could be taken to the upholstery shop for finishing... But that is in the future. Gotta take it one step at a time.
As a quick update, my first two prototypes were printed out of PLA. For the uninitiated amongst us, PLA is a low temperature entry-level filament for printers, and holds up notoriously poorly to things like sunlight and >100 degree temperatures. However, it does print fast, so it is nice for quick prototypes.
Version 3 will be printed out of ABS. A much better material for the application, but much slower and harder to print with. I've been experimenting with getting it to run right, but the size of the pieces make it prone to warping. The mid-rear quarter of the prototype made it to 75% complete, but did ultimately fail. Cutting the console from quarters into eighths should help this somewhat, but will take more assembly time.
For now, nothing interesting to show. Maybe a week or two to get prototype V3 completely printed.
Been a few weeks since I posted an update. I've been trying to get the V3 prototype printed, but ABS has not been my friend. Using the original geometry, it was warping like crazy. So I tried breaking it down into way more pieces, but each piece's individual warp was stacking up into a problem.
Path forward isn't entirely clear, but I'm trying a different type of filament that should retain strength and durability but print easier this week. If that fails, I may end up having to go a more expensive route, having it printed elsewhere or using a more expensive material / upgraded setup.
Finally some progress to report! This version is ready for next steps - gap filling with epoxy, prepping, and fiberglass.
This version is printed from High Impact Polystyrene. It should have the properties needed to withstand up to about 180 degrees without deforming, and was acceptably printable. I�m not overly happy with the strength of the base part, but it is sufficient and will be more than enough once the fiberglass layer is installed.
That looks great. If one were to cover that like the factory part would you still need to fiberglass/epoxy it.
Thanks! I'm pretty happy with it.
I have had this thought too. A nice Dark Gray Leather finish would stitch together nicely and probably save a fair bit of time compared to the fiberglass approach. I suspect the part wouldn't be particularly durable if I didn't do some level of strengthening however. Even with a leather finish, I would still want to fill the gaps with a JB Weld style 2 part epoxy for strength and smoothness.
For reference, my wife accidentally kicked one of the un-welded parts and broke a section off last night while I was working on it. It went back together fine after a few more plastic staples (After consoling her about how bad she felt), and it is much stronger fully built, but it did shake my confidence in the no-fiberglass approach a little.
Last edited by codyman125; Jun 19, 2025 at 01:36 PM.
Reason: Switched from Mercedes style leather to a Rich Corinthian Leather more appropriate for these cars
What filament are you using for this? PLA or ABS? I would think that ideally you would want to print this in something like PET-CF for strength. PLA will warp, especially in a hot FL car .ABS might be acceptable.
this is a super interesteing project. I personally am going to a 4th gen console as part of my 5 speed swap. Do you have capabilities to print custom parts? I need to make a file for window switches and the power mirrors in a 4th gen console. I'd be willing to pay for the files, and your work.
This part is made from High Impact Polystyrene (HIPS). Better known as soluble support for ABS. It is only soluble (and only mildly) in D-Limonene, which is a specific and uncommon solvent. HIPS has much of the temperature resistance and strength of ABS without the tendency to warp on large parts.
Originally Posted by Bald_eagle_machine
I would think that ideally you would want to print this in something like PET-CF for strength.
PET-CF would be great, but might require a better printer than my Bambu P1S. Also, -CF & -GF filaments have a tendency to give off tons of tiny shards of carbon or glass. Pretty nasty stuff to print in your living room on weekends / around pets and kits... Also, $85/spool for PET-CF where >3 spools are needed vs $17/spool for HIPS. Could be reasonable if I decide to ditch the outer fiberglass and hide the printer in a HEPA box or something though.
Originally Posted by Bald_eagle_machine
Do you have capabilities to print custom parts?
I can if the need arises. Large parts are hard, but it sounds like you need something pretty small. Feel free to DM me with more context.
Also, the 4th gen console is a great option. Even adds a cup holder. Buuuuut I want it to look as stock as possible. Figured this would be a fun project too!
Last edited by codyman125; Jun 19, 2025 at 01:49 PM.
Reason: Can't make up my own damn mind if PET-CF would be worth the trouble. Started hostile to the idea, then too accepting.
This part is made from High Impact Polystyrene (HIPS). Better known as soluble support for ABS. It is only soluble (and only mildly) in D-Limonene, which is a specific and uncommon solvent. HIPS has much of the temperature resistance and strength of ABS without the tendency to warp on large parts.
PET-CF would be great, but might require a better printer than my Bambu P1S. Also, -CF & -GF filaments have a tendency to give off tons of tiny shards of carbon or glass. Pretty nasty stuff to print in your living room on weekends / around pets and kits... Also, $85/spool for PET-CF where >3 spools are needed vs $17/spool for HIPS. Could be reasonable if I decide to ditch the outer fiberglass and hide the printer in a HEPA box or something though.
I can if the need arises. Large parts are hard, but it sounds like you need something pretty small. Feel free to DM me with more context.
Also, the 4th gen console is a great option. Even adds a cup holder. Buuuuut I want it to look as stock as possible. Figured this would be a fun project too!
May I suggest the idea of a center console delete plate that removes the center console lid and replaces it with a decent cupholder plate? feel like those would sell well
May I suggest the idea of a center console delete plate that removes the center console lid and replaces it with a decent cupholder plate? feel like those would sell well
Interesting Idea! I�ve been considering molding one onto the passenger side in front of the hand brake, but a replacement lid could be neat too!
Maybe a more discrete solution could be an add in plate that folds with the existing lid, and can either be left down acting as a cup holder, or lifter with the console lid to act as a glove box still.
Small update on this project, I'm not planning on fiberglass-ing it anymore. The time, dollar, and safety input to get the fiberglass to lay correctly and smooth enough for paint would kill all reproducibility.
Sitting in the car over the weekend thinking about it, I realized that moving away from fiberglass to an upholstered finish would need a slight redesign of the part. Making this white one little more than scrap plastic... So I proceeded with a percussive durability test (Leaned on it with all my weight, and just generally tried to beat the @$%# out of it), but was unable to break it in any meaningful way. This bodes well that the design doesn't actually need the fiberglass to be robust. Still planning on filling all the seams and gaps with plastic epoxy, but removing the fiberglass will help a ton.
So funny enough, @84 1LE 's question ended up being the path to go down I think! Planning on using This Vinyl for the upholstery, and I will have to take some creative liberties near the glove box to make it look nice, but this should be a better looking and better functioning center console at the end of the day.
That's good news on the durability - perhaps in the future something like this vacuum upholstering that JustDashes uses would be viable to get it skinned nicely.
That's good news on the durability - perhaps in the future something like this vacuum upholstering that JustDashes uses would be viable to get it skinned nicely.
That's a very interesting option. Vacuum forming would provide a nice, solid, protective cap and create a nice finish. I'll reach out a few places and see what this sort of service would cost.
Ordered a few new parts from Hawks this week. New center console lid, shift plate, radio pod, and interior hardware kit. Immediately found a problem with the console design!
The 91-92 auto shift plate has a big bulky gear indicator bolted to the underside that is completely absent on the 85-90 shift plate. The current design interferes, and will need to be adjusted.
Also this week, I continued percussive testing until I found a failure point. Took quite a beating to get there, but the failure points were about where I suspected they would be. Next version will incorporate some changes to improve those areas!
Please post files online when finished. I put all mine on cults 3d now.
I haven't decided how to handle this yet. On the one hand, an exact re-model of the existing center console should be available publicly. On the other, I'm not making an exact re-model. My version is being adjusted substantially to improve some of the failure points of the old center console, and around different methods of upholstery. I'm now over $750 and closing in on 200 hours invested towards making a reproducible design, and I don't trust vendors abroad to not take the finished design and undercut me.
If I decide the task is too tall and I don't want to reproduce them, I'll post everything I've got out there for others to pick up the torch. Before that, I need to give it more than the cursory thoughts I've given it so far.
As a more broad update on this project, I've upgraded my printing setup with active chamber heating and I've been working on adjusting the design for extra strength. More experienced additive manufacturers than I have suggested that the active chamber heating is the missing link to get ABS parts to work, so back down that rabbit hole for a bit.
On upholstery, still no word from JustDashes, but I did only just find a Pre-Quote auto-response that I had to click a link in hiding in my spam folder. We'll see in the next few days. Outside of that, I have concepts of a plan on how to get the vinyl to lay right. Should be a "fun" step in the process.
I haven't decided how to handle this yet. On the one hand, an exact re-model of the existing center console should be available publicly. On the other, I'm not making an exact re-model. My version is being adjusted substantially to improve some of the failure points of the old center console, and around different methods of upholstery. I'm now over $750 and closing in on 200 hours invested towards making a reproducible design, and I don't trust vendors abroad to not take the finished design and undercut me.
If I decide the task is too tall and I don't want to reproduce them, I'll post everything I've got out there for others to pick up the torch. Before that, I need to give it more than the cursory thoughts I've given it so far.
you can charge on cults3d. I�d say if you have versions that are basically OEM shape they are definitely worth putting up as is.
get little bits of money back as you continue with the modified versions.
$750 is a lot of r&d. I�m only at $40 on the spoiler.
I pulled the last part off the printer this morning, and version 4 of the center console is ready for discussion! This version incorporates a few pretty large improvements over the previous versions.
Notably:
1. This version is printed fully form ABS plastic. Long term durability and chemical compatibility should now be reasonable. Many modern interior parts are fabricated from ABS, and this should behave similarly.
2. This version has specific focus on print orientation. The failure points of the last design were on the weak layer lines. This version specifically orients the layer lines to provide maximum strength. I don't think I could break this one if I tried.
3. This version is better designed for upholstery. There are still some kinks I'm not so sure about, but I'm to a point where I can't improve it until I know how it fairs.
I'm starting to feel much more confident in the design and my ability to produce it. I'd like input on if anyone else out there would want one of these, and what they think one of these (upholstered) should sell for? Any other comments/concerns/suggestions are appreciated too!
~Cody
Last edited by codyman125; Aug 18, 2025 at 09:13 AM.
Reason: photos not working
P.S. Pay no attention to the colors. It is just fun to use up the last of multiple spools on projects like this. The colors serve no purpose and no meaning.
Last edited by codyman125; Aug 18, 2025 at 09:15 AM.
Hard to say price without seeing your idea for the final product. you�d have to price it based off costs and r&d.
id Price it fairly and get deposits prior to making any beyond your personal use.
looks good to me but the upholstery itself will make or break it.
Originally Posted by codyman125
P.S. Pay no attention to the colors. It is just fun to use up the last of multiple spools on projects like this. The colors serve no purpose and no meaning.
Hard to say price without seeing your idea for the final product. you�d have to price it based off costs and r&d.
id Price it fairly and get deposits prior to making any beyond your personal use.
looks good to me but the upholstery itself will make or break it.
You're right, I should have the first upholstery done before setting a price. I may be getting ahead of myself in excitement.
This is just the first one that meets strength, quality, and durability requirements, and I am testing the waters to see if this would be a 1 of 1 at the end of the day or if it would be a 1 of 1000. I have my expectations set at between 10 and 50 that I could eventually sell, but I could be way off base.
If I account for everything, the materials cost alone will be around $200 not counting any time, energy, or design.
I've got some more progress done on this. No upholstery yet but I did get all the seams epoxied together and the unit sanded down. See below.
With any luck, I should be getting to the upholstery shortly. In the mean time, I've also designed and implemented the internal cross member that will eventually set front to back motion, and perfected the rear mount point that will set vertical alignment. It is as solid as a rock bolted in the car!
Further, I've spent the night working on a funky solution to the E-Brake slot. Since TPU can't really be printed with support, won't directly bind with other printed materials like ABS, and isn't strong enough on its own to fill the E-Brake slot, I've devised a two part approach that prints a thin TPU layer backed by a bolt in ABS support. The little nubbins on the ABS part will lock into matching holes in the TPU Part. This (should) be strong enough on its own, but can also be glued if needed. I think this will work quite well, but we'll have to see the prototypes first!