LS1 swap for my '89 GTA
 12-25-2014, 03:38 PM
#801
 12-25-2014, 04:05 PM
#802
Supreme Member

Thread Starter
iTrader: (1)
Join Date: Mar 2007
Location: Apopka, Florida
Posts: 1,237
Likes: 0
Received 7 Likes
on
6 Posts
Car: 1989 Pontiac Trans Am GTA
Engine: cammed LS1
Transmission: Monster SS 4L65E
Axle/Gears: 9 bolt posi w/ 3.70 gears
Re: LS1 swap for my '89 GTA
Here are some pics of the front speakers:
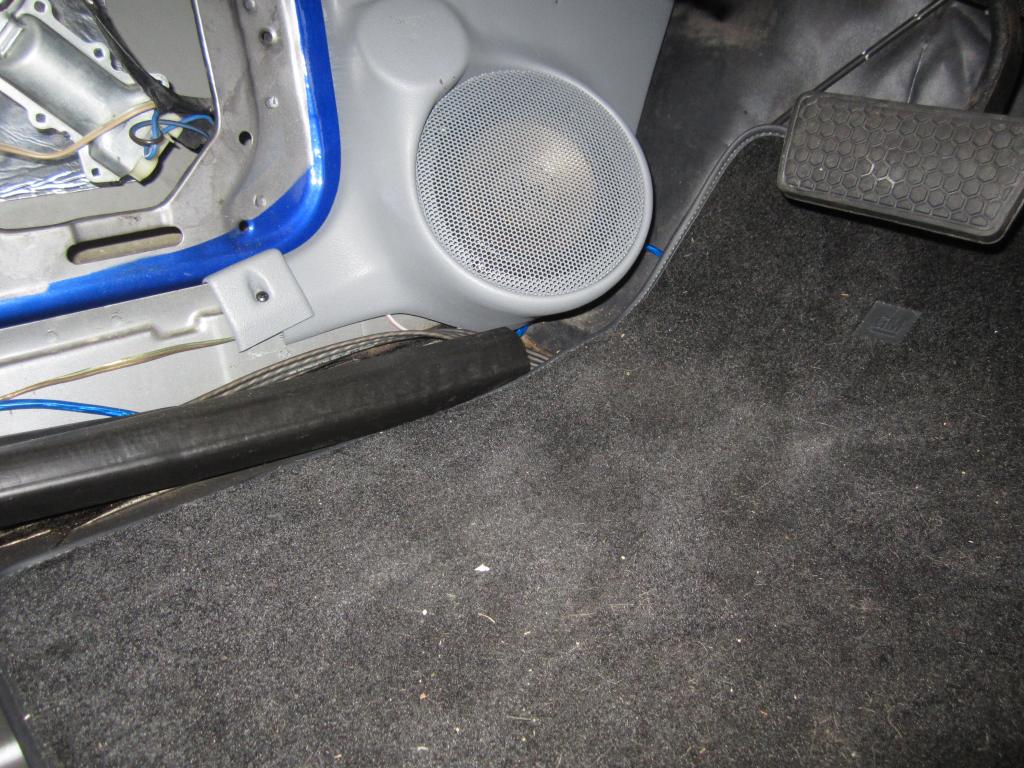
Not liking this one too well since it's right where I always rest my foot. I'm sure I will eventually get used to it.
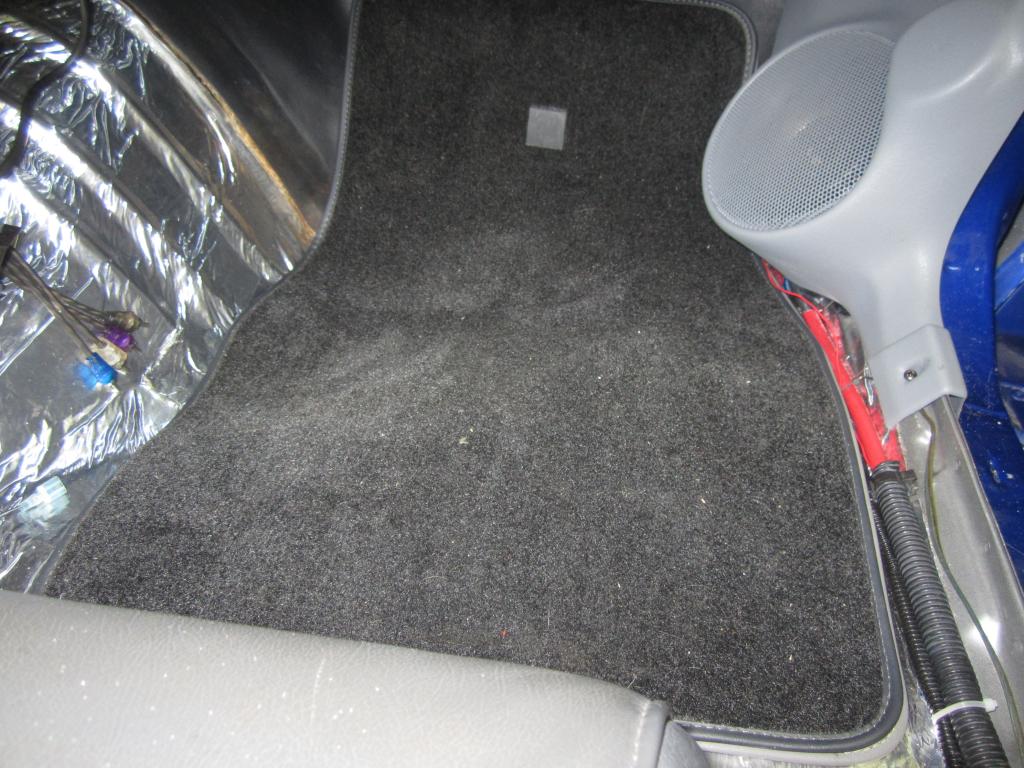
Here's the other side. These are both just for a test fit. I will also fill the kick panel cavities with Poly-Fil once I do the final installation.
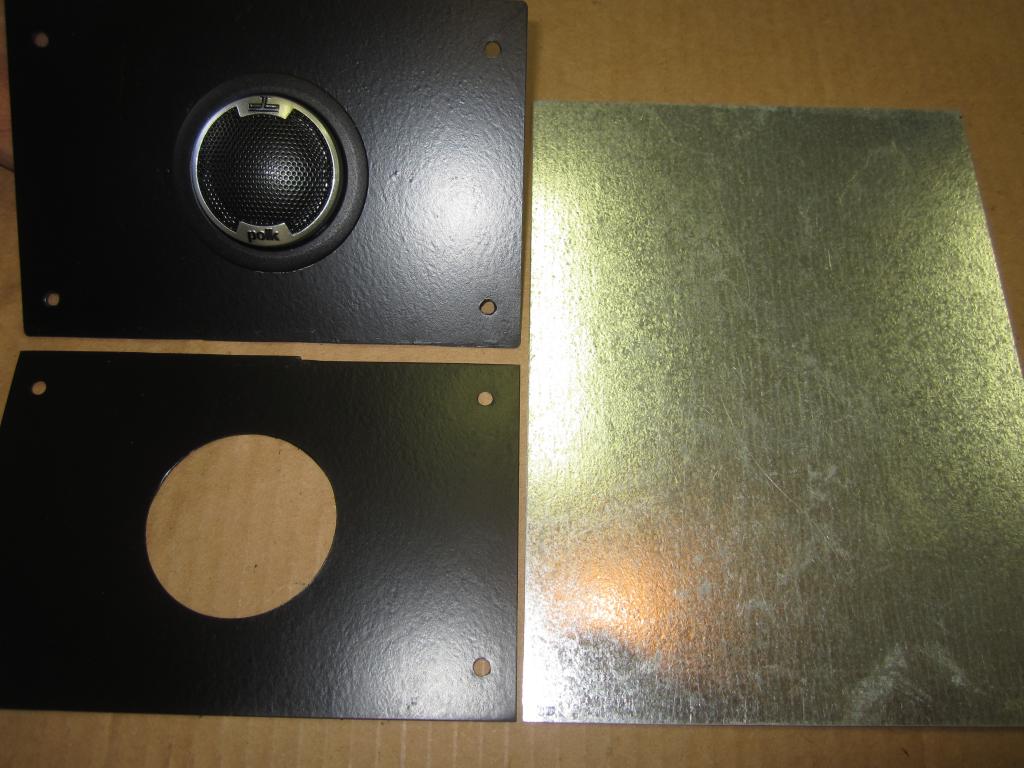
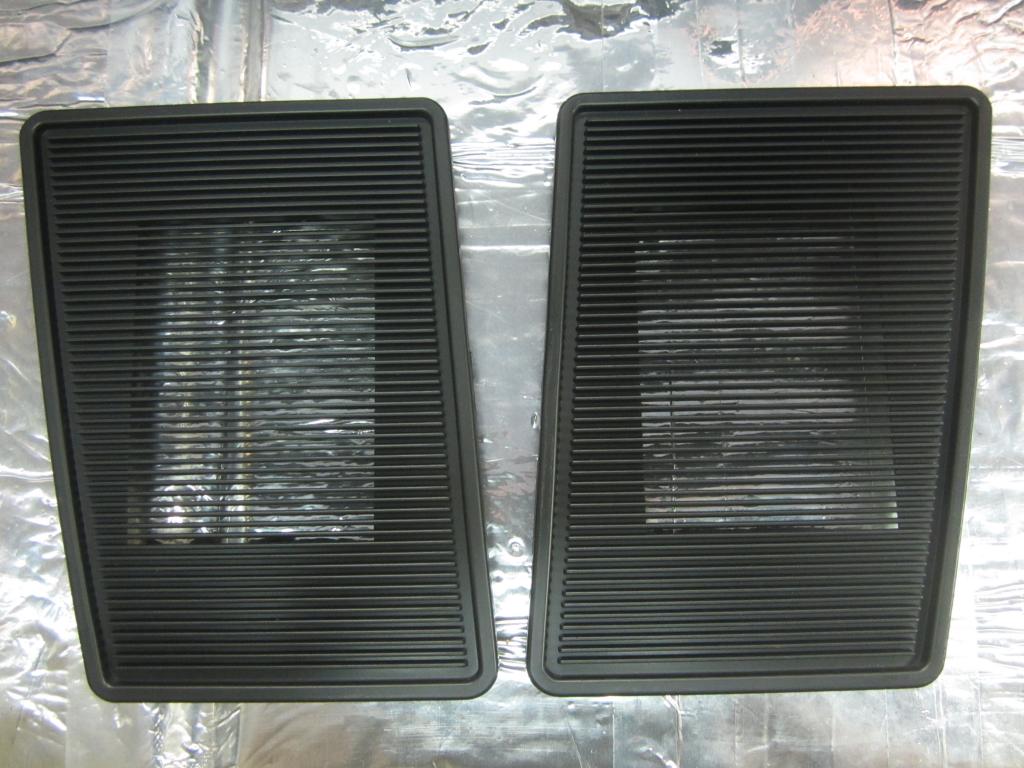
Here are the front plates that I made. I painted them black so that I wouldn't get any reflection off of them on my windshield.
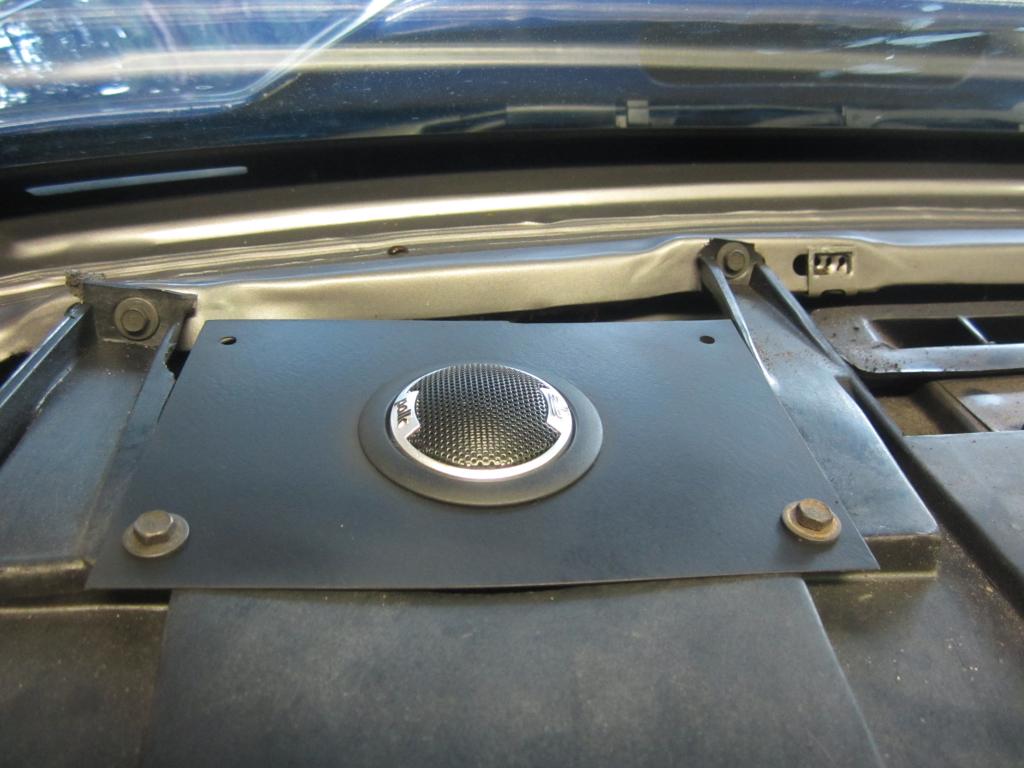
And look what Santa brought me for Christmas... BRAND NEW NOS speaker grills complete with four studs on each grill! I couldn't believe that I found them on eBay. They were fairly expensive, but I didn't care. You just can't find those things any more.
And last, but not least... I decided to ditch the old tired 10" sub that I have and I bought a new Kicker 8" sub.
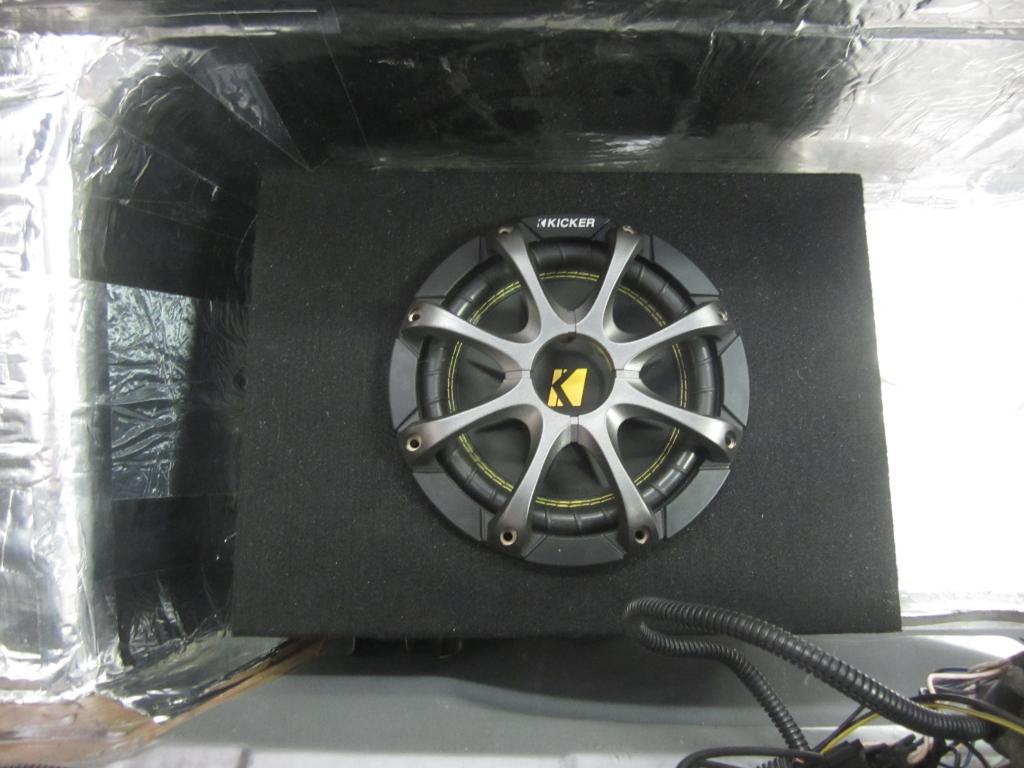
It's a much nicer speaker, it wasn't very expensive & it requires less volume for the sealed box. Speaking of which, I found the nice sealed box in the picture on Amazon for $26! I couldn't even build one for that cheap! The volume of the box was just a touch on the small side, but adding Poly-Fil should get it where I need it to be. I will post pics once I get the sub enclosure mated back with the amp tray.
While at the Turkey Run at the Daytona Speedway this past Thanksgiving I ran across a guy selling a GM Weatherpack connector kit. So I bought that and decided that I will use them as quick disconnects for removing the amp tray from the car. I figured that would be the easiest way to disconnect everything and get it out of there without needing tools.

Not liking this one too well since it's right where I always rest my foot. I'm sure I will eventually get used to it.

Here's the other side. These are both just for a test fit. I will also fill the kick panel cavities with Poly-Fil once I do the final installation.

Here are the front plates that I made. I painted them black so that I wouldn't get any reflection off of them on my windshield.

And look what Santa brought me for Christmas... BRAND NEW NOS speaker grills complete with four studs on each grill! I couldn't believe that I found them on eBay. They were fairly expensive, but I didn't care. You just can't find those things any more.

And last, but not least... I decided to ditch the old tired 10" sub that I have and I bought a new Kicker 8" sub.

It's a much nicer speaker, it wasn't very expensive & it requires less volume for the sealed box. Speaking of which, I found the nice sealed box in the picture on Amazon for $26! I couldn't even build one for that cheap! The volume of the box was just a touch on the small side, but adding Poly-Fil should get it where I need it to be. I will post pics once I get the sub enclosure mated back with the amp tray.
While at the Turkey Run at the Daytona Speedway this past Thanksgiving I ran across a guy selling a GM Weatherpack connector kit. So I bought that and decided that I will use them as quick disconnects for removing the amp tray from the car. I figured that would be the easiest way to disconnect everything and get it out of there without needing tools.
Last edited by dprest68; 01-06-2015 at 12:19 AM. Reason: updated pic
12-26-2014, 05:55 AM
#803
Supreme Member
iTrader: (30)

Join Date: Jul 2000
Location: Fort Myers, FL
Posts: 1,514
Received 17 Likes
on
10 Posts
Car: 91 Firebird
Engine: 6.0
Transmission: T56
Axle/Gears: 3.73
Re: LS1 swap for my '89 GTA
Nope, no pics yet......
I need to buy new carpet.... maybe next month that will finally happen!
I need to buy new carpet.... maybe next month that will finally happen!
12-31-2014, 10:32 AM
#804
Supreme Member
Thread Starter
iTrader: (1)
Join Date: Mar 2007
Location: Apopka, Florida
Posts: 1,237
Likes: 0
Received 7 Likes
on
6 Posts
Car: 1989 Pontiac Trans Am GTA
Engine: cammed LS1
Transmission: Monster SS 4L65E
Axle/Gears: 9 bolt posi w/ 3.70 gears
Re: LS1 swap for my '89 GTA
Here are a few pics of Luis' (LHernandezJr - AKA MotoBooks) new project for those of you that used to follow his threads
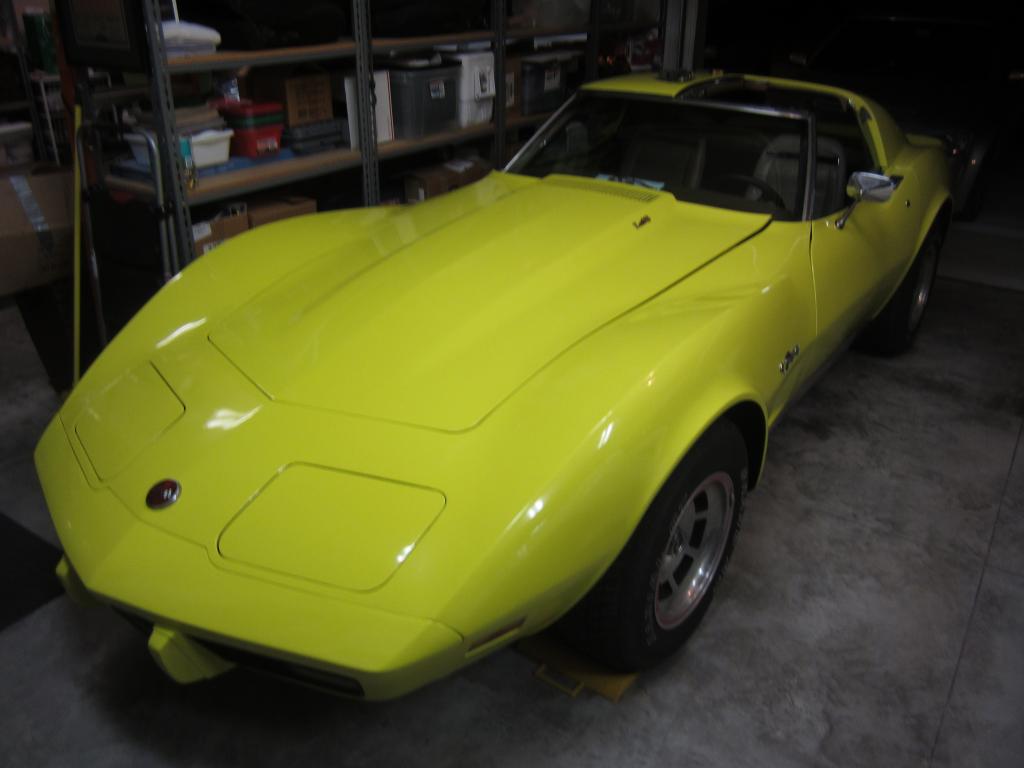
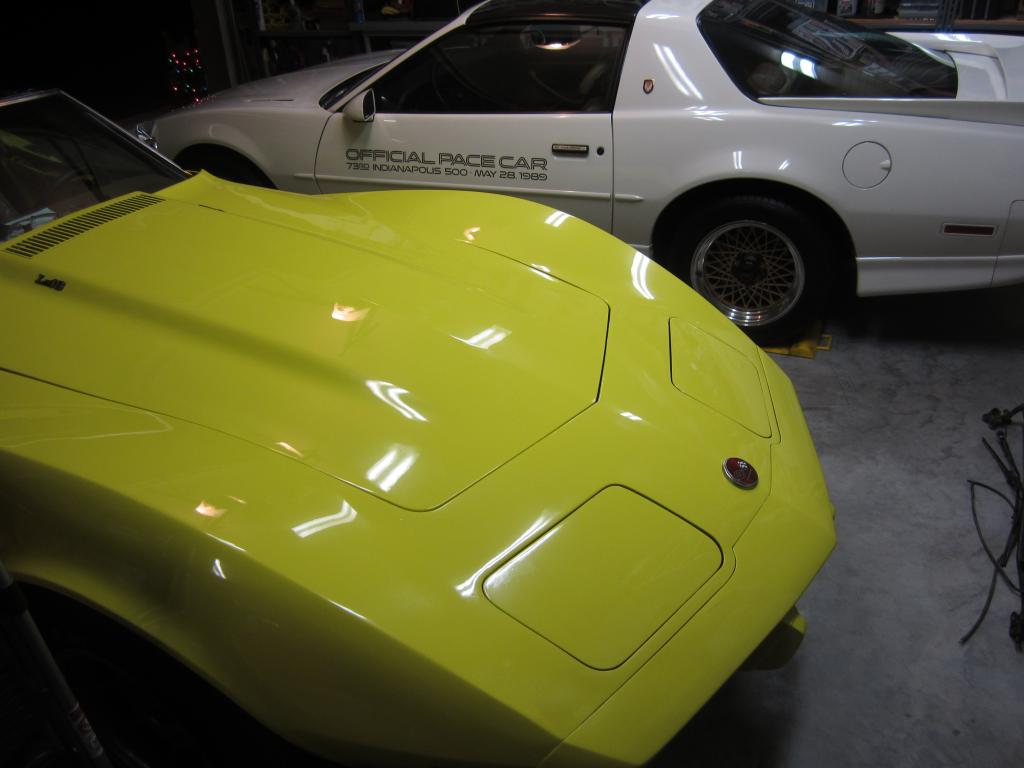
It's a 1975 Corvette Stingray. We've been working on stripping the interior out of it to see what he is working with. For the most part, the car seems to have a pretty decent foundation.


It's a 1975 Corvette Stingray. We've been working on stripping the interior out of it to see what he is working with. For the most part, the car seems to have a pretty decent foundation.
Last edited by dprest68; 01-02-2015 at 10:41 AM. Reason: typo
12-31-2014, 10:41 AM
#805
Supreme Member
Thread Starter
iTrader: (1)
Join Date: Mar 2007
Location: Apopka, Florida
Posts: 1,237
Likes: 0
Received 7 Likes
on
6 Posts
Car: 1989 Pontiac Trans Am GTA
Engine: cammed LS1
Transmission: Monster SS 4L65E
Axle/Gears: 9 bolt posi w/ 3.70 gears
Re: LS1 swap for my '89 GTA
Here are a few more items Santa brought me 
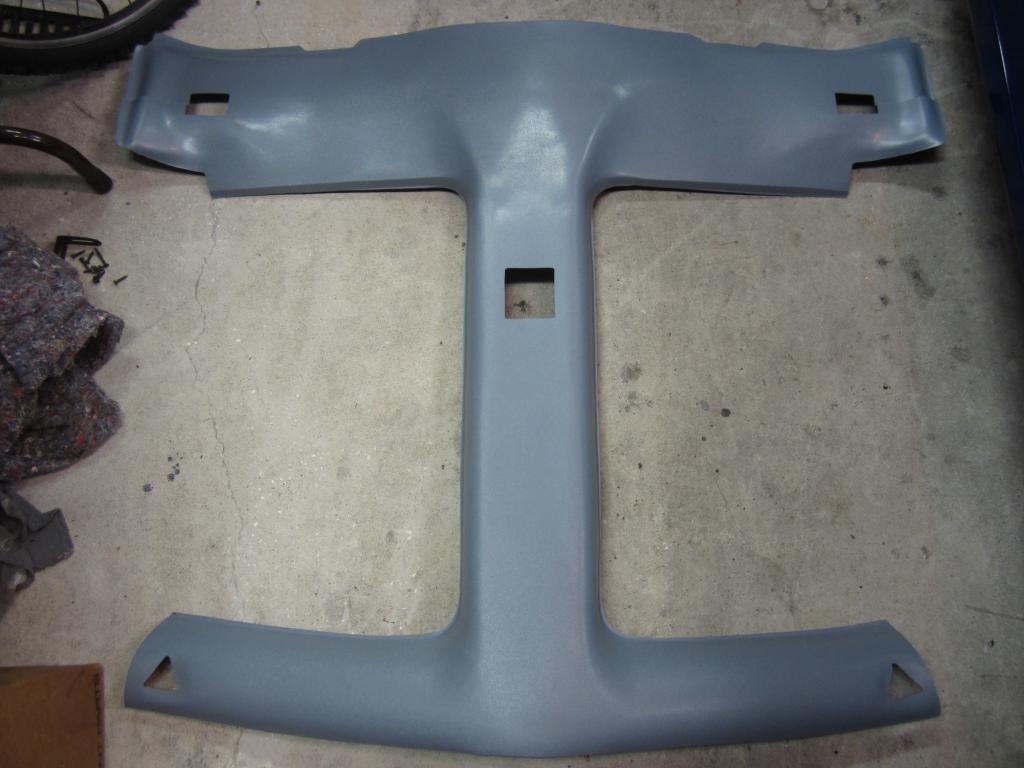
ABS headliner. Not sure if I am actually going to use it. It doesn't fit as good as I would have liked it to.
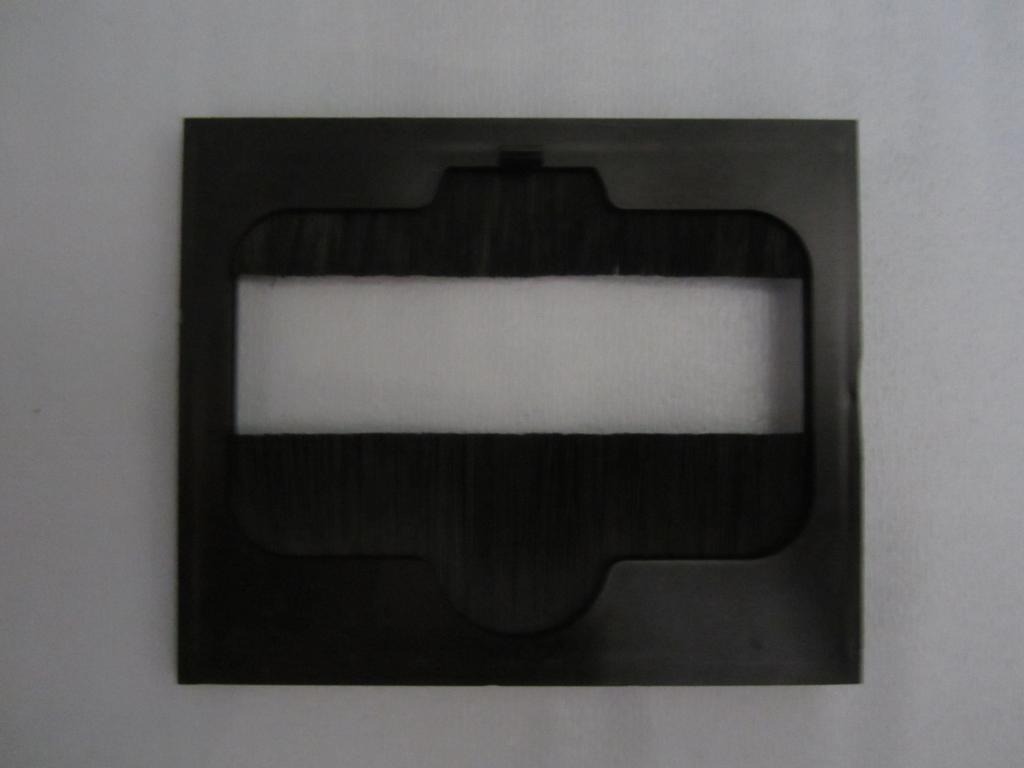
New NOS brush type thingamabob (highly technical term there!) for the rear hatch motor. I just happened to run across it on eBay as well.

ABS headliner. Not sure if I am actually going to use it. It doesn't fit as good as I would have liked it to.

New NOS brush type thingamabob (highly technical term there!
) for the rear hatch motor. I just happened to run across it on eBay as well.
12-31-2014, 10:45 AM
#806
Supreme Member
Thread Starter
iTrader: (1)
Join Date: Mar 2007
Location: Apopka, Florida
Posts: 1,237
Likes: 0
Received 7 Likes
on
6 Posts
Car: 1989 Pontiac Trans Am GTA
Engine: cammed LS1
Transmission: Monster SS 4L65E
Axle/Gears: 9 bolt posi w/ 3.70 gears
Re: LS1 swap for my '89 GTA
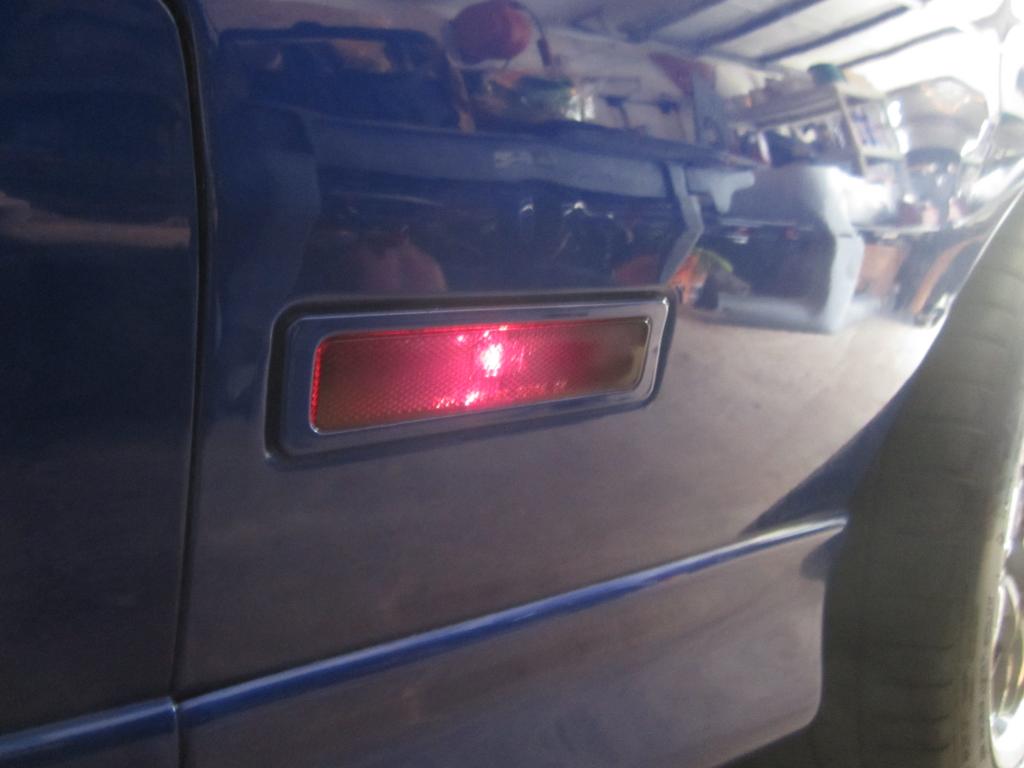
I decided to tint the rear marker lights
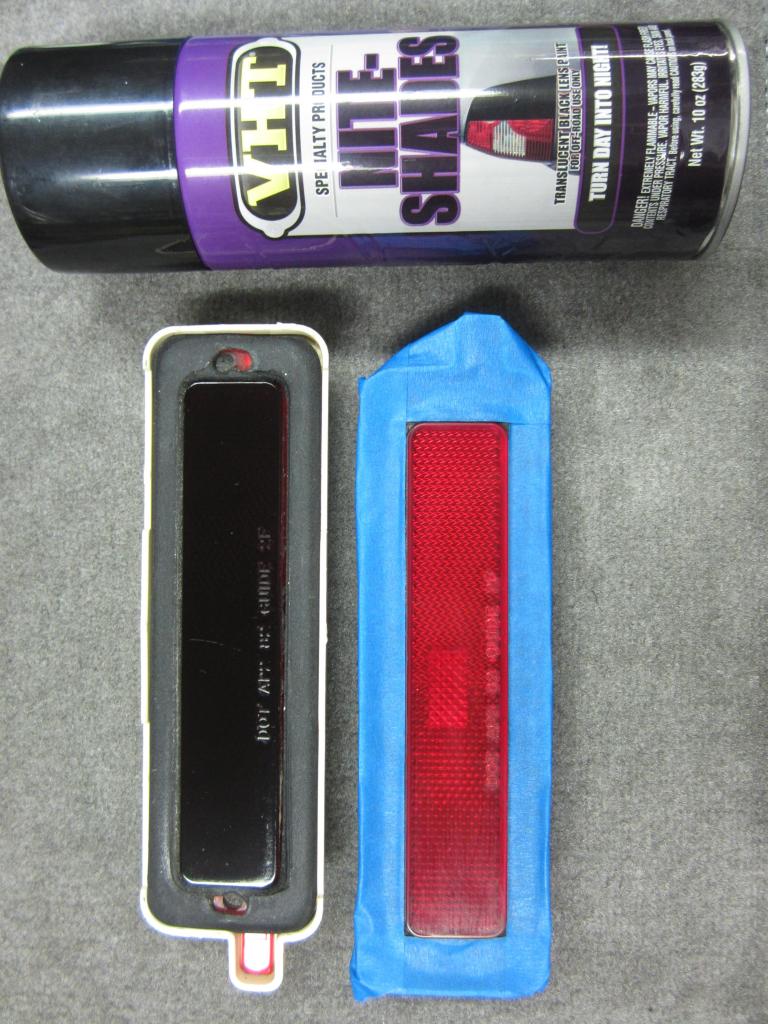
Installed...
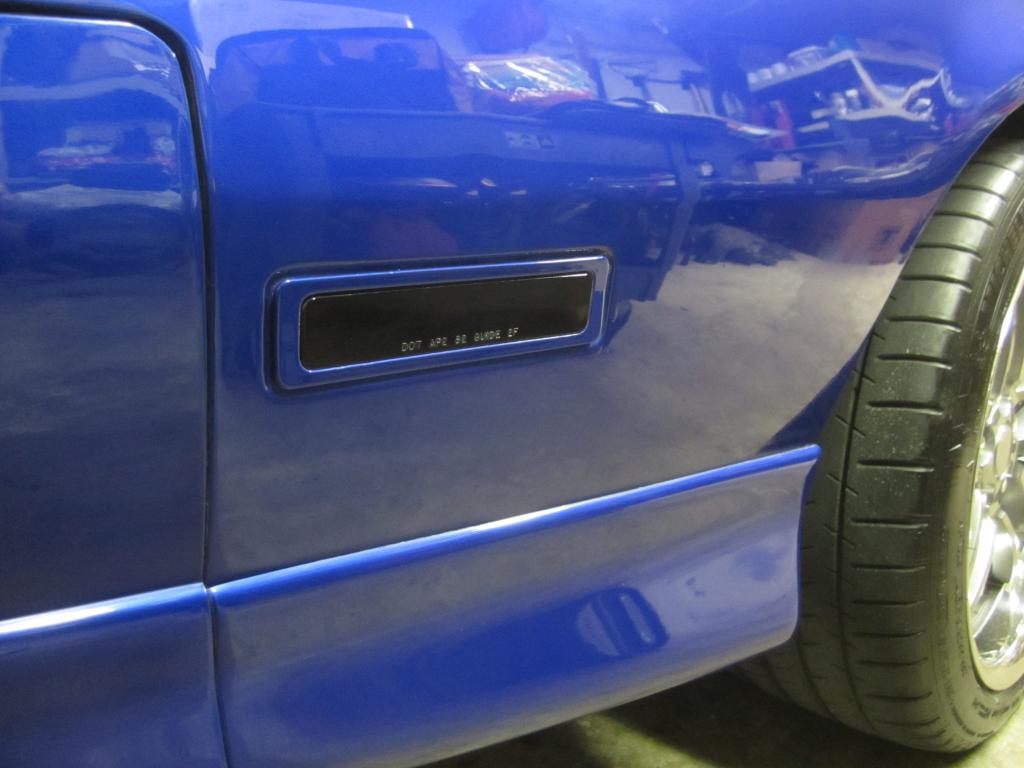
Lights on...

Installed...

Lights on...
 12-31-2014, 11:10 AM
#807
Supreme Member
Thread Starter
iTrader: (1)
Join Date: Mar 2007
Location: Apopka, Florida
Posts: 1,237
Likes: 0
Received 7 Likes
on
6 Posts
Car: 1989 Pontiac Trans Am GTA
Engine: cammed LS1
Transmission: Monster SS 4L65E
Axle/Gears: 9 bolt posi w/ 3.70 gears
Re: LS1 swap for my '89 GTA
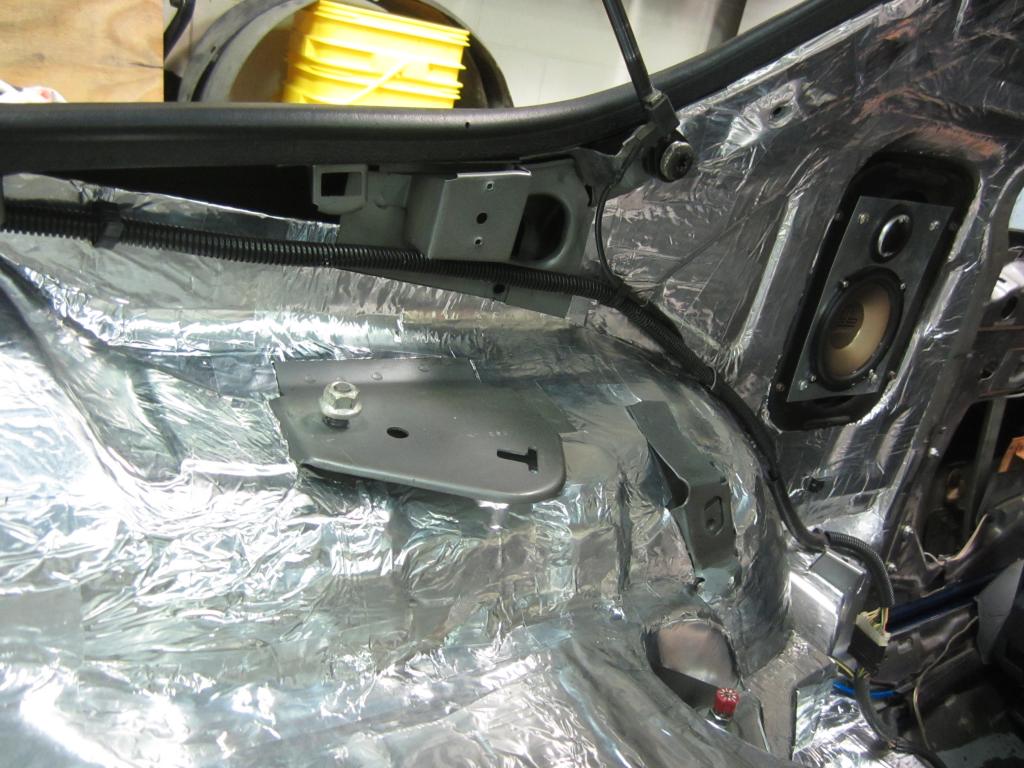
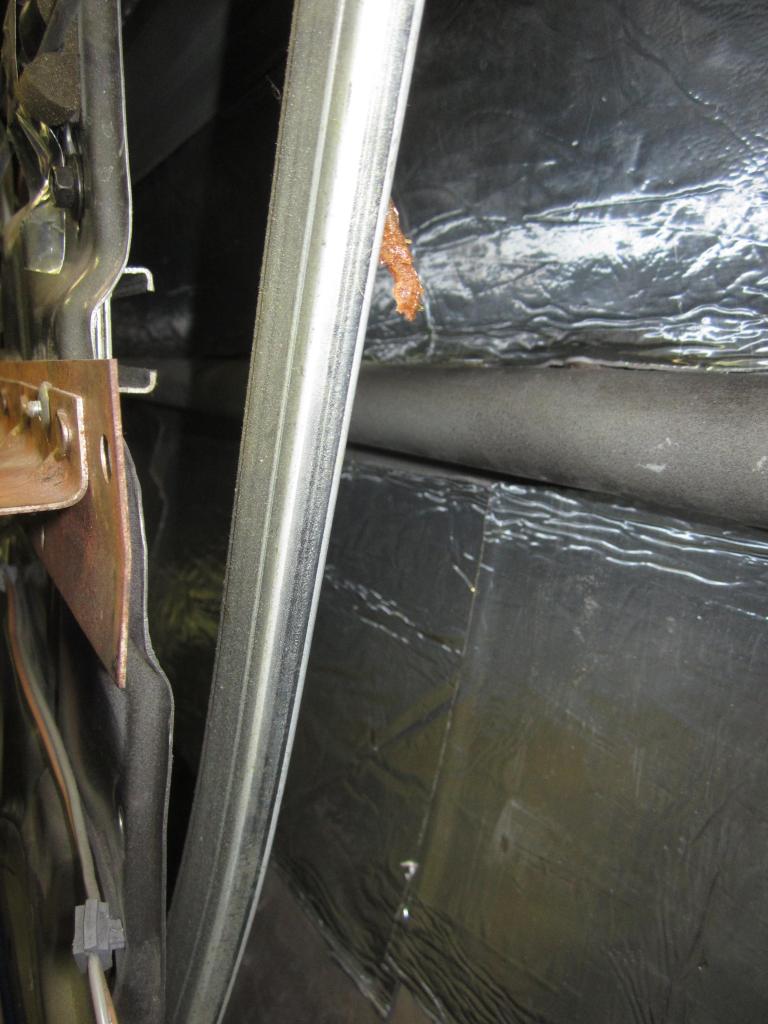
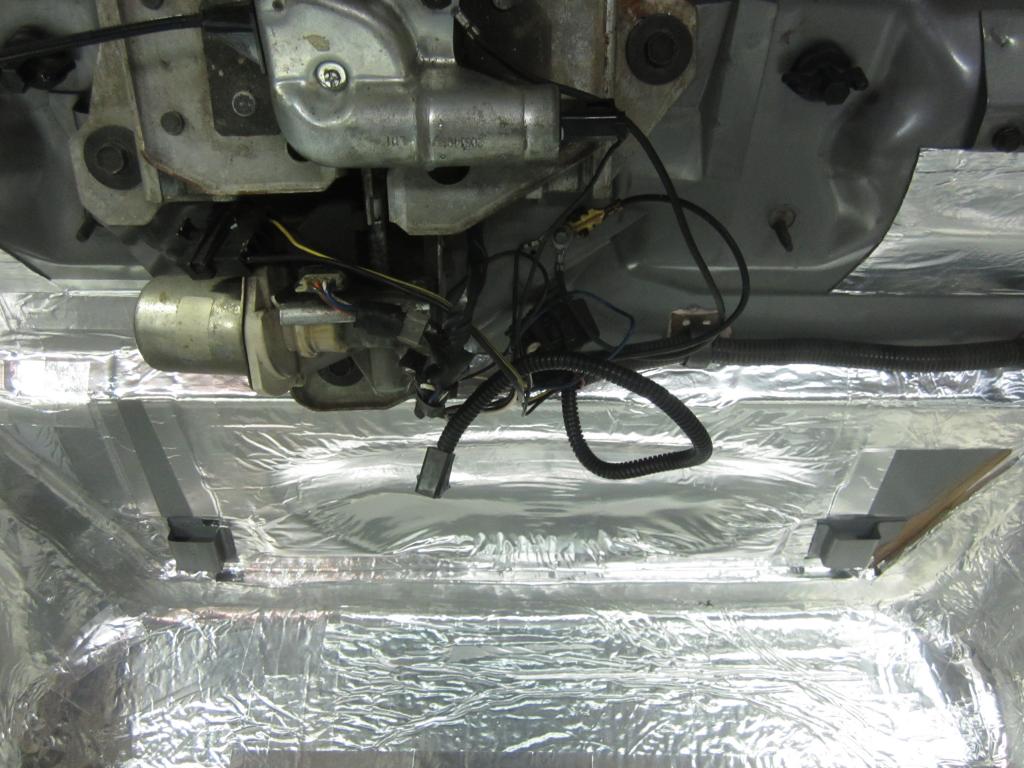
Here are some more boring FatMat pics. lol
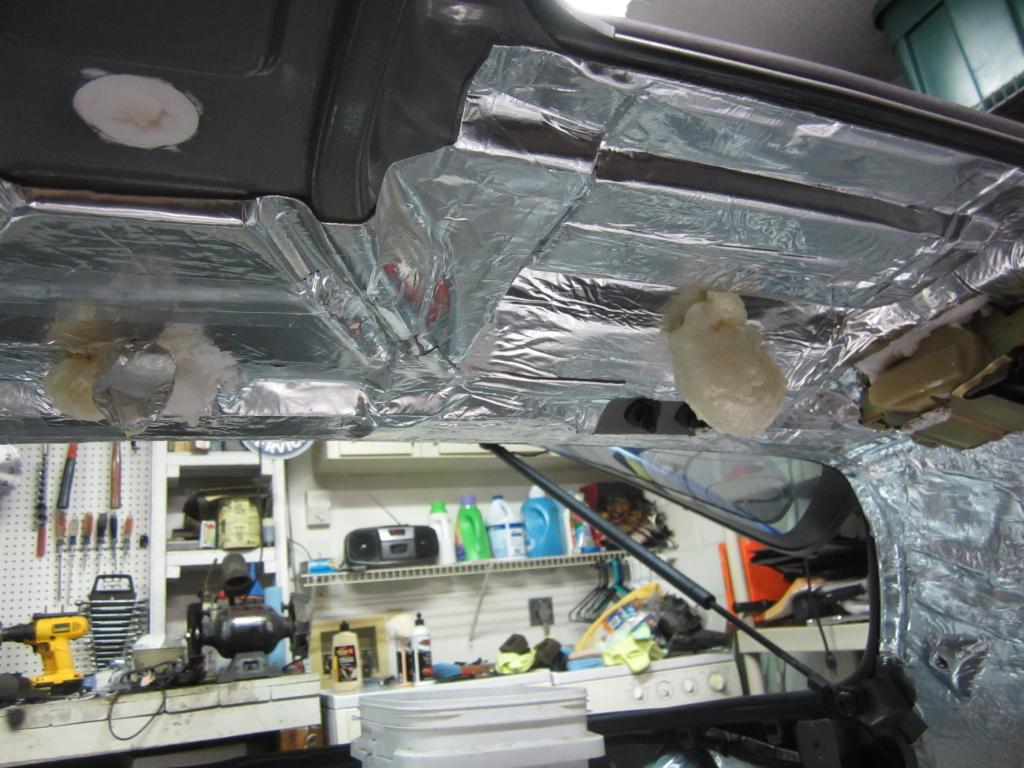
Luis had the brilliant idea of filling the roof cavities with foam. We used low expansion foam in the area between the T-tops and over the windshield. We used high expansion foam in the larger area between the T-tops and rear hatch. This really helped the metal in that area. It now has a solid thud when you tap on the metal in that area instead of the tinny sound that it used to have.

Behind the driver's side rear wheelwell
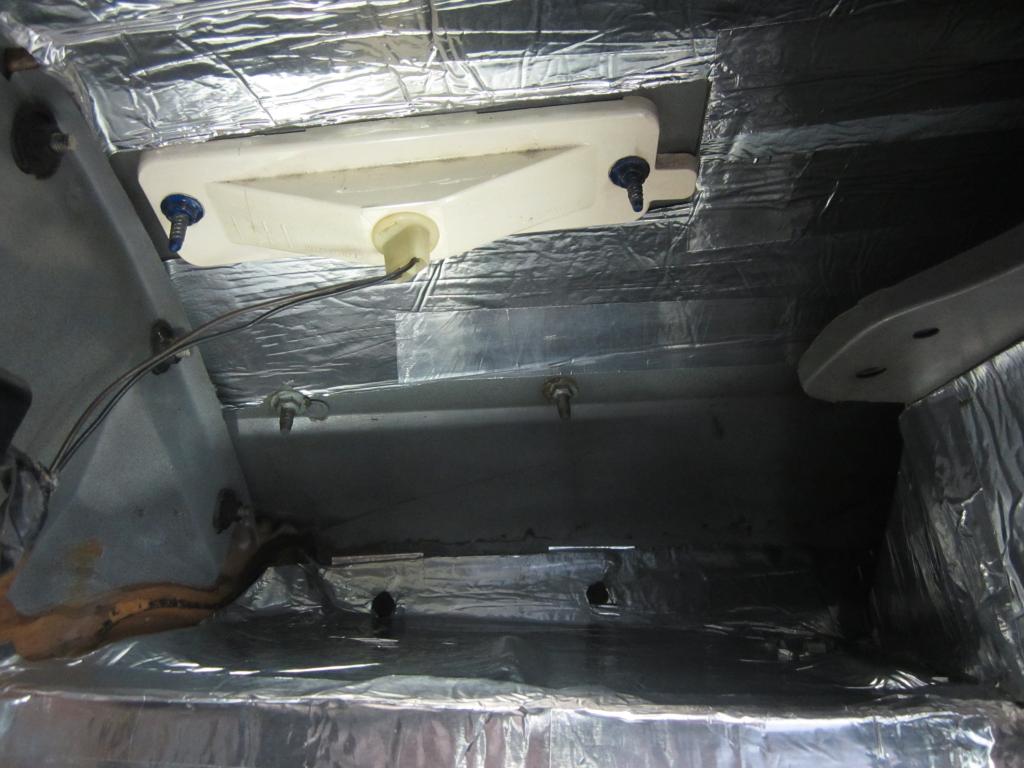
As you can see, I didn't install any FatMat where the ground effects are.
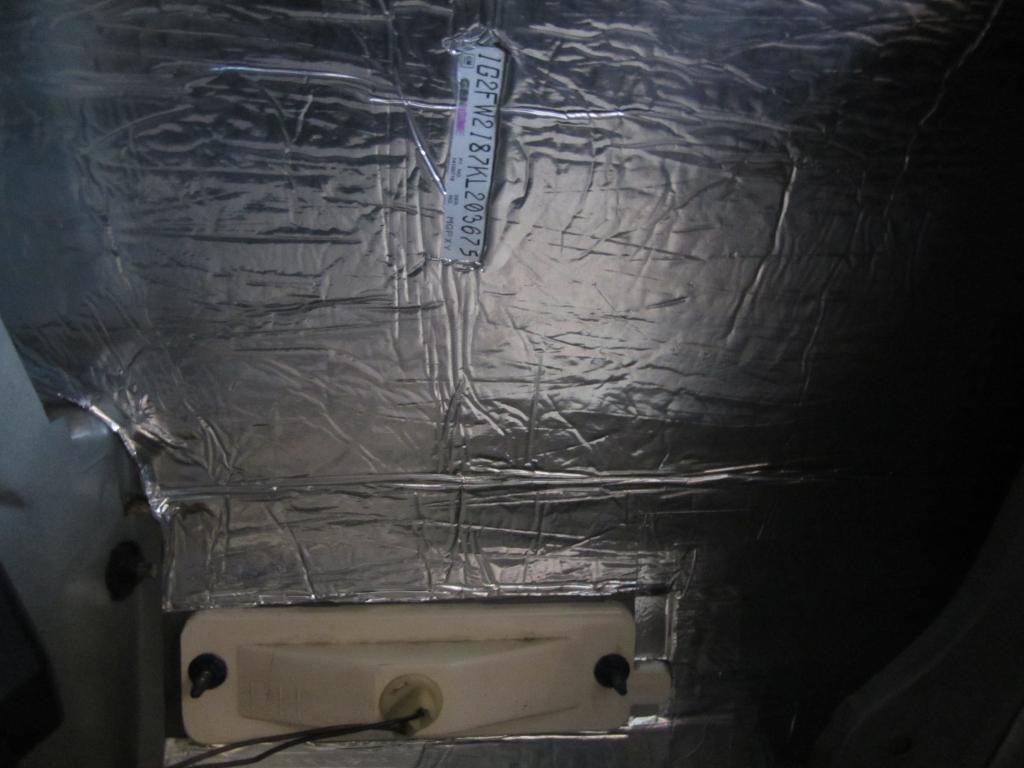
I know it's totally unnecessary, but I cut out a window for the VIN on the rear quarter to show that it's the original quarter.
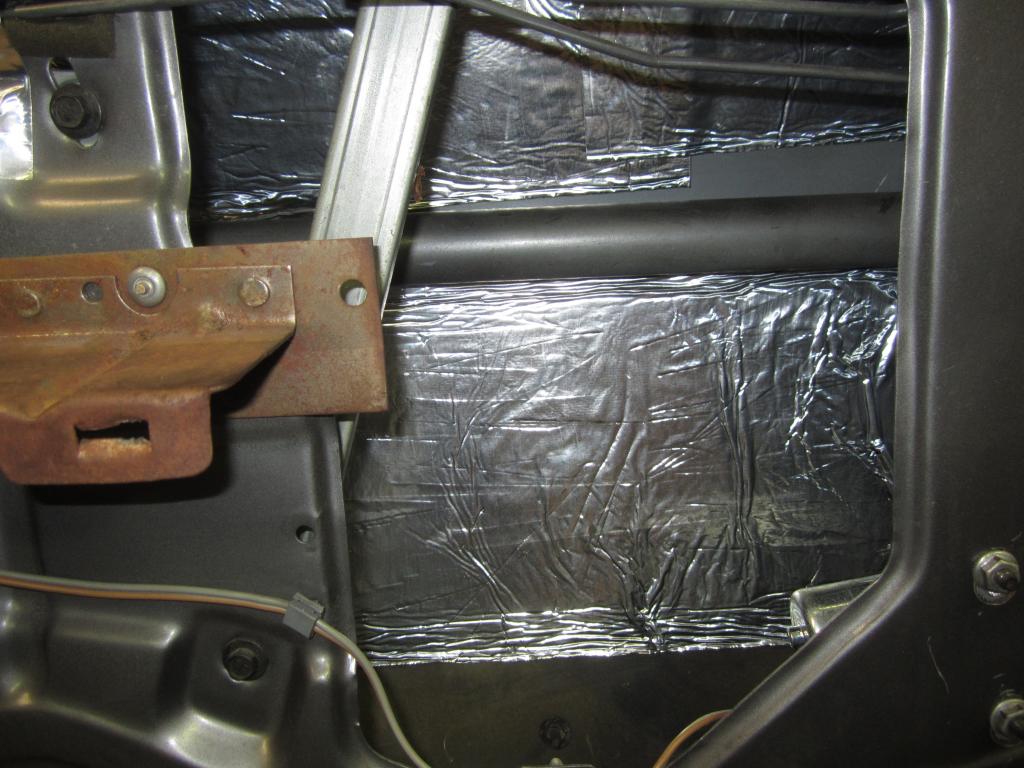
Rear wheelwells
I installed 2 layers on both side to help cut down on road noise. With the interior removed and the addition of fairly sticky tires I have been really hearing grains of sand in the road being kicked up in the wheelwells. The addition of the two layers of FatMat has really helped cut down on that noise.
Door pics to follow...

Luis had the brilliant idea of filling the roof cavities with foam. We used low expansion foam in the area between the T-tops and over the windshield. We used high expansion foam in the larger area between the T-tops and rear hatch. This really helped the metal in that area. It now has a solid thud when you tap on the metal in that area instead of the tinny sound that it used to have.

Behind the driver's side rear wheelwell

As you can see, I didn't install any FatMat where the ground effects are.

I know it's totally unnecessary, but I cut out a window for the VIN on the rear quarter to show that it's the original quarter.
Rear wheelwells

I installed 2 layers on both side to help cut down on road noise. With the interior removed and the addition of fairly sticky tires I have been really hearing grains of sand in the road being kicked up in the wheelwells. The addition of the two layers of FatMat has really helped cut down on that noise.

Door pics to follow...
12-31-2014, 11:35 AM
#808
Supreme Member
Thread Starter
iTrader: (1)
Join Date: Mar 2007
Location: Apopka, Florida
Posts: 1,237
Likes: 0
Received 7 Likes
on
6 Posts
Car: 1989 Pontiac Trans Am GTA
Engine: cammed LS1
Transmission: Monster SS 4L65E
Axle/Gears: 9 bolt posi w/ 3.70 gears
Re: LS1 swap for my '89 GTA
FatMat inside the doors...
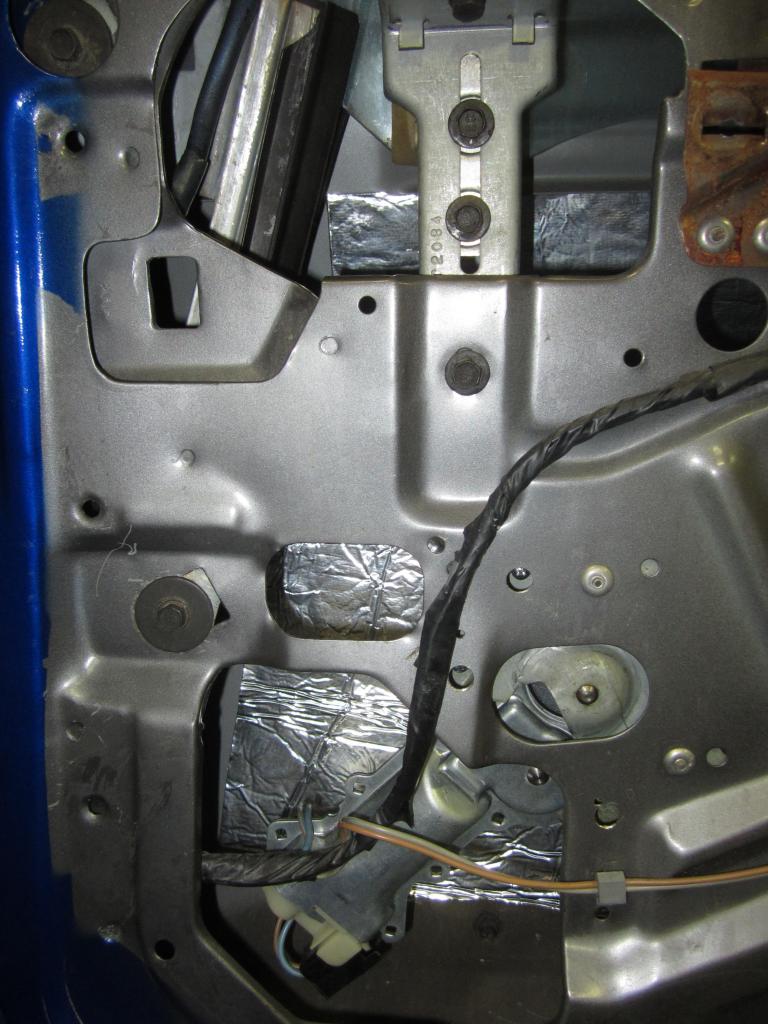
It was a two person job to make this happen. Luis fed each sheet in from the back of the door while I aligned and installed from the front. He removed a few inches of the backing paper before feeding me the sheet so that we could get it aligned properly, then he had to pull the backing paper off as we installed each sheet. We were both kind of surprised by how relatively simple it was with two people.
Similar to the roof panel, the addition of the FatMat to the door skin really helped give it a solid sound when you tap on it versus the tinny sound that it used to have.
All I have left to do to finish up with the FatMat is the area on the passenger side behind the rear wheelwell. Hopefully I can wrap that up today.
I would have to give this product 5 out of 5 stars. It's fairly easy to work with and performs as advertised. I think my exhaust sound inside the car is even quieter than it was before thanks to this stuff.

It was a two person job to make this happen. Luis fed each sheet in from the back of the door while I aligned and installed from the front. He removed a few inches of the backing paper before feeding me the sheet so that we could get it aligned properly, then he had to pull the backing paper off as we installed each sheet. We were both kind of surprised by how relatively simple it was with two people.


Similar to the roof panel, the addition of the FatMat to the door skin really helped give it a solid sound when you tap on it versus the tinny sound that it used to have.
All I have left to do to finish up with the FatMat is the area on the passenger side behind the rear wheelwell. Hopefully I can wrap that up today.
I would have to give this product 5 out of 5 stars. It's fairly easy to work with and performs as advertised. I think my exhaust sound inside the car is even quieter than it was before thanks to this stuff.
12-31-2014, 12:03 PM
#809
Supreme Member
Thread Starter
iTrader: (1)
Join Date: Mar 2007
Location: Apopka, Florida
Posts: 1,237
Likes: 0
Received 7 Likes
on
6 Posts
Car: 1989 Pontiac Trans Am GTA
Engine: cammed LS1
Transmission: Monster SS 4L65E
Axle/Gears: 9 bolt posi w/ 3.70 gears
Re: LS1 swap for my '89 GTA
Luis and I (well, okay... mostly Luis) have been working on the paint on my car. I clay barred the entire car to get all of the impurities off of the paint. Then he followed using his buffer and the products below to bring the paint back to an almost new looking finish again. The paint had quite a bit of haze to it.
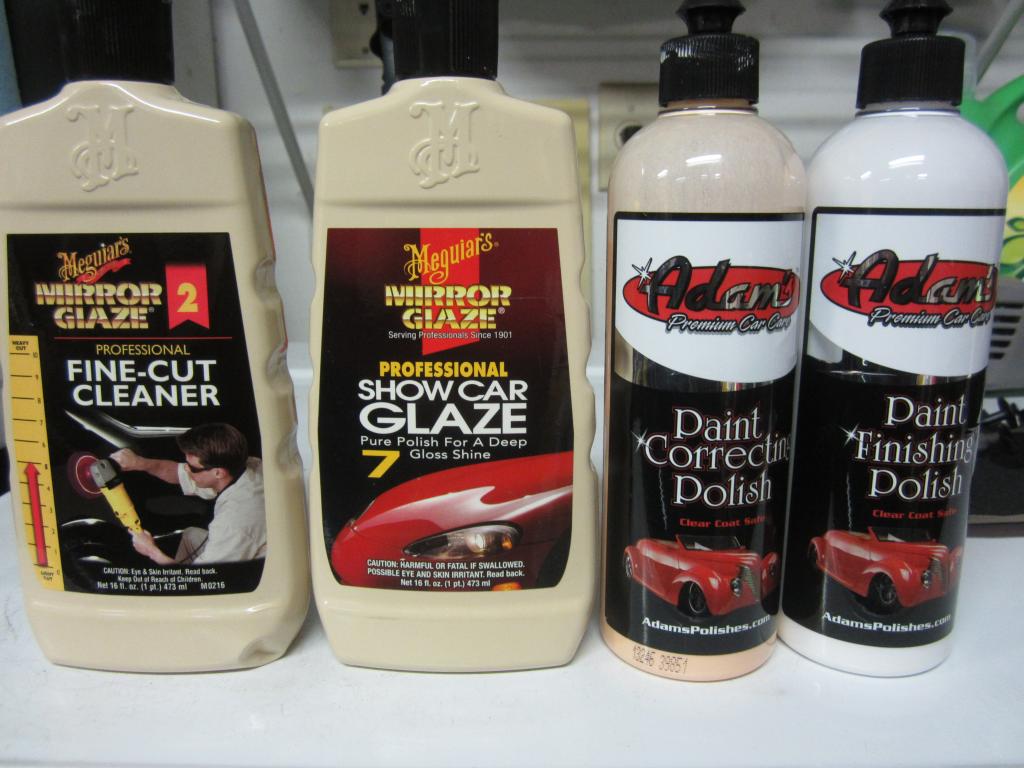
Thanks to this stuff, I may be able to get another 5 or 10 years out of this paint before I have to repaint it.
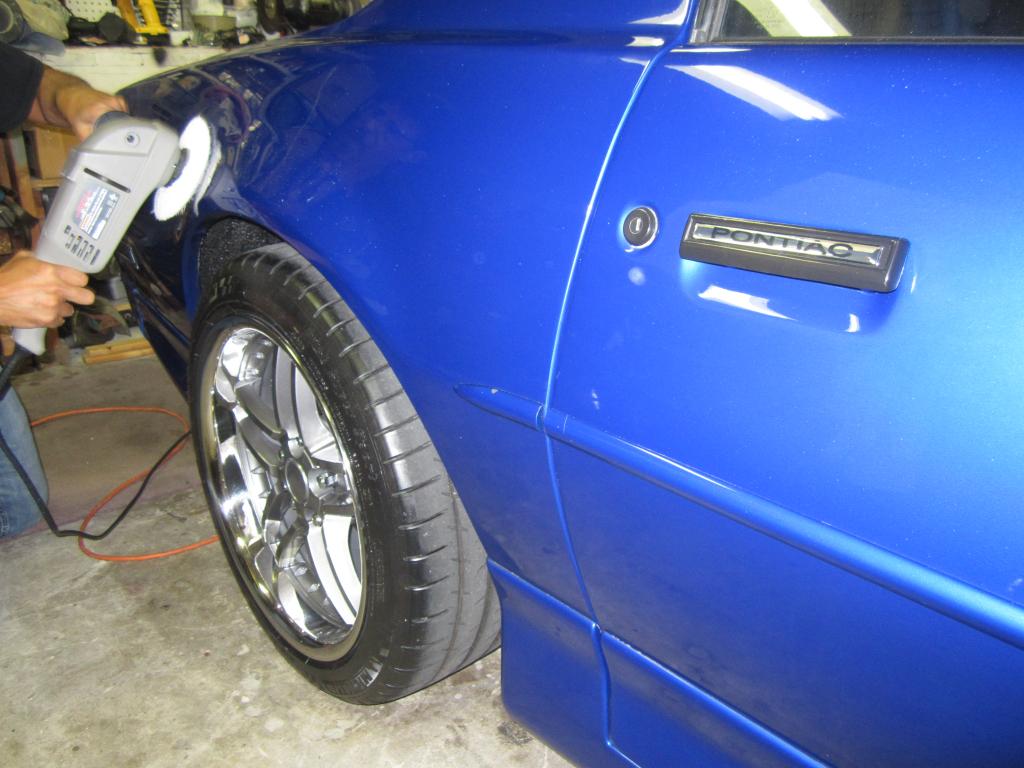
Luis in the process of polishing this quarter panel. After we finished the FatMat inside the doors we decided to change out the door handles (right side of the picture) with a new pair that Luis had "donated to the cause" awhile back. Thanks bud. The other ones were fairly loose and were probably rattling while driving the car.

While he was making his way around the car he polished the tail lights as well. Man, what a difference that made! You can see the mirror finish the bumper now has too. The car has since been completely polished, now I just need to wax it. I will post more pics after that happens.
That concludes my updates for the year. Happy New Years guys... and gals if there are any that follow this thread.

Thanks to this stuff, I may be able to get another 5 or 10 years out of this paint before I have to repaint it.

Luis in the process of polishing this quarter panel. After we finished the FatMat inside the doors we decided to change out the door handles (right side of the picture) with a new pair that Luis had "donated to the cause" awhile back.
Thanks bud. The other ones were fairly loose and were probably rattling while driving the car.
While he was making his way around the car he polished the tail lights as well. Man, what a difference that made! You can see the mirror finish the bumper now has too. The car has since been completely polished, now I just need to wax it. I will post more pics after that happens.
That concludes my updates for the year. Happy New Years guys... and gals if there are any that follow this thread.
01-01-2015, 02:57 PM
#810
01-01-2015, 07:01 PM
#811
Member
iTrader: (2)
Join Date: Feb 2010
Posts: 460
Likes: 0
Received 3 Likes
on
3 Posts
Car: '89 Camaro
Engine: LS1
Transmission: 4L65/70E
Axle/Gears: 9 Inch, 3.70 gears
Re: LS1 swap for my '89 GTA
I was wondering what happened to Luis, I enjoyed reading his threads. They gave me a lot of ideas for cleaning up my car.
Your car is looking good. I'm still jealous of all the shows down that way.
Your car is looking good. I'm still jealous of all the shows down that way.
01-02-2015, 10:36 AM
#812
Supreme Member
Thread Starter
iTrader: (1)
Join Date: Mar 2007
Location: Apopka, Florida
Posts: 1,237
Likes: 0
Received 7 Likes
on
6 Posts
Car: 1989 Pontiac Trans Am GTA
Engine: cammed LS1
Transmission: Monster SS 4L65E
Axle/Gears: 9 bolt posi w/ 3.70 gears
Re: LS1 swap for my '89 GTA
Thank you sir!
It's definitely nice to have car shows pretty much year round to attend. It does get a bit unbearable sometimes in the middle of summer though.
01-02-2015, 11:27 AM
#813
Senior Member
Re: LS1 swap for my '89 GTA
Looking very good, that blue sure does come out beautiful. My son who lives in Daytona has told me when I complete my "Z" I need to bring it down to the Turkey Run. I am working with Pocket right now on a 6.0 package, so I guess its time to start my build thread, maybe this weekend time permitting I'll start it.
01-02-2015, 07:44 PM
#814
Senior Member
iTrader: (3)
Join Date: Jan 2012
Location: Clark NJ
Posts: 877
Likes: 0
Received 2 Likes
on
2 Posts
Car: 1988 Pontiac Transam GTA Notchback
Engine: 2003 Chevy 5.3 Vortec (325 cu)
Transmission: 4L60E
Axle/Gears: 3.27
Re: LS1 swap for my '89 GTA
Your car looks amazing. Once I get my leaks straightened out and order new carpet in the summer I am going to use fatmat aswell.
01-02-2015, 09:01 PM
#816
Senior Member
iTrader: (3)
Join Date: Jan 2012
Location: Clark NJ
Posts: 877
Likes: 0
Received 2 Likes
on
2 Posts
Car: 1988 Pontiac Transam GTA Notchback
Engine: 2003 Chevy 5.3 Vortec (325 cu)
Transmission: 4L60E
Axle/Gears: 3.27
Re: LS1 swap for my '89 GTA
Yea I meant Dave's car lmao, but your car looks really good too. I guess I need more sleep
01-03-2015, 12:55 PM
#817
Senior Member
iTrader: (4)
Join Date: Oct 2008
Location: Niles, IL
Posts: 857
Likes: 0
Received 5 Likes
on
4 Posts
Car: '91 LS6/T56/9"
Engine: LS6
Transmission: T56
Axle/Gears: Currie 9"/4.11, detroit truetrac
Re: LS1 swap for my '89 GTA
Just wanted to let you know that I'll be stealing your expanding foam idea for my build here:
https://www.thirdgen.org/forums/memb...n-91z-ls1.html
Keep it up, looks awesome.
https://www.thirdgen.org/forums/memb...n-91z-ls1.html
Keep it up, looks awesome.
01-04-2015, 09:56 AM
#818
Supreme Member
Thread Starter
iTrader: (1)
Join Date: Mar 2007
Location: Apopka, Florida
Posts: 1,237
Likes: 0
Received 7 Likes
on
6 Posts
Car: 1989 Pontiac Trans Am GTA
Engine: cammed LS1
Transmission: Monster SS 4L65E
Axle/Gears: 9 bolt posi w/ 3.70 gears
Re: LS1 swap for my '89 GTA
Looking very good, that blue sure does come out beautiful. My son who lives in Daytona has told me when I complete my "Z" I need to bring it down to the Turkey Run. I am working with Pocket right now on a 6.0 package, so I guess its time to start my build thread, maybe this weekend time permitting I'll start it.
Just wanted to let you know that I'll be stealing your expanding foam idea for my build here:
https://www.thirdgen.org/forums/memb...n-91z-ls1.html
Keep it up, looks awesome.
https://www.thirdgen.org/forums/memb...n-91z-ls1.html
Keep it up, looks awesome.
01-06-2015, 12:15 AM
#819
Supreme Member
Thread Starter
iTrader: (1)
Join Date: Mar 2007
Location: Apopka, Florida
Posts: 1,237
Likes: 0
Received 7 Likes
on
6 Posts
Car: 1989 Pontiac Trans Am GTA
Engine: cammed LS1
Transmission: Monster SS 4L65E
Axle/Gears: 9 bolt posi w/ 3.70 gears
Re: LS1 swap for my '89 GTA
Luis and I drove the GTA over to this hot rod shop last Friday to get a quote on having some work done to my car. I found them at the Turkey Run over in Daytona this past Thanksgiving. I didn't figure I would be able to afford to have them work on my car since they do show quality work. I was pleasantly surprised by their labor rate which was actually cheaper per hour than my local mechanic. So I guess I can't afford not to use them! lol
While talking with the owner, he suggested that I cut the scoops off of my current hood and graft them on a stock hood. That way I would get the look I want along with the perfect fit. And I wouldn't have to buy another RAII hood that may or may not fit and that would also still need to be prepped and painted. It should cost about the same either way. When they repaint the hood I am going to have them repaint my passenger side mirror (slightly damaged) and have them straighten out the fiberglass on my rear spoiler and repaint it as well. I am going to have them repaint the frame around my windshield and put a new windshield in it as well. That should get the paint and bodywork where I want it to be.
The owner also gave me a few ideas for my headliner and door panels. I can't wait to see how this all turns out. I want to get the car over there towards the end of the month if possible.
01-06-2015, 05:40 AM
#820
Supreme Member
iTrader: (30)
Join Date: Jul 2000
Location: Fort Myers, FL
Posts: 1,514
Received 17 Likes
on
10 Posts
Car: 91 Firebird
Engine: 6.0
Transmission: T56
Axle/Gears: 3.73
Re: LS1 swap for my '89 GTA
I like the hood mod idea
especially if you start with a GTA hood and use the vents as the starting point for the nostrils..... and it will be a one off, unique piece. (not sure how the ram air box will fit though)
however, I feel that the RAI hood fits the thirdgen lines much better than the RAII you have now......
Can't wait to see some
01-07-2015, 09:16 AM
#821
Supreme Member
Thread Starter
iTrader: (1)
Join Date: Mar 2007
Location: Apopka, Florida
Posts: 1,237
Likes: 0
Received 7 Likes
on
6 Posts
Car: 1989 Pontiac Trans Am GTA
Engine: cammed LS1
Transmission: Monster SS 4L65E
Axle/Gears: 9 bolt posi w/ 3.70 gears
Re: LS1 swap for my '89 GTA
I like the hood mod idea
especially if you start with a GTA hood and use the vents as the starting point for the nostrils..... and it will be a one off, unique piece. (not sure how the ram air box will fit though)
however, I feel that the RAI hood fits the thirdgen lines much better than the RAII you have now......
Can't wait to see some
especially if you start with a GTA hood and use the vents as the starting point for the nostrils..... and it will be a one off, unique piece. (not sure how the ram air box will fit though)
however, I feel that the RAI hood fits the thirdgen lines much better than the RAII you have now......
Can't wait to see some
The RAI hood probably fits the lines better, but I was never really a big fan of that hood. I think I'll stick with what I have

By the way, I ordered my carpet yesterday. I ordered it with a set of matching floor mats and 2 extra yards of the carpet to cover the backs of the back seats. I can't wait to get carpet back in my car again. I am tired of looking at Fatmat!

Last edited by dprest68; 01-08-2015 at 08:50 AM.
01-07-2015, 09:53 AM
#822
Supreme Member
Thread Starter
iTrader: (1)
Join Date: Mar 2007
Location: Apopka, Florida
Posts: 1,237
Likes: 0
Received 7 Likes
on
6 Posts
Car: 1989 Pontiac Trans Am GTA
Engine: cammed LS1
Transmission: Monster SS 4L65E
Axle/Gears: 9 bolt posi w/ 3.70 gears
Re: LS1 swap for my '89 GTA
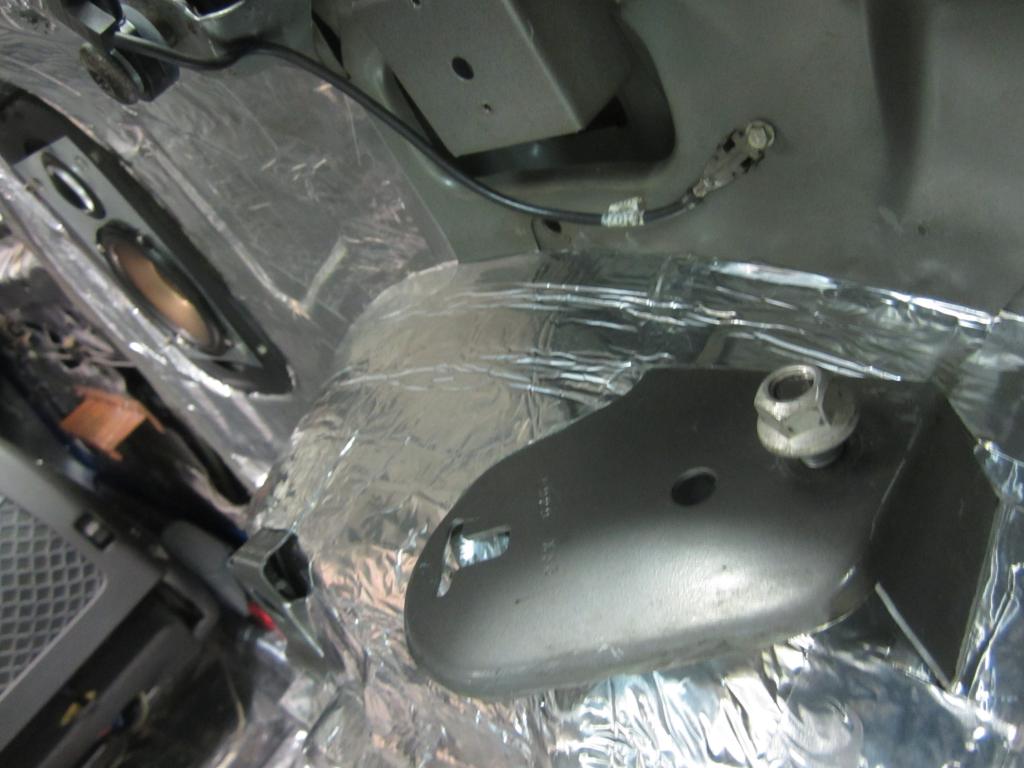
Here are the last two Fatmat pics... I promise. lol. I am officially done with the Fatmat.
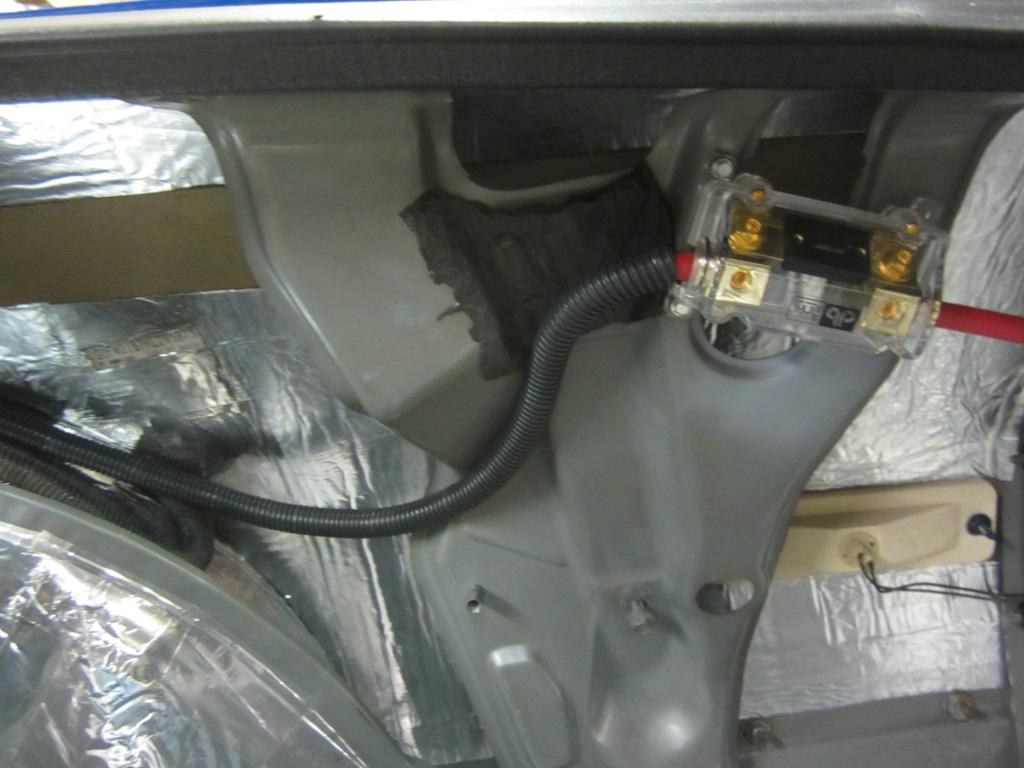
Moving on to more exciting stuff...
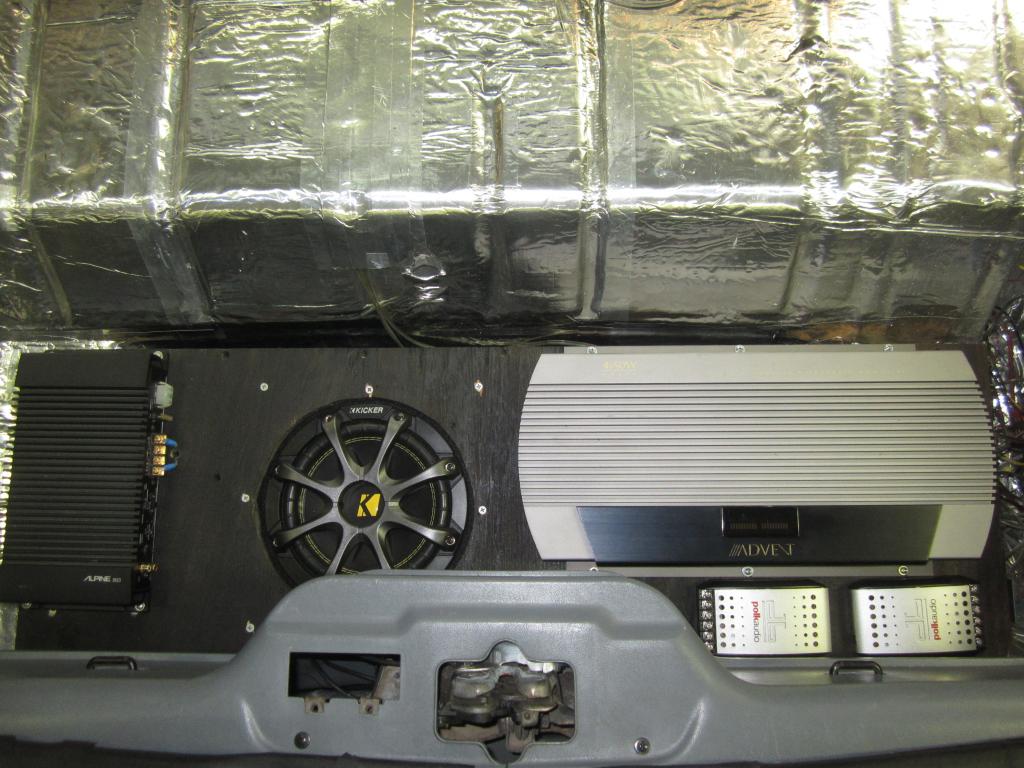
I modified my amp tray for the new sub enclosure. As it currently sits, the sub enclosure hits the front wall (middle of the picture). I am going to have to enlongate the opening for the sub and slide the enclosure back about an inch so that the tray fits in there properly. Once I get all of these little kinks worked out I am going take all of the correct measurements from the tray and use them to draw the tray on CAD so that I can send it over to the Waterjet guy and have him cut me a nice tray out of aluminum.
01-08-2015, 07:21 AM
#823
Supreme Member
iTrader: (30)
Join Date: Jul 2000
Location: Fort Myers, FL
Posts: 1,514
Received 17 Likes
on
10 Posts
Car: 91 Firebird
Engine: 6.0
Transmission: T56
Axle/Gears: 3.73
Re: LS1 swap for my '89 GTA
I would absolutely stay with what you have now... its just cheaper that way! LOL
and before you mod you amp rack any, I would wait until you have the carpet in place....
and before you mod you amp rack any, I would wait until you have the carpet in place....
01-08-2015, 08:47 AM
#824
Supreme Member
Thread Starter
iTrader: (1)
Join Date: Mar 2007
Location: Apopka, Florida
Posts: 1,237
Likes: 0
Received 7 Likes
on
6 Posts
Car: 1989 Pontiac Trans Am GTA
Engine: cammed LS1
Transmission: Monster SS 4L65E
Axle/Gears: 9 bolt posi w/ 3.70 gears
Re: LS1 swap for my '89 GTA
Yeah, I was just thinking that last night. The new carpet is going to be slightly thicker than what I pulled out of it since it will have mass backing and jute padding on the back of it. I also want to get the side panels in the car on each side of the amp tray so that I can take some final finished measurements. As the old saying goes, "measure twice, cut once". Hopefully the carpet will be here next week.
01-11-2015, 07:13 PM
#825
Junior Member

Join Date: Dec 2014
Posts: 6
Likes: 0
Received 0 Likes
on
0 Posts
Re: LS1 swap for my '89 GTA
Man great thread, I really love it. Been going through every single post since I found it. You have answered several questions I had since I started my rebuild in 2008! wished you were around back then!
Where did you get your rear spoiler? it's not original, looks like a cross between the 4th gen and third!
Keep up the great work
Where did you get your rear spoiler? it's not original, looks like a cross between the 4th gen and third!
Keep up the great work
01-12-2015, 08:13 AM
#826
Supreme Member
Thread Starter
iTrader: (1)
Join Date: Mar 2007
Location: Apopka, Florida
Posts: 1,237
Likes: 0
Received 7 Likes
on
6 Posts
Car: 1989 Pontiac Trans Am GTA
Engine: cammed LS1
Transmission: Monster SS 4L65E
Axle/Gears: 9 bolt posi w/ 3.70 gears
Re: LS1 swap for my '89 GTA
Man great thread, I really love it. Been going through every single post since I found it. You have answered several questions I had since I started my rebuild in 2008! wished you were around back then!
Where did you get your rear spoiler? it's not original, looks like a cross between the 4th gen and third!
Keep up the great work
Where did you get your rear spoiler? it's not original, looks like a cross between the 4th gen and third!
Keep up the great work
Yeah, the rear spoiler is a 4th gen style fiberglass aftermarket spoiler. Click here for a link to it.
01-12-2015, 03:24 PM
#827
Junior Member
Join Date: Dec 2014
Posts: 6
Likes: 0
Received 0 Likes
on
0 Posts
Re: LS1 swap for my '89 GTA
If I would have noticed it before that it looked way better than the original I would have ordered that instead of the fiberglass third gen...crap!
Did you have to drill new holes to install it?
Did you have to drill new holes to install it?
01-13-2015, 09:42 AM
#828
Supreme Member
Thread Starter
iTrader: (1)
Join Date: Mar 2007
Location: Apopka, Florida
Posts: 1,237
Likes: 0
Received 7 Likes
on
6 Posts
Car: 1989 Pontiac Trans Am GTA
Engine: cammed LS1
Transmission: Monster SS 4L65E
Axle/Gears: 9 bolt posi w/ 3.70 gears
Re: LS1 swap for my '89 GTA
It was about 12 or 13 years ago when I put that spoiler on my car, so I don't remember exactly. I know I drilled at least two holes for that spolier, but I think I had to drill four holes to install it. And the holes for the stock spoiler had to be filled.
01-19-2015, 12:33 AM
#830
Junior Member
Re: LS1 swap for my '89 GTA
not to be an a$$ or anything , but i have heard bad things about using foam and corrosion ... i used this stuff ... http://www.ebay.ca/itm/1-Gallon-Spra...073de9&vxp=mtr
01-19-2015, 01:15 AM
#831
Supreme Member
Thread Starter
iTrader: (1)
Join Date: Mar 2007
Location: Apopka, Florida
Posts: 1,237
Likes: 0
Received 7 Likes
on
6 Posts
Car: 1989 Pontiac Trans Am GTA
Engine: cammed LS1
Transmission: Monster SS 4L65E
Axle/Gears: 9 bolt posi w/ 3.70 gears
Re: LS1 swap for my '89 GTA
not to be an a$$ or anything , but i have heard bad things about using foam and corrosion ... i used this stuff ... http://www.ebay.ca/itm/1-Gallon-Spra...073de9&vxp=mtr
01-19-2015, 01:19 AM
#832
Supreme Member
Thread Starter
iTrader: (1)
Join Date: Mar 2007
Location: Apopka, Florida
Posts: 1,237
Likes: 0
Received 7 Likes
on
6 Posts
Car: 1989 Pontiac Trans Am GTA
Engine: cammed LS1
Transmission: Monster SS 4L65E
Axle/Gears: 9 bolt posi w/ 3.70 gears
Re: LS1 swap for my '89 GTA
The new carpet came in on Monday. I have been working on getting the back carpet and the back interior panels in the car. I am going with a darker gray on all of the panels to match the 4th gen seats. It looks MUCH better. I will post some pics later on.
01-19-2015, 10:06 AM
#833
Supreme Member
Thread Starter
iTrader: (1)
Join Date: Mar 2007
Location: Apopka, Florida
Posts: 1,237
Likes: 0
Received 7 Likes
on
6 Posts
Car: 1989 Pontiac Trans Am GTA
Engine: cammed LS1
Transmission: Monster SS 4L65E
Axle/Gears: 9 bolt posi w/ 3.70 gears
Re: LS1 swap for my '89 GTA
Here are a few pics of what I was working on this weekend
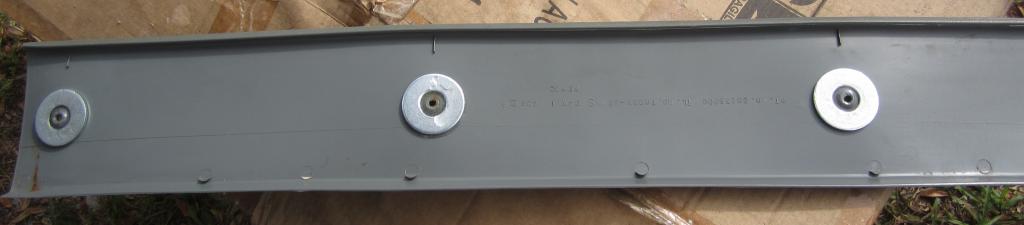
The rear headliner panel looked fine on the other side, but some of the holes were cracked. So I borrowed Luis' idea of epoxying washers around the holes to help reinforce them.
Yeah, I think I lost my mind...
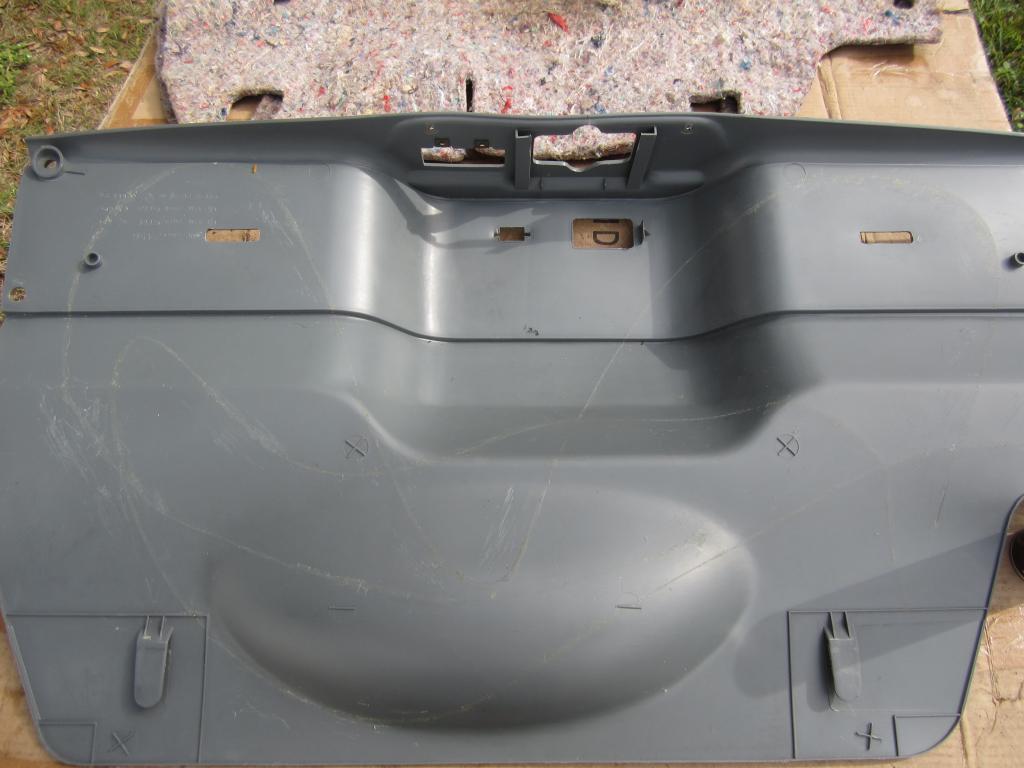
One thing led to another and before I knew what happened I had removed all of the old glue from the back of the rear panel.
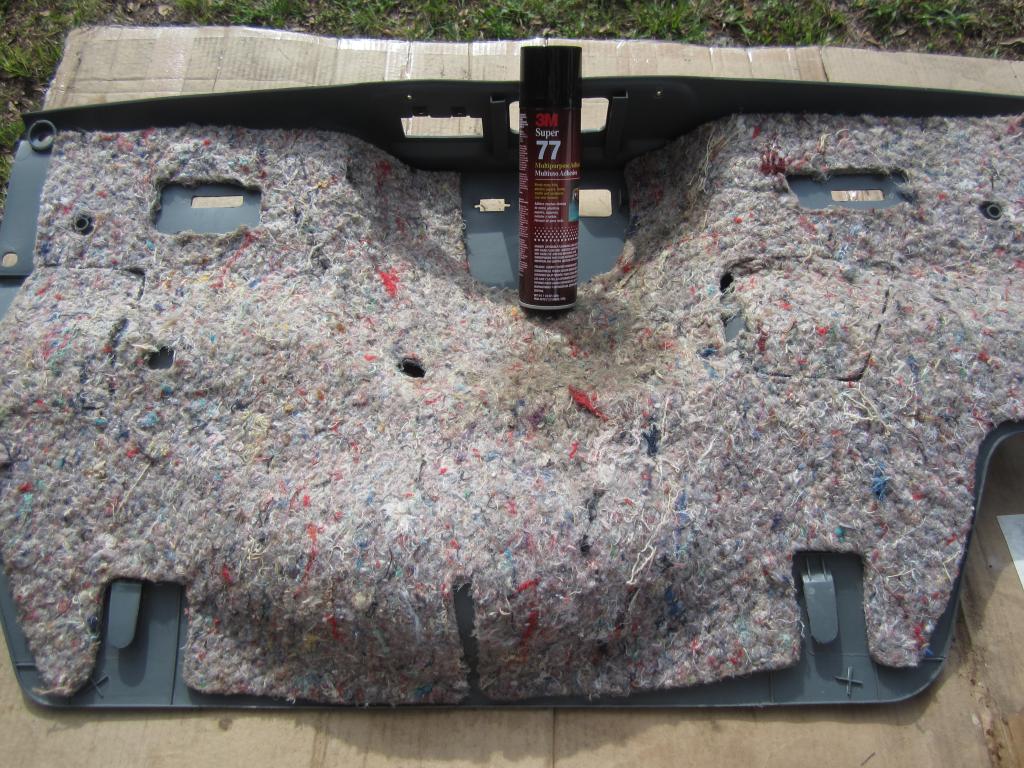
Turns out working with this spray adhesive in the direct sunlight isn't a great idea. It stuck to the panel instantly. I had about 10 second to get it in the correct location on the panel.
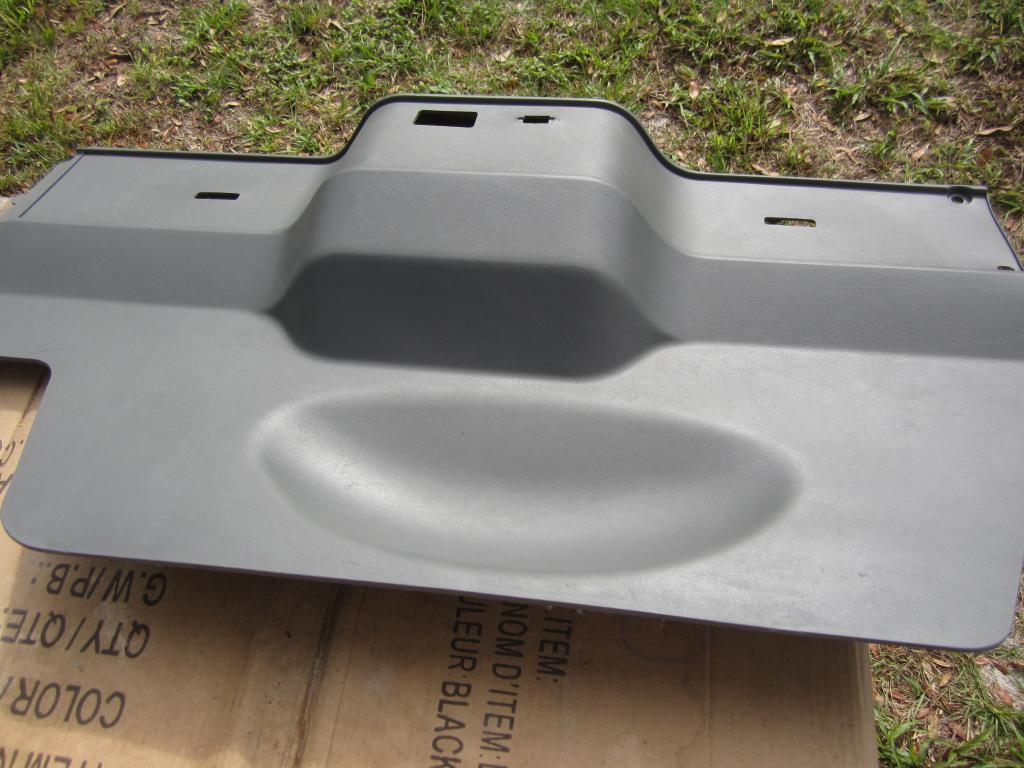
Painted with SEM Very Dark Gray. Unfortunately I forgot to apply adhesion promoter prior to painting the panel. So it's going to get another coat.
01-19-2015, 04:06 PM
#834
Junior Member
Join Date: Dec 2014
Posts: 6
Likes: 0
Received 0 Likes
on
0 Posts
Re: LS1 swap for my '89 GTA
Well, I may be interested in your third gen fiberglass spoiler for one of my other cars if you wanted to switch over.
It was about 12 or 13 years ago when I put that spoiler on my car, so I don't remember exactly. I know I drilled at least two holes for that spolier, but I think I had to drill four holes to install it. And the holes for the stock spoiler had to be filled.
It was about 12 or 13 years ago when I put that spoiler on my car, so I don't remember exactly. I know I drilled at least two holes for that spolier, but I think I had to drill four holes to install it. And the holes for the stock spoiler had to be filled.
01-20-2015, 09:11 PM
#835
Senior Member
iTrader: (3)
Join Date: Jan 2012
Location: Clark NJ
Posts: 877
Likes: 0
Received 2 Likes
on
2 Posts
Car: 1988 Pontiac Transam GTA Notchback
Engine: 2003 Chevy 5.3 Vortec (325 cu)
Transmission: 4L60E
Axle/Gears: 3.27
Re: LS1 swap for my '89 GTA
From the picture it looks like the color came out very nicely. I did something similar with my rear hatch panel- it literally saved it.
I need to do the same thing with washers on my headliner plastic. The thing is I am not sure if it can be saved at all becasue there is plastic missing. i am thinking of getting the plastic piece Hawks sells and paint it to match. Luis' thread gave me a lot of great ideas. - Miss reading it
I need to do the same thing with washers on my headliner plastic. The thing is I am not sure if it can be saved at all becasue there is plastic missing. i am thinking of getting the plastic piece Hawks sells and paint it to match. Luis' thread gave me a lot of great ideas. - Miss reading it
02-10-2015, 07:15 PM
#836
Supreme Member
Thread Starter
iTrader: (1)
Join Date: Mar 2007
Location: Apopka, Florida
Posts: 1,237
Likes: 0
Received 7 Likes
on
6 Posts
Car: 1989 Pontiac Trans Am GTA
Engine: cammed LS1
Transmission: Monster SS 4L65E
Axle/Gears: 9 bolt posi w/ 3.70 gears
Re: LS1 swap for my '89 GTA
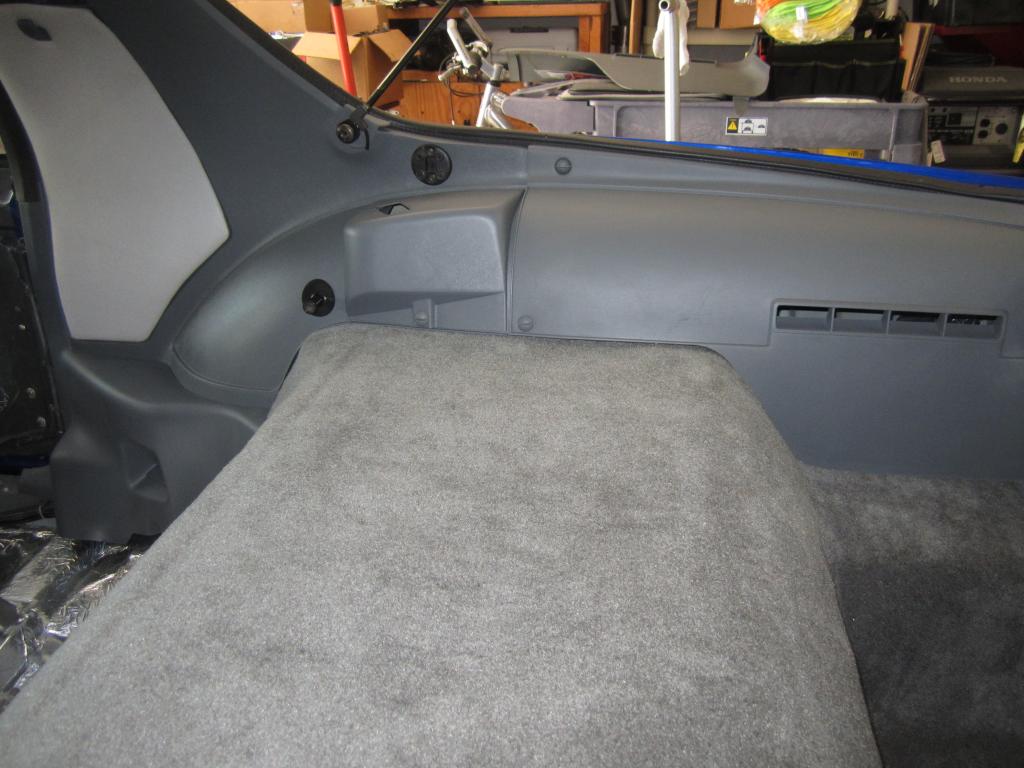
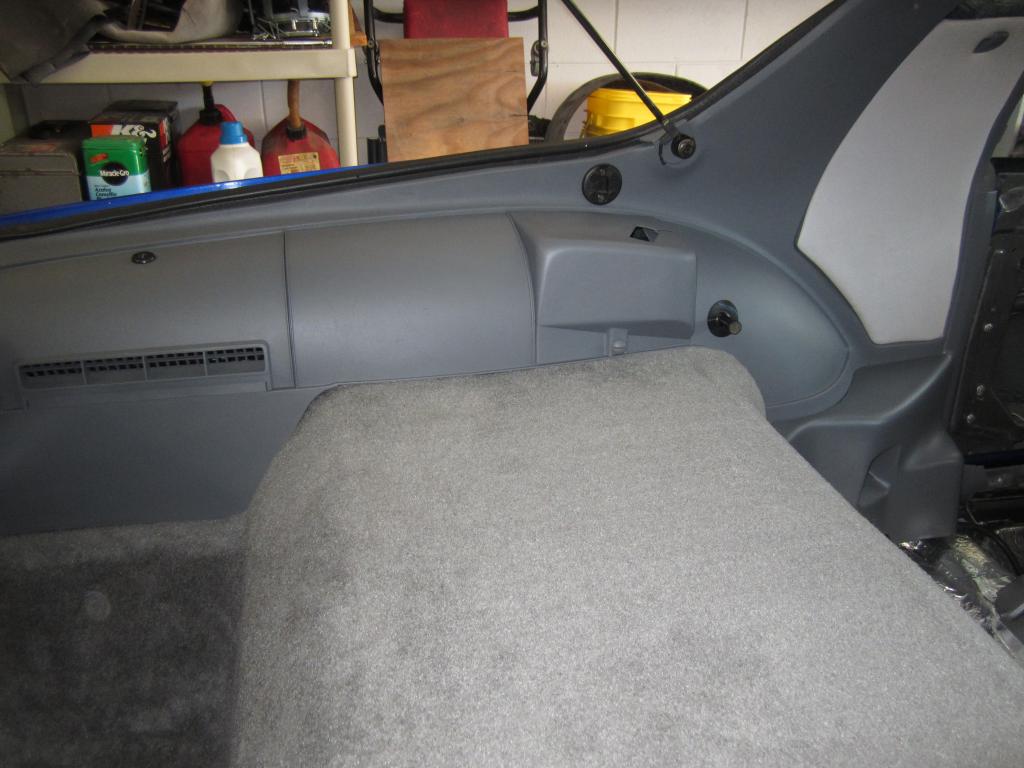
Okay, time for another update. I decided it was finally time to get the front carpet in the car this past weekend. Luis came over and helped me get it in there. Thanks bud! There's no way I could have done it alone. The mass backing made the carpet just that much harder to work with.
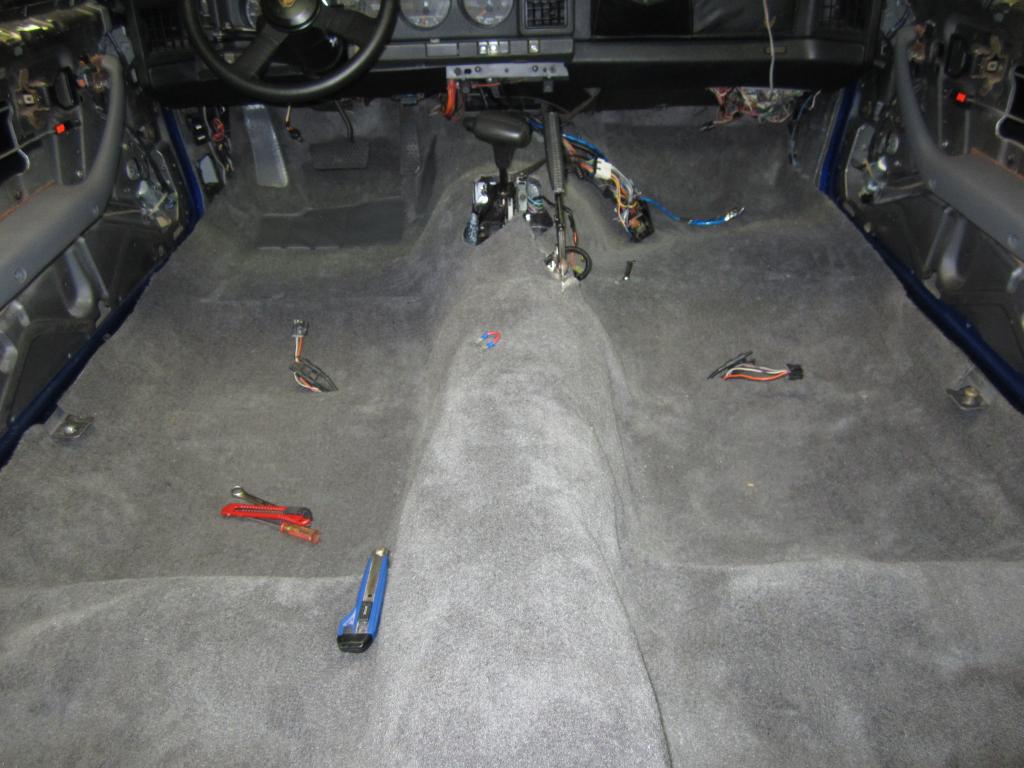
Here's the front carpet in place with most of the necessary cuts made to get everything back in the car. We had to cut quite a bit around the console area to get it to fit in that area. This is really nice carpet, but the jute padding that comes with it is like industrial grade or something. It was REALLY difficult to cut through it.
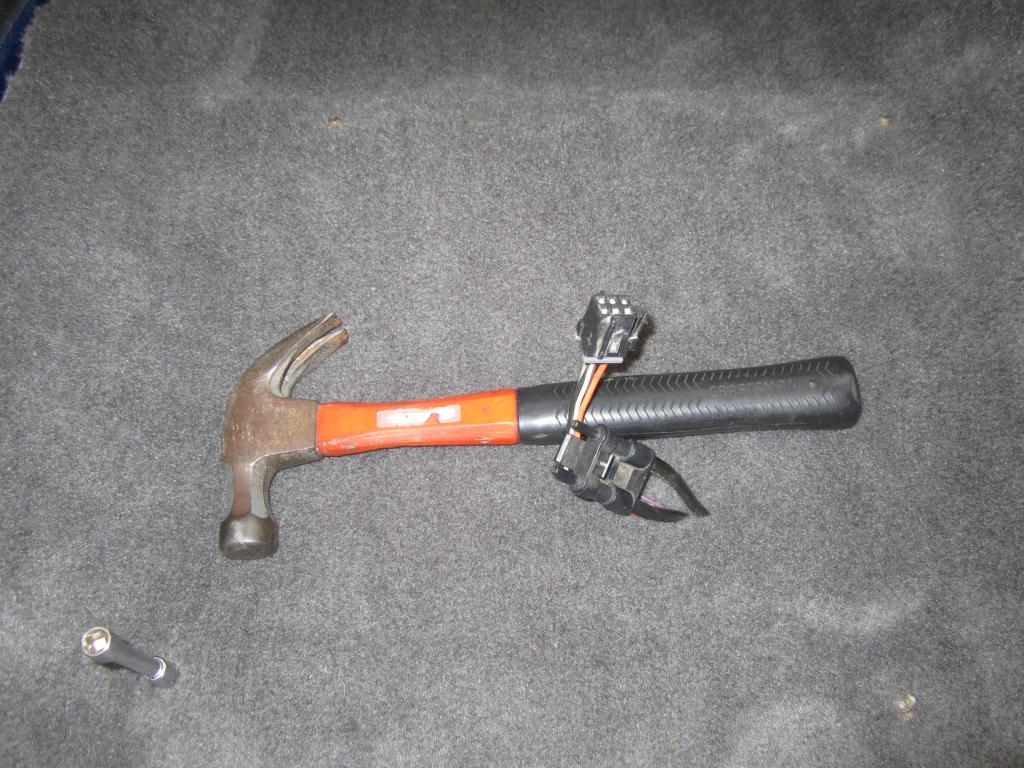
It's a little hard to see, but I used an 8mm socket on an extension and tapped on it a few times to seat the carpet down around each seat stud. It would have been quite difficult to get the seats bolted down otherwise.

Here's the interior most of the way back together. We had to jack the rear of the car up and stick an ice pick through the seat belt bolt holes in order to locate them on the inside of the car. It pretty much took us all weekend to get it to this point. I still need to get the seats recovered, but it looks okay for now. I wanted to have the back seats in place to help mold that carpet better on the hump between the seats. It looks so much better with the new carpet.
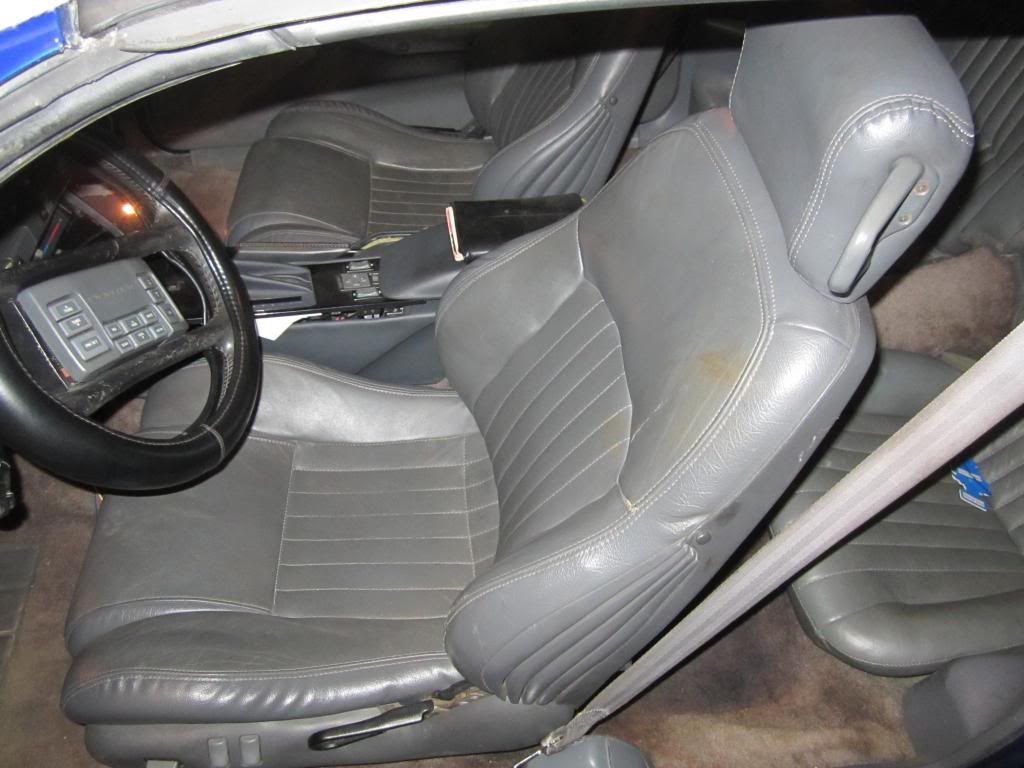
Just in case you forgot, here's what the interior used to look like...
Next on the to do list... get the stereo system hooked back up and get the headlight motors rebuilt.

Here's the front carpet in place with most of the necessary cuts made to get everything back in the car. We had to cut quite a bit around the console area to get it to fit in that area. This is really nice carpet, but the jute padding that comes with it is like industrial grade or something. It was REALLY difficult to cut through it.

It's a little hard to see, but I used an 8mm socket on an extension and tapped on it a few times to seat the carpet down around each seat stud. It would have been quite difficult to get the seats bolted down otherwise.

Here's the interior most of the way back together. We had to jack the rear of the car up and stick an ice pick through the seat belt bolt holes in order to locate them on the inside of the car. It pretty much took us all weekend to get it to this point. I still need to get the seats recovered, but it looks okay for now. I wanted to have the back seats in place to help mold that carpet better on the hump between the seats. It looks so much better with the new carpet.
Just in case you forgot, here's what the interior used to look like...

Next on the to do list... get the stereo system hooked back up and get the headlight motors rebuilt.
02-11-2015, 06:09 AM
#837
Supreme Member
iTrader: (30)
Join Date: Jul 2000
Location: Fort Myers, FL
Posts: 1,514
Received 17 Likes
on
10 Posts
Car: 91 Firebird
Engine: 6.0
Transmission: T56
Axle/Gears: 3.73
Re: LS1 swap for my '89 GTA
great, now I will have to add carpet to my list of stuff to get my car back on the road..... thanks! LOL
It looks great though! You guys did a superb job
It looks great though! You guys did a superb job
02-12-2015, 12:34 AM
#839
Supreme Member
Thread Starter
iTrader: (1)
Join Date: Mar 2007
Location: Apopka, Florida
Posts: 1,237
Likes: 0
Received 7 Likes
on
6 Posts
Car: 1989 Pontiac Trans Am GTA
Engine: cammed LS1
Transmission: Monster SS 4L65E
Axle/Gears: 9 bolt posi w/ 3.70 gears
Re: LS1 swap for my '89 GTA
Luis and I worked on the car again this evening. We got the radio back in the car and the center console back together.
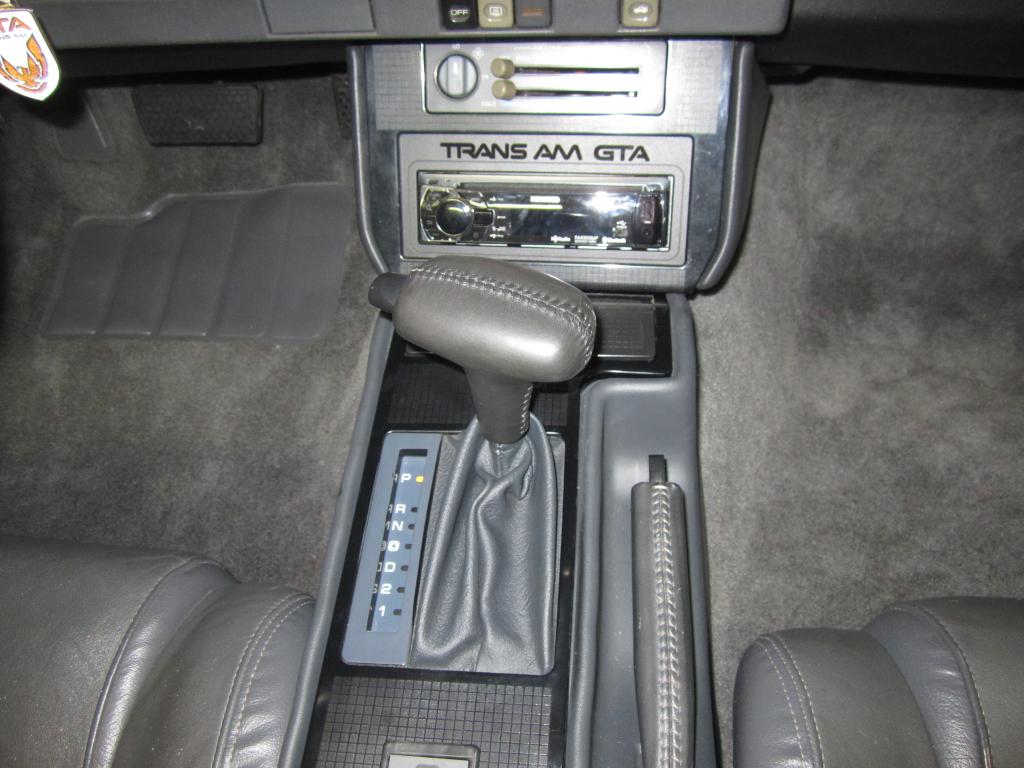
Getting that radio in there took the longest. We had to remove the carpet behind the radio because of the RCA cables. That doesn't sound all that difficult, but it was because of the jute padding on the carpet and the small opening in the radio pod that we had to work through. I will take a picture of the section of carpet and jute we cut out so you guys can see what we had to deal with. So after all of that and some cable management we were finally able to get the radio mounted in place. I am going to have to get an HUmount for my other cars too. That mount just made it so much easier to do cable management. And it looks really sweet when the lights are on in the car...
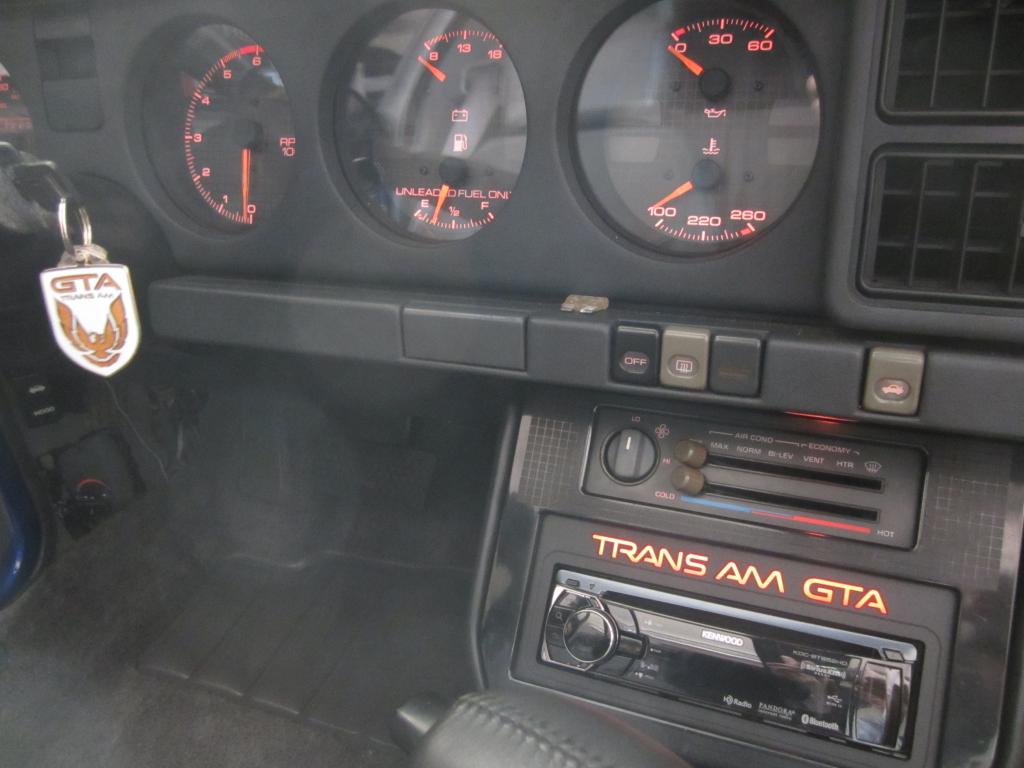
Here 's a slightly better picture of the dash lit-up. The HUmount lights are connected to the dimmer switch, so that works out pretty nice. And as you can see, there is absolutely no light scatter from the HUmount like before.
We also made a few adjustments to the center console wiring to help make it easier to remove the top plate in the future. I have a shifter adjustment issue I need to resolve, but I think I have an idea how to fix it.
Tomorrow we are going to work on the kick panels. Hopefully we can get them finished up. Then I will have to finalize the amp wiring before I will have a working radio again. While that will be nice, I have really been enjoying the music my engine makes!
Last edited by dprest68; 02-13-2015 at 09:25 AM. Reason: updated photo
02-12-2015, 08:07 AM
#840
Senior Member
Re: LS1 swap for my '89 GTA
ta gauges are sooooo much better than the camaro counterparts! good progress.
02-12-2015, 12:06 PM
#842

Re: LS1 swap for my '89 GTA
When I am ready to completely redo my car, I will definitely be using some of your methods, Dave! It has come a long way and looks fantastic! I'm interested to see the work the shop does to the hood. I love the RAII, but the fitment is what kills me about it. I have tried countless number of times to get it to fit properly without success. Looks forward to more.
Luis' departure from the boards was unfortunate. He has many great ideas to add to this forum.
Luis' departure from the boards was unfortunate. He has many great ideas to add to this forum.


 02-13-2015, 09:11 AM
#845
Supreme Member
Thread Starter
iTrader: (1)
Join Date: Mar 2007
Location: Apopka, Florida
Posts: 1,237
Likes: 0
Received 7 Likes
on
6 Posts
Car: 1989 Pontiac Trans Am GTA
Engine: cammed LS1
Transmission: Monster SS 4L65E
Axle/Gears: 9 bolt posi w/ 3.70 gears
Re: LS1 swap for my '89 GTA
When I am ready to completely redo my car, I will definitely be using some of your methods, Dave! It has come a long way and looks fantastic! I'm interested to see the work the shop does to the hood. I love the RAII, but the fitment is what kills me about it. I have tried countless number of times to get it to fit properly without success. Looks forward to more.
Luis' departure from the boards was unfortunate. He has many great ideas to add to this forum.
Luis' departure from the boards was unfortunate. He has many great ideas to add to this forum.
Thanks for the compliments. I appreciate it. We'll see what happens with the hood. Same here on the fitment though. I can't wait to get a hood on there that fits the cars correctly.Yeah, Luis' departure was unfortunate. Luckily for me he lives nearby and we are good friends. So I guess some of his good ideas still trickle down to you guys through my thread.
I was thinking we should plan another Florida F-body gathering in the near future CB. Maybe something a little more central this time. lol. Maybe this time Luis will even grace us with his presence.
What do you think?You didn't know that Luis was no longer on this forum?
02-13-2015, 09:31 AM
#846
Supreme Member
Thread Starter
iTrader: (1)
Join Date: Mar 2007
Location: Apopka, Florida
Posts: 1,237
Likes: 0
Received 7 Likes
on
6 Posts
Car: 1989 Pontiac Trans Am GTA
Engine: cammed LS1
Transmission: Monster SS 4L65E
Axle/Gears: 9 bolt posi w/ 3.70 gears
Re: LS1 swap for my '89 GTA
Here's a pic of the carpet sections we removed from under the radio
You can see that the jute is about four times thicker than the carpet. And we had to cut them through the radio pod opening. Good times! lol
I got the kick panels painted yesterday. I am going to try to get them in the car either today or tomorrow.

You can see that the jute is about four times thicker than the carpet. And we had to cut them through the radio pod opening. Good times! lol
I got the kick panels painted yesterday. I am going to try to get them in the car either today or tomorrow.
02-14-2015, 10:44 AM
#847
Re: LS1 swap for my '89 GTA
By the time I'm ready to do what I want, maybe the new LT motors can be had at a reasonable price.
I was thinking the same thing, Dave. Another Florida gathering would be nice. Are you thinking Lakeland? Perhaps Fantasy of Flight would be willing to accommodate us.
I was thinking the same thing, Dave. Another Florida gathering would be nice. Are you thinking Lakeland? Perhaps Fantasy of Flight would be willing to accommodate us.
02-14-2015, 11:18 AM
#848
Supreme Member
Thread Starter
iTrader: (1)
Join Date: Mar 2007
Location: Apopka, Florida
Posts: 1,237
Likes: 0
Received 7 Likes
on
6 Posts
Car: 1989 Pontiac Trans Am GTA
Engine: cammed LS1
Transmission: Monster SS 4L65E
Axle/Gears: 9 bolt posi w/ 3.70 gears
Re: LS1 swap for my '89 GTA
Yeah, that would be awesome. Let's try to get something together. Let me know how I can help. Just as a few other ideas, there's the Mount Dora Museum of Speed and the Don Garlits museum over in Ocala. Maybe we should start a thread about it and gauge interest in the idea? What do you think?
02-14-2015, 11:51 PM
#849
Supreme Member
Thread Starter
iTrader: (1)
Join Date: Mar 2007
Location: Apopka, Florida
Posts: 1,237
Likes: 0
Received 7 Likes
on
6 Posts
Car: 1989 Pontiac Trans Am GTA
Engine: cammed LS1
Transmission: Monster SS 4L65E
Axle/Gears: 9 bolt posi w/ 3.70 gears
Re: LS1 swap for my '89 GTA
I took the car out for a short spin today. It wasn't intended to be a short spin, but while I was driving down my street I tried to put my driver's side window up. It was acting very weird like it didn't want to go up. It finally went up about halfway then stopped and it made a few clunking sounds. So I turned around and took it back home to investigate. Upon inspection, I found a few plastic strips at the bottom of my door. Turns out they are the rubber/plastic window guides at the front of the door. Not sure why they broke, but we came up with a way to fix it. The guide used to be one piece that was U-shaped and was stapled to the metal part of the guide. The rubber/plastic is now super hard and brittle so there was no way we were going to get it to go back together like it was before. Luis came up with a plan to epoxy the rubber/plastic guide strips back on the metal part
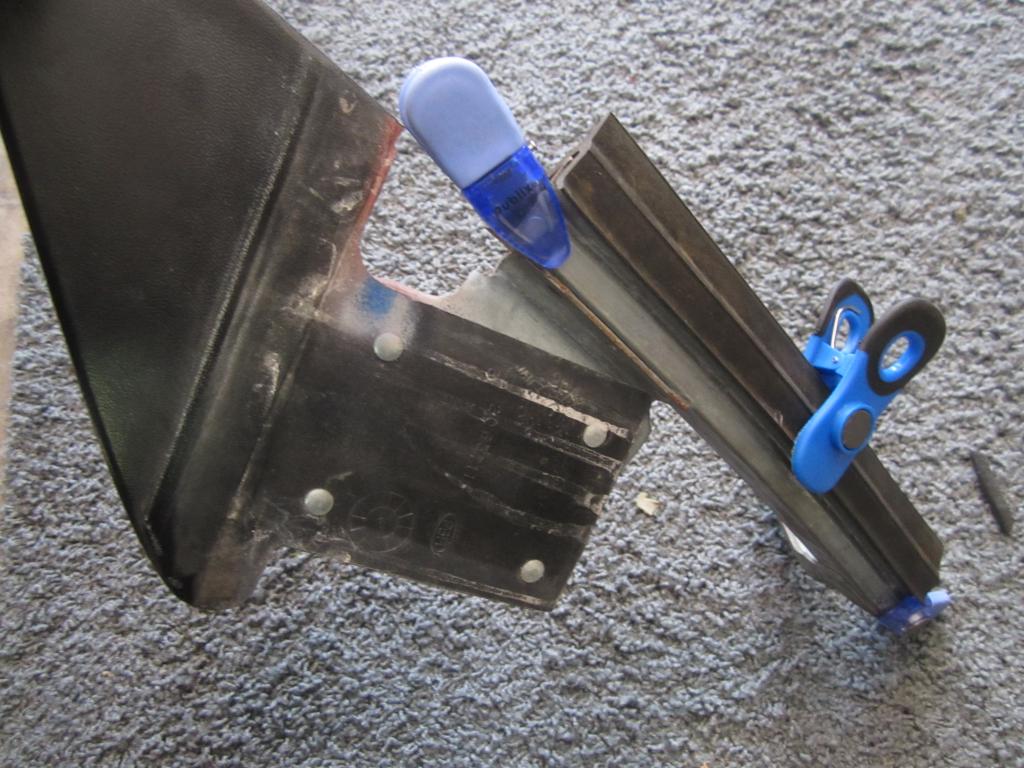
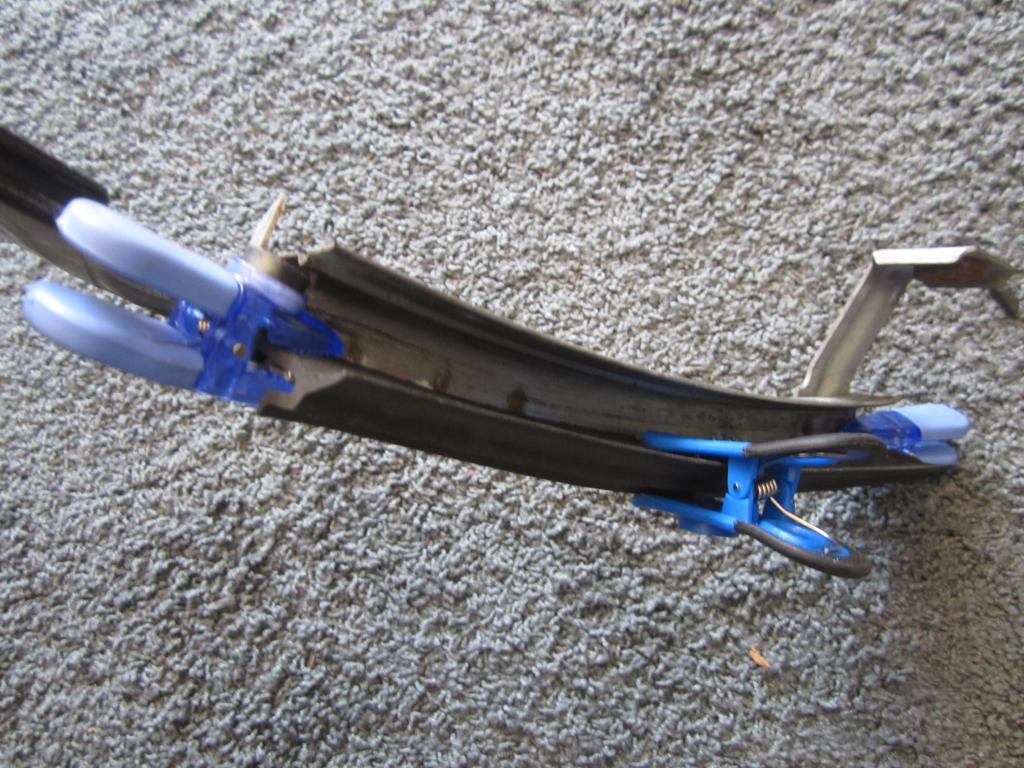
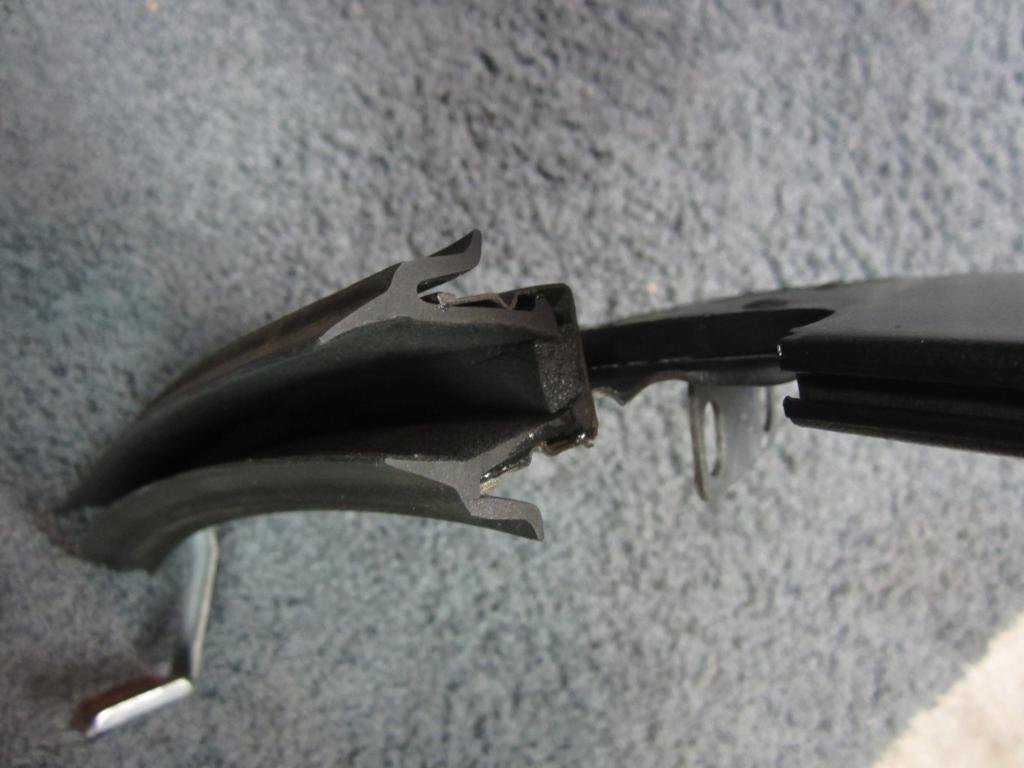
Once both guides were epoxied back in place, Luis cut a strip of neoprene and wedged it in between the two strips just to make sure the window doesn't contact the metal part of the guide. I think it turned out to be a pretty nice fix. Hopefully it works with no issues.
Here's the finished product with the triangle painted using SEM Landau Black
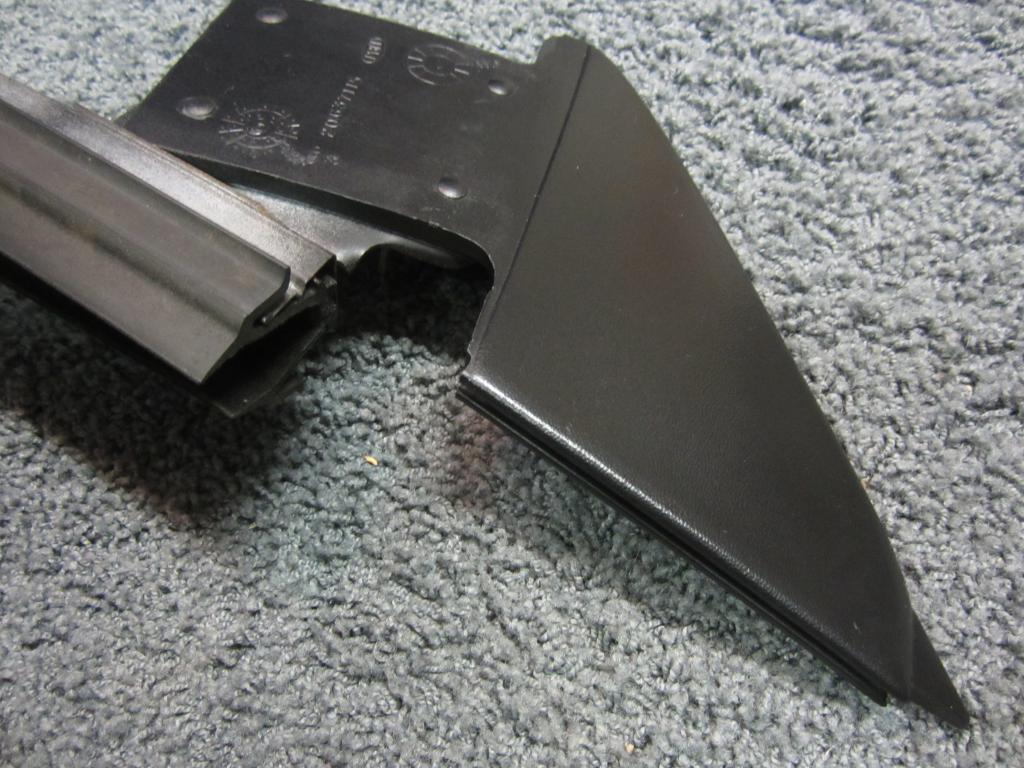
So tomorrow I will get it back in the car and get it aligned properly and test it to make sure the problem has been resolved. I am keeping my fingers crossed
02-15-2015, 12:19 AM
#850
Supreme Member
Thread Starter
iTrader: (1)
Join Date: Mar 2007
Location: Apopka, Florida
Posts: 1,237
Likes: 0
Received 7 Likes
on
6 Posts
Car: 1989 Pontiac Trans Am GTA
Engine: cammed LS1
Transmission: Monster SS 4L65E
Axle/Gears: 9 bolt posi w/ 3.70 gears
Re: LS1 swap for my '89 GTA
While Luis was there we also removed both headlight assemblies so that we could rebuild both headlight motors and detail (paint) the driver's side bracketry. Both motors would spin out of control long after the lights were raised or lowered. They would even spin if just the driving lights alone were on, then turned off. We both thought that was odd. So we proceeded to tear everything apart.
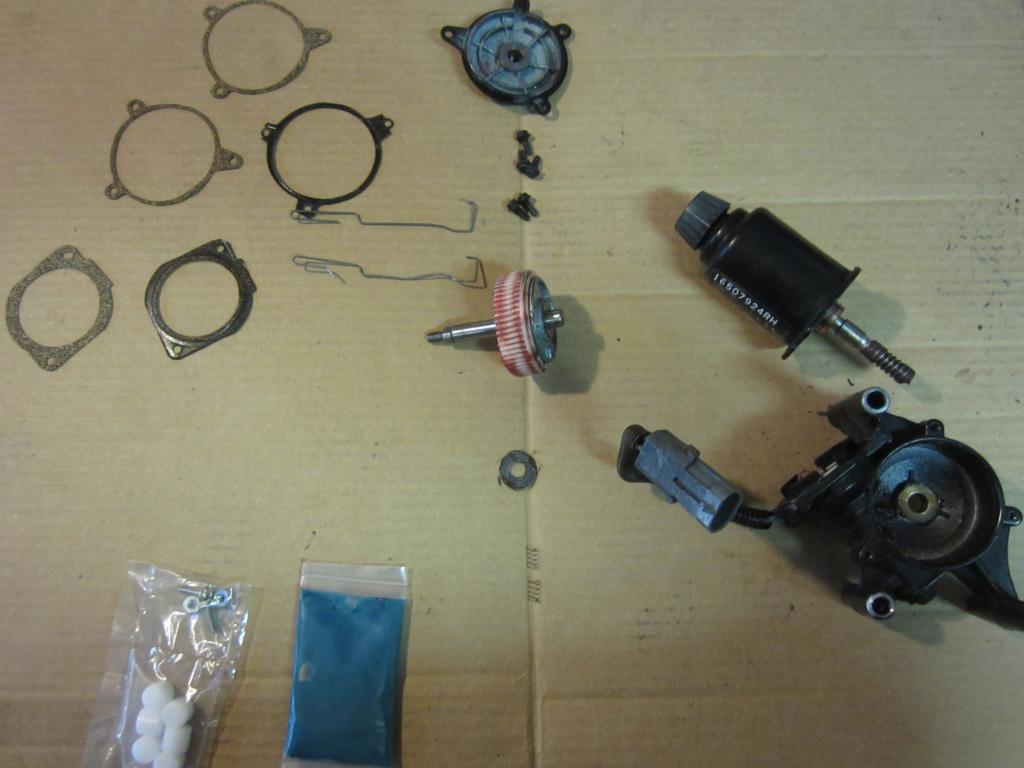
Luis brought over his paper clip brush retainers (middle of the picture) that really made things much easier to put the actual motors back together. The white gear with the red grease on it in the middle of the picture is what holds the three plastic buttons that you see in the lower left of the picture. So we separated the gear from the metal shaft...

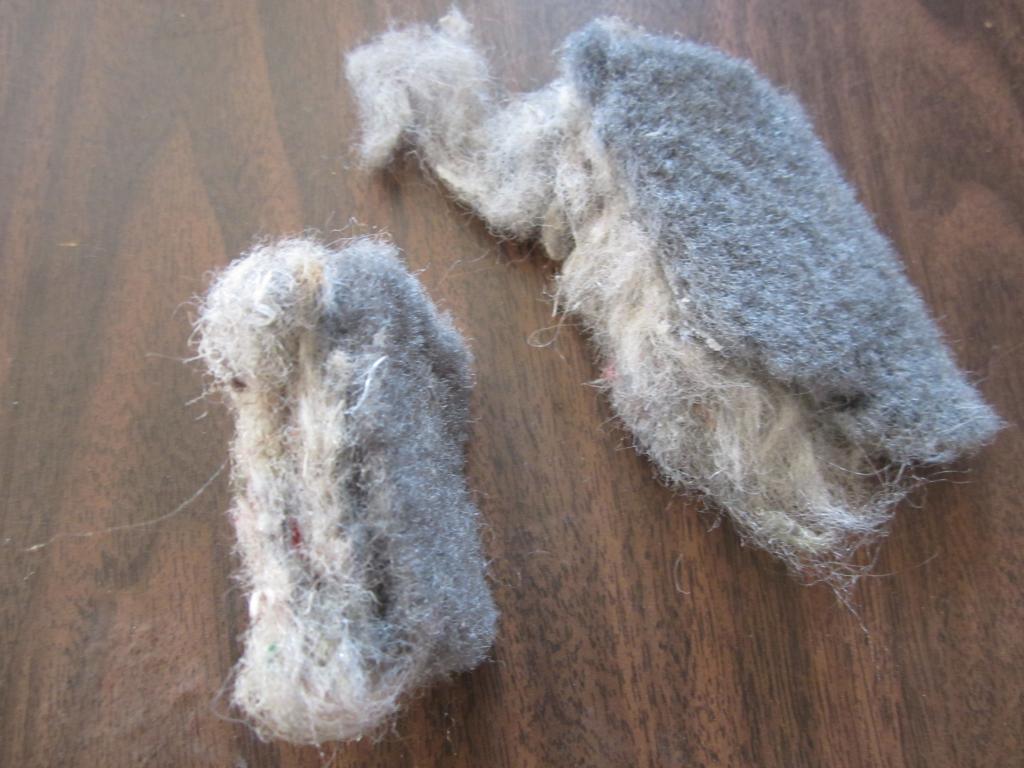
Hey... someone stole my buttons and replaced them with rock salt! lol. It's hard to believe those were plastic buttons too at one point. The buttons on the other side looked like grated Parmesan Cheese! It made me hungry for spaghetti. It took us a little while, but we finally got both motors rebuilt. We even got the passenger side headlight assembly back in the car and tested. It works again like it's supposed to. 
I am still working on sanding and painting everything for the driver's side headlight assembly. Hopefully I can get it back in the car tomorrow.

Luis brought over his paper clip brush retainers (middle of the picture) that really made things much easier to put the actual motors back together. The white gear with the red grease on it in the middle of the picture is what holds the three plastic buttons that you see in the lower left of the picture. So we separated the gear from the metal shaft...

Hey... someone stole my buttons and replaced them with rock salt! lol. It's hard to believe those were plastic buttons too at one point. The buttons on the other side looked like grated Parmesan Cheese! It made me hungry for spaghetti.
It took us a little while, but we finally got both motors rebuilt. We even got the passenger side headlight assembly back in the car and tested. It works again like it's supposed to. I am still working on sanding and painting everything for the driver's side headlight assembly. Hopefully I can get it back in the car tomorrow.
Last edited by dprest68; 04-02-2015 at 02:33 AM.