When you click on links to various merchants on this site and make a purchase, this can result in this site earning a commission. Affiliate programs and affiliations include, but are not limited to, the eBay Partner Network.
87 GTA/LS1 Swap - Now with (less?) questionable decisions
LTX and LSXPutting LT1s, LS1s, and their variants into Third Gens is becoming more popular. This board is for those who are doing and have done the swaps so they can discuss all of their technical aspects including repairs, swap info, and performance upgrades.
Re: 87 GTA/LS1 Swap - Now with (less?) questionable decisions
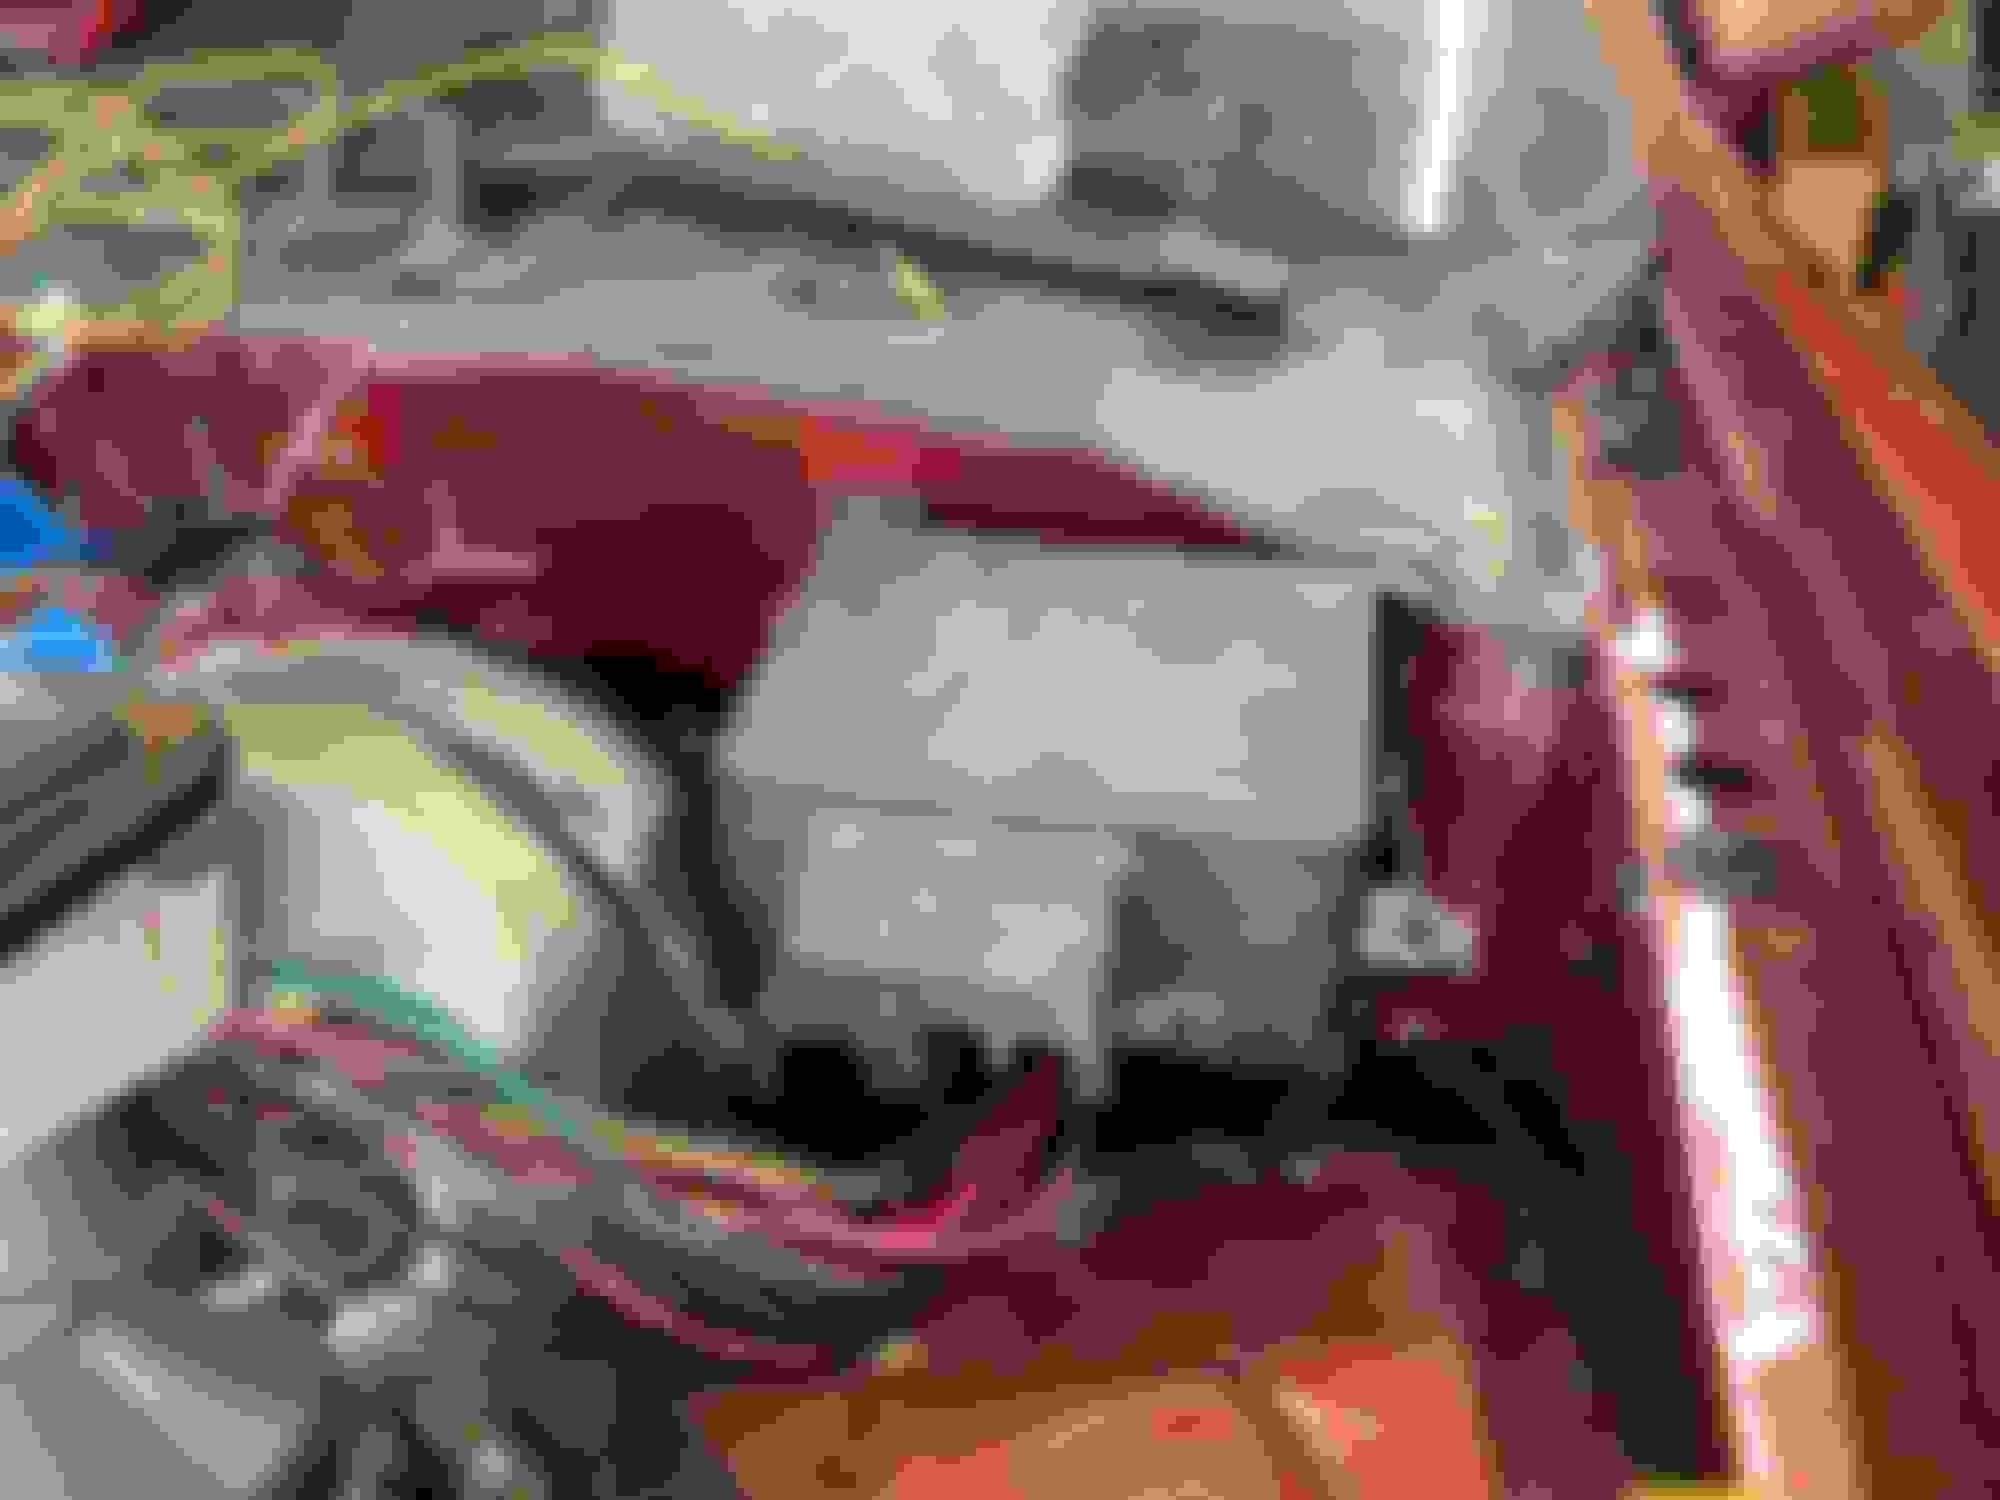
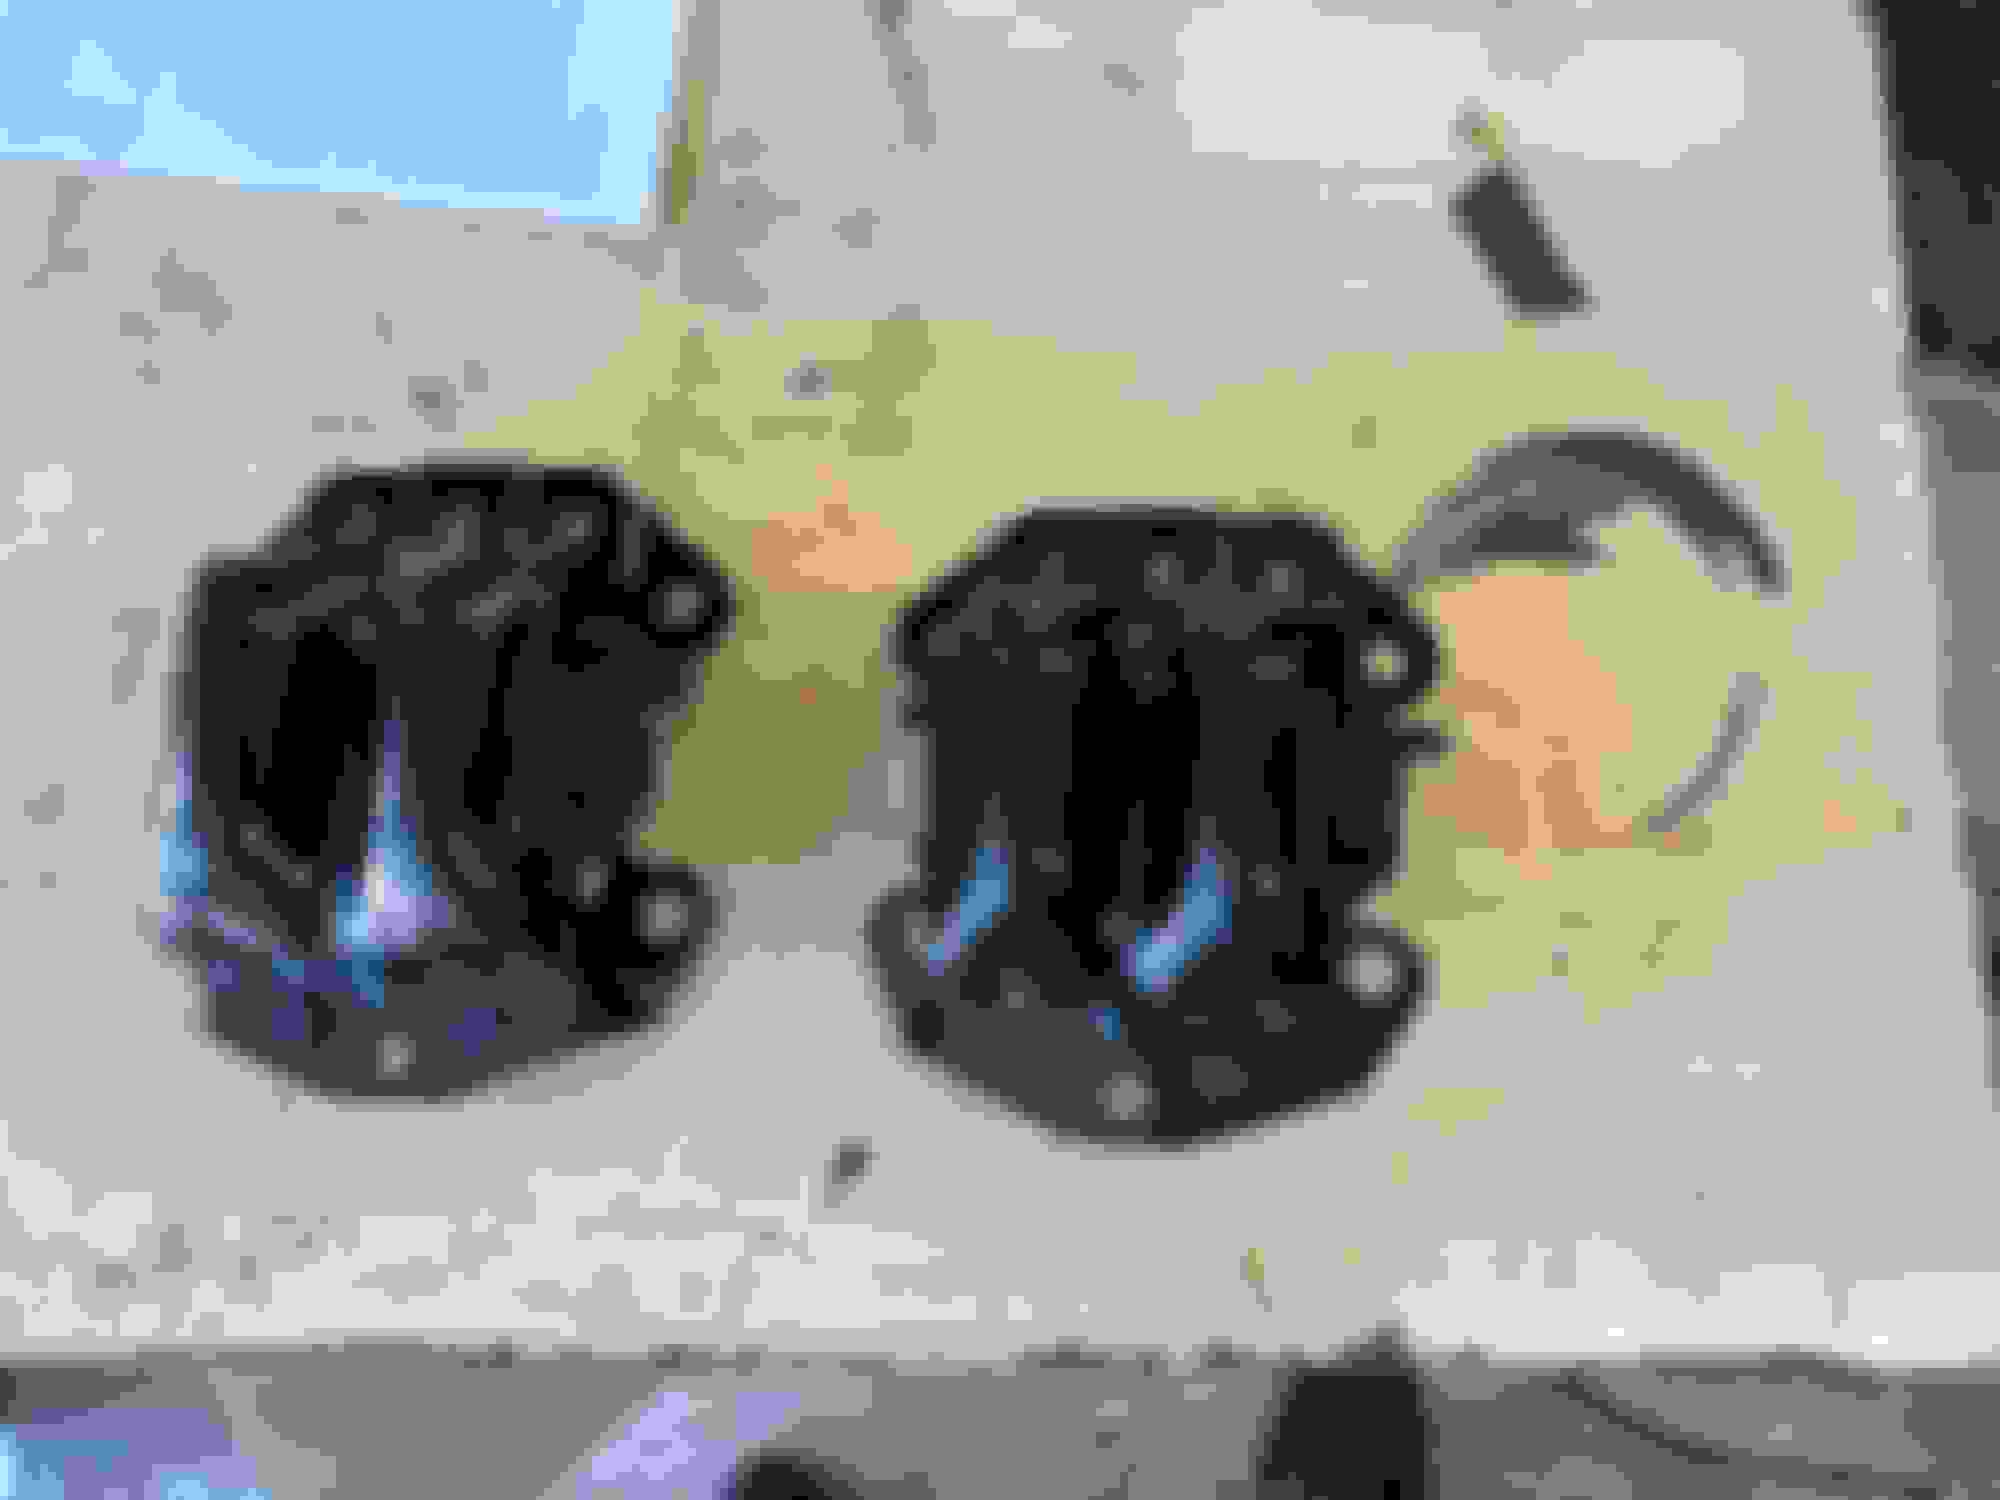
I'm finishing up work cleaning out the tank and getting the external wiring harness that it connects to done. Currently looking for a good spot to ground the new pump to (so I can follow some of vorteciroc's advice in how to use the weatherpack pass-thru connector with a larger pump). Question for the forum, what are these 2 lifted brackets used for (see picture)? My car's been apart for way too long for me to remember what, if anything, was attached there. Either seems like a decent spot to run a ground wire. Underside of car, passenger side, gas tank area
Re: 87 GTA/LS1 Swap - Now with (less?) questionable decisions
I welded a stainless threaded boss onto the body near the connector and attached a ring terminal to the boss. Caterpillar p/n 175-1540 (stainless, M10 thread, 1" tall). The body is very thin metal, you'll need a backing plate to keep it from blowing through real bad.
Re: 87 GTA/LS1 Swap - Now with (less?) questionable decisions
Originally Posted by 84 1LE
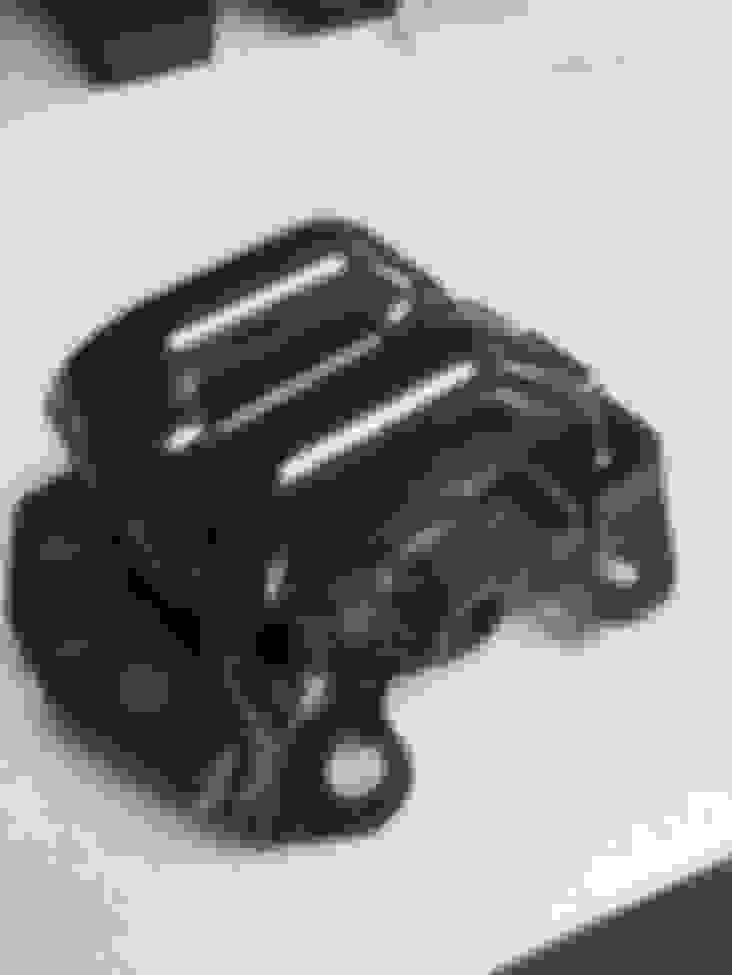
Heat shield for the over the axle exhaust. Glad to see you're back as well. I grounded my fuel pump to the rear lap belt anchor bolt.
Oh yeah! Thanks for jogging my memory. I do indeed have those shields still...
I never went anywhere. Been working off and on with the gas tank, it's just not a whole lot to share. When I wrap it up (or have odd questions), I'll post some more It's getting to be quite nice working outside, so hopefully it will heat up the forums as well!
Originally Posted by QwkTrip
I welded a stainless threaded boss onto the body near the connector and attached a ring terminal to the boss. Caterpillar p/n 175-1540 (stainless, M10 thread, 1" tall). The body is very thin metal, you'll need a backing plate to keep it from blowing through real bad.
I thought of doing something similar to that and figured it was really thin metal. I've never learned to weld, so if I can avoid it I'll try... Also thought about taking one of the rivets out of the weatherpack thru-connector that the fuel pump uses and replacing it with a bolt/nut. This wouldn't require any welding and may only require enlarging the hole a little. Figure if I cleaned the paint off a bit and then used a star washer to dig in under the first nut (one to secure the bolt, a second to secure the ring terminal from the harness), it should work alright.
Last edited by 3.1EyeCandy; Apr 24, 2022 at 08:37 PM.
Re: 87 GTA/LS1 Swap - Now with (less?) questionable decisions
Originally Posted by 3.1EyeCandy
I thought of doing something similar to that and figured it was really thin metal. I've never learned to weld, so if I can avoid it I'll try...
I had a friend do the welding.
My only job was holding the backing plate and pulling the carpet out of the way.
Another way is to weld bolts and washers to the body to make threaded ground studs, but you gotta know your stuff to get hardware with correct base material and coatings or it won't conduct or weld right.
Re: 87 GTA/LS1 Swap - Now with (less?) questionable decisions
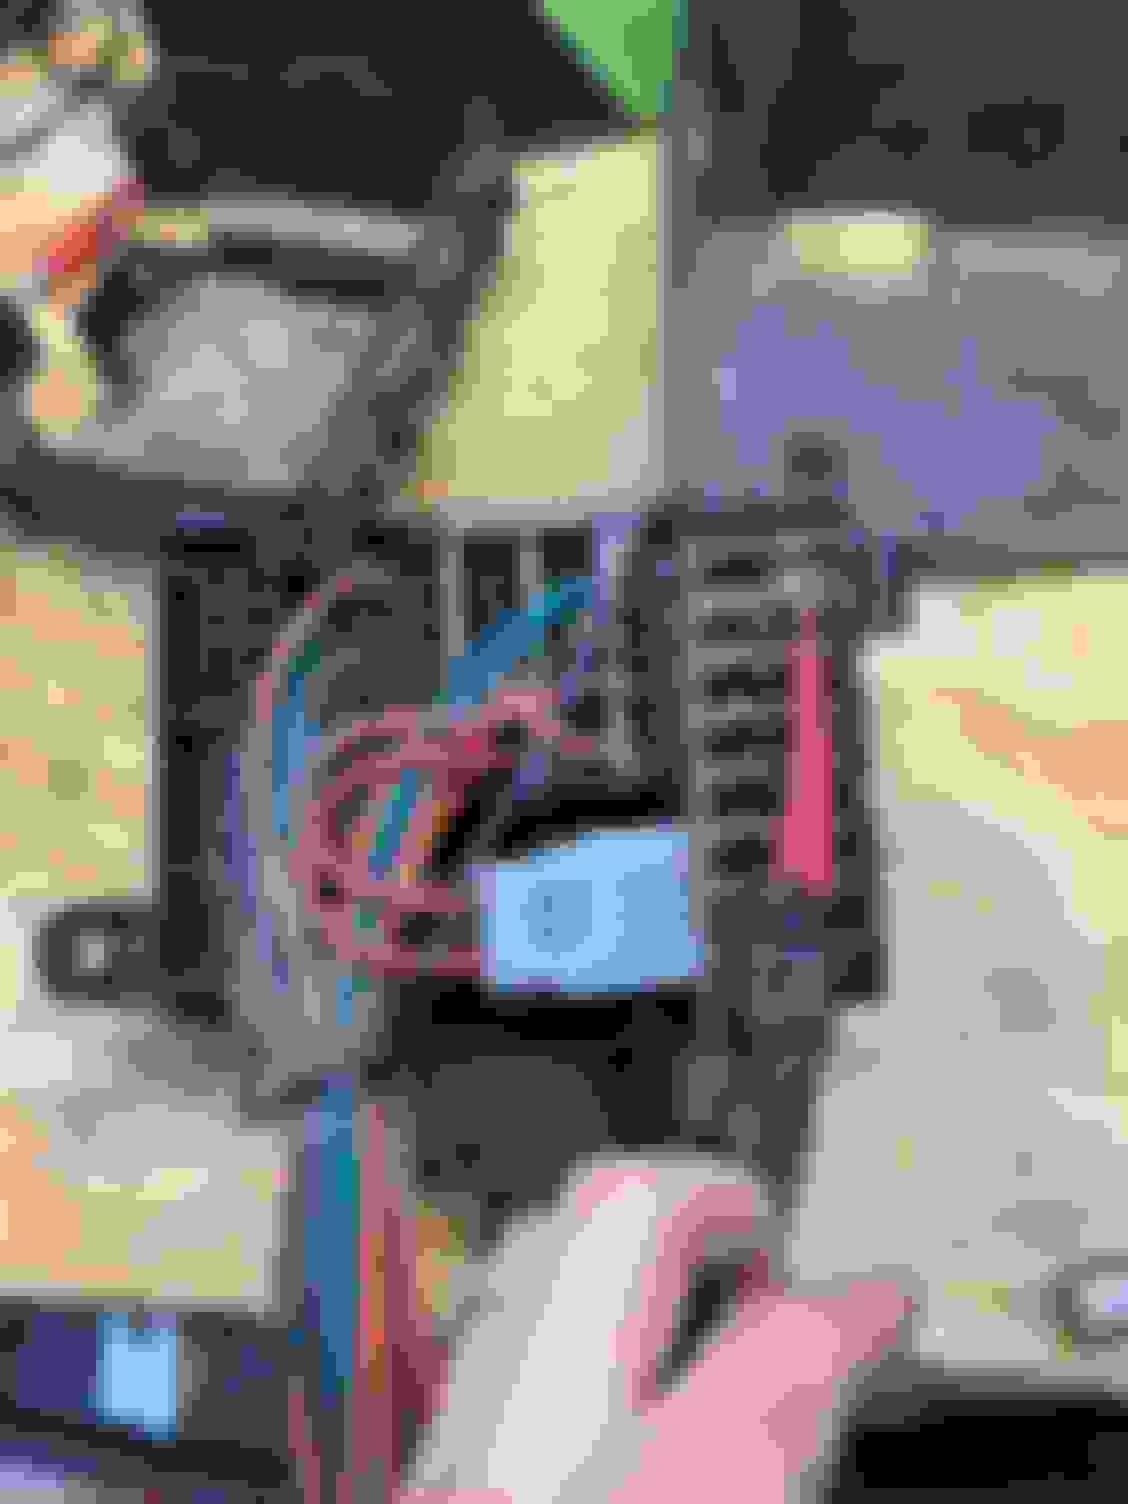
I've been exploring an alternative fuse/relay center for the engine bay sourced from an Astro Van. This is the same unit currently sold with the GMPP engine kits, but sourced from the junkyard along with the bracket from the Astro Van. Based on some reading here and elsewhere, this should be a good unit as it takes GT280 (or is it 280?) terminals on the underside and could fit in the same area as our relay bracket (with some tweaks of course).
I've gotten the unit disassembled and have begun to source the terminals and make sure I've got something to crimp them with. Am also thinking on how best to use the unit. It has a row of Maxi fuses (many which are quite large) and on the Astro Van it had a direct hookup the batter positive without any (that I could see) fusible links, so I'm thinking it could be used to eliminate the fusible links as well as house 3 large relays for fans, a large relay for the fuel pump, and an assortment of fuses for items in the engine bay.
Here's a picture of the unit itself, as well as the top and bottom:
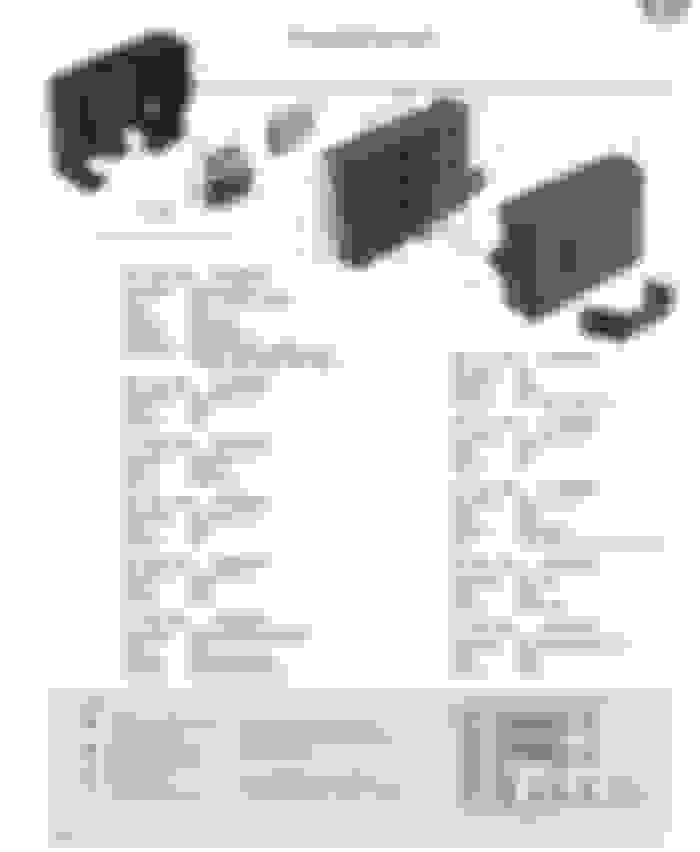
For future reference, here's the page from the Aptiv catalog. Most of the parts are still available, but not all.
Here's my transpose of that catalog page and some notes I made while looking up part numbers:12146281 - electrical center
12146286 - bottom cover
12162365 - top cover
12160765 - bus stud assembly cover
12084791 - fuse extractor
15492611 - bus stud terminal assembly (expensive, currently nearly $140)
(At least one if not more secondary locks aren’t currently available)
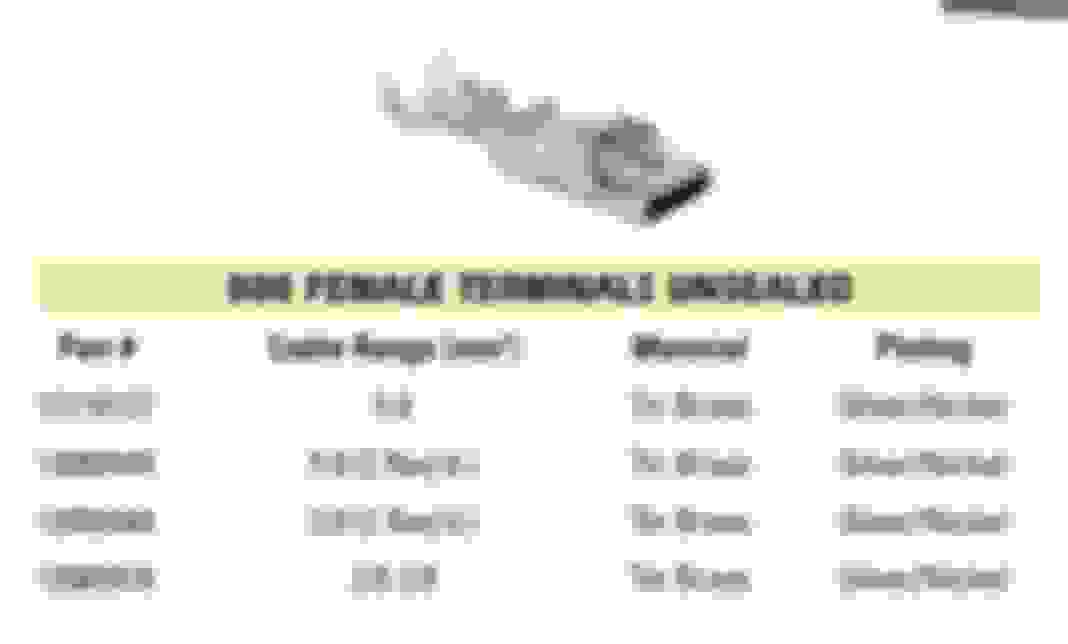
1. I need to find a source for the 280 Metro-Pack Bus Bar 16.2 Tangless AND something to crimp them with (by hand). I found the terminals themselves at EFI Connection, but haven't yet found something to crimp them with. The dies I have now for my crimper likely won't work due to the bus bar section being in the middle of the 2 crimps for the terminal and my dies do both crimps on a 280 terminal at the same time... maybe I need something that only does the 1 at a time... Here's a picture of one I pulled from the box:
2. Need to find a (reasonable priced) source AND something to crimp with for the 800 MAXI Fuse terminals. These also seem to have either an integrated or add-on tang. I've found the part numbers for these from Aptiv (see below) and am looking to find them at a reasonable price. It also looks like they can be crimped with one of my existing dies, so that's nice. Is it possible to interchange the 800 MAXI with some that aren't from Aptiv (since they're quite pricey)? If not, I may just use splice crimps on the wires themselves, not sure yet.
Here's a couple pictures:
Thanks guys. We've got several good folks on this board who seem to enjoy diving deep into the electrical in our cars, so I'm hopeful we can identify good ways to use this box as they're readily available in junkyards and offer a bit more room than some aftermarket options as well as a near factory appearance.
Last edited by 3.1EyeCandy; May 6, 2022 at 02:40 PM.
Re: 87 GTA/LS1 Swap - Now with (less?) questionable decisions
Im not sure about those actual terminals, but the crim[ping part looks like an open barrel crimp.
Try look at this crimper. Cheap and works great. Or you can look through that line of tools and see if they have something, but the one below I think will work for crimping those to wires.
IWISS Open Barrel Terminal Crimper Plier Tool for Molex Style DELPHI AMP TYCO Deutsch Terminals Crimper Open Barrel 24-14 AWG
Re: 87 GTA/LS1 Swap - Now with (less?) questionable decisions
I think the terminal part numbers for those power centers are listed in the front part of the Electrical Centers section of the Delphi connections catalog (few pages in front of where you found the fuse box).
Re: 87 GTA/LS1 Swap - Now with (less?) questionable decisions
Originally Posted by QwkTrip
I think the terminal part numbers for those power centers are listed in the front part of the Electrical Centers section of the Delphi connections catalog (few pages in front of where you found the fuse box).
Learn something new every day. These catalogs are huge!
Re: 87 GTA/LS1 Swap - Now with (less?) questionable decisions
Actually, you should have no reason to remove and replace the Metri-Pack 800 Buss...
Just install regular Metri-Pack 800 Terminals on the opposite-side for your new Connections/ Wires.
And when you do purchase some of these Terminals, make certain that they come with the Surface-Area Spring installed.
Often you will find the Metri-Pack 800 Terminals for about half-price...
Because you will have to purchase the Surface-Area Springs separately.
Last edited by vorteciroc; May 6, 2022 at 06:02 PM.
Re: 87 GTA/LS1 Swap - Now with (less?) questionable decisions
Originally Posted by vorteciroc
Actually, you should have no reason to remove and replace the Metri-Pack 800 Buss...
Just install regular Metri-Pack 800 Terminals on the opposite-side for your new Connections/ Wires.
And when you do purchase some of these Terminals, make certain that they come with the Surface-Area Spring installed.
Often you will find the Metri-Pack 800 Terminals for about half-price...
Because you will have to purchase the Surface-Area Springs separately.
That's the plan! I'll make sure they come with the surface-area spring (is that the tang looking piece?)
Re: 87 GTA/LS1 Swap - Now with (less?) questionable decisions
Originally Posted by 3.1EyeCandy
I Need to find a (reasonable priced) source AND something to crimp with for the 800 MAXI Fuse terminals.
Unfortunately, the Metri-Pack 800 Series is where things start to get expensive (Relatively) compared to most all of the smaller-sized Delphi Connector Series.
Nothing other than the Delphi Terminals, will fit into the 800 Series/ Maxi-Fuse slots in the Bussed Electrical Center that you are using.
I like that Bussed Electrical Center, except that it is not a Sealed BEC... Great for use inside the Cabin/ Dry areas.
I recently had to replace most of my Crimpers for the "Larger" size Terminals and Cable-Seals.
Believe it or not, if used enough... you will find excessive End-Play (Slop) in the Crimpers that will produce unusable crimps.
The Power-Pack Crimpers that I was using, are no longer produced/ available...
So I purchased Two new Crimpers that will universally cover my needs (and avoid purchasing 5 different "Used/ Pre-Owned" Crimpers, for $200 to $300 each).
So I purchased a New Delphi #12040070, for 8AWG Conductor Crimping (good for most 10AWG to 6AWG needs).
(Example use: Metri-Pack 800 Series Terminals, and Packard Series 56, 58, and 59 Terminals).
They were $100 at Mouser.com, and easy to find.
I also purchased a New Sargent #6225 CT, for 6AWG, 4AWG, 2AWG, and some 0AWG Conductor Crimping.
(Example use: Power-Pack 1000 and 2000 Series Terminals, and Battery/ Alternator Power and Ground Cables).
They were $160 at Waytekwire.com; also easy to find.
They work wonderfully, and I am very happy that I did not spend $1,000 to $2,000 on "used" replacement Delphi Crimpers.
Re: 87 GTA/LS1 Swap - Now with (less?) questionable decisions
I kept the fusible links and moved them to the A terminal. This is the same fuse box used on astro vans. Also added the small relay for my aux fan, with a 30amp (silver) circuit breaker on the left bank. The e-rod F.B is pretty basic.
Re: 87 GTA/LS1 Swap - Now with (less?) questionable decisions
I'm just curious... since you have added several available Maxi-Fused Circuits to your Third-Gen...
What are you powering through the Fusible-Links?
With the 800-Series Maxi-Fuse Components, you can power whatever you like, for up to a Continuous 60A Load.
This should cover most everything that our Cars have.
If pushing on the 60A Door...
The 950-Series Maxi-Fuse Components are good for up to a 100A Continuous Load (but you would need a different BEC than the current one).
Re: 87 GTA/LS1 Swap - Now with (less?) questionable decisions
Originally Posted by QwkTrip
Wow, that box nestled right in there.
That's what's so appealing about it... yeah it's not sealed 100% but if my car sees enough water for it to matter I've got other issues. If this one EC can be used to replace fusible links, provide a home for the core relays the LS swap needs, and a few fuses... while looking like it's meant to be there, seems like a good way to go.
Re: 87 GTA/LS1 Swap - Now with (less?) questionable decisions
Originally Posted by vorteciroc
Unfortunately, the Metri-Pack 800 Series is where things start to get expensive (Relatively) compared to most all of the smaller-sized Delphi Connector Series.
Nothing other than the Delphi Terminals, will fit into the 800 Series/ Maxi-Fuse slots in the Bussed Electrical Center that you are using.
I like that Bussed Electrical Center, except that it is not a Sealed BEC... Great for use inside the Cabin/ Dry areas.
I recently had to replace most of my Crimpers for the "Larger" size Terminals and Cable-Seals.
Believe it or not, if used enough... you will find excessive End-Play (Slop) in the Crimpers that will produce unusable crimps.
The Power-Pack Crimpers that I was using, are no longer produced/ available...
So I purchased Two new Crimpers that will universally cover my needs (and avoid purchasing 5 different "Used/ Pre-Owned" Crimpers, for $200 to $300 each).
So I purchased a New Delphi #12040070, for 8AWG Conductor Crimping (good for most 10AWG to 6AWG needs).
(Example use: Metri-Pack 800 Series Terminals, and Packard Series 56, 58, and 59 Terminals).
They were $100 at Mouser.com, and easy to find.
I also purchased a New Sargent #6225 CT, for 6AWG, 4AWG, 2AWG, and some 0AWG Conductor Crimping.
(Example use: Power-Pack 1000 and 2000 Series Terminals, and Battery/ Alternator Power and Ground Cables).
They were $160 at Waytekwire.com; also easy to find.
They work wonderfully, and I am very happy that I did not spend $1,000 to $2,000 on "used" replacement Delphi Crimpers.
I found some 800 MAXI terminals on eBay, lot of 25 for $25. Couldn't pass that up.
You rock on those crimpers. Good prices. I think the biggest thing I'll be powering is the fans. The Racetronix harness has two 40A fuses and I believe Metro-Pack 630 terminals/connectors. I'll need to invest in some crimpers and possibly wire if I plan to modify that harness at all. Not sure yet if I want to do my own battery cables or pay somebody else for it. But if I go that route I'll be grabbing those crimpers you recommended. Thanks again!
Re: 87 GTA/LS1 Swap - Now with (less?) questionable decisions
Originally Posted by vorteciroc
I'm just curious... since you have added several available Maxi-Fused Circuits to your Third-Gen...
What are you powering through the Fusible-Links?
The two green fuses are for the fuel pump and cooling fan. The two red ones are for the two terminals in front i labeled A and B, but those are GMs doing for the e-rod harness. I added the silver C.B for my aux fan, but that should've been a fuse. I just didn't have one at the time (should probably fix that). Fusible links are for the headlamp switch and ignition switch, IIRC. Its whatever was going to the starter originally. I just re-routed them.
Originally Posted by QwkTrip
Wow, that box nestled right in there. Do you have a 3rd gen or 4th gen brake booster?
Its a great spot and i just used the two existing threaded bungs for the old relay bank that was there before. Only had to drill the Astro piece for one of the bolts.
That is a 3rd gen booster/master/p.valve set-up.
Re: 87 GTA/LS1 Swap - Now with (less?) questionable decisions
Originally Posted by vorteciroc
Did your BEC come with any Shunts installed in any of the Maxi-Fuse Slots?
You mean one of these? No. We looked at several of these in the junkyard and none had any shunts. Do you recommend them? I could see it being a good idea considering the powered bus right there.
Re: 87 GTA/LS1 Swap - Now with (less?) questionable decisions
Originally Posted by 3.1EyeCandy
You mean one of these? No. We looked at several of these in the junkyard and none had any shunts. Do you recommend them? I could see it being a good idea considering the powered bus right there.
Yes, that looks like an ATO/ ATC sized Shunt Resistor.
I was just trying to find 2 or 3 MAXI-Fuse sized Shunts, so I do not need to purchase a Bag of 200 of them.
You guys don't really have any need to use those Shunts (except as a Jumper, up to the labeled Max-Ampacity).
I use them for Circuit Testing.
With Multi-Meter Leads across the Probe-Points, the Amperage/ Load of that Circuit can be measured.
Which will help establish which Fuse (Ampacity: 10, 15, 20 Etc) will be installed for the corresponding Circuit.
Re: 87 GTA/LS1 Swap - Now with (less?) questionable decisions
Originally Posted by vorteciroc
So I purchased a New Delphi #12040070, for 8AWG Conductor Crimping (good for most 10AWG to 6AWG needs).
(Example use: Metri-Pack 800 Series Terminals, and Packard Series 56, 58, and 59 Terminals).
They were $100 at Mouser.com, and easy to find.
OMD, I owe you a drink. I have been struggling with the crimps for the Packards and the Metri-Pack 600. I even went through Delphi catalogs and various websites to try to figure out what I needed, all fruitless. Thank you
Re: 87 GTA/LS1 Swap - Now with (less?) questionable decisions
Originally Posted by QwkTrip
Wow, that box nestled right in there. Do you have a 3rd gen or 4th gen brake booster?
After test fitting mine, I'm going to take a guess and say that he has a 4th gen booster. My 3rd gen booster makes it such that the left bolt hole does NOT line up. Pretty frustrating to have it be so close, yet not fit right in. The box itself nestles in fine in the corner (but quite tight if you're used to larger gaps everywhere). It's the Astro Van bracket that's a fail. It was worth a try though.
Toying with the idea of making a custom bracket to hang it. Seems like it would be the only way if keeping the 3rd gen booster. The left bolt hole would actually extend to the left of the main bracket body so the material would need to be a bit stout. I've mocked something up with cardboard and it seems doable, just pretty tight.
Last edited by 3.1EyeCandy; May 15, 2022 at 08:00 PM.
Reason: 84 ILE says he's using a 3rd gen booster. Need to dig some more.
Re: 87 GTA/LS1 Swap - Now with (less?) questionable decisions
Nope, that's all 3rd gen stuff. I'd already answered Qwks question. Maybe you missed it, but thats a direct transfer from my 84z. If you look at how far it is from the firewall, you can tell. The 4th gen mounting puts the booster much closer. You can also see how close the Astro piece is to the booster, in fact it just touches. I may have slotted the top left mounting hole just a bit, in fact i might of done that with both holes. So i can wiggle the astro part right up against the booster, but no need for custom bracketry. Unless that's what you really wanted. Trust me, those are all 3rd gen brake components. Here's another angle.
Re: 87 GTA/LS1 Swap - Now with (less?) questionable decisions
Originally Posted by 84 1LE
Nope, that's all 3rd gen stuff. I'd already answered Qwks question. Maybe you missed it, but thats a direct transfer from my 84z. If you look at how far it is from the firewall, you can tell. The 4th gen mounting puts the booster much closer. You can also see how close the Astro piece is to the booster, in fact it just touches. I may have slotted the top left mounting hole just a bit, in fact i might of done that with both holes. So i can wiggle the astro part right up against the booster, but no need for custom bracketry. Unless that's what you really wanted. Trust me, those are all 3rd gen brake components. Here's another angle.
Wow. Are you saying that top left bolt is in the factory hole for the previous bracket? Trust me, I don't want to have to do any custom bracketry if I can stand it.
I'll edit my previous post as I don't want to mislead anyone. I'll take some pics in good light to show what I'm seeing.
Re: 87 GTA/LS1 Swap - Now with (less?) questionable decisions
For my comfort, I'd probably drill. a new hole top left of the current one rather than slot. It doesn't seem close enough without pushing on the plastic bracket to get it to line up. Posting a couple pictures, though they're still not very good at showing it. My booster's been replaced with a rebuilt unit, but I'd think it is stock size.
Please disregard the mess...
Left hole doesn't line up. Hole in firewall is top-left of that hole, behind the bracket plastic. In this pic the bracket is pressed hard against the booster.
One last one in poor lighting to show placement against booster:
Comparing our photos, your bolt is definitely top-left of where the center of the hole is on mine when the bracket is pressed hard against the booster.
Last edited by 3.1EyeCandy; May 15, 2022 at 08:32 PM.
Re: 87 GTA/LS1 Swap - Now with (less?) questionable decisions
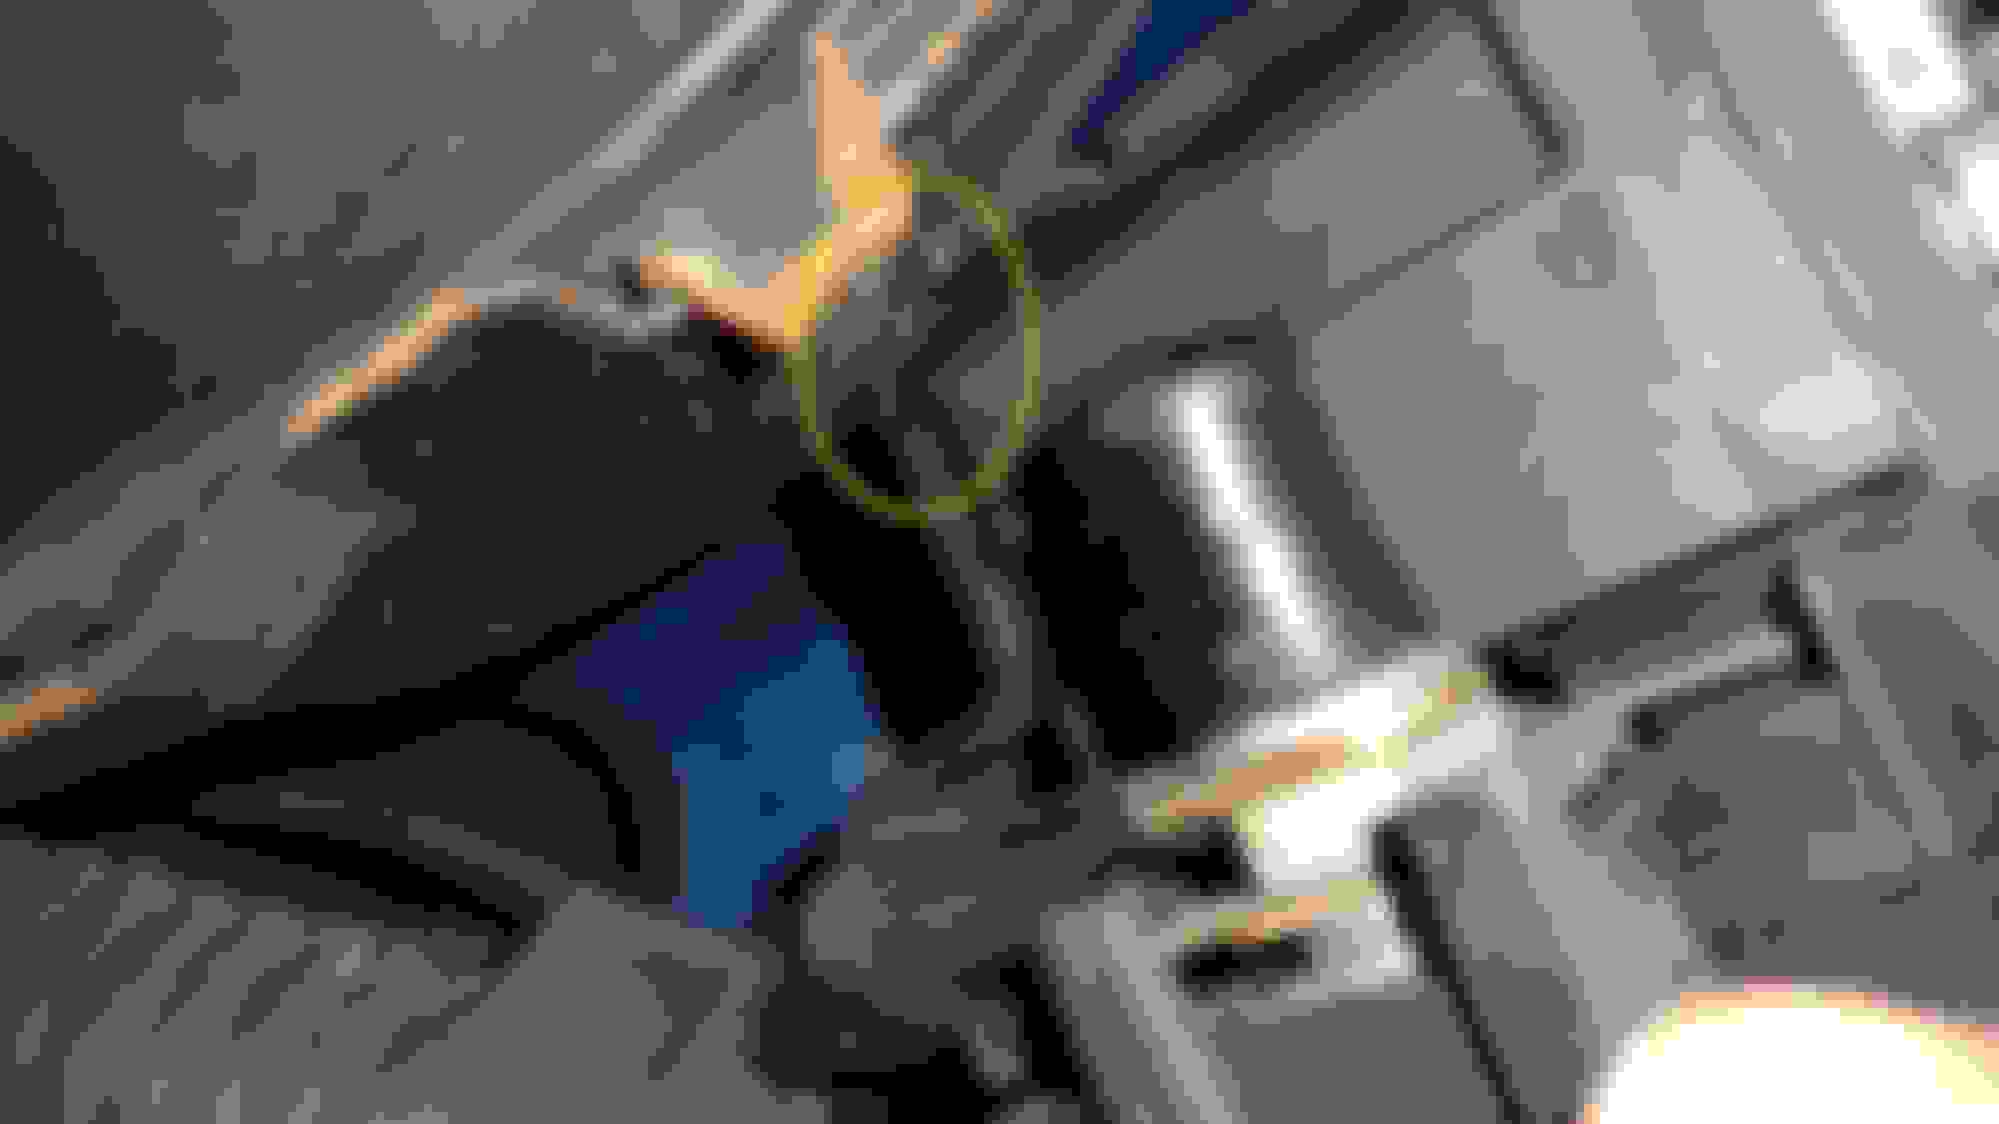
Yes, Im using the two holes with the threaded bungs already there for the old relay bank (bracket). That set-up also worked the same in my 84. So the holes were made/elongated for that car and it went on w/ no mods on the 89. Im pretty sure you can make that plastic piece work. You just have to elongate that top left hole so you can move the astro part to the right. IIRC my lower right bolt is right up against the inside edge and there is still room to further elongate the other hole leftward, but i think i just cut enough to move the astro part off the booster and cover that lower right threaded bung. I may have slotted that lower right hole, like the top right one is (vertical (for some wiggle room). I could take a pic with the FB removed. Just that torx bolt on the front right that holds the FB down.
Lower right hole is where the yellow circle is and to the left edge of that circular notch on the cowl, just like yours. Your booster looks just like mine also, minus the color.
Re: 87 GTA/LS1 Swap - Now with (less?) questionable decisions
Well its not as near to the inside edge as i remember, but it does look like I slotted the hole vertically. I also noticed something else....
....Looks like i trimmed this lower corner. Probably to help lower that side so the upper left hole would line up a little better, maybe.
I may have trimmed some material above the hole here. Probably while i was test fitting different positions.
Re: 87 GTA/LS1 Swap - Now with (less?) questionable decisions
Couple small good updates.
@84 1LE - copied your trimming of the bracket and it's snug but fits. Quite excited about this
Also took the plunge and got the ground stud setup for the fuel pump using a 1/4" 20 round head machine screw along with a star lock washer on each side of the body, a washer and a nut. Scuffed it up down to shiny metal on both sides first. Going to sandwich the ground eyelet between two washers and another nut (with a little blue locktite under the final nut). Once I've got it secured, I'll cover up any scuffed metal with a little paint for good measure.
Re: 87 GTA/LS1 Swap - Now with (less?) questionable decisions
Originally Posted by 3.1EyeCandy
Also took the plunge and got the ground stud setup for the fuel pump using a 1/4" 20 round head machine screw along with a star lock washer on each side of the body, a washer and a nut. Scuffed it up down to shiny metal on both sides first. Going to sandwich the ground eyelet between two washers and another nut (with a little blue locktite under the final nut). Once I've got it secured, I'll cover up any scuffed metal with a little paint for good measure.
Nice!
Pretty much looks just like the 100+ Cars that I have done that way.
Great job with your Car!
Keep it up!
Re: 87 GTA/LS1 Swap - Now with (less?) questionable decisions
This weekend, my friend and I attached the transmission to the new Circle D torque converter, and the engine to the transmission. Then we put them in the car! Only got one of the two motor mount bolts lined up and in. By then it was 1 PM and past time to eat lunch and call it a day. Way too hot here in southeast Texas.
Putting the bolts in the motor mounts is always the hardest part it seems. The last 2 times, I was using another vendor's mounts and it was tough. Now I'm using the Hooker Blackheart parts. In all cases I've had poly inserts. Hooker goes so far as to say this in the technical notes:
Installation of these mounting brackets requires the use of 1998-2002 4th-gen F-body LS1 engine mounts (stock GM, Anchor, Westar or equivalent brand) or aftermarket poly inserts available from Energy Suspension or Prothane. While poly inserts may be preferable for their function/performance, their installation is widely known, and should be expected to be, difficult.
Searched ls1tech for a while and the consensus is that installing the poly motor mounts is a giant PITA. Couple areas that we may try though:
- loosening the motor mount brackets to provide more play to slide the 18mm bolt in, then tighten them down
- using a scissor jack to move the passenger side of the motor
I'll also gladly accept advise from forum members. Was considering rubber mounts as an alternative, and I may yet. But it seems the struggle is normal and I should struggle a while longer
My 5 year old took this picture while seated. Turned out pretty good
Last edited by 3.1EyeCandy; Jun 19, 2022 at 08:55 PM.
Re: 87 GTA/LS1 Swap - Now with (less?) questionable decisions
as far as poly mounts, i have used a lot of them and haven't had too bad a time with the engine install, however this is with UMI k members... this allows you to float around the perch mounts, ie i leave the bolts on the UMI k member engine support pieces loose until i get the drivetrain in and then go around and tighten everything up... i do this on a lift as well which makes it more reasonable to do
Re: 87 GTA/LS1 Swap - Now with (less?) questionable decisions
I very much do like to use Poly-Graphite for Suspension/ Body Mounts and Bushings.
I am not a fan of doing so with the Drive-Line, except for IRS.
Use with an Auto-Trans seems to be too often problematic...
And I Solid-Mount the Engine in Cars more often than anything else now.
Re: 87 GTA/LS1 Swap - Now with (less?) questionable decisions
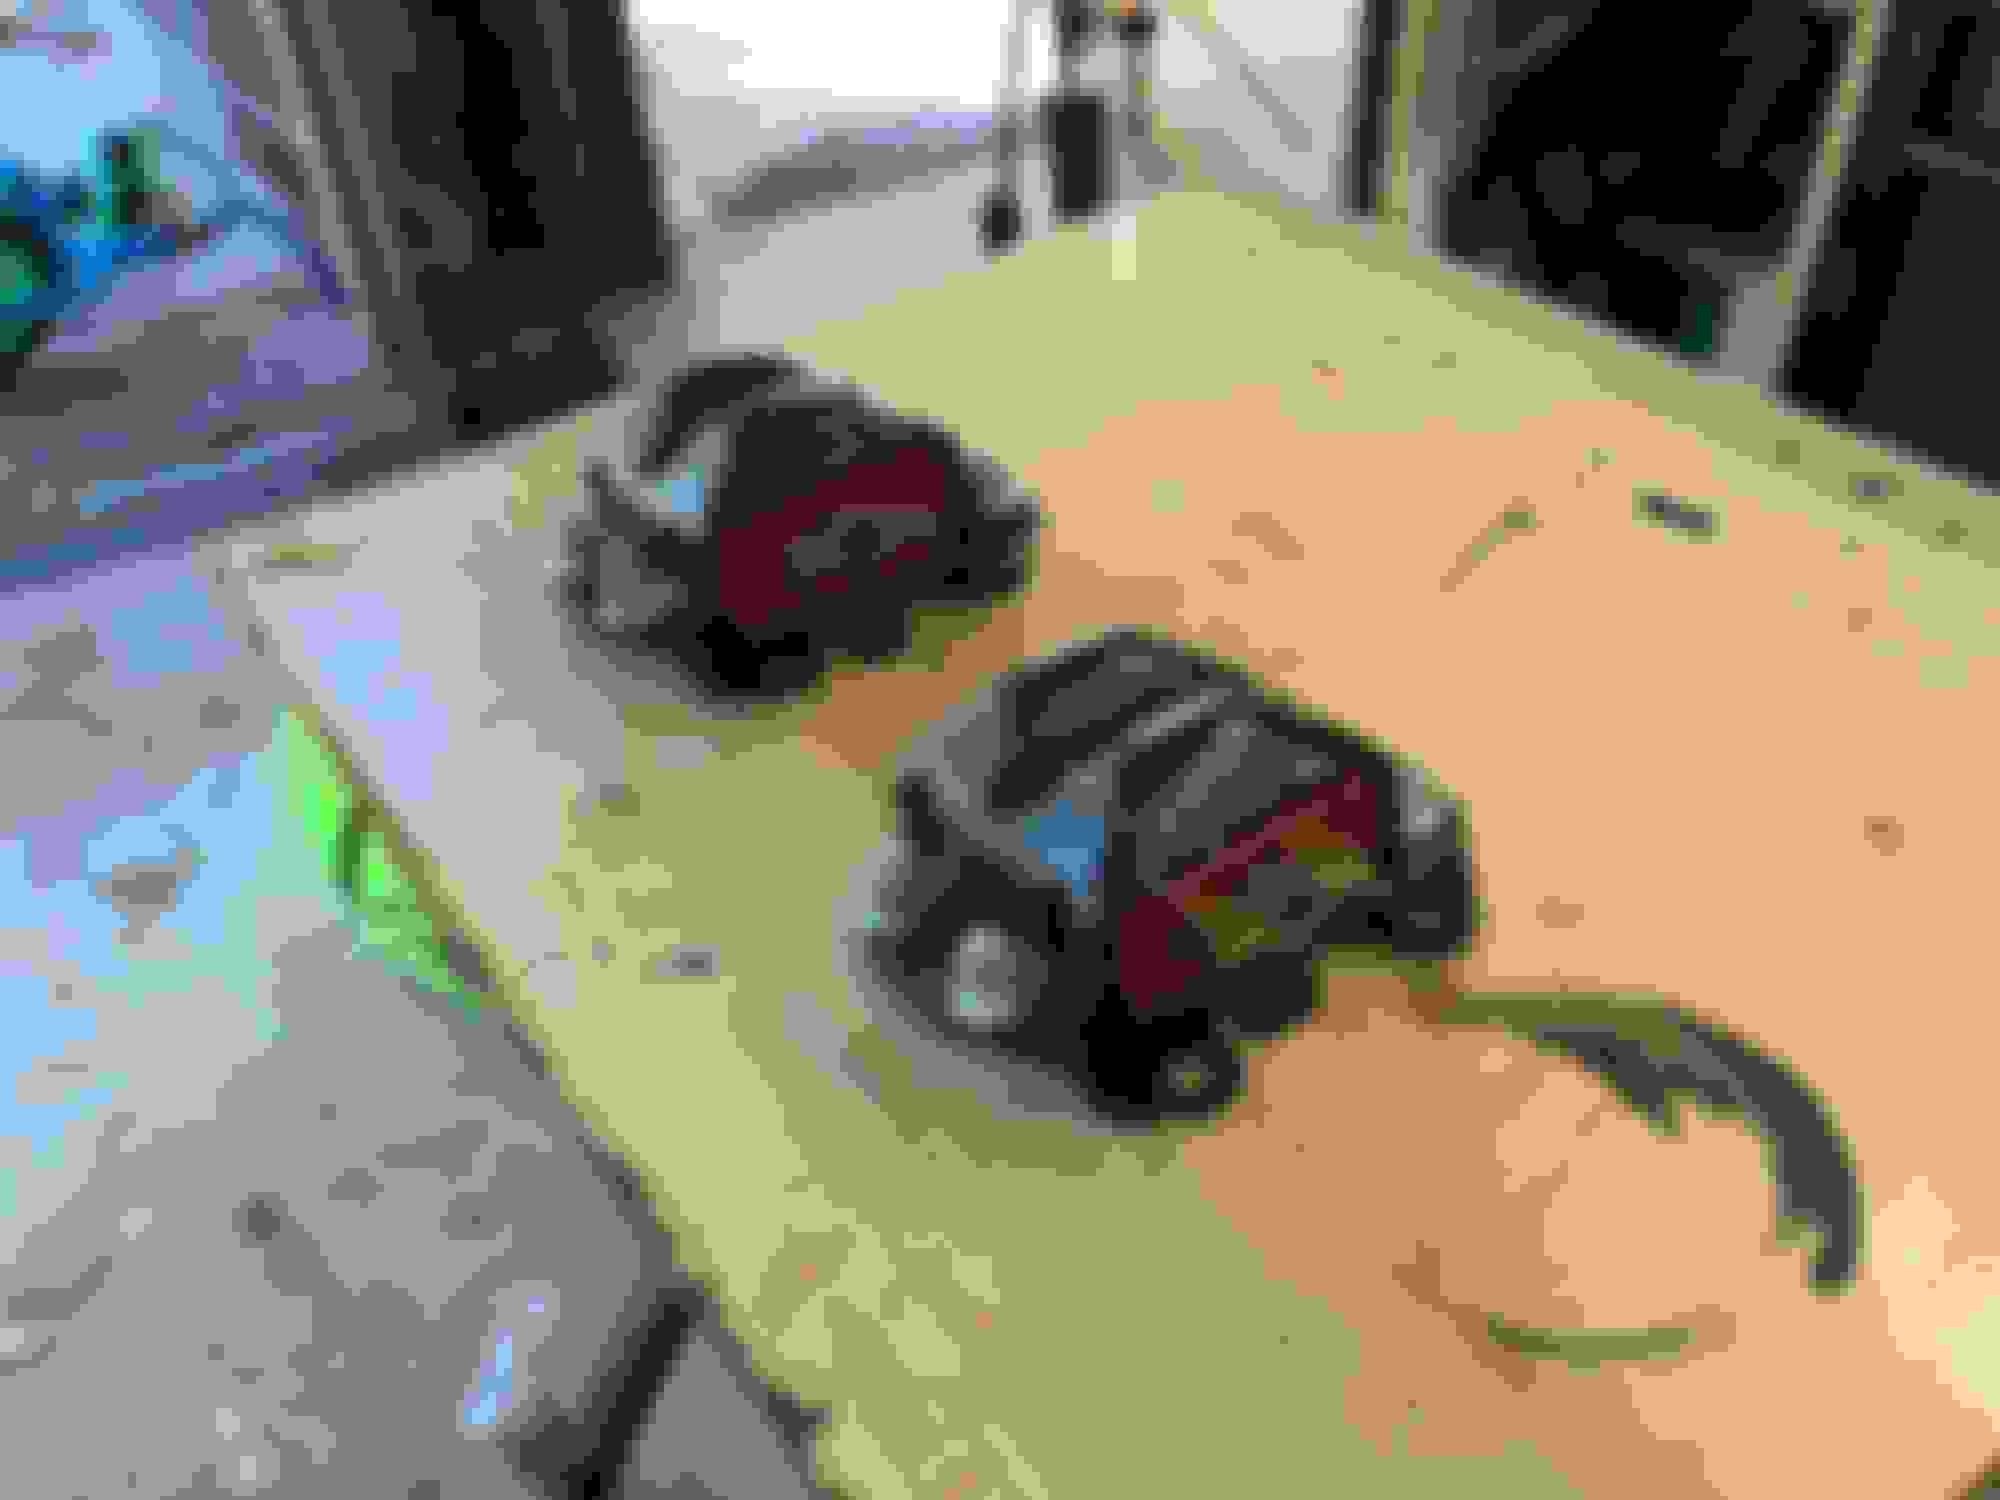
Some small progress today to report. A while back when I dropped the tank and removed the exhaust shields, I noted that they were speckled with rust. I'm sure they would have lasted plenty long in that condition, but I'd rather not reinstall rusty parts if I can stand it.
So I took them and had them sandblasted by a local company in the Conroe area, then sprayed them with 2 coats of
. I found this recommended on some forums by motorcycle guys trying to get originally zinc-coated natural appearance metal to get close to the original look after being cleaned of rust after many years. I'm happy to report that they look much better and should be resistant to rust better than the rest of the car. They don't appear perfectly as original though, probably because of the pitting from the rust and sandblasting. But I think they look great.
Got them reinstalled today after finding the bag of bolts that has evaded me for several months...
Re: 87 GTA/LS1 Swap - Now with (less?) questionable decisions
Originally Posted by 3.1EyeCandy
Some small progress today to report. A while back when I dropped the tank and removed the exhaust shields, I noted that they were speckled with rust. I'm sure they would have lasted plenty long in that condition, but I'd rather not reinstall rusty parts if I can stand it.
So I took them and had them sandblasted by a local company in the Conroe area, then sprayed them with 2 coats of CRC Zinc-It Instant Cold Galvanize Spray then 1 coat of CNC Bright Zinc-It Instant Cold Galvanize Spray. I found this recommended on some forums by motorcycle guys trying to get originally zinc-coated natural appearance metal to get close to the original look after being cleaned of rust after many years. I'm happy to report that they look much better and should be resistant to rust better than the rest of the car. They don't appear perfectly as original though, probably because of the pitting from the rust and sandblasting. But I think they look great.
Got them reinstalled today after finding the bag of bolts that has evaded me for several months...
What is the Plan for the Exhaust System?
As great as your Heat-Shields came out... Do you actually need them anymore (meaning stock Exhaust routing and Muffler placement)?
I LOVE removing every Pound or Ounce of Junk that is no longer needed on these Cars (Third-gens)!
Most all of the Third-Gens that I have built are 3,000 Lbs or lighter (I think ALL have been 3,200 Lbs or Less).
Re: 87 GTA/LS1 Swap - Now with (less?) questionable decisions
Originally Posted by vorteciroc
What is the Plan for the Exhaust System?
As great as your Heat-Shields came out... Do you actually need them anymore (meaning stock Exhaust routing and Muffler placement)?
I LOVE removing every Pound or Ounce of Junk that is no longer needed on these Cars (Third-gens)!
Most all of the Third-Gens that I have built are 3,000 Lbs or lighter (I think ALL have been 3,200 Lbs or Less).
Enjoy!
I've got the full Hooker Blackheart setup for exhaust.
Yesterday's update - finished installing the fuel filler neck, 4th gen tank filler tube, and the associated covers and shrouds. Drilled a hole from the bottom of the car to mount the 4th gen piece. Fit nicely and beats the zip-ties I used last time I did this.
Driver's side without the plastic shroud on the rear side of the wheel well.
Drilled a hole for a bolt in the underside.
Attached the fuel filler neck with a GM bolt, then tightened down the fuel filler hose with a couple hose clamps.
Reinstalled the black surround and fuel door
Reinstalled the plastic shroud (hit with some SEM black paint first, it will look dirty soon enough)
Today's update - we test fit the Hooker Blackheart 1 7/8 headers and they fit nicely. The motor mounts still don't line up all that well, but we didn't spend much time trying to tweak and get it to fit either. After reading the instructions for the Hooker mount pedistals, they indicate that some aftermarket poly mounts cause issues and they recommend their own to be used... so I ordered a set. Who knows, maybe it will help?
Headers are ready to be boxed and sent to Jet-Hot. When they say they fit without modification, they're not kidding.
Re: 87 GTA/LS1 Swap - Now with (less?) questionable decisions
Originally Posted by 3.1EyeCandy
The motor mounts still don't line up all that well, but we didn't spend much time trying to tweak and get it to fit either. After reading the instructions for the Hooker mount pedistals, they indicate that some aftermarket poly mounts cause issues and they recommend their own to be used... so I ordered a set. Who knows, maybe it will help?
Removed the motor mounts and replaced the inserts with the new ones that came from Holley. Both sets look identical in dimension, though the Holley have a slightly different design that uses more poly material than the others. Read the instructions a dozen times and confirmed that I had them installed correctly (both before, and now). Reinstalled and then attempted to get the bolts in. I can manage to get one side in, then the other I can get the bolt through the front but the back won't line up enough to be hammered through. About at my whit's end on this one. It has me curious if this would have lined up out of the engine bay at all. Maybe it's time for a few steps back again. Is it worth getting a set of stock rubber engine mounts to try?
To quote Holley's tech documents on the Blackheart setup:
Originally Posted by Hooker 3rd-gen F-body LS Swap Tech Data
Installation of these mounting brackets requires the use of 1998-2002 4th-gen F-body LS1 engine mounts (stock GM, Anchor, Westar or equivalent brand) or aftermarket poly inserts available from Energy Suspension or Prothane. While poly inserts may be preferable for their function/performance, their installation is widely known, and should be expected to be, difficult.
Re: 87 GTA/LS1 Swap - Now with (less?) questionable decisions
Did some reading and found a post by @toddokyover on ls1tech describing the correct positioning of the mount cages. For me - my mounts are in the correct position (just checked). I'm going to edit his post and repost the pictures here for the benefit of others in the future who may be affected by the mounts being upside down:
Originally Posted by toddoky
Yes the clamshell housing itself, it can be bolted on correctly, or upside-down. Here's a couple of images that show the same mount right-side-up and then upside-down on the same block...the tang of replacement poly inserts can be installed with the correct up-down orientation in either instance, but the metal housing is made with a slight bias towards one end, which shifts the holes through-holes in the inserts further away from each other if the housings are installed upside-down on the block. The last photo here shows a new mount and clearly depicts the tang being away from the stepped end of the housing.
Correct Placement
Upside Down
Factory Original Mount
Lastly, the easy way to tell when your mounts are difficult to take pictures of:
Originally Posted by toddoky
All the aftermarket mounts are made in China and probably come from a few main sources over there. The tab on the Anchor brand mount I have seems to be formed a little askew, which allows the mount to be bolted on in either orientation. The important thing to be aware of is the tab will be towards the front of the engine on the passenger side, and towards the rear of the engine on the driver side when the mounts are correctly installed on the engine.
Last edited by 3.1EyeCandy; Sep 6, 2022 at 11:07 PM.
Re: 87 GTA/LS1 Swap - Now with (less?) questionable decisions
Here are some pictures of the Holley mounts, as well as the previous set of non-Holley inserts and then afterward. These may come in handy if others identify something wrong. At this point though, it seems like the best advice I've seen is to loosen up the mount bolts as well as the cage-to-motor bolts, then see if it can be stabbed in. Finally, tighten the bolts down. Biggest pain with this has to do with ease of access. The controls arms likely need to removed to get decent access from underneath on the K-member and the cage-to-motor bolts will be fairly tight (but doable) as well.
Prior to cage insert change
Prior to cage insert change
Relevant instructions from Holley
Passenger side mount, picture taken from the front, showing the correct tab location.
Passenger side, after I drove the bolt back out by beating a crowbar against the head of the bolt
Re: 87 GTA/LS1 Swap - Now with (less?) questionable decisions
Victory! Bolts are through the motor mounts
Bought a set of factory GM motor mounts (rubber) and changed my approach a bit (most of the following is the same, but I want to give a complete picture for others that struggle with this). When bolting the mounts to the engine, I left the bolts loose by about 3/8" on each side (mount to engine bolts, the pedestal to k-member bolts were tight). I also continued to jack up the back of the transmission and pick up the motor using an engine hoist, which allowed for the motor to be easily moved by hand. Then I lowered the motor down slowly while pushing the motor back until the mounts were within the pedestals, but not resting on them. Used screwdrivers to line up the mounts to the pedestal holes, lowering or raising the hoist as needed. Also used a large pry bar under the mounts to pick up on them or move the engine left or right. Got the first bolt through in the passenger side. Drivers side bolt started okay but the back hole wasn't lining up (same as before). With the rubber mounts, the motor could be moved with a pry bar a bit easier and the hole got almost lined up where it needed to be, but not quite. I took the pry bar and laid on the floor, using it against the motor from the bottom rear until it lined up a little better, then my wife hammered the bolt through. Lastly, lowered the engine and transmission, then snugged the bolts up holding the mounts to the engine.
Some pictures of the GM mounts and the completed state: GM Motor Mounts
Bolts are in!
Some thoughts
I had to remove the Holley mounts and apparently I was pretty rough on them. The poly that was inside the hole tore during my attempt at an install. I'm sure I could have been nicer to them, but was disappointed to see them tear like this. The other poly mounts that I have do not have poly inside the hole, just metal. I don't think this is a ding on the product so much as it is a caution for the installer.
Damaged (during install) Holley Poly Motor Mount
In some small way using rubber motor mounts feels like giving in to a problem and using an inferior part. However, I don't see it that way on the whole. My goals for this car are meager - 1) I'd like it to run under its own power and get out of my garage, 2) it should have as much or more power than a factory 4th gen, and 3) it should be an enjoyable car to drive in the same spirit as the GTA it used to be. As such, rubber mounts are fine by me.
To that end, I ordered a factory transmission mount and drilled the necessary hole in the Hooker crossmember for it (despite what the instructions say, it does not come with the center hole needed for a factory mount).
Modified crossmember bracket to accommodate factory transmission mount, which uses the center hole
Re: 87 GTA/LS1 Swap - Now with (less?) questionable decisions
Small progress today. Update for those interested, and myself later when I try to figure out what I've done
I got the headers back from Jet-Hot (want to reduce underhood temps as much as I can) and decided that it would be wise to make sure everything that will be difficult to get to with the headers installed is taken care of. First up - fuel lines and transmission cooler lines.
Replaced Fuel Line
A while back I bought a custom FGL 8805SS from sstubes.com with a GM 3/8” quick disconnect type flare on one end (followed the pattern set by ala91z28, post #444,https://www.thirdgen.org/forums/ltx-lsx/497781-ls3-engine-swap-9.html). When I went to install it months back, I found that the GM quick disconnect flare was on the wrong end, so had to straighten out the line as best I could, then bend it to fit the car. I got it really close, but ended up putting a small kink in the line near the fuel filter. Yuck.
So I bought another one. This time, had sstubes.com put the GM 3/8" quick disconnect on both ends. This way, there's no way to screw it up. I can either use the flare in the engine bay with a fitting, or cut it off. Got this replacement line put on the car today. Nothing is ever perfect, but it fit quite well and was amenable to some slight adjustments.
Question for the board:with the fuel line now in the factory position, how did you secure it to the car (in the engine bay) AND bend it for use with the LS fuel rail? It's pointed toward the front of the car right now.
Added Transmission Cooler Lines
Back when the car was running (12 years ago?), somehow I either damaged or got rid of the stock transmission cooler lines when I installed the Spohn tubular K-member. At that time, I decided I'd just buy -6 AN fittings for the 4L60E case and run nylon braided lines wherever I wanted. I never did finish that install. In the years since, I've come to value not working on the car and the idea of having a hose-based transmission cooler line swell, leak, or rupture didn't sit well.
So I bought new stainless transmission cooler lines (for a thirgen) from inlinetube.com, along with a bunch of clips to attach the fuel/brake line to the body of the car. I also bought two fittings for the 4L60E (GM 8637742) from RockAuto.com. These are the right thread (NPS not NPT), screw right into the case of the 4L60E, and allow factory thirdgen lines to thread in. After doing a bunch of reading, I removed the AN fittings, carefully removed the teflon tape I used on them 12 years ago from the transmission case threads, and installed the new fittings directly into the case (no crush washer). From what I read, teflon tape should be avoided in hydraulic systems and crush washers are not needed when the mating surface between the fittings is in great shape. Lastly, I torqued the fittings to 28 foot pounds. Then spent 2 minutes installing one of the lines, and 30 minutes installing the other... Then spent quite a bit of time trying to straighten/bend the cooler lines to hug the transmission tighter. Think I got it good enough, but I'll know better when we install the headers.
Hint to myself or others in the future - if the case fitting threads right onto the transmission cooler lines when detached from the case, but is difficult when installed in the case, then it's the angle of the transmission cooler lines. Tweak them a bit to get it as straight as possible into the case fitting, move yourself to better align, and try again. Once I got the angles right, the cooler line threaded right into the case fitting.
Question for the board: the transmission cooler lines hang loose from the transmission to the radiator without any support (routing over the K-member, below the motor mount pedistals). They're bent in such a way as I guess that's fine. Anybody attach them to either the motor or body of the car?
Last edited by 3.1EyeCandy; Oct 12, 2022 at 04:52 PM.


 It's getting to be quite nice working outside, so hopefully it will heat up the forums as well!