
My engine bay (Start to finish) thread

Thread Starter

Joined: Dec 2007
Posts: 1,924
Likes: 12
From: Minnesota
Car: 84 camaro, 88 trans am, 98 camaro
Engine: Modded , stock, LSX modded
Transmission: 700r4, 700r4, t-56
Axle/Gears: 327, 308, 373
Re: My engine bay (Start to finish) thread
.
Last edited by FueledSoul; Jul 24, 2009 at 12:21 AM.
Thread Starter
Joined: Dec 2007
Posts: 1,924
Likes: 12
From: Minnesota
Car: 84 camaro, 88 trans am, 98 camaro
Engine: Modded , stock, LSX modded
Transmission: 700r4, 700r4, t-56
Axle/Gears: 327, 308, 373
Re: My engine bay (Start to finish) thread
So every once in a while i get a PM asking about my engine bay fuel lines so i decided to make a post with the part numbers, prices and the purchase source. I will start with parts from the factory hard lines and compile a list up to the feed on the carb. . .
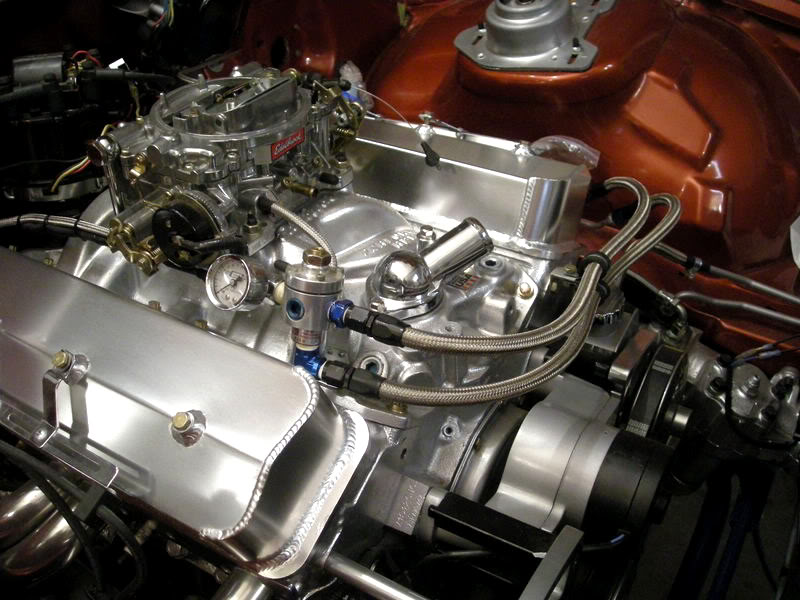
O-rings (NOTE!!!! keep your old o-rings even if they brake take them with you to a auto parts store and match them up with new ones)
Earl's #361-9894DBH # Fuel Injection Female O-Ring Seal 14mm x 1.5 Thread (Jegs $11.99 )
Earl's #361-9894DBJ # Fuel Injection Female O-Ring Seal 16mm x 1.5 Thread (Jegs $11.99 )
Above highlight in red is what you need so you can adapt your new AN fittings and lines
Earl's #361-AT800106 -6AN Ano-Tuff Straight Swivel-Seal Fitting (Jegs $7.99)
Above highlight in blue you'll need 4 of these straight 6AN fittings
Earl's #361-310006 AN Size: -06 (3/8''); 10' Foot Length (Jegs $52.99) - NOTE: You wont need more then 6 feet
Other parts to keep the lines from moving
Insulated Clamps ( under 5 dollars )
made my own mount to run lines (cost of materials)
nuts and bolts ( under 5 dollars )
Earl's #361-982266 90� -6AN to 3/8" AN to NPT adapter (Jegs $9.99)
Earl's #361-981666 Straight -6AN to 3/8" NPT Adapter (Jegs $9.99)
Earl's Performance #593204ERL Internal Allen Head Pipe Plug, 3/8 in. NPT, Aluminum, Blue Anodized, Pair (source Summit racing $6.25)
vacuum line cap ( under 2 dollars )
Ditched Mallory's mount they included made my own (cost of material)
Mallory #4309 Mallory Fuel Pressure Regulator
( Summit racing $84.95)
3/8 threaded pipe ( under 2 dollars)
Mr. Gasket #1561 Analog Fuel Pressure Gauge
(Summit racing $19.95)
Spectre #29883 Single Feed Fuel Line w/Gauge hole for Edelbrock/Carter (auto parts store $13)
So thats my entire engine bay fuel line setup from hard line to carb. All prices are current to date with this post. i didn't pay the exact prices as listed above. also many items can be ordered from one source and anything where i didn't put a source is because it can generally be found at auto parts stores, hardware store etc.
Supreme Member
iTrader: (5)
Joined: Aug 2006
Posts: 2,491
Likes: 6
From: Cleveland, Ohio
Car: 89' IROC-Z
Engine: LO3
Transmission: 700R4
Axle/Gears: 10-Bolt/2.73
Re: My engine bay (Start to finish) thread
I see you went with the fabricated set. Very nice. I actually have the second set you had (Transdapt set) and am mating R&M wire loom separators on the top of them. I bought them for their added room (taller). Mine have a PCV and Breather though.
Everything looks great though. Thanks for pictures as well since I have yet to install my set...haha.
Ill be waiting for more.
Everything looks great though. Thanks for pictures as well since I have yet to install my set...haha.
Ill be waiting for more.
Junior Member
Joined: Feb 2007
Posts: 52
Likes: 0
From: Ventura, California
Car: 1989 IROC-Z
Engine: 5.7 TPI
Transmission: 5 Speed
Re: My engine bay (Start to finish) thread
What a great project! At what point in your life did you say to your self; "One day I'm gonna build a bad a$$ 3rd gen."?


Joined: Jun 2001
Posts: 8,028
Likes: 93
From: DC Metro Area
Car: 87TA 87Form 71Mach1 93FleetWB 04Cum
Re: My engine bay (Start to finish) thread
Looks good...
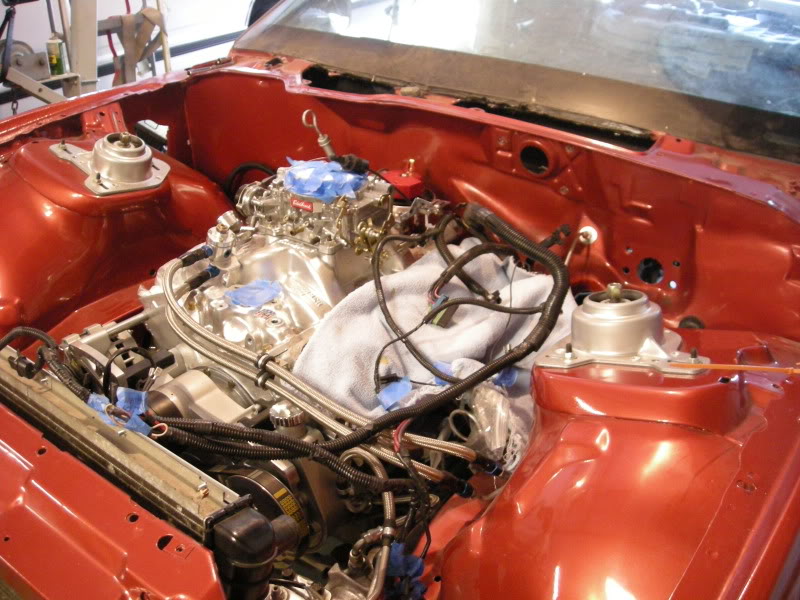
what crank and PS pulley is that? what kind of silver paint are you using?
what crank and PS pulley is that? what kind of silver paint are you using?
Thread Starter
Joined: Dec 2007
Posts: 1,924
Likes: 12
From: Minnesota
Car: 84 camaro, 88 trans am, 98 camaro
Engine: Modded , stock, LSX modded
Transmission: 700r4, 700r4, t-56
Axle/Gears: 327, 308, 373
Re: My engine bay (Start to finish) thread
http://marchperfsales.com/pg63.html
the paint i used depends on where but the brands iv gone with are duplicolor and plasti-kote
Thread Starter
Joined: Dec 2007
Posts: 1,924
Likes: 12
From: Minnesota
Car: 84 camaro, 88 trans am, 98 camaro
Engine: Modded , stock, LSX modded
Transmission: 700r4, 700r4, t-56
Axle/Gears: 327, 308, 373
Re: My engine bay (Start to finish) thread
speaking of sometime i want to get some caps to go over the alt and PS pulleys like these


there is a lot of lilte things i want to replace with nicer looking peaces
there is a lot of lilte things i want to replace with nicer looking peaces
Last edited by FueledSoul; Apr 11, 2009 at 11:56 PM.


Senior Member
Joined: Jun 2008
Posts: 1,298
Likes: 2
From: Norfolk VA
Car: 85 Camaro IROC
Engine: 5.7 TPI
Transmission: 700-R4
Axle/Gears: open rear, 3.42 gears
Re: My engine bay (Start to finish) thread
i dont think that is what he was asking
he was saying: why are your fans pressed flat up against the radiator.
or at least thats what i want to know.
fan shrouds should look like this
http://www.mahaffeymotorsports.com/FanShrouds.htm
there should be a gap of around an inch so that all the air being pulled out can go through the entire radiator, not just an area the size of the fan.
the way you have it set up is going to be a lot less efficient.
i would space the fan shroud out at least an inch. as long as the shroud is still fairly airtight, it will work better than what you have now.
Thread Starter
Joined: Dec 2007
Posts: 1,924
Likes: 12
From: Minnesota
Car: 84 camaro, 88 trans am, 98 camaro
Engine: Modded , stock, LSX modded
Transmission: 700r4, 700r4, t-56
Axle/Gears: 327, 308, 373
Re: My engine bay (Start to finish) thread
There is a inch of gap between the shroud and the rad
Thread Starter
Joined: Dec 2007
Posts: 1,924
Likes: 12
From: Minnesota
Car: 84 camaro, 88 trans am, 98 camaro
Engine: Modded , stock, LSX modded
Transmission: 700r4, 700r4, t-56
Axle/Gears: 327, 308, 373
Re: My engine bay (Start to finish) thread
.
Last edited by FueledSoul; Jun 19, 2009 at 02:29 AM.

TGO Supporter
iTrader: (1)
Joined: May 2002
Posts: 2,480
Likes: 2
From: El Paso, Texas
Car: 1987 IROC Z
Engine: 350 TPI L98 block
Transmission: 700R4
Re: My engine bay (Start to finish) thread
Keep em comin man, adding a gallery just on your build alone. Awesome stuff.
Thread Starter
Joined: Dec 2007
Posts: 1,924
Likes: 12
From: Minnesota
Car: 84 camaro, 88 trans am, 98 camaro
Engine: Modded , stock, LSX modded
Transmission: 700r4, 700r4, t-56
Axle/Gears: 327, 308, 373
Re: My engine bay (Start to finish) thread
thanks man! where is that gallery at?
Thread Starter
Joined: Dec 2007
Posts: 1,924
Likes: 12
From: Minnesota
Car: 84 camaro, 88 trans am, 98 camaro
Engine: Modded , stock, LSX modded
Transmission: 700r4, 700r4, t-56
Axle/Gears: 327, 308, 373
Re: My engine bay (Start to finish) thread
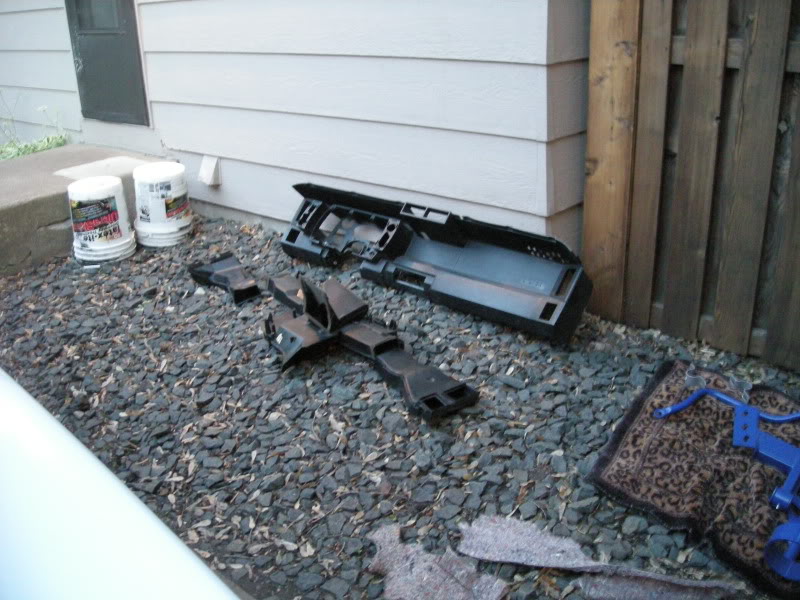
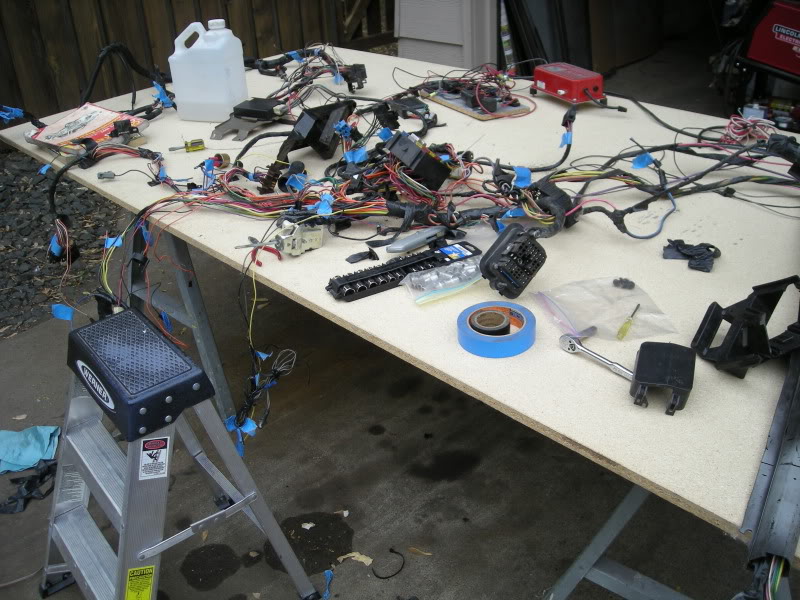
The wiring in this car has pissed me off for years! Its butchered to hell from the pervius owner. Over time i had blown fuses, shorts, sounds and smells electricity you name it. i was going to wait till after i was done with the body work, paint and interior and take it all out to re-do it. i thoght about it one night when i was bored and i decided to gutted it all out. took about a half a hour to get the dash, steering column and wires out. Im so glade i did it!
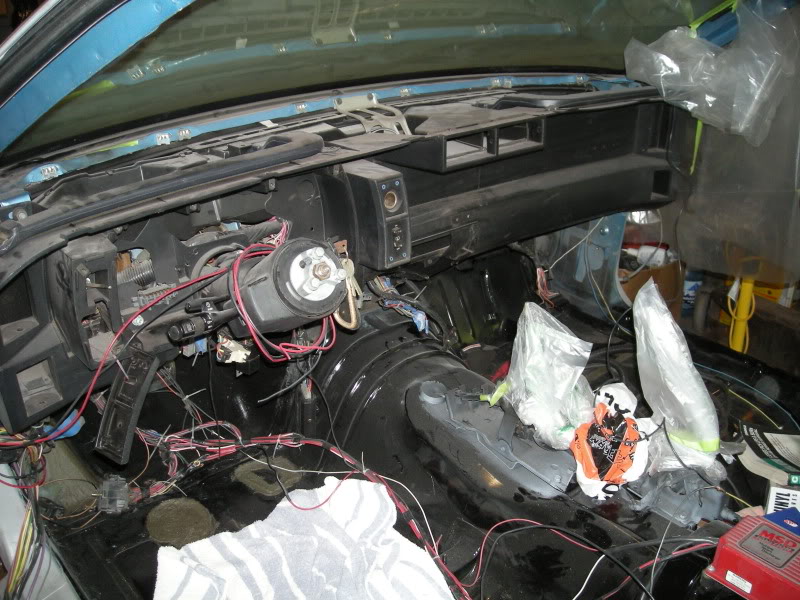
This is how i ran the engine wires, right under the steering column i didn't know where i wanted to run them when i started to shave the firewall this was just suppose to be temporary, worked ok but inside the car was a different story so I'm running them somewhere else and redoing the engine harness
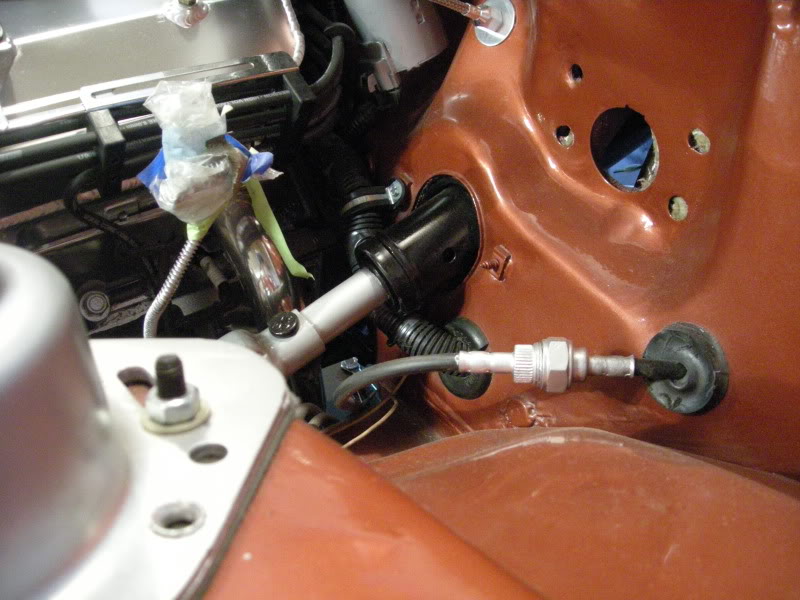
This is how i ran the engine wires, right under the steering column i didn't know where i wanted to run them when i started to shave the firewall this was just suppose to be temporary, worked ok but inside the car was a different story so I'm running them somewhere else and redoing the engine harness
Last edited by FueledSoul; Jul 23, 2009 at 10:18 PM.
Thread Starter
Joined: Dec 2007
Posts: 1,924
Likes: 12
From: Minnesota
Car: 84 camaro, 88 trans am, 98 camaro
Engine: Modded , stock, LSX modded
Transmission: 700r4, 700r4, t-56
Axle/Gears: 327, 308, 373
Re: My engine bay (Start to finish) thread
i spent a few hours trying to go through the harness what a hack job! who ever put this style harness in my car really had no idea what they where doing no wounder why i was goin through electrical problems. the person who put this in. . . tapeing wires together F-ing classic!
Last edited by FueledSoul; Jun 18, 2009 at 08:24 PM.
Thread Starter
Joined: Dec 2007
Posts: 1,924
Likes: 12
From: Minnesota
Car: 84 camaro, 88 trans am, 98 camaro
Engine: Modded , stock, LSX modded
Transmission: 700r4, 700r4, t-56
Axle/Gears: 327, 308, 373
Re: My engine bay (Start to finish) thread
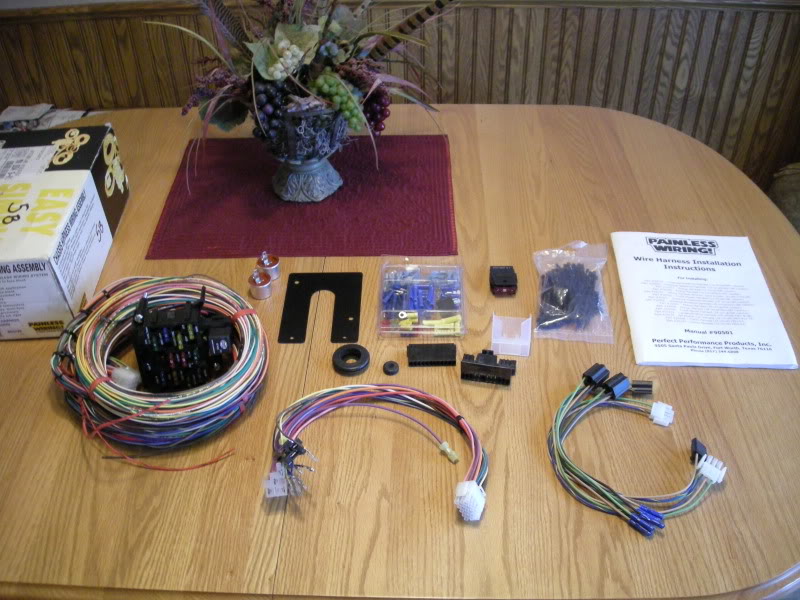
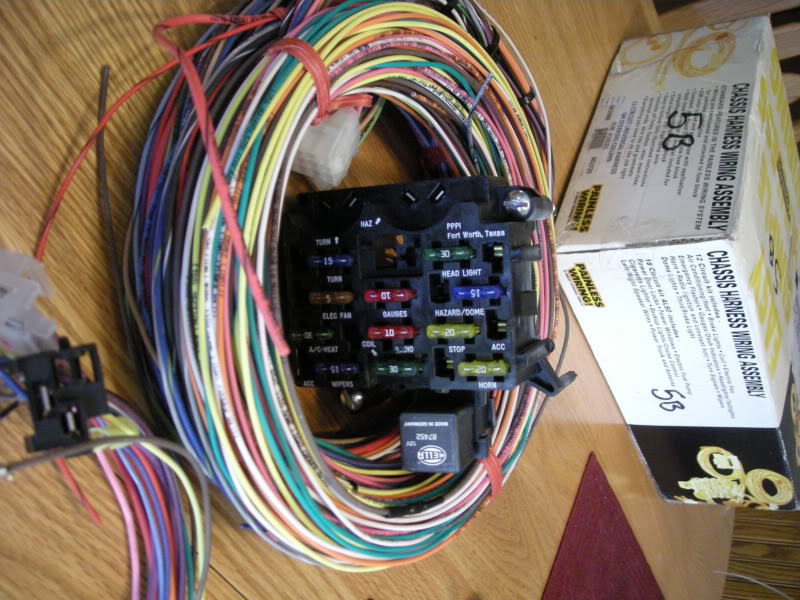
So i decided not to waste my time with this entire harness. i went with a painless kit Part# 10101 12 Circuit Universal / Streetrod Harness / GM Keyed Column. heres the link to the kit.
http://www.painlesswiring.com/webcat...Street Machine
this should save time and make things easy and i wont have to worrie about the electrical problems. i got it half off too witch makes me that much happyer
http://www.painlesswiring.com/webcat...Street Machine
this should save time and make things easy and i wont have to worrie about the electrical problems. i got it half off too witch makes me that much happyer
Thread Starter
Joined: Dec 2007
Posts: 1,924
Likes: 12
From: Minnesota
Car: 84 camaro, 88 trans am, 98 camaro
Engine: Modded , stock, LSX modded
Transmission: 700r4, 700r4, t-56
Axle/Gears: 327, 308, 373
Re: My engine bay (Start to finish) thread
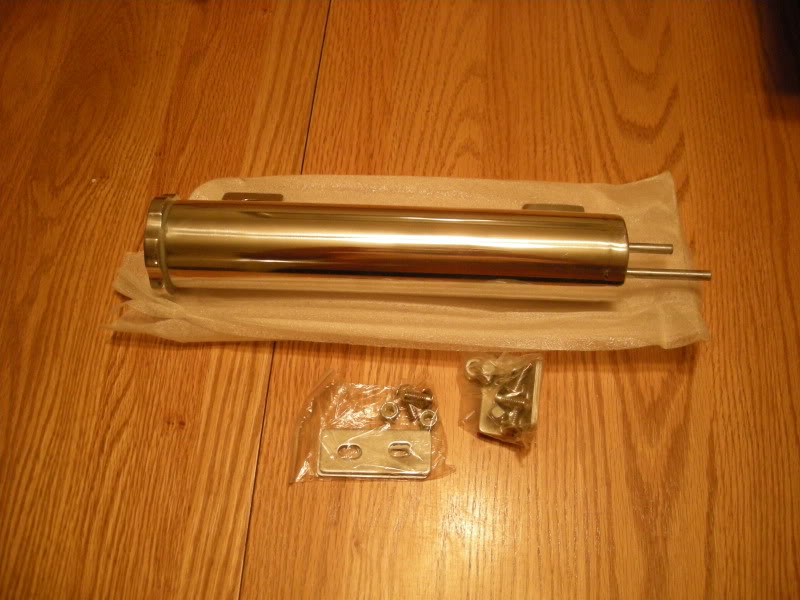
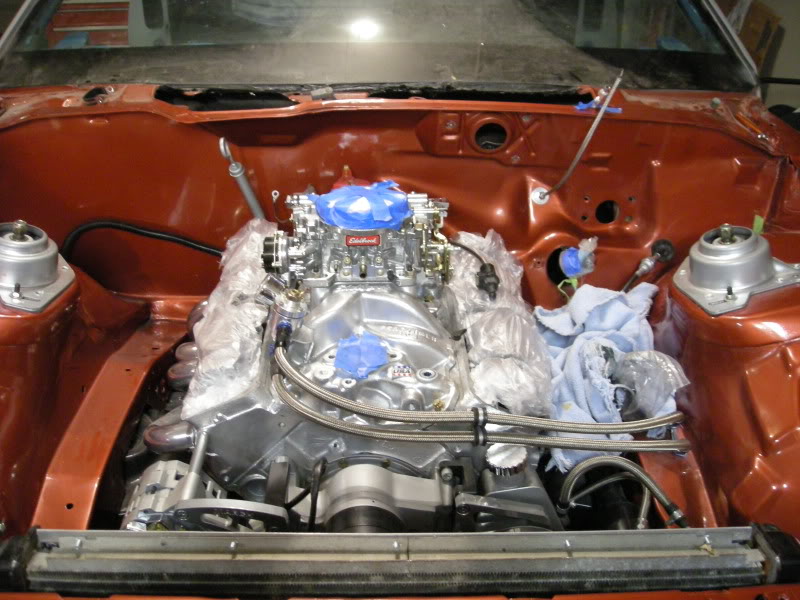
i also orderd a ton of parts to get the engine done! finealy! i will post pic of the stuff i got later tonight when i have some more time
Thread Starter
Joined: Dec 2007
Posts: 1,924
Likes: 12
From: Minnesota
Car: 84 camaro, 88 trans am, 98 camaro
Engine: Modded , stock, LSX modded
Transmission: 700r4, 700r4, t-56
Axle/Gears: 327, 308, 373
Re: My engine bay (Start to finish) thread
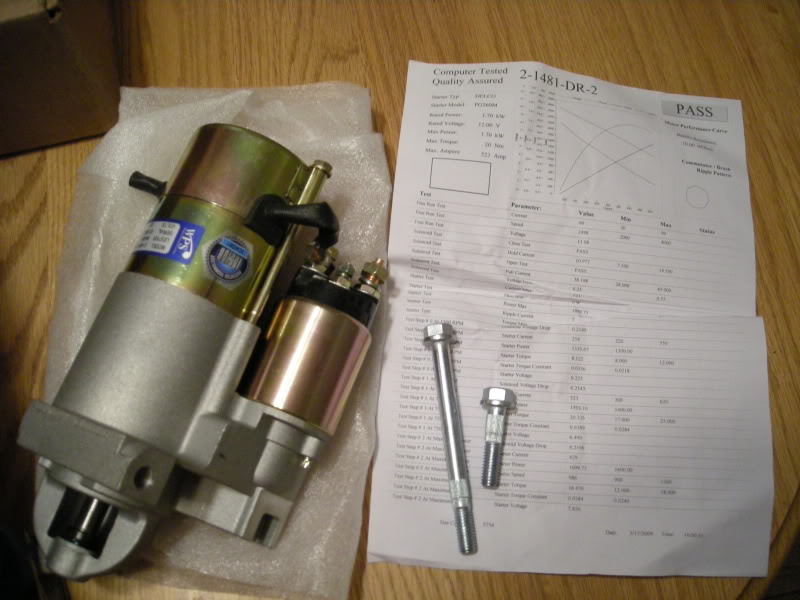
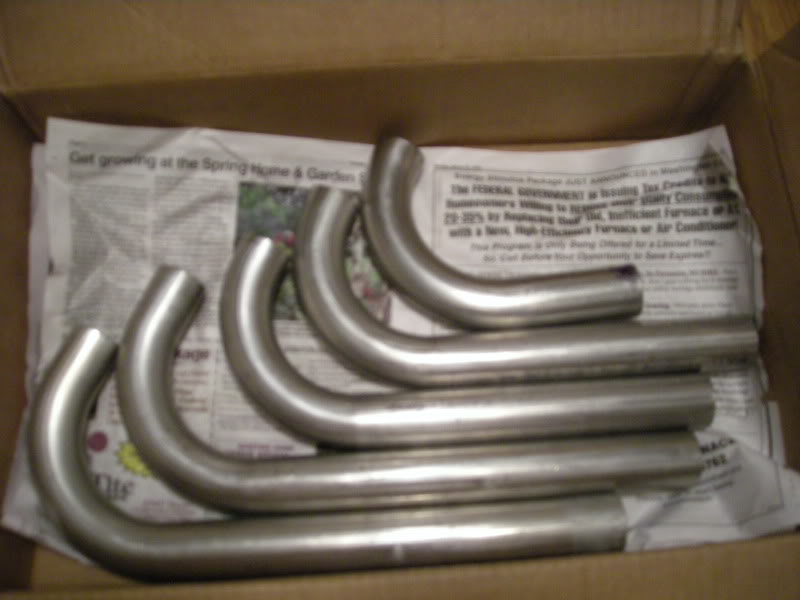
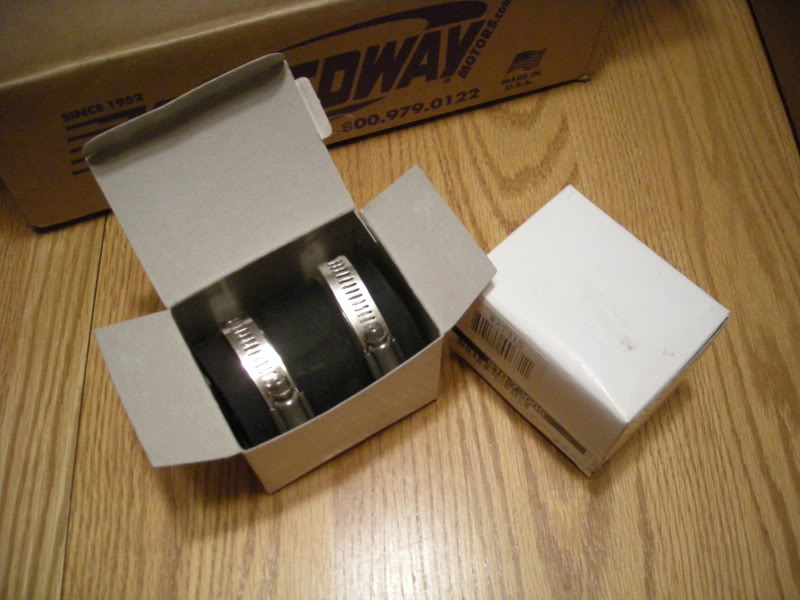
Here is some stuff i got so far . . more stuff will be coming in next week . . .
temporary airfilter
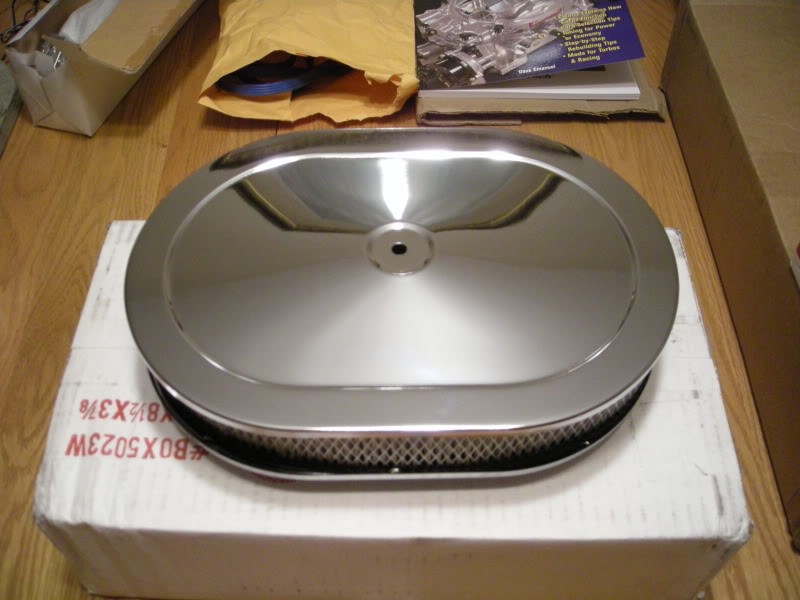
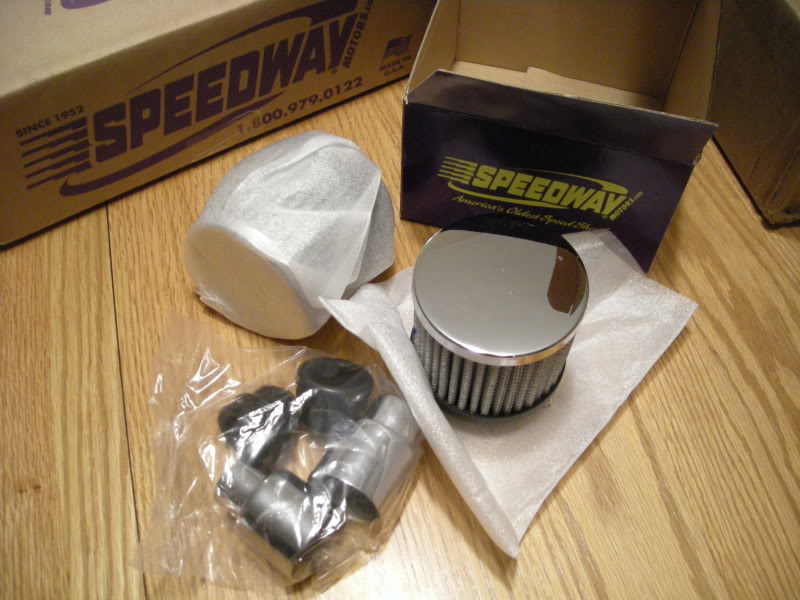
temporary airfilter
Last edited by FueledSoul; Jun 19, 2009 at 02:30 AM.
Thread Starter
Joined: Dec 2007
Posts: 1,924
Likes: 12
From: Minnesota
Car: 84 camaro, 88 trans am, 98 camaro
Engine: Modded , stock, LSX modded
Transmission: 700r4, 700r4, t-56
Axle/Gears: 327, 308, 373
Re: My engine bay (Start to finish) thread
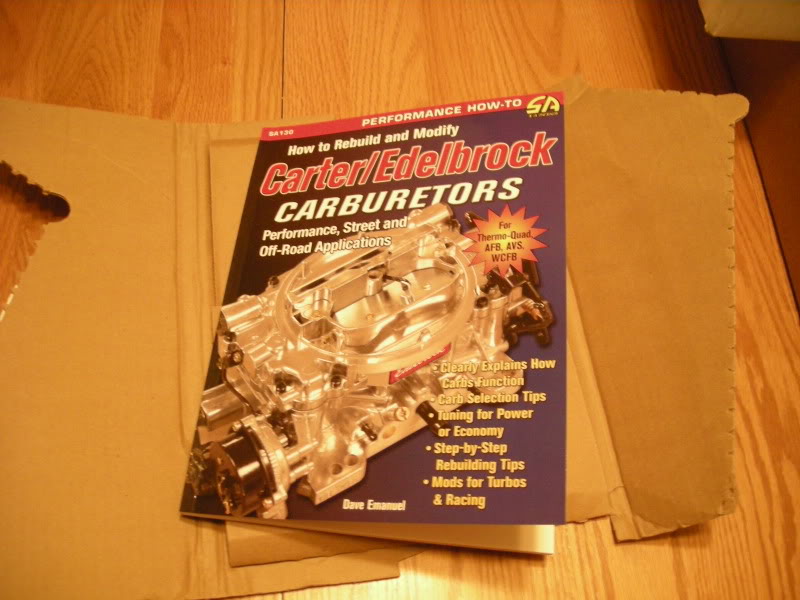
iv always wanted to buy and sit on my own time and read this book i found it online new for half the cost of the price on the back of the cover

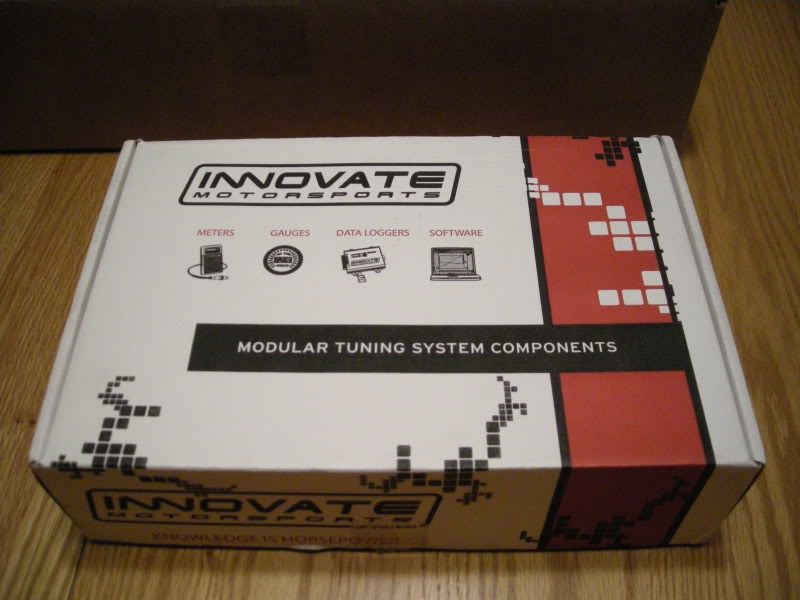
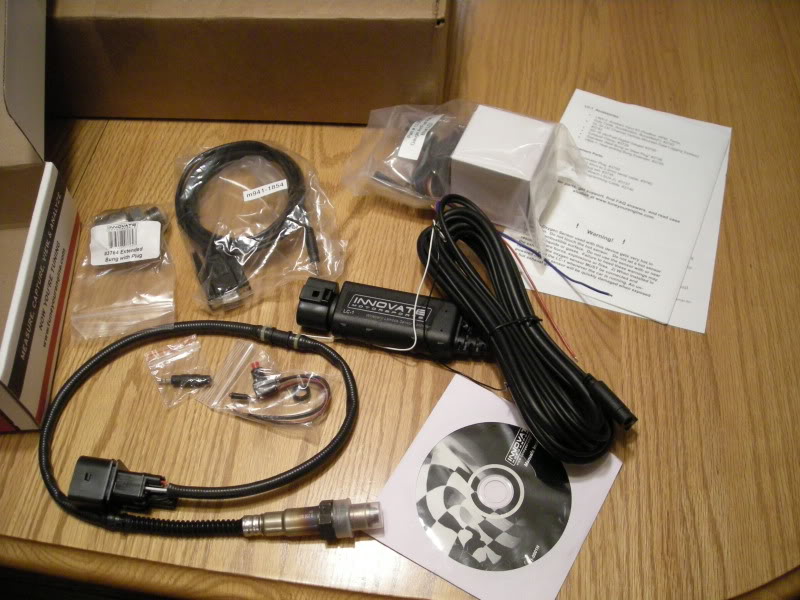
innovate wide band 02 kit. just FYI the bung that comes in this kit i wont be using since im running a 100% stainless steel exhuste so i have to get some stainless bungs if anyway wants to know off hand the bung in these kits are M18 X 1.5.
Last edited by FueledSoul; Jun 19, 2009 at 02:14 AM.
Thread Starter
Joined: Dec 2007
Posts: 1,924
Likes: 12
From: Minnesota
Car: 84 camaro, 88 trans am, 98 camaro
Engine: Modded , stock, LSX modded
Transmission: 700r4, 700r4, t-56
Axle/Gears: 327, 308, 373
Re: My engine bay (Start to finish) thread
Thanks to members here at TGO that have given me great deals and bought parts from!

Last edited by FueledSoul; Jun 19, 2009 at 02:26 AM.
Thread Starter
Joined: Dec 2007
Posts: 1,924
Likes: 12
From: Minnesota
Car: 84 camaro, 88 trans am, 98 camaro
Engine: Modded , stock, LSX modded
Transmission: 700r4, 700r4, t-56
Axle/Gears: 327, 308, 373
Re: My engine bay (Start to finish) thread
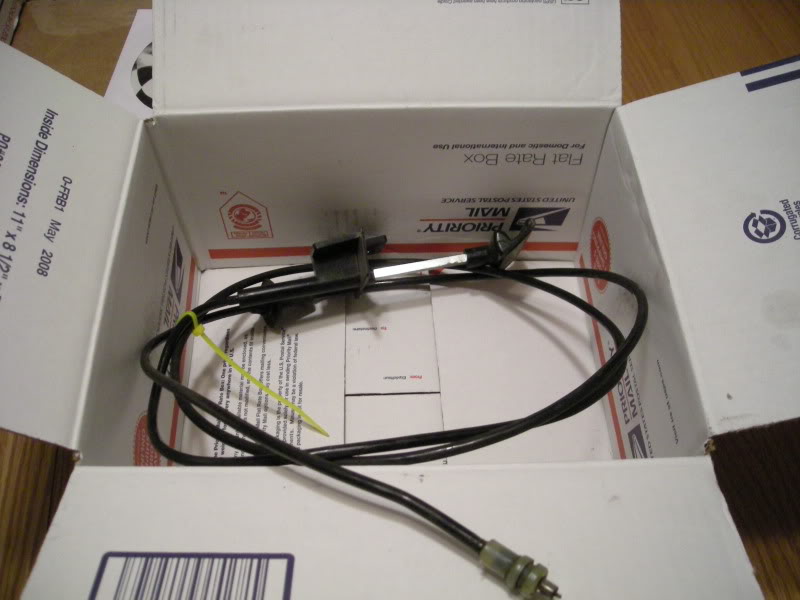
i found and pulled this at a parts yard for $10 bucks
Thread Starter
Joined: Dec 2007
Posts: 1,924
Likes: 12
From: Minnesota
Car: 84 camaro, 88 trans am, 98 camaro
Engine: Modded , stock, LSX modded
Transmission: 700r4, 700r4, t-56
Axle/Gears: 327, 308, 373
Re: My engine bay (Start to finish) thread
feels like im going backwards . . .
i should be hammering out alot in the bay with in the next 2 weeks and have it 100% driveabile
another thing i want to adress is the linkage and brakets im likely going to buy some aluminum plate and make my own stuff. i also plan to get a nice looking kickdown with out paying lokar prices!
anyway. . .
so im close! once my painless kit comes i should be in business. in the mean time i will put together a new engine harness, fuse and relay board
Member
iTrader: (5)
Joined: Jul 2008
Posts: 254
Likes: 0
From: Michigan, West Bloomfield
Car: 84 z28, 86 irocz
Engine: LS6, 305 TPI
Transmission: TH350, T56
Axle/Gears: 3.73, 4.10
Re: My engine bay (Start to finish) thread
Dont even bother putting the heater/ac duct work back in the dash, Im welding in plates over my firewall (clean smooth look) and i took out all the wireing heatercore, etc eveything that had to do with the heater or ac. the dash is like empty now lol. And I have been cleaning all the wiring up as well. and the guy was a moron as well HE USED HOUSEING cord like if you were to cut the cord of your lamp and use it. at least you didnt have any of that!
Thread Starter
Joined: Dec 2007
Posts: 1,924
Likes: 12
From: Minnesota
Car: 84 camaro, 88 trans am, 98 camaro
Engine: Modded , stock, LSX modded
Transmission: 700r4, 700r4, t-56
Axle/Gears: 327, 308, 373
Thread Starter
Joined: Dec 2007
Posts: 1,924
Likes: 12
From: Minnesota
Car: 84 camaro, 88 trans am, 98 camaro
Engine: Modded , stock, LSX modded
Transmission: 700r4, 700r4, t-56
Axle/Gears: 327, 308, 373
Re: My engine bay (Start to finish) thread
Dont even bother putting the heater/ac duct work back in the dash, Im welding in plates over my firewall (clean smooth look) and i took out all the wireing heatercore, etc eveything that had to do with the heater or ac. the dash is like empty now lol. And I have been cleaning all the wiring up as well. and the guy was a moron as well HE USED HOUSEING cord like if you were to cut the cord of your lamp and use it. at least you didnt have any of that!

Member
iTrader: (5)
Joined: Jul 2008
Posts: 254
Likes: 0
From: Michigan, West Bloomfield
Car: 84 z28, 86 irocz
Engine: LS6, 305 TPI
Transmission: TH350, T56
Axle/Gears: 3.73, 4.10
Re: My engine bay (Start to finish) thread
Thread Starter
Joined: Dec 2007
Posts: 1,924
Likes: 12
From: Minnesota
Car: 84 camaro, 88 trans am, 98 camaro
Engine: Modded , stock, LSX modded
Transmission: 700r4, 700r4, t-56
Axle/Gears: 327, 308, 373
Member
iTrader: (5)
Joined: Jul 2008
Posts: 254
Likes: 0
From: Michigan, West Bloomfield
Car: 84 z28, 86 irocz
Engine: LS6, 305 TPI
Transmission: TH350, T56
Axle/Gears: 3.73, 4.10
Re: My engine bay (Start to finish) thread
yeah idk you need something that takes out the moisture to make a defroster work like a ac unit. A fan usualy doesnt work.
Thread Starter
Joined: Dec 2007
Posts: 1,924
Likes: 12
From: Minnesota
Car: 84 camaro, 88 trans am, 98 camaro
Engine: Modded , stock, LSX modded
Transmission: 700r4, 700r4, t-56
Axle/Gears: 327, 308, 373
Re: My engine bay (Start to finish) thread
agin. . . not even to that point yet
Member
iTrader: (5)
Joined: Jul 2008
Posts: 254
Likes: 0
From: Michigan, West Bloomfield
Car: 84 z28, 86 irocz
Engine: LS6, 305 TPI
Transmission: TH350, T56
Axle/Gears: 3.73, 4.10
Re: My engine bay (Start to finish) thread
Yeah im definatly interested, Im about to put ac back on my iroc because i hate when it rains and is hot out, and it fogs all up, really is annoying. But keep up the good work, i cant wait to see what your finished product will look like, The color is awsome and I like the engine bay.
Thread Starter
Joined: Dec 2007
Posts: 1,924
Likes: 12
From: Minnesota
Car: 84 camaro, 88 trans am, 98 camaro
Engine: Modded , stock, LSX modded
Transmission: 700r4, 700r4, t-56
Axle/Gears: 327, 308, 373
Re: My engine bay (Start to finish) thread
Yeah im definatly interested, Im about to put ac back on my iroc because i hate when it rains and is hot out, and it fogs all up, really is annoying. But keep up the good work, i cant wait to see what your finished product will look like, The color is awsome and I like the engine bay.
Senior Member
Joined: Jun 2008
Posts: 1,298
Likes: 2
From: Norfolk VA
Car: 85 Camaro IROC
Engine: 5.7 TPI
Transmission: 700-R4
Axle/Gears: open rear, 3.42 gears
Re: My engine bay (Start to finish) thread
my defroster works with no ac...
if the moisture is on the inside, i just turn it on full blast and it seems to work pretty well.
if its on the outside, thats what wipers are for.
looking really good man.
wanna do mine next?
ill buy you a beer when you are done ok?
if the moisture is on the inside, i just turn it on full blast and it seems to work pretty well.
if its on the outside, thats what wipers are for.
looking really good man.
wanna do mine next?
ill buy you a beer when you are done ok?
Member
iTrader: (5)
Joined: Jul 2008
Posts: 254
Likes: 0
From: Michigan, West Bloomfield
Car: 84 z28, 86 irocz
Engine: LS6, 305 TPI
Transmission: TH350, T56
Axle/Gears: 3.73, 4.10
Re: My engine bay (Start to finish) thread
my defroster works with no ac...
if the moisture is on the inside, i just turn it on full blast and it seems to work pretty well.
if its on the outside, thats what wipers are for.
looking really good man.
wanna do mine next?
ill buy you a beer when you are done ok?
if the moisture is on the inside, i just turn it on full blast and it seems to work pretty well.
if its on the outside, thats what wipers are for.
looking really good man.
wanna do mine next?
ill buy you a beer when you are done ok?
Well just driving home it was really hot and humid. and my widshield started to fog up, and I turned on the defroster(heat) made it worse, then cold and did nothing.
Thread Starter
Joined: Dec 2007
Posts: 1,924
Likes: 12
From: Minnesota
Car: 84 camaro, 88 trans am, 98 camaro
Engine: Modded , stock, LSX modded
Transmission: 700r4, 700r4, t-56
Axle/Gears: 327, 308, 373

Thread Starter
Joined: Dec 2007
Posts: 1,924
Likes: 12
From: Minnesota
Car: 84 camaro, 88 trans am, 98 camaro
Engine: Modded , stock, LSX modded
Transmission: 700r4, 700r4, t-56
Axle/Gears: 327, 308, 373
Re: My engine bay (Start to finish) thread
A few other parts came in today one of them being my painless wiring harness. . . After looking at it and reading the booklet im so glade i went this route! guess there's a reason there called painless. Now i will have a more organized harness. I paln to mark and labble all the wires like were they go to etc. I still have to make a new board for the engine ( fuses, relays, etc.) The engine harness i will be using weatherpack connectors at the fire wall so i can disconnect the engine harness quick from the main board makeing it easyer to pull a engine and take things off it later. Oh i also found that boating marine electronics has
alot of net stuff that can be used in automotive applications. The painless kit i bought only has the basic necessities. I will have to come up with a board if i run power windows locks and whatever else i want to run but that should be pretty straight forward and easy to do.
alot of net stuff that can be used in automotive applications. The painless kit i bought only has the basic necessities. I will have to come up with a board if i run power windows locks and whatever else i want to run but that should be pretty straight forward and easy to do.
Last edited by FueledSoul; Jun 22, 2009 at 06:09 PM.
Joined: Nov 2008
Posts: 59
Likes: 0
From: Mankato, MN
Car: 1989 Camaro RS
Engine: 305 TBI L03
Transmission: TH700R4 Corvette servo
Axle/Gears: 10Bolt 2.73
Re: My engine bay (Start to finish) thread
wow, i know what im going to do if i ever have to go into detail on wiring, like u said the name says it all, plus the pannel looks like it should b in the car not an add on that looks cheap, i like it
Member
Joined: Jul 1999
Posts: 324
Likes: 1
From: Omaha, NE
Car: Vert IROC Camaro
Engine: 355ci
Transmission: T-5
Axle/Gears: 9-bolt w/3.45s
Re: My engine bay (Start to finish) thread
FueledSoul, the amount of work that you've put into your car is incredible!
Keep up the good work and keep us posted!
Keep up the good work and keep us posted!
Senior Member
iTrader: (7)
Joined: Dec 2007
Posts: 618
Likes: 0
From: Williamstown, NJ
Car: '98 Mustang GT
Engine: '03 4.6L
Transmission: T45
Axle/Gears: DK
Re: My engine bay (Start to finish) thread
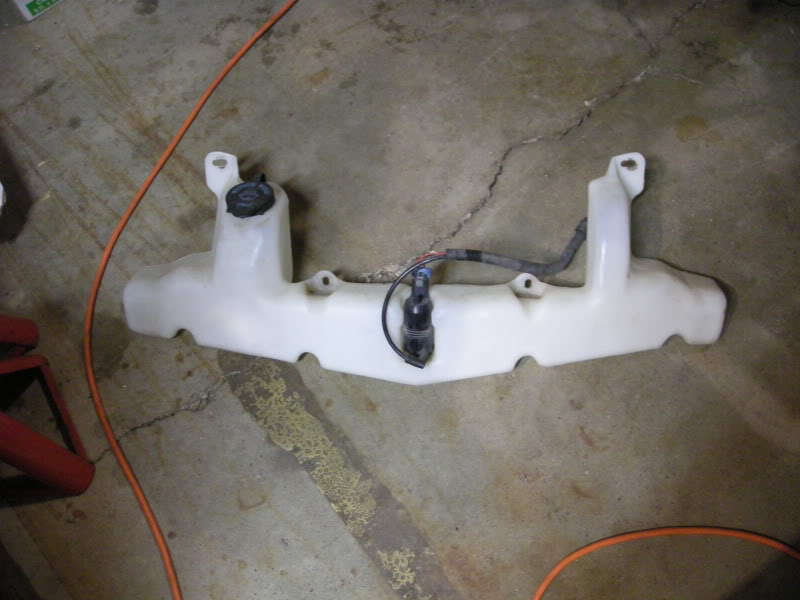
Did you get the washer reservoir mounted? If so, do you have pics?
Member
iTrader: (5)
Joined: Jul 2008
Posts: 254
Likes: 0
From: Michigan, West Bloomfield
Car: 84 z28, 86 irocz
Engine: LS6, 305 TPI
Transmission: TH350, T56
Axle/Gears: 3.73, 4.10
Re: My engine bay (Start to finish) thread
Ok Im doing the same thing with the firewall (as far as the old heater/ac holes). Im only at the point where I have welded the plates in. And to make it look better im am of course going to have to use filler. But i am concerned from the heat/body flex, etc that the bondo will crack. But I see you did the same thing?
Member
Joined: Jul 2009
Posts: 123
Likes: 0
From: Lebanon, Pennsylvania
Car: 1984 Berlinetta,'82 and '86 Camaro
Engine: Rebuilt 350
Transmission: Automatic. =[
Axle/Gears: Stock
Re: My Camaro (Start to finsh) thread
Wow... I really need to do that as well... Now if I had half the amount of patience you had I might get somewhere.
Looks Great Man.
Looks Great Man.

Supreme Member
iTrader: (3)
Joined: Jun 2009
Posts: 2,350
Likes: 3
From: Mid West
Car: '87 Camaro
Engine: '92 Carb'd 350
Transmission: 700r4
Axle/Gears: factory stock
Re: My engine bay (Start to finish) thread
This is awsome-- My only ques so far is how many tools have flown across the garage? LOLOL Thanks for posting all this! Inspiring to say the least. GOOD LUCK!!
Junior Member
Joined: May 2009
Posts: 12
Likes: 0
From: Fort Campbell, KY
Car: '91 RS
Engine: 350
Transmission: 700r4
Axle/Gears: 3.23
Re: My engine bay (Start to finish) thread
(jaw hits floor) Wow... FueledSoul that's amazing. Beautiful work. Keep it up and keep us posted.
Thread Starter
Joined: Dec 2007
Posts: 1,924
Likes: 12
From: Minnesota
Car: 84 camaro, 88 trans am, 98 camaro
Engine: Modded , stock, LSX modded
Transmission: 700r4, 700r4, t-56
Axle/Gears: 327, 308, 373
Re: My engine bay (Start to finish) thread
soon. I jumped ship and iv been working on the underside of the car i will be making my way back to the engine bay later this week. . .i
Thread Starter
Joined: Dec 2007
Posts: 1,924
Likes: 12
From: Minnesota
Car: 84 camaro, 88 trans am, 98 camaro
Engine: Modded , stock, LSX modded
Transmission: 700r4, 700r4, t-56
Axle/Gears: 327, 308, 373
Thread Starter
Joined: Dec 2007
Posts: 1,924
Likes: 12
From: Minnesota
Car: 84 camaro, 88 trans am, 98 camaro
Engine: Modded , stock, LSX modded
Transmission: 700r4, 700r4, t-56
Axle/Gears: 327, 308, 373
Re: My engine bay (Start to finish) thread
Thread Starter
Joined: Dec 2007
Posts: 1,924
Likes: 12
From: Minnesota
Car: 84 camaro, 88 trans am, 98 camaro
Engine: Modded , stock, LSX modded
Transmission: 700r4, 700r4, t-56
Axle/Gears: 327, 308, 373
Re: My engine bay (Start to finish) thread
Ok Im doing the same thing with the firewall (as far as the old heater/ac holes). Im only at the point where I have welded the plates in. And to make it look better im am of course going to have to use filler. But i am concerned from the heat/body flex, etc that the bondo will crack. But I see you did the same thing?
as far as flex bodyfillers have some flexabitly but not much there are many places iv seen body filler go that are questionable areas that would flex under high stress. the firewall for example i woundn't worrie about think about whats close to the firewall the windshield so. . . yea. what i did is i used a short haired fibberglass body filler as the main filler for most of all the areas this filler is alot harder to sand and get consistently smooth so i used a skim coat of body filler over it to fill in pin holes and imperfections
Thread Starter
Joined: Dec 2007
Posts: 1,924
Likes: 12
From: Minnesota
Car: 84 camaro, 88 trans am, 98 camaro
Engine: Modded , stock, LSX modded
Transmission: 700r4, 700r4, t-56
Axle/Gears: 327, 308, 373
Thread Starter
Joined: Dec 2007
Posts: 1,924
Likes: 12
From: Minnesota
Car: 84 camaro, 88 trans am, 98 camaro
Engine: Modded , stock, LSX modded
Transmission: 700r4, 700r4, t-56
Axle/Gears: 327, 308, 373