
FueledSoul
Supreme Member
close

Dec 7, 2024
Quote:
Thanks man! Originally Posted by UnSouled_RS
(jaw hits floor) Wow... FueledSoul that's amazing. Beautiful work. Keep it up and keep us posted. 
FueledSoul
Supreme Member
close
Dec 7, 2024
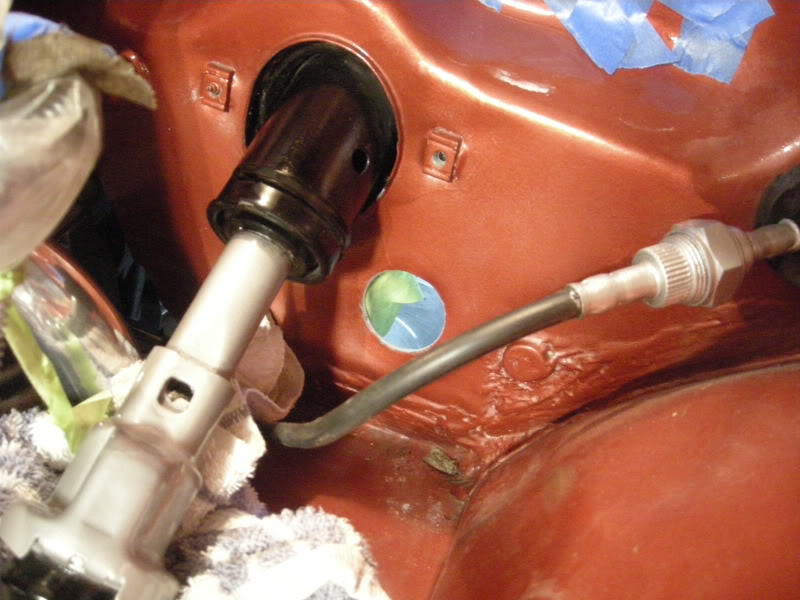
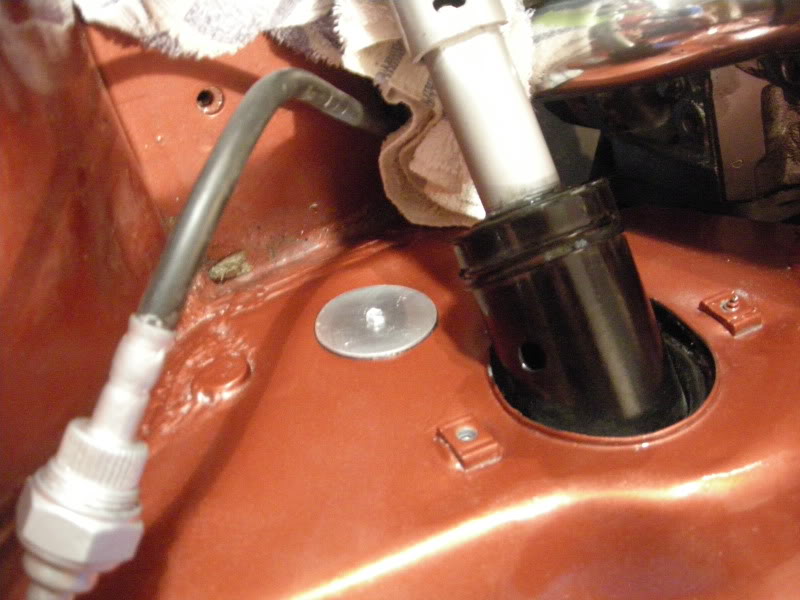
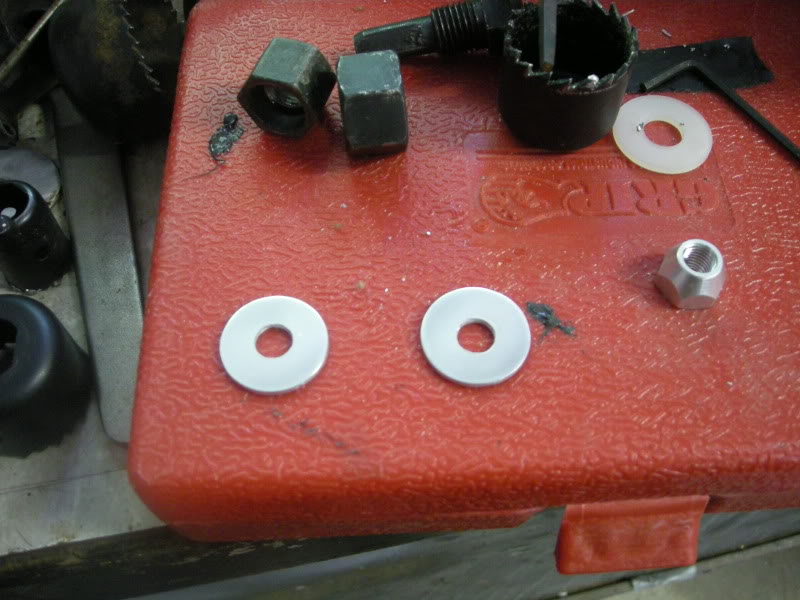
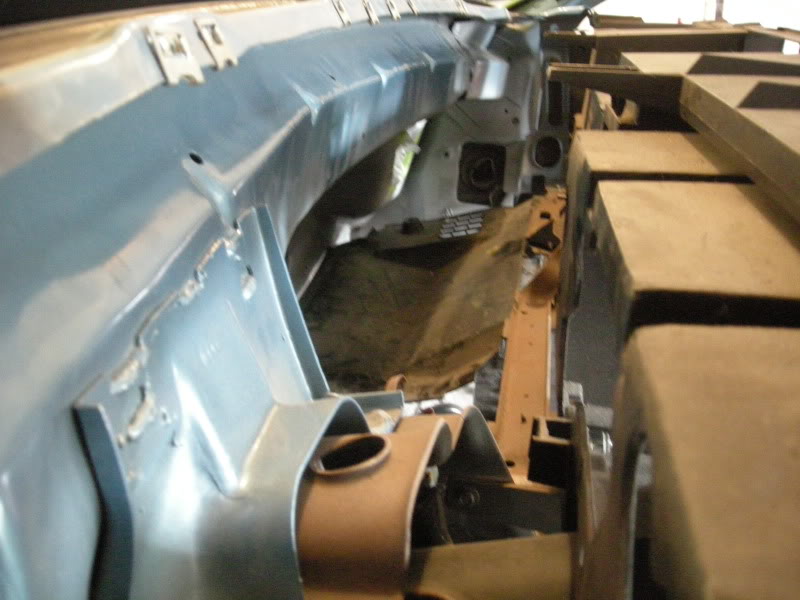
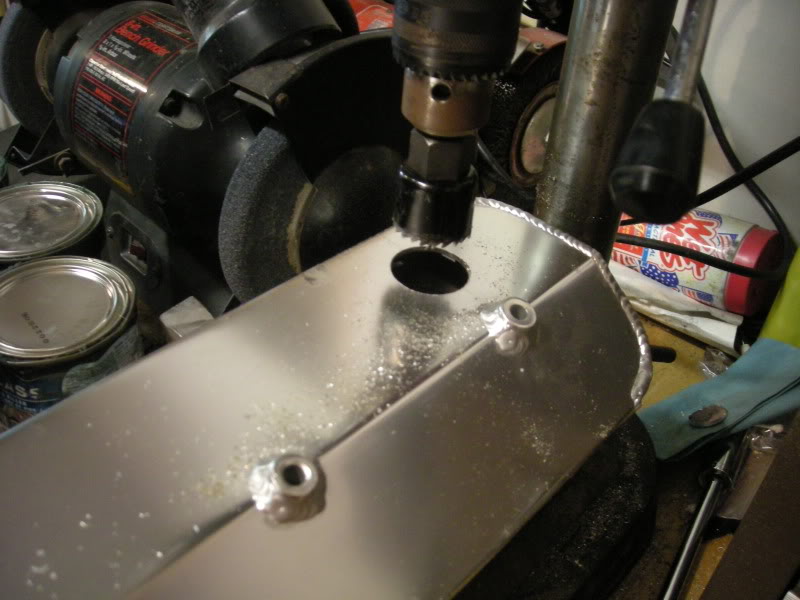
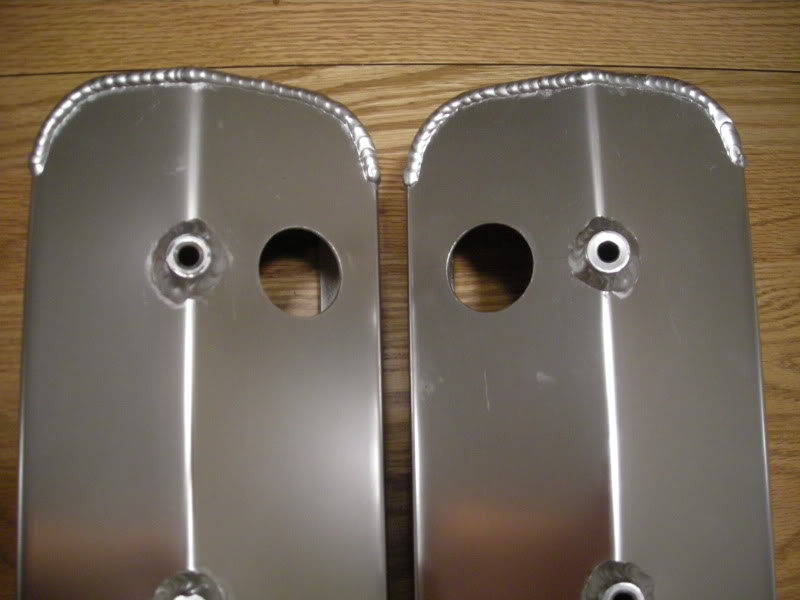
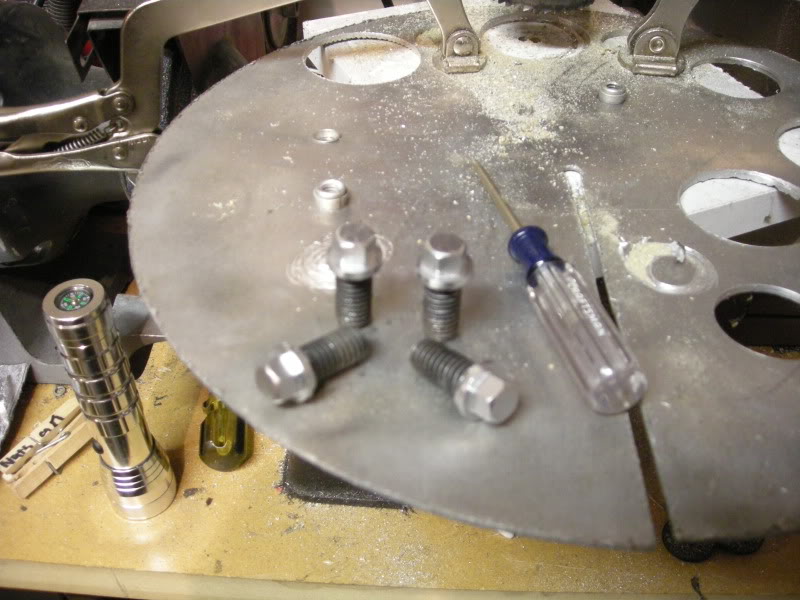
working on the bay agin. I started by making block off plate. I left this hole incase i want to run a manual latter on. I used 16 gauge aluminum that i had left over from my radiator surround

FueledSoul
Supreme Member
close
Dec 7, 2024
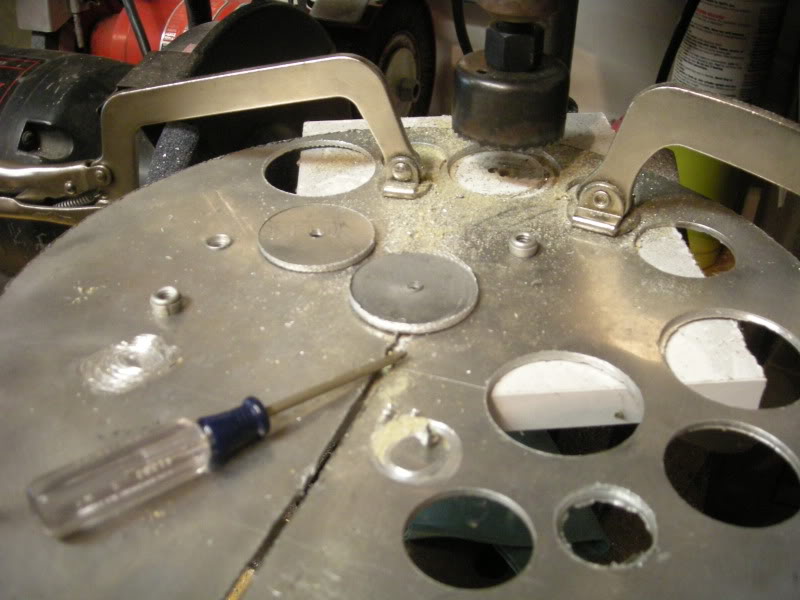
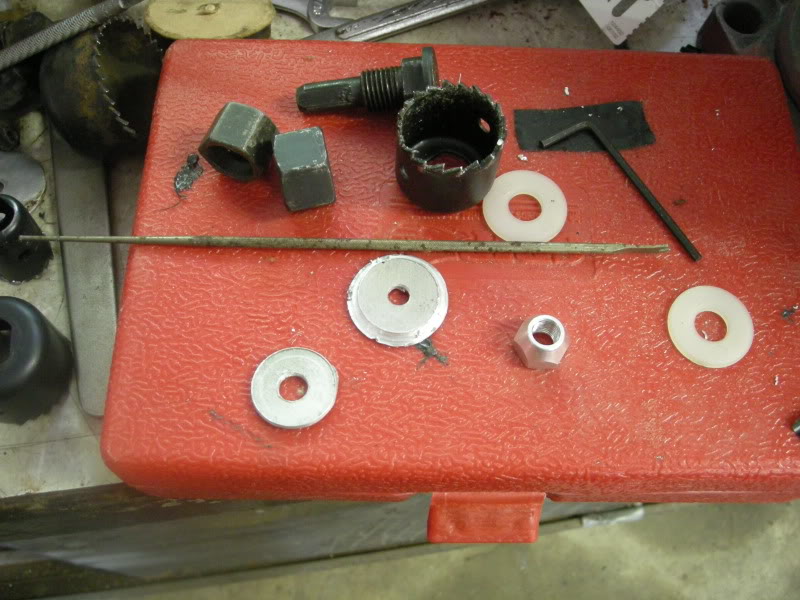
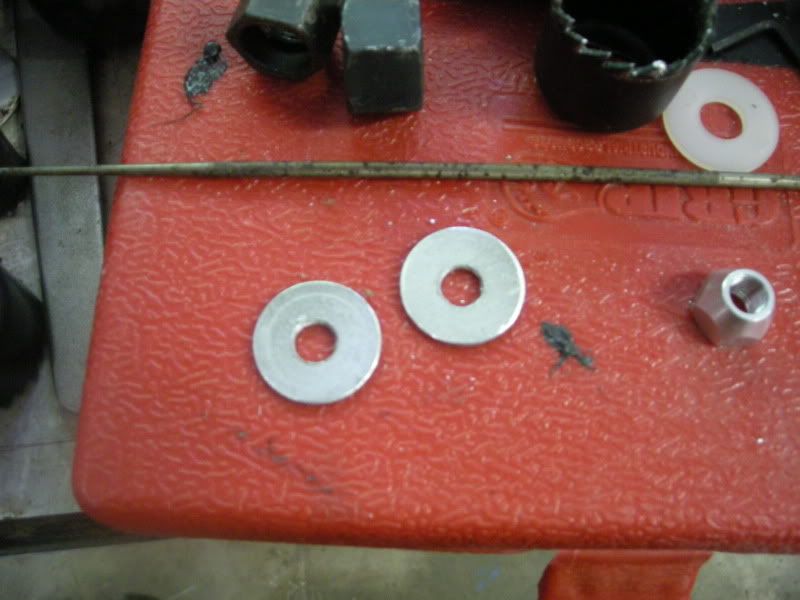
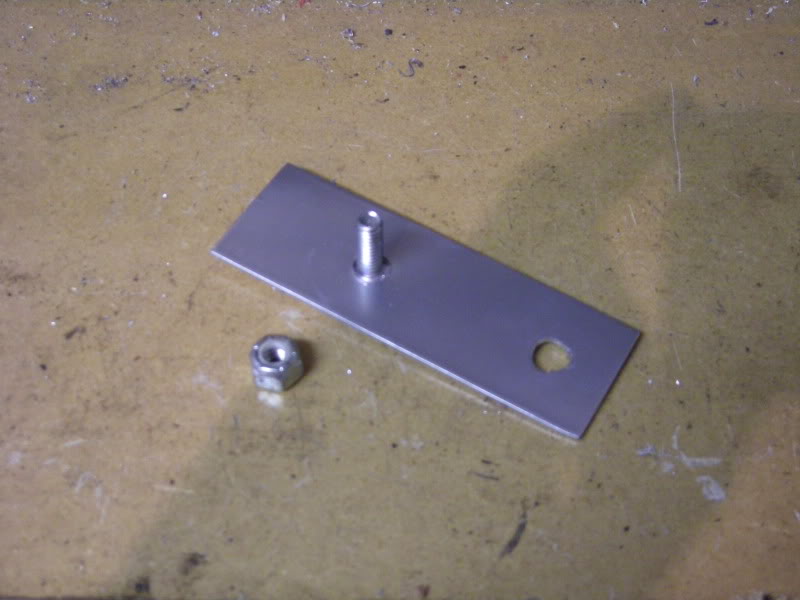
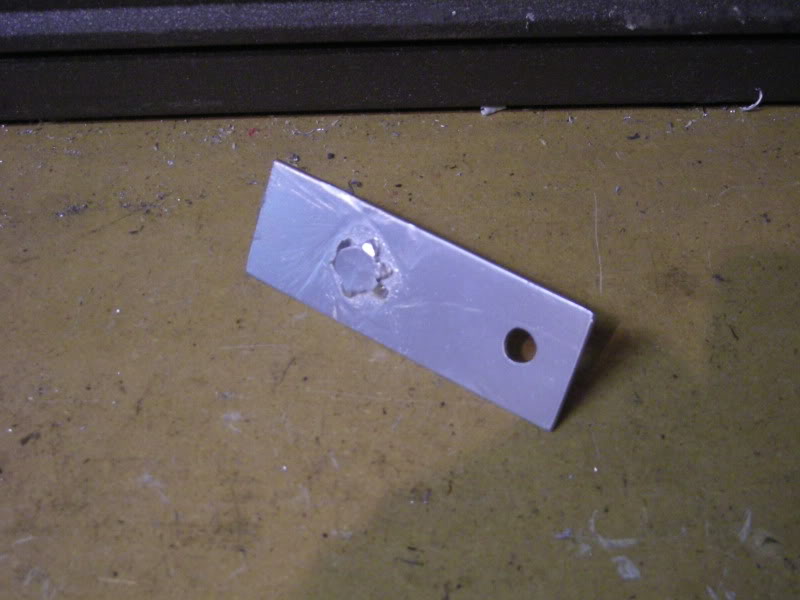
This wasn't my frist time making something like this. I had made a few washer sized peaces when i couldn't find stainless washers in the size i needed with the right sized center holes at the parts stores so i made my own from the 16 gauge aluminum and polished them. Heres the ones i did previously.
Junior Member
Looking good, two thumbs up
FueledSoul
Supreme Member
close
Dec 7, 2024
Thanks
FueledSoul
Supreme Member
close
Dec 7, 2024
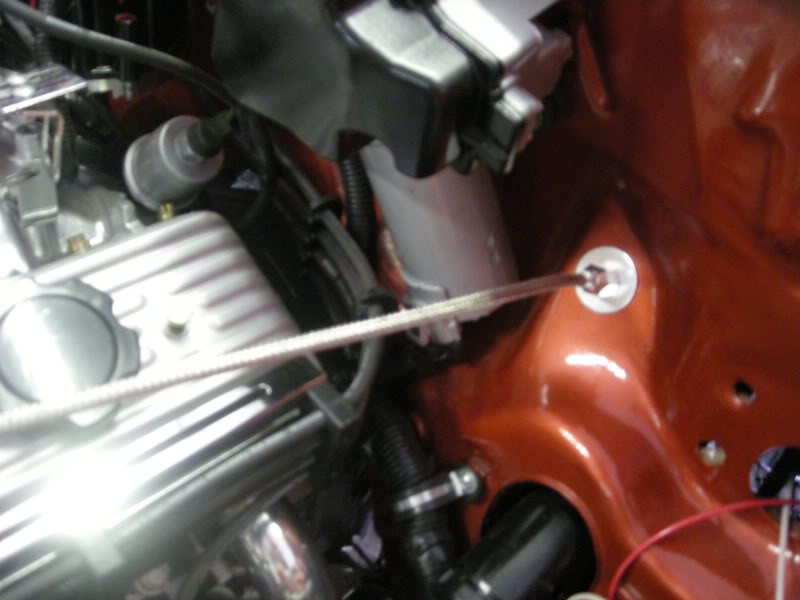
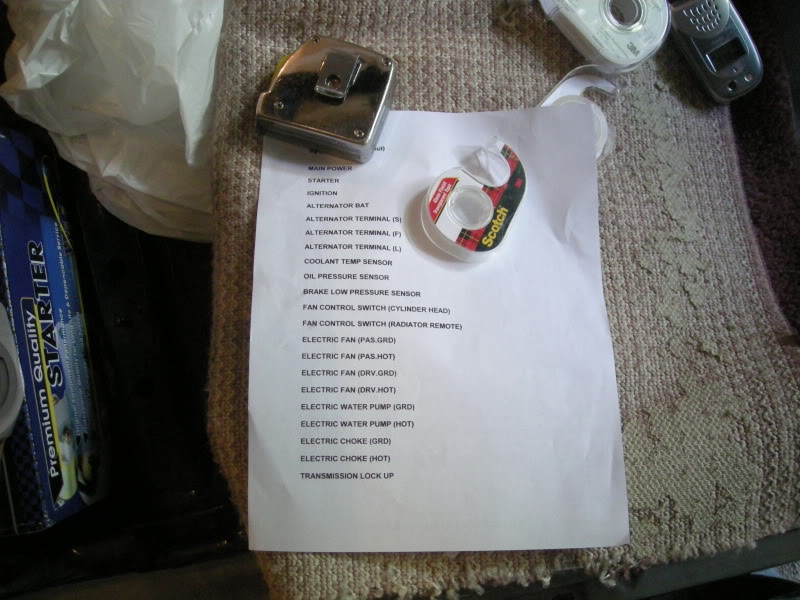
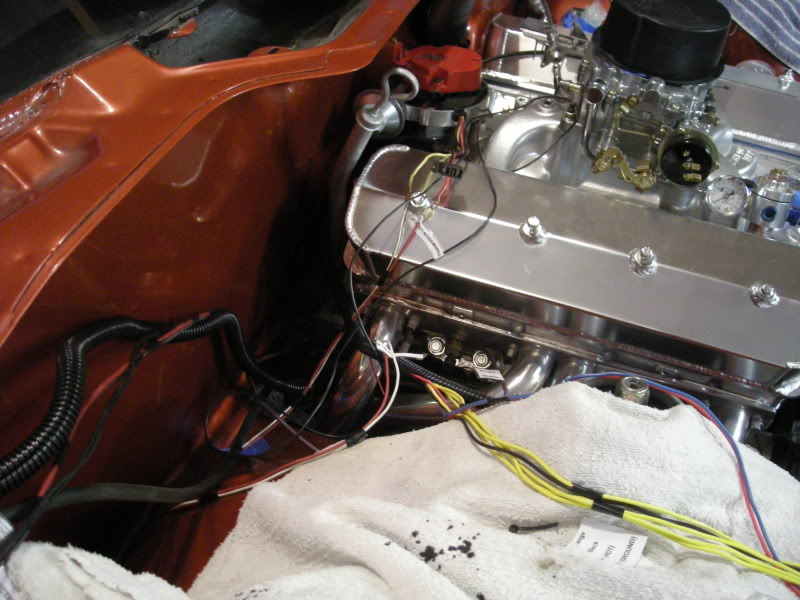
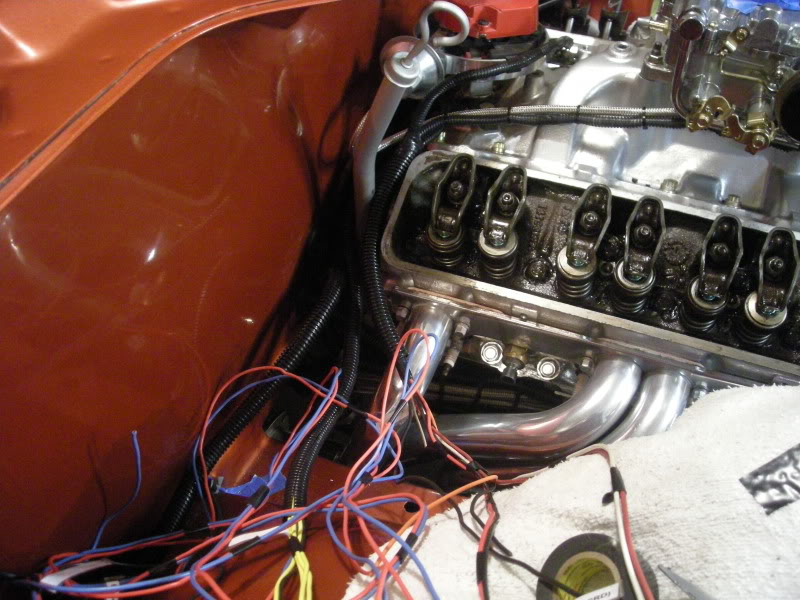
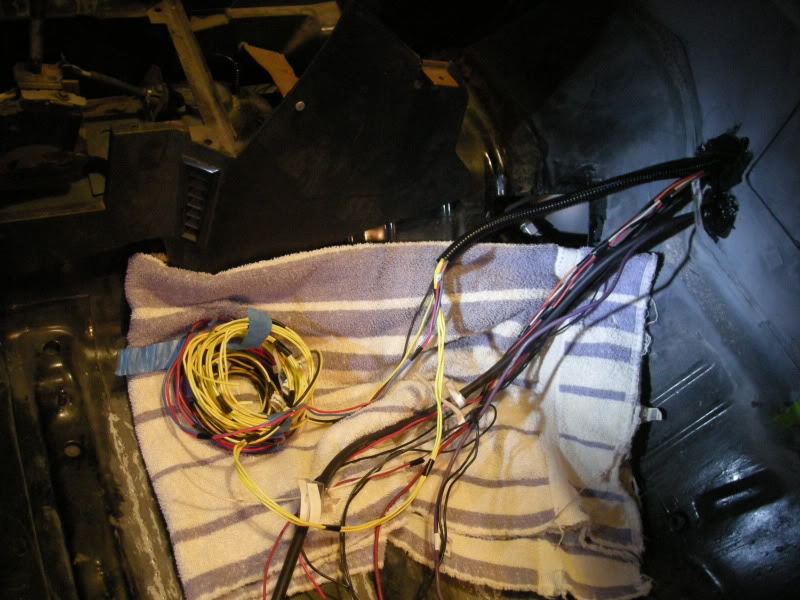
I drilled some holes on my firewall and put gromets in to run all the wires through.
FueledSoul
Supreme Member
close
Dec 7, 2024
I made up a paper sheet of labbles and used transparent tape to tag each wire in my engine bay. I asked my dad to come over to give me a hand. im not that great at electrical that's his area of expert. we hammered out all the wireing in a few hours.
FueledSoul
Supreme Member
close
Dec 7, 2024
I started to loom and hide all the wiring last night im about 65% done so all post some pics later on. i got a few other odds and ends still

Supreme Member
Hey FueledSoul--This is GREAT! Engine bay,paint,now wiring___GM should take note on how to make it look gooood! Serious-you have a great eye//hand and talent.
FueledSoul
Supreme Member
close
Dec 7, 2024
Quote:
Thanks for the huge complement man! Originally Posted by t-top havoc
Hey FueledSoul--This is GREAT! Engine bay,paint,now wiring___GM should take note on how to make it look gooood! Serious-you have a great eye//hand and talent. FueledSoul
Supreme Member
close
Dec 7, 2024
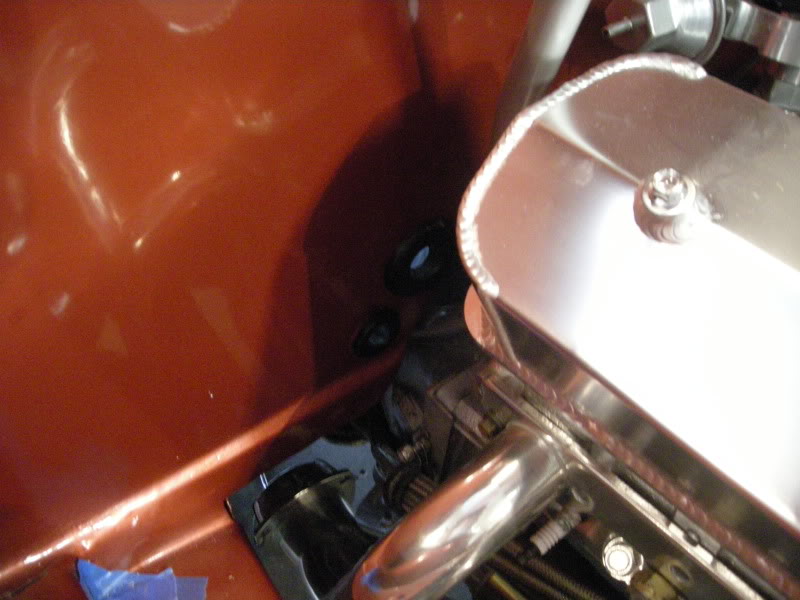
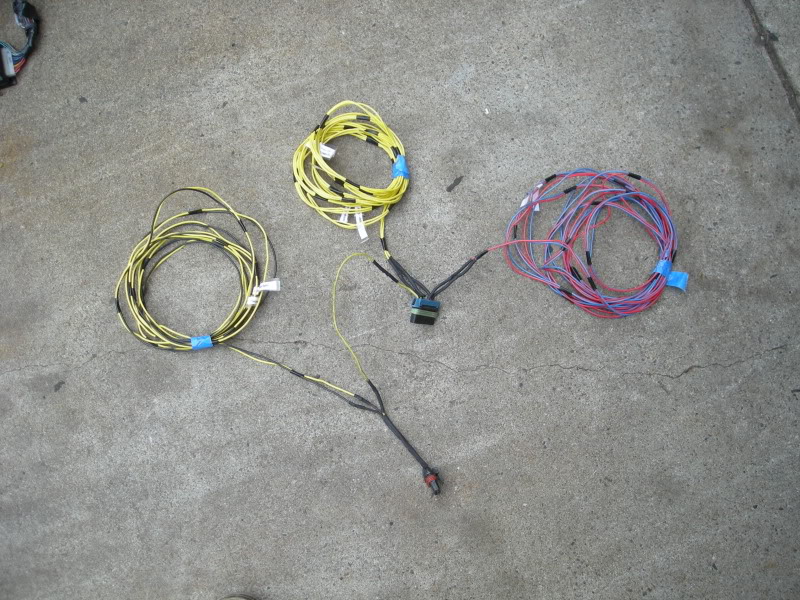
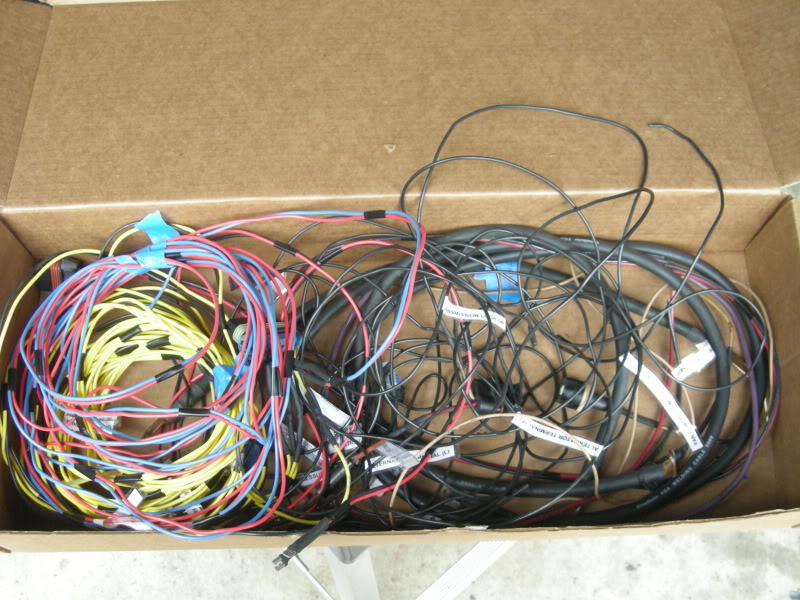
I spent lastnight rooting the wires, wraping them in looms and making everything thing clean, neat and out of sight. heres some pics.
FueledSoul
Supreme Member
close
Dec 7, 2024
FueledSoul
Supreme Member
close
Dec 7, 2024
FueledSoul
Supreme Member
close
Dec 7, 2024
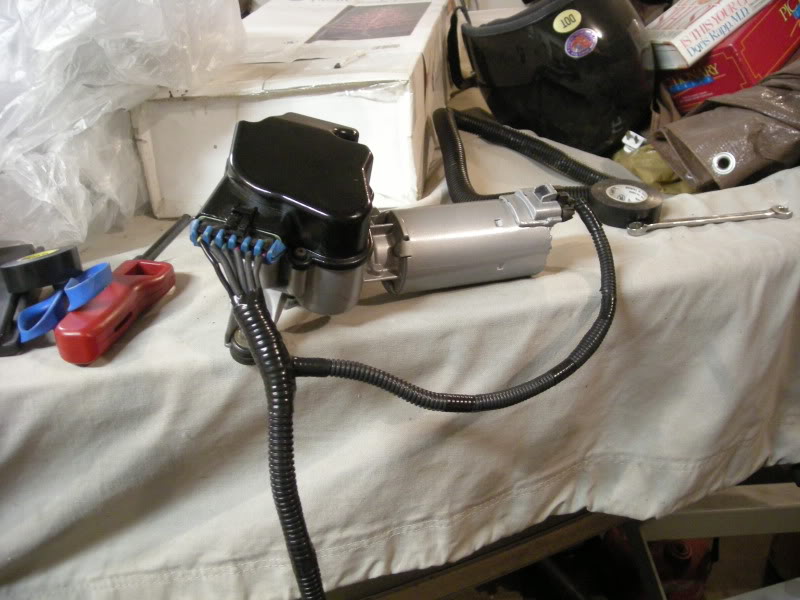
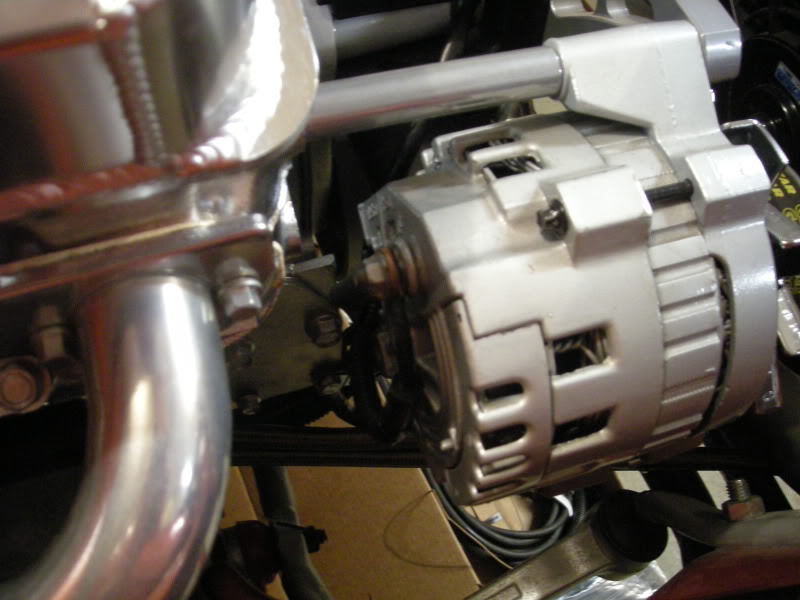
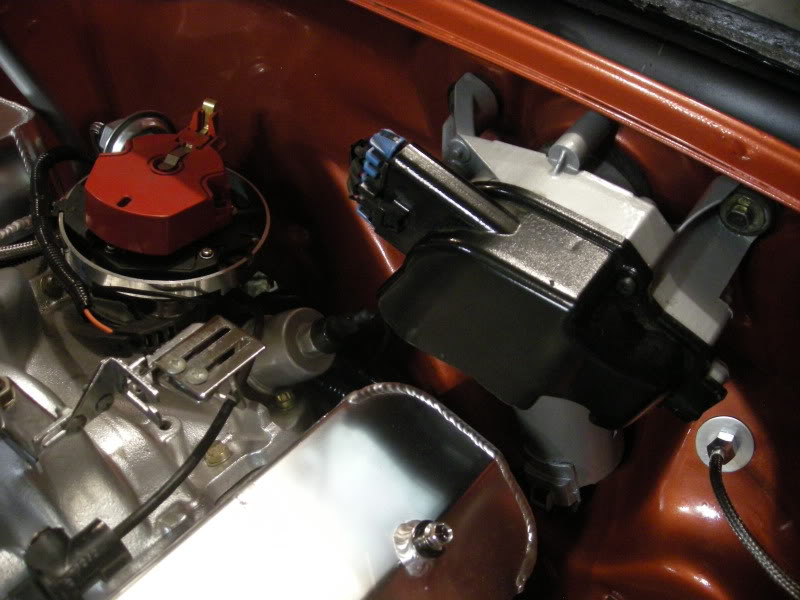
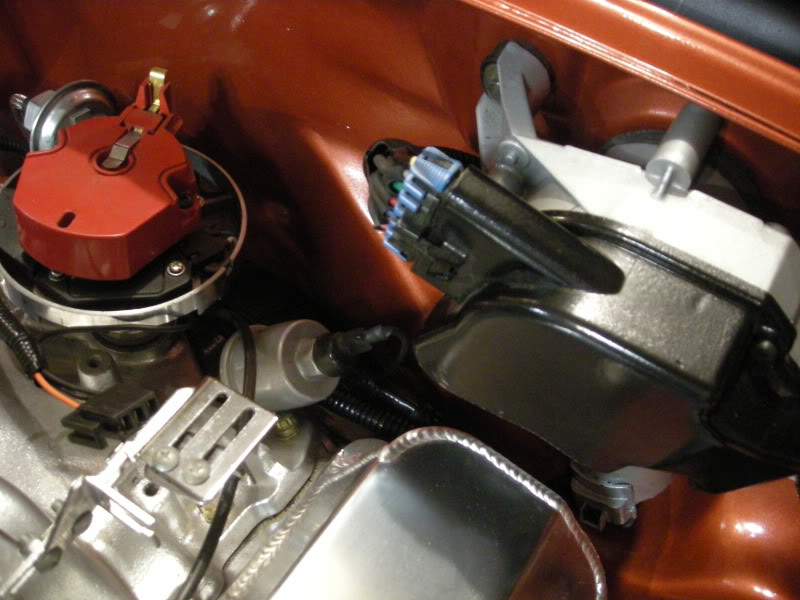
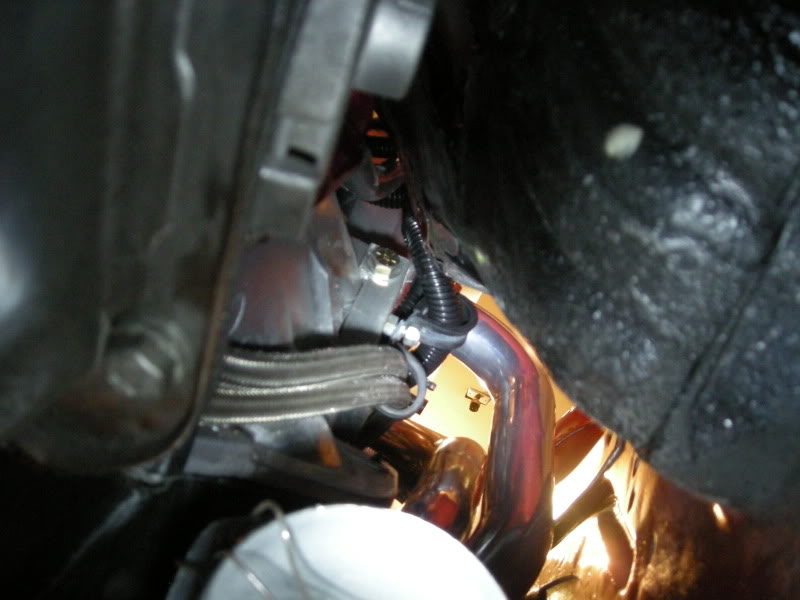
Had to fab a braket to run the wires how i wanted
FueledSoul
Supreme Member
close
Dec 7, 2024

Junior Member
Wow that is beautiful, nice work man!
I wish I could afford to do all that to mine.
I wish I could afford to do all that to mine.
FueledSoul
Supreme Member
close
Dec 7, 2024
Thanks
FueledSoul
Supreme Member
close
Dec 7, 2024
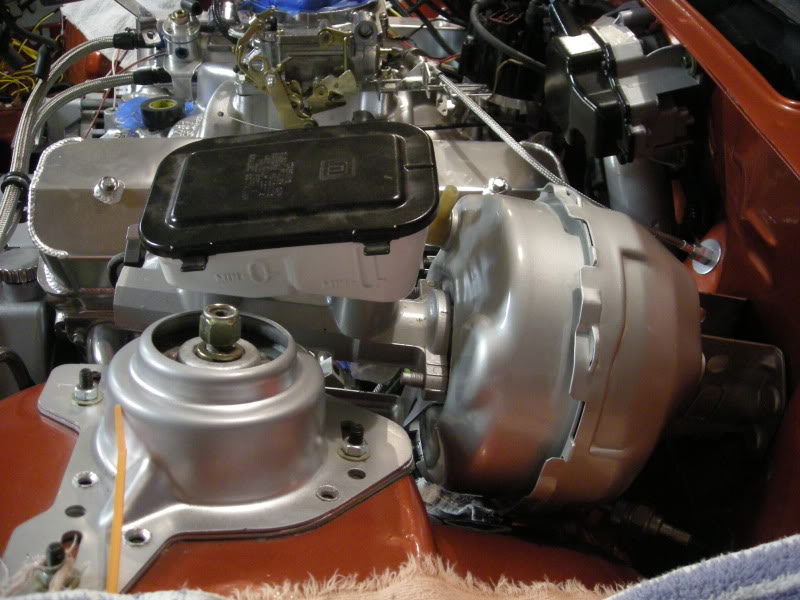
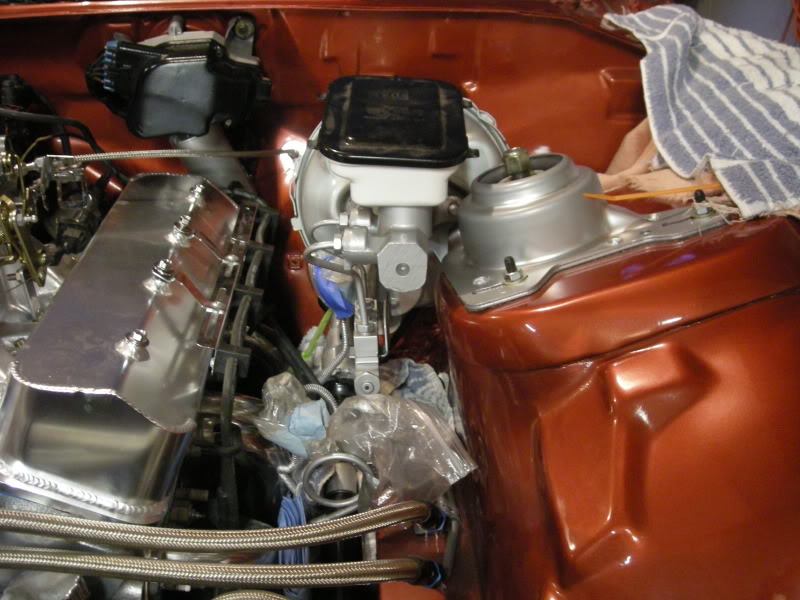
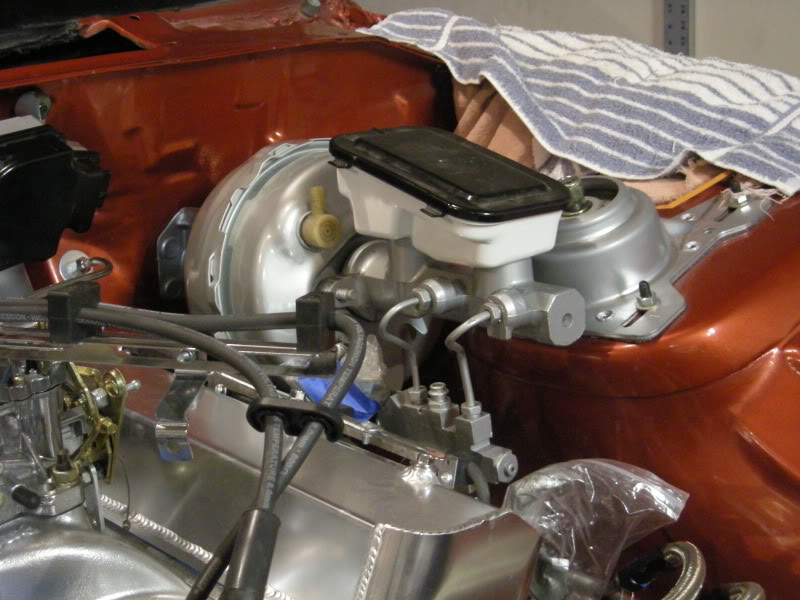
So i put my booster and master in and i hate it  . its so bulky. so now im looking for something smaller and sleeker or some other alternative. If anyone has any ideas at all please post!
. its so bulky. so now im looking for something smaller and sleeker or some other alternative. If anyone has any ideas at all please post! Supreme Member
I swear to god this kills me when I hear something about modifying the brake booster. There is a company out there that makes a kit that puts the brake booster behind the firewall sideways, now I know this isn't the best place for doing a swap or replacement of a part for the brake booster and master but it will clean your engine bay back up.
One problem, I can't find out who the hell made it and have been searching for it for the last 2 years....so.
P.S. It was strictly for our 3rd Gens. Everything needed came with it. Don't remember price.
One problem, I can't find out who the hell made it and have been searching for it for the last 2 years....so.
P.S. It was strictly for our 3rd Gens. Everything needed came with it. Don't remember price.

Junior Member
very nice. i like to see people do things the right way.
FueledSoul
Supreme Member
close
Dec 7, 2024
Quote:
One problem, I can't find out who the hell made it and have been searching for it for the last 2 years....so.
P.S. It was strictly for our 3rd Gens. Everything needed came with it. Don't remember price.
Was is electric brake booster? Id been very intrested in seeing/finding this alsoOriginally Posted by I H8 WWD
I swear to god this kills me when I hear something about modifying the brake booster. There is a company out there that makes a kit that puts the brake booster behind the firewall sideways, now I know this isn't the best place for doing a swap or replacement of a part for the brake booster and master but it will clean your engine bay back up.One problem, I can't find out who the hell made it and have been searching for it for the last 2 years....so.
P.S. It was strictly for our 3rd Gens. Everything needed came with it. Don't remember price.

Senior Member
Supreme Member
Quote: . its so bulky. so now im looking for something smaller and sleeker or some other alternative. If anyone has any ideas at all please post!
The hydroboost is probably still available. Originally Posted by FueledSoul
So i put my booster and master in and i hate it . its so bulky. so now im looking for something smaller and sleeker or some other alternative. If anyone has any ideas at all please post! 
And the price is right.
(Excellent thread BTW.)
Member
Well for me. Im ditching the booster, and wanna go with manuel brakes.
Supreme Member
Hydraboost from a early 90's Chevy HD truck should work. My boss has a bone stock 1990 Chevy 4-door dually with a 454 big block / 5-speed. It has hydraboost from the factory.
FueledSoul
Supreme Member
close
Dec 7, 2024
Quote:
something like this?
Hmmm i was thinking of how i could fab something like this but i see its been done. now i know its possbaile to fab. At any rate i have the room for it i think Originally Posted by RED_DRAGON_85
http://www.ecihotrodbrakes.com/hangi...ssemblies.htmlsomething like this?

FueledSoul
Supreme Member
close
Dec 7, 2024
Quote:
And the price is right.
(Excellent thread BTW.)
iv been looking into that too. but not to sure on that yet. iv heard pros and consOriginally Posted by Scorpner
The hydroboost is probably still available. And the price is right.
(Excellent thread BTW.)
FueledSoul
Supreme Member
close
Dec 7, 2024
Quote:
iv been thinking about this too. but how would that work on a street car that sees the occasional autocross. Isnt that more of a drag car thing?Originally Posted by Curtisyz54
Well for me. Im ditching the booster, and wanna go with manuel brakes. FueledSoul
Supreme Member
close
Dec 7, 2024
Quote:
iv looked at retro fiting one too. you can pick them up farly cheap. and alot of the newer trucks have hydraboost tooOriginally Posted by 1bad91Z
Hydraboost from a early 90's Chevy HD truck should work. My boss has a bone stock 1990 Chevy 4-door dually with a 454 big block / 5-speed. It has hydraboost from the factory. FueledSoul
Supreme Member
close
Dec 7, 2024
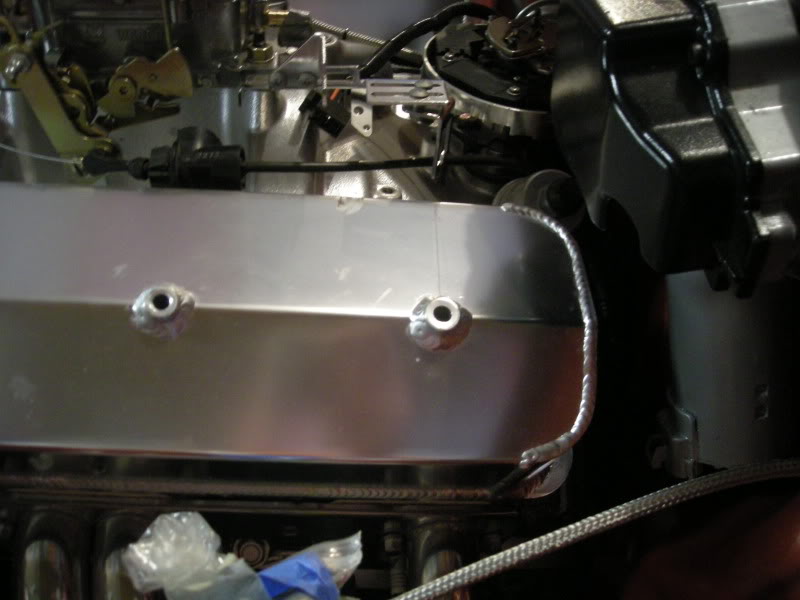
Update.
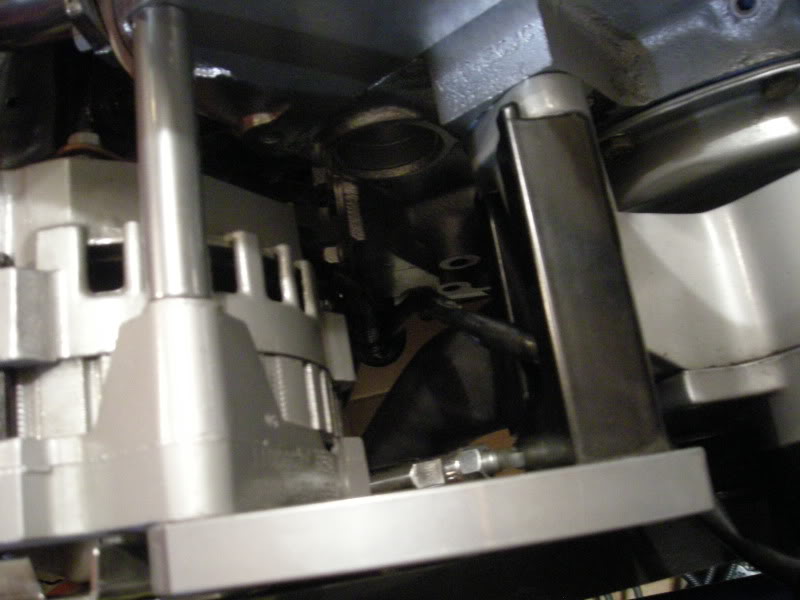
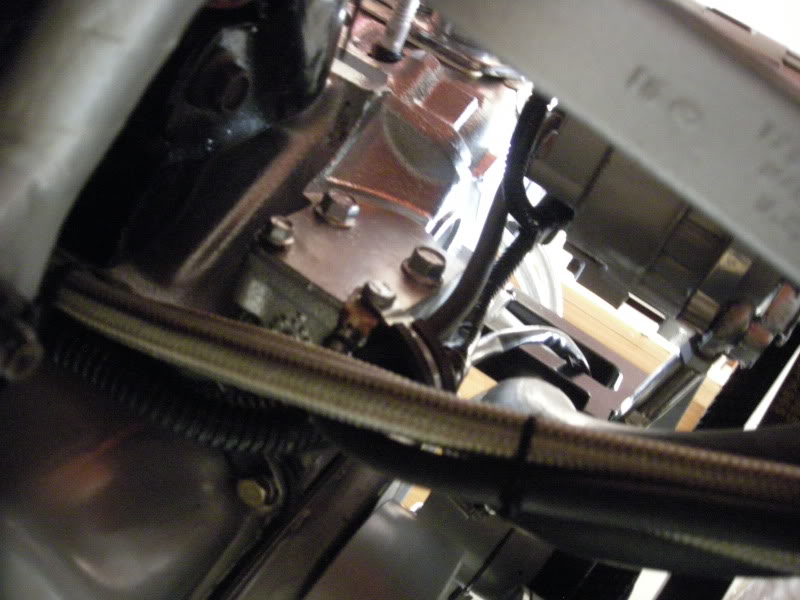
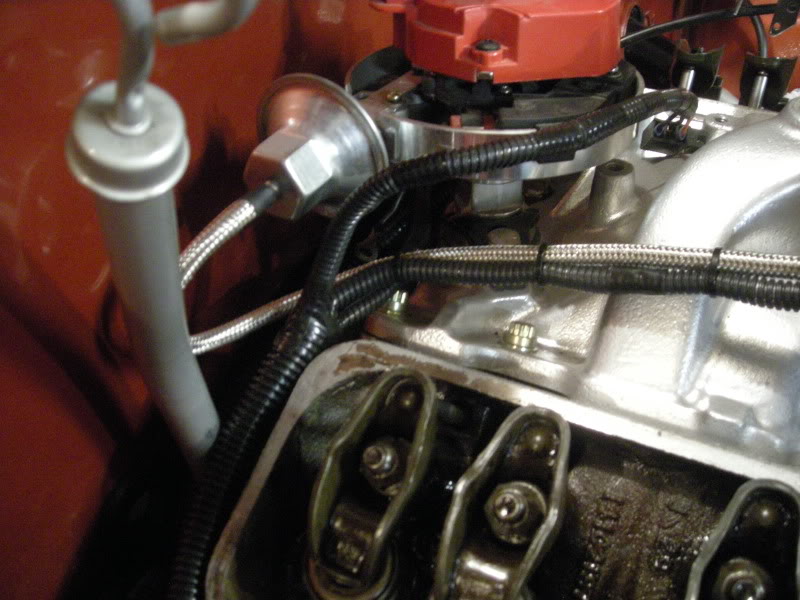
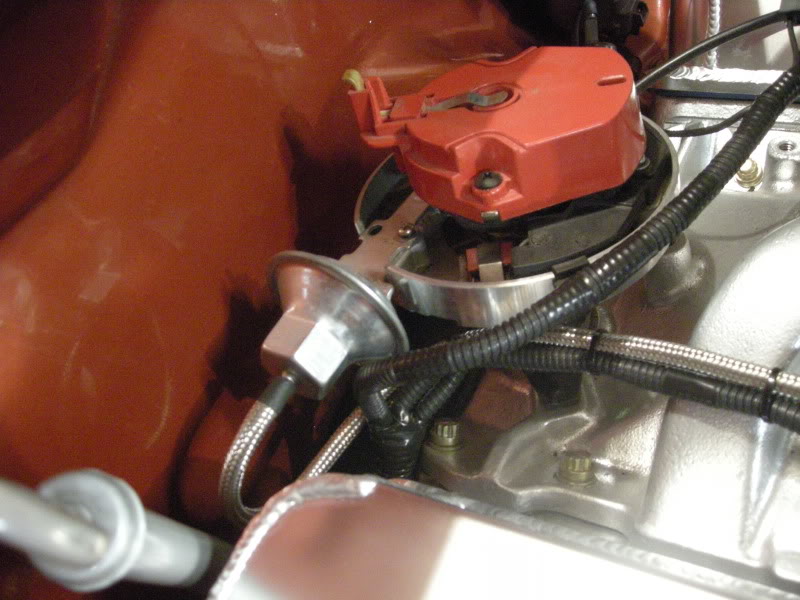
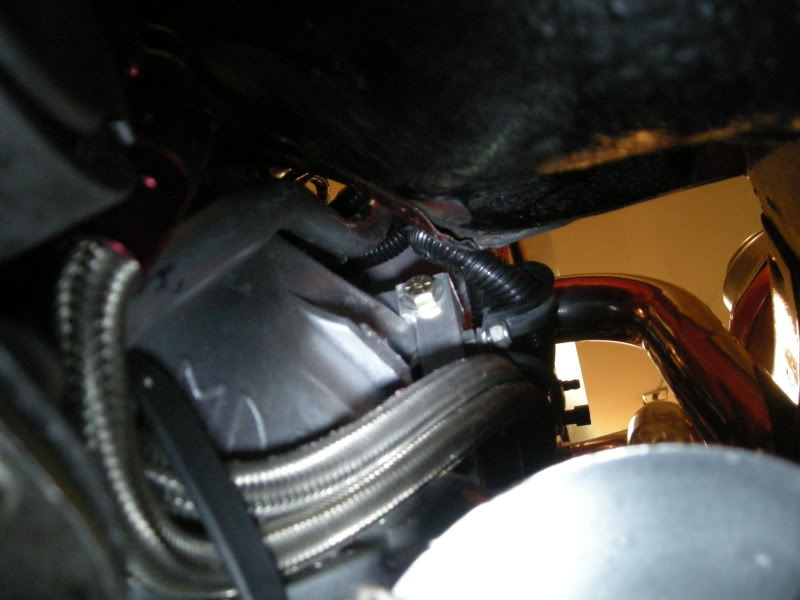
Heres a peace i made to keep my wires and AN lines away from the headers and to keep everything looking clean.
Heres a peace i made to keep my wires and AN lines away from the headers and to keep everything looking clean.
FueledSoul
Supreme Member
close
Dec 7, 2024
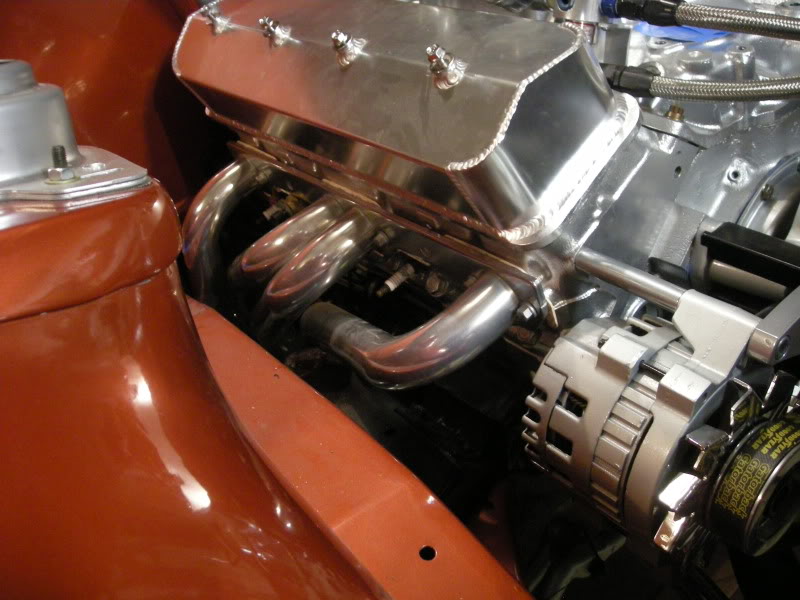
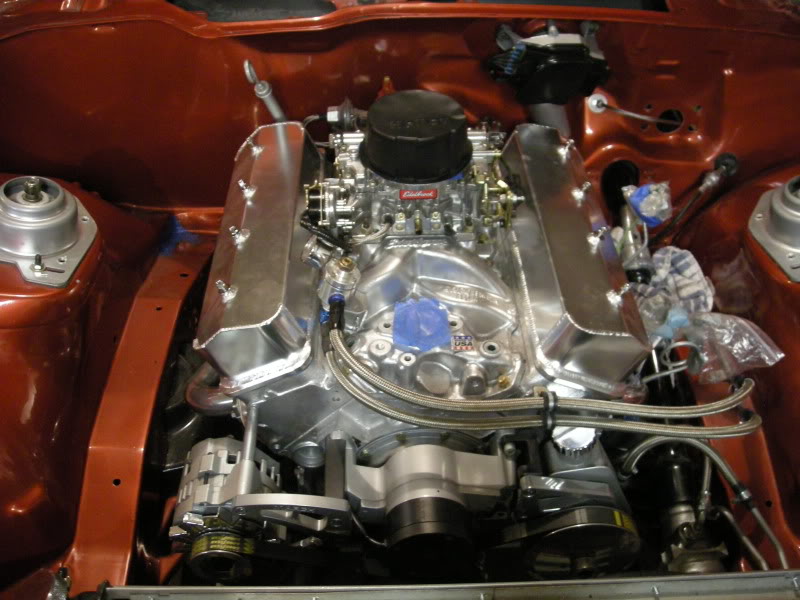
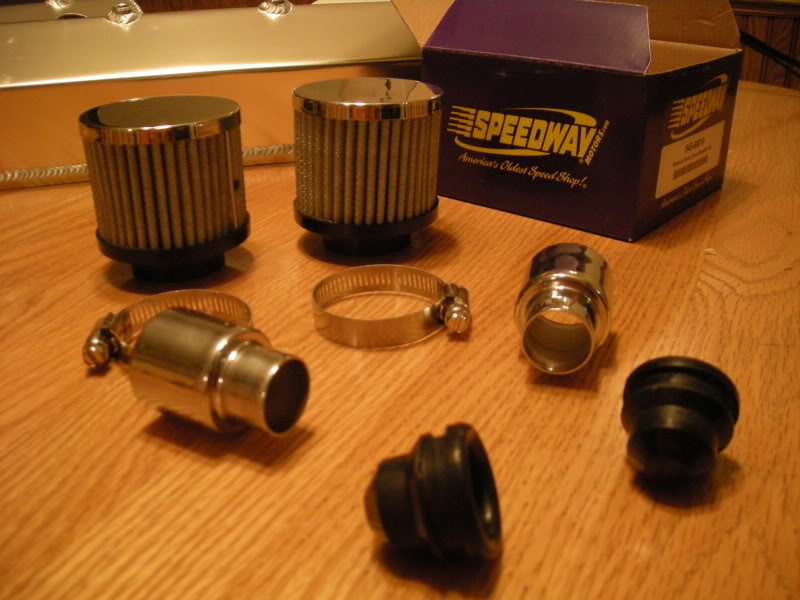
cut holes to install the dual valve cover breather kit from speedwaymotors.com,
FueledSoul
Supreme Member
close
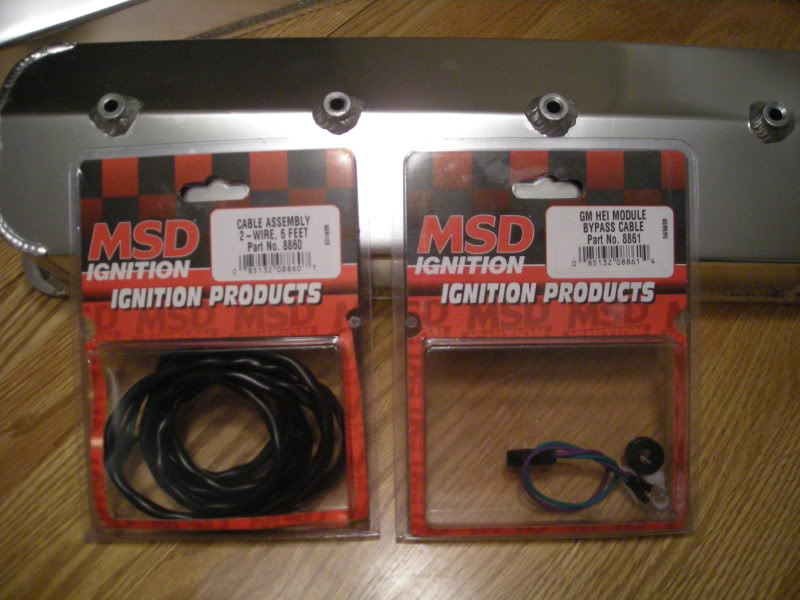
Dec 7, 2024
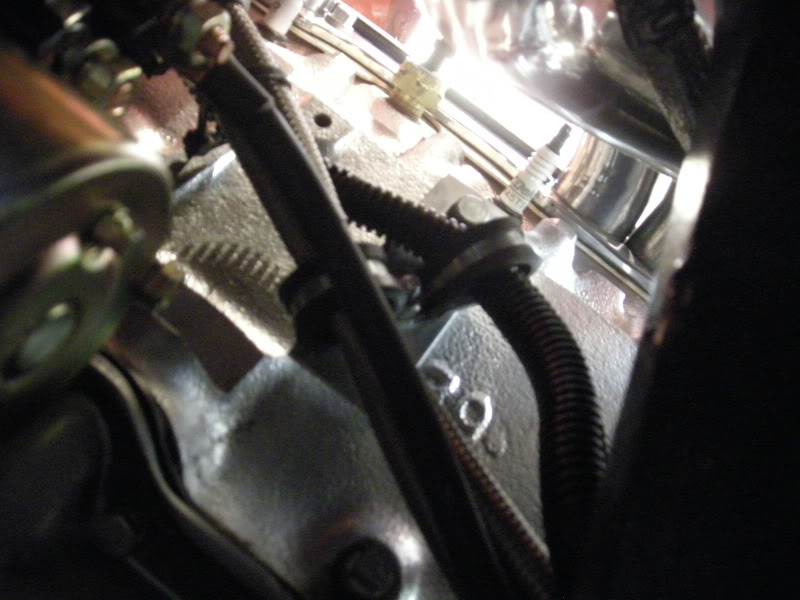
took the simple rout and just order a harness and bypass to hook up my MSD to the new distributor
i cermic coated the bolt heads for my headers
i cermic coated the bolt heads for my headers
FueledSoul
Supreme Member
close
Dec 7, 2024
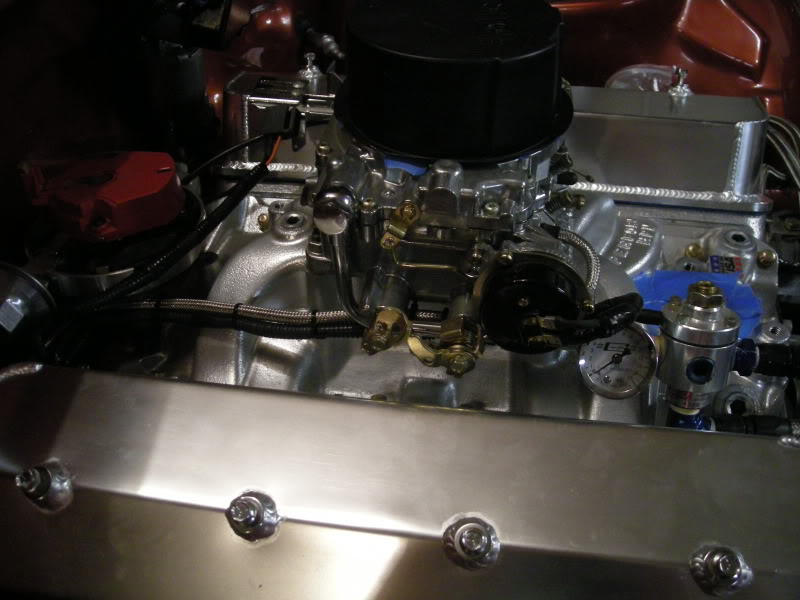
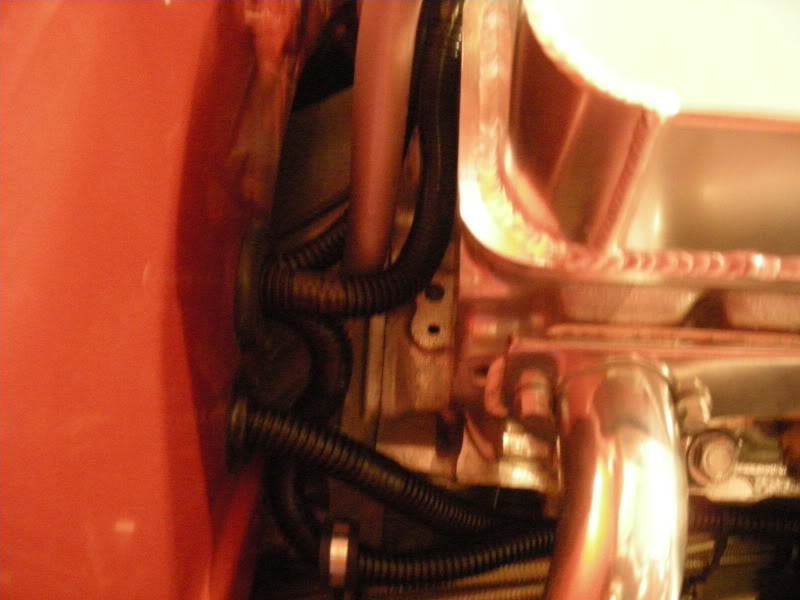
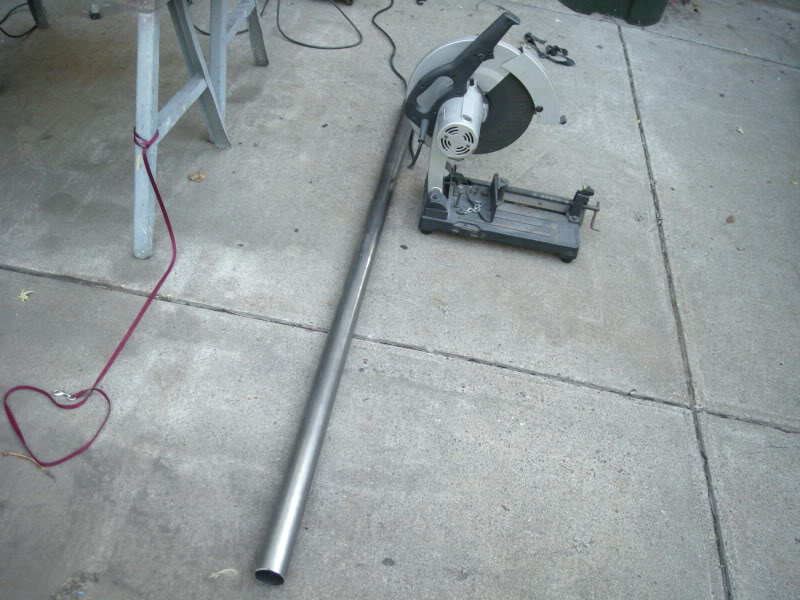
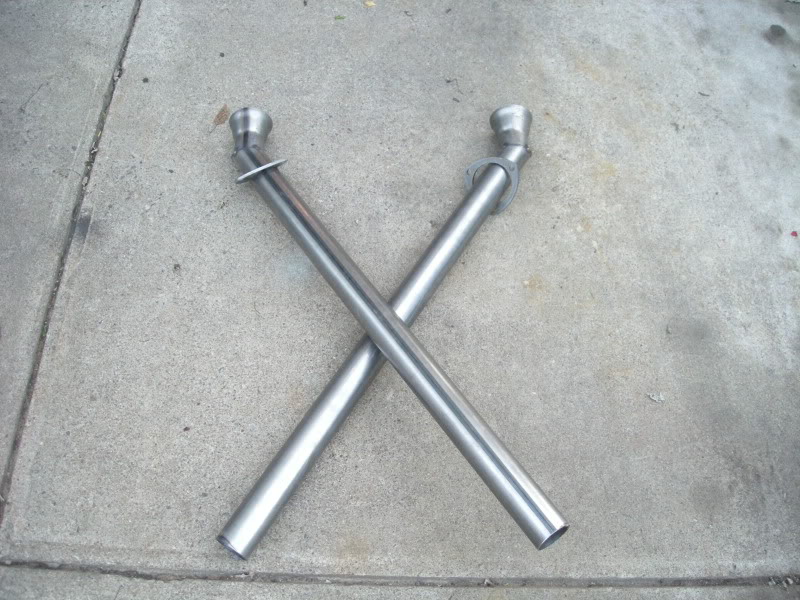
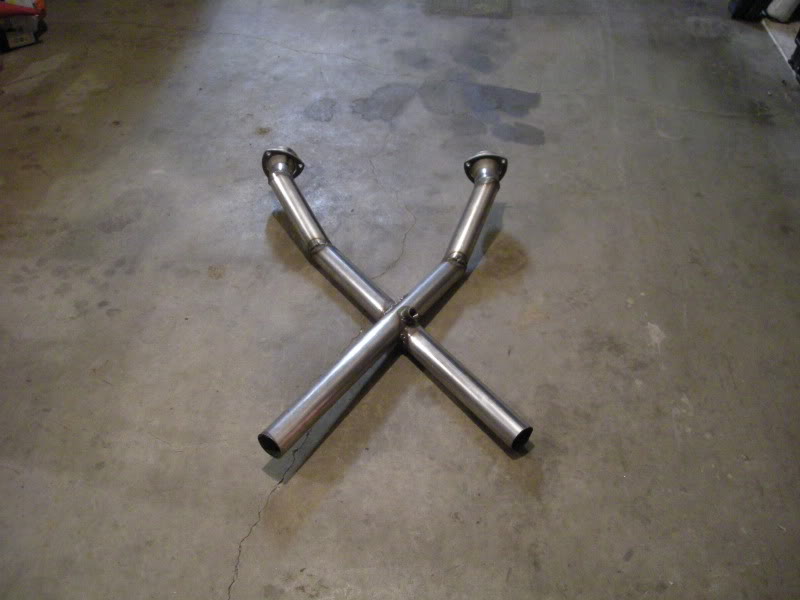
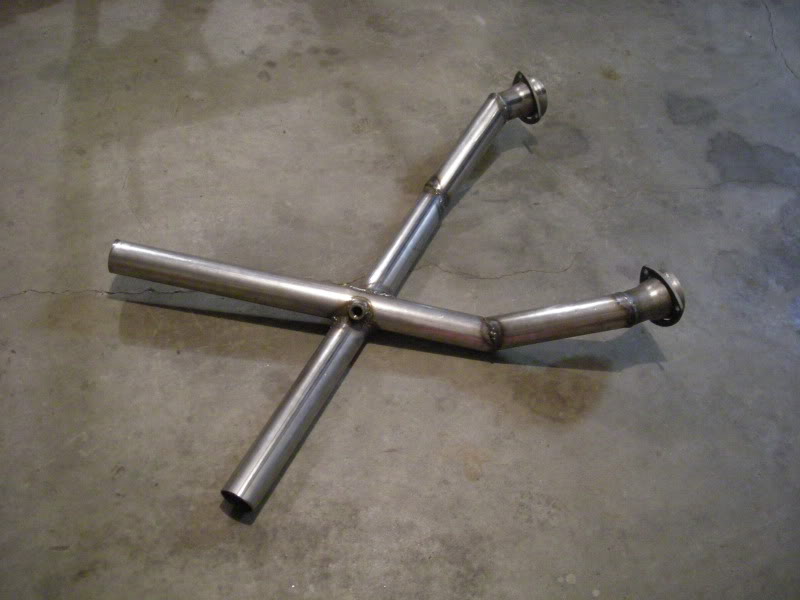
i wanted to read my combined AFR so i tied both bank together building my own cheap simple x-pipe.
FueledSoul
Supreme Member
close
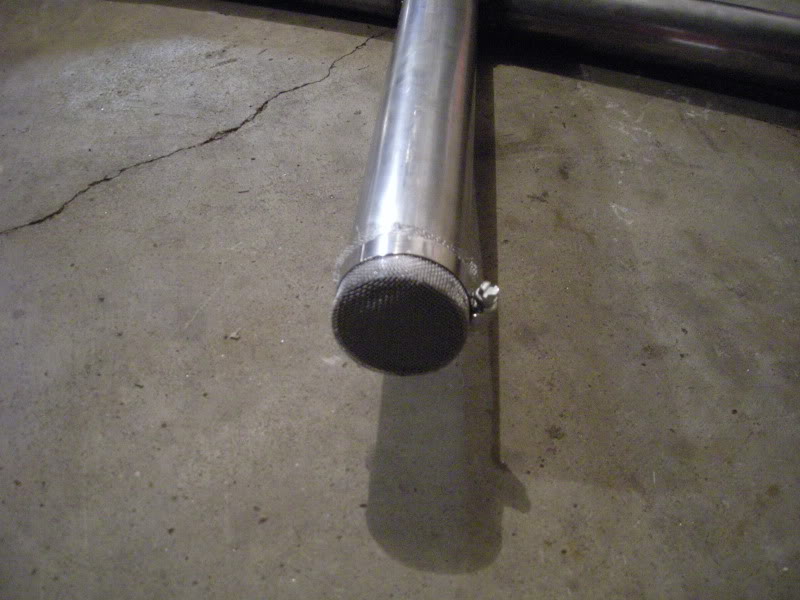
Dec 7, 2024
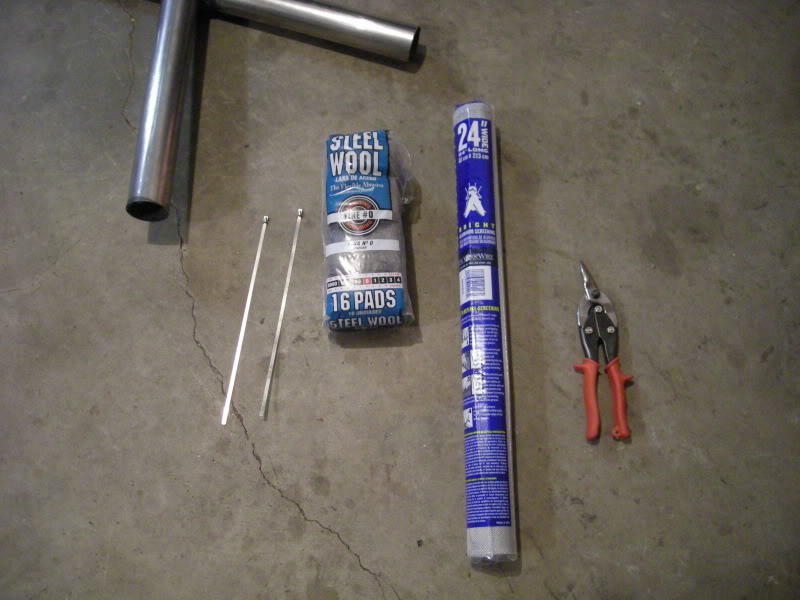
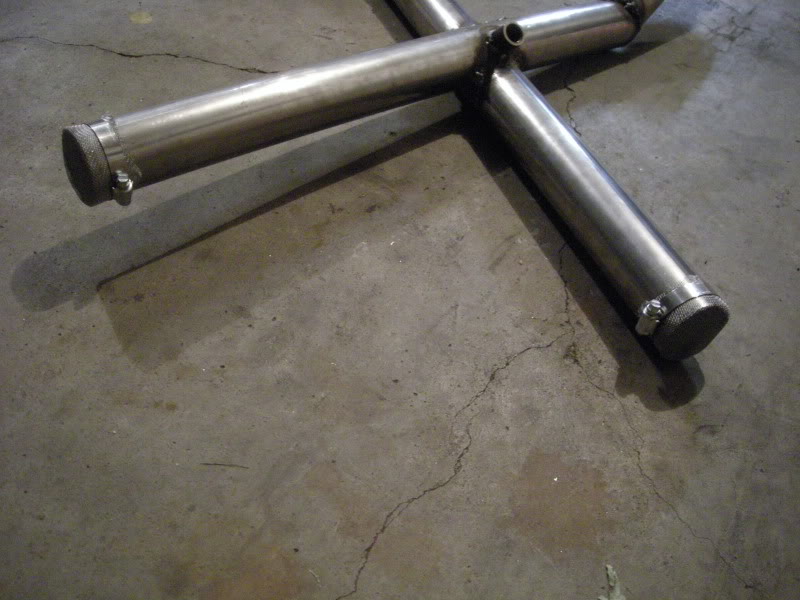
I used steel wool, aluminum screen and some claps to make it some what less audible when i fire it up.
FueledSoul
Supreme Member
close
Dec 7, 2024
I have a small bit of wiring left but i will be testing everything out and making sure everything works. i guess you can call it a test run. . . even tho the engine will be running like im planing i still have a few peaces left to fab like the stainless radiator hose, and the top plate for the radiator. some holes to drill to mount the over flow and coolnet jug just some small stuff.
Member
Quote:
Originally Posted by FueledSoul
iv been thinking about this too. but how would that work on a street car that sees the occasional autocross. Isnt that more of a drag car thing? On a street car? fine. My dad has a 70 Duster with manuel brakes, I kinda like it. Autocross? well it would take a little but more power from you (but no pain, no game right?) I was also just looking at all the old Trans Am race cars (camaros,mustangs etc) and none of them had power brakes or steering. And they do some heavy braking and turning. And yes it is kinda a drag car thing (as that is why I want to do it)
Personaly I like manuel brakes.
Junior Member
Nice

Tony, I think you are going to regret going with those breathers. They spit oil all over and I would hate to see that on your nice pretty engine
Junior Member
really does look great, i'm in the same process right now, everything is shaved and smoothed, i put plates in where the battery boxes were and filled all the holes in the frame rails, getting ready for paint. I put my engine in for fitment before paint, now it has to come back out. Is the silver base clear too? Looks great whatever it is.
Senior Member
mtwlkn122
Senior Member
close
Jan 28, 2011
- Join DateNov 2008
- LocationBatavia Area, NY
- Posts:467
- iTrader Positive Feedback0
- iTrader Feedback Score(0)
- Car91 Firebird, 06 Dodge Ram 1500 SLT
- Engine3.1L, 4.7L
- Transmission700r4, 45RFE
- Axle/Gears3.23 open, 3.55?
- Likes:0
- Liked:0 Times in 0 Posts
IDK what to even say...i am just speechless...You my friend do ABSOLUTELY AMAZING WORK!
Have you ever thought of a profession in this?...you serious have a niche for, well for the lack of words, perfection.
Have you ever thought of a profession in this?...you serious have a niche for, well for the lack of words, perfection.
Senior Member
keep up the good work Fueled Soul!
i'm a few months behind you.
got a hydroboost at the good guys show for 250.00 brand new, love the small footprint it leaves in the engine bay! plus an excuse to run two more braided lines! i haven't heard any negatives on the hydroboost, if someone has had a bad experience i'd like to know
i went a little different route than you, not quite ready to post pics yet though
keep the awesome pics coming!
Eric B
FueledSoul
Supreme Member
close
Dec 7, 2024
Quote:
Personaly I like manuel brakes.
Originally Posted by Curtisyz54
On a street car? fine. My dad has a 70 Duster with manuel brakes, I kinda like it. Autocross? well it would take a little but more power from you (but no pain, no game right?) I was also just looking at all the old Trans Am race cars (camaros,mustangs etc) and none of them had power brakes or steering. And they do some heavy braking and turning. And yes it is kinda a drag car thing (as that is why I want to do it)Personaly I like manuel brakes.
thanks for the input
Quote:
thanksOriginally Posted by jagmanofsteel
Nice Quote:
Thanks man, butOriginally Posted by FlamedROC
Tony, I think you are going to regret going with those breathers. They spit oil all over and I would hate to see that on your nice pretty engine i haven't had a problem with them, what i did was fab some baffles to keep that from happing and there doing a good job.
Quote:
Sounds awsome! i was going to do the same but i desided not too, i left it looking stock to a point where one would really have to move there eyes around to figger out whats been done. the aluminum color on the engine is a sinlge, with a two stage the clear starts to yellow. there is however clears out there designed to work with high temperatures and not yellow over time. i might be looking into that for the next engine but all have to research it more. but other then whats on the engine most everything else is a two stage Originally Posted by mongo136
really does look great, i'm in the same process right now, everything is shaved and smoothed, i put plates in where the battery boxes were and filled all the holes in the frame rails, getting ready for paint. I put my engine in for fitment before paint, now it has to come back out. Is the silver base clear too? Looks great whatever it is. Quote:
Have you ever thought of a profession in this?...you serious have a niche for, well for the lack of words, perfection.
Thanks a ton! Originally Posted by mtwlkn122
IDK what to even say...i am just speechless...You my friend do ABSOLUTELY AMAZING WORK!Have you ever thought of a profession in this?...you serious have a niche for, well for the lack of words, perfection.
. . . I haven't really given it much thought. i definitely like doing this stuff. . . the challenges, problem solving and above all being creative. but im only one person there are plenty other people out there that are talented in this stuff. i dont know where to start or how i would get there...Quote:
i'm a few months behind you.
got a hydroboost at the good guys show for 250.00 brand new, love the small footprint it leaves in the engine bay! plus an excuse to run two more braided lines! i haven't heard any negatives on the hydroboost, if someone has had a bad experience i'd like to know
i went a little different route than you, not quite ready to post pics yet though
keep the awesome pics coming!
Eric B
Sweet, got a pic of the hydo mounted up?. well shoot us a link when your ready to share Originally Posted by SLEEPER 86
keep up the good work Fueled Soul!i'm a few months behind you.
got a hydroboost at the good guys show for 250.00 brand new, love the small footprint it leaves in the engine bay! plus an excuse to run two more braided lines! i haven't heard any negatives on the hydroboost, if someone has had a bad experience i'd like to know
i went a little different route than you, not quite ready to post pics yet though
keep the awesome pics coming!
Eric B

Junior Member
ChrisCamaro86
Junior Member
close
Oct 26, 2011
- Join DateSep 2009
- LocationNJ
- Posts:18
- iTrader Positive Feedback0
- iTrader Feedback Score(0)
- Car1986 Camaro, 2002 WRX, 2005 STi
- Engine305ci LG4 4-Barrel
- Transmission700R4 with Corvette Internals
- Axle/GearsOne-Wheel Wonder
- Likes:0
- Liked:0 Times in 0 Posts
Love it and the valve covers really tie it all in! I def want to start something like this on my Camaro's engine bay. Can't wait to see the finished product!
lookin' great man, but i think you're going to hate the ground clearance you get with your exhaust...why not get some mandrel bends and build one that tucks up in the tunnel a little better?
FueledSoul
Supreme Member
close
Dec 7, 2024
That was a temperay pipe to read my AFR. i woundnt cheap out after going this far  jet-hot coated headers with 100% Stainless mandrel from the headers all the way back havent made it to that point yet iv had a a kit siting on around for 4 years now just not put together yet
jet-hot coated headers with 100% Stainless mandrel from the headers all the way back havent made it to that point yet iv had a a kit siting on around for 4 years now just not put together yet Supreme Member
Hey FueledSoul--They say "a picture is worth a thousand words"...
I for one would be beating down your door when this is finished and hand you mine!! I'd want you to re-wire // route the wires & build me some SFCs then........... ...
...
Does TGO have a cover car..?..
I for one would be beating down your door when this is finished and hand you mine!! I'd want you to re-wire // route the wires & build me some SFCs then...........
...Does TGO have a cover car..?..

Junior Member
FueledSoul, you do incredible work, I really enjoy watching your progress. Hopefully mine will turn out 1/2 as nice as yours is. Beautiful job!!!!!
Senior Member
Any update, I just got done reading the whole thread about 2 hrs for both
may i ask wich march pulley set you are use?
i was looking for thinking almost the same setup
i have found a march number that i think that i must have 22007-09
i like the silver coating (low cost custom style) but i can`t find it were to buy it!
i think i need that part nr because i think i have the saginaw press fit SP pulley
i have a original sepentine setup from a 88 camaro!
do you now wich one i need!
thanks dennis ( nice engine bay )
noboostnogo
Senior Member
close
Oct 24, 2025
- Join DateNov 2007
- LocationMechanicsville Virginia
- Posts:715
- iTrader Positive Feedback100
- iTrader Feedback Score(4)
- Car1989 Turbo Trans Am gta
- Engine383 78mm turbo
- TransmissionTh350 rmvb with brake
- Axle/Gears9 bolt 3.45s
- Likes:0
- Liked:0 Times in 0 Posts
Very nice, very inspiring!
i have a couple question tho, did you get rid of the bulkhead connector?? where did you run the wires for the headlights and turn signals and stuff.
Great job on everything, this is immaculate
i have a couple question tho, did you get rid of the bulkhead connector?? where did you run the wires for the headlights and turn signals and stuff.
Great job on everything, this is immaculate