
FueledSoul
Supreme Member
close

Dec 7, 2024
Quote:
I for one would be beating down your door when this is finished and hand you mine!! I'd want you to re-wire // route the wires & build me some SFCs then........... ...
...
Does TGO have a cover car..?..
Thanks Originally Posted by t-top havoc
Hey FueledSoul--They say "a picture is worth a thousand words"...I for one would be beating down your door when this is finished and hand you mine!! I'd want you to re-wire // route the wires & build me some SFCs then...........
...Does TGO have a cover car..?..

Quote:
Thanks Originally Posted by KennyN
FueledSoul, you do incredible work, I really enjoy watching your progress. Hopefully mine will turn out 1/2 as nice as yours is. Beautiful job!!!!! Anything you put work and time into will turn out nice sometimes its more about having patienceQuote:
updating right now Originally Posted by firebird896
Any update, I just got done reading the whole thread about 2 hrs for both Quote:
i was looking for thinking almost the same setup
i have found a march number that i think that i must have 22007-09
i like the silver coating (low cost custom style) but i can`t find it were to buy it!
i think i need that part nr because i think i have the saginaw press fit SP pulley
i have a original sepentine setup from a 88 camaro!
do you now wich one i need!
thanks dennis ( nice engine bay )
The one your looking for is http://www.summitracing.com/parts/MCH-22021-09/ if your running a belt driving water pumpOriginally Posted by Iroc-Dennis
may i ask wich march pulley set you are use?i was looking for thinking almost the same setup
i have found a march number that i think that i must have 22007-09
i like the silver coating (low cost custom style) but i can`t find it were to buy it!
i think i need that part nr because i think i have the saginaw press fit SP pulley
i have a original sepentine setup from a 88 camaro!
do you now wich one i need!
thanks dennis ( nice engine bay )
Quote:
i have a couple question tho, did you get rid of the bulkhead connector?? where did you run the wires for the headlights and turn signals and stuff.
Great job on everything, this is immaculate
yea i got rid of the bulkhead, headlight wires etc all post a pic shortly showing where i routed them.Originally Posted by noboostnogo
Very nice, very inspiring!i have a couple question tho, did you get rid of the bulkhead connector?? where did you run the wires for the headlights and turn signals and stuff.
Great job on everything, this is immaculate
Thanks
FueledSoul
Supreme Member
close
Dec 7, 2024
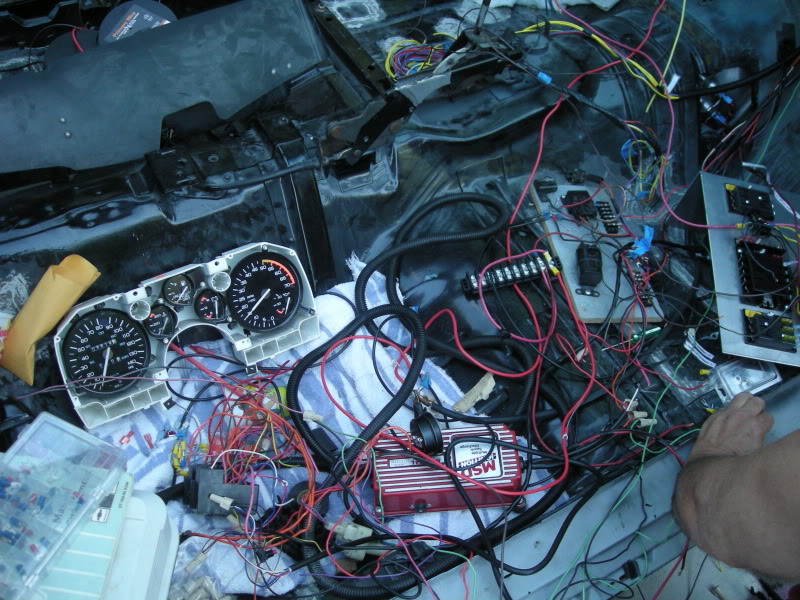
So after getting the engine harness done it was time to start on the board i used a sheet of 14ga aluminum and had drawn up some dimension and had a friend brake it since i don't have a brake. started with the fuse blocks and relays. i decided i didn't need the painless anymore since i already this far and we have been redoing the entire cars wiring anyway.
FueledSoul
Supreme Member
close
Dec 7, 2024
FueledSoul
Supreme Member
close
Dec 7, 2024
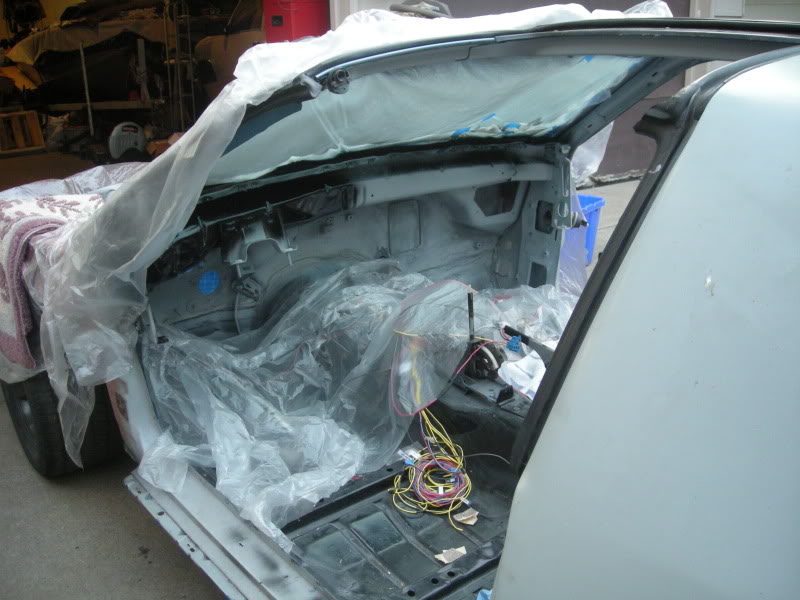
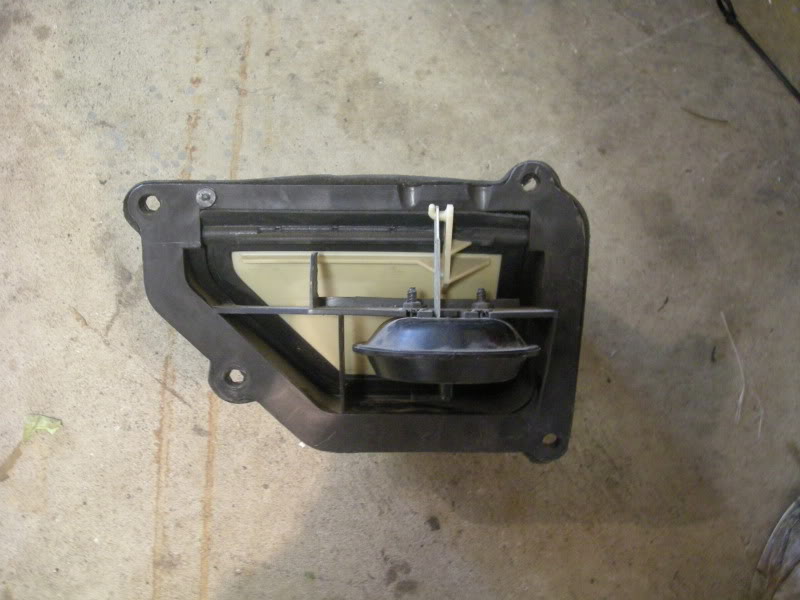
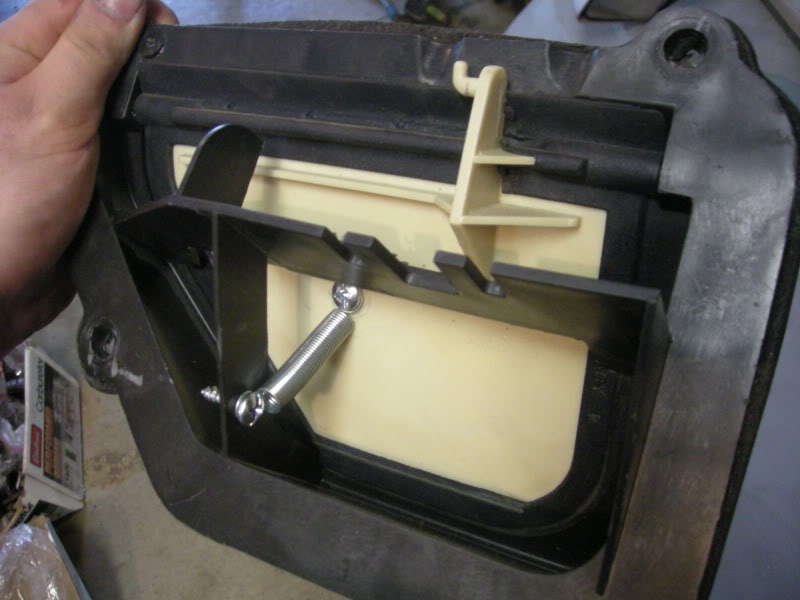
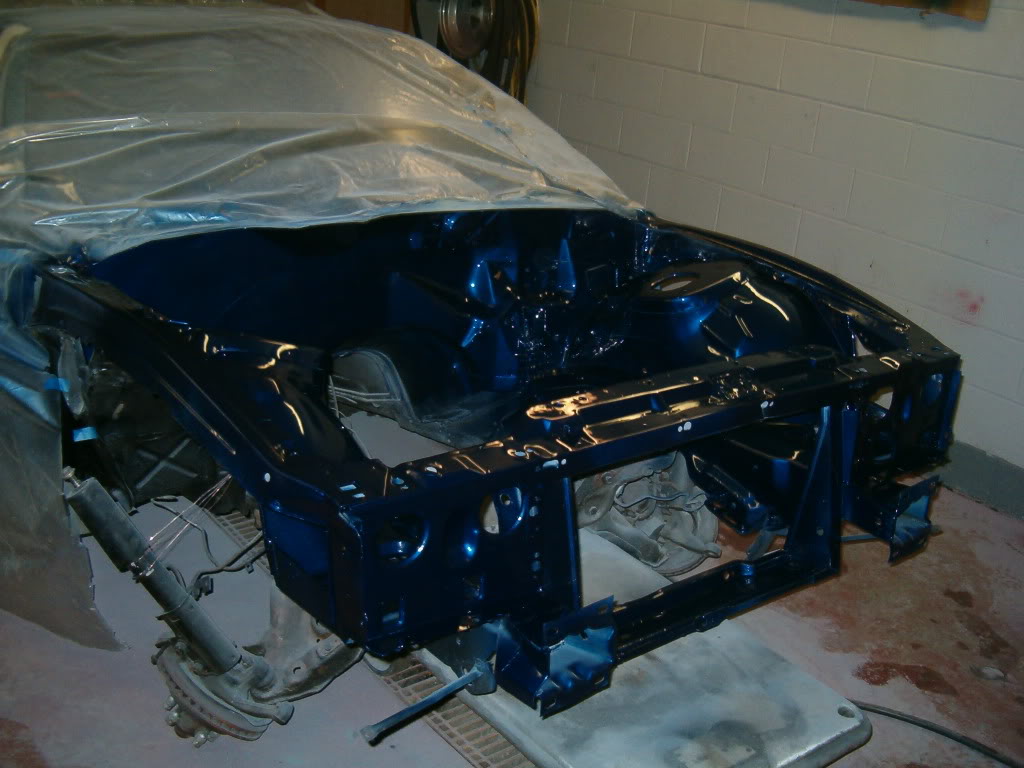
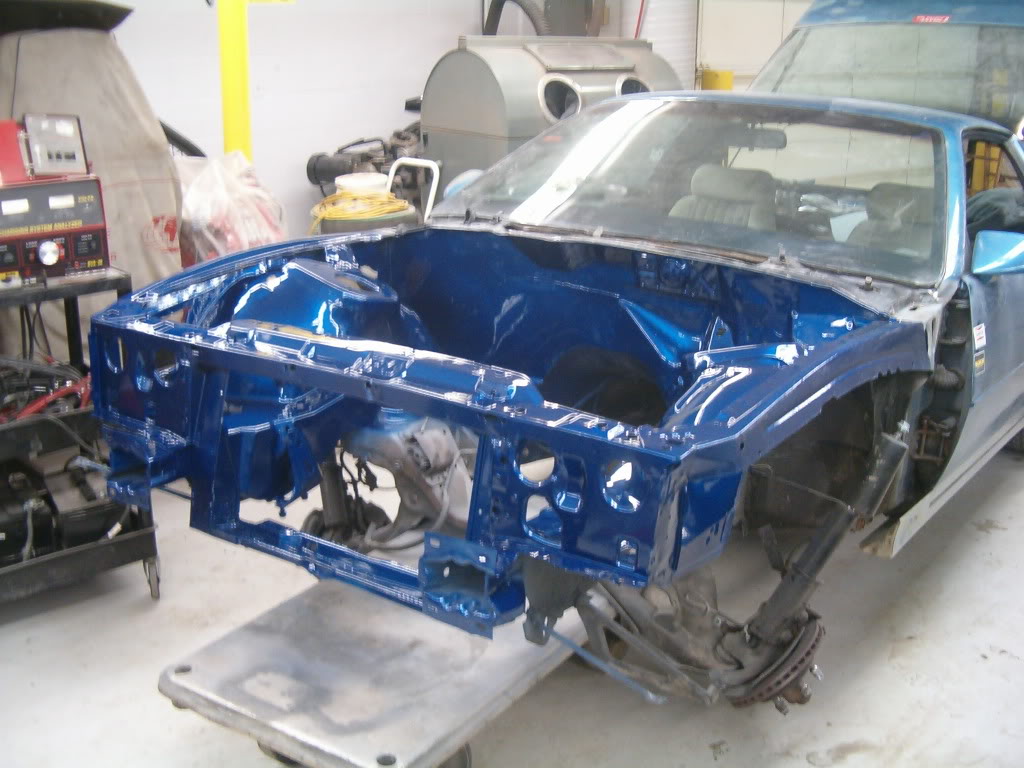
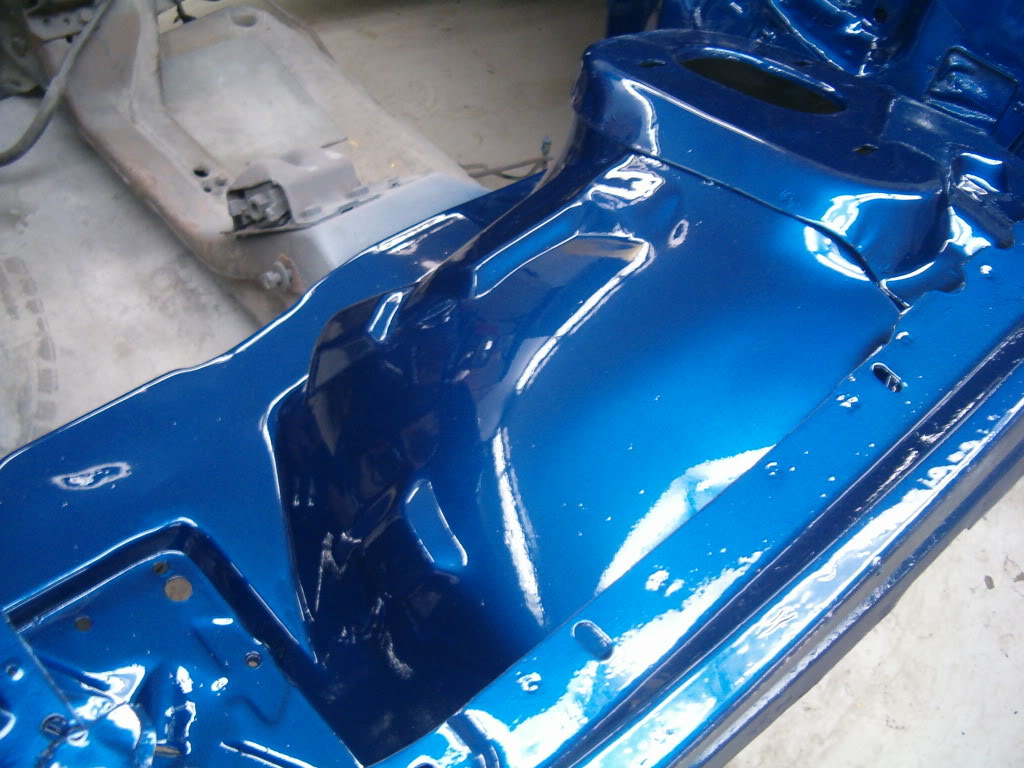
I started to finish painting the firewall and the rest of the inside. i also decided not to block off or weld a plate in place of the fresh air flap, instead i utilized it for a pressure relief to keep my gaskets from blowing out when i shut the doors or hatch. i would have left the vacuum diaphragm but it ended up interfering with the fuse board i had made up so i took it out and ran a spring.

FueledSoul
Supreme Member
close
Dec 7, 2024
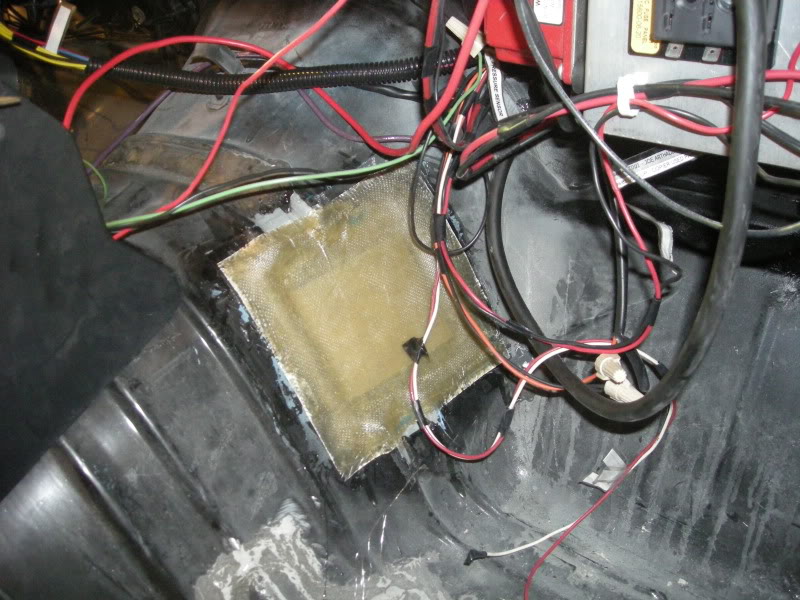
I forgot to add to when i was coming up with the board i also wanted to bolt my msd to it so i had it wrap in. i also finished making a fibber glass excess panel for my tranny lines.

FueledSoul
Supreme Member
close
Dec 7, 2024
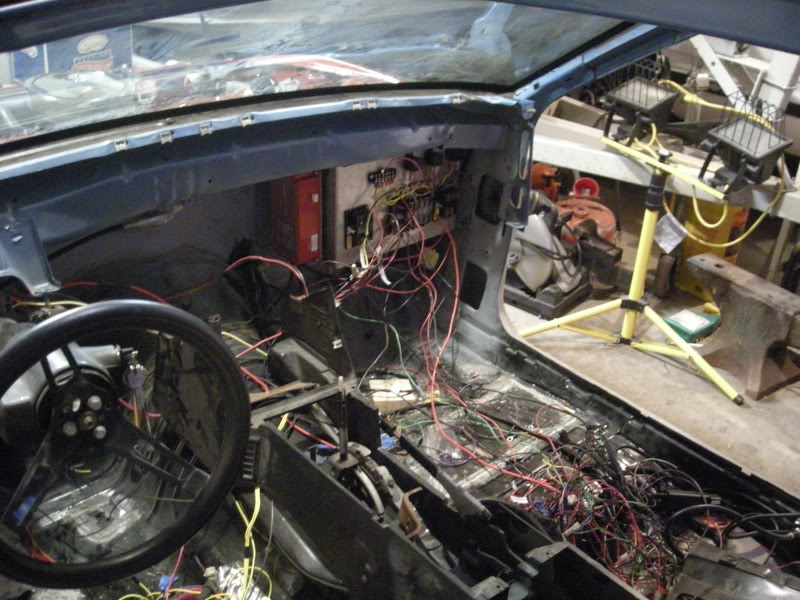
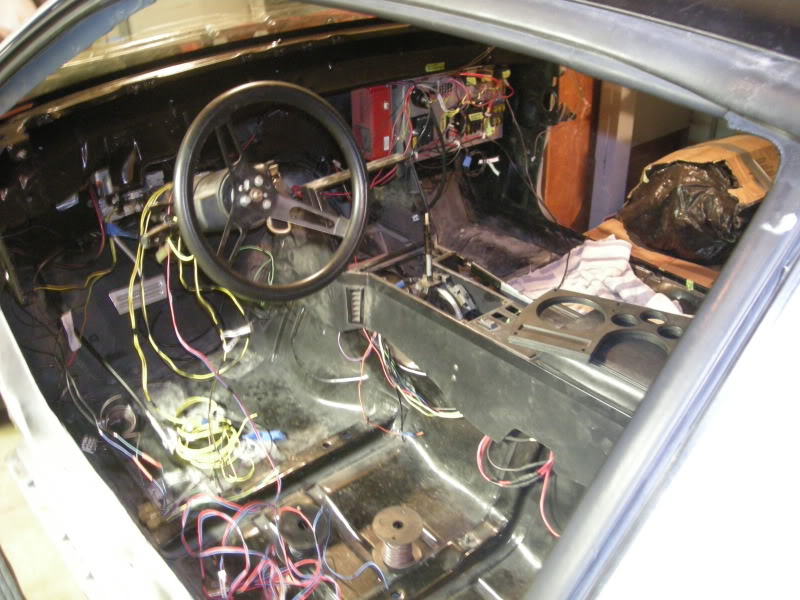
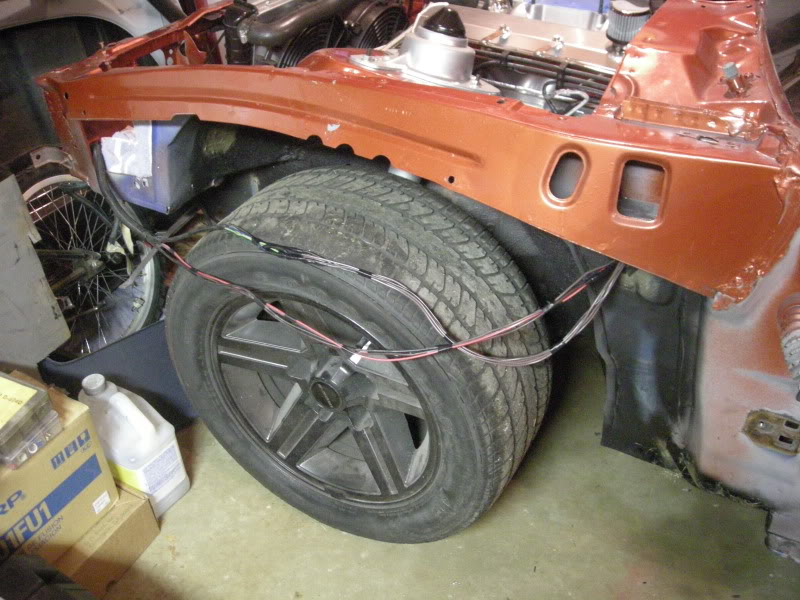
Wires still look messy but it will be better looking then any factory 80's wiring. Heres how i ran the headlight etc wires.
FueledSoul
Supreme Member
close
Dec 7, 2024
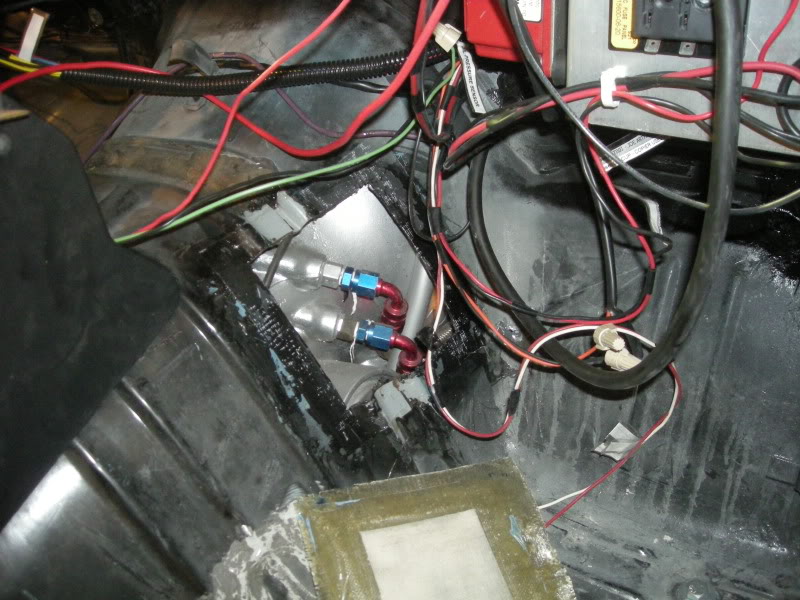
I got it running this summer but had some AFR issues which later turned out to be dirt in the carb i completely rebuilt it with in the last month also picked up a ultrasonic cleaner which help clean it all up even all orifices and cut rebuilding times down. i turned the fuel pump on and had gas from the front lines pumping into a shop rag and i got a lot of particles in the rag i don't know yet if its in just the lines that have stuff in them or somethings going on in the tank so im just going to cycle the fuel and add new gas and see if i still get anything coming out, im running a factory in-line fuel filter too so will see.
I still have to make a radiator hose, brackets for the carb and a braided kick down, finish the radiator top plate and im still stuck on what to do brakes I.E booster and master, but. . .
For your entertainment heres some videos
Note: The video and sound isn't greatest quality.

I still have to make a radiator hose, brackets for the carb and a braided kick down, finish the radiator top plate and im still stuck on what to do brakes I.E booster and master, but. . .
For your entertainment heres some videos
Note: The video and sound isn't greatest quality.
noboostnogo
Senior Member
close
Oct 24, 2025
- Join DateNov 2007
- LocationMechanicsville Virginia
- Posts:715
- iTrader Positive Feedback100
- iTrader Feedback Score(4)
- Car1989 Turbo Trans Am gta
- Engine383 78mm turbo
- TransmissionTh350 rmvb with brake
- Axle/Gears9 bolt 3.45s
- Likes:0
- Liked:0 Times in 0 Posts
wow what a wire tuck!!!! awsome job

im just curious to know how you are distributing your + power. I cant seem to make it look nice. Is that thick black wire your positive from the battery or starter?
Keep up the amazing work.
im just curious to know how you are distributing your + power. I cant seem to make it look nice. Is that thick black wire your positive from the battery or starter?
Keep up the amazing work.

good to see you got it running!
Supreme Member
Since you have allready come this far with your build, I would recommend using a pre-fabbed locking metal access panel (hinged with a latch) for your trans line access.
Summit and Jegs carry them in stock....

Summit and Jegs carry them in stock....
FueledSoul
Supreme Member
close
Dec 7, 2024
Quote:
im just curious to know how you are distributing your + power. I cant seem to make it look nice. Is that thick black wire your positive from the battery or starter?
Keep up the amazing work.
i move the bat to the rear of the car i have a main power wire going to the front of that panel its just not hooked up in that pic, the one you see goes to the starter. thanks Originally Posted by noboostnogo
wow what a wire tuck!!!! awsome jobim just curious to know how you are distributing your + power. I cant seem to make it look nice. Is that thick black wire your positive from the battery or starter?
Keep up the amazing work.
Quote:
Originally Posted by FlamedROC
good to see you got it running! Quote:
Summit and Jegs carry them in stock....
its already cut and the fibber glass one was molded to that area fits perfact, just going to used RTV it hold it in place and keep it sealed. never see it undercarpetOriginally Posted by 1bad91Z
Since you have allready come this far with your build, I would recommend using a pre-fabbed locking metal access panel (hinged with a latch) for your trans line access.Summit and Jegs carry them in stock....
Member
Looking great man, I also shaved my firewall, and smooted out alot and filled all holes.
Close up

Close up
Senior Member
Nice job curtiszyz How old are you again? arent you 17? Great work
Member
Quote:
Originally Posted by Sonymaster20
Nice job curtiszyz How old are you again? arent you 17? Great work Thanks, and yes I am.

Supreme Member
dont know how i missed this thread.
pretty slick stuff!
any more progress on your transmission lines cover?
pretty slick stuff!
any more progress on your transmission lines cover?

LOL and I thought I was making progress, great looking bays, both of you.
FueledSoul
Supreme Member
close
Dec 7, 2024
Quote:
Thanks. yours looks nice! too. what color is that?Originally Posted by Curtisyz54
Looking great man, I also shaved my firewall, and smooted out alot and filled all holes. FueledSoul
Supreme Member
close
Dec 7, 2024
Quote:
pretty slick stuff!
any more progress on your transmission lines cover?
the covers done i just needed to run a bead rtv around it and snap it in placeOriginally Posted by stage20
dont know how i missed this thread.pretty slick stuff!
any more progress on your transmission lines cover?
Member
Quote:
Thanks! Its called Deep Water Pearl. It is used on the 09 Challengers and what not. Its a Chrysler color.Originally Posted by FueledSoul
Thanks. yours looks nice! too. what color is that? noboostnogo
Senior Member
close
Oct 24, 2025
- Join DateNov 2007
- LocationMechanicsville Virginia
- Posts:715
- iTrader Positive Feedback100
- iTrader Feedback Score(4)
- Car1989 Turbo Trans Am gta
- Engine383 78mm turbo
- TransmissionTh350 rmvb with brake
- Axle/Gears9 bolt 3.45s
- Likes:0
- Liked:0 Times in 0 Posts
any updates?
FueledSoul
Supreme Member
close
Dec 7, 2024
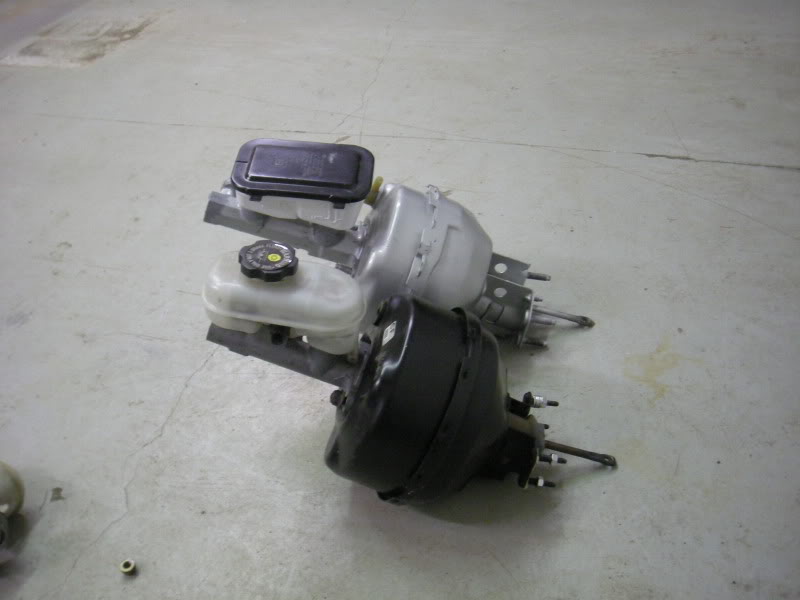
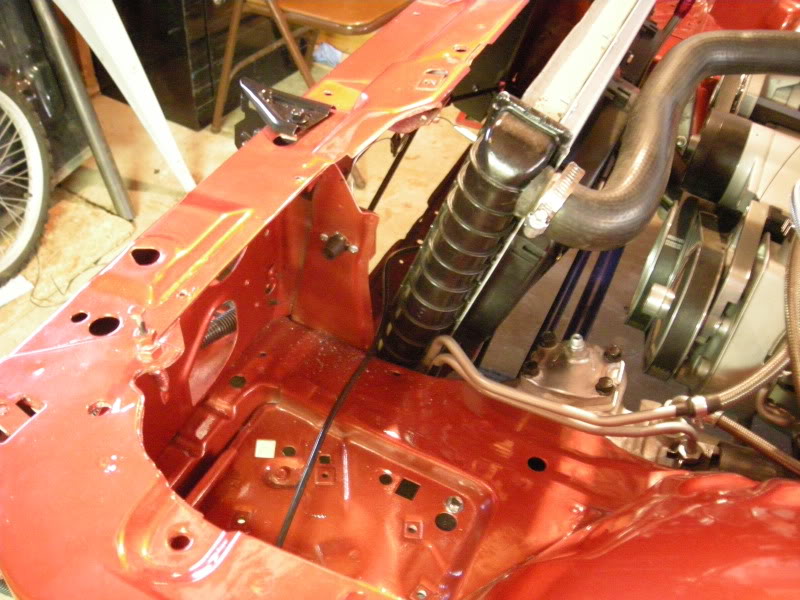
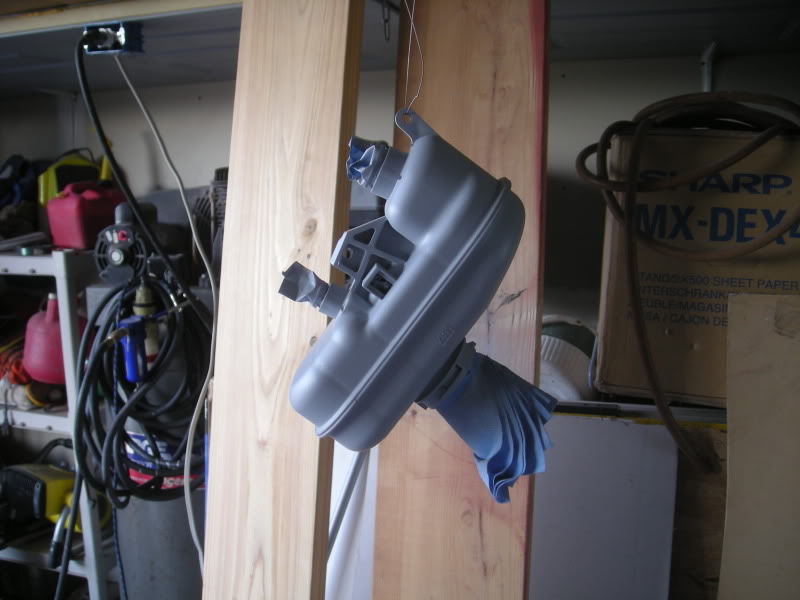
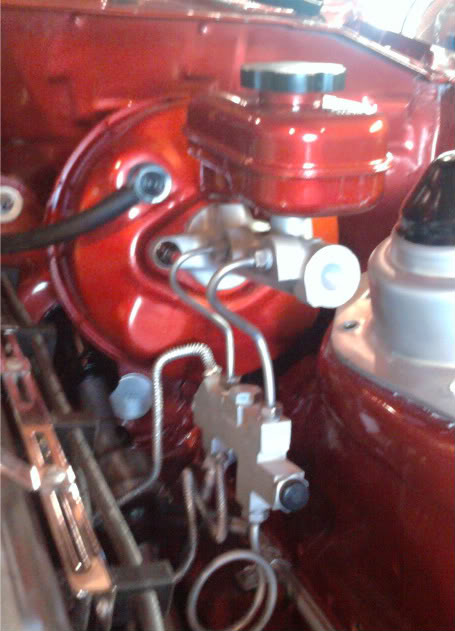
Well i finally decided on what to run for a brake assist.
Brakes:
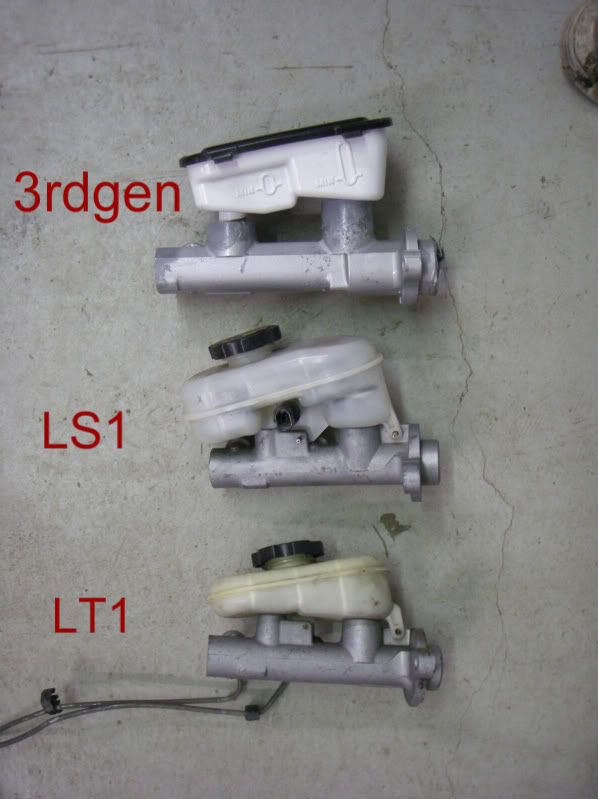
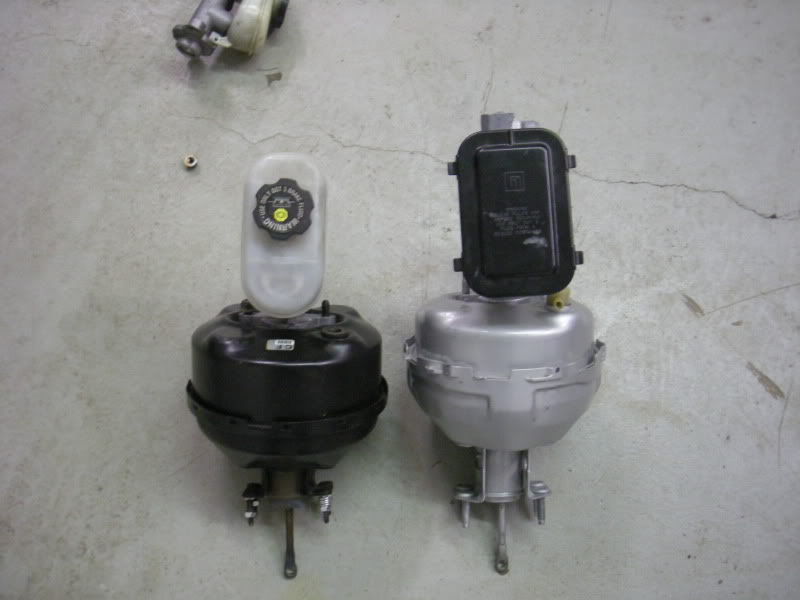
i bought a LT1 booster and LS1 master cylinder. i just test fitted them on the car. the booster tucks closer to the fire wall and its appearance is much cleaner, i still have to prep it and put on some color, im painting it the same color as the car so it will blend in with the bay a bit more. i will use the stock prop valve with the ls1 master at least that's the plan. the master cylinder is much smaller and more compacted then the 3rdgen master so all in all im much happier plus i gained some brake performance going with a 1" bore ls1 master cylinder.
Carb:
I was having problems with the flimsy crab bracket, im going to order a bracket from loker, i did pick up a braided stainless steel TV cable since its the only one that can be used with that bracket.
Im also going to have to add a fuel fillter close to the carb, i already have one thats inline under the car but im picking up some junk in the carb which caused some fuel problems and flooding i rebuilt the carb entirety a few months back so its all ready to go for round 2. so i might have to re-do some lines and run things a bit differently now.
Other:
I have to paint the top radiator plate and bolt that in, i have to find some clips for the hood release. i still have to mount the 4thgen washer bottle and then find a place to bolt the aftermarket over flow and some other miscellaneous stuff. engine related i also have to make a y-pipe and hook up my exhaust system. then im pretty much done other then doing some small detail work and touch ups and a wash.
Oh and im about 75% done with wiring up the whole entire car thanks to my dad
Brakes:
i bought a LT1 booster and LS1 master cylinder. i just test fitted them on the car. the booster tucks closer to the fire wall and its appearance is much cleaner, i still have to prep it and put on some color, im painting it the same color as the car so it will blend in with the bay a bit more. i will use the stock prop valve with the ls1 master at least that's the plan. the master cylinder is much smaller and more compacted then the 3rdgen master so all in all im much happier plus i gained some brake performance going with a 1" bore ls1 master cylinder.
Carb:
I was having problems with the flimsy crab bracket, im going to order a bracket from loker, i did pick up a braided stainless steel TV cable since its the only one that can be used with that bracket.
Im also going to have to add a fuel fillter close to the carb, i already have one thats inline under the car but im picking up some junk in the carb which caused some fuel problems and flooding i rebuilt the carb entirety a few months back so its all ready to go for round 2. so i might have to re-do some lines and run things a bit differently now.
Other:
I have to paint the top radiator plate and bolt that in, i have to find some clips for the hood release. i still have to mount the 4thgen washer bottle and then find a place to bolt the aftermarket over flow and some other miscellaneous stuff. engine related i also have to make a y-pipe and hook up my exhaust system. then im pretty much done other then doing some small detail work and touch ups and a wash.
Oh and im about 75% done with wiring up the whole entire car thanks to my dad

Supreme Member
Good to hear from ya FueledSoul!!!
Interesting use for brake booster & master cylinder....
Amazing work...Thanks for adding to inspiration...
Interesting use for brake booster & master cylinder....
Amazing work...Thanks for adding to inspiration...
FueledSoul i have send you a PM
dennis
dennis

The Project
Supreme Member
close
Oct 10, 2024
Quote:
Brakes:
i bought a LT1 booster and LS1 master cylinder. i just test fitted them on the car. the booster tucks closer to the fire wall and its appearance is much cleaner, i still have to prep it and put on some color, im painting it the same color as the car so it will blend in with the bay a bit more. i will use the stock prop valve with the ls1 master at least that's the plan. the master cylinder is much smaller and more compacted then the 3rdgen master so all in all im much happier plus i gained some brake performance going with a 1" bore ls1 master cylinder.
Cool idea Originally Posted by FueledSoul
Well i finally decided on what to run for a brake assist. Brakes:
i bought a LT1 booster and LS1 master cylinder. i just test fitted them on the car. the booster tucks closer to the fire wall and its appearance is much cleaner, i still have to prep it and put on some color, im painting it the same color as the car so it will blend in with the bay a bit more. i will use the stock prop valve with the ls1 master at least that's the plan. the master cylinder is much smaller and more compacted then the 3rdgen master so all in all im much happier plus i gained some brake performance going with a 1" bore ls1 master cylinder.

noboostnogo
Senior Member
close
Oct 24, 2025
- Join DateNov 2007
- LocationMechanicsville Virginia
- Posts:715
- iTrader Positive Feedback100
- iTrader Feedback Score(4)
- Car1989 Turbo Trans Am gta
- Engine383 78mm turbo
- TransmissionTh350 rmvb with brake
- Axle/Gears9 bolt 3.45s
- Likes:0
- Liked:0 Times in 0 Posts
we need pictures lol
hows the wiring coming along?
hows the wiring coming along?
FueledSoul
Supreme Member
close
Dec 7, 2024
Quote:
Interesting use for brake booster & master cylinder....
Amazing work...Thanks for adding to inspiration...
Originally Posted by t-top havoc
Good to hear from ya FueledSoul!!!Interesting use for brake booster & master cylinder....
Amazing work...Thanks for adding to inspiration...
Thanks
Quote:
dennis
PM sent backOriginally Posted by Iroc-Dennis
FueledSoul i have send you a PMdennis
Quote:
Originally Posted by The Project
Cool idea Quote:
hows the wiring coming along?
Originally Posted by noboostnogo
we need pictures lolhows the wiring coming along?
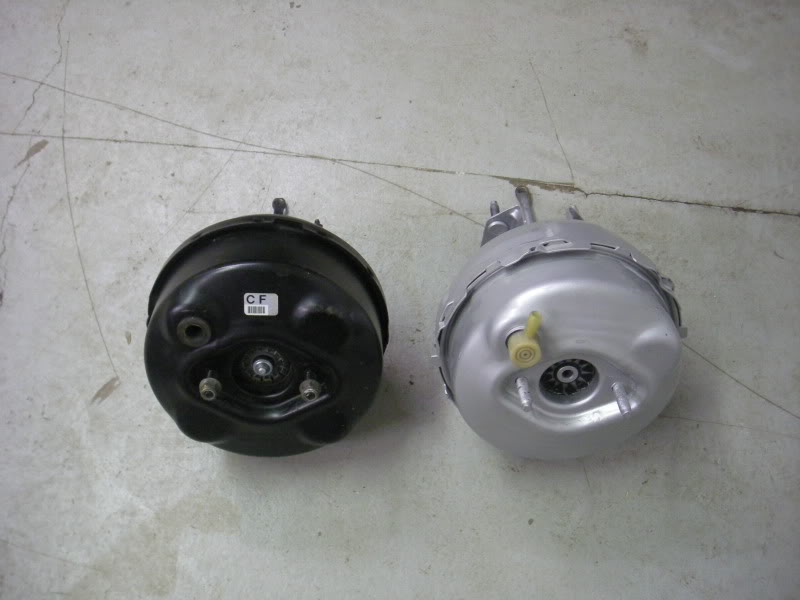
If your talking about the brake setup i might have time to take some comparison pics and post them tomorrow. still haven't got any of it hooked up on the car yet. as far as wiring we have to wire in the door locks, power windows, hatch pull down and wires for the curiosity lights. then its all done for the most part but we'll still have to test everything before i loom it.
FueledSoul
Supreme Member
close
Dec 7, 2024
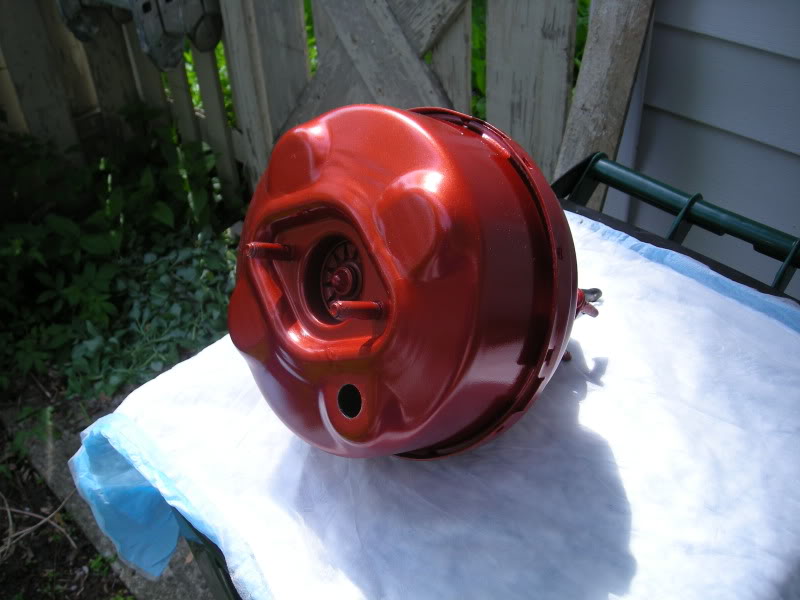
Heres some pics
FueledSoul
Supreme Member
close
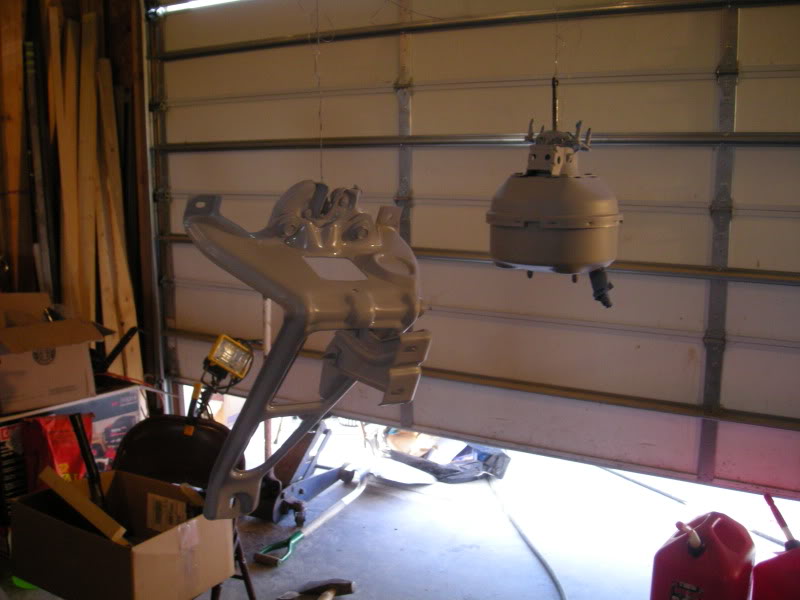
Dec 7, 2024
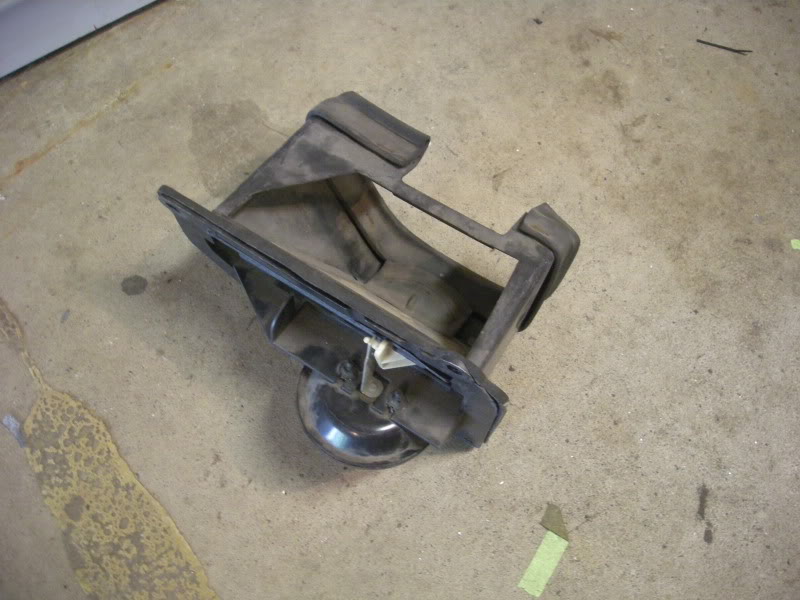
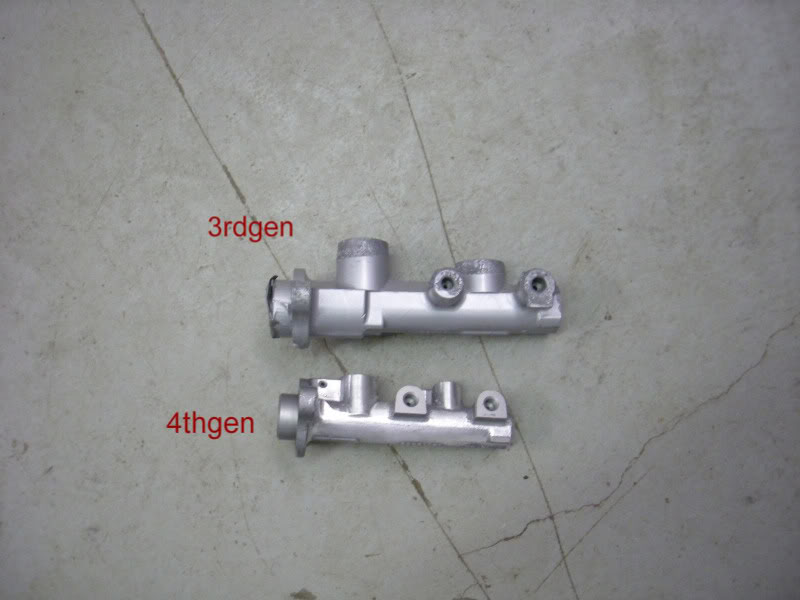
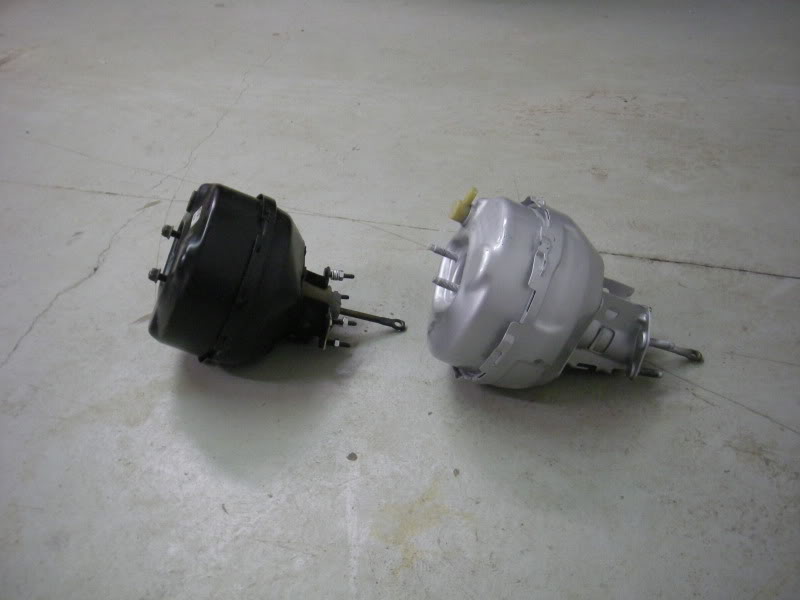
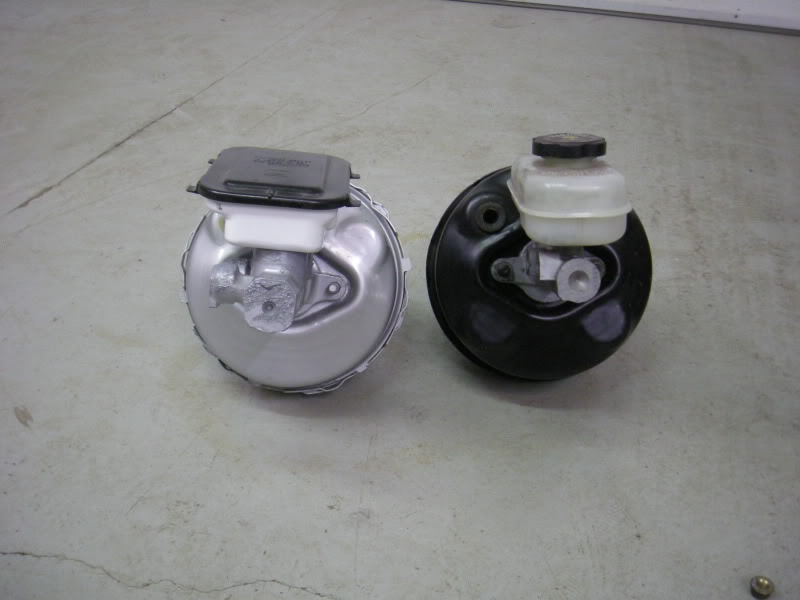
4thgen and 3rdgen booster compare

FueledSoul
Supreme Member
close
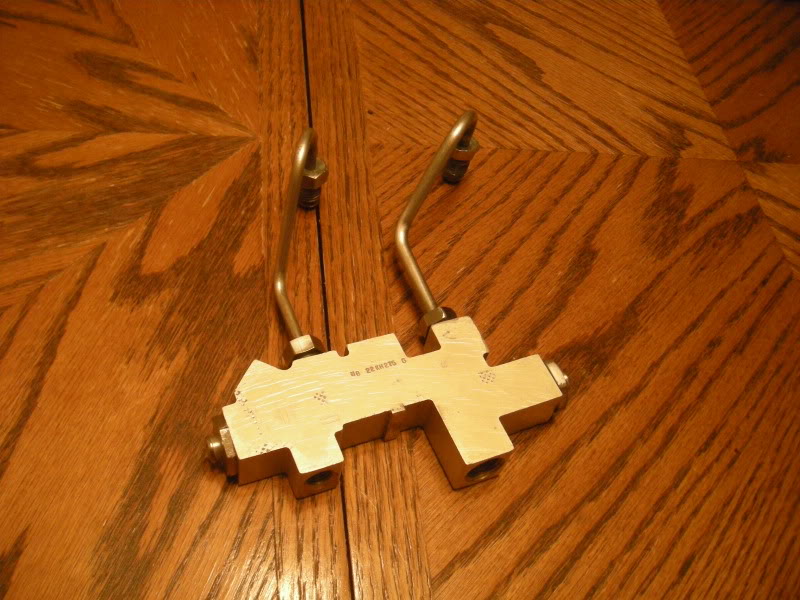
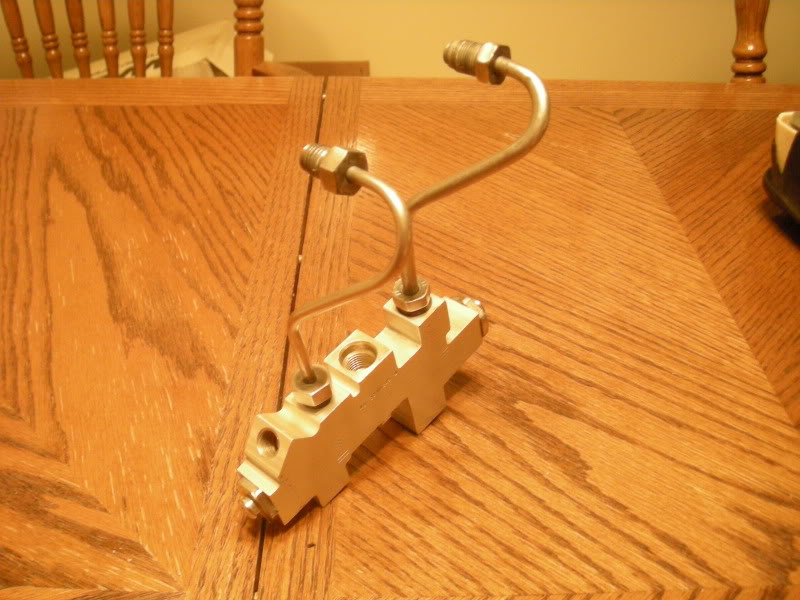
Dec 7, 2024
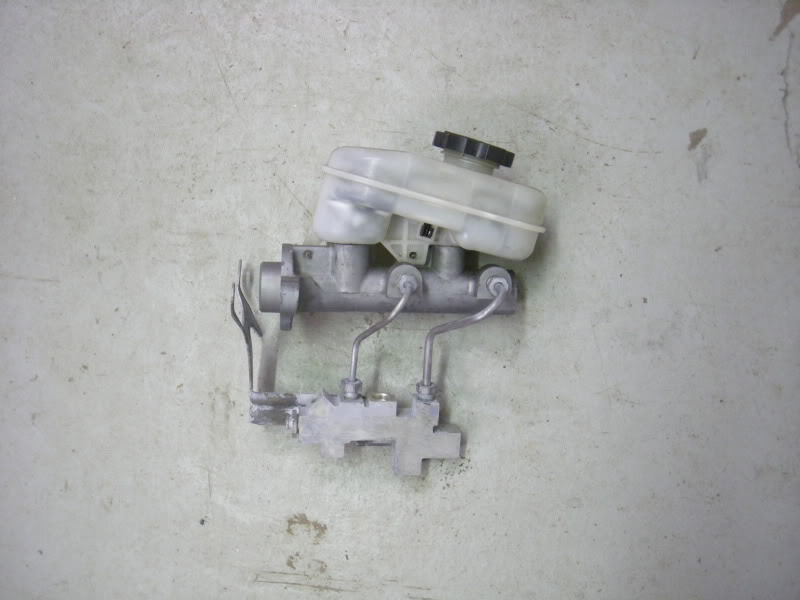
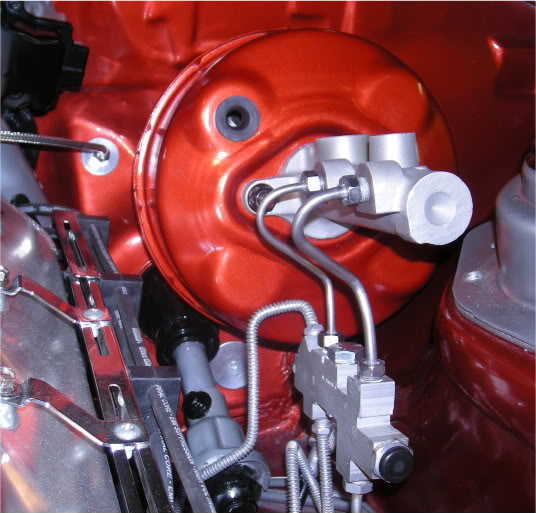
LS1 master with 3rdgen prob valve
Supreme Member
Definitely remembering this when I clean out my bay and do my brake setup. Awesome comparison.
Member
Have you considered hydroboost? Alot smaller than that bulky vacuum booster.
Supreme Member
Something like this, in which they have a bolt in application for us, gets rid of the big ole' brake booster
http://www.hydratechbraking.com/GM_3rdgenF_Body.html
http://www.hydratechbraking.com/GM_3rdgenF_Body.html
Member
or even a hydroboost off a astrovan for the budget minded. Eventually I'll go that route when the engine bay is ready for painting and such.
FueledSoul
Supreme Member
close
Dec 7, 2024
Iv looked into running hydro-boost, pass. iv looked into everything. . . over a year this is what i ended up with its cheap and better looking then the 3rdgen master and booster. i would love to dump the booster and run manual brakes and really clean up the bay but this is going to be driven on the street
Senior Member
Good job, you've inspired me.
FueledSoul
Supreme Member
close
Dec 7, 2024
thanks
FueledSoul
Supreme Member
close
Dec 7, 2024
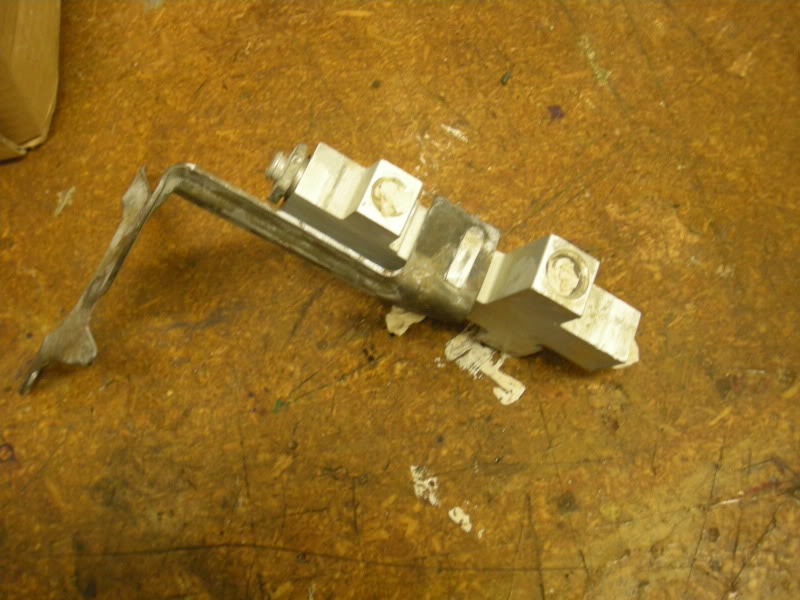
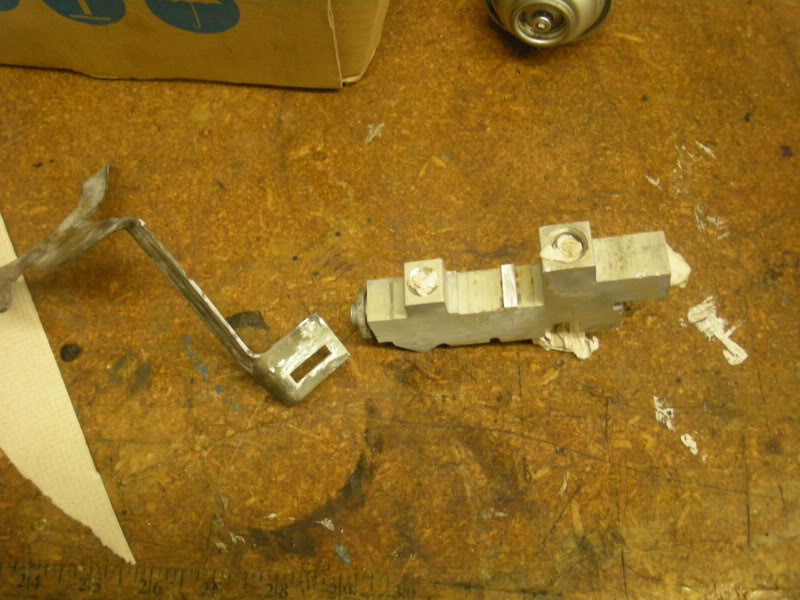
I worked on the prop valve tonight cleaned it put it back together and semi polished it. . .

Senior Member
I'm at the same thing right now, nice work man!!
Quote:

Originally Posted by FueledSoul
Wires still look messy but it will be better looking then any factory 80's wiring. Heres how i ran the headlight etc wires. 
Wow its been a long time since I've been to this thread and wow, what an inspiration for me to want to at least work on my wiring harness and fix some of the wires that have been cut and splices before I got the car. Great job!!
Senior Member
So how goes the progress Soul, we haven't heard from you in here for almost a year!

Supreme Member
built91Z28
Supreme Member
close
Feb 22, 2013
I'm glad I looked at this thread. I think I need a new booster anyways and really wanted one that sat just a little farther back than the stock one. The tip of my master hits my Spohn strut mount and only lets me set the camber so far in.
Member
Wow, great thread! I was looking for how-to's about cleaning the engine bay up...but I don't think I'm ready to rip the motor out and respray it just yet. LoL! I just wanted to clean up the existing bay as there is so much grease and crap, and it's a white car, so it's filthy. Someday I hope to have an engine bay as clean as yours. Great job!
Senior Member
How did the car turn out? Did you get it finished?
FueledSoul
Supreme Member
close
Dec 7, 2024
Thanks for all the comments and complements guys! Progress has been some what slow on the bay, iv been busy busting out the body panels, here's whats going on with that
https://www.thirdgen.org/forums/auto...ml#post4647632
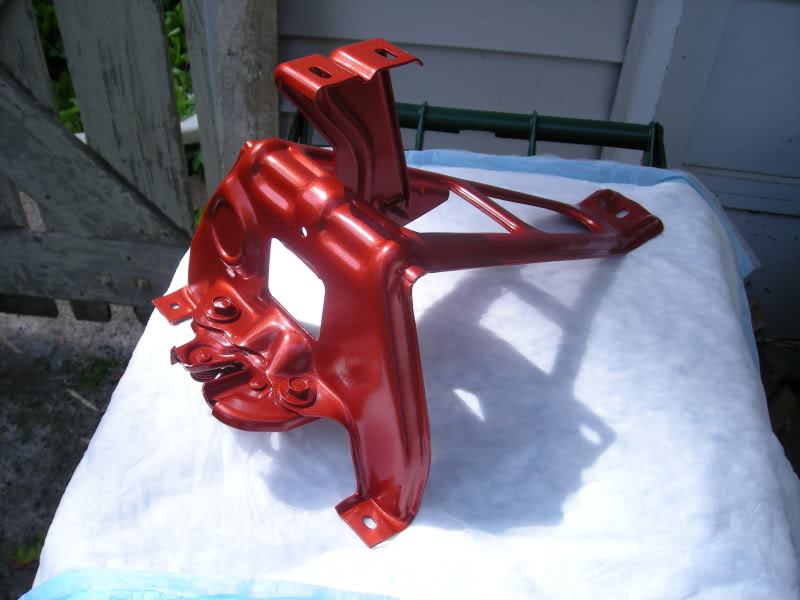
Here is some pics of the booster and other parts i installed into the bay.
its not much.
Drilled out and mounted my secondary fan control box
Got some peaces in primmer painted

https://www.thirdgen.org/forums/auto...ml#post4647632
Here is some pics of the booster and other parts i installed into the bay.
its not much.
Drilled out and mounted my secondary fan control box
Got some peaces in primmer painted
FueledSoul
Supreme Member
close
Dec 7, 2024
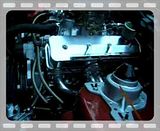
Here is some crappy camera phone pics, sorry for the quality, hope to get some better ones when im done with everything

Senior Member
Ah I didn't know you'd started another thread, I like your door handles lol. The engine bay looks amazing, and I really like that color.
FueledSoul
Supreme Member
close
Dec 7, 2024
thanks man
Member
Sweet man, I'll have to come down to the cities sometime and check the car out when it's done...I'm just going through your body work thread right now.
WOW!
Supreme Member
That looks great! 