When you click on links to various merchants on this site and make a purchase, this can result in this site earning a commission. Affiliate programs and affiliations include, but are not limited to, the eBay Partner Network.
Organized Drag Racing and AutocrossDrag racing and autocross discussions and questions. Techniques, tips, suggestions, and "what will I run?" questions.
OK I'm back! Sorry for the long delay.. it's been a crazy summer for me and my photo hosting website was giving me issues and I didn't have a second to figure it out. Decided to hop on tonight though to set things straight and get back on track with my posts.
I've been keeping up with the car work where I can but I keep feeling like I am so far away. Lots of small issues slowing me down but I'm chipping away! I would love to post some detailed information about everything I've done since my last posts, but I think I will let some pictures get everyone up to speed. If you have any specific questions or want any more details on something just let me know!
Rear suspension going in. UMI weight jacks, new ARP studs in the axles and a Spohn Panhard bar that came with the car:
Front suspension going in. UMI weight jacks, stock A-arms rebuilt with Delrin bushings and tall ball joints, modified stock spindles for C6 Z51 front brakes and 13.4" rotors, upgraded hubs for 1LE bearings:
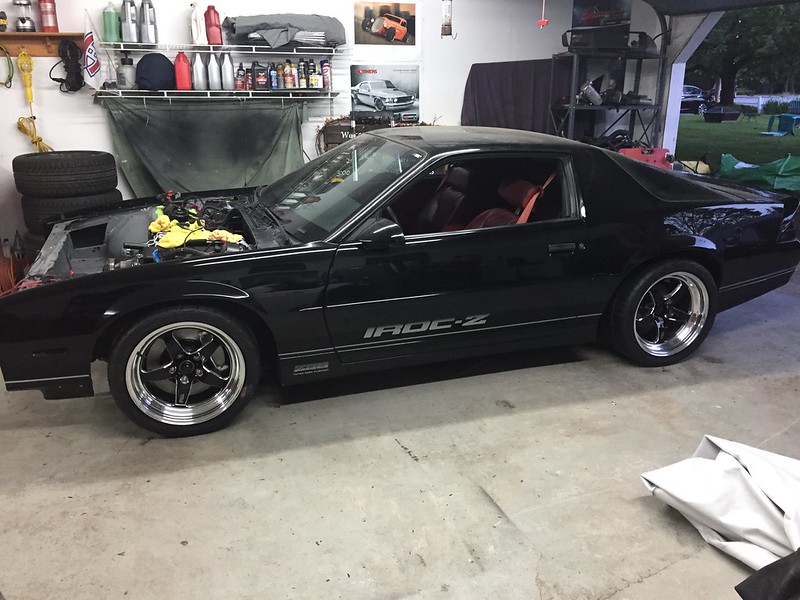
And my wheels and tires are all mounted up and ready to go!
First time the car has been on all 4 tires in 1 and a half years!
I'm currently attacking the engine bay and trying to get everything squared away there. Since this picture was taken, I have my steering shaft installed, headers wrapped and installed and I'm almost done with installing a newer serpentine setup from a later 3rd gen:I should be posting some more regular updates now so stay tuned!
Awesome build! How hard was it to install the front and rear weight jacks? Are they just bolt in or were modifications made?
Front were installed just like a normal spring. For the rears, you need to grind away some metal on the driver's side lower spring perch so you will have access to fit a socket up there to adjust the spring. I did mine with a grinder and a Dremel and it worked OK. On the passenger side, it looks like i may need to relocate a brake line clip. Not too bad overall.
I had been wondering about how you were doing with the car project. Excellent progress. Nice choice of parts too.
Do you think you will be ready for next weekend? I see you are signed up for the UMI Autocross, which is 1 week from today!
Unfortunately no I was pushing really hard to get there but just ran into too many small issues. I would have had to cut a lot of corners to have the car running in time and I didn't want to do that. I'm bummed, but I am still cranking away on it. Now I have the time to do things right though and not rush.
Unfortunately no I was pushing really hard to get there but just ran into too many small issues. I would have had to cut a lot of corners to have the car running in time and I didn't want to do that. I'm bummed, but I am still cranking away on it. Now I have the time to do things right though and not rush.
gotcha, thats ok, better to be sure to build it right instead of cut-corners. no worries. next time then
I see you are still registered on the entrants list online; I was actually just able to get registered a few days ago due to someone dropping out. If you can't make it, maybe think about contacting UMI to see if they can turnover your spot to someone on the wait-list? maybe you can even get your $ back. I will now be attending and am prepared to get my butt kicked all weekend, but still have fun during the event and the drive to/from it.
My wheels are 18x10.5" with a 6.6" backspace on all 4 corners. I haven't quite gotten it down on the ground with full weight yet to really check the fitment but it looks damn close. I am running C6 Z51 rotors in the front which does add to the track width.
I received recommendations to go with less backspacing in the front (the next step down on these wheels is 6.2") but my thought process is you can always REDUCE backspacing with a small spacer to fine tune the fitment, whereas you can't ADD BACK backspacing (move the wheel closer to the center of the car) without ordering a new set.
Front backspacing needs to be 6 inches on that wheel size. Get a good billet 1/2 inch spacer and you should be good. Rears may need some small spacers as well depending on axle movement in hard corners and sidewall flex on the tires.
My next big task is getting my radiator installed. After a bunch of research, I ended up going with Cold Case for my radiator. They seemed to offer good quality and were about half the price of the bigger guys like BeCool and Dewitts. The quality so far looks good, and I ordered mine with their shroud and cooling fans.
To attach the shroud to the radiator, they supply some rivets or self-tapping screws for you to use. You have to drill your own holes in the shroud and the radiator (maybe the reason for the lower cost). Riveting the shroud to the radiator didn't seem like a great idea if I ever had to remove it. I also didn't really like the look of self tapping screws. So, I invested in a Riv-nut gun and decided to go that route and use some nice button head screws for a clean look:
I also wasn't crazy about the polished look (there's honestly nothing polished under my hood right now) so I decided to paint the shroud black:
One of the issues I'm running into now is fitting the radiator in the stock space. I'm running into 2 problems:
The first is the new AC condensor I bought doesn't quite match the original, which is causing the tubes to hit the side of the radiator. (I checked and the radiator is the same width as the stock one, which is what I originally thought the issue was.) I guess my options here are to use my old stock one, order one from my local autoparts store and hoping that one is right, or cutting and re-soldering the tubes on my new one.I'm leaning towards throwing the stock condensor back in for now to keep things moving.
I'm going to stick with the stock one for now since my system was holding pressure OK when I took it out.
The next issue is the new radiator is thicker than the stock one, so of course my upper radiator support does not fit. Eventually I'd like to go with a nice custom upper radiator support, but for now to get the car running I am going to modify the stock one to fit. I made some little extension brackets that work to hold it in place until I can access to a shear and brake to make a custom upper radiator support:
nice use of the rivnuts, I don't think I could drill into a new radiator like that though. Also, you can just tweak those lines on the condenser, just support the braze joint so the line isn't bending at that sopt. And believe it or not, the Be Cool radiators just came with a piece of sheet metal as a spacer to move the upper radiator support back, just like you are doing except they just used a long piece of aluminum that spanned the whole length
I had issues when fitting my Griffen 3" rad.
Three things. Width, depth (front to back) and height. (Not much else is there?)
I fabbed an adapter out of 1/4" x 2" aluminium bar stock and fashioned a way to connect it to the rad support and the fan shroud to it. Came out pretty well I think.That took care of the height issue. And the depth on the topside.
On the bottom, it didn't fit in the stock rad support lower cradle nor the rubber isolators. I had to notch the C-channel of the lower rad support and then utilize some wider than stock isolators. Worked out OK.
Width required trimming the overlap welds along the lower support. Nothing at all visible there when looking into the engine bay.
I don't have pictures of the lower support mod but I do have one of the upper rad to shroud adapter.
(That engine bay sure has changed in the ten years since that picture was taken! Upper rad hose included...)
Last edited by skinny z; Aug 14, 2019 at 10:19 PM.
nice use of the rivnuts, I don't think I could drill into a new radiator like that though. Also, you can just tweak those lines on the condenser, just support the braze joint so the line isn't bending at that sopt. And believe it or not, the Be Cool radiators just came with a piece of sheet metal as a spacer to move the upper radiator support back, just like you are doing except they just used a long piece of aluminum that spanned the whole length
Ok I will try bending the lines on the condenser... it's already too late to return it so might as well! I wish mine came with the spacer, but I'm guessing that's one of things you lose with the lower price.
I had issues when fitting my Griffen 3" rad.
Three things. Width, depth (front to back) and height. (Not much else is there?)
I fabbed an adapter out of 1/4" x 2" aluminium bar stock and fashioned a way to connect it to the rad support and the fan shroud to it. Came out pretty well I think.That took care of the height issue. And the depth on the topside.
On the bottom, it didn't fit in the stock rad support lower cradle nor the rubber isolators. I had to notch the C-channel of the lower rad support and then utilize some wider than stock isolators. Worked out OK.
Width required trimming the overlap welds along the lower support. Nothing at all visible there when looking into the engine bay.
I don't have pictures of the lower support mod but I do have one of the upper rad to shroud adapter.
Nice clean setup! I actually like the one solid piece that goes right across... wish I had thought of that! I also had to modify the lower mounting pads on mine... nothing is bolt in!
That comment is a little misinformed.
The 1/4" stock was used to:
Offset the height of the new rad as compared to the OEM.
Compensate for the additional depth of the new rad. There would be a considerable gap between the rad and the shroud if bar stock wasn't used.
Also, I had it in stock and would accept the countersunk screws that fixed it to the rad support as well as accepting the screws from the shroud.
Nice build, I'm not a fan of most after market wheels but I like those.
A couple of things, are you running a 3ed gen booster or 4th gen booster? You may (as I did) find that with a 3ed gen booster and 4th gen master your pedal is a little soft with the engine running. If you do check the pin in the booster clearance to the plunger in the master. If there is too much play you will need spacers. Good call on painting the booster btw that grey paint the re builders uses rust through the first few times it gets wet.
Are you running front weight jacks? If so detailed pictures please I'm considering doing that.
That comment is a little misinformed.
The 1/4" stock was used to:
Offset the height of the new rad as compared to the OEM.
Compensate for the additional depth of the new rad. There would be a considerable gap between the rad and the shroud if bar stock wasn't used.
Also, I had it in stock and would accept the countersunk screws that fixed it to the rad support as well as accepting the screws from the shroud.
I assumed that you threaded and put screws into the bar stock directly, that's what it looked like that's why I said if he used J nuts it didn't have to be too thick. It did seem like overkill, but if it work, it works. I'll use what I have lying around for some projects too, wasn't poking at you
Nice build, I'm not a fan of most after market wheels but I like those.
A couple of things, are you running a 3ed gen booster or 4th gen booster? You may (as I did) find that with a 3ed gen booster and 4th gen master your pedal is a little soft with the engine running. If you do check the pin in the booster clearance to the plunger in the master. If there is too much play you will need spacers. Good call on painting the booster btw that grey paint the re builders uses rust through the first few times it gets wet.
Are you running front weight jacks? If so detailed pictures please I'm considering doing that.
I am running a 4th gen booster. I haven't driven the car yet but I will keep an eye out for the clearance and adjust it once I get it going. I am using weight jacks from UMI all around, I'll try to dig up some pictures for you.
Are you running front weight jacks? If so detailed pictures please I'm considering doing that.
The stock spring is replaced by a very short spring and a screw jack. The spring sits in the a-arm like normal, but the screw jacks sits on top of the spring. The screw jack nestles up into the stock upper spring pocket. Turning the screw jack makes the jack longer or shorter, changing the ride height of the car. The spring height and location never changes.
And yes, the car is literally teetering on a big screw.
FYI - Ground Control ships out their kit with springs that are waaaaaay too short. I've since bought 2" longer springs for the rear, but I haven't bought longer springs for the front yet (but I need to).
love the wheel and tire combo,looks very flattering to the iroc.
I agree, those are great looking wheels, interesting cardboard tool for measuring fitment. Mine was pegboard, but if yer cutting it close, you don't have to spend a wad to figure it out....
love the wheel and tire combo,looks very flattering to the iroc.
Originally Posted by 427seven
I agree, those are great looking wheels, interesting cardboard tool for measuring fitment. Mine was pegboard, but if yer cutting it close, you don't have to spend a wad to figure it out....
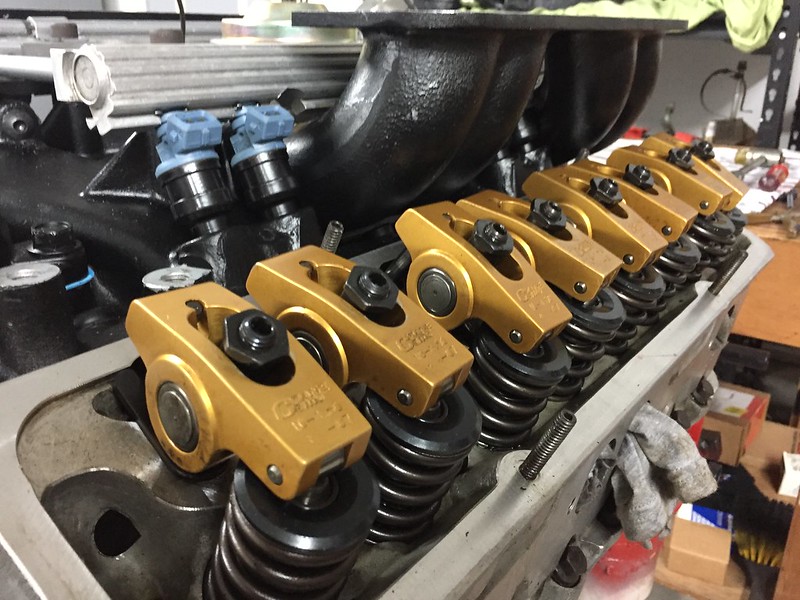
Question: What did you end up with for pushrod length?
I kept the ones that were already in the engine. I didn't change anything in the valvetrain, and everything was running fine and the wear marks on the top of the valves where the rollers ride were right in the middle. I didn't measure their exact length but I could pull one out if you really need it.
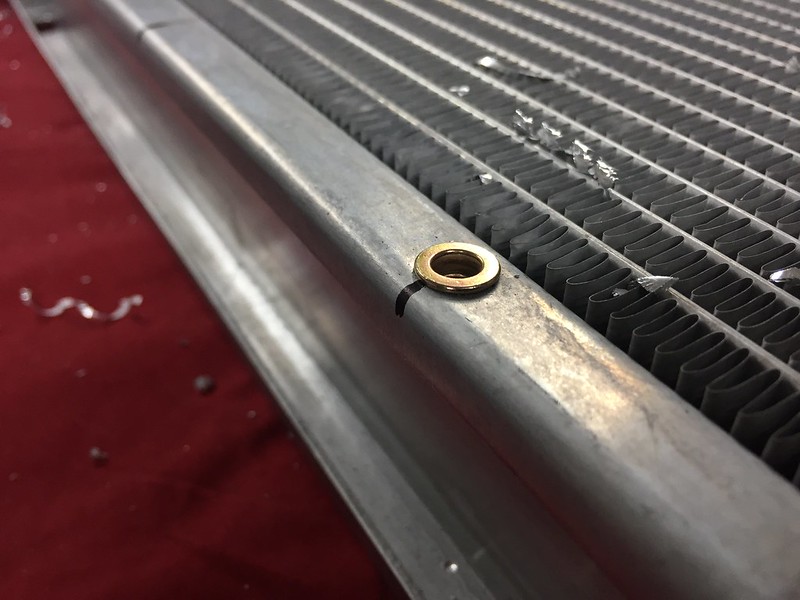
Thanks to the tip from scooter, I ended up bending the lines on my condenser slightly and everything seems to be fitting OK now. You can't be afraid to tweak some parts sometimes!
Radiator and condenser are in for good now, just need to get some washers for the M6 button head screws I used. I grabbed some foam from Home Depot to help seal the condenser against the core support so hopefully that holds up.
I am now deep into my next big job which is getting the wiring figured out. My strategy so far has been to unwrap everything and loosely lay it in place. I've then been starting to connect things, and play with different layouts and how I want to route the harness. Sometimes that means shortening some wires and lengthening others. I've also been repairing any damaged wires along the way and replacing any of those crimp-on connectors with nice soldered jointed covered in heat shrink. It's taking me a long time but wiring is one thing you don't want to have to go back and do twice!
Once I have everything where I like it, I've started to wrap everything using Tessa tape. I was put onto this stuff from a local builder and I love it! I have 2 types, one for high temp areas and one for the rest of the engine bay. It's very easy to work with, and leaves a nice professional look. I've been starting at the furthest end of the harness and working my way back towards the firewall which has been working out OK for me so far.
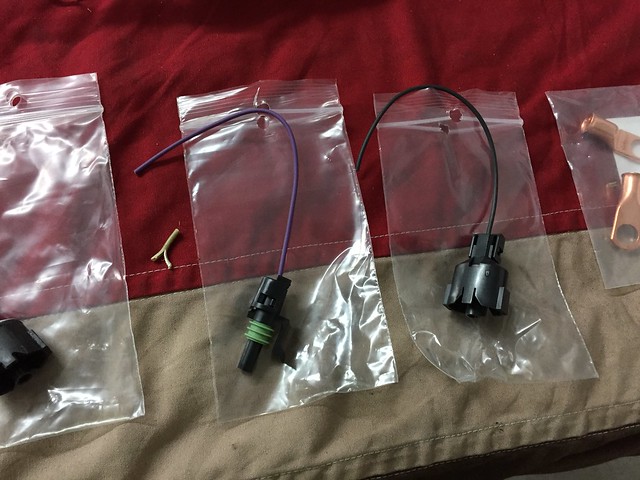
I took some pretty good notes when I was taking everything apart but there are still a few connectors that I need help identifying. These were either not hooked up or I forgot to label them. If anyone can help me ID these that would be awesome! I'll post this up in the electrical section as well:
These 2 are in the engine harness that runs along the passenger side frame rail. Maybe have to do with the AIR system
Similar place in the engine harness along the passenger side. This is not the knock sensor. Looks like it is routed into the fan relay:
This one is back behind the engine. No clue on this one:
Last edited by garage_engineer; Dec 1, 2019 at 03:47 PM.
The green connector picture should be AIR injection, or EGR?
The knock sensor looking is the fan switch?
The last picture should be oil pressure or oil pressure switch?
Unfortunately no I was pushing really hard to get there but just ran into too many small issues. I would have had to cut a lot of corners to have the car running in time and I didn't want to do that. I'm bummed, but I am still cranking away on it. Now I have the time to do things right though and not rush.
Love this build. I was also supposed to have my car done for the UMI autocross. The car had other ideas though. As I went to load the car to take it there the tranny started making a strange noise. I was not really happy with the brakes on the car anyway so it sat at home. I'm in the process of the LS1 brake upgrade now so brakes shouldn't be an issue anymore. I was lucky enough to have my buddy let me co-drive his 91 1LE Camaro. So I got to have a blast and not be out my $150. My car will be ready for next year!
Love this build. I was also supposed to have my car done for the UMI autocross. The car had other ideas though. As I went to load the car to take it there the tranny started making a strange noise. I was not really happy with the brakes on the car anyway so it sat at home. I'm in the process of the LS1 brake upgrade now so brakes shouldn't be an issue anymore. I was lucky enough to have my buddy let me co-drive his 91 1LE Camaro. So I got to have a blast and not be out my $150. My car will be ready for next year!
ah!! that was you in the red 1le!?!?? I was looking to find out who was driving that car. I had the other red gen3 there. my best run was a 54.355. no worries to both of you guys. hope we can all do it next year. I'll have several hundred more horsepower and better tires by then.
ah!! that was you in the red 1le!?!?? I was looking to find out who was driving that car. I had the other red gen3 there. my best run was a 54.355. no worries to both of you guys. hope we can all do it next year. I'll have several hundred more horsepower and better tires by then.
I remember your car. This was my first time doing autocross. I think my best lap was like 56 something. My buddy�s was like 50.8. I did improve 10 seconds from my first run to my last. I only ran 7 total runs between the 2 days.
I kept the ones that were already in the engine. I didn't change anything in the valvetrain, and everything was running fine and the wear marks on the top of the valves where the rollers ride were right in the middle. I didn't measure their exact length but I could pull one out if you really need it.
No need to pull one out. My question is linked to one of my earlier questions back when you were assembling the engine. I tend to be a little preachy about valve train geometry having witnessed too many engines (including my own back when) ultimately fail because of the lack of attention or misunderstanding about what's involved. Once you start upgrading and changing components things can get out of whack (heads, rocker arms, machine work, etc.). The results aren't necessarily immediate and in a few of the cases I've been involved with, valve guide wear starts to creep in as the miles pile on. I screwed one of my own top end builds up in fine fashion and the guides were toast in under 5000 miles. Perhaps the original builder has done his due diligence and you're good to go.
hey skinny,i just bought screw in studs for my vortec heads and also have ls1 valve springs(just need the comp retainers)
i know i have to machine down the stud bosses to compensate for difference in rocker stud height and thread them.
do you think i will be alright with new stock "vortec" felpro stem seals using a cam with 0.470 lift or do you really think they need to be
machined down for the 0.530" seals? this is the max lift im going to go with these heads ,1.5/1 rockers and this cam(gmpp 7151)so
using what you know do you think the ls springs,new stem seals and comp retainers will be adequate for this mild build.
ps:sorry for the temp hijack,here is your awesome thread back!!!
For what it's worth, I used the Vortecs right out of the box with a .454" lift flat tappet cam. Stock studs. Stock seals. I'd say you're pushing it with .470". Some Vortecs you can. Some you can't. If you get the required clearance, then I'd say you're good to go with stock seals, LS1 spring and the small retainers. Just my opinion but I had decent results for thousands of kilometres until the cam went flat. Then I went the whole nine yards.
On a side note, I made the move to guide plates but in all reality, for what I was doing at the time, I think I'd go the self guiding rocker route if I were to do it again. Until things get really serious. (as they are now). Valve train stability is everything at 7000 rpm.
im just using the philosophy that gm is putting this cam in a l31 block with vortec heads and calling it an sp350/357 crate engine using pressed in studs and stock springs.im going above and beyond that with screw in studs,ls1 springs,new stem seals and comp retainers for even more clearance etc. which is the reason for this mod,right? from every source ive found they are saying "up to 0.55 lift with the ls spring mod,well im a long way from that number(or thought i was)
that was my train of thought.i just thought i should throw new stem seals while the springs are off anyway..thanks for your time
Yes. The beehive/conical spring and small retainer are what's needed to gain room for the extra lift. Once I went with the positive style Viton seal (with the guides cut down), I've had clearance for .570" and room to spare.
And yes, thanks to Garage Engineer for the loan.
Been plugging away at the car slowly but surely over the last couple of months.
Wiring is coming along nicely, but it is taking a lot of time getting everything just right. Working behind the engine to get everything cleaned up and organized has proved to be a bit of a pain but it will be worth it for a nice clean look. I've been replacing some broken connectors with new ones from Hawks as well and repairing all the bad connections I find. A couple of quick pics:
I finally tracked down some OEM fuel lines to go with my retro-fitted serpentine setup (again sourced from Hawks). I painted everything to match and was able to make my old stock flexible lines (the ones that went with old non-serpentine accessories) work by slightly bending the hard lines on the frame rail to give a bit more slack. I am happy I took the time to find an OEM set of hard lines to snake behind the alternator. In my opinion it looks a little better than a long AN line hanging on top of the valve cover.
Lastly, because the 4th-gen booster I installed sits a bit closer to the firewall, I was not able to mount my clutch reservoir behind it on the firewall. So, after racking my brain for a bit, I came up with this little bracket design that I think will work pretty well:
Last edited by garage_engineer; Nov 12, 2019 at 12:49 PM.
please,if you or anyone else knows this,please help.
im trying to find out if the brake components(rotors,calipers,lines,e-brake)
from a 10 bolt disc brake rear will bolt up to a 9 bolt disk brake rear end.
i have to pull my dead 10 bolt with perfect brakes and exchange it for my
good 9 bolt with craptacular brakes
.........
(it has crusty calipers,rotors,seized e-brake etc) etc
thanks,i like the look of the newer master cylinder but Ive got my clutch reservoir on the firewall and don't really want to move it.
you can kind of see where mine is. Right behind the 4th gen booster.
Note: third gen booster is further way from the firewall so you'll have even more room for the reservoir
Last edited by Rhyan Lang; Nov 13, 2019 at 04:17 PM.
Just need to confirm one detail with everyone before I go ahead and install my intake plenum:
What are the consequences to completely removing the EGR valve and the temp sensor? I wanted to keep them in order to avoid having a check engine light, but the exhaust crossover that it would use is blocked off anyway. I was having a hard time finding a nice neat space for the black piece shown in the pictures below and tonight snapped the fragile vacuum line by accident. Can I just get rid of this whole system under the intake and replace it with a block off plate? Could I then get this code removed when I have the car tuned?
the plastic vacuum line you accidentally broke can be easily repaired by sliding a piece of vacuum hose over both ends,rejoining the two halves.
about deleting them,im sorry but i dont know.
do you know if you can use the 4th gen master cylinder and the third gen booster?
Gap to the booster pin will be above spec causing the brake pedal to have a dead zone and a long pedal throw. Pedal effort is slightly lighter too. If you want a good pedal then stay with the stock master.


 I should be posting some more regular updates now so stay tuned!
  I was pushing really hard to get there but just ran into too many small issues. I would have had to cut a lot of corners to have the car running in time and I didn't want to do that. I'm bummed, but I am still cranking away on it. Now I have the time to do things right though and not rush.


 I'll use what I have lying around for some projects too, wasn't poking at you