When you click on links to various merchants on this site and make a purchase, this can result in this site earning a commission. Affiliate programs and affiliations include, but are not limited to, the eBay Partner Network.
Making some more progress. Waiting on correct length pushrods to show up so I can finish the engine. Cleaning up the engine bay and sorting out the wiring harness. Going to re-paint the engine bay, then install the engine and finish up the wiring. Converting the TPI harness (which was repinned to use Megasquirt and EDIS) to 58x. Using an early silverado 1 wire oil pressure sender, segregated 10awg fuel pump circuit, and some distribution blocks on the firewall for power and ground.
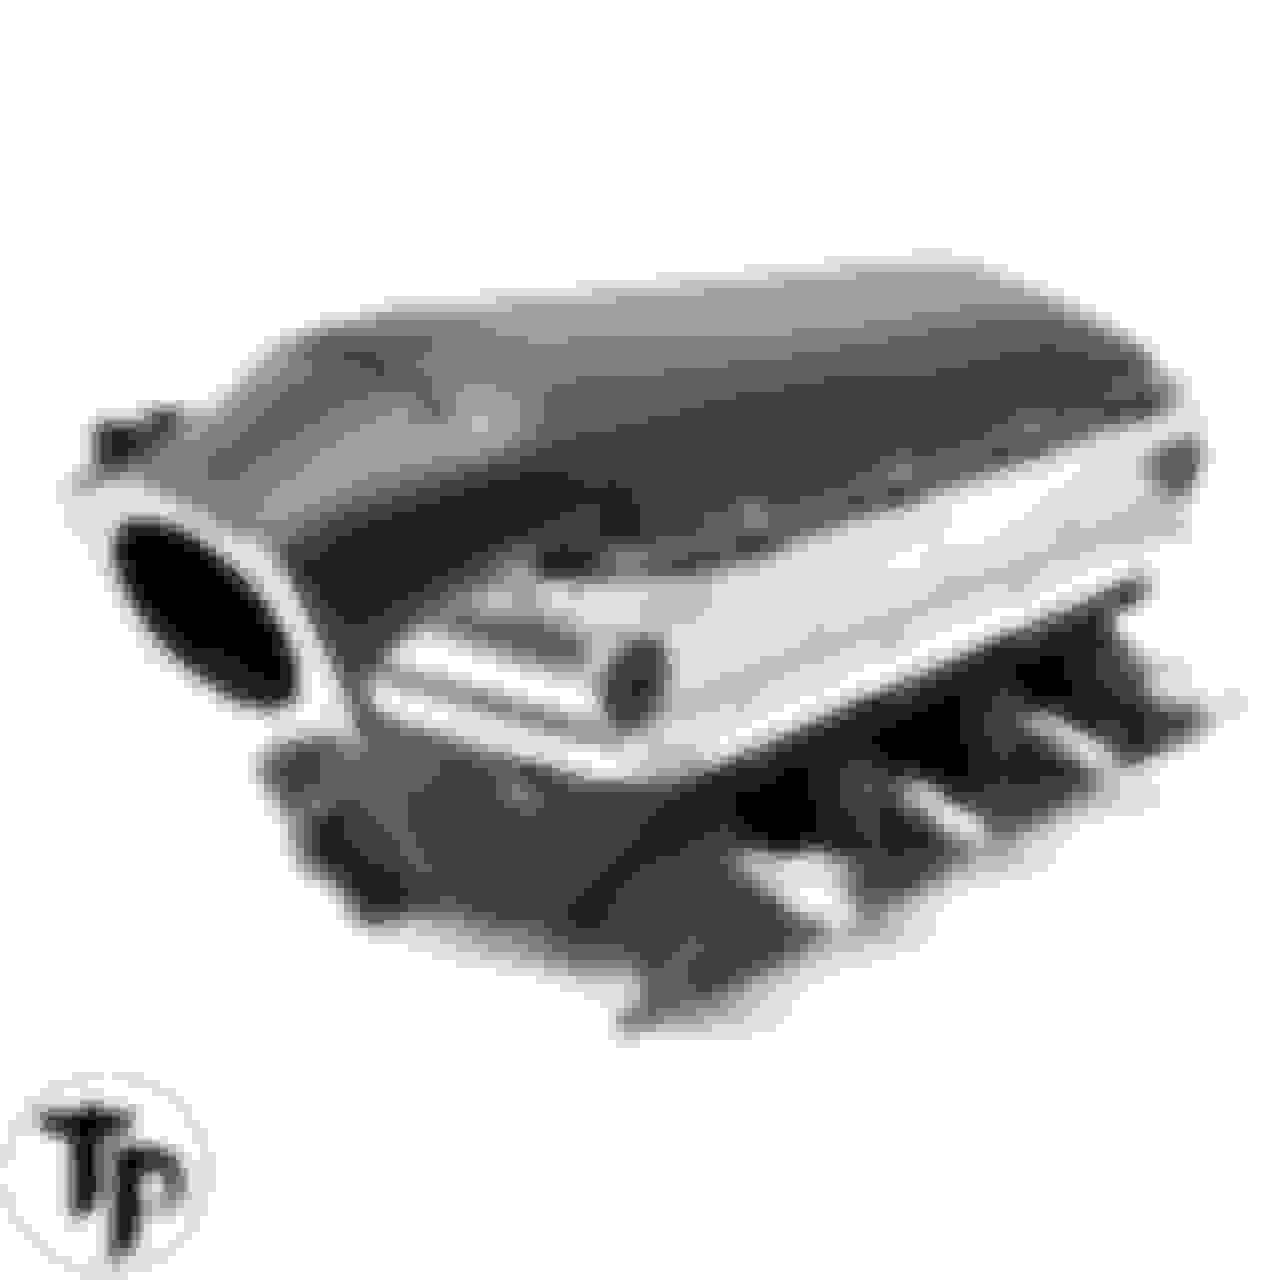
Cut up the LS2 fuel rails and removed the dividers. Tig welding AN ends on each so I'll have full parallel fuel flow with the feed in the front and return in the rear. I'm not a fan of dead ending fuel rails.
Also re-worked the BMR subframe connector so I can fit the 3.5" pipe within the stock routing. The extension I added is welded to the pinch in the front and along the whole drip edge. It's staggered over the BMR subframe connector so I was able to weld it it top bottom and both sides.
I need to call vintage air and see if they will sell me the 3rd gen fbody defrost vent to go with their small retrofit heater box.
I hope you have better luck than I had with that throttle body. I had one of those and tried for a week to get the motor to run with it. I tried every single trick out there and it just wouldn't take. Super frustrating. I ended up scrapping it and went with a Motion Raceworks Icon throttle body. Engine fired up and idled good, only had to do some slight throttle blade screw adjustment to bring IAC down to 5-8% hot
I hope you have better luck than I had with that throttle body. I had one of those and tried for a week to get the motor to run with it. I tried every single trick out there and it just wouldn't take. Super frustrating. I ended up scrapping it and went with a Motion Raceworks Icon throttle body. Engine fired up and idled good, only had to do some slight throttle blade screw adjustment to bring IAC down to 5-8% hot
Interesting. What problem were you having ? I've run a few LS2 style off shore throttle bodies and have not had any issues.
Interesting. What problem were you having ? I've run a few LS2 style off shore throttle bodies and have not had any issues.
Motion makes good stuff.
-- Joe
I couldn't get the engine to idle longer than 3 seconds. Tried a couple different IAC valves at it, no change. I tried opening up the IAC port and got it running about 4 seconds. Drilled a .125" hole in the blade made no difference. Changed TPS sensors with no change. Fuel and spark were good to go. Turned the idle screw a bunch that just made the engine hit about 1400 rpm then die.
After my frustration built up to the max I ended up buying an icon 102 TB and had it overnight shipped to Canada and bolted it on and the engine fired right up and held a strong idle. Only had to make a small idle screw adjustment.
After looking into it a bit deeper in certain the IAC port wasn't machined properly and the TB opening wasn't actually round
Repainted the engine bay. The vintage air stuff (heat only) came in. I'll probably put the engine in sometime next week. I have the a-arms off the car, swapping springs, a-arms, and camber/caster plates.
I was hoping to get this thing moving by Christmas, but, that's probably unlikely at this point. Hopefully sometime shortly after the new year
That bay looks sweet. Hey quick question, ever thought about a quick hammer, dolly, and mud on the fender turbo space to smoothe it out? Or will that turbo/piping block enough of it off so it won't be in view?
That bay looks sweet. Hey quick question, ever thought about a quick hammer, dolly, and mud on the fender turbo space to smoothe it out? Or will that turbo/piping block enough of it off so it won't be in view?
I don't think it's going to be visible once the turbo and piping are in place, but I like the idea of heat shields such as those shown in the image posted by @battmann above. I think it's probably a good idea to keep the paint from burning. The eastwood engine bay paint is rated for like 220 degrees. In a n/a engine I wouldn't be as concerned, but I've seen turbo piping bright red!
I might work on the fuel lines tonight, clutch master, brake booster, etc.
I saw battmanns heat shield. Very nice. My setup glowed here and there. It never melted the paint area, but it was the original bay paint with 900 years. Also I was short bursts. What are you running for lines? Stock? EVAP as a 2nd line?
I saw battmanns heat shield. Very nice. My setup glowed here and there. It never melted the paint area, but it was the original bay paint with 900 years. Also I was short bursts. What are you running for lines? Stock? EVAP as a 2nd line?
Pretty much the same setup as whe. I had the supercharged 412.
Ls1 fuel tank, 470lph pump I to some 3/8 lines. 8 awg wiring for the pump. I'm removed the factory fuel lines a decade ago. Going to mount the regulator on the driver strut tower.
I cut up some factory LS2 fuel rails so I'll have parallel feed and return.
When I did a flow test of this setuo a few years ago I got over 450lph on the return side with the rail pressure set at 60psi so it should be plenty for the smaller 70/70 turbo.
I'm thinking the 5.3 I built is probably about 400hp naturally aspirated, so in theory 12-14lbs of boost should put it 700 or so horsepower.
In reality, there are all sorts of other issues with the car preventing me from pushing more power. Rear end, transmission, no roll bar, SFI belts, etc.
My goal is to basically be a no prep radial tire 125mph 1/4 mile far.
I added the heat shield because my new paint was cracking on the inner fender. The stuff I used was DEI 50552. I used black because I thought it went better with my build theme but DEI makes this in silver too. It’s adhesive backed so you only get one shot to place it. I had to add DEI 10039 heat tape to the edge of the heat shield because the heat was making the top metal layer pull away from the fiber layer below.
I originally wanted to put heat wrap on my headers but couldn’t find the stuff I saw on some high end car builds at the Columbus Goodguys show. Below is a picture. Anyone know what this product is??
Didn't get much done tonight, but I did get the clutch master, brake booster, and pedals installed.
I'm using 4th gen pedals, booster, clutch master, and brake master. I ditched the prop valve years ago and am using an adjustable valve for the rear brakes. Some guys mix and match and have to drill then deal with the ball stud diameter difference. The trick here is, if you use 4th gen pedals just use a 4th gen booster because the mount studs are smaller 8MM and fit perfectly in the larger holes in the firewall, the integrated bracket for the clutch master lines up, and the booster is about 2" closer to the firewall so it's a little cleaner I think.
I have the adapter in the clutch master to make it a -4 to hook up to my Howe hydraulic throw out bearing.
I added the heat shield because my new paint was cracking on the inner fender. The stuff I used was DEI 50552. I used black because I thought it went better with my build theme but DEI makes this in silver too. It�s adhesive backed so you only get one shot to place it. I had to add DEI 10039 heat tape to the edge of the heat shield because the heat was making the top metal layer pull away from the fiber layer below.
I originally wanted to put heat wrap on my headers but couldn�t find the stuff I saw on some high end car builds at the Columbus Goodguys show. Below is a picture. Anyone know what this product is??
oh crap forgot to add my downpipe and headers were coated and wrapped
Cant find a pic of the wrap, that was the dei "ceramic coatiing" in the can, Held up pretty well, Also I sprayed the wrap with the dei stuff to. IDK how tough the Oem paint is but I never saw any blistering. But i didn't care, paint was shot.
My goal is to basically be a no prep radial tire 125mph 1/4 mile far.
Think I'm crazy?
-- Joe
I think that easily attainable depending on some choices/setup. That puts you in like the high 10s or so maybe mid 10s. I think. Build is coming along nicely. I dig the wastegate setup.
New hard lines. Routed it following the mostly stock route. I have to finish up the engine bay side, but the regulator will be mounted to the driver strut tower. Then I'll just run some short PTFE to the fuel rails.
Not going to win any best in shows for neatness, but it works. I don't know how guys run these with absolutely flawless bends. I've been doing this for decades and I still can't pull a section off the roll and make it look straight .
Not going to win any best in shows for neatness, but it works. I don't know how guys run these with absolutely flawless bends.
Most guys uses these. You got to pass the tube through it. There's a hinged one that you can do after you make your bends. There's also a cheaper one that's just a long tube with a hole in it. Doesn't work as well but it helps a bit.
Fuel lines and regulator done. I hope the track doesn't give me a hard time about the routing. I followed stock, and am going to pretend it's stock lines. If they make me encase it in pipe I'm not going to be happy..
Picked at the wiring a bit more last night. Just about ready to drop the engine in, and start cutting wires to length and re-loom the harness.
Mounted the clutch reservoir on the firewall because the bracket apparently relies on also having the proportioning valve bracket, which is long gone.
Sorting out the wiring. The oil filler neck is a little closer to the turbine housing than I wanted. I may have to do something about that.
#8 plug wire touches the down pipe. Probably going to have to use two 90's and run it behind the head.
yea that�s gona get toasty. I would recommend some aftermarket valve covers with the aluminum fill cap. It�s much shorter and should clear. You could also get an aluminum adapter and run a AN fitting 45 and use it as a breather. Nothing wrong with 90s on the plug wires. I did all of them that way to clear my turbo headers and it works fine. Or you could relocate the coils which will help with the extra heat.
yea that�s gona get toasty. I would recommend some aftermarket valve covers with the aluminum fill cap. It�s much shorter and should clear. You could also get an aluminum adapter and run a AN fitting 45 and use it as a breather. Nothing wrong with 90s on the plug wires. I did all of them that way to clear my turbo headers and it works fine. Or you could relocate the coils which will help with the extra heat.
I ended up taking the valve cover off and cut the second tab off so I could screw the filler directly into the cover. Took like 3 minutes with a burr.
tonight's problem is Joe forgot to install the dipstick and now realizes it likely won't work with this big *** manifold.
I ended up taking the valve cover off and cut the second tab off so I could screw the filler directly into the cover. Took like 3 minutes with a burr.
tonight's problem is Joe forgot to install the dipstick and now realizes it likely won't work with this big *** manifold.
Any suggestions there?
-- Joe
on mine I run the GM fbody dipstick and I bent it so it kicks out to the pass side more to clear my turbo header. I then used a rivnut in the front subframe under the strut tower and used a bolt to anchor it down. I�m running solid motor mounts so im not worried about vibration but with rubber or poly you couldn�t do that. A flexible dipstick would work but not really work worth a d@mn. It would tell you if you had oil but actual level
goes out the window. I never would get the lokar again as they suck just as bad as the cheap stuff so save a few bucks and cheap out. First iteration and it�s changed slightly. New position bent forward more and attached to front subframe
@customblackbird
when did you add the strut tower brace to your car? don’t think I saw a picture of that before. looks pretty sweet! I assume you made that yourself?
on mine I run the GM fbody dipstick and I bent it so it kicks out to the pass side more to clear my turbo header. I then used a rivnut in the front subframe under the strut tower and used a bolt to anchor it down. I�m running solid motor mounts so im not worried about vibration but with rubber or poly you couldn�t do that. A flexible dipstick would work but not really work worth a d@mn. It would tell you if you had oil but actual level
goes out the window. I never would get the lokar again as they suck just as bad as the cheap stuff so save a few bucks and cheap out.
That's never gonna work for my setup, the log is huge and in the way, and then the adapter I built for the WG makes it even worse. I ordered the cheap flexible as suggested and I'll try screwing it to the strut tower or something.
I wonder what the factory oil level sender reports for a signal. I have a few spare 0-5v inputs in my ECU. I've been considering replacing the cd player I never use with an android head unit and having it default to a few gauges.
How do you like the car with the solid engine mounts? I'm using the dirty dingo mounts with factory rubber k-member side mounts. I'm a little nervous about how much flex it might have. The dingo mounts don't really sit on the factory mount like the OE clamshells do, they just ride on the bolt. Not sure if it's in my head or not, but I feel like it has the potential to rock quite a bit. If the exhaust/crossover/etc taps the k-member, frame, etc going down the road I'm going to lose my mind.
My crossover is tight in some spots. You can see the mounts I used and the cross over in this photo:
I spent a little more time tonight tracing and labeling wires from the factory TPI harness. If I have time over the weekend I'll finish splicing in the LS stuff. I'm using the 3 wire coolant temp sensor so it runs the gauge and ECU, and the 1 wire LS1 oil pressure sender for the gauge. My fuel pump wiring isn't factory, I have a 30 amp relay on the firewall run by the ECU. (so if the relay fails, I don't have the oil pressure switch as a backup but that's fine). Going to use the same type of relay for the intercooler fan + pump, so I'll keep a spare in the car.
I like your distribution block. I bought a similar one which I'm going to mount on the firewall.
I started mocking up the vintage air box tonight as well. It is tight and just fits due to the shape of the firewall, but it will be biased to the passenger side with the inlet/outlet coming through right above the passenger frame rail. I should be able to just run some hoses along 90 degree out of the water pump and along the frame rail into the nipples. The controller is kind of cool - has an electronic door for floor vs defrost, and an electronic valve for the coolant flow.
@customblackbird
when did you add the strut tower brace to your car? don�t think I saw a picture of that before. looks pretty sweet! I assume you made that yourself?
Yea, its been on for a while I would say at least 7+yrs or so. I take it off alot to work on the car which happens to be when I take the photos lol. Yes, its a single peice of 1.25x.125" DOM tubing I filled with wet sand and bent with a Harbor Freight cheapo tubing bender and welded threaded tube ends and a firewall tab. I bent it to go around the top of a BBF carb hat originally but works great with the LS NNBS intake even though I had to shave down the intake support ribs to clear it. The top plates are from SPOHN I believe and welded tabs for the STB rod ends. It allows me to adjust the aligment without messing with the STB support and the support engages the whole top of the thin stock strut tower metal vs just a small pad like the others use. Way overkill I would assume but it works and it was pretty cheap that long ago.
That's never gonna work for my setup, the log is huge and in the way, and then the adapter I built for the WG makes it even worse. I ordered the cheap flexible as suggested and I'll try screwing it to the strut tower or something. Sounds good, again the level amount really doesnt work great but its fine if your just making sure theres oil. I do an oil change every 3 years or so just bc I feel the oil gets old from sitting but its not necessary and I never check the level lol.
I wonder what the factory oil level sender reports for a signal. I have a few spare 0-5v inputs in my ECU. I've been considering replacing the cd player I never use with an android head unit and having it default to a few gauges. It's just a simple single pole switch, I can't remember if its a ground or 5v signal but I got a billet adapter and put a oil temp sensor in there. Basically open or closed and when the little float isn't floating anymore it just sends the signal.
How do you like the car with the solid engine mounts? I'm using the dirty dingo mounts with factory rubber k-member side mounts. I'm a little nervous about how much flex it might have. The dingo mounts don't really sit on the factory mount like the OE clamshells do, they just ride on the bolt. Not sure if it's in my head or not, but I feel like it has the potential to rock quite a bit. If the exhaust/crossover/etc taps the k-member, frame, etc going down the road I'm going to lose my mind. I have zero issues, car is smooth and I get no vibrations. Honestly you could not tell and I also have the Racecraft moly kmember, 800lb front springs in weight jacks, KONI yellows and the back is 175lb with weight jacks. The car isn't exactly a caddy lol but its very comfortable on long 3hr trips and no vibrations/engine noise from the motor mounts. I also don't use the fbody specific solid motor mounts just he $29 cheapo SBC mounts off ebay or whatever. Running ebay steel LS setback adapters on the block to the $29 solid engine mounts and I just had to drill a new hole for one of the bottom motor mount bolts to Kmember to line up. I'm also running 4 bolts in the mounts on the kmember side. Then 1/2" grade 8 bolts, washers and nuts. I know what your saying about the aftermarket mounts as all the weight is on the bolt and not on the tabs like OEM. I did similar setup on my 78 LS swapped vette but used poly motor mounts and there is no real difference in engine vibrations. For noise I recommend deadening the whole car if you have the interior out as that and a mass backed carpet cut down on ALOT of road noise. It did however highlight a few resonate rattles I need to take car of with interior stuff now that I can hear those now. I did a Siless 3in1 from the firewall to the trunk and then new mass backed carpet. On the vette I did .050" kilimatt then a custome double foil with foam kit and another jute with foil and I feel no heat in the vette which they are known for getting real hot in the foot/tranny tunnel area.
My crossover is tight in some spots. You can see the mounts I used and the cross over in this photo: Photo isn't showing up for me.
I spent a little more time tonight tracing and labeling wires from the factory TPI harness. If I have time over the weekend I'll finish splicing in the LS stuff. I'm using the 3 wire coolant temp sensor so it runs the gauge and ECU, and the 1 wire LS1 oil pressure sender for the gauge. My fuel pump wiring isn't factory, I have a 30 amp relay on the firewall run by the ECU. (so if the relay fails, I don't have the oil pressure switch as a backup but that's fine). Going to use the same type of relay for the intercooler fan + pump, so I'll keep a spare in the car. 3 wire coolant sensor worked for me as well on my vette and I run the stock gauge and the other input is for the holley term X. Same on the fuel pump with the walbro 450 in tank but I put the relay in the back truck spare tire area where my battery is and triggered the 40amp fastronix relay off the ECU. Def keep a few spares and I bring a whole lot of fuses just in case.
I like your distribution block. I bought a similar one which I'm going to mount on the firewall. Blue Sea Systems is the brand and its the only one I buy even for the fuse panels. I tried to cheap out twice with amazon specials and over sized the capacity by pushing lower current and I melted two different panels without popping a single fuse. One left me on the side of the road in the vette and ended up costing me $150 for a tow less than a mile from my house. It now has a blue sea panel and has had zero issues. I originally couldn't find a blue sea version with a dual 12v and ground setup so I could use one side for ignition 12v and the other for Batt 12v so I cheaped out. Then I found the blue sea of course after it stranded me and its a nice small setup and I have everything running off that. The Fastronix stuff isn't bad either and I really like there 40amp relays as they feel high quality in the hand.
I started mocking up the vintage air box tonight as well. It is tight and just fits due to the shape of the firewall, but it will be biased to the passenger side with the inlet/outlet coming through right above the passenger frame rail. I should be able to just run some hoses along 90 degree out of the water pump and along the frame rail into the nipples. The controller is kind of cool - has an electronic door for floor vs defrost, and an electronic valve for the coolant flow. post some pics! Might be better to run some 45* off the pump to push the hoses on the top of the frame rail to the inlet/outlet if you have the room for easy access. Hidden on the side of the subframe rail would be cleaner though as you wouldn't see it or even inside the frame rail!
I ended up bending the one that came with the pan and got it installed. I cut the mounting tab off, but where I have it bent up I think I can just make a small clamp to mount on this 6mm hole in the valve cover.
Is the dipstick handle higher than the cowl? Looks like it from the picture but could
just be the viewing angle.
No, it is about an inch lower, BUT I was thinking of bending it over towards the driver side (kinda like a 4th gen LT) because it looks like a flag pole.
I broke a map sensor the other day because I didn't realize LS6 and LS2 are different sizes (12mm vs 11mm). So I ordered a 2 bar cobalt sensor, which should be 11mm. Fun never ends!
Wiring is close to being done. Vintage air heater mounted, I just need to finish fabricating a trim plate for the grommets. Not sure where I'm going to put the fancy electronic shutoff valve though.
-- Joe
why not do the LS9 2.5 bar sensor? That is even bigger than 12mm I believe. I had to drill out my map
sensor hole in the NNBS intake for it to fit. That one is also preprogrammed in the termX allows for alittle extra boost lol.
why not do the LS9 2.5 bar sensor? That is even bigger than 12mm I believe. I had to drill out my map
sensor hole in the NNBS intake for it to fit. That one is also preprogrammed in the termX allows for alittle extra boost lol.
I think the Holley sniper sensor I broke was the aftermarket version of that.
The LS2 intake I have is 11mm . The plastic looks super thin so I was nervous about trying to drill it to 12mm.
Worked on some more wiring tonight. Almost done. Then I need to loom it all and clamp it to the firewall .
I think the Holley sniper sensor I broke was the aftermarket version of that.
The LS2 intake I have is 11mm . The plastic looks super thin so I was nervous about trying to drill it to 12mm.
Worked on some more wiring tonight. Almost done. Then I need to loom it all and clamp it to the firewall .
makes sense, the GM sensor read more accurate than the Bosch replacement that came in my fitech EFI.
interested to see what you do for an upper rad hose as I have the same LS3 waterpump. I ended up using silicone hoses and aluminum but have yet to find a OE hose that works. 4th gen Camaro is too long and so is the GTO.
The hose I was running with the miniram actually fits perfect, however, I need to cut a small section out of it because I bought the ICT steam port hose adapter so I can connect the steam line to the upper radiator hose. I think the application for the hose was a '91 corvette.
The lower hose is another story. I bought the one everyone said in the stickies to buy, and it's not even remotely close. I'll probably just buy a universal 1.5" hose.
I have to figure out where I'm going to put my IAT sensor too. I'm coming off the throttle body with a 90* 4-2 elbow, then some 3" aluminum into the IC. The aluminum piping doesn't have a thick enough wall to tap the sensor into.
I really wish I could have used one of those Bosch TMAP sensors that have the integrated IAT in it, but they are all 12mm as well.
I have a longer term goal in the back of my head, depending on how well this combo works out this year. Currently I have the intercooler sitting in the passenger 'battery tray'. I'd like to eventually do the Holley low-ram intake with the tick performance integrated intercooler. I could then run a vortech 'battery box' tank, which would give me a ton of water to absorb the heat, and I could re-clock the turbo to go right into the throttle body.
But that's $2,000 just for the intake and I need to concentrate on a proper transmission and rear end first.
For your IAT just grab a little weld bung and put it on your IC piping. This is what I ended up doing with mine. The other two bungs up by the TB are for a water meth system
For your IAT just grab a little weld bung and put it on your IC piping. This is what I ended up doing with mine. The other two bungs up by the TB are for a water meth system
Good idea! I can put it on the pipe that my BOV is mounted on. I think it's 3/8 NPT, they should sell aluminum bungs for that.
Post a pic of the upper Hose and the distance from the
water pump outlet to the upper rad hose connection. Also let me know if you cut any sections out. I would love to find a solid single upper hose to clean up the engine bay.
for the steam port I just drilled and tapped the back upper (behind the outlet) for 1/8 not and run a piece of silicone hose to the front driver steam port on the head. I always do this or get the spacers with the pre drilled port. Since the Camaro ls3 pump doesn�t need spacers I did it like that as it�s cleaner.
Idk if u can see it in the picture
I can see it. I'm not sure that that would work with the LS3 crossover I bought, I'd have to do a 180 degree loop with the hose. I guess it's something to think of, the water pump could come back off in two seconds.
This is a factory Corvette L98 upper radiator hose. I may or may not run it. It works, although It would likely be better to have something with just two 90 degree bends.
After dealing with the snow storm (20+ inches), throwing a rod in one of the snow blowers, and other nonsense I'm finally back to playing with the car. Started putting the vintage air defrost vents in, and running the cooling hoses to the heater core. Trying to find a good place for the heater valve in the engine bay that's becoming busy.
Yea, I used a longer piece of silicone hose prob 10" or so and did a 180 loop back to the front driver head steam port. I think I run the same LS3 steam setup which is a front crossover and two plugs for the back. I then put a small ziptie to hold the hose to the steam crossover and keep it from moving around or getting in the way.
What belt did you use? Looks like you are using the same basic alternator bracket as me. I used the K1970 (77.6") and it's too short. It's recommended by speed engineering but I'm guessing the ls3 water pump tensioner is farther out.
Getting a little more closer. Intake routing almost works. I have not made the mounts for the intercooler yet until the hoses are 100% decided. I'm on the fence right now about the BOV. It fits where it is, but it's after the intercooler. I have some room if I welded the flange ON the intercooler and had the valve basically vent into the fender. You can see on the passenger side where I'm talking about.
I did mine before the intercooler but tucked under the tray and behind the fender liner. Makes for better pshhhhhhh noises lol. To make your life easier put it after the intercooler but I guess it depends if your spraying meth. I did mine before bc I spray water/meth and bc I had room. It would be more piping but you could prob fit the A2W under the battery tray in the nose and also hide all the pump hoses etc and it might be cleaner and have less heat soak from the engine.
I tried A2W and my IAT temps were always higher than with a A2A.
What were you running for a charge cooler and for a heat exchanger?
Tigging the bov flange on the cooler.
I spent some time last night reading up on how the boost controller works and I think I might have it figured out. My waist kit has a 12 lb spring in it, So in theory that's the minimum amount of boost I can run. Then the Mac valve bleeds off boost to the WG, so it can hold more up to my target threshold. If the valve fails for some reason it's on the 12lb spring.
Now the question is, how does back pressure impact the waste gate? Does it go against the spring?
it was a big 1200hp CX racing intercooler and a very large heat exchanger prob 25�x18�x1.5�. I ran a Davis Craig brushless intercooler pump but also have a pierburg i never ran. Heat exchanger was a custom job I got for cheap as he didn�t need it. I also tried the Toyota Prius heat exchangers for the electric motors they are nice and cheap and look similar to yours but thin so you don�t fight it blocking air flow.
So yes, backpressure affects the spring rate a lot and the bigger the valve the more surface area so it affects it more. A 12psi spring might only give you 8psi. Make sure you bench test it with compressed shop air and tee in a 15psi fuel pressure gauge or something that reads low pressure accurately. With the fire ring installed and clamped to the WG so it�s preloaded check the pressure where is starts to unload and then pressure when fully open. That way you know the actual spring rate. When installed get your base spring pressure once you see what the pre turbo BP is along other things. You also need an accurate spring open pressure for the EBC setup. I bench tested mine and it was 12psi but on the car I got 6psi but it was a big 60mm HKS clone WG so lots of surface area and it was on a cheap 76/65 .81AR so lots of preturbo back pressure. Going to the 78/75 .96AR that went to 8psi and the same with the 70/70. With the cutout open that would go to 10psi. What�s nice about the HKS is that you can preload the spring and adjust the open pressure so I was able to bump it up a bit. Remember your also fighting after turbo back pressure as that also affects the valve but you won�t have any issues with that. I only saw 1psi ish with a 3� downpipe all the way out a full exhaust. The WG position also affects the flow on the gate and the spring open pressure. Priority flow will open sooner and something terrible will have a later opening due to placement and less force on the valve. You won�t know till you have it together and test it. Make sure your first few runs are on spring only and don�t have the MAC valve hooked up at all.
correct on the EBC and how it works. With a 3 port MAC valve min pressure will be spring pressure and theoretically you can double spring pressure with a EBC at 100% duty.
I tried A2W and my IAT temps were always higher than with a A2A
i assume you mean just driving around? Mine was sorta same way. But it depends on where the turbos are getting air from and if the piping to throttle body gets heat soaked or not, and where the iat sensor is. My water tank will heat up over time mainly from radiant heat from the turbos in the current setup but the last setup would also get warm, esp in summer since the sun beats down on the back hatch area where tank was. And i never used an exchanger for the water
so my cruising around iat seemed to stay higher than ambient but once in throttle, in boost, iat it wouldnt move much with A2W. The air to air would increase steadily but to be fair it was probably undersized more than ideal. Both were safe temps however. Just the warm water was still more effective at cooling.
once you add ice to tank its no contest lol 80 deg iat at 30 psi
i assume you mean just driving around? Mine was sorta same way. But it depends on where the turbos are getting air from and if the piping to throttle body gets heat soaked or not, and where the iat sensor is. My water tank will heat up over time mainly from radiant heat from the turbos in the current setup but the last setup would also get warm, esp in summer since the sun beats down on the back hatch area where tank was. And i never used an exchanger for the water
so my cruising around iat seemed to stay higher than ambient but once in throttle, in boost, iat it wouldnt move much with A2W. The air to air would increase steadily but to be fair it was probably undersized more than ideal. Both were safe temps however. Just the warm water was still more effective at cooling.
once you had ice to tank its no contest lol 80 deg iat at 30 psi
You ran the water tank in the trunk right? I've been thinking about that lately. I would have loved to run a holley low-ram with the tick performance intercooler brick, and then run a water box in the passenger battery tray but I'm already blowing the budget on this thirdgen. I think I saw some photos of your setup and you ran the water lines to the back of the car?
I guess another option is the dead space forward of the crash bar.
Yeah sbc was trunk tank with front intercooler. Long lines. Intercoolers right on turbos so direct warm air goin in
bbc tank and intercooler are both hatch mounted. Also real close to turbo so it gets warm air constantly as turbos are heatsoaked. Also exhaust right under floor there over axle so floor gets hot and tank heatsoaks some on that. It is surprising how much heat gets every where lol
 12-07-2023, 09:53 PM