When you click on links to various merchants on this site and make a purchase, this can result in this site earning a commission. Affiliate programs and affiliations include, but are not limited to, the eBay Partner Network.
Re: removing ball joint and bushings from factory control arm
I needed a nipple just like you to get the spring to compress enough. My spring compressor did the same exact thing with the bunged threads but mine was a loaner tool and I just returned it.
Re: removing ball joint and bushings from factory control arm
Tell that horrible line to the billions of starving ones across the world...
seriously if your going to be posting videos for other members (possibly newcomers) to follow along SAFETY should be #1 priority!!!
The previous post you made you laughed and made a joke about not doing a "ow my *****" technique... Watch that part tootie is referring too... That was a close call to your family jewels....!!!!
Re: removing ball joint and bushings from factory control arm
Raining today, so not good weather for lying in the driveway.
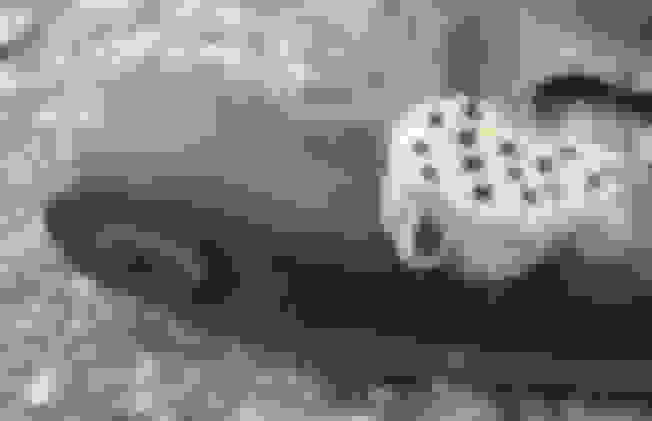
Examined the old strut-mount towers.
I now see exactly in what manner these towers fail.
The rubber tears pretty dramatically.
These towers are 29 years old on a car with 86K on the odometer.
V6 motor.
This is the tower from the driver's side.
Passenger side was equally perished.
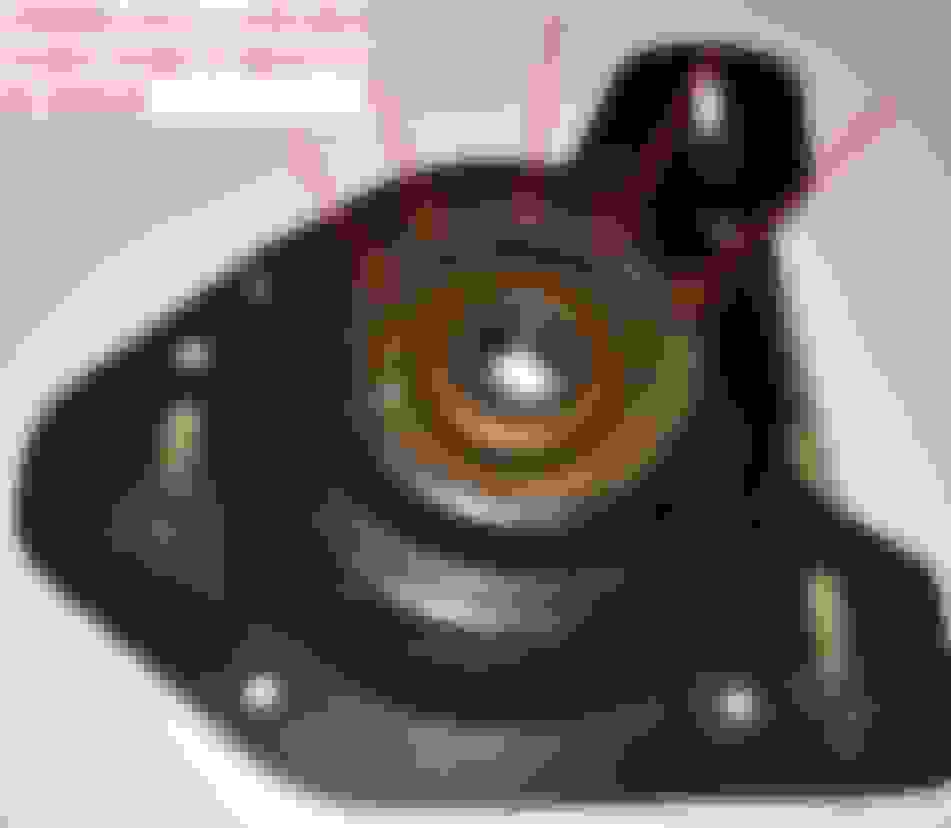
A way to visualize exactly how these towers are put together is to imagine the Russian nesting dolls.
In the case of the third gen, the strut tower is made of four "dolls."
Top and bottom "dolls" are metal (big black metal flanges).
The two middle "dolls" are heavy duty RUBBER.
The two middle "dolls" are riveted together by six rivets, which also serve to keep-centered the ball-bearing bushing that supports the shaft of the strut.
So, with all these dolls sandwiched together, the strut has a flexible, but sturdy, mounting point.
With age, and use, the rubber (the two middle "dolls") begins to rip. Eventually, both middle dolls will tear 360 degrees around the center ball-bearing bushing, and the strut will punch the the bushing completely out of the "dolls' nest."
Dead struts like were on my car probably slow the progress toward the catastrophic punch-through.
Re: removing ball joint and bushings from factory control arm
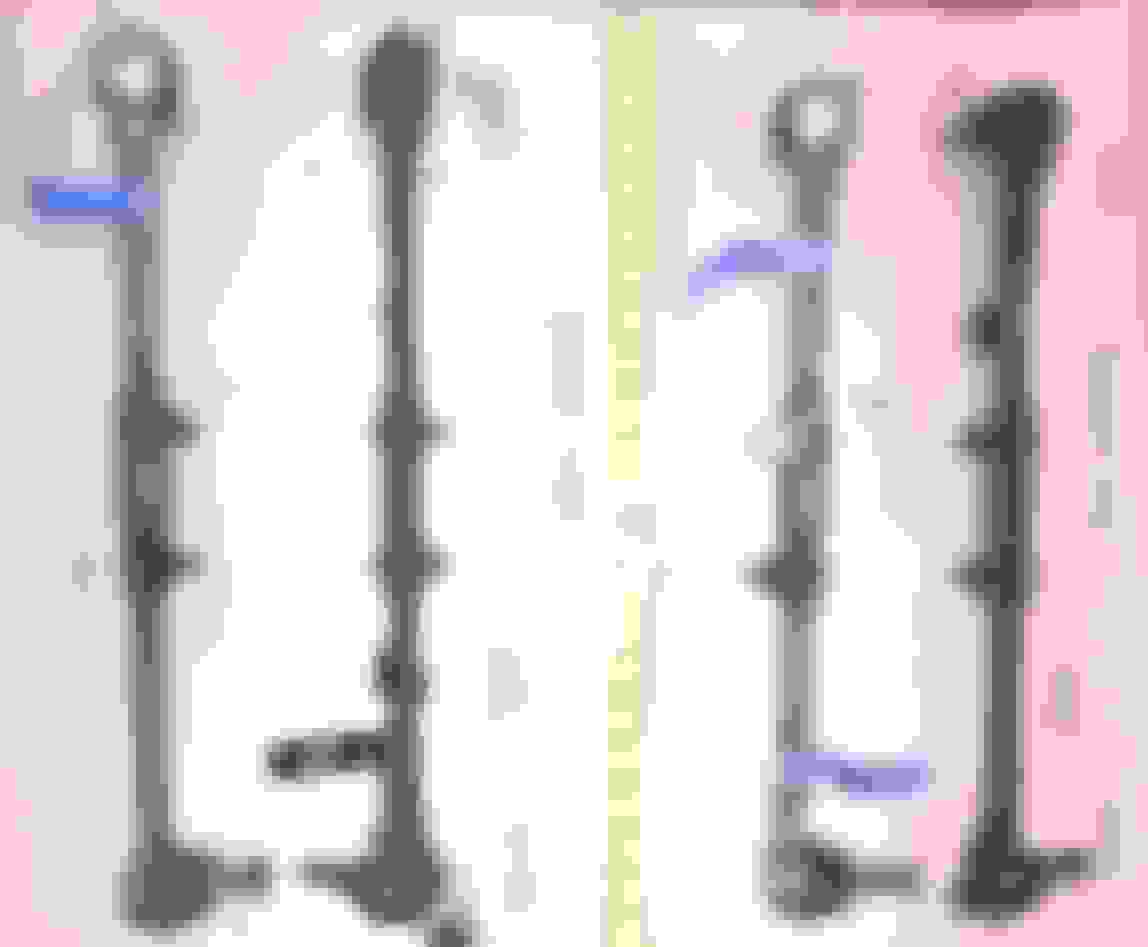
Getting the new tie-rods ready.
Ball-pivots of the old ones were still reasonably tight, but seems worthwhile to bring as much of the steering parts as possible up to 2017 condition. 1988 was a long time ago.
And the old tie-rod parts were crusty and disgusting (even if they weren't completely worn out like some of the other suspension parts).
Re: removing ball joint and bushings from factory control arm
I don't think you are supposed to torque the control arm mounts to spec until the suspension is completely assembled, and the vehicles weight is on the tires. In other words, probably on a drive-on lift, or a pit.
The reason is, once tightened, the bushings are now pinched tight in their mount. As you noted, very hard to move now. That's because you are twisting the rubber bushing. And some amount of movement is by design. But beyond that designed amount of twist, the bushing will be destroyed. That's why you torque them with the car on the ground, under load. That becomes the "mid-point" of their travel. They can now travel some in each direction without destroying the bushing. As is, you may tear the rubber just pushing the arm up to meet the strut.
I destroyed a spring compressor with air tools once...welded the nut right to the threaded rod...got too hot turning it too fast under a high load. I've turned these by hand ever since, and not had another problem. Slow, but it doesn't destroy the tools. Most might argue with that, but that was my experience. I was fortunate...the nut was just about to the end of it's travel when it failed, so when I cut the bolt with a torch, there was little to no tension on the spring. If it had been fully compressed, that would have been another ball game.
High Pressure Lube (HPL) on the threads is a (thread) life saver. You can get little tubes of it at your auto parts store. Coat those threads well. It's cheap insurance.
My compressors are external style, like you might use on a strut. The only good thing about one failing is that when I bought another set, I now have 3. So I can spread the load more evenly than with 2. Won't help me much when I have to do my springs on the T/A though.
Re: removing ball joint and bushings from factory control arm
Thanks Dave.
I guess we will find out about the bushings.
For what its worth, I put lube on the bushings and lube on the flanges where the bushings make contact.
If torque against the bushings were harmful, wouldn't the violent movement of the control arm as the car is driven cause equally-harmful torque forces against the bushing?
The range of motion of the control arm once everything is tied together is at least as great as the range of motion to lift the control arm to the point where one may begin to install the steering knuckle and strut.
Re: removing ball joint and bushings from factory control arm
On the road again!
Front end definitely sits higher than before.
Handles like a completely different car.
It was a lot of work, but I am SO GLAD I did it.
Will be playing with the alignment a little over the weekend. Tires are old, so not sure I will accomplish a lot in the alignment department. It drives great just as-is.
Re: removing ball joint and bushings from factory control arm
Follow up post.
Been driving this car a lot. Still tracking straight, and not nearly as "sporty" going over rough pavement.
Went to re-install the cone-shaped caps on the new strut-tower mounts. Discovered that the inside-diameter of the new part is too small diameter to allow the cones to snap into place. I might be able to whittle on the cone-caps to make them fit (sort of). I think that would look pretty half-***, so I think I'll just leave them off.
Re: removing ball joint and bushings from factory control arm
I swear you look familiar... where in NOVA are you from? I mean really familiar. I'm in Laurel, MD, used to be very active with the local f-body groups with a black '97 WS6 TA, but I almost feel like it's from something more recent... maybe we should take it offline.
Nice videos but a few comments:
90% of the time the easiest way to get the ball joints out on these cars is to rest the control arm on some support (2 boards on the outside edges of the control arm) and just whack the top stud of the ball joint with a sledgehammer and it comes right out. When it doesn't I've found the easiest way is some black iron plumbing adapters and a press. One of those tools is only really meant for doing the job on the car.
the best and safest way to pull springs is to support the control arm with a jack and then pull the pivot bolts. It's a little more work to line up the bolt holes to re-assemble it, but it's MUCH safer. Even if the spring does get hung up and releases with some force, you have the strut, spindle, brakes and control arm between you and it, and none of that can come out far enough to "bite" you.
Re: removing ball joint and bushings from factory control arm
I like the idea of using the control arm and a jack to sandwich the spring back into the pocket. Especially since the $30 compressor tools turned out to really only last for one use.
Will definitely try the sandwich method next time I do this job.
Unless you are into competitive rifle, we probably haven’t crossed paths on the playground. I’m only now just getting back into cars after a 40-year layoff.
Re: removing ball joint and bushings from factory control arm
Lowering springs usually have a free height that is short enough to install by just jacking up on the control arm. Stock type springs are taller and I would expect to have to use a spring compressor.
I once installed a set of Moroso drag springs in my car and that was some scary crap. It'll make you pretty nervous picking up a set of springs that have been compressed as far as physically possible. And they still would not install in the a-arm pocket. I had to raise the a-arm using a jack with the springs partly in the pocket, then completely remove the spring compressor and resituate the compressor inside the coils for another round of compression. Oh, hell no I'm not doing that again! And I sold those springs soon after.
Re: removing ball joint and bushings from factory control arm
I've never done the sandwich method. But, I have tried to visualize the method others have described. Here is the the sandwich method as I understand it. Please feel free to correct me if I've incorrectly described it.
The sandwich method (as I understand it) works best if you run a strong ratchet strap from one side of the underside of the body of your floor jack, and then over the K-member, and then back down to the other side of the underside of your floor jack.
Without the ratchet strap, you may end up lifting the whole front of the car off your jack stands using the sandwich method.
You will need to take up the slack on the ratchet strap as you pump the floor jack. This better be the best ratchet strap you can afford, because I think this method is asking a lot of the ratchet strap.
I stole an image from another member's post to use as a reference. I added the thick red line on the right. The thick red line is the path I believe the ratchet strap must take when using the sandwich method.
Remember, the sandwich method is using the force of gravity (weight of the car), and the force of a ratchet strap to compress the spring while the front of your car is balanced on jack stands. My biggest concern about the sandwich method is the dance you will have to do with the floor jack under the control arm in order to simultaneously position the control-arm bushings to line up with the mounting points on the body while also using the floor jack to compress (sandwich) the spring.
I almost think you would be best served if you use TWO floor jacks. One to do the heavy lifting of compressing ("sandwiching") the control arm against the spring, and serving as a tie-down point for the ratchet strap. Then, use the second floor jack to finesse the bushing-ends of the control arms into the exact location to allow you to get the control arm pivot bolts installed.
For those of you who may be unfamiliar with the parts and concepts here, what you are looking at in the pic is the part known as the "K-Member." This is the view of a stripped K-member, viewing from above the car. As if you were, standing on the dash, looking into the engine bay, with the hood removed. Your engine bolts to the K-member by way of two motor mounts. If you look carefully, just to the the left of the red line, you can see the outline of where one of the motor mounts was present before the K-member was stripped. On the opposite side, you can actually see the motor-mount outline a little bit better. The motor mount is actually your friend in the sandwich method, as the motor mount will limit how far your ratchet strap can creep out of position while the strap is being tightened. The spring has to be sandwiched under the circular "bumps" you see on each side of the K-member.
Re: removing ball joint and bushings from factory control arm
Thanks.
I’ve had such bad luck with getting any competent or trustworthy local shops to work on my third gen, I came to the realization that I was gonna need to do this stuff myself, or it was never gonna get done, or the car was going to be ruined by incompetent techs who can’t be trusted to do an oil change without ruining something. If something’s gonna get broken, at least I might as well be the one responsible.
Re: removing ball joint and bushings from factory control arm
Originally Posted by W.E.G.
Thanks.
I’ve had such bad luck with getting any competent or trustworthy local shops to work on my third gen, I came to the realization that I was gonna need to do this stuff myself, or it was never gonna get done, or the car was going to be ruined by incompetent techs who can’t be trusted to do an oil change without ruining something. If something’s gonna get broken, at least I might as well be the one responsible.
and then they "test" drive it. huh uhh, no way.
wow - great thread. can't believe I haven't run across this before. been struggling with the idea of removing front control arms due to the springs. how come you chose not to use the OTC compressor ?
P.S. those KYB mounts look exactly like the AC Delco. I just replaced mine and had both issues you had, dust cap, the need for washers on back. I used grade 8 washers.
Last edited by LiquidBlue; Jul 31, 2019 at 11:38 AM.
Reason: WRONG LINK
Re: removing ball joint and bushings from factory control arm
W E G thanks for the nice write up But I have one minor issue :
being the tight a$$ I am I went to RockAuto and compared their priced to Advances I came up with a savings of $369.03 less shipping charges . I didnt factor in the hardware or strut mount retainers you listed so for about 450$ + 74$ = 524$ vs 757 easy 200+$ saved
this was all for Moog branded and KYB and Monro struts - just figured it was worth noting - I love R/A
Re: removing ball joint and bushings from factory control arm
Was that with R/As shipping every part from a different warehouse from all over the planet??? lol Every order I make it seems everything comes seperate
Re: removing ball joint and bushings from factory control arm
Originally Posted by TTOP350
Was that with R/As shipping every part from a different warehouse from all over the planet??? lol Every order I make it seems everything comes seperate
Very true in some cases. If I decide to not order from RA, this is the reason why.
After filling my cart with the parts I want and there's several different warehouses indicated, I'll go back and fill the cart with different branded, duplicate parts and attempt to pare it down to one warehouse. Sometimes it works, most times not.
I avoid their "economy" priced parts.
Still, RA is a less expensive alternative than most other places.
I usually go to https://www.retailmenot.com/ and get RA's 5% discount code. It helps defray some of the shipping costs.
Re: removing ball joint and bushings from factory control arm
Watched your full video on you tube. Those spring compressors scare the heck out of me. The one I used stripped out before the spring was fully compressed. It was a rental from Advanced Auto and used which is not the way to start.
Re: removing ball joint and bushings from factory control arm
I've done the coils a few times now on these cars. This tool by OEM works great after one gets to know how to do it. ThirdGen's do need a 1 inch or so pipe nipple or spacer to add to the three thick washers. I just remove and hang the brake caliper, jack under the ball joint, then disconnect the lower strut bolts. Lower my jack and out comes the spring. I only use the compressor to install the new spring. The trick is to get the lower compressor plate lined up so that it allows the new spring to be installed and the control arm raised back up. I have it down to about an hour a side.
Great thread. Just so I'm clear in your videos where you are driving out the old bushings is the entire part coming out, metal sleeve and all? Or just the rubber part itself.
I'm just about to tackle this myself and noticed the old bushes have a metal lip on the side I assumed would be flat so they would just push out. The new bushes don't have that so they should go in pretty easy.
Did your impact and the press kit just force it out regardless and bend the metal so it went back through the hole or did you have to chisel that edge down first before you got the impact gun on it to get it out? Thanks